Have you deleted photos and now look for a way to bring them back? Or maybe you already tried something that didn’t work. We’ve seen this problem pop up online countless times – it happens to anyone using SD cards with cameras, phones, or other devices. Since our team has worked through just about every type of data loss scenario you can imagine and helped plenty of people recover their files, we decided to put together a dedicated guide for this exact case.
Here, we’ll explain how to recover deleted photos from an SD card, which tools are worth using, and the common quirks you might face along the way.
Key Takeaways
- Stop using the SD card immediately. Deleted photos usually still sit on the card until new photos/videos overwrite that space, so every extra shot lowers your odds.
- Recovery results depend heavily on the tool you choose. Different SD card recovery apps use different scan engines and offer varying support for file systems and photo formats.
- Connect the SD card to your Computer, scan it, check which files are recoverable and preview them (if the software supports previews, which the tool we demonstrate does), then recover what you need.
- Recover to your computer, not back to the SD card (it can overwrite other deletions you still might save; use an internal drive or another external one).
SD Card Photo Recovery 101
If photos disappear, pull the card out right away and keep it untouched until you’re ready to run recovery.
We don’t want to drown you in technical details, but this you should know.
When you delete photos from an SD card, they don’t instantly disappear. The card simply marks that space as “free”, while the actual photo data usually stays put until something else overwrites it.
That’s why the golden rule is simple: stop using the card. Every new picture, video, or file you save eats away at the chances of recovery. Even formatting doesn’t always wipe everything (most quick formats only reset the file system, not the underlying data). Recovery software can often still pull your photos back, but only if you keep the card untouched.
And to be clear, this doesn’t mean all hope is lost if you already took another shot or saved something new. But every additional file may overwrite or damage the exact file you want to restore, which is why avoiding further use matters so much.
How to Restore Deleted Photos From an SD Card
We’ll keep this simple and break everything into clear chunks so it doesn’t feel overwhelming. At each step, I’ll explain the best approach and why it matters.
So here’s how to recover deleted photos from an SD card without making things worse:
Step 1: Choose and Install SD Card Data Recovery Software
We actually compared the most popular SD card recovery programs not too long ago – testing them front to back for recovery efficiency, speed, cost-effectiveness, and overall usability. But if you don’t feel like reading through a ton of charts, here are the three best performers from those tests.
Software |
Full Review |
Recovery Performance |
Speed |
Cost-Effectiveness |
UI Score |
Free Version & Limits |
Price (Full License) |
Extra Features |
Pros |
Cons |
Disk Drill |
5/5 – Excellent at photos |
5/5 |
4.5/5 |
5/5 – beginner-friendly |
Free preview + 100MB free recovery (Windows) |
~$89 (Pro) |
Byte-to-byte backup, Advanced Camera Recovery, file previews |
Easy to use, strong results, clear previews |
Free version data limits |
|
R-Studio |
5/5 – Industry-level recovery |
4.5/5 |
3/5 |
3/5 – advanced UI |
Demo lets you recover files <256KB |
from $79.99 |
Raw file reconstruction |
Powerful, supports many formats |
Steep learning curve, not beginner-friendly |
|
UFS Explorer |
4.5/5 – Great with SD cards & partitions |
4/5 |
3.5/5 |
3.5/5 |
Demo lets you preview, but recovery limited (files <256KB) |
from $64.95 |
Supports virtual disks, RAID, multiple FS |
Versatile, affordable mid-range |
UI less polished, fewer extra features than Disk Drill |
These are the tools we can recommend. Disk Drill is the most approachable for everyday users, R-Studio is ideal if you’re comfortable with more technical interfaces, and UFS Explorer sits in between as a cost-effective but slightly less user-friendly option.
All you need to do now is head to the official website of the tool you picked and download the latest version. Installation is nothing unusual: just install it the same way you would any other software.
- If you’re on Windows, run the installer and follow the prompts.
- If you’re on Mac, the system will ask you to grant the app Full Disk Access so it can scan your drives properly. That’s normal, and you’ll want to allow it so the deleted SD card photo recovery works as expected.
For the sake of this guide, we’ll demonstrate the next steps with Disk Drill. In our opinion, it strikes the right balance – it doesn’t overwhelm you with endless menus or technical jargon, yet its recovery engine is still among the best in the field. It’s also safe to download and install. We know this because we checked the app ourselves for malware and security issues.
Step 2: Connect Your SD Card to the Computer and Launch the Recovery Tool
With the software ready to go, it’s time to plug in your SD card. If your laptop has a built-in card slot, use that.
Otherwise, grab a USB card reader – those inexpensive plastic ones you see online work fine as long as they’re not damaged. Slide the card in, and make sure your computer recognizes it. On Windows, you should see it pop up in File Explorer. On Mac, it’ll show in Finder.
If you don’t see your SD card in File Explorer (Windows) or Finder (Mac), don’t give up yet. It might still show up in Disk Management (Windows) or Disk Utility (Mac). This usually means the SD card is corrupted, which explains why it doesn’t appear in the usual places. We’ve written separate guides that walk you through those cases if that’s what you’re dealing with:
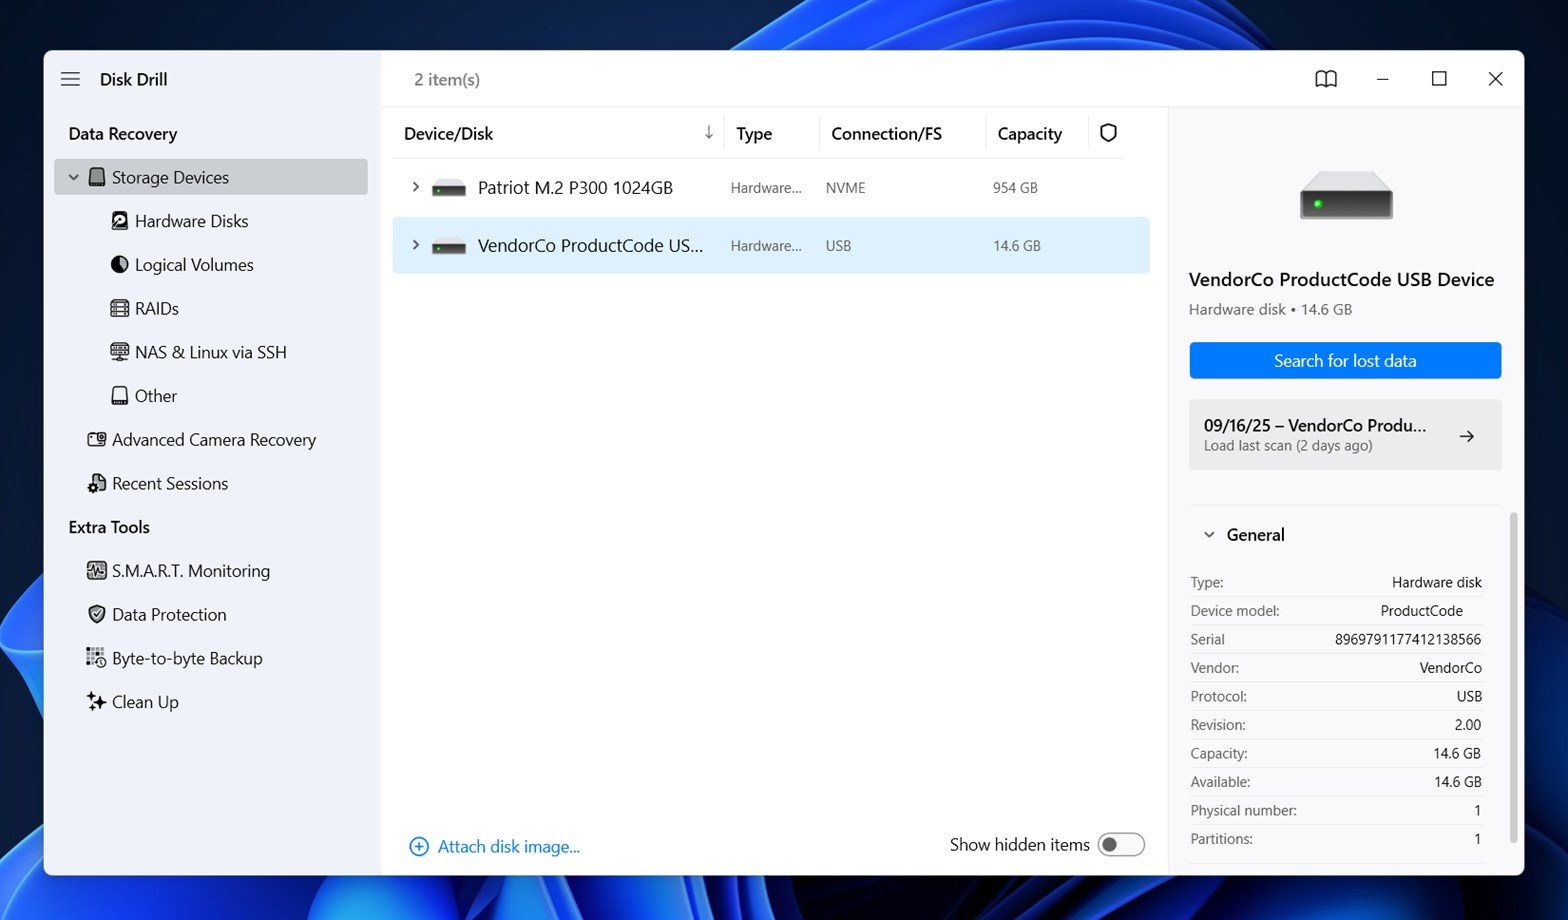
Once the card is connected, launch Disk Drill (or whichever tool you chose). It will automatically list all drives and external media. Your SD card should appear there with its name and size.
Step 3: Run a Scan
Now comes the fun part. In Disk Drill, find your SD card in the list of drives and click Search for lost data. You can also right-click the card and choose the same option from the menu.
Disk Drill will then ask you to pick a scan mode: Universal Scan or Advanced Camera Recovery.
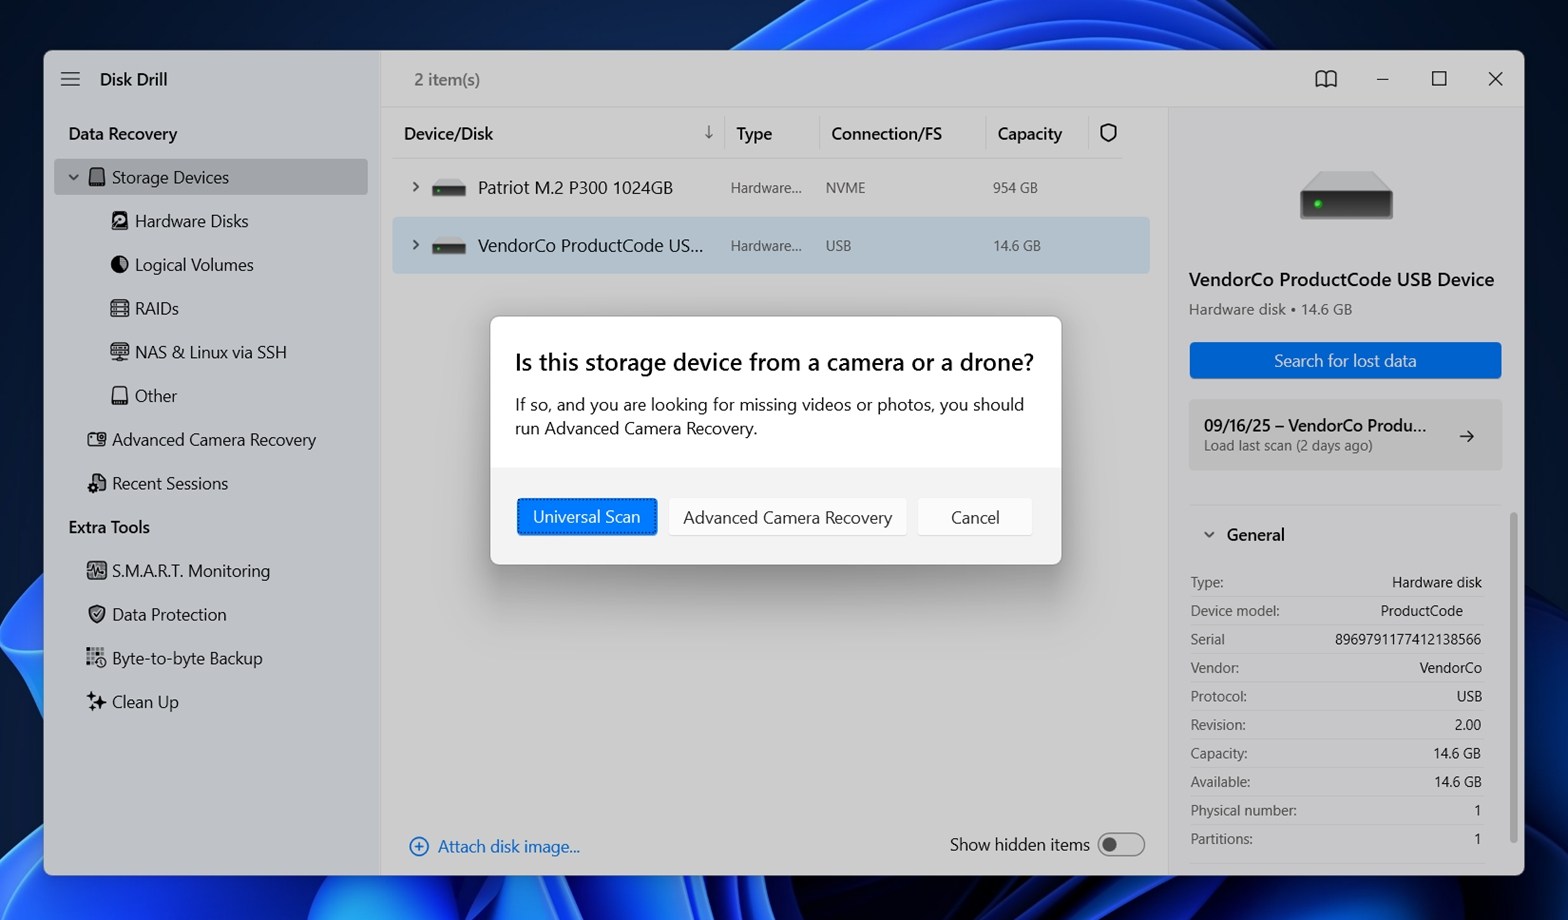
- If you recently deleted files and haven’t touched the card since, go with Universal Scan. It’s faster and usually enough to pull back most photos and videos.
- If the card is giving you trouble – maybe it’s corrupted, or the Universal Scan doesn’t return what you need – switch to Advanced Camera Recovery. This mode can reassemble scattered photo and video fragments into usable files.
Technical Note: When you hit “Search for lost data” in Disk Drill, it might look like a single action, but under the hood the app cycles through multiple scan methods, just like most serious recovery tools do.
- Quick Scan – Targets files that were recently deleted. Since the file system (NTFS, FAT32, or exFAT) is intact, names and folder structures are usually preserved. Compatibility with specific formats doesn’t matter here, because the scan relies on file table records to bring everything back.
- Deep Scan (includes Signature Scan) – Follows automatically if Quick Scan doesn’t find enough. It works when the card has been formatted, the file system was replaced, or parts of it are damaged. Recovery here can still include original names and folder structure.
When that isn’t enough, it adds Signature Scan. Signature Scan ignores the file system entirely and looks for file patterns (like JPG, MP4, RAW) to piece files back together. The downside is filenames and folders are usually lost, and fragmented files may come out incomplete.
Step 4: Preview and Select Your Photos
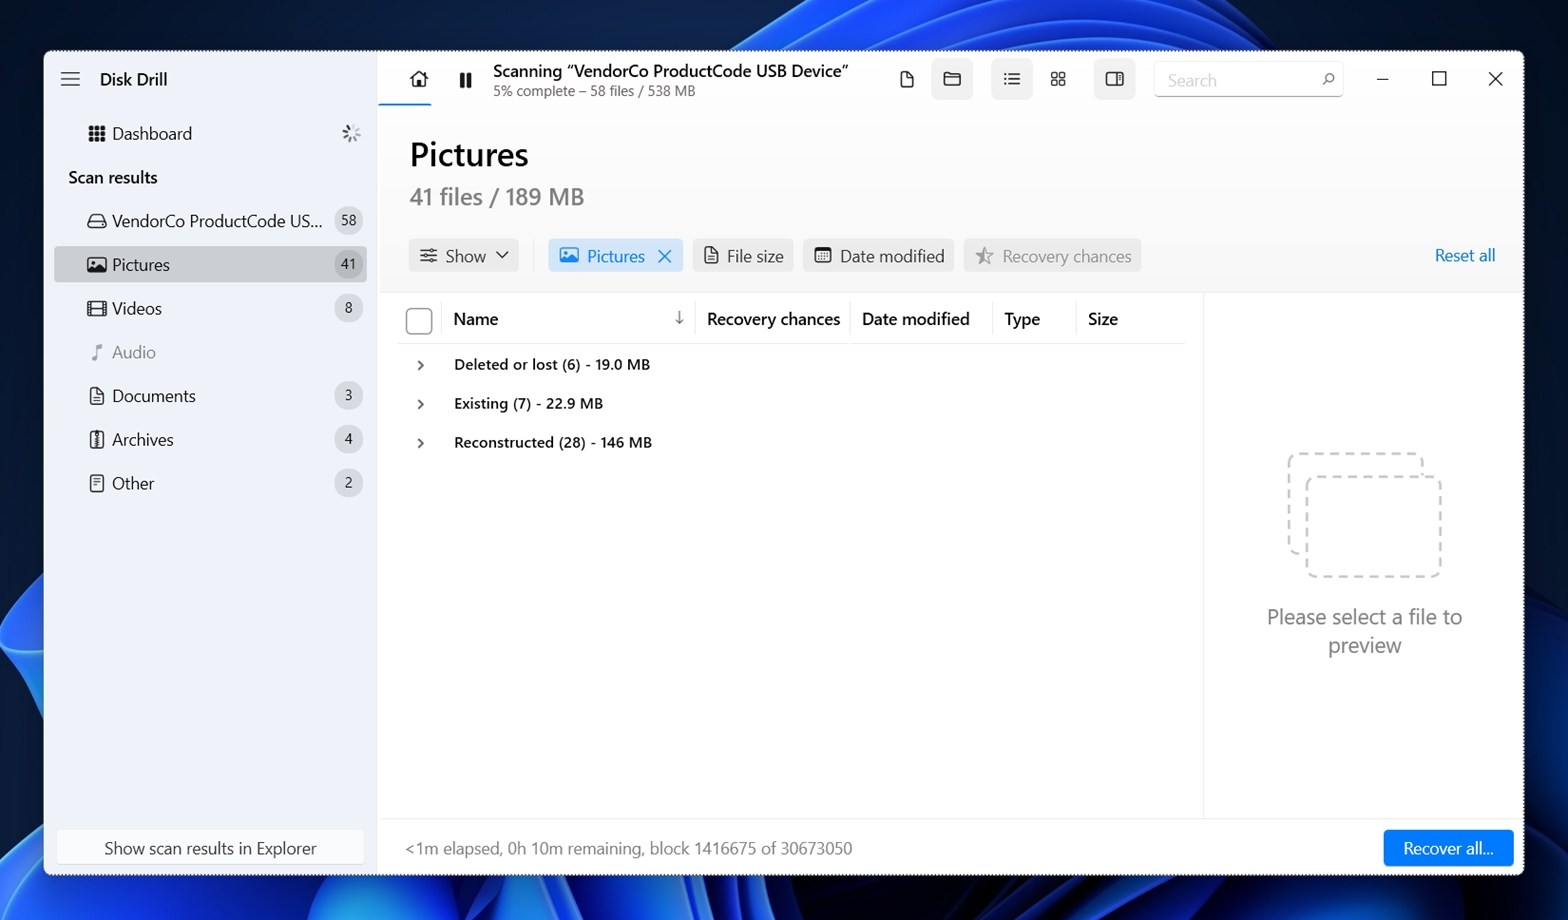
Once the scan finishes (or even while it’s still running), you’ll start seeing results in Disk Drill. The recoverable files from your SD card are grouped into categories like Pictures, Videos, Audio, and Documents. Since we’re after photos, click on Pictures.
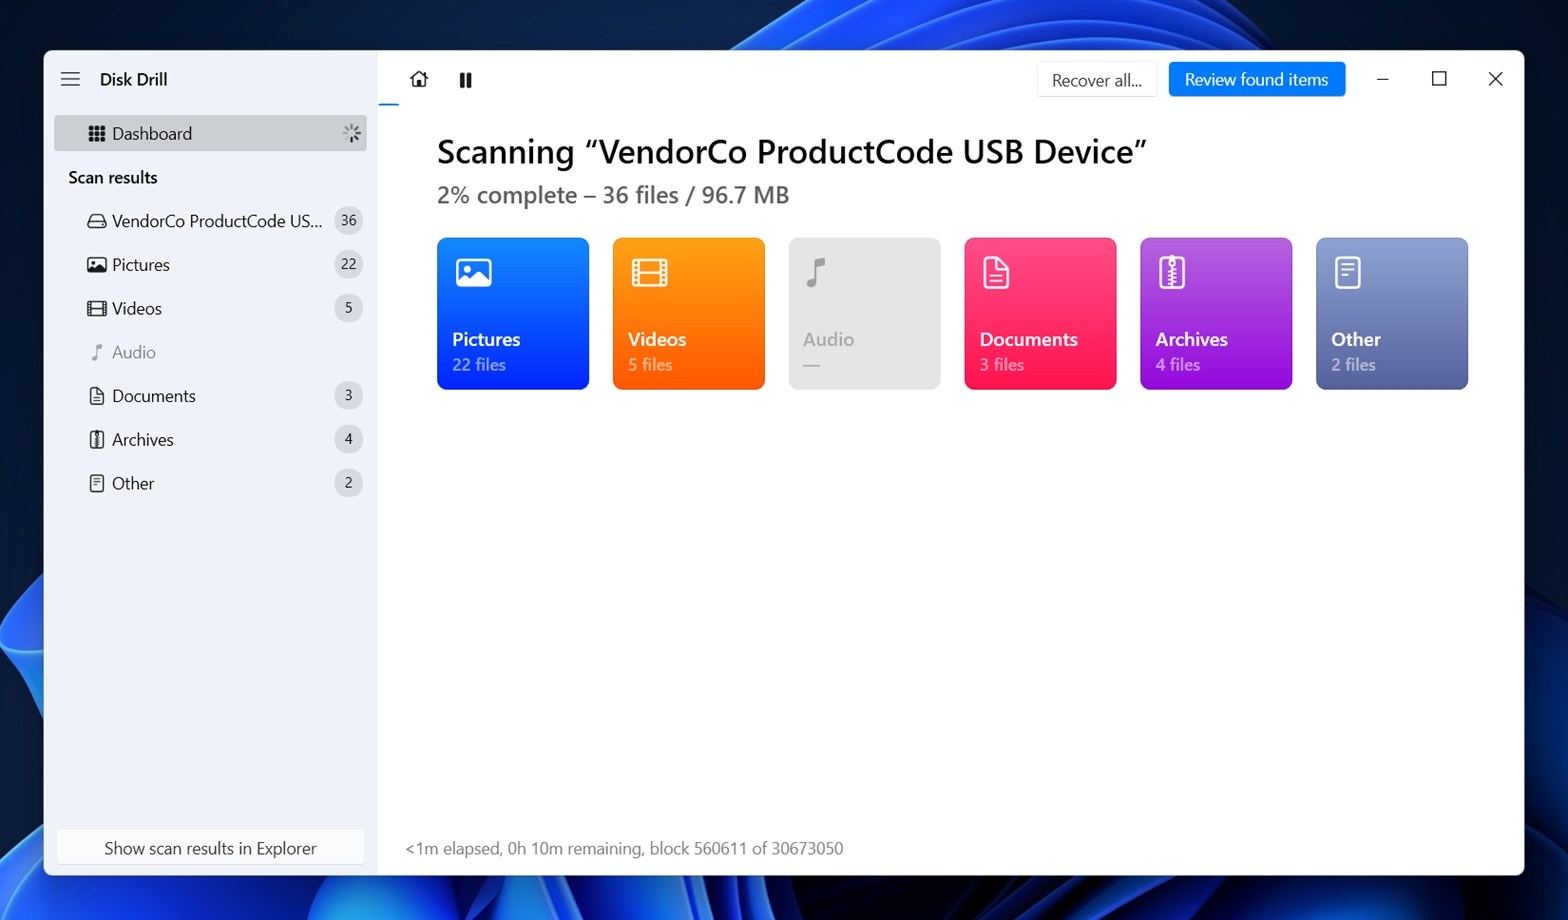
Inside, files may be organized into Deleted or Lost, Existing, and Reconstructed. Browse through these sections and look for your missing shots.
When you click on a file, Disk Drill opens a preview on the right side. It supports nearly everything: from everyday formats like JPEG and PNG to RAW formats such as CR2, NEF, NRW, RAF, X3F, and more. As long as your OS has an appropriate viewer installed (either built-in or third-party), Disk Drill will display the photo preview.
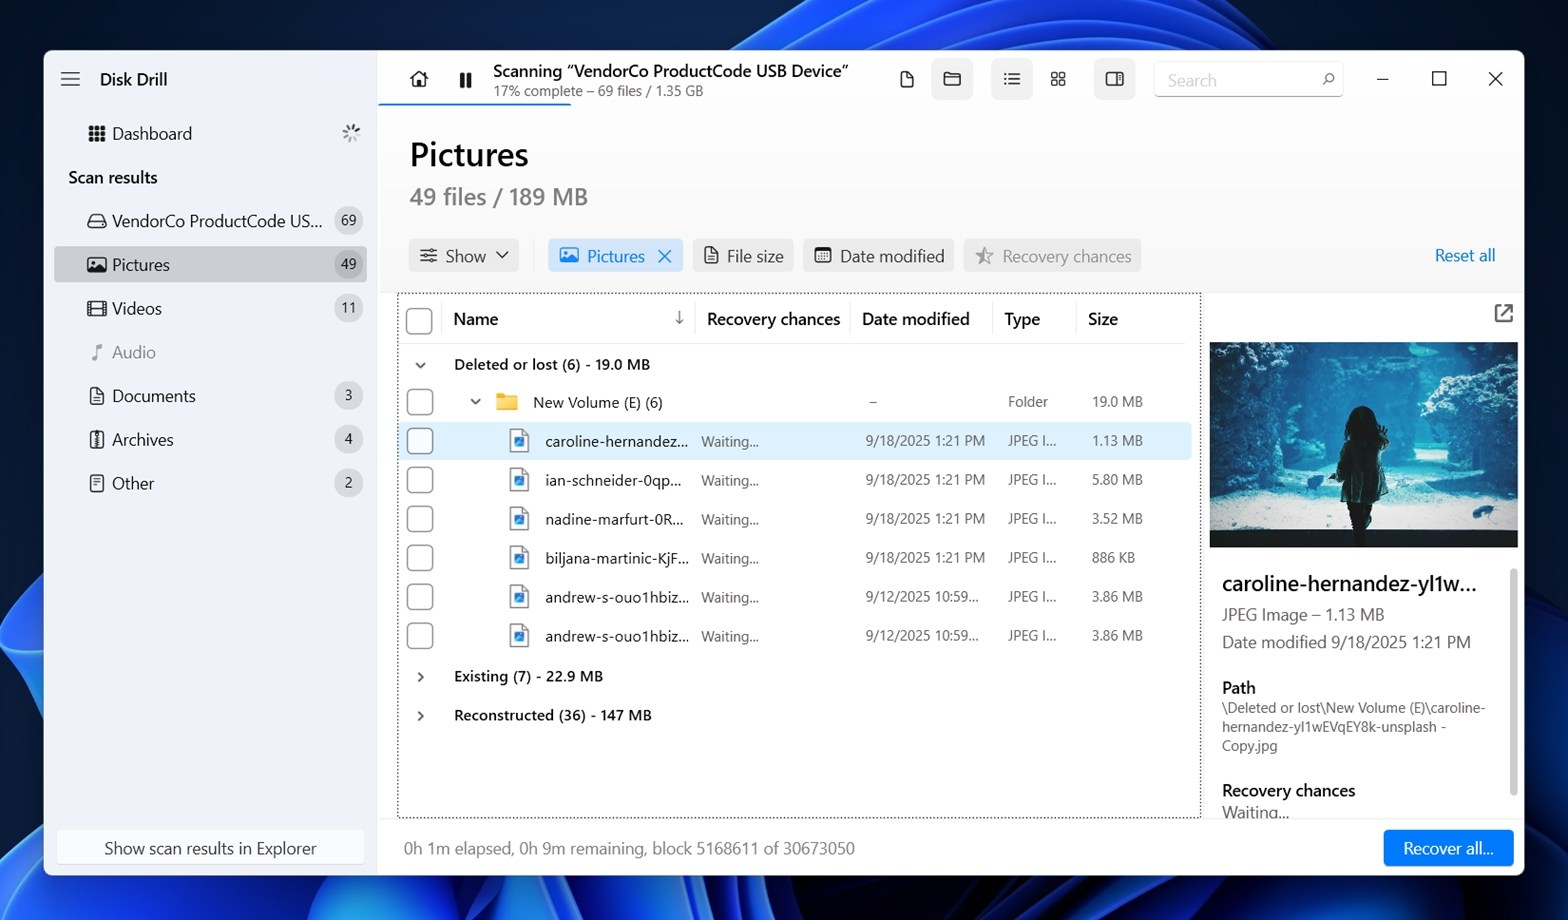
If you can preview the image, that’s a strong sign – it means your photo is fully intact and will recover without issues. If it doesn’t open, check the Recovery Chances indicator next to it:
- High: Almost guaranteed to recover.
- Average: Recovery is possible, but the file might be incomplete or slightly damaged.
- Low: Recovery is unlikely, and the file may be corrupted.
Take your time to go through the previews and select the files you actually want.
If you don’t see a preview on the right, check whether preview mode is enabled. Look for the little eye icon 👁️🗨️ next to the file name. 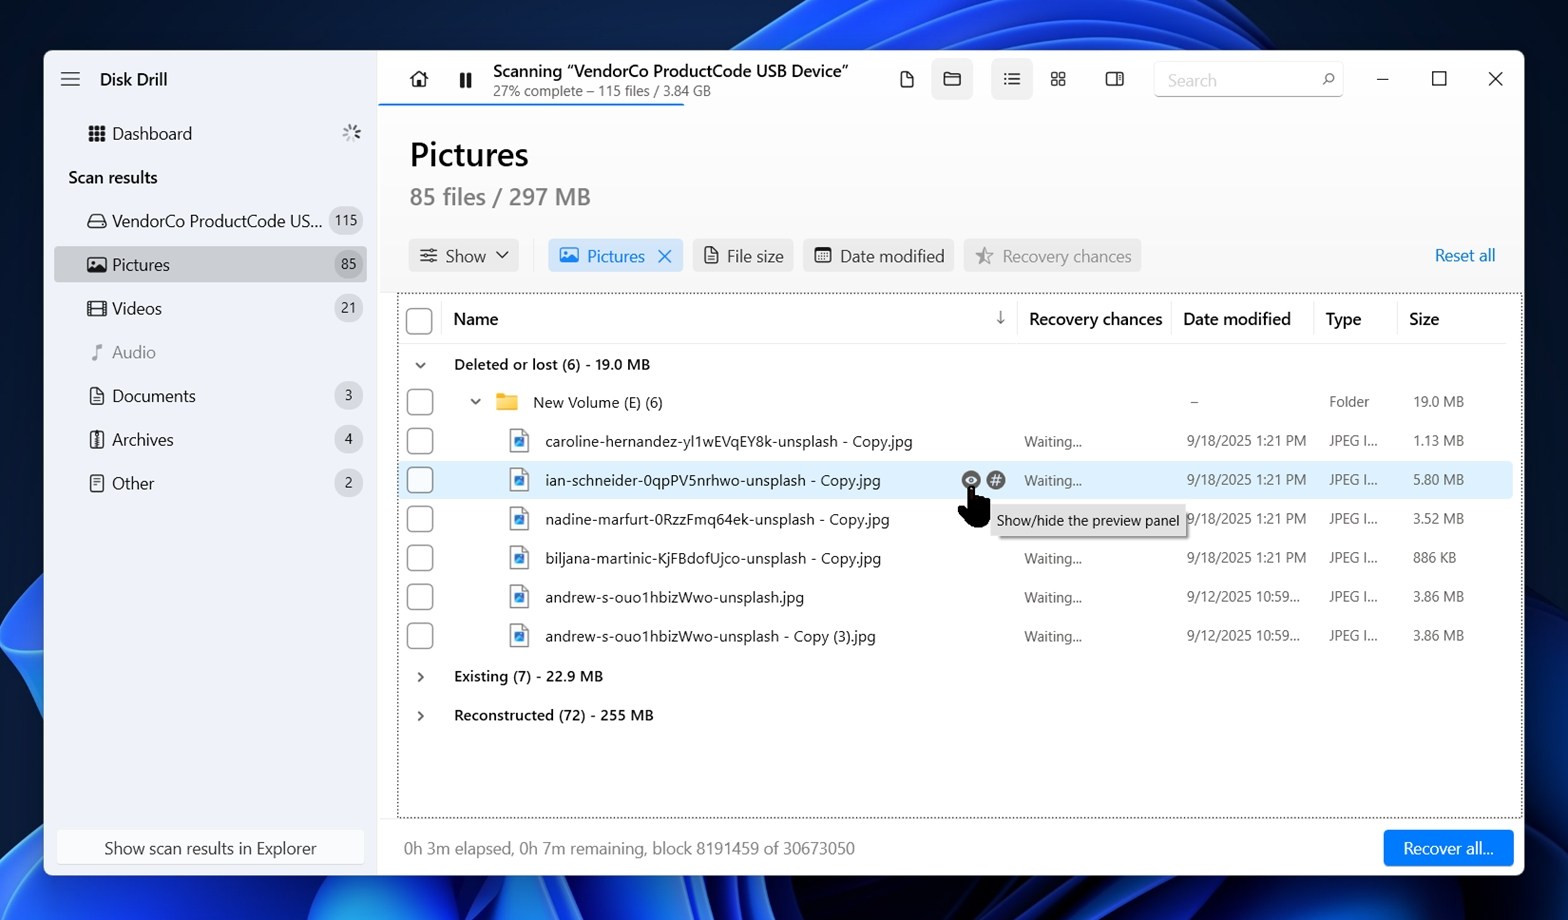 Click it, and Disk Drill will open the preview window so you can inspect the photo.
Step 5: Recover to a Safe Location
Now that you’ve marked the photos you want, it’s time to actually bring them back. Click the Recover/Recover all… button at the bottom of Disk Drill. The software will then ask you to choose a destination folder.
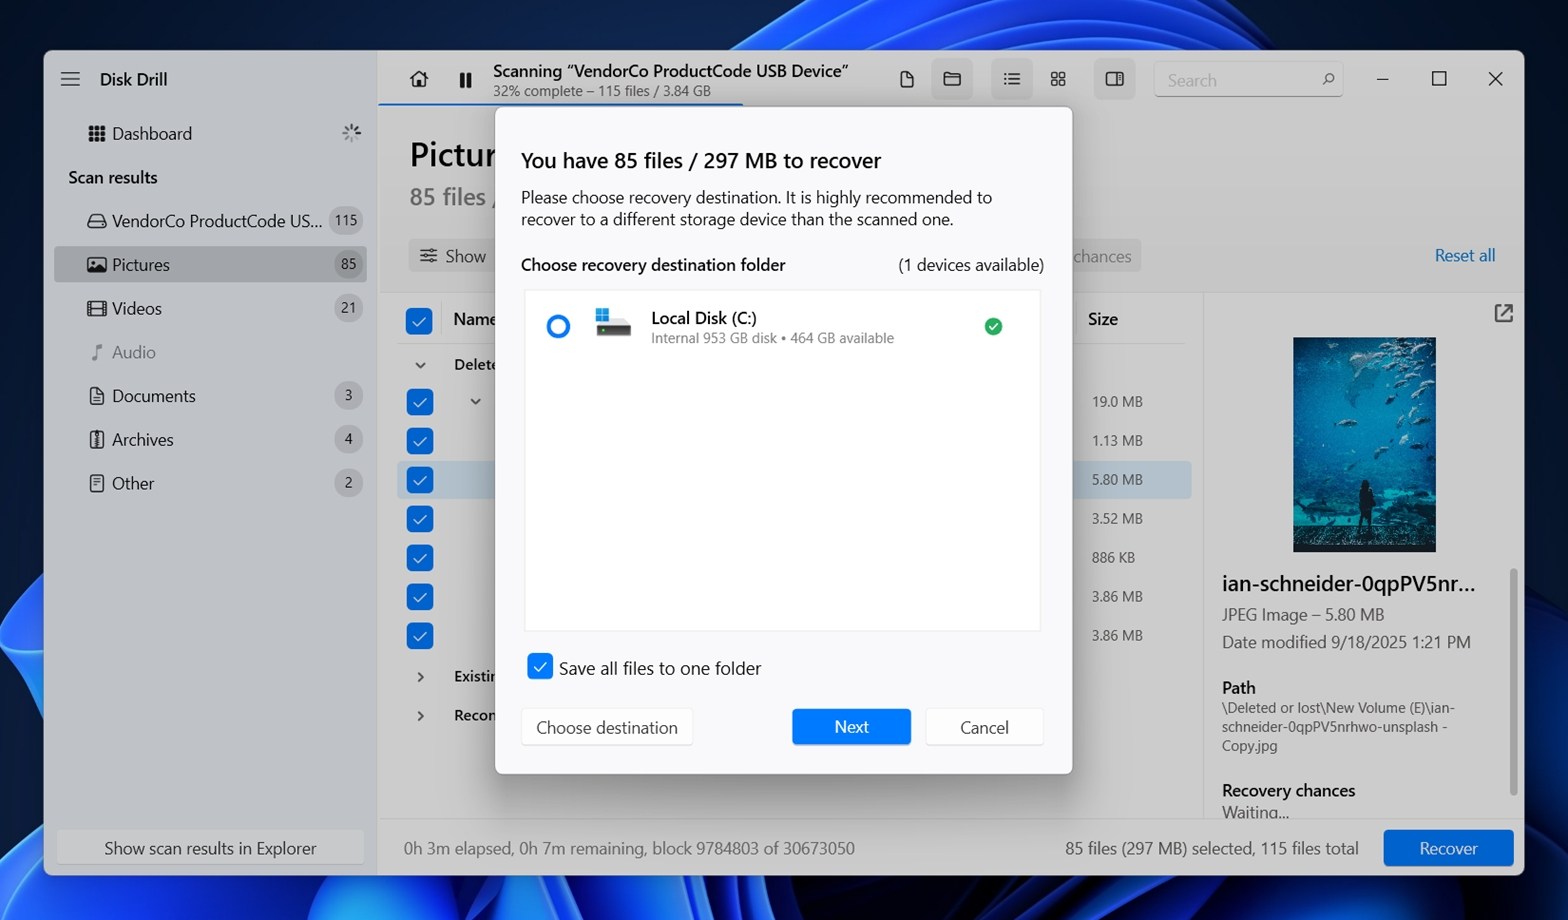
Here’s the part you can’t skip: don’t recover back to the same SD card. If you do, you risk overwriting other deleted files that might still be recoverable. Always pick a safe location on your computer’s internal drive or an external hard drive.
Once you confirm the folder, Disk Drill will copy the selected photos over. If they previewed fine earlier, they’ll now open normally in your image viewer. Larger RAW files might take a bit longer to restore, but they’ll end up in the same destination folder.
When it’s done, check the folder to make sure everything came through. It’s a good idea to spot-check a few files by opening them in full resolution before you wipe or reuse the SD card.
Hopefully, this walkthrough was enough to answer your recovery questions, because we’ve seen people on our forum ask how to use Disk Drill, even though we find it to be one of the most intuitive recovery apps out there.
Can I Recover Deleted Photos From an SD Card on an Android Phone?
Yes, you can recover deleted photos from an SD card on an Android phone, and we have a full guide on Android photo recovery where we also cover memory cards.
But keep in mind: it’s a bit more complicated than it sounds. The results depend on how your phone is set up. Apps like MobiSaver: Data & Photo Recovery or DiskDigger can recover photos from an SD card, but they deliver full results only on rooted devices.
If your phone does not use the SD card as system storage, you can technically root the device afterward without harming the deleted files on the card. They’ll still be there. The problem is that rooting wipes the phone’s internal storage. Even if you try to back it up first, the process is risky, time-consuming, and often not worth the hassle.
So while it’s technically possible, we recommend finding a way to run the recovery on a computer instead. Desktop tools give you far better chances and don’t depend on tricky requirements.
Can I Connect My Device With the SD Card Inside to Scan It on a Computer?
This is also a question we sometimes hear, and the answer is: it depends. For older digital cameras and GoPros that use the USB Mass Storage protocol, you can connect them to a computer with a regular USB cable and scan the card that way if you don’t have a memory card reader handy. In those cases, the SD card shows up as a separate drive, and recovery software can access it.
But most modern devices don’t behave like that. Newer cameras and almost all Android phones connect over MTP (Media Transfer Protocol), which doesn’t give recovery tools the low-level access they need. In practice, the computer only sees files that are currently on the device, not the deleted ones hiding under the surface.
That’s why, whenever possible, the best option is still to remove the SD card and plug it directly into your computer through a card reader or SD slot.
Why Backups Beat Recovery Every Time
As closing words, we want to say this.
Photo recovery from SD cards is a pretty easy and often successful process with DIY tools. In fact, in our own survey, about 79% of people who tried DIY recovery managed to get their files back. That’s encouraging, but it also means 21% didn’t. If recovery were guaranteed, that number would be 100%. A lot of things can lower your chances.
- Some people keep using the SD card after deletion, which overwrites the missing files.
- Others rely on sketchy free tools they found online that don’t perform well.
- And the type of photo file matters too. Many people discover that large RAW files are harder to recover completely – sometimes only the embedded JPEG preview comes back while the actual RAW image is damaged.
That’s why our advice is simple: know the possibilities of SD card photo recovery, but don’t depend on it as your only safety net. Backups beat recovery every single time. A second copy on your computer, an external drive, or cloud storage makes the difference between a quick restore and hours spent scanning and hoping for the best. Take a look at your device – maybe the digital camera you use with your SD card already has a cloud backup function, like some Canon models do. Or, after every photo session, simply copy everything to your PC. You’ll thank yourself later.
FAQ
How long do I have to recover photos from SD card before the chances drop?
It’s not really about time. It’s about what happened to the SD card right after the photos got deleted.
If you deleted the photos, pulled the card out, and it just sat in a drawer for, let’s say, six months, your chances can still be excellent. Nothing “expires” on its own. The deleted data stays in place until something overwrites it. But if you kept using the camera right after the deletion and took new photos, your chances can drop.
Can I recover lost SD card photos if I already took new pictures after the deletion?
Recovery is possible even if you did use the card to make new photos. There’s no way to know whether the new pictures overwrote the exact space where the deleted ones were stored. Sometimes the card records to other free sectors, which leaves your deleted photos untouched.
If you didn’t take any new photos at all, your chances are much higher. That’s all we mean when we say “don’t touch your SD card” – the less you use it after deletion, the better your odds.
If I deleted photos in my camera, can I recover lost photos from SD card the same way as if I deleted them on a PC?
From a recovery standpoint, deleting photos in a camera works similarly to deleting them on a PC. In both cases, the SD card usually just marks the files as deleted and leaves the actual photo data in place until it’s overwritten. Recovery software can scan the card and often bring the photos back.
How to retrieve deleted photos from SD card without a computer?
If you want to recover deleted photos from an SD card without using a computer, consider using Android data recovery apps like EaseUS MobiSaver or DiskDigger. Tools like these can scan your phone and attempt to bring back deleted photos directly. Keep in mind, though, that results are limited if your device isn’t rooted.
Why do recovered photos look blurry when I recover deleted photos from SD card on Android phone?
Blurry results usually mean the recovery app only managed to pull back cached thumbnails instead of the original full-resolution images. This happens a lot when you try to recover deleted photos from SD card on Android phone without root access. Apps like DiskDigger can still find previews stored by the system, but they can’t always reach the deeper file data unless the device was rooted beforehand.
In these cases, it’s better to remove the SD card and connect it to a computer to scan with recovery software (chances of getting the full-quality photos back are much higher).
How do you recover pictures from SD card on Samsung phone?
There are two primary methods to achieve this. First, you can install a data recovery app directly on your Samsung smartphone. Alternatively, you can remove the SD card from your smartphone, insert it into a PC using a card reader, and then scan it with data recovery software installed on your computer.
Can I recover memory card photos with native Windows utilities?
Not really. Windows doesn’t include a built-in tool that can recover memory card photos once they’ve been deleted. The Recycle Bin only works for files deleted from local drives, not SD cards. If you had File History or another backup system set up before the deletion, you might be able to restore copies from there, but by default, these utilities don’t back up connected SD cards, so it’s usually not an option.
Is it possible to restore deleted photos from SD card using CMD?
There isn’t any “magic” undelete command in CMD that brings your photos back. What you can do is run recovery tools that work through the command line, such as PhotoRec or Microsoft’s Windows File Recovery.
Plus, in some cases, photos might look deleted but are actually just hidden – sometimes due to a virus. If that’s the case, you can use the attrib command in CMD to unhide them. Still, most people find it easier to fix this through File Explorer, since it gives you the same result with less typing.
Can I recover deleted photos from SD card for free?
You can. There are some truly free SD card recovery tools like PhotoRec, Windows File Recovery (WFR), and Recuva that can scan and restore photos without cost. They vary in ease of use and recovery performance, though.
Many of the more capable solutions also offer freemium tiers. For example, Disk Drill (which we’ve used in this guide) lets you recover up to 100 MB on Windows for free, which can be enough for a handful of photos.
This article was written by Michael Alimo, a Contributing Writer at Handy Recovery Advisor. It was recently updated by Roman Demian. It was also verified for technical accuracy by Andrey Vasilyev, our editorial advisor.
Curious about our content creation process? Take a look at our Editor Guidelines.