Many Mac and MacBook owners use external hard drives to expand their storage capacity or store backups. I’ve got three of them: one for Time Machine backups, one that stores my music collection, and one that’s used to transfer large files between machines.
Like all digital storage devices, external hard drives are subject to a variety of data loss scenarios. Eventually, you may have to recover data from an external hard drive on your Mac. In this article, we are going to discuss five different ways to recover lost data from an external hard drive.
Five Effective Methods for Mac External Hard Drive Recovery
Depending on the specific circumstances of your external hard drive data loss scenario, different methods may be more likely to successfully recover your information. We will discuss when you should use each method as we review them, but first a quick word on why you should try to recover your lost data before using the external drive to save any new files.
When modern operating systems, including macOS, delete a file from a storage device, they do not immediately physically remove the data. As long as the file still physically exists on the storage device, specialized data recovery software can repair the deleted logical links and make the data accessible again. Once new data is saved and overwrites the original deleted file, the deleted file can no longer be recovered with software. This fact leads to the most important factor to keep in mind when attempting to recover files from an external hard drive on a Mac.
IMPORTANT: You need to stop using the external hard drive to save new information as soon as you determine that you have lost data that you want to try and recover. Every time you use the device to save a file, you risk overwriting the previously deleted data. You can, however, still use the device to read files and can safely transfer data from the device to your Mac or another external storage device. Just refrain from storing any new data on the external hard drive until you have completed your recovery attempts.
OK, now we can proceed to the recovery methods that might be able to get your valuable deleted data back from an external hard drive. To help you find the best approach quickly, we’ve outlined some common scenarios below.
- Recently Deleted Files? Check the Trash with the disk attached.
- Files Not in Trash Without Backups? Here’s a guide on how to use data recovery software.
- Reading Errors and Corrupted File System? Try to fix it with Disk Utility’s First Aid. Note that data recovery software can read data from a disk even with a corrupted file system.
- Use Time Machine for Backing up External Disks? Here’s a guide on how to recover data from your external disks.
- Disk Damaged or Unreadable Due to Physical or Mechanical Faults? Stop all attempts and contact a professional data recovery service.
Method 1: Use the Mac Trash to Restore Data from an External Hard Drive
Most Mac users are aware of the Trash bin, which temporarily holds deleted files and makes them available for a simple recovery. Based on how you have the Trash configured, files can remain there until the bin is manually emptied or roll-off after a set number of days.
Some of you may be thinking that recovering from the Trash won’t work with an external hard drive, but that is not the case. The external drive has a hidden Trash folder that stores deleted files in the same way as the Trash on your main system.
The Trash bin on the external drive is displayed along with the main disk’s bin when the device is connected to your Mac. Just view your Mac’s Trash, and you will see all of the files that can be recovered from both the external and internal drive.
Use the following steps to get your lost external hard drive data back from the Trash.
- Connect the external hard drive to your Mac.
- Open the Trash by clicking on its icon.
- Search for the file you want to recover.
- Right-click on the item and select the Put Back option to restore it to its original location on the external or internal drive.

More information on recovering from the Trash can be found in this article.
Method 2: Use Software to Perform Mac External Hard Drive Recovery
If you are faced with a lost file that is no longer recoverable from the Trash and for which you have no backup, data recovery software may be able to get your information back. As long as a deleted file has not been overwritten, data recovery software can repair the deleted logical links.
Many data recovery products are on the market, and we have tested quite a few of them. We are going to use Disk Drill for our demonstration of recovering lost data with software for several reasons.
Disk Drill features an intuitive and user-friendly interface and a simple, clickable recovery method. The tool is designed to be used by a general computer user but provides excellent recovery capabilities with its sophisticated scanning algorithms. Support for approximately 400 different file formats means that Disk Drill can work with a wide array of file types you have lost. It is also capable of retrieving data from corrupted file systems and RAW disks.
Use the following procedure to recover data from an external hard drive on a Mac using Disk Drill data recovery software.
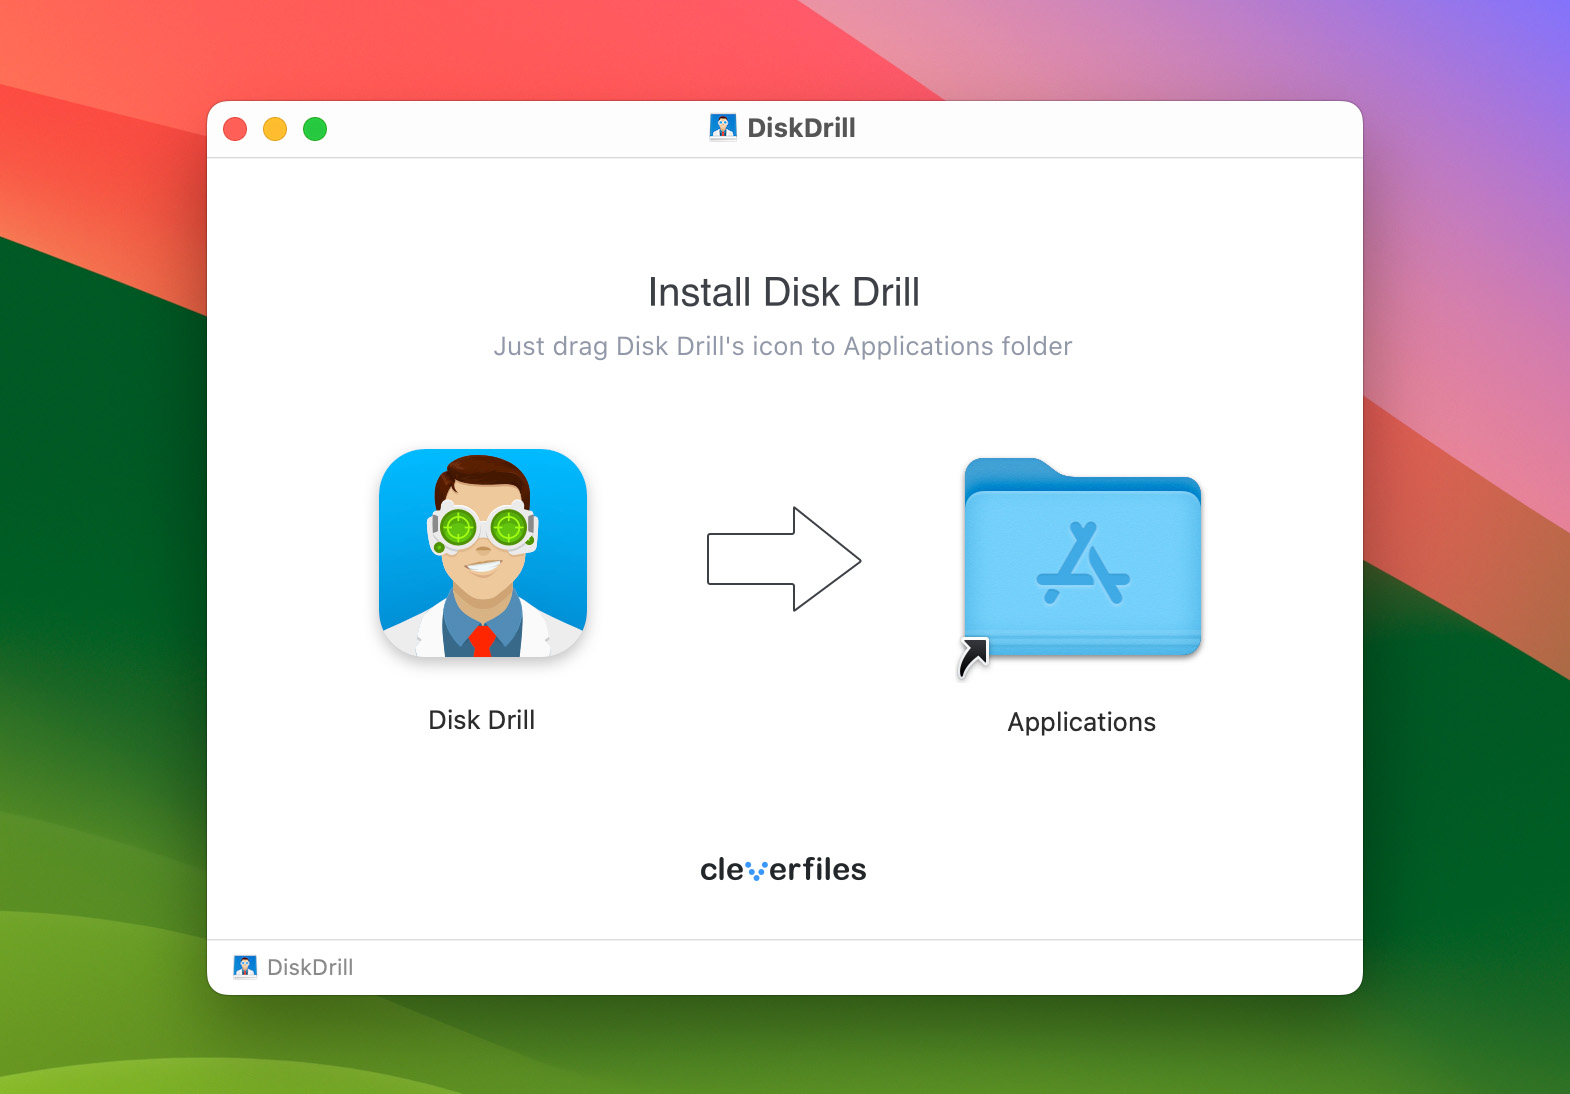
- Download and install Disk Drill for Mac on your main hard drive. Don’t install it on the external disk that has lost data to avoid inadvertently overwriting the data you want to restore.
- Connect the external hard drive that experienced data loss to your Mac.
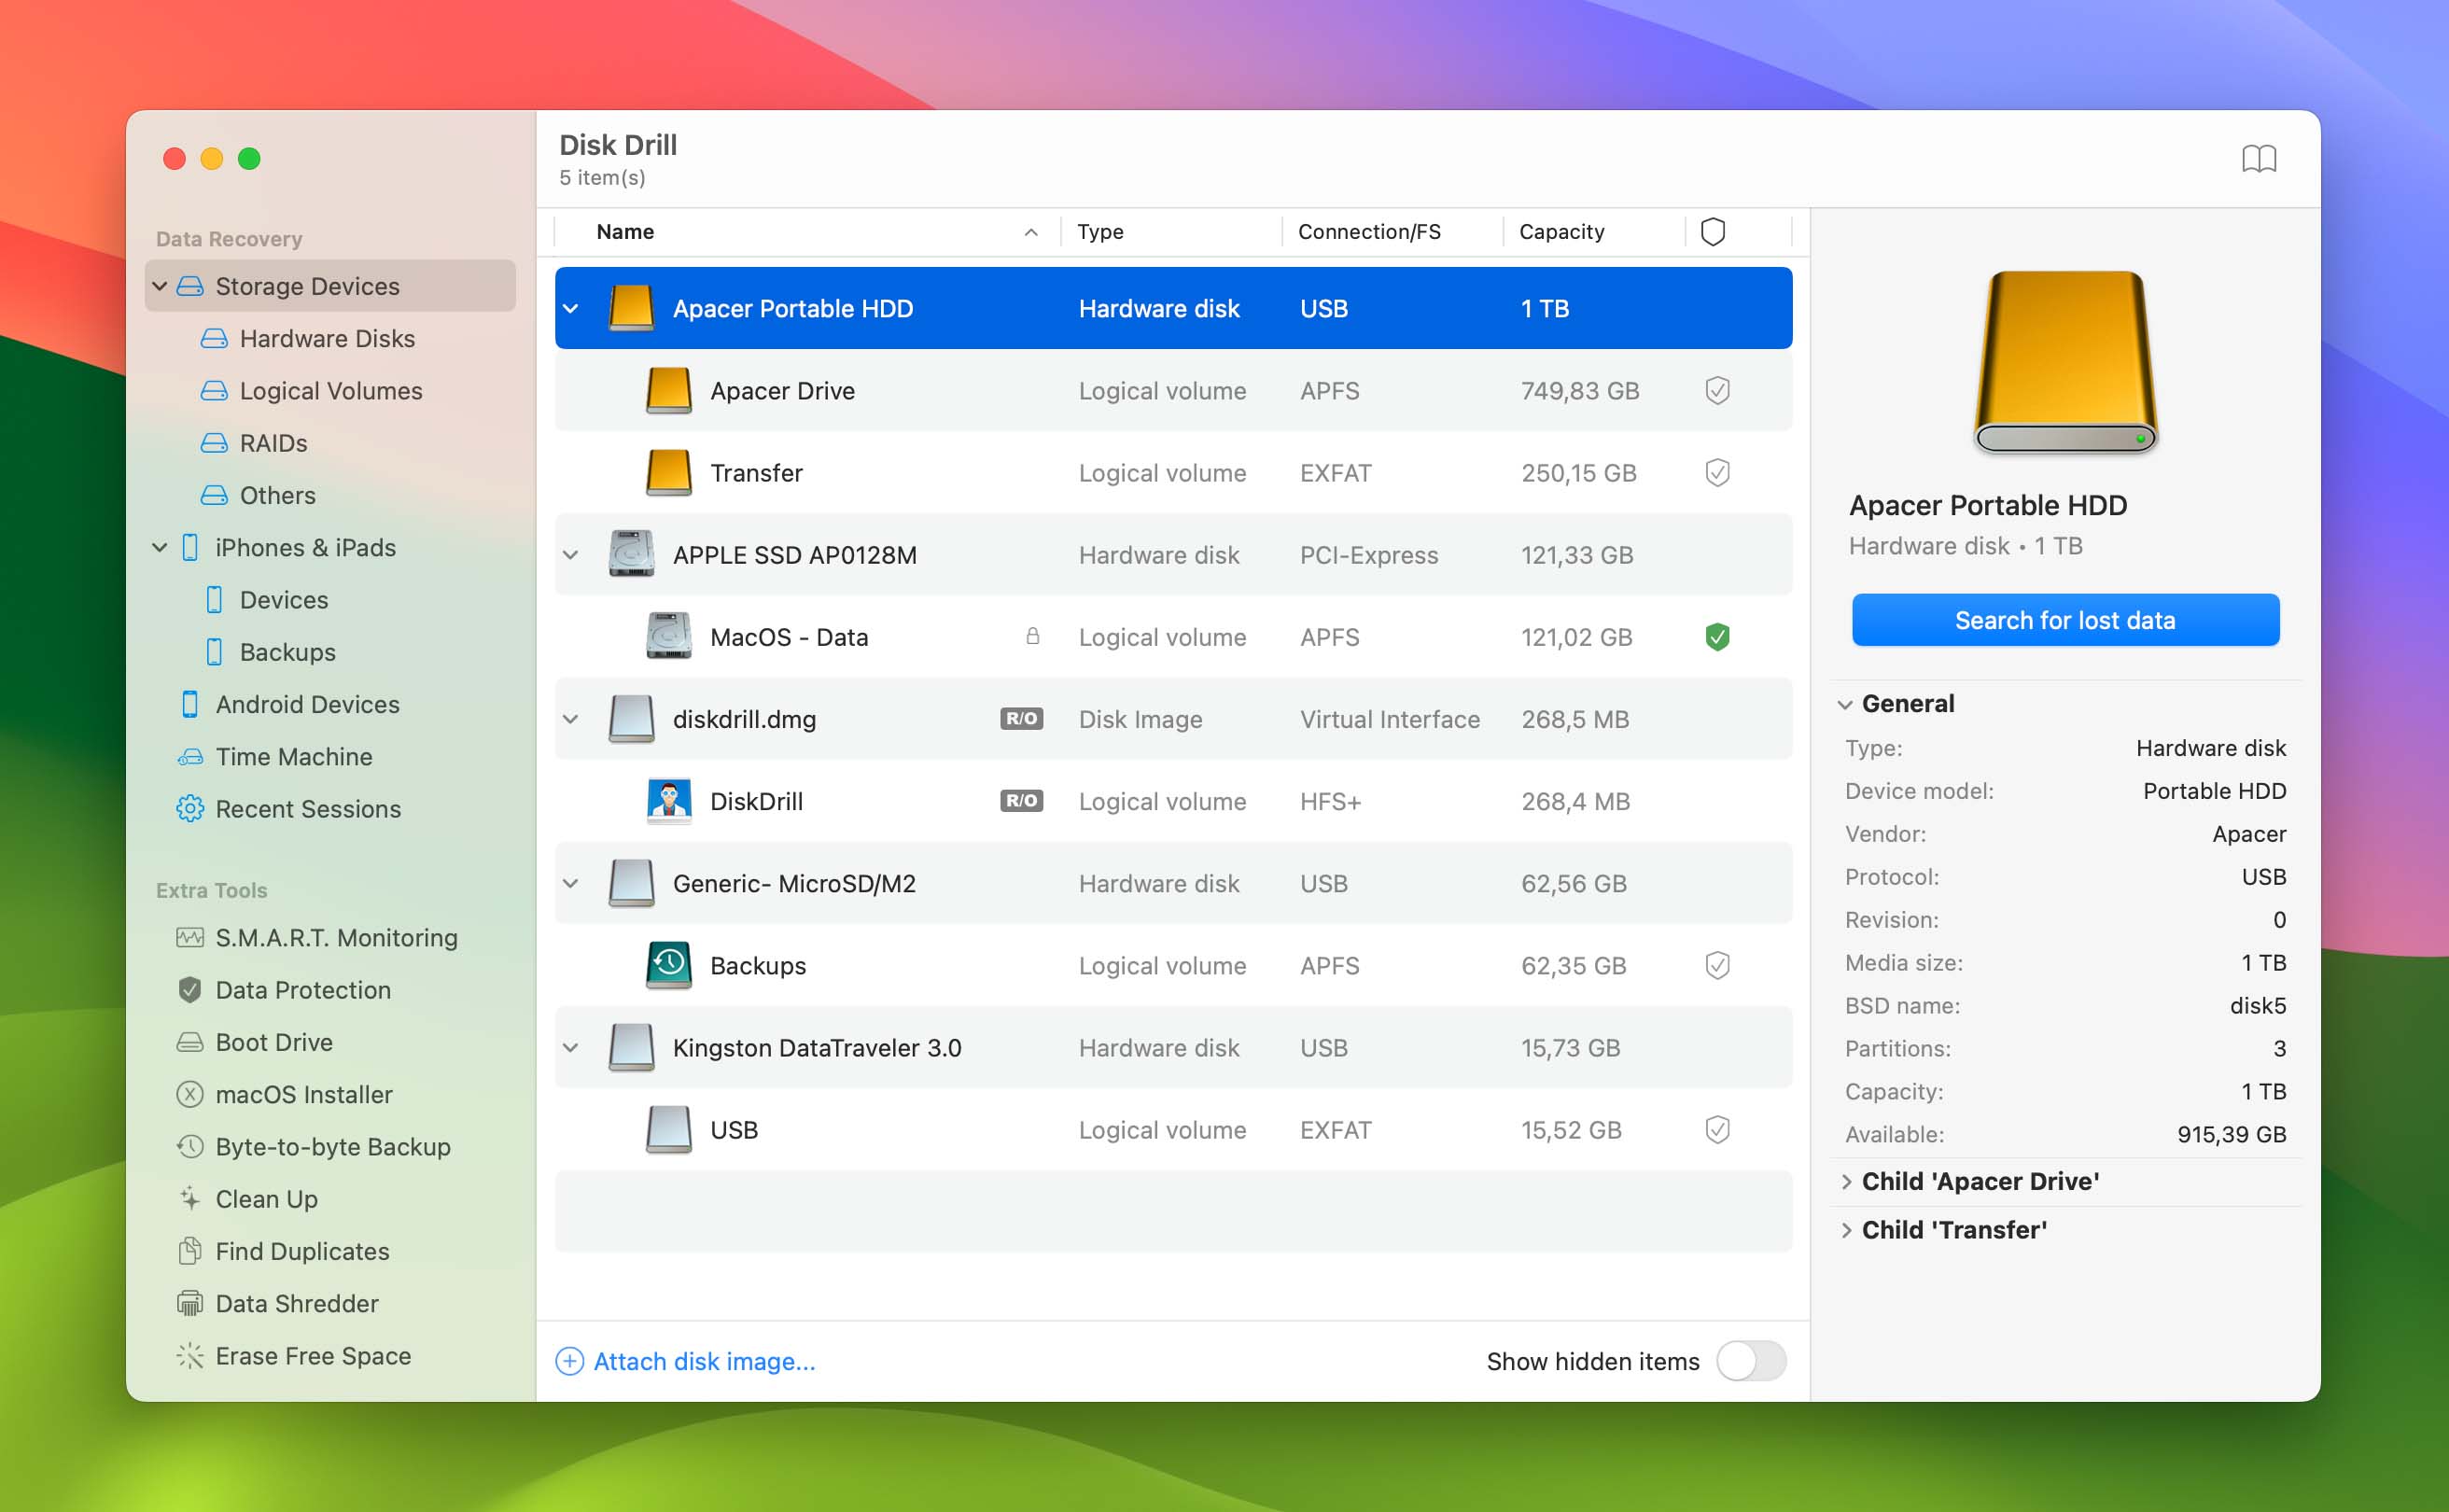
- Start Disk Drill and select the external drive from the list displayed in the app’s main window.
- Click the Search for lost data button to start scanning the external drive for files that can be recovered.
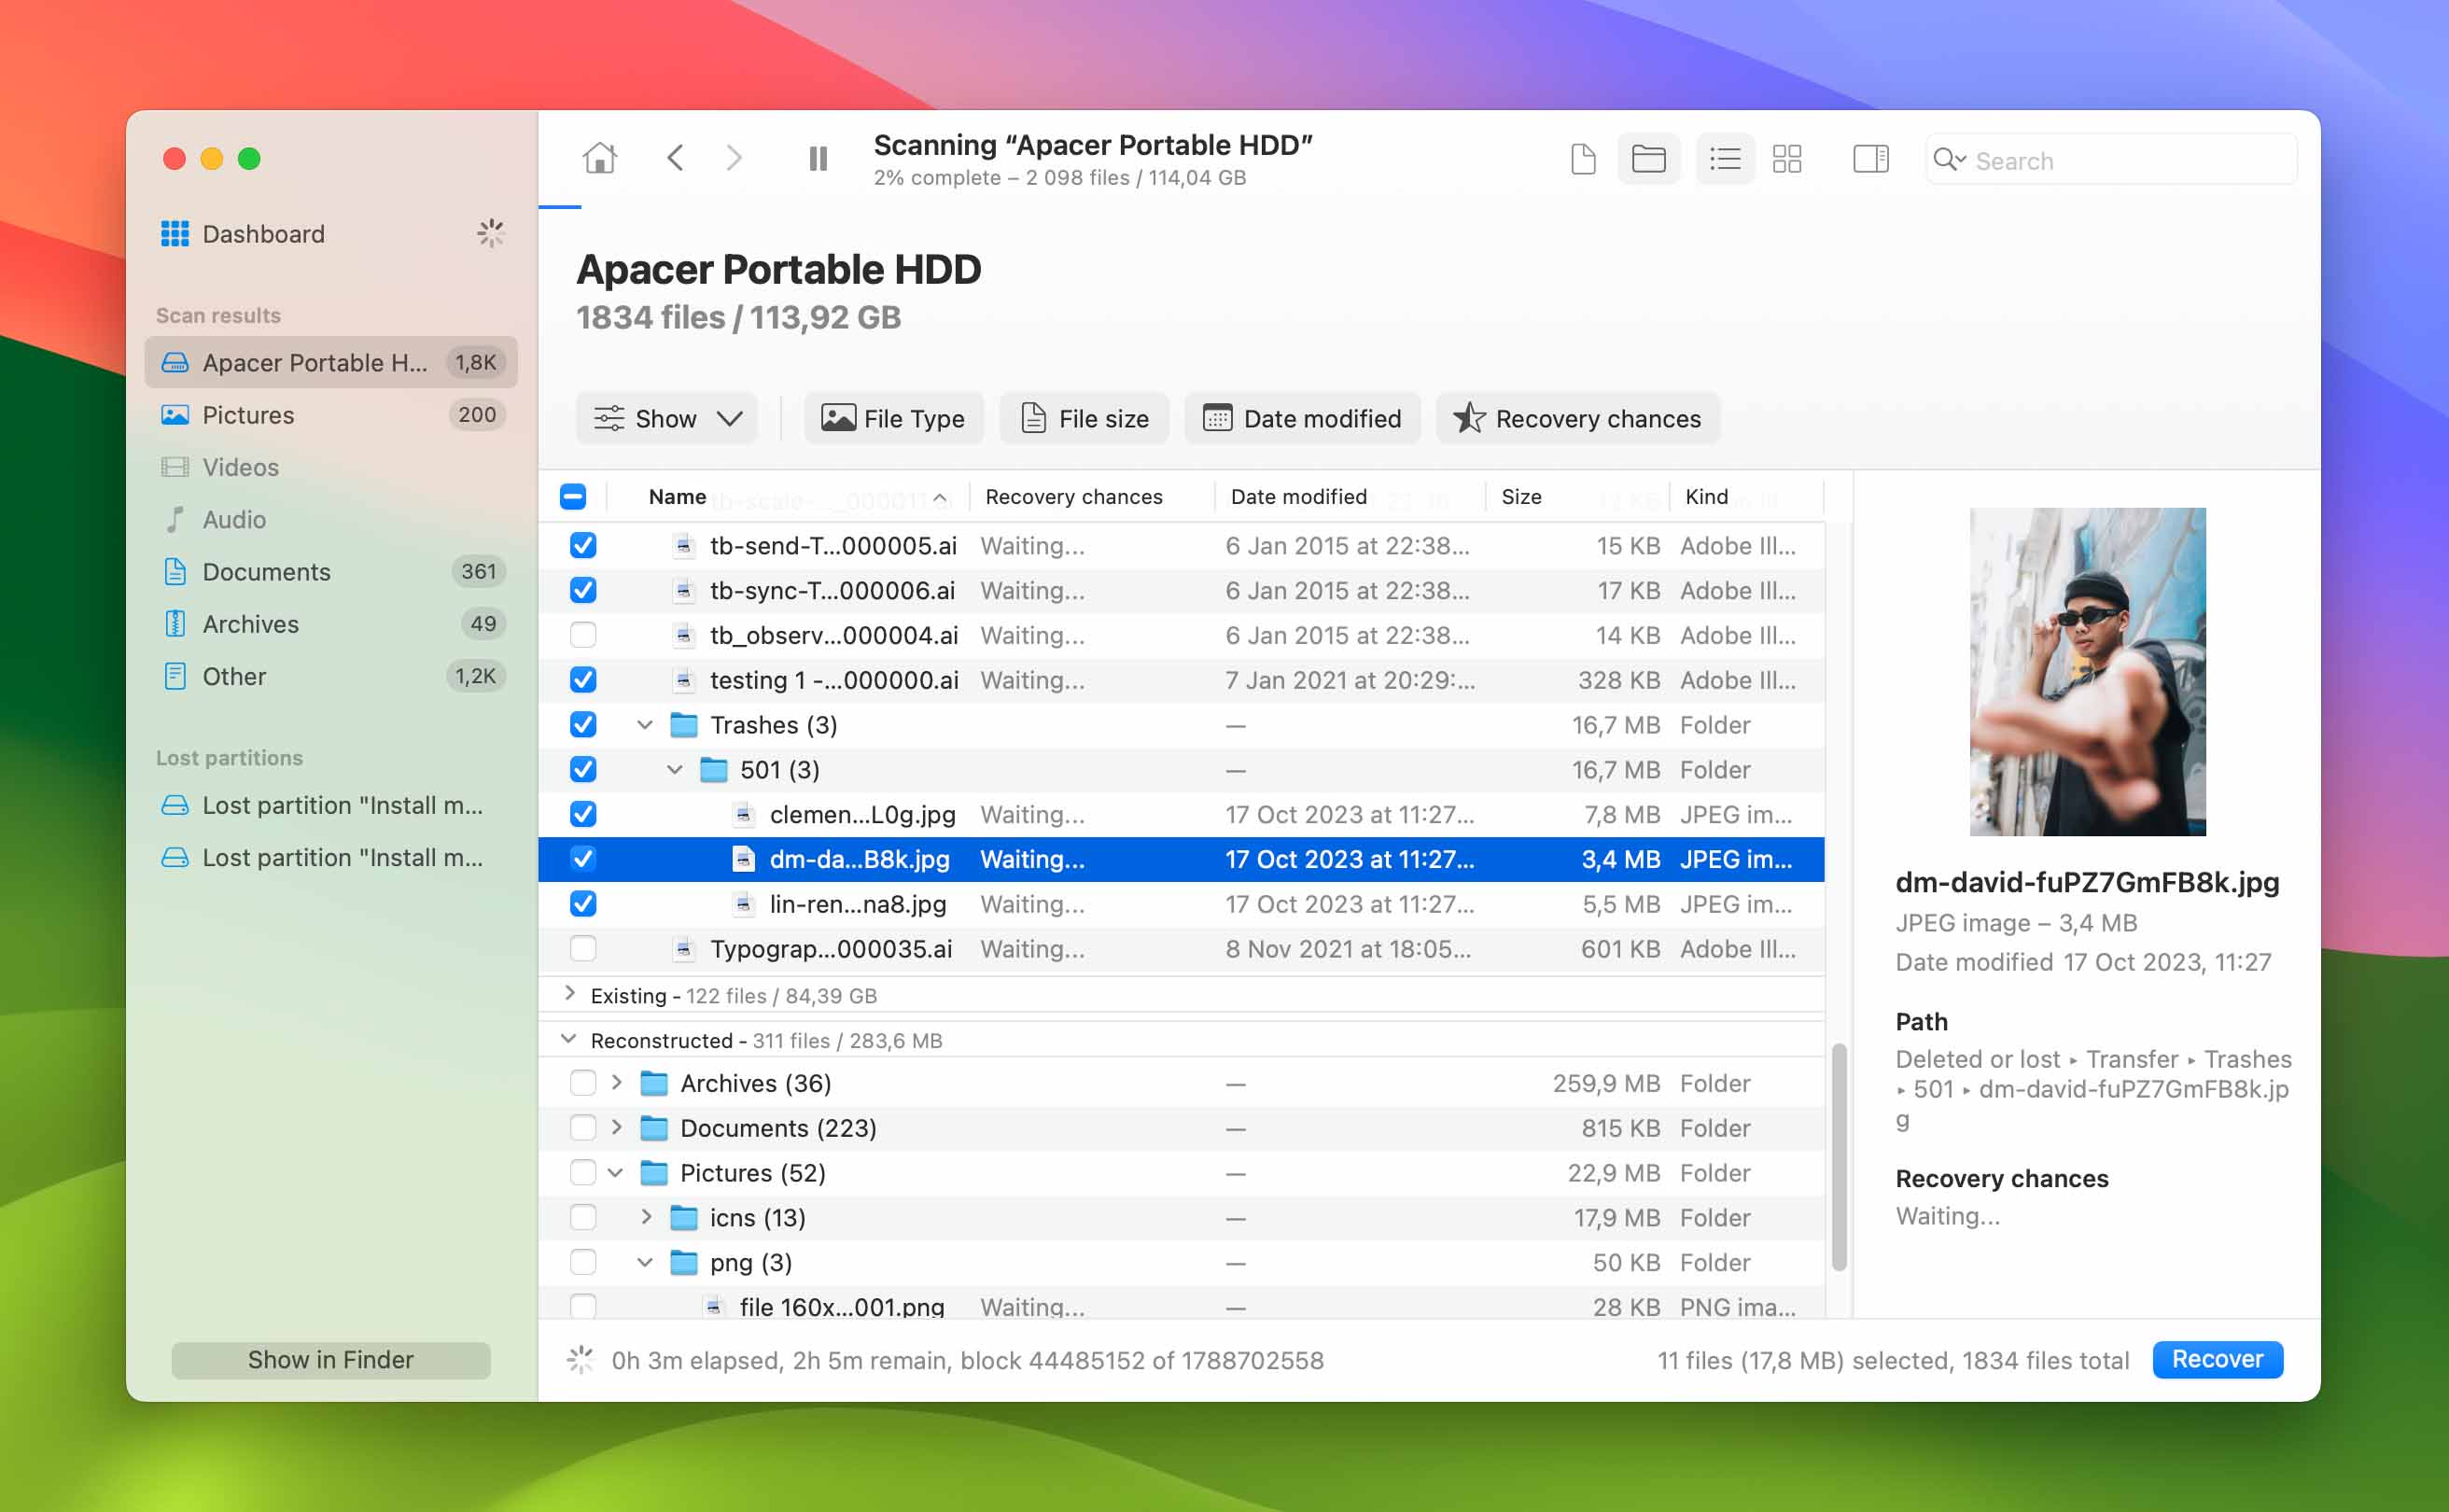
- Preview the files found by Disk Drill to determine if you want to recover them.

- Choose the recoverable files that you want to restore and click Recover button.
- Select a safe location to store the recovered data that is not on the affected external disk.
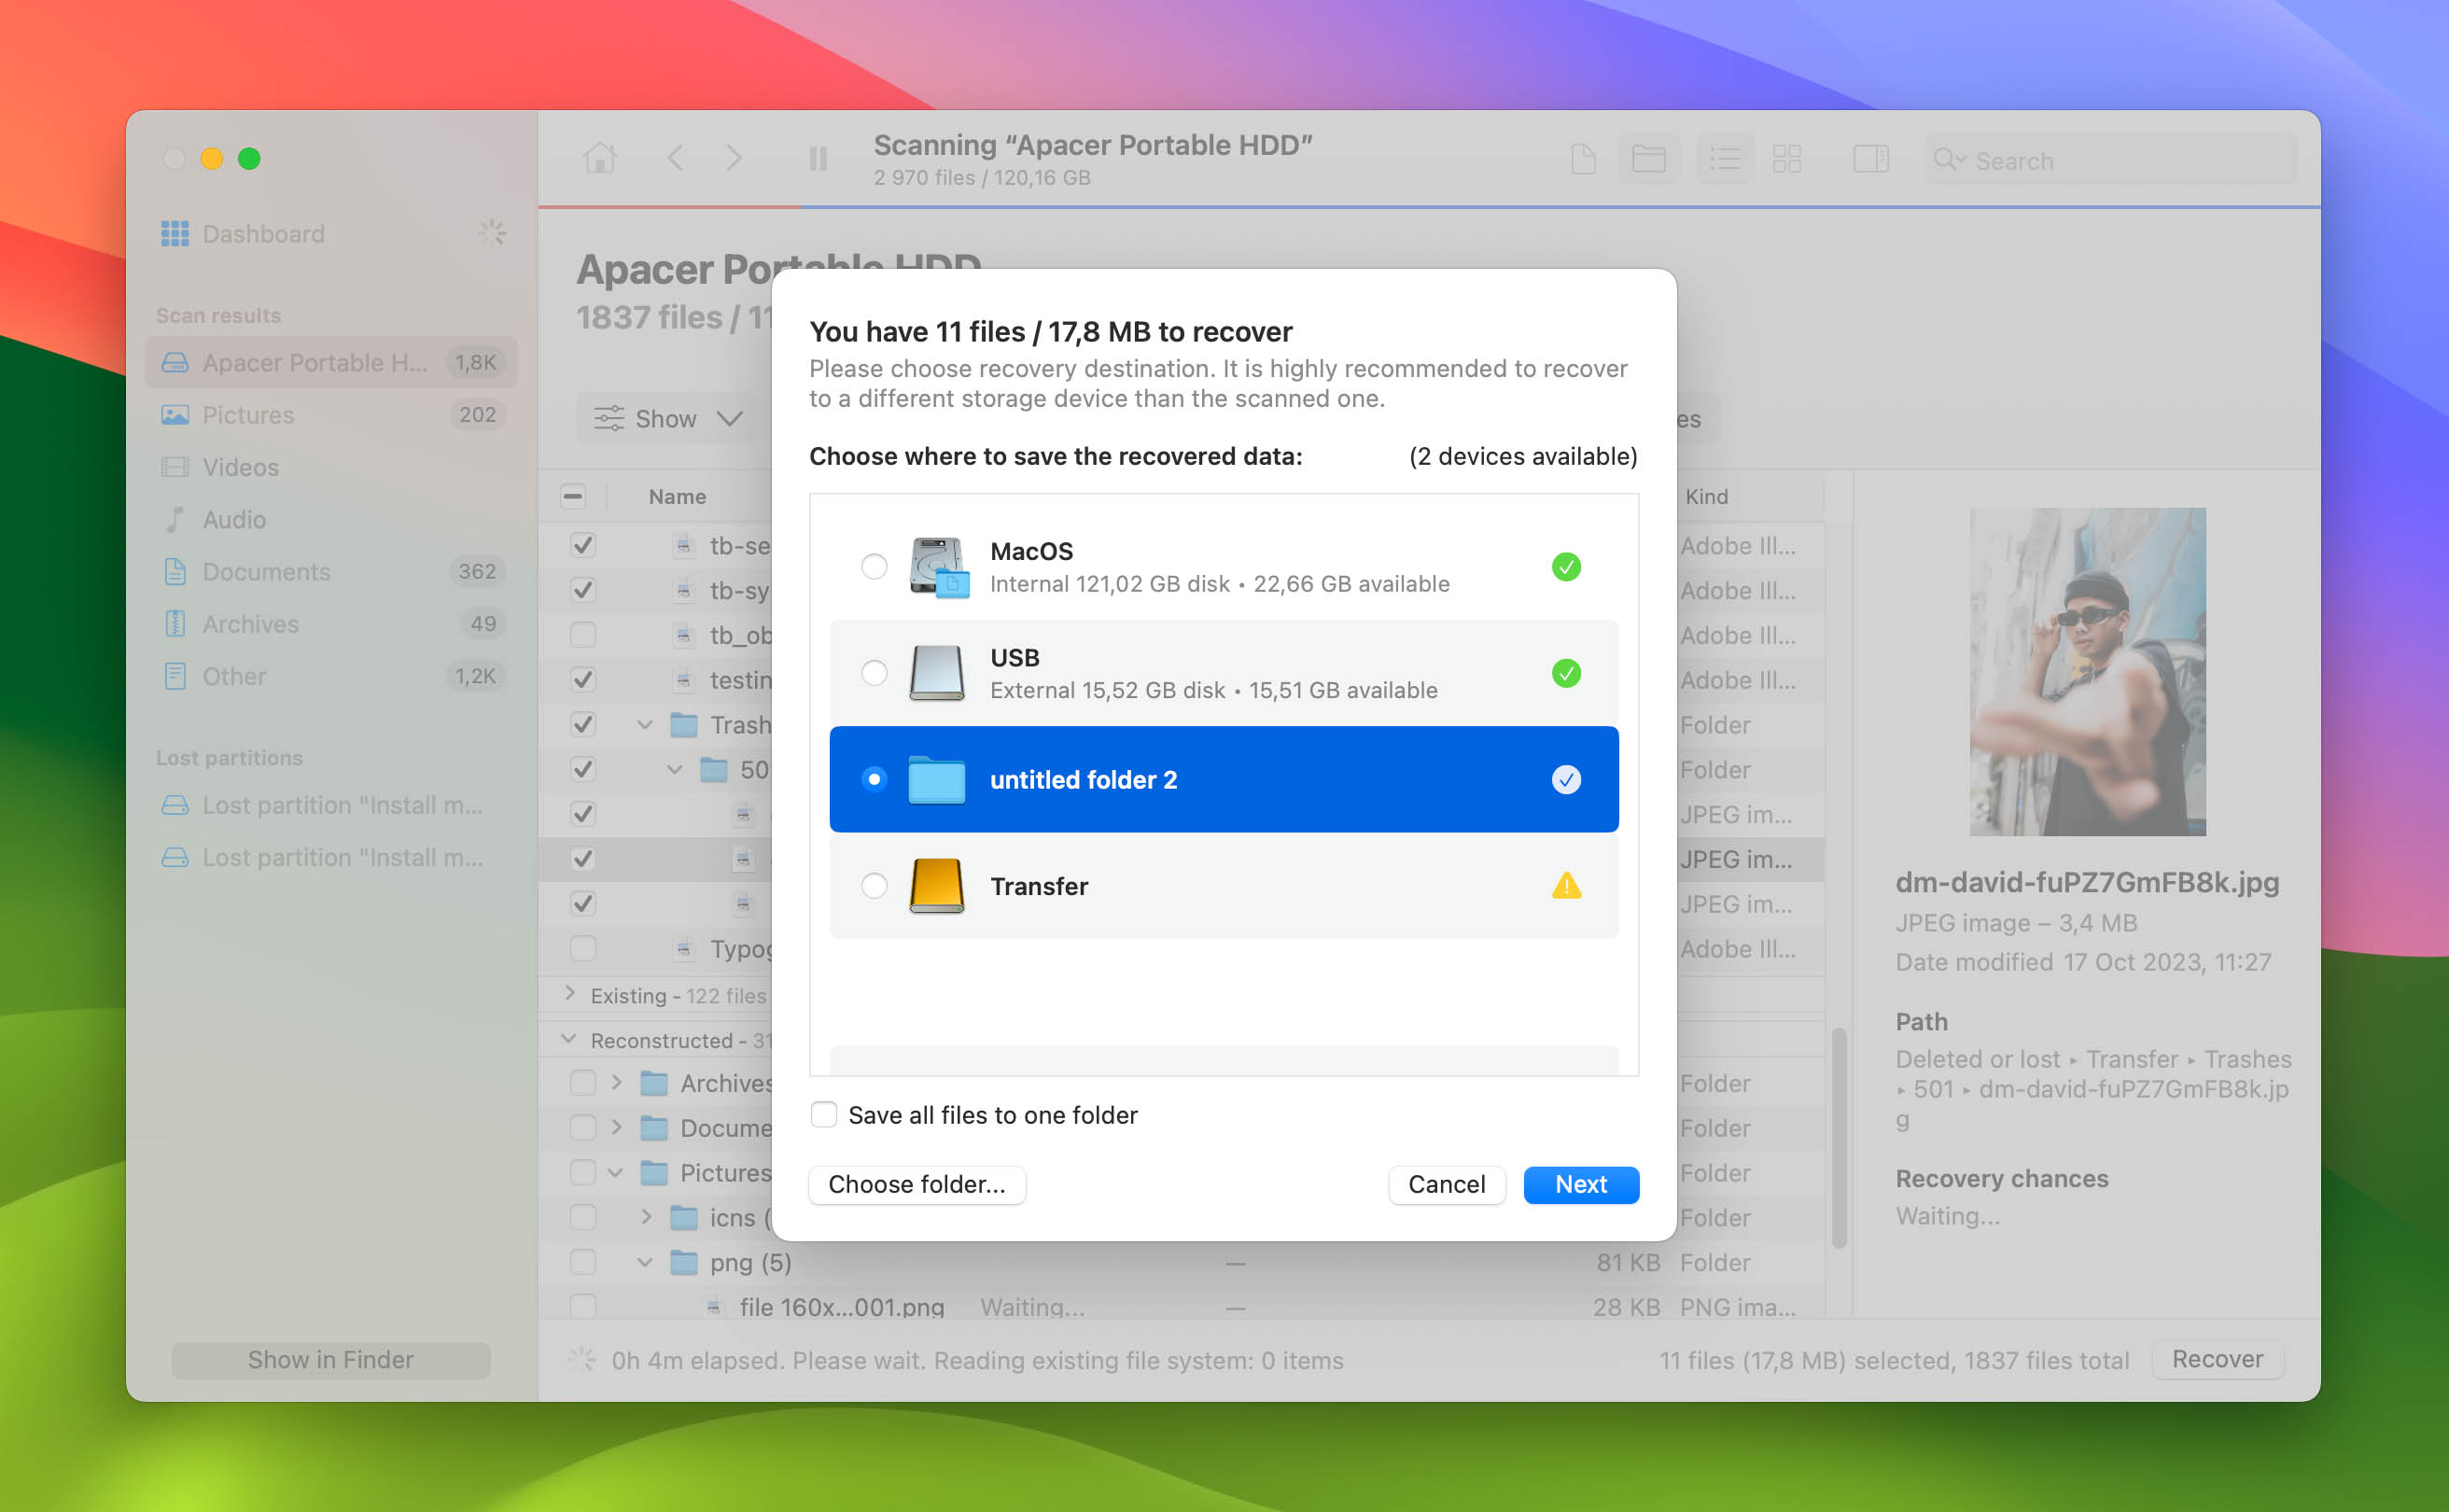
- Click the Next button to complete the recovery process.
Your files will be restored to the location you have selected. Recovery can take some time depending on the size of the files and how scattered their components are on the external drive. Be patient and you will soon have all of the identified files back and available for use.
Important Note: The definition of “overwritten” can be complex in real-world scenarios. For instance, some parts of a file could be overwritten while others are not, leading to partial recoveries that may or may not be useful.
We have a comprehensive review of Disk Drill if you are interested in learning more about its features in detail. Please note that our review is based on the Windows version. However, for Mac users, our colleagues have a full review of Disk Drill for Mac if you require more information about this data recovery solution. Additionally, we offer a review of the best data recovery software for Mac, providing you with alternative options for external hard drive recovery tools. MacBook users may find it useful to check out this guide for insights on how to recover data from your Apple laptop.
Method 3: Recover Files From an External Hard Drive on Mac with Time Machine
Are you backing up your Mac? You should be, and Apple makes it easy by including the Time Machine backup and recovery application as part of your base macOS installation. The tool is simple to use and is a great way to protect your valuable data from accidental loss or deletion.
Most Time Machine backups are taken using a removable storage device like an external hard drive. You can configure Time Machine to back up the files on your Mac’s main drive as well as external drives that are connected to your computer when the backup is taken.
To do this, you need at least two available ports to connect the two external drives: one for the backup and one that contains the data you want to protect. Keep the two drives connected until the backup completes.
The disk you wish to back up must use either the HFS or APFS format while the destination disk for the backup will automatically be formatted to APFS during the Time Machine setup process, regardless of its initial format.
You’ll need the same type of physical configuration to recover deleted files from the external drive from your Time Machine backup. The two drives should both be connected to your Mac during the recovery process. Before backing up the external drive or recovering it, you need to remove the external drive from the items excluded for backup by Time Machine. Here’s how to do it.
- Connect the drive that will be backed up by your Mac.
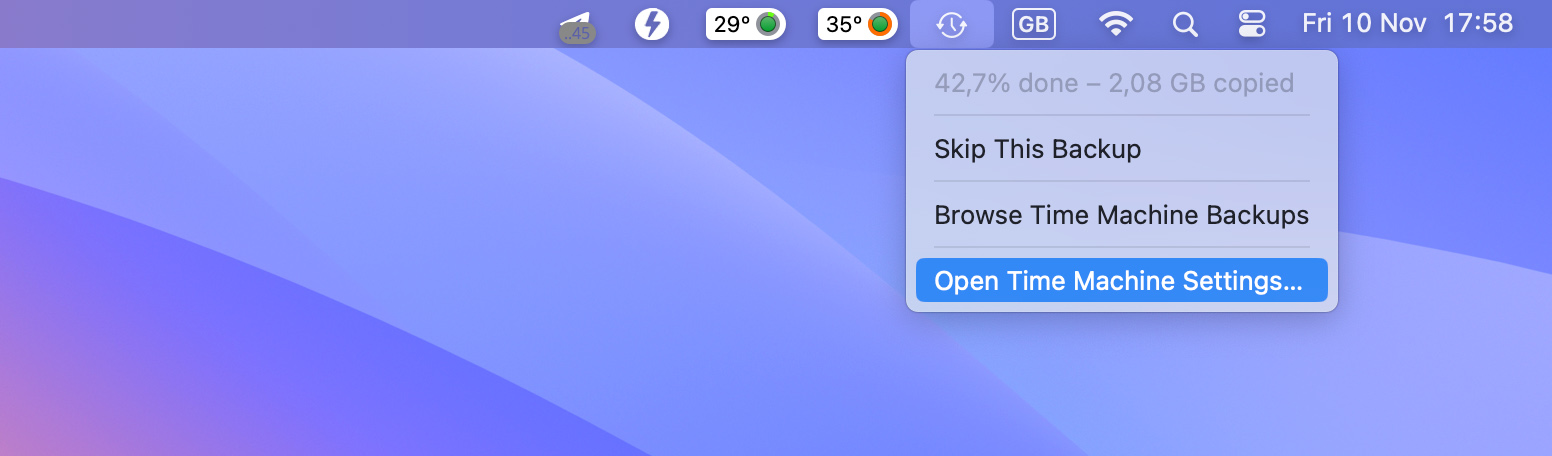
- Open Time Machine by clicking on its icon.
- Select “Open Time Machine Settings…” option.
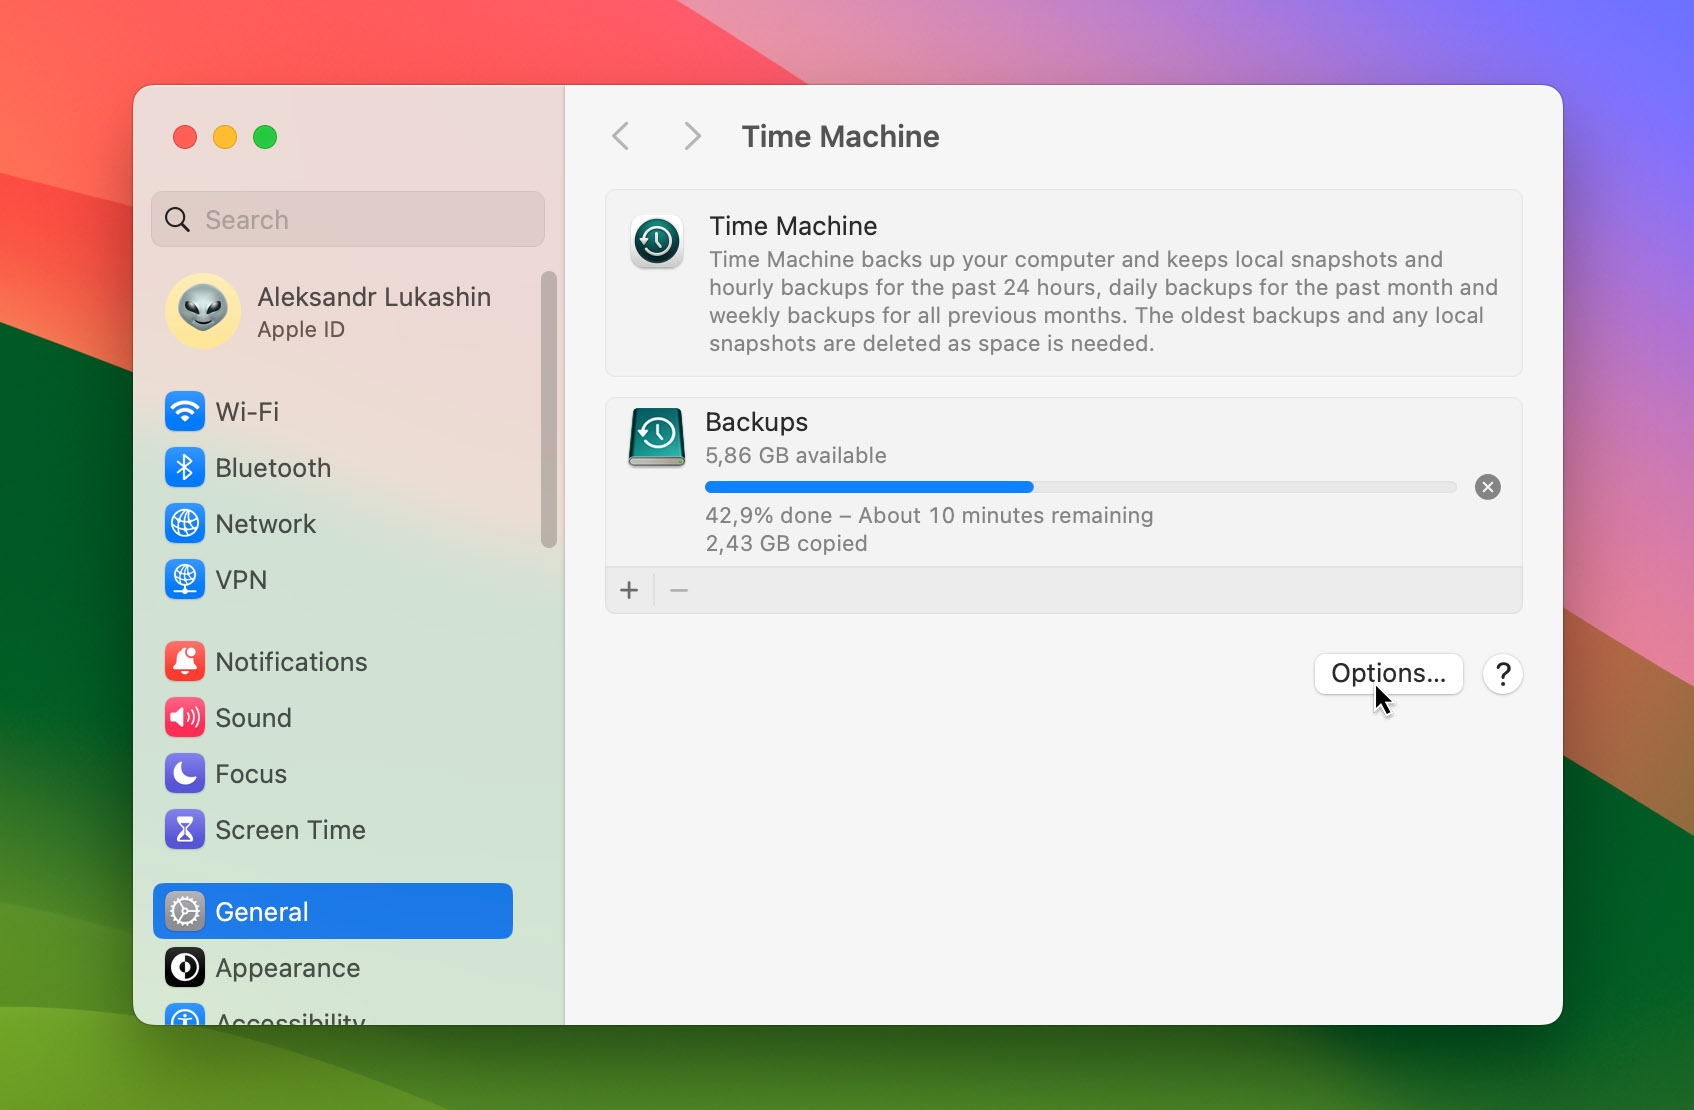
- Click on Options in the lower right of the window.
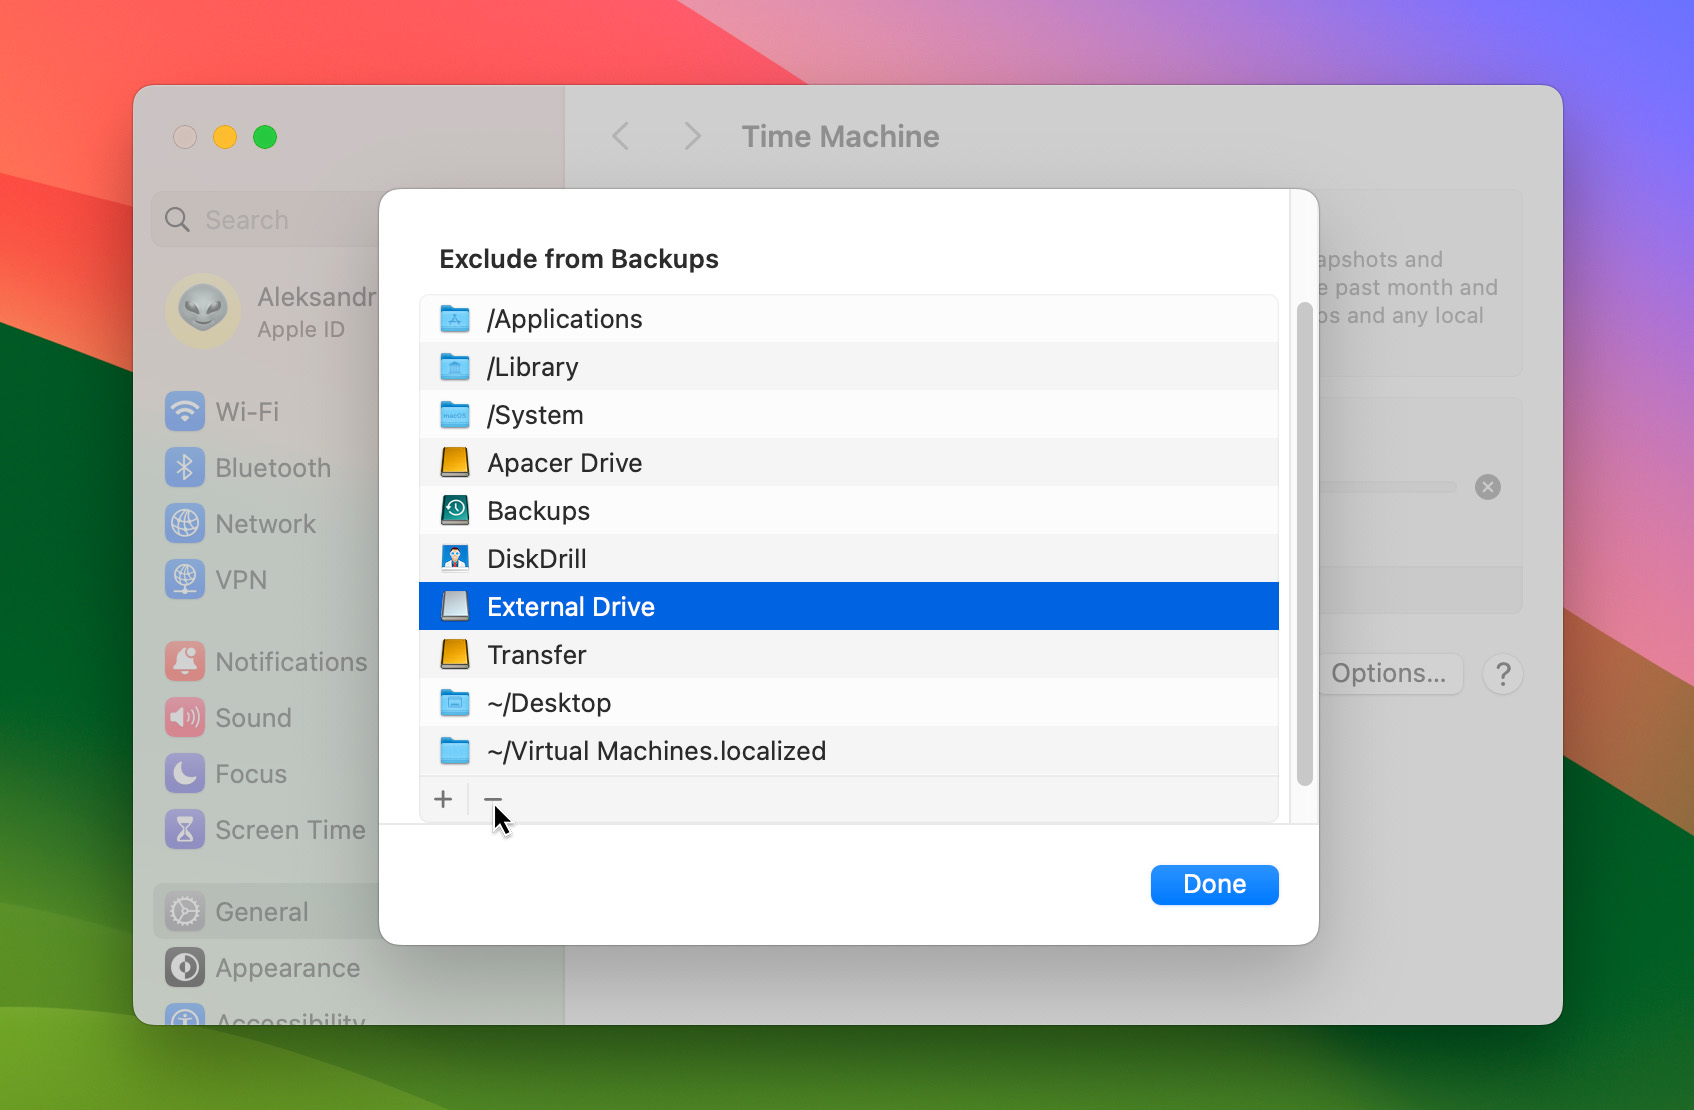
- Remove the external drive from the excluded list if it is there.
Use the following steps to recover files from an external hard drive using a Time Machine Backup after this process is complete. Leave the external drive connected to the Mac.
- Connect the storage device containing the Time Machine backup files to your computer.
- Open a Finder window in the folder that previously stored the file you want to recover. In this case, that will be a folder on the external hard drive.
- Launch Time Machine by clicking the Time Machine icon on the menu bar.
- Search through the available backups using the timeline and arrows to locate the file or files you want to recover.
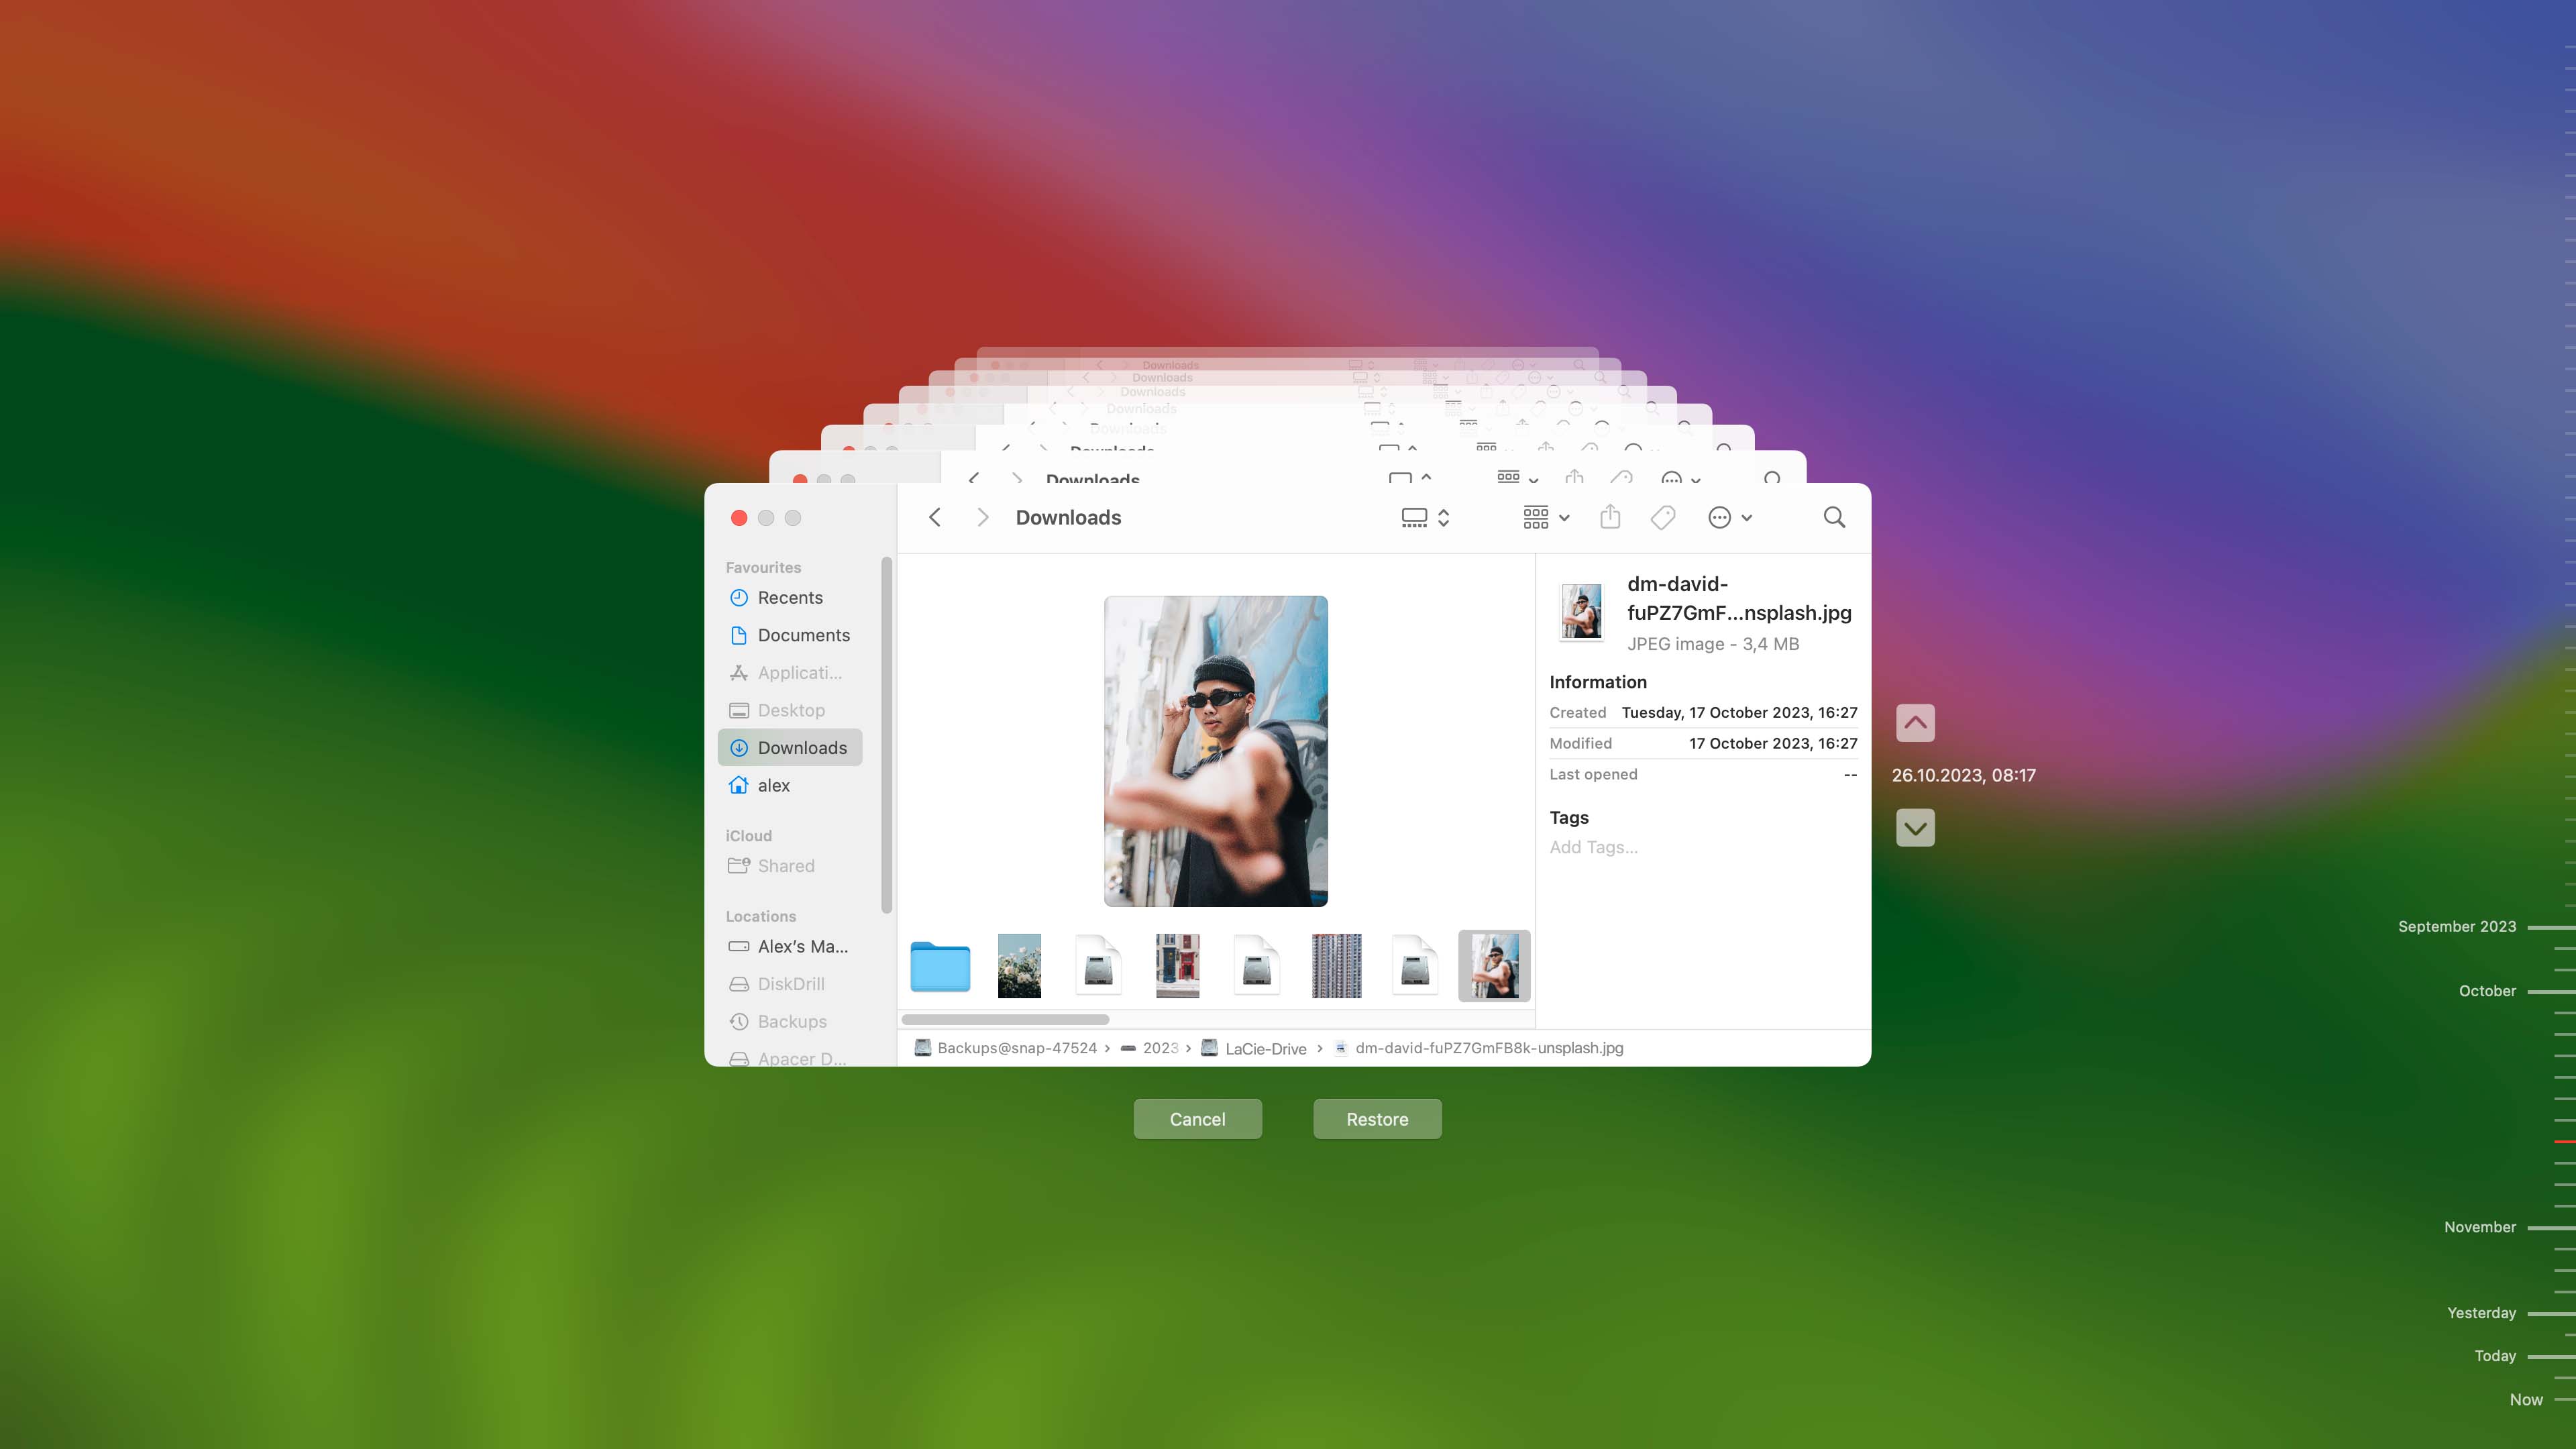
- Select the items you want to retrieve and click the Restore button. The items will be restored to their original location on the external hard drive.
Important Note: If the backup was not up-to-date, or if the files were never included in a backup, then Time Machine would not be able to recover those files.
For more information regarding recovering with a Time Machine backup, please consult this article. Of course, for this recovery method to work, you need to have a backup that contains the lost file. In some cases, you may not have taken this precaution and are faced with a lost file that’s not backed up or located in the Trash. Fortunately, data recovery software solutions are designed to resolve this problem. The same applies if you need to recover your Mac back to a previous date without Time Machine.
Method 4: Repair a Failing Mac External Hard Drive with Disk Utility
If you have an external hard drive that is showing signs of imminent failure, you should see if it can be repaired with Disk Utility. Disk Utility is part of your macOS base installation and can be accessed by opening the Application and then Utilities folder on your main Mac internal disk.
Problems like intermittently causing a crash when connected or not allowing you to access files stored on it can indicate there is a problem with your external hard drive. Rather than wait for the drive to stop working altogether, you should try to repair it with Disk Utility.
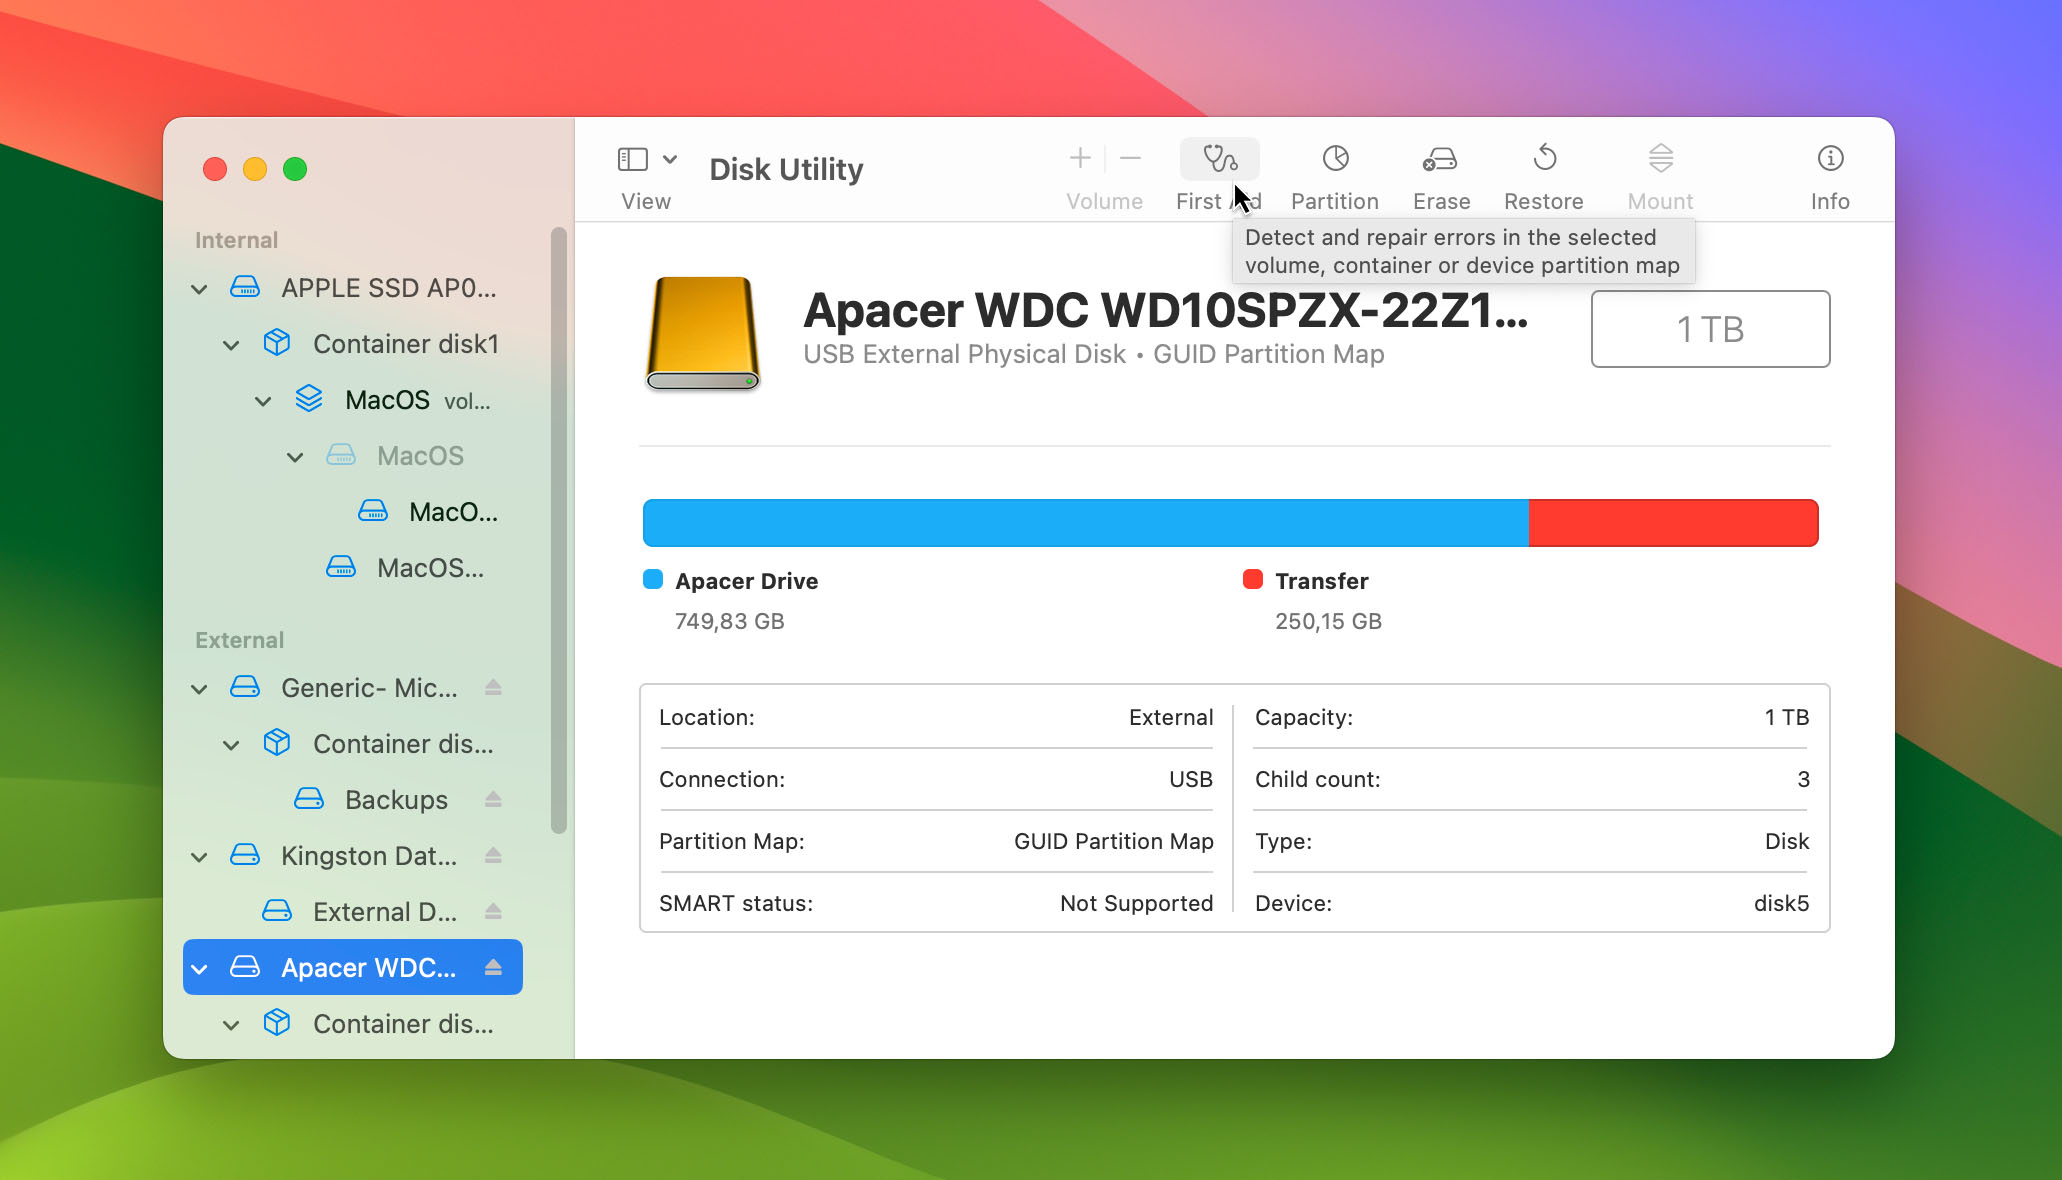
Use the following procedure to attempt to repair the external drive.
- Connect the external hard drive to your Mac.
- Start Disk Utility.
- Choose the external hard drive from the list in the app’s left panel.
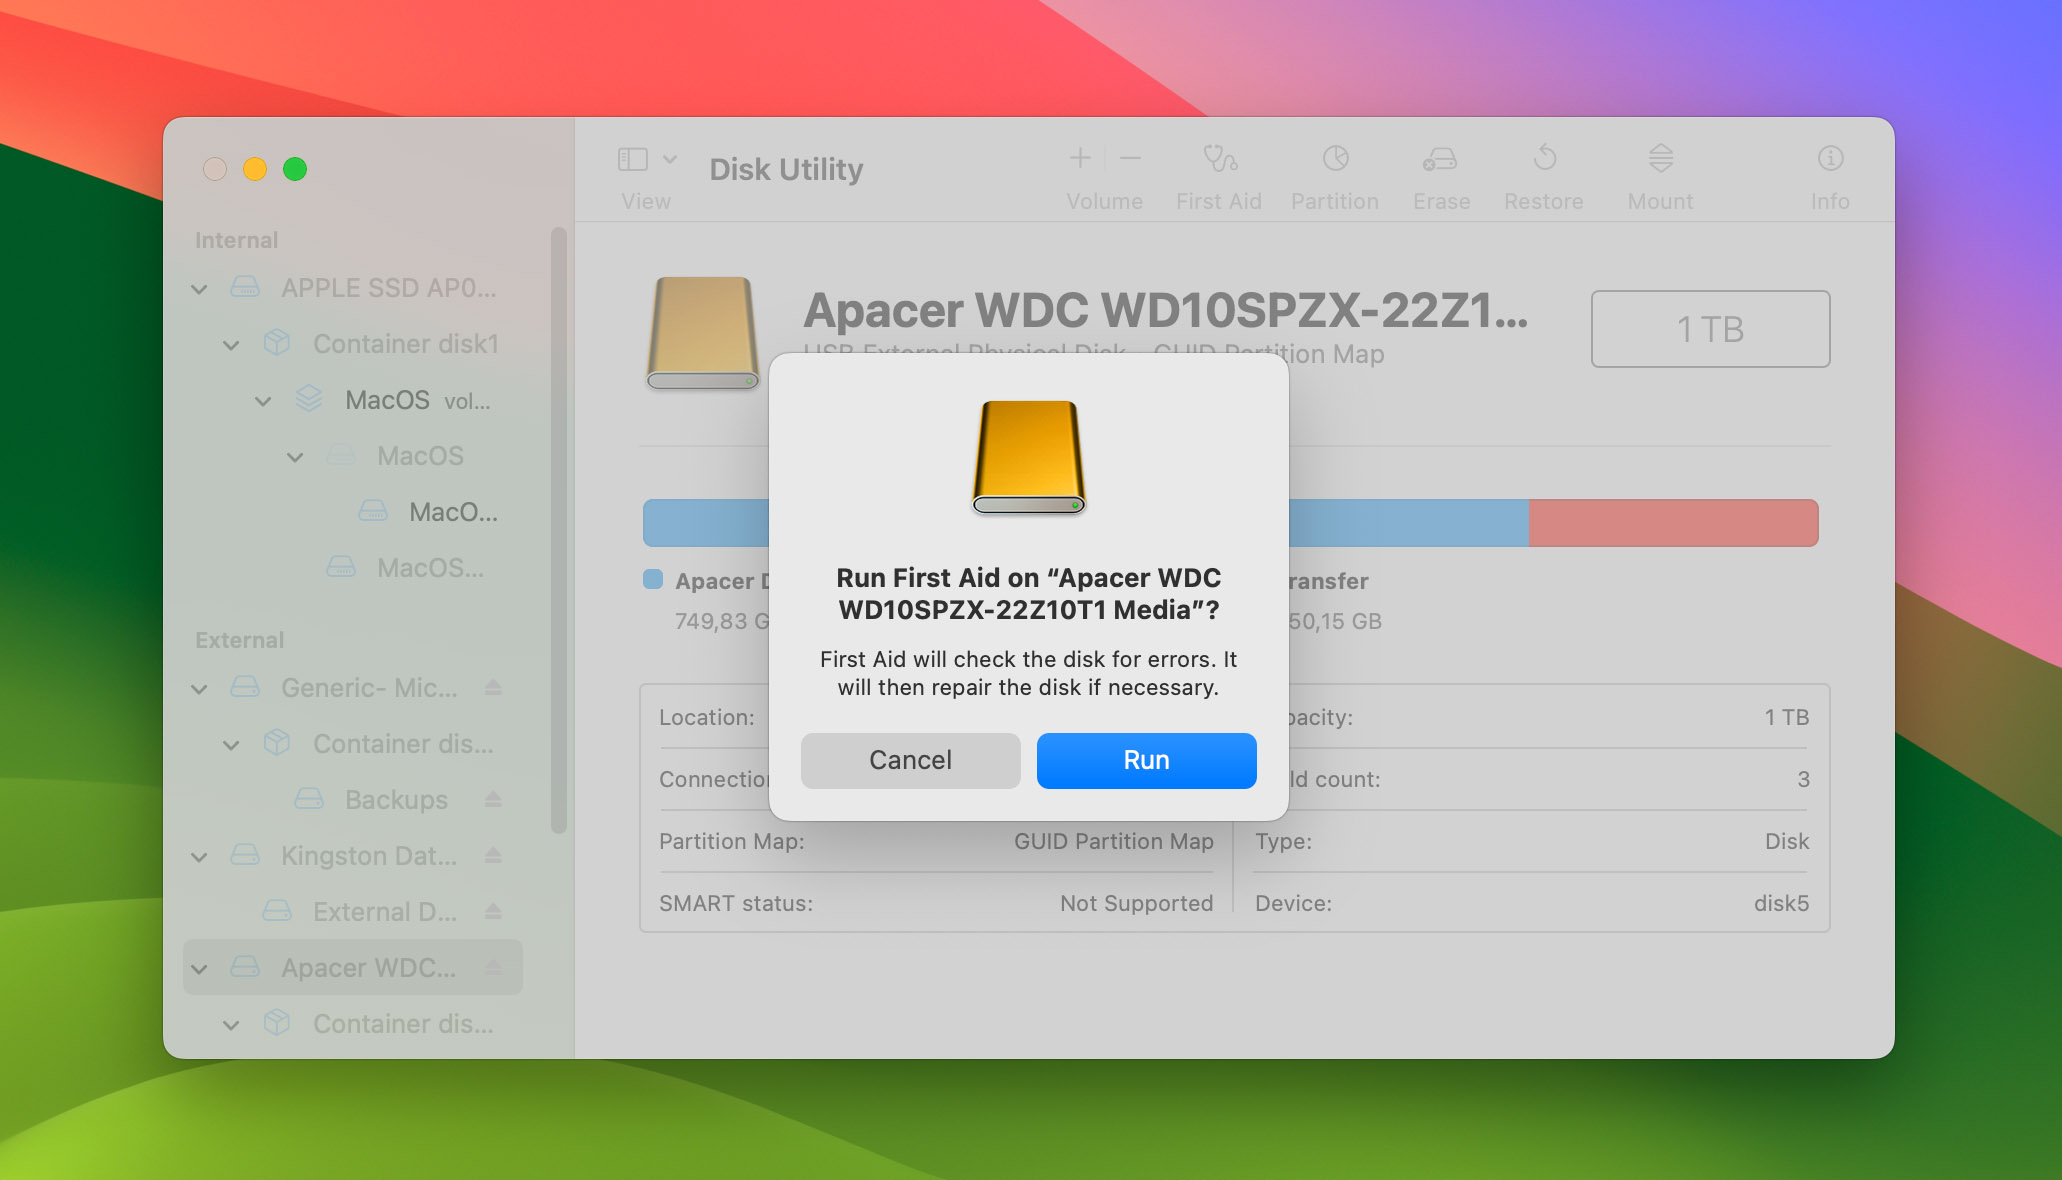
- Click on First Aid to start the process of checking and potentially repairing the disk.
- You will be prompted to continue the process, and the drive will be unavailable while the utility checks it and repairs any errors.
After performing the repairs, we strongly recommend that you back up the drive or copy its data to another device to protect against a catastrophic drive failure. Don’t wait until it’s too late. Signs of a failing drive usually indicate it will indeed fail soon.
Method 5: Recover Lost Data from an External Hard Drive with a Data Recovery Service
If all other recovery options fail, a data recovery service may be able to get your data back. In cases of physical damage to the external hard drive, this may be your only viable way to try a recovery. This is the most expensive option and requires you to send the storage device to a recovery center which may not be accepted if there is sensitive information on the device.
Technicians at a data recovery service use advanced hardware and software techniques that are more powerful than those available to general computer users. Essentially what they do is try to clone your drive so its data can be recovered. Here’s how it works.
- You contact the recovery service for an initial estimate and shipping instructions.
- You ship them the device and will be contacted after they evaluate it for a firm estimate of the cost of recovery.
- The recovery center recovers the data from the damaged drive and returns it to you on a new storage device.
Important Note: Not all damage is recoverable; there are instances where data may be permanently lost despite the best efforts of professional recovery services.
A reputable recovery service will not charge you if they cannot recover your data. They also will not advertise a per-gigabyte rate for recovery, as each one is different. For more information on data recovery services, we suggest you take a look at our article on the subject.
FAQ
Why is the external hard drive not showing up on my Mac?
If your external hard drive is not showing up on your Mac, it could be for a variety of reasons that include:
- A bad USB cable
- The drive is incorrectly formatted for your Mac
- The drive has become corrupted
- The drive is physically damaged
- The Finder settings might be incorrect (*)
(*) with disks hidden in the Finder sidebar and on the desktop. This can lead users to mistakenly think that the disk is not visible or missing.
How do you recover files from an external hard drive on a Mac?
You can recover deleted files from an external hard drive on a Mac using a variety of methods. Data recovery software is the most efficient method as it can recover files that have not been backed up and that have been deleted from the Trash.
To recover files from an external hard drive on a Mac using most data recovery software solutions, follow these generalized steps:
- Select a reputable data recovery software that is compatible with macOS and install it on your Mac.
- Connect your external hard drive to your Mac using a suitable cable.
- Initiate a scan by selecting the external drive from the software’s list of available devices.
- Browse and choose the files you wish to recover from the list provided post-scan. Note that some software may not allow file selection.
- Specify a secure location on your Mac to save the recovered files and complete the recovery process.
How do I fix a corrupted external hard drive on a Mac?
Use Disk Utility to fix a corrupted hard drive on your Mac. Connect the external drive to your Mac and use First Aid within Disk Utility to repair the drive.
How do I recover files from an external hard drive that won't boot?
If your external hard drive won’t boot but is still recognized by your system, you can try copying the data to another disk. You may be able to rescue the majority of data from the disk in this way.
How to recover files from an external hard drive that is not recognized?
In cases where you cannot get the operating system to recognize your external hard drive, you need to use a backup to recover your files or engage a data recovery service to attempt the recovery.
Is it possible to recover data from an accidentally erased external hard drive on a Mac?
Yes, it is. Data recovery software can recover erased data from an external drive as long as it has not been overwritten by new data. Just connect the drive to your Mac and let recovery software scan the disk for recoverable data.
Conclusion
We have shown you several ways to recover data from an external hard drive. Based on your specific data loss scenario, some may be more appropriate than others. You might be lucky and find the lost data in the Trash for a simple recovery. If not, a versatile data recovery software tool like Disk Drill can recover files from internal as well as external disks.
Please take our advice and backup your valuable information using Time Machine or another backup solution. The time you spend backing up your data will be handsomely repaid if you ever need to recover lost data from your backup media. With backups and reliable data recovery software, you should be able to recover from most data loss situations. Good luck with your data recovery!
This article was written by Robert Agar, a Staff Writer at Handy Recovery Advisor. It was also verified for technical accuracy by Andrey Vasilyev, our editorial advisor.
Curious about our content creation process? Take a look at our Editor Guidelines.