Apple likes to do things their own way, and its Apple File System (APFS) is a perfect example of this. The proprietary file system is the backbone of data management in the latest macOS Sonoma and its predecessors, offering support for encryption, snapshots, and much more.
But because this file system is unique to Apple devices, it presents additional challenges when it comes to the recovery of lost or deleted files. To successfully perform APFS data recovery, you need the right approach and the right tools— traditional recovery methods might not cut it. That’s why we’ll show you how to recover individual files or complete partitions using data recovery software tools from APFS storage devices.
Wanna skip the theory part and jump right to the recovery guide? Click here.
What is APFS and Where Is It Used?
The Apple File System (APFS) is currently the default filesystem for Apple computers and mobile devices. It replaced HFS+, also known as Mac OS extended, starting with macOS High Sierra and iOS 10.3. APFS provides improved speed, optimization, and data handling functionality over the HFS+ filesystem.
Some of the technical reasons for the improved performance of drives using APFS include:
- Files can be cloned to reduce the cost of copying;
- Free space can be shared between multiple volumes;
- Sparse files don’t allocate empty blocks.
Wow, working with APFS volumes makes it super simple to do a clean installation of macOS!
You can just create a new volume in disk utility, install to it, boot up in it, then delete your old volume.
— Andy Tran | #BLM ✌️🌈🎉 (@nivenhuh) March 26, 2021
These features of the filesystem make it more efficient in handling and storing data and increase the speed with which files are copied and accessed. Taken together, they furnish improved performance over disks using HFS+.
Choosing between filesystems
Depending on the version of iOS or macOS you are using, APFS might be the default filesystem. Since APFS is the default for modern Apple operating systems, such as macOS Sonoma, it will automatically use this filesystem when formatting devices. You can force it to use the HFS+, and you may need to do so in certain situations.
Use APFS in these cases:
- Internal or external HDD and SSD drives on Macs running a recent version of macOS, such as Sonoma or Ventura.
- You don’t need to share the data on the device with older systems that do not support APFS.
Use HFS+ in these cases:
- Internal or external HDD and SSD drives on Macs that don’t support macOS Sonoma or its close predecessors.
- You need to share the data in mixed environments that include Macs running old versions of macOS as well as the latest ones.
Check out our guide for details on recovering data from your Mac’s hard drive. It presents valuable information that can help you get your lost data back from HFS+ or APFS formatted drives.
Can Deleted APFS Data be Recovered?
Yes, deleted APFS data can be recovered with data recovery software as we discuss on this support page on hard drive recovery. Unfortunately, there are circumstances where software solutions will not be able to recover deleted APFS files. Let’s looks at some different scenarios.
- External APFS storage devices – Data recovery software can recover lost and deleted files from external mechanical HDD drives formatted with APFS.
- Internal APFS storage devices – Internal HDD drives formatted with APFS can have their lost data recovered with recovery software. If the drive is an SSD, see the next section.
- SSDs with TRIM enabled/disabled – If TRIM is enabled, you will not be able to recover data from an SSD unless you’re very fast and manage to turn it on before it makes your data unrecoverable. When TRIM is disabled, data recovery software can recover data from an SSD in the same way it does with an HDD.
INFORMATION: What is TRIM? TRIM is an Advanced Technology Attachment (ATA) command that enables an operating system to inform a NAND flash solid-state drive which data blocks it can erase because they are no longer in use.
Undelete APFS Data via Data Recovery Software
Data recovery software offers users a reliable method of recovering lost and deleted files from APFS drives. In cases where the drive is an HDD or SSD drive with TRIM disabled (unfortunately, TRIM can be disabled only on macOS Monterey and older), chances are good that you can successfully perform APFS data recovery.
IMPORTANT: We strongly suggest that you stop using the drive that has experienced data loss as soon as you realize you have lost some files. Due to the way macOS deletes data, continued use of the device risks overwriting potentially recoverable data. Once a file has been overwritten, it is impossible to recover the original data.
There are many commercial and freeware data recovery products from which to choose. They vary in characteristics such as price, functionality, recovery results, and usability. Over the years we have used many of these solutions and obtained differing degrees of success. We invite you to view our review of data recovery software tools for Mac.
We like Disk Drill for Mac as our recovery tool and will feature it in our demonstration of how to recover deleted APFS files. The great recovery results and the app’s intuitive and simple interface are two of the reasons we chose this solution to restore our lost data. A more detailed review of Disk Drill can be found on this page. We’re also big fans of PhotoRec, whose free-to-use, open-source nature makes it a no-brainer for budget-minded Mac users.
Option A: Disk Drill
The following steps should be used with Disk Drill to recover data from an APFS formatted drive.
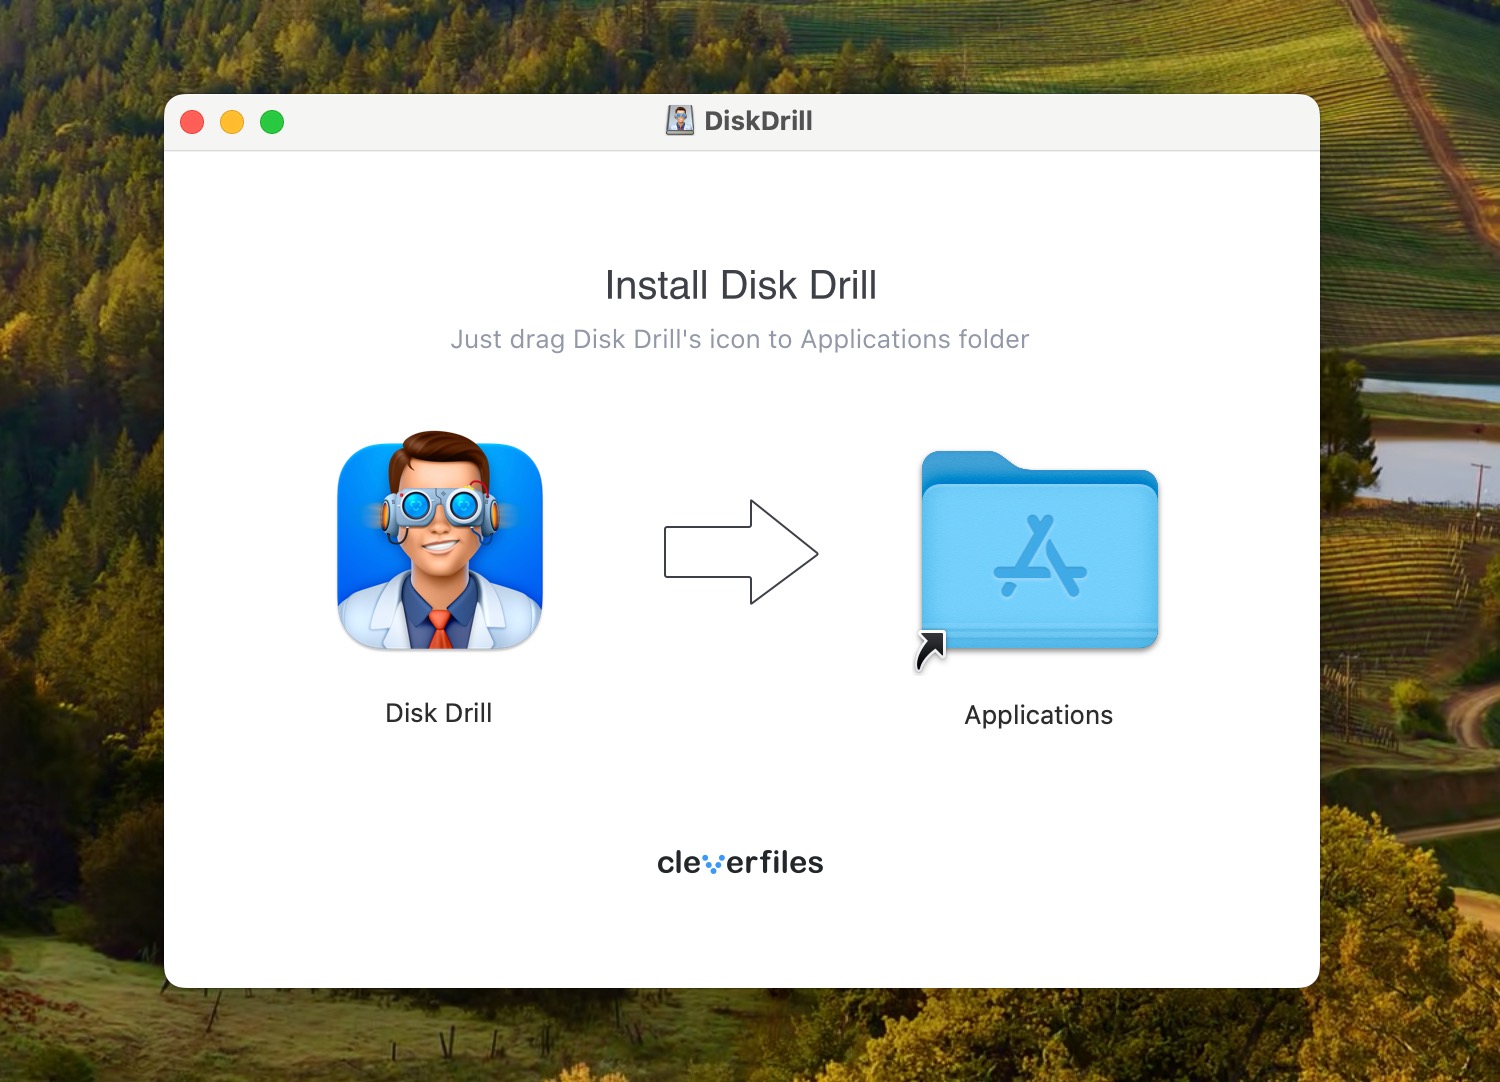
- Download and install Disk Drill. To avoid overwriting recoverable data, do not perform the download and installation on the drive that contains the lost data. This means if you are recovering files from your main disk, use an external drive to hold the recovery program.
- If you are recovering data from an external drive, connect it to your Mac.
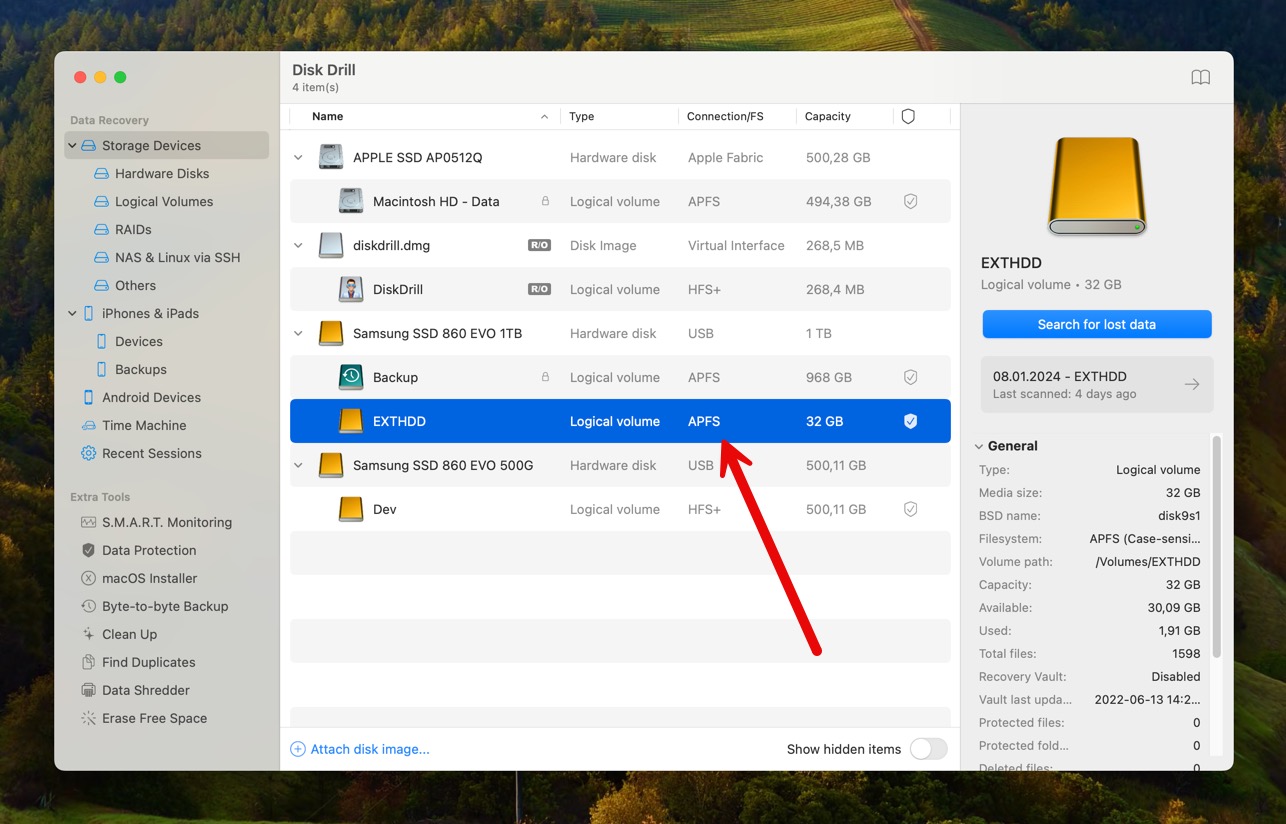
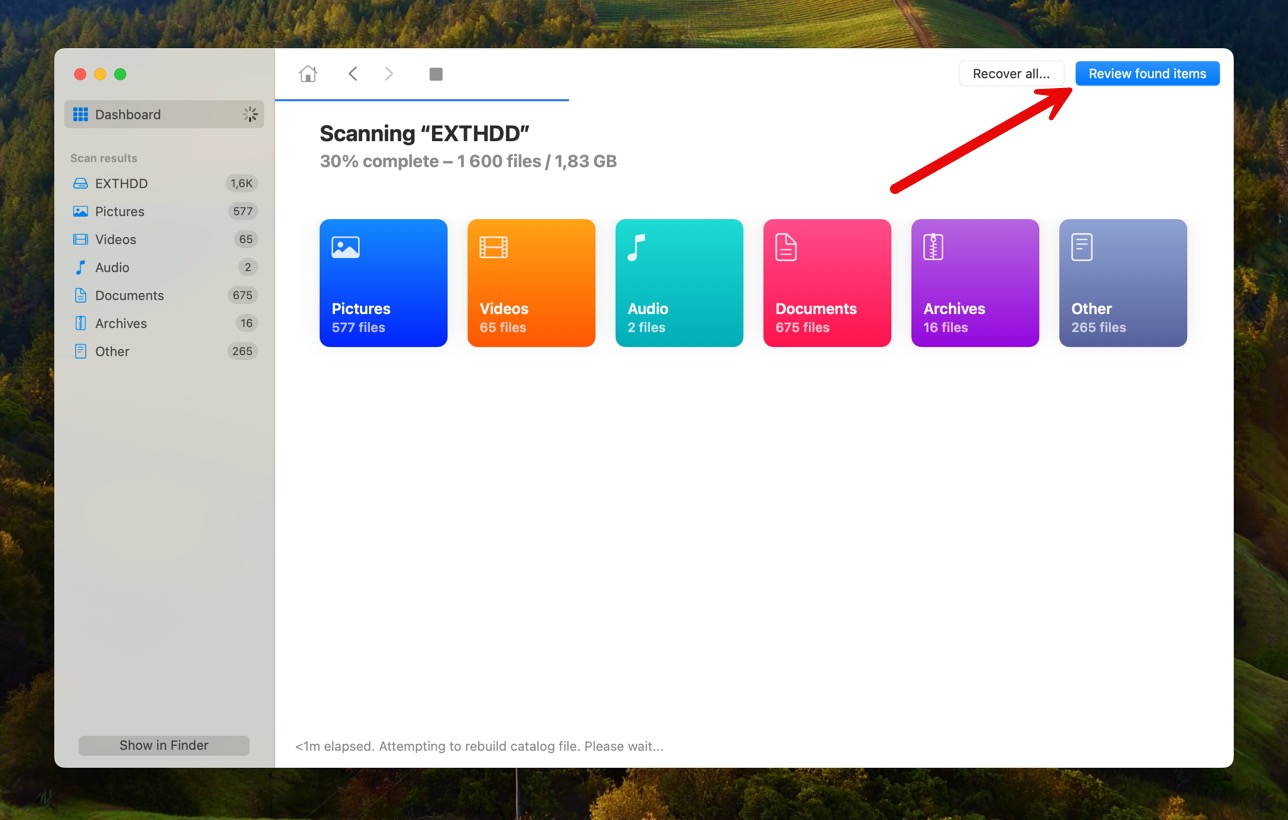
- Launch Disk Drill and choose the affected drive from the app’s list of available storage devices.
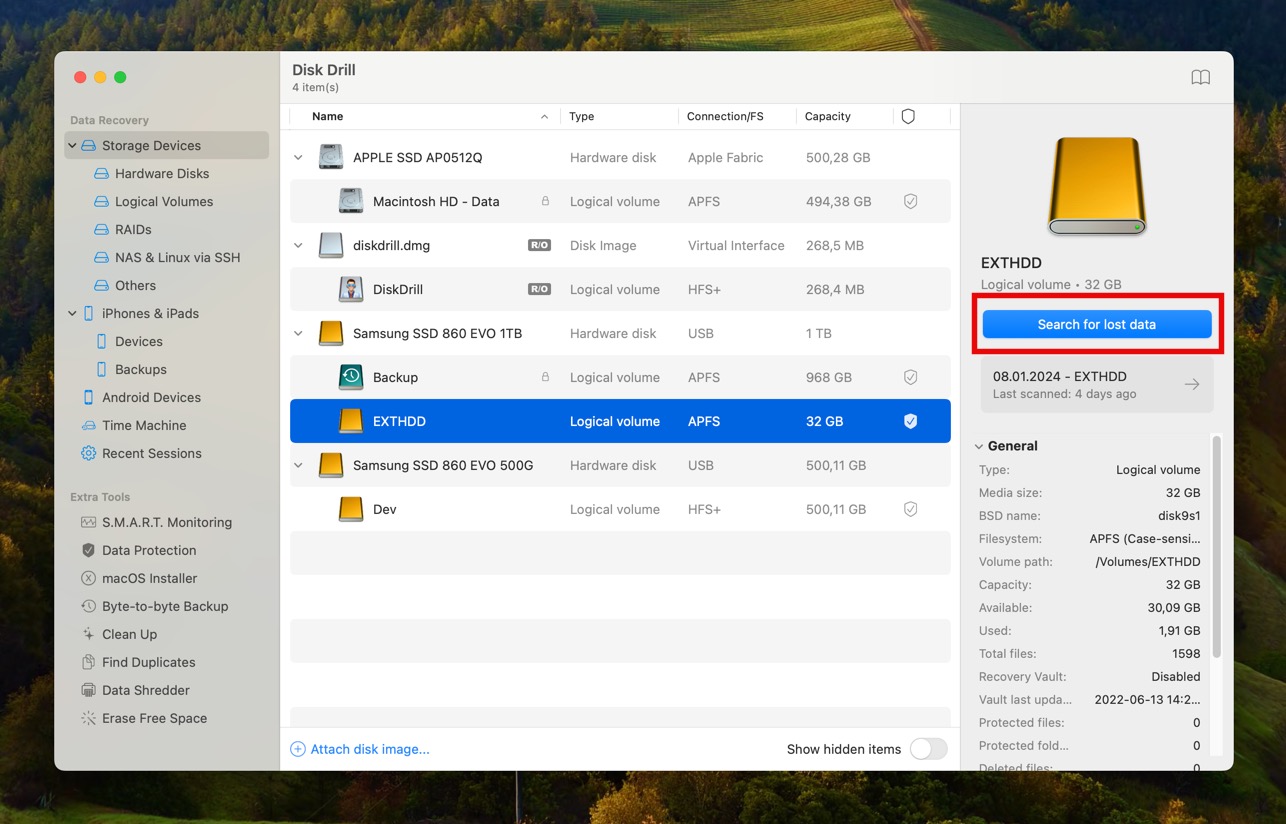
- Click the Search for lost data button to start scanning the drive for recoverable files.
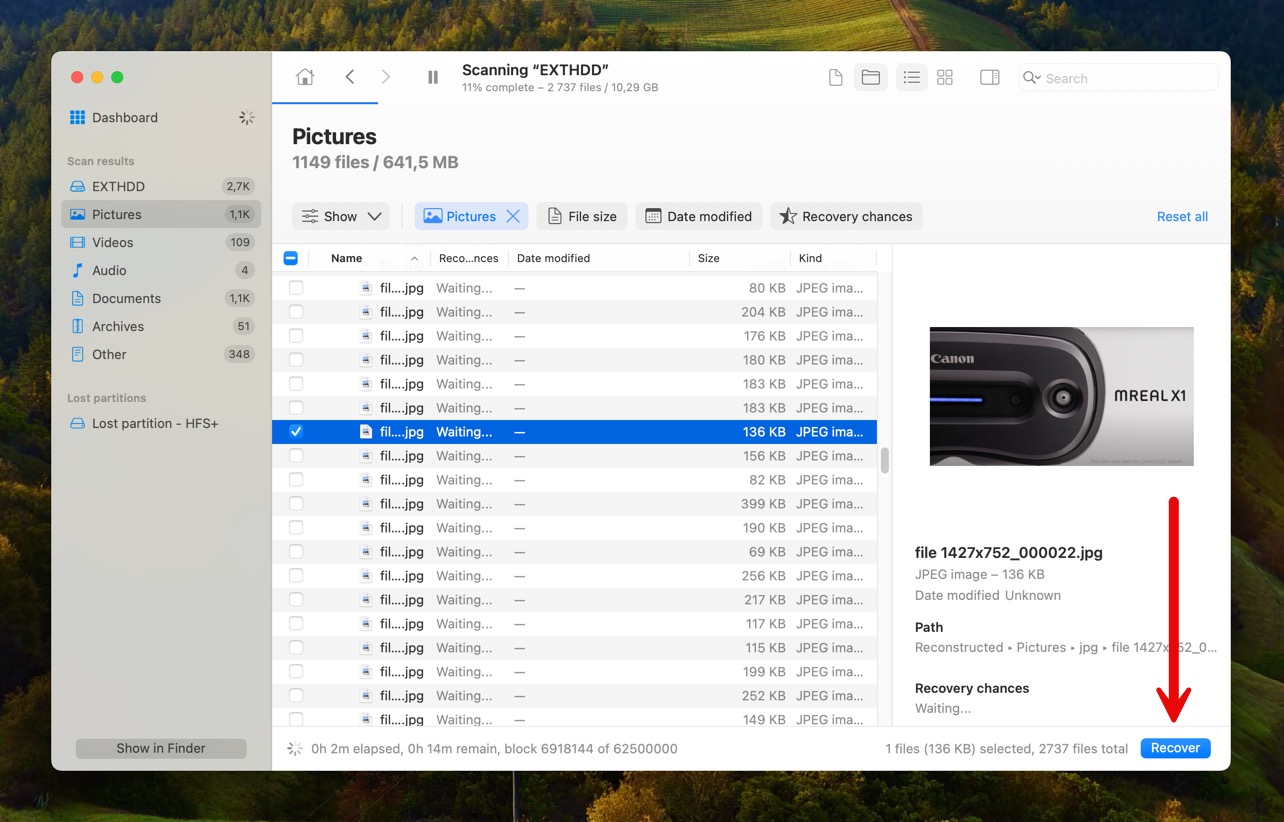
- Preview the found files as scanning proceeds. You can use filters to limit the displayed results to a specific file or type of file. Select the files you want to retrieve from the list of recoverable data.
- Click the Recover button after making your selections. You will be prompted to choose a safe location for storing the recovered data. Do not use the drive that experienced data loss or you risk overwriting the data you want to retrieve.
Disk Drill provides a straightforward and easy procedure for recovering data from an APFS drive. It’s a powerful recovery tool that allows users with any level of computer experience to successfully recover lost data from APFS drives and virtually any other type of disk-based storage device.
Option B: PhotoRec
PhotoRec is a freeware data recovery solution that is specifically designed to recover files based on their file signatures. It’s a powerful tool that gets the job done, but it does have one major drawback. PhotoRec employs a command-line interface that is not as easy to use as most commercial alternatives.
Use the following procedure to recover deleted APFS files using PhotRec. You can also get more detailed information about using PhotoRec on its homepage or in our PhotoRec review.
- Download PhotoRec (included with TestDisk) using the Homebrew package manager or manually from its website.
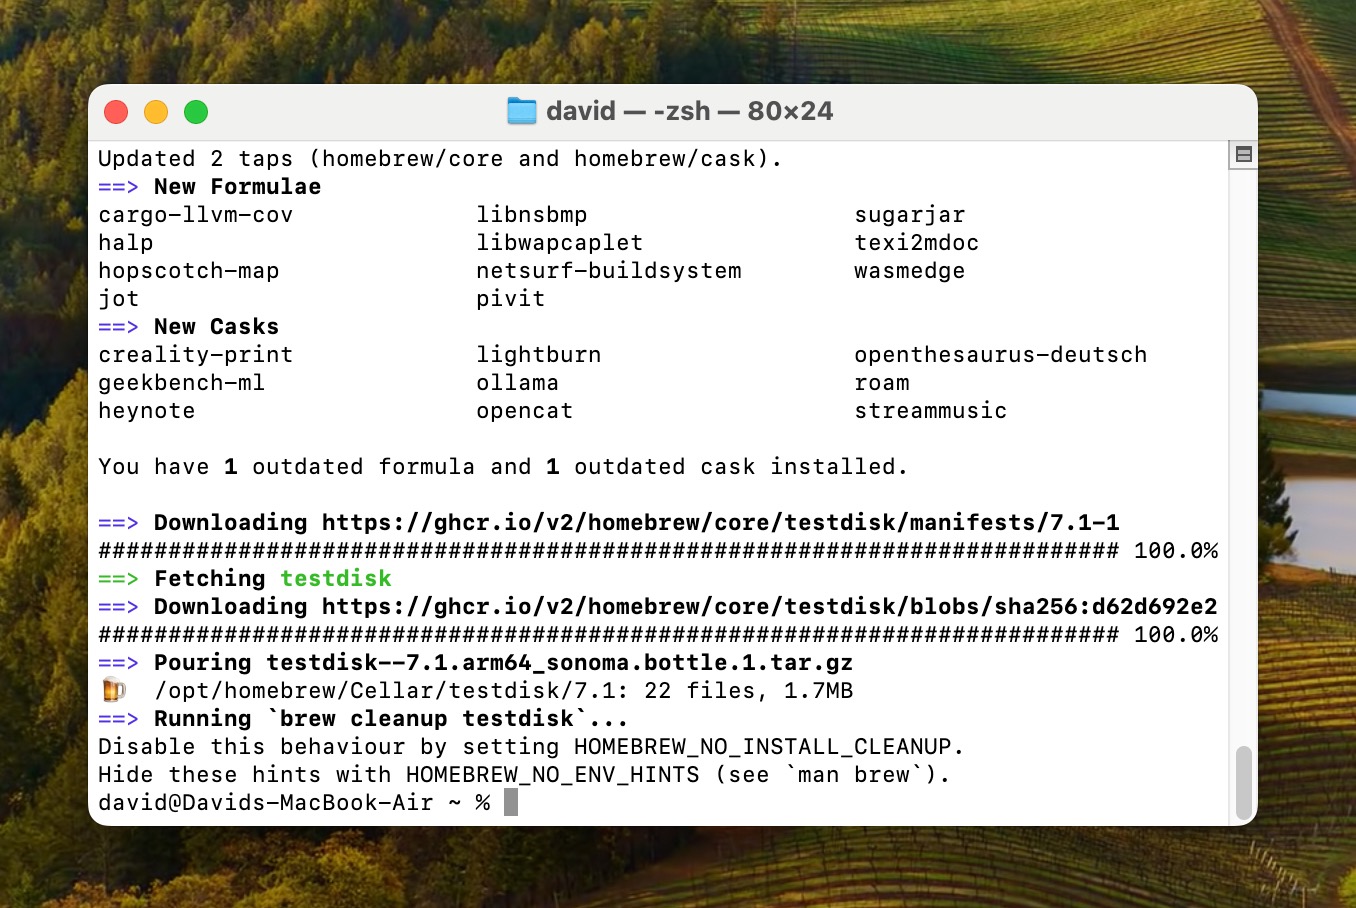
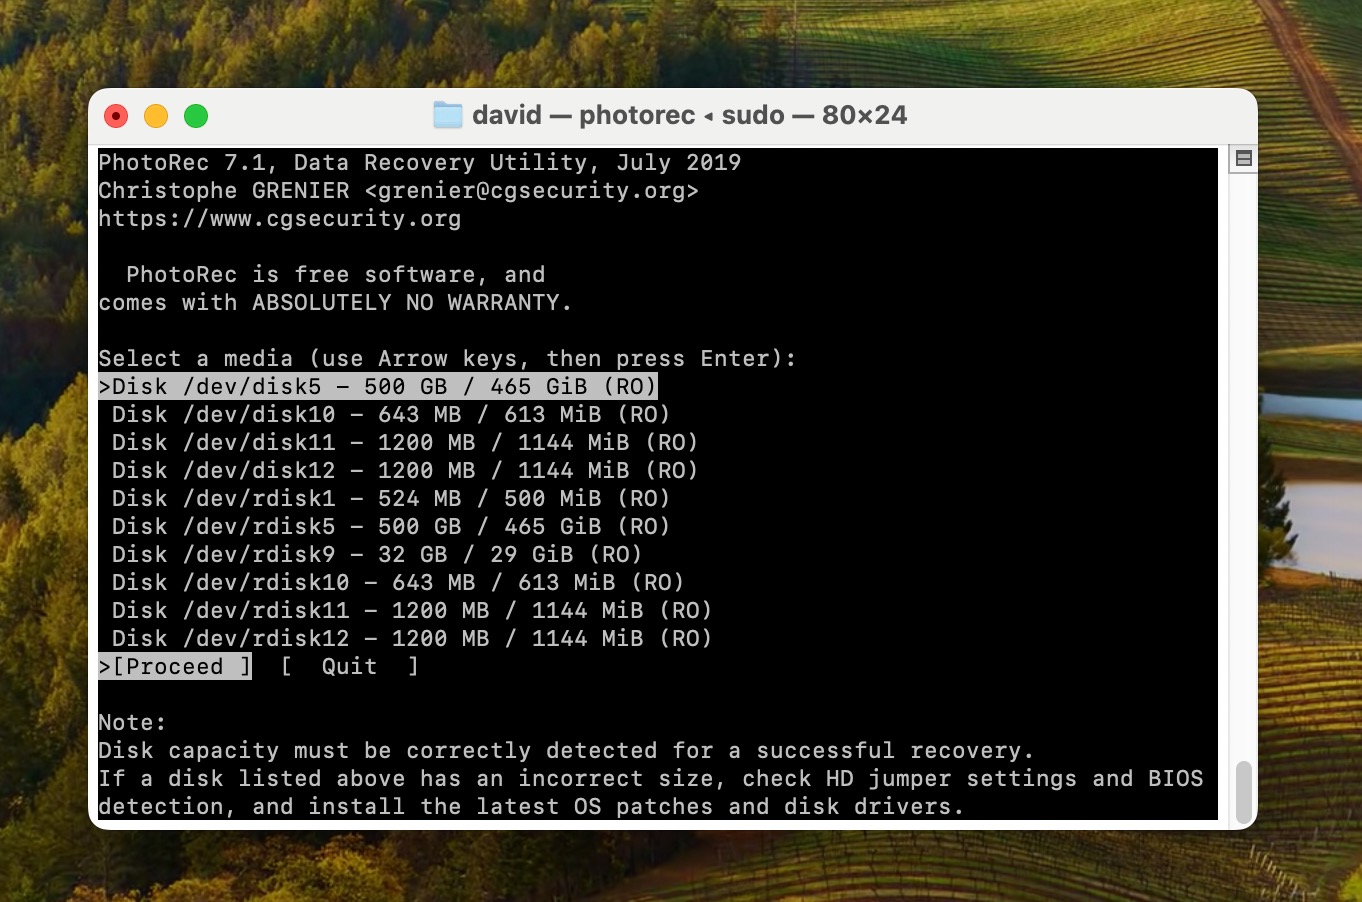
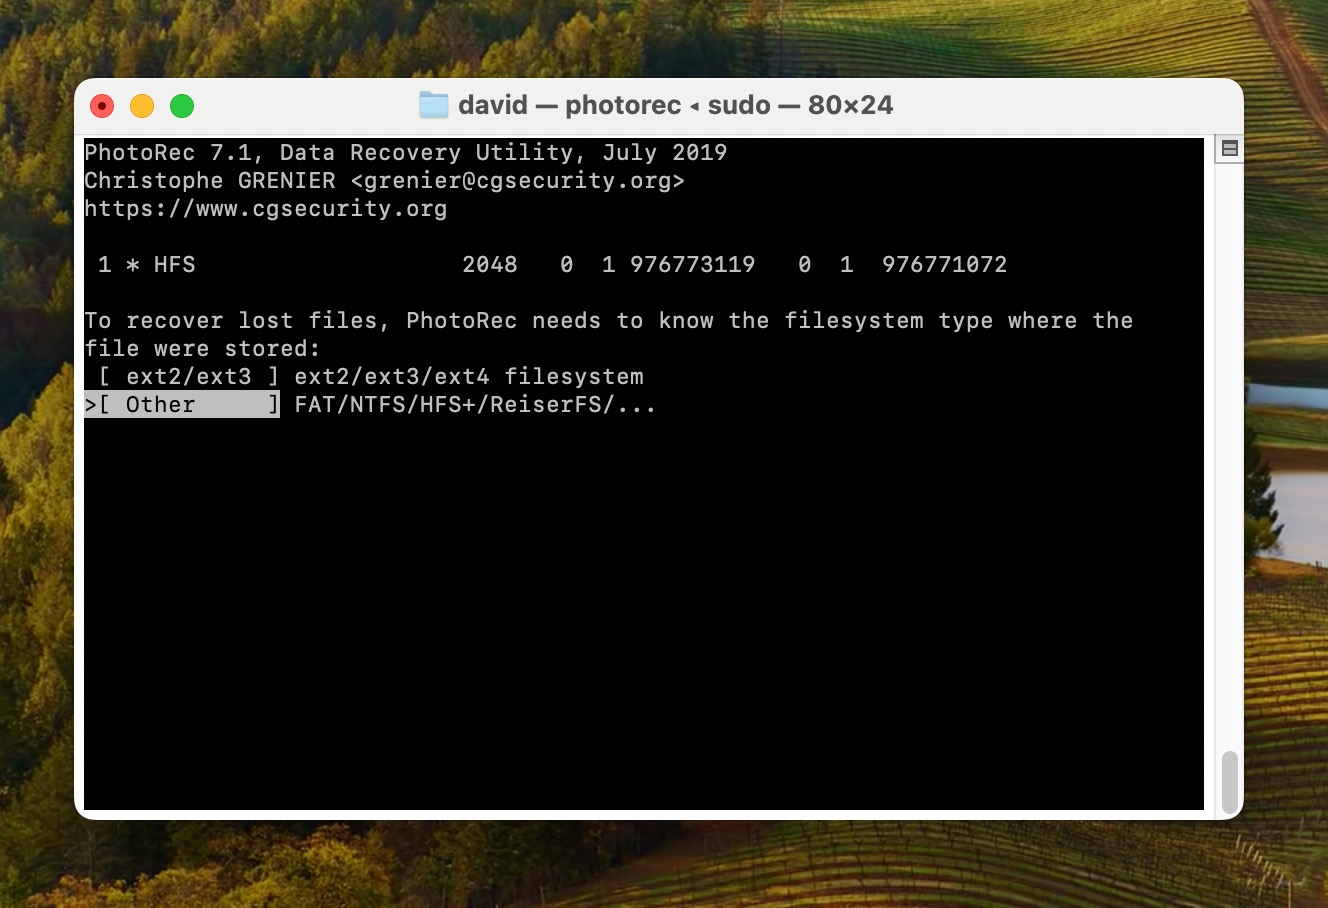
- Launch PhotoRec from the Terminal app as administrator (if you’ve installed it using Homebrew, then you can type “sudo photorec” and hit Return).
- Select the APFS storage device you want to scan and then specify the partition you want to focus on. Alternatively, you can scan the whole storage device.
- Highlight the Search button and hit Enter. You will be asked to choose your file system. For APFS, select the Other option.
- Specify a recovery directory and press “C” when you’re ready to start scanning. Make sure to select a directory on a different storage device than the APFS one you’re scanning to avoid overwriting the same files you’re trying to recover. Then, you just need to wait for PhotoRec to, hopefully, deliver good results.

The command-line interface can be difficult to navigate for non-technical users. For more information about open-source data recovery tools, check out our informative guide.
Recover Data from APFS Snapshot
One of the coolest features of APFS is its ability to create snapshots, which are read-only moment-in-time copies of your entire APFS volume, capturing the exact state of your files at specific points. As you can guess, you can use snapshots to restore data that is no longer available on your current volume.
Time Machine, Apple’s built-in backup tool for macOS, works hand-in-hand with APFS snapshots to safeguard your data by making hourly copies of files that have changed on your drive. These hourly backups are called local snapshots, and they’re stored right on your Mac’s internal drive, separate from the comprehensive backups on your external Time Machine drive.
To recover data from APFS snapshots:
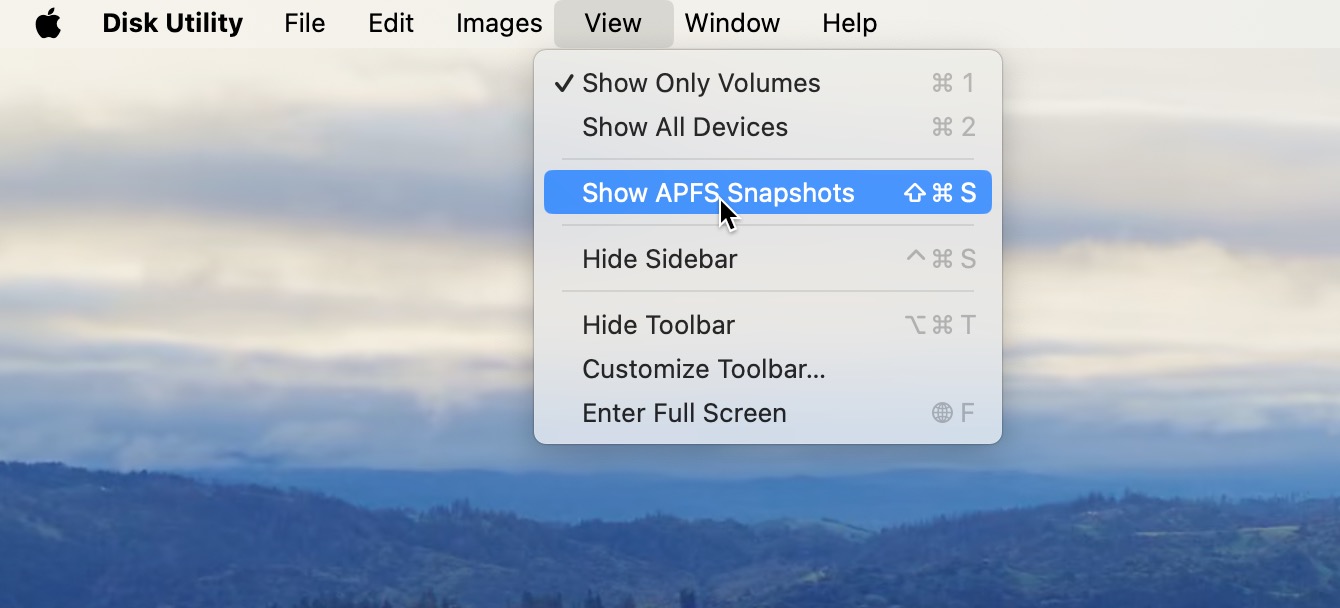
- Open Disk Utility on your Mac and choose View > Show APFS Snapshots.
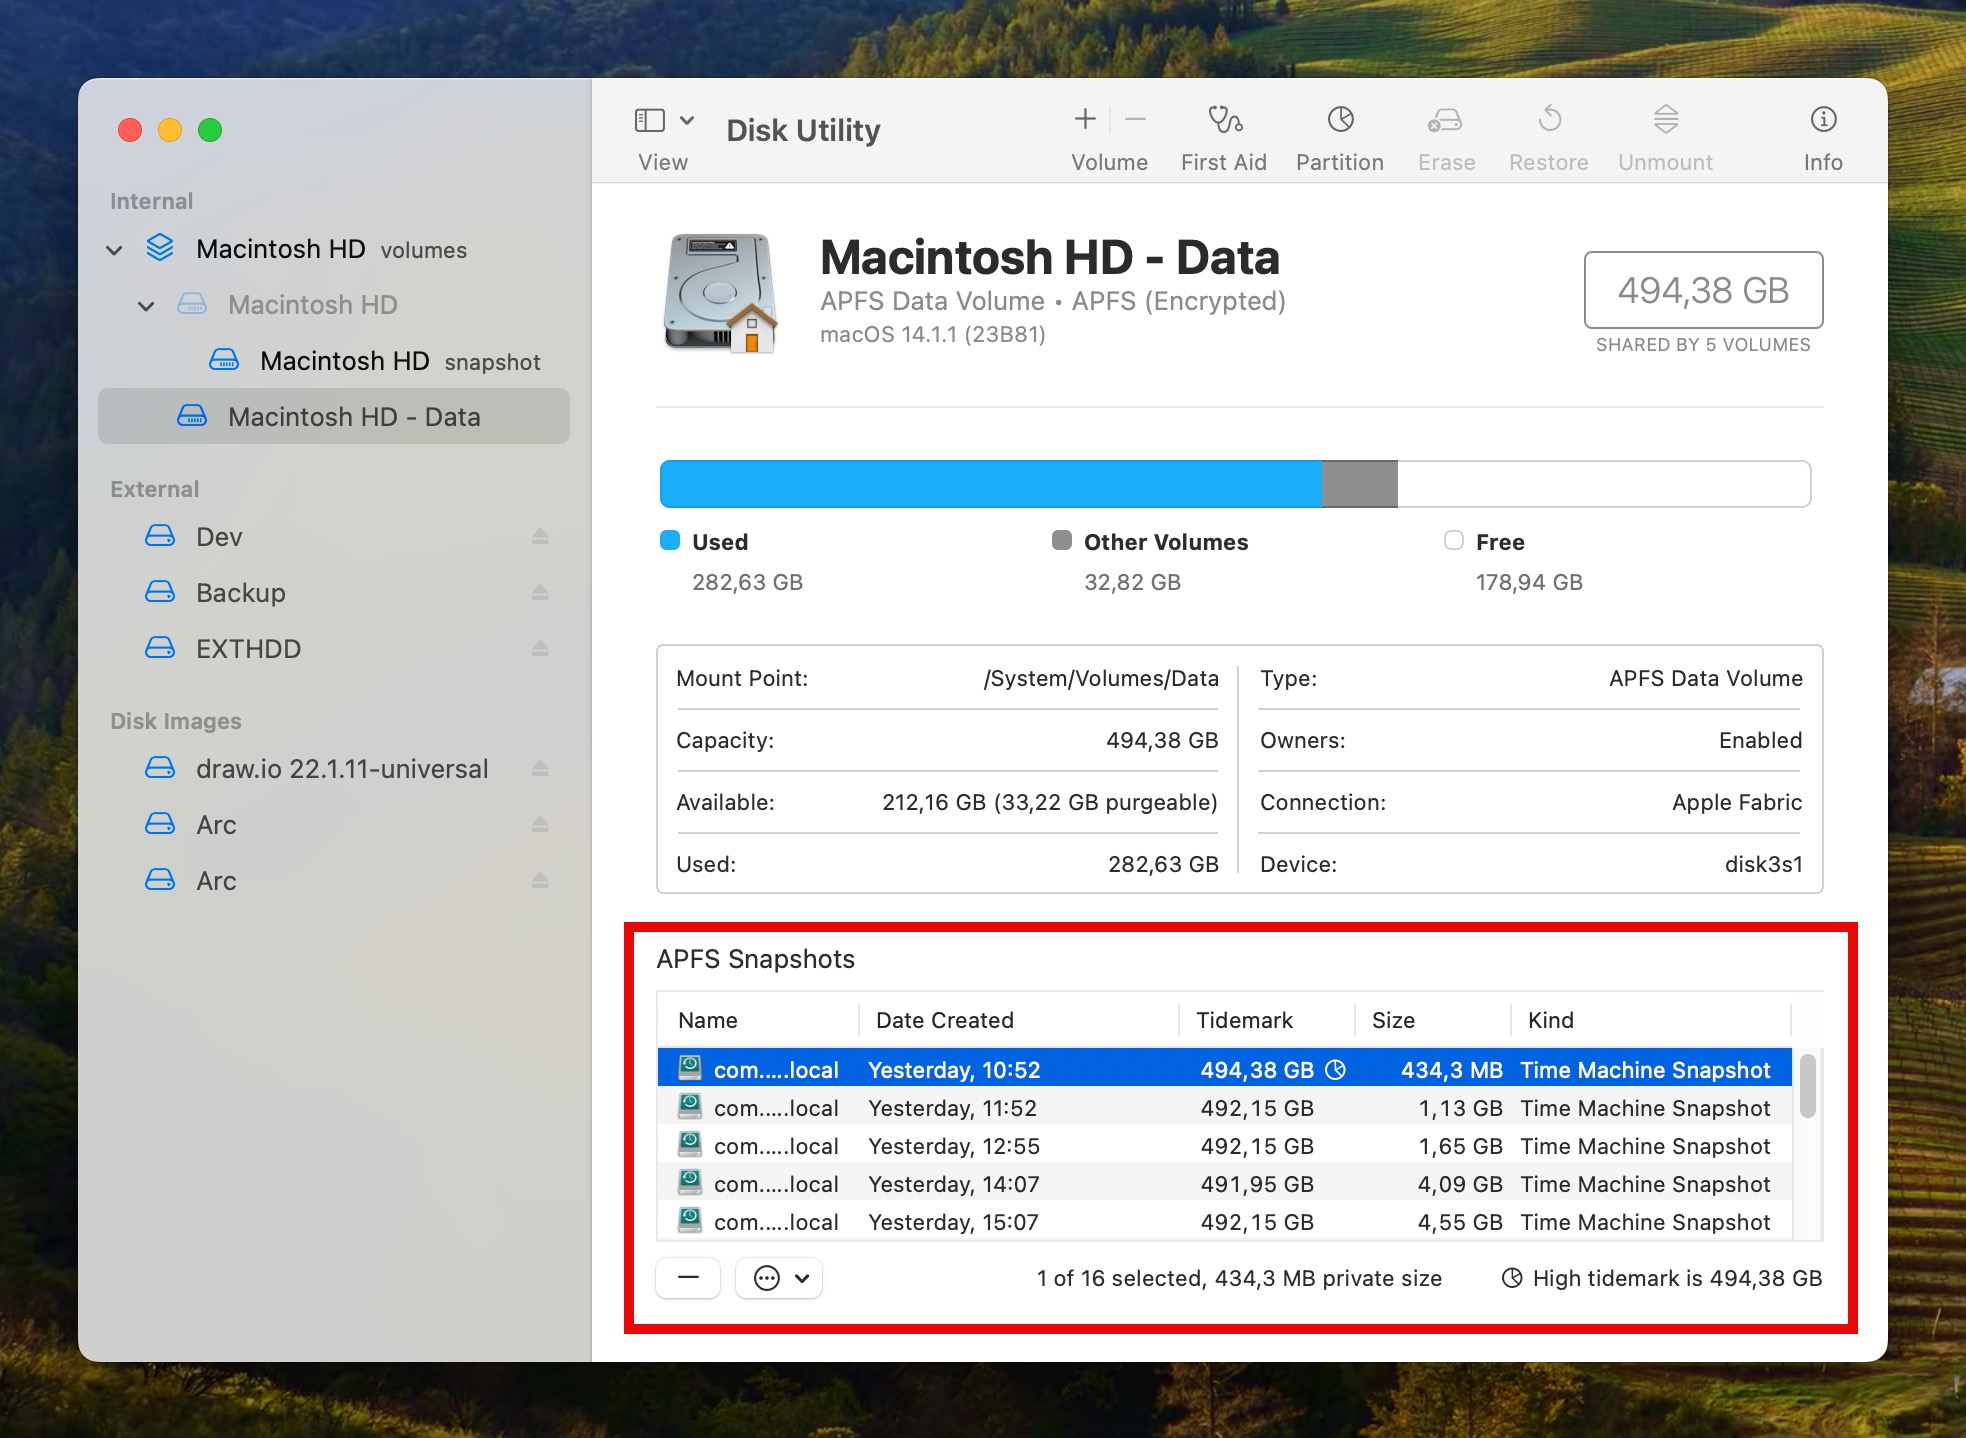
- Select the volume where you lost your data in the sidebar. The bottom of the window will list all snapshots of that volume.
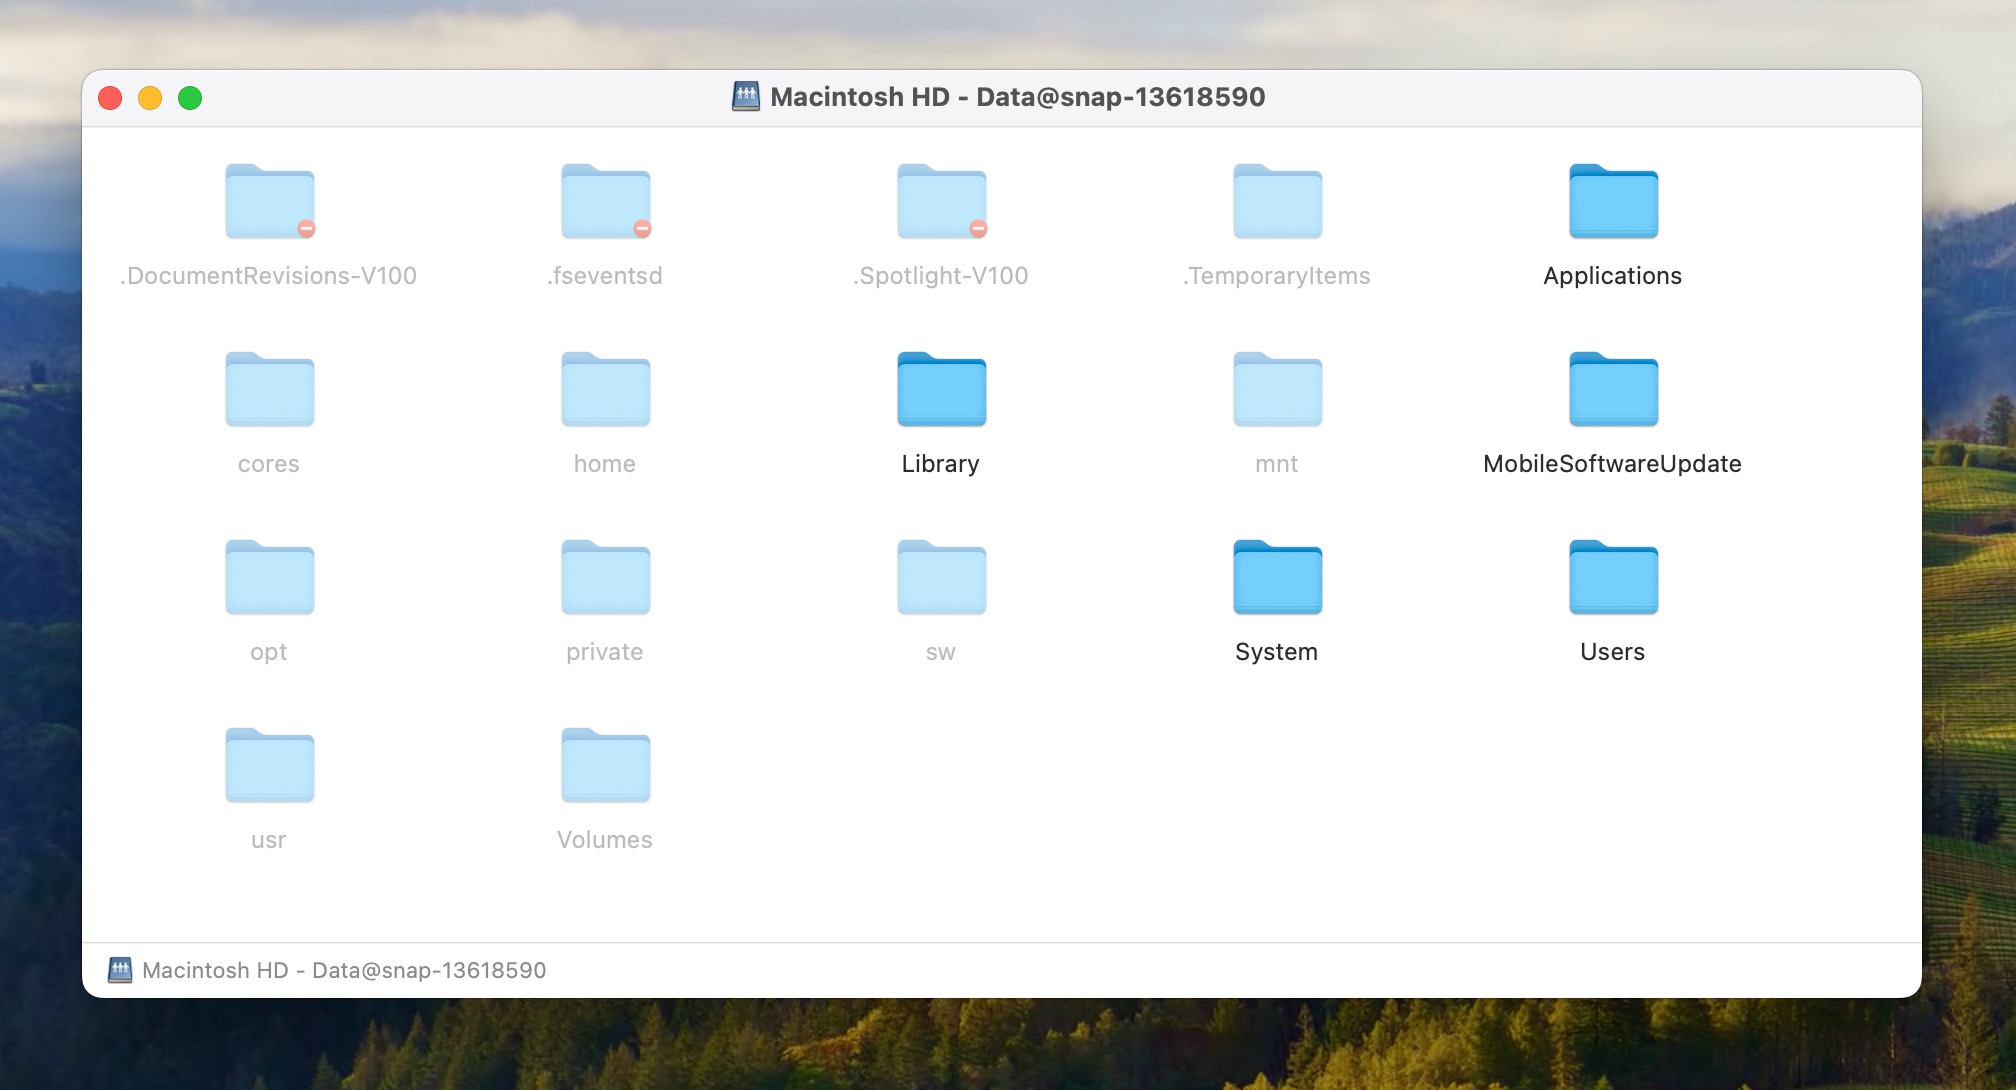
- Double-click a snapshot to mount it, which lets you see its contents in Finder.
- You can then drag-and-drop anything you want from the snapshot to a safe location.
Note: Time Machine is smart about space. It automatically removes older snapshots when your disk starts getting full or when they’re over 24 hours old. That’s one more reason to hurry up when dealing with data loss.
How to Recover APFS Data Using Windows PC
If you’re a Mac user with access to a Windows PC or a Windows user who needs to recover data from an APFS-formatted storage device, then you’re not out of luck.
You can use data recovery software that specializes in signature scanning and treats the APFS file system as if it were RAW. That means it bypasses the file system structure and looks directly for file data. It’s a bit like finding a needle in a haystack, but the success rate can be great if you use a capable data recovery software solution. The biggest downside of this approach is that recovered files lose their original file names and folder structure.
Alternatively, you can opt for data recovery software that natively supports APFS file systems on Windows, though your choices will be more limited, and the number of file formats supported by such software may be considerably lower.
Leading data recovery software options for recovering APFS-formatted storage devices on Windows include:
- Disk Drill: Our favorite APFS data recovery software for Mac is also available on Windows. The Windows version is limited to signature scanning (the Mac version can read APFS file system structure), but that’s not a huge problem since Disk Drill’s signature scanner is extremely good and capable of recovering even modern file formats like digital camera RAW files. What’s more, the free version of Disk Drill for Windows can recover up to 500 MB of data for free, and it works just like the Mac version, so you can follow the tutorial above.
- R-Studio: This is a comprehensive data recovery tool with direct support for APFS file systems on Windows. Designed for more advanced users, it can be difficult to use, but those who master it can use it to solve even complicated data loss problems. Many different editions of R-Studio are available, and the least expensive one with support for APFS costs $79.99. A free trial version is available, but it can recover only the tiniest of files.
- DMDE: Another great choice for APFS file recovery on Windows is DMDE. The software has been around for over 15 years and has received countless positive reviews despite its barebones interface. The free version of DMDE can recover up to 4,000 files from a selected directory, and you can perform as many free recoveries as you want.
Of course, you can always try multiple data recovery software solutions to see how they perform. But since your time to recover lost data may be limited (especially when dealing with extensive corruption or physical issues), you should always start with the solution that’s most likely to work.
FAQ
Can you recover APFS partition using TestDisk?
No, unfortunately, TestDisk doesn’t support APFS partitions, so you can’t use it to recover one. You can, however, use its close relative, PhotoRec, to recover individual files.
What is the best APFS data recovery software?
We like PhotoRec as the best freeware APFS data recovery solutions. Disk Drill gets our vote for the best commercial tool for its simplicity, excellent recovery results, and reasonable price.
How to recover data from an encrypted Apple APFS drive?
The procedure to recover data from an encrypted drive is the same as for an unencrypted drive once you have unlocked it. Be prepared to provide your unlock password and then follow the steps outlined above for recovering specific files with Disk Drill. Check out this guide for more information on recovering data from encrypted drives.
How to recover an APFS volume/partition?
Data recovery software or a previously created backup can be used to recover a lost or deleted APFS volume or partition. You can use the freeware instructions listed above for TestDisk or use other data recovery solutions. Most reliable tools enable you to recover lost volumes and partitions.
Conclusion
The APFS filesystem is here and will remain so for the foreseeable future. Data recovery software can help recover deleted APFS files in a variety of data loss situations. If you need to retrieve specific data, Disk Drill offers stress-free recovery that gets your files back with just a few clicks. As we have shown, a freeware tool like TestDisk may be the best solution for a lost partition.
Whichever commercial or freeware solution you choose, remember to stop using the affected drive as soon as you discover data loss has occurred. This will avoid overwriting the data you want to restore for the best recovery results.
This article was written by Robert Agar, a Staff Writer at Handy Recovery Advisor. It was recently updated by David Morelo. It was also verified for technical accuracy by Andrey Vasilyev, our editorial advisor.
Curious about our content creation process? Take a look at our Editor Guidelines.