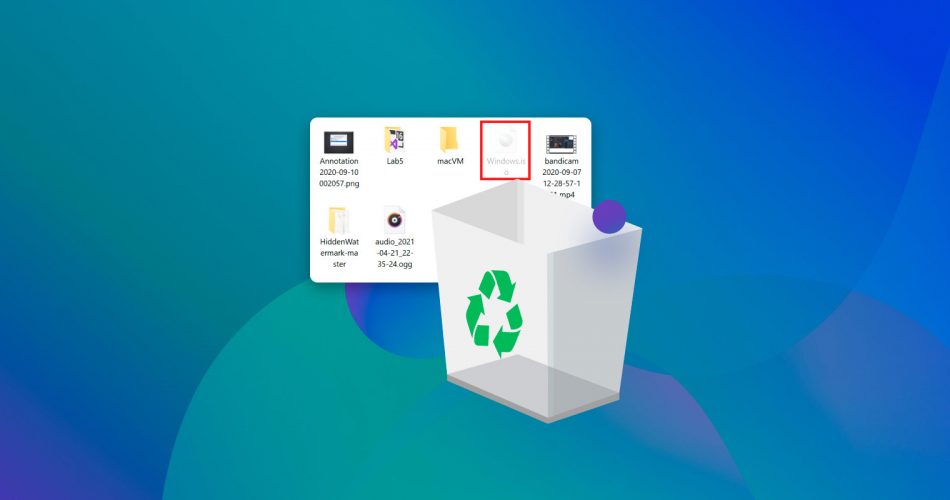
We often take the recycle Bin for granted – like a Genie who can magically retrieve your files. However, what if the Recycle Bin doesn’t have your deleted files? Where did the deleted file disappear? And how can you recover deleted files that are not in the Recycle Bin? This article will provide solutions for retrieving a file that is not in the Recycle Bin.
The Perplexing Case of the ‘Can’t Find Deleted File in Recycle Bin’ Mystery
The Recycle Bin is the first filter that protects your data from total loss, ensuring safe recovery in cases of accidental file deletion. Its little wastebasket icon sits on the Desktop, acting as a ‘holding bay’ for files that you press ‘Delete’ on.
When a deleted file is not visible in the Recycle Bin, the following reasons could be why:
- You used Shift + Delete to delete the files.
- Files got deleted through the Command Prompt.
- The removed files were on a flash drive.
- The computer settings use the option Don’t move files to the Recycle Bin.
- You emptied the recycle bin.
- The recycle bin is full or corrupted.
- The deleted files are much larger than the maximum size of the recycle bin.
Our data shows that most times, if files and folders are not in the Recycle Bin, they are no longer available. To save time, we’ll start right away with how to recover them. We’ll begin with the best method we know.
How to Recover Deleted Files That Are Not in the Recycle Bin
Two solutions will help you restore files that are not in the Recycle Bin. Follow our step-by-step methods to retrieve your files quickly.
Method 1: Use a Data Recovery Tool
If you don’t have a backup of your data, data recovery software remains a viable option. One highly rated and dependable tool is Disk Drill Data Recovery. Not only does Disk Drill demonstrate great recovery performance, but it is also capable of recovering data from a Recycle Bin that can’t be accessed.
We will use this as an example to demonstrate the process of recovering deleted files that are not present in the Recycle Bin.
Remember that each drive/partition has its own $RECYCLE.BIN. This hidden system folder stores the actual data of deleted files per drive. The Recycle Bin folder only contains the reference for deleted files on all drives.
Follow these steps to recover your files using Disk Drill:
- Download the tool. Open the official website for Disk Drill to download the setup and install it on an external drive to avoid further data loss. Give Disk Drill administrator privileges, as this is essential for the scanning algorithms to run.
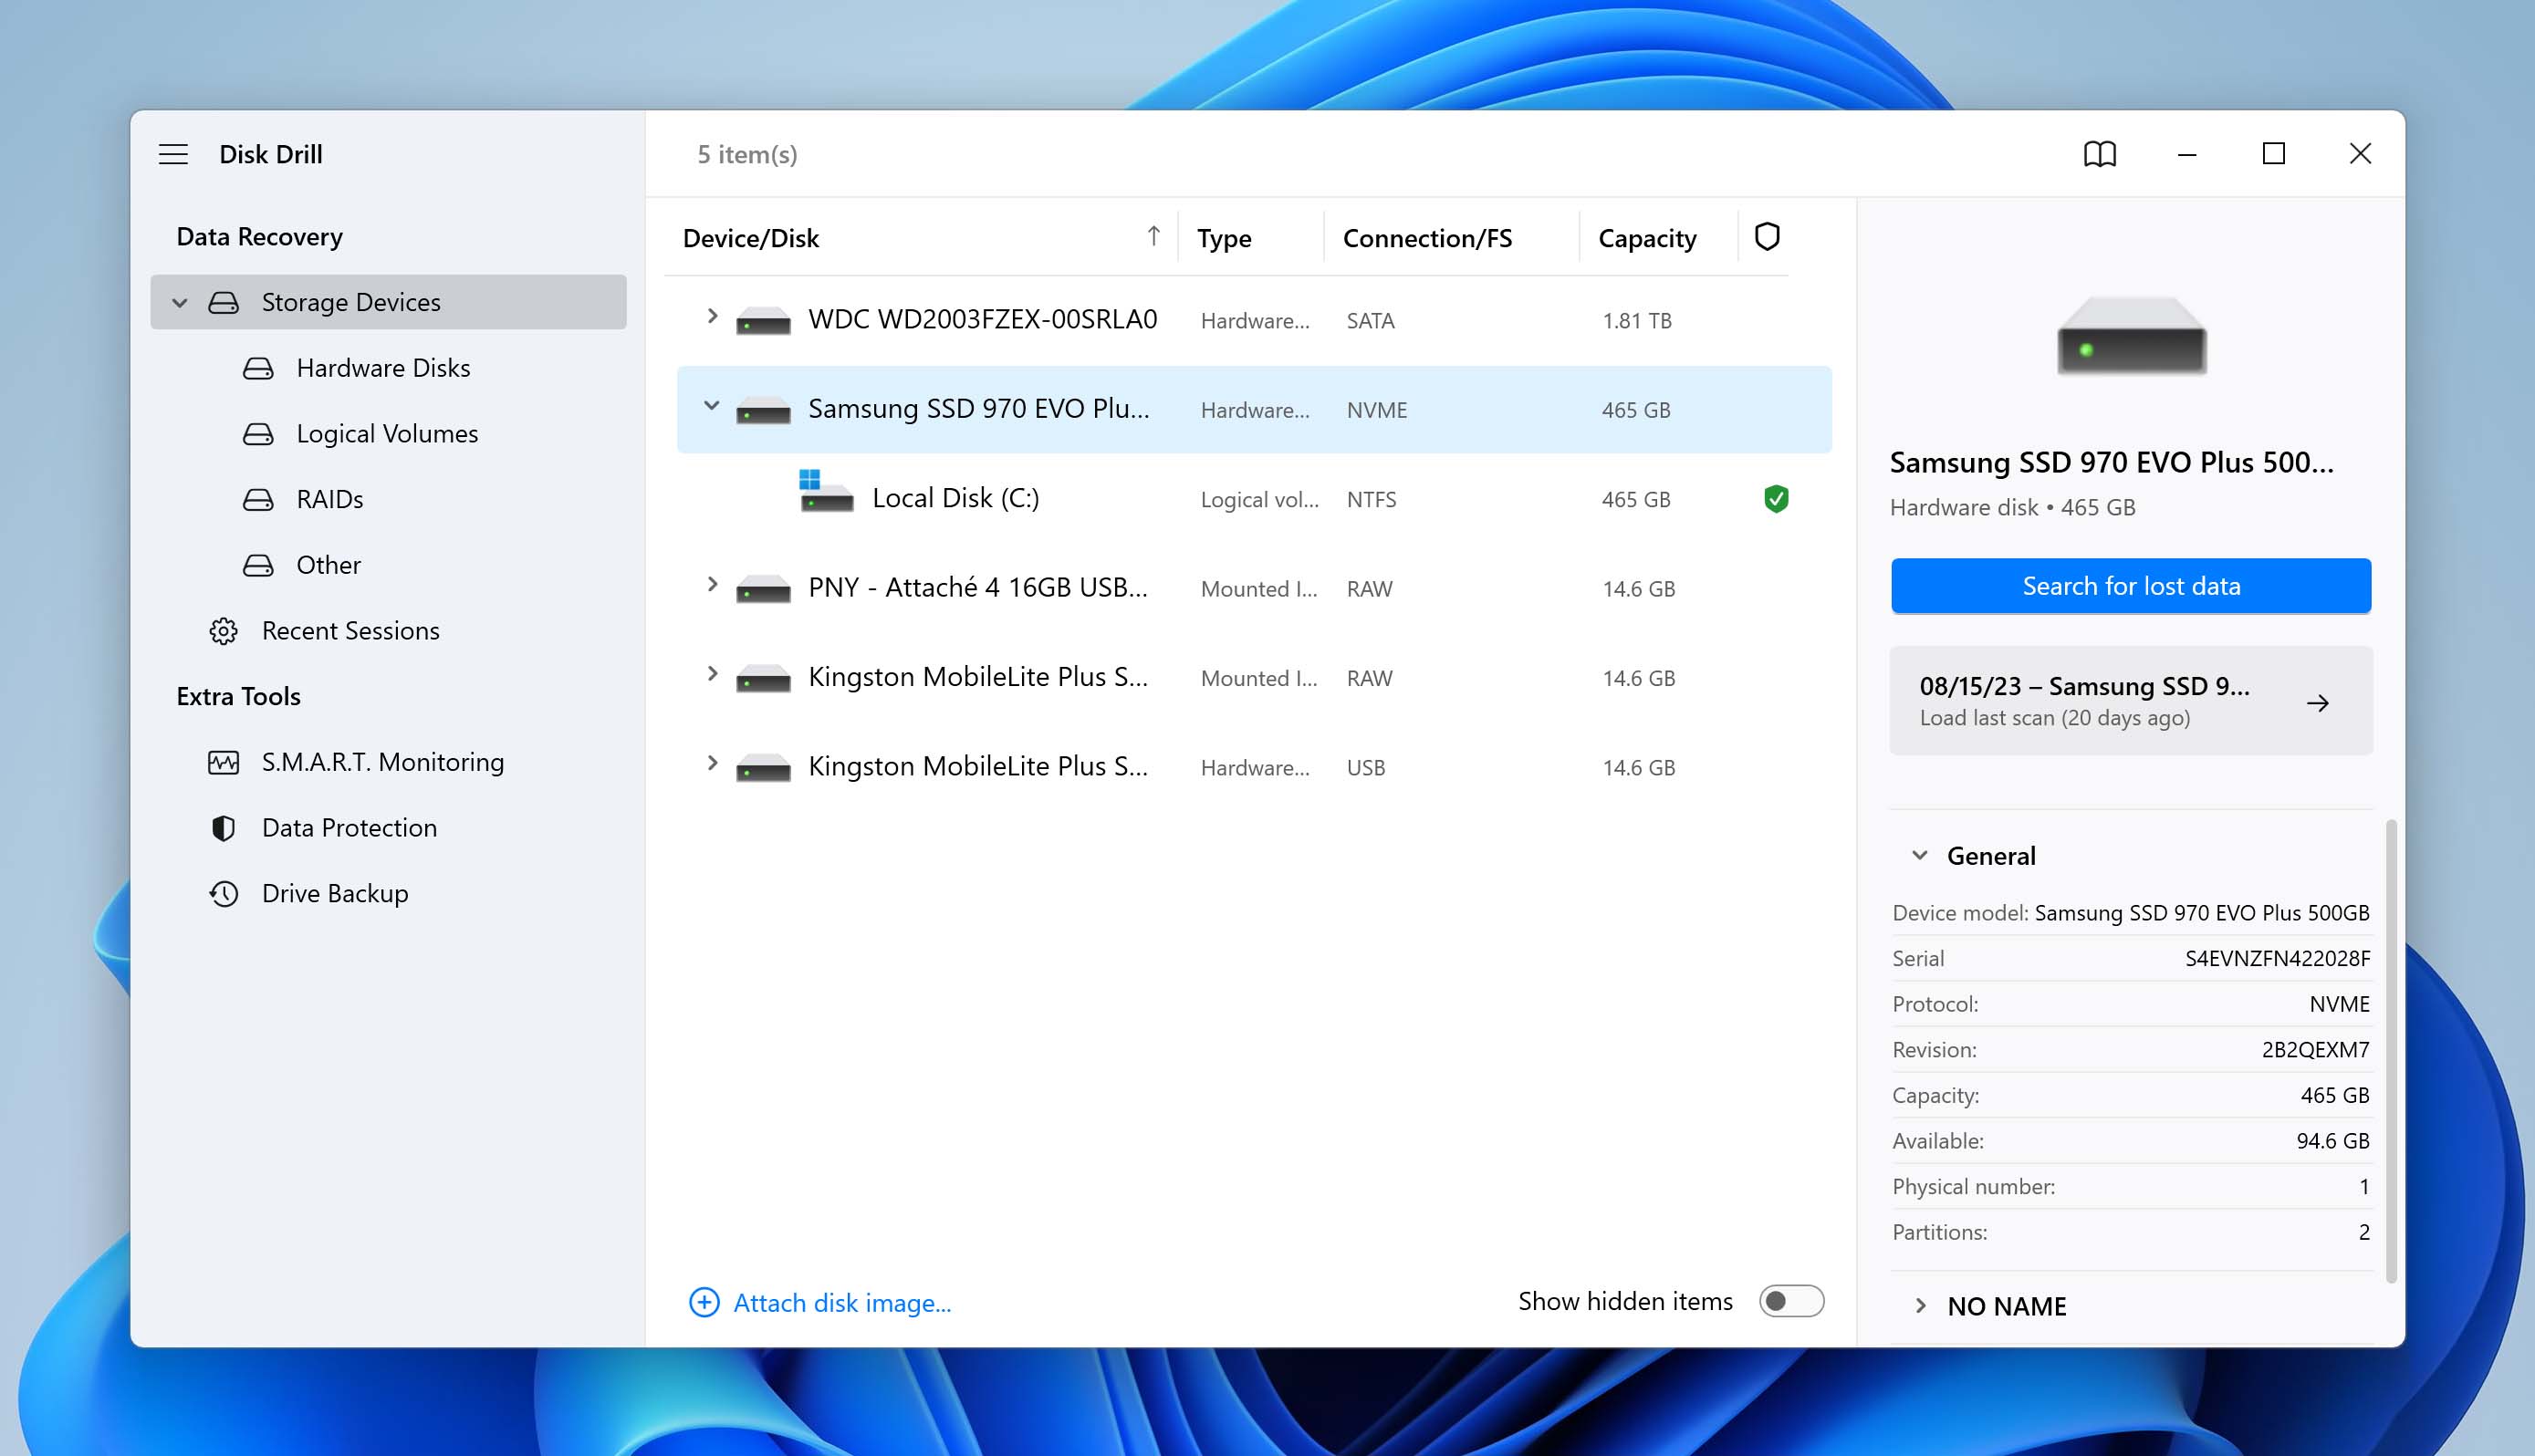
- Launch Disk Drill. Run Disk Drill by double-clicking on its icon or searching for it from the Start Menu. A dialog box will pop up, prompting you to select a drive for recovery. As the Recycle Bin is placed in the main hard drive, select it.
- Start the Scan. Disk Drill opens the main window, showing all the drives that you can scan. Select the disk where your deleted files were previously located. Once you select the drive, click the Search for lost data button to initiate the scan.
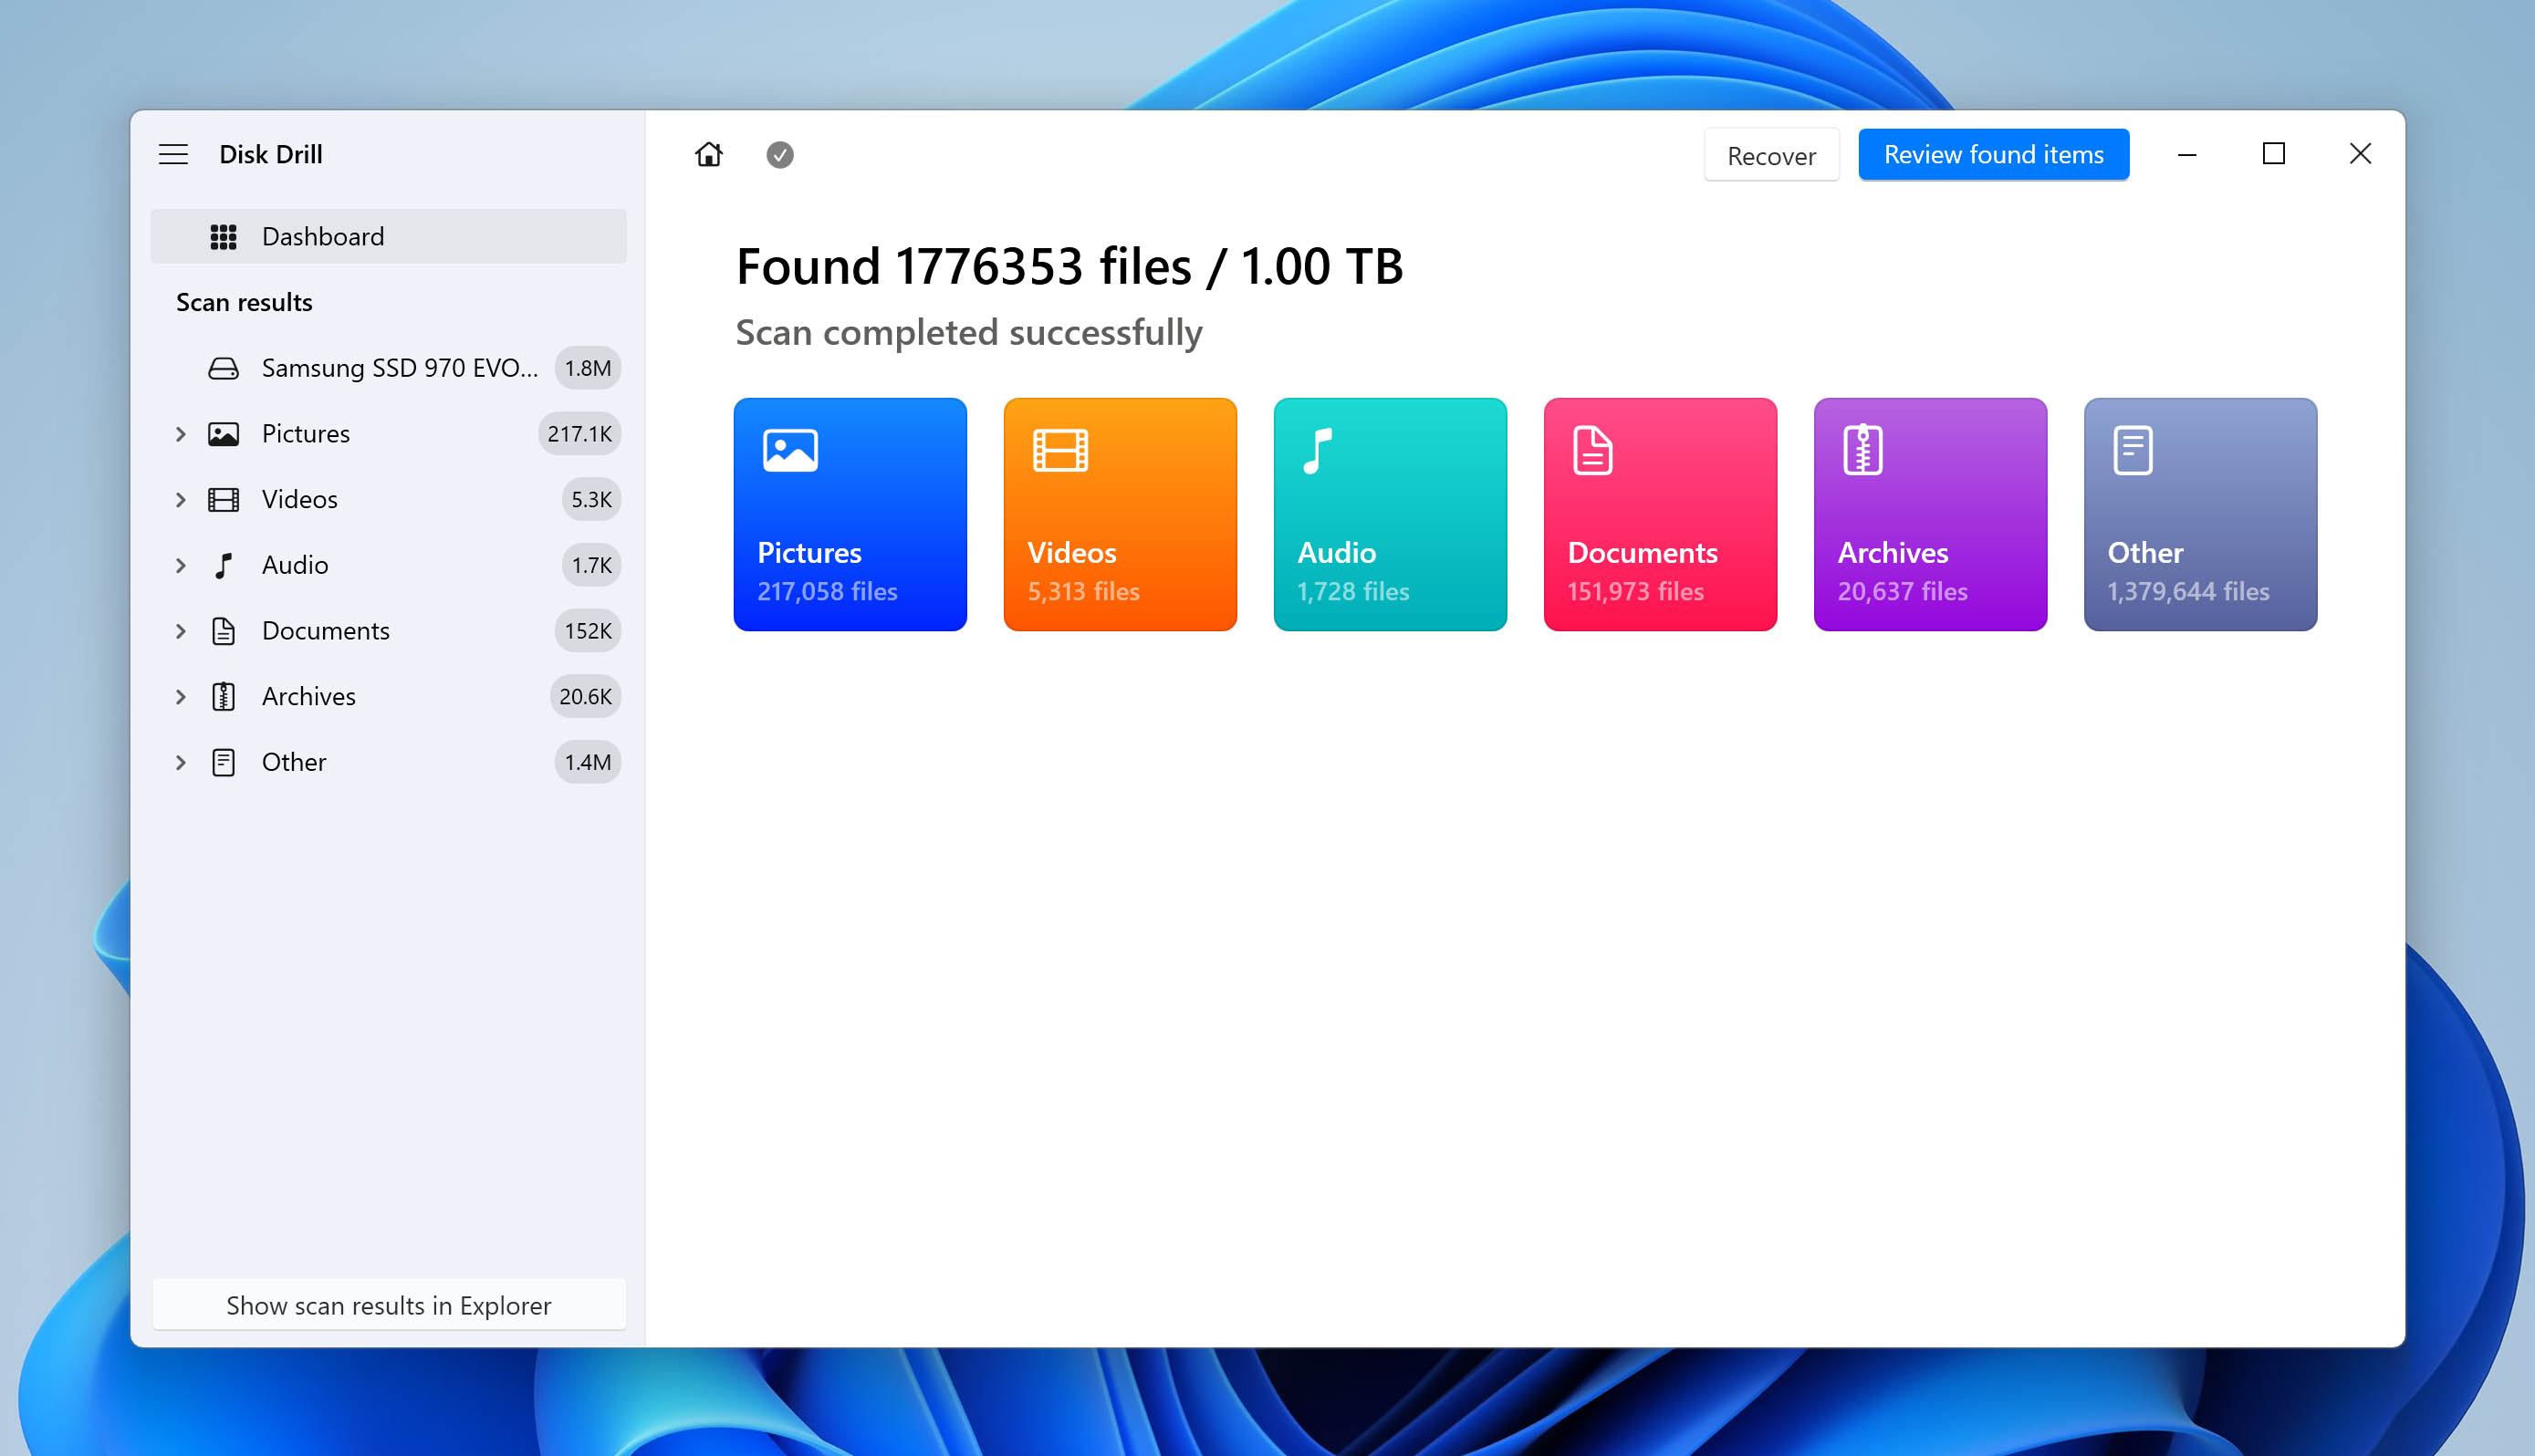
- Review found items. After Disk Drill finishes scanning, click Review found items to see all the files it scanned, categorized based on file types: pictures, video, audio, documents, archives, and others. You can filter the results to narrow them down to the files you want to recover by clicking on any of the categories. 👀
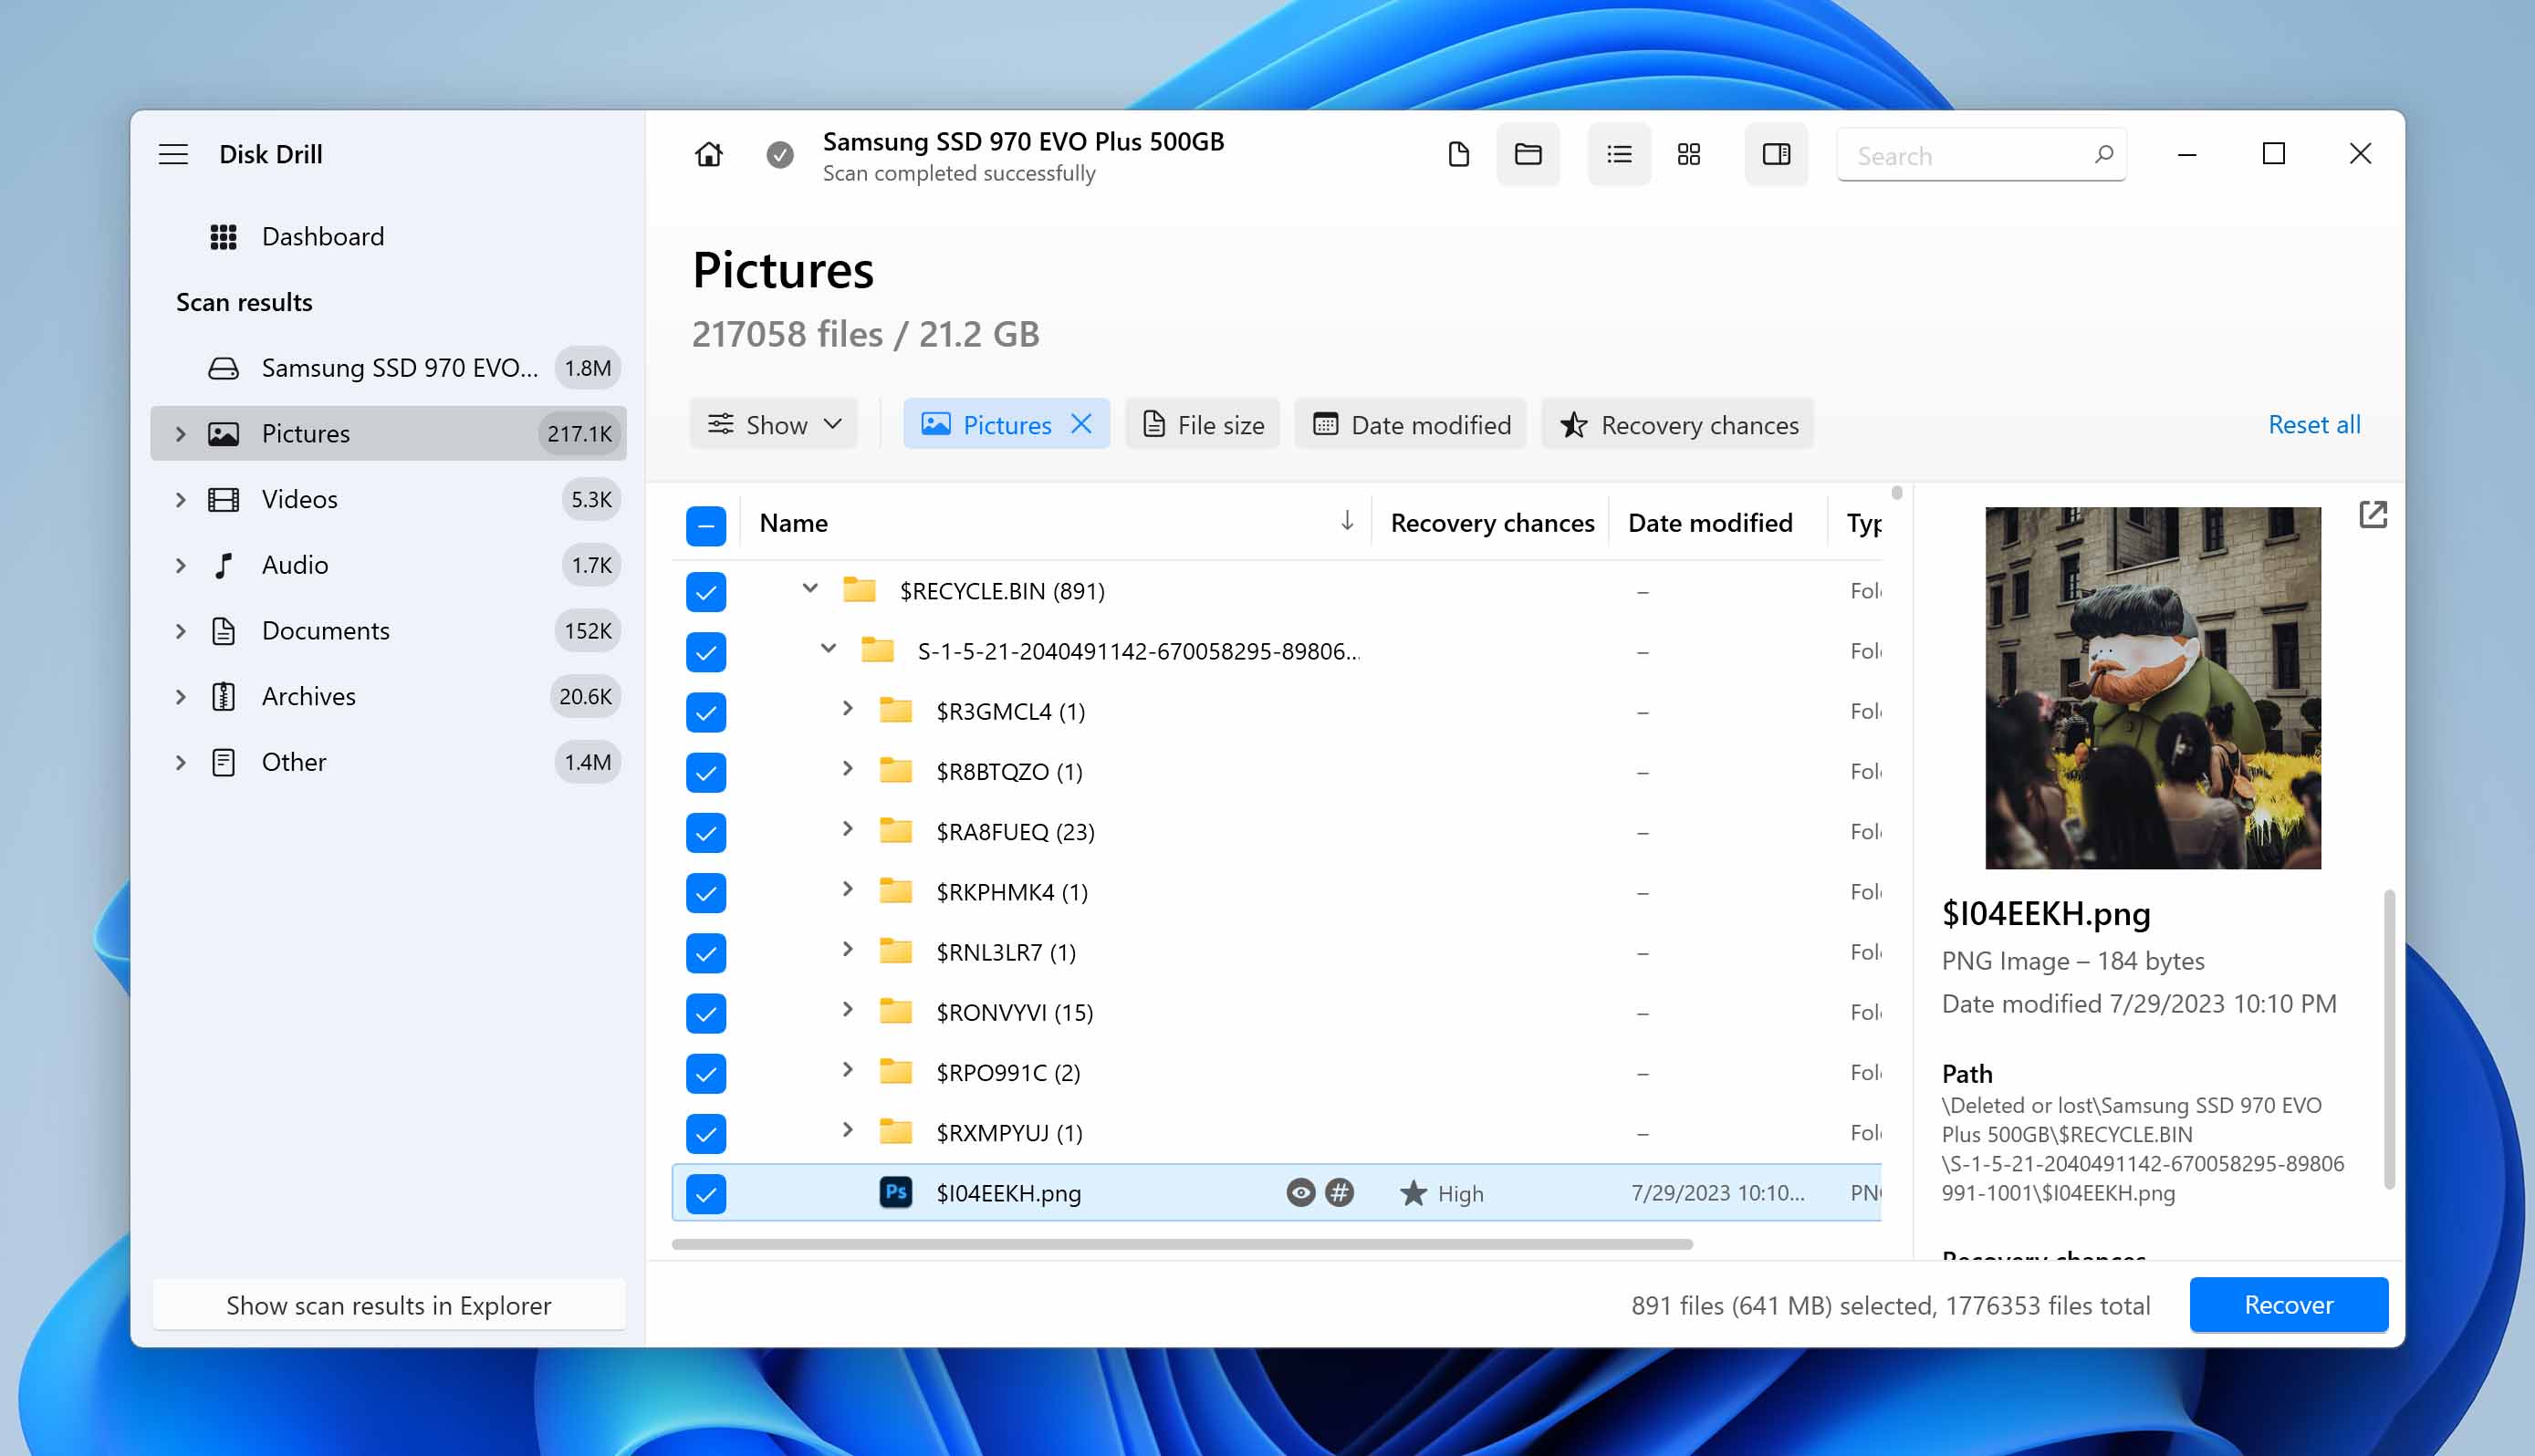
Tip: In the scan results, also pay attention to the $RECYCLE.BIN folder located in the Deleted and Lost tab.
- Choose Files for Recovery. Browse and select all the files you want to recover. Preview photos or videos scanned by clicking on them and playing them in the Preview tab. You can also check the recovery chances of each of the files you select. Once you select all the files for recovery, click Recover.
- Restore Deleted Files from Recycle Bin. Disk Drill will prompt you to select a recovery location. Make sure you choose a storage location that is not the disk you scanned to avoid file corruption or data being overwritten. After choosing the file destination, click Next to proceed to file recovery.

You can move the restored files to a newer location if you so desire, and continue using your computer as always.
Take a look at our comprehensive review of Disk Drill, which includes everything you need to know about this tool. Additionally, we’ve devoted a separate article to evaluate the safety aspects of the tool.
The data recovery market is indeed diverse, making the selection of a specific tool potentially overwhelming. Here, we provide a detailed breakdown of the top data recovery tools currently available.
Method 2: Retrieve Files Using Windows Backup and Restore
This method only works if you have already set up Windows Backup and Restore.
Windows Backup helps you create copies of your files from time to time to make sure that you can always restore them. If you have used the Windows Backup feature to create backups, you can retrieve files with the following steps:
- Connect your backup storage media to your Windows PC.
- Go to settings by pressing Windows key + I key combination.
- Select Update & Security and then Backup.
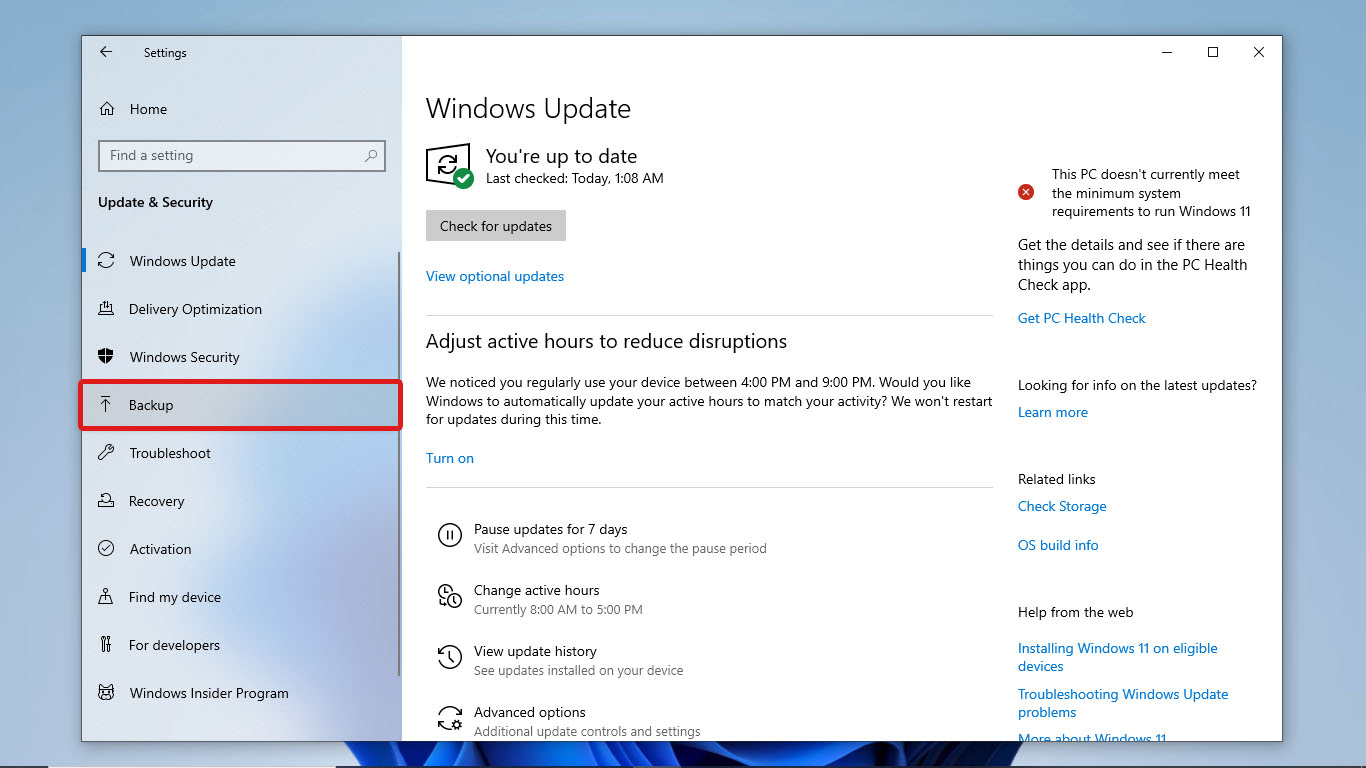
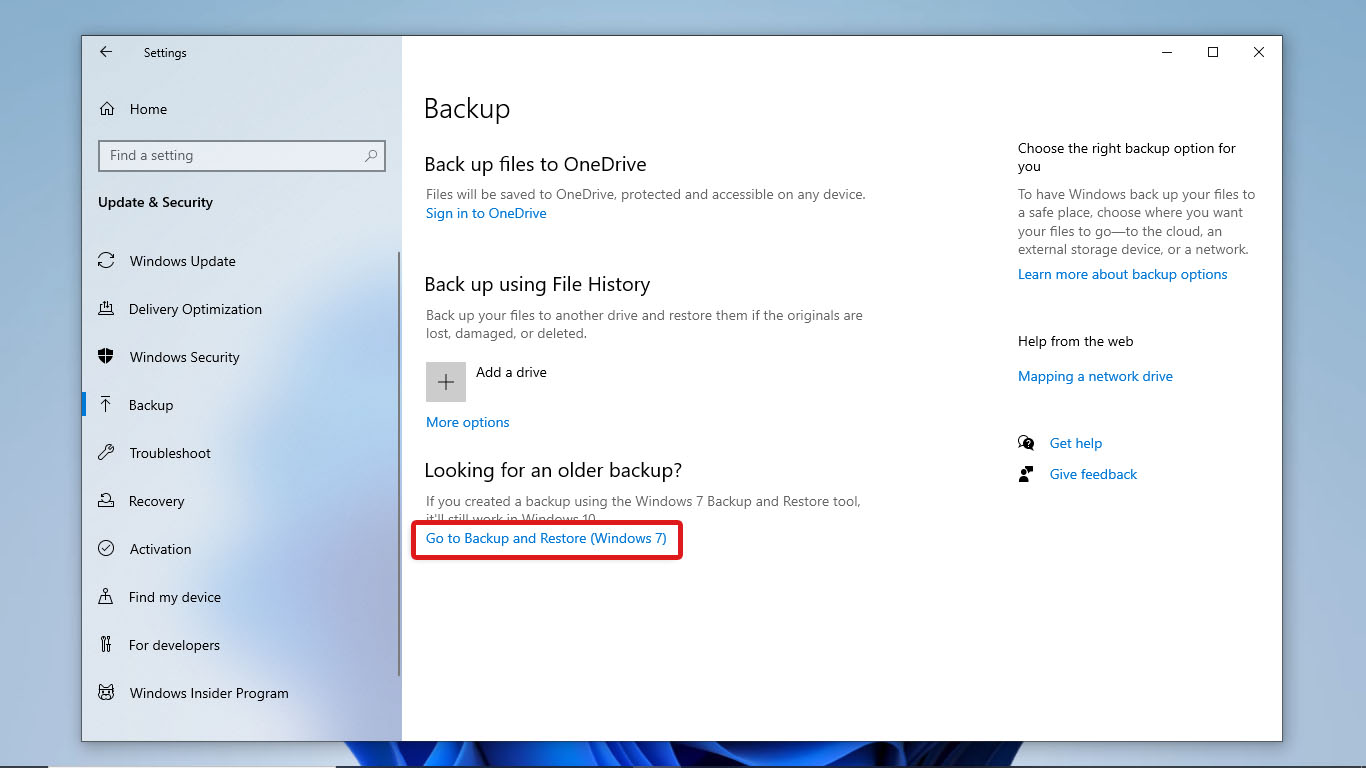
- Then click on Go to Backup & Restore (Windows 7).
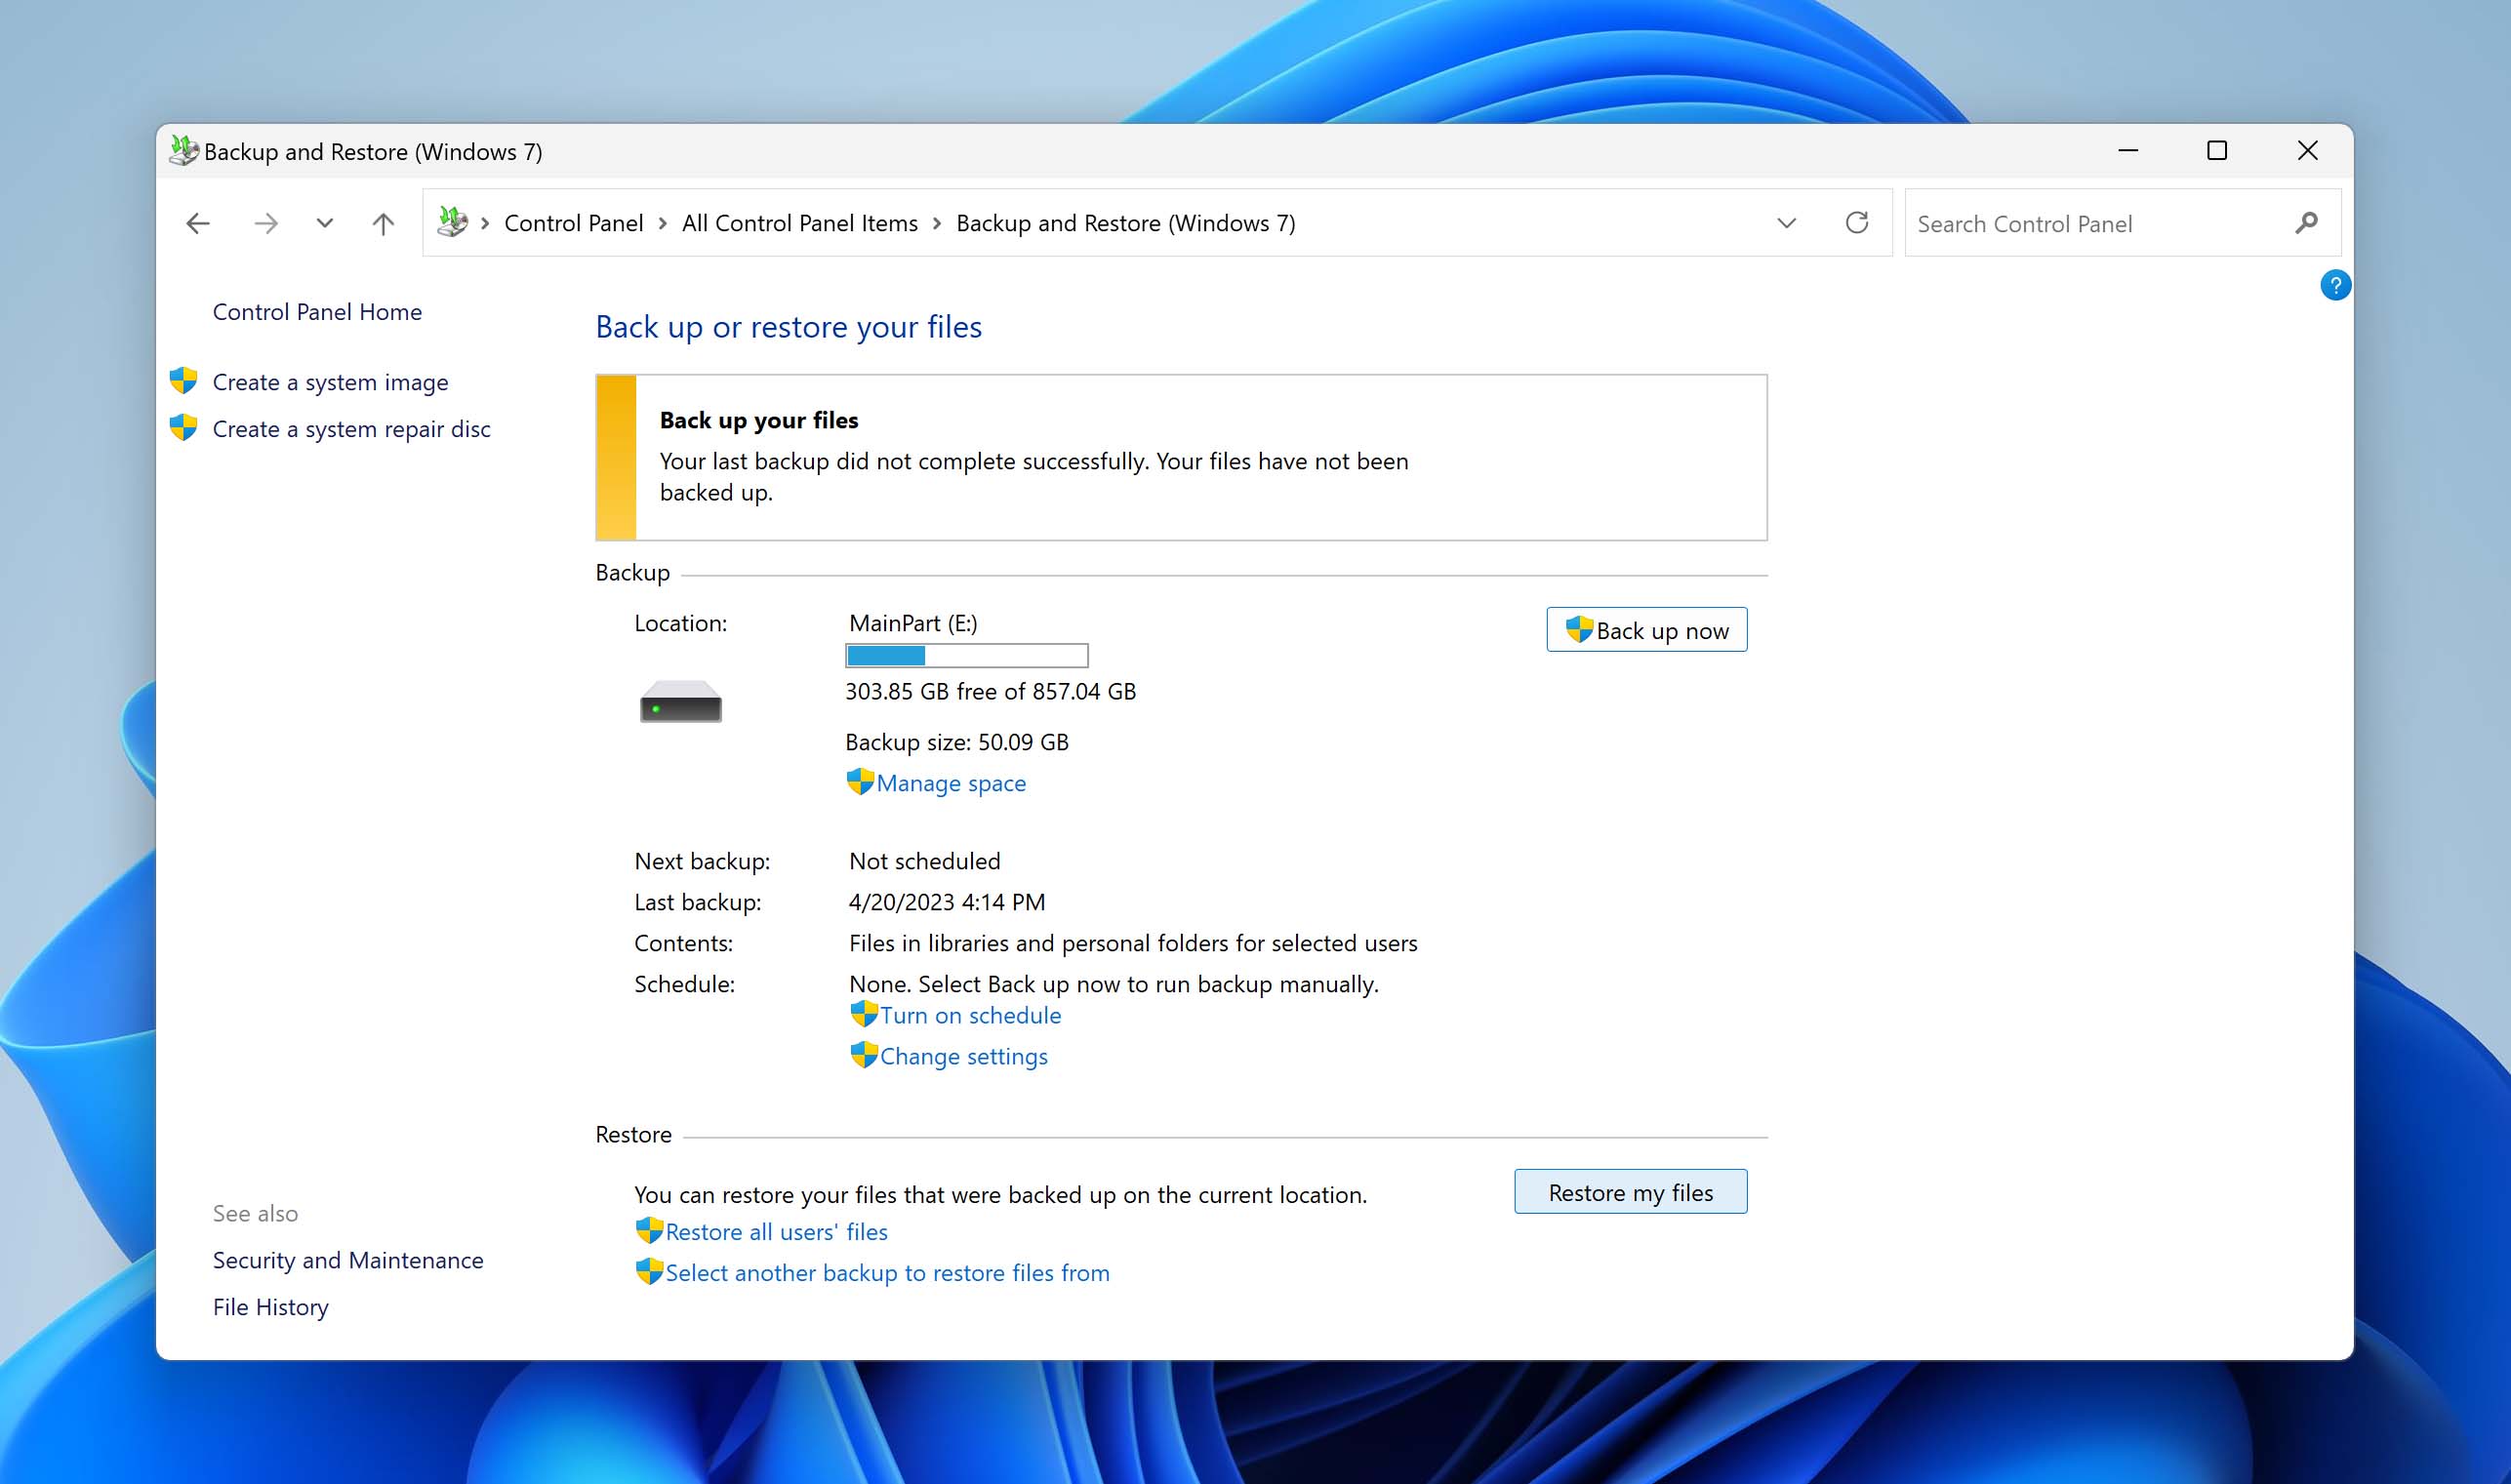
- Click on Restore my Files.
On Windows 11
- Open search. Then, find and open the Control Panel.
- Go to Backup and Restore (Windows 7).
- Click Restore my file.
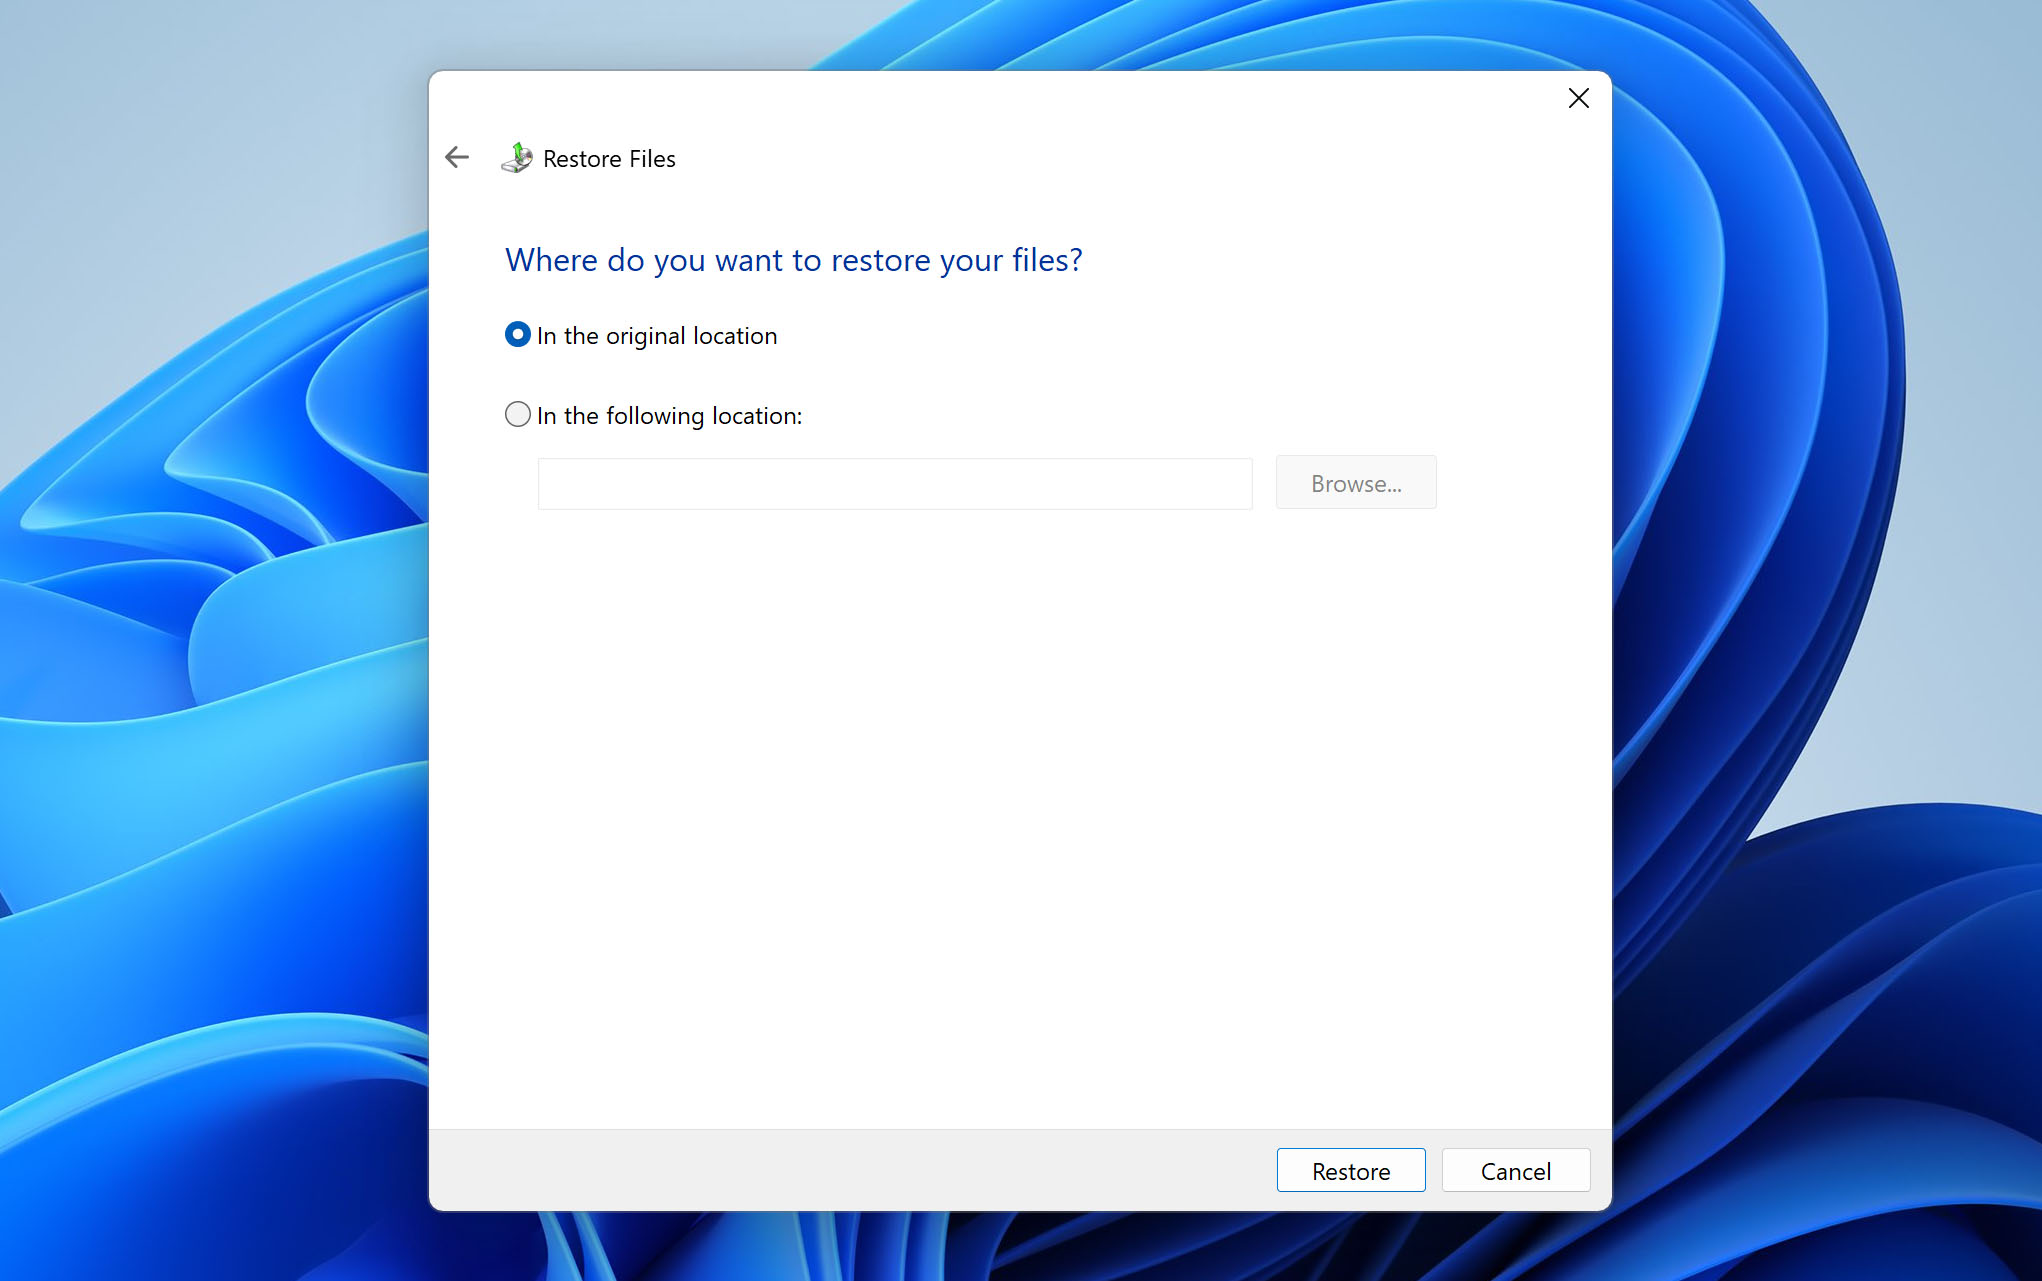
- On the window that opens, click Browse for files or Browse for the folder (depending on what you want to restore)
- Select the files/folders you want to restore from the backup.
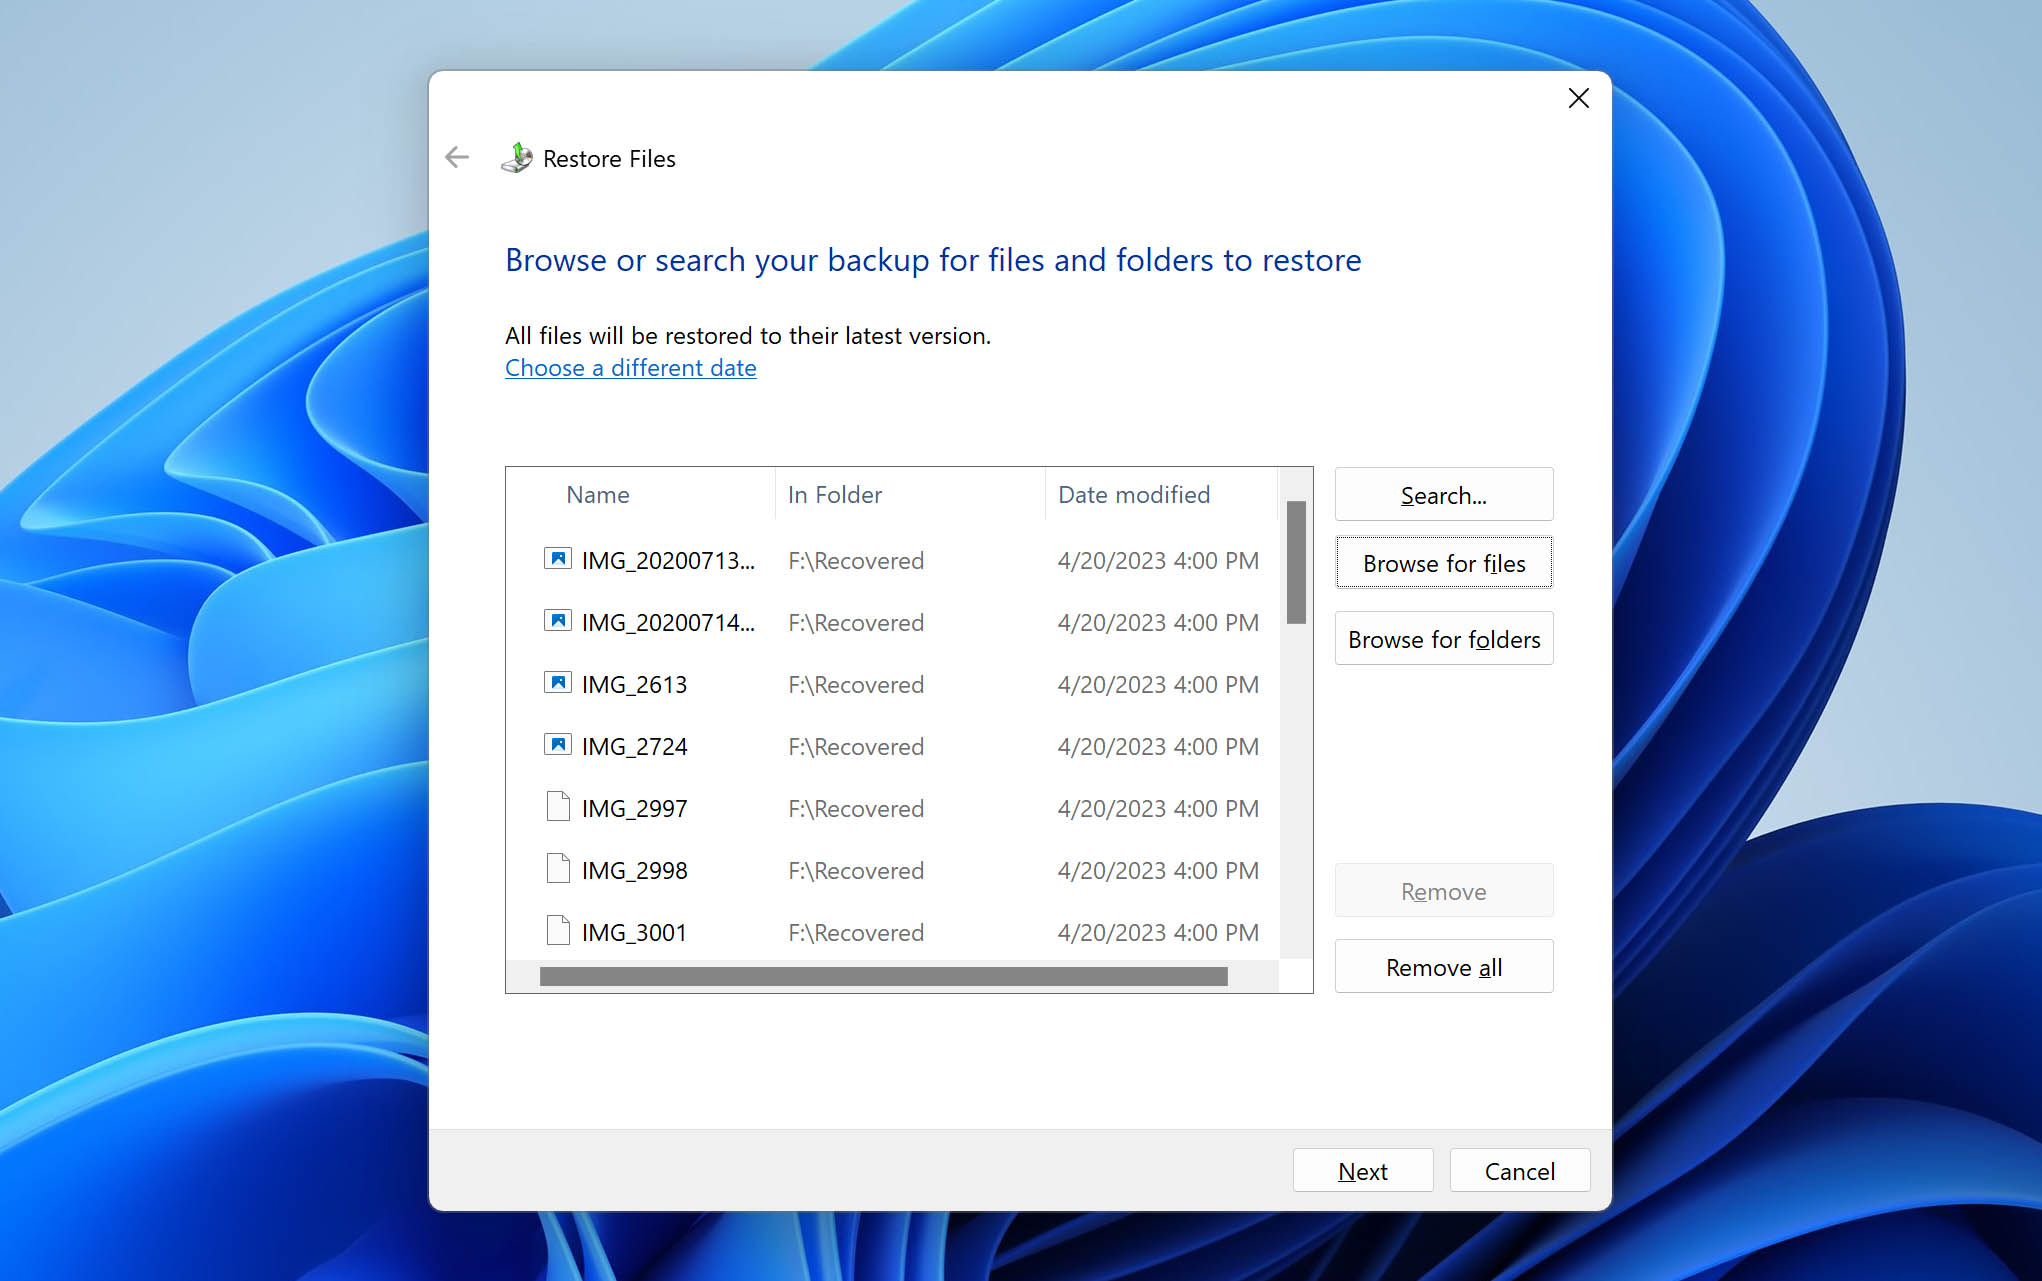
- Click Next and choose whether to save your files to a new location or to the original location. Then, click Restore.
Method 3: Recover Files from Previous Versions
There is yet another method to recover deleted files from recycle bin. This method accesses the previous version of files using restore.
The Previous Version feature on Windows creates a restore point that helps roll back changes. It maintains a file history to help retrieve files and folders even if the recycle bin is empty or you shift-deleted them.
Here’s how to restore files using File History:
On Windows 10
- Go to the folder that used to have the deleted file and right-click. Now click Restore previous versions. An option to recover the folder will appear.
- Search for the deleted file from the list of available previous versions and click Restore.
On Windows 11
Restore a previous version of a file/folder on Windows 11 using the following steps:
- Open File Explorer and select the folder where you want to recover a previous version file.
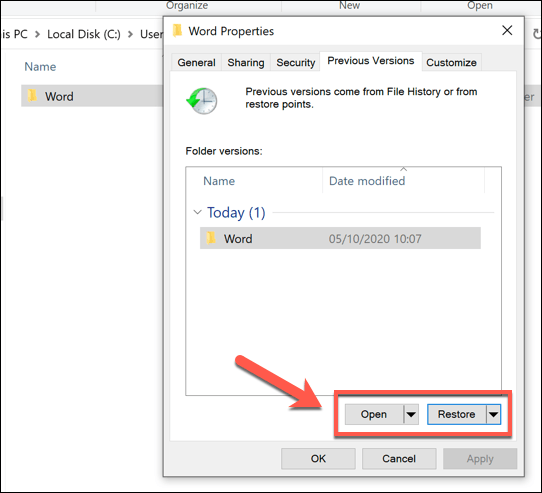
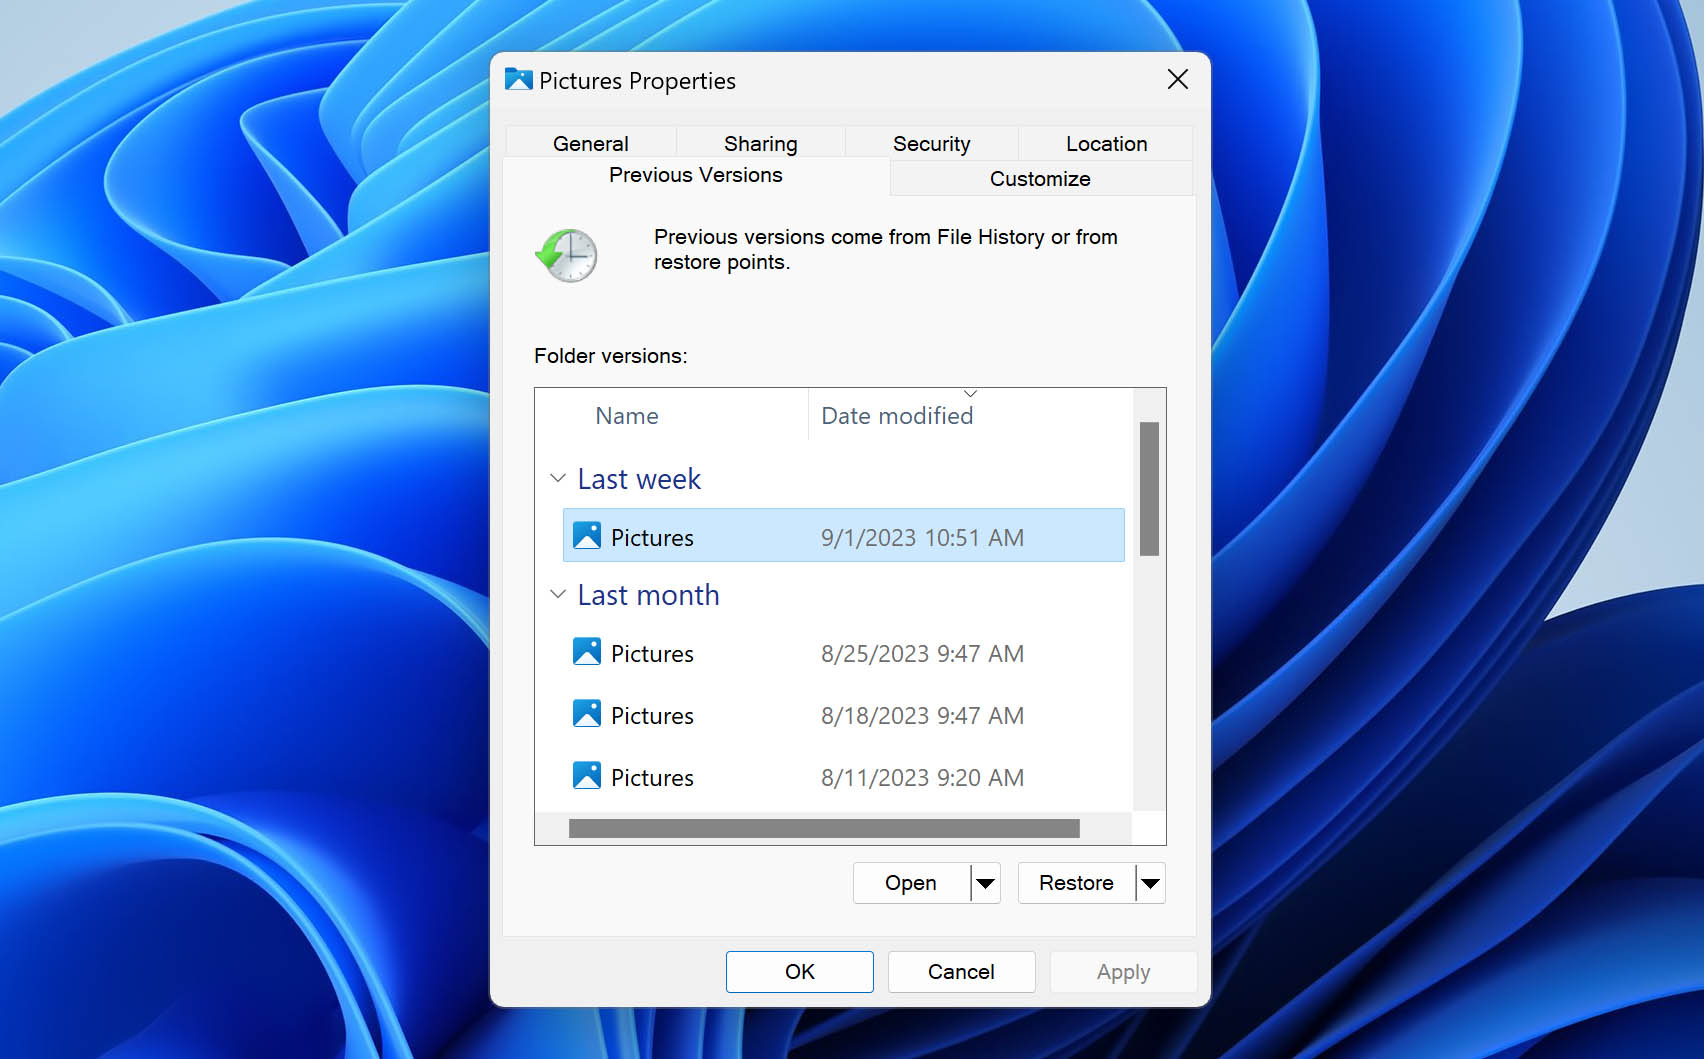
- Right-click the parent folder and click Properties.
- Select the Previous Versions tab. You should see all the available versions of the folder under Folder versions.
- Choose which version you want to restore and click Restore. Alternatively, you can click Open to browse for specific files to restore.
- Click Restore To. Then, a pop-up window would appear.
- Choose where you want to restore your file or folder. Then, click the Select folder button.
In case you don’t see Restore Previous Versions upon right-clicking, it means that no prior restore point was set. To enable Windows to store previous versions of your file, turn on File History by doing the following steps:
On Windows 10/11
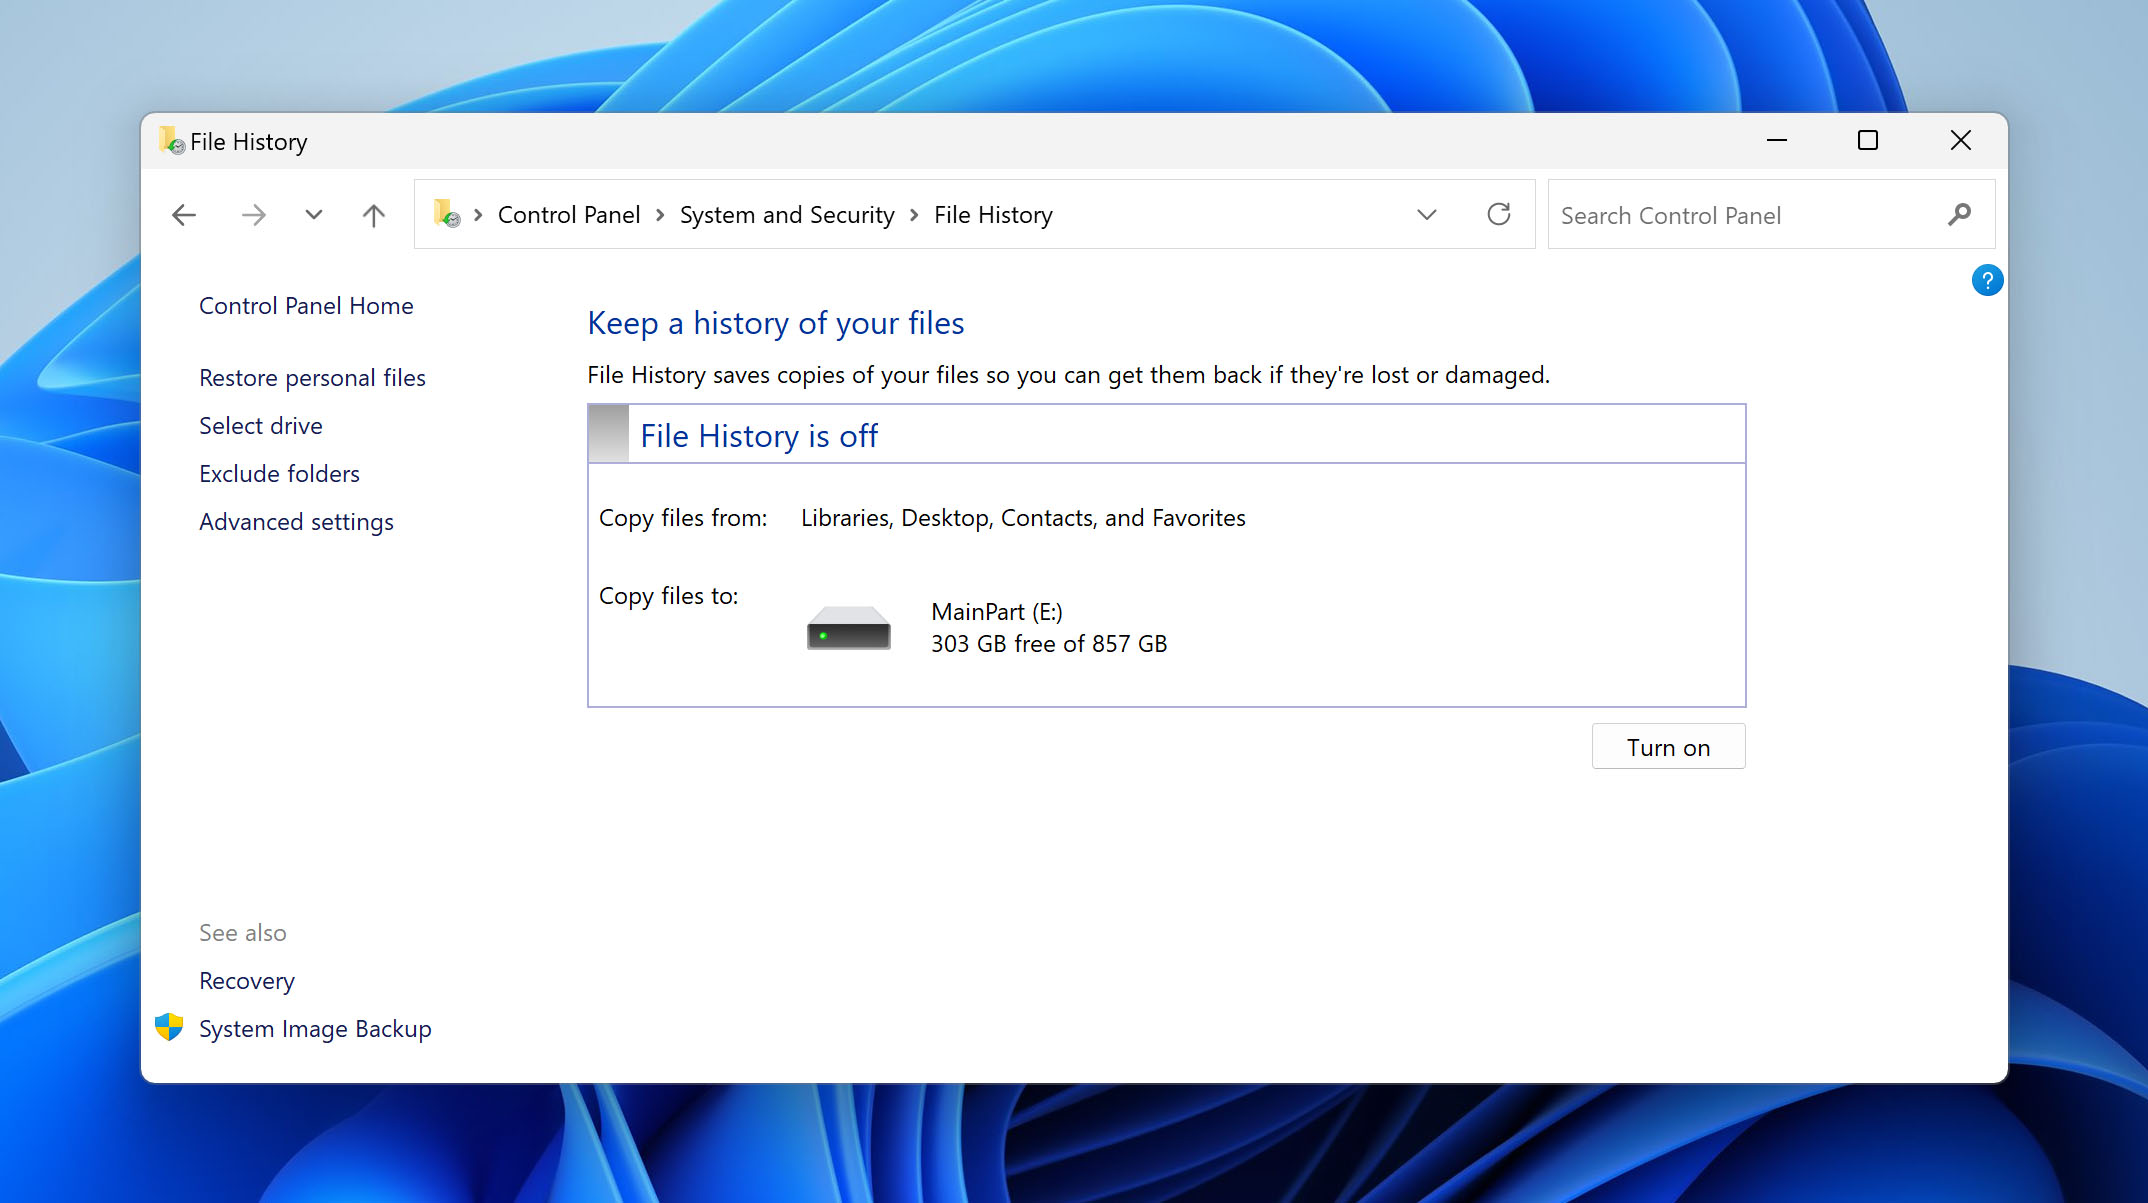
- Open Control Panel by searching for it from the Start menu.
- Select System and Security settings.
- Click File History.
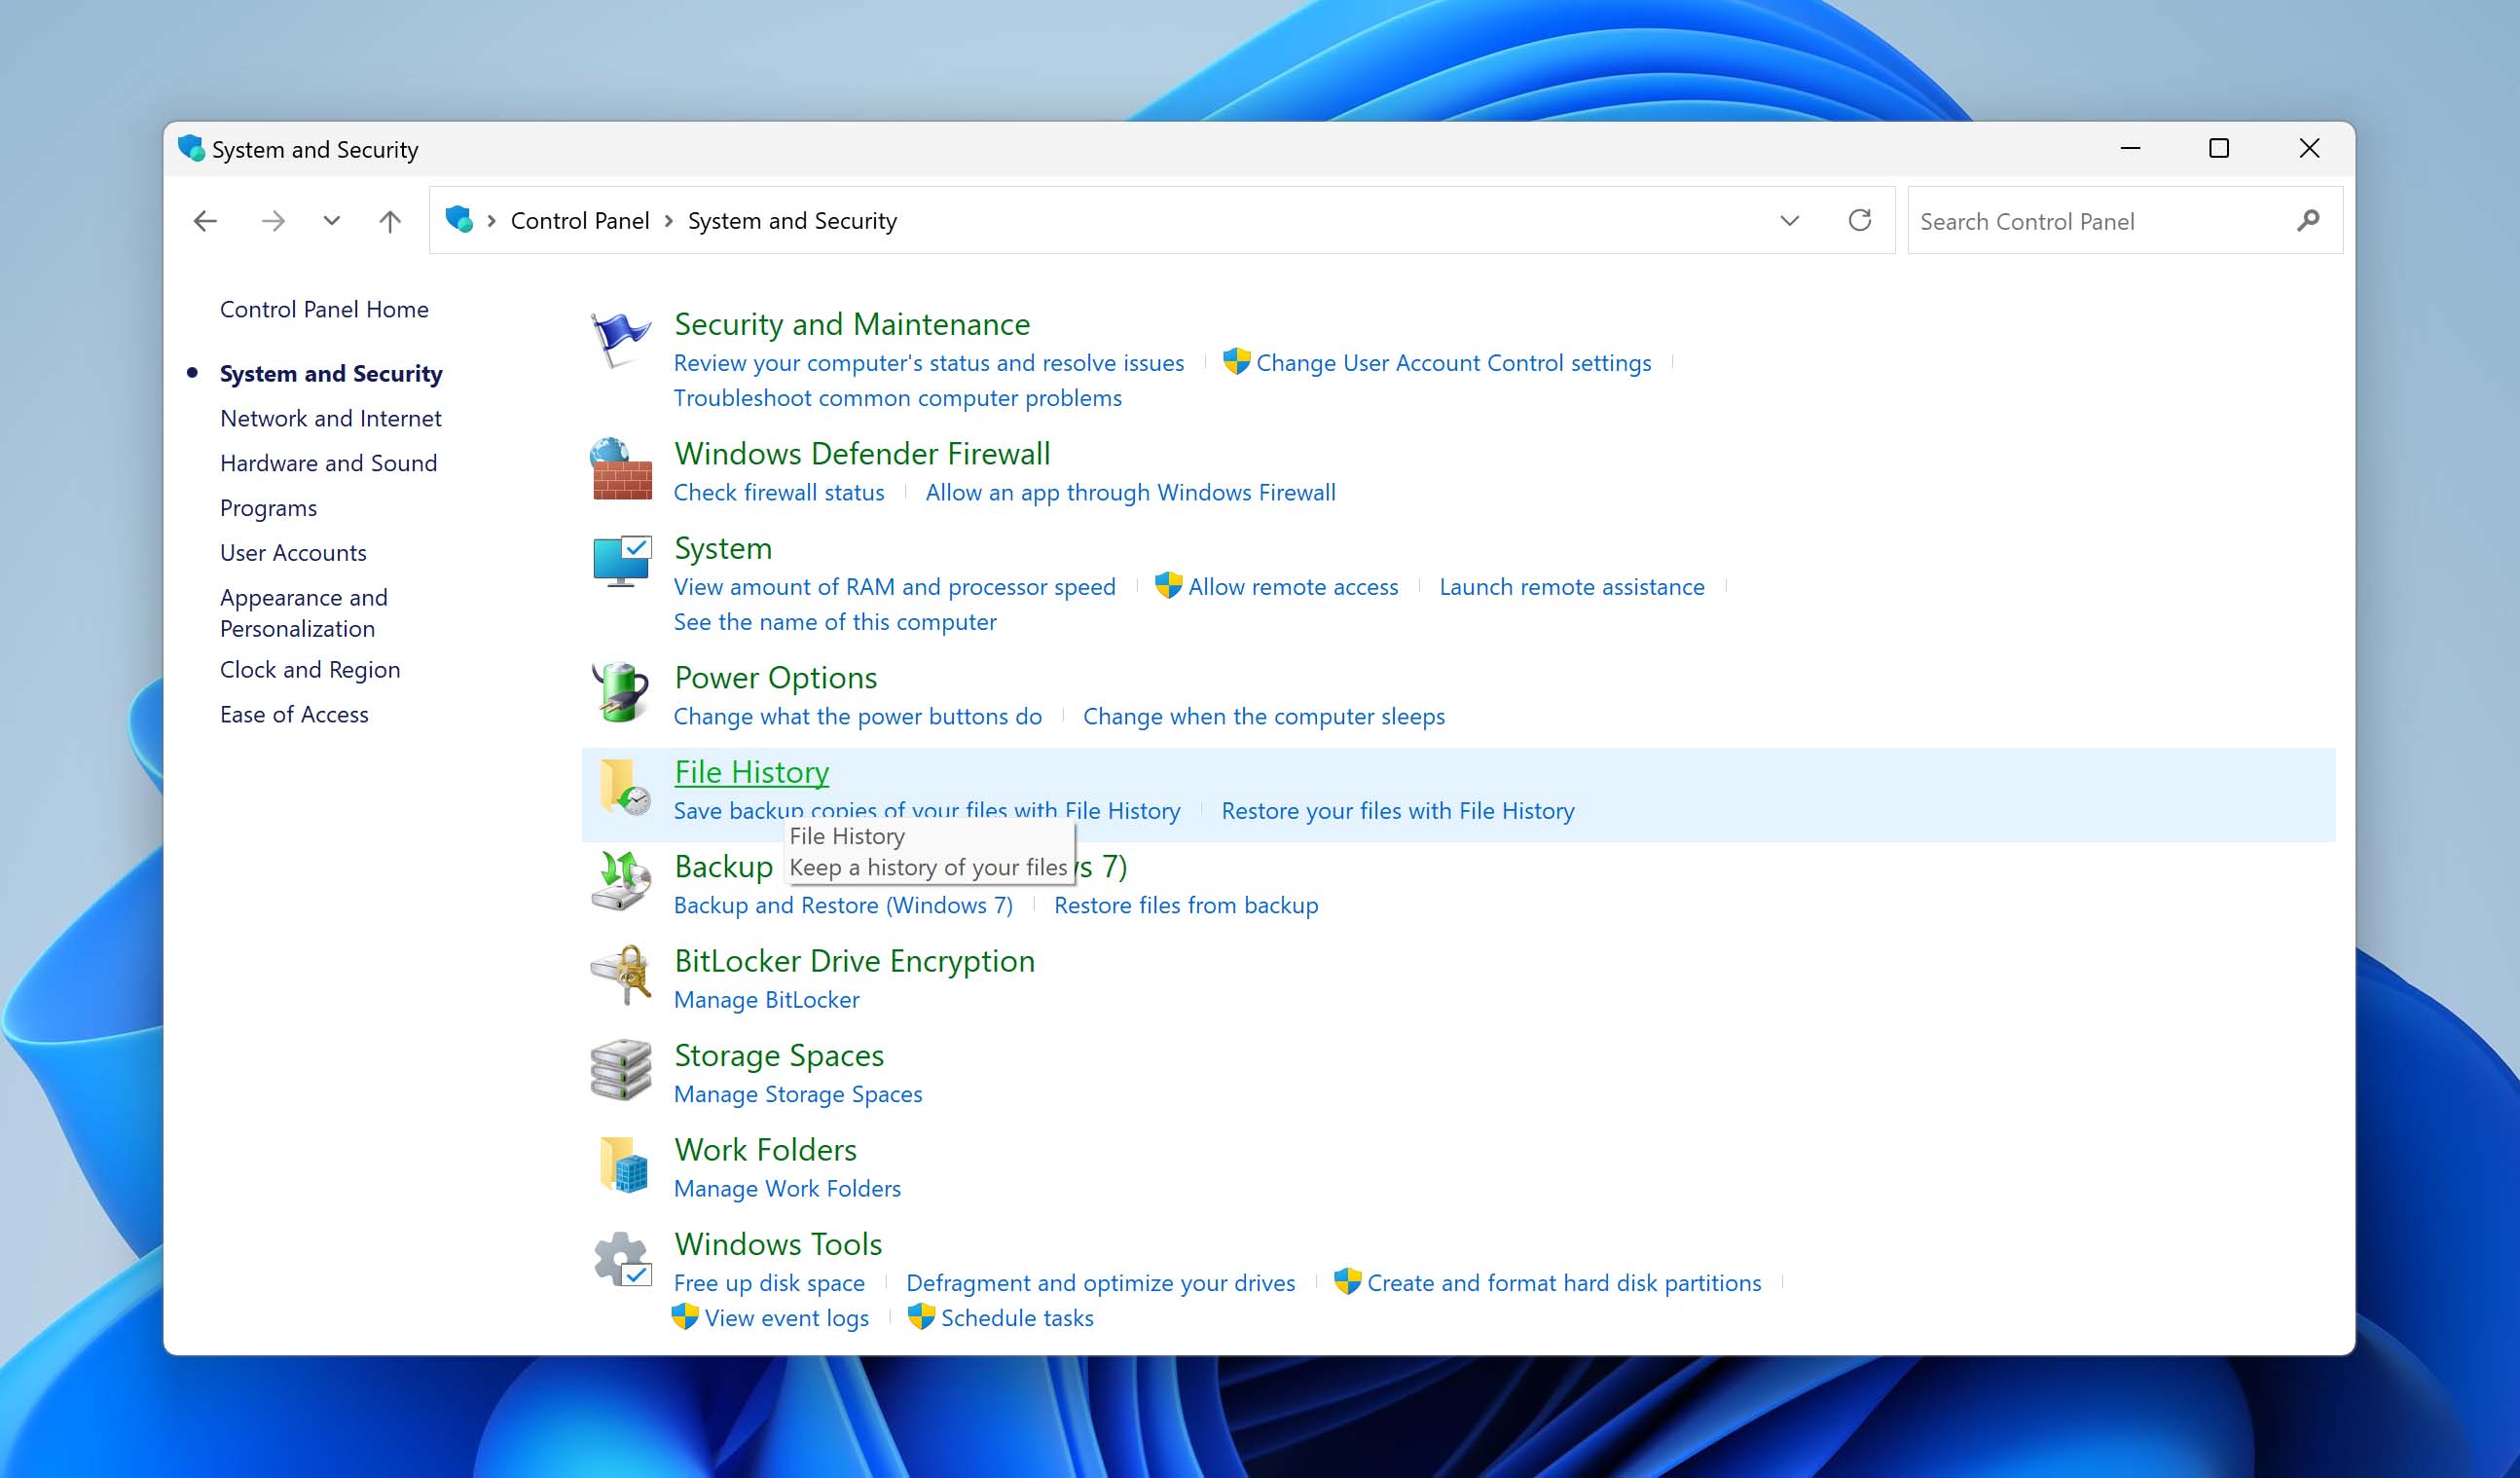
- Under “Keep a history of your files”, you should see the backup drive currently selected. If you want to select another drive, configure the settings by clicking Select drive. Otherwise, click Turn on.
Alternatively, you can enable a system restore point to allow Windows to create previous versions of your files and folders. To do so, follow these steps:
On Windows 10
Enable the Previous Versions feature for Windows 10 by configuring System protection settings:
- Turn on System Protection from the Control Panel.
- On the left side of the bar, click on System & Security > System > System Protection.
- Available drives will show up with corresponding protection.
- Select a particular drive and click on configure.
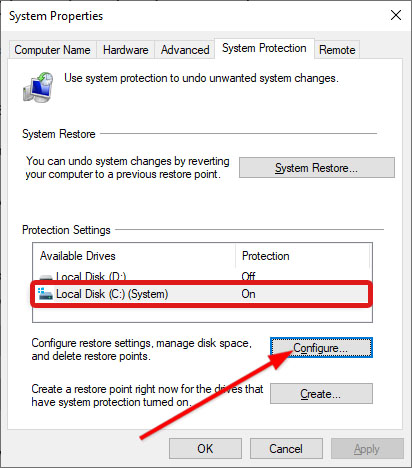
- Click on restore system settings and previous versions of files then click on Ok.
On Windows 11
Enable the Previous Versions feature on Windows 11 in the System protection settings by doing the following:
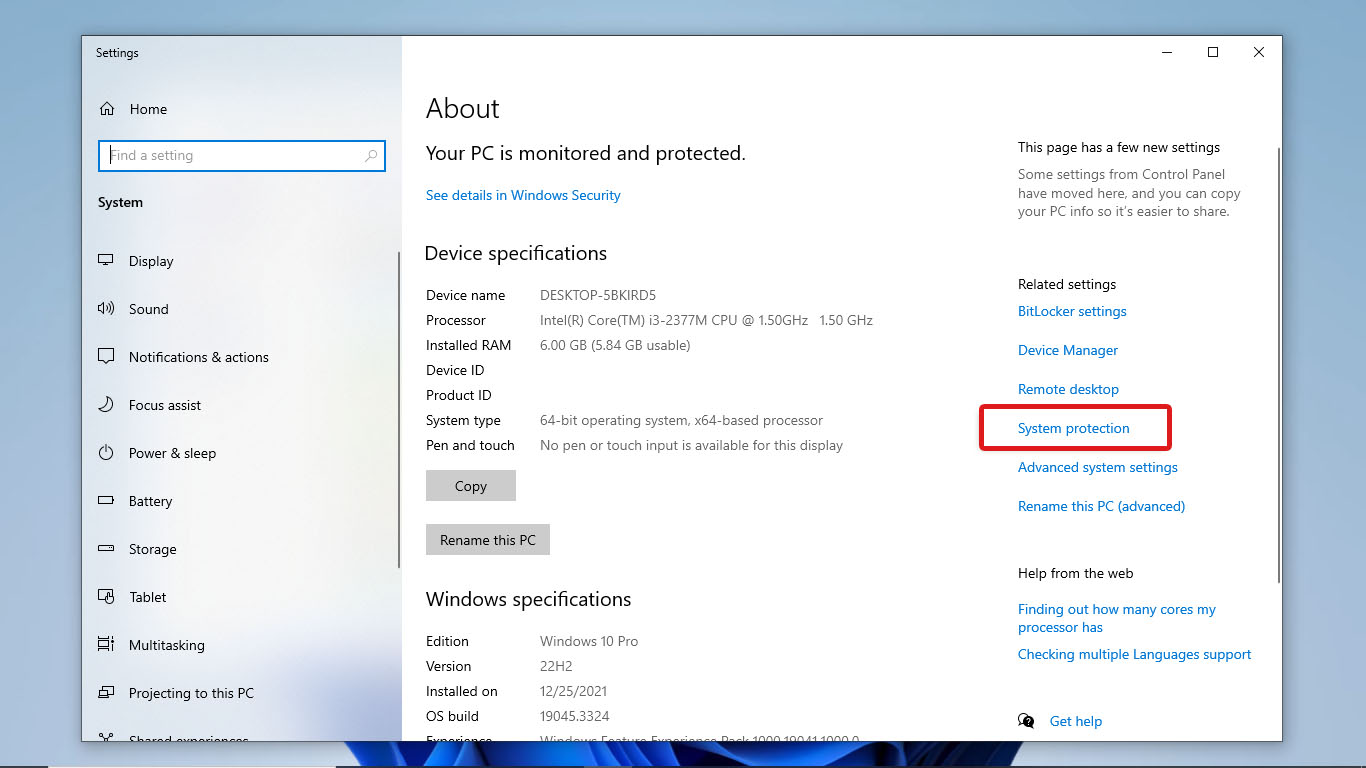
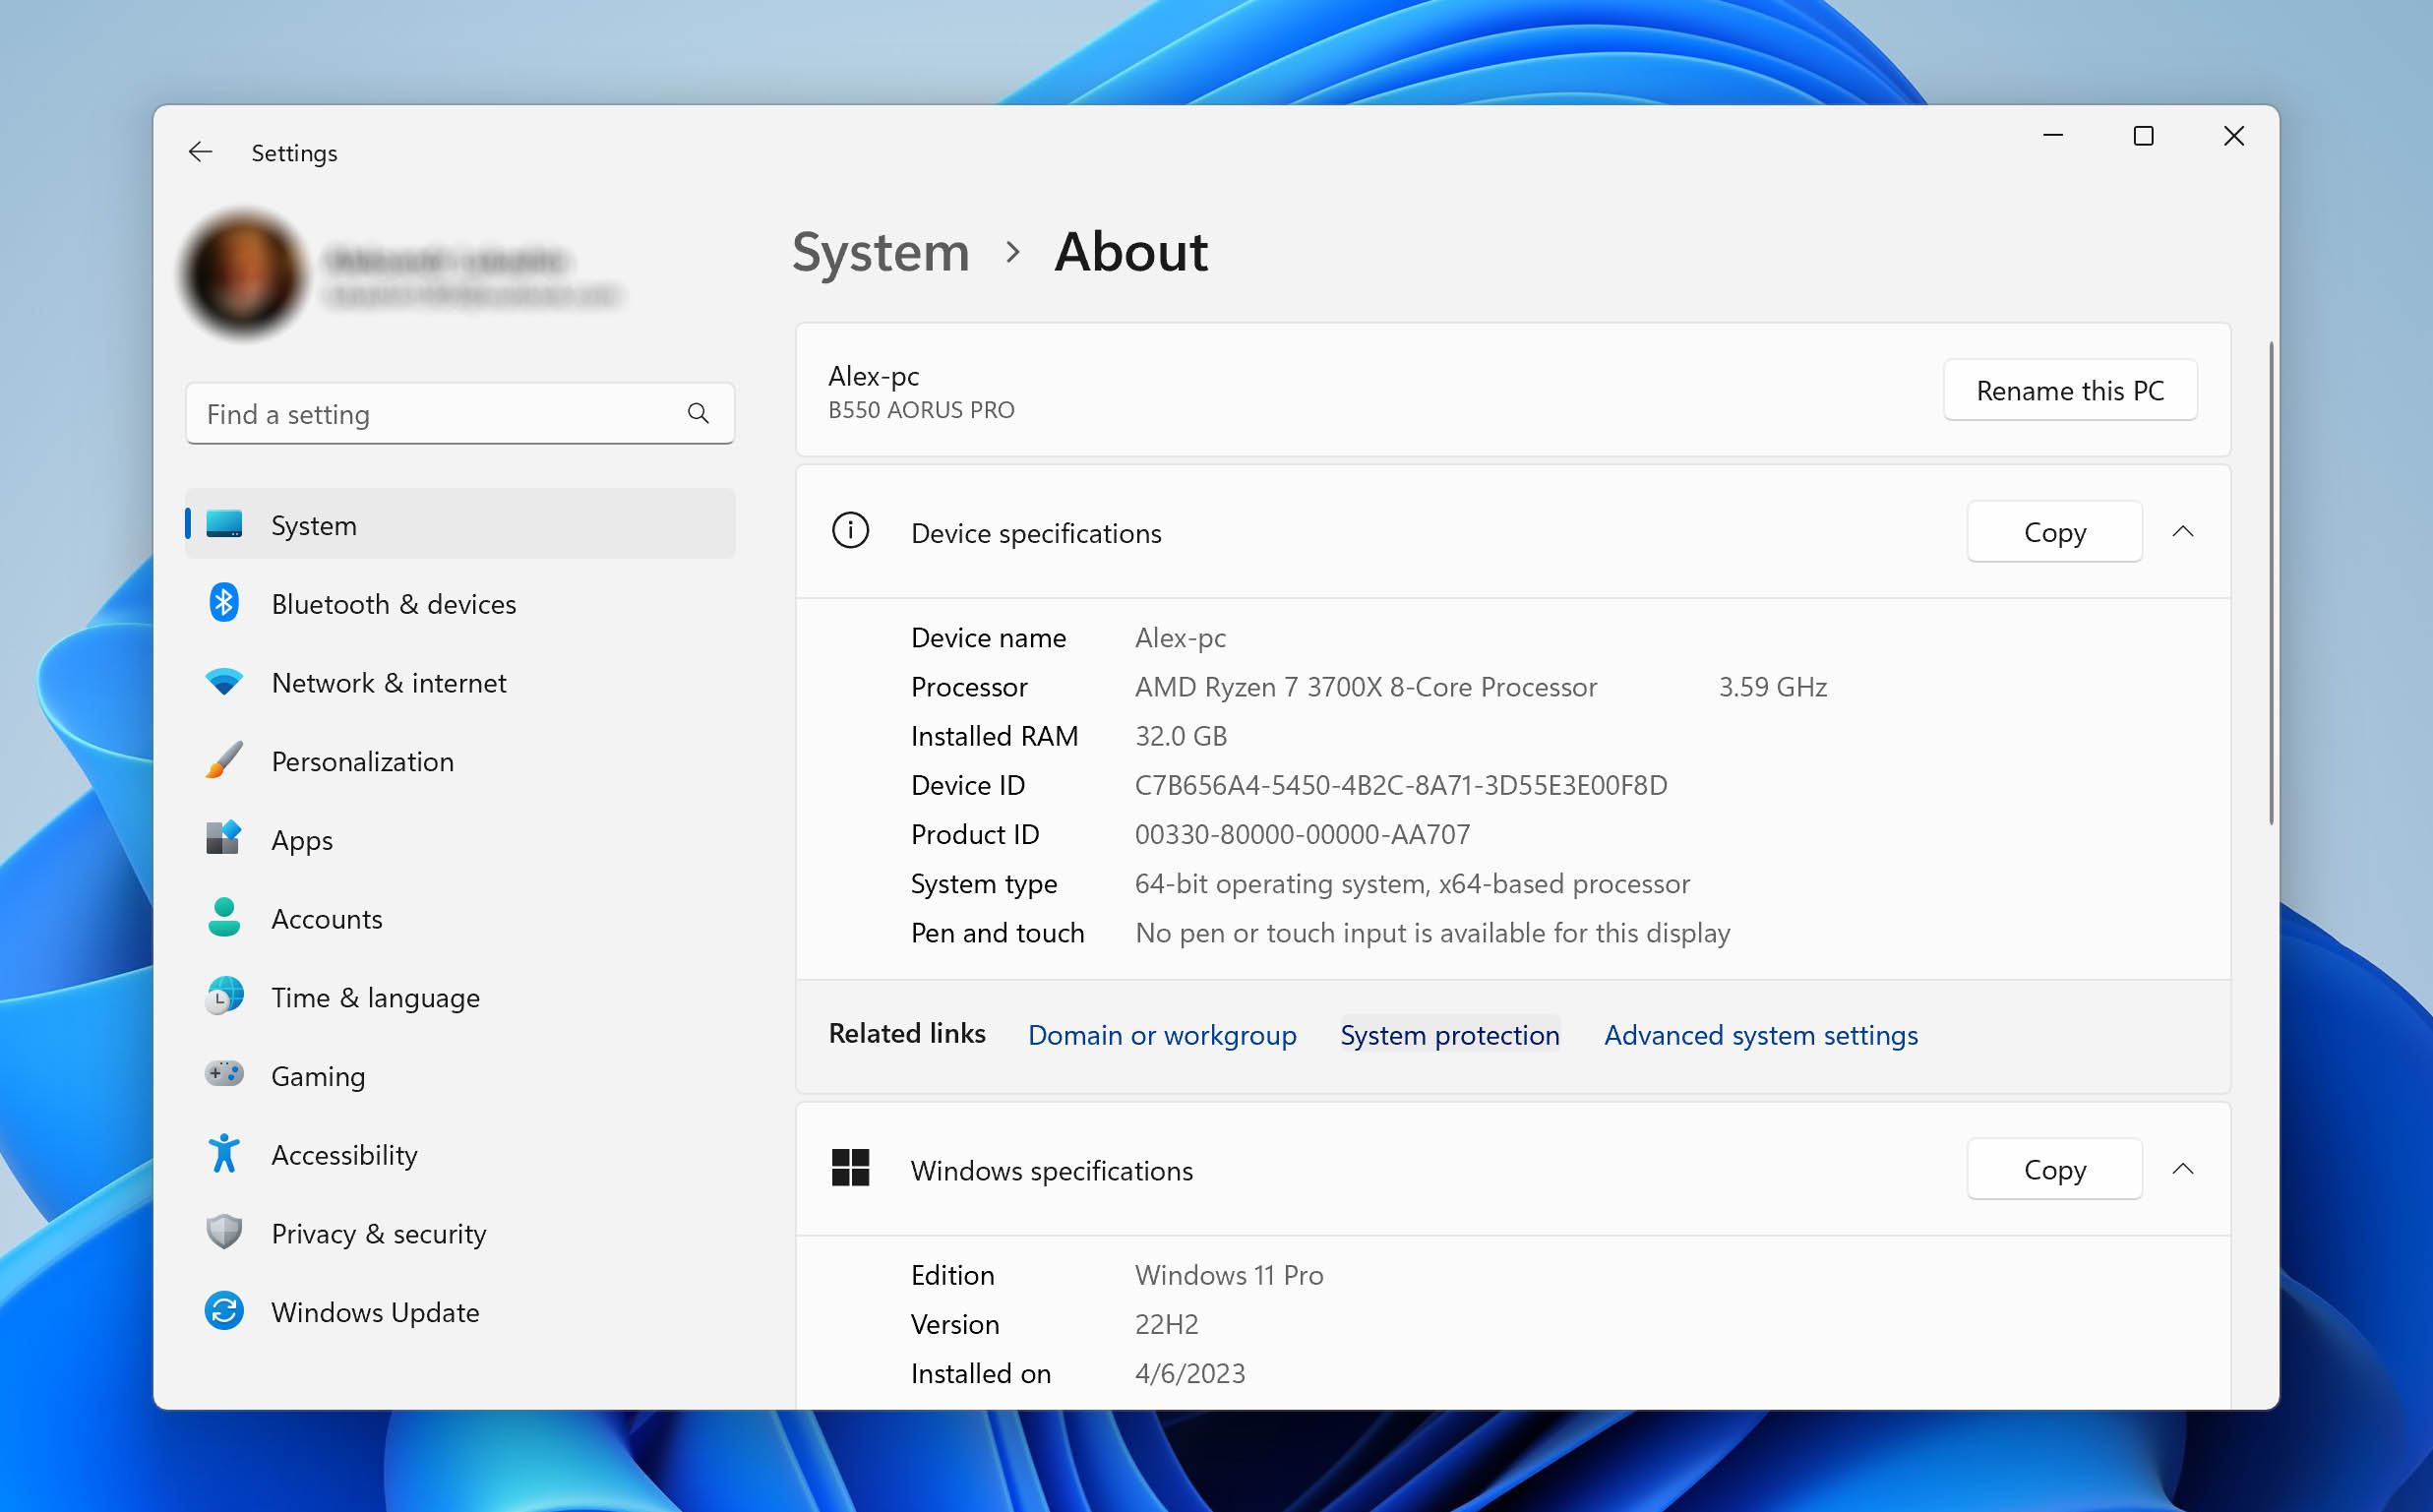
- Go to your PC’s Settings.
- Go to the System tab > About.
- Under the “Device specifications” section, click System protection. This will open the System Properties window.
- The Protection Settings section shows all the available drives and their protection status. Select the drive you want to enable Previous Versions in and click Configure.
- Select Turn on system protection. Then, click OK.
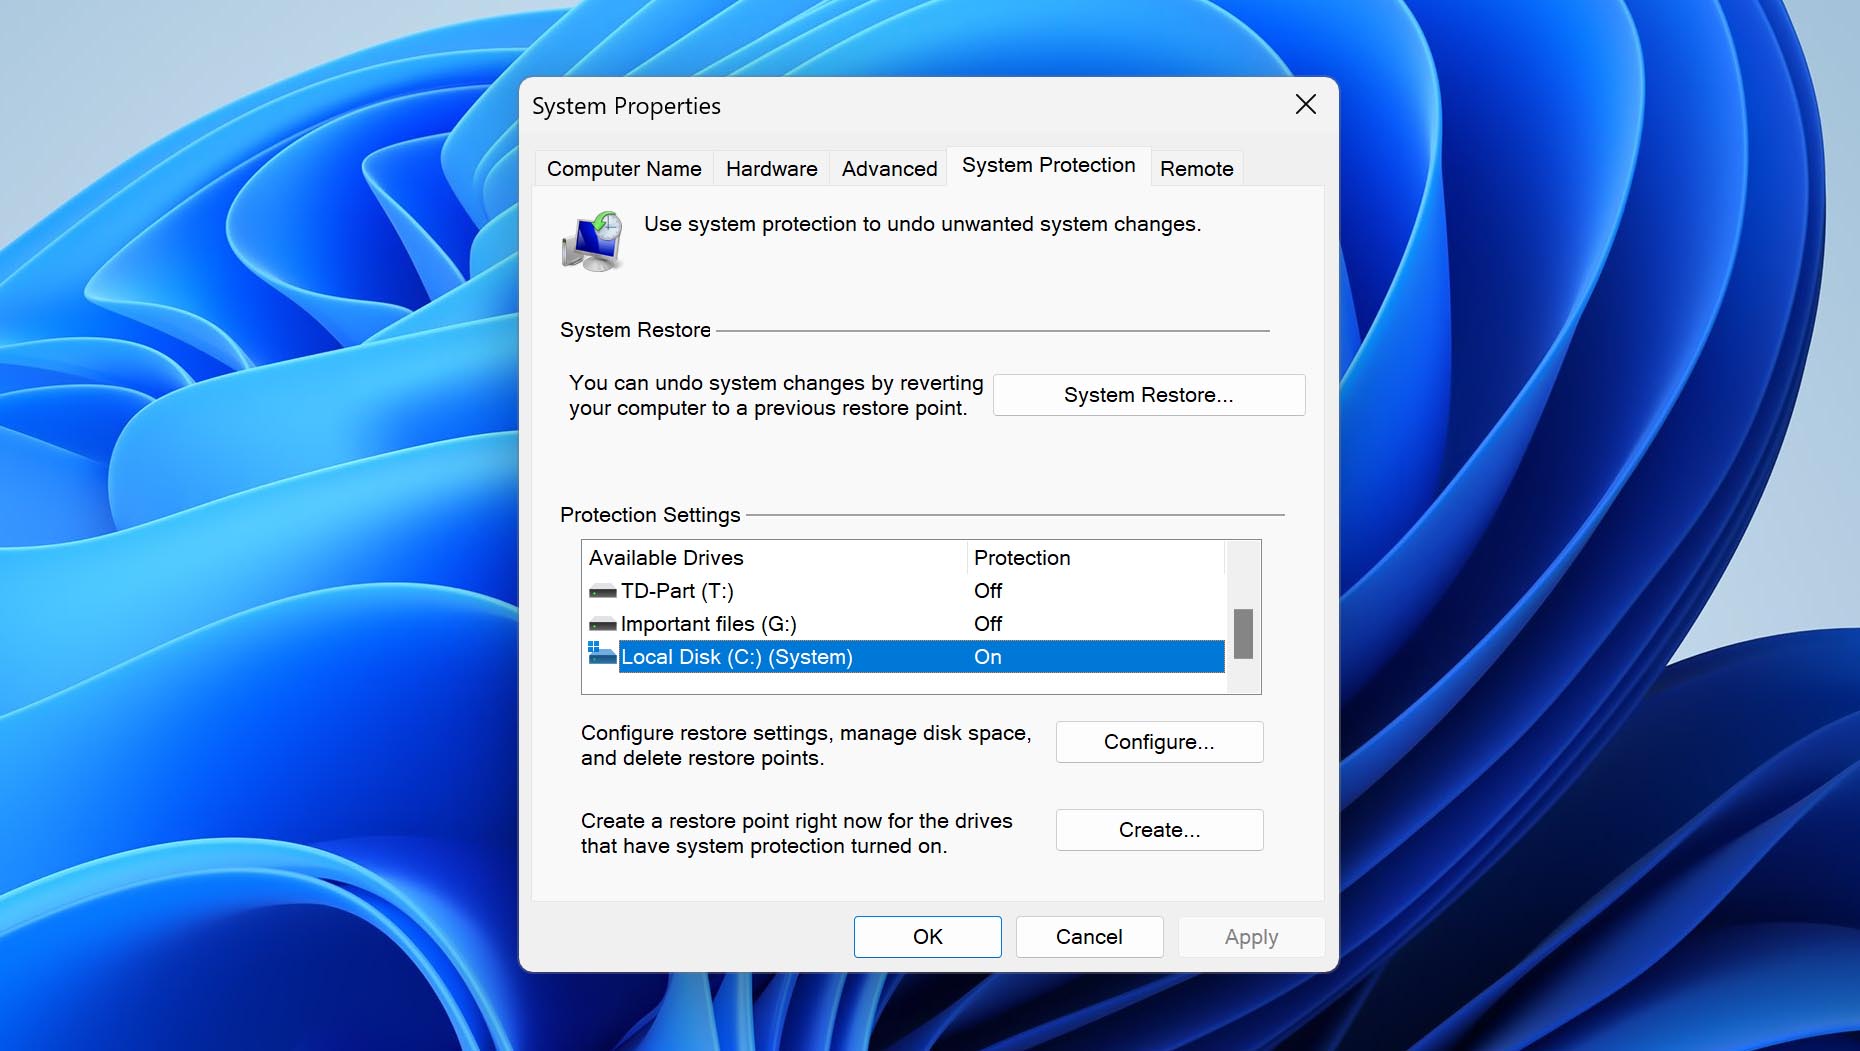
- Create a restore point by clicking Create and specifying the details required.
- Click Create to finish creating your restore point. Then, click Close.
- Click OK to apply the settings.
After enabling this, you will now have the option to recover files in the future.
These are the inbuilt features of Windows 10 that can help you restore files that have been deleted from the recycle bin. However, if you didn’t have these features enabled beforehand, you will need to use a data recovery tool.
Read also: How to Recover Deleted Files on Windows 10
How to Fix Files Not Going to Recycle Bin When Deleted
Now that you have recovered your deleted files that were not in the recycle bin, what’s next? It’s time to address the issue that prevented your files from going to the Recycle Bin when deleted. The following steps will assist you in preventing files from disappearing or not being moved to the Recycle Bin when deleted.
Fix 1: For a Disabled Recycle Bin
Sometimes, the Recycle Bin in Windows is disabled. If this happens, you will not see any files there.
To solve this:
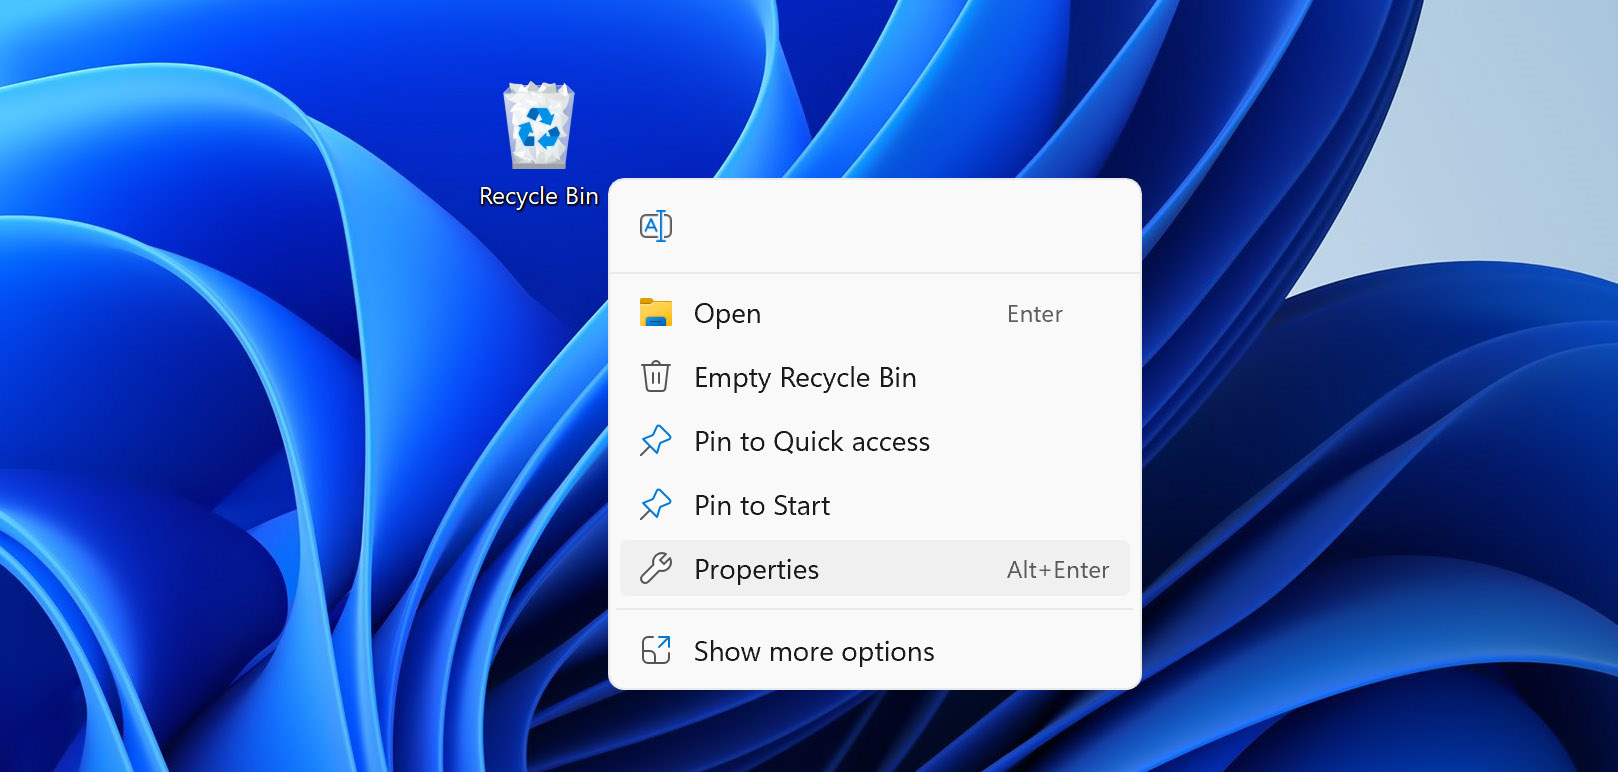
- Right-click on the ‘Recycle Bin’ icon on the desktop and select Properties in the menu that appears.
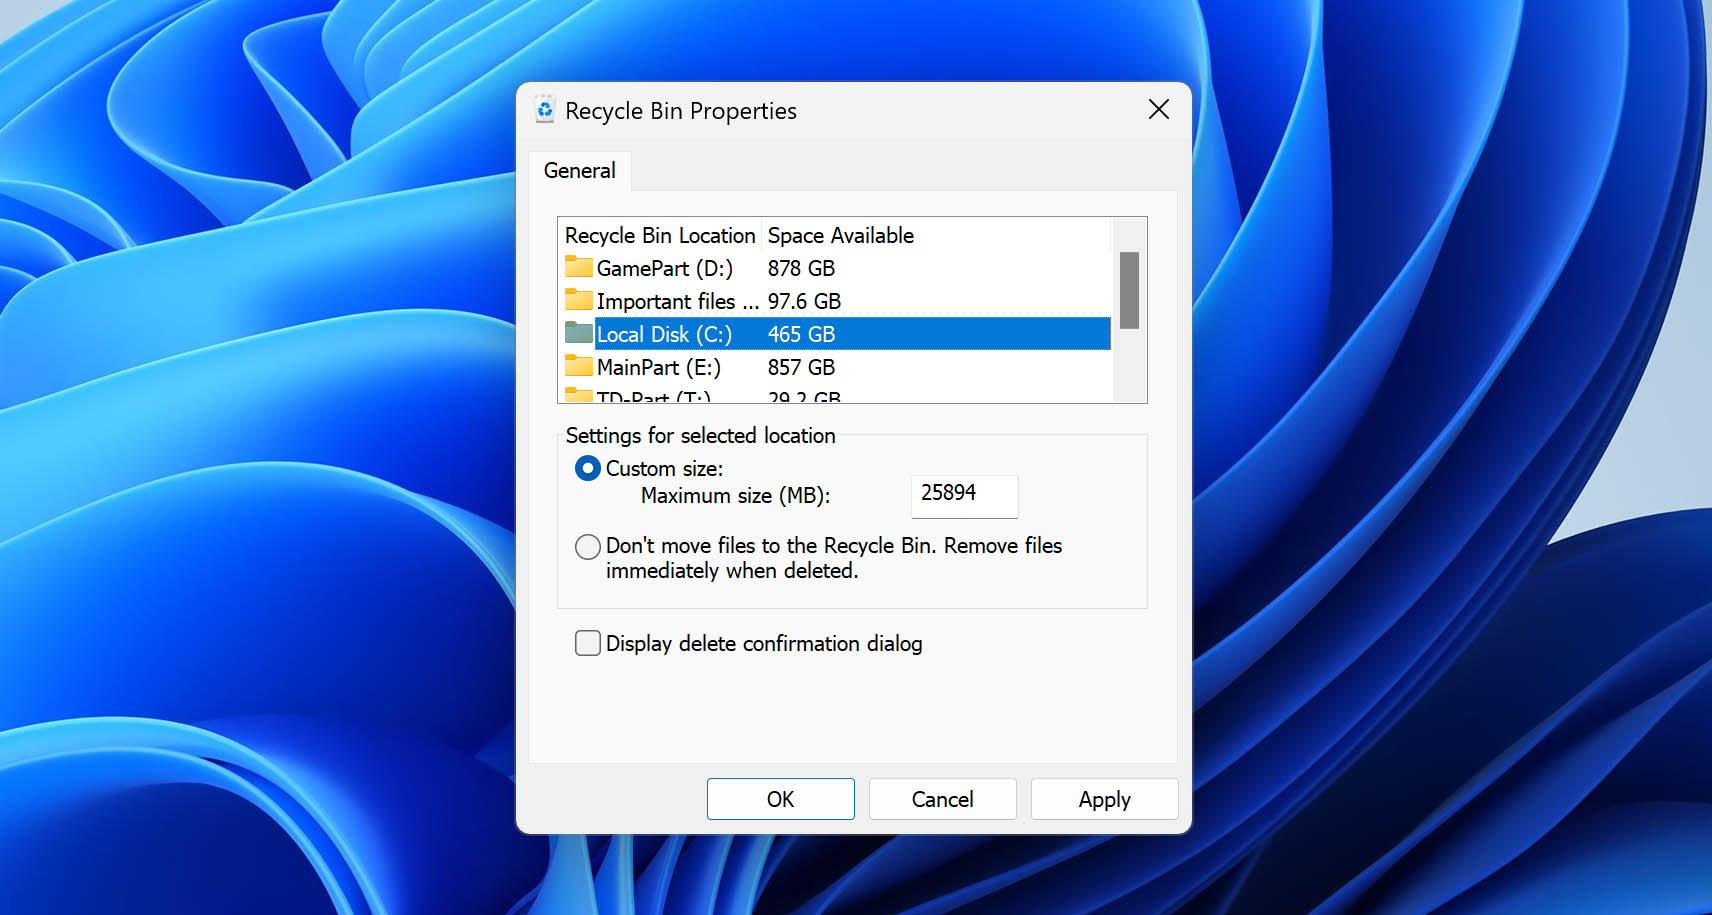
- Select the drive you want to configure.
- Under the Settings for selected location, select Custom size: and configure the maximum size you want for the drive’s Recycle Bin.
Note that the same steps are applicable on both Windows 10 and Windows 11.
Fix 2: For a Smaller Recycle Bin
A small Recycle Bin has a lower capacity. When it is full, it deletes older files to make space for the newly deleted files. That’s why it is crucial to increase the size of Recycle Bin to its maximum capacity.
Here’s how you can increase the capacity of the Recycle Bin:
- Open the Recycle Bin properties window as in the previous fix.
- Go to Settings for selected location and note the maximum size for the deleted files in the Recycle Bin.
- If the size is too small, expand it and click on Apply and then Ok to save the new settings.
Fix 3: For Files Deleted From a Virtual Machine
Files deleted from a virtual machine go to the Recycle Bin folder of that machine and not your local Recycle Bin. To check the settings on your VM, do the following:
- Inside the virtual machine, right-click on the Recycle Bin icon. Then, select Properties.
- Make sure that the Custom size option is selected.
Fix 4: For Files Deleted By Viruses or Malware
If your files got deleted because of a virus or malware, they might skip the Recycle Bin and become permanently deleted. If this is the case, you can scan your drive using Windows Defender or a third-party antivirus software of your choice. This is to detect and remove the virus/malware and avoid further data loss.
To scan your device with Windows Defender, do the following:
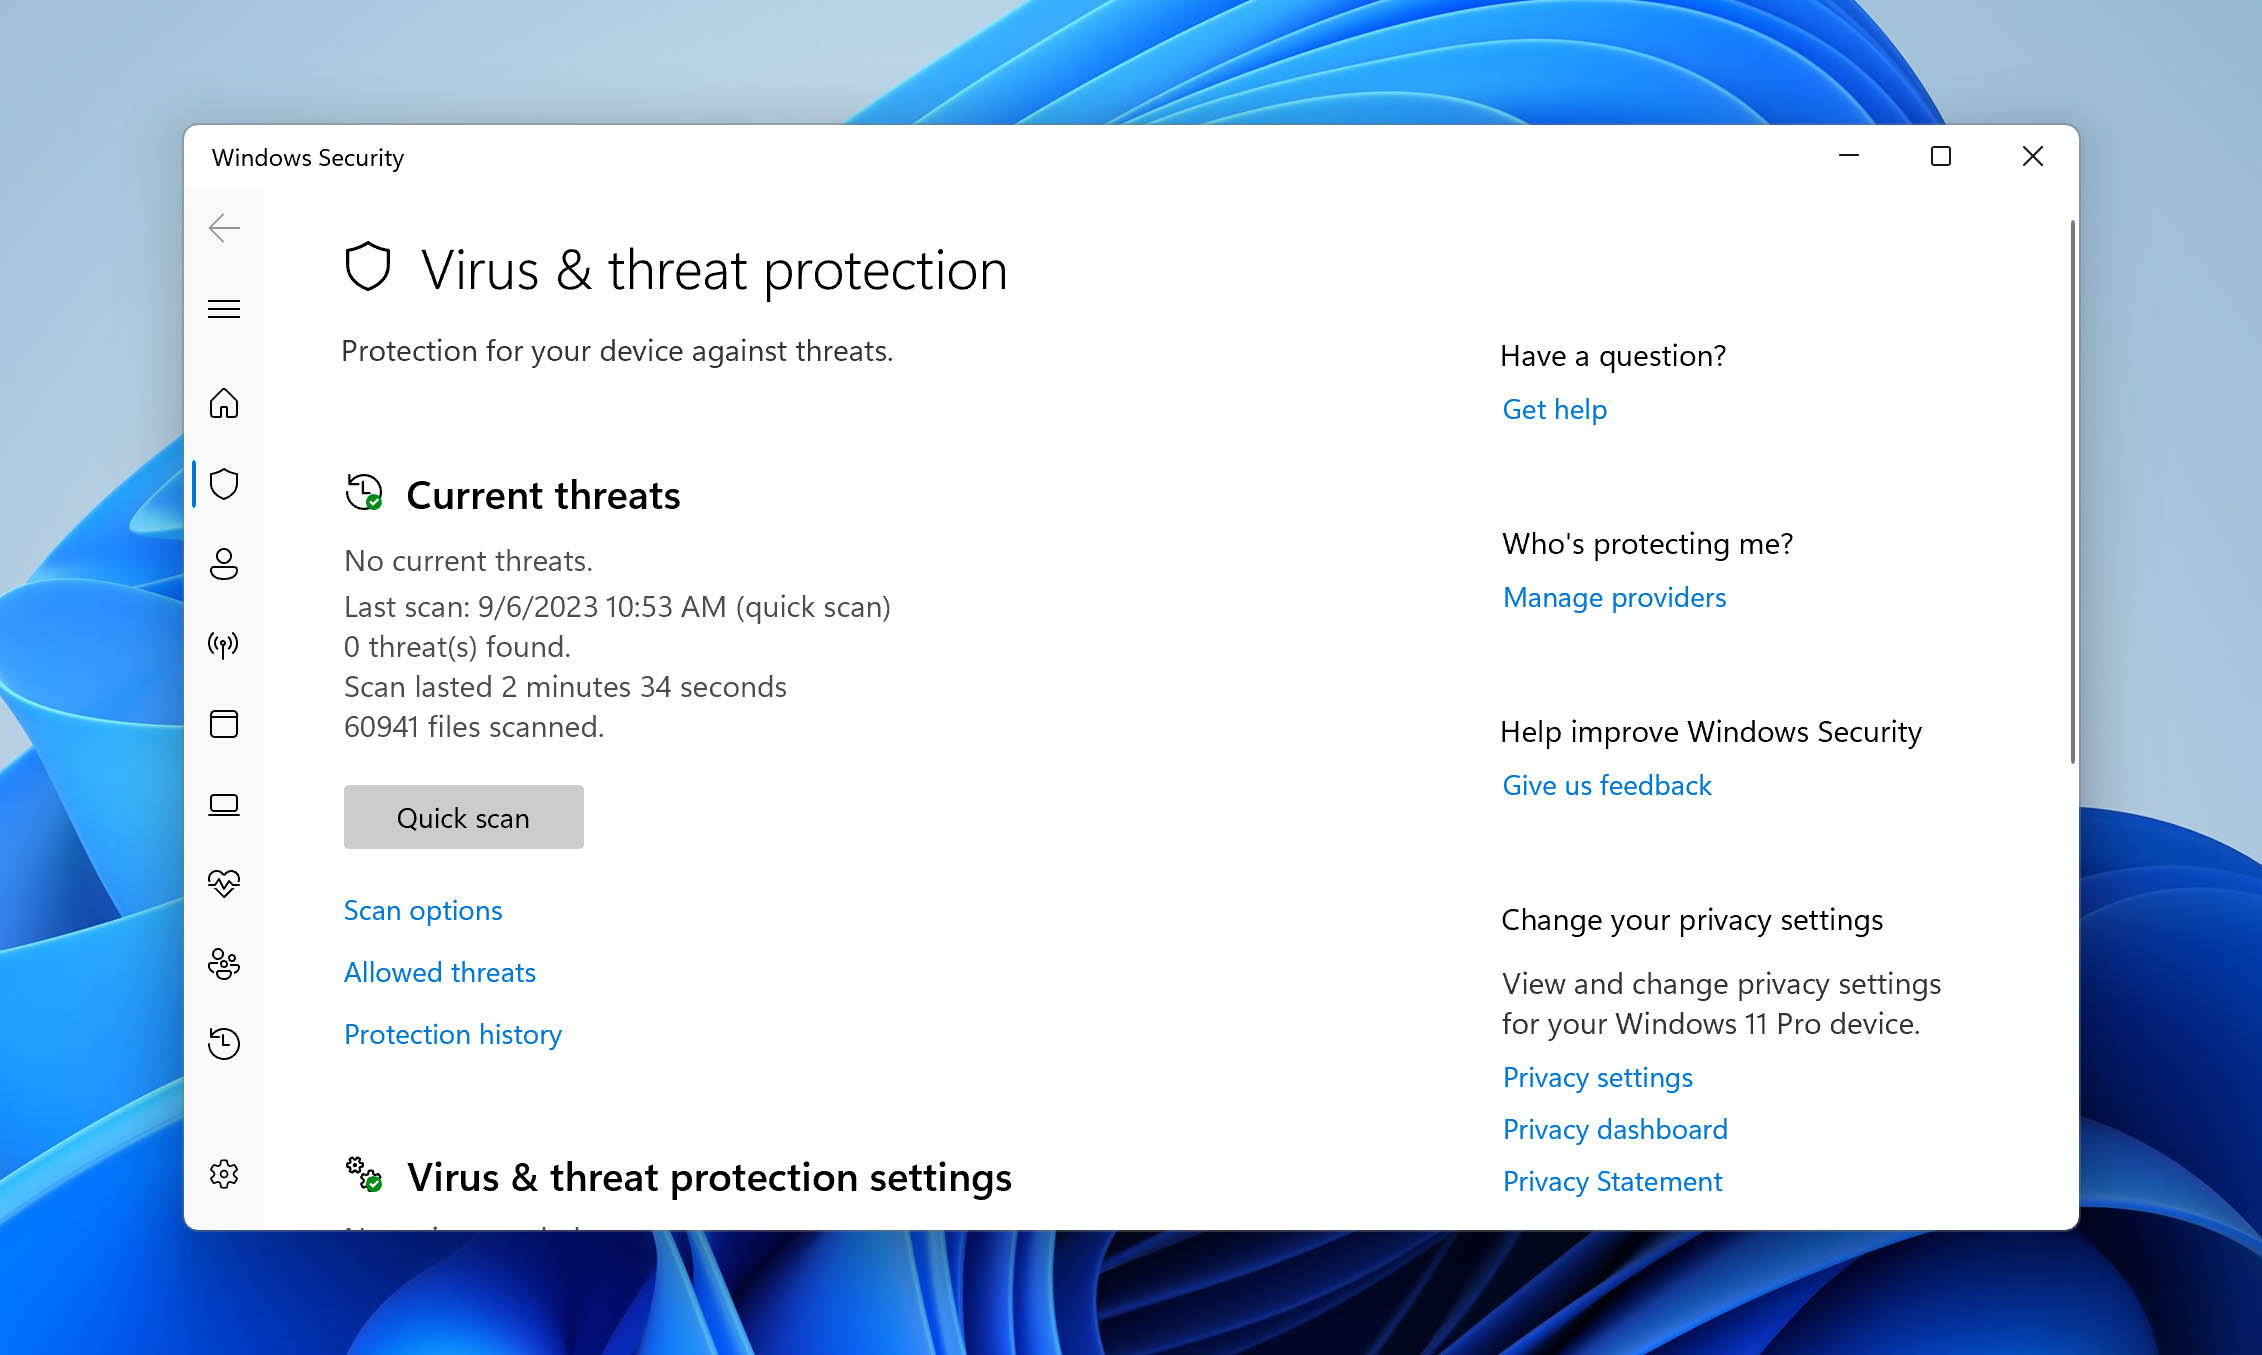
- Open Virus & threat protection by searching for it from the Start menu.
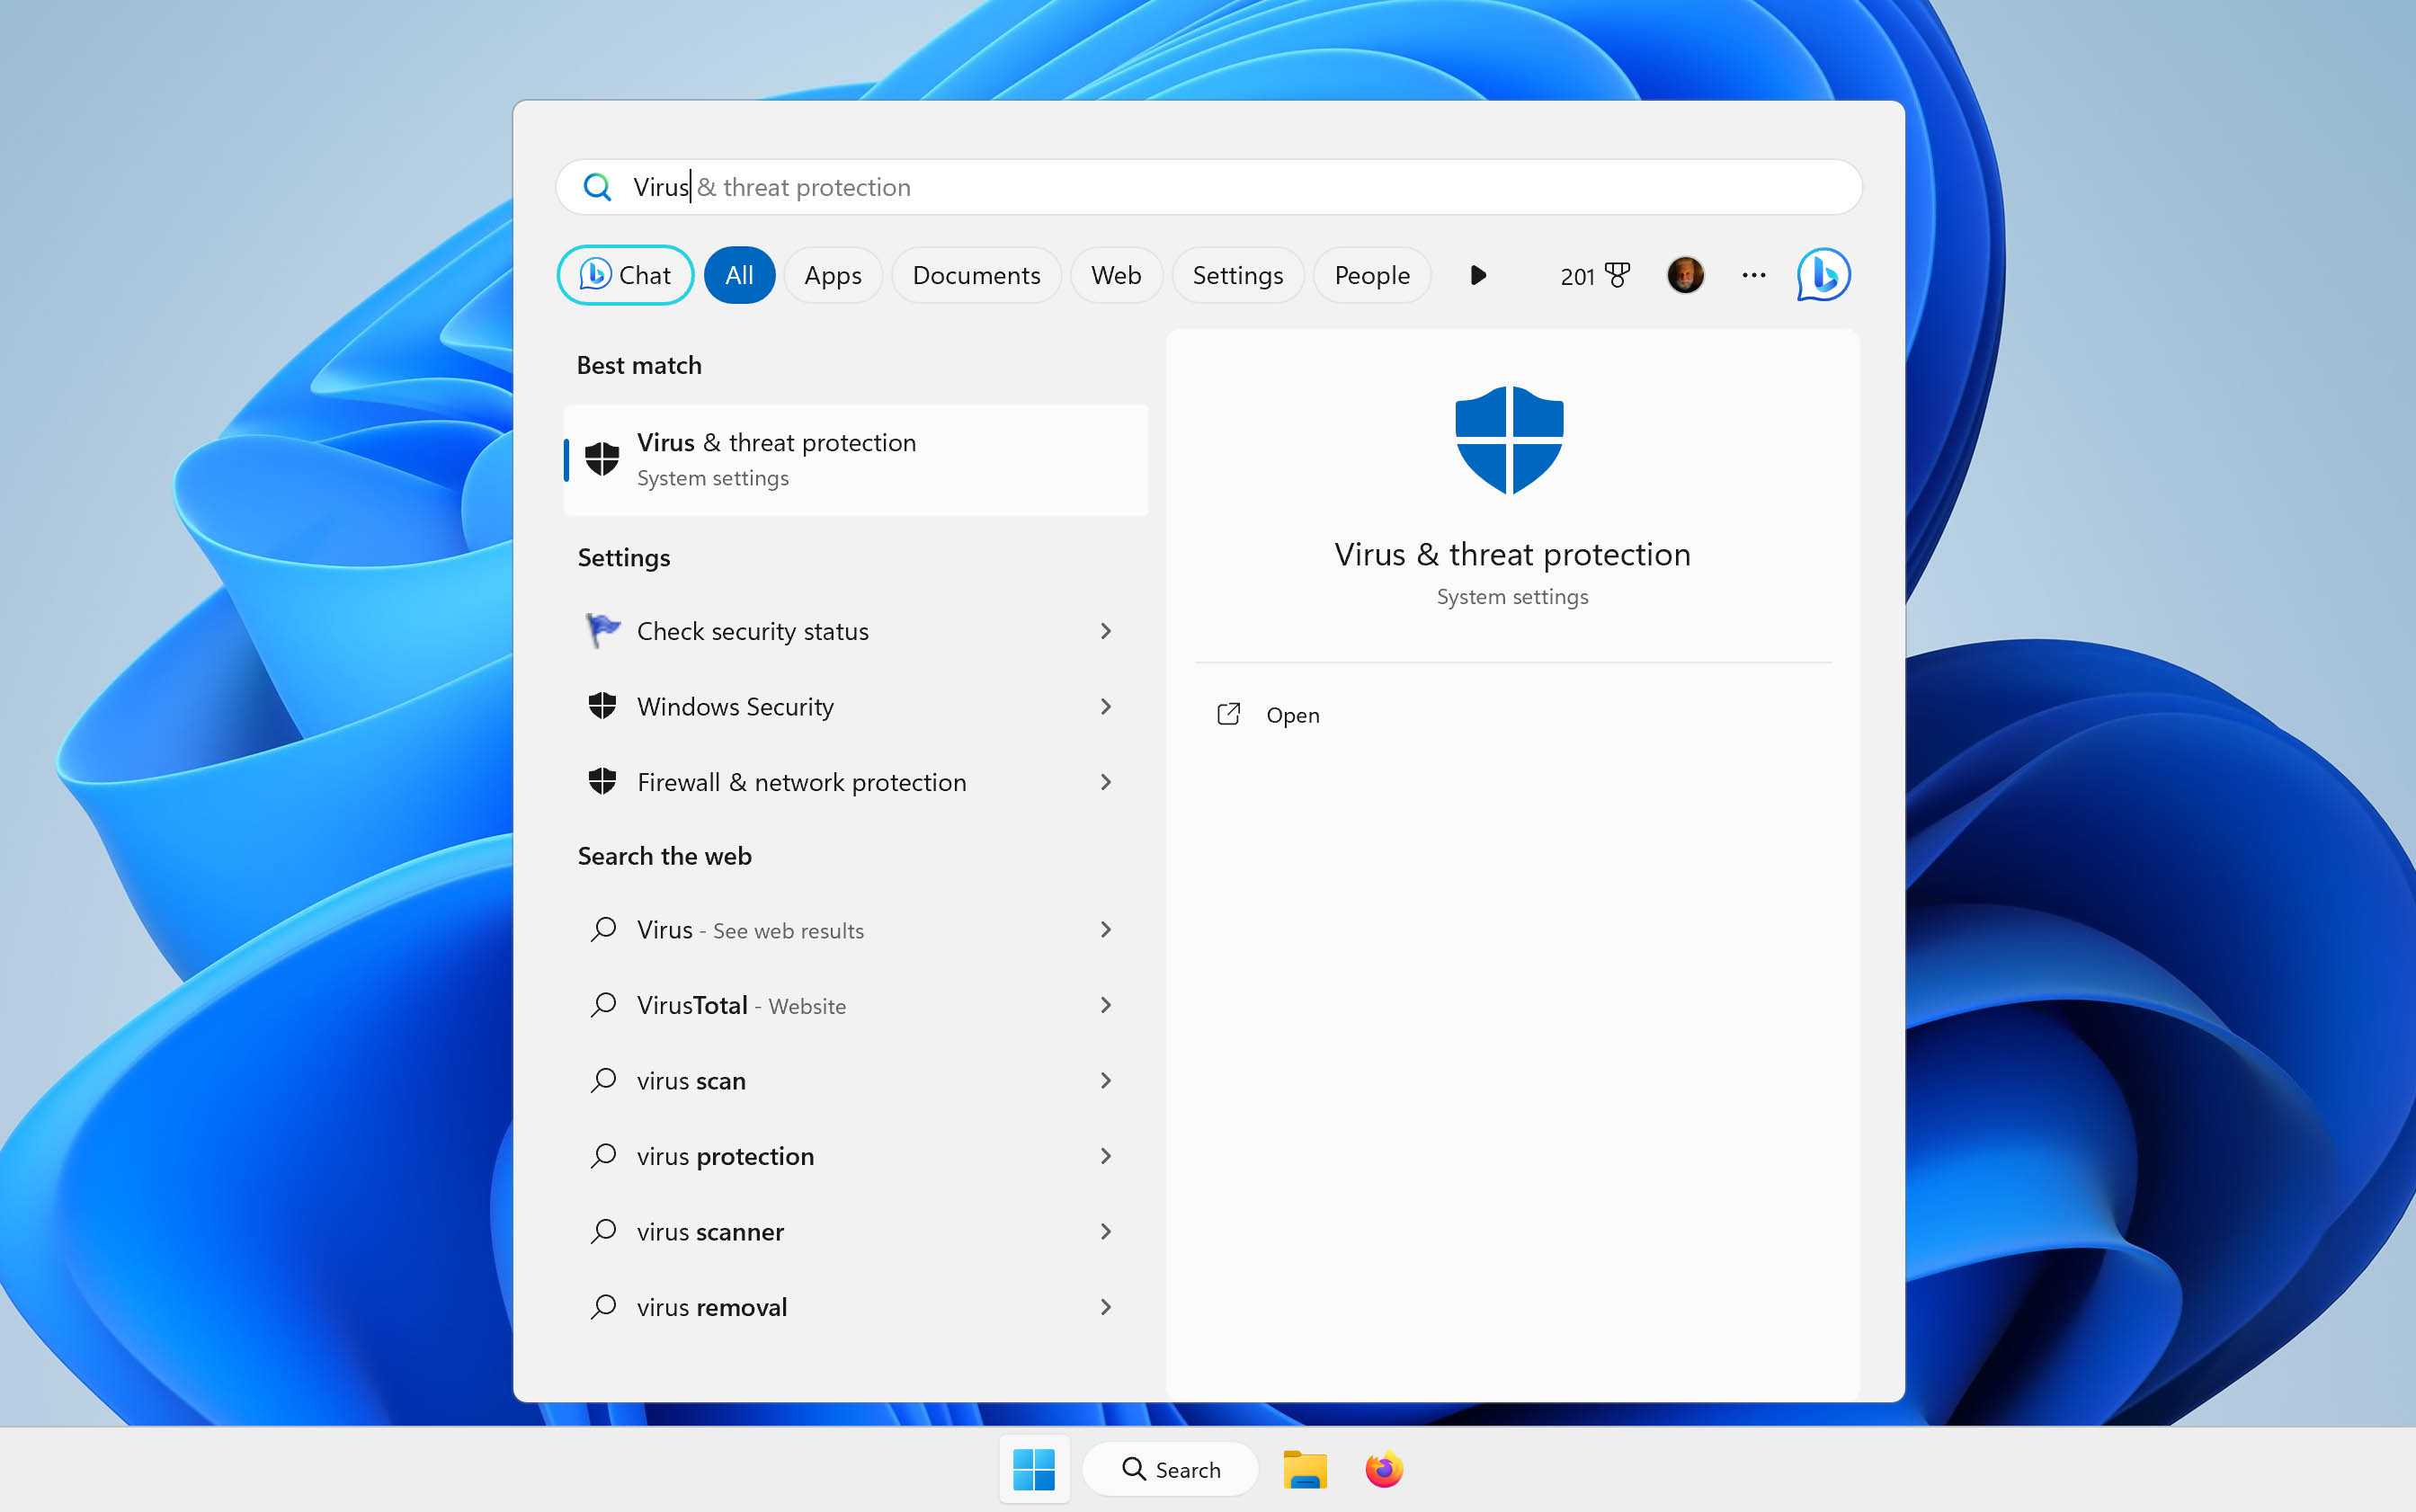
- By default, the Quick scan option is selected. Click that if you only want to perform a quick scan of your drive. If you want to perform a full scan, select Scan options and select Full scan. Then, select Full scan and click Scan now. Quick scans only check the folders where threats are usually found. Meanwhile, full scans will check all the files and running programs on your drive. This might result in longer scan times.
Scanning your device with anti-virus/anti-malware software not only removes viruses/malware infection, it can also restore your files in some cases. This is because some viruses only hide your files after infection.
For permanently deleted files, use a data recovery tool to get your data back after removing the virus.
Tips To Increase Chances of Recovery And Prevent Future Data Loss
Here are some helpful tips and best practices to prevent file deletion.
Always Ensure That You Confirm the Deletion of a File
Encountering a dialog box that requires you to confirm file deletion can help prevent the accidental deletion of files. This box might not always be visible.
To make Windows display a confirmation dialog, follow these steps:
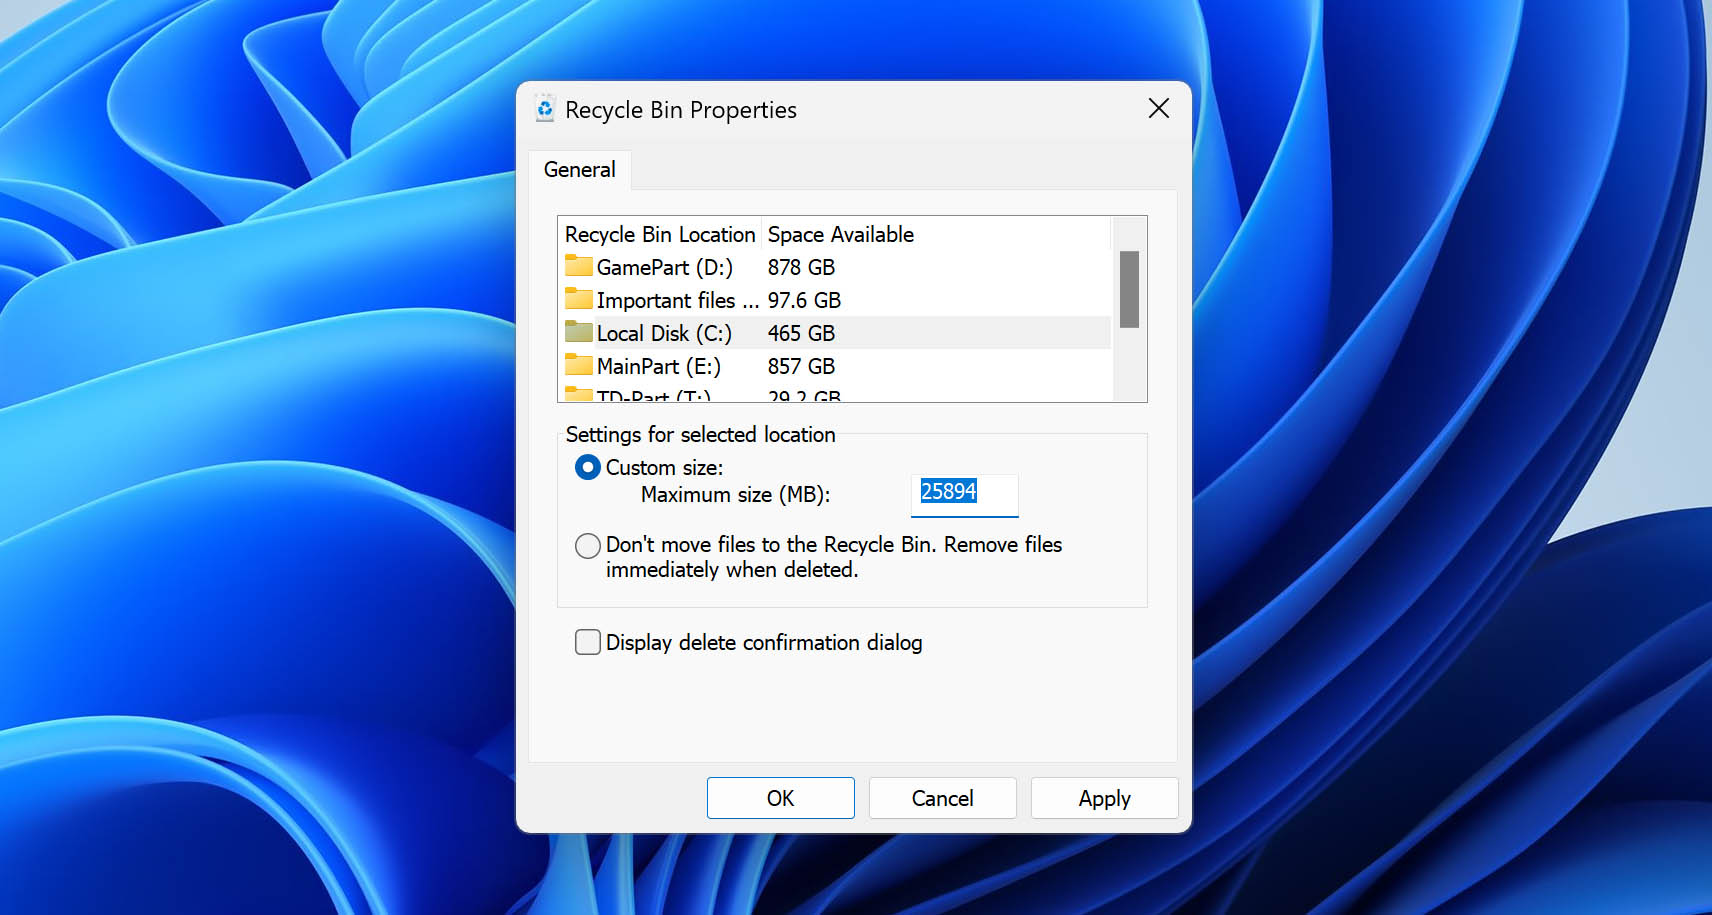
- Right click on the Recycle Bin and click on Properties.
- Check whether the Display delete confirmation dialog is enabled, and toggle it on if not.
- You will now be prompted to confirm the deletion of files.
Make the Recycle Bin Visible
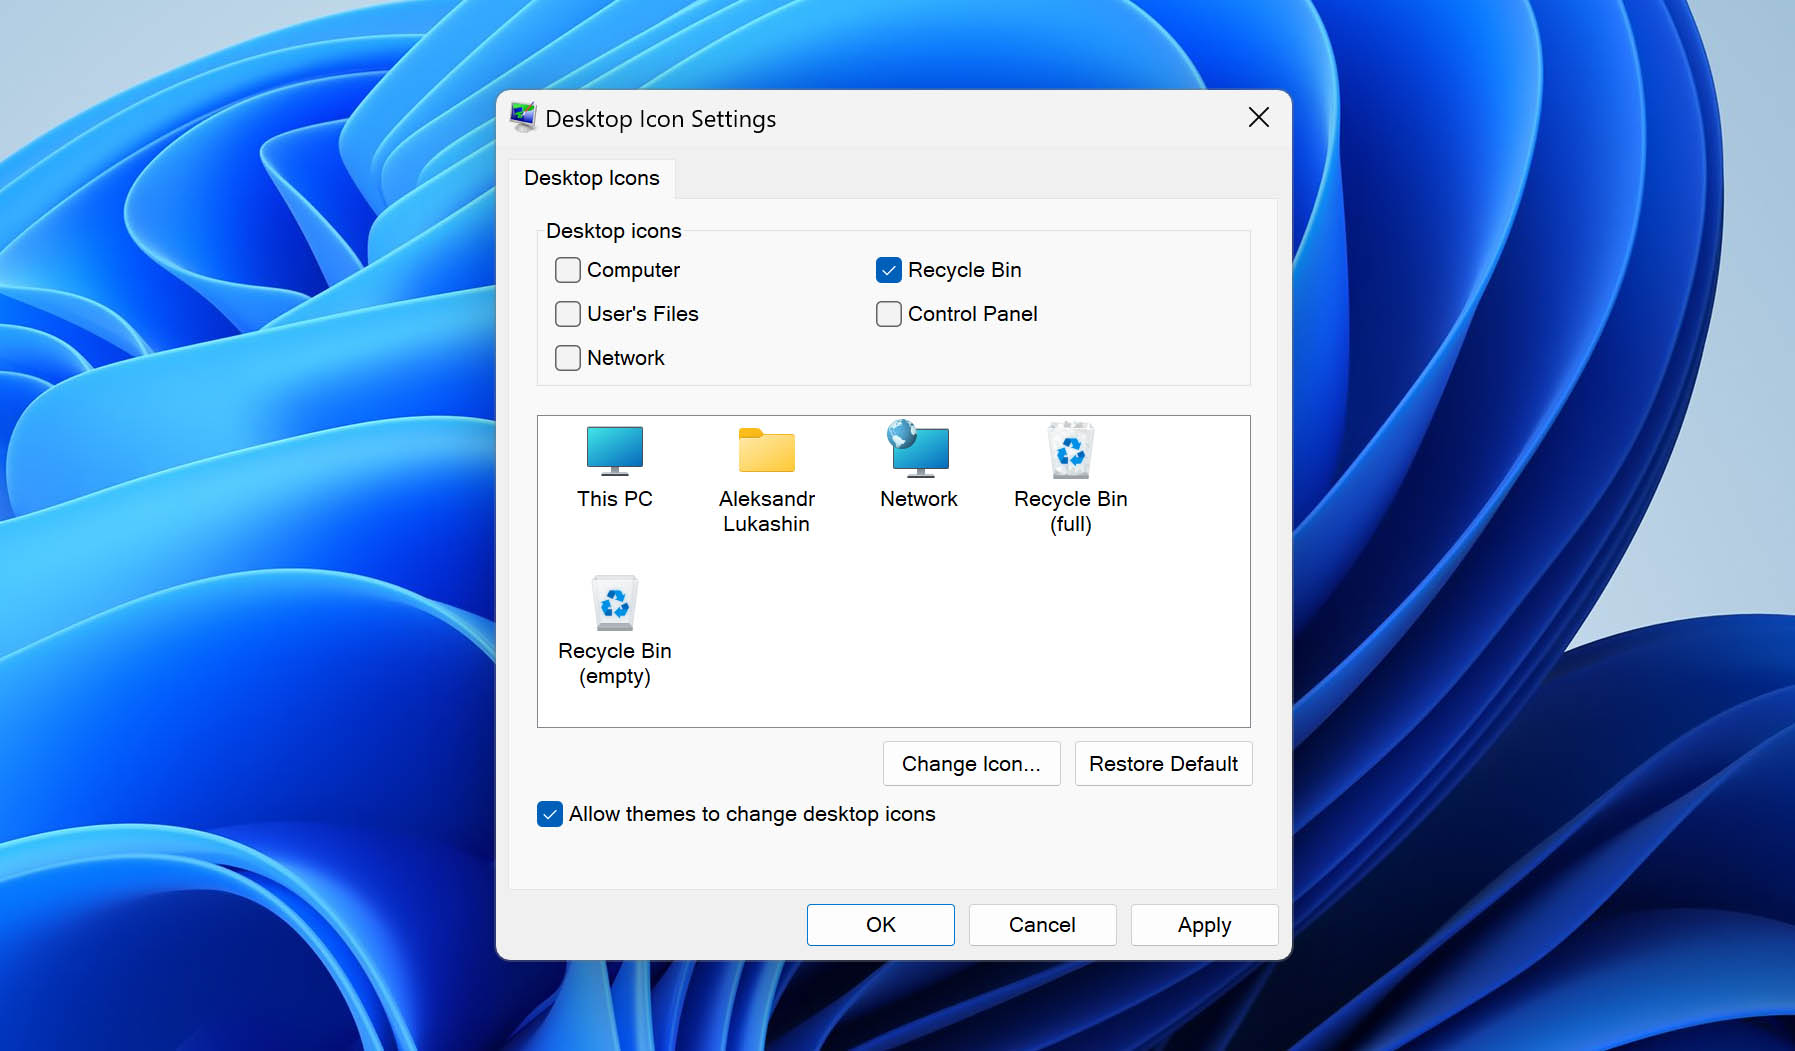
The Recycle Bin stores deleted files, but what if its icon is also missing? By default, the desktop should show you a shortcut for the Recycle Bin. However, if you are unable to see the Recycle Bin, follow these steps:
On Windows 10:
To make the Recycle Bin visible on Windows 10, do the following:
- Click on the Start button, or press the Windows key.
- Select Settings.
- Click on Personalisation > Themes > Desktop settings.
- Make sure that the Recycle Bin checkbox is toggled on and click on Apply.
On Windows 11:
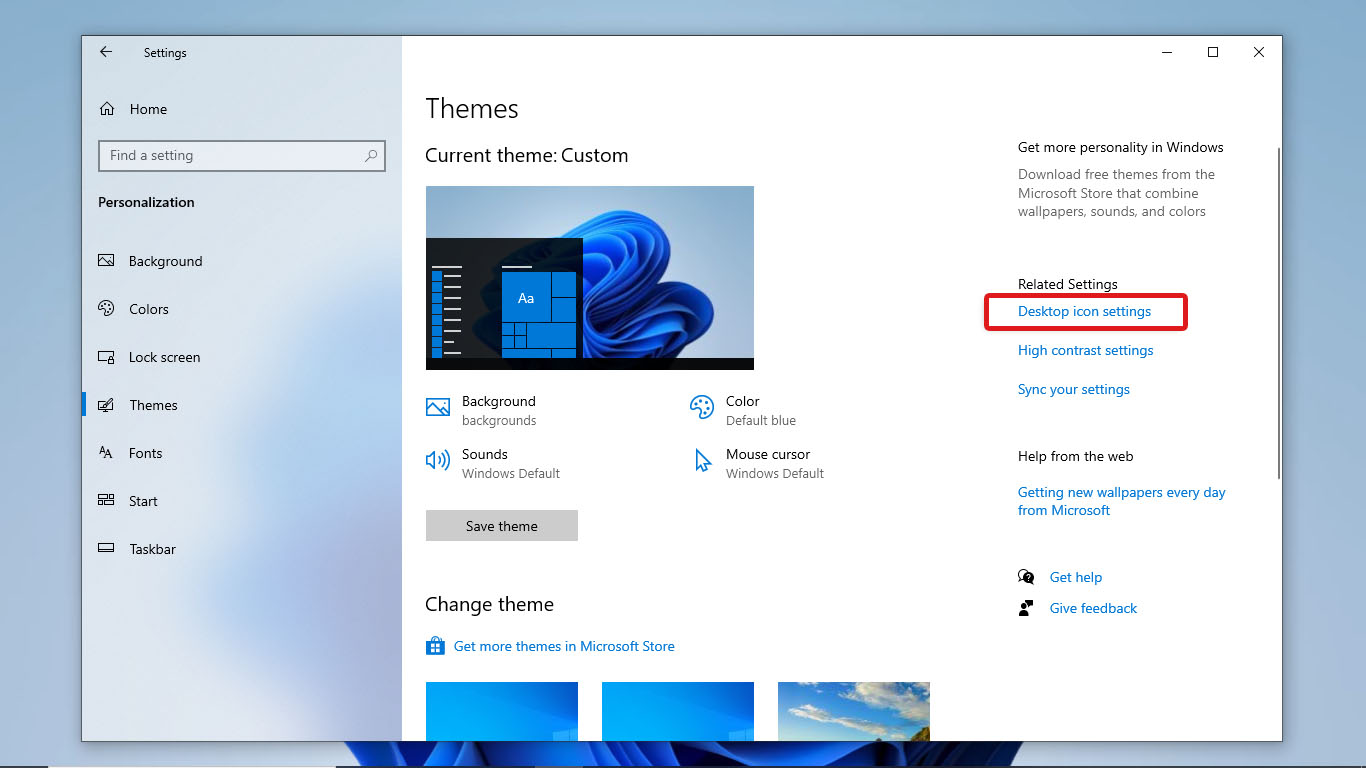
For Windows 11, follow these steps:
- Press Win + X and select Settings.
- Go to Personalization in the left sidebar and select Themes.
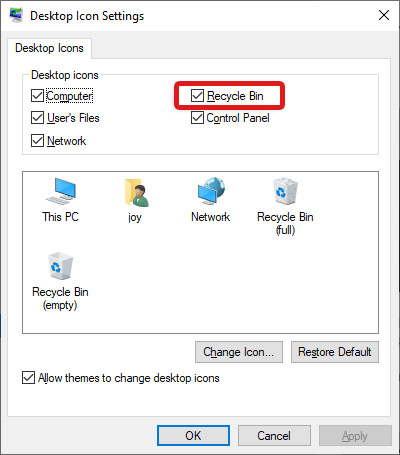
- In the Related settings section, select Desktop icon settings.
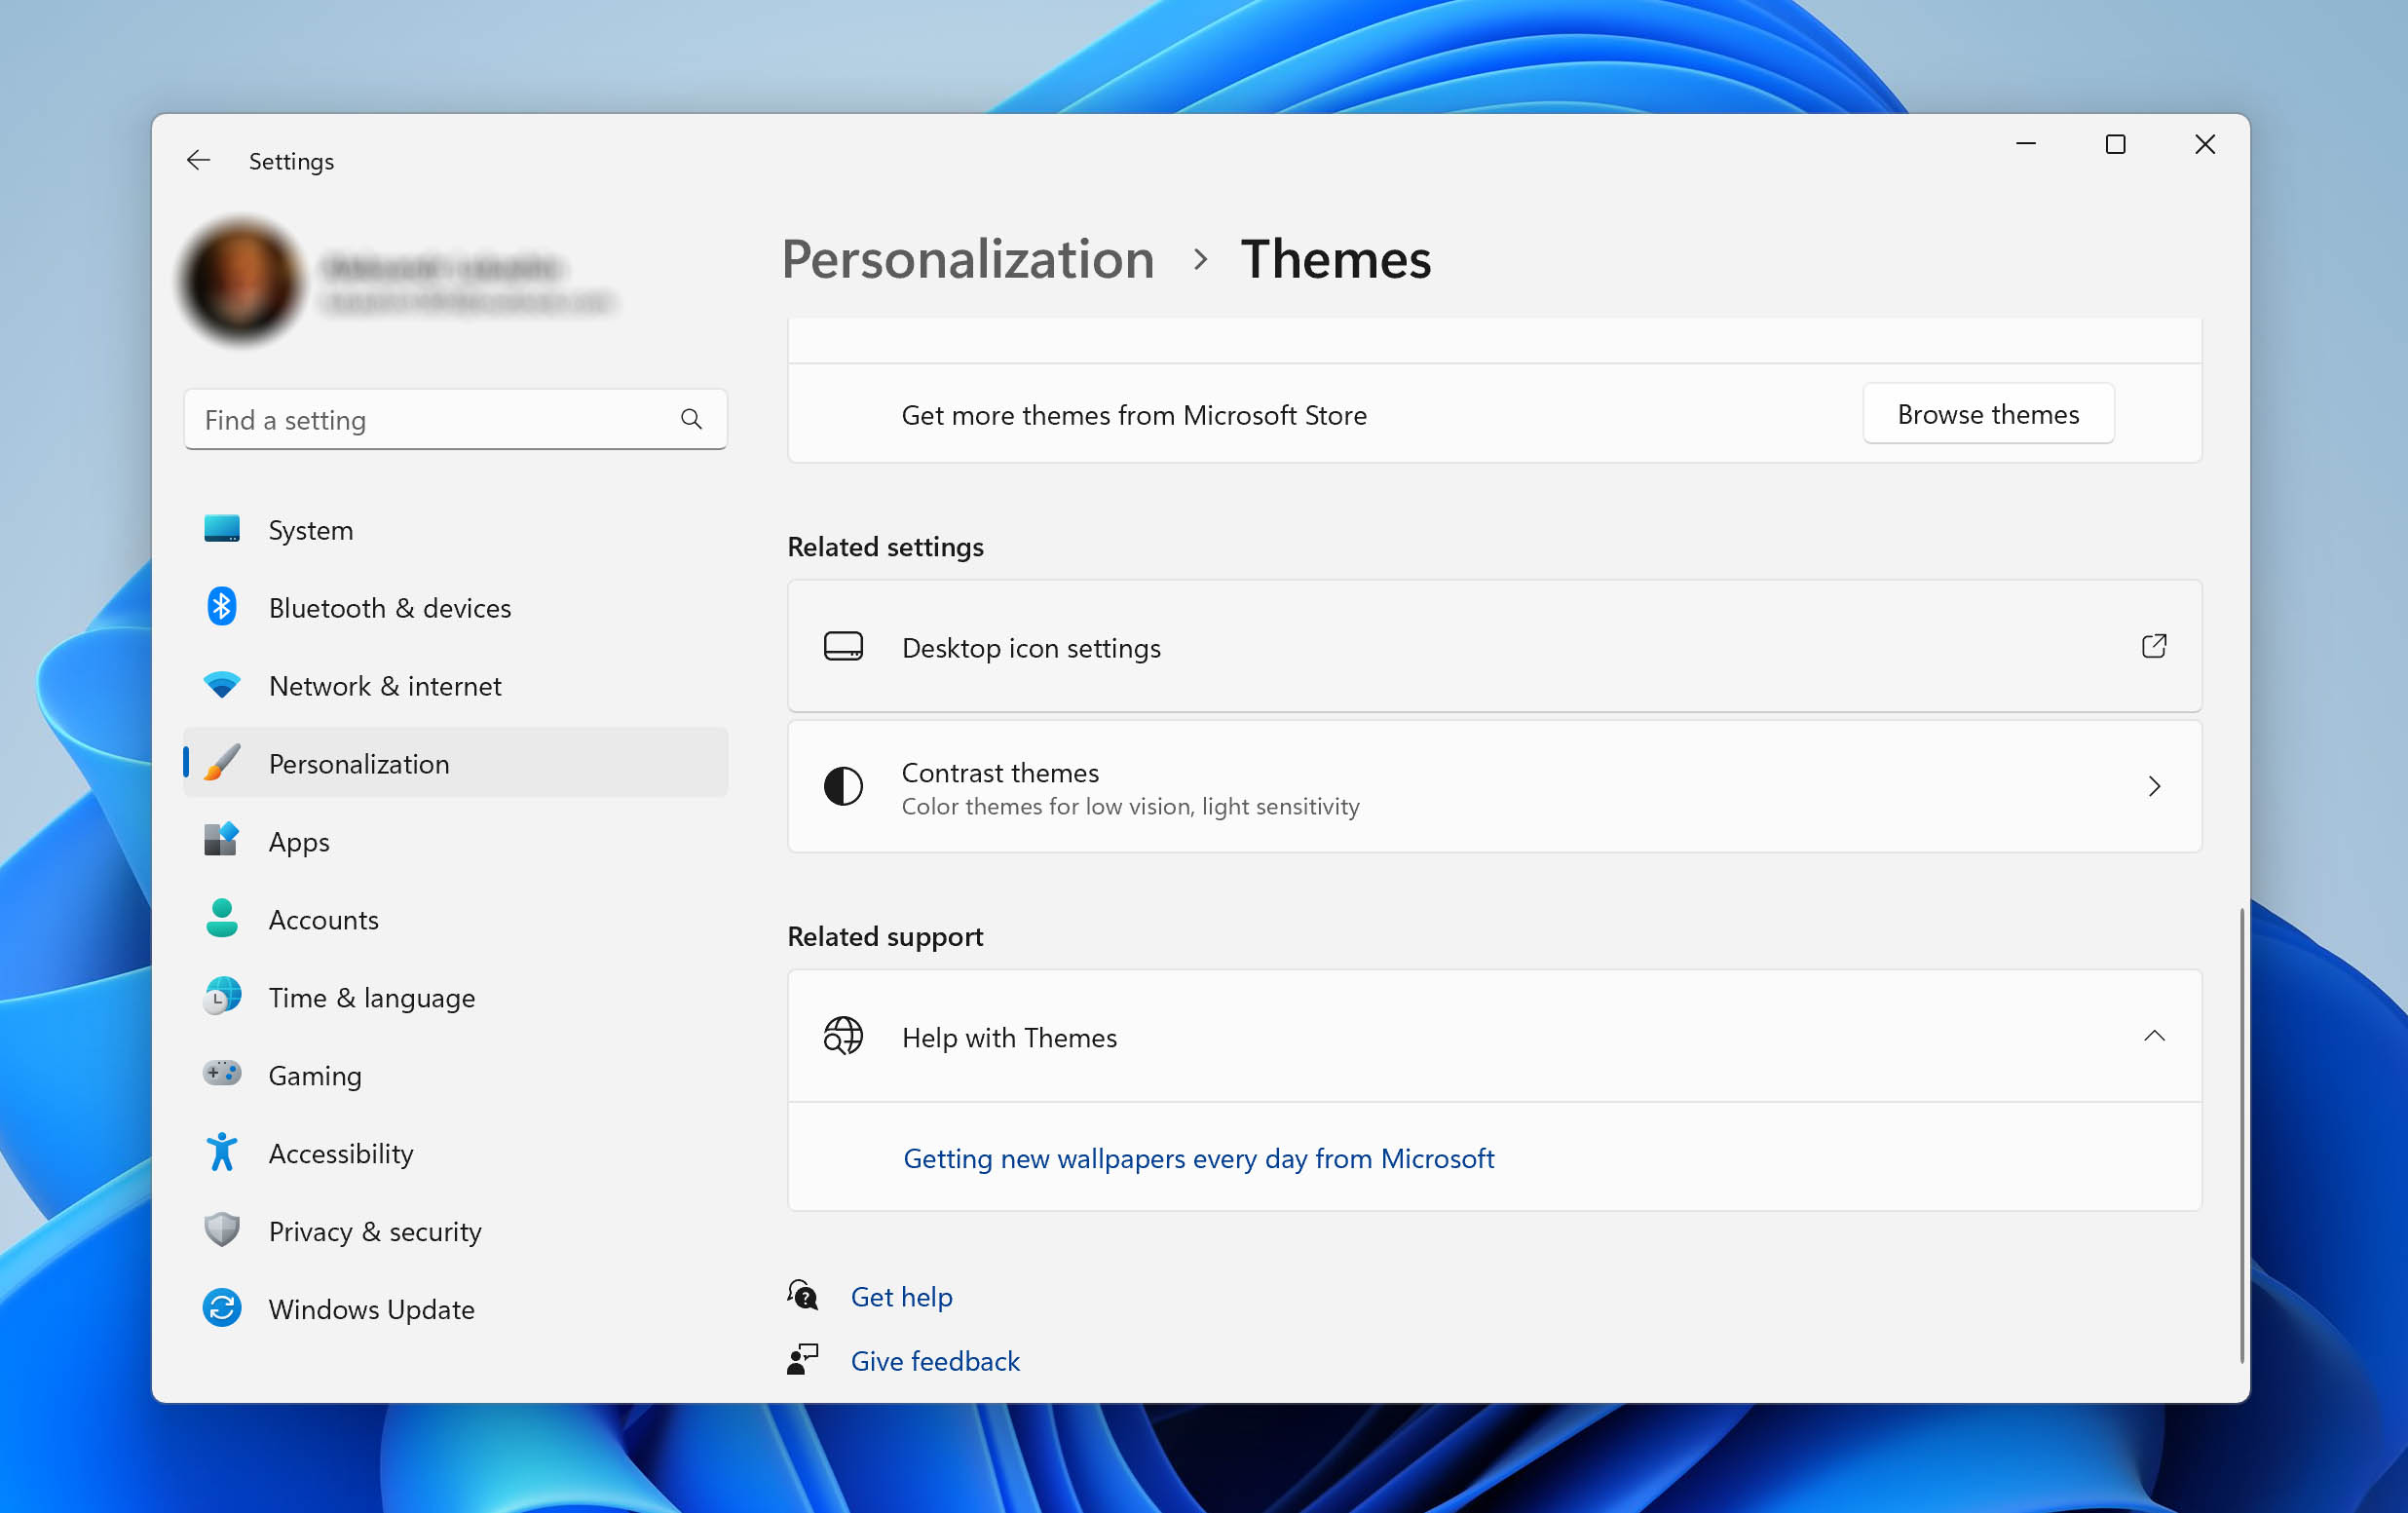
- In the window that opens, select the Recycle Bin checkbox
Change How Long a File Remains in the Recycle Bin Before Being Erased
Windows keeps files in the Recycle Bin for 30 days by default or until its space is exceeded. This might not be suitable for you if you are deleting many files or large files.
Here’s how you can modify this setting:
On Windows 10:
- Right-click on the Start Menu and select System and then Storage
- Click on the Change how we free up space automatically button.
- Select the length of time that you prefer the most.
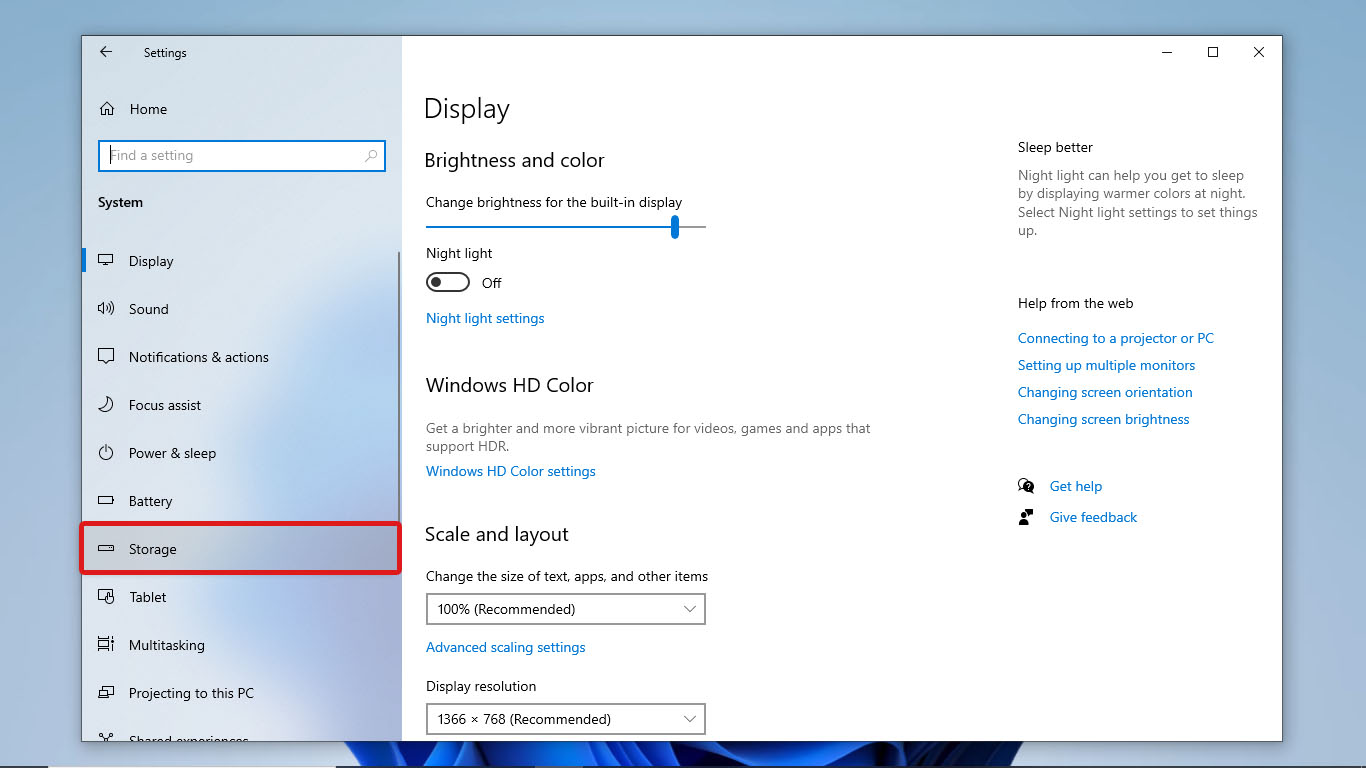
On Windows 11:
- Press Win + X and select Settings.
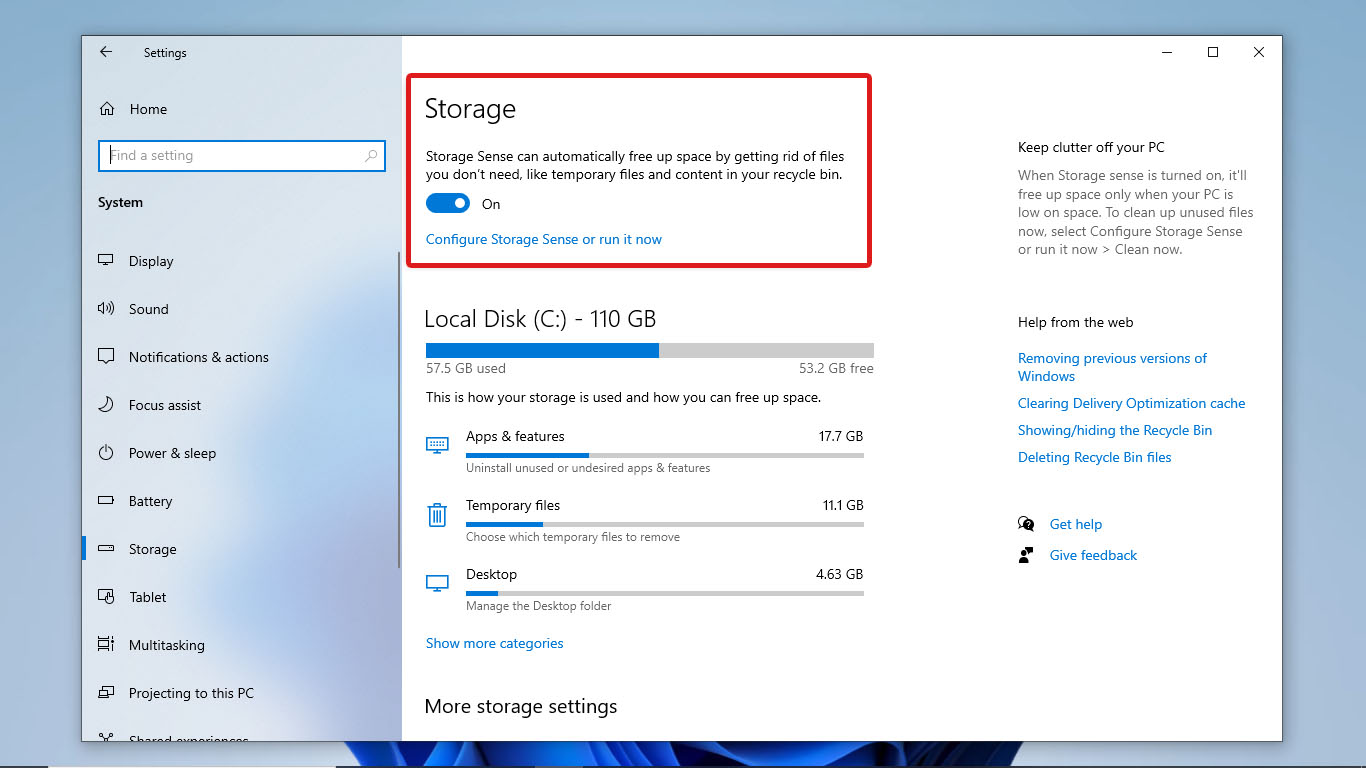
- Go to System on the left sidebar. Then, select Storage.
- In the Storage management section, click Storage Sense.
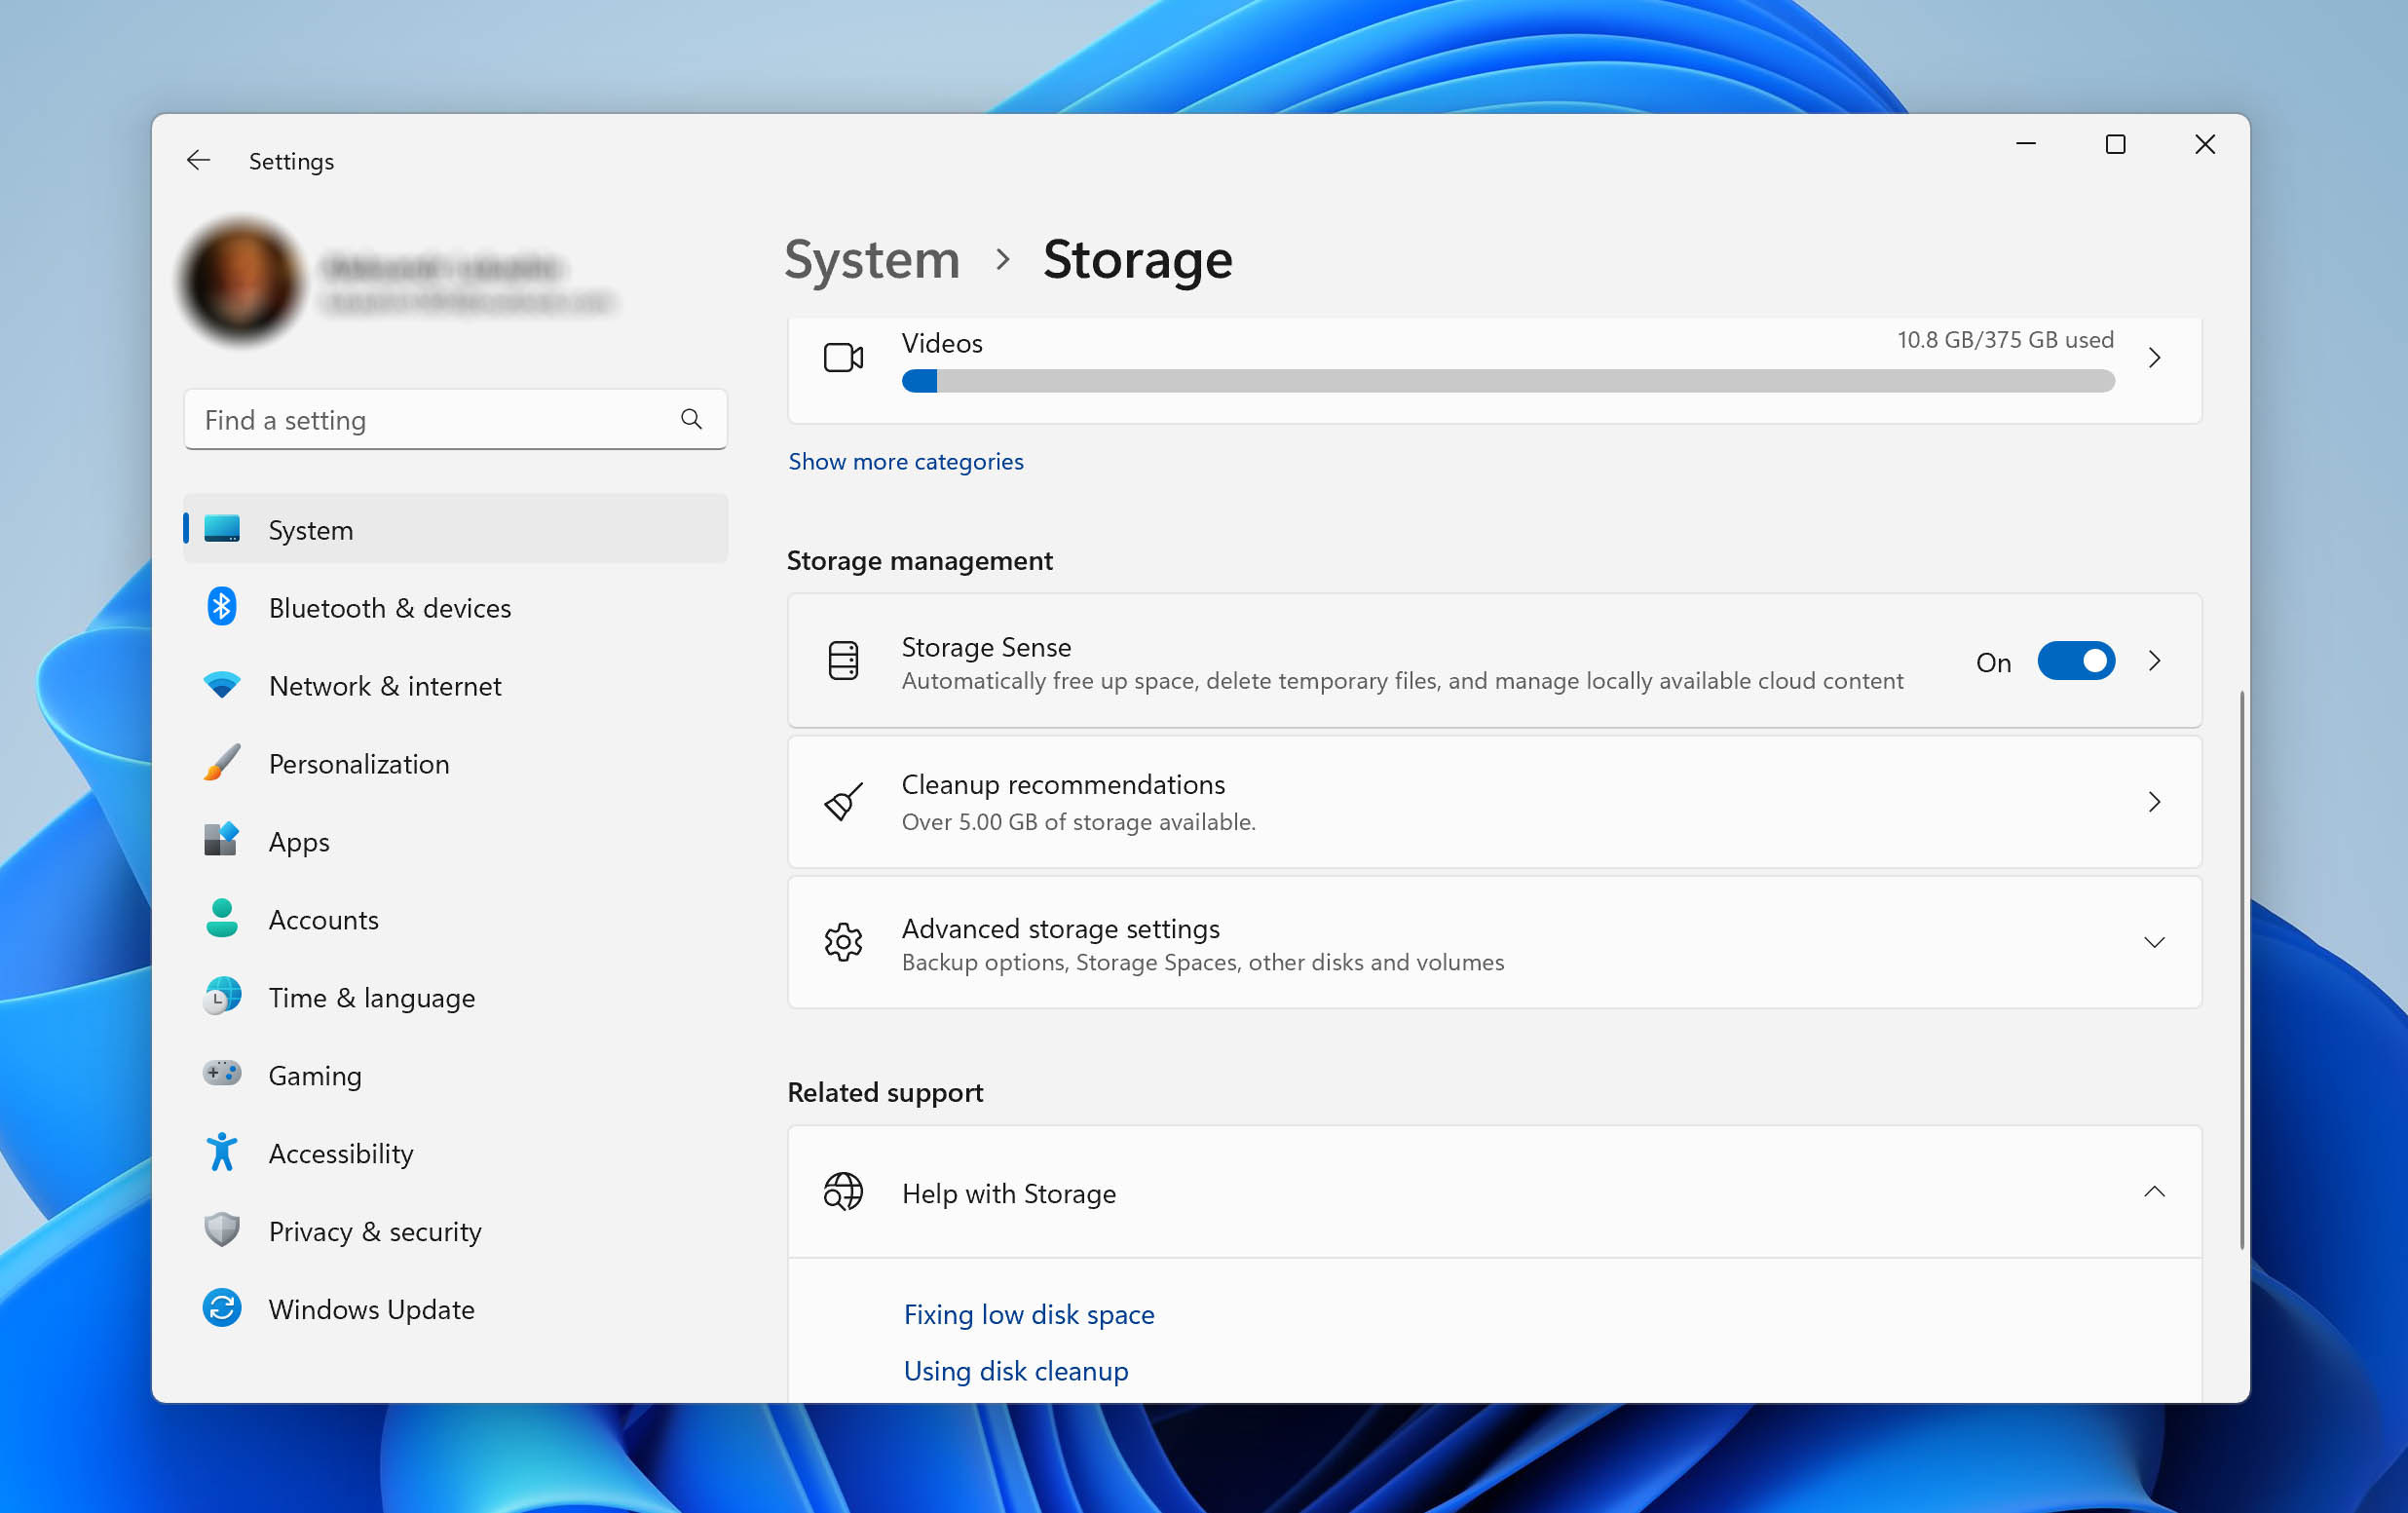
- Select the length of time after which previously deleted files will be removed from the Recycle Bin.
FAQ
Where do deleted files go if they are not there in the Recycle bin?
Although files are deleted from the Recycle Bin, they still physically exist on the hard drive. They remain there until overwritten by new data. Once overwritten, the only recovery method is by using backup storage media.
How many days does a deleted file stay in the Recycle Bin?
A deleted file stays in the Recycle Bin indefinitely. However, if Storage Sense is turned on, your files will automatically be deleted after 30 days by default. You can change this number by configuring the Storage Sense settings.
Does Windows 10 automatically empty Recycle Bin?
Windows 10 comes with Storage Sense, a feature designed to automate drive maintenance. It includes an option to empty the Recycle Bin automatically while keeping the most recent files if you need them back.
What to do if Deleted One Drive files are not in Recycle bin?
When Storage Sense is turned on, it clears One Drive locally & makes them online-only. Do check OneDrive & its own recycle bin for such deleted files.
How do I stop my Recycle Bin from auto-deleting?
There are two ways you can stop recycle bin from automatically deleting files.
Method 1 – Get Rid of the Task Scheduler
Assuming you already have a task for the Recycle Bin to auto empty, simply delete this task and the auto-deletion will halt.
Method 2 – Alter Your Recycle Bin Settings
On Windows 10:
- Open the Settings app. Navigate to System > Storage.
- Click on Change how we free up space. Now, uncheck the second option: delete files that have been in the recycle bin for over 30 days.
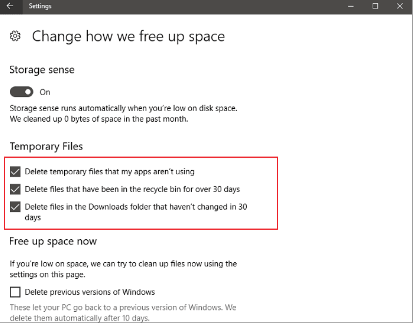
Now your Recycle Bin will stop deleting files automatically.
On Windows 11:
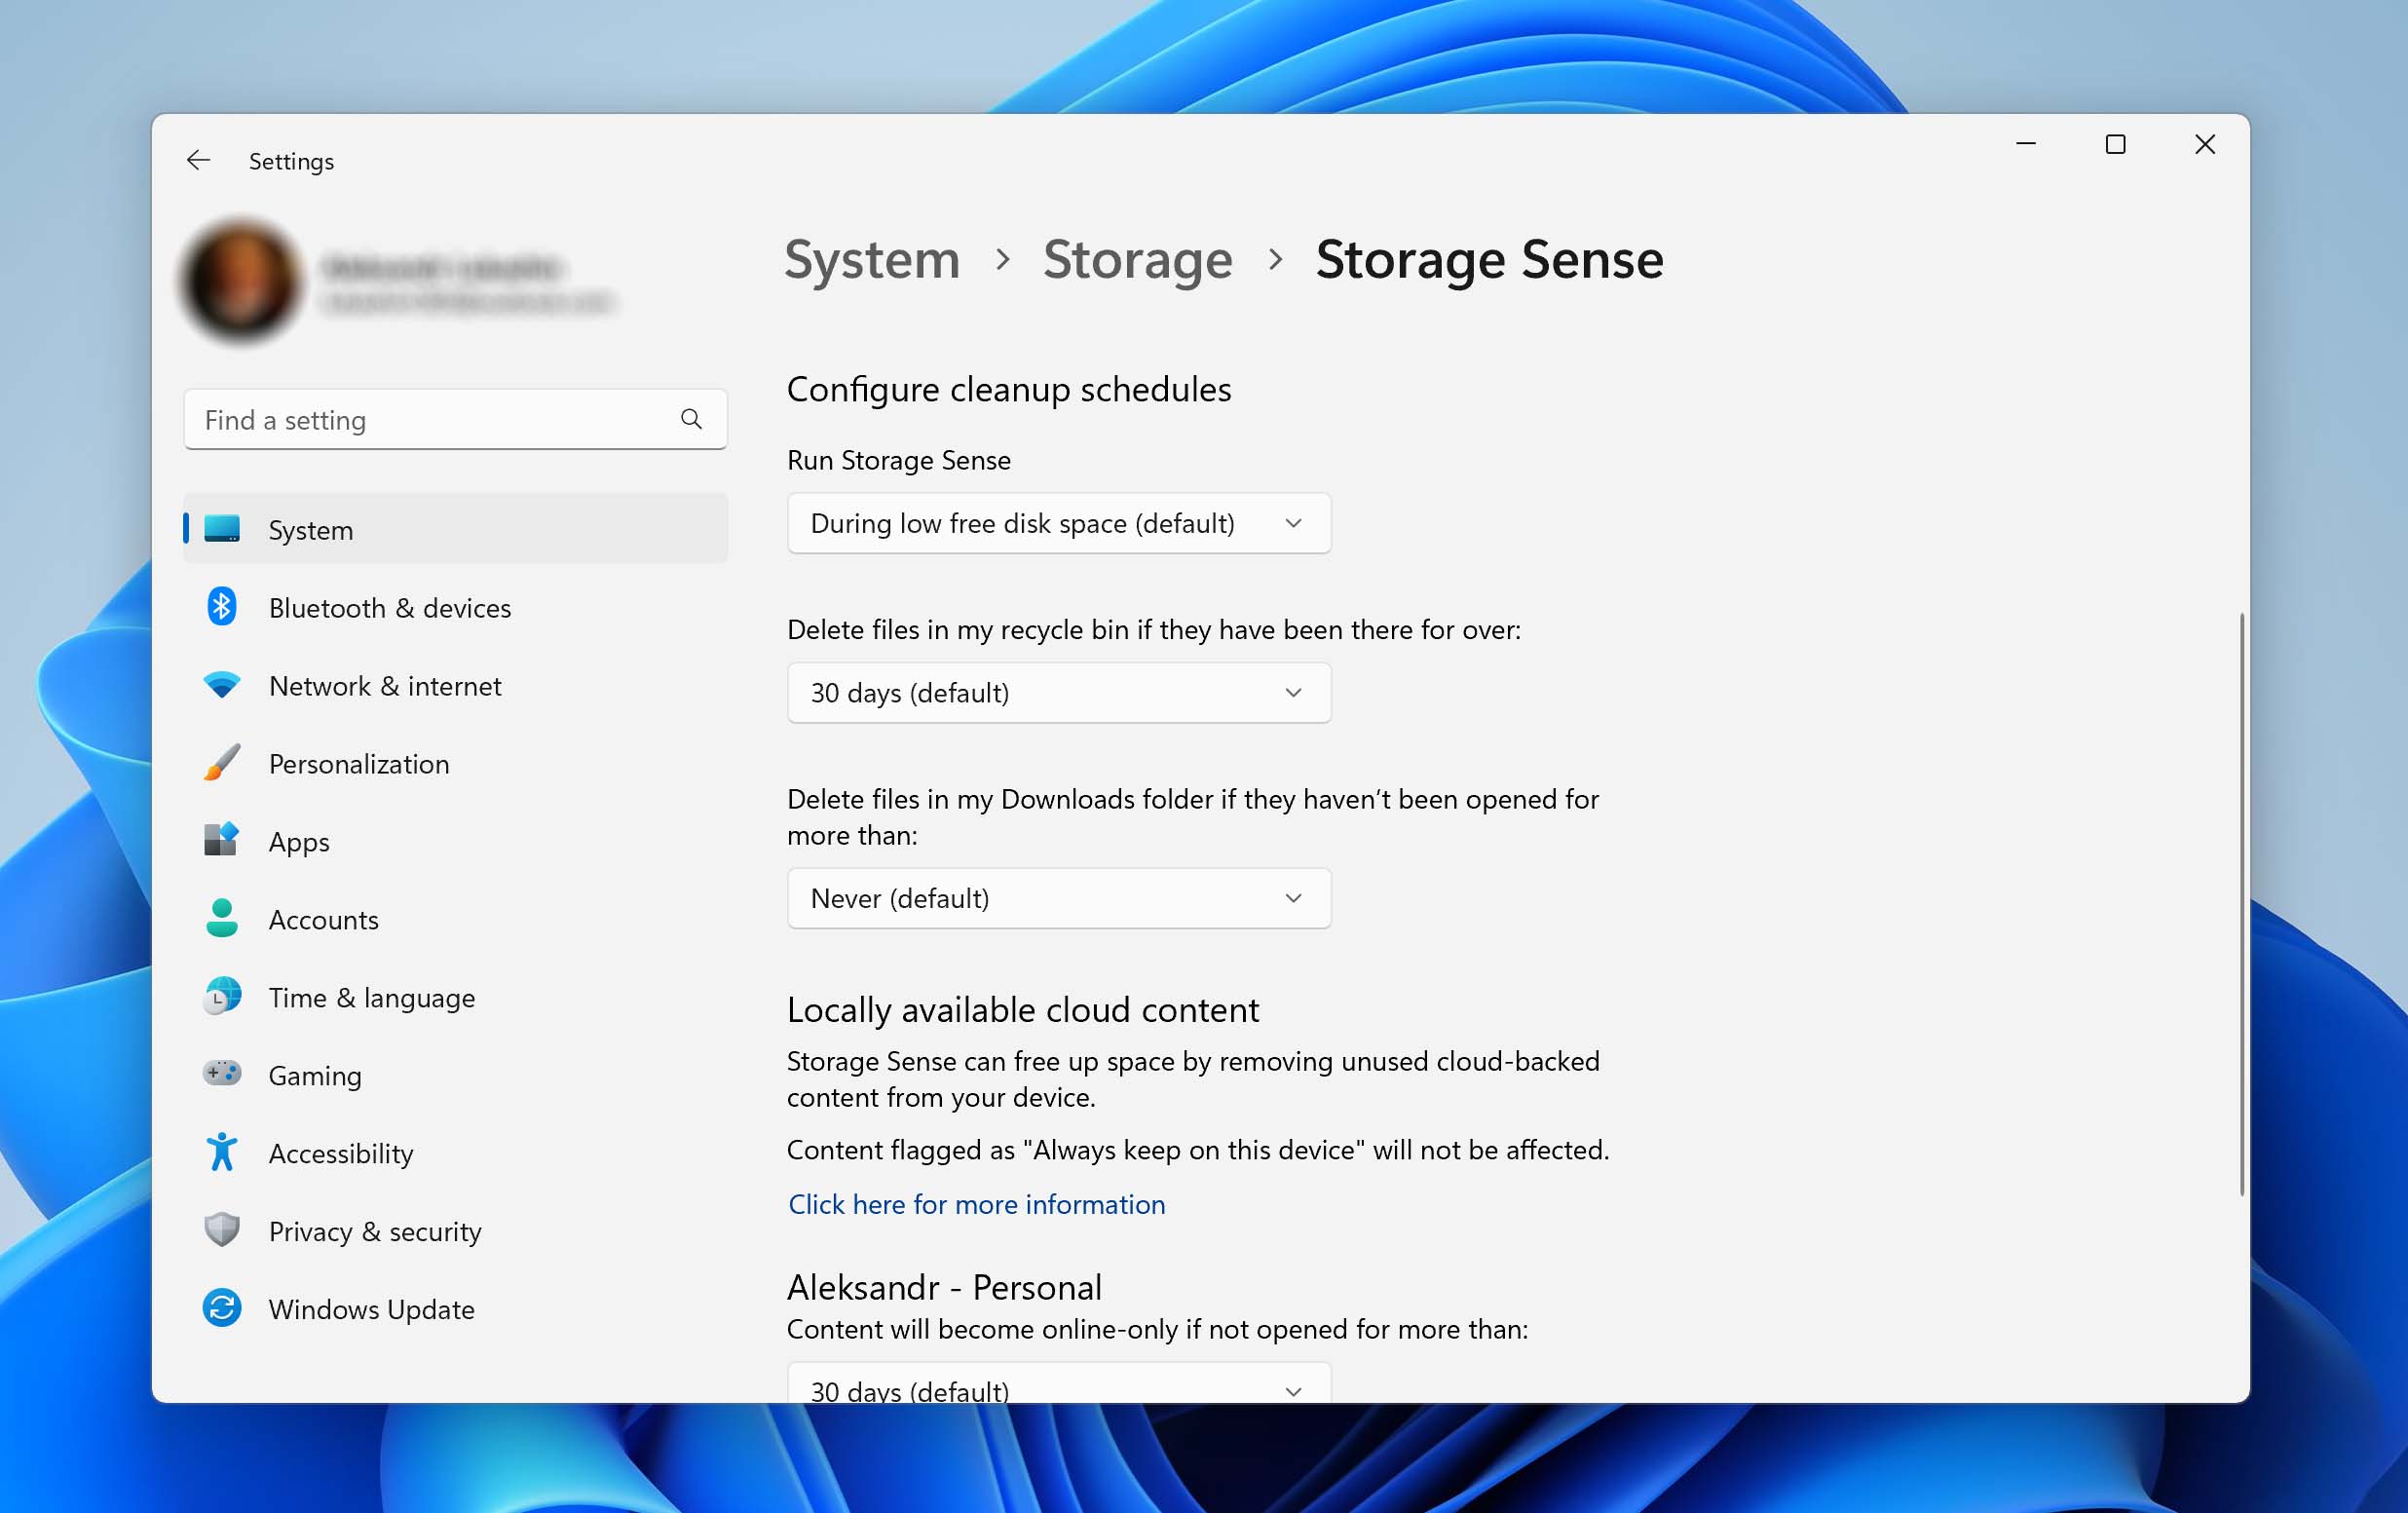
- Open the Settings app. Then, head to System > Storage > Storage Sense.
- Under Configure cleanup schedules, set the Delete files in my recycle bin if they have been there for over: option to Never.
Is recovering deleted files from Windows 7 different from that of Windows 10?
The recovery process is broadly similar except for one difference – the presence of ‘Storage Sense’ on Windows 10. When turned on, the Storage sense automatically removes temporary files and files in the recycle bin that are older than 30 days. It clears the files locally, but the recovery process is similar to files deleted by the user & not Storage Sense.
Conclusion
The bottom line is that there are quite a few ways to deal with a deleted file not in the Recycle Bin. Usually, the files are either hidden or not accessible but can be recovered through several methods. Speedy responses and data recovery software can help you recover files before new data overwrite them.
This article was written by Joshua Solomon, a Contributing Writer at Handy Recovery Advisor. It was recently updated by Princess Lescan. It was also verified for technical accuracy by Andrey Vasilyev, our editorial advisor.
Curious about our content creation process? Take a look at our Editor Guidelines.