CHKDSK is a utility commonly used by Windows users to repair errors on their storage devices. However, in some instances, running this utility can lead to data loss. In this guide, we’ll provide an overview of CHKDSK and demonstrate how to recover files lost after using the CHKDSK Windows utility.
What is CHKDSK?
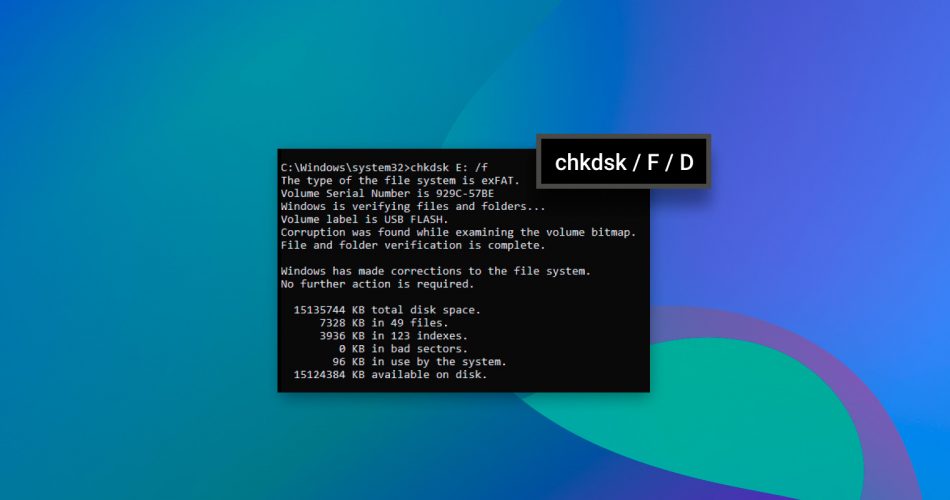
CHKDSK is a tool included in Windows that ensures that the file system isn’t corrupt and it can also fix logical file errors. Actions such as improperly shutting down a computer, removing USB drives without safely ejecting them, and other things like viruses and malware can possibly corrupt the file system or cause logical file errors. If CHKDSK happens to cause files on your computer to be deleted, you have some options for recovering them which we will examine below.
Pro Tip: The sooner you attempt to recover your files the better. When a file is deleted, it isn’t immediately removed from your computer’s storage device. The area on the storage device where the file is stored is simply marked as being available for overwriting. The longer you wait to recover files, the more likely it is for them to be overwritten.
What Can Cause CHKDSK to Delete Data
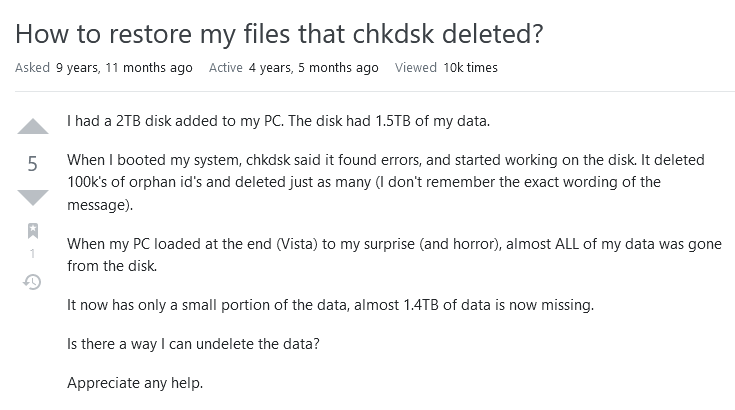
While CHKDSK is useful, there are a few scenarios that might cause it to delete files. Unfortunately, Superuser user Chindraba experienced this, as did this Reddit user and this Spiceworks user.
We will cover some of the scenarios that might cause something like this to happen, below:
- 🚫 CHKDSK is interrupted: An event such as a shutdown or a restart while running CHKDSK can result in your files being deleted. Avoid shutting down or restarting your computer while running CHKDSK to avoid running into any issues.
- 💾 Running CHKDSK on a corrupt or damaged hard disk: If a hard drive is damaged or corrupted, there are sectors that may become inaccessible eventually. The more you use the drive, the faster these sectors will become inaccessible. If your hard disk is corrupt or damaged, you should back up your data immediately or seek out the services of a professional data recovery service if the damage is severe.
- ⛔ CHKDSK finds bad sectors: If CHKDSK finds bad sectors on your hard drive, it will mark them as bad. Windows will see this and won’t store or read data from these bad sectors. If data is stored on these bad sectors, it could be lost permanently.
Is It Possible to Recover Files Deleted by CHKDSK?
It is possible to recover data from a storage device that has had files deleted by CHKDSK even if the issue is related to the drive having bad sectors. Advanced data recovery software such as Disk Drill Data Recovery has the scanning algorithms to handle tricky scenarios like this.
You should note, however, that if you are using an SSD, you have to be careful. SSDs use a technology called TRIM that allows your operating system to tell your SSD about which blocks of data are no longer in use.
After a while, the files in these blocks are permanently deleted. If this happens, you won’t be able to recover your files. You will need to do the following if you are trying to recover files deleted by CHKDSK on an SSD with TRIM enabled:
- Create an image of your SSD. If your drive is failing, this is crucial since your drive could stop working at any moment.
- Scan the backup image with data recovery software to attempt file recovery. We cover how to use data recovery software below.
How to Recover Files Deleted by CHKDSK
Since files aren’t immediately removed from your computer’s hard drive after the deletion, we can take advantage of this to actually recover data deleted by CHKDSK. A third-party tool such as Disk Drill can be used to recover these files or, if you keep regular backups, you may be able to restore a copy of the file that was deleted.
To recover the data, we’re going to use the data recovery tool Disk Drill which is available on Windows and macOS. We prefer Disk Drill because it excels in recovering data (both in terms of speed and performance) in many different data loss scenarios, including when some files have been deleted by CHKDSK. Better yet, it’s extremely easy to use, making it a great option for all types of users.
Here’s how you can use Disk Drill to recover files that were deleted by CHKDSK:
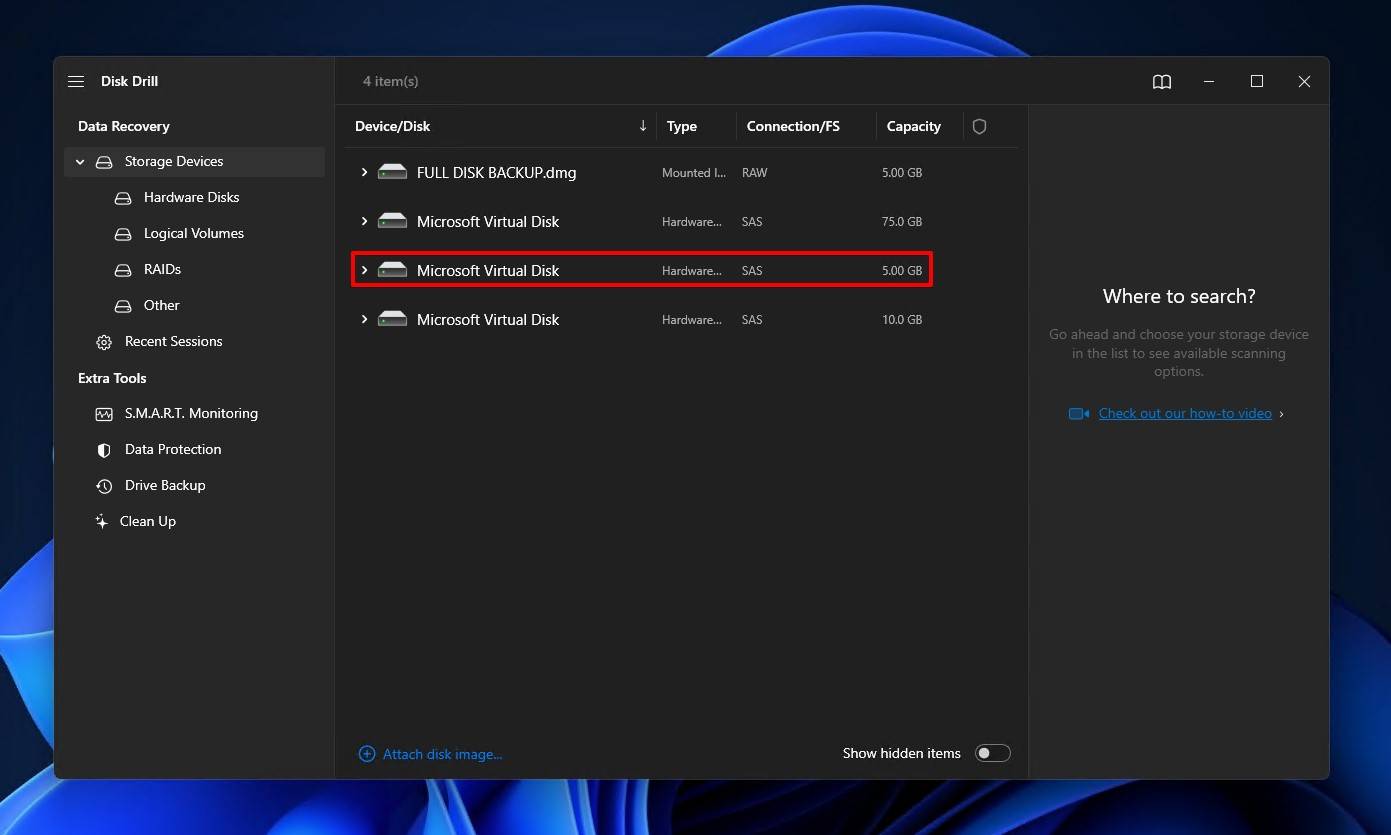
- Download and install Disk Drill to a separate partition or drive. After Disk Drill is installed, when you go to run it, you will be asked to grant the application admin permissions. This allows Disk Drill to run its advanced algorithms so that it can attempt to recover the maximum amount of files. When the Disk Drill window opens, select the drive that you want to recover files from to get the process started.
- Click “Search for lost data” to start the search. This initiates an in-depth scan of the selected drive, allowing Disk Drill to identify any recoverable data. Depending on the size of the drive and the type of connection you’re using, this process can take some time.

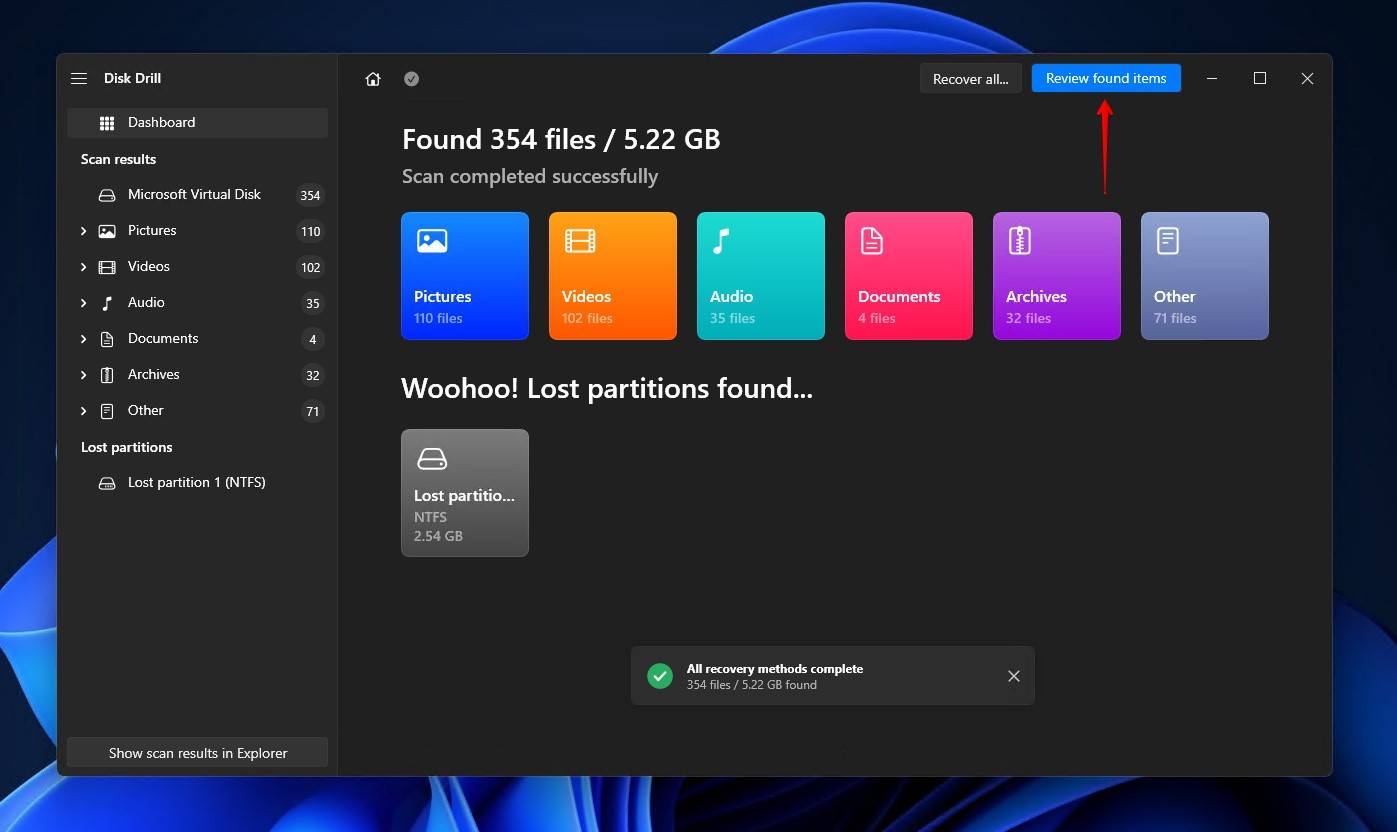
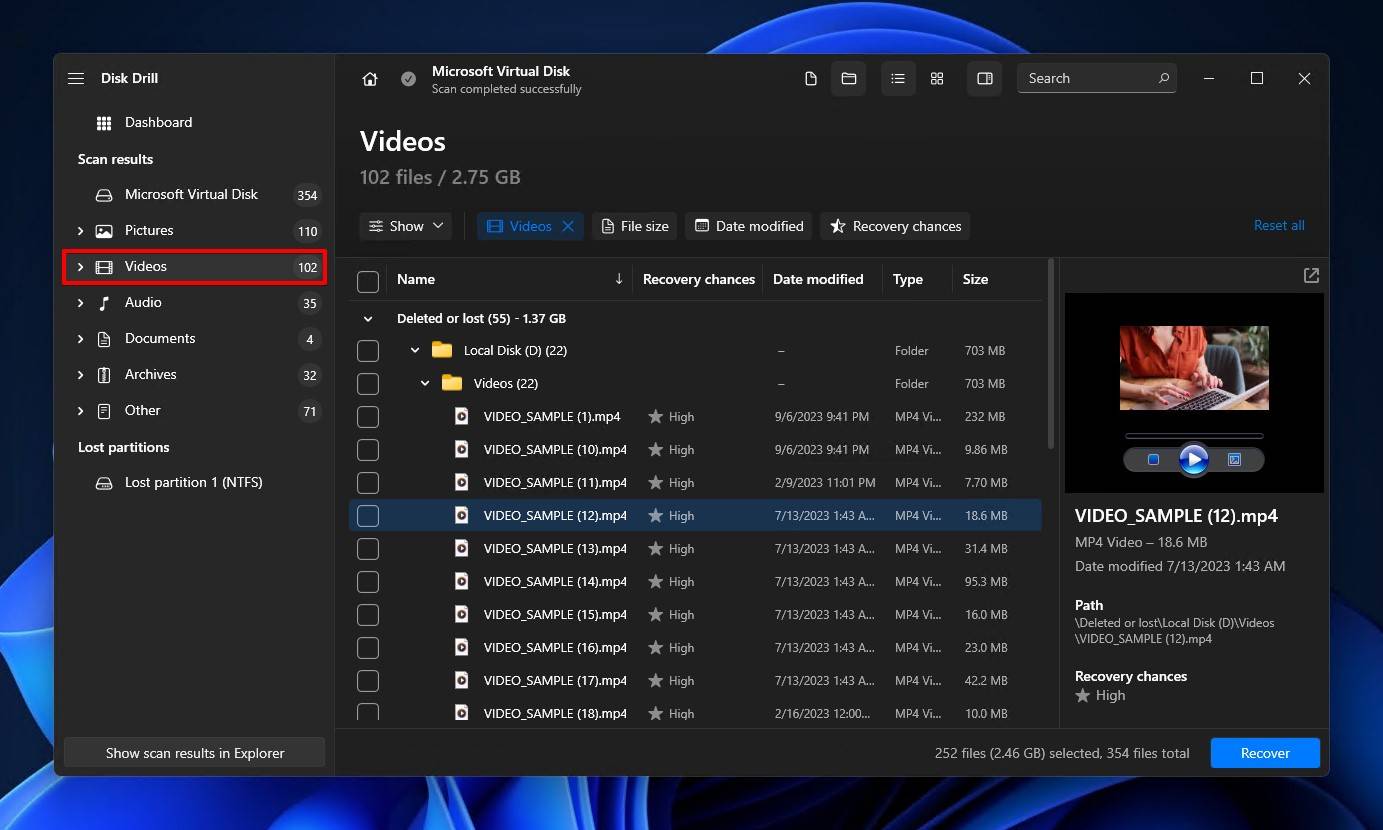
- Click “Review found items”. Alternatively, you can click one of the colored file type icons to filter the data, or “Recover all” to restore everything that was found straight away.
- Select the files that you wish to recover. After the search, Disk Drill displays a list of the files that it found. You can filter by category to help you quickly locate the type of file that you want to find. For example, searching under Video will show you all of the video files that were found in the search.
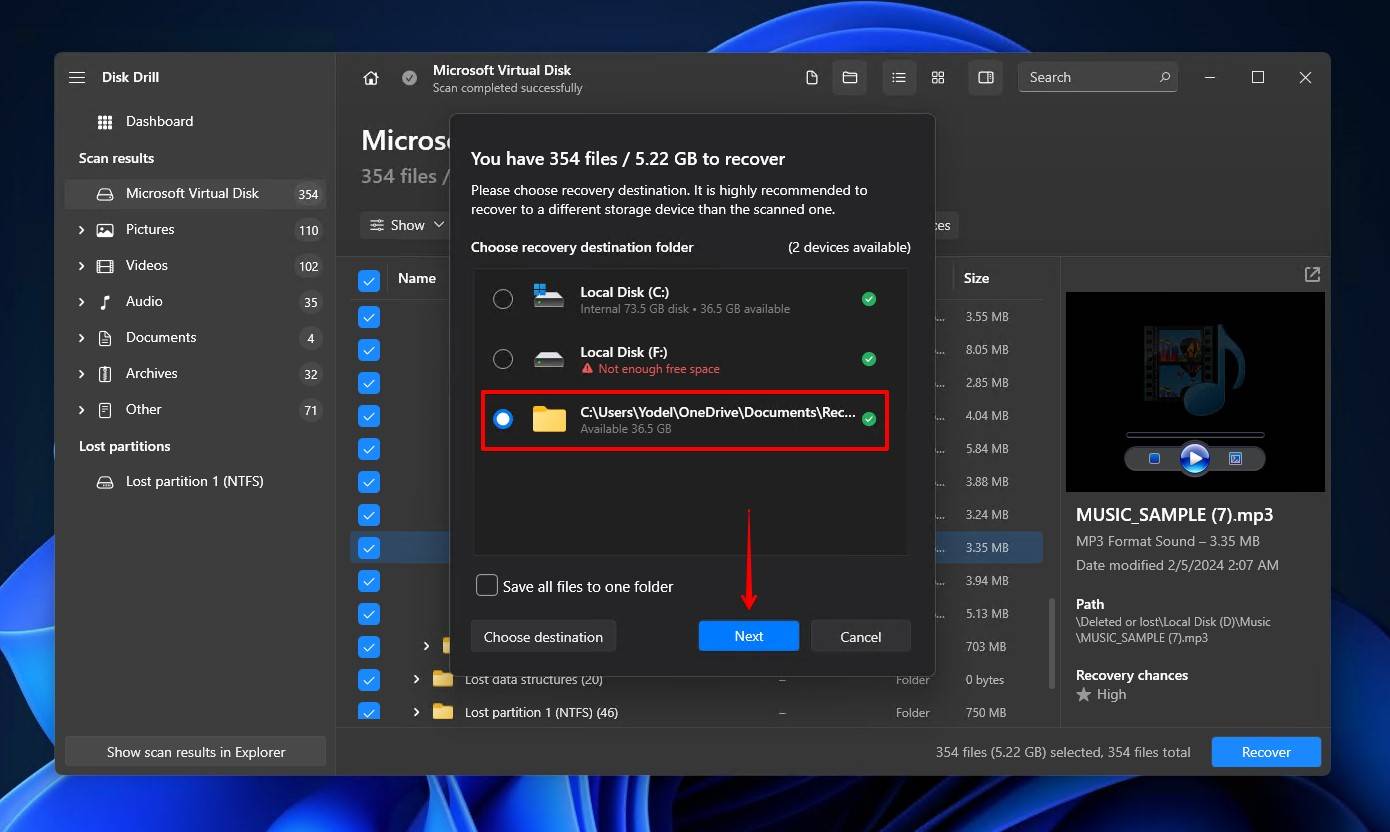
- Click “Recover” and choose a recovery location. Make sure that you save these files to a storage device that isn’t the one you’re recovering from, as saving the files to the same disk may cause them to become damaged and unrecoverable as a result. When the files have been saved, Disk Drill will display a confirmation message letting you know if the process worked or not.
Recovering Files Deleted By CHKDSK Using Windows’ File History Feature
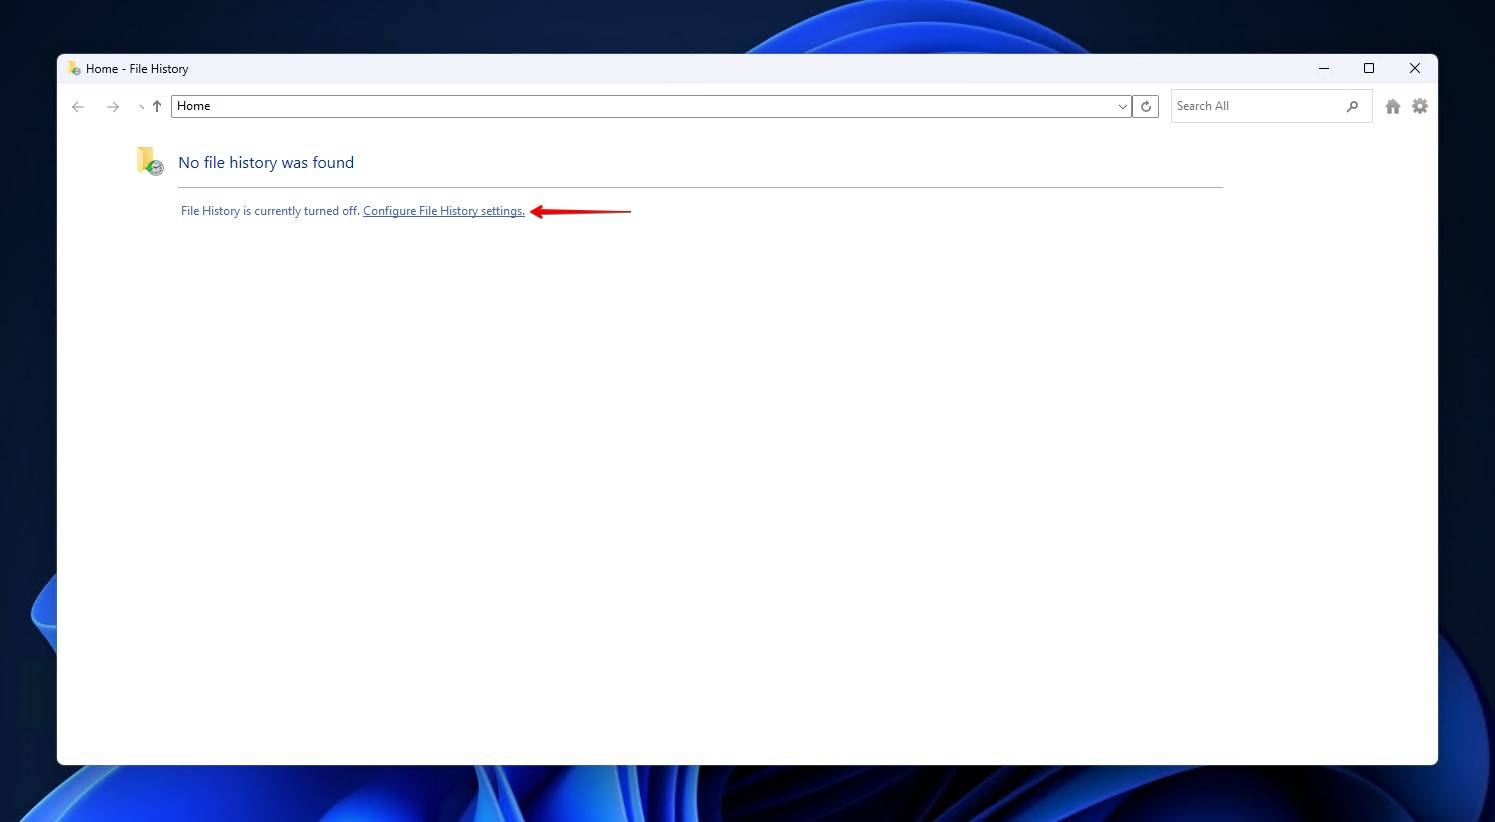
If you had previously set up Windows’ File History feature before the data loss occurred, you’re in luck. This feature can help you recover files that may have been deleted by CHKDSK. If you didn’t have this feature enabled before the loss, unfortunately, it won’t help in recovering the lost data.
How to Restore Deleted Files Using File History
For those who had it set up, here’s how you can use it to restore your files in Windows 10 and 11:
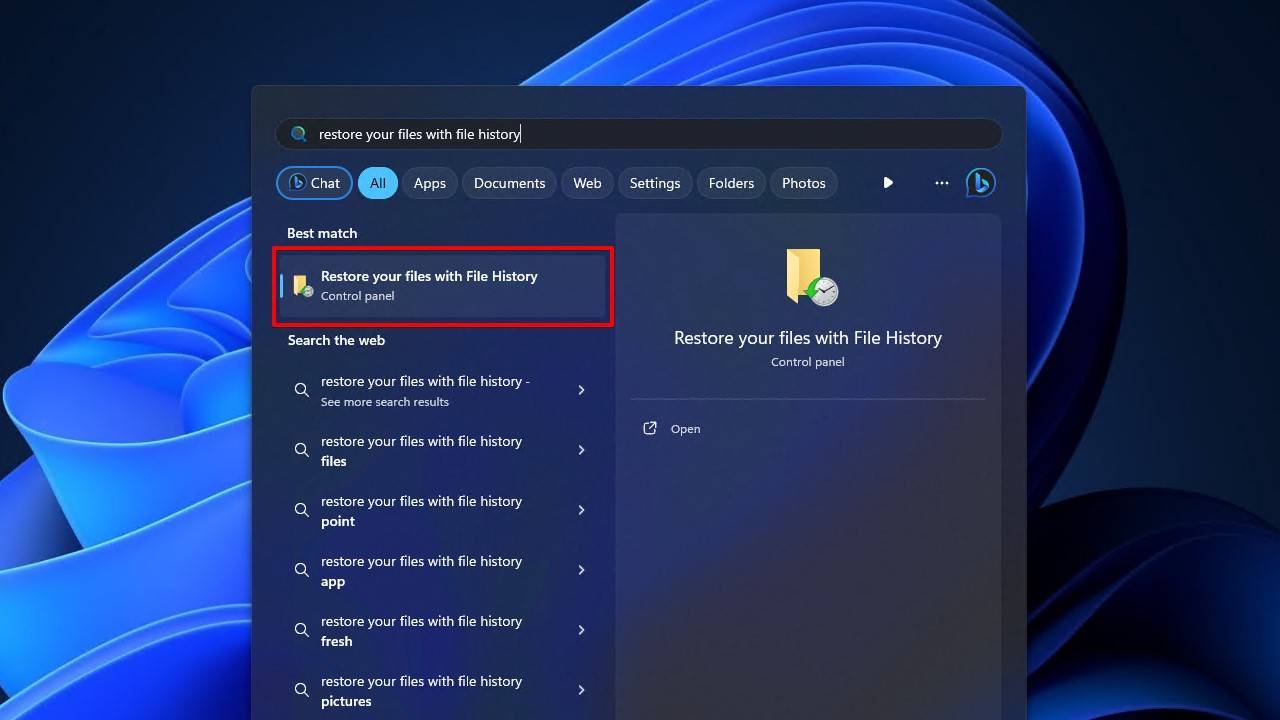
- First, you need to start the restore process. To do this, open the Start menu and search “Restore your files with File History”. Open the first result.
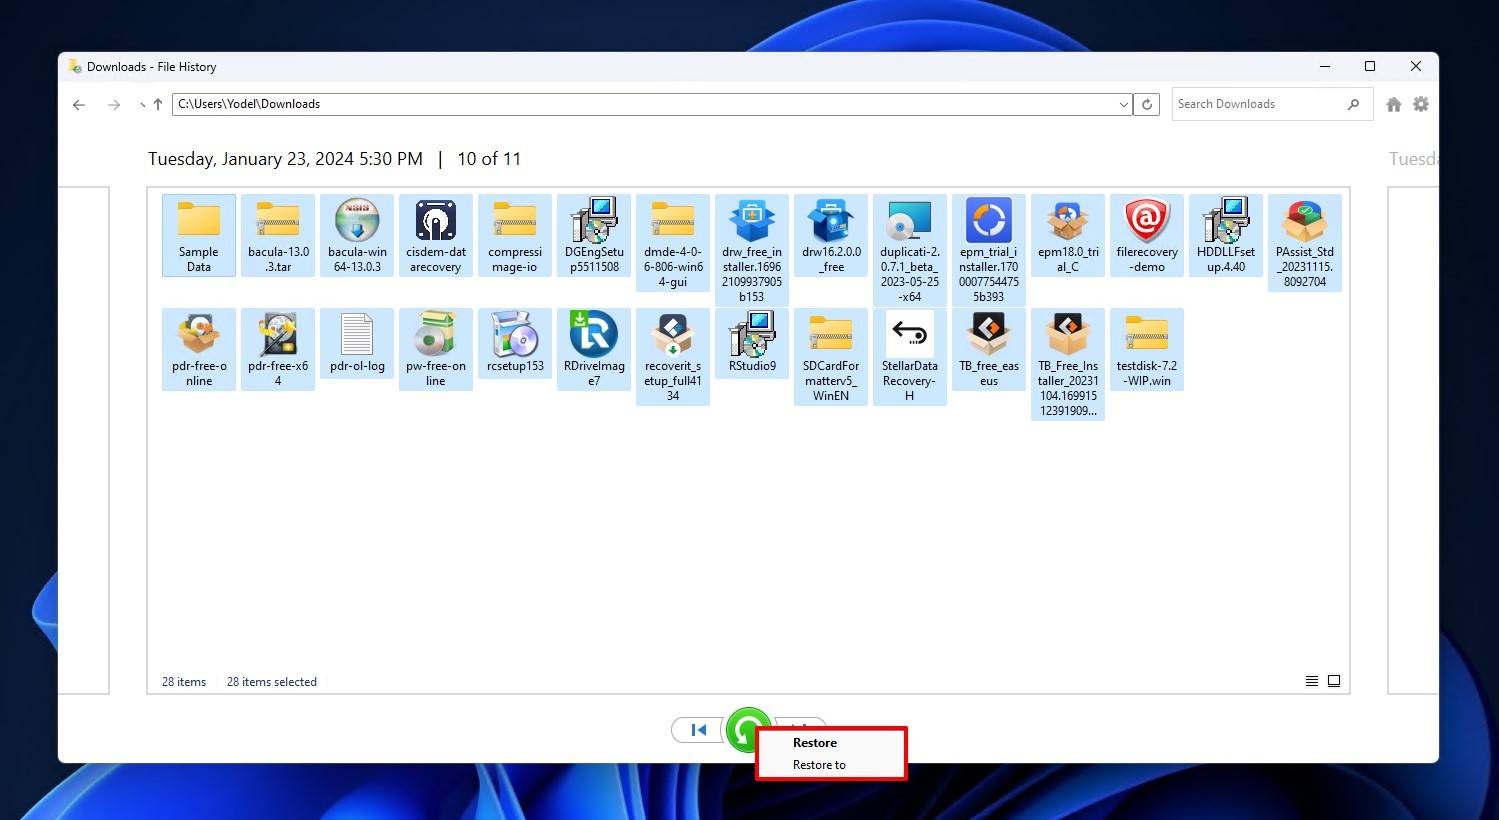
- Find the folder containing your lost files. In the new window that opened, navigate to the folder that contained your deleted files. You can use the left and right navigation buttons at the bottom to switch between backups.
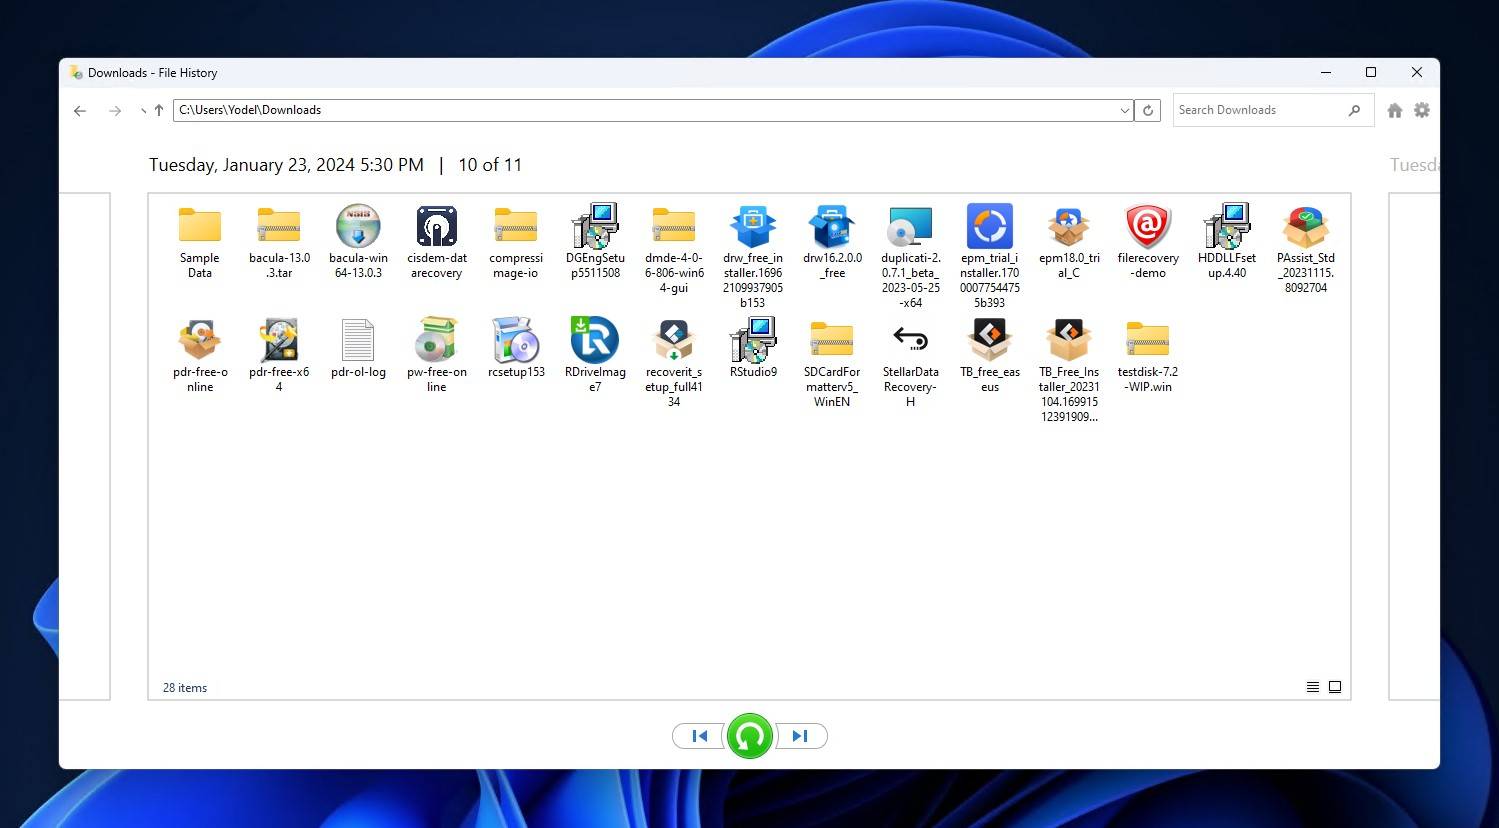
- Restore the files. Select the files you wish to restore. Then, right-click the green Restore button. To recover the files to their original location, click Restore. Alternatively, you can restore them elsewhere by clicking Restore to.
Setting Up File History for Future Protection
To prevent future data losses, it’s a good idea to set up File History now. Here’s how you can do it on Windows 10 and 11.:
You will need to do the following to get set up with File History:
- Open Start menu and search “Restore your files with File History”. Open the first result.
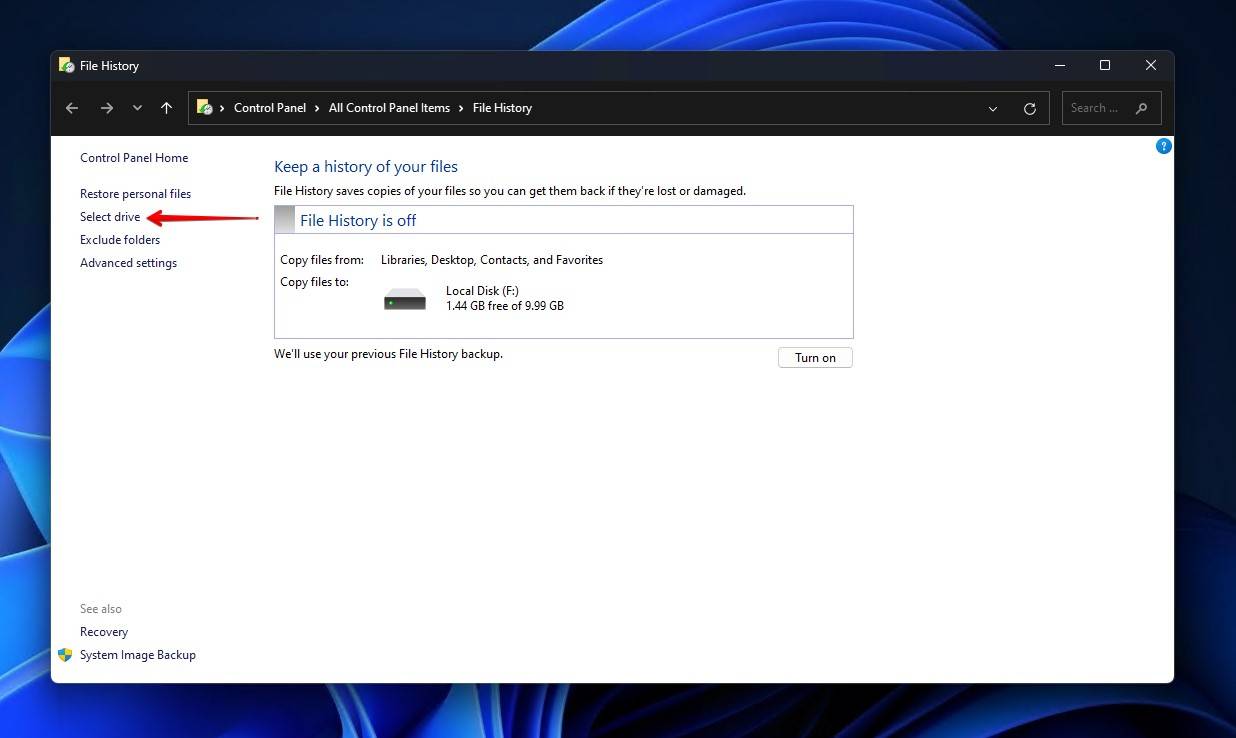
- Click Configure File History settings.
- Click Select drive.
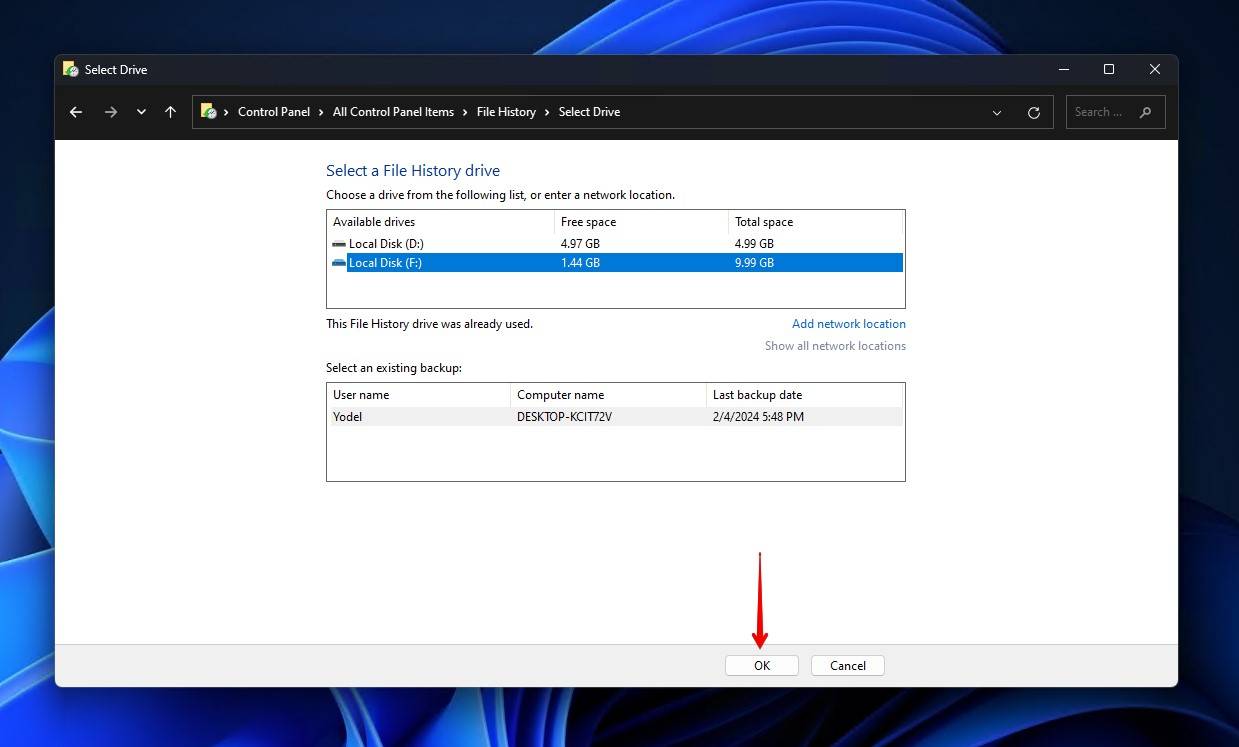
- Choose the drive that File History will use to back up your files, then click OK.
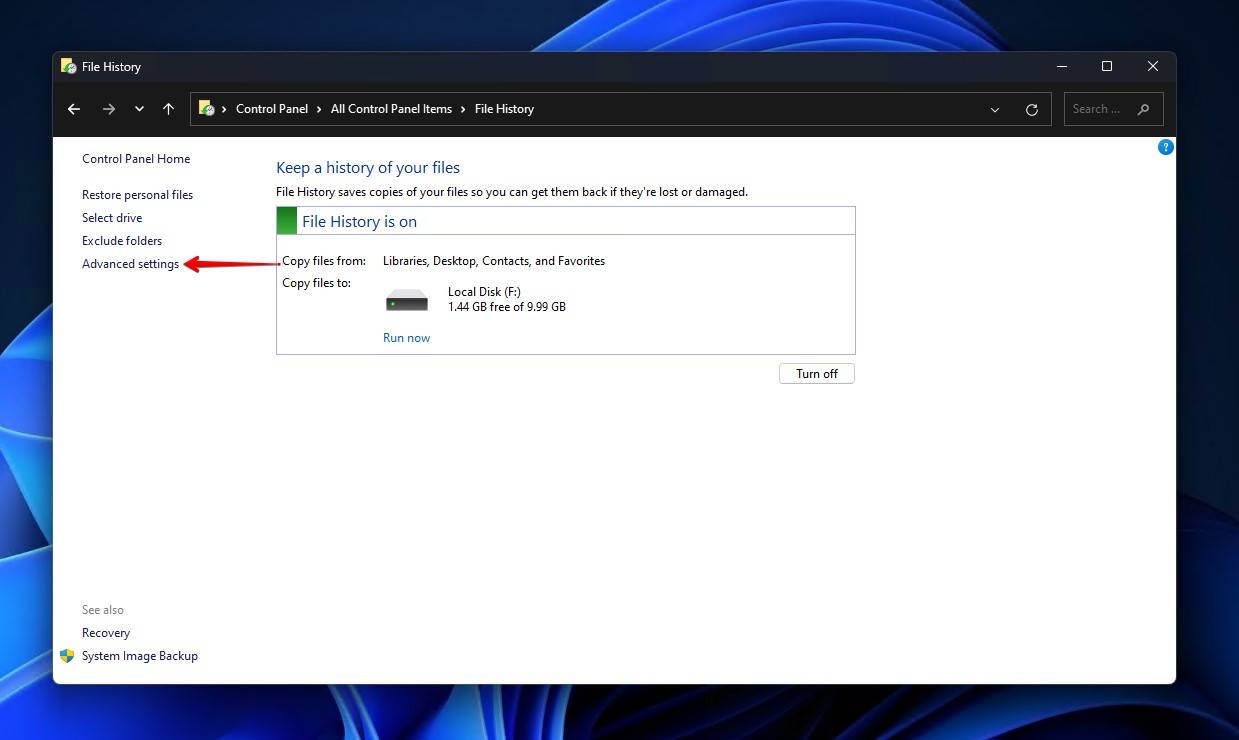
- To modify how often File History runs, as well as how long each backup version is saved, click Advanced Settings.
FAQ
What can cause CHKDSK to delete data?
Interruptions while running CHKDSK may result in data loss. In addition, running CHKDSK on a drive that is damaged can lead to further damage and data loss. This also applies to drives that are corrupted. Running other operations while using CHKDSK may also cause data to be deleted.
Is it possible to recover files deleted by CHKDSK?
Yes. You can recover files deleted by CHKDSK. When a file is deleted, it isn’t immediately removed from its original storage device. It is first marked as being available for overwriting. By using specialized software for data recovery such as Disk Drill, you can recover files that have been deleted if you act quickly enough. If you don’t act quickly, the files that you are trying to recover might be overwritten as you create more data. If you have your data backed up, you might also be able to recover your data that way.
How do you recover files that were deleted by CHKDSK on Windows 7 and 8?
There is more than one option for recovering files deleted by CHKDSK on Windows 7 and Windows 8. If the File History option is enabled, you can recover files using that feature. In addition, powerful data recovery software such as Disk Drill, which can recover over 350 different file types, is also a good option. This software lets users recover up to 500 MB of data for free on Windows computers.
Wrapping Up
CHKDSK is a useful Windows utility, but under some circumstances, it may lead to data loss. Luckily, using data recovery software such as Disk Drill can help users recover data if they ever run into issues with CHKDSK deleting files. In addition, the File History feature can also help users recover CHKDSK deleted data.
Additional Tips for Using CHKDSK Safely:
- Always back up your data before running CHKDSK, especially if you suspect the hard drive is corrupt or damaged.
- Avoid interrupting CHKDSK once it’s in progress.
- If you’re running CHKDSK on a system drive, ensure you boot from a Windows installation disk or a recovery drive.
This article was written by William Elcock, a Contributing Writer at Handy Recovery Advisor. It was recently updated by Jordan Jamieson-Mane. It was also verified for technical accuracy by Andrey Vasilyev, our editorial advisor.
Curious about our content creation process? Take a look at our Editor Guidelines.