
Have you accidentally emptied the Trash on your Mac when you didn’t mean to? Or maybe you just remembered you actually need that spreadsheet you deleted last month? If so, this guide is exactly what you need. This is a common problem faced by many Mac users. In fact, over 1,000 users looking for the ‘recover emptied trash mac’ keyword on average each month according to Google Ads. This text already helped many users recover emptied Trash on Mac, and we hope this guide assists you in doing the same. We tested each of the solutions below and are ready to share our shortlist of best methods. Read on, and you’ll find everything you need to know to get your files back.
Want to skip the background and jump straight to the recovery guide? Click here.
Quick Takeaways
- Your best first step: check backups (Time Machine, external backup). If a backup exists, use it.
- If there’s no backup (and there often isn’t), stop using the Mac and avoid installing anything on the same drive where files were before they were deleted.
- Install a data recovery app (ideally not on the same drive or device from which the files were moved to the Trash), scan the drive, and recover any files you find to a different drive (if possible).
- If you deleted files from an internal Mac SSD, your recovery chances are lower than on an internal HDD because of TRIM.
- Expect two outcomes with software recovery: best case – you get original names/folders; worst case – you get “reconstructed” files with generic names (still usable, just messy).
- Cloud sync services like iCloud mirror deletions too, so they’re not a guaranteed safety net (but not every cloud service handles it the same way).
- You can also go with a professional recovery service, but if the data was already ‘TRIMmed’ or overwritten and DIY scans find nothing, a lab usually won’t be able to bring those files back either.
Is it Possible to Recover Files on Mac After Emptying Trash?
Yes, it is possible to restore Trash on a Mac after you empty the Bin. Emptying the Trash essentially instructs the macOS to permanently delete all files and folders in the Bin. However, these items are not immediately erased from your Mac’s system drive or the external storage media where they were originally located.
In simpler terms, the logical links that make the file accessible to the OS are deleted, but the data remains on the storage device. The space occupied by the files that were in the Trash is marked as available for future use by the operating system. Data will eventually be overwritten by new information based on the needs of the OS.
Until the data has been overwritten, it can be recovered by specialized data recovery software. These tools scan the storage drive, locate logical links to the deleted files and folders, and allow you to copy them to a specified location for recovery. If those links are gone, the software can search for deleted files using their “signatures” — unique patterns that help identify the data.
Many modern data recovery programs offer a “Quick Scan” mode. This mode is ideal for situations where you’ve emptied the Trash or deleted data using the rm command. It scans the device’s file system and recovers data based on saved records, provided the relevant file information hasn’t been corrupted or overwritten. In this mode, software often recovers data with original file names, folder structure, and regardless of file format. If the Quick Scan fails, the software usually utilizes more complex algorithms based on file types (unique file signatures). However, some programs, including the one we’ll discuss today (PhotoRec), rely solely on this latter method. This means they cannot recover file metadata, and the number of supported file types becomes critical.
Keep in mind, that once the files have been overwritten, they can only be recovered if you have backed them up.
Stop using the Mac or other device which you deleted data from as soon as you realize you have accidentally emptied the Trash. Continued use makes it more likely that the files you want to recover will be overwritten by new data and impossible to recover with a software solution.
If the files were deleted from an internal SSD (and all newer Macs use SSDs), keep in mind that SSDs often use the TRIM command. This process automatically clears deleted data to optimize drive performance, which makes data recovery nearly impossible. If this applies to you, be prepared for that possibility.
How to Recover Emptied Trash on Mac with Software
Let’s look at how to recover accidentally emptied Trash on a Mac using two different types of software solutions. One provides a user-friendly interface that simplifies data recovery and enables anyone to successfully recover emptied Trash on a Mac. The other is a command-line program that requires more extensive technical expertise to use effectively.
For more about the options available in the world of data recovery software, we point you to our review of some of the best macOS solutions on the market.
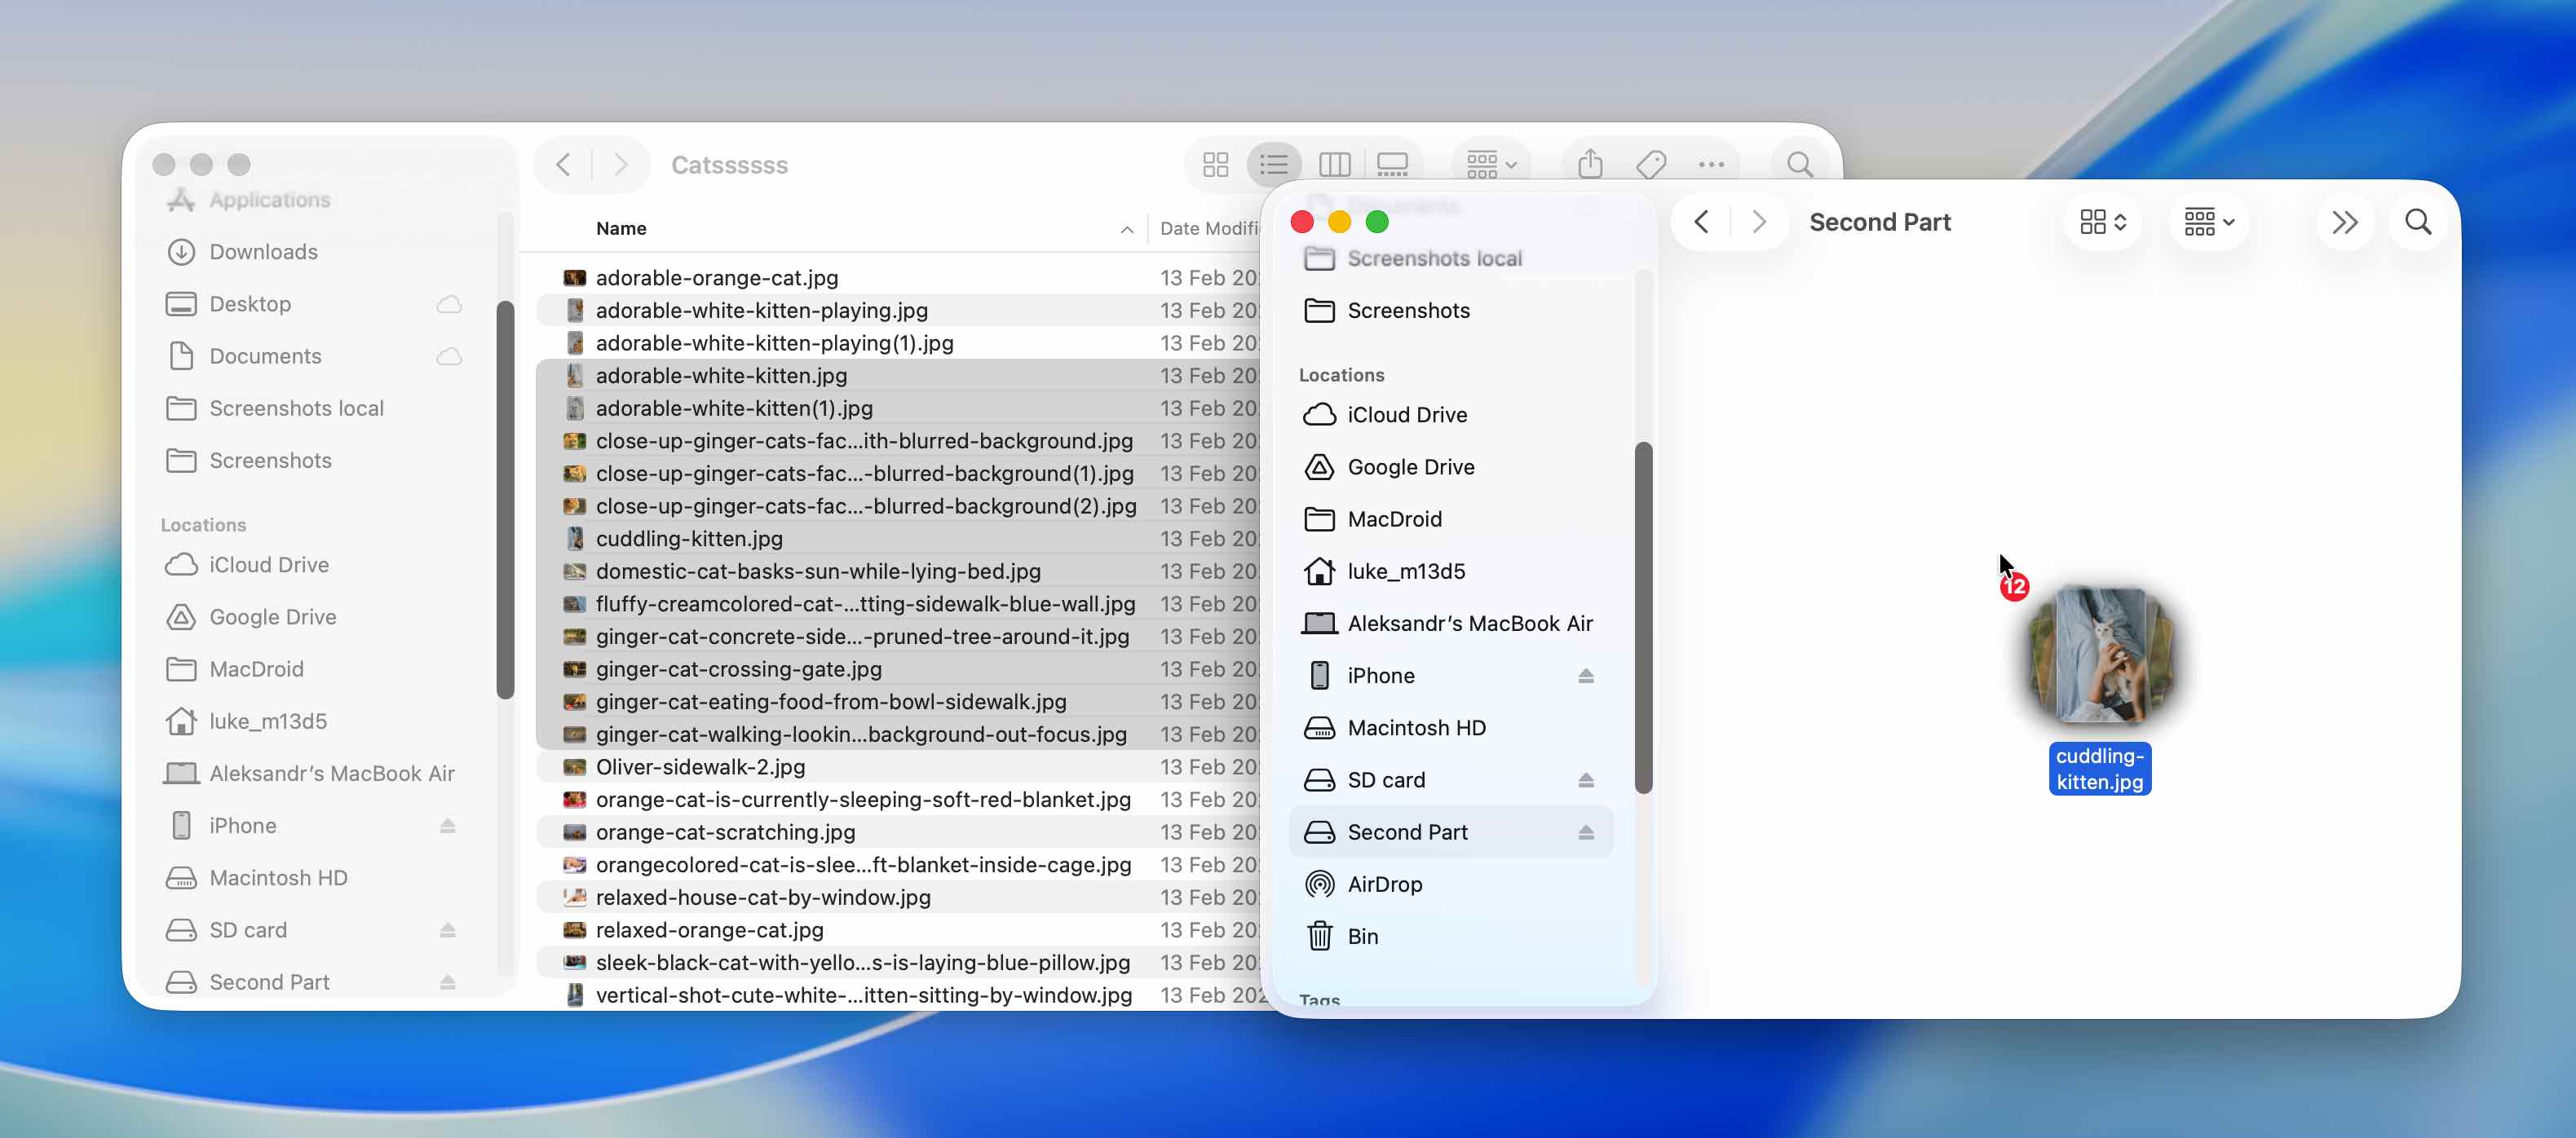
Method 1: Disk Drill
Disk Drill, released by Cleverfiles in 2010, is a freemium product that falls into the class of user-friendly data recovery software. It enables even novice Mac users to recover emptied Trash on a Mac with just a few clicks. The tool uses advanced scanning algorithms to find recoverable deleted data and allows you to preview, select, and restore the identified files.
![]()
We’ll show you step-by-step how to use Disk Drill to recover files after you accidentally emptied the Trash. But Disk Drill isn’t just for this type of data loss. Whether you need to recover lost or deleted data on your Mac, retrieve files from formatted drives, or even salvage data from corrupted storage devices, it has you covered. It’s a quite versatile tool.
Here’s how to use Disk Drill:
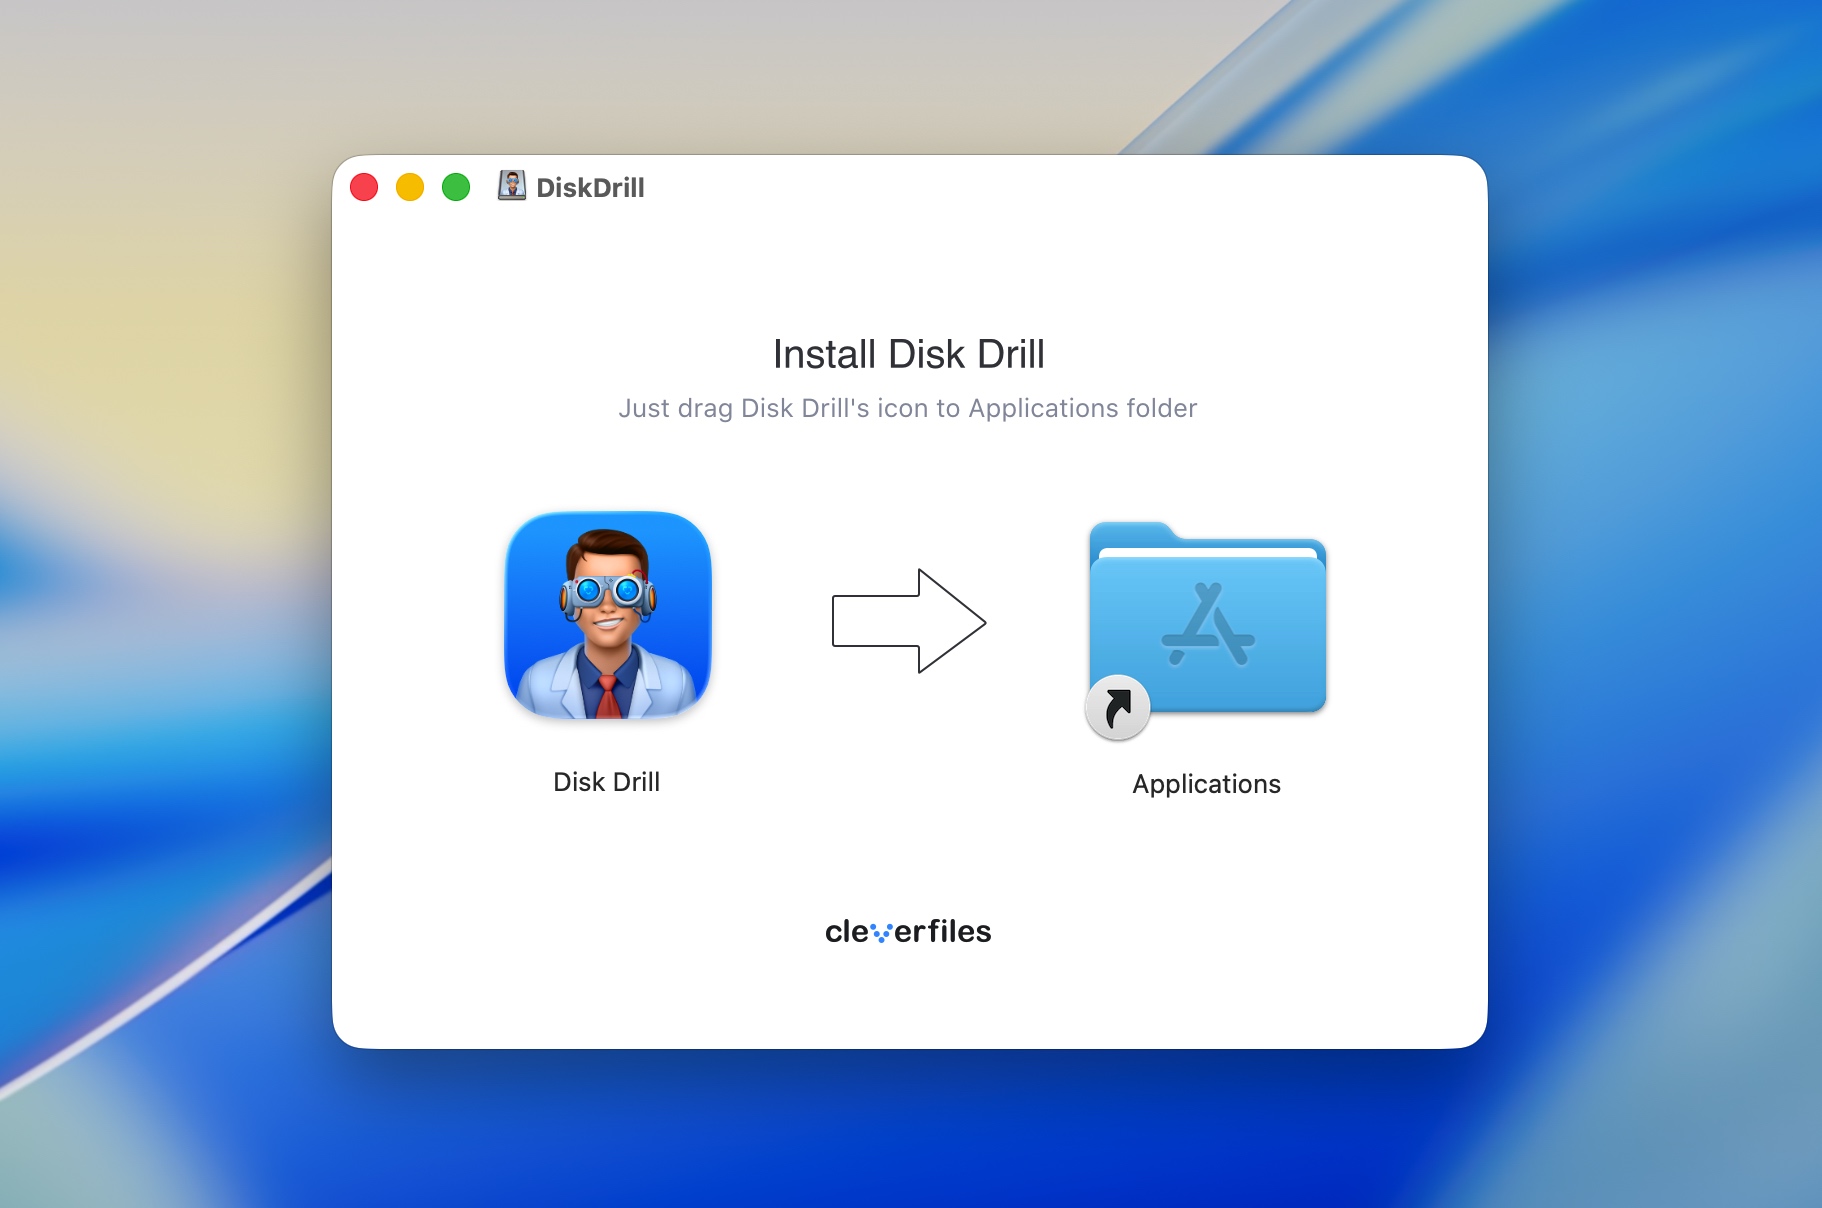
- Download and install Disk Drill for Mac on a separate drive or partition from the one where you deleted your files, if possible. This is to protect the recoverable data from being overwritten, but we understand that many Macs only have one partition. If that’s the case for you, and you don’t have an external drive available for installation, you can go ahead and install it on your Mac’s main drive.
- Launch Disk Drill and select the disk that originally stored the data before it was moved to the Trash (most likely your Mac’s internal drive).
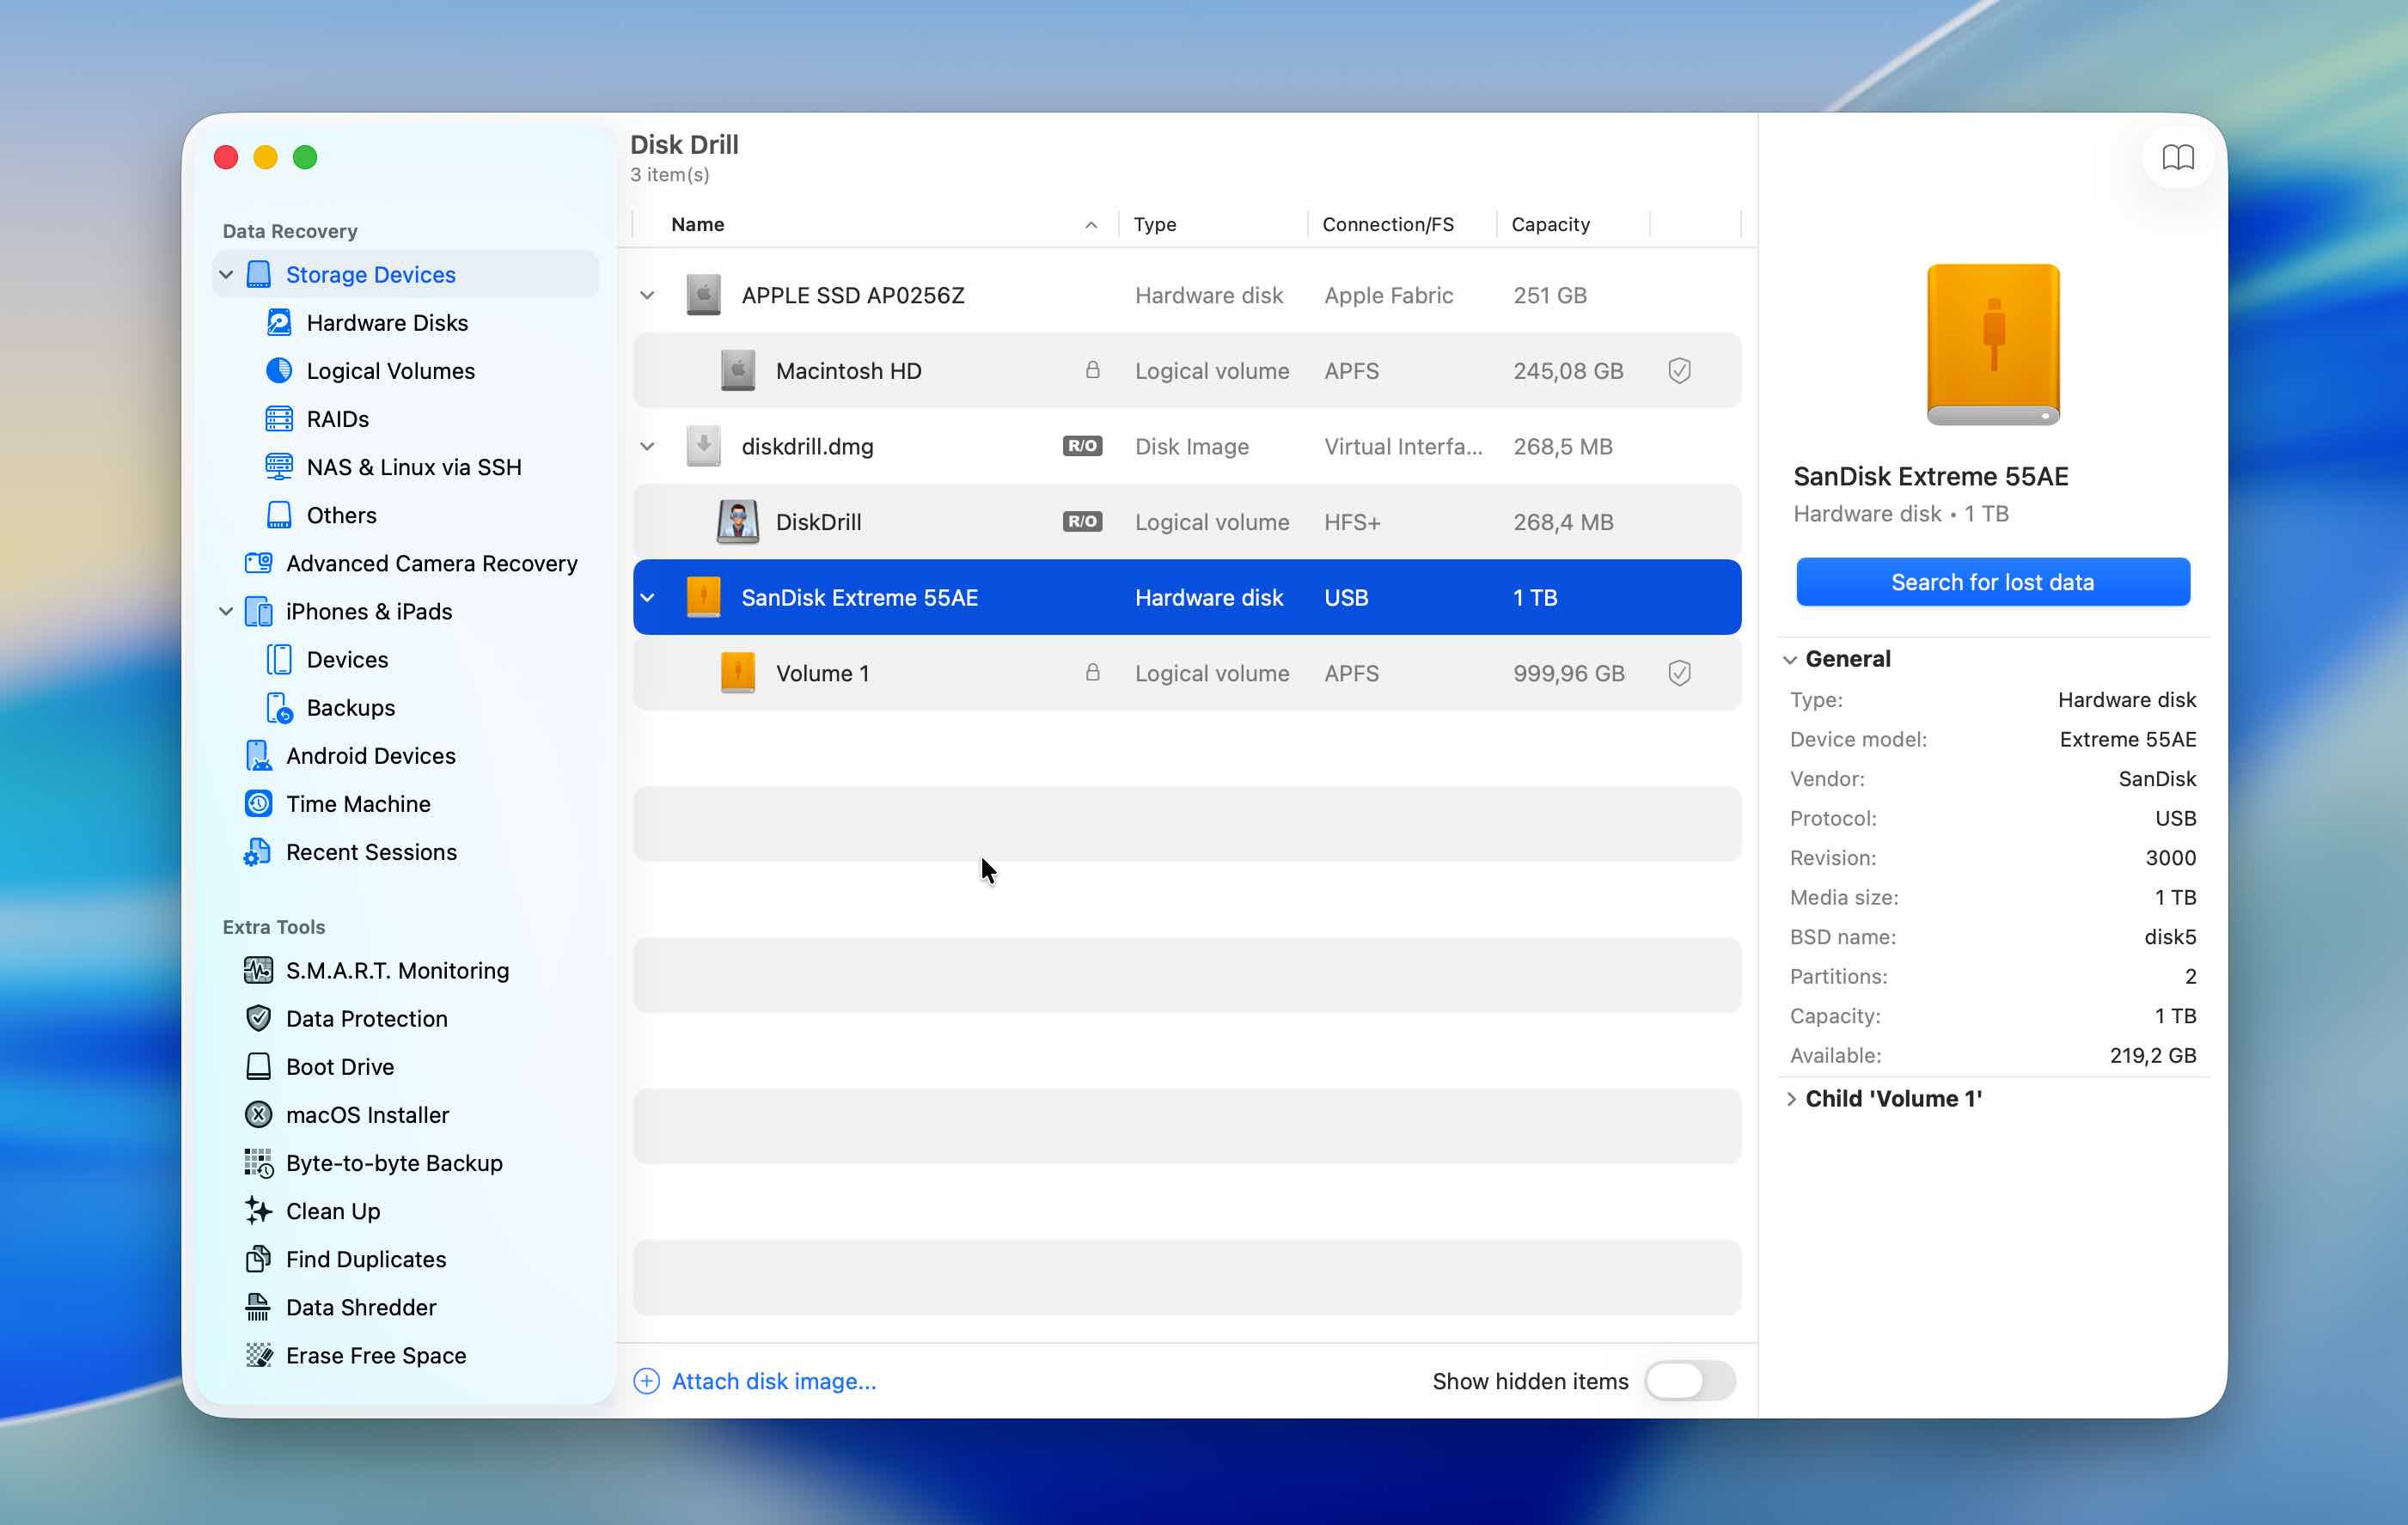
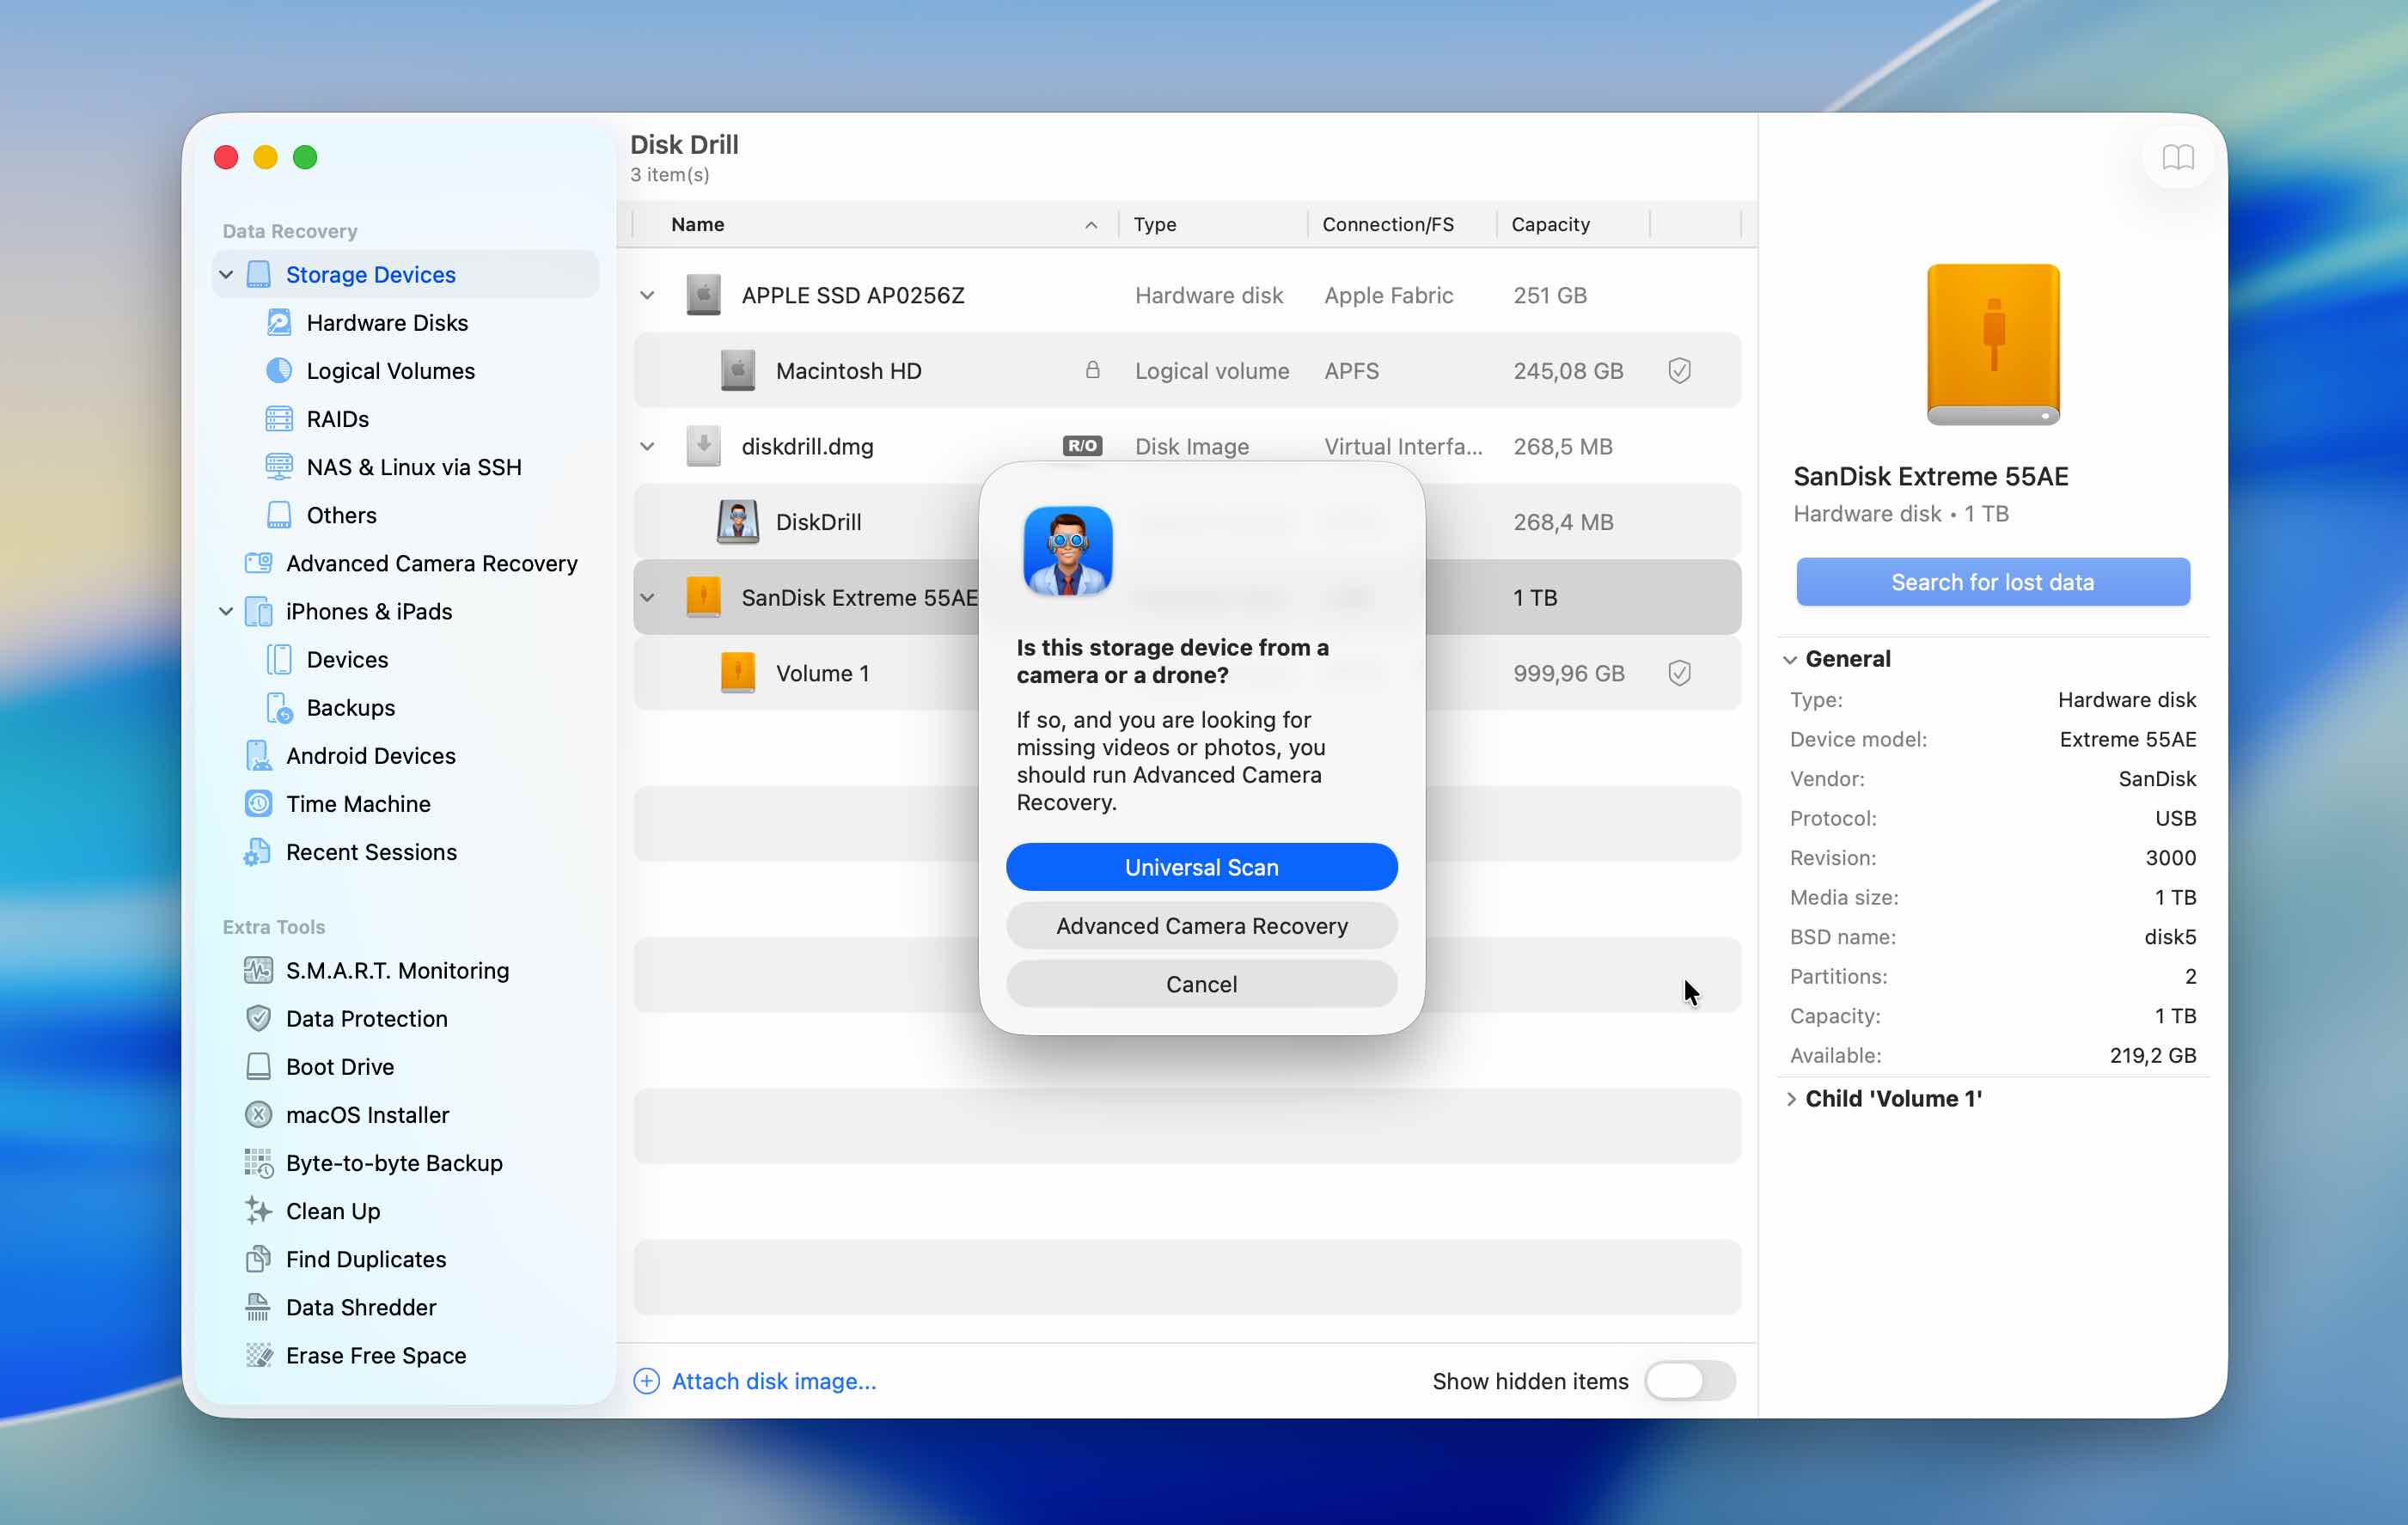
- Click Search for Lost Data to start the scan. If you’re scanning an internal drive, the scan will begin right away. But if you’re scanning an external device, you’ll be asked to choose a scan mode: Universal Scan or Advanced Camera Recovery. For most cases, it’s best to go with Universal unless you’re specifically trying to recover footage from digital cameras or drones; that’s where Advanced Camera Recovery really shines.
- As Disk Drill analyzes your drive, you’ll see categories like Pictures, Video, Audio, Documents, Archives, and Other.
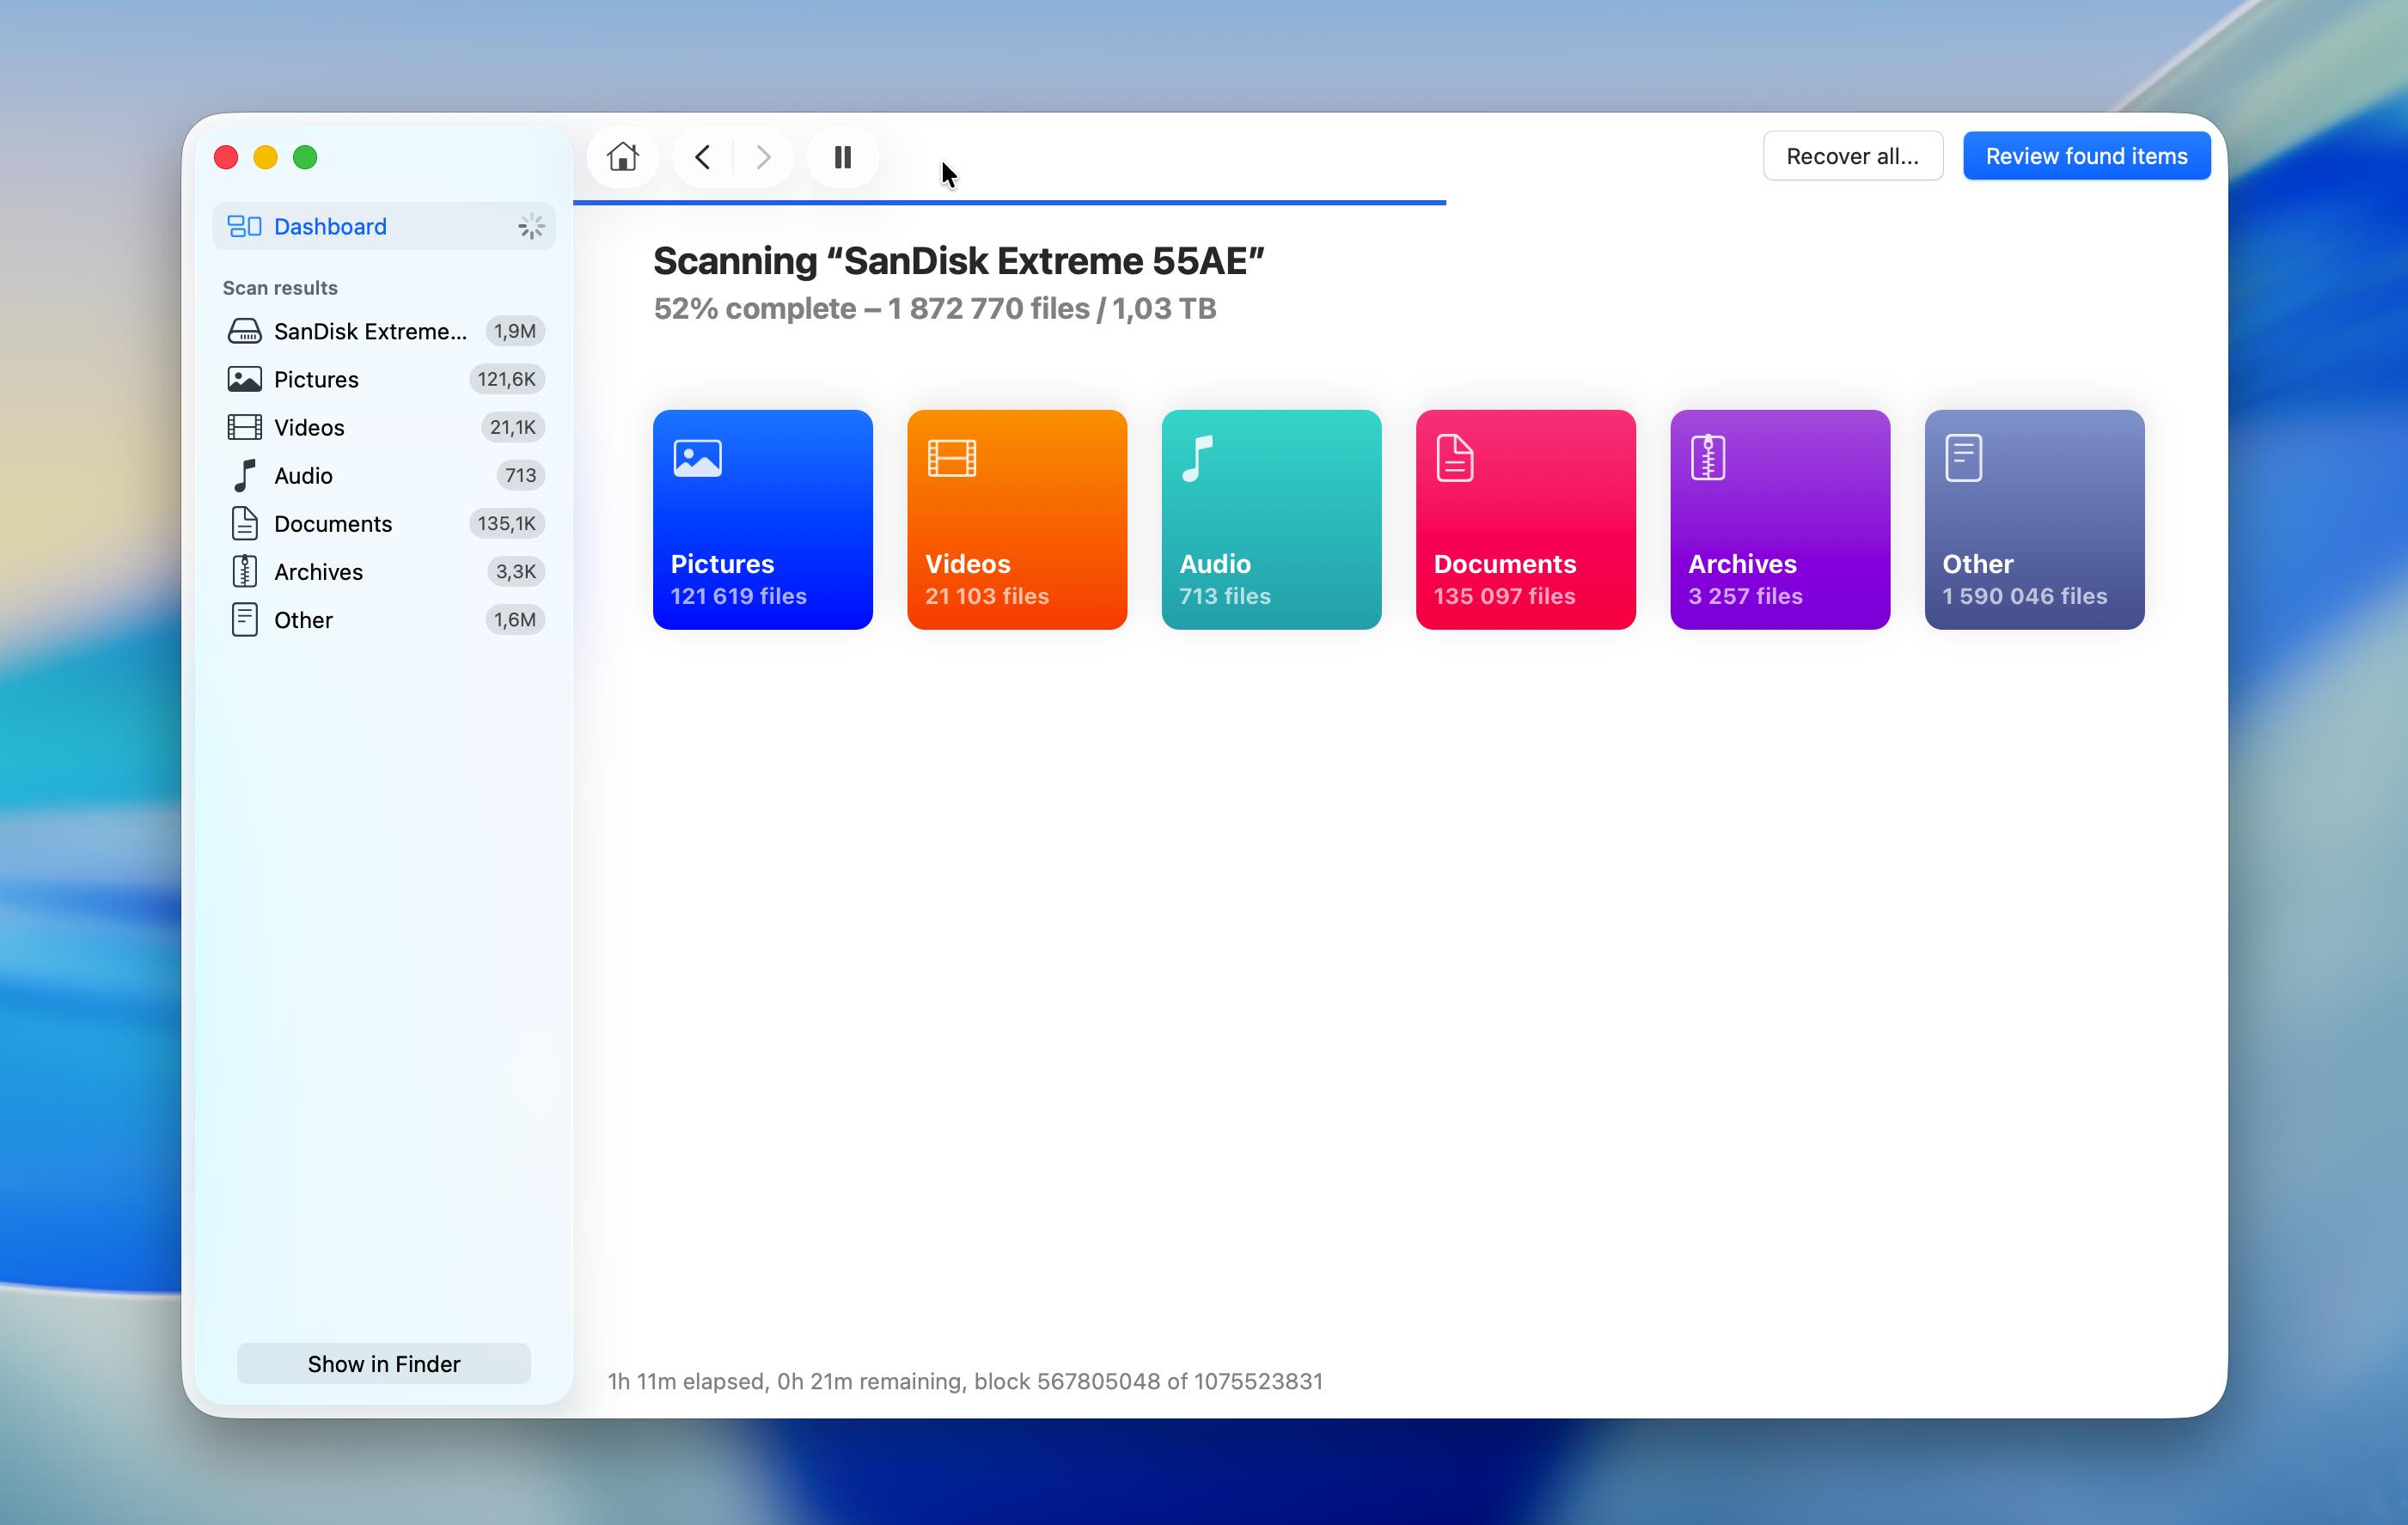 You can click on any of these to view files filtered by type. If you want to see everything Disk Drill finds, click the Review found items button at the top. Unlike many other recovery apps, Disk Drill lets you start reviewing files before the scan is even finished. This feature can save you a lot of time if it locates your deleted Trash files early in the process.
 - In the results, you’ll notice three main subcategories:
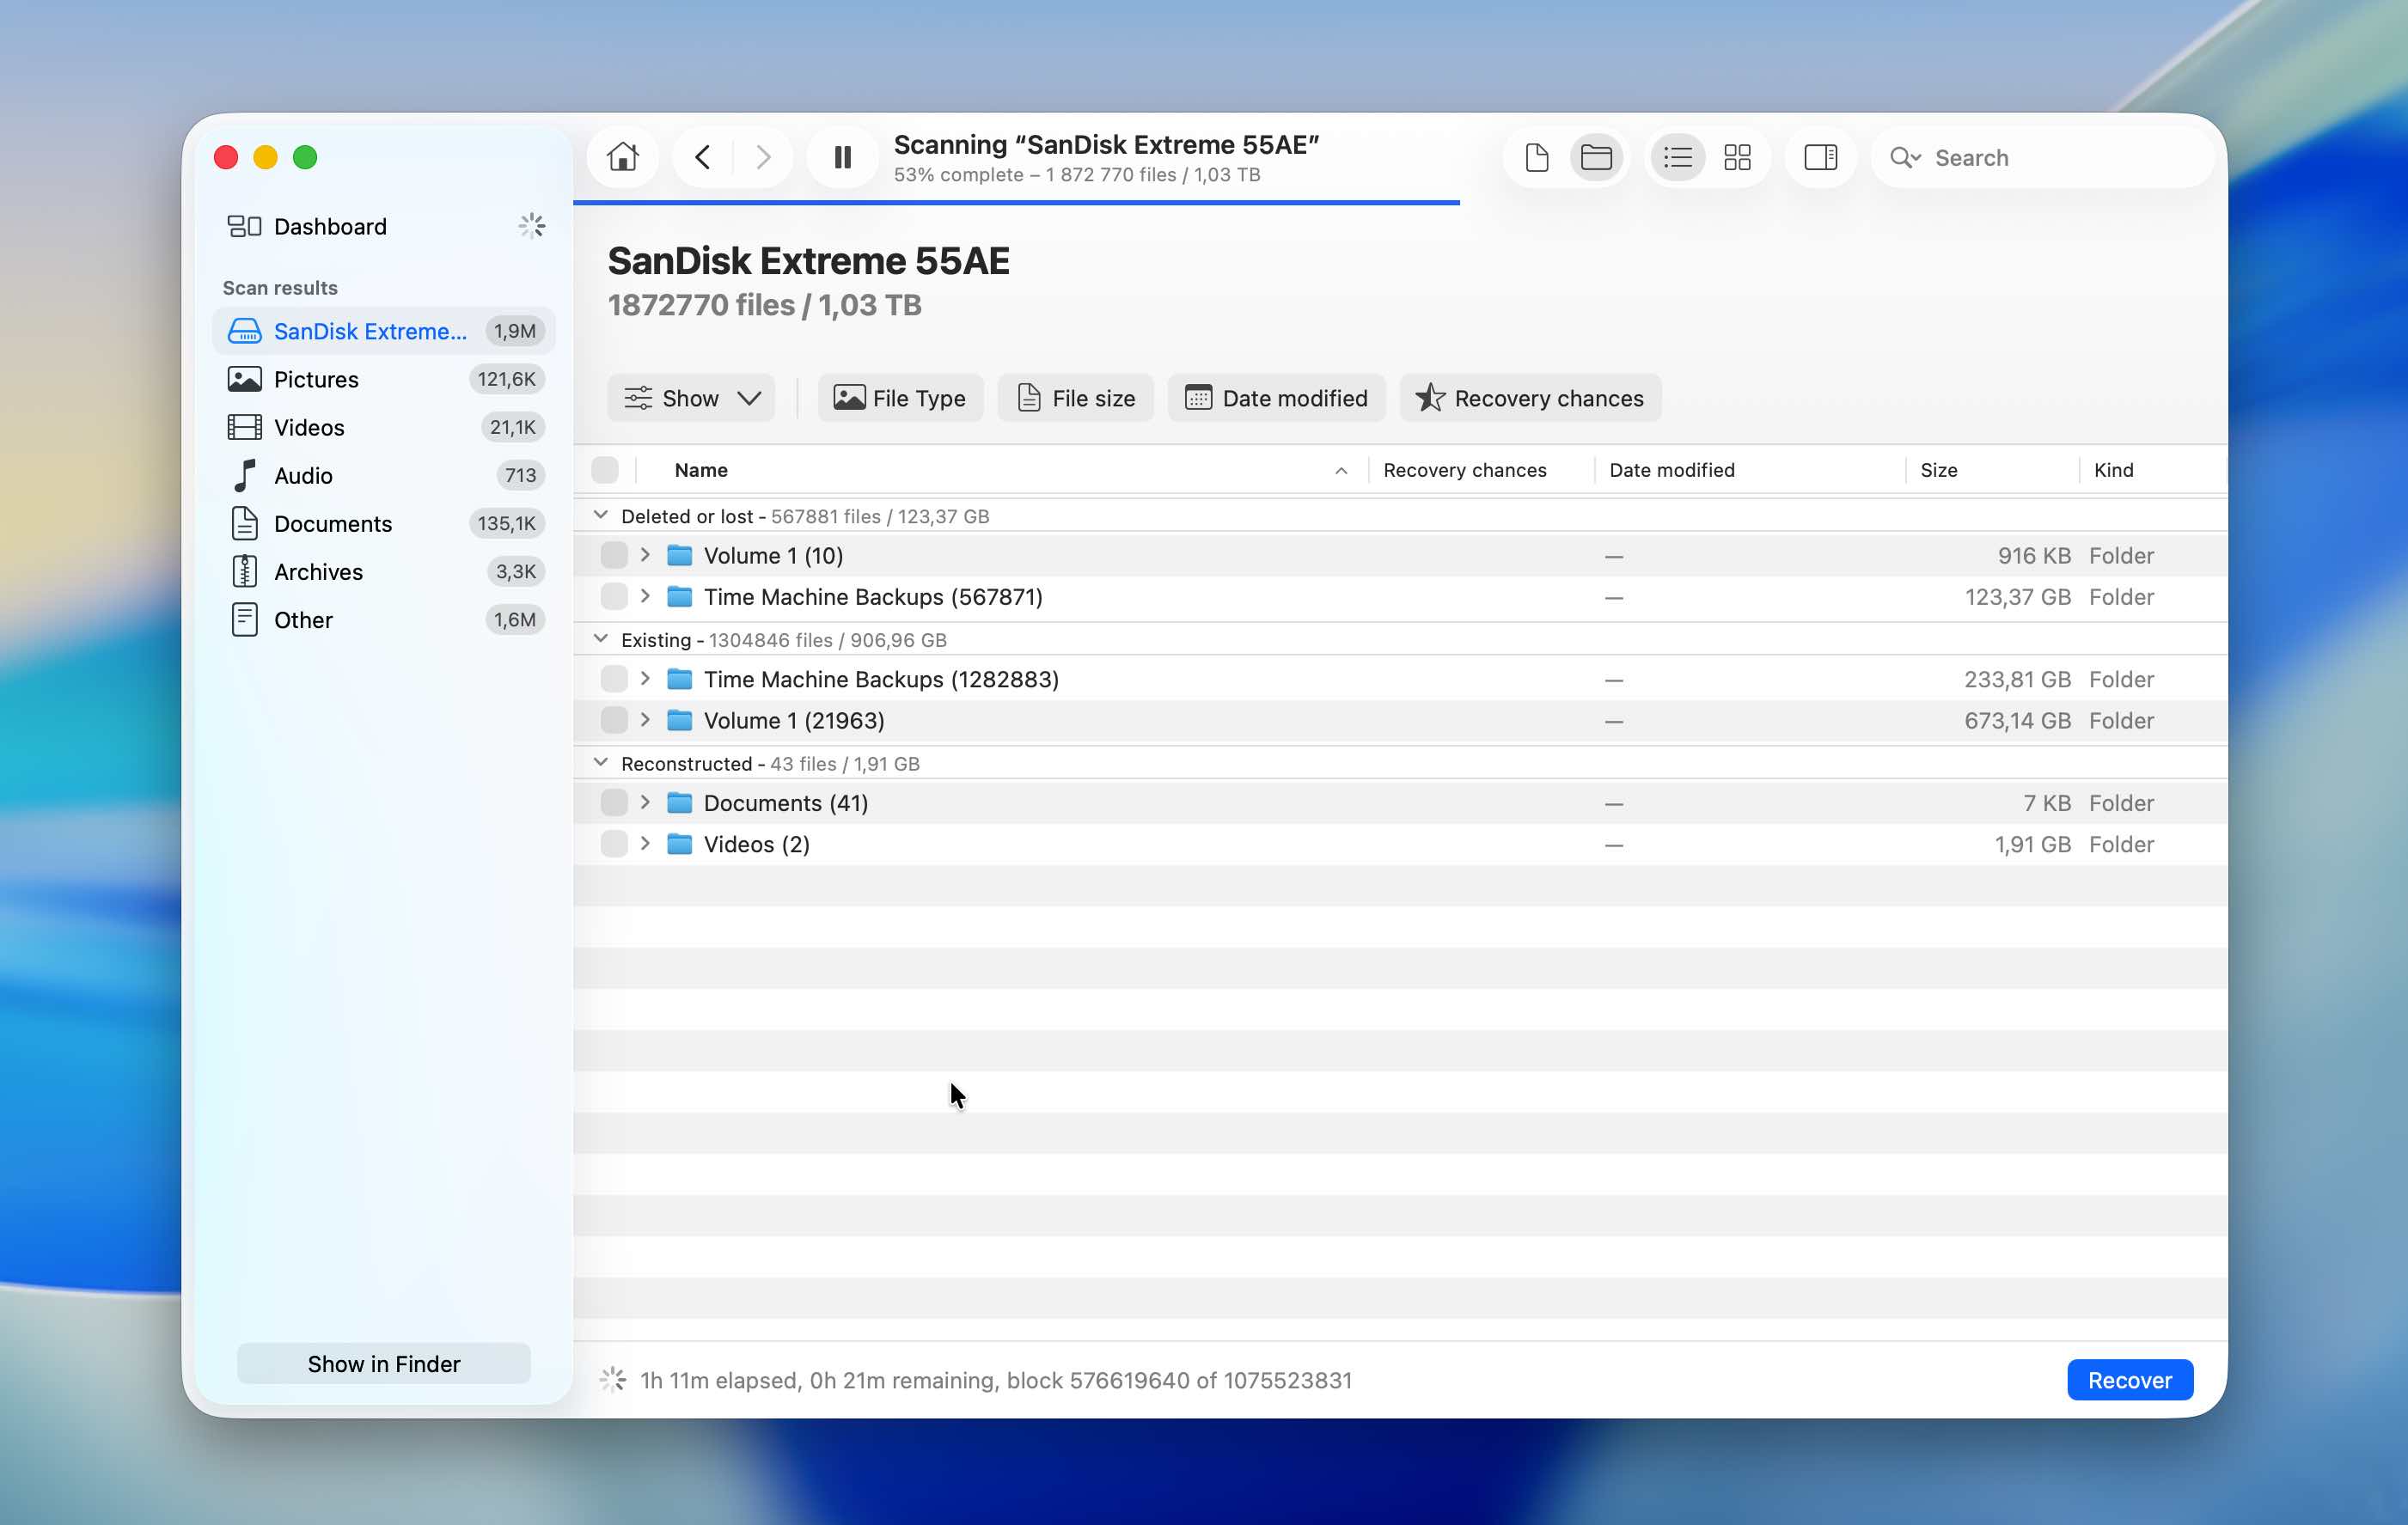
- Deleted or Lost: Files in this category were deleted but still have intact file system records. These files can often be restored with their original names and folder structures.
- Reconstructed: These files are identified using Disk Drill’s signature scan. While their content can be recovered, metadata like names and folder locations are missing, so you may see generic names like “file0001.doc.”
- Existing: These are files that remain on the drive and haven’t been deleted.
To refine the results, use the search bar at the top. You can filter files by name, partial name, or even file extensions like .jpg or .mp4.
- To confirm you’ve found the exact files you’re looking for, you can preview them. Just click the 👁️🗨️ eye icon next to any file to see its content. This is especially helpful for documents, audio, videos, and pictures.
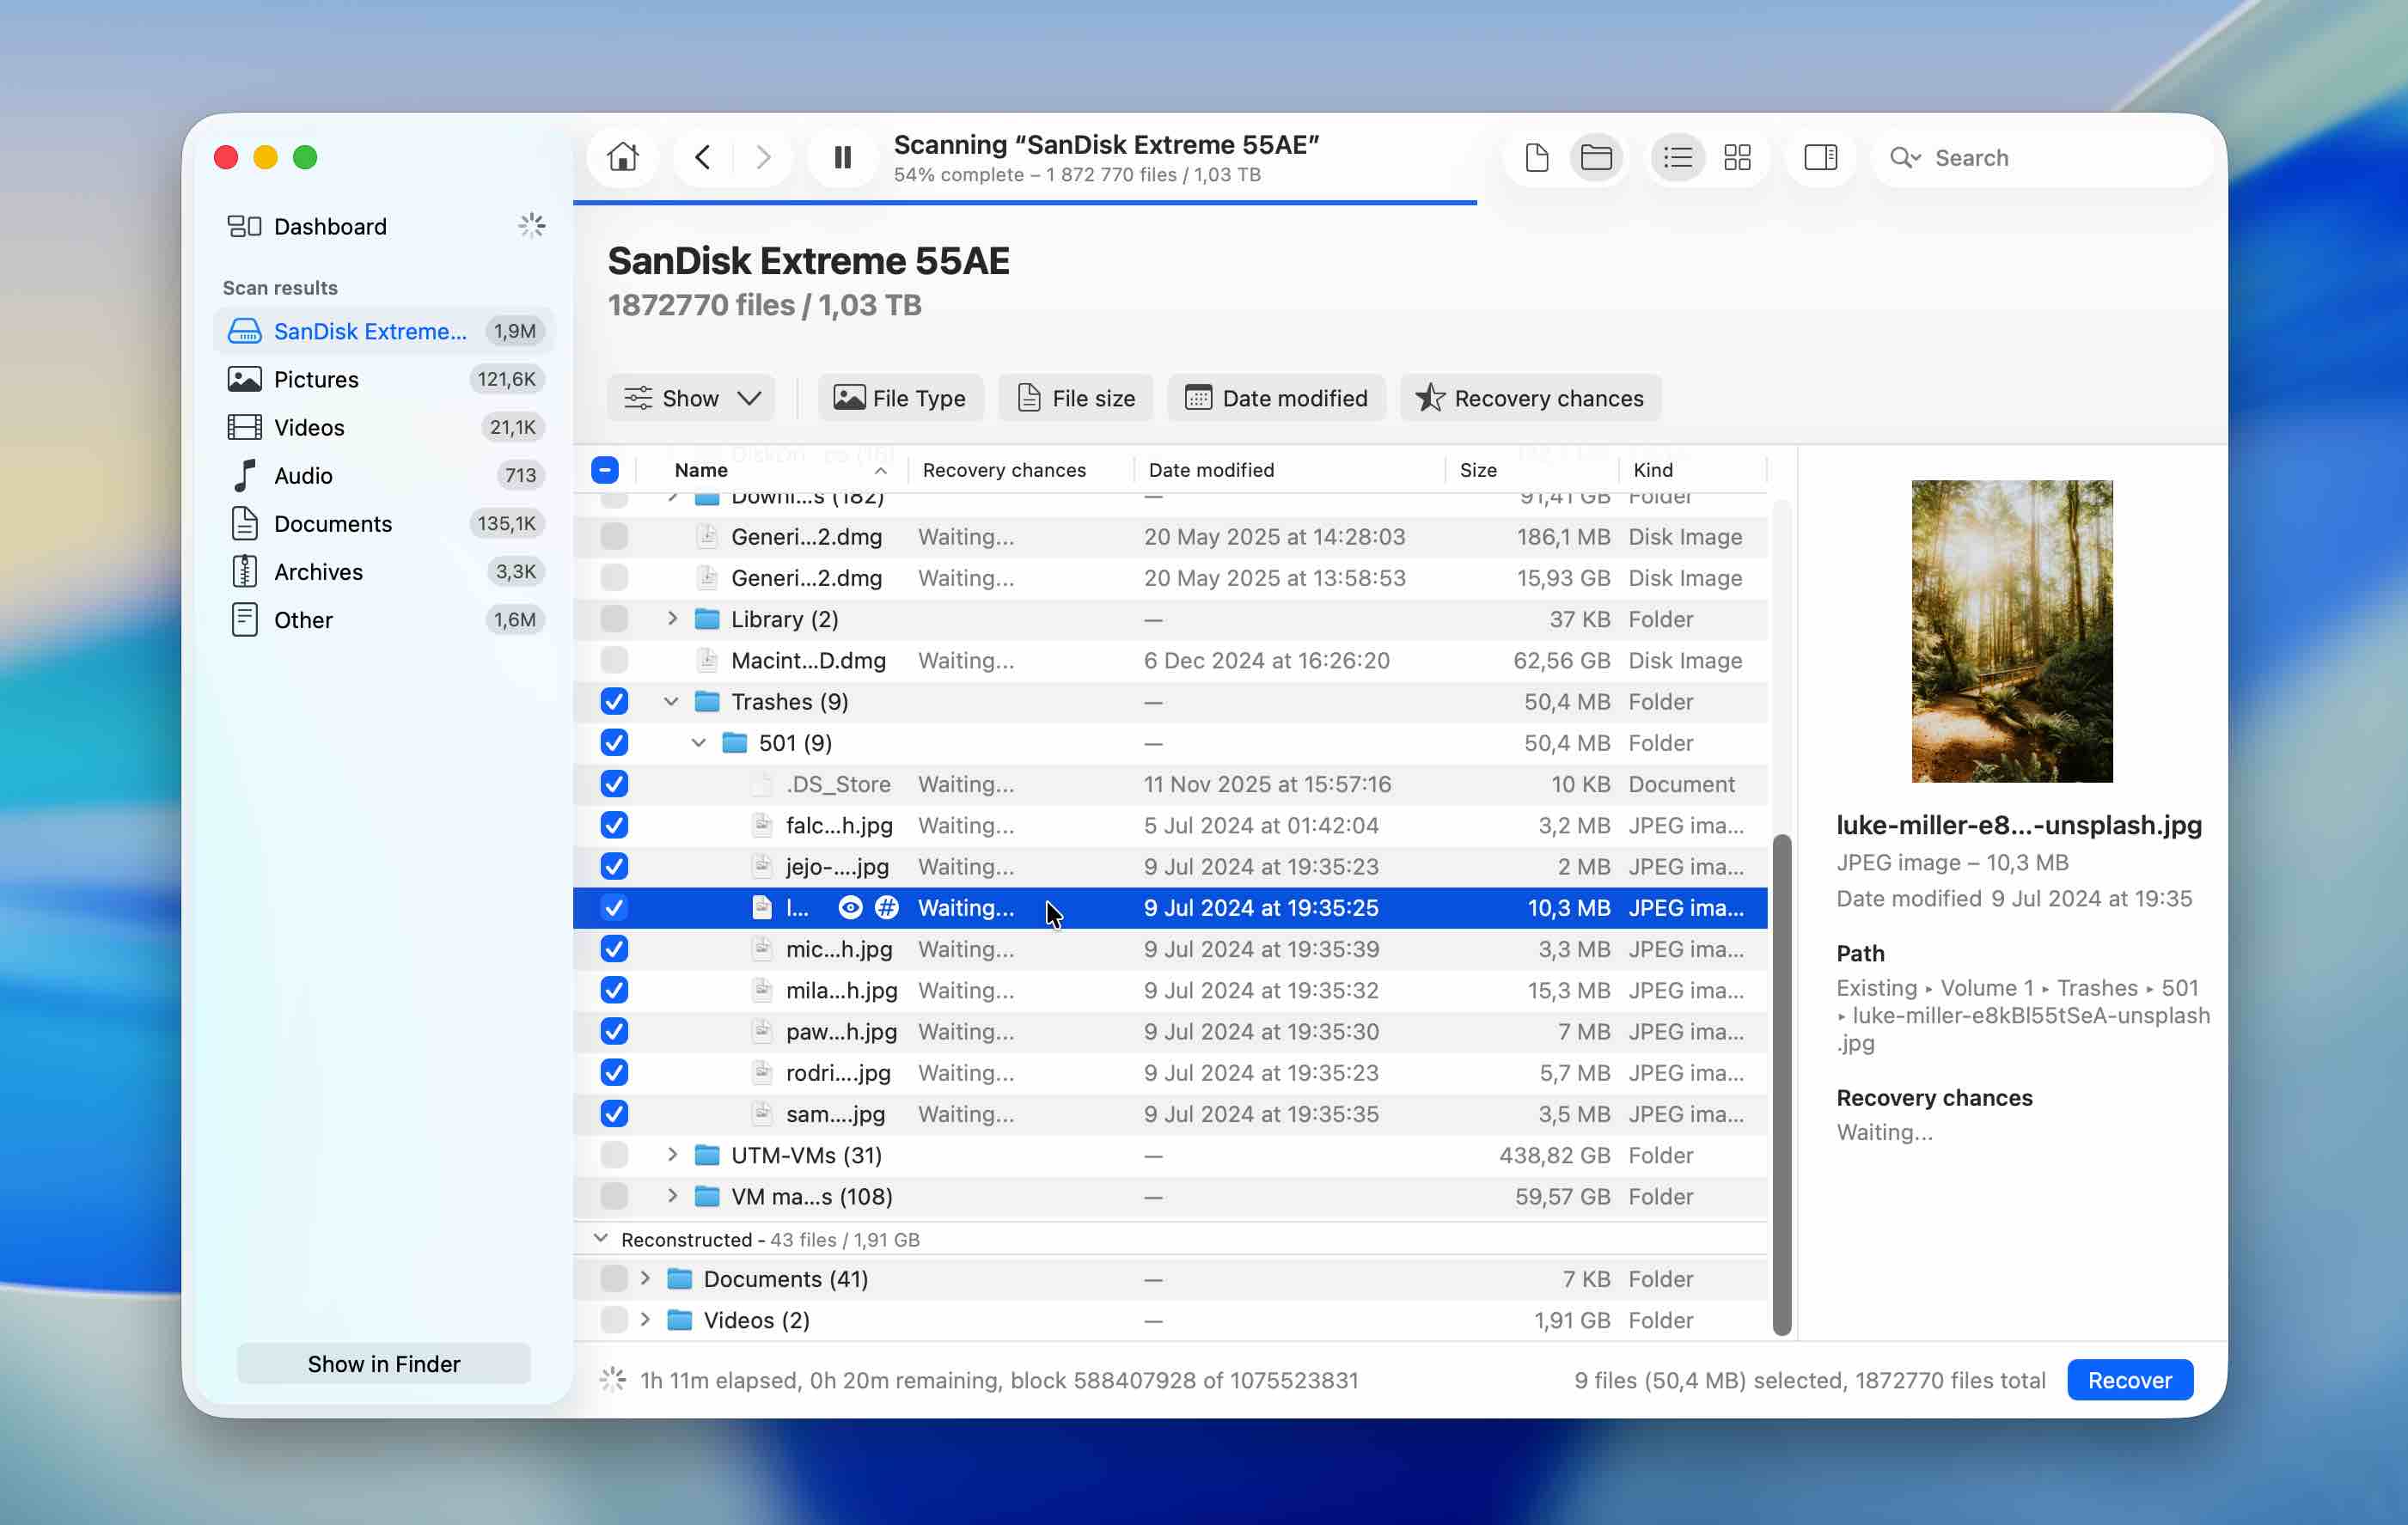 Additionally, you’ll notice Recovery Chances displayed next to each file, marked as High, Average, or Low. These indicators show the likelihood of the file being fully functional after recovery. And here’s a tip: if you can preview a file, it means it will be 100% fine once recovered.
 - After you’ve verified the files you want, check the boxes next to them and click the Recover button.
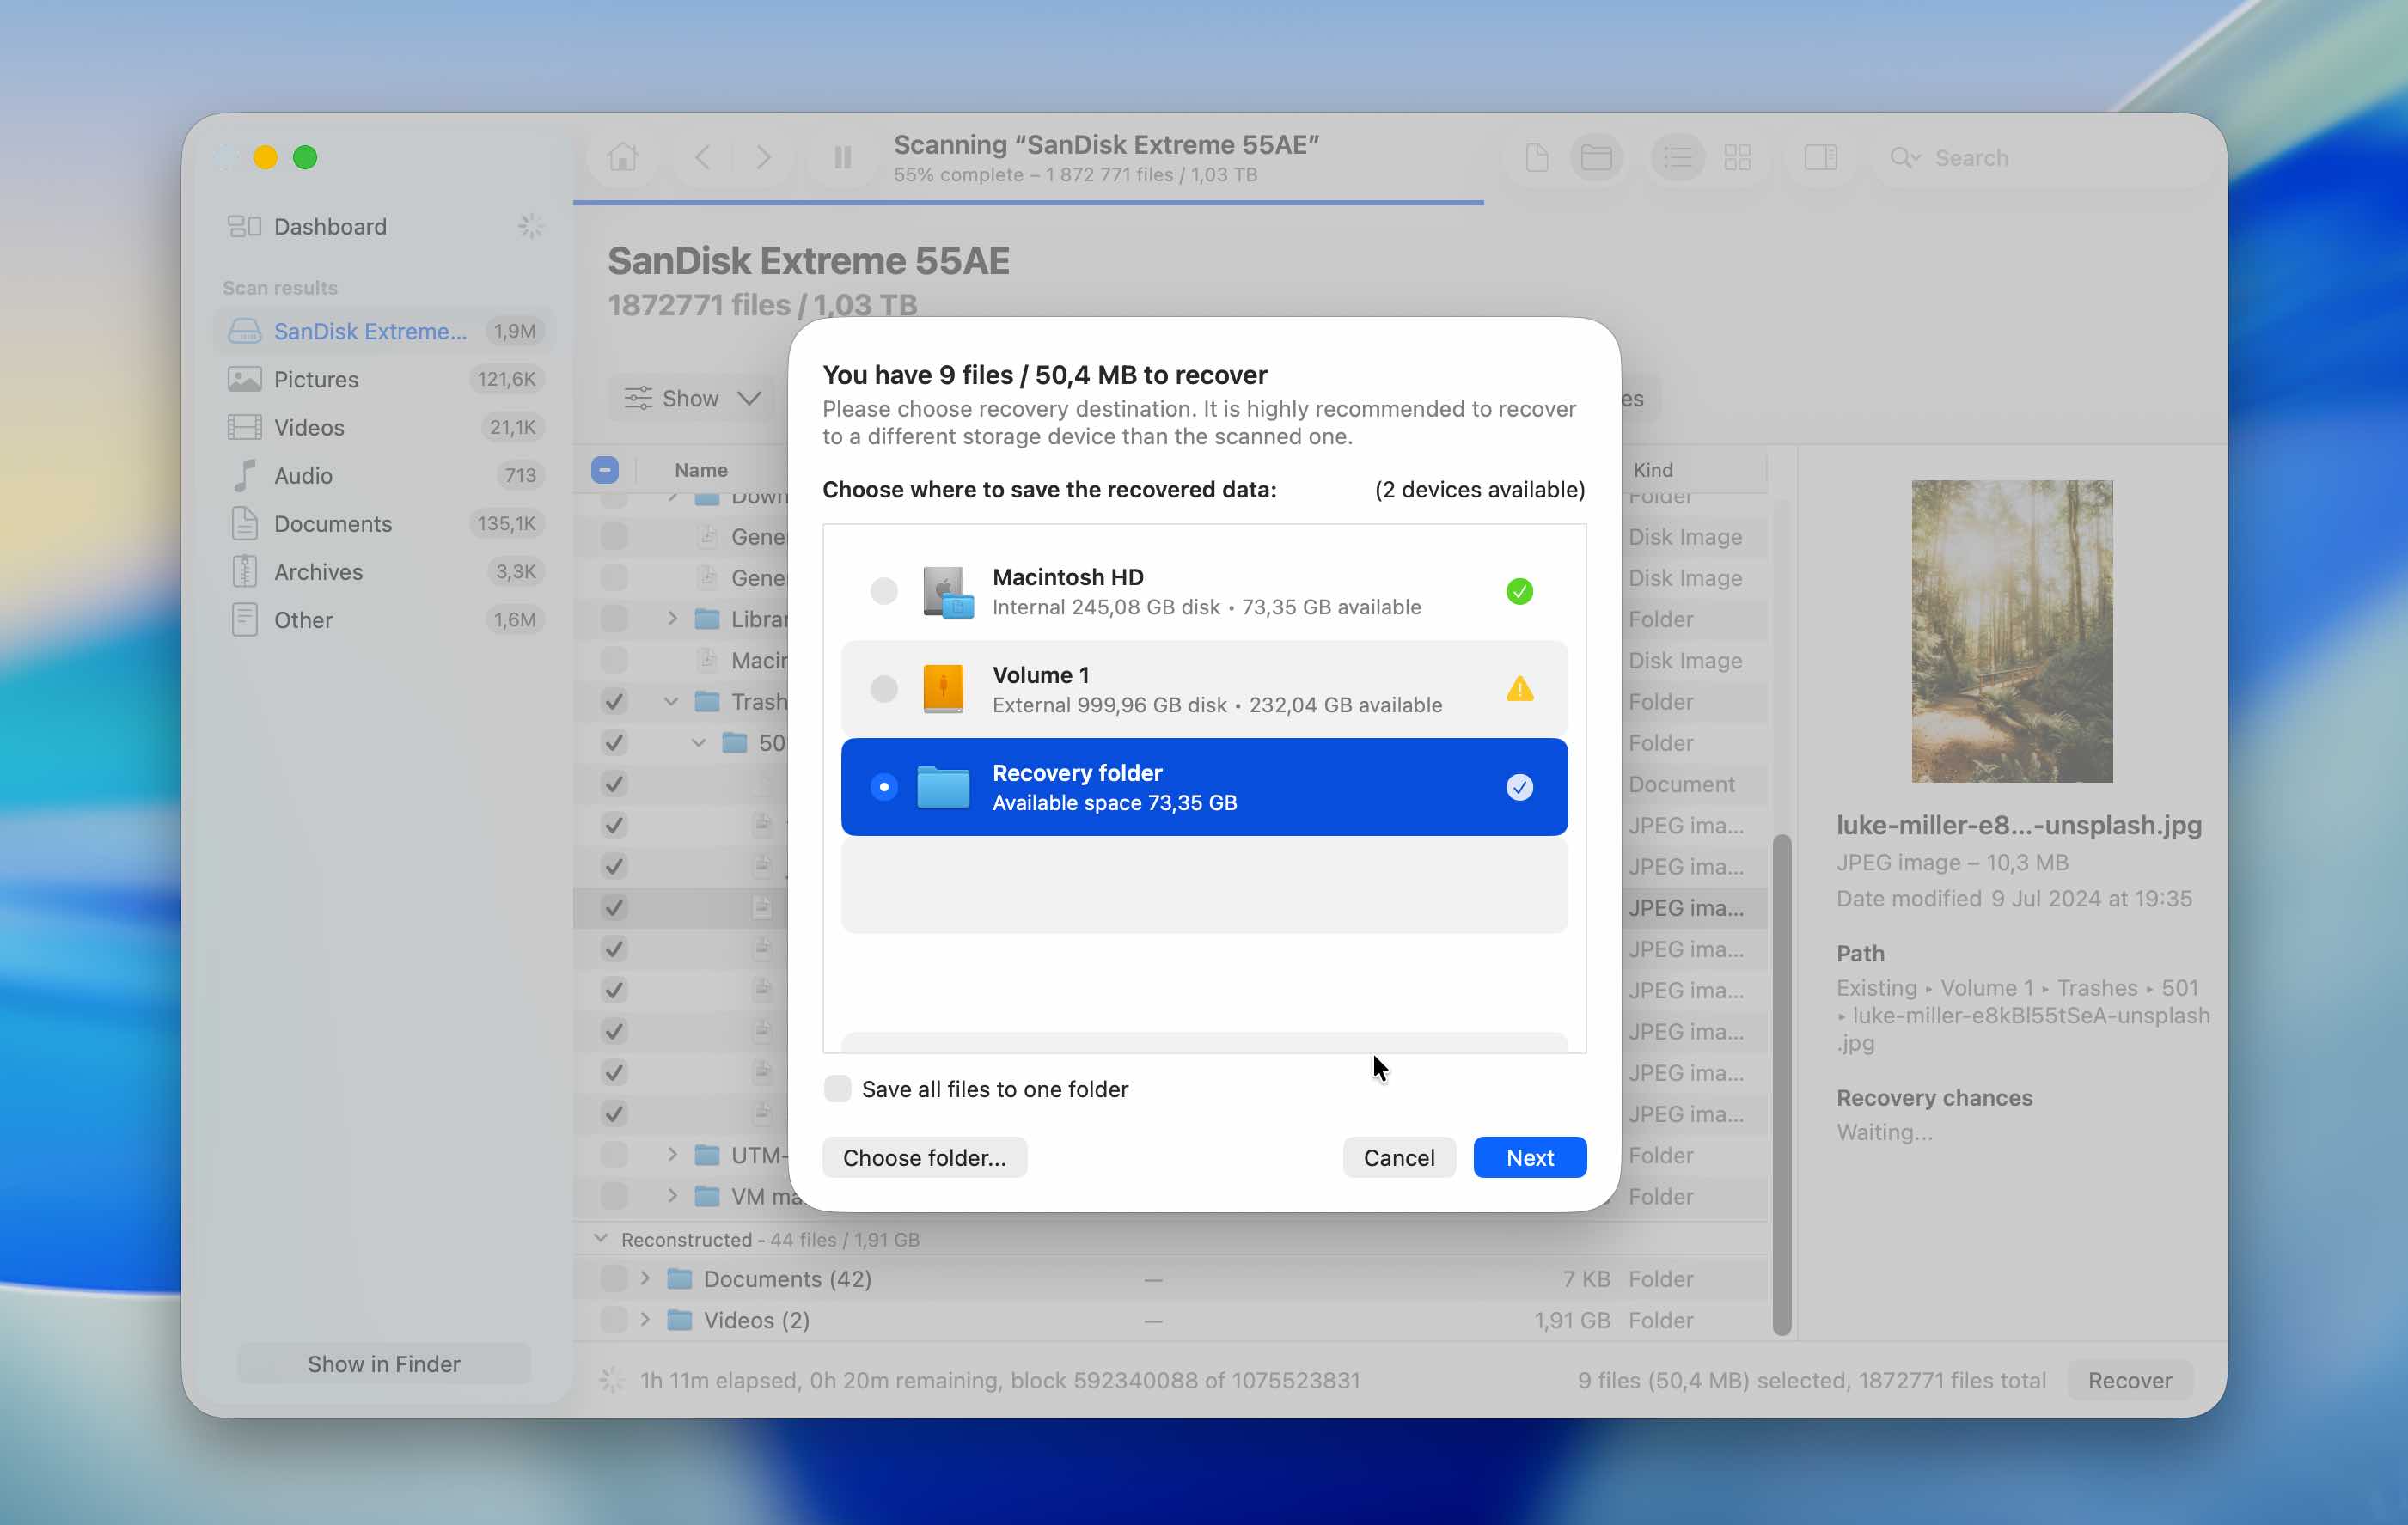
- Now, choose a recovery destination. If possible, save the recovered files to a different drive or partition to avoid overwriting other recoverable data.
Disk Drill is a powerful and safe file recovery app, but its value doesn’t stop there. Even in its free version, it offers useful extras like disk health monitoring, a clean-up tool, a duplicate finder, and more. What we want to highlight, though, is its Data Protection feature. This tool can help you avoid accidental data loss in the future by making recovery faster and more reliable.
Disk Drill’s data protection includes two options: Recovery Vault and Guaranteed Recovery. Recovery Vault saves metadata for deleted files, like their names and locations, so they’re easier to restore. And Guaranteed Recovery creates complete backups of files sent to the Trash (or specified folders), this way they can be fully recovered even if the drive fails. These features take just a minute to set up but can save you a lot of time in the future, check them out.
Method 2: PhotoRec
PhotoRec is a freeware open-source data recovery tool that can be used to recover emptied Trash on your Mac. It employs a less friendly command-line interface and requires users to have some knowledge about their disk configuration. These facts make it less viable as a recovery method for the general user who just emptied the Trash by accident on their Mac.
![]()
Before we move on to the guide, here’s what you need to know about the potential difficulties users may face with this software:
- The software provides a rudimentary command-line interface that is navigated with arrow keys. While there is qPhotoRec, a version of PhotoRec with a basic graphical user interface, it’s only available for Windows. Mac users will need to use PhotoRec through the Terminal to recover their files.
- Files are recovered under generic filenames which complicate and slow down the recovery effort.
- Additionally, you can’t selectively choose which files to recover from the results; the tool will recover everything it finds.
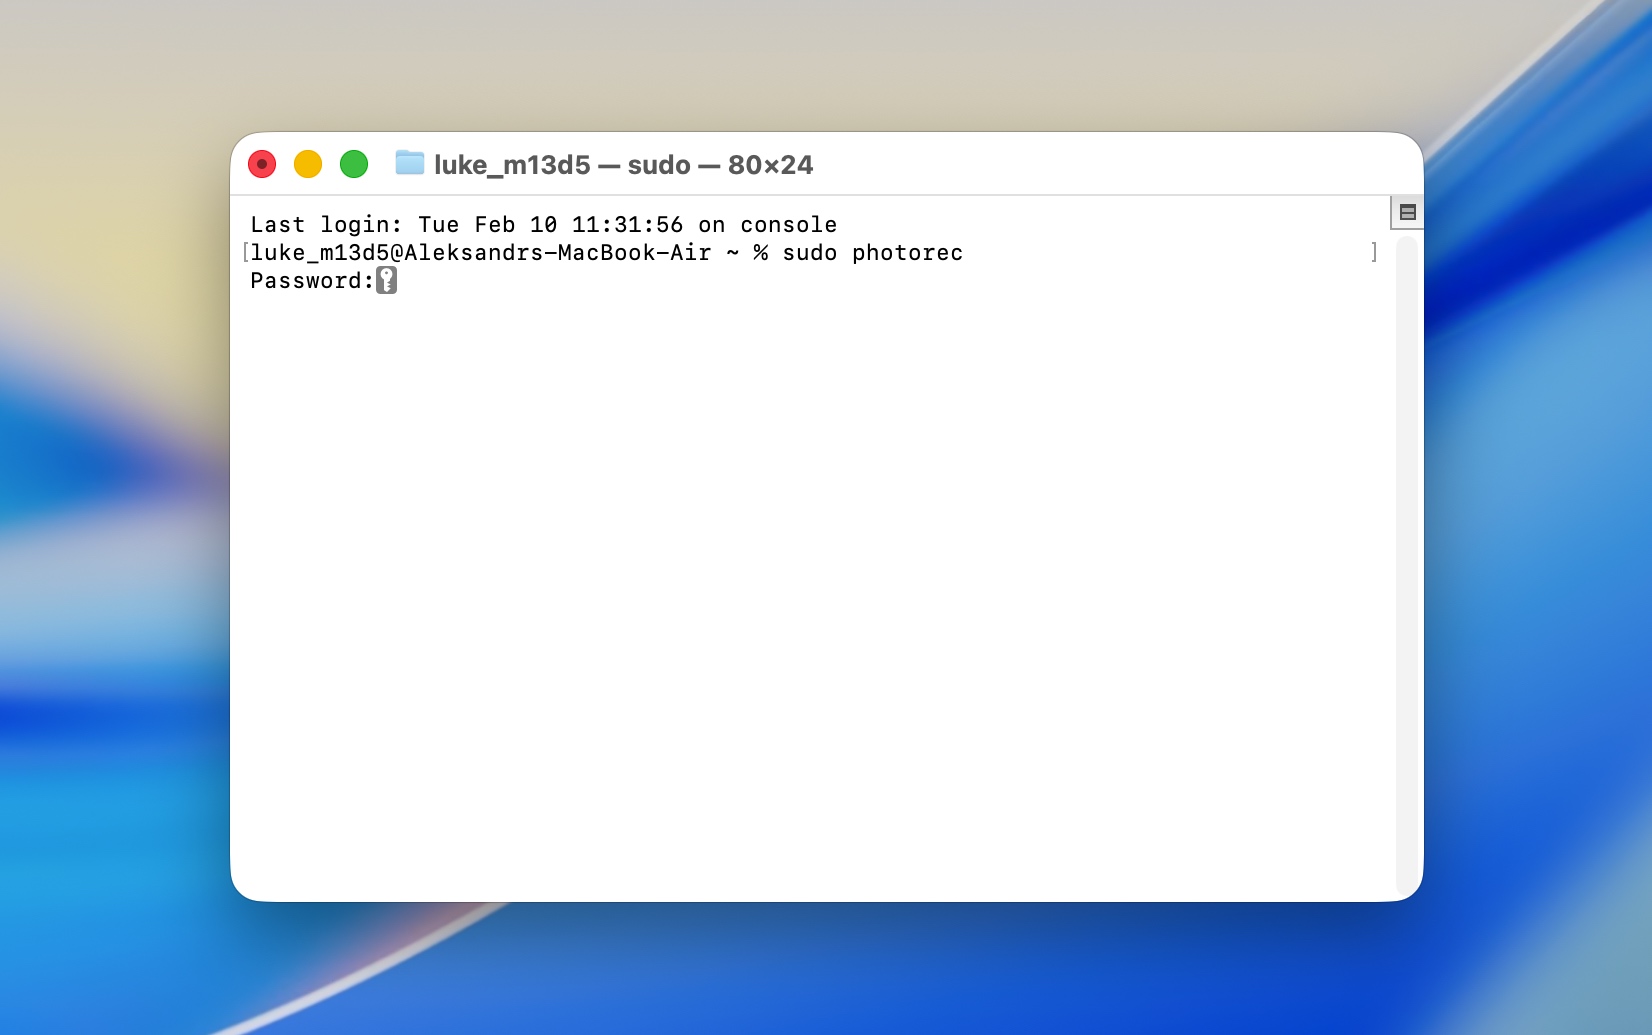
Here’s how you can recover empty Trash on Mac with PhotoRec:
- Download, install, and launch PhotoRec. PhotoRec is bundled with TestDisk, a tool that helps recover lost or deleted partitions, rebuild damaged partition tables, repair file systems, and fix boot sectors. After the download is complete, extract the archive, open Terminal, navigate to the extracted folder, and run PhotoRec with this command:
sudo ./photorec
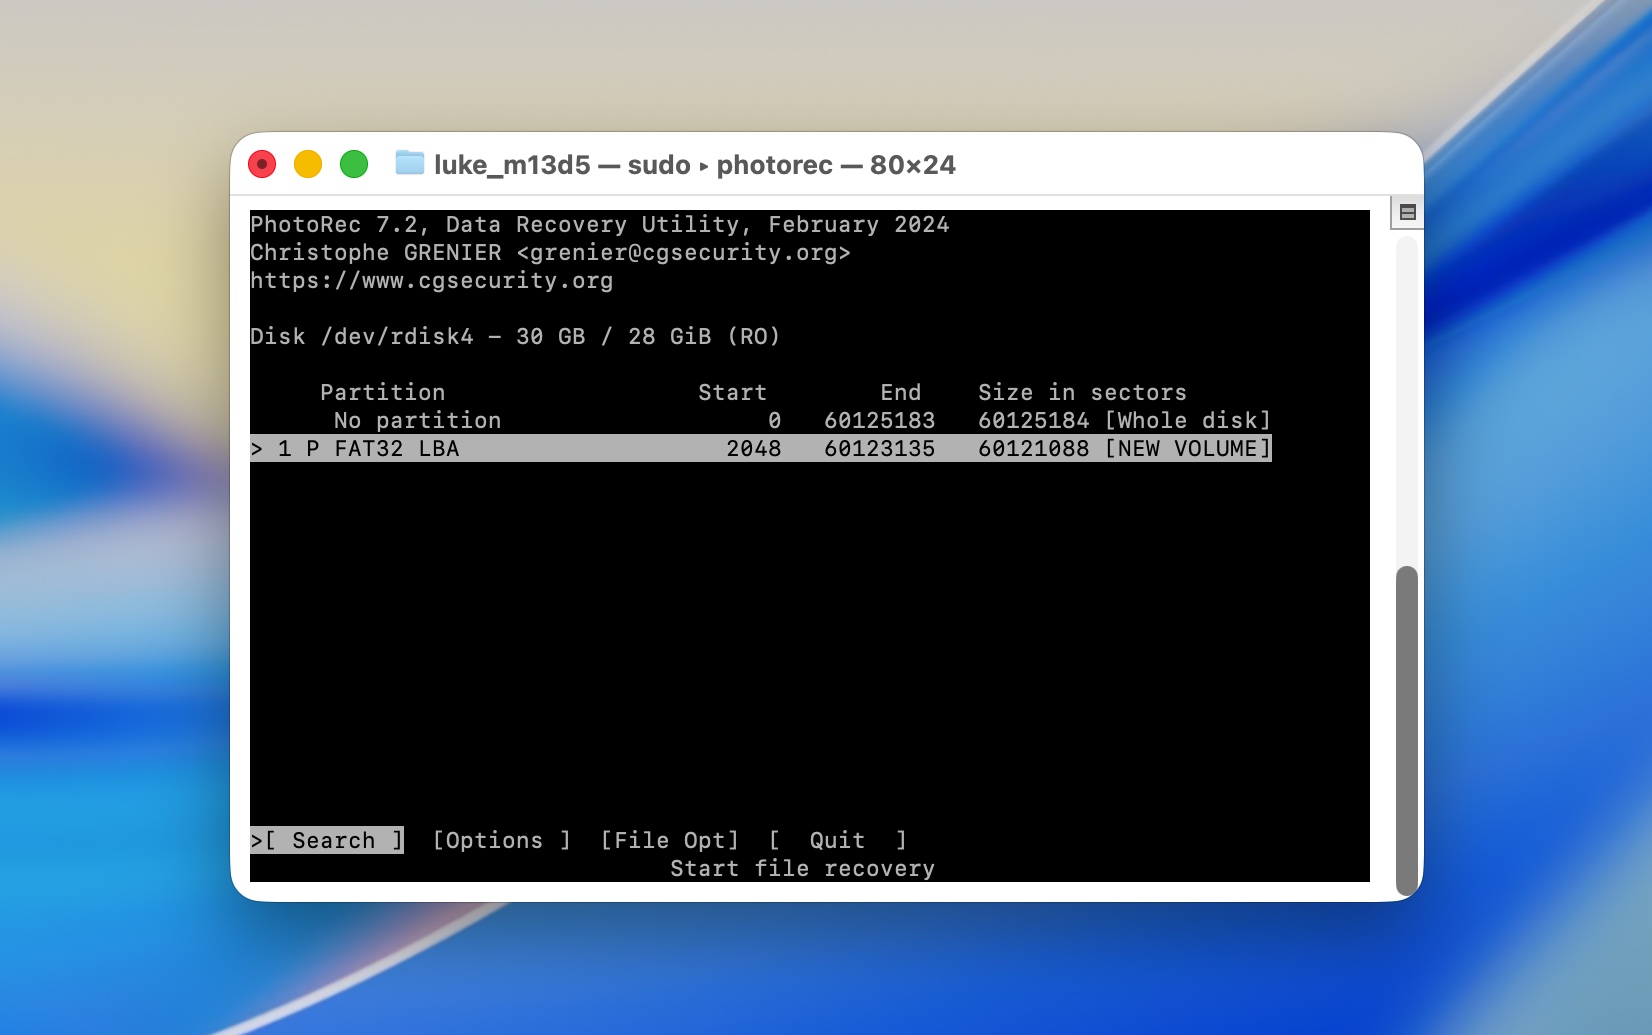
- Now, select the disk that contained the deleted data.

- Choose the partition containing the files you need to recover.
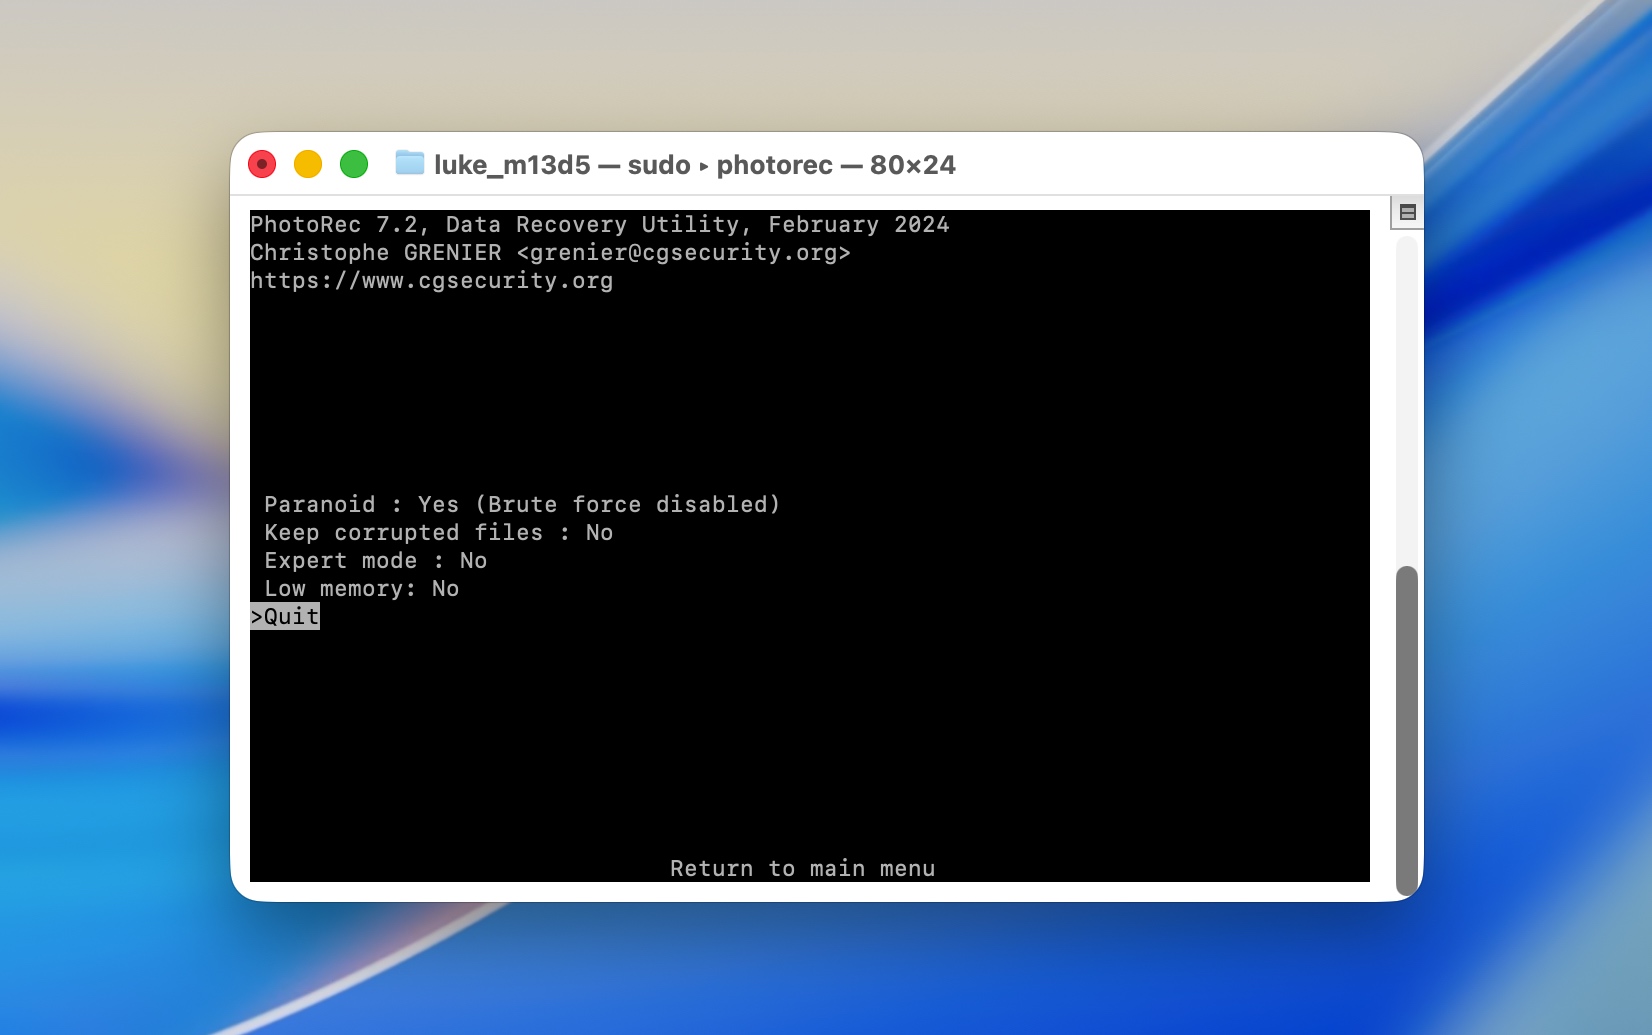
- Select the PhotoRec options to be used for this recovery.
- Choose the files and file type to be recovered.

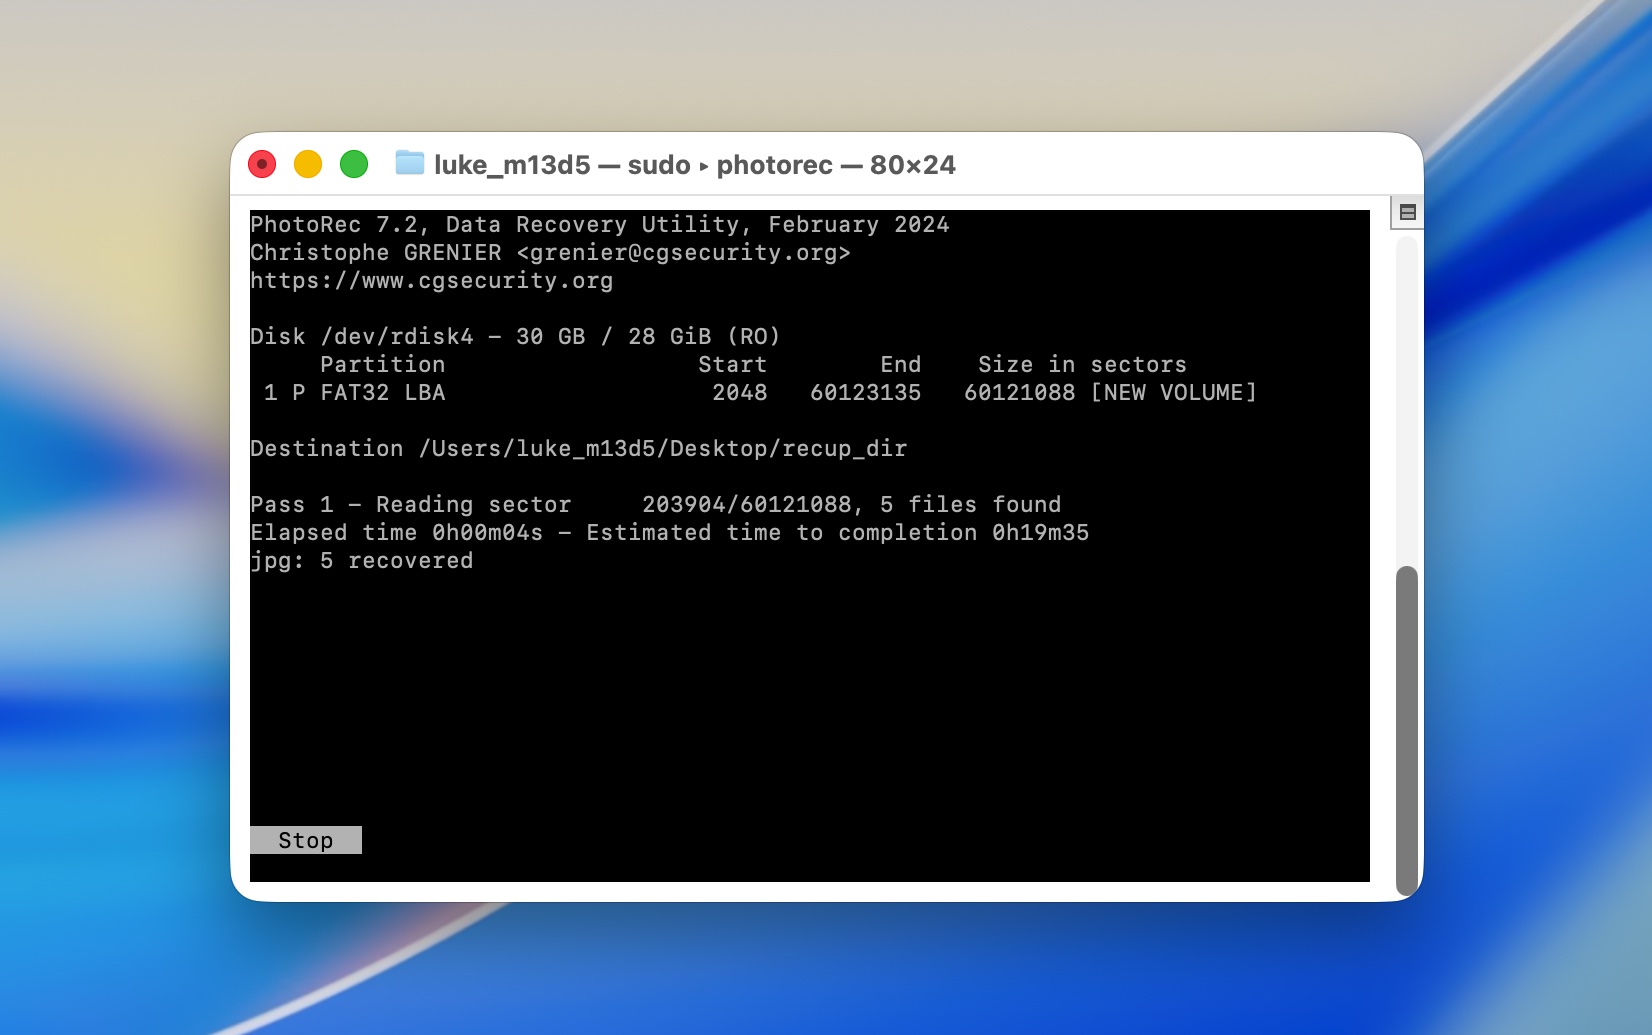
- Carve a partition to store the recovered files.
- Choose where to save the recovered data.

- Perform the recovery.
Though PhotoRec is not as feature-rich as commercial recovery software, sometimes it can be enough to restore Trash on your Mac. For more details on this software, we suggest you read our full review of PhotoRec.
How to Recover Emptied Trash on Mac Without Software
Now let’s look at some ways to restore Trash on a Mac without software.
In this section, we’ll mostly talk about backups. It’s important to understand that backups can only help if they were already active and running before the files were deleted. It doesn’t matter whether the backup was local or cloud-based—it only works if it was set up beforehand. By default, macOS does not back up your files unless you choose to enable built-in backup solutions or a third-party tool.
Method 1: Check Your Backups
If you regularly back up your Mac, you may be able to use the backup media to recover an emptied Trash bin. The key here is having the deleted files contained in your backup. New or recently modified data may not have been captured in your backups. Here are some options for recovering from backups that do contain the data that has been emptied from the Trash.
Manual Backup
The recovery method with manual backups is entirely dependent on the tool used to create them. It may simply involve moving and copying files or may require you to interact with the backup solutions user interface.
Time Machine Backup
This backup and recovery tool comes installed on your Mac. Use the following procedure when restoring the Trash from a Time Machine backup.
- Connect the Time Machine backup media to your Mac. You can still use Time Machine even if you can’t locate your external backup drive. Time Machine stores local snapshots directly on your Mac’s internal drive. These snapshots allow you to recover recently deleted files as long as they fall within the timeframe of the stored snapshots (up to 24 hours or until space is needed on the disk).
- Click the Time Machine icon in the menu bar and select Browse Time Machine backups.
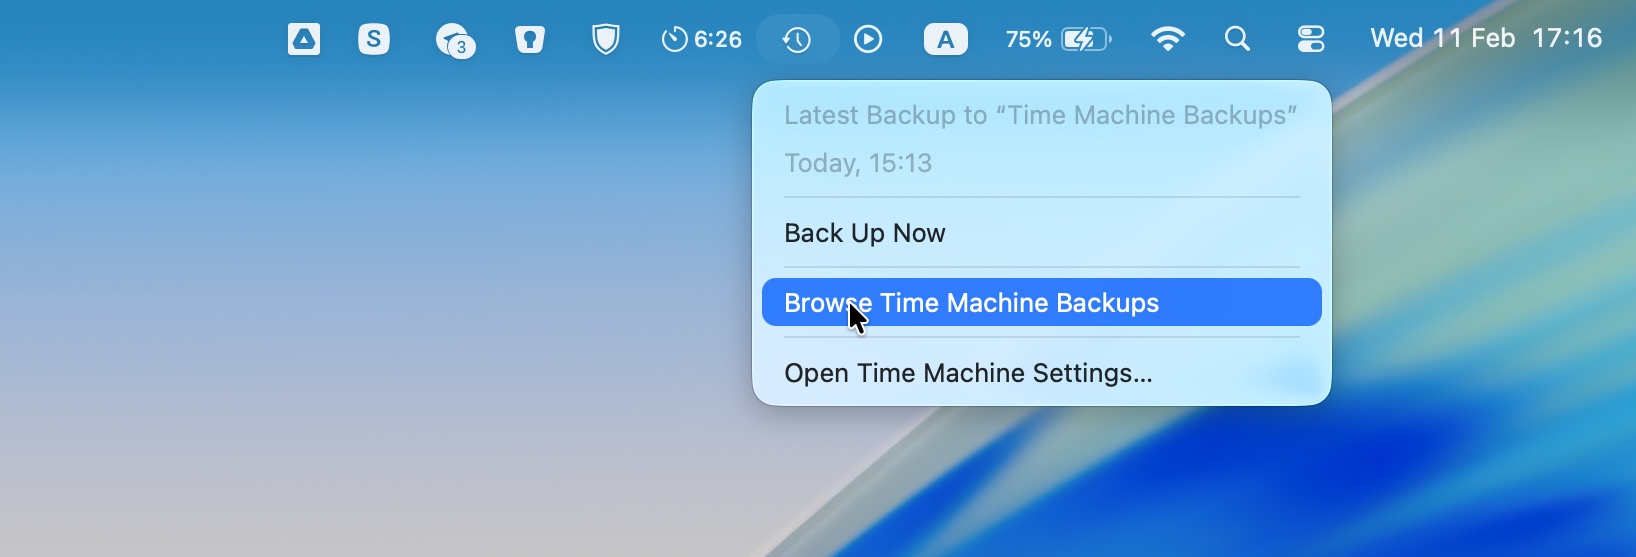
- In the Time Machine interface, navigate to the folder where the deleted files were originally stored. For example, if you deleted a file from the Desktop, open the Desktop folder.
- Use the timeline on the right side of the screen to scroll through previous backups. Find the date and time when the file still existed. Each snapshot represents a different point in time.
- Select items to be recovered and click Restore.
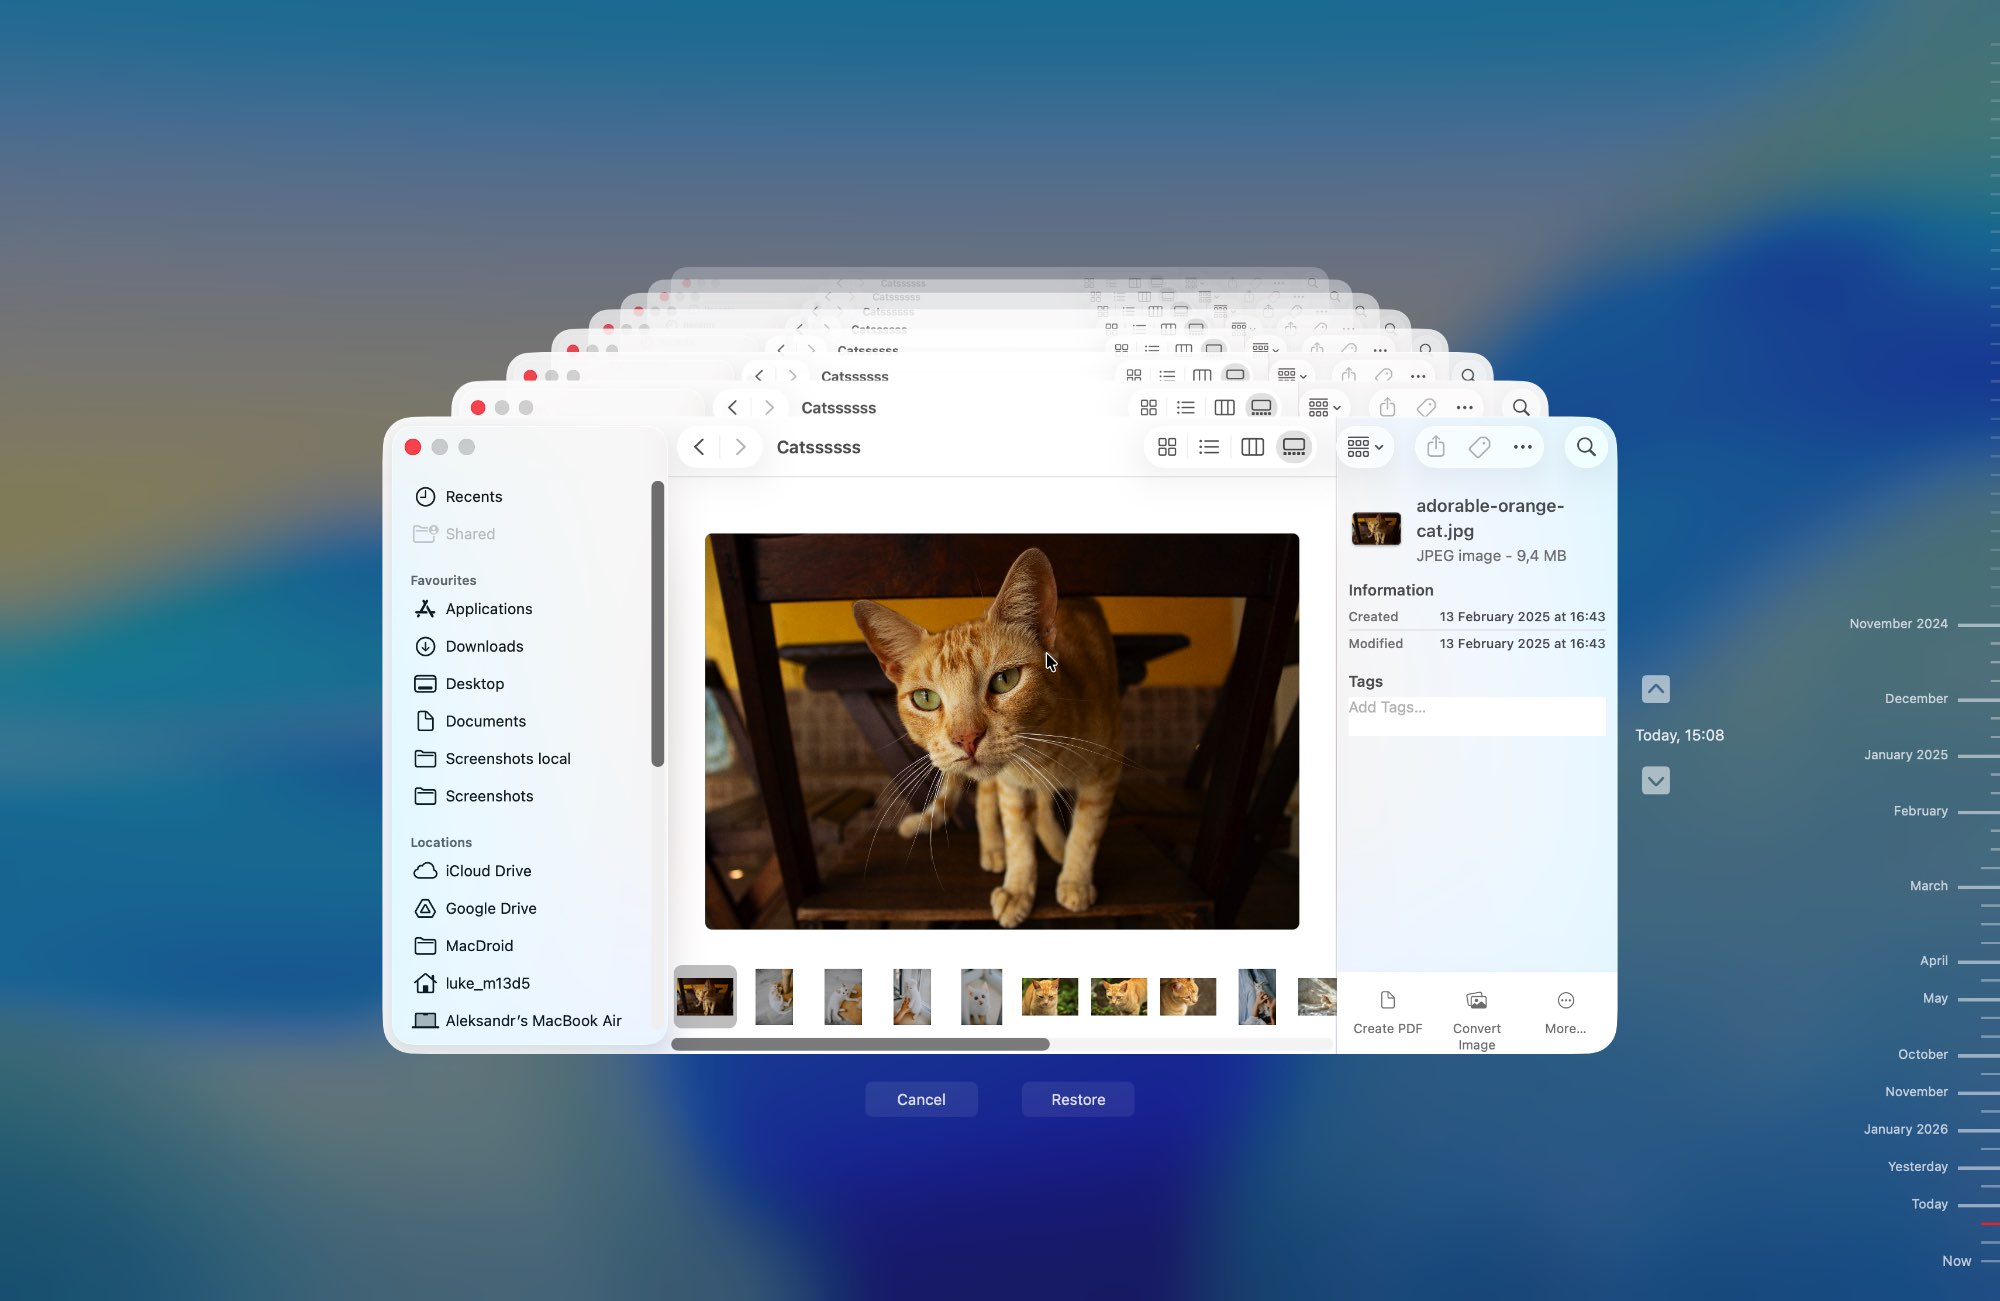
By the way, you can restore your files to a different location if you want to. Navigate to the file or folder you need, then Control-click (or right-click) and select “Restore to…” from the menu.
Cloud Backup
Another option is cloud backups. Your Mac comes with iCloud preinstalled, but you may also use alternatives like Google Drive or Dropbox. For this section, we’ll focus on Google Drive, as its functionality makes it a better option for recovering accidentally emptied Trash compared to iCloud.
With iCloud, synchronization works in a way that deletes files across devices. If you empty the Trash on your Mac, the file is also removed from the Recently Deleted folder in iCloud, as they are synchronized. On the other hand, Google Drive handles synchronization differently. When you delete a synchronized file, it becomes desynchronized. This means it may no longer be in the Trash on your Mac, but it will still be in the Trash of Google Drive. Here’s how to recover deleted files from Google Drive’s Trash on Mac:
- Log in to your Google Drive account through a web browser.
- In the left-hand menu, click on Trash to view files you’ve recently deleted.
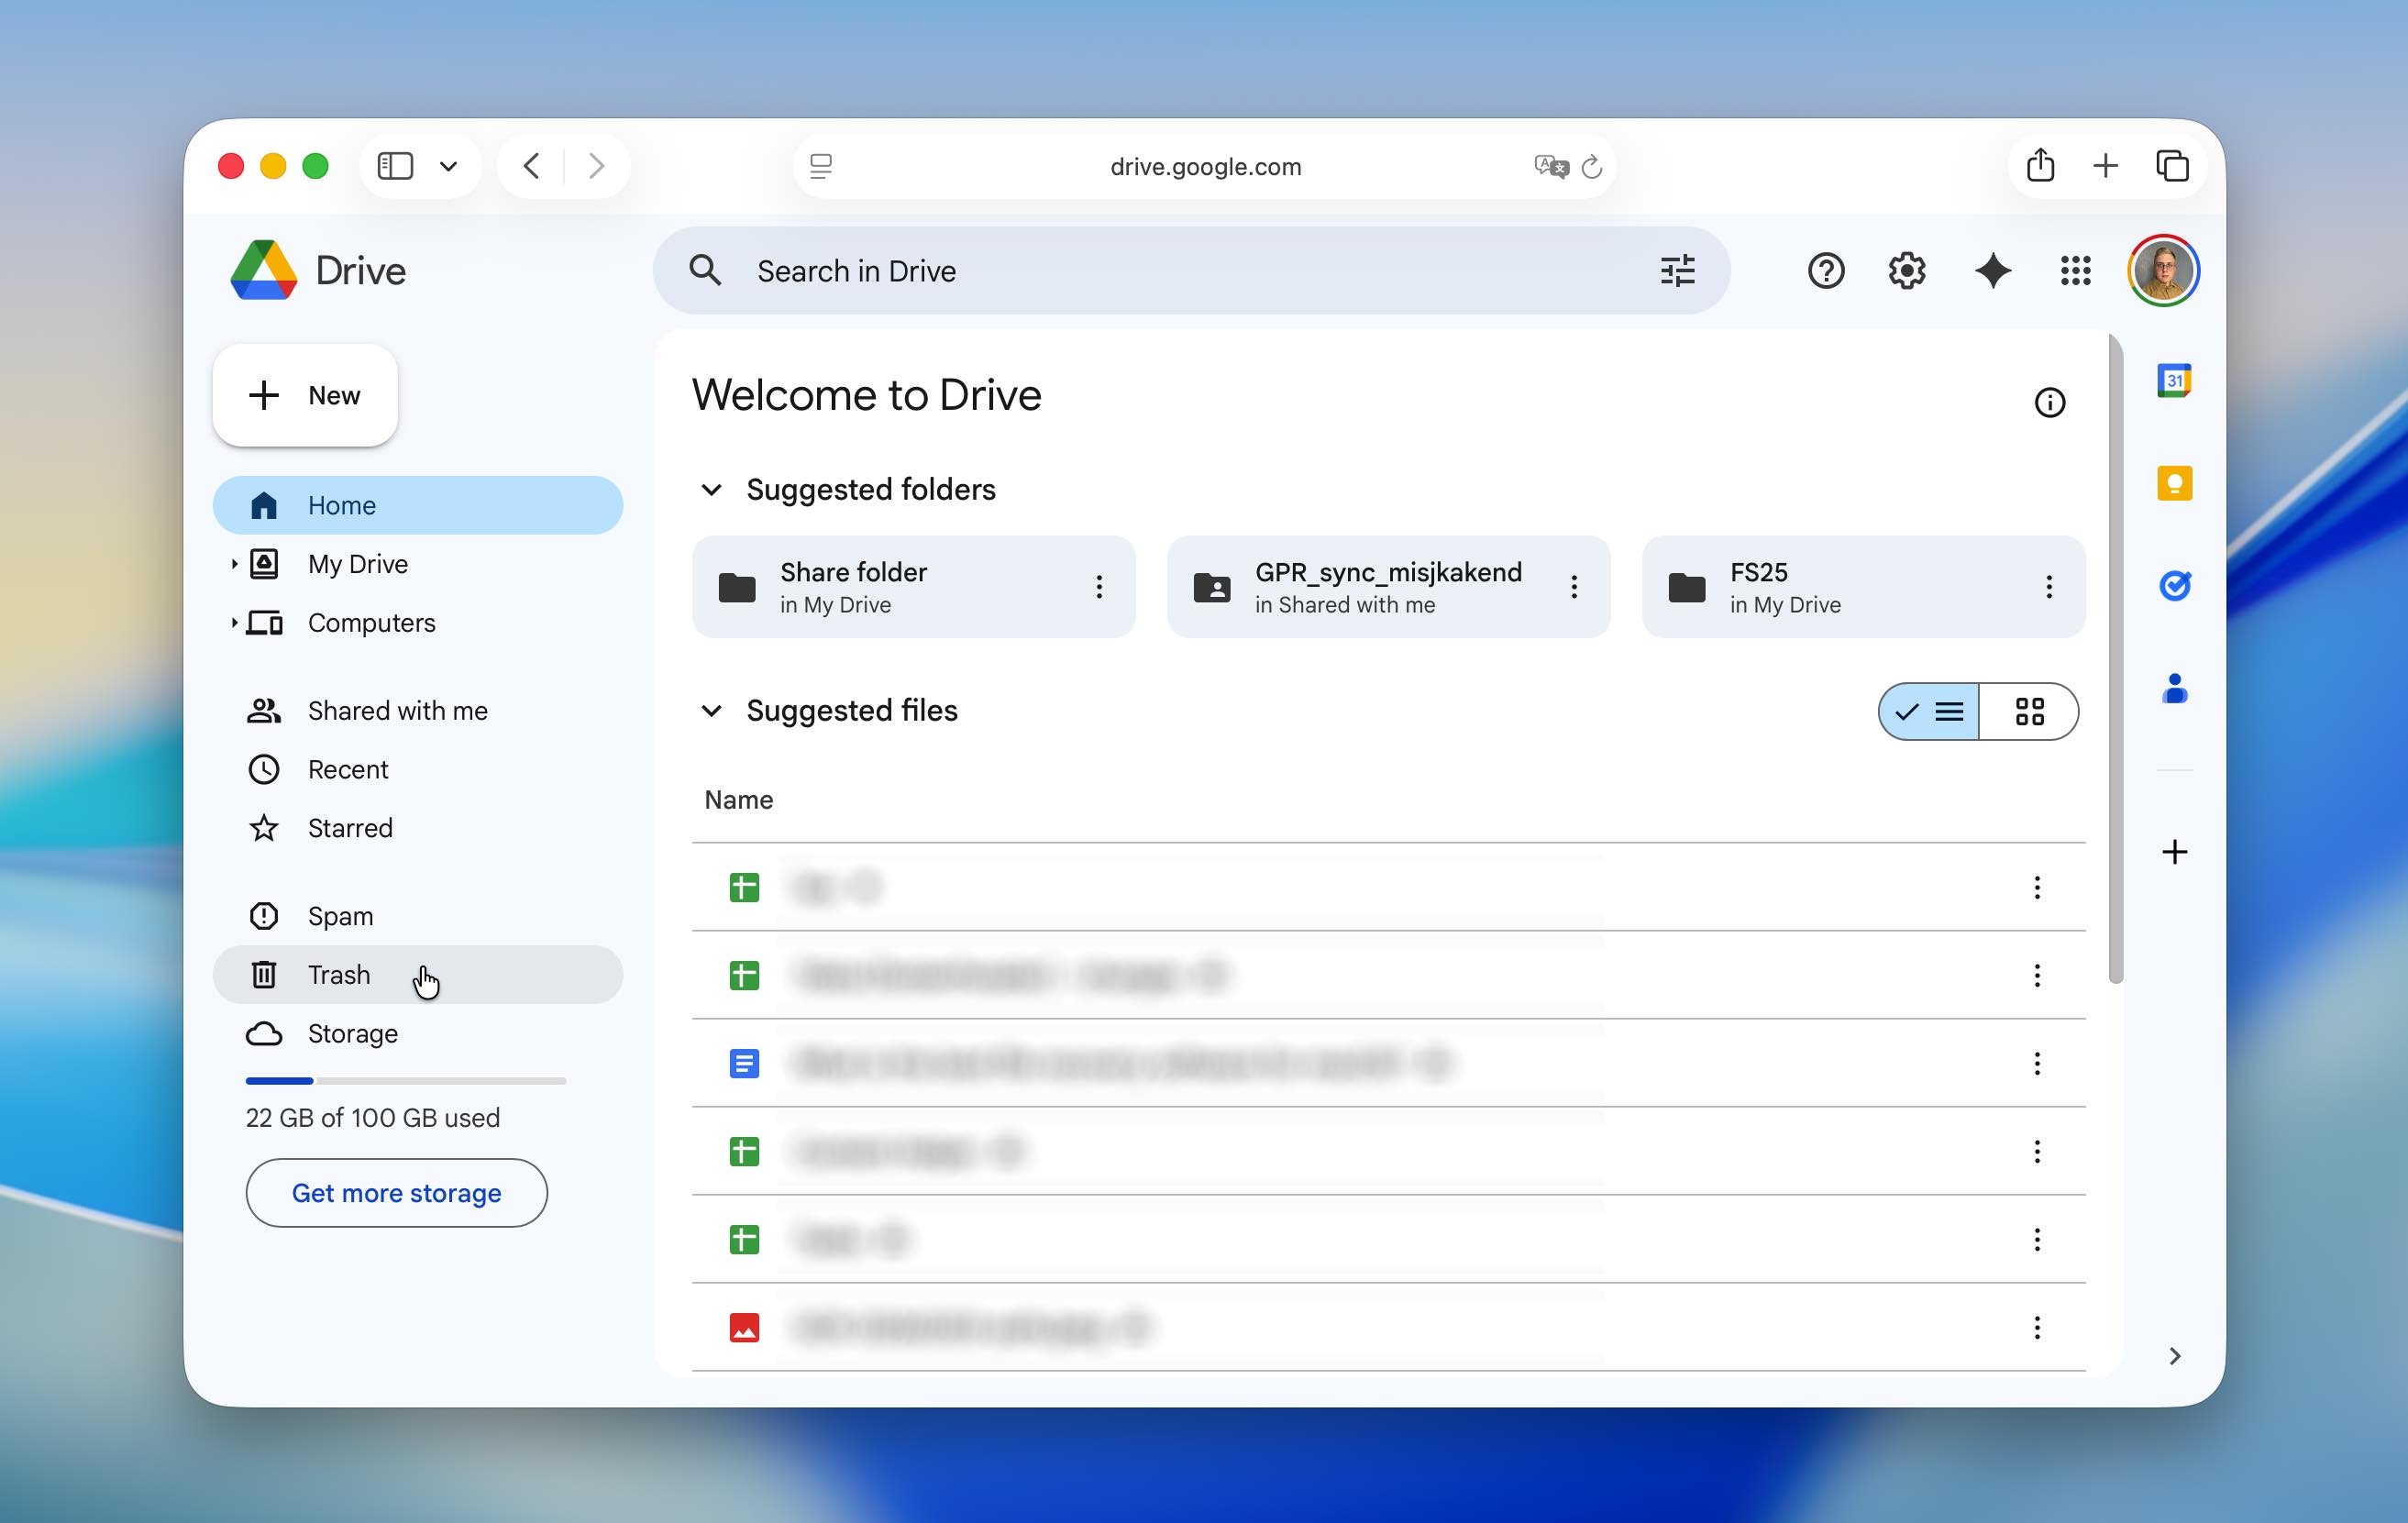
- Look through the list of deleted files for the one you want to recover. Use the search bar at the top if the list is long.
- Once you find the file, right-click on it and select Restore. The file will be moved back to its original folder in Google Drive.
- If you want to keep the file locally on your Mac, right-click on the restored file and select Download to save a copy directly to your Mac.
We understand that the chances of you using Google Drive might be slim. If you use a different cloud service, be sure to check it as well.
Method 2: Contact a Data Recovery Service
Data recovery services are great for addressing issues with damaged storage devices or failed hard drives. If you have simply emptied the Trash by mistake on your Mac, the technical skills of the data recovery center may not provide any additional value.
Either the files are there and can be recovered with DIY software or they have been overwritten and cannot be recovered except with a backup. You can save time and money by performing the recovery yourself using a reliable software solution.
Stuck in Your Recovery Efforts? Need Help?
If you have trouble with DIY data recovery, you can turn to professional data recovery services. It’s entirely up to you, but as we mentioned before, it can be a bit overkill and very expensive for most situations. Instead, you might want to seek guidance online. There are plenty of helpful communities that are more than happy to assist with data recovery issues.
For general tech support, you can check out communities like r/techsupport. Or for advice tailored specifically to data recovery, r/DataRecoveryHelp is a great place to start. You can also explore dedicated forums such as discussion.7datarecovery.com, where users and experts share practical recovery tips and solutions.
We also have our own Handy Recovery Advisor Community, where you can start a discussion about your specific situation. Be sure to include as many details as possible—like the type of drive, file system, and recovery steps you’ve already tried. The more details you provide, the easier it will be for others to offer accurate and effective advice.
Don’t hesitate to ask for help! These communities are full of experienced users who’ve likely faced similar challenges and can guide you in the right direction without the hefty price tag of professional services.
FAQ
How does Trash work on Mac?
When you or an application deletes an item on your Mac, it is not physically removed from your hard drive. Instead, it’s moved to a special folder called the Trash. Items are held in the Trash for a set period (usually 30 days) or until it reaches its storage limit. After this time, they are ‘permanently’ erased. Of course, you can also manually empty the Trash at any time.
You can easily restore files from the Trash on your Mac before it is emptied. Just open the Trash folder by clicking on the wastebasket icon in your Mac’s dock. Right-click on the item you want to restore and select Put Back. The item will be recovered to its original location on your Mac.
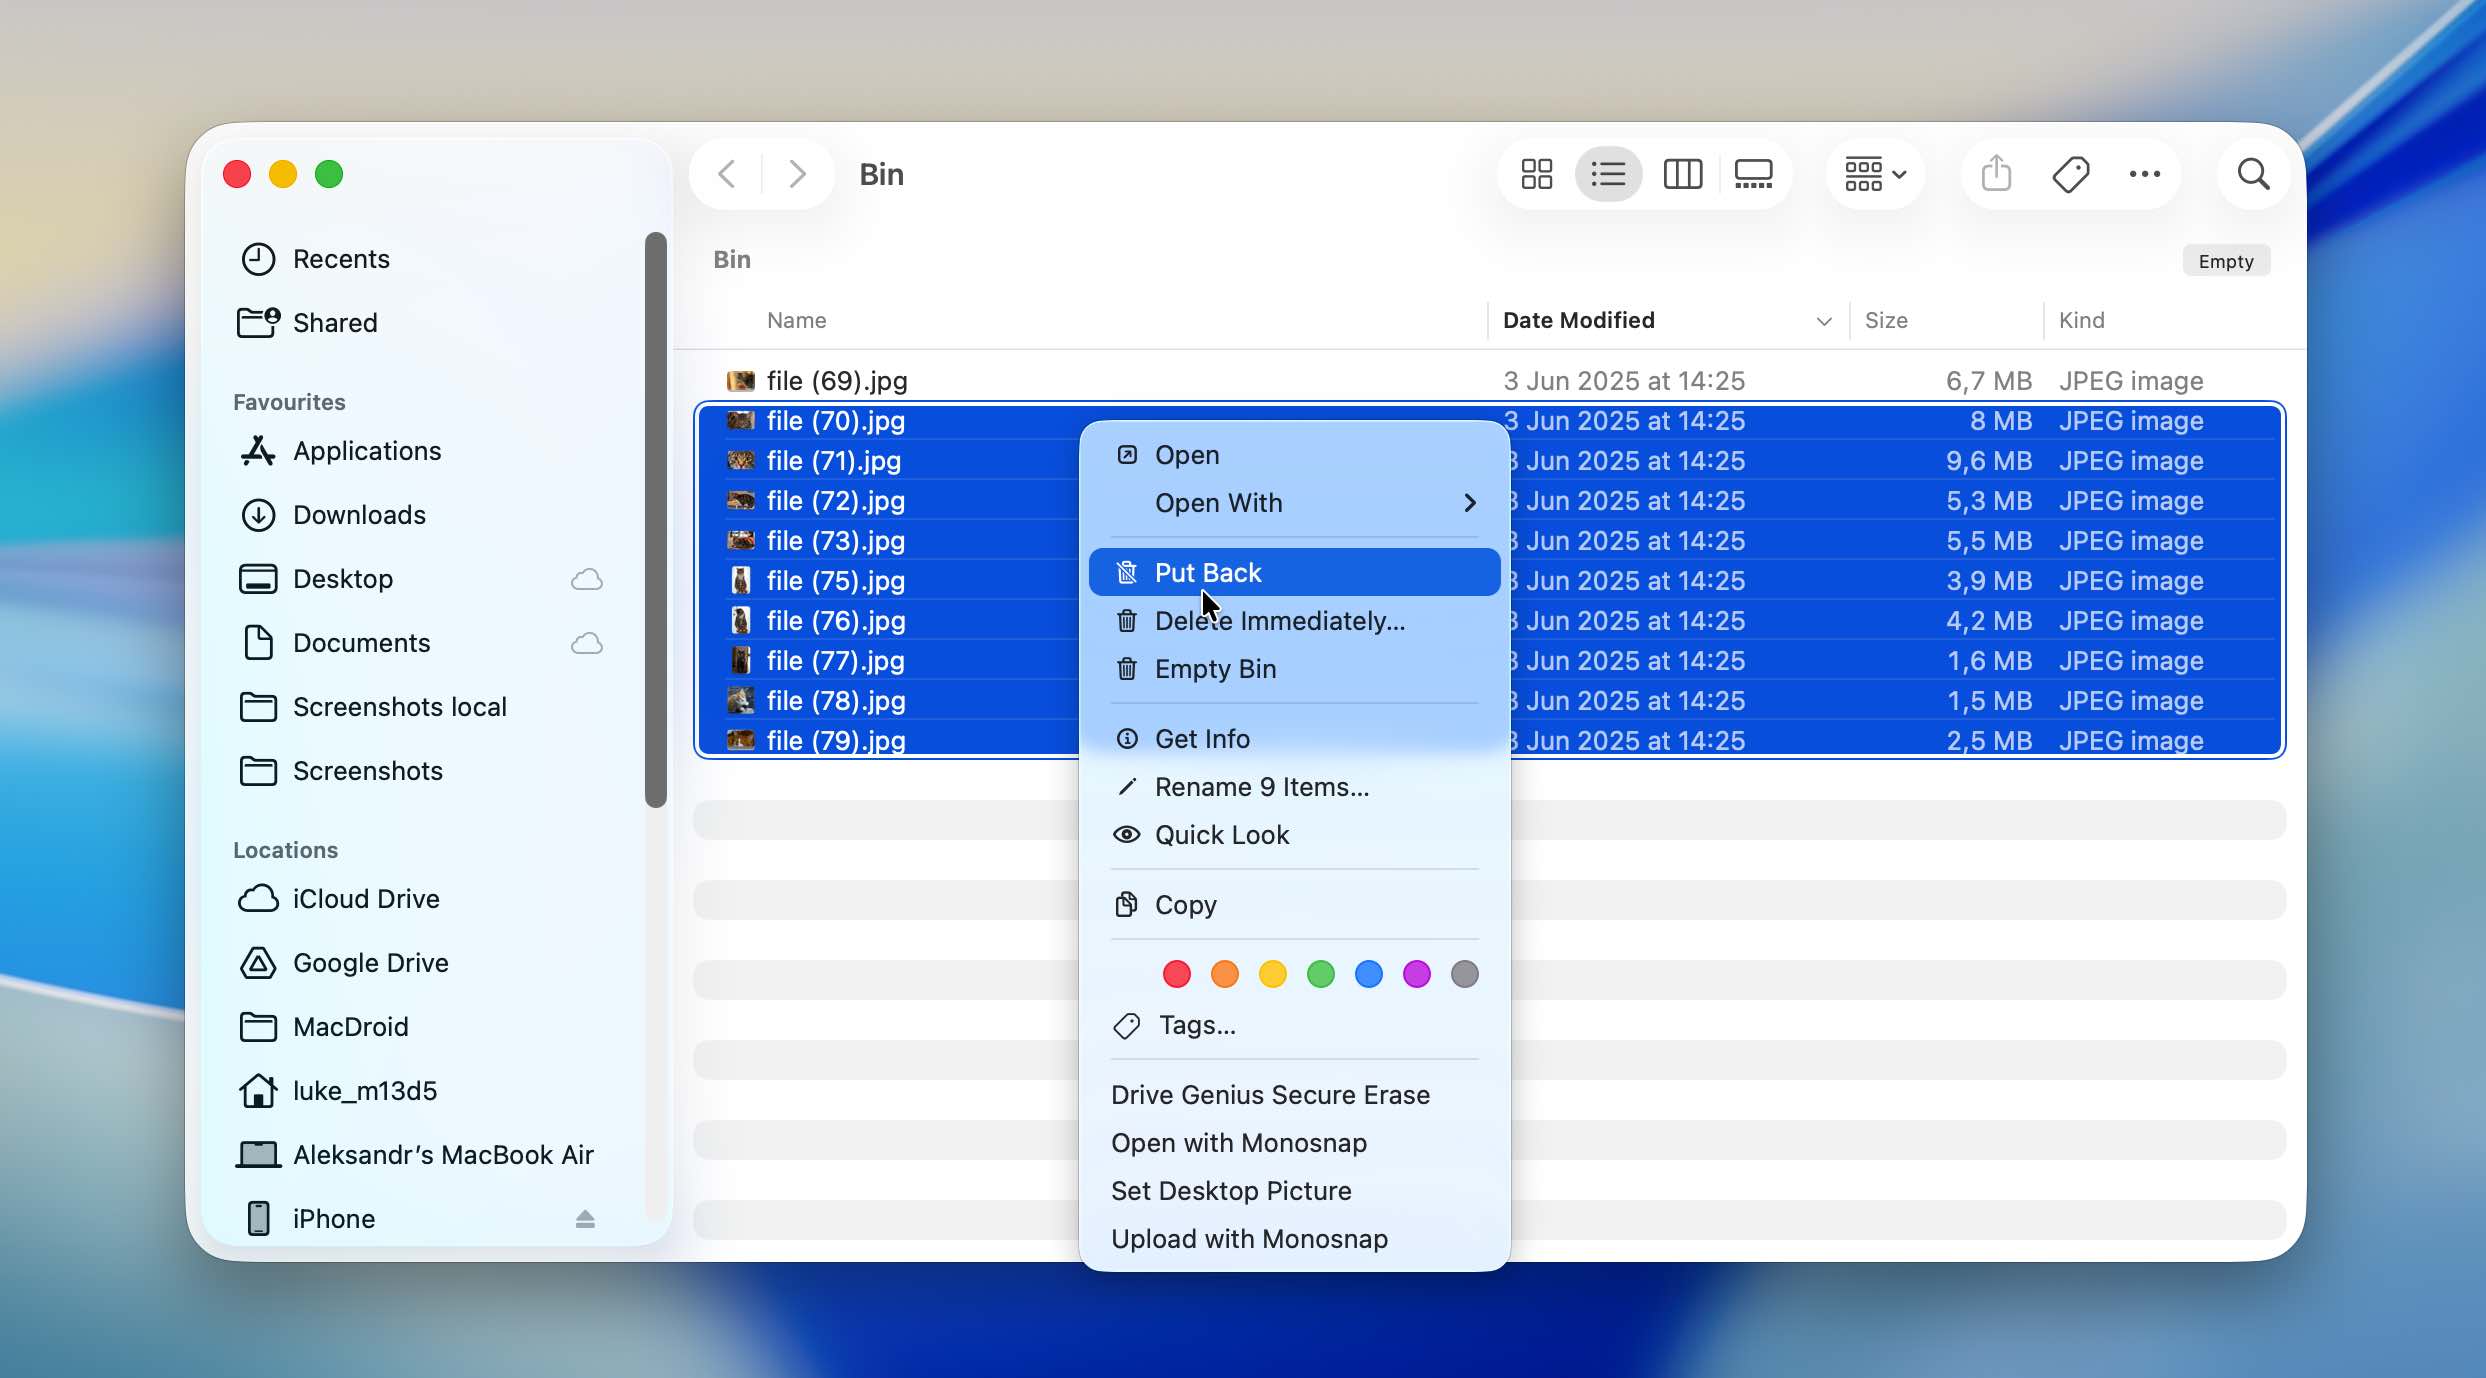
How to get something back from Trash on Mac?
Here’s what you need to recover something from Mac’s Trash:
- Open Trash on your Mac.
- Pick the items you want to recover.
- Select something you want to restore from your Trash, then right-click on it.
- Click the ‘Put Back’ option to undelete files.
Does Mac have an undo empty Trash command?
No, macOS does not include an undo command for emptying the Trash. Once you click Empty Trash, the files are removed, and there’s no built-in option to reverse this action. However, you can recover the files using methods like recovery software (e.g., Disk Drill) or backups (Time Machine or cloud storage).
How can I recover accidentally emptied Trash on Mac?
Use this procedure to recover accidentally emptied Trash on a Mac:
- Download and install data recovery software on your Mac or an external disk.
- Launch the App and select the disk containing the lost data.
- Scan the disk and preview recoverable items (if the software allows for previews).
- Select the files you want to restore (if the software has this option).
- Restore the selected items to a new storage location.
I'm new to macOS. Is it possible to recover files deleted from the Recycle Bin on Mac?
Macs don’t have a Recycle Bin. The Recycle Bin is a Windows feature—on a Mac, it’s called Trash. And yes, it is possible to recover files deleted from the Trash, even if it has been emptied—and that is precisely what we covered above.
You can recover them using a few methods. Check your backups, like Time Machine or cloud services (e.g., iCloud or Google Drive), to restore the files. If backups aren’t available, use recovery software like Disk Drill or PhotoRec.
Yes, but only if you have backups in place. If you use Time Machine or another backup system, you can restore files directly from those backups without relying on third-party recovery software. For example, Time Machine allows you to navigate past snapshots and restore files to their original location.
What are the best apps for Mac trash recovery?
Some of the best apps for recovering files from emptied Trash on a Mac include:
- Disk Drill is a top choice for retrieving files, even if they were permanently deleted. It supports a wide range of file types and offers extras like disk health monitoring and duplicate file cleanup.
- PhotoRec is a free tool for advanced users, it can recover files based on their signatures. While it doesn’t offer a graphical user interface for Mac (Terminal use is required), it’s quite capable.
There are also some noteworthy recovery apps that we didn’t include in this article but are known for their strong reputation and reliable recovery performance, such as R-Studio and UFS Explorer.
Can I recover emptied Trash on my Mac for free?
Yes, it’s possible to recover emptied Trash on your Mac for free. All the methods we covered above are free in one way or another. PhotoRec is completely free and lets you recover files without any cost. Disk Drill has a free version that allows you to scan and preview files to make sure they are recoverable, though recovery requires upgrading. Time Machine is built into macOS and is free to use if you’ve set it up beforehand. Most cloud services, like iCloud and Google Drive, also offer free plans.
Is it safe to use data recovery software on my Mac?
Yes, it’s generally safe to use data recovery software on your Mac, as long as you choose a reputable tool. Apps like Disk Drill and PhotoRec are well-trusted and don’t alter your data during the recovery process.
Our team also extensively tested the Disk Drill specifically for safety, if you want to learn more.
Is it possible to recover Trash on Mac using Terminal?
Yes, it is possible to recover Trash on Mac using Terminal but only if it has not been emptied. Check out this page for more info on using Mac Terminal to recover deleted files.
How can I recover Trash on MacBook Pro?
You can use data recovery software to restore items from an emptied Trash on a MacBook Pro using the procedure detailed above. We invite you to look at a more in-depth look at MacBook data recovery.
This article was written by Robert Agar, a Staff Writer at Handy Recovery Advisor. It was also verified for technical accuracy by Andrey Vasilyev, our editorial advisor.
Curious about our content creation process? Take a look at our Editor Guidelines.