
The three main MacBook data recovery methods described in this article include iCloud backups, Time Machine backups, and data recovery software, namely Disk Drill. With our guidance, you’ll be able to pick and apply the best method to effectively address your specific data loss problem.
MacBooks are excellent examples of the convergence of form and functionality. They are high-powered computers with a sleek and modern appearance that appeals to users in all kinds of disciplines. You probably use your MacBook to store a lot of important information.
Unfortunately, your computer is not impervious to the problem of data loss and you may at some point need to recover deleted or lost files from a MacBook Pro’s hard drive. We are going to show you the three best ways to perform a MacBook data recovery so you can get your valuable information back.
Before We Start The most important action you can take to improve the chance of a successful recovery is to immediately stop using the storage device that has experienced data loss. This applies to your internal drives as well as any external devices such as a thumb drive or memory card. Failure to follow this advice risks overwriting the data you wish to restore before you can recover it.
Why is MacBook Data Recovery Even Possible?
The answer to this question can be summed up in one word: macOS! But let’s dig a little further and explain that mysterious answer with some details about how macOS makes data recovery possible. It’s really not that mysterious at all.
When a file is deleted on a MacBook running macOS, the logical links that make the data accessible to applications and the operating system are removed. The data is physically retained on its storage device and the space it formerly occupied is marked as available for use by the system.
At some future point in time, new information will be stored in this space, overwriting the original deleted file. Until that activity occurs and the file is overwritten, it can be recovered by data recovery software. This specialized software scans a storage device and repairs the deleted logical links. Once the links are repaired, applications can access the files as if nothing had ever happened to them.
The catch is, data recovery software only works if the deleted files have not been overwritten with new information. For this reason, it is very important to stop using the storage device, in this case, your MacBook, until the recovery process is completed. Once you overwrite a file, your only chance of getting it back is from a backup.
Top 3 Best Methods to Recover Data From MacBook/MacBook Pro Hard Drive
Let’s talk about the best ways to recover deleted data from your Mac laptop.
Before we proceed we need to discuss the issue of backing up your MacBook. You may have heard this before, but it is considered best practice to regularly make backups of your important information. The importance of back-ups is evidenced by the fact that two of our top three recovery methods make use of a previously taken backup as the basis for restoring your data.
If you are not backing up your MacBook yet, we suggest you start doing it right away. One day you may be very glad you did.
There are many third-party backup solutions on the market. Some use cloud storage and others require you to use an external storage device such as a USB drive. We are going to concentrate on two Apple solutions. Since they come with your MacBook, you can be sure Apple support has more information on these solutions should you run into trouble.
Method 1. Recover Lost Files on MacBook Pro From an iCloud Backup
iCloud is Apple’s cloud storage solution and you can use it to easily and safely store your files. You can recover a deleted file from iCloud for up to 30 days after it is deleted. Storing your files in iCloud also makes them available from all of your devices and computers. Here’s what you have to do to use iCloud.
Set up iCloud Drive on your MacBook
- On your Mac, choose Apple menu > System Preferences, click Apple ID, then select iCloud in the sidebar.
- Select iCloud Drive.
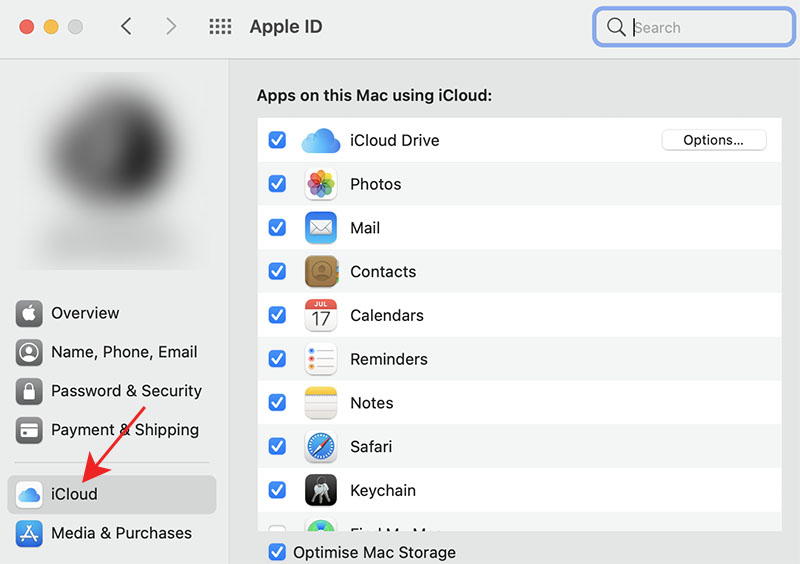
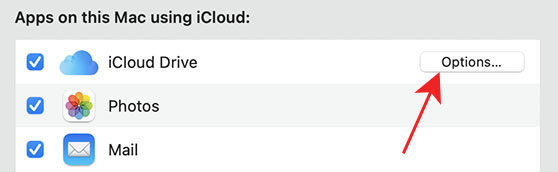
- Click Options next to iCloud Drive.
- Select Desktop & Documents Folders.

- Click Done.
After completing this procedure, your Desktop and Documents Folders will be stored on your MacBook’s iCloud Drive from where they are automatically backed up to the cloud. Items in your iCloud Drive can be recovered from iCloud if they are deleted.
Restore a file deleted from iCloud
If you have deleted a file directly from your iCloud Drive, it can be recovered up to30 days after the deletion occurred by using the following steps.
- Go to iCloud.com and login with your Apple ID.
- Open iCloud Drive and click Recently Deleted in the bottom-right corner of the window.
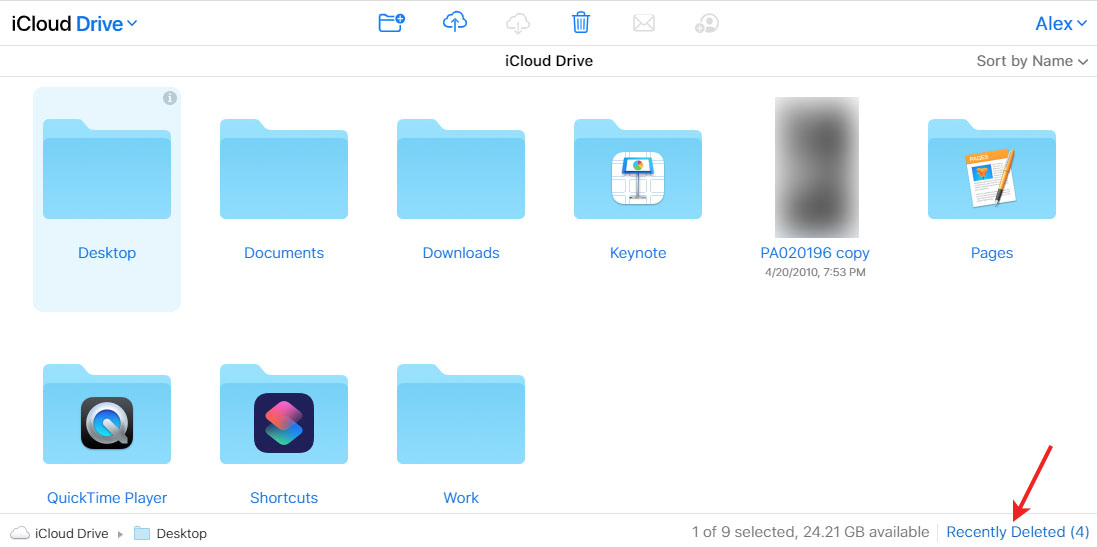
- Click Recover All or select the items you wish to restore and then click Recover.

Restoring data deleted from other applications
Follow these steps to recover files deleted from within an app or from one of your devices including your MacBook.
- Go to iCloud.com and login with your Apple ID.
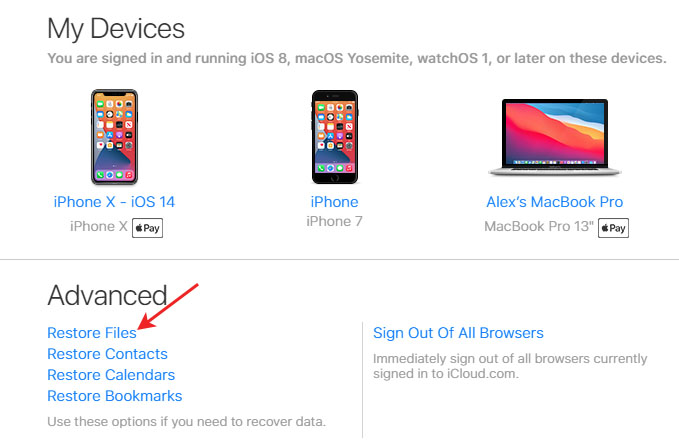
- Under your Profile’s drop-down menu, select Account Settings.

- Click Restore Files.
- Select individual files or Select All.
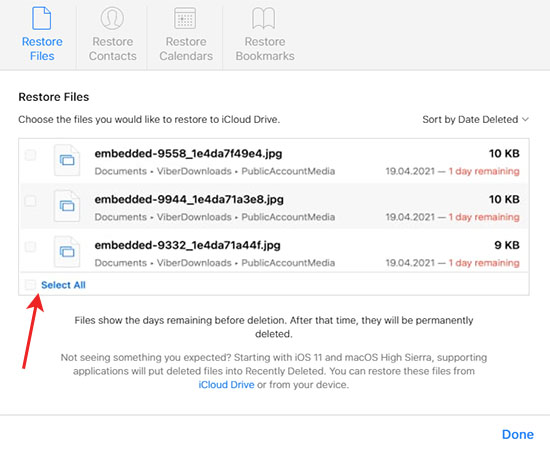
- Click Restore to recover the files to their original locations.
The limitation with this recovery method is that you have to be using iCloud and you will not be able to recover files deleted more than 30 days ago.
Method 2. Recover Deleted Files on MacBook Pro From a Time Machine Backup
Time Machine is Apple’s backup and recovery solution and is included as a free feature with macOS on your MacBook. This gives you no excuse for not backing up your machine. You will need an external disk to use Time Machine.
We recommend a disk at least as large as the disk or disks you will be backing up with Time Machine. Consult this Apple support page if you need help setting up Time Machine.
Once you have it all set up, you should either automatically schedule backups or regularly perform the process manually. Now let’s run through the steps required to restore deleted data with Time Machine.
- Open a Finder window in the Folder where the lost data was stored. For example, if you deleted a file from your Pages folder, open Finder in the Pages folder.
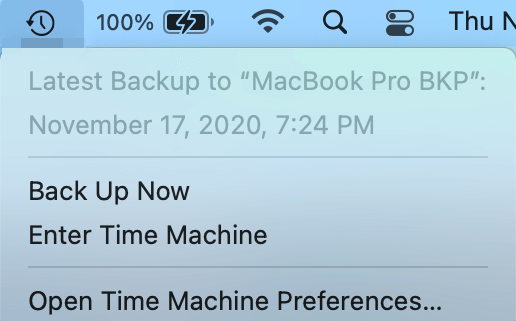
- Open Time Machine by clicking the clock icon on your menu bar, from Launchpad, or by selecting it from System Preferences.

- Use the arrows and timeline to browse the local snapshots and backups.
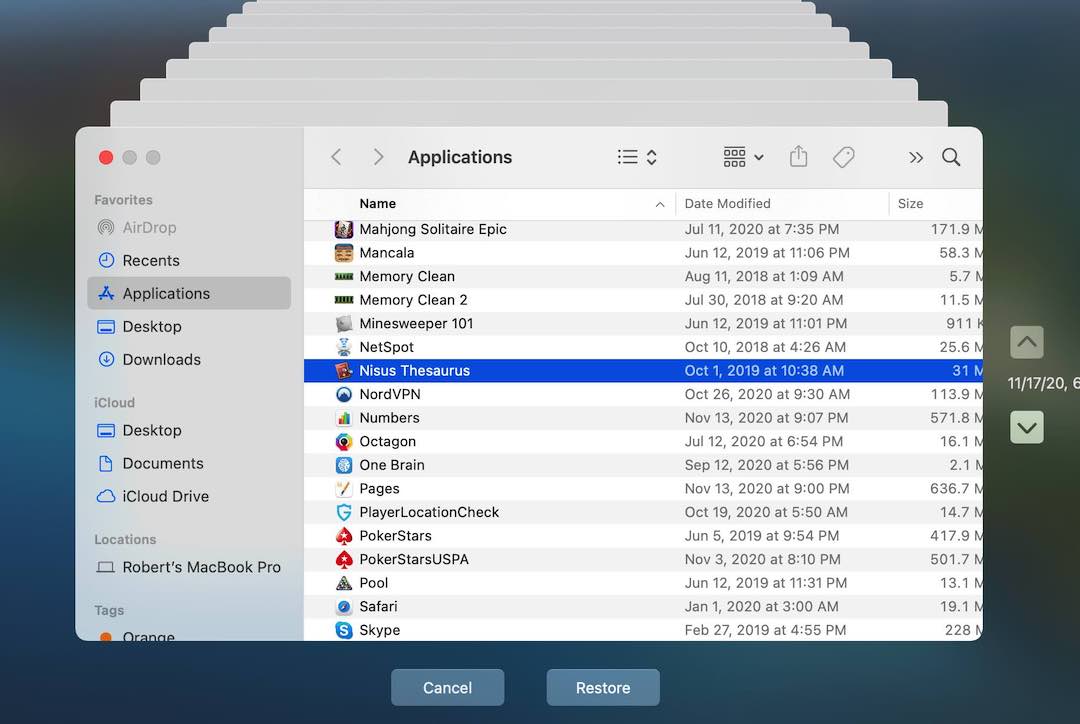
- Select one or more items you want to restore and click Restore.
Restored items will be recovered to their original location on your MacBook.
Method 3. Retrieve Data From MacBook Hard Drive Using Data Recovery Software
The most efficient method of restoring deleted files on a MacBook is with data recovery software. Native OS tools may not be sufficient and you might not have had a chance to back up the data before disaster struck. Maybe you have previously neglected to make backups and are now questioning your judgment.
You may be wondering how software can restore deleted files. It’s really no mystery. Data recovery software for Mac takes advantage of the way that your Mac deletes data. When your MacBook deletes a file, it removes the logical links that made the item accessible by other applications and marks the space it occupies as available for future use.
The physical data remains on the storage device until it is overwritten by new information. This is why we strongly caution against using the device until you have performed the recovery. Failure to follow this warning risks overwriting your data, making it impossible for it to be recovered with software.
As with backup solutions, there are many data recovery software products on the market. They vary widely in their ability to successfully recover your files, compatibility with devices and operating systems, and price.
They all essentially work the same way by restoring the logical links that enable the data to be accessed by your programs. Reliable solutions can recover many different types of files from all kinds of storage devices.
Choosing Data Recovery Software
We will be using Disk Drill as our demonstration data recovery software tool. It is easy to use and reasonably priced. We have had excellent recovery results when using the app. You can certainly use a different recovery application and obtain information about its use from the developer’s website.
Here is a little about why we like Disk Drill before we proceed with the recovery steps. The tool has an intuitive interface that minimizes the stress involved with a data loss scenario.
The Mac version supports all of the latest versions of macOS and also enables you to recover lost data from a MacBook, MacBook Pro, MacBook Air, iMac, iMac Pro, Mac mini, Mac Pro, iPad, or iPhone.
You can recover data from virtually any type of disk-based storage device that can be connected to your Mac. This includes external drives, memory keys, and SD cards. In deep scanning mode, Disk Drill recognizes and can recover over 400 different file types. This includes all popular formats for videos, images, audio files, documents, archives, and more. Some examples are:
- Video – AVI, MOV, MP4, WMV
- Audio – MP3, OGG, WMA, WAV
- Images – PNG, JPG, GIF, TIFF
- Documents – DOCX, TXT, PDF
- Archives – RAR, ZIP, CAB, DMG
Recovering deleted MacBook data with Disk Drill
Follow these steps to recover your lost files with Disk Drill.
-
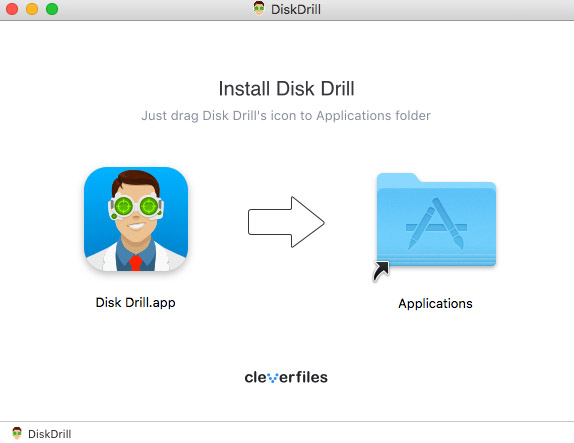
Download the Tool:
Download, install, and launch Disk Drill for Mac on your MacBook.
-
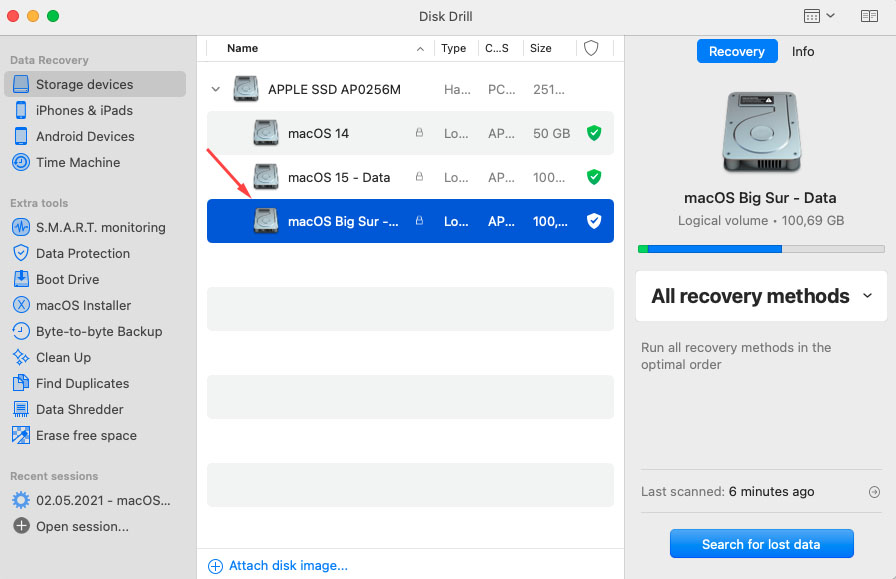
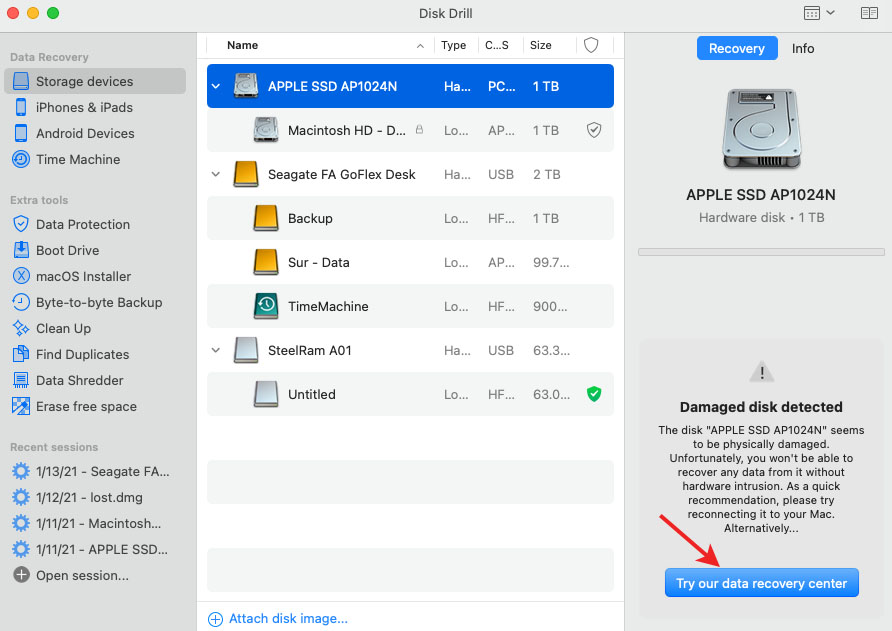
Select the Device:
Select the storage device that contained the deleted items from the disk list provided by the application.
-
Start Scanning:
Click the Search for Lost Data button to start scanning for deleted files. You can choose a specific scanning method or let the tool run through all of its procedures in the optimal order.
-
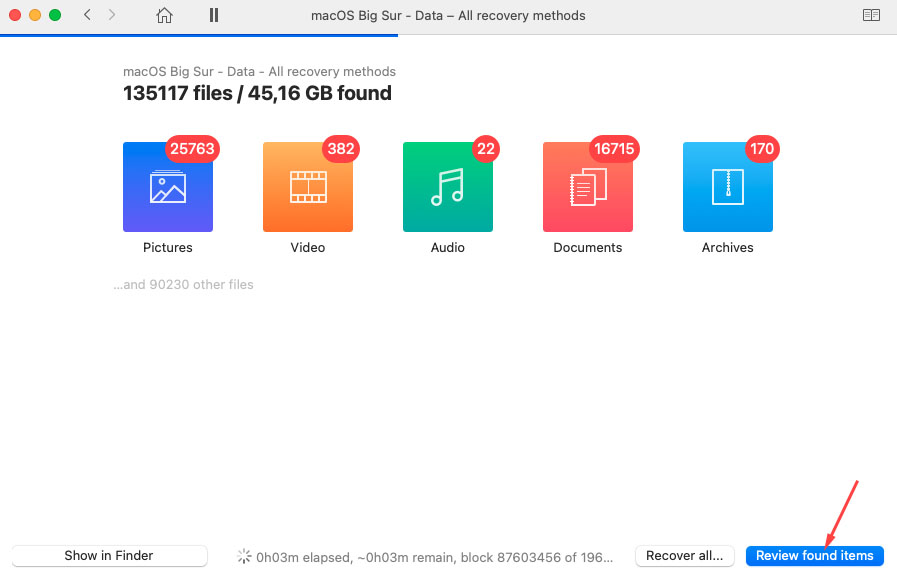
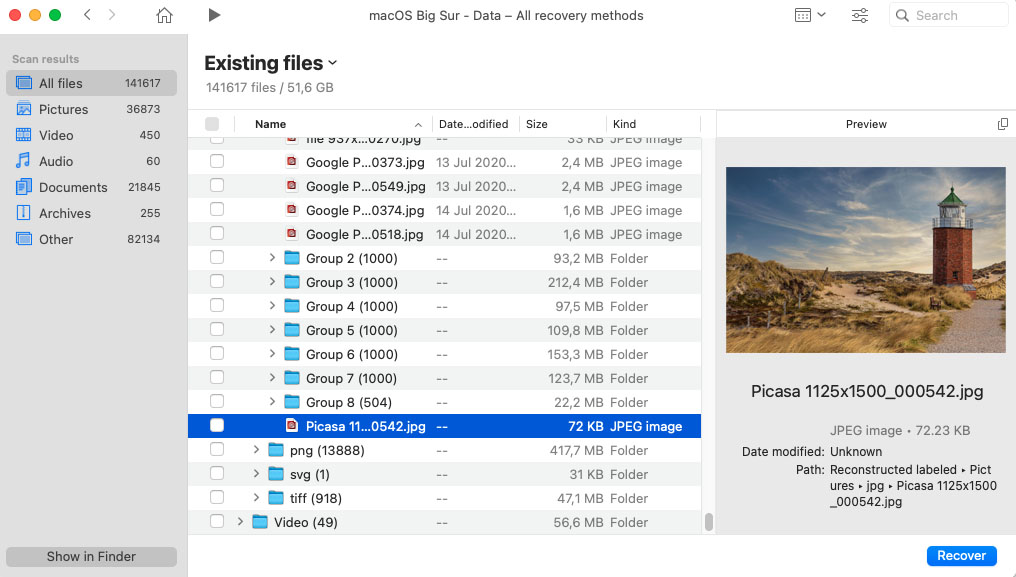
Preview Found Files:
Select the items that you wish to recover. You can choose to restrict your selections to a particular type of file if desired. As you select items, you can preview them in the window to verify they are the items you wish to restore.
-
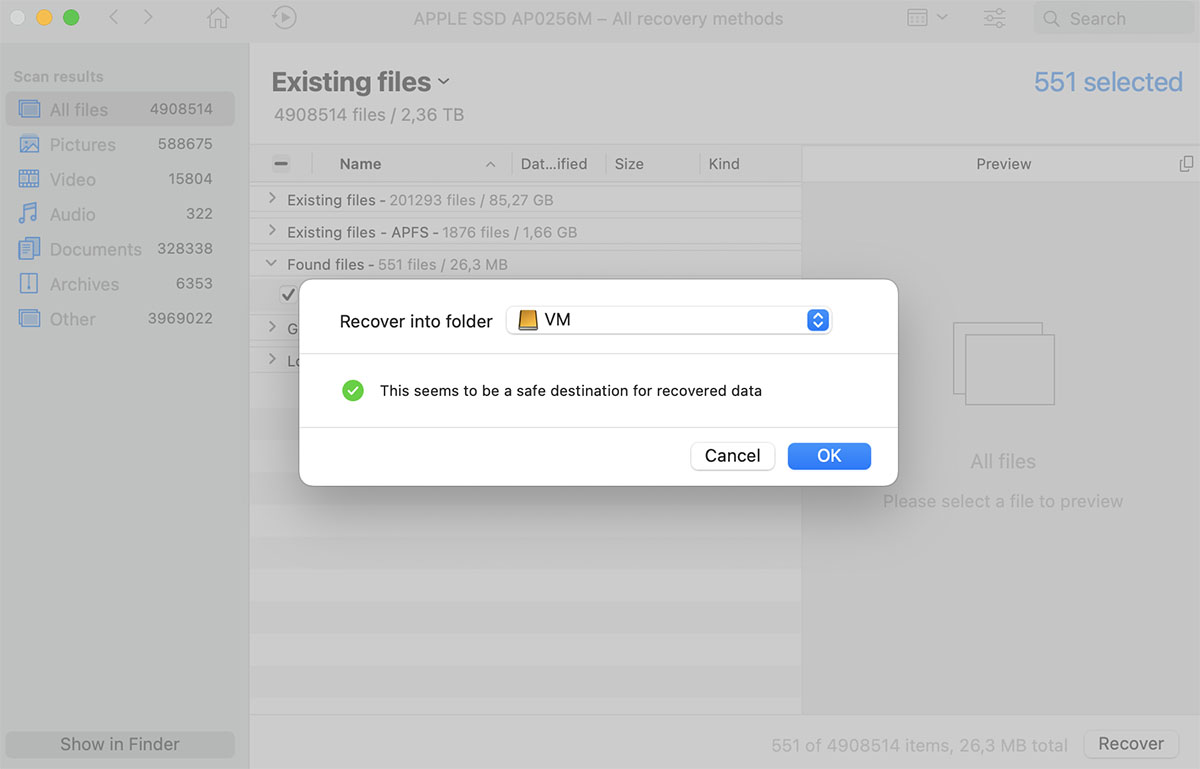
Recover Your Data:
Click Recover and choose a new storage location for the recovered data. Once again, do not use the original disk or partition to avoid the risk of overwriting the information you want to restore. When the process completes, your files will be in your designated location.
Honorable Mentions
Some recovery methods, while perfectly valid and potentially useful, do not make it into our top three for a variety of reasons. Let’s look at these methods and see why there are better ways to recover lost or deleted data from your MacBook Air or MacBook Pro.
💻 The MacBook Trash Bin
This is the first place to look for a deleted file on your MacBook. Most Mac users have already tried this method unsuccessfully or they probably would not be reading this article. In case you are unaware of the steps required to check the Trash Bin, use the following instructions.
- Click on the Trash Bin icon to open the Trash folder.
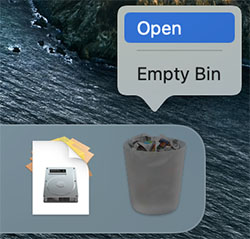
- Search for the files you would like to recover.
- Right-click on the chosen items and select the Put Back option to restore files from the Trash back to their original location.

↩️ The Undo Option
The Command+Z keystroke combination lets you undo your last action. You can also access the undo command from within many apps by accessing it on the Menu bar. Using this command immediately after deleting a file may get it back, but the problem is you need to have realized that you’ve made a mistake as you are making it.
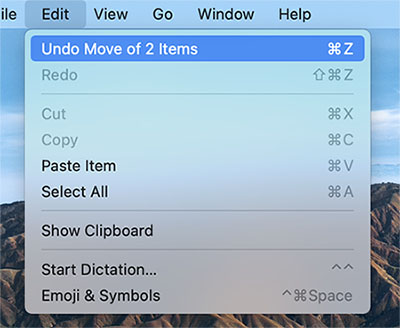
This is not usually how things work, and you may have executed many other commands before you notice the missing file, making it less likely that it can be recovered with this method.
🧰 MacBook Data Recovery Services
Using a professional data recovery service should be seen as a last resort if all of the other methods described in this article cannot recover your deleted data. In some cases such as a dead hard drive that needs repair, a recovery service may be your only option. In situations where you have experienced a hard disk crash and you do not have a backup or the media is corrupt, a data recovery service is worth a try.
A data recovery service employs skilled technicians who use specialized hardware and software techniques to attempt to clone the damaged drive so its data can be rescued. If it sounds expensive, it’s because it usually is.
A reputable company will not charge you if they cannot recover your data, but to find out if they can you need to send them your storage device. The inconvenience and cost of a data recovery service are the main reasons to only engage one if all other recovery options have failed and the information to be recovered is valuable.
Common Causes of MacBook Data Loss
Your MacBook is an example of cutting-edge technology that you can carry around and use wherever you like. Many desktop systems on the market wish they were as powerful as a MacBook, and they all would like to be as portable.
But even a computer with the advanced characteristics of a MacBook is not immune to the problem of data loss. Unfortunately, no one has yet developed a computer that can guarantee it will never lose some of your data. Following are the common causes of data loss that can plague MacBook owners at the worst possible time.
Reason |
Description |
💁♂️ Human error |
Human error is by far the most common reason data is lost on a MacBook. It’s very easy to accidentally delete an important file or inadvertently format the wrong drive or partition. The key is to act quickly and attempt to resolve the issue either by restoring the items from the Trash or using data recovery software. Consider taking an extra second to verify any activity that might delete data to avoid making this type of error. |
👾 Malware or viruses |
Infection with a computer virus or piece of malware can do all sorts of damage to your MacBook and its information. While some malware attempts to steal sensitive data, other variants just look to cause as much destruction as possible and can be responsible for wiping out a large chunk of data. Running updated anti-virus software and refraining from connecting unverified devices to your laptop will minimize the risk of infection. |
💥 System crashes |
System crashes happen for a variety of reasons and can never successfully be anticipated. The same can be said about their results. You can’t predict how a system crash will affect your computer, but one way may be data loss. This is especially true of files you were working on or transferring when the crash occurred. |
🔨 Physical damage |
Physical damage can be caused by various factors or environmental conditions. Dropping your MacBook is one of them. Exposing your laptop to excessive heat or moisture is another way to incur physical damage that can result in data loss. Physical damage can also be caused by the normal wear and tear experienced by mechanical hard drives. Unfortunately, in most cases, data loss caused by physical damage cannot be resolved without engaging a data recovery center. |
💻 Problematic software updates |
Though Apple strives to only release fully verified software updates, even they occasionally make a mistake. You might also fall victim to a bad software update for a third-party tool running on your machine. These bad software updates can result in extensive data loss. For this reason, we strongly recommend backing up your MacBook before upgrading any of its software. |
FAQ
FAQ
How do I recover data from my MacBook Pro?
You can recover data from a MacBook Pro using multiple methods which include:
- Recovering files from the Trash;
- Using the Command -Z keystroke combination to undelete files on a MacBook;
- Using a backup to restore your lost files;
- Recovering with specialized data recovery software;
- Engaging a professional data recovery service.
How much does MacBook data recovery cost?
Data recovery costs vary wildly. You might be able to recover lost files for free from your Mac’s Trash. Data recovery software is a reliable option and there are many reasonably priced solutions on the market. At the other end of the spectrum are data recovery services which are the most expensive option but may be the only way to recover information from a damaged device. Check out our guide on the cost of data recovery services for more information.
How to recover data from a dead MacBook Pro/Air?
If you cannot get your MacBook Pro or Air to fire up, you may need to use a data recovery service to recover data. The drive must be accessible for data recovery software or other methods to restore files without the help of trained recovery technicians.
How can I recover deleted files on a MacBook without software?
You can recover deleted files on a MacBook using three different methods that do not involve data recovery software.
- Recover from the Mac Trash bin.
- Use the Command -Z keystroke combination to undo the deletion.
- Restore the deleted files from backup media using Time Machine or another backup solution.
Please consult our guide for further information on recovering data on a Mac without software.
What is the best MacBook data recovery software?
Many data recovery solutions are available that can restore your lost or deleted files from your MacBook. If you are looking for a freeware solution, check out PhotoRec. Though it uses a command-line interface, it should get your files back. Users looking for an easier to use paid solution should check out Disk Drill or OnTrack Data Recovery. These tools provide a more user-friendly interface that simplifies the recovery process.
Conclusion
Losing an important file is never a pleasant experience and can be extremely stressful. It’s good to know that the situation may not be hopeless and that there are multiple recovery methods that may be able to get your data back safely. We have emphasized the importance of regularly taking backups of your Mac’s data to protect you from data loss.
When backups and system utilities are not enough, consider using data recovery software to restore your lost data. It’s an inexpensive alternative to sending the device to a data recovery service and may be able to get your valuable data back where it belongs.
This article was written by Robert Agar, a Staff Writer at Handy Recovery Advisor. It was also verified for technical accuracy by Andrey Vasilyev, our editorial advisor.
Curious about our content creation process? Take a look at our Editor Guidelines.