
Accidentally deleted an important PNG file? Don't worry, you still have a chance to get it back!
Portable Network Graphics (PNG) files are one of the most common formats for photos found on the internet now thanks to their lossless data compression and support for transparency. Just like any type of file, PNG files are susceptible to accidental deletion and corruption.
Whether you’re a designer who has lost their final work or a curator of internet imagery, we’re going to cover all the different ways you can recover your lost, deleted, or corrupted PNG files and how you can protect your photos going forward.
Before attempting anything, be sure to read this article in its entirety. Continued use of the drive that held the file can cause the data to be overwritten which can cause the data to become unrecoverable.
How Does PNG Recovery Work?
To understand the data recovery process, it’s a good idea to understand how data recovery software works. Your data is stored on a storage device. When you delete a PNG file, that data isn’t immediately erased. Instead, it will remain on the drive until the physical location on that drive is overwritten with new data. This gives you the chance to recover data in almost any situation.
Even though the data still physically resides on the drive after deletion, it will no longer be visible to your operating system by default. So, in order to recover this data, you need to use data recovery software. There are lots of data recovery solutions available online, but they all serve to undelete your data.
Data recovery works best when you act fast. When data is deleted, that space on the drive is marked so that new data can be written to it. The more times the deleted data is overwritten, the harder recovery becomes.
Before We Begin
Recovery may be as simple as restoring the lost PNG files from your computer’s Recycle Bin or reversing your most recent action. Before moving onto the main methods of recovery, it’s recommended you try these first.
🗑️ Recover Deleted PNG Files from the Recycle Bin
Your Windows system has a Recycle Bin by default that temporarily holds deleted files before permanently deleting them. This gives you a chance to recover them in case you accidentally deleted them.
- On your Desktop, open the Recycle Bin.
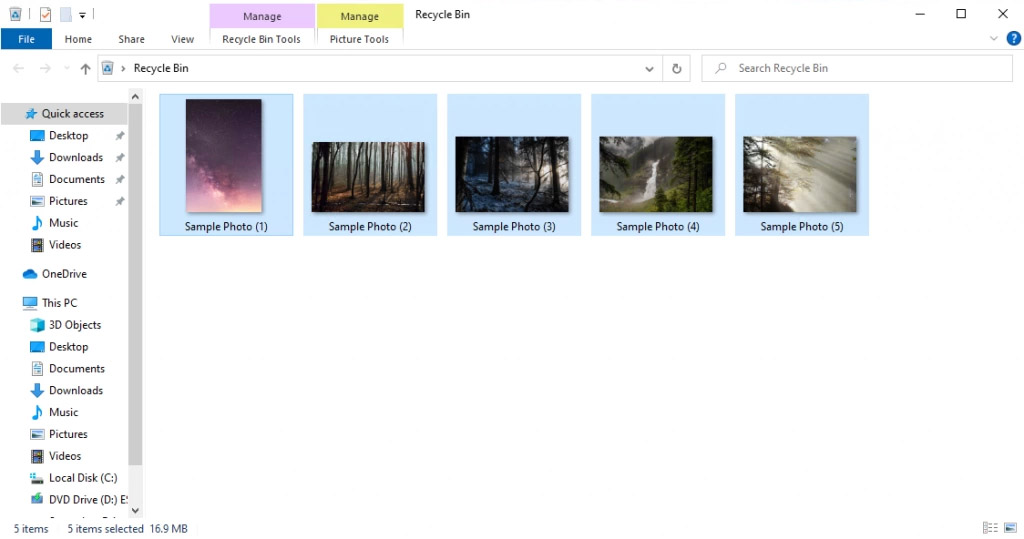
- Select the files you want to restore.
- Click on Recycle Bin Tools, then Restore the selected items.
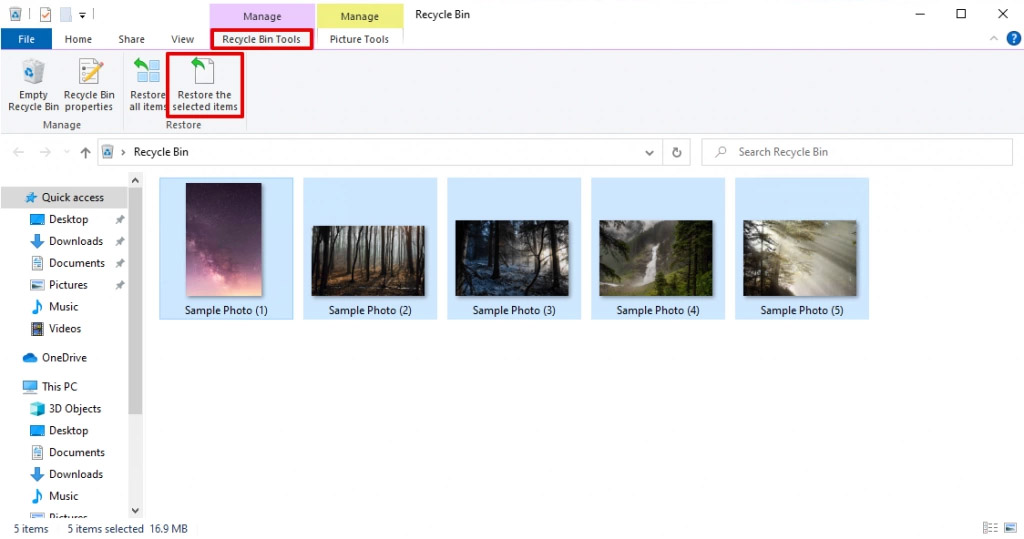
Once restored, the files will be back in their original locations.
⌨️ Recover Deleted PNG Files Using CTRL + Z
When you perform an action on your computer like typing a word, moving a folder, or deleting a file, you can easily undo these actions using a combination of keys.
- Immediately after deleting your PNG file, make sure the folder you deleted it from is the active window.
- Press CTRL + Z and the file will be restored to where it was before it was deleted. The below image shows
the deleted files being restored from the Recycle Bin back to their folder.

This can be done multiple times. For instance, if you deleted two files individually, you can push CTRL + Z twice to recover both of the files.
🔍 Search For The Lost Files
Windows Explorer comes with quite a powerful search function. If you can no longer find your files, it could be that they’re simply located in a different folder rather than deleted. Before attempting recovery, try searching for your files first.
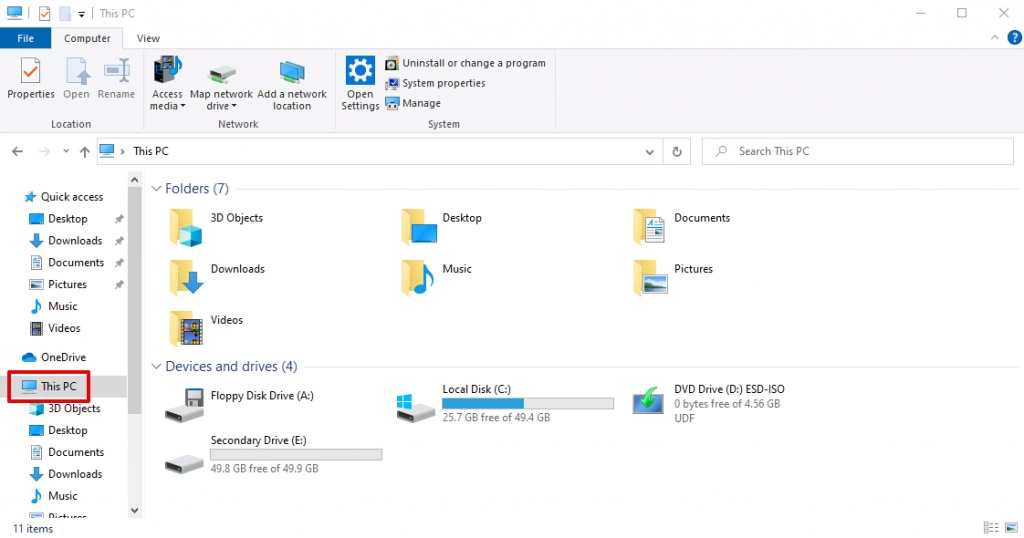
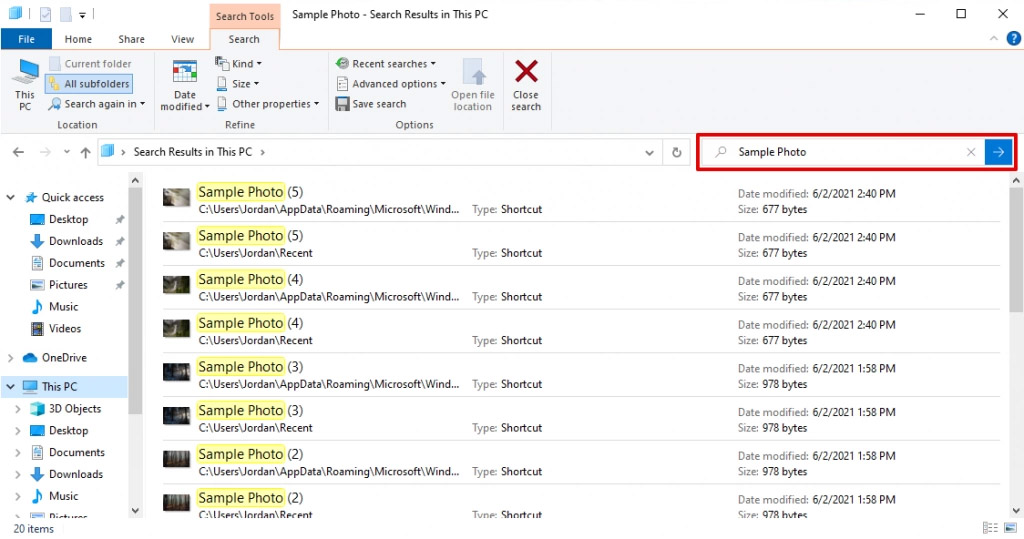
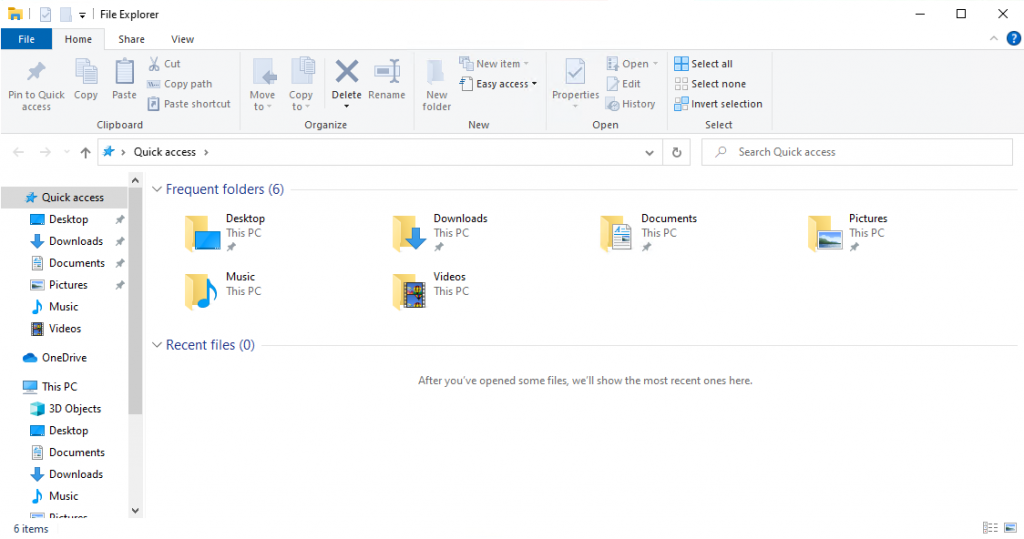
- Open Windows Explorer and click on This PC in the left panel.
- In the Search This PC field, enter the name of the PNG file and press Enter. If you don’t know the file
name, you can search *.png instead and Windows Explorer will display all PNG files on the computer.
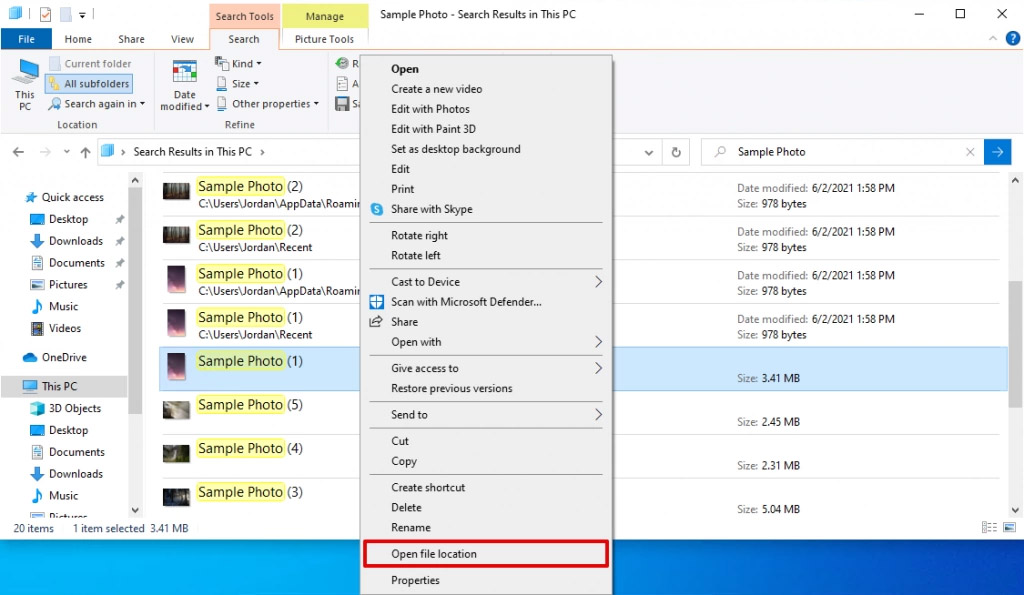
- When you find your file, right-click on it and select Open file location.
If you have a rough idea of where your files may be, you can cut down on search times by going to the parent folder in Windows Explorer before searching.
How to Recover Deleted or Damaged PNG Files
Recovering your PNG files can be done in a few different ways. Thankfully, there exist solutions to recover deleted photos from almost any device. So, no matter what situation you’re in, there’s a good chance there’s a recovery solution available.
Recover Deleted PNG Files Using Data Recovery Software
Data recovery software can turn the file recovery process from difficult to easy, often recovering your data in just a few clicks. Additionally, most recovery tools offer different types of recovery, including photo recovery software. We recommend Disk Drill as it’s trusted by many for its robust recovery capabilities and data protection features.
Disk Drill Data Recovery can be used to scan and recover PNG files from most storage devices, such as external hard drives, USB drives, and SD cards.
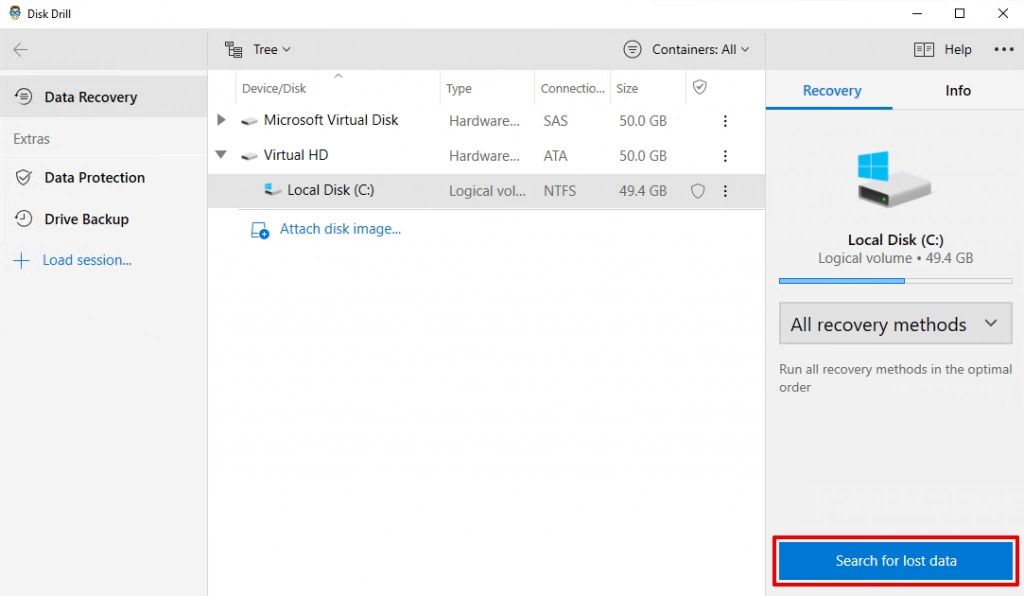
- Download, install, and open Disk Drill.
- Select the drive that contained the PNG files. At the bottom left of the screen, click Search for lost data.
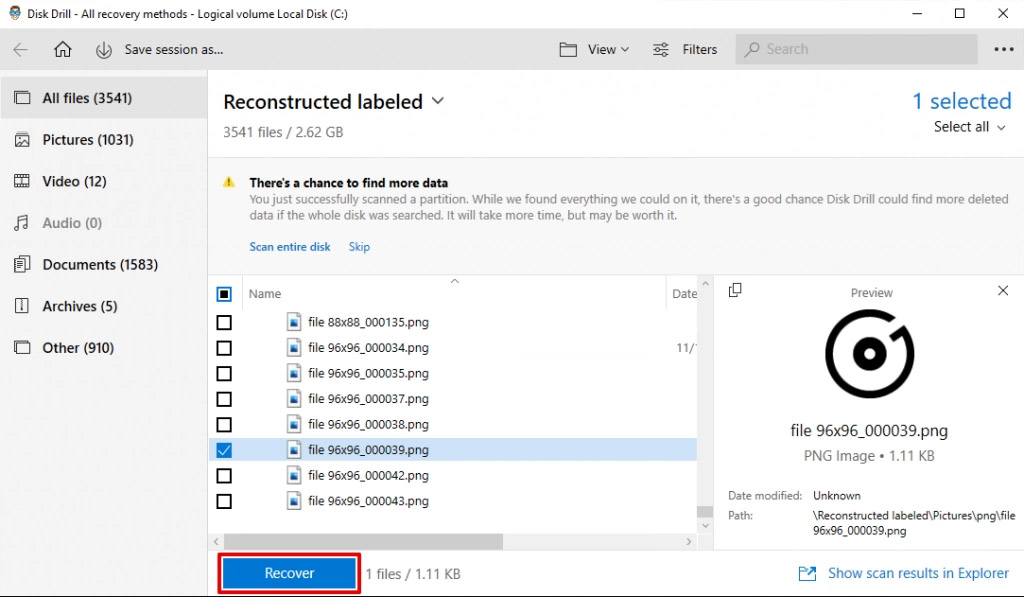
- When the scan is complete, click Review found items.

- Select the files you want to recover by checking the box next to their name. When ready, click Recover.
- Specify where you want your recovered files to be. Then, click OK.
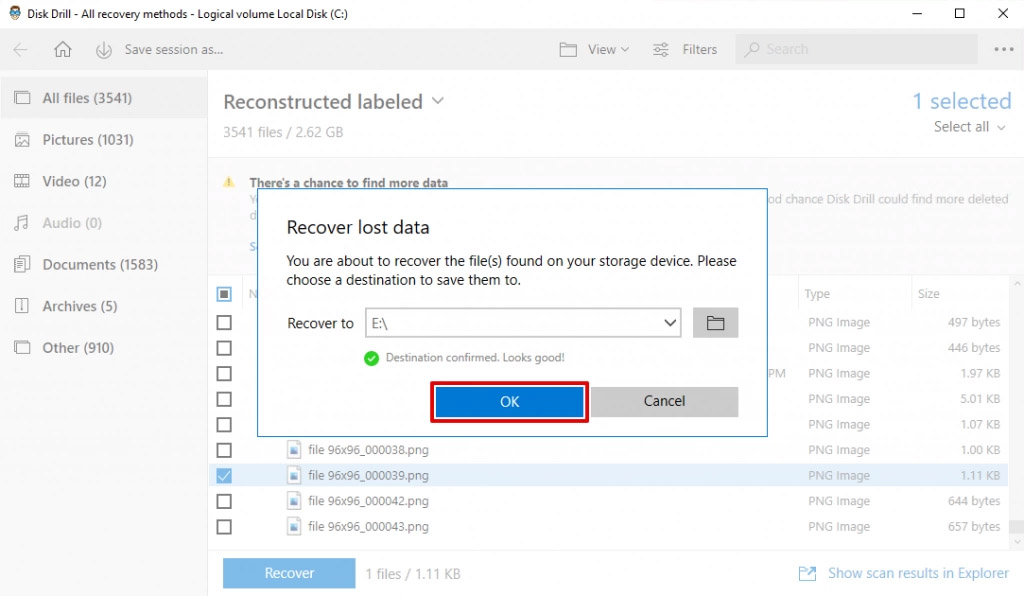
After you press OK, Disk Drill will present you with an overview screen of the recovery. The files can be found in the previously specified location.
Recover Deleted PNG Files Without Software
If you’d prefer not to use data recovery software, you can try recovering your PNG files using the features included with Windows.
Restore the folder to a previous version
If you have File History enabled to create backups of the folder that contained the PNG files, you can restore to a previous version that contained the pictures.
This is only possible if you had File History enabled and configured to create backups of the correct folder.
- Navigate to the parent folder of the folder that contained your PNG files.
- Right-click the folder that contained your PNG files. Click Restore previous versions.

- Select a backup to restore to. Click Restore.
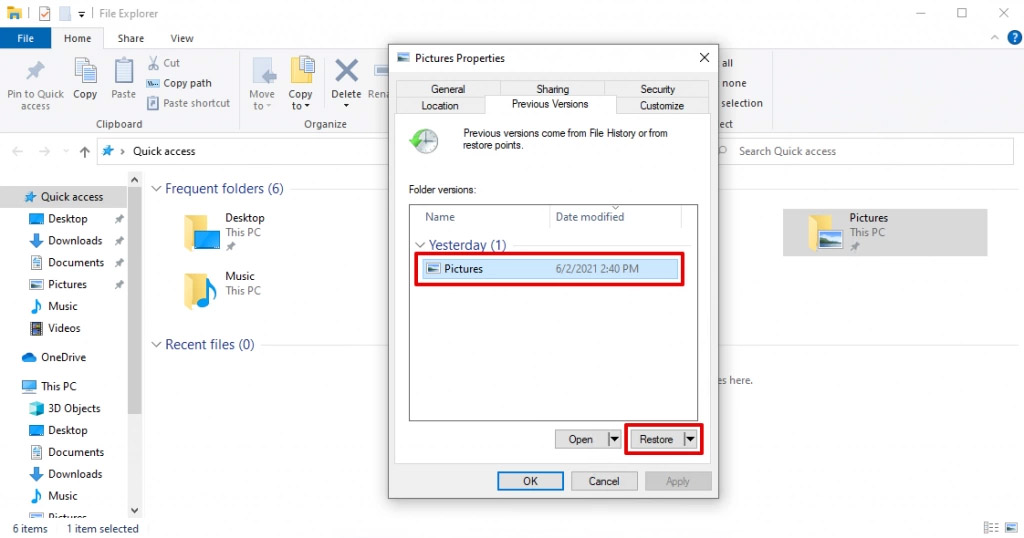
After you click Restore, the files will be restored back to their original location.
Restore from a Windows backup
For those who have set up a backup using Backup and Restore (Windows 7), you can restore the PNG files directly from the backup.
Again, this is only possible if you’ve previously set up a backup using Backup and Restore.
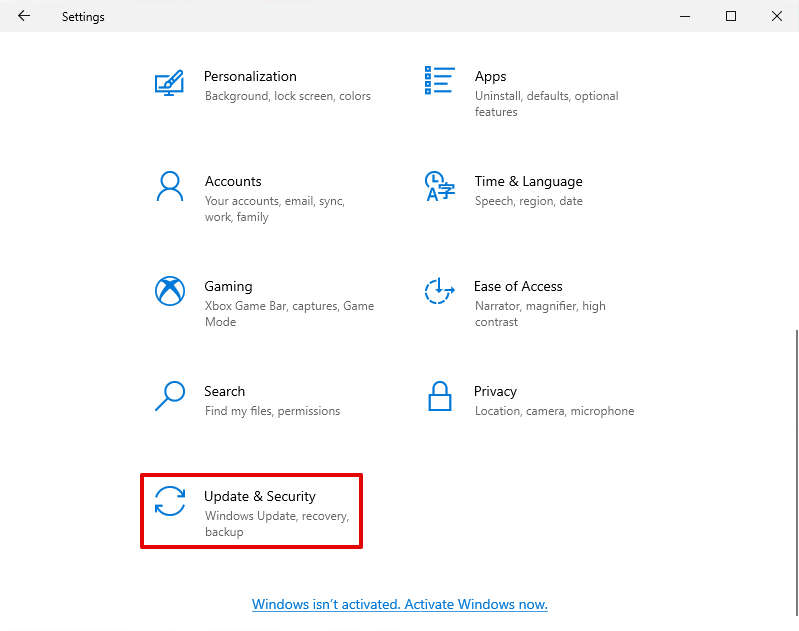
- Right-click Start and click Settings.
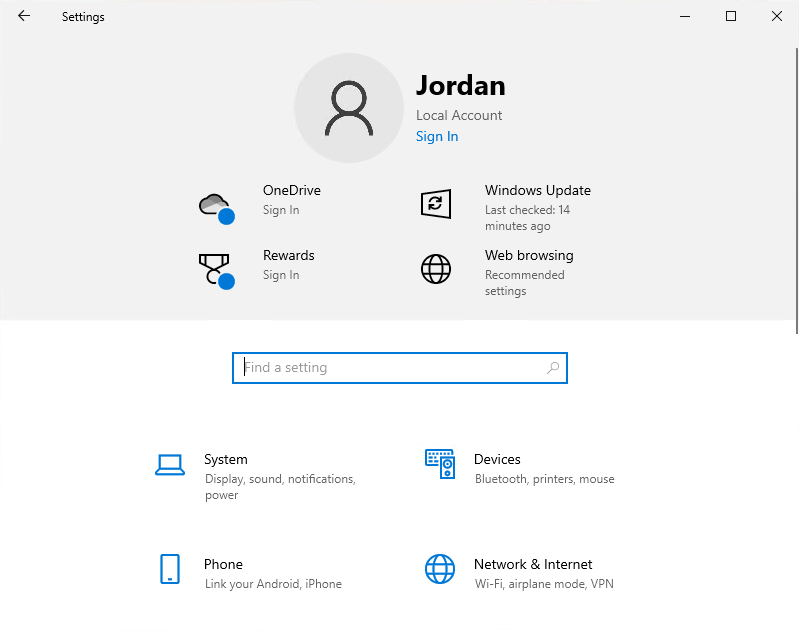
- Click Update & Security.
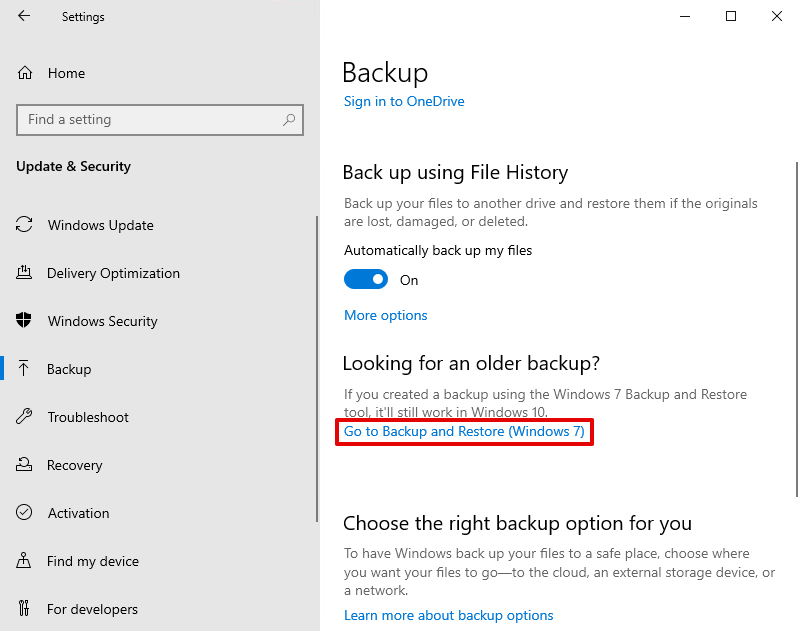
- Click Backup, then Go to Backup and Restore (Windows 7).
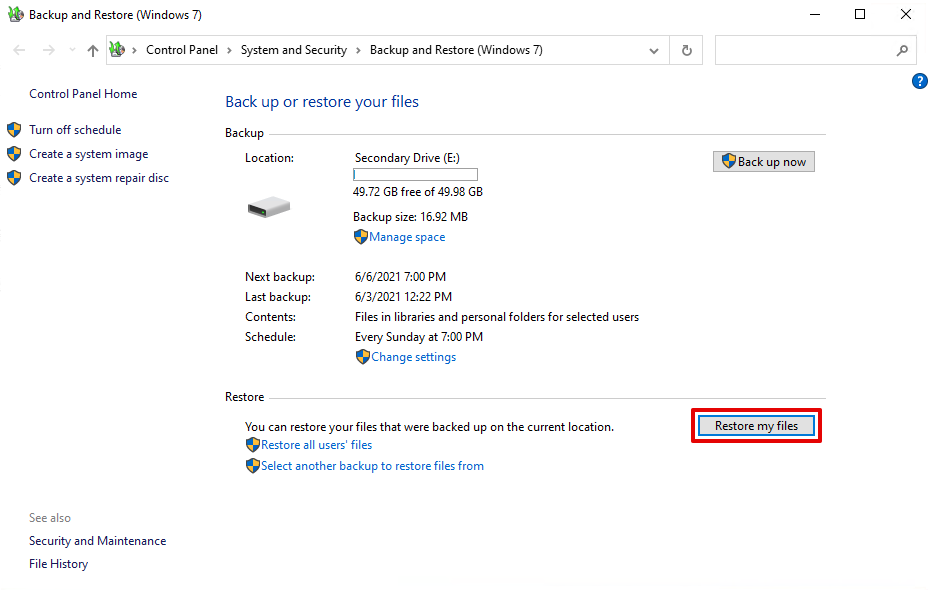
- Click Restore my files.
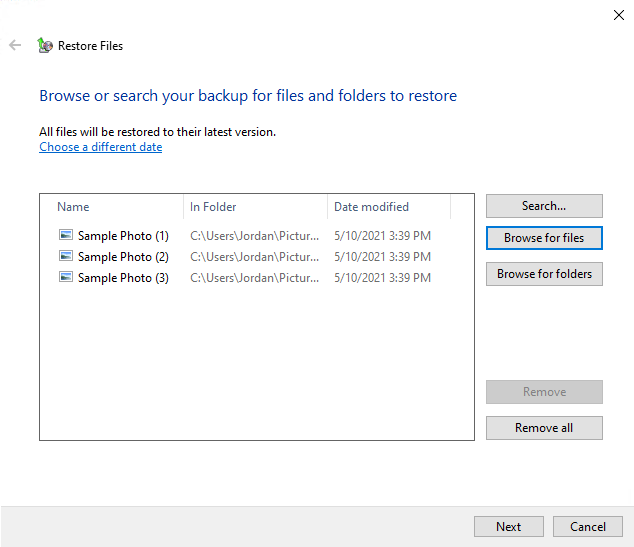
- Click Browse for files. Select the PNG files you want to restore then click Add files. When finished, click Next.
- Choose whether you want to restore the files to their original location or another. Finally, click Restore.

Recover Damaged PNG/Repair Damaged PNG Files
Damaged or corrupted PNG files may become unreadable or feature glitchy visual elements. When they’re in this state, there is still a chance that you can repair them back to their original state.
Convert the file from PNG to JPG
By converting the PNG file from PNG to JPG, there’s a chance that the converted file will be fixed and readable.
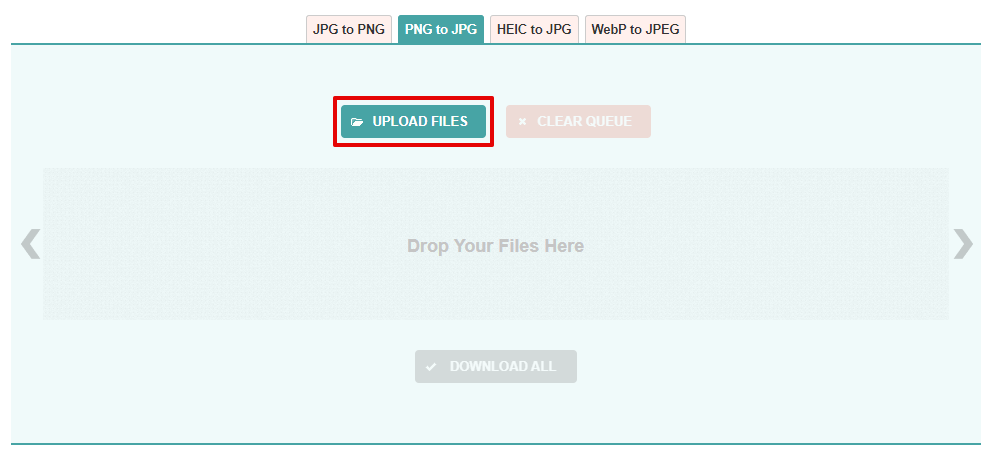
- Go to PNG to JPG, a free online photo converter.
- Upload the PNG files that you want to convert.
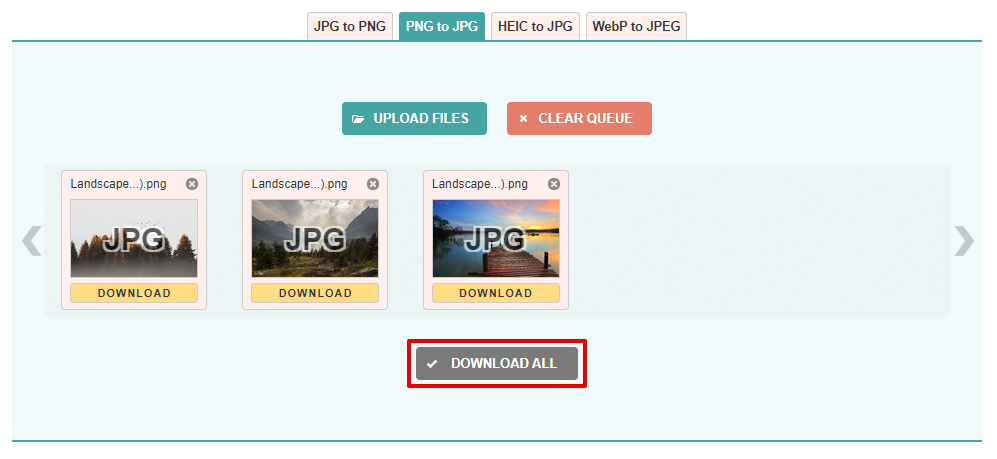
- When they’re finished, click Download under the image, or Download All to download all of the converted files.
If this hasn’t worked, move onto the next method.
Repair the PNG using a photo repair tool
If you’d prefer not to upload your files online for privacy reasons, you can use Stellar’s Photo Repair Tool to repair the PNG files. You can easily select your files and have them repaired in only a few clicks.
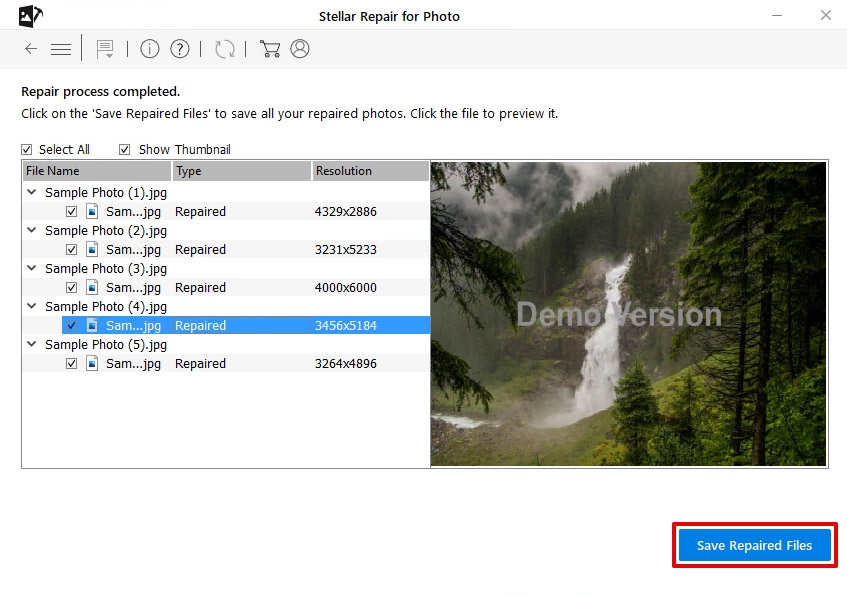
The free version of Stellar Repair for Photo will only show you a demo preview of the repaired file. To recover the photo completely, you will need to opt for a paid version.
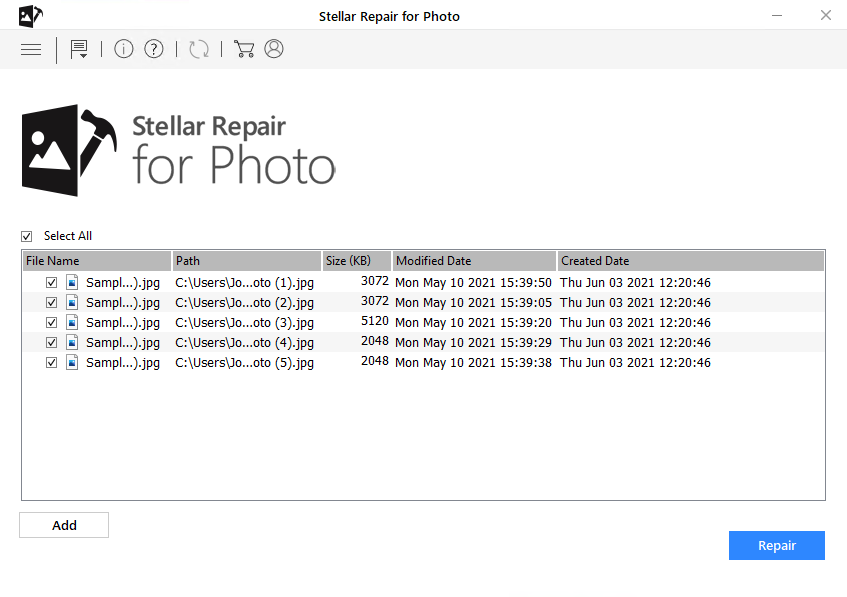
- Download, install and open Stellar Repair for Photo.
- Click Add File and select the damaged PNG Files. Click Repair when ready.
- When the repair is complete click OK. You can preview your files, then when ready, click Save Repaired Files.
File Loss Prevention Going Forward
Nobody likes being in a situation where they need to scour the web for ways to recover their data. To save yourself the time and effort, here are a handful of super easy steps you can take to proactively protect your data:
- 💾 Back up your files – By creating regular backups, you’re essentially creating copies of the existing data. If your files are deleted or become corrupted, you’ll have an identical copy that you can easily restore from.
- ⏏ Safely eject storage media – If you store PNG files on SD cards, USB drives or external hard drives, make sure you safely eject the storage media before removing it from the computer. If it’s not safely ejected, removing it can interrupt write functions that can corrupt your files.
- 👀 Look for signs of drive failure – Disappearing files, crashing applications, and ticking noises are all symptoms of a failing drive. If you notice any of these symptoms, it’s time to create a backup of your data and consider replacing the drive with a new one.
- 📁 Organize your files – By keeping your files organized, you’re reducing the risk of your files being lost amongst a random collection of other unnecessary files. And, you’ll make backing up your data a lot easier if everything has its place.
Most importantly, in addition to the above steps you can take to protect your data, you need to be careful in what actions you’re taking on your computer. By taking a few extra moments to look over what changes you’re making, you could save yourself countless hours of troubleshooting as the result of a rushed decision.
FAQ
How to recover deleted PNG files?
If you’ve recently deleted a PNG file, try checking your Recycle Bin or undoing your most recent action by pressing CTRL + Z in the active window where the file was deleted. Otherwise, you can try restoring from to a previous version if you have File History enabled:
- Navigate to the parent folder of the folder that contained your PNG files.
- Right-click the folder that contained your PNG files. Click Restore previous versions.
- Select a backup to restore to. Click Restore.
If you don’t have a backup of your PNG files, your next best option is to use photo recovery software.
Is it possible to recover PNG files on Android?
Yes. You can recover PNG files using DiskDigger, an Android recovery app that can scan your internal storage and restore deleted photos:
- Download and open the app.
- Tap Start basic photo scan.
- Select the photos that you want to restore. When ready, click Recover.
- Specify the location you want to restore the photos to.
If your file doesn’t show up, you can try using Android data recovery software.
What to do if I am unable to open a PNG file?
If you have a damaged PNG file, there’s a chance that it won’t open. If this happens, you can try converting it to a JPG:
- Go to PNG to JPG, a free online photo converter.
- Upload the PNG files that you want to convert.
- When they’re finished, click Download under the image, or Download All to download all of the converted files.
When converted, try opening the file to see if the issue is resolved.
Conclusion
Everyone has photos that they cherish. When these photos are deleted or lost, it can be devastating. Luckily, by using the recovery methods discussed in this article, you can get your PNG files back in no time.
To protect your computer and the data that’s on it, take heed of our advice regarding file loss prevention steps you can take so that you’re prepared the next time some of your files are lost or deleted.
This article was written by Jordan Jamieson-Mane, a Staff Writer at Handy Recovery Advisor. It was also verified for technical accuracy by Andrey Vasilyev, our editorial advisor.
Curious about our content creation process? Take a look at our Editor Guidelines.