If your file opens with an error, has issues displaying the content, or won’t even open at all – it’s probably corrupted. This is common, and it can be caused by a lot of things that are out of our control. Fortunately, corrupted files aren’t always totally lost.
There are ways to fix and recover corrupted files on Windows 10 using built-in tools and third-party applications. This article is a guide to all the methods that have helped thousands of users restore their corrupted files. Read on.
What is a Corrupt File & What Does Corrupted Data Mean?
You’ll know a file is corrupted if: (1) it won’t open or it opens with an error, or (2) the file opens but doesn’t appear correctly. What exactly is happening?
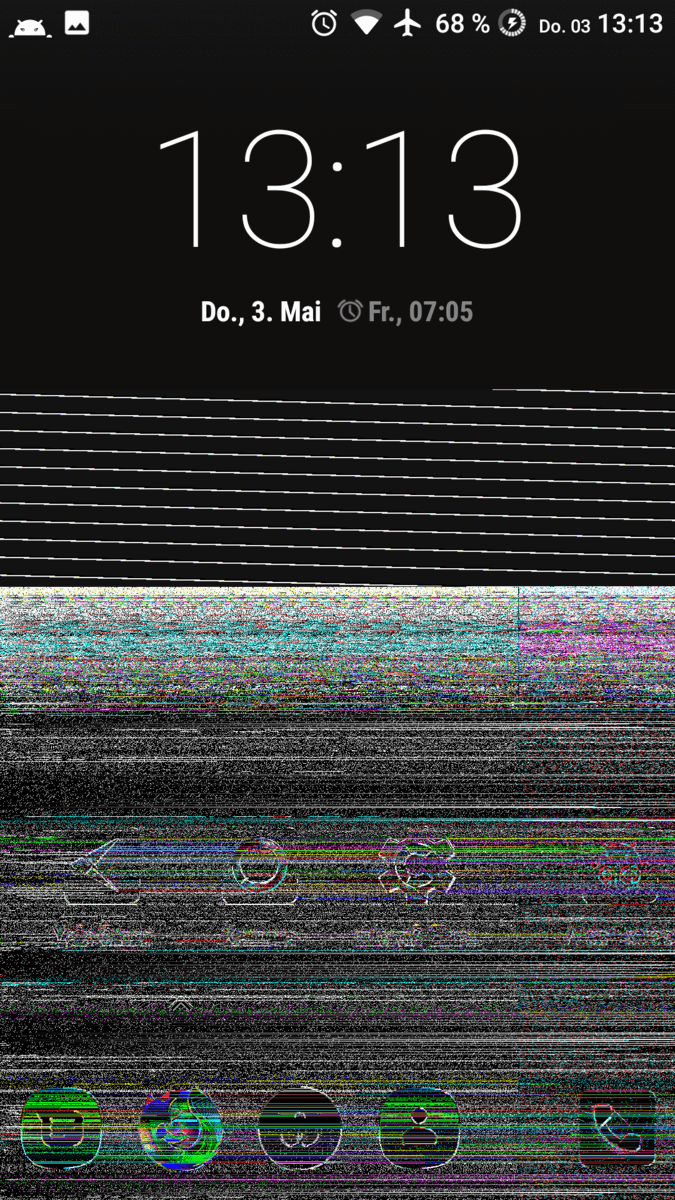
PNG file with one altered bit. (source)
Files are made up of bytes of information structured in a specific way. If this structure gets disrupted and/or the information being written to the file is incorrect, it gets corrupted. The data’s “integrity” becomes compromised, preventing it from being accessed the way it was intended. As you can see from the above image, just one bit out of place can be super disruptive.
What Causes File Corruption & How Can Files Get Corrupted?
File corruption can come from all sides. It can be an OS problem, a third-party application tampering with system files or even hardware failure. See below for more details.
🦠 Virus infection
Depending on a virus’ “payload” (what it intends to do), it can overwrite a file’s code with the wrong information. This directly causes data corruption. Even if you “clean” your computer with anti-virus, files often remain corrupted.
⚡️ Read/write interruption
If a device is interrupted in the middle of reading or writing data, it can cause corruption (as the integrity of the data is compromised). A good example is when the power suddenly goes out while transferring files to another location.
⚙️ Failed/faulty Windows Update
A bugged Windows update can cause system file corruption. This often happens when users upgrade early.
❌ Drive corruption
If the drive itself got corrupted (in similar ways a file gets corrupted), it’s highly likely that it affected your files as well. You’ll need to recover your files from your corrupted USB or hard drive before attempting to correct the issue (see this section).
🔥 Physical damage
Physical damage to the disk in your computer can wreak havoc on your files. For example, if your computer falls to the ground while your hard disk is spinning, the resulting scratches can render entire sectors of data useless.
How to Recover Corrupted Files
Corrupted file recovery depends on how your computer is set up. While some methods allow you to uncorrupt a file, others try to restore a working version from a backup or directly from your file system. See which method applies to you.
Method 1: Restore Previous Versions Using File History or a Restore Point
If you enabled File History or created a Restore Point, Windows 10 should be making incremental saves of your files and folders. We can use these saves to retrieve the previous version of a file – specifically, the version of it before it got corrupted.
Here’s how to check if you have Previous Versions available:
- File History (Settings > Update & Security > Backup)
- Create a Restore Point (Start button > search box > type “Create a restore point”)
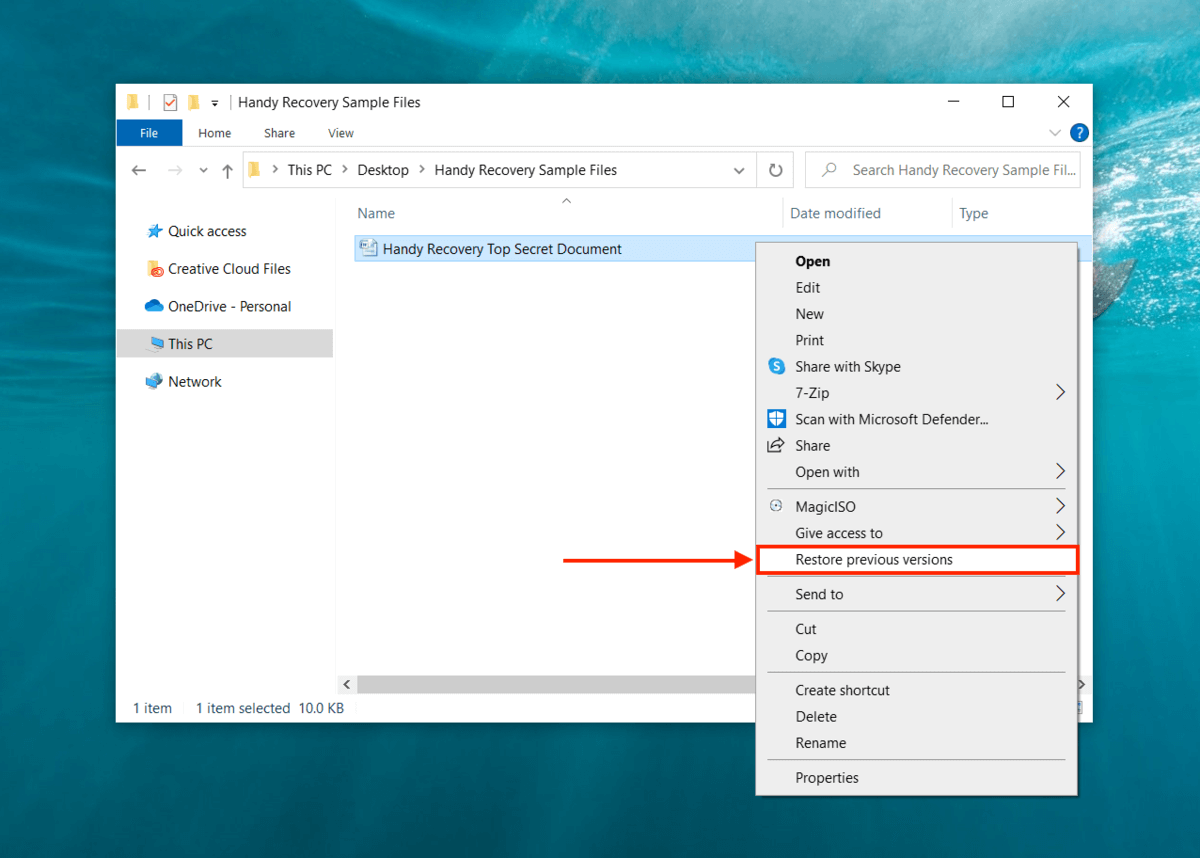
You’ll need to have set up one of these backup systems on your PC to open a corrupt file with this method. To access the previous versions of any file or folder, simply right-click it and click “Previous versions.”
Method 2: Restore Files From a Backup (From Windows 7 Backup)
If you enabled Windows backup you can try to use it to restore the backup version of your files on Windows 10. Here’s how:
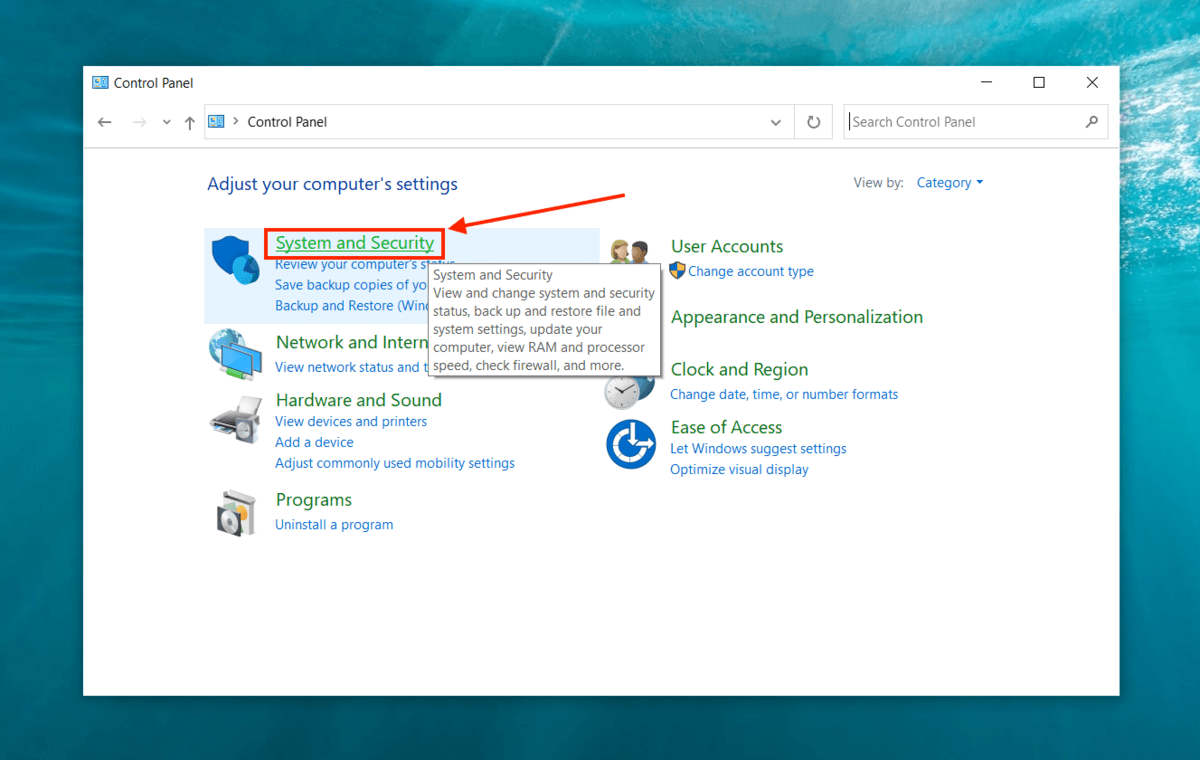
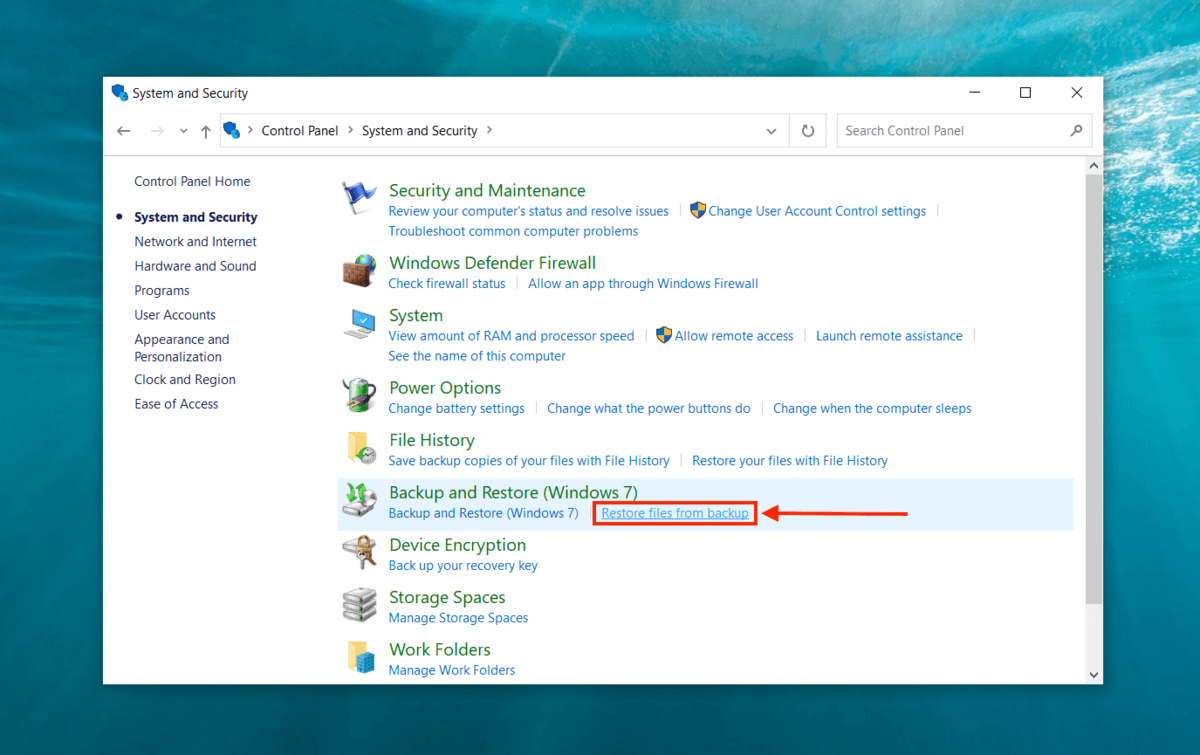
To check if you enabled Windows backup, click the Start button > Control Panel > System and Security > Backup and Restore (Windows 7).
- Make sure the hard drive or USB that contains your backup is securely connected to your computer or laptop.
- Click the Start button > Control Panel > System and Security
- Under Backup and Restore (Windows 7), click “Restore files from backup.”
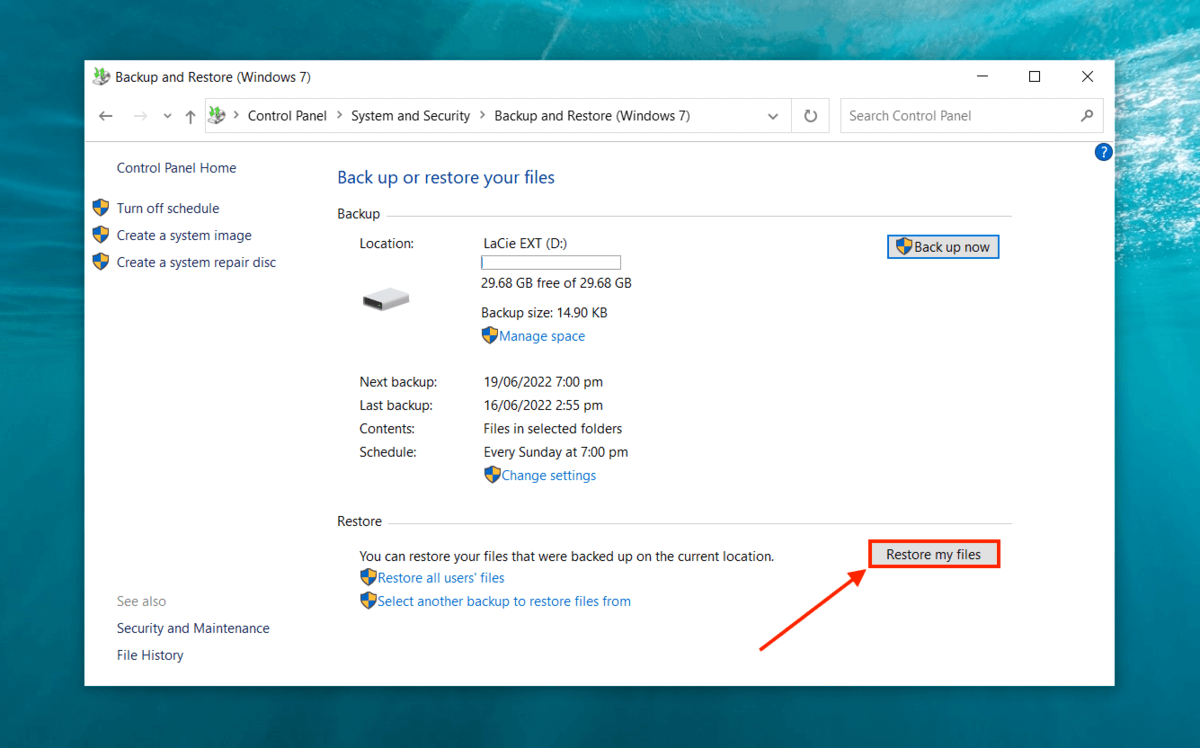
- Under “Restore”, click “Restore my files.”
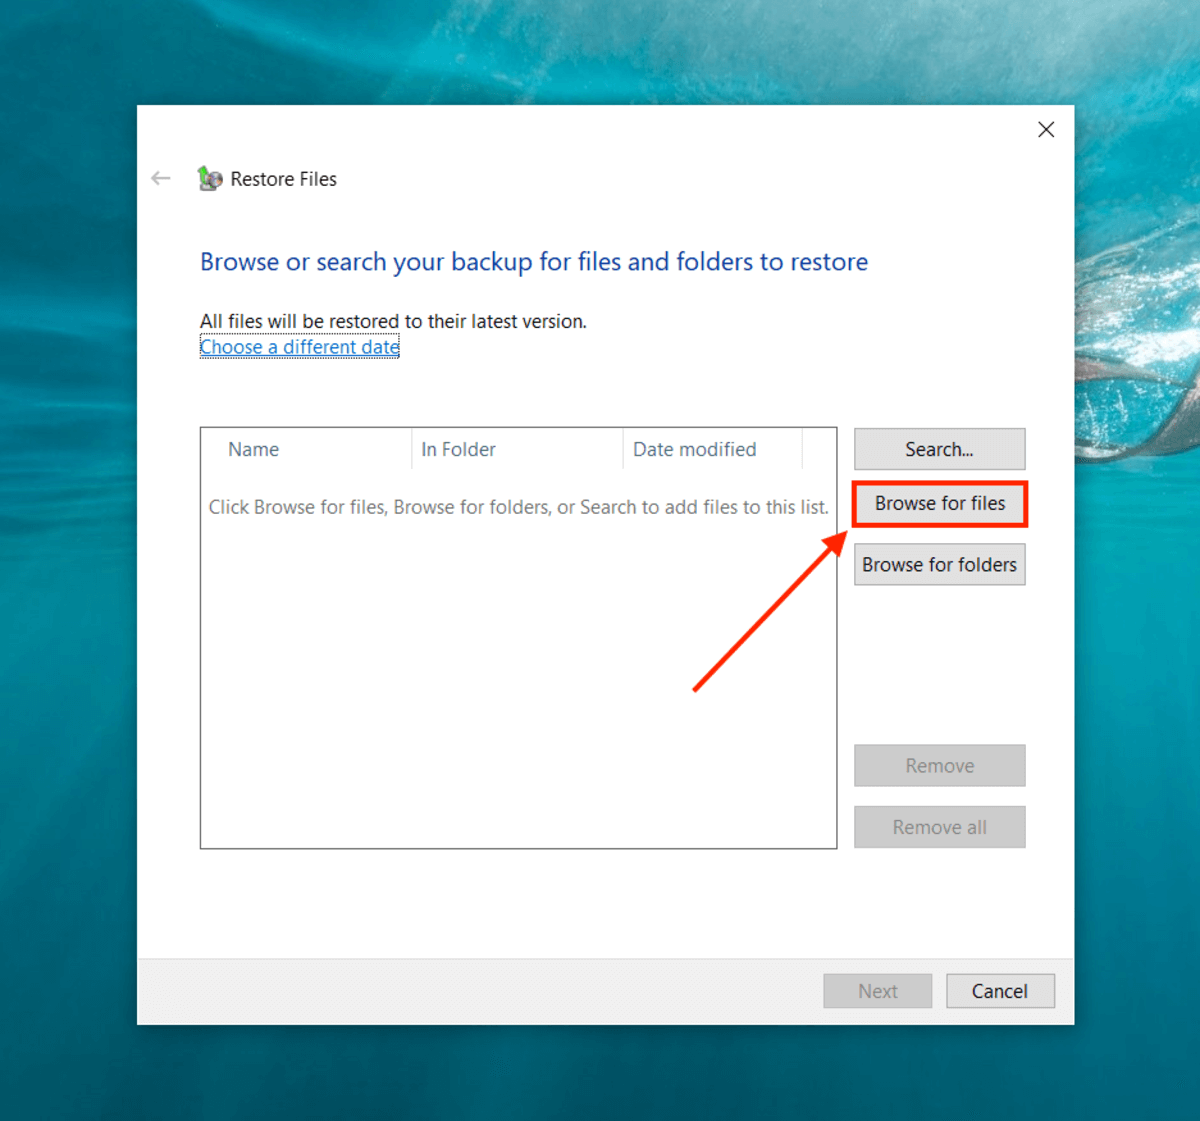
- In the new window, click “Browse for files.”
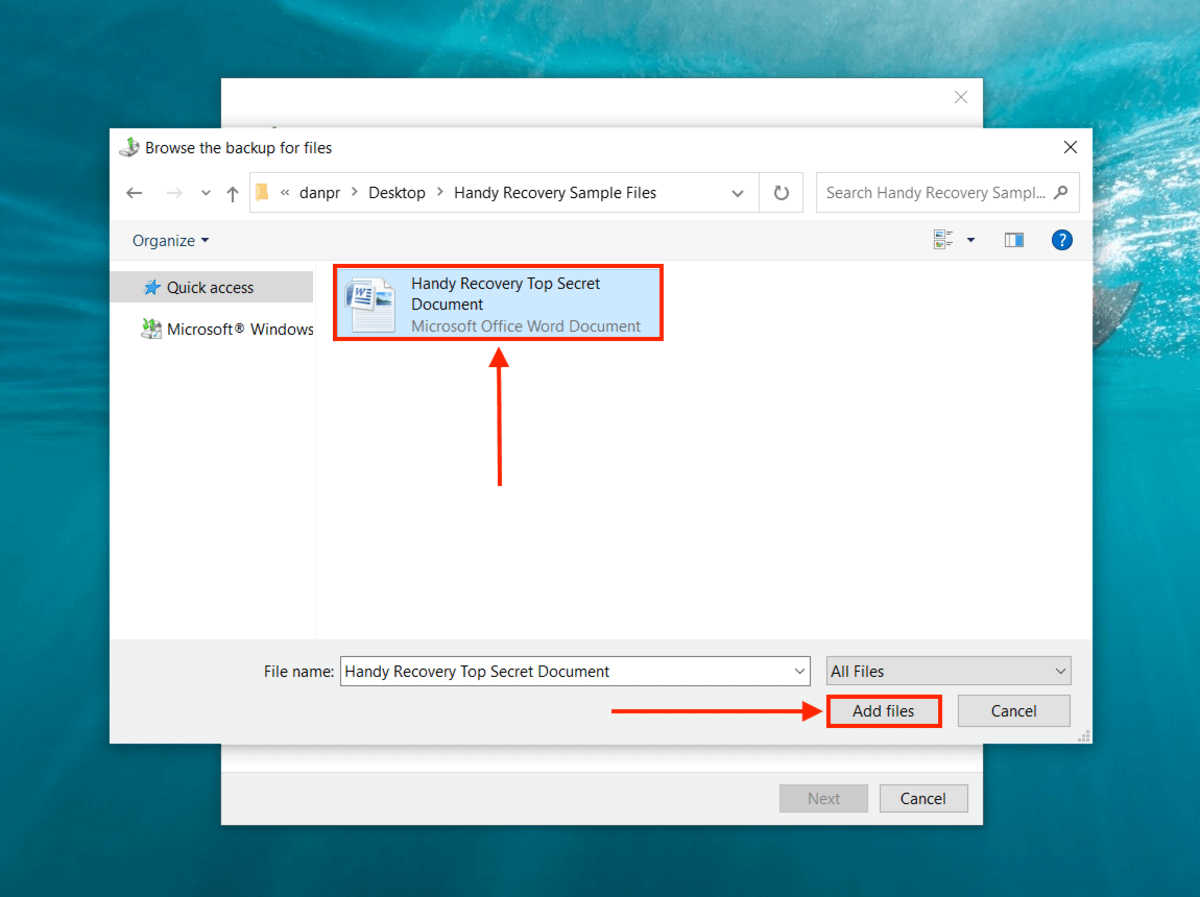
- Navigate to the folder that stores the backup file. Click it, then click “Add files.”
- Back in the Restore Files window, select the file you want to restore and click “Next.”
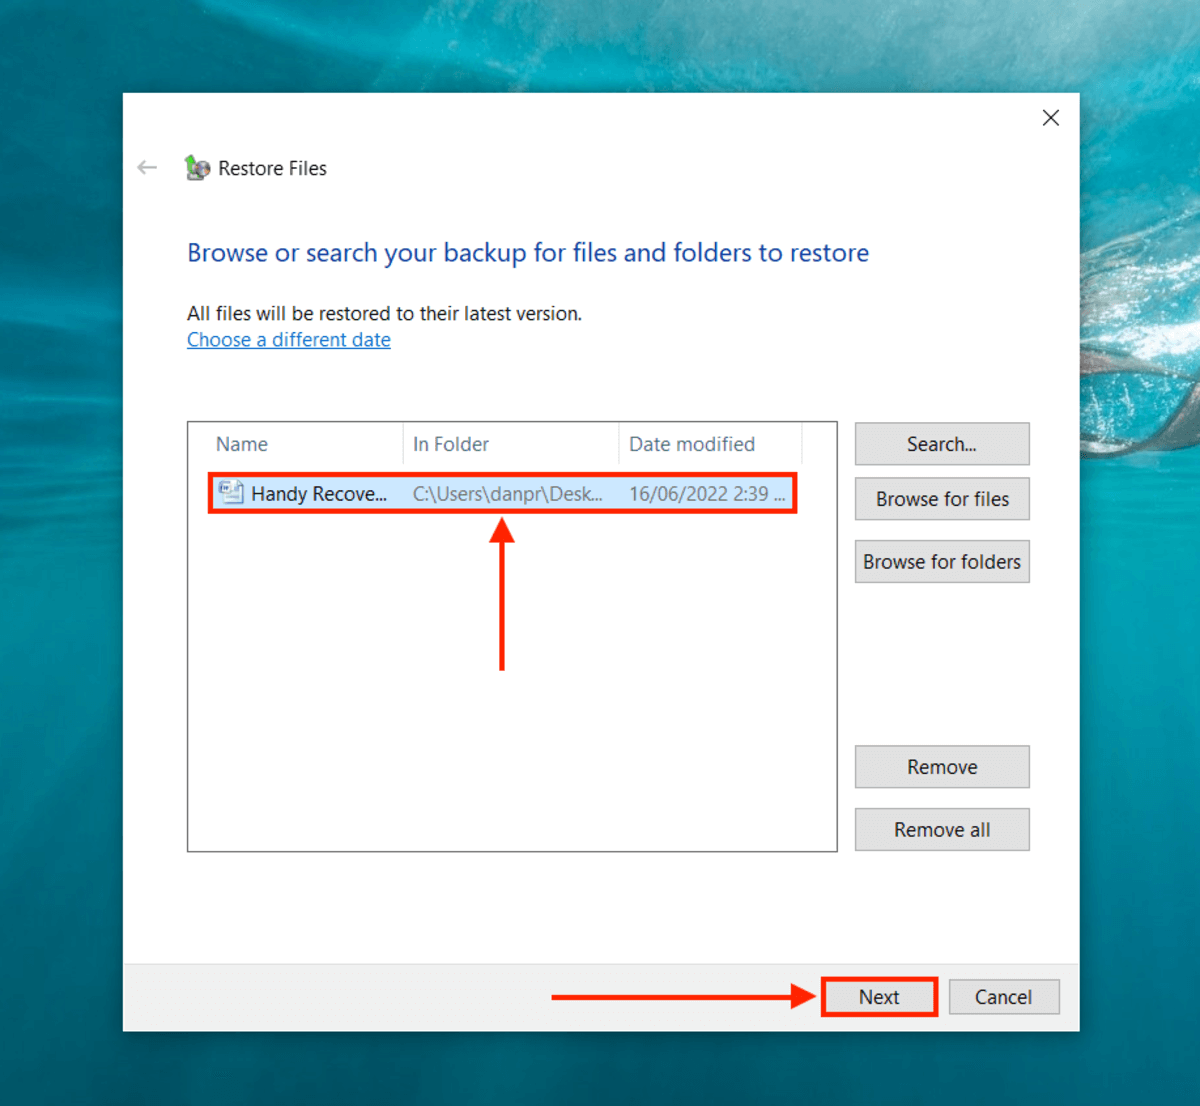
- You can choose to restore the file in its original folder, but we suggest using the “Browse” button to save it to a new location – specifically, on a different storage device. Then, click “Restore.”

Method 3: Use the SFC Scannow Command in Command Prompt
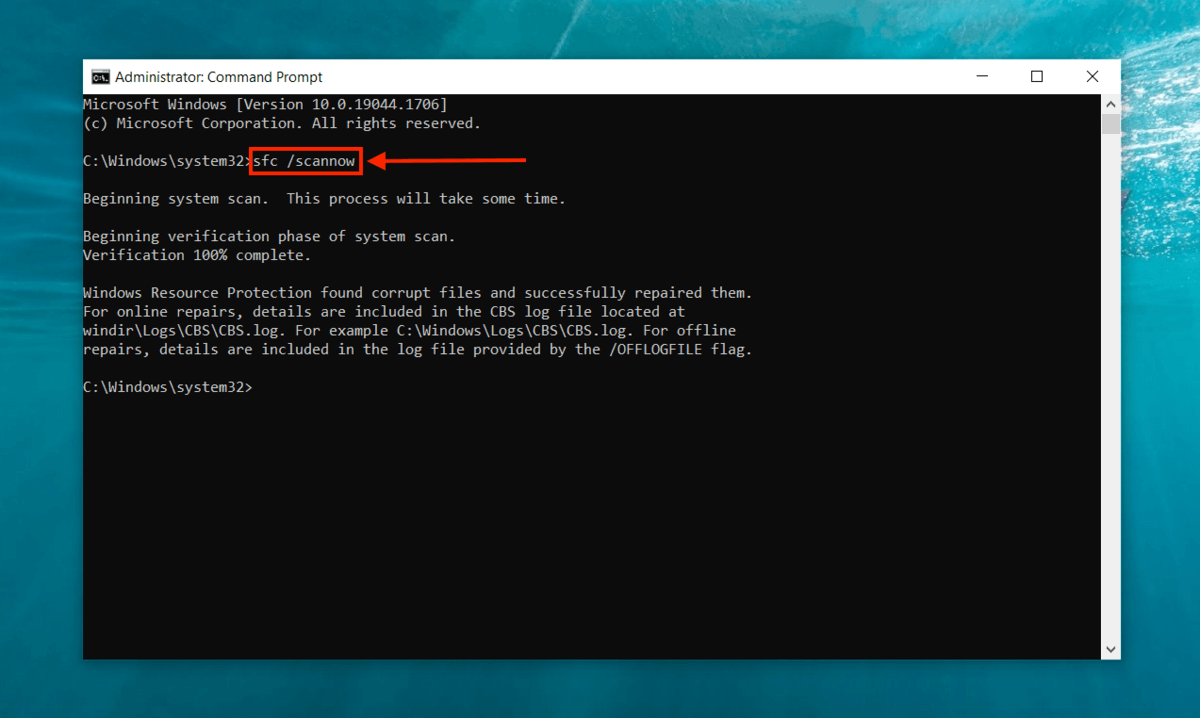
The SFC Scannow command will check for corrupt files and replace them. It’s a super simple command, so you can do this easily even if you never touched code before. Use the Start menu to search for Command Prompt or “CMD” and run it as administrator.
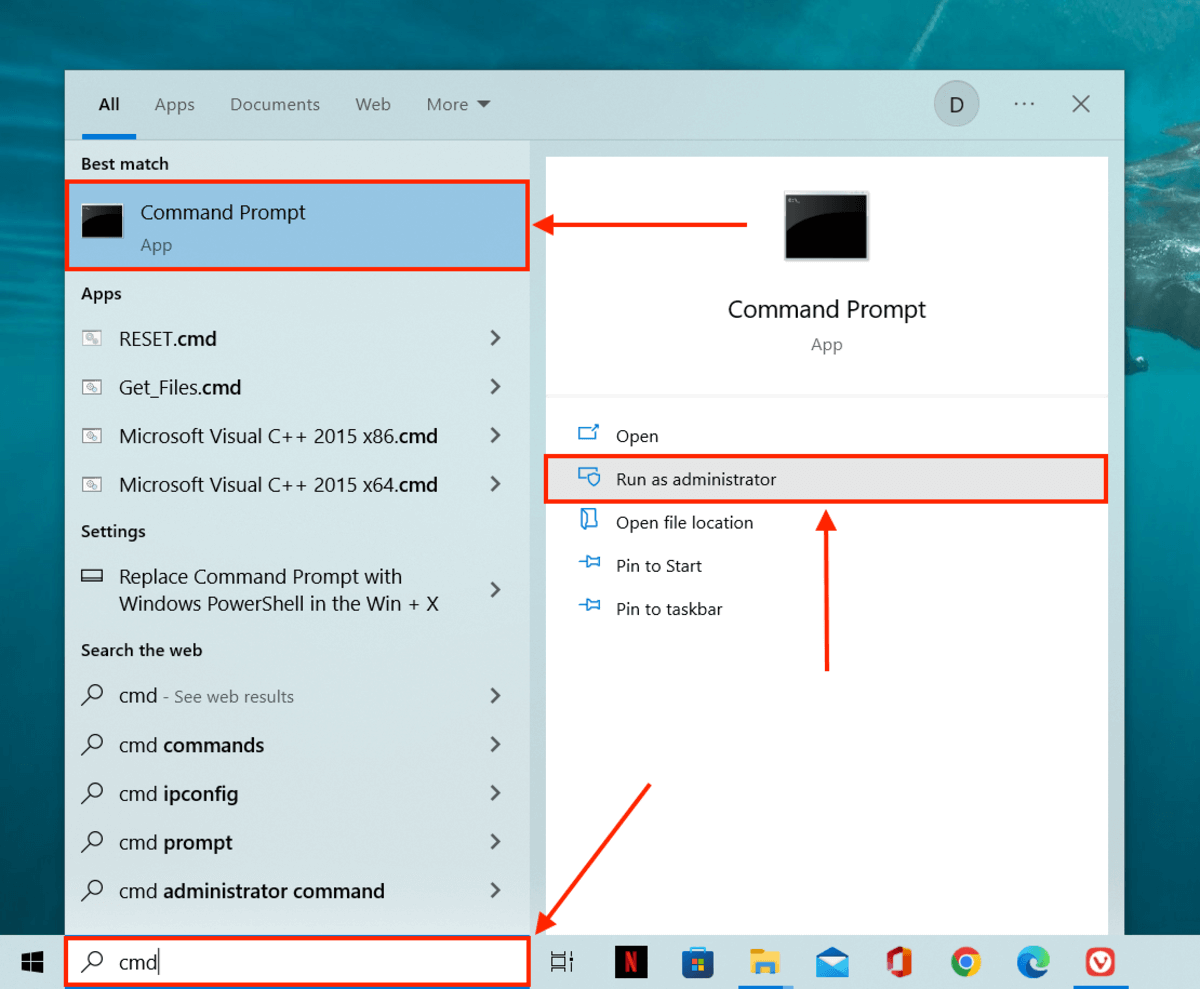
Then, type the following command and hit enter:
sfc /scannow
Method 4: Use the CHKDSK Command in Command Prompt
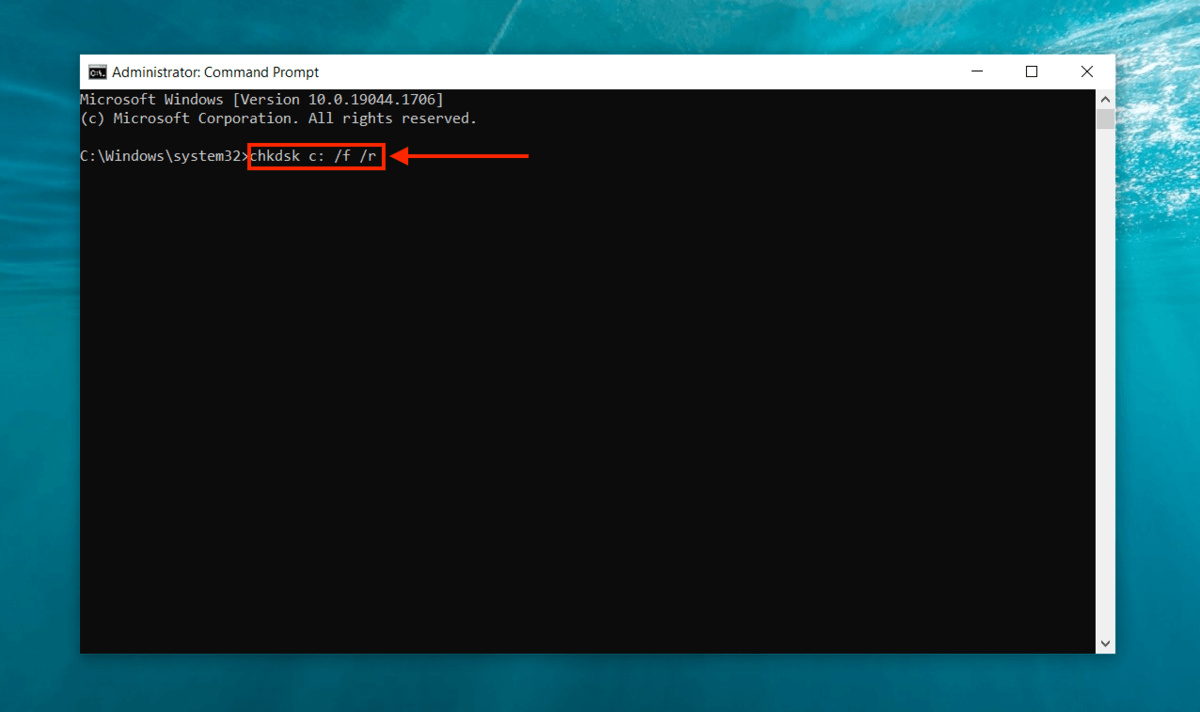
Chkdsk is another command that fixes file system issues. It’s also super easy to execute. Simply run Command Prompt as administrator, then type the following command and hit enter:
chkdsk c: /f /r
Replace “c:” with the assigned letter for the drive that stores your corrupted file.
Method 5: Change the File to Another Format
Try converting your file to another format. Most apps are capable of doing this through the “Save as” dialogue. We’ll demonstrate this below using Microsoft Word.
If your document won’t stay open long enough to do the steps below (or won’t even open at all), try using an online converter. Googling “[file type]” + “converter” should yield some results.
- Open the document using its original app (we’re using Microsoft Word).
- Click File/Office button > Save as…
- Use the dropdown menu to select a new format (for ex. HTML or PDF) for your document, then click “Save.”
⚠️
Make sure to choose a format that best preserves your content. For example, our Word document only contained text, so we chose HTML. If your content is an image or photo, try saving it from PNG to JPG or vice versa.

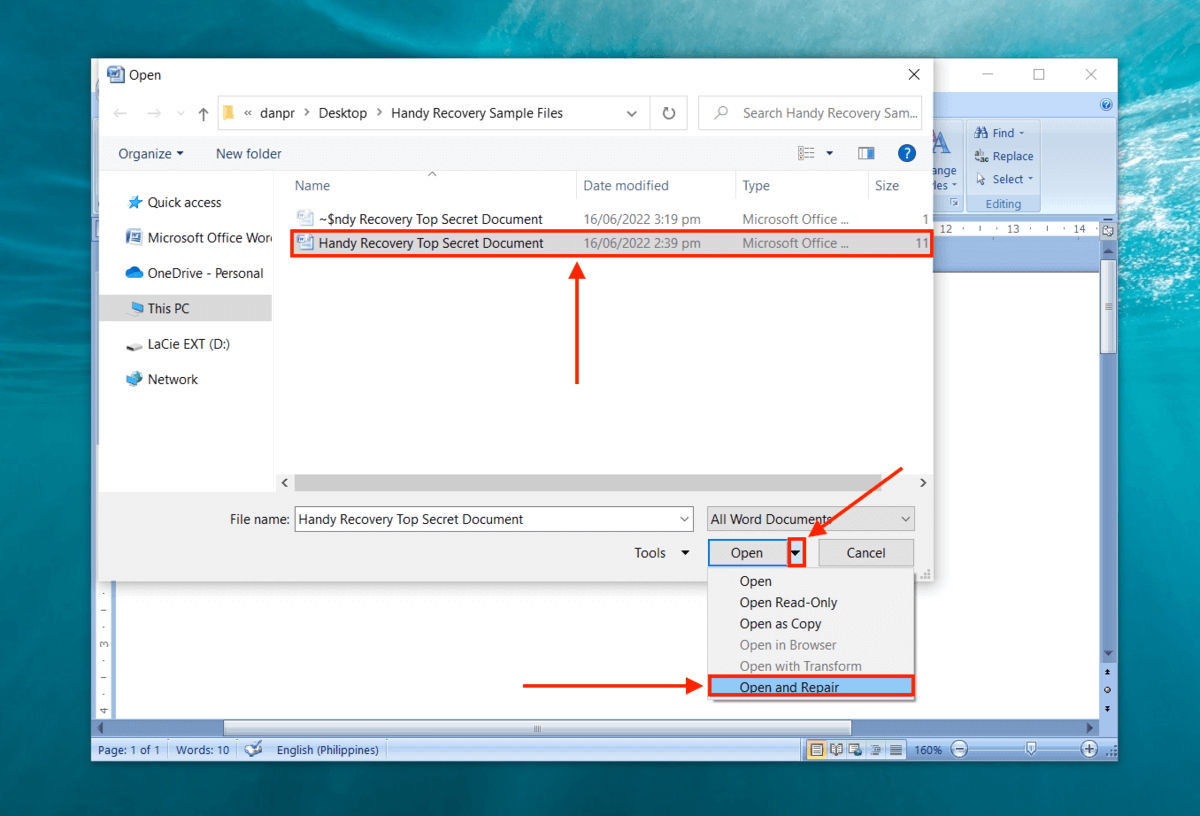
Method 6: Open and Repair (Microsoft Office)
Microsoft Office has a built-in autorepair tool called “Open and Repair” that can scan for and fix corrupted files as it opens them. It doesn’t require any setup beforehand, so all Microsoft Office users can give this a try.
- In Microsoft Word/Excel/Powerpoint, click File/Office button > Open.
- Find the folder where your damaged file is stored.
- Click your file, then click the arrow beside Open > Open and Repair.
Method 7: Use a Repair Tool
If none of the above methods work, try using online file repair tools. These are browser-only file fixer and file opener apps that can repair corrupted files through the website, without having to download anything. You just upload your broken file(s) to the website and let them do the rest.
Do be aware that all of the best tools (as in, reliable tools that real users can vouch for) are paid. We can’t vouch for any free tools. Here are a few good ones:
- Onlinefile.repair – $10 for files under 100 MB
- https://online.officerecovery.com – $59 for up to 30 jobs in 48 hours (better for high volume tasks)
- https://onlinefilerepair.com/ – $5 for files under 100 MB
How to Recover Multiple Corrupted Files/Files That Keep Getting Corrupted
If your file keeps getting corrupted, multiple files have suddenly become corrupted at the same time, or your files have gone missing, you’re most likely dealing with a corrupted drive – not a corrupted file. In this case, use trustworthy data recovery software to recover your corrupted files.
For this article, we’ll be using Disk Drill. It has an excellent success rate and it’s easy to use, so you should have no problems following along with the steps. Even better, Disk Drill Basic for Windows offers 500 MB of free data recovery – more than enough for most non-video files.
For corrupt data recovery on a problematic drive, we suggest using Disk Drill’s Byte-to-byte backup feature (100% free to use) to create an image backup of your drive. Then, you can attempt to fix the corrupted drive, while using the image backup as the target for data recovery. We’ll include these steps below.
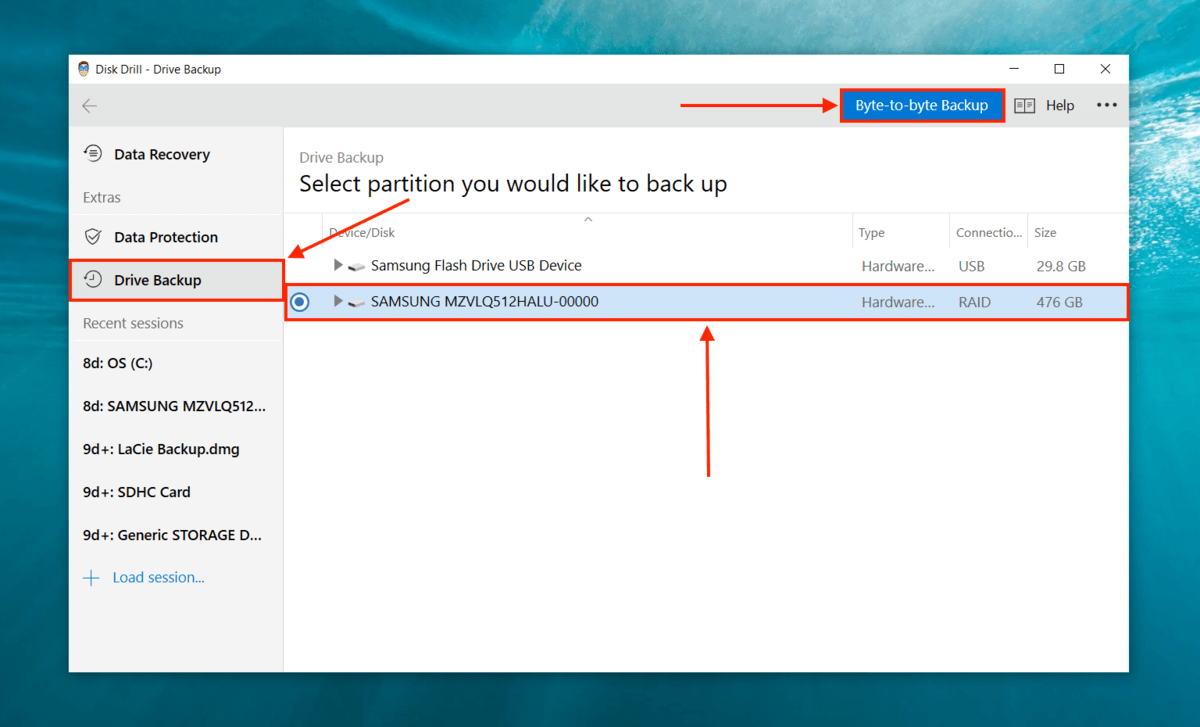
- Download and install Disk Drill, then launch it.
- On the left sidebar, click “Drive Backup.” Then, select your drive in the middle pane and click “Byte-to-byte backup.”
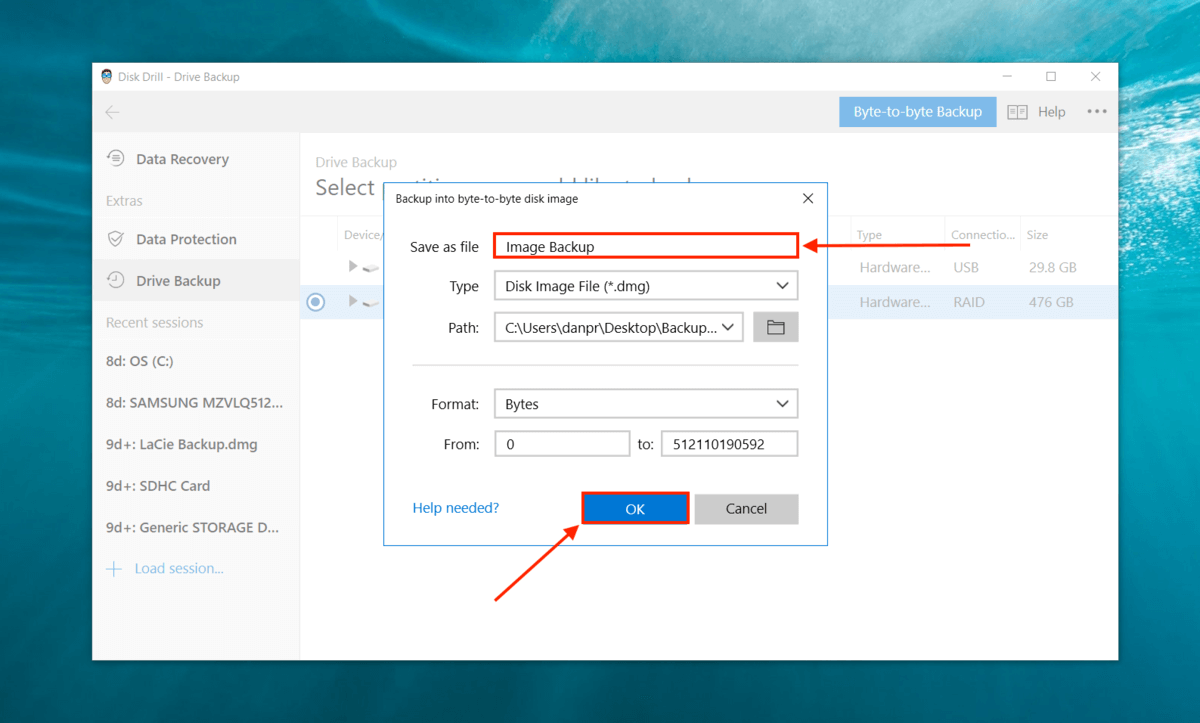
- In the dialogue box that appears, name your backup file and click “OK.”
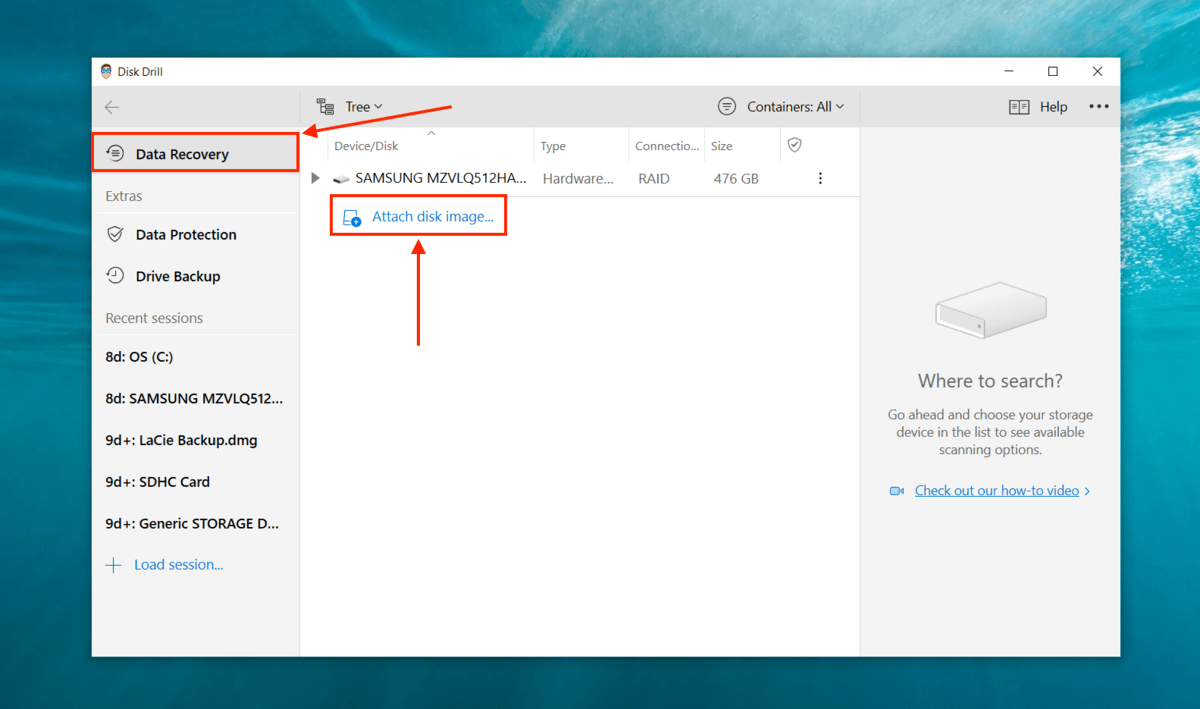
- Once Disk Drill completes the backup process, click the back arrow button to return to the main Disk Drill window and click “Data Recovery” on the left sidebar. Click “attach disk/image…”
- Navigate to the location where the backup file is saved, then click “Open.”

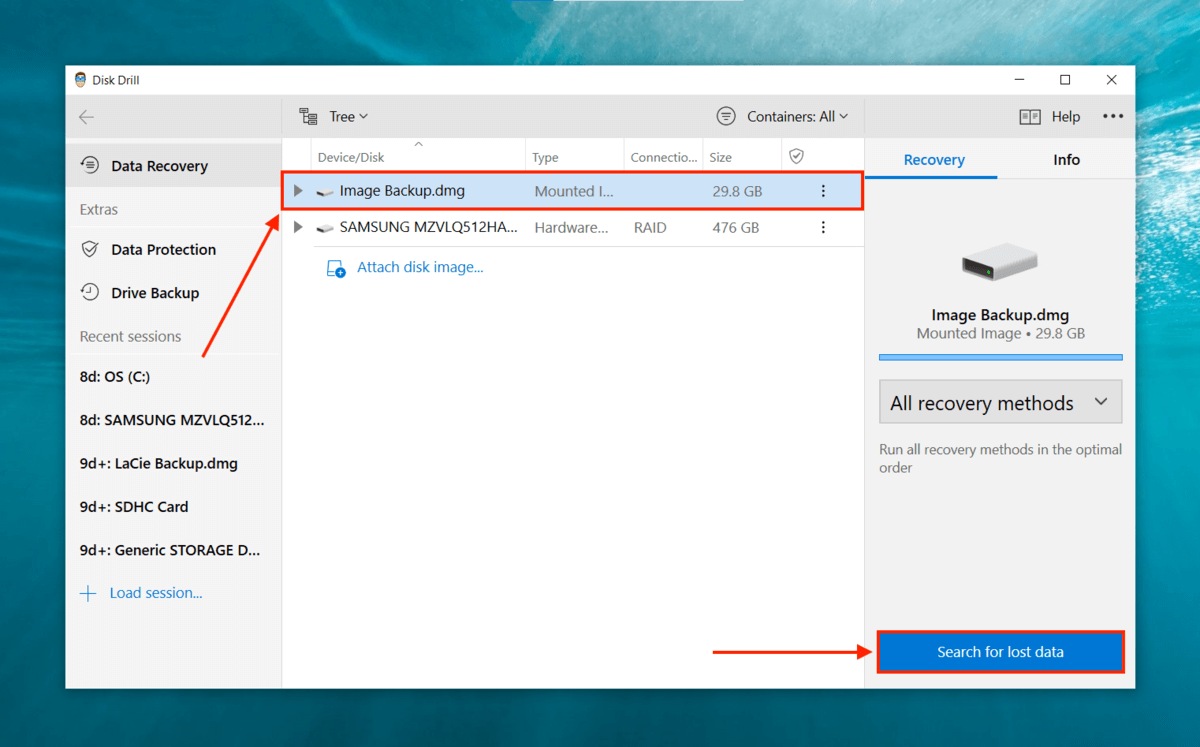
- We’re back to the main window. Select the backup image from the list, then click “Search for lost data.”
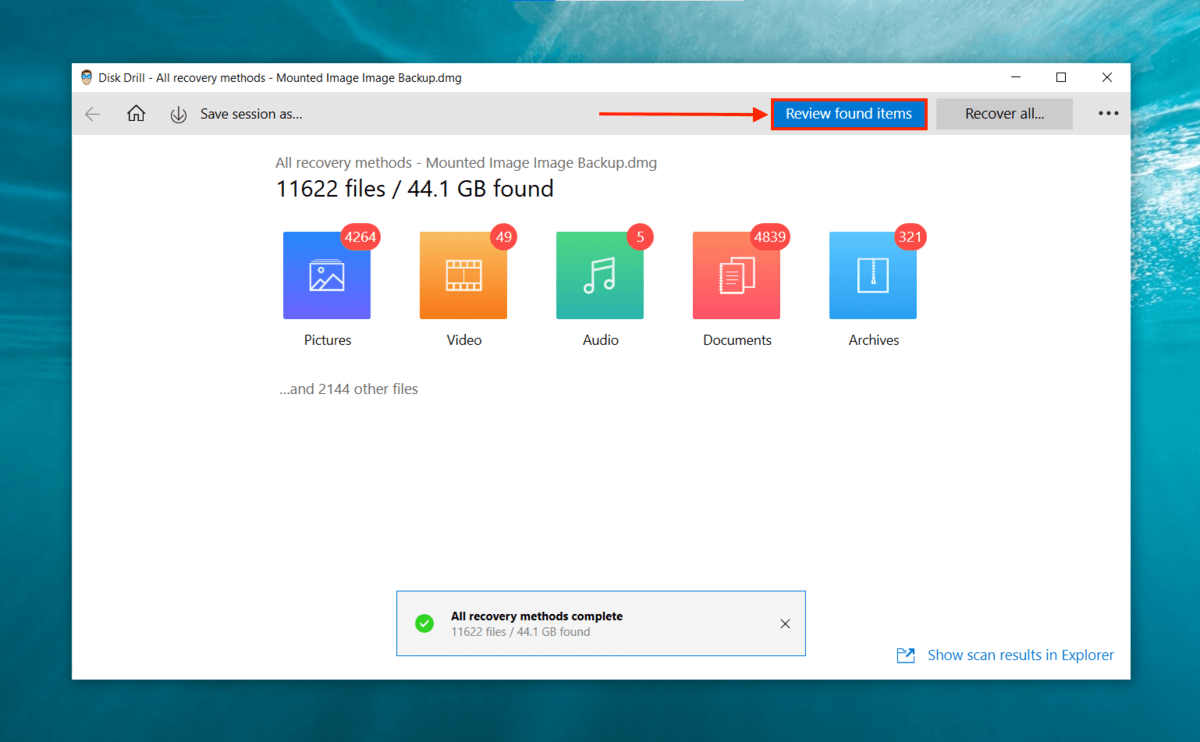
- Wait for Disk Drill to complete its scan, then click “Review found items.”
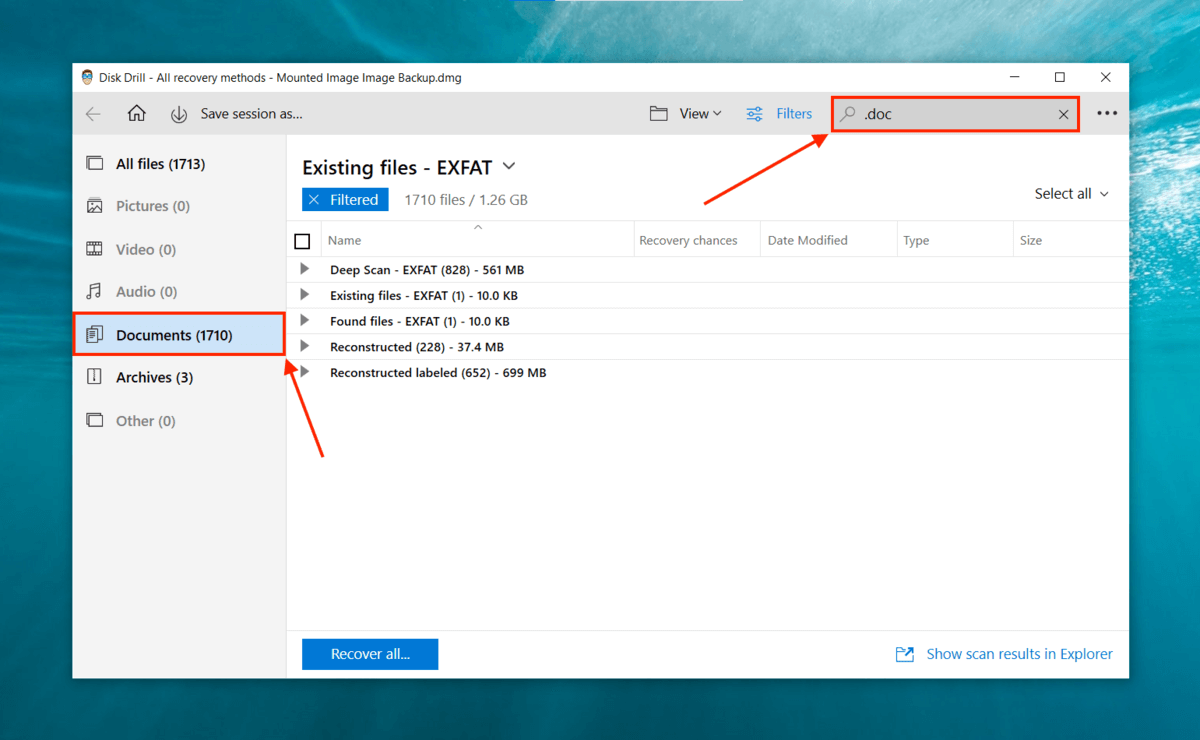
- You can quickly find your file by using the search bar or the filters in the left sidebar.
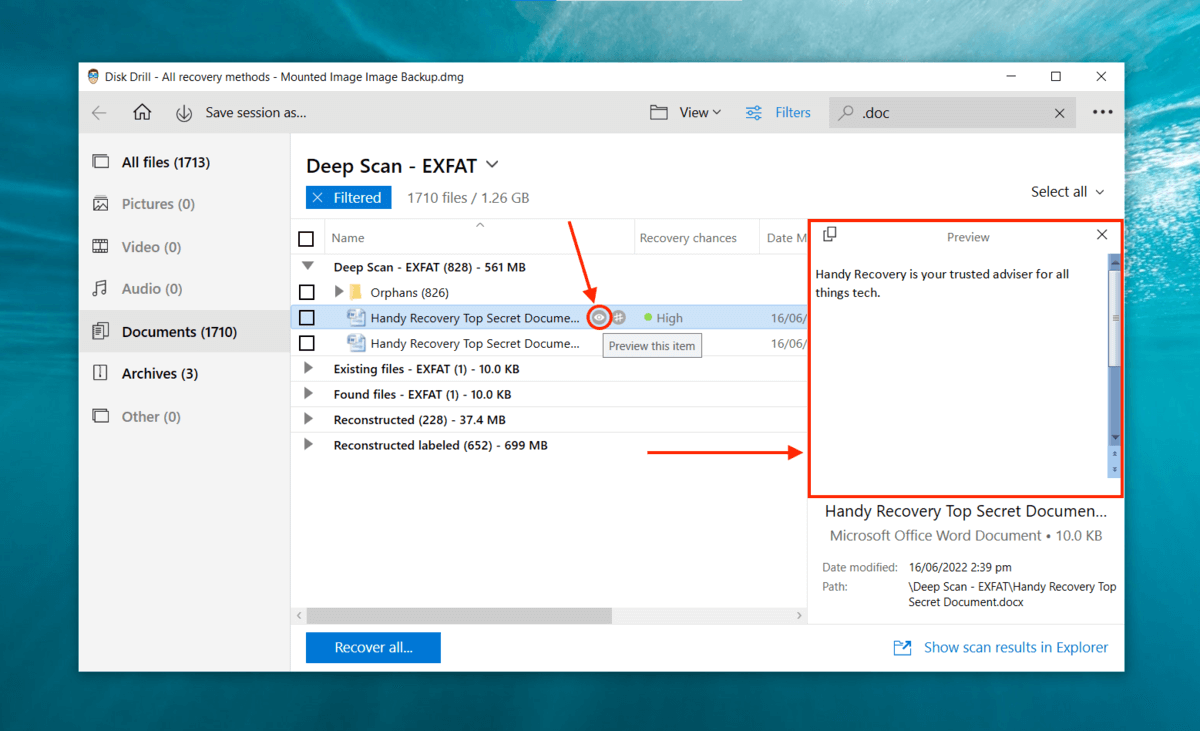
- You can check if you got the right files by previewing them. Hover your mouse pointer to the right of any file and click the eye button that appears. We have had some success previewing corrupted video files and image files during our other tests.
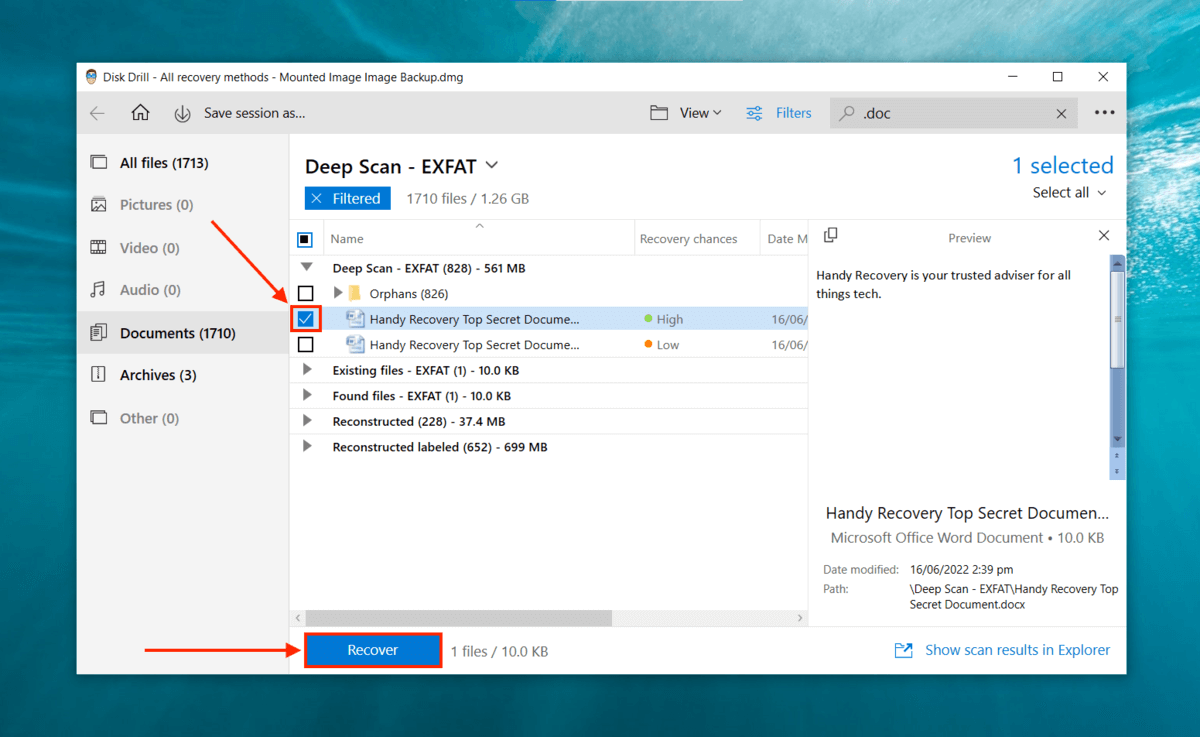
- Use the boxes in the left-most column to select the files you want to restore. Then, click “Recover.”
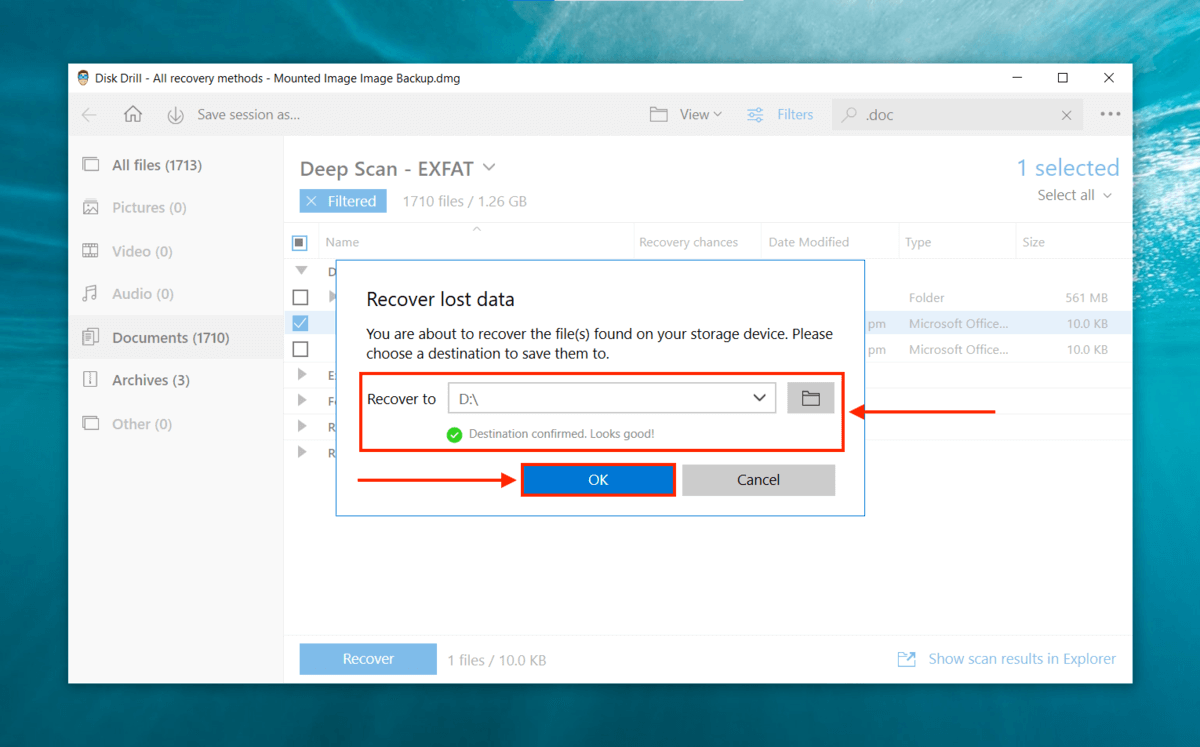
- Select a location that is not where the original file is located. For example: if it’s on your computer, save the recovered file to a USB device. If you are trying to recover files from a corrupted SD card, save the restored data to your computer. This will help us avoid overwriting the data. Then, click “OK.”
If you want to learn more about our experiences with this tool, read our full Disk Drill review.
FAQ
How can I recover my corrupted data?
To recover your corrupted data, try the following methods (for step-by-step guides for all of these methods, read the original article):
- If either File History or Restore Point is enabled, you can right-click a file or folder and click “Restore previous versions” to access old saves of the same file.
- Restore files from a backup created in Start > Control Panel > System and Maintenance > Backup and Restore.
- Launch Command Prompt as Administrator and execute the sfc /scannow command.
- Launch Command Prompt as Administrator and execute the chkdsk command.
- Change the file to another format by using the save or export dialogue in the original app (for ex. Microsoft Word).
- Use the Open and Repair function in Microsoft Office apps (for MS Office users only).
- Use a Repair Tool like onlinefile.repair
- If your drive (not an individual file) is corrupted, use a data recovery software like Disk Drill to restore and backup all of your data.
Can corrupted files be repaired?
In most cases, yes! There are multiple methods to fix and recover a corrupted file – even a corrupted hard drive.
How do I view corrupted files?
To view corrupted files, you first have to repair or recover them. Here are all the methods you can try to do so:
- Restore a previous version of the file.
- Restore the file from a backup.
- Use the SFC Scannow command in elevated Command Prompt.
- Use the Chkdsk command in elevated Command Prompt.
- Change the file to another format.
- Use Microsoft Office Open and Repair function (MS Office users only).
- Use a repair tool.
For step-by-step guides for all of these methods, read the original article.
How to recover corrupted files using Command Prompt?
To recover corrupted files using Command Prompt, there are two commands we can try. First, make sure to run Command Prompt as administrator. Then, type one of these commands and hit enter:
sfc /scannow
If your file still doesn’t work after executing this command, launch Command Prompt as administrator and execute this command:
chkdsk c: /f /r
Is there any corrupted file recovery software?
Yes, there are lots of tools online that offer corrupted file repair. Here are a few examples:
Most of them aren’t free though, so be ready for that.
Does Windows 10 have a file repair tool?
There are 2 system file repair tools you can launch via elevated Command Prompt:
Sfc /scannow
Chkdsk c: /f /r
Is it possible to recover corrupted files online?
Yes, it’s possible to recover corrupted files online – however, be aware that most of these tools are paid. Here are a few we recommend:
Is it possible to recover corrupted files on Android?
Yes! Specifically, you can recover files from a corrupted SD card by removing it from your Android device and connecting it to your computer using a card reader. Then, you can scan the SD card with data recovery software.
This article was written by Alejandro Santos, a Staff Writer at Handy Recovery Advisor. It was also verified for technical accuracy by Andrey Vasilyev, our editorial advisor.
Curious about our content creation process? Take a look at our Editor Guidelines.