It’s happened to us all. Maybe you were in a hurry moving a file. Or maybe you replaced a document with an older version by mistake. Or maybe you just plain weren’t paying attention.
If you’ve worked with computers at all, chances are you’ve accidentally overwritten or replaced files on your Mac before. And sadly, you can’t recover your old version from the trash like other deleted files.
But don’t worry—you can still recover your files. This guide shows you the four best techniques for getting your data back.
Is It Even Possible To Recover Overwritten/Replaced Files On A Mac?
Yes, it sure is.
When you overwrite or replace a file on a Mac, you aren’t actually deleting that file. Instead, you’re just marking it okay to be overwritten by new data. And until that happens, you may be able to recover it with data recovery software.
Beyond that, backups and certain in-app features make it simple to revert your files to an earlier version, even if you did accidentally replace them with another file.
Best of all, the methods of recovering your overwritten files are easy enough that anyone can do it. No diving deep into hidden files and directories. And no inputting commands in terminal to recover your deleted files.
Methods to Recover Replaced Files On Mac
So, how can you recover overwritten or replace files on Mac?
There are four solutions in particular that are likely to give you the best results:
- Local Backups
- Cloud-Based Backups
- In-App Restore Features
- Data Recovery Software
Solution #1: Local Backup (Time Machine)
The best way to recover files on your Mac is to restore from a backup using Time Machine.
Time Machine is Apple’s built-in backup system. With Time Machine, you don’t have to worry about remembering to back up your important files. Instead, this handy feature takes care of it for you automatically. It also manages your backup data by deleting your oldest backups when your disk becomes full.
Time Machine keeps:
- Local snapshots as space permits (stored on your hard drive).
- Hourly backups for the past 24 hours.
- Daily backups for the past month.
- Weekly backups for all previous months.
IMPORTANT: Regularly backing up your files is the absolute best way to protect yourself against permanent data loss. If you aren’t running regular backups now, it’s in your best interest to start today.
To recover replaced files on Mac using Time Machine:
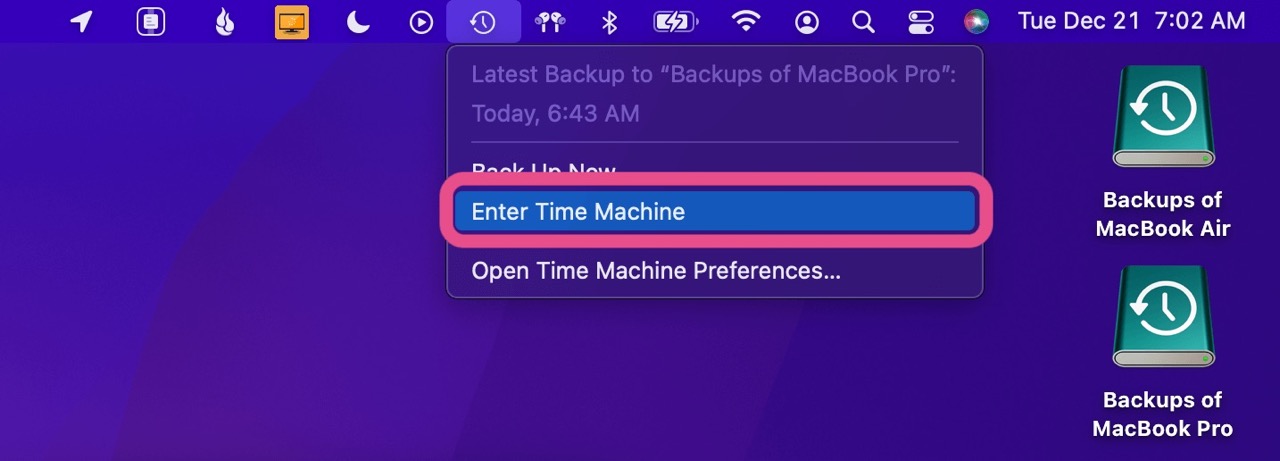
- Make sure your backup drive is connected and open Time Machine from the menu bar or with Spotlight (Command + Space).
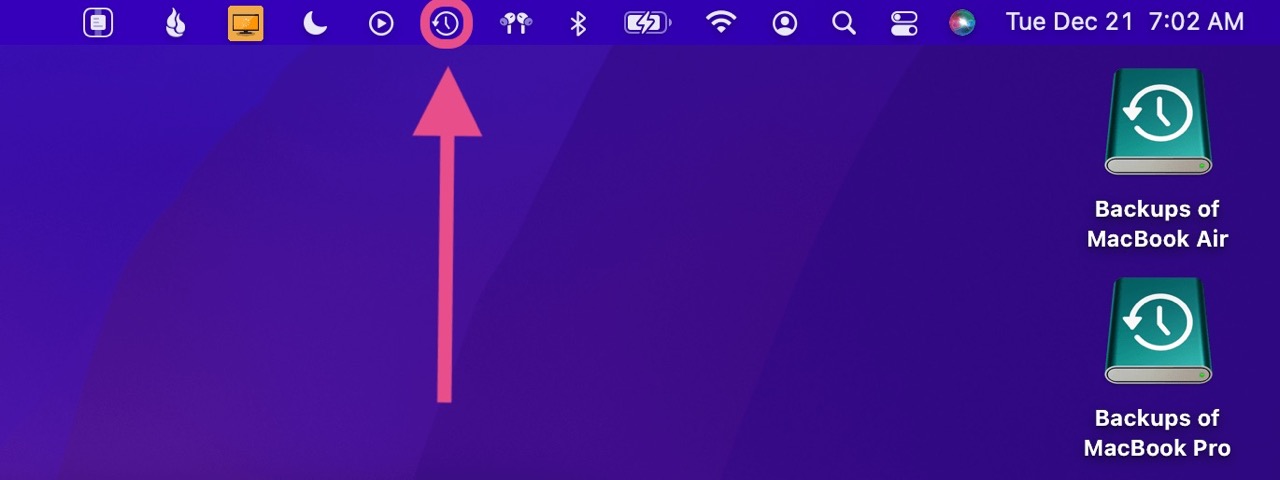
- Enter Time Machine.
- Navigate through your backups using the timeline to the right, the arrows, or by clicking the previous version windows.
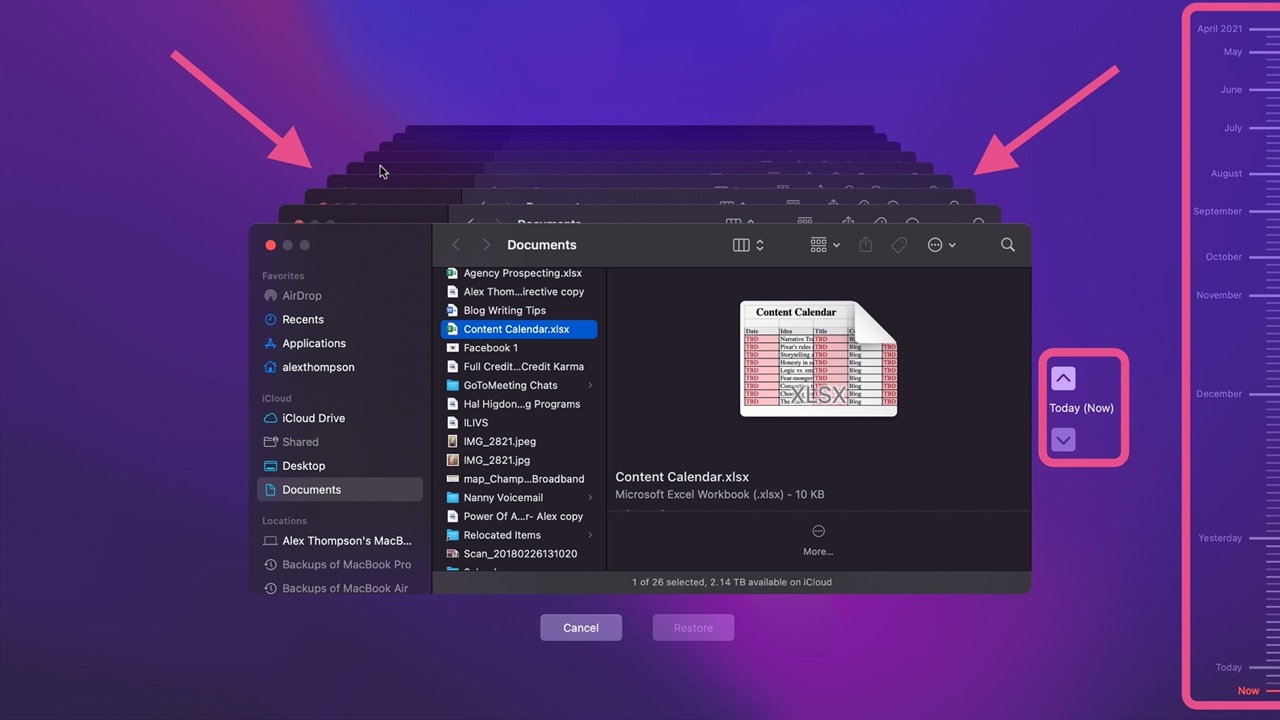
- Find and select your file. Then click Restore.
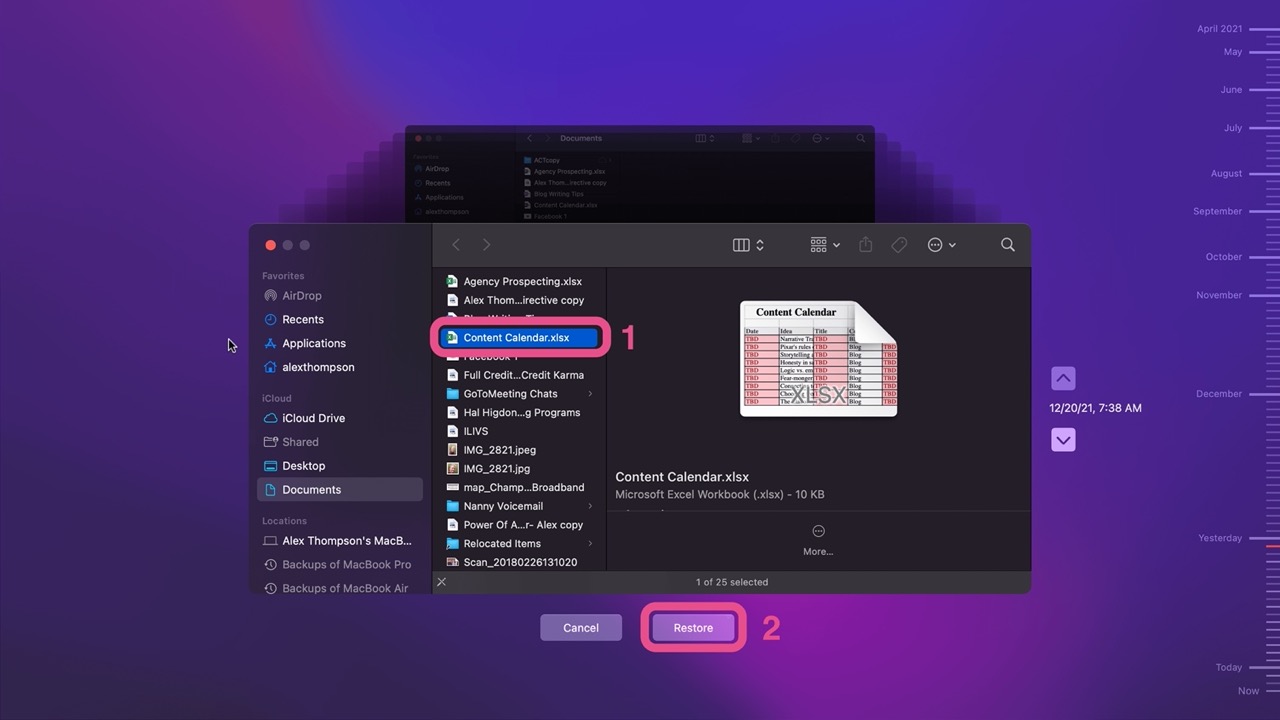
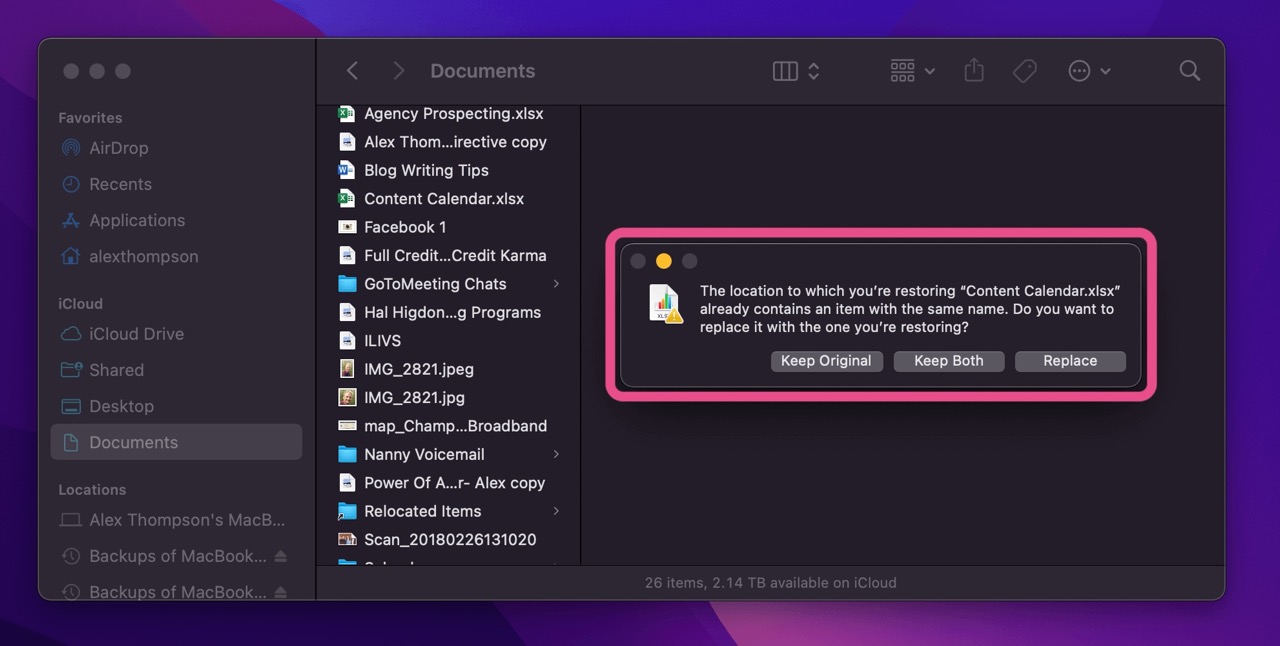
- If you’re replacing a newer version of the file, choose Replace. Or you can restore the previous version while keeping both versions.
Solution #2: Cloud Backups
Time Machine is great for regular backups. But to get the most out of it, you need to keep an external backup drive connected to your Mac throughout the day. And for some, that just might not be feasible.
Cloud backups are a helpful alternative (or supplement) to using Time Machine. These solutions store your data in an offsite location and run backups over the internet—no hard connections required.
Many people will use one of three cloud backup solutions: iCloud, Dropbox, or Google Drive.
iCloud
Apple’s iCloud service securely stores your data while keeping any changes consistent across all your devices. You can also use iCloud to restore overwritten or replace files on your Mac.
NOTE: You can only restore within a limited timeframe (usually just 30 days).
To undo a replaced file on Mac using iCloud:
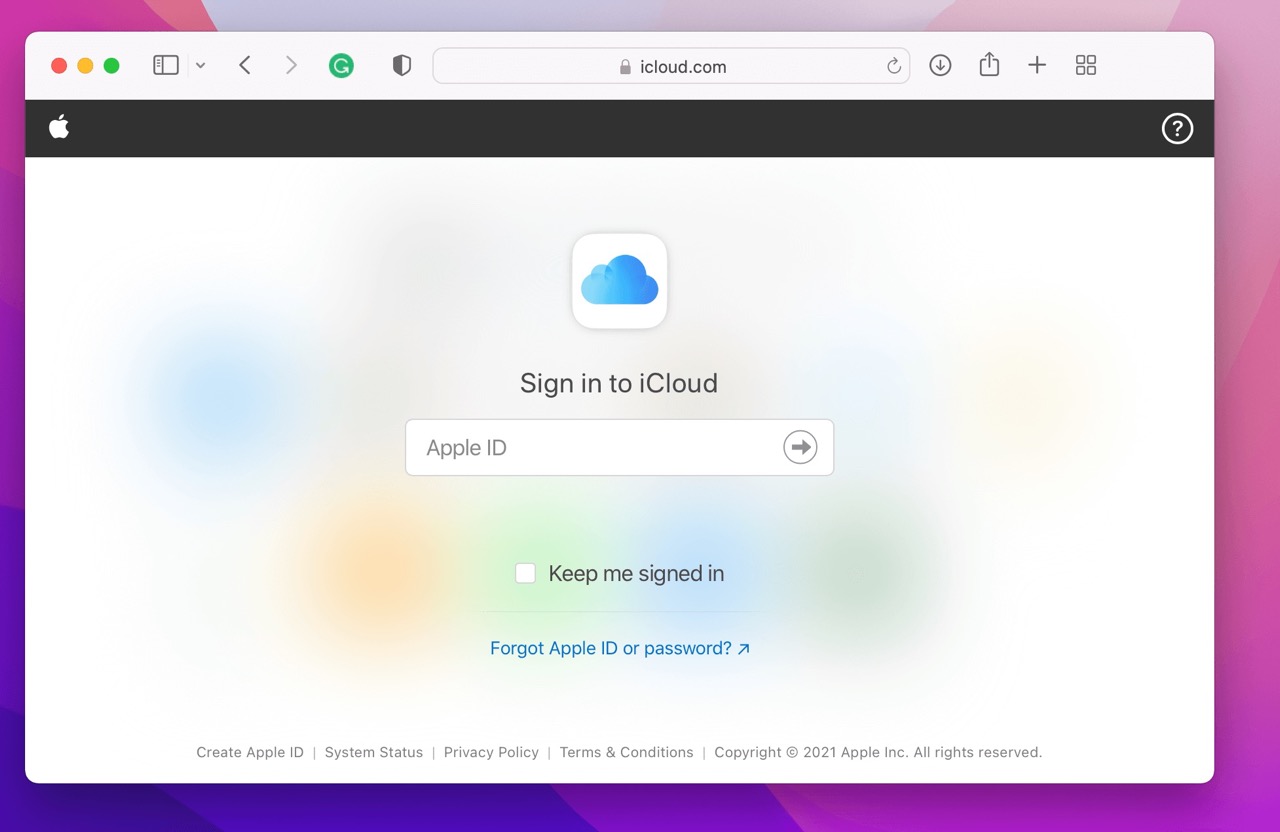
- Go to iCloud.com and log in to your account using your Apple ID.
- Once logged in, click Account Settings.
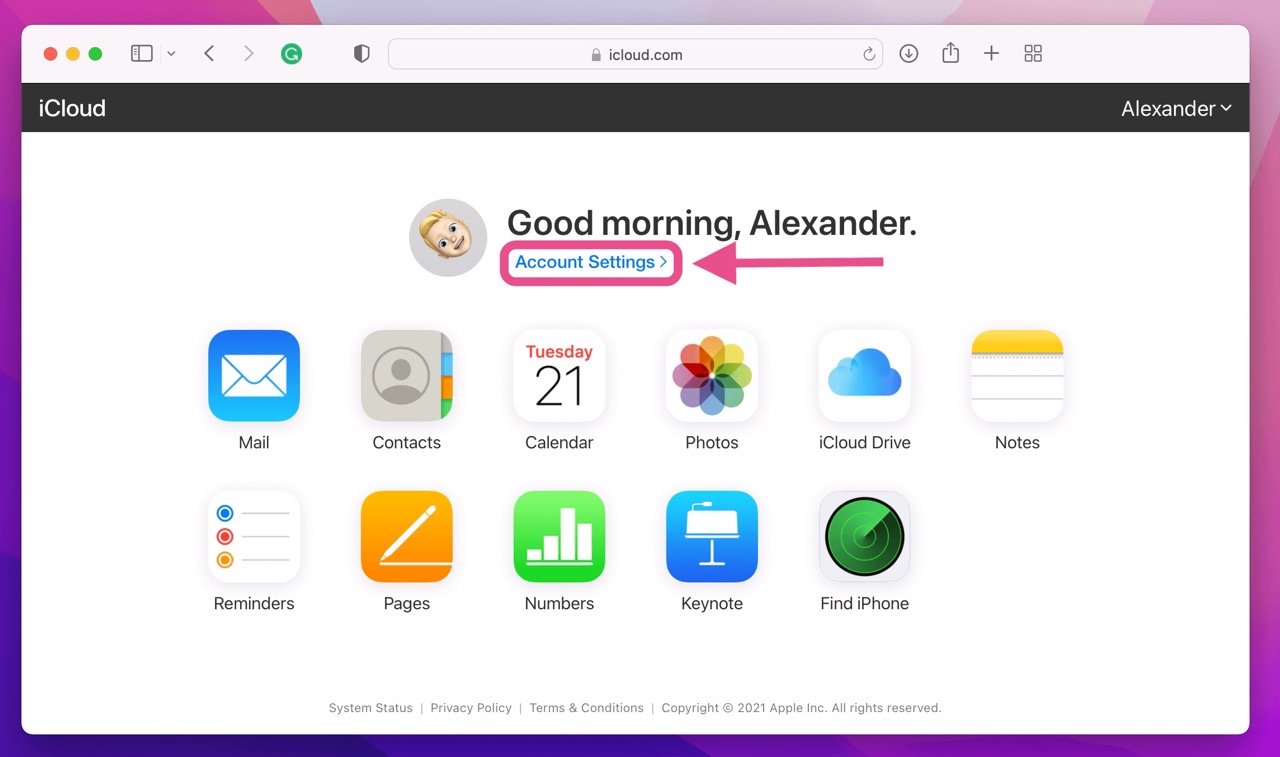
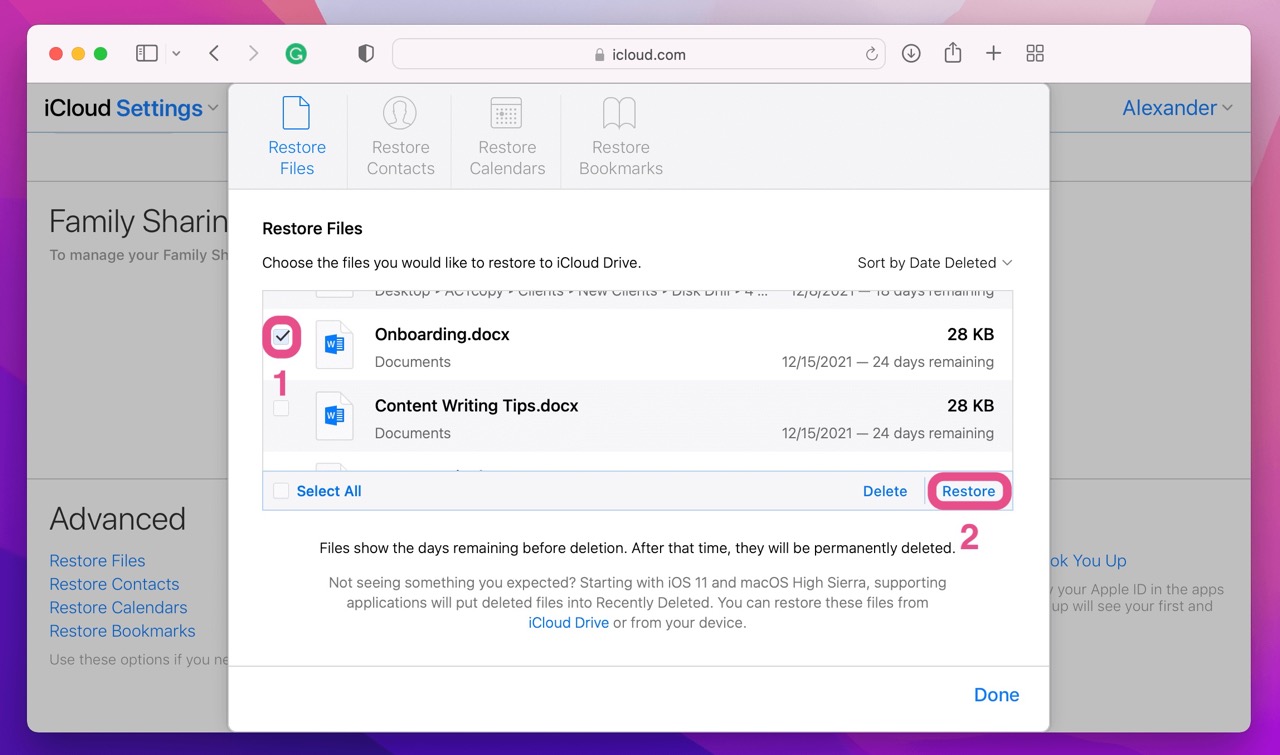
- Scroll to the bottom of the page and select Restore Files.
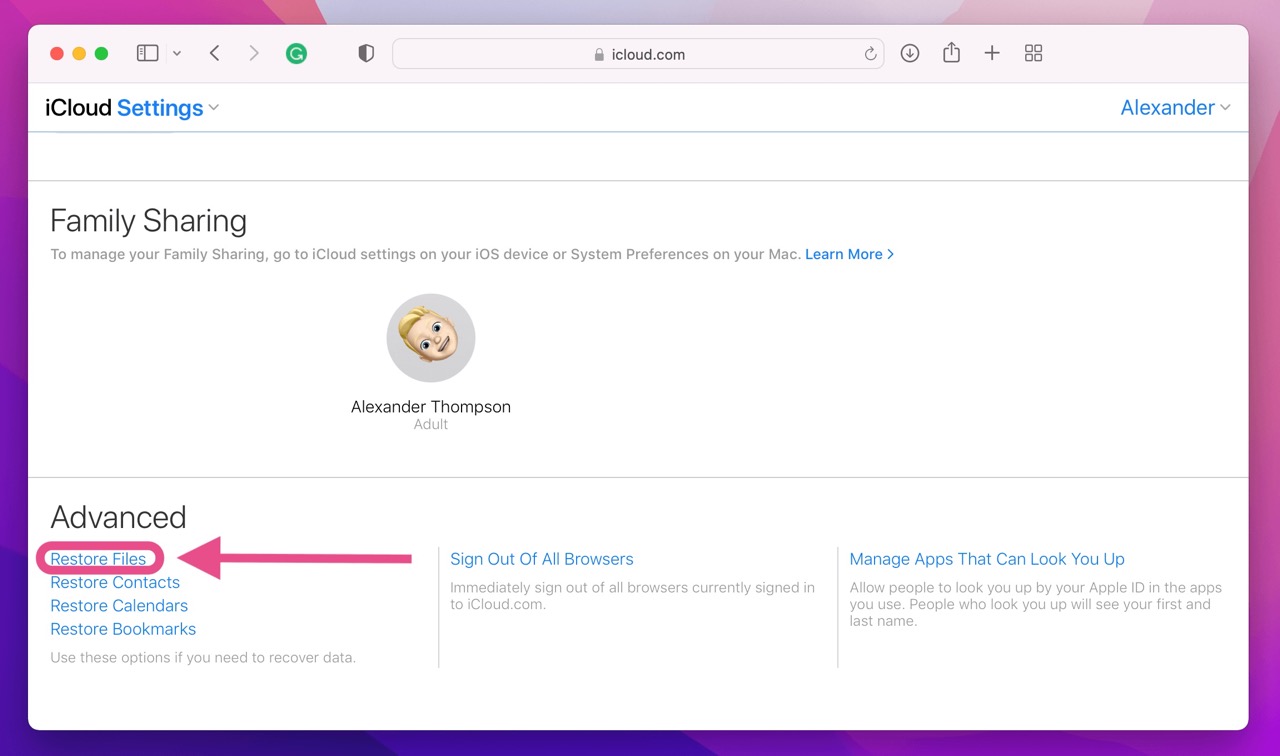
- Find the files you’d like to restore and select Restore.
Dropbox
Dropbox is another cloud-based file storage system. Similar to iCloud, you can configure Dropbox to automatically run backups for certain files or folders on your Mac. If you’ve done so, there are some steps you can take through Dropbox to recover any files you’ve accidentally overwritten.
To recover an accidentally replaced file on Mac using Dropbox:
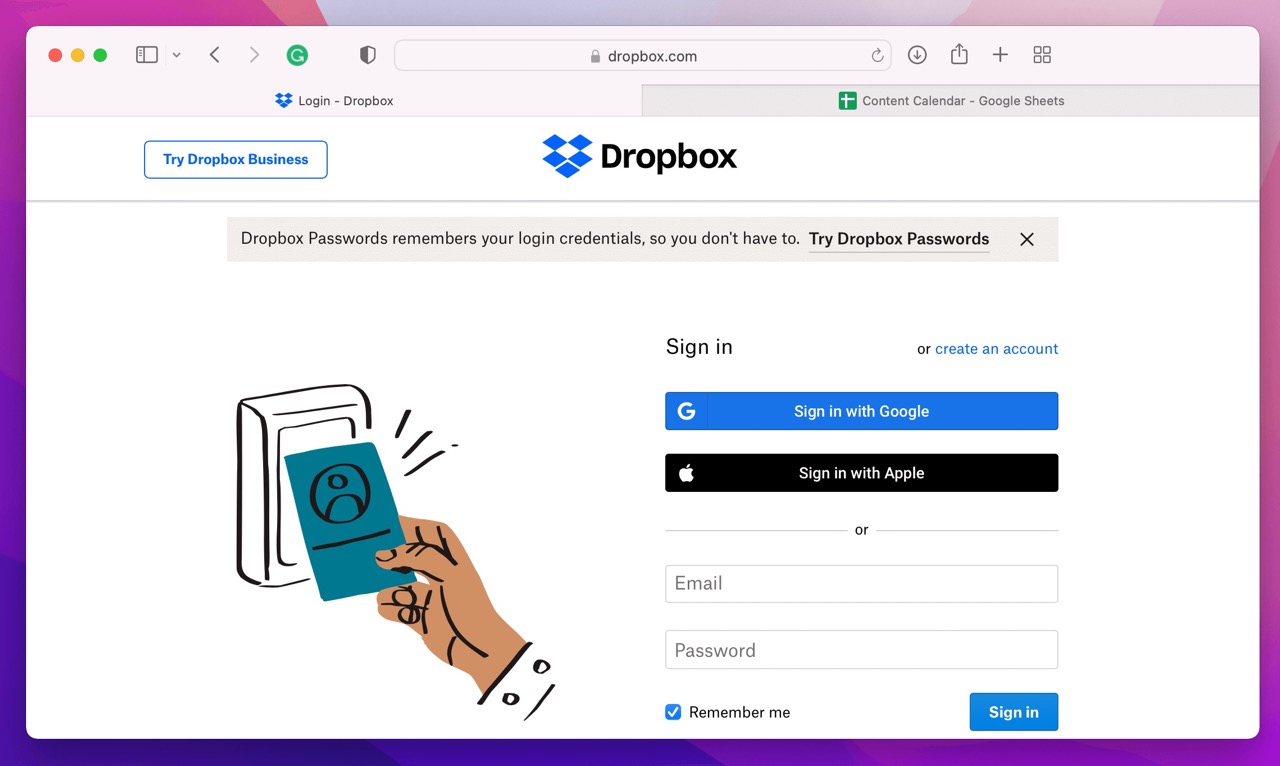
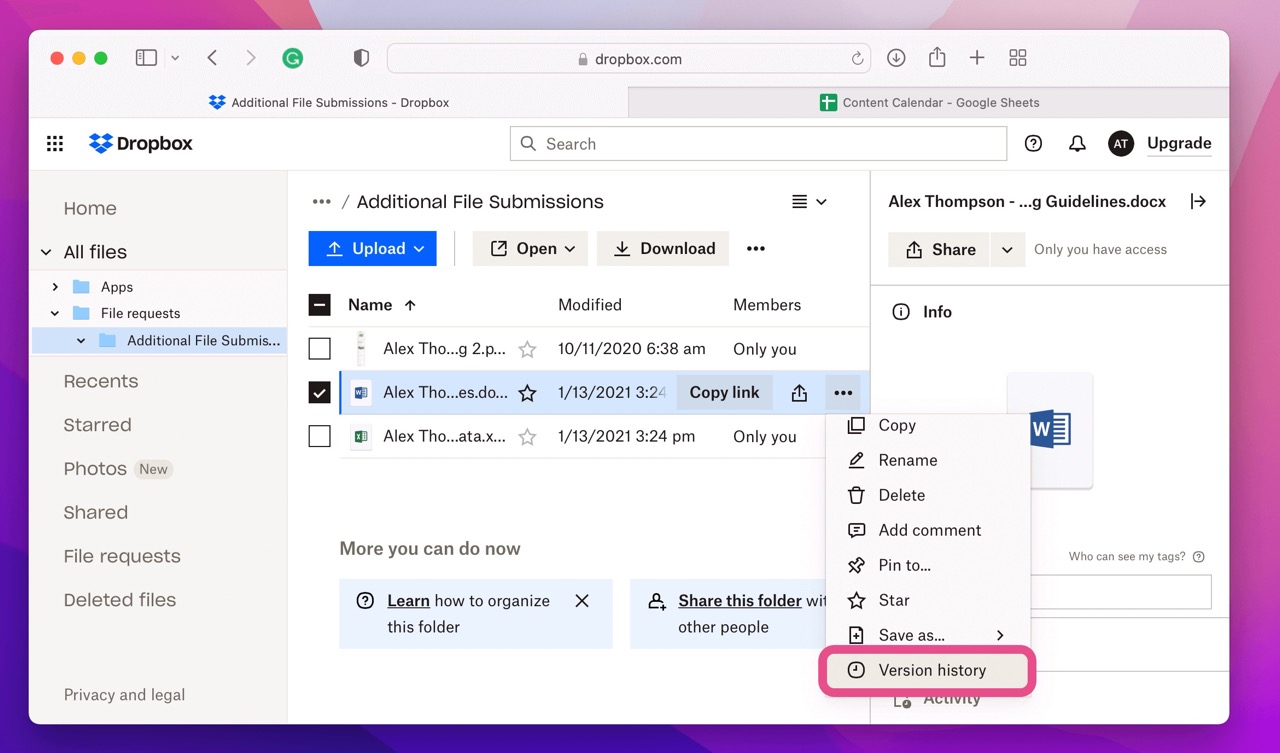
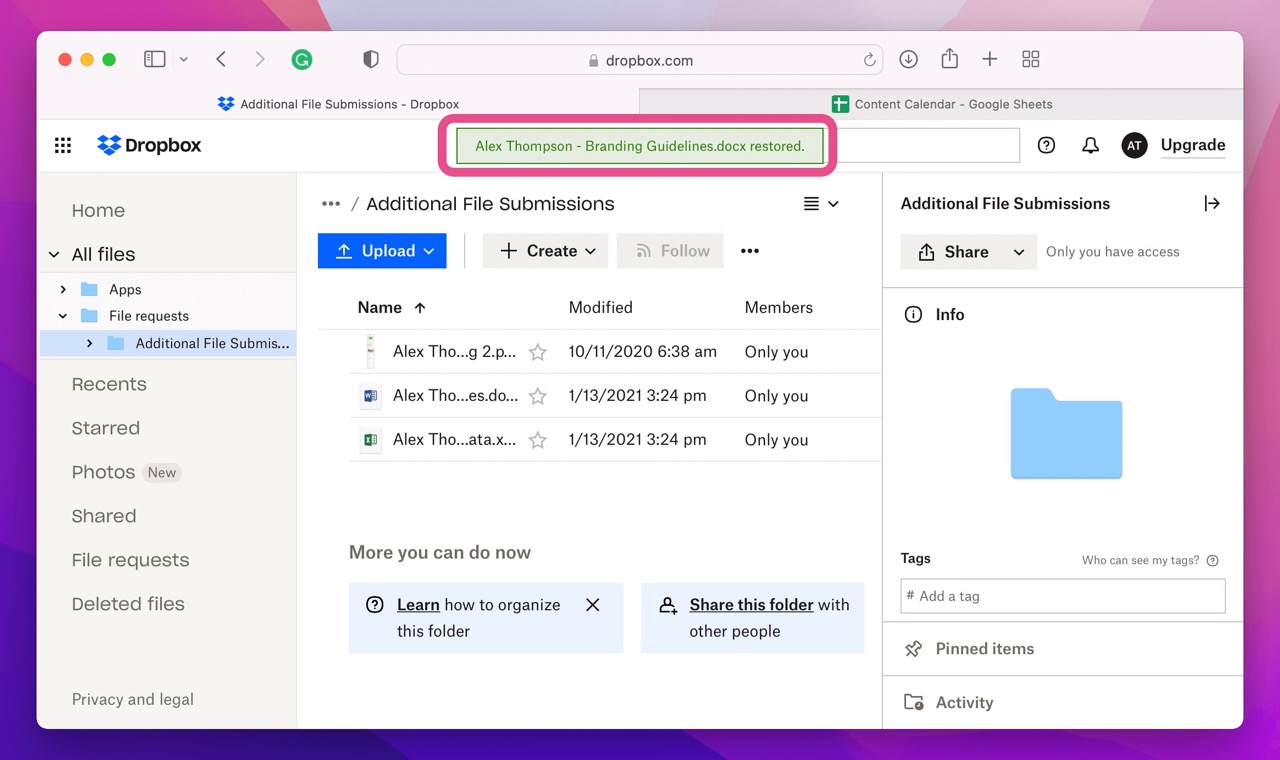
- Go to Dropbox.com and log in to your Dropbox account.
- Find the file you replaced with a newer version.
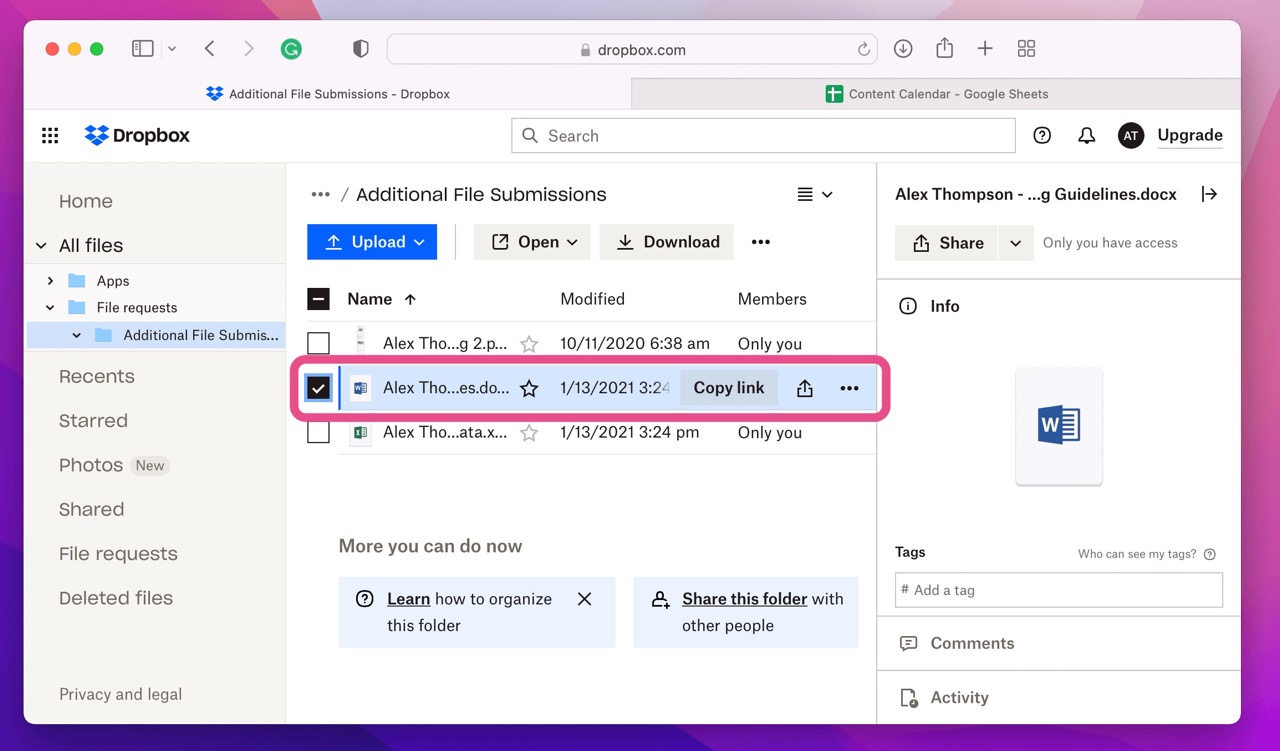
- Select version history from the three-dot option dropdown.
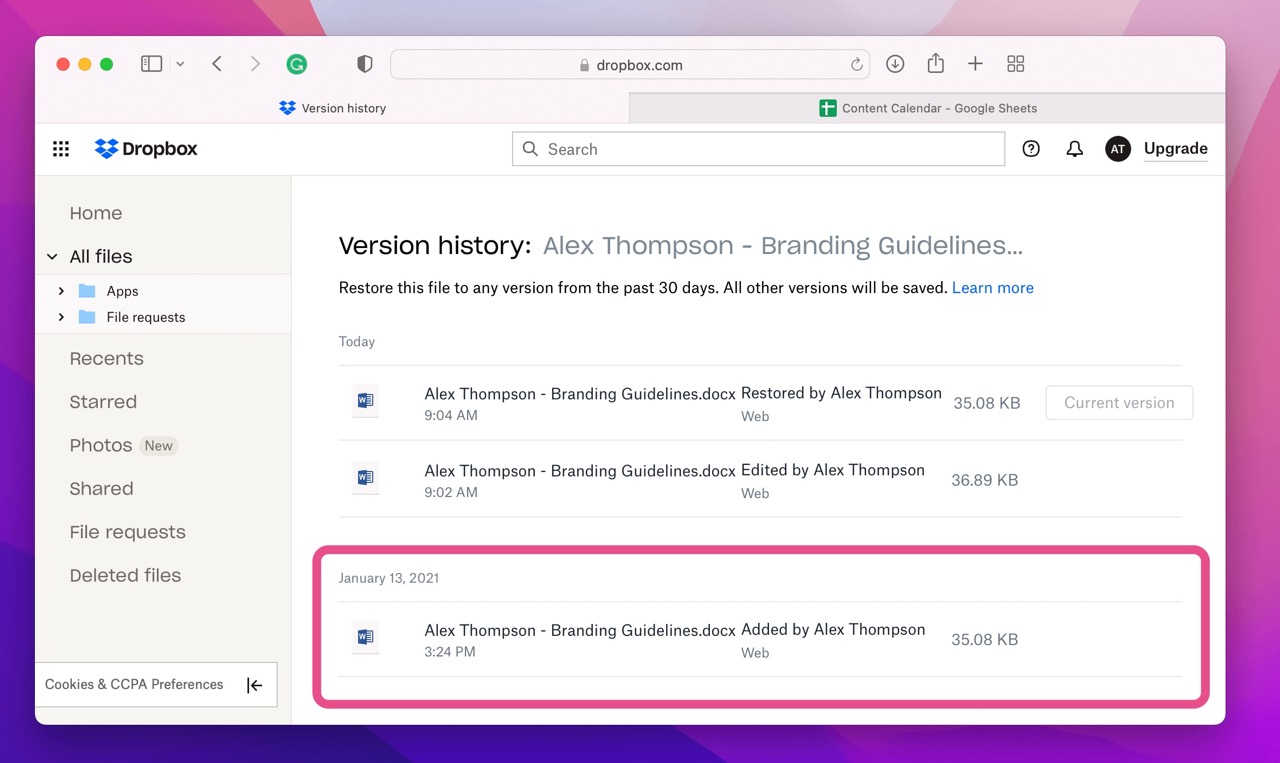
- Find the version you’d like to restore.
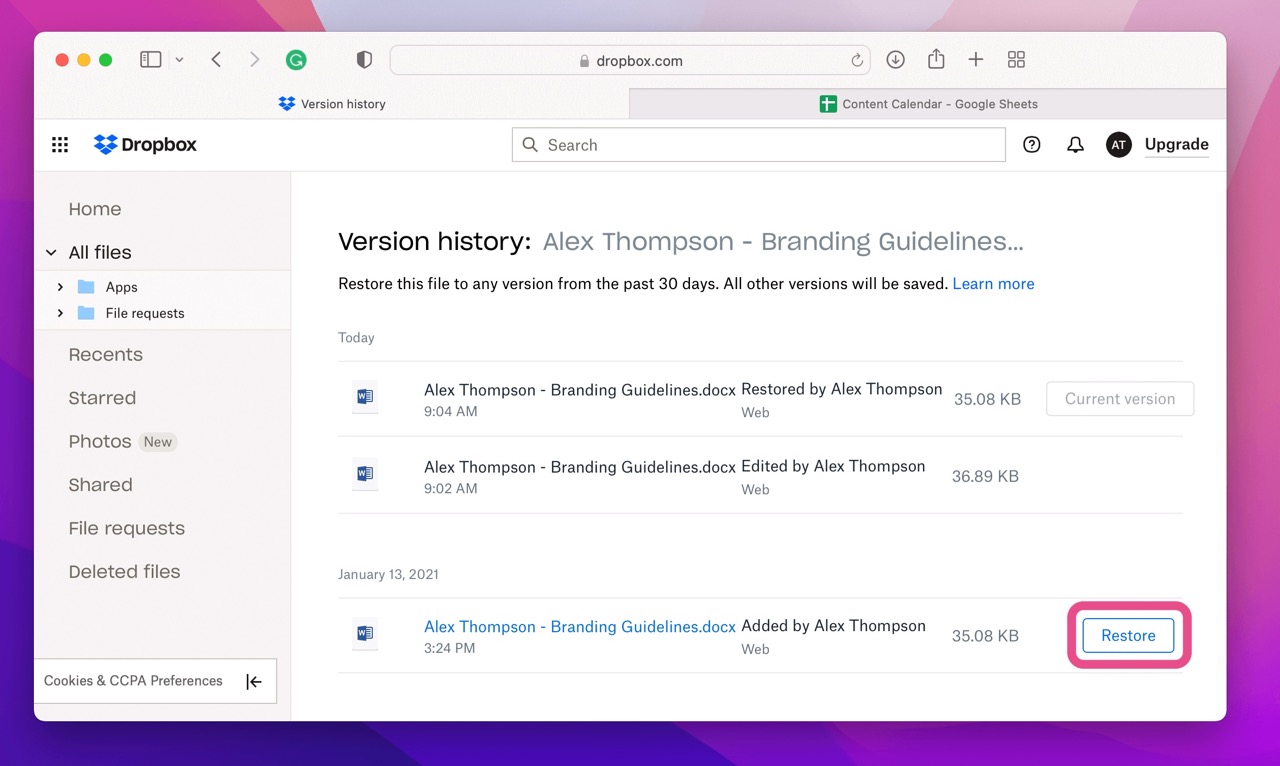
- Select Restore.
- Confirm you’d like to restore this version.
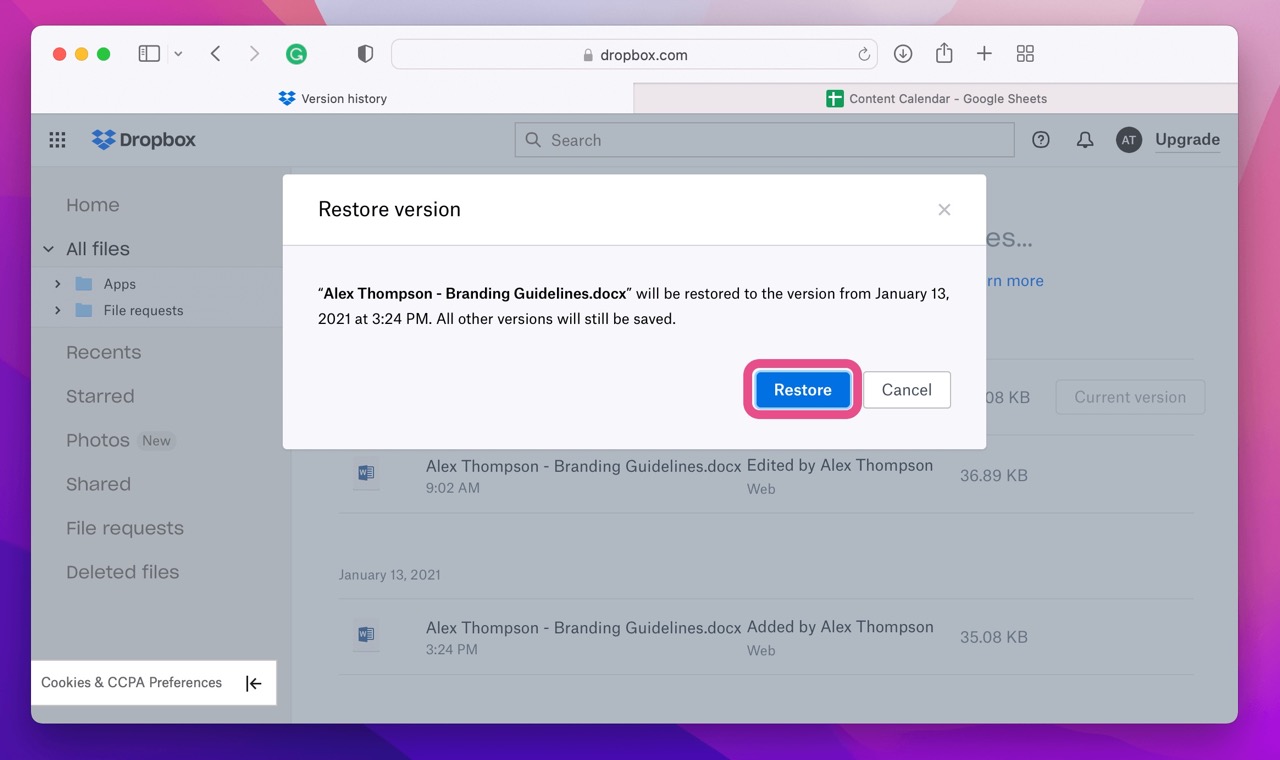
- You’ll be taken back to the home page and see a success message at the top of the page.
Read also: How to Recover Deleted Files From Dropbox
Google Drive
Google Drive is Google’s cloud file storage system. It’s especially convenient if you’re using Google’s file formats like Google Docs or Google Sheets. You can also set up Drive to automatically backup and sync any changes you make on your Mac or through Drive. And luckily, they also make it easy to restore files to a previous version.
To recover replaced files on Mac using Google Drive:
- Go to drive.Google.com and log in to your Google account. Then find the file you’d like to revert to a previous version.
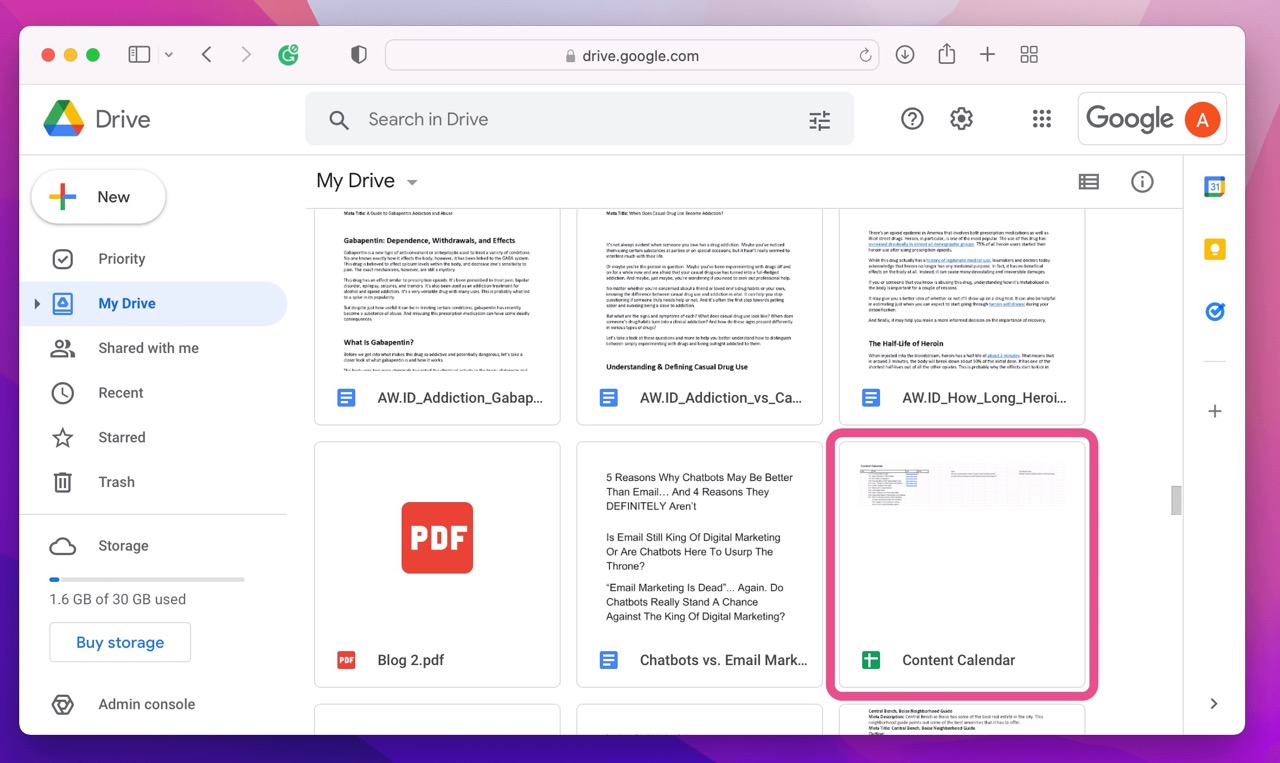
- Open the file and select the version history feature at the top of the page.
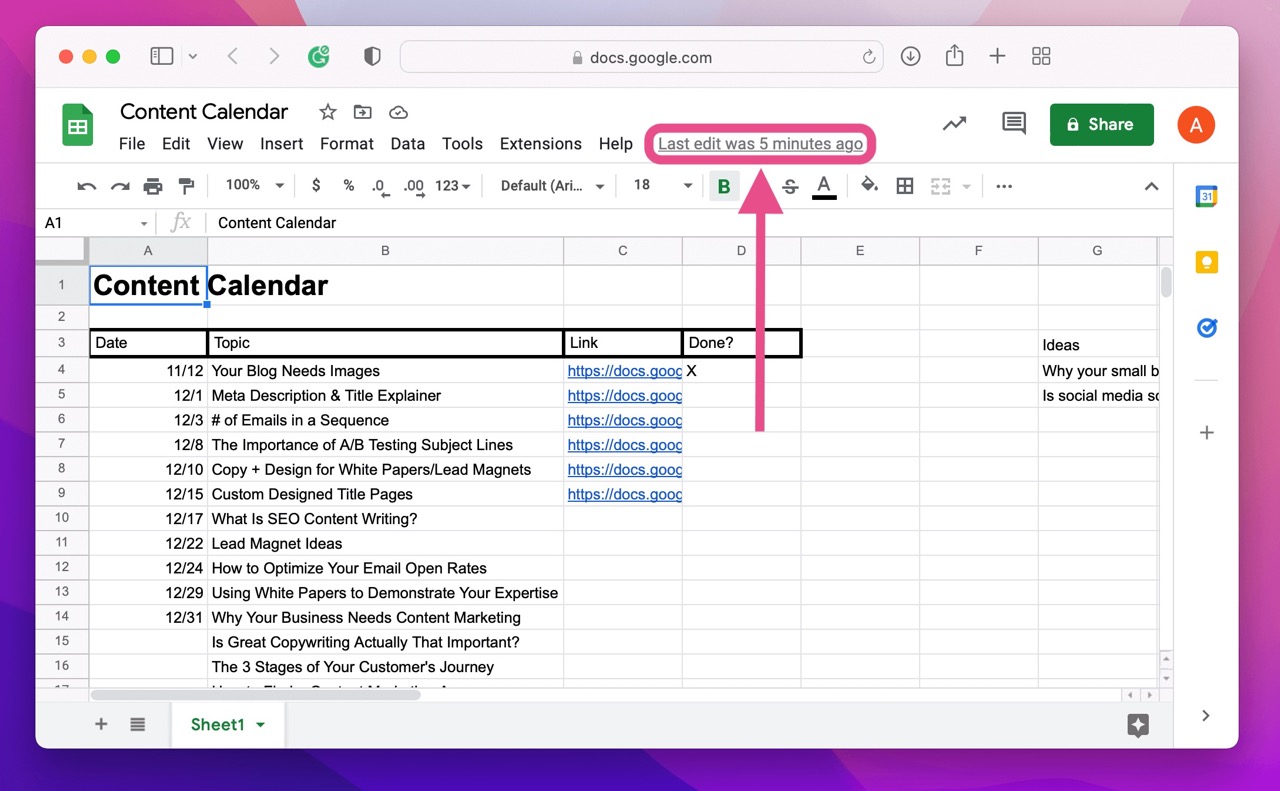
- Find and select the version of the file you’d like to restore.
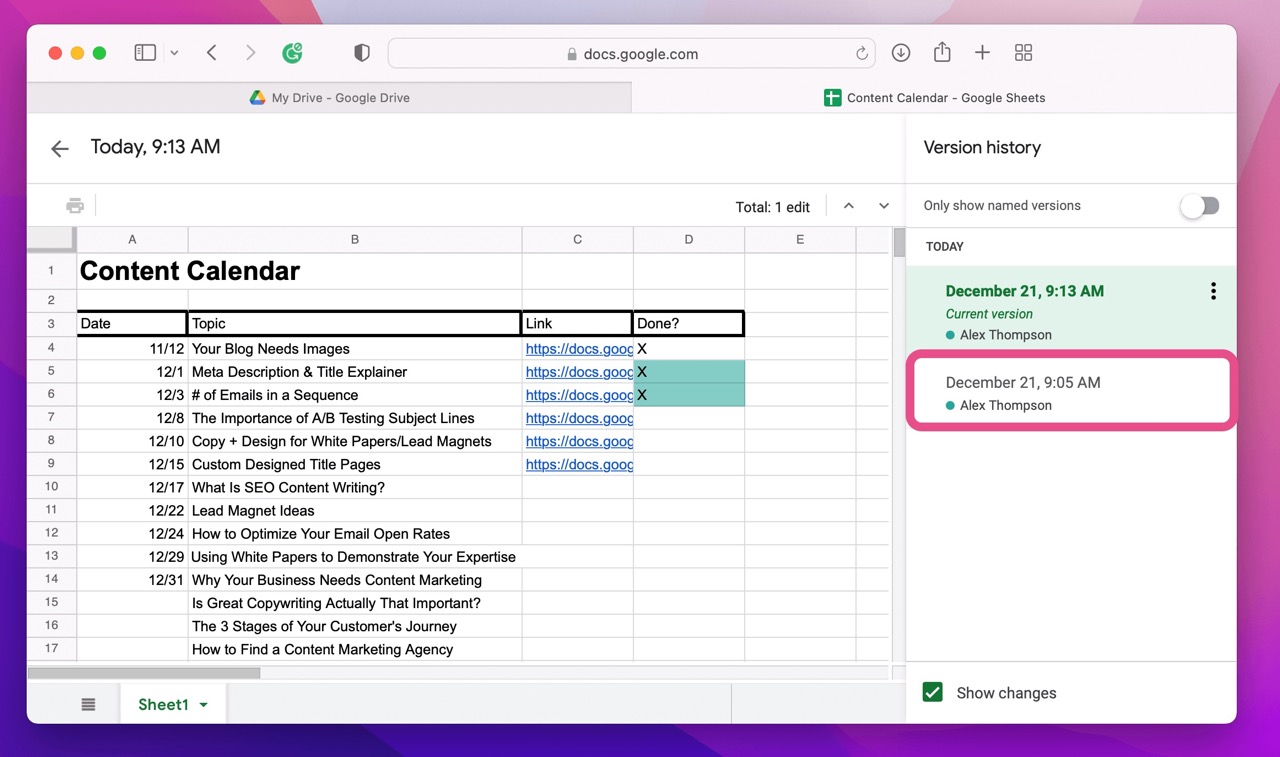
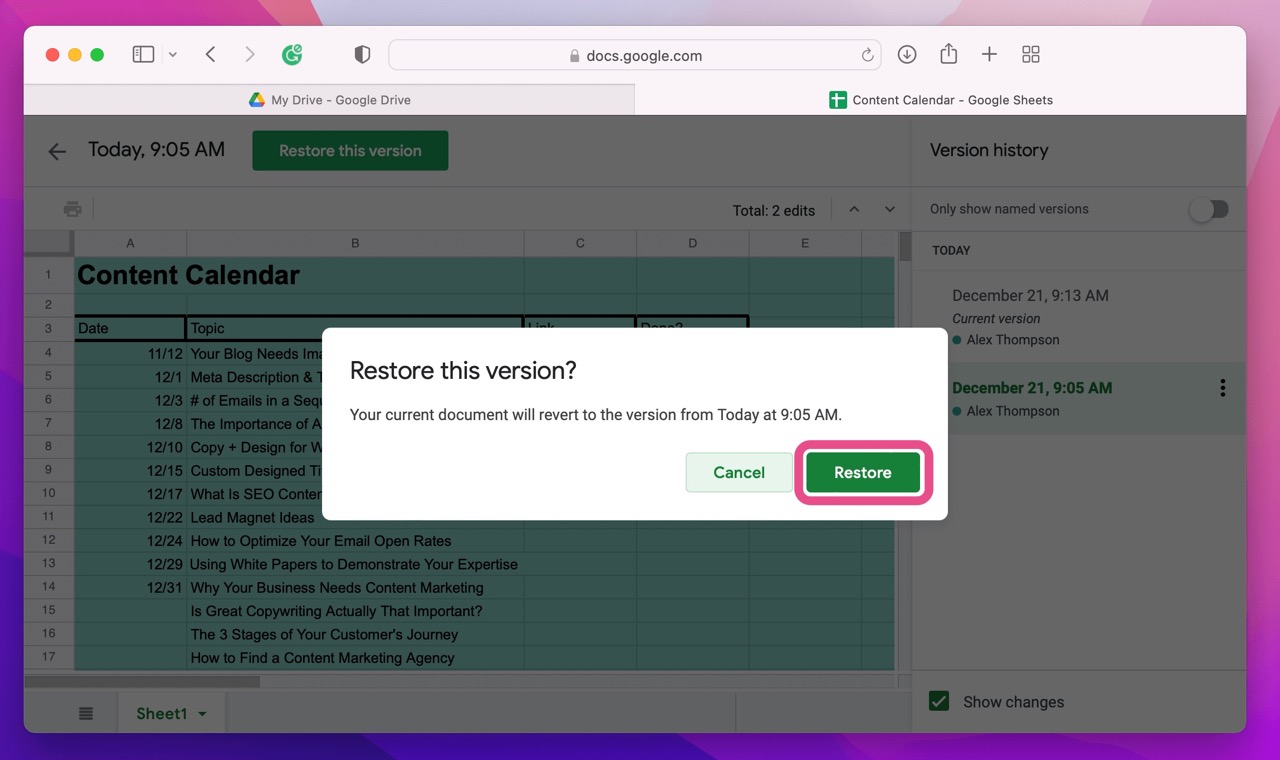
- Click the Restore button.
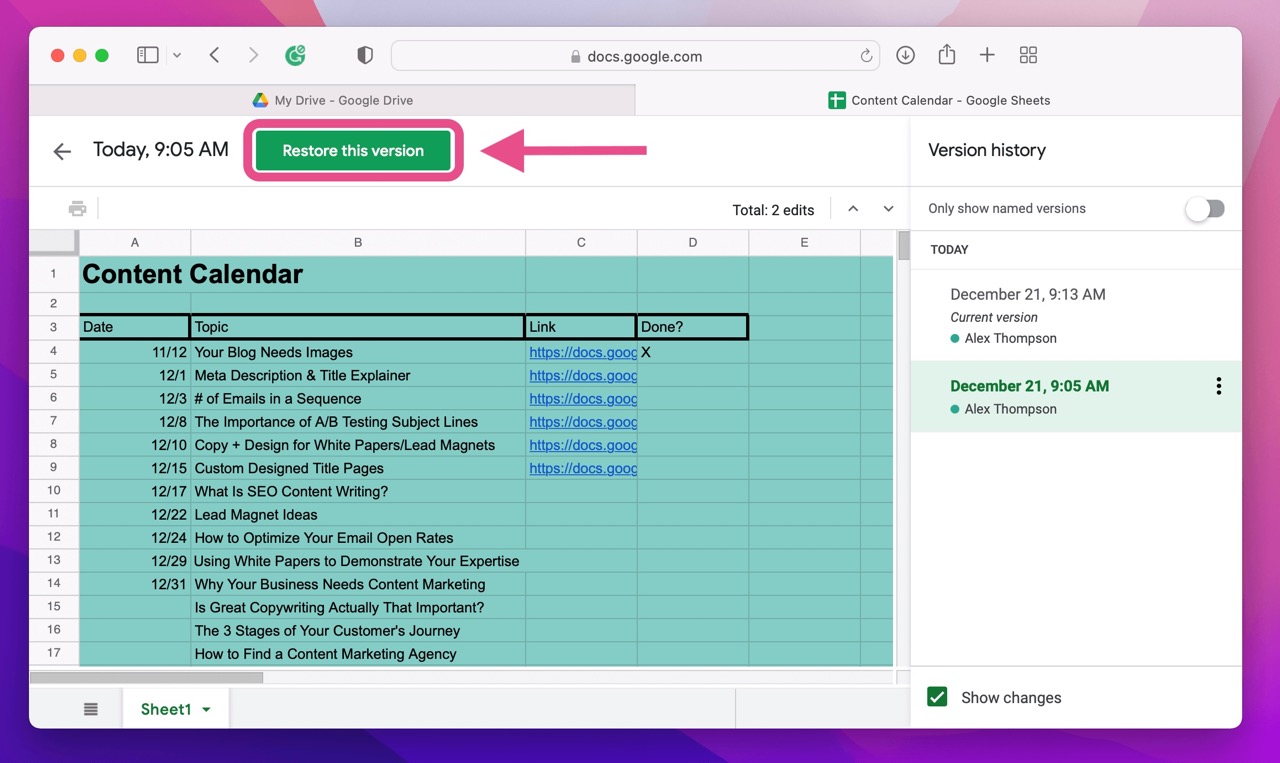
- Confirm you’d like to restore the file to this version.
Read also: Recover Deleted Files From Google Drive
Solution #3: Built-In Apps Features
Many modern apps and programs now come with built-in features for restoring files to previous versions. If restoring from Time Machine or cloud storage options don’t work for you, try reverting to other file versions using the steps below.
Word/Excel
Microsoft Word and Excel are two of the most widely used programs to date. Many businesses and individuals alike depend on them on a daily basis. Thankfully, there are several options for recovering deleted or unsaved Excel files and Word documents.
NOTE: This method uses Microsoft Office 365 features involving OneDrive, Microsoft’s cloud storage solution.
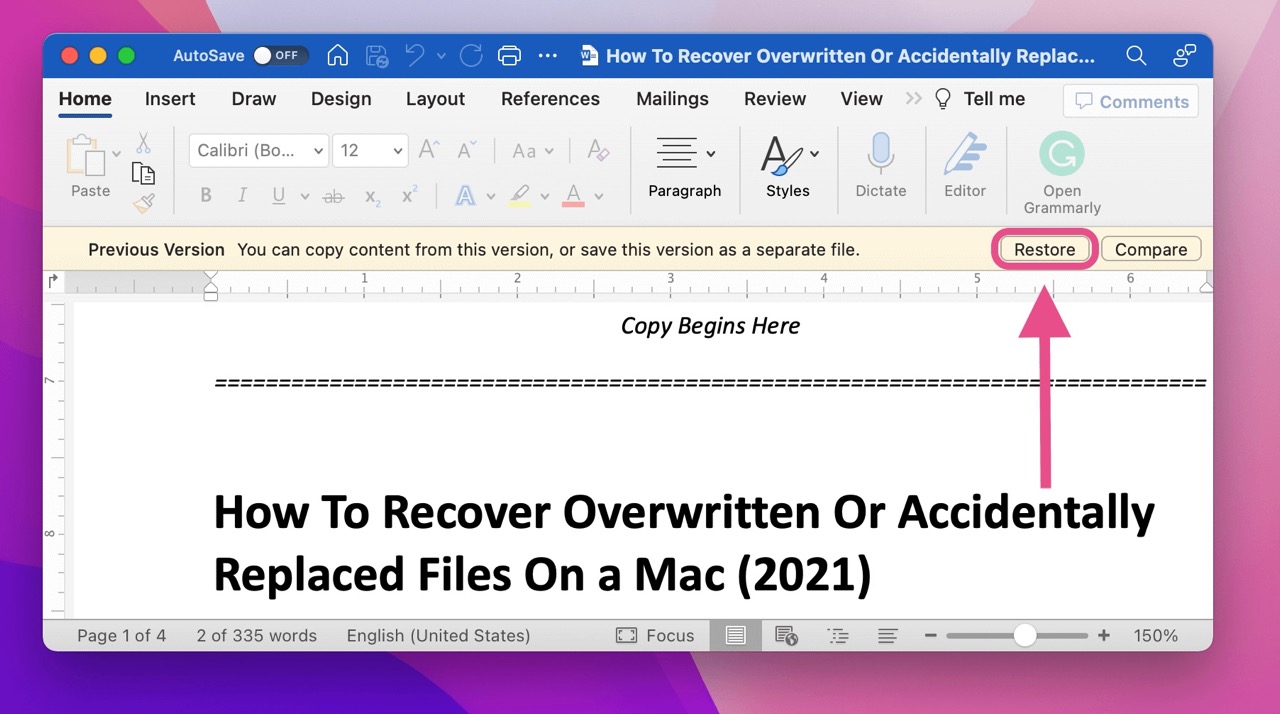
To undo a replaced file on Mac through Word, Excel, or other Microsoft Office apps:
- First, open the document you’d like to restore to a previous version.
- Select File from the Menu Bar. Then click Browse Version History.

- Find the version you’d like to restore from the Version History sidebar and click Open Version.
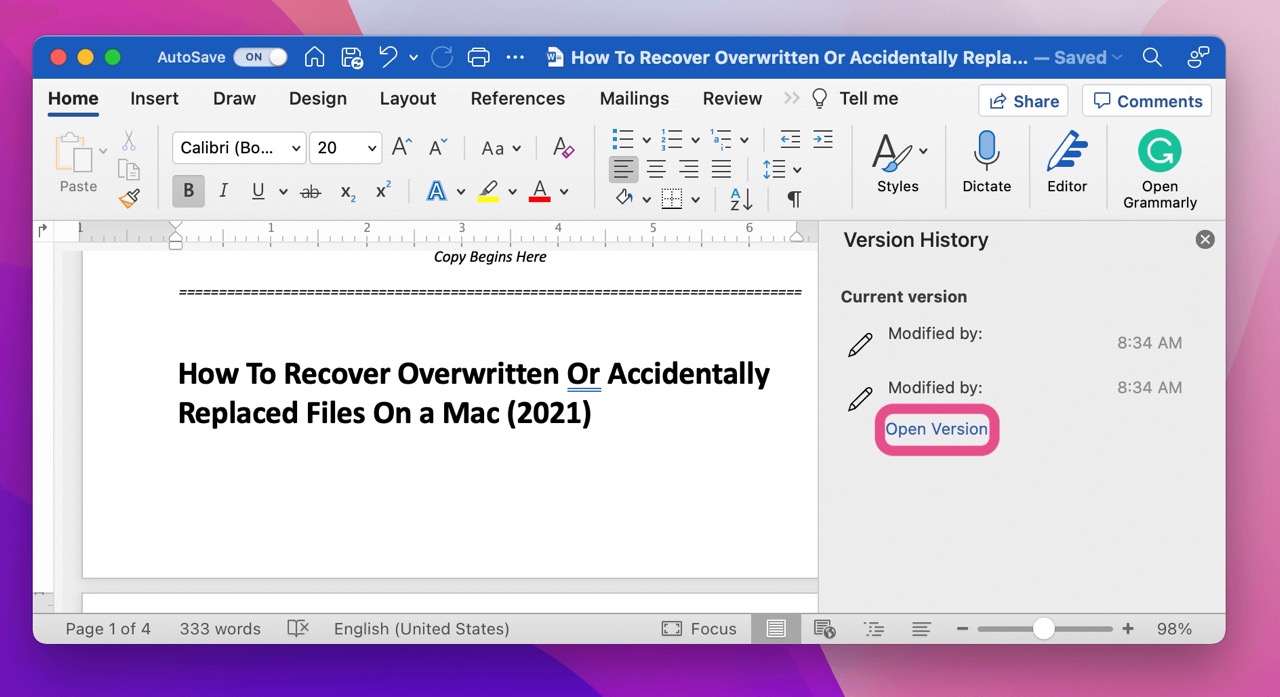
- From here, you can choose to either restore the older version or compare the differences between the two versions.
Pages/Numbers
Apple’s alternatives to Word and Excel, Pages, and Numbers provide similar functionality to their Microsoft counterparts. They also offer options for recovering overwritten files.
NOTE: Version histories of Pages and Numbers files are backed up using Time Machine. As such, the more backups you have through Time Machine, the more version histories you’ll have to work with.
To recover overwritten files on Mac using Apple’s native apps like Pages or Numbers:
- Open Pages, Numbers, or another Apple app.
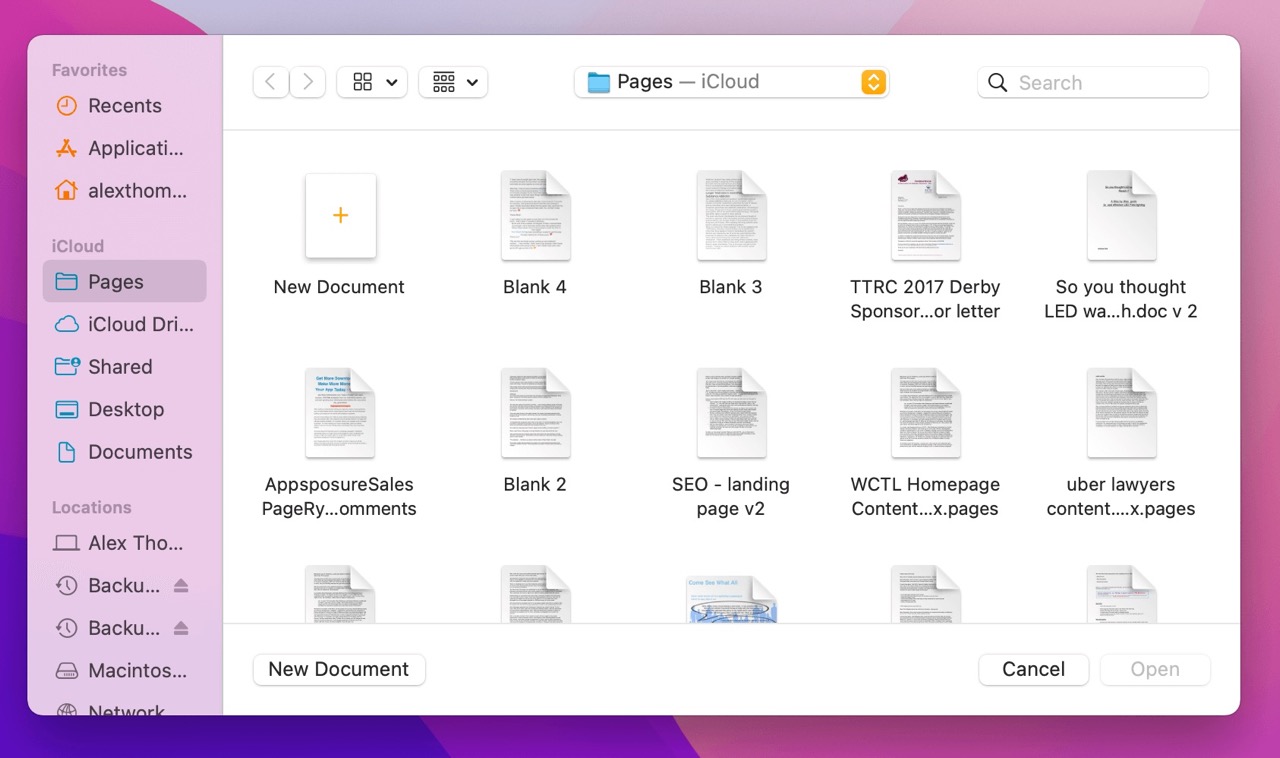
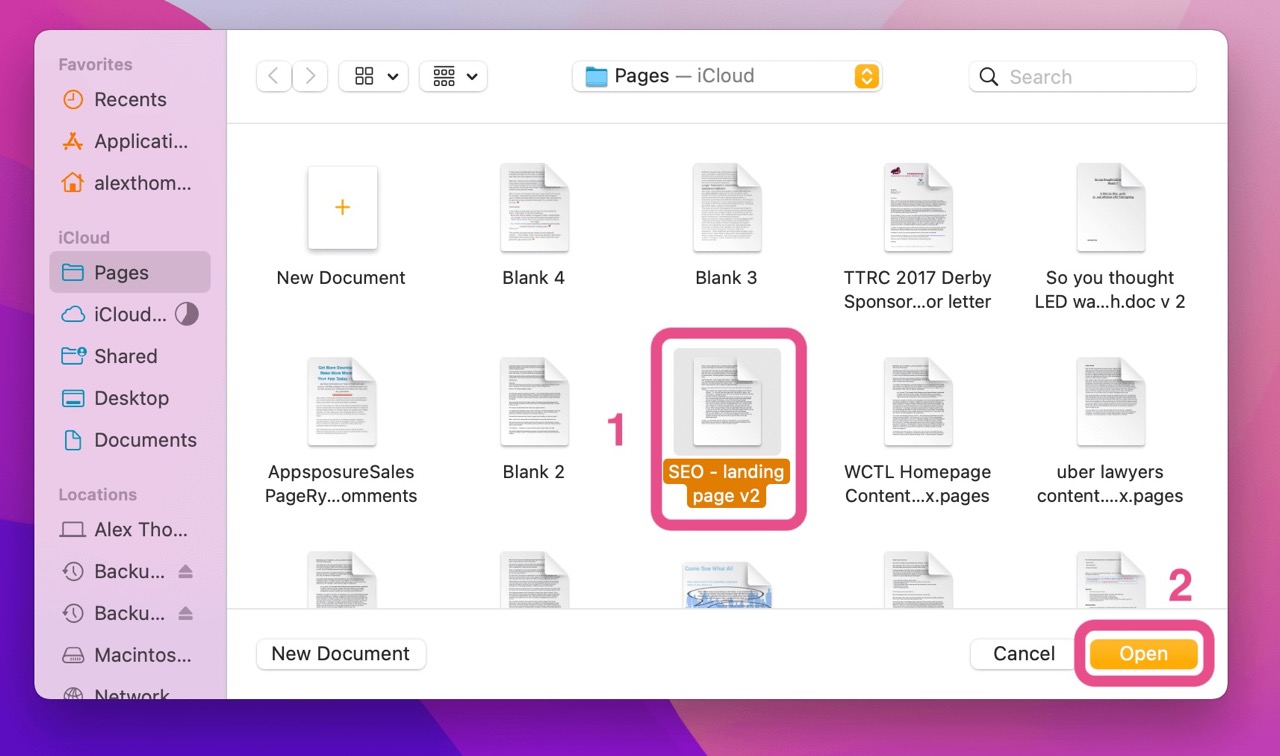
- Find and open the document you’d like to restore to its previous version.
- Click File in the Menu Bar, then Revert To, and then Browse All Versions.
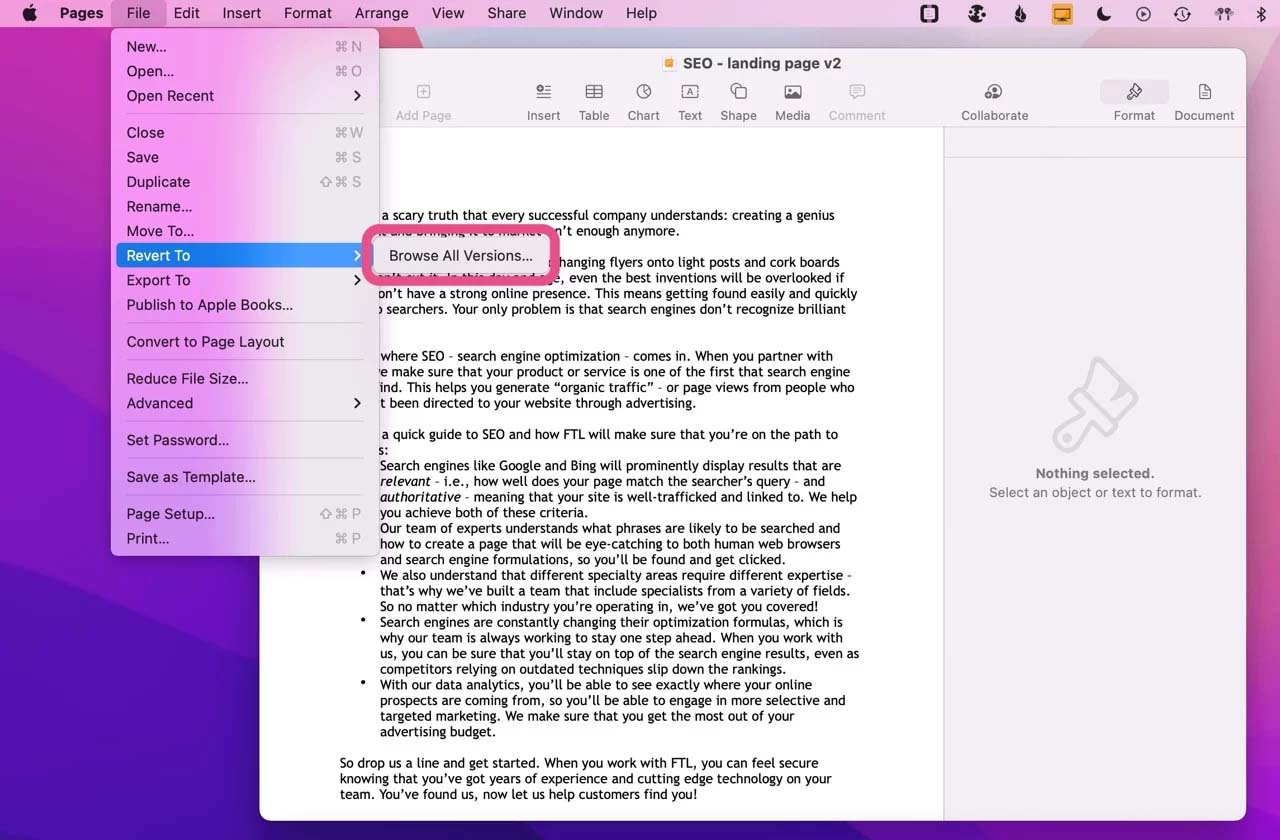
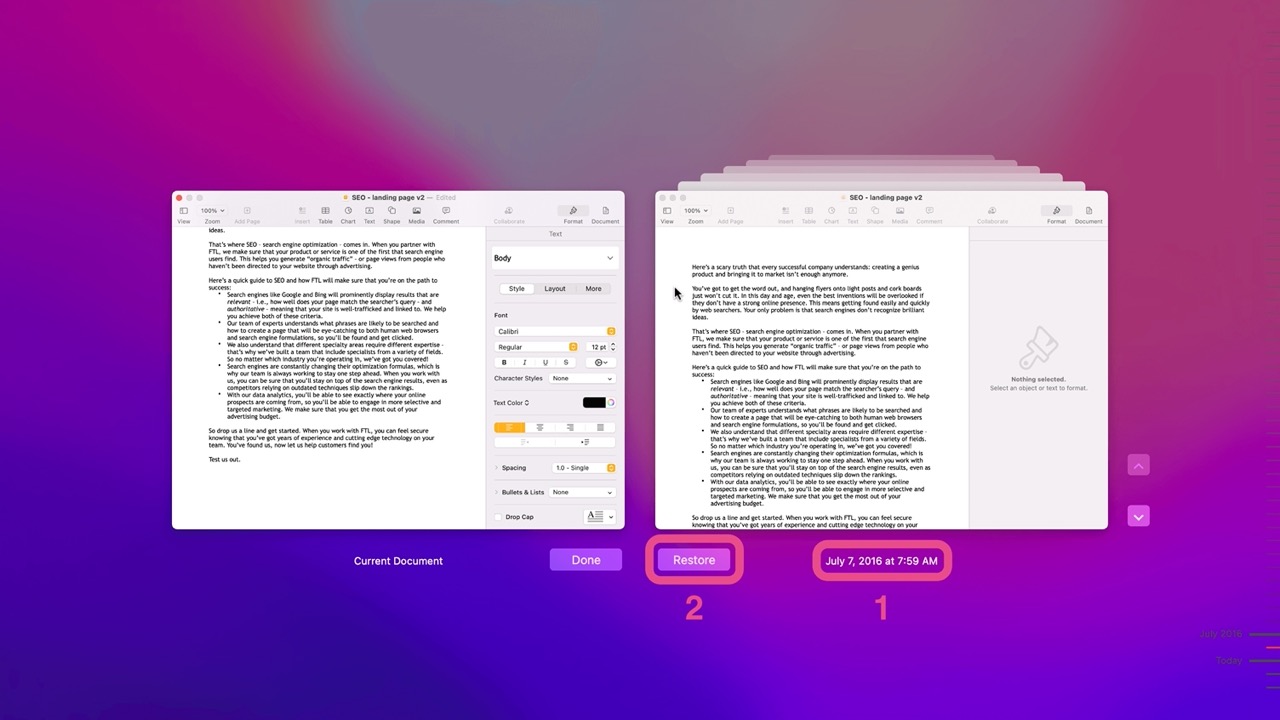
- Similar to Time Machine, you can browse through your version histories using the timeline to the right, the arrows next to the windows, or by clicking the background windows.
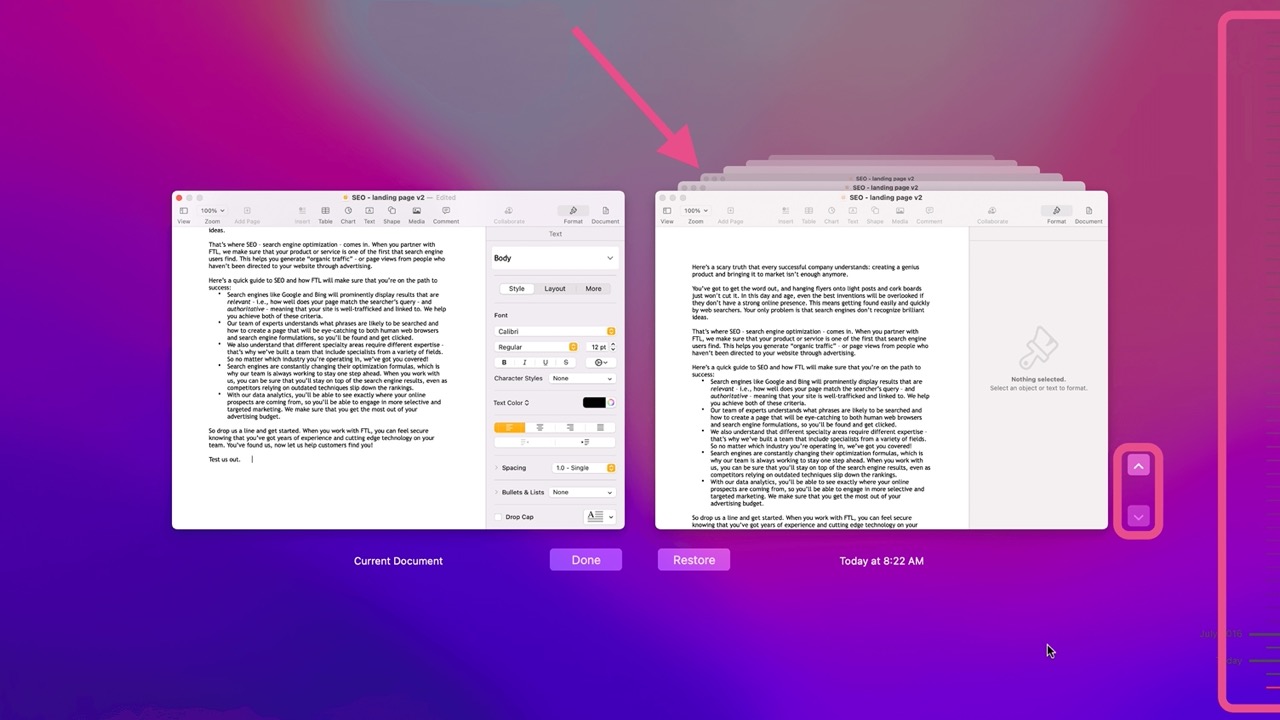
- Find the version you’d like to restore and click Restore.
Solution #4: Data Recovery Software
When you replace a file, you aren’t immediately deleting it from your disk drive. Instead, you’re just marking it as being okay to overwrite. That file actually remains intact until you record new data and subsequently overwrite it.
Think of your files as not necessarily being gone but rather invisible.
Data recovery software reads your disk drive and identifies all these invisible files. Then, you can unmark those files and restore them to normal, usable files.
IMPORTANT: It’s best to stop using your disk drive to prevent file corruption. The more you use it, the more likely your replaced file is being overwritten by new data.
Recommended Data Recovery Software: Disk Drill
We recommend using Disk Drill as your go-to data recovery software. The interface is intuitive and easy to use. The data recovery capabilities are exceptionally powerful (meaning you’re better able to restore your missing files). And there are a host of additional data protection and disk backup tools for you to use.
To learn more about Disk Drill, take a look at our in-depth review.
To recover a replaced file on Mac using Disk Drill:
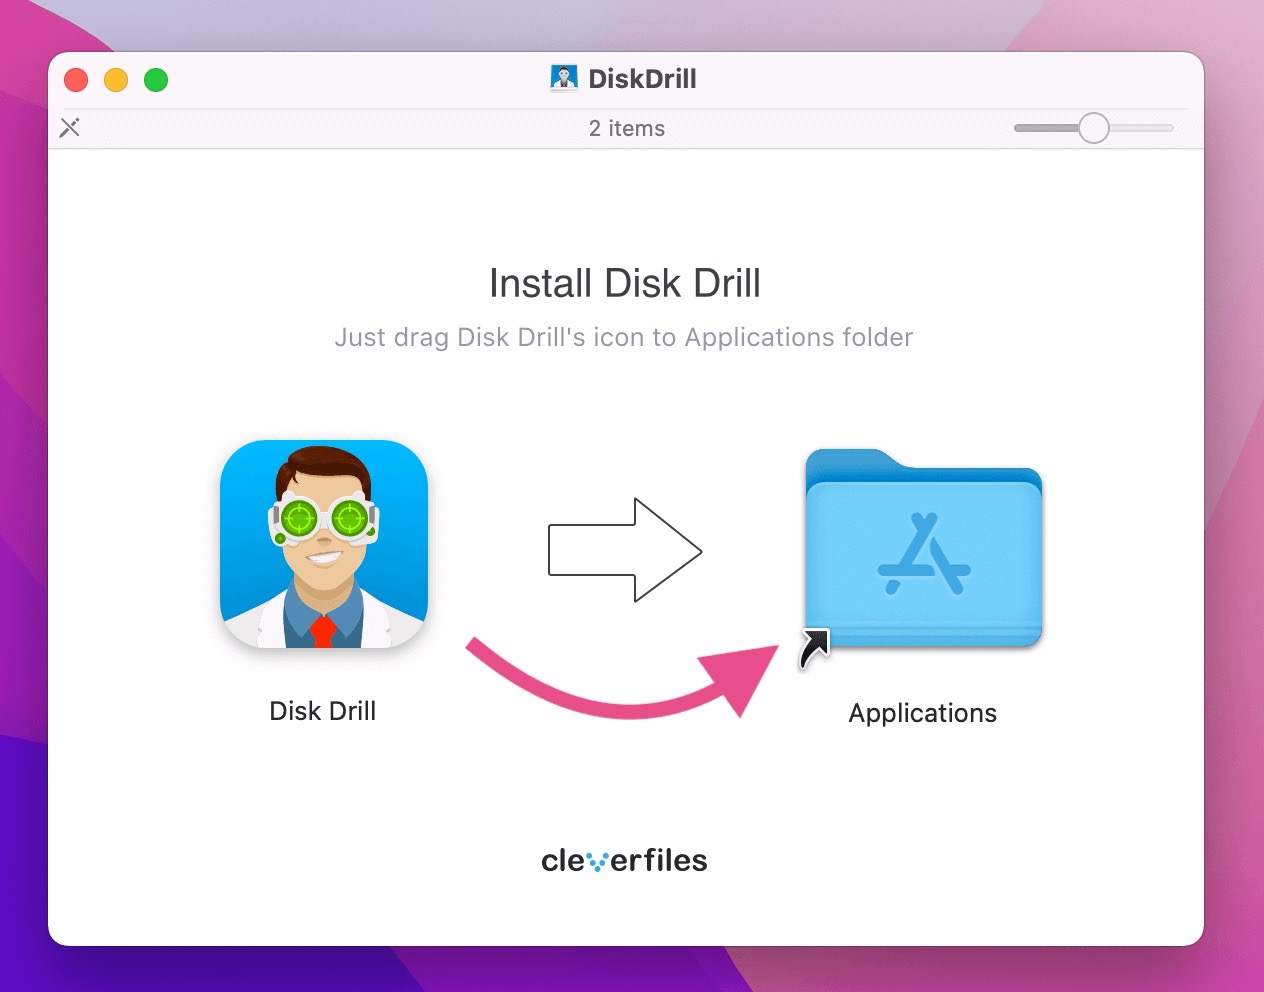
- Download Disk Drill and install the application by dragging the icon to the Applications folder in the window.
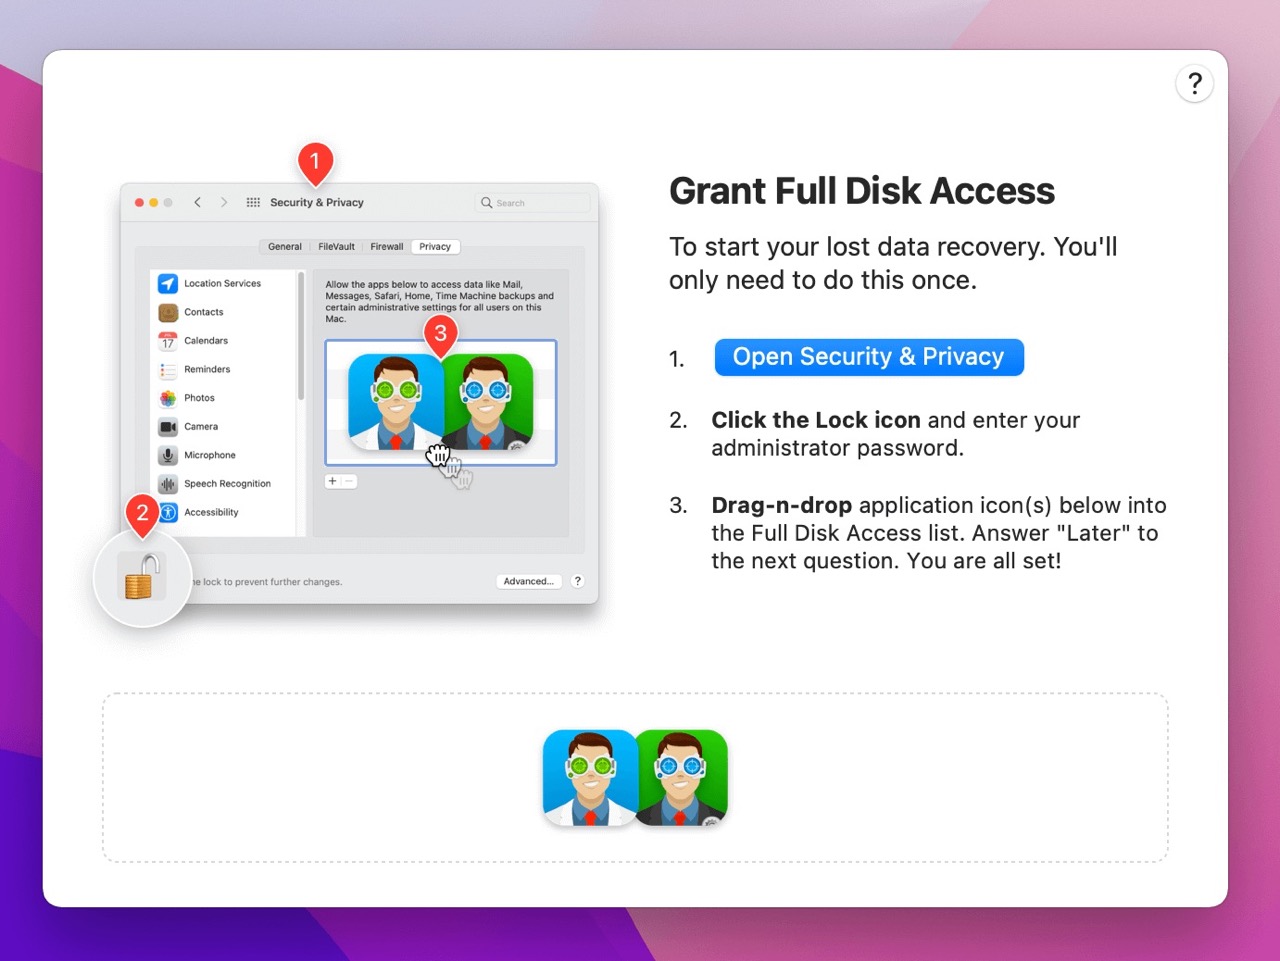
- Open the program. You’ll first see a window showing you how to grand Disk Drill full disk access. Disk Drill requires this access to find your overwritten files.
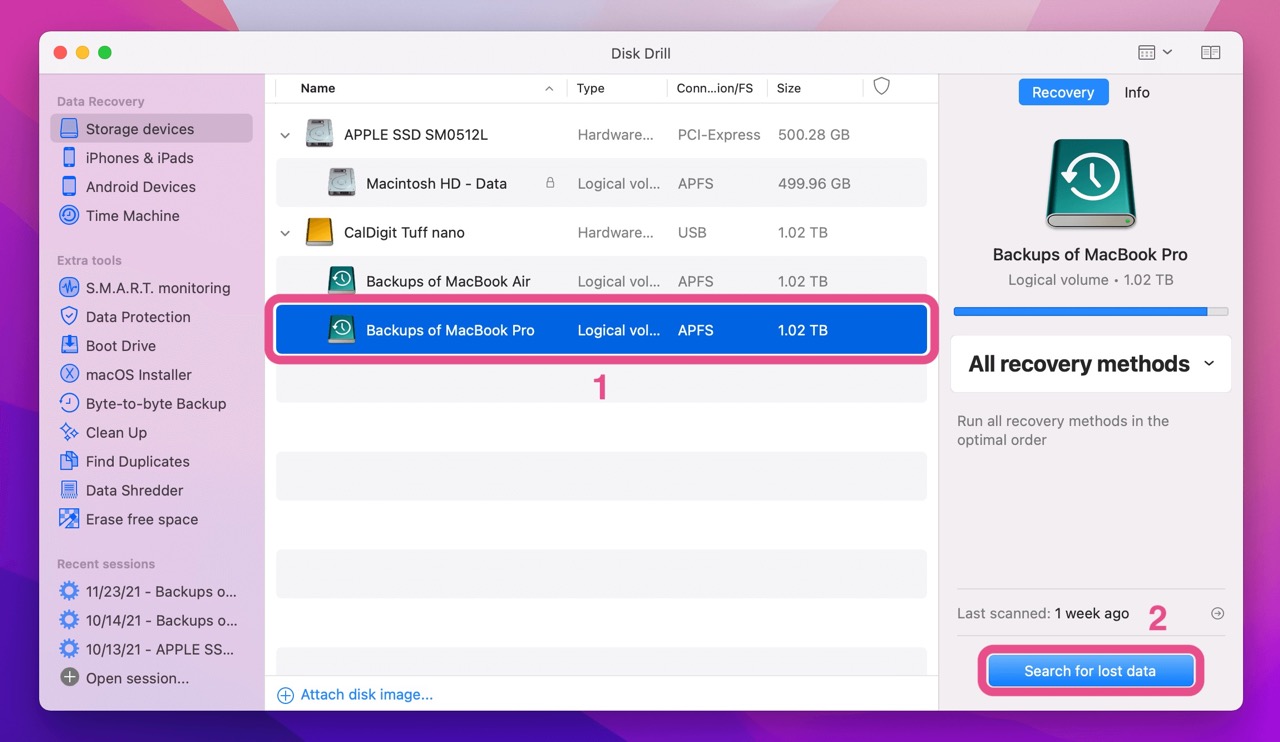
- Select the drive storing your file. Then click Search for lost data.
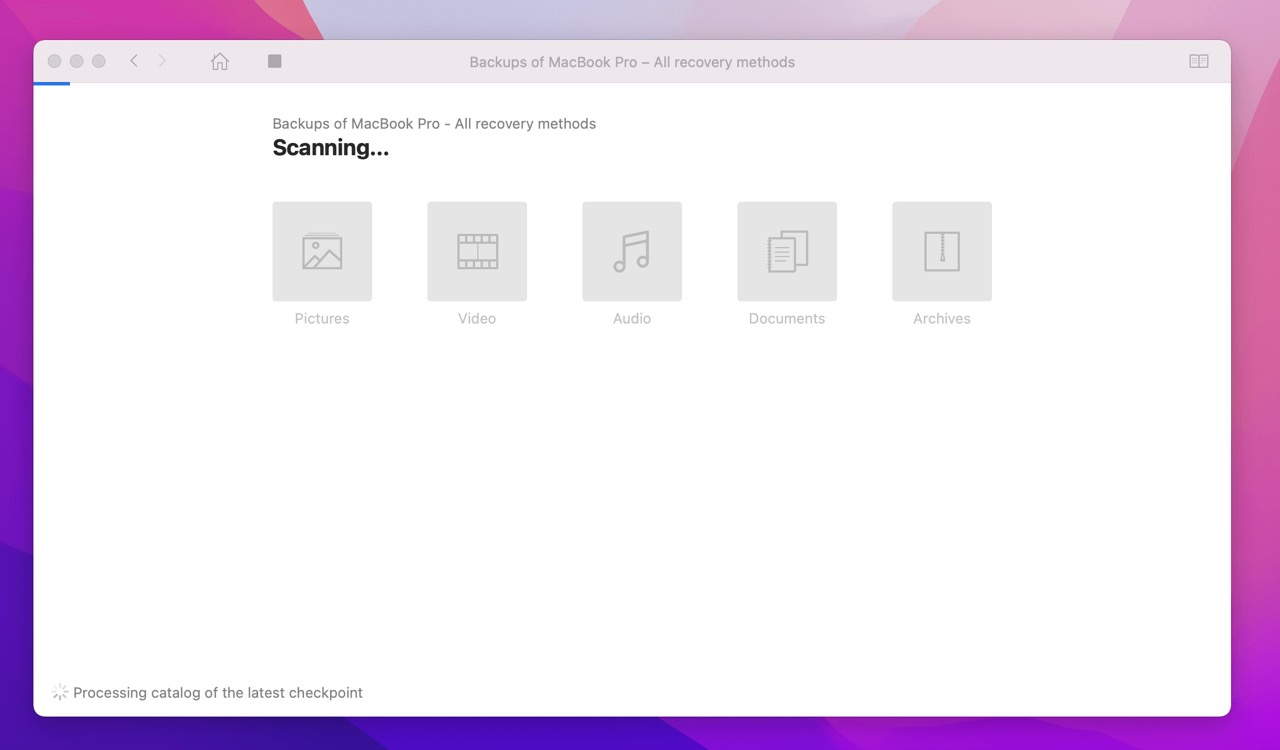
- Wait for the scan to finish (this may take a few minutes).
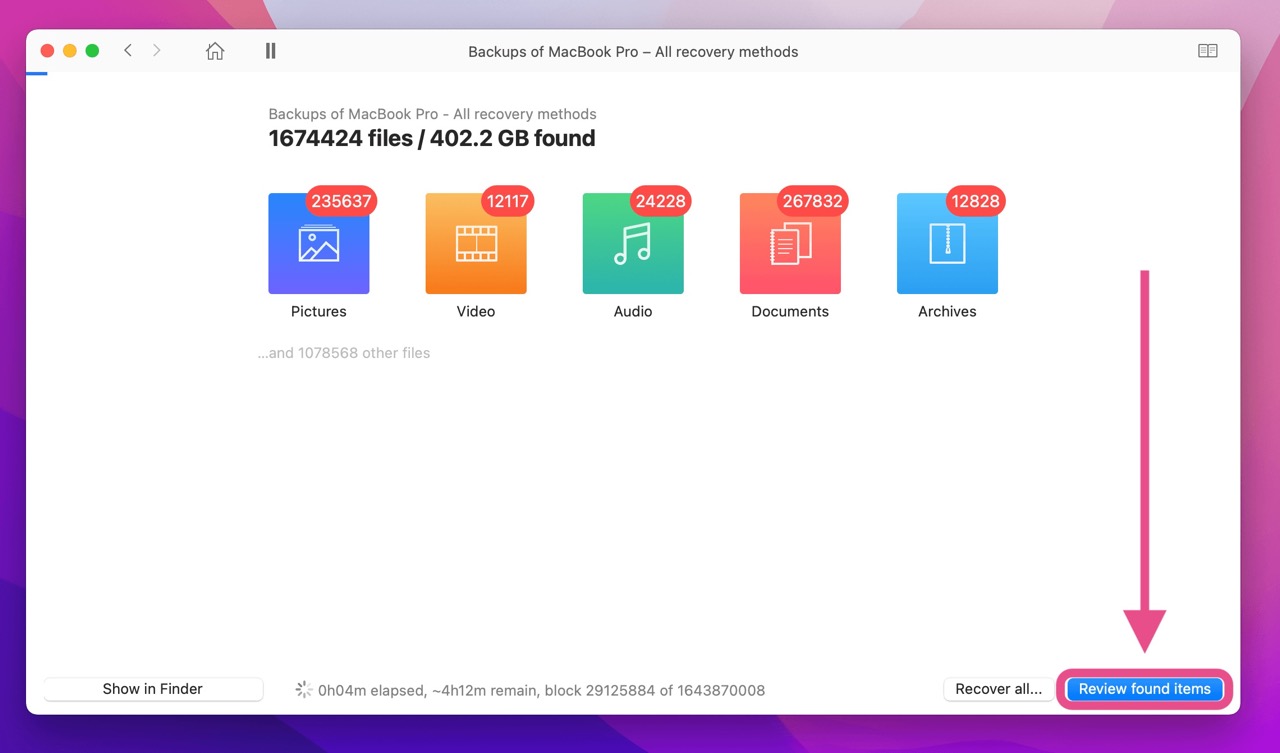
- Once the scan completes, click Review found items.
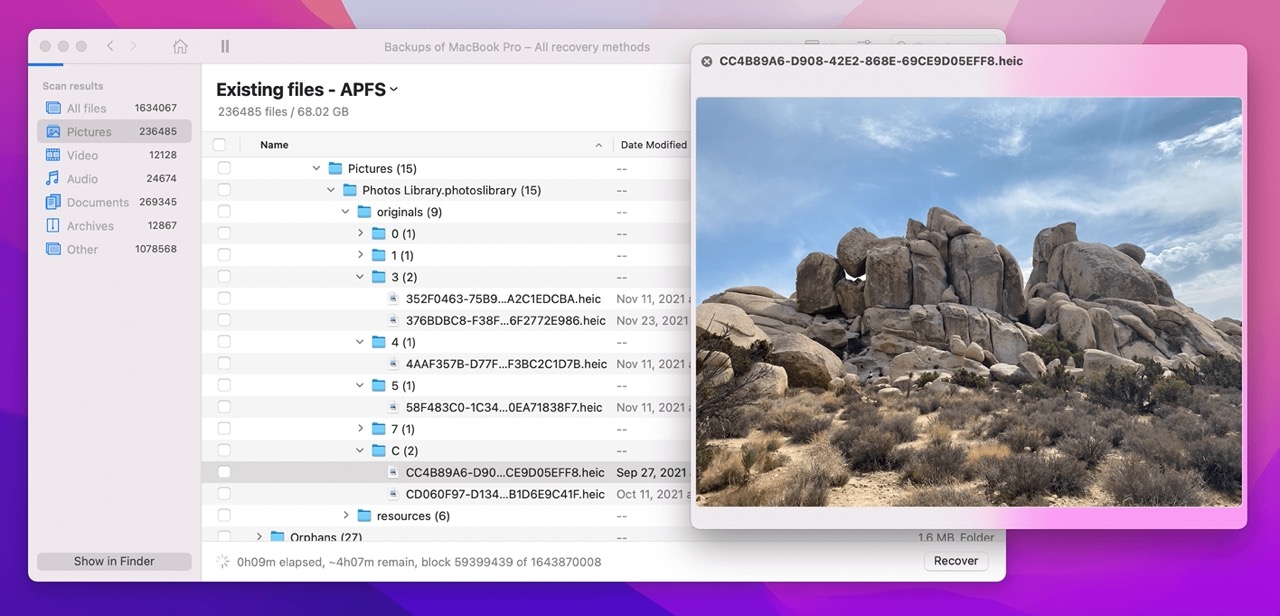
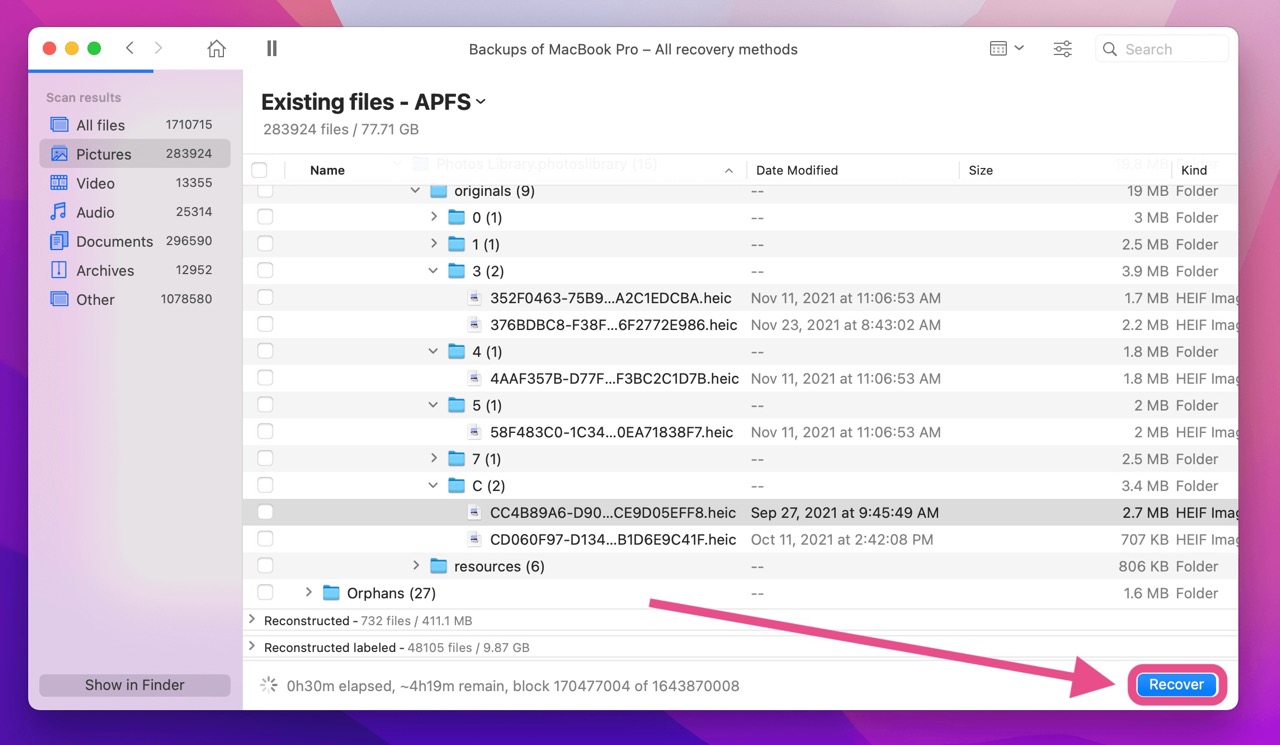
- Find your overwritten or replaced file. You can preview what your file looks like using the eye icon that appears next to the file name after you select it.
- Select the file and click Recover.
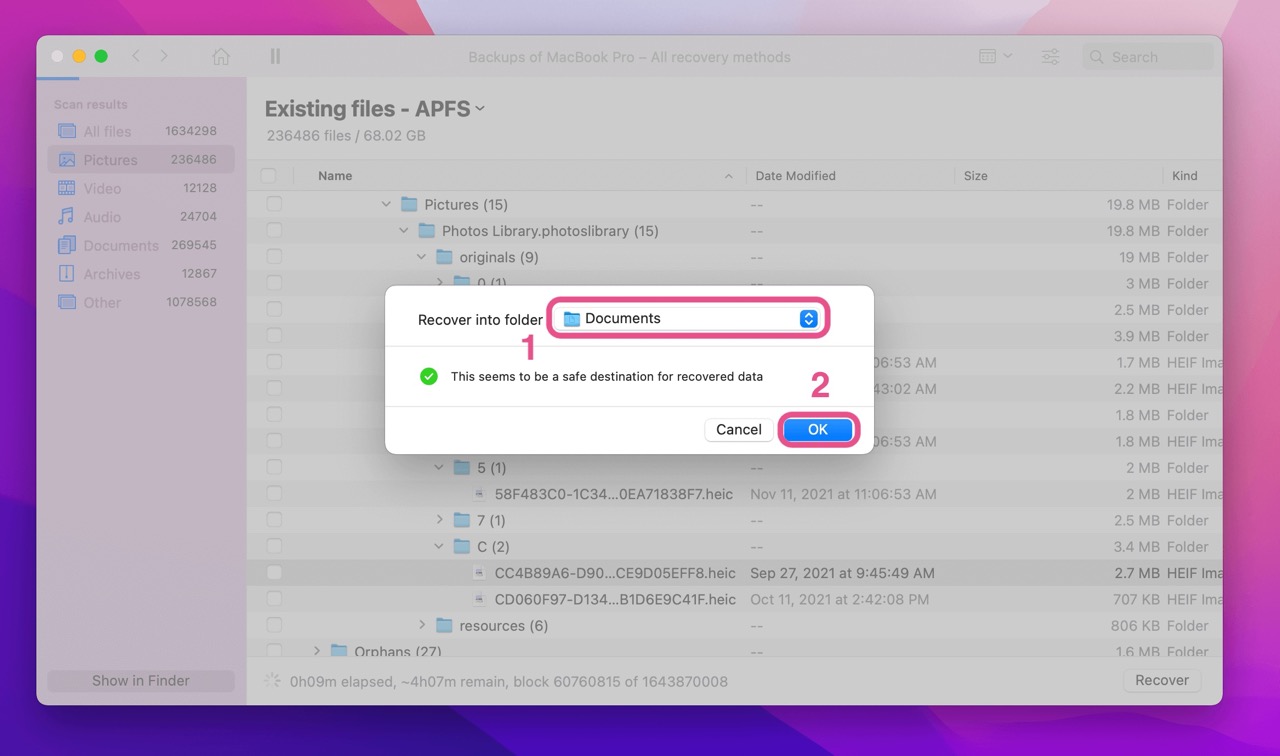
- Choose the location you’d like to restore the file to and select Ok.
Below are just a few of the most frequently asked questions about recovering replaced files on Mac.
FAQ
Where do overwritten files go?
When you overwrite a file (whether purposefully or on accident), you’re just swapping out the reference to the original file with the reference to the new file. Nothing’s gone just yet.
Instead, that original file remains on your hard drive until you overwrite it with new data (more efficient than replacing the reference and the underlying data in one fell swoop).
So while your overwritten files aren’t in your trash or their original location, they’re often still on your drive until it needs to use the space.
Can you recover overwritten files on Mac?
Yes, you can. Since your files aren’t actually deleted from the hard drive immediately after you overwrite them, you can use a few techniques to restore them.
Your best bet is to use backups saved through Time Machine or through cloud-based backup services like iCloud, Dropbox, or Google Drive. You can also try using certain in-app features that let you revert your document to a previous version. Finally, you can use data recovery software like Disk Drill or R-Studio to look for previous versions still left on your hard drive.
How do I recover a file I accidentally replaced on Mac without Time Machine?
If you don’t have access to your Time Machine backups or haven’t been backing up regularly, there are a few things you can do to recover a file you replaced accidentally.
- Cloud-Based Backups – If you use services like iCloud, Dropbox, or Google Drive, you may be able to restore earlier versions of the file.
- In-App Features – Some apps automatically store previous versions of your files and let you revert to these versions in case you’ve accidentally replaced them.
- Data Recovery Software – Software like Disk Drill or R-Studio lets you scan your disk drive for deleted files and restore them back to normal.
Is it possible to recover a file replaced by another file with the same name on a Mac?
Yes, it is. There are a few techniques you can use to recover your original file. You can use:
- Time Machine to restore them to an earlier version using a local backup.
- Cloud-based backups like iCloud, Dropbox, and Google Drive.
- In-app features that let you revert to an earlier file version.
- Data recovery software like Disk Drill or R-Studio.
Is it possible to recover an overwritten Word document on Mac?
Yes, you can recover an overwritten Word document on Mac.
If you’re using Microsoft 365, you can use browse previous versions of the document, restore files to earlier versions, and even compare new and older versions to see what changed.
You can also restore your Word document to an earlier version by restoring from a backup through Time Machine or a cloud-based backup service.
You can also use data recovery software like Disk Drill or R-Studio to recover the previous document version too.
How to recover an overwritten Word document on Mac?
It is possible to recover an overwritten Word document on Mac by using one of the techniques below.
To restore using Microsoft 365:
- Open your Word file.
- Go to File > Browse Version History.
- Find the version you’d like to restore and click Open Version.
- Choose Restore.
To restore using Time Machine:
- Launch Time Machine.
- Search through the Time Machine snapshots and backups to find the file version you’d like to restore (use the file preview feature if needed).
- Select the file you’d like to restore and click Restore.
To restore using Disk Drill:
- Download, install, and grant disk access to Disk Drill.
- Select the drive your file was stored on and click Search for lost data.
- After the scan finishes, find your missing file, select it, and click Recover.
- Choose where you want to restore your file to and click Ok.
How to recover overwritten files on an external hard drive?
To recover overwritten files on an external hard drive:
Use a previous backup in Time Machine:
- Launch Time Machine.
- Search through the Time Machine snapshots and backups to find the file version you’d like to restore (use the file preview feature if needed).
- Select the file you’d like to restore and click Restore.
Use data recovery software like Disk Drill:
- Download, install, and grant disk access to Disk Drill.
- Select the drive your file was stored on and click Search for lost data.
- After the scan finishes, find your missing file, select it, and click Recover.
- Choose where you want to restore your file to and click Ok.
How to recover a replaced folder on Mac?
The best way to recover a replaced folder on Mac is by restoring it from a previous backup. If you’ve been backing up your files regularly, you can use Time Machine to restore the file. Just follow the steps below.
- Launch Time Machine.
- Search through the Time Machine snapshots and backups to find the replaced folder.
- Select the folder you’d like to restore and click Restore.
You can also use data recovery software like Disk Drill to restore your replaced folder by following the steps below.
- Download, install, and grant disk access to Disk Drill.
- Select the drive your folder was stored on and click Search for lost data.
- After the scan finishes, find your missing folder, select it, and click Recover.
- Choose where you want to restore your folder to and click Ok.
Conclusion
Overwriting or replacing files on your Mac can be nerve-wracking at first glance. And that anxiety is likely to double once you realize your overwritten file bypassed the Trash Bin entirely.
But luckily, the techniques covered in this guide let you recover your files in no time. From Apple’s Time Machine and a bevy of cloud-based options to in-app fixes and data recovery software, you have plenty of recovery solutions to choose from.
This article was written by Alex Thompson, a Author at Handy Recovery Advisor. It was also verified for technical accuracy by Andrey Vasilyev, our editorial advisor.
Curious about our content creation process? Take a look at our Editor Guidelines.