
Accidentally deleted your MOV video collection? Or can’t find a specific MOV file you were working on? When it comes to data recovery, Apple’s video format is no different from any other, and the methods and tools are the same. We’ll show you how to quickly recover deleted MOV files or restore lost ones using methods we’ve seen work time and time again.
Is it Possible to Recover a Deleted MOV file?
Deleted files usually end up in the Trash on Mac or the Recycle Bin on Windows. You’ve probably checked those already. But what if the files aren’t there? Maybe you emptied the Trash without thinking, some time has passed (Trash keeps files for 30 days by default), or you used Shift + Delete on Windows to bypass the Recycle Bin altogether. It might seem like a dead end—but it’s not.
When a file is deleted, the operating system typically marks it as “deleted,” which hides it from view in file managers. However, the actual data often remains on the storage device. Specialized apps can locate and recover this hidden data. The success of recovery depends on key factors:
- If you’ve actively used the storage device where the MOV files were stored, the risk of overwriting the “old” data with “new” data increases. When this happens, recovery becomes impossible.
- The type of storage also matters. Recovery is more reliable on hard drives (HDDs) than on solid-state drives (SSDs). This is because SSDs use the TRIM command, which actively erases deleted data to improve performance. The good news is that TRIM doesn’t work on external SSDs, unless you’re connecting it via Thunderbolt. Some memory cards use commands similar to TRIM when formatted in cameras that support this feature, which can make recovery impossible.
The most important thing here is to stop using the storage where your MOV files were ASAP. Every time you save/transfer new data, you risk overwriting the old files, which makes recovery impossible. Act fast to get those MOV videos back.
Are You Sure Your MOV File Is Lost?
Before we cover any tools, it’s worth it to check your OS features to confirm whether files are not gone but simply misplaced. Here are some quick tips to find MOV files on Windows and macOS:
🪟 On Windows:
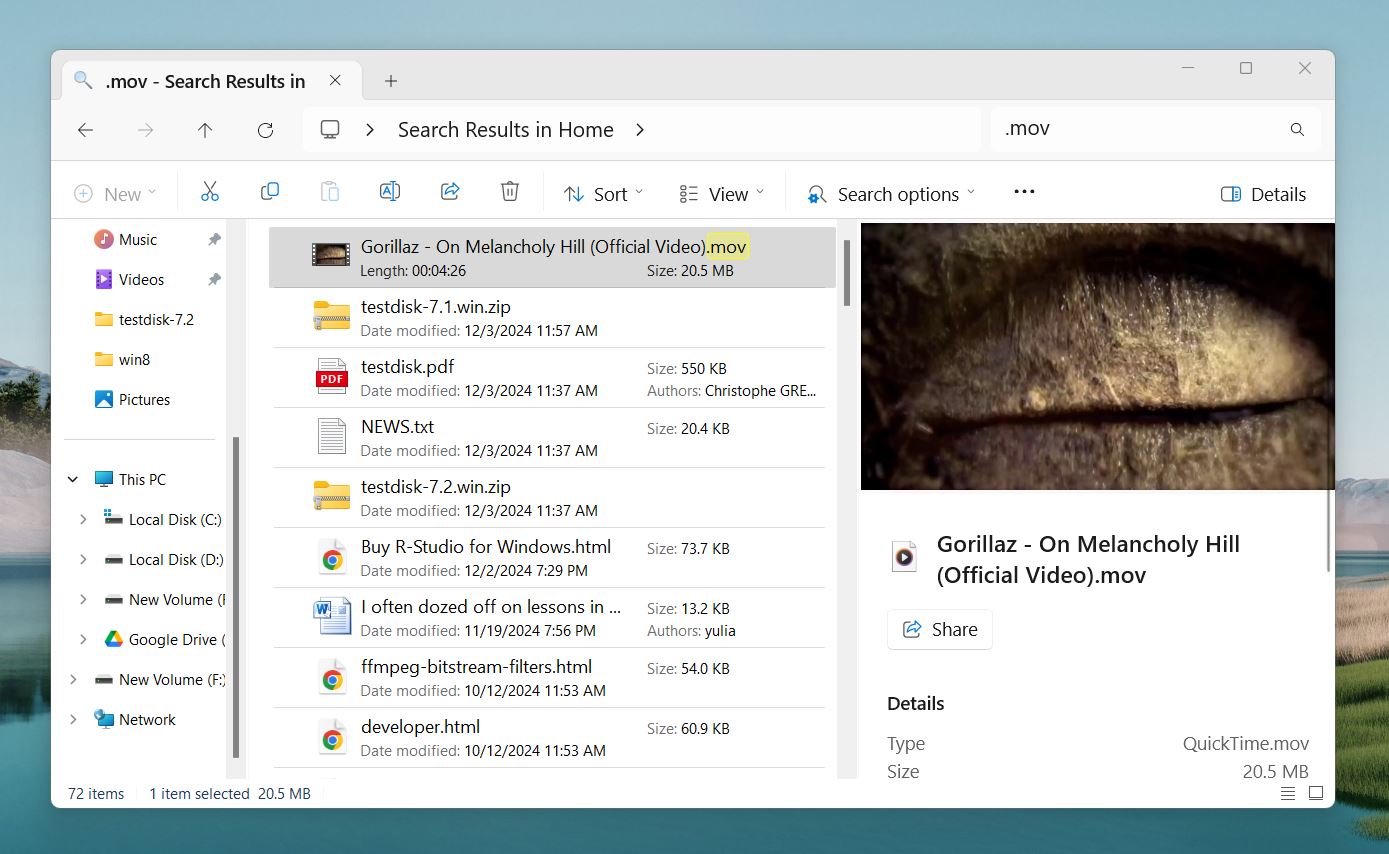
- Open File Explorer and type .mov in the search bar. Add a partial or full file name if you recall it.
- Press the Windows key, select Recent Files, and see if the system lists your file there.
- Tap Win + R, type %temp%, press Enter, and look inside the Temp directory. Sometimes the system stores files there.
- Check OneDrive or other synced storage accounts if you back up files automatically.
🍎 On macOS:
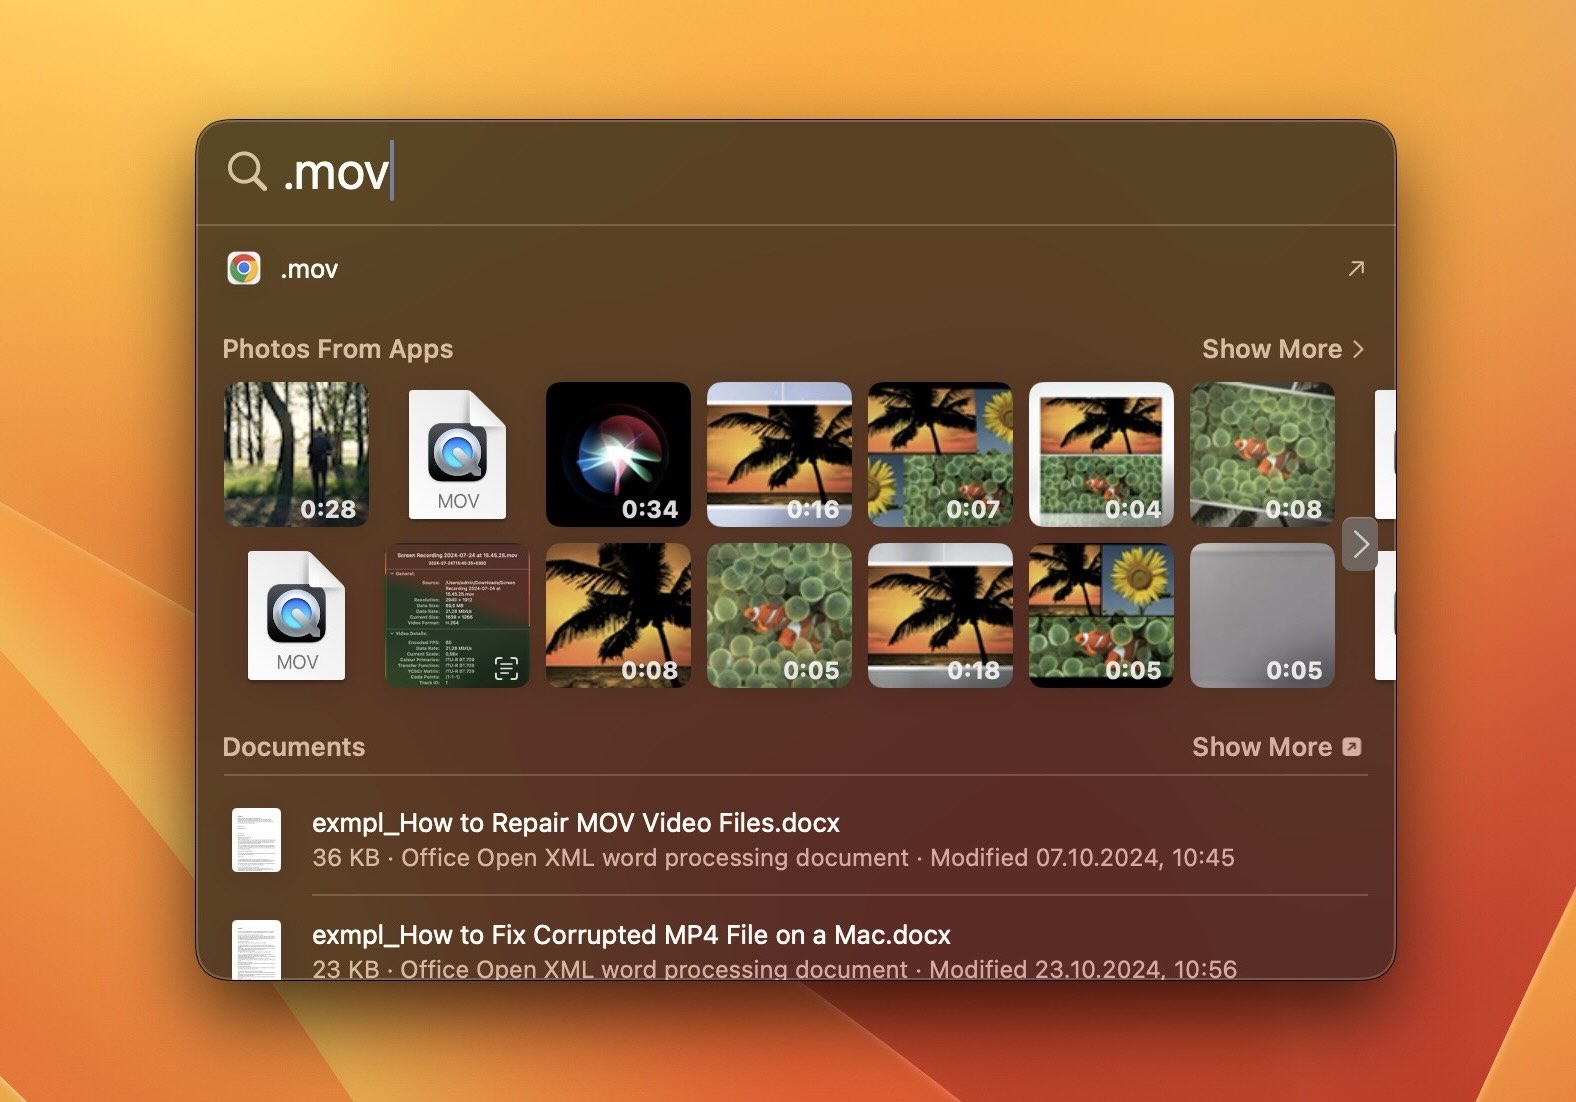
- Press Cmd + Space and type .mov or the file name. Spotlight searches the entire system for matches.
- Open Finder and pick Recents from the sidebar. This shows recently accessed files.
- Check iCloud Drive through Finder or iCloud.com if you sync your files.
How to Recover Deleted MOV Files Using Data Recovery Software
If your deleted or lost MOV files are nowhere to be found, there are two options here: data recovery apps or backups. Since most people don’t think about backups until it’s too late, we’ll cover data recovery software first. Our internal statistics show for most people it’s more relevant.
Important: If possible, download and install the recovery app on a different drive/partition than the one containing your lost MOV files.
Option A: Disk Drill
Disk Drill by CleverFiles is one of our favorite data recovery programs for macOS, and it works equally well on Windows. It does a thorough scan of your entire storage device, allows you to preview your files before recovering them, and has one of the highest recovery rates in the industry.
![]()
Features:
- Disk Drill supports recovery for many video formats, including MOV, and over 400 file types in total.
- The app allows you to play MOV files directly within Disk Drill before recovery to check if it’s the right file.
- Works on Windows and macOS.
- Disk Drill offers both Quick Scan and Deep Scan options to help you recover your deleted MOV files with ease. Quick Scan is perfect for those “oops” moments—like when you accidentally Shift+Delete a file or emptied your Recycle Bin recently. On the flip side, Deep Scan goes deeper when things get tricky, such as when your drive gets formatted or the file system goes haywire.
Price: Basic – free, $89 for PRO
If you want an in-depth look at the features or deeper recovery process of the app, you can check out our Disk Drill PRO Review. If you are interested in a detailed review of the macOS version, please see this.
Let’s recover your deleted MOV files with Disk Drill:
- Download Disk Drill from the official website. Once the download completes, open the installer file. Follow the on-screen instructions to install Disk Drill on your computer.⚠️
If possible, download/install the recovery app on a different drive/partition than the one containing your lost MOV files.
- Open Disk Drill, you’ll see a list of all connected storage devices. Choose the drive or storage medium where your MOV files were stored. This could be your internal hard drive, an external USB drive, or an SD card.
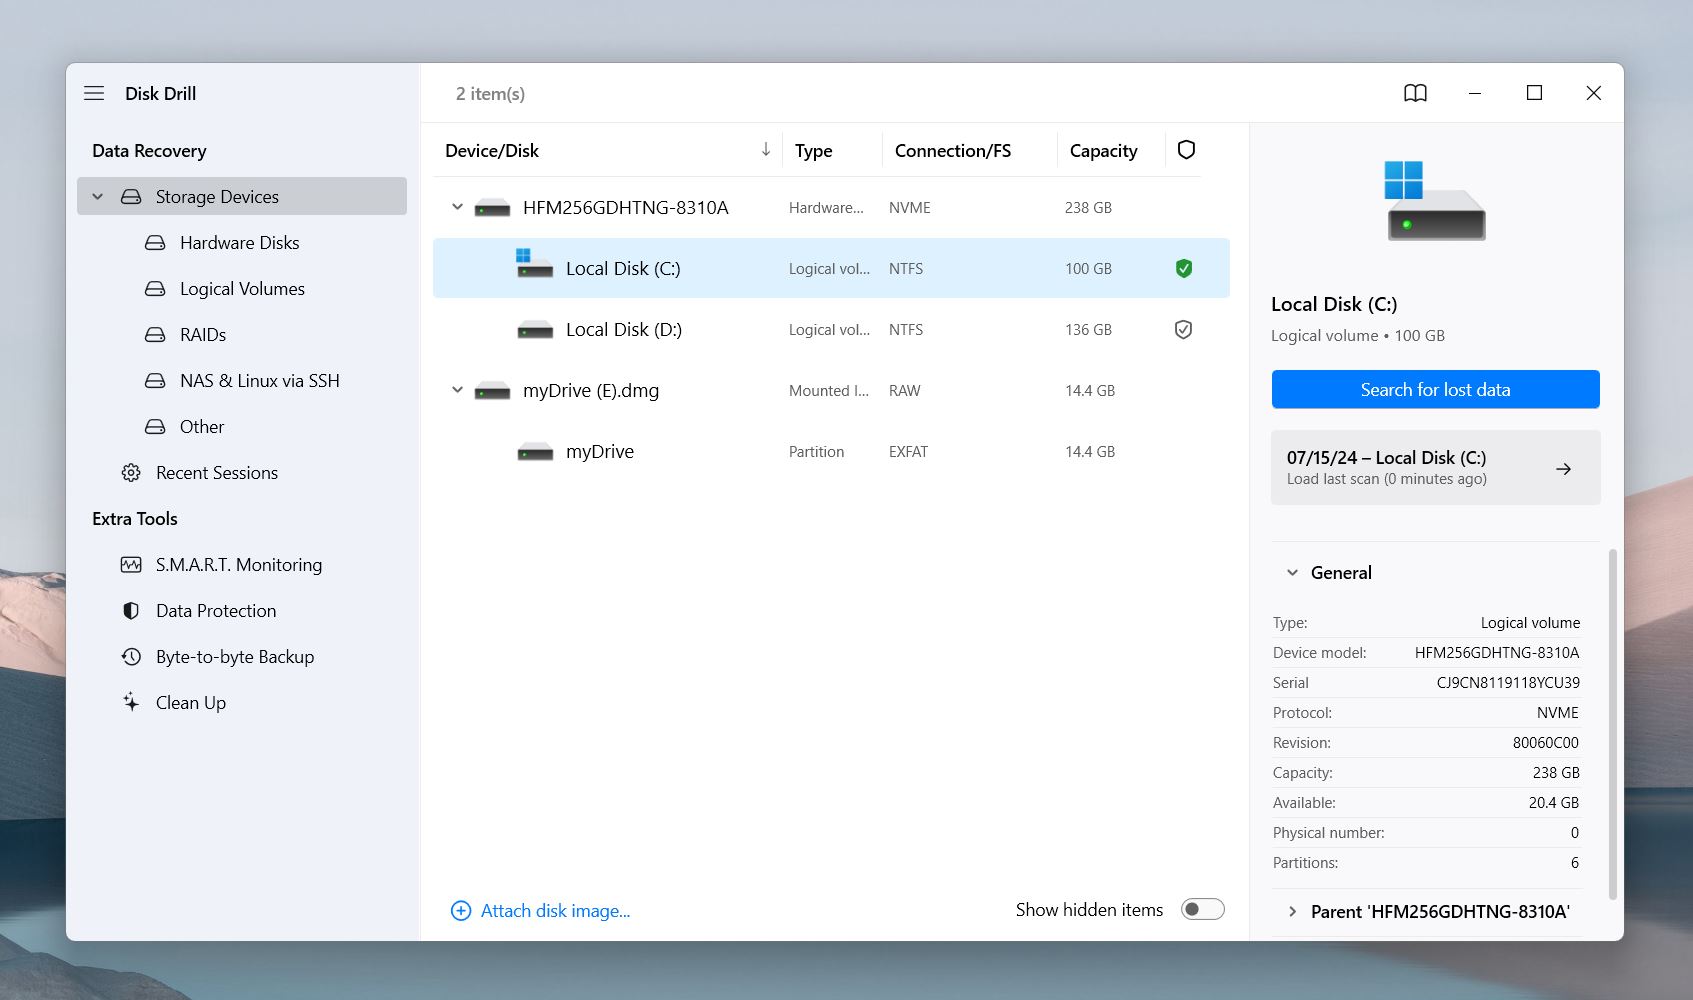
- Next, click on Search for lost data. The scan itself can take several minutes to an hour, depending on the speed of your device and the storage size.
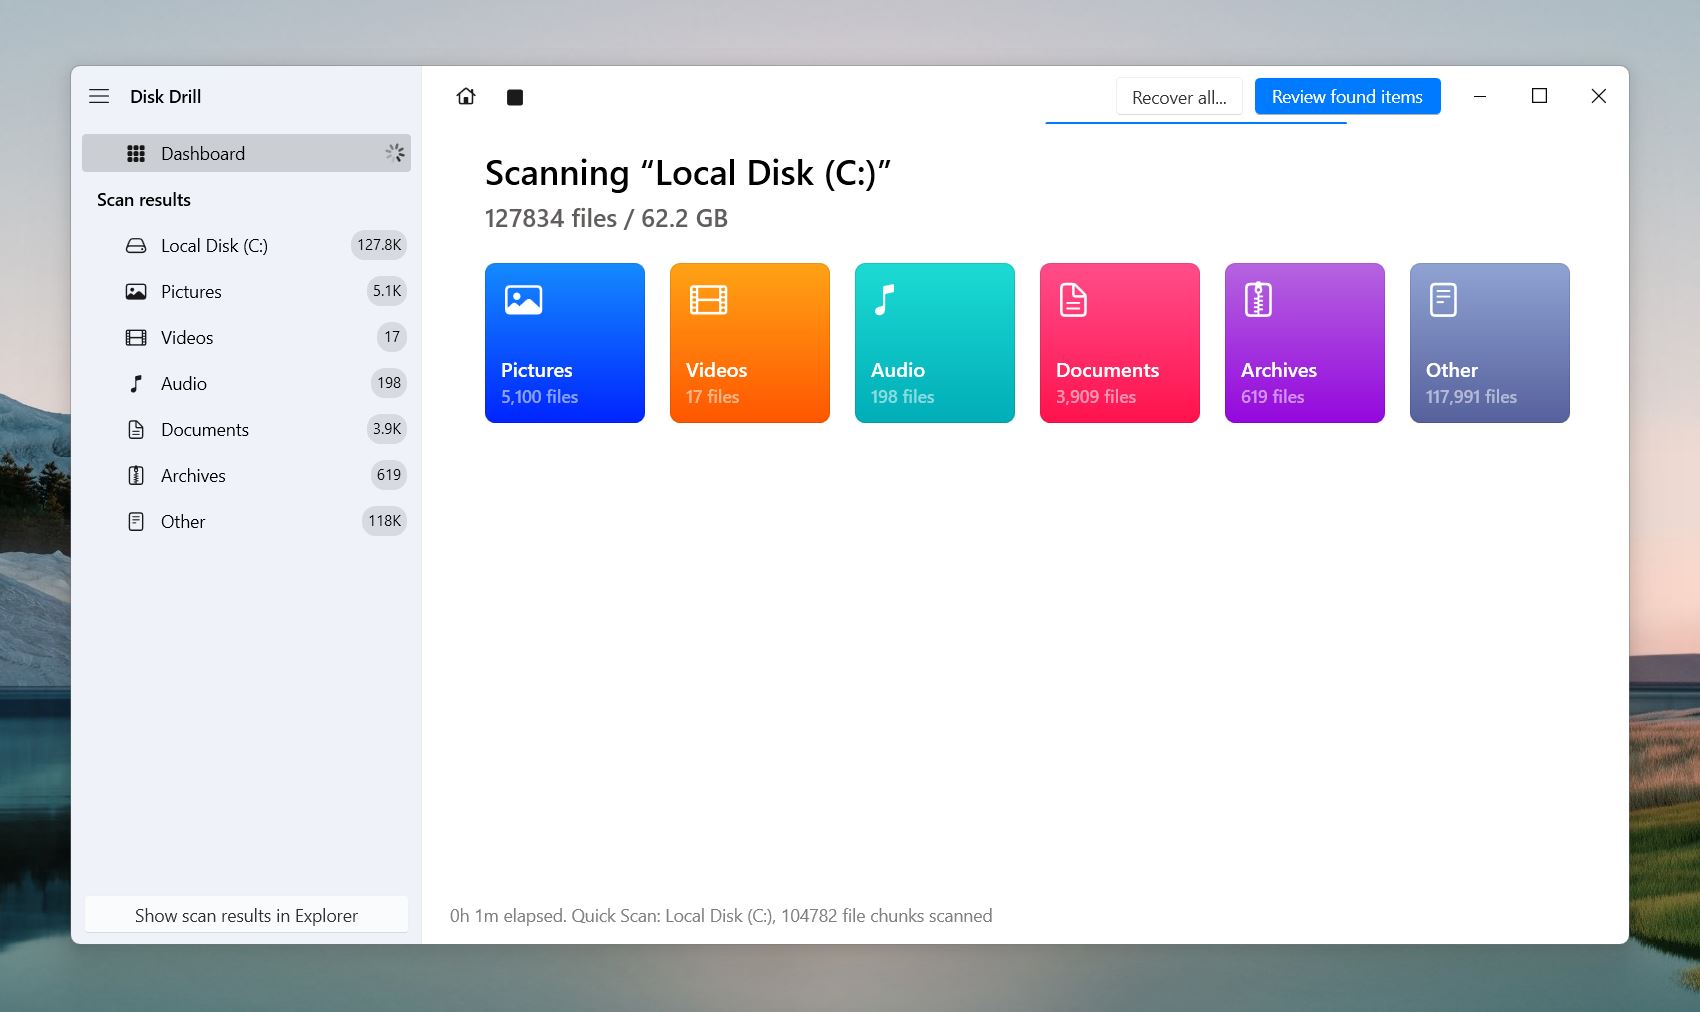
- When the scan is complete, Disk Drill will display all the found files on your screen. You can look through the different file types by category, like Pictures, Video, Audio, Documents, and Archives. Alternatively, there’s also a search bar at the top-right portion of Disk Drill that you can use. Simply type in “MOV” to look for MOV video files.
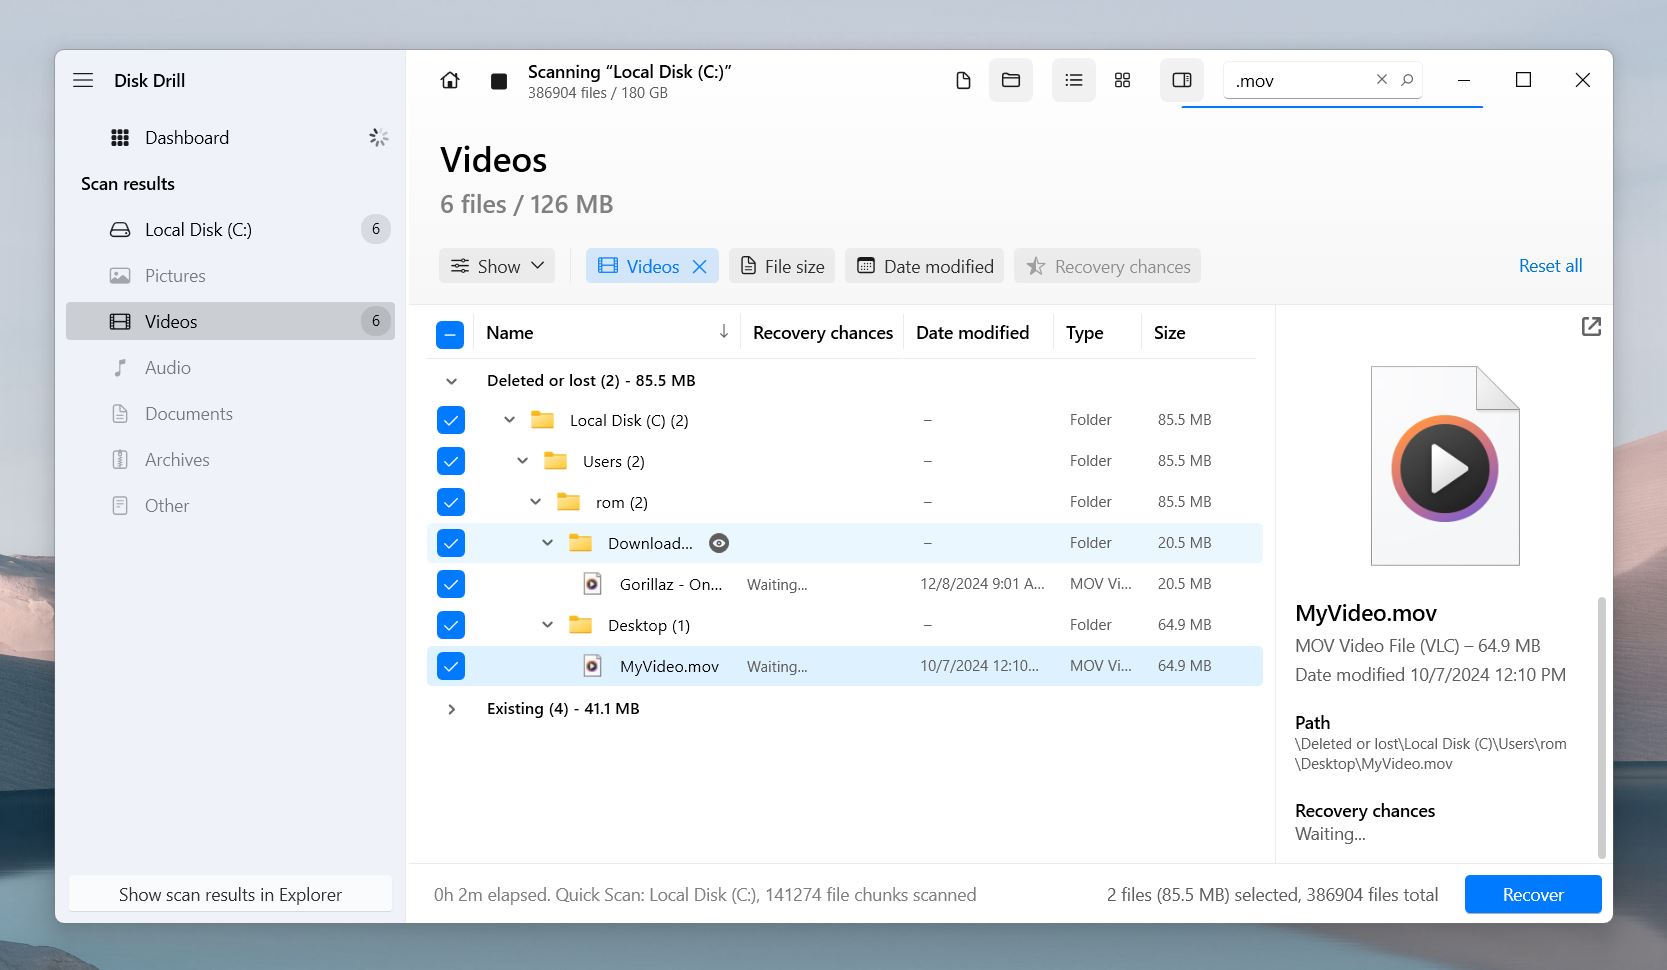
- You can preview all the found files by clicking on the eye icon on the right side of the file name. This should help you find MOV files much easier and will help you determine whether the MOV file is recoverable. If a preview is available, there’s a big chance that you can recover the file. Also, look at the Recovery Chances column. Files with a high recovery chance are usually recovered fully intact and playable.
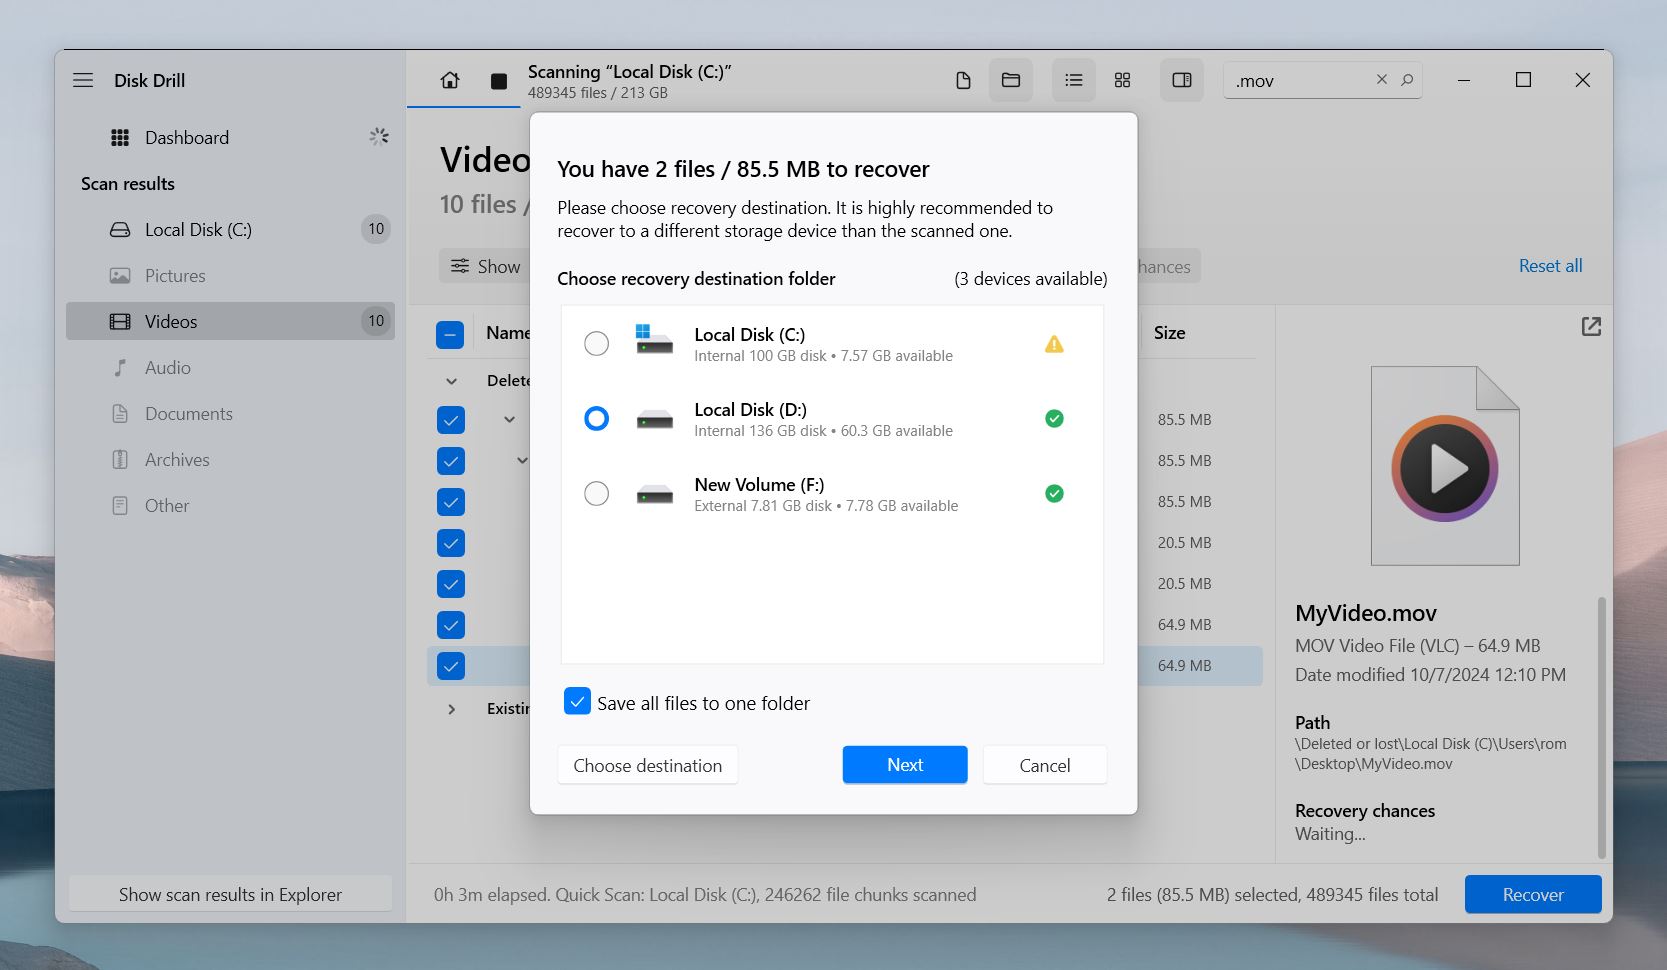
- Finally, when you find the MOV file you want to recover, simply click on the Recover button at the bottom-right corner of your screen. You’ll be asked for a destination folder for the recovered file. We recommend recovering the file to a different storage device and not in the same storage where the MOV file is located. This is to avoid accidentally overwriting or corrupting the MOV file while recovering it. Remember that the free version of Disk Drill has some restrictions. On macOS, you can scan and preview your files but won’t be able to recover them. On Windows, the free version allows you to recover up to 500 MB of data. If you need to recover more, consider upgrading to the PRO version.
If you couldn’t find the deleted MOV file you were looking for, check if you scanned the entire disk or only the partition. If you did the latter, do a scan again for the entire disk.
Option B: PhotoRec
Another recovery option is PhotoRec. It is a free and open-source recovery tool that offers file recovery at no cost. Although it’s free, PhotoRec does have some limitations. It operates primarily as a command-line tool (though a basic GUI variant exists for Windows), lacks a file preview feature, and has very spartan functionality.
![]()
Features:
- Can recover an unlimited number of files.
- Has good results on MOV file recovery.
- Works on Windows, macOS, and Linux.
- PhotoRec operates using only signature scan mode, which searches for file signatures to recover deleted files. This method allows you to retrieve MOV files even from corrupted devices, though it doesn’t preserve the original file names or folder structures.
Price: Free
We’ve done a full review on PhotoRec before. You should check it out if you’re interested.
🪟 How to Install PhotoRec on Windows:
- Visit the official PhotoRec website and download the Windows version. PhotoRec comes bundled with TestDisk.
- Locate the downloaded ZIP file, right-click it, and select Extract All to unzip the contents to a folder.
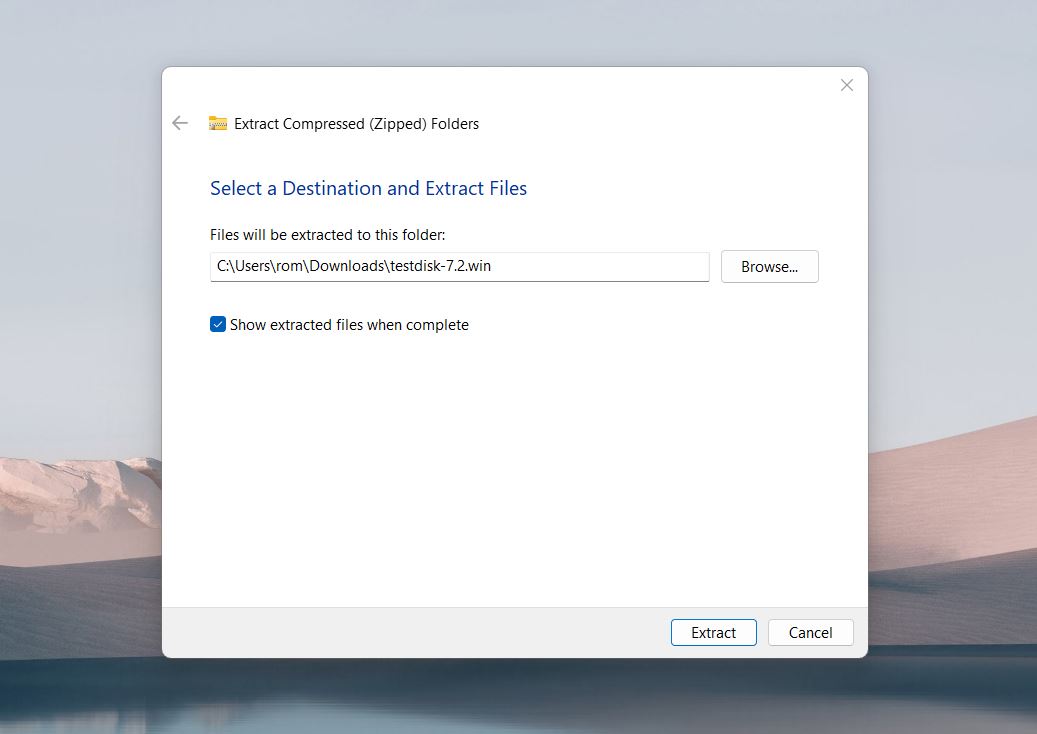
- Open the extracted folder. Double-click photorec_win.exe to start it in common-line.
- (Alternative) In the same folder, double-click QPhotoRec.exe to launch the basic GUI version.
🍎 How to Install PhotoRec on macOS:
- Open up your Terminal through Spotlight.
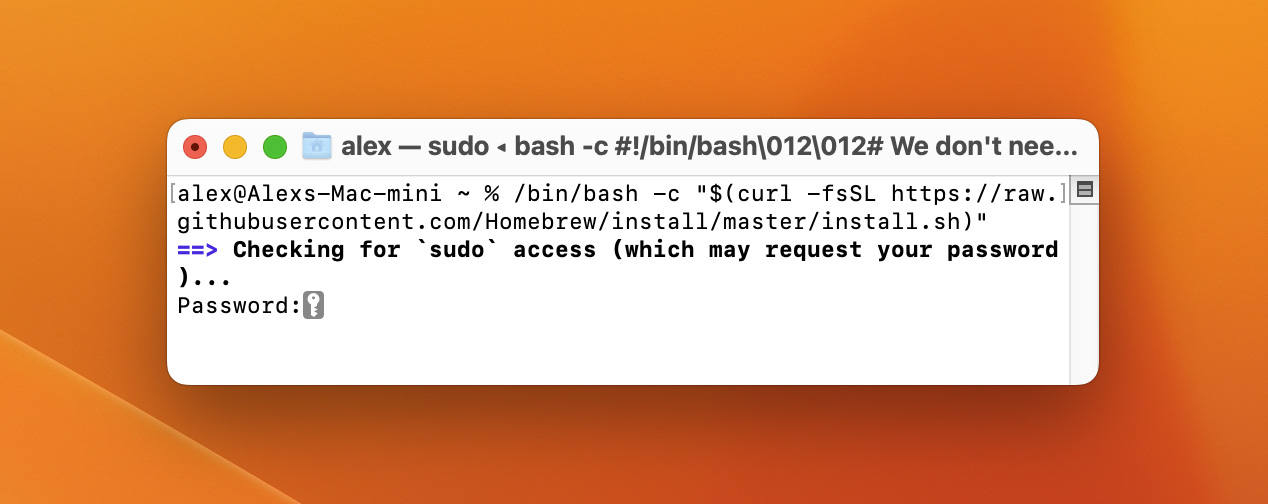
- Copy and paste the following command below to the Terminal. This will install Homebrew on your Mac, a downloader for programming tools, scripts, or languages.
/bin/bash -c "$(curl -fsSL https://raw.githubusercontent.com/Homebrew/install/HEAD/install.sh)"
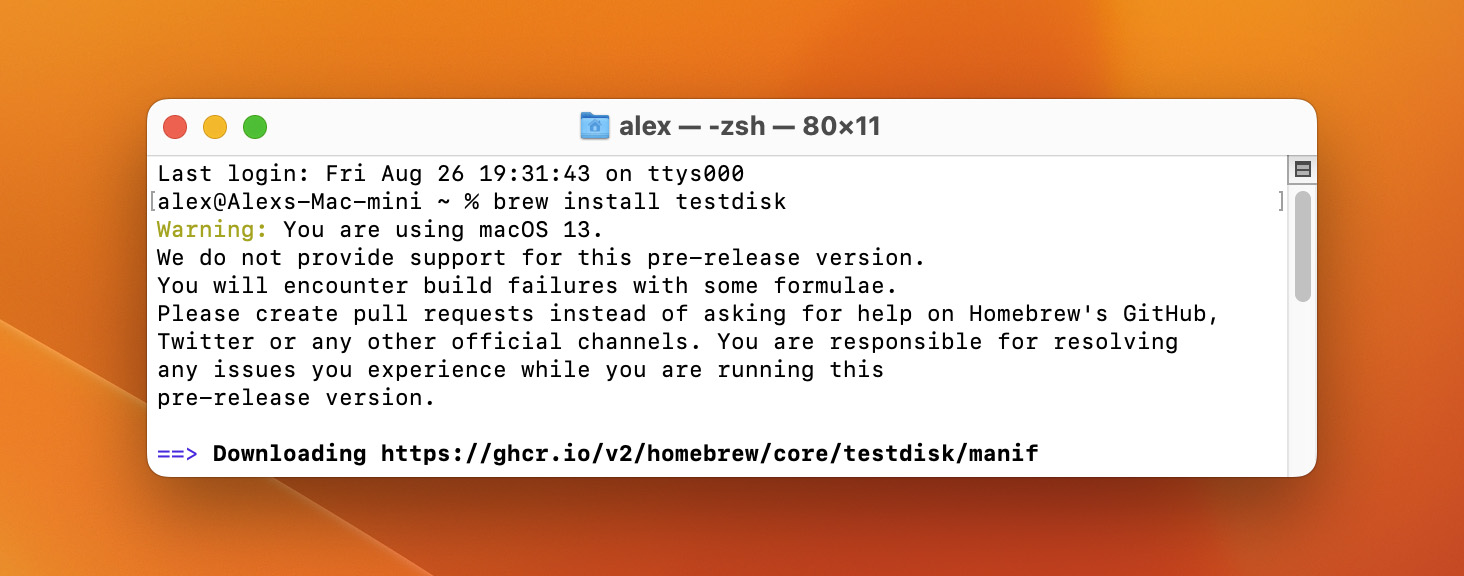
- After that, type in brew install testdisk on the Terminal to install TestDisk, which comes with PhotoRec.
Alternatively, you can also download TestDisk/PhotoRec archive, unpack it, and then launch the PhotoRec executable file.
How to recover MOV files with PhotoRec:
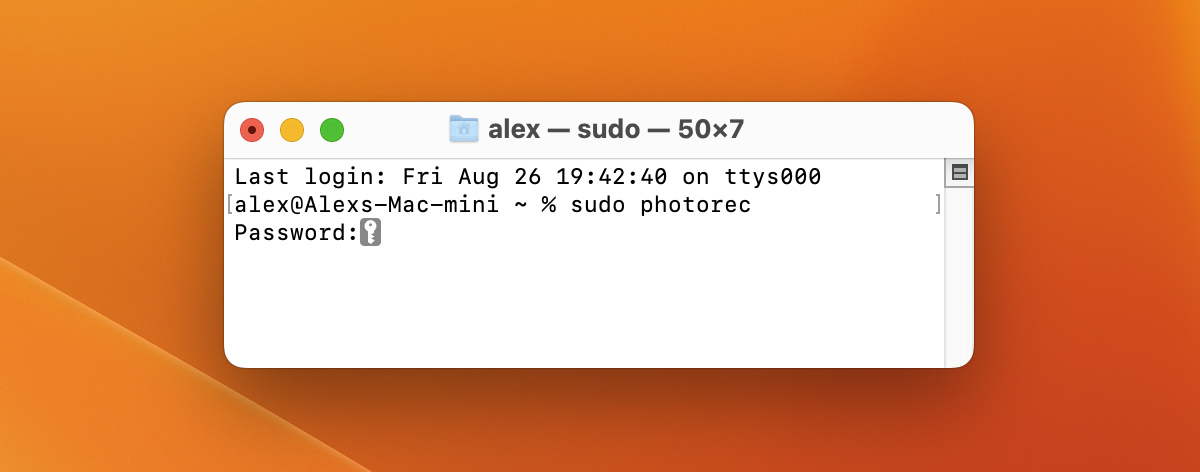
- Launch the Terminal and type in sudo photorec then hit Enter.
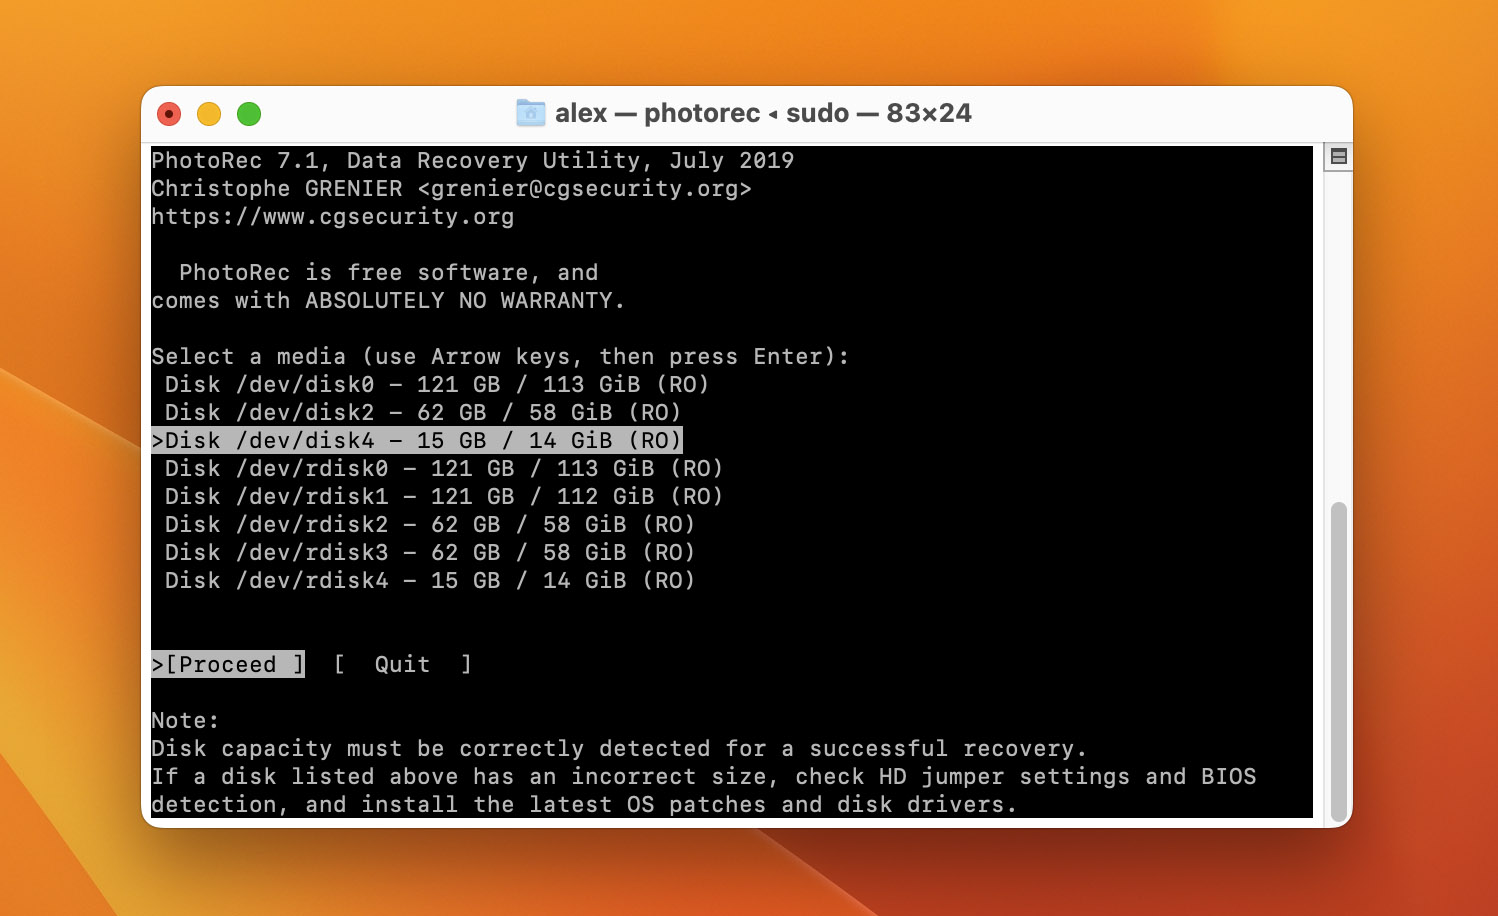
- Select the media with the deleted MOV file that you want to scan for lost data.
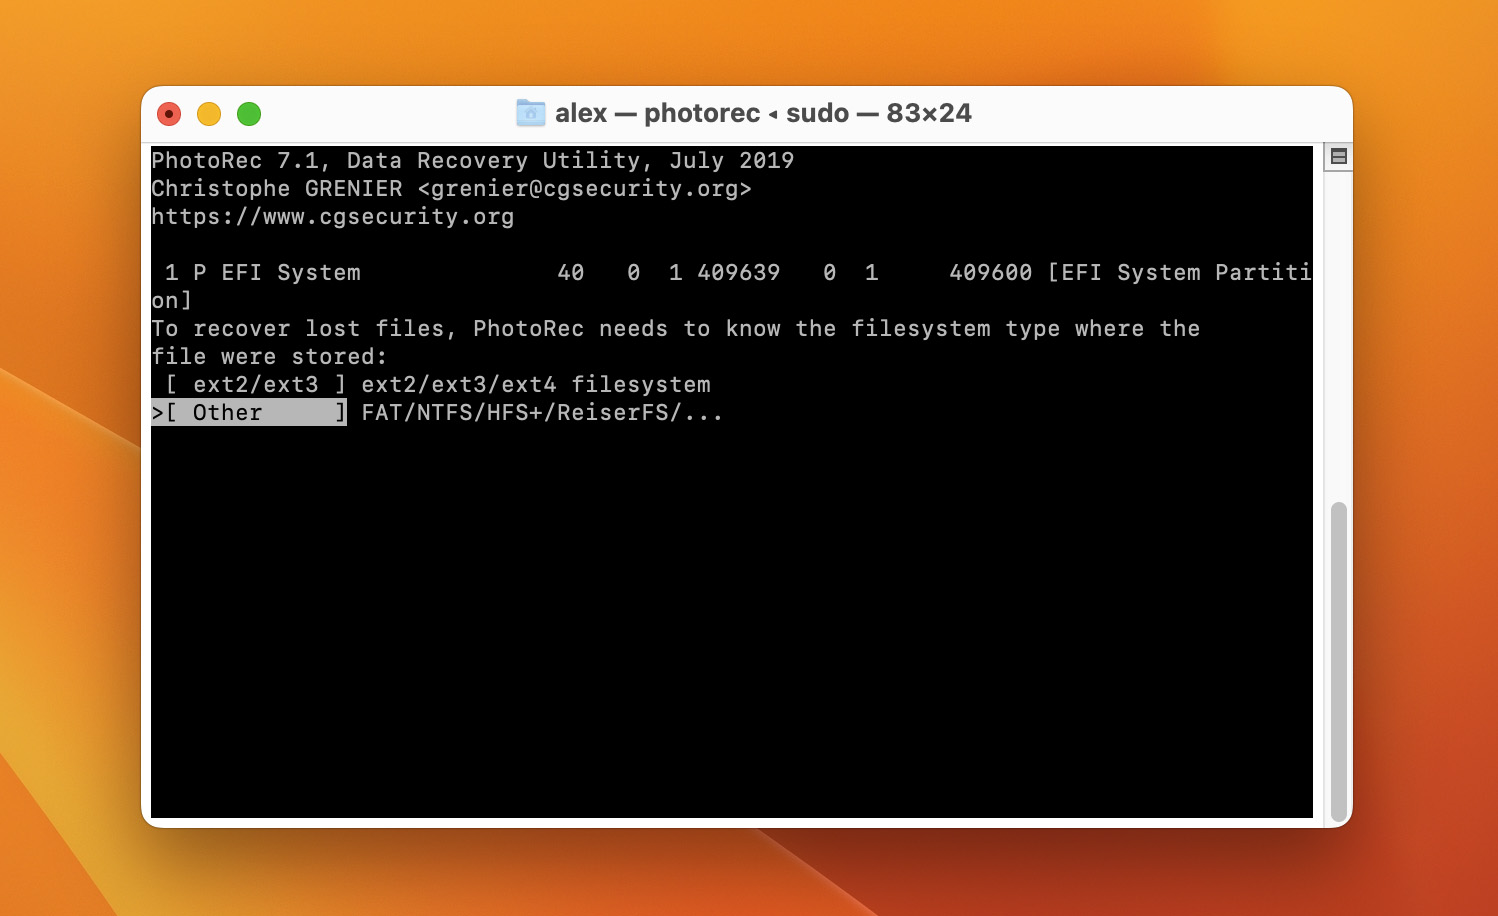
- After that, you’ll be asked to identify the type of file structure that the storage device users. If you don’t know your device’s filesystem, open Finder, highlight the storage device, and press cmd + i.
- When you’re through with that, it’s time to direct PhotoRec to the recovery destination folder. It’s best to choose a directory from another storage device, separate from where you’re recovering your MOV video files.
- By default, PhotoRec saves recovered files in the testdisk-7.2 folder (or the folder where PhotoRec is located). You can leave this as is or specify a different directory. When ready, confirm your selection (press C).
- Once that’s done, the scan will begin and any recoverable files will be sent to the recovery destination folder.
You’ll receive a recovery summary showing you how much data was retrieved when the process is finished.
How to Restore Lost MOV Files With Native Backups (If Any)
Now to backups. Both Windows and Mac users have built-in backup options. If you’re one of those experienced users who had backup systems running, you can easily restore deleted MOV files using these tools. In case you set them up but never had the misfortune to use them, here’s a quick guide on File History (if you’re a Windows person) and Time Machine (for Mac enthusiasts).
Option For Windows: File History
File History was first introduced with Windows 8, and since then remains a useful and reliable built-in backup option for Windows users.
Features:
- Built-In Windows feature.
- File History automatically backs up your files at regular intervals.
- File History keeps multiple versions of your files.
- By default, File History backs up key locations, like Libraries, Desktop, Contacts, and Favorites.
Price: Free
File History will only help you recover your MOV file if it was already running before the file was deleted and if the file was stored in a location that File History is configured to back up. If you’ve never used it before, we highly recommend setting it up. We have a guide where you can learn how to configure File History.
Recovering your MOV files with File History is easy and can be done in just a few steps.
Here’s how to bring your deleted videos back:
- Connect Your Backup Drive.
- Click on the Start menu and type “File History” in the search bar. Select Restore your files with File History from the results.
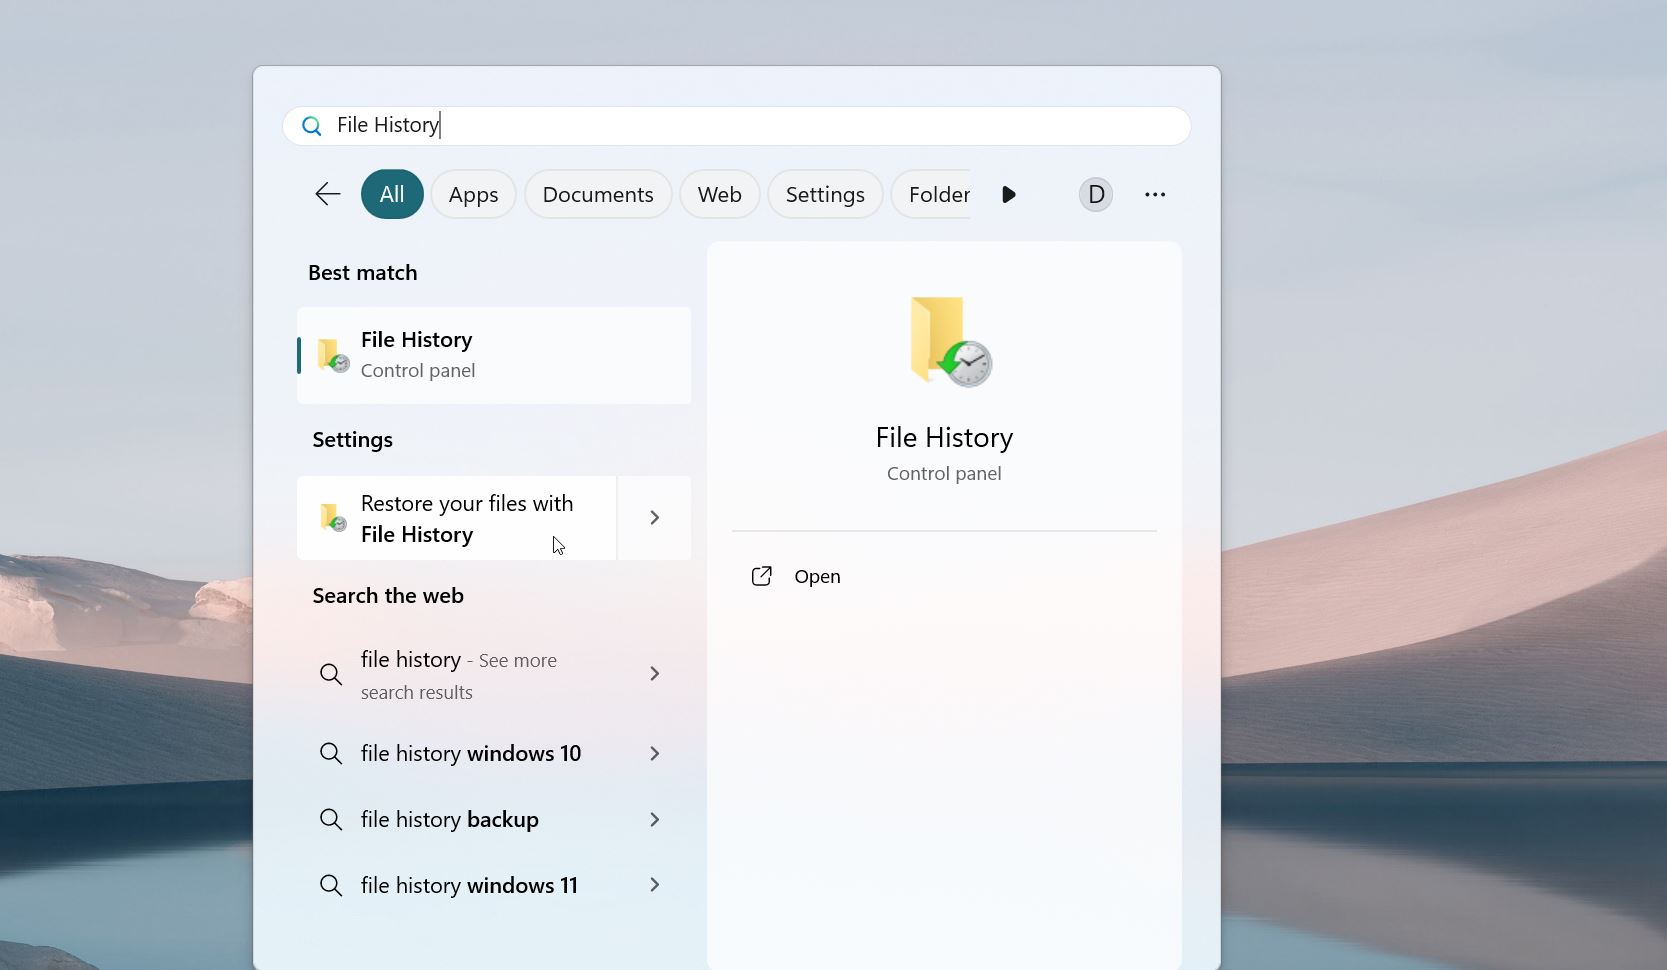
- In the File History window, navigate through the folders to find the location where your MOV files were originally stored.
- Use the arrows on the left side of the window to browse through different backup dates.

- Select the MOV file you want to recover and click the Restore button. File History will restore the MOV file to its original location.
If you prefer to restore the file to a different location, right-click on the file and choose Restore to. Then, select your desired destination folder.
Option For Macs: Time Machine
Time Machine is a macOS-native backup and recovery tool. It lets users backup local data to an external storage device and recover those backups easily. When your external backup disk is not available, Time Machine also has the capability to use local snapshots that can restore your files.
Features:
- Time Machine comes pre-installed on all Macs.
- Unlimited backups and recovery.
- Can automatically back up files.
- Time Machine keeps multiple versions of your files, so you can recover not just the deleted MOV file but also previous versions if needed.
Price: Free
Time Machine cannot recover data that has not been backed up in the past. So, if you haven’t used Time Machine until now, this won’t work for you. You can read Apple’s official documentation on how to create Time Machine backups for your future use.
How to recover a lost MOV file from a Time Machine backup:
- Connect your local storage device that contains the Time Machine backups of your Mac.
- Open the folder where your missing MOV files are supposed to be through a Finder window. If your missing MOV files are from the Desktop, you don’t need a Finder window.
- Click on the Time Machine icon on your menu bar to start Time Machine. You can also do this from Launchpad. For those of you who can’t find Time Machine on your menu bar, open System Preferences and select the Time Machine icon.
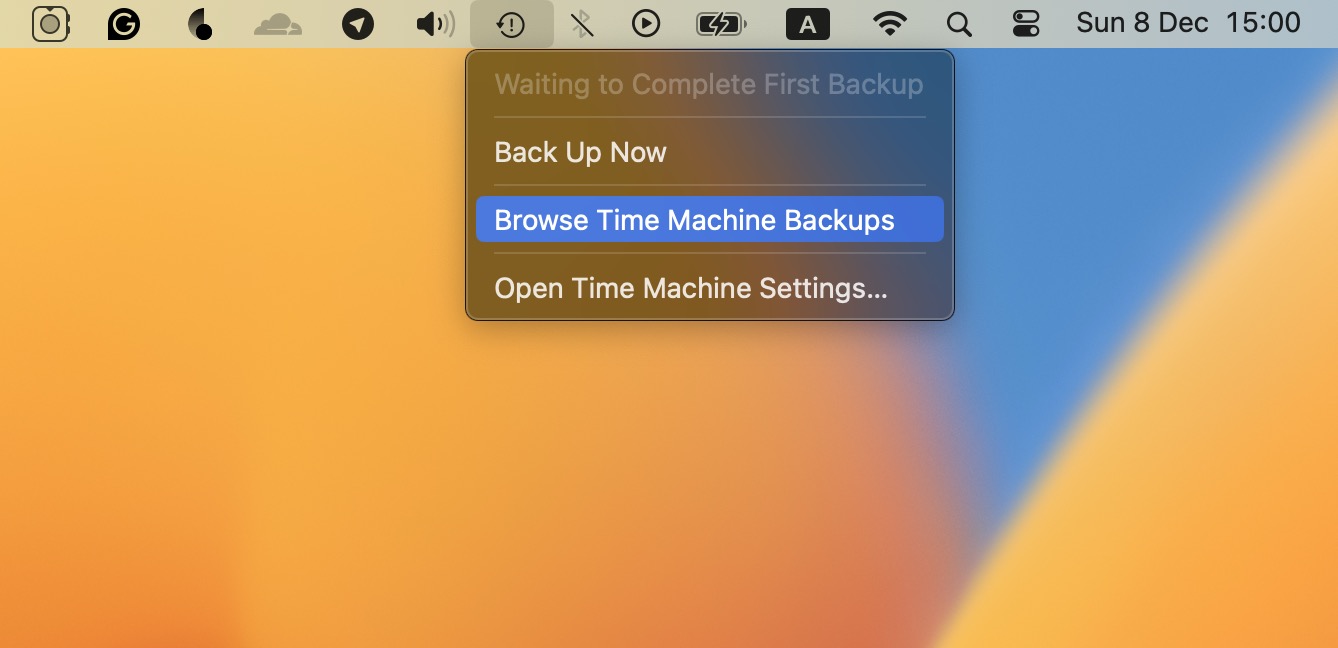
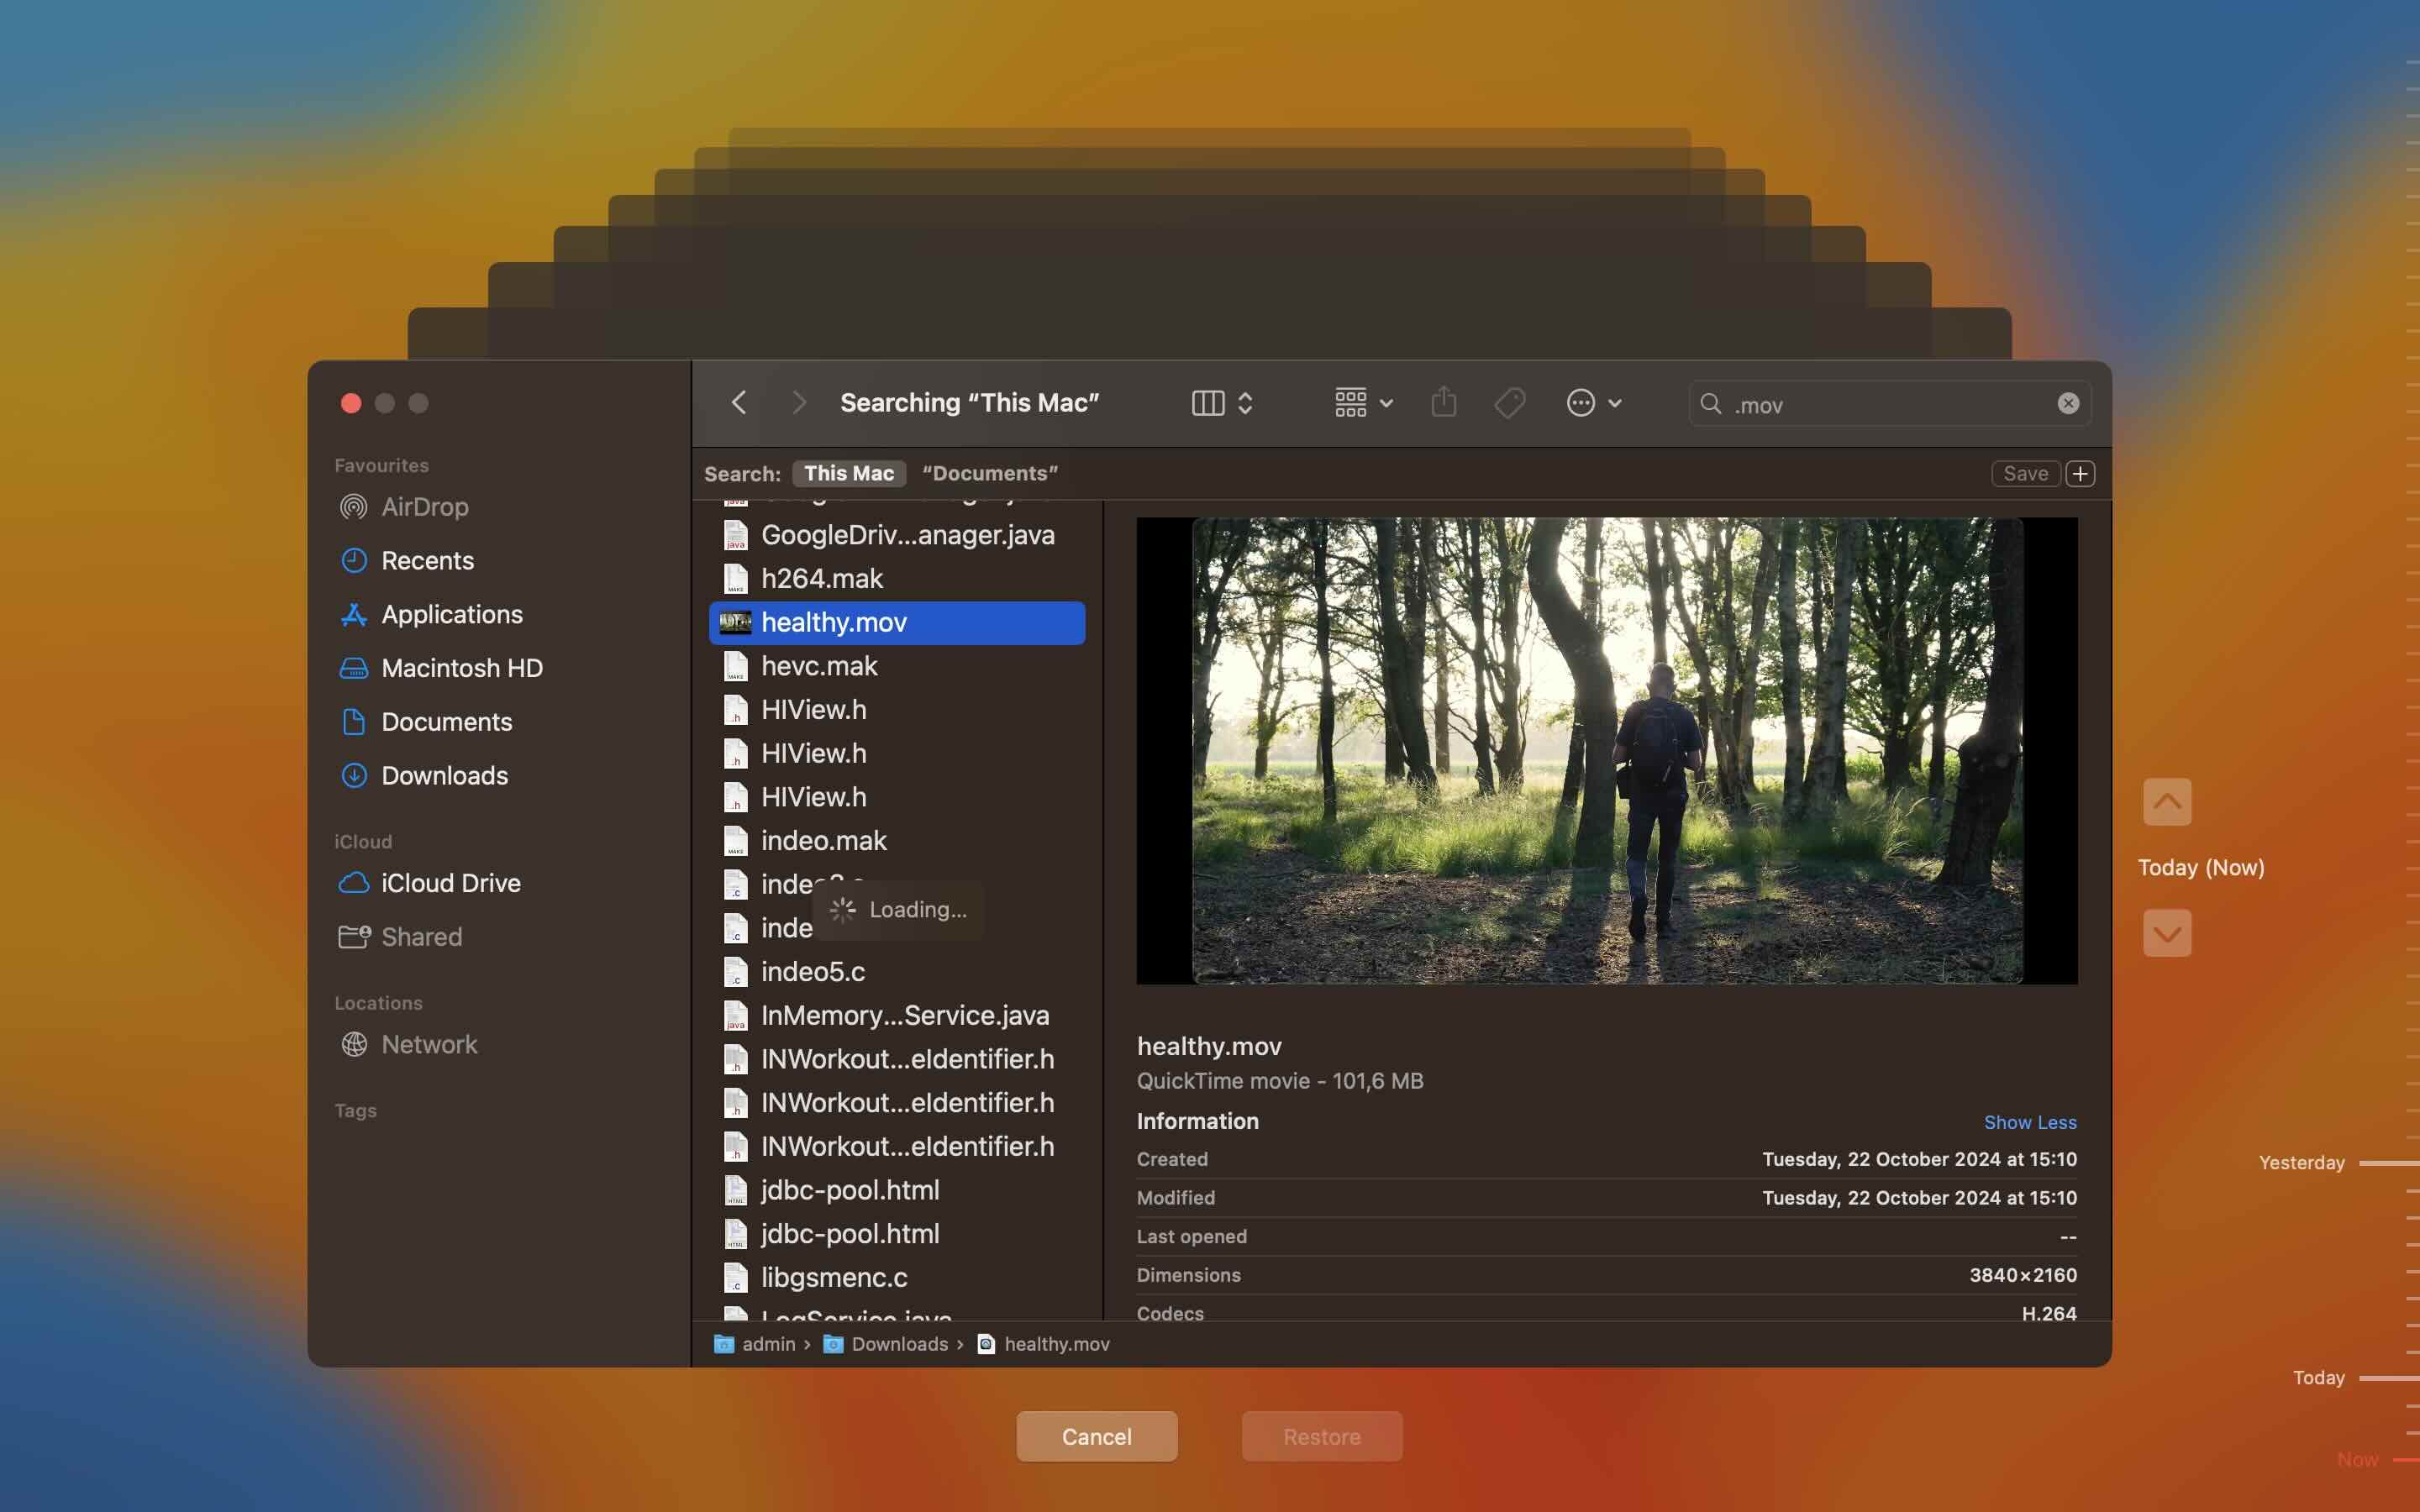
- With Time Machine open, click on the arrows at the right-hand side to browse through local backups. Do this until you find the MOV files you want to recover.
- Once you’ve found your MOV videos, select the item and click on the Restore button at the bottom of the window. The process may take some time depending on the size and number of your MOV files.
There are other ways to use Time Machine in different cases, you can view our guide here.
Now, if the files you’ve recovered up to this point have playback errors or missing video data, then it’s been corrupted.
Final Tips
The methods we covered above usually do a great job with deleted or lost MOV files. That said, there are times when things don’t go as smoothly.
For example, if you deleted an MOV file ages ago and kept using the same storage device, the file might have been partially overwritten. When that happens, you might end up with a recovered video that’s incomplete and won’t play in your media player. We’ve seen this before, and it doesn’t always mean the end of the road.
If you find yourself in a situation like this, don’t stop. We have a separate guide on how to repair MOV video files. It walks you through the process step by step. Before repairs, make a backup of your recovered file, just in case. You don’t want to accidentally make things worse while trying to fix it.
FAQ
How do I recover a deleted MOV file on Mac?
You can recover a deleted MOV file on your Mac with data recovery software:
- Select a reliable data recovery tool.
- Download and install it.
- Launch the app and scan the storage device with the deleted MOV file.
- Browse the results for your MOV file (if possible).
- Select the file and recover it to a safe destination.
How do I recover a deleted MOV video from an SD card?
To recover a deleted MOV video from an SD card, stop using the card immediately and remove it from your device, whether it’s a digital camera or smartphone. Connect the card to your computer using a card reader, then download and install recovery software like Disk Drill or PhotoRec. Run the software and scan your SD card to locate and recover the deleted MOV file.
Can I recover MOV files from an emptied Recycle Bin?
Yes, you can recover MOV files from an emptied Recycle Bin, but you’ll need specialized recovery software to do it. Tools like Disk Drill or PhotoRec can scan your drive for files that were deleted, even after the Recycle Bin was emptied.
This article was written by Mako Young, a Contributing Writer at Handy Recovery Advisor. It was recently updated by Roman Demian. It was also verified for technical accuracy by Andrey Vasilyev, our editorial advisor.
Curious about our content creation process? Take a look at our Editor Guidelines.