If you look for a free data recovery tool and see TestDisk mentioned everywhere, you probably ask yourself if it’s actually worth a try. In this TestDisk review, we cover everything you might need to know—what it does, how it works, whether it’s safe, and if it delivers what it promises. Our team tested it so you don’t have to take chances. Stick around, and by the end, you’ll know if TestDisk suits your recovery needs.
TL;DR: TestDisk is a free, open-source tool that works well for structural issues on drives (lost partitions, damaged partition tables, and boot sectors). That said, its text-based interface isn’t beginner-friendly, and it’s not the tool for recovering actual lost files that were deleted or lost due to formatting. For a smoother experience and reliable file recovery, data recovery tools like Disk Drill or EaseUS are better options.
Want to help make our content better? Please vote for the best alternative to TestDisk:

TestDisk Main Features
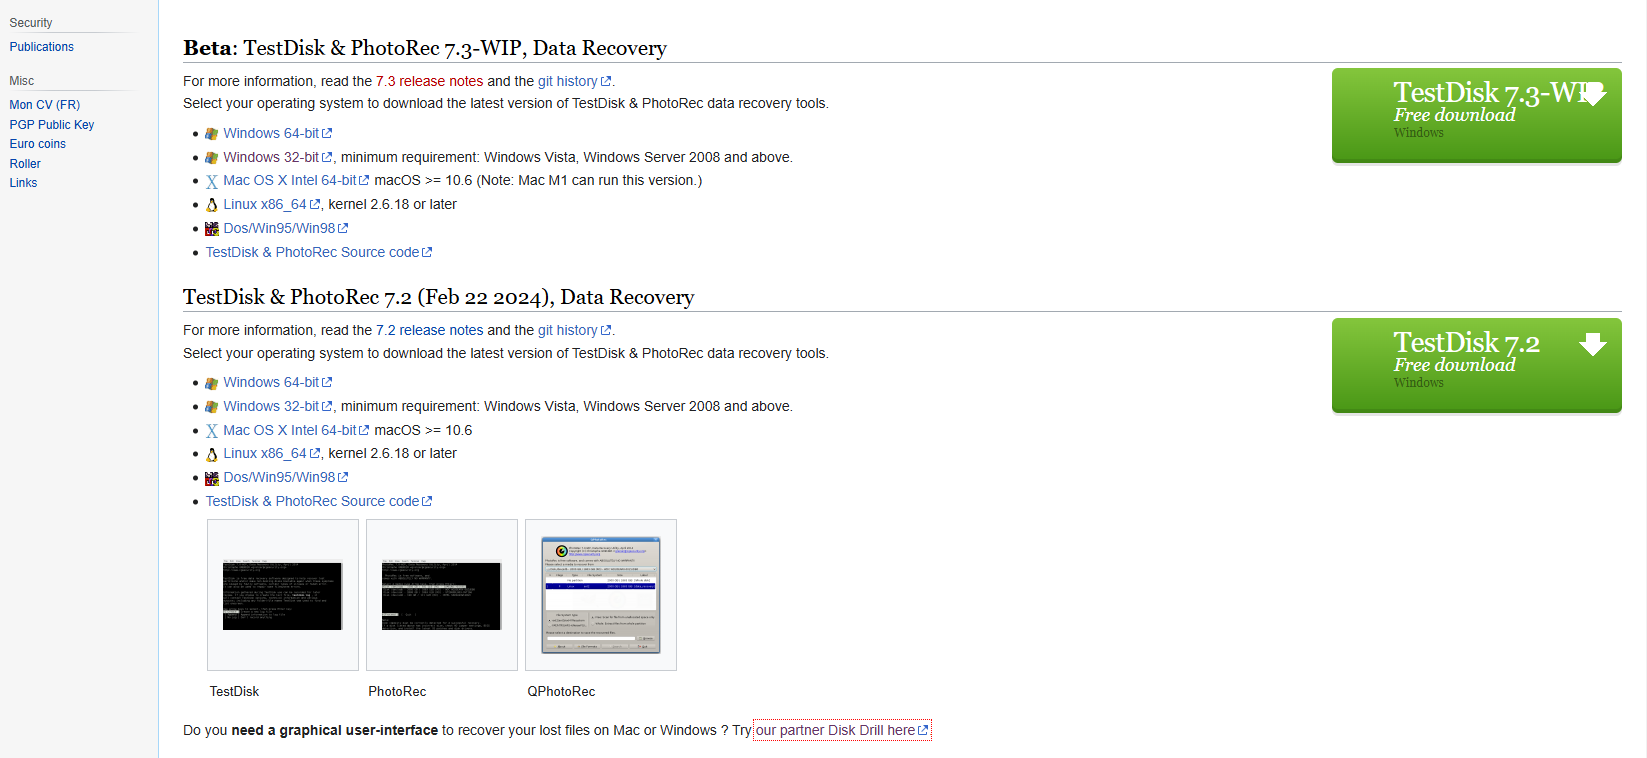
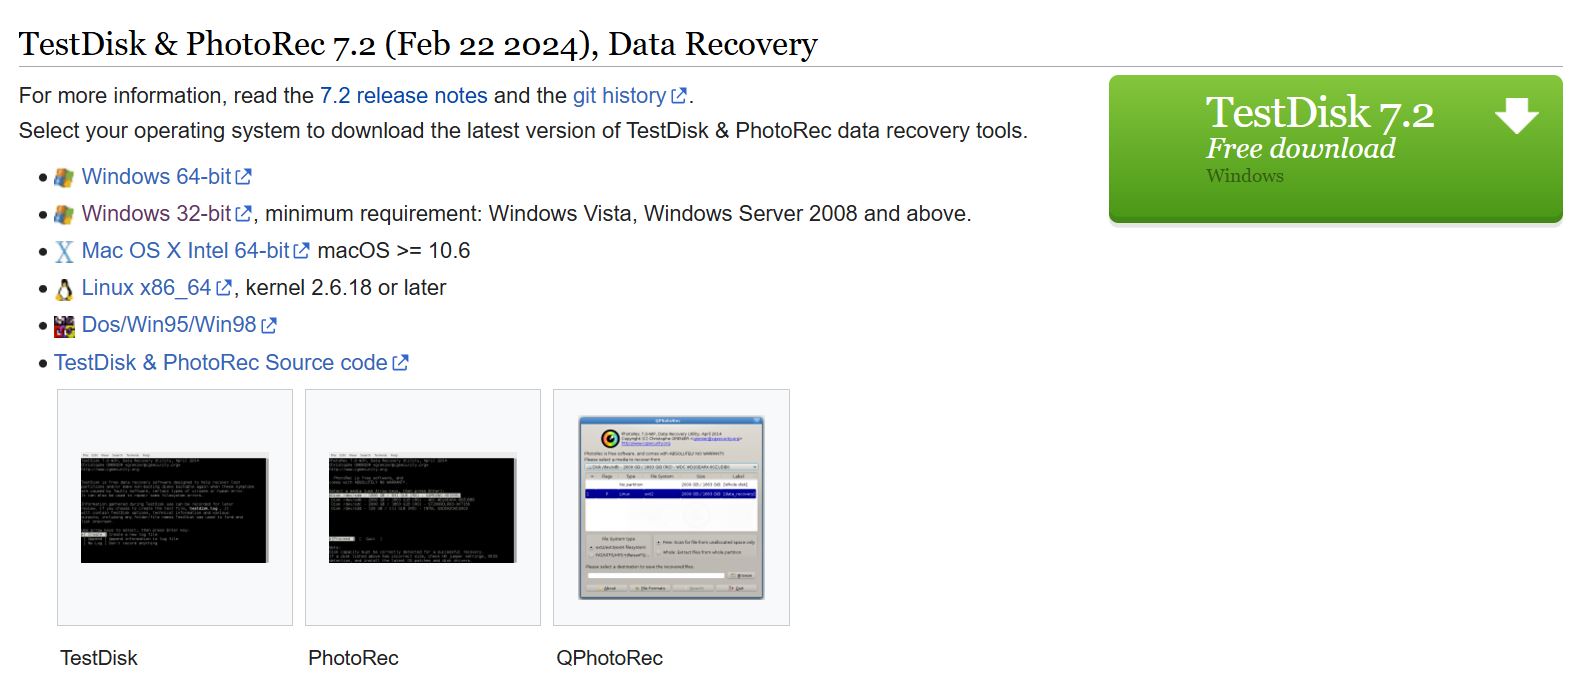
TestDisk is completely free and open-source software developed and maintained by Christophe Grenier. The latest stable version, 7.2, was released on February 22, 2024, and is available for download on its official website. There is also a newer version, 7.3, but it’s currently in beta. Now, let’s take a closer look at the key features that make TestDisk a popular choice for data recovery.
Data Recovery
The developer of TestDisk explains that this tool was primarily designed to recover lost partitions or make non-booting disks operational again when issues stem from software-related problems. Whether it’s a corrupted partition table, a virus, or an accidental deletion of the partition table, TestDisk claims to tackle these problems head-on. Here’s a list of what it promises to do:
- Fix partition table, recover deleted partition.
- Recover FAT32 boot sector from its backup.
- Rebuild FAT12/FAT16/FAT32 boot sector.
- Fix FAT tables.
- Rebuild NTFS boot sector.
- Recover NTFS boot sector from its backup.
- Fix MFT using MFT mirror.
- Locate ext2/ext3/ext4 Backup SuperBlock.
- Undelete files from FAT, exFAT, NTFS and ext2 filesystem.
- Copy files from deleted FAT, exFAT, NTFS and ext2/ext3/ext4 partitions.
As you can see, TestDisk primarily focuses on partition recovery and boot sector problems. If you deal with a missing partition, it might be a good choice. But if you lost specific files—maybe from accidental deletion or formatting—and now need a free recovery tool, TestDisk isn’t the best fit. That’s not what it’s primarily designed for.
If you need to recover individual files, TestDisk’s companion tool, PhotoRec (which is included in the same download archive as TestDisk), is the better option. PhotoRec focuses on ‘classic’ file recovery. Like TestDisk, it’s completely free, but its interface is pretty bare-bones and not the easiest to use. While it works, it’s not exactly the most advanced or user-friendly tool out there.
If you need something more polished and easier to use, Disk Drill is a great TestDisk alternative for data recovery. Unlike PhotoRec, Disk Drill has a clean, modern interface that anyone can navigate without any problems. It also delivers solid recovery results and offers a free version (though it comes with some limitations). At Handy Recovery Advisor, we have tested and reviewed many popular data recovery applications. You can check out our first-hand software tests to find an app that will be perfect for you.
Multiple Operating System Support
One of the standout features of TestDisk is its compatibility with multiple operating systems. Whether you’re a Windows, macOS, or Linux user, this tool works seamlessly across platforms. In fact, it even supports DOS (either real or in a Windows 9x DOS-box)!
For this article, we tested TestDisk on Windows 11 to see how it performs on the latest OS. During setup, we ran into an issue where Microsoft Defender SmartScreen blocked it. This is pretty common with open-source tools like TestDisk, but it’s not a big deal. To get around this:
- Click More info on the SmartScreen notification.
- Then, select Run anyway to launch the program.
Interface
Now, the interface is probably TestDisk’s weakest feature. It’s completely text-based and runs in the command line, which can feel clunky and outdated if you’re used to modern tools with sleek, clickable menus. Navigating TestDisk means using your keyboard to move through options, which isn’t exactly intuitive for most people.
That said, the instructions are mostly clear, and each step is laid out in a straightforward way. If you’re okay with prompts and don’t mind the old-school vibe, it gets the job done. For anyone who prefers something more polished and beginner-friendly, though, this might be a dealbreaker.
Multi-Language Support
TestDisk offers support through a community forum, documentation, and direct access to the developer (If you need to report a bug or request a feature, send an email to grenier@cgsecurity.org).
The support forums are available in various languages such as English, French, Spanish, German, etc. So you can always refer to the subforums in your native language and get all the help you need in using TestDisk.
TestDisk’s official site also provides detailed guides and FAQs for common problems like bad sectors, incorrect disk sizes, or recovering deleted files. These guides are quite thorough.
Is TestDisk Safe?
TestDisk comes from a respected and trustworthy developer, Christophe Grenier, who started the project in 1998 and remains the primary developer today. He’s also responsible for packaging TestDisk and its companion tool, PhotoRec, for a variety of platforms, including DOS, Windows, Linux, macOS, and Fedora distributions.
Since TestDisk is open-source, anyone can review its code to verify that it’s safe. There’s nothing hidden—no spyware, no malware, and no shady behavior. If you’re the type to double-check everything, you can even inspect the code yourself.
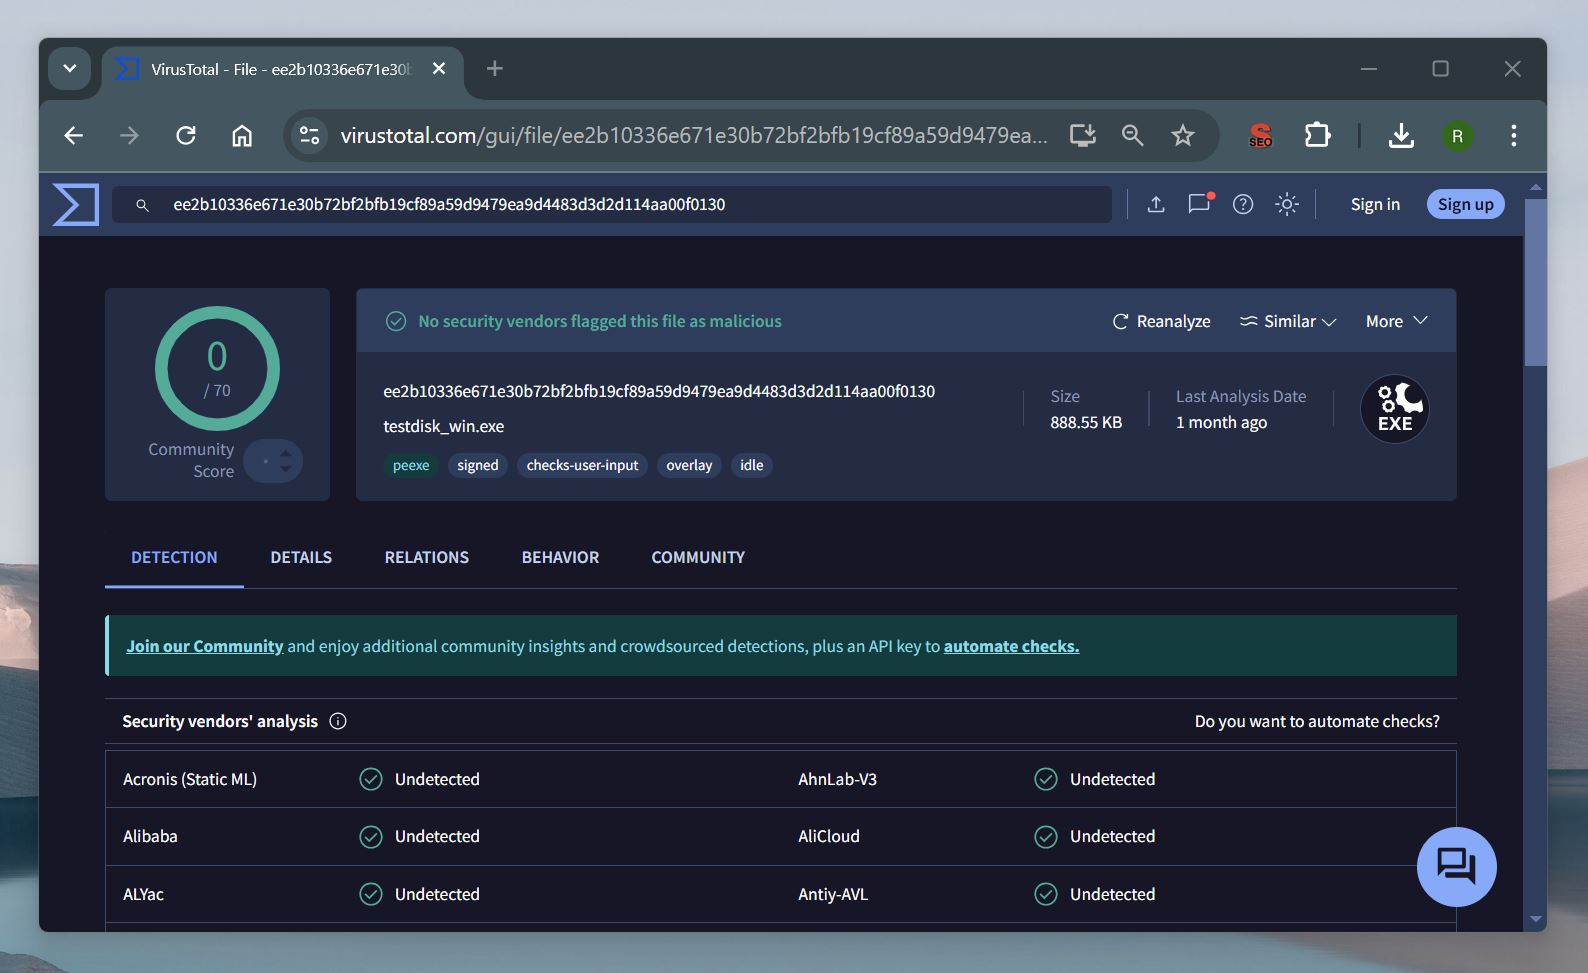
It’s also safe to download from the official TestDisk website. We checked it ourselves with VirusTotal, and the results confirm that the software is clean—it doesn’t contain any malware or harmful components. Out of 70 security vendors, none flagged TestDisk as malicious.
That said, safety also depends on how you use it. TestDisk gives you full control over your drives, which means there’s a risk of making mistakes. If you accidentally select the wrong drive and perform fixes on healthy storage, you could end up causing unnecessary damage or data loss. TestDisk doesn’t ask for extra confirmations, so you need to double-check every action you take.
How to Use TestDisk
Now let’s get into the details. We’ll show you how the actual recovery process works in TestDisk, step by step—how to download it, how to run it, and how to recover your data. We’ll keep it simple and easy to follow. Let’s get started!
- Download TestDisk recovery software from the official site.👀
This is a direct download link.
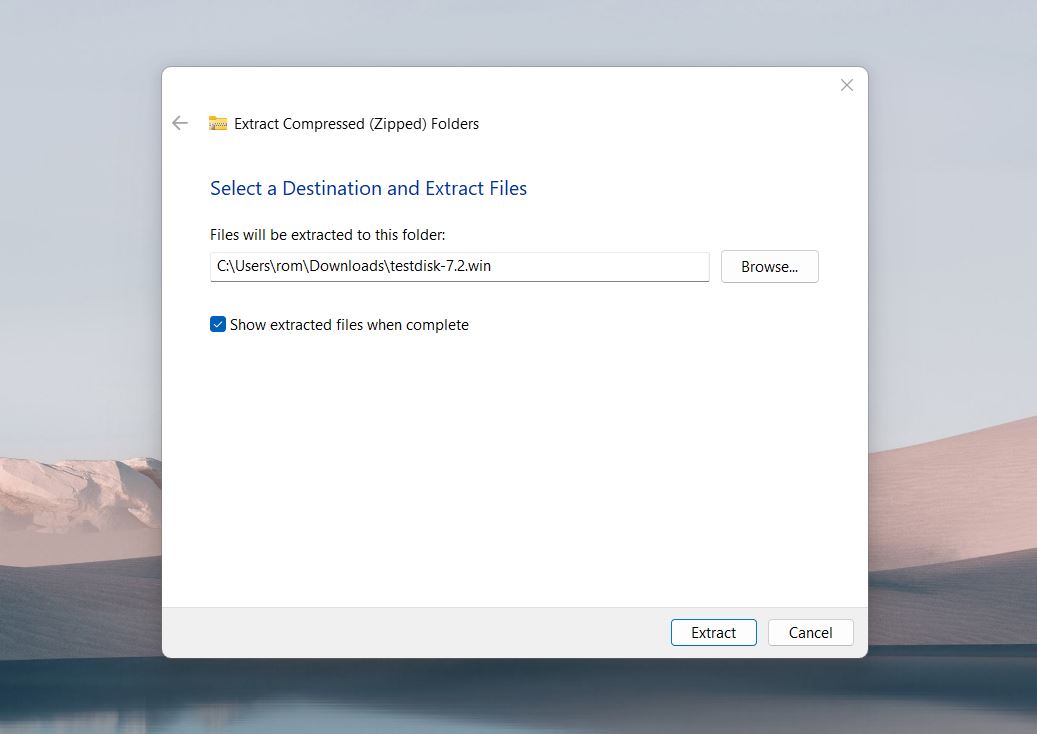
- Once the archive is downloaded, right-click the file and choose Extract All and select a location of your choice and extract it.
 The extracted folder will be named after the software version you downloaded. In our case, the folder name was “testdisk-7.2”.
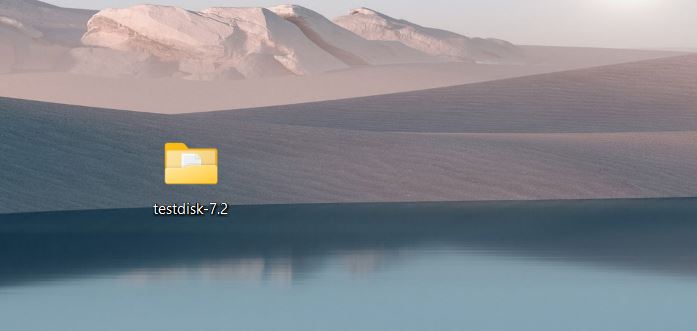
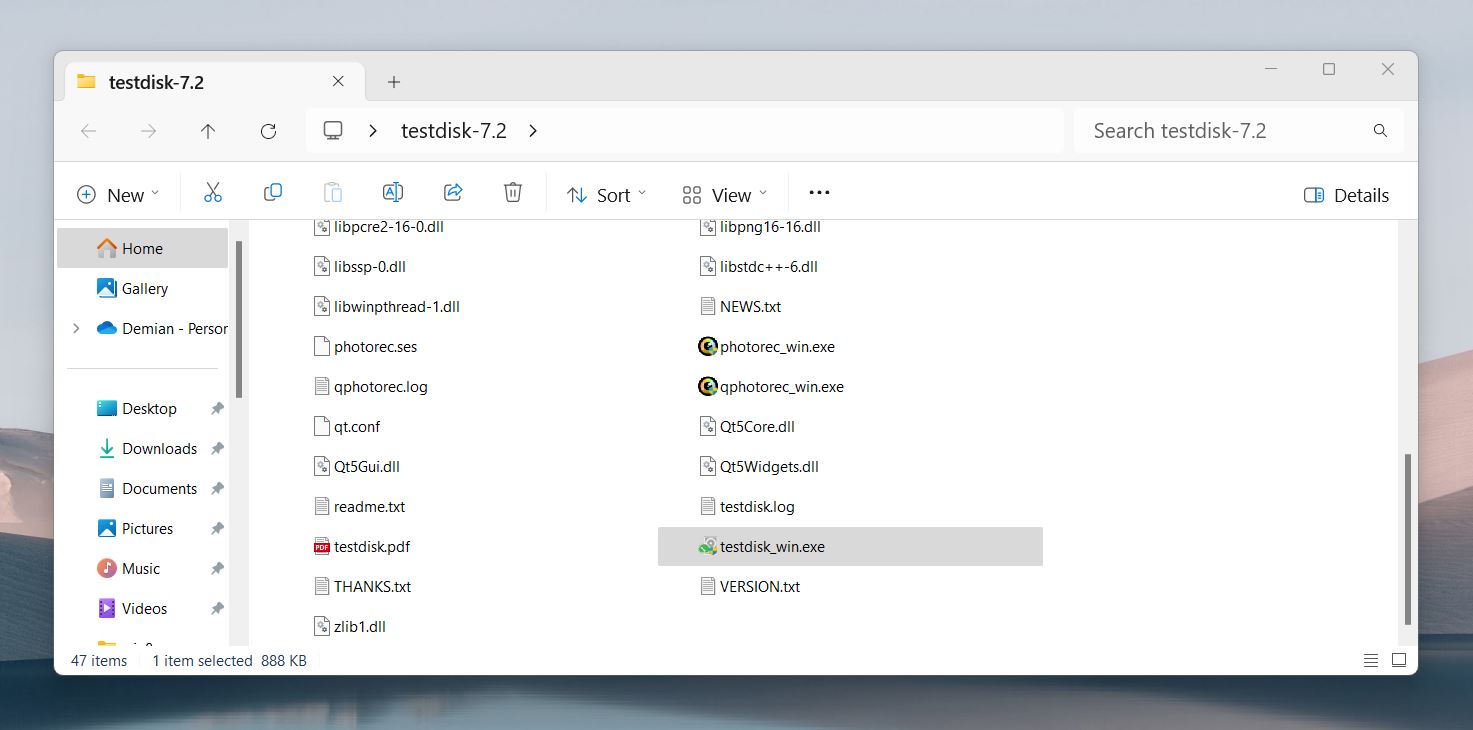
- Open the folder and navigate to the testdisk_win application. Launch it.
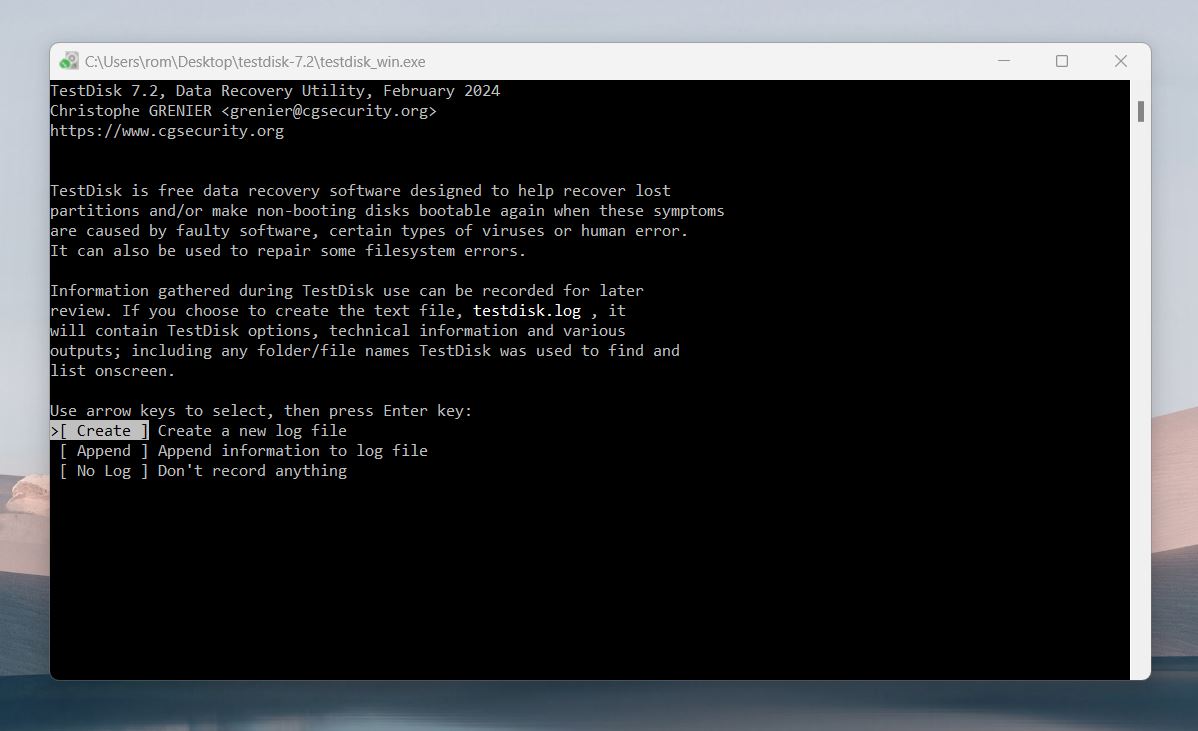
- After launching TestDisk, you will be greeted by a terminal home screen. Here, select the Create option and hit Enter. The software will now scan your PC for connected storage devices.
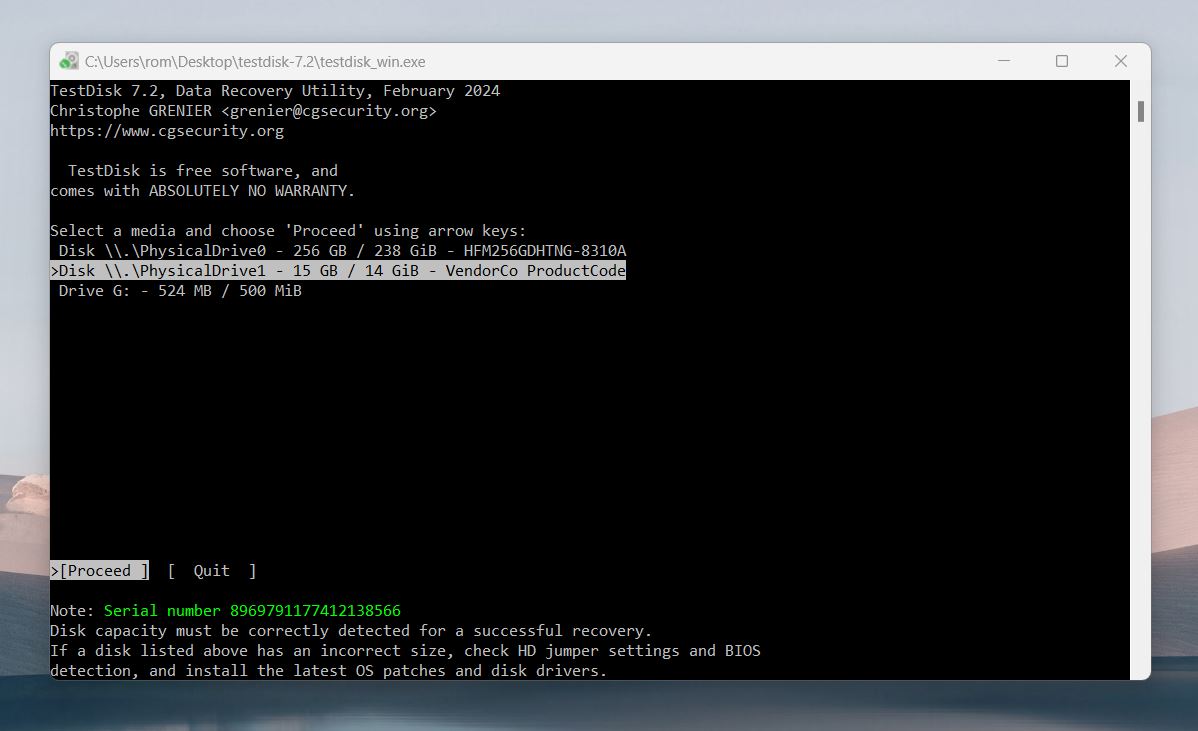
- Once the scan is complete, you will receive a list of available storage devices on your computer. Select the drive you want to further scan for the lost partition by using arrow keys and press Enter.
- The next screen will ask you to select a partition table type. Select Intel (or your detected partition) and press Enter. The program usually detects partitions automatically.
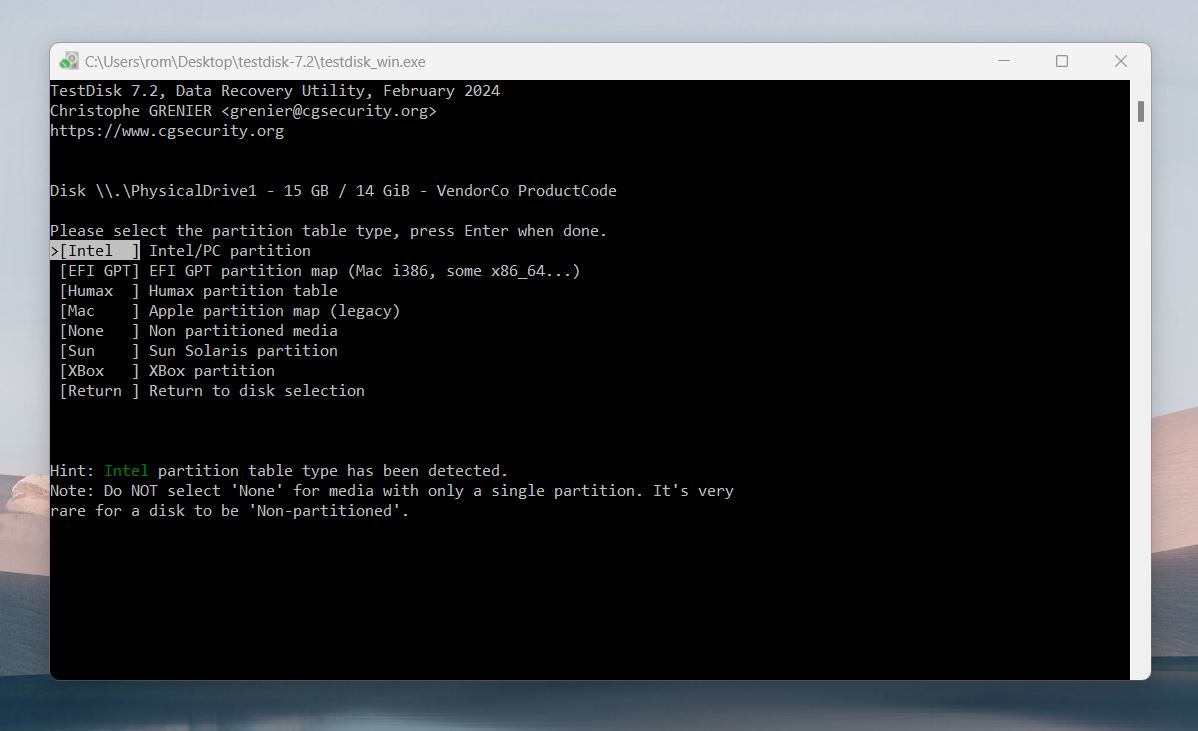 ✅
✅TestDisk is able to recognize the following partition table formats: Apple partition map, GUID Partition Table, Humax, PC/Intel Partition Table(master boot record), Sun Solaris slice, Xbox fixed partitioning scheme, Non-partitioned media.
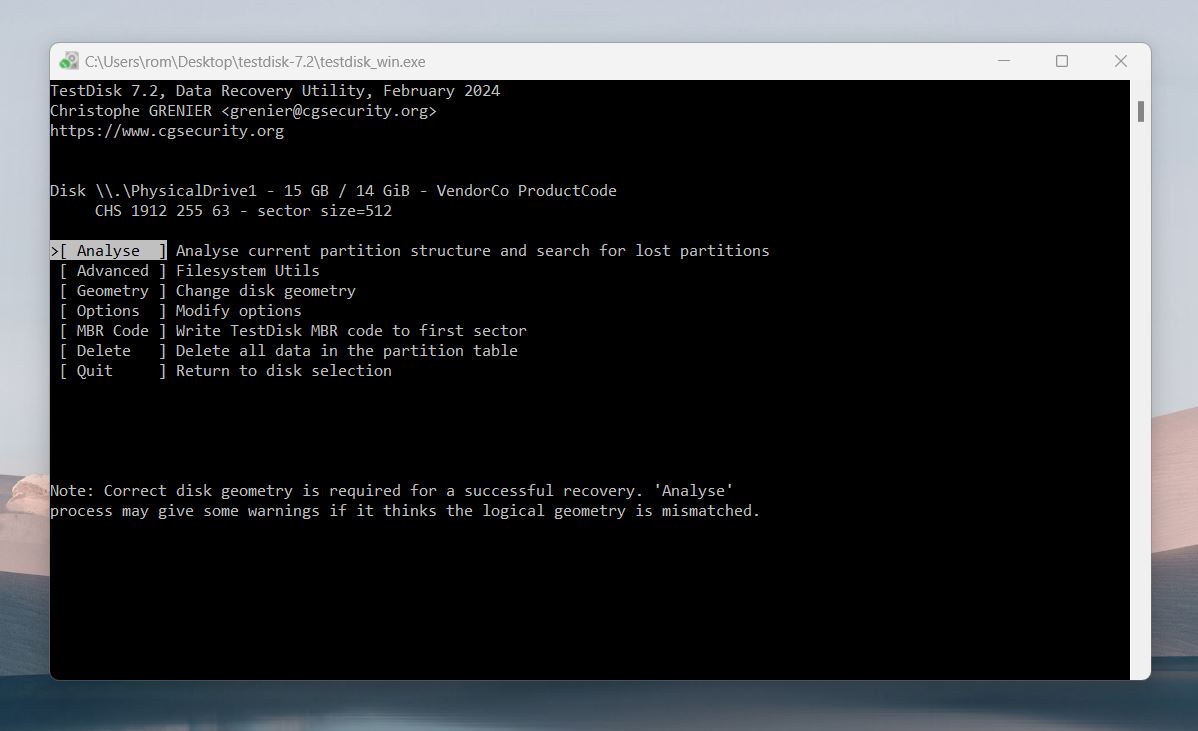
- On the next screen TestDisk presents you with a lot of options. From here, you can initiate a quick scan to analyze the selected partition for search, change the disk storage allocation structure and even delete all data in the partition table. It is impressive to see that TestDisk offers so many features despite being a free open-source time software.
If you are trying to recover a deleted hard drive partition, select the Analyze option and press Enter. TestDisk will analyze the selected disk.
- On the next screen, select Quick Search and hit Enter.
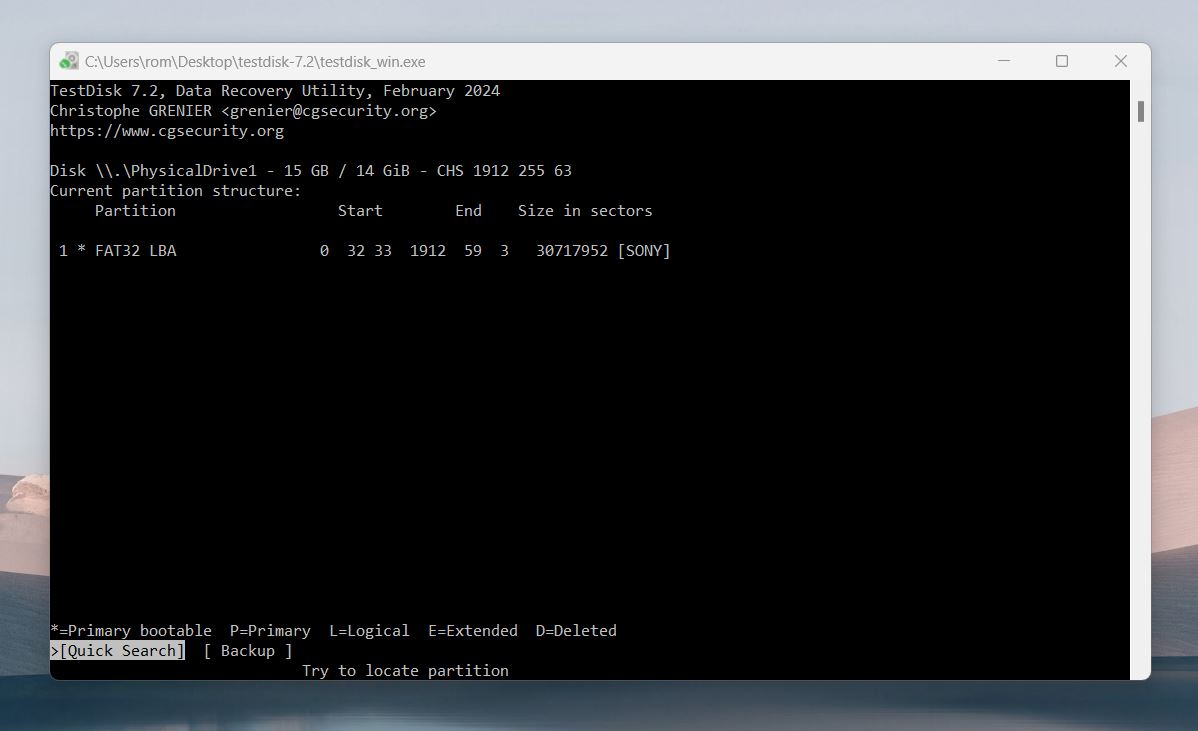
- For some reason, quick search was not able to find anything so we had to press Continue to move on to the next screen where you get an option to perform a deeper search.
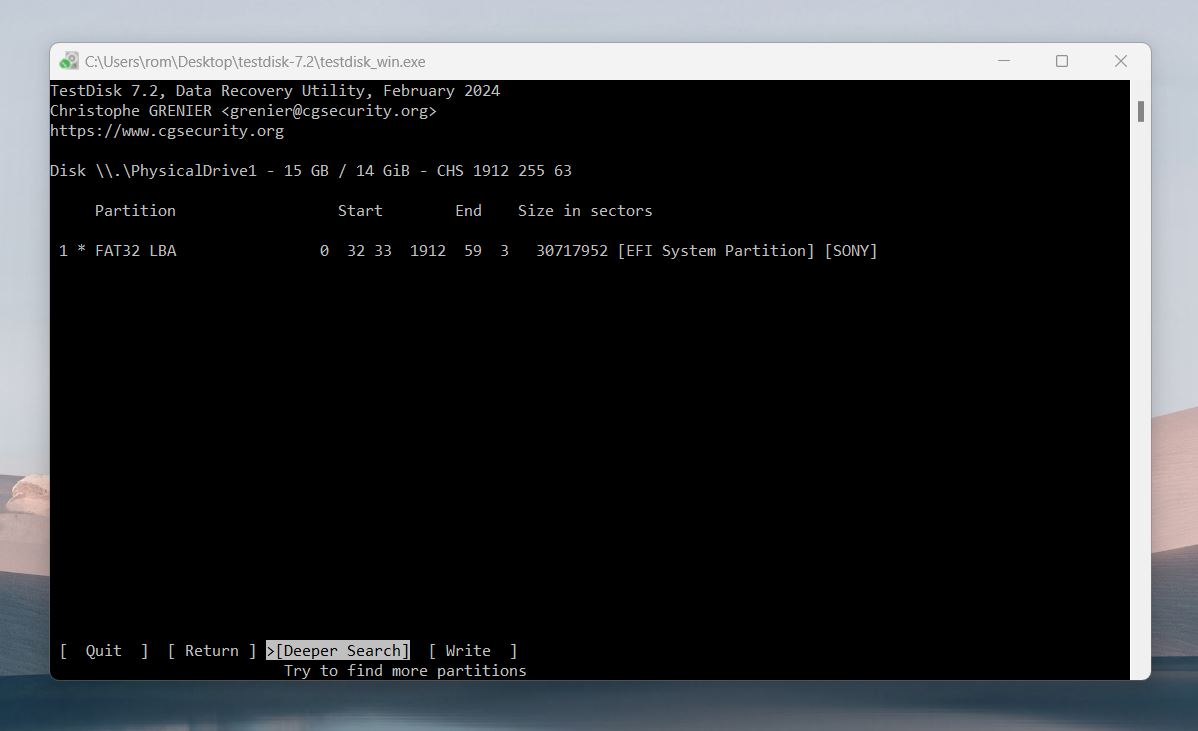
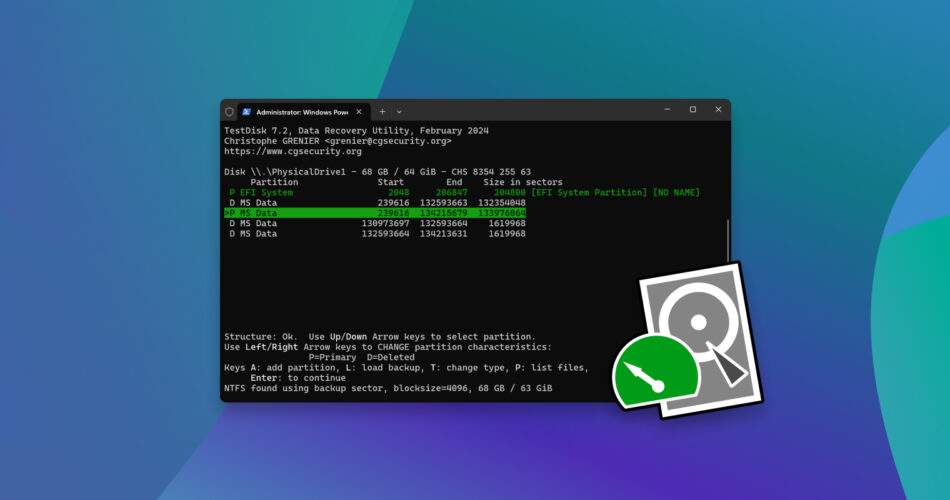
- TestDisk took around two minutes to completely scan our 16GB USB drive, which is fairly quick. Once the search is complete, TestDisk lists out the partitions that you can recover and you will be asked to make the selection.
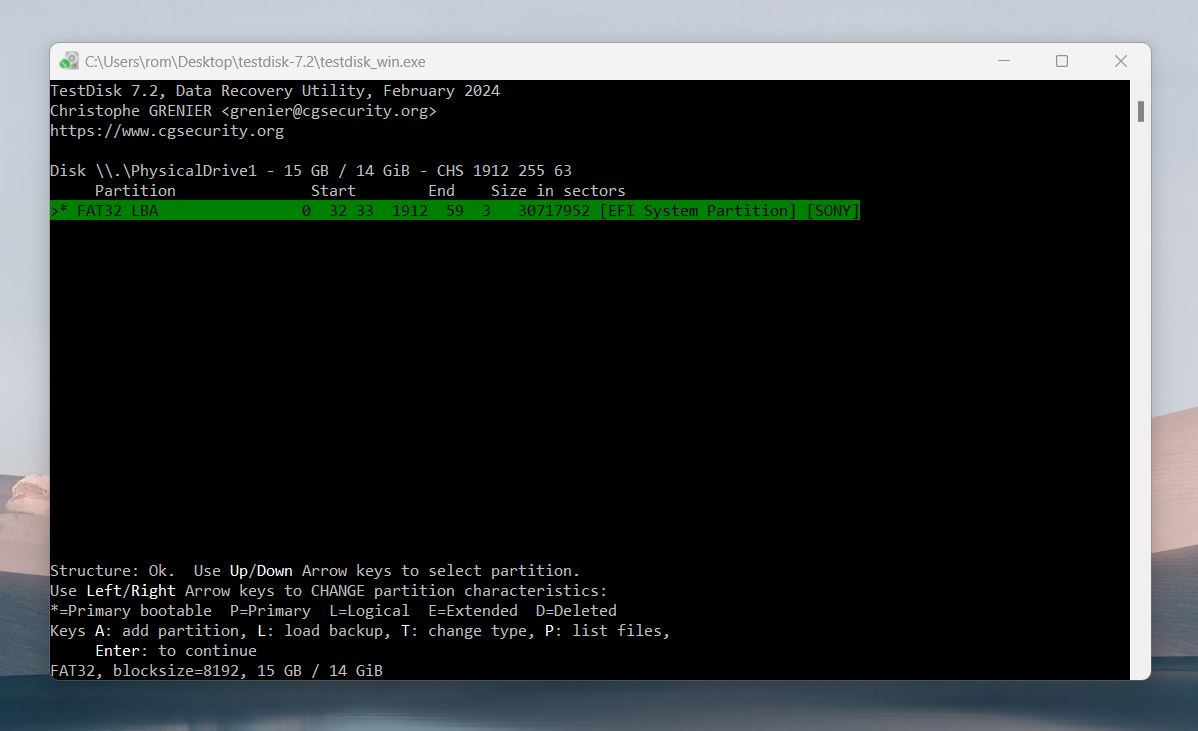
- Partitions marked as D(eleted) won’t be recovered unless their status is changed. Use the arrow keys to highlight the partitions you want to recover and check their size. You can press p to view their file contents to confirm they’re the ones you need. To recover a partition, change its status from D(eleted) to either *(bootable), P(rimary), or L(ogical). After marking the partitions, move to the next screen and choose the Write option to save the changes to the partition table. Press Enter, confirm with y, and select OK to finalize the update.
That’s how an average TestDisk recovery session looks. It’s not the simplest of processes, as you can see, but if you have basic command-line skills and follow guides carefully, it can be a very useful tool.
How Effective Is TestDisk?
The answer to that depends on your recovery goal. Based on our experience, TestDisk is very effective for partition table fixes, deleted partition recovery, and rebuilding/repairing NTFS, FAT12, FAT16, and FAT32 boot sectors. If your goal is to address structural issues, TestDisk performs exceptionally well.
That said, if you need to recover specific deleted files, TestDisk isn’t your best option. Even though the official site mentions it can undelete files from FAT, exFAT, NTFS, and ext2 file systems, this isn’t what TestDisk is primarily designed for. Even its developer doesn’t position it as a tool for recovering individual files. It’s better suited for broader fixes than restoring specific data.
Here’s a simple table to outline scenarios where TestDisk is effective and the tasks it can handle for different file systems:
Scenario |
Supported File Systems |
Can TestDisk Handle It? |
Notes |
Recover Lost Partitions |
FAT12/16/32, exFAT, NTFS, ext2, ext3, ext4, HFS+ |
Yes |
TestDisk excels at locating and recovering deleted or lost partitions. |
Repair Partition Table |
FAT12/16/32, exFAT, NTFS, ext2, ext3, ext4 |
Yes |
TestDisk can rebuild partition tables to restore access to drives. |
Restore Boot Sector |
FAT12/16/32, exFAT, NTFS, ext2/ext3/ext4 |
Yes |
Copies backup boot sectors or rebuilds new ones for damaged systems. |
Fix File Table |
NTFS, ext2/ext3/ext4 |
Yes (NTFS only) / Use fsck for ext2/3/4 |
TestDisk can repair NTFS file tables but relies on external tools like fsck for others. |
Undelete Files |
FAT12/16/32, exFAT, NTFS, ext2 |
Limited |
While it can undelete files, it’s not the best tool for specific file recovery tasks. |
Rebuild ext2/3/4 Superblock |
ext2, ext3, ext4 |
Yes |
Identifies and restores backup superblocks for Linux file systems. |
Repair HFS+ Drives |
HFS, HFS+, HFSX |
Yes |
Recovers partitions but recommends fsck for file table repairs. |
By the way, TestDisk available on Live Rescue CDs. A Live Rescue CD is a bootable disc or USB image loaded with tools designed to troubleshoot, repair, and recover systems. These environments run independently of the OS installed on the machine, which makes them invaluable when a system won’t boot. TestDisk is often included in many of these rescue CDs, you can find a complete list of supported Live Rescue CDs on its official page.
User Feedback
Since TestDisk is not hidden behind a paywall of any sort, a lot of people have first-hand access to it. So naturally, the software has gained a lot of user reviews that help the developers to fine-tune its features. If you refer to online forum reviews, you will find many satisfied users who were able to recover lost partitions and deleted data by using TestDisk.
That being said, the software does have its fair share of flaws that are pointed out by many users as well. First and foremost, many people found the command-line interface of TestDisk discouraging. Even though data recovery is fairly straightforward, many users stated that the interface barricaded them from using other features.
Here are a few clippings from the web so that you can get a fair idea of what to expect from this data recovery tool.
As a free partition and file recovery solution, TestDisk and PhotoRec does everything a domestic user might expect. They’re as suitable for standard PC workstations as they are for laptops. (Sofia, Techradar)
Despite having to refer to the TestDisk Guide webpage numerous times, I was eventually able to navigate through the command-line structure to perform the partition recovery. It was certainly not an enjoyable experience and I suspect that many users would have given up and searched for another alternative to fix their lost partition. (Odysseas, Clever Files)
TestDisk is a simple but powerful application to analyze and recover disk partitions. What I like most is that it has an integrated tool called “PhotoRec” that is used to recover lost files in similar memory. I also like that it is compatible with different types of memory, especially optical drives. The Linux version could not be exploited by the members of my team because when it opens it freezes and closes automatically. (Lisandro G, G2)
Our Verdict on TestDisk
TestDisk is a great tool for what it’s designed to do—recover lost partitions, repair boot sectors, and fix partition tables. It’s free, open-source, and delivers features that often rival expensive recovery software. For users who need to restore access to drives with structural issues, TestDisk is a great option.
That said, it’s not for everyone. The text-based interface will repel most people who come across it, especially those who aren’t comfortable with command-line tools.
Overall, TestDisk is an excellent tool for advanced users or anyone willing to take the time to follow detailed guides. It’s not flashy, but it’s reliable for partition recovery and drive repair tasks. For a free tool, it’s hard to beat.
Pros:
- Highly effective for partition recovery and boot sector repairs.
- Completely free.
- Open source.
- Portable.
- Lightweight.
- Supports raw and dismounted disks without a file system.
- Recovers lost file systems.
- Multi-platform.
- Included in popular bootable recovery tools.
- Handles a wide range of file systems, including FAT, NTFS, ext2, and more.
Cons:
- Text-based interface.
- Requires technical knowledge.
- Deep scans can take hours on large drives.
- Lacks automation.
- Not beginner-friendly.
- Easy to misselect the wrong drive during recovery.
- Not specialized for recovering individual files.
FAQ
Is TestDisk free?
Yes, TestDisk is completely free to use. As mentioned earlier, it is an open-source freeware that is licensed and distributed under GNU (General Public License), which means you can download it, use it, and even modify its code without paying a dime. There are no trial versions, hidden fees, or subscriptions—just full access to a powerful recovery tool.
How to run TestDisk?
Once you have downloaded TestDisk from the official website, set a destination and extract the downloaded folder there. Now, open the extracted folder and navigate the file testdisk_win. Run it to launch TestDisk on your Windows PC.
How to use TestDisk?
Once you’ve launched TestDisk, navigate through the Terminal screen using arrow keys. You can select the storage devices you want to scan and the partitions you want to analyze, and press Enter to confirm the selection. Then all you have to do is proceed with the upcoming prompts and select the files and the destination folder where the files will be restored and TestDisk will do the rest.
How long does TestDisk take to scan an HDD?
The time taken to scan an HDD depends on the type of scan you’re running on your storage. If you perform a Quick Scan, TestDisk will not take more than a few minutes to analyze your HDD. However, a Deep Scan can take as long as a couple of hours to finish. In our test, It tool TestDisk about fifteen minutes to scan a 512GB SSD and around forty minutes to scan a 1TB HDD.
How to use TestDisk to recover a partition?
Run TestDisk and create a log file when prompted. Select the drive containing the lost partition, choose the partition table type (TestDisk often auto-detects this), and run Analyze. Start with a Quick Search and proceed to Deeper Search if needed. Highlight the lost partition, change its status to *(bootable) or P(rimary), and select Write to update the partition table. Exit TestDisk, and your partition should now be accessible.
How to use TestDisk to repair a raw partition?
You can use TestDisk to repair a raw partition by scanning your drive and available partitions. Once the software gives you a list of partitions available for analysis, you can perform a Quick Search or a Deeper Search for an overall scan of your drive. The damaged partitions will be displayed in green. Now, choose a partition you want to repair and select Write and press Enter. Confirm by pressing Y and in a few moments, your damaged RAW partition will be recovered.
Is TestDisk portable?
Yes, both TestDisk and its satellite software PhotoRec are portable and you don’t need to go through an installer to run. You can simply download the folder and extract its contents at the desired location to get started with the recovery process.
This article was written by Ojash Yadav, a Contributing Writer at Handy Recovery Advisor. It was recently updated by Roman Demian. It was also verified for technical accuracy by Andrey Vasilyev, our editorial advisor.
Curious about our content creation process? Take a look at our Editor Guidelines.