Your NTFS-formatted hard drive can encounter data loss in any number of ways. Files, folders, and entire partitions can be accidentally deleted, corrupted, or lost due to improper formatting. Or, you may lose access to your data because the NTFS file system has become damaged.
Even after your files have become lost or deleted, there are still some ways you can get them back. But, you must be careful in how you approach it, as your data is in a state where it could be lost permanently if you make a mistake. We’ve outlined some proven methods for recovering your data after it has been deleted.
To avoid losing your data forever, make sure you stop using the drive until you’re ready to perform recovery. It’s also highly recommended that you make a backup of the drive to preserve the data in its current state in case anything goes wrong.
Reasons Behind NTFS File Loss
New Technology File System (NTFS) is a file system developed by Microsoft in 1993. It was developed as a replacement for the File Allocation Table (FAT) and High Performance File System (HPFS) file systems and included better performance, reliability, and access to more disk space.
The NTFS file system as we know it wasn’t always so reliable. Here’s a quick breakdown of what each version introduced:
- 1.0 – Introduced with Windows NT 3.1, released in 1993.
- 1.1 – Introduced with Windows NT 3.51, released in 1995. This version includes support for compressed files, named streams and access control lists (permissions).
- 1.2 – Introduced with Windows NT 4.0, released in 1996. This version includes security descriptors.
- 3.0 – Introduced with Windows 2000, released in 2000. This version brought with it a whole list of new features, including disk quotas, filesystem encryption, and sparse files.
- 3.1 – Introduced with Windows XP, released in 2001, and currently the most up-to-date version. The Master File Table (MFT) was updated to improve redundancy for MFT records.
There are a number of reasons why the files on your NTFS-formatted drive can become lost, deleted, or otherwise inaccessible. Let’s look at the common reasons:
- 🤯 User error – More often than not, your files may be deleted simply by the accidental touch of a button. User error includes accidental deletion, unintentional formatting, or improper adjustments made to volumes.
- ❗ Corruption – Corruption occurs when the write process for a file is interrupted before it can complete. When a file becomes corrupted, it is no longer whole and becomes inaccessible. This can happen if you don’t eject the storage device safely before removal.
- 🦠 Virus attack – Viruses can damage your computer in many ways. One such way is targeting the file system and either deleting the data, corrupting it, or holding it for ransom.
- 💾 Failing hardware – All hardware has a lifespan. This is especially true for hard drives seeing as they contain moving parts. However, this is also true for solid state drives that use NAND flash memory. At the end of your storage device’s lifespan, you may notice erratic performance like disappearing files or slow read/write speeds.
- 👨💻 Software bugs – Bugs within the NTFS file system can be exploited by hackers who want to damage your system. One bug involves trying to access a directory that includes the $i30 string. Attempting to access it can corrupt your entire partition, leading to all your files becoming inaccessible.
Any one of the above causes could be why your files have become lost. Now that you’re aware of what may have caused it, let’s discuss the solutions.
How to Recover Deleted Data From NTFS Drives
We’re going to look at a few ways you can perform NTFS file recovery. While some may not work for you, it’s important that you try each step before trying the next.
Method 1: Recover Using Data Recovery Software
When you delete your data, it isn’t gone forever. Instead, the space it used on your drive is marked as available so new data can overwrite it. NTFS data recovery is made possible using data recovery software if you haven’t made backups of your data. It provides you with the ability to recover lost, deleted, or formatted data, even if it has been supposedly permanently deleted.
There are so many options out there. Below we’re going to cover two different applications you can use.
Option A: Disk Drill
Disk Drill has proven time and time again to be a reliable NTFS data recovery software tool for recovering data in a multitude of data loss scenarios. Its user interface is very intuitive and its all-in-one scanner yields great results. Should your NTFS file system be corrupted or damaged, it can recover files using the signature alone, with support for over 370 file formats. For drives in an unstable state, you can create a byte-to-byte backup within the software and scan that instead to preserve the original data.
![]()
Follow these steps to scan your NTFS hard drive using Disk Drill:
- Download, install, and open Disk Drill.
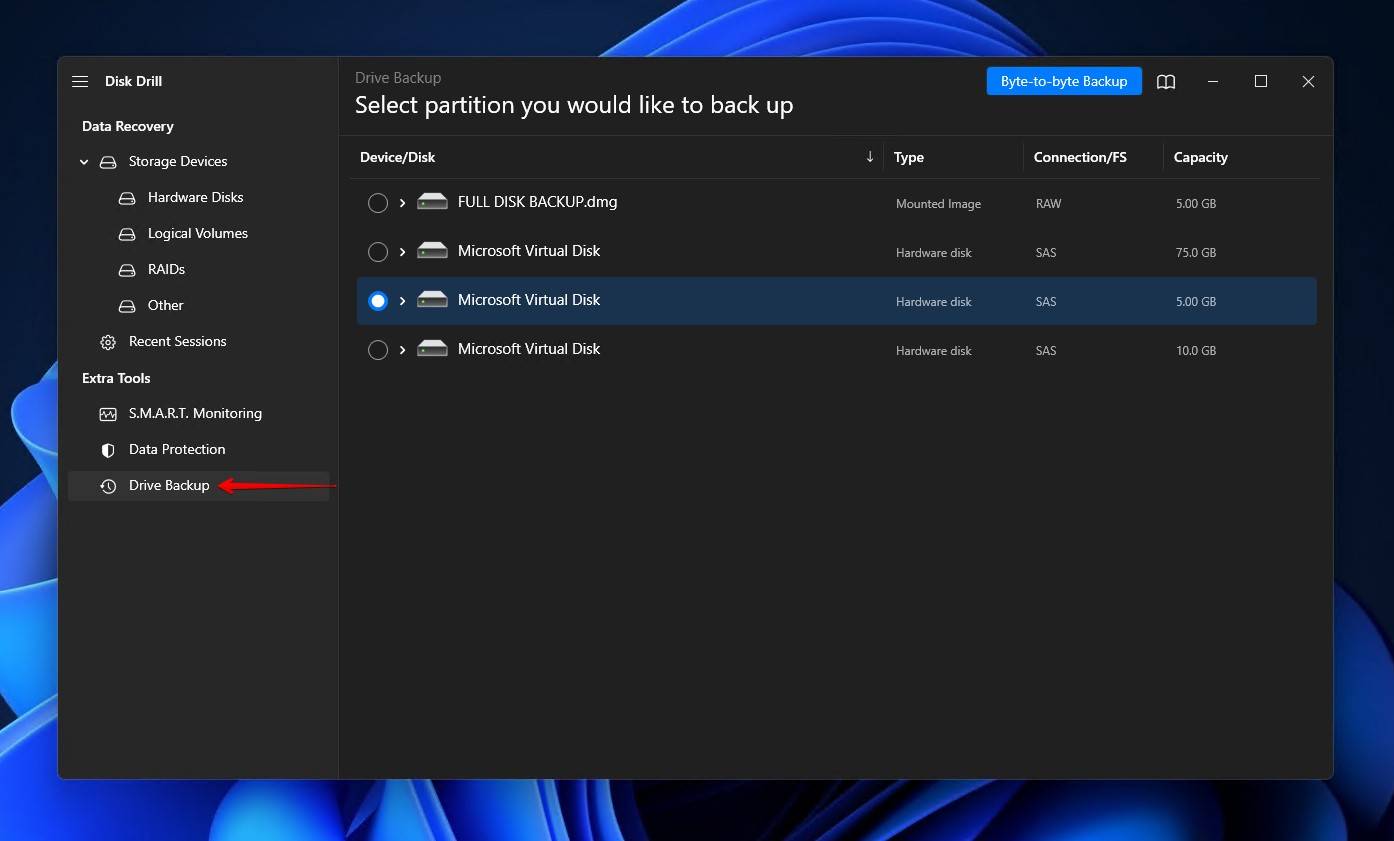
- At this point, you can create a byte-to-byte backup if necessary using the Drive Backup feature. Bear in mind that creating a backup is free, but you will need to upgrade to Disk Drill PRO if you’re recovering more than 500 MB of data.
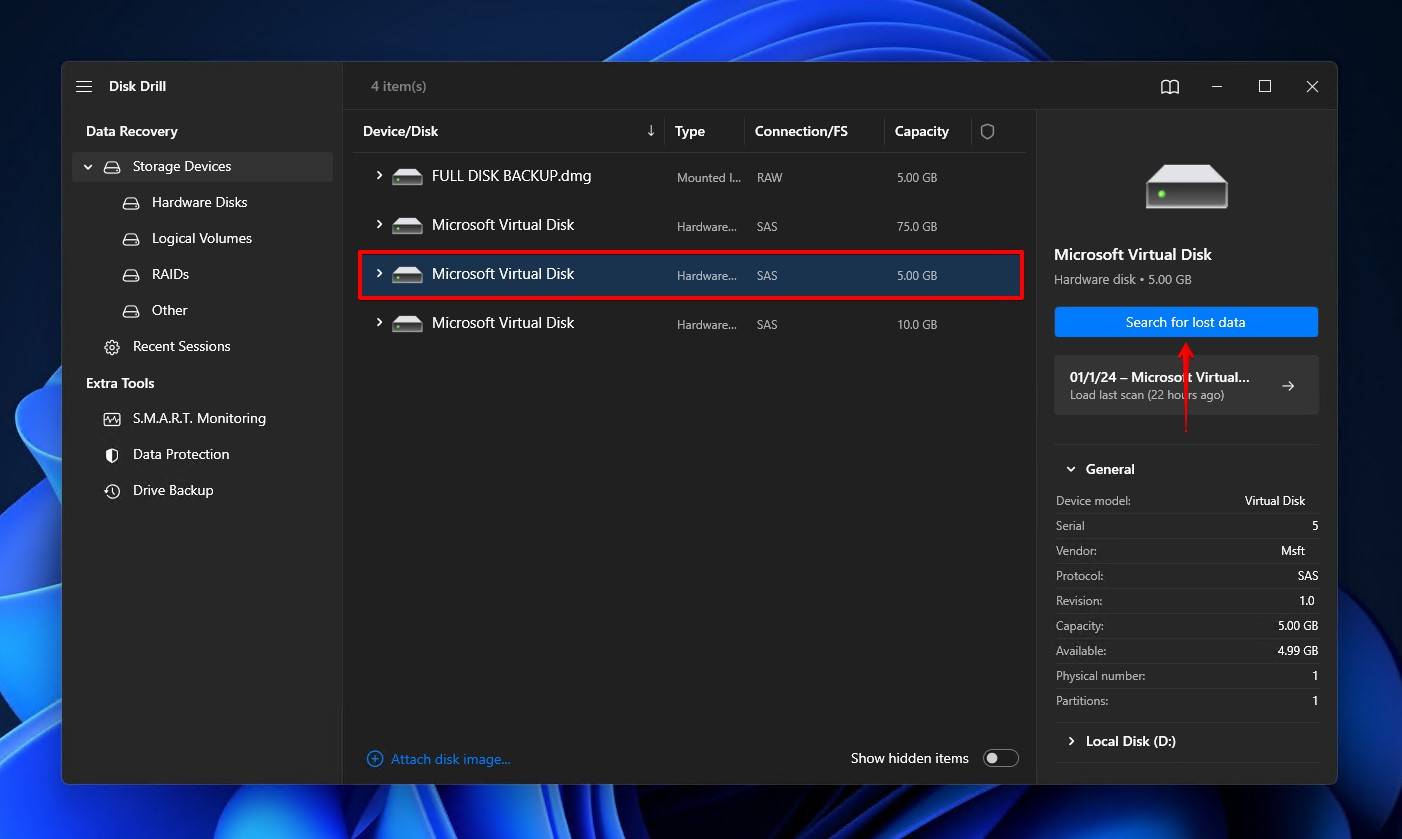
- Select the drive, volume, or image you want to scan. When ready, click Search for lost data.
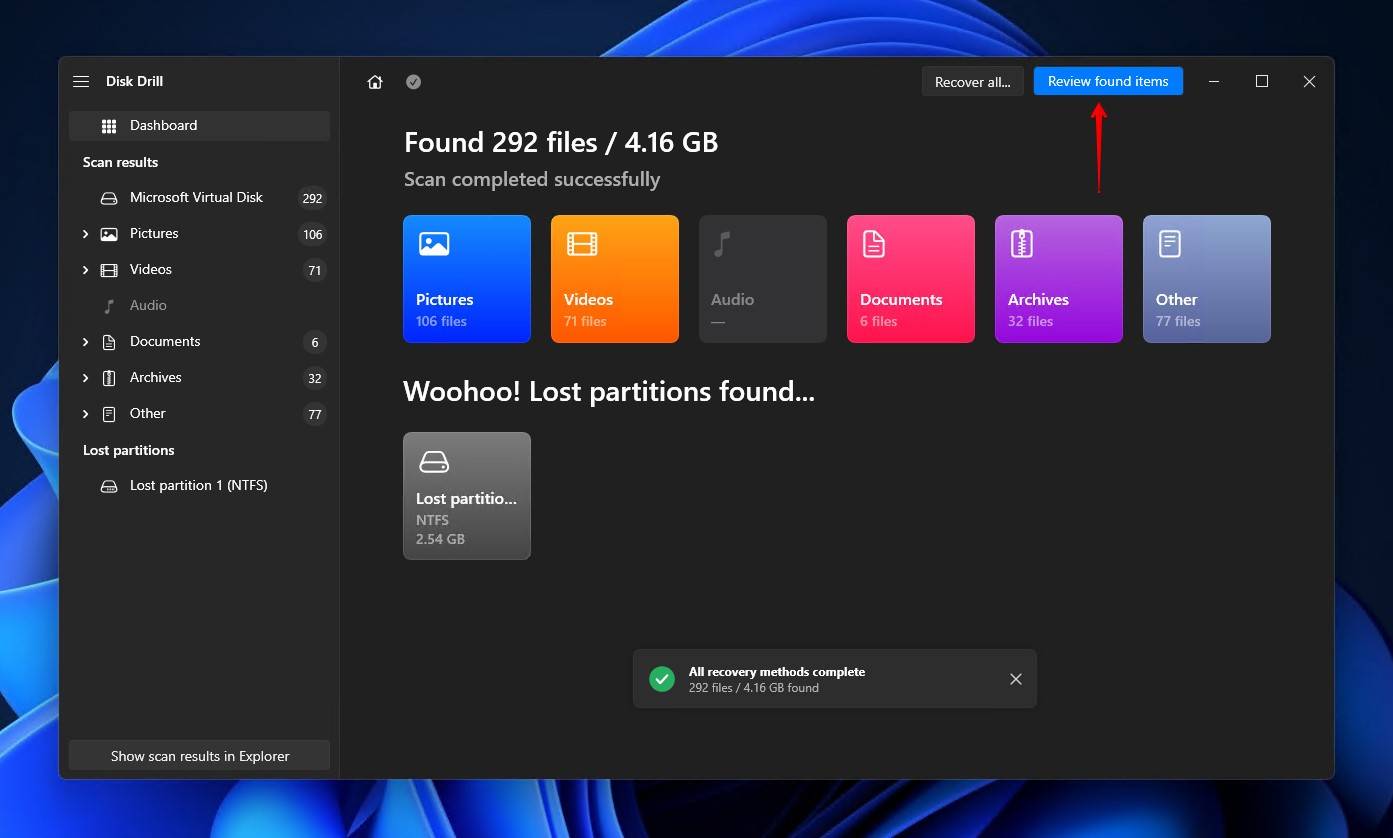
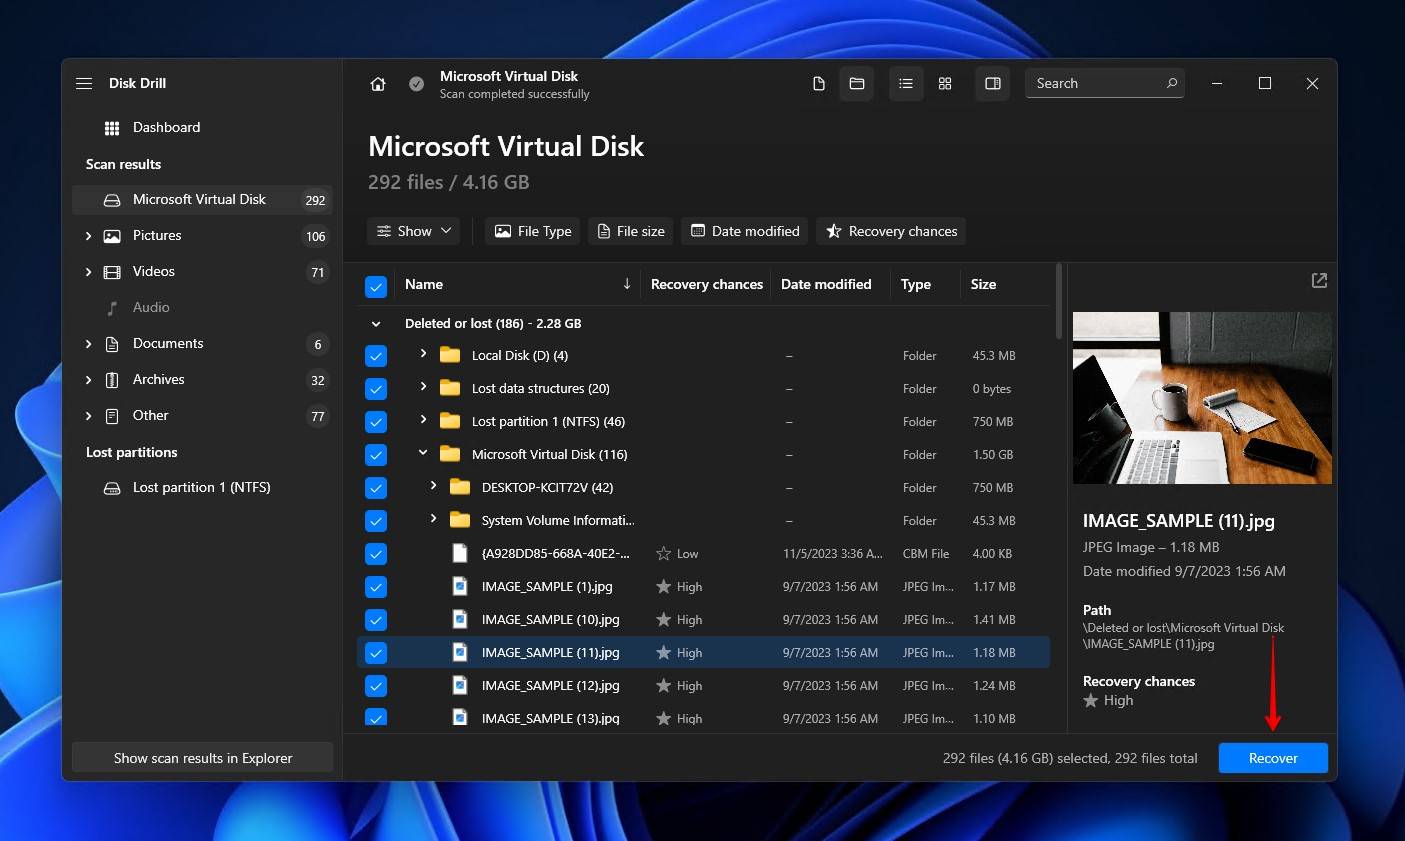
- Click Review found items when the scan has finished. If you’re looking for a specific file type, click one of the colored file format icons. Or, click Recover all to recover everything straight away.
- Use the Deleted or lost, Existing, and Reconstructeddropdown menus to mark what files you want to recover. Mark files by ticking their checkbox. Use the preview function and Recovery chances column to make sure your data is intact. When ready, click Recover.
👀
Find your files faster by using the search box at the top right of the Disk Drill window. You can search using keywords or file extensions (for example, *.jpg to display all JPG files).
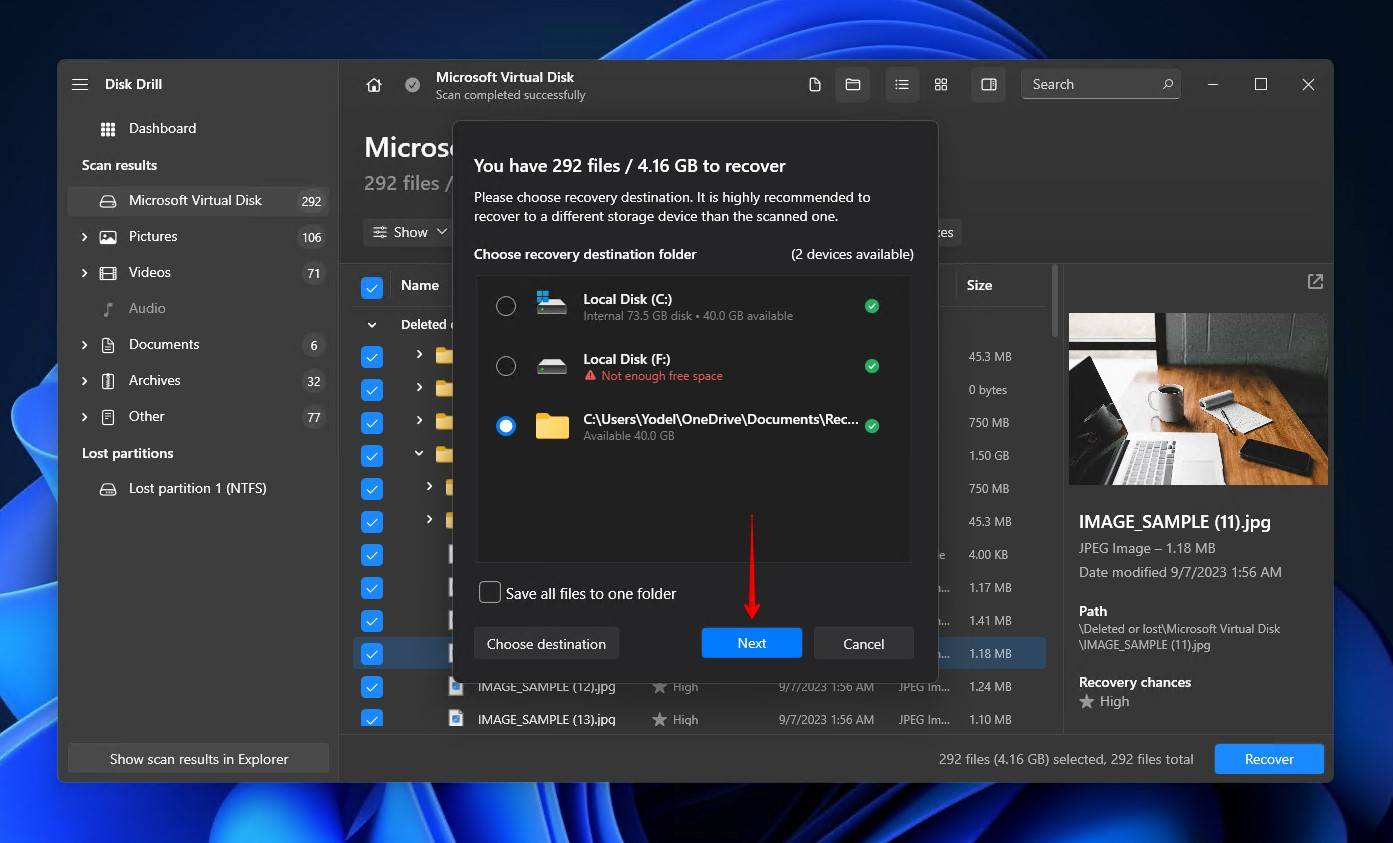
- Select where you want to store the recovered files. Make sure you specify a location on a separate storage device to avoid overwriting your data. When you’re ready, click Next.
Option B: Windows File Recovery
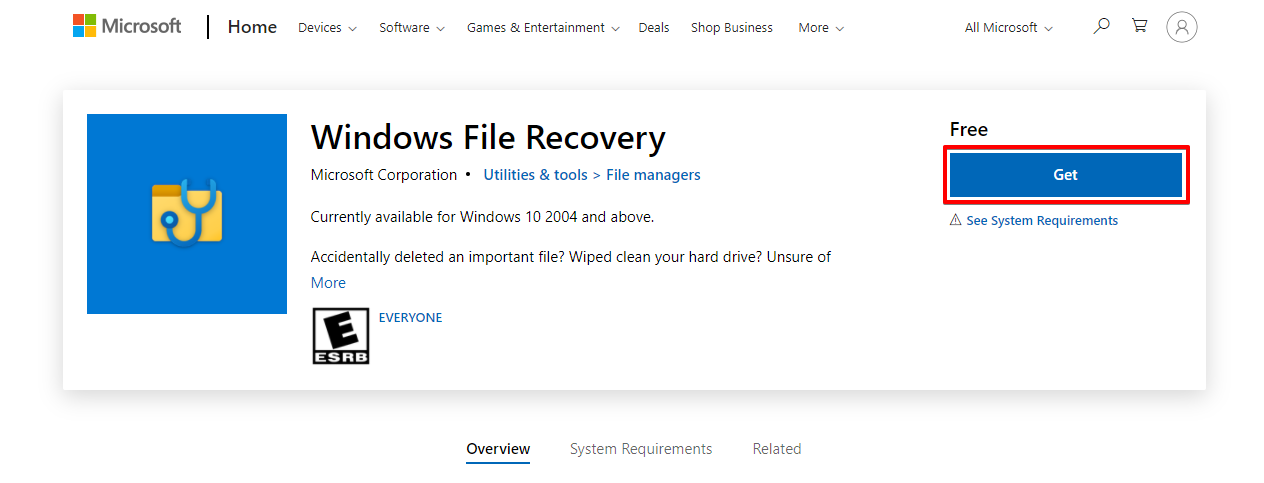
Windows File Recovery is a free NTFS file recovery tool developed by Microsoft, which was released in early 2020. It uses a command-line interface instead of a graphical user interface. It’s not as feature-rich as other alternatives. In fact, it’s quite basic. But, it’s free and includes a wide array of switches that allow you to customize your recovery.
![]()
You cannot recover data to the same partition it was recovered from with Windows File Recovery. Instead, you must recover your data to another partition or a separate storage device like a USB or external hard drive.
- Sign-in to your Microsoft account and download the Windows File Recovery tool.
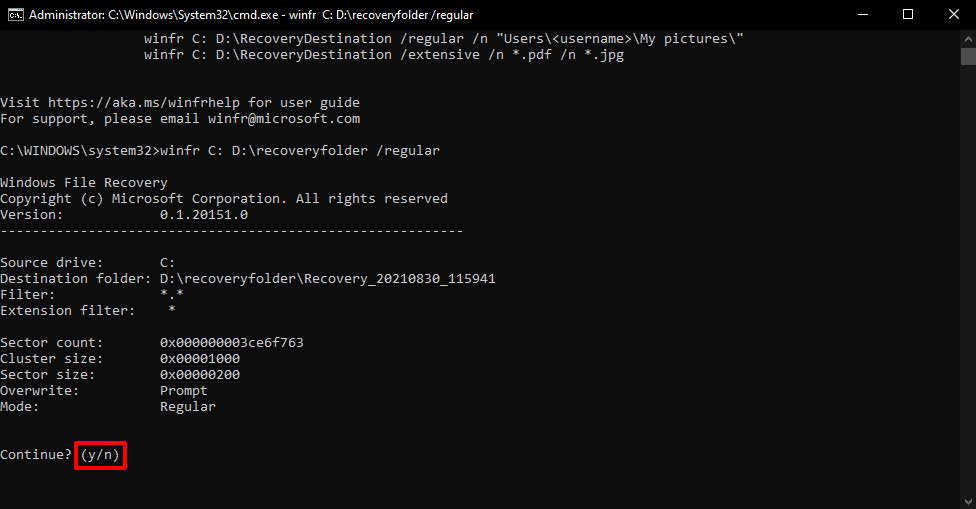
- There are many different switches included. Let’s just do a basic scan of the NTFS drive. Type winfr C: D:\recoveryfolder /regular. Replace C: with the drive letter you’re recovering from and D:\recoveryfolder with your recovery destination. Press Enter.
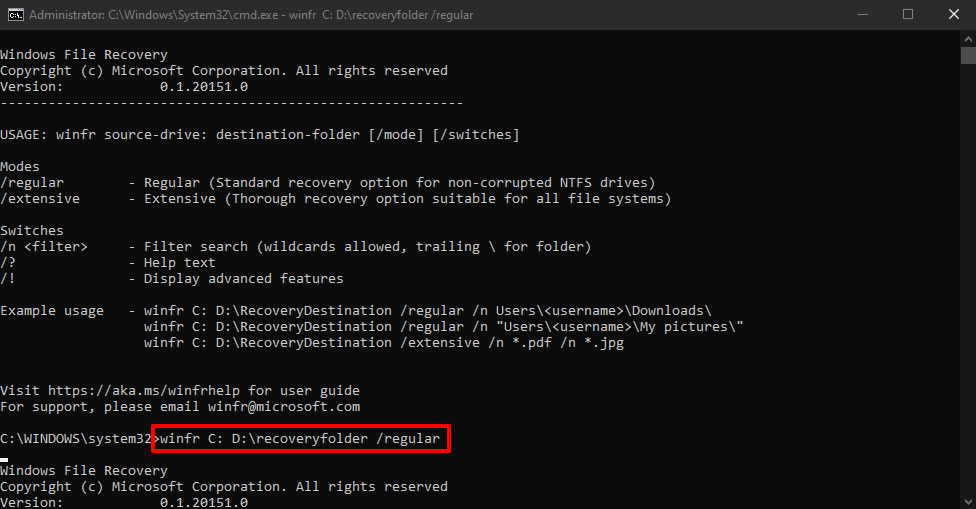
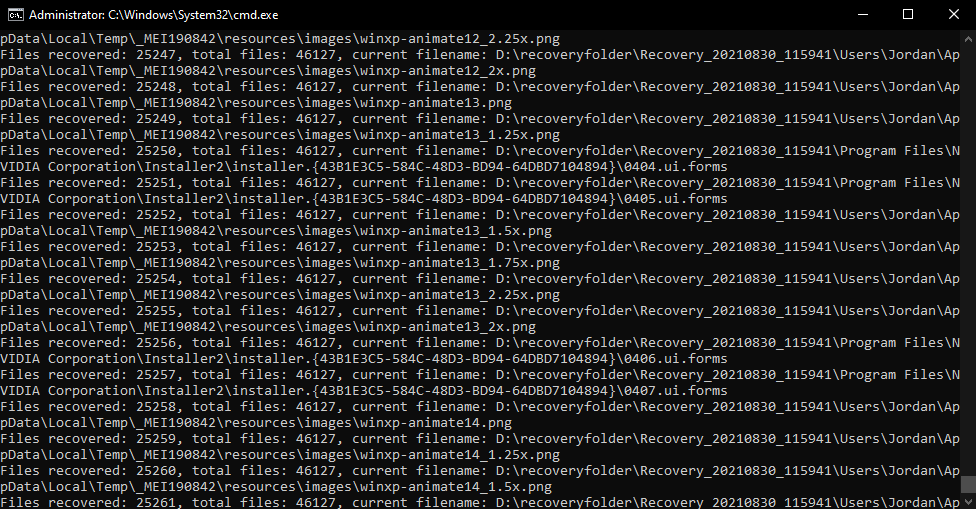
- Press Y to continue. The scan will begin.
- Once finished, you can find your files in the specified recovery folder.
Option C: TestDisk
TestDisk is a free open-source data recovery utility. Like Windows File Recovery, it uses a Command Line Interface (CLI). However, it differs from the previous solutions in that it primarily focuses on recovering lost partitions (along with the data they contain). It can do so by fixing the underlying damage that has caused the NTFS partition to disappear and rebuilding the partition table.
![]()
We’ll guide you through how to restore a lost NTFS partition using TestDisk:
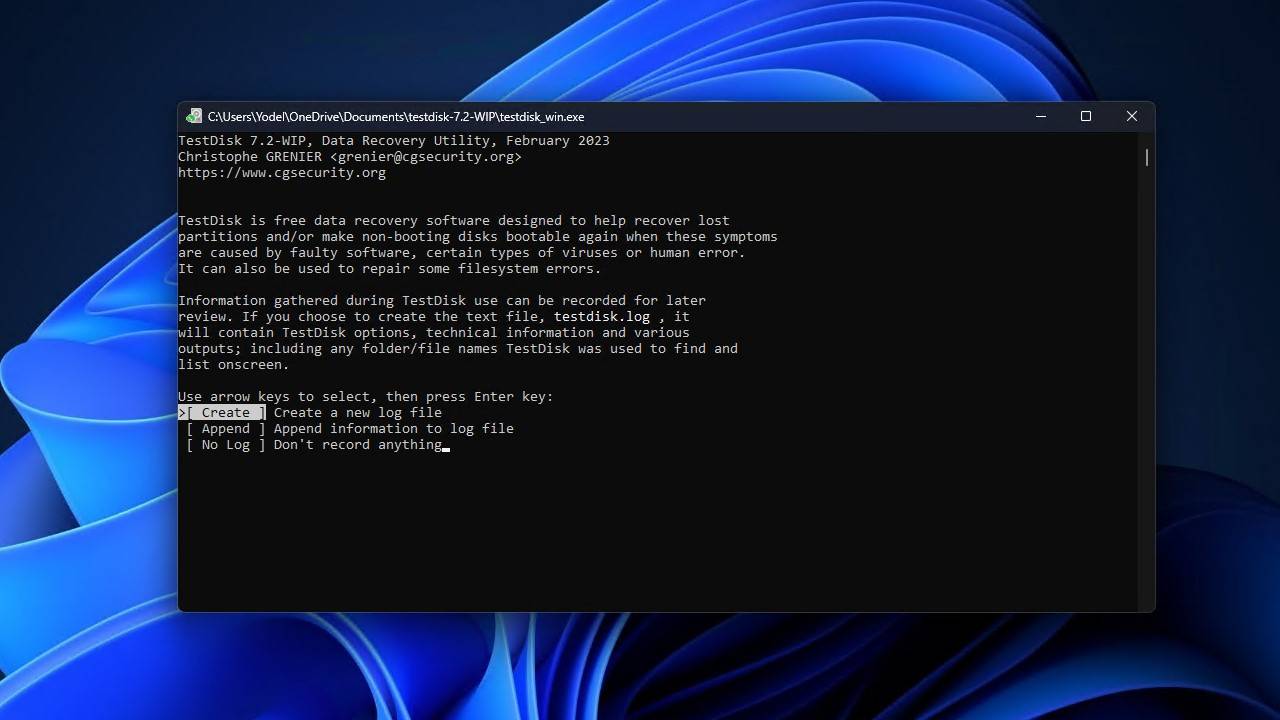
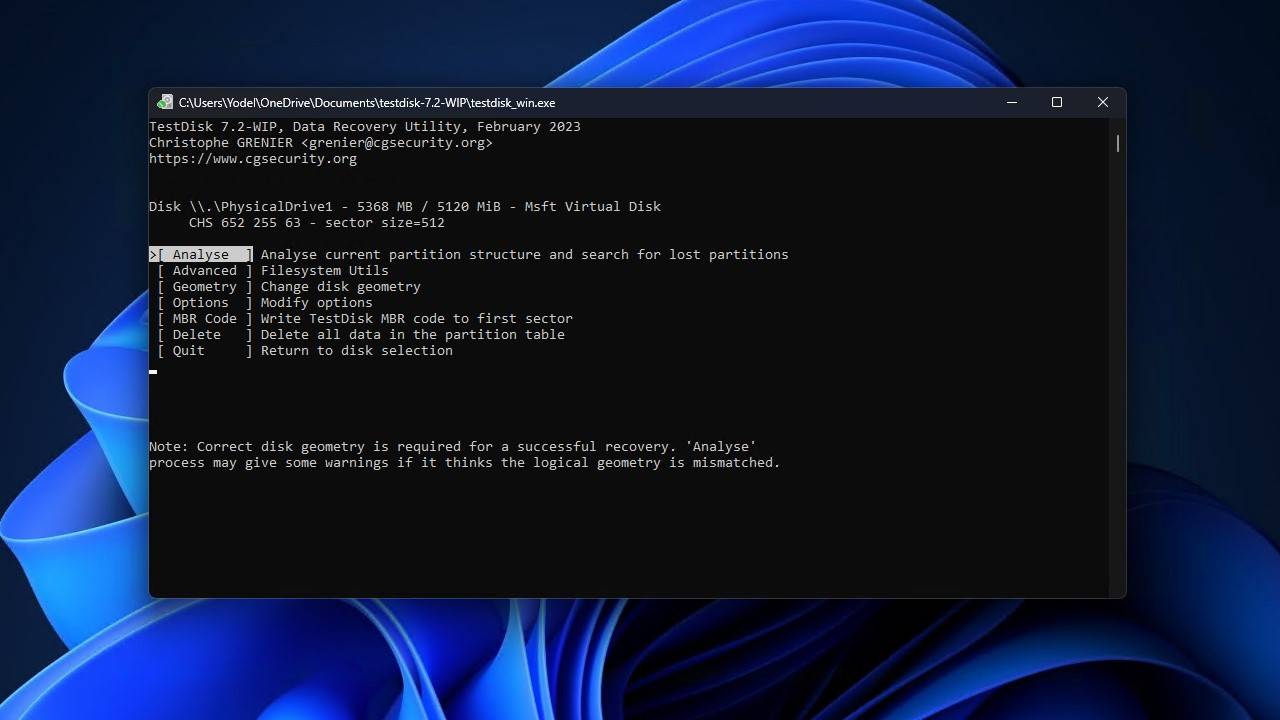
- Download and extract TestDisk. Launch testdisk_win.
- Press Enter to create a log file.
- Highlight the disk that you want to scan using the up and down arrow keys, then press Enter.

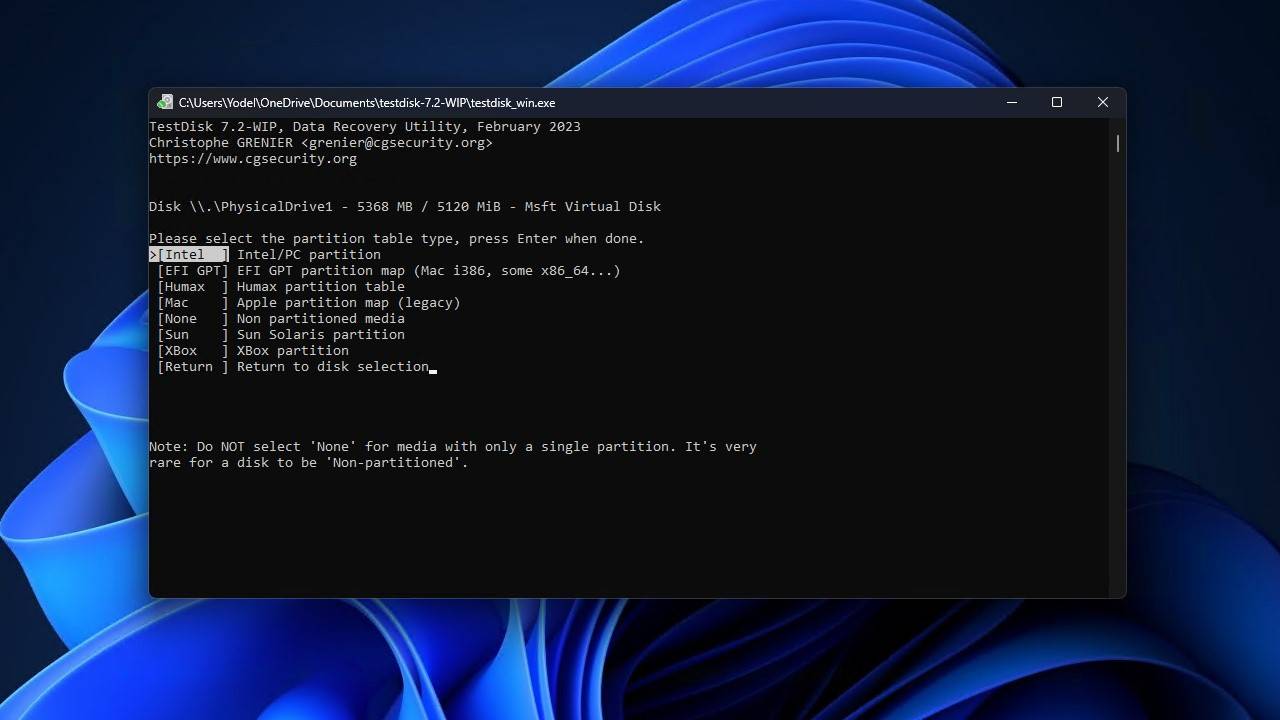
- Choose the partition table type the disk uses. TestDisk will do its best to automatically select the appropriate one. When ready, press Enter.
- Press Enter to begin searching for lost partitions.
- Press Enter again to begin the quick search.
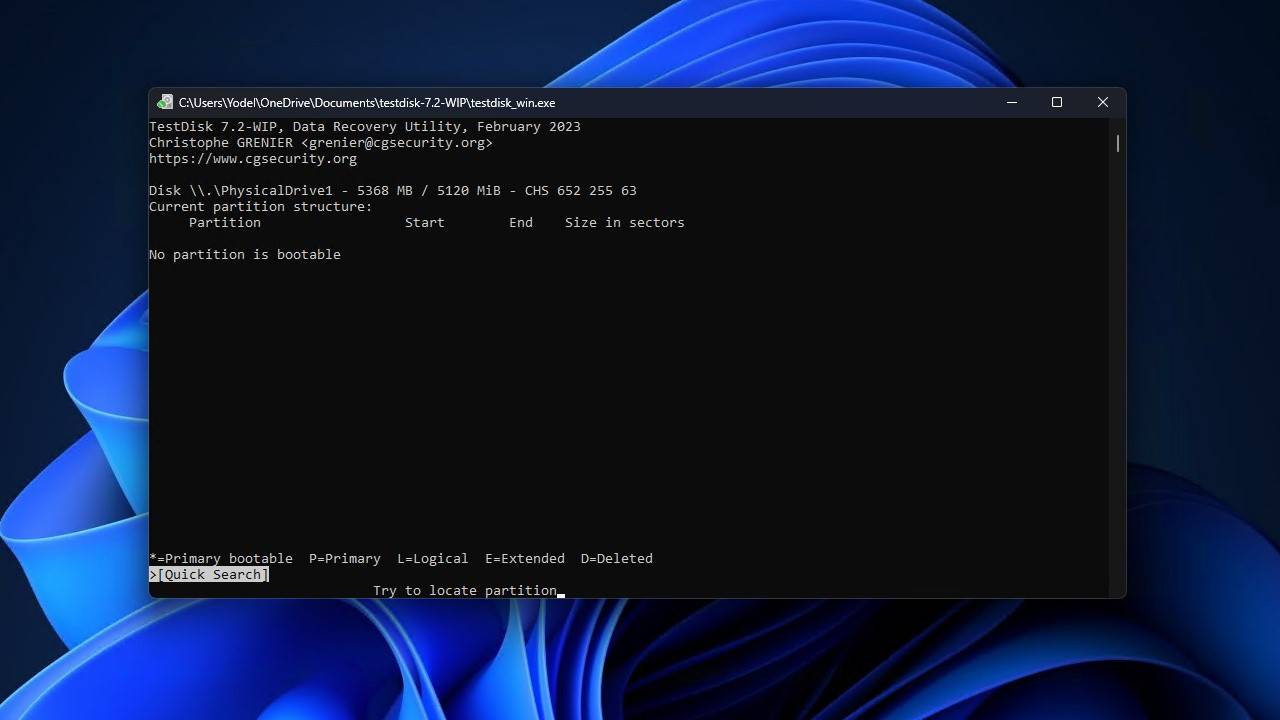
- Press Enter.
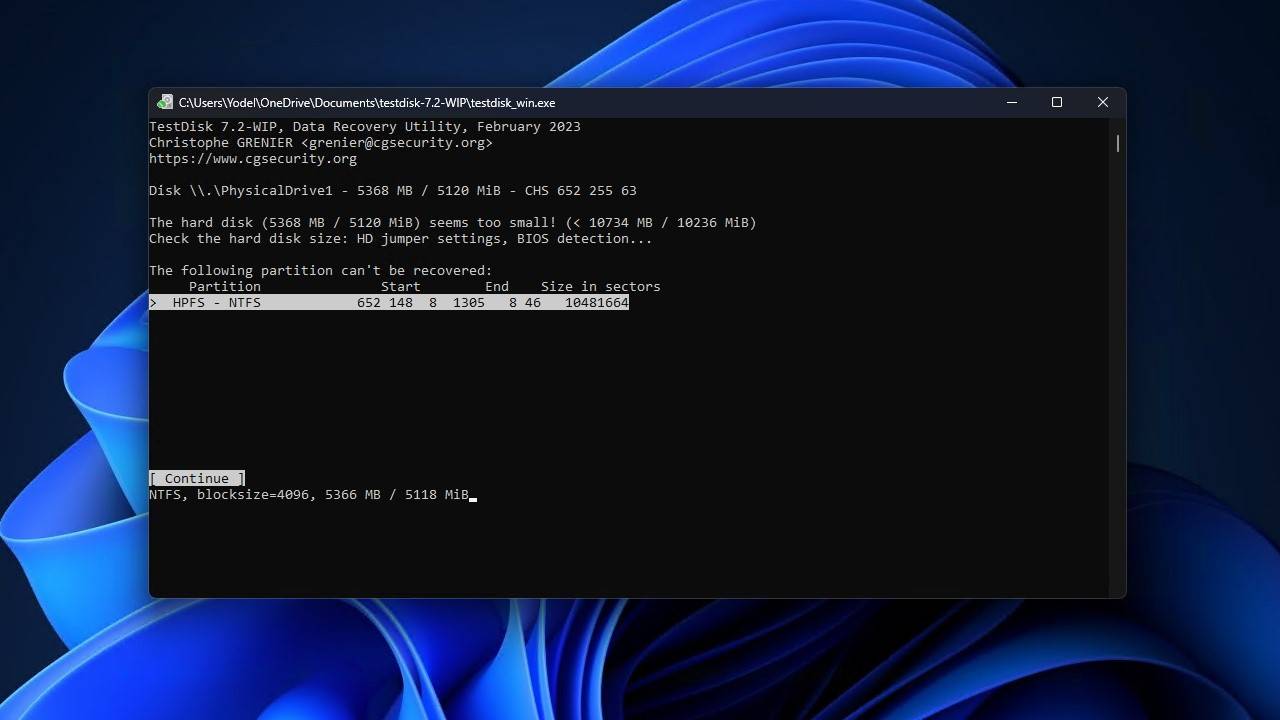
- Highlight the missing partition. If nothing is available, try doing a deeper search. When ready, press Enter.
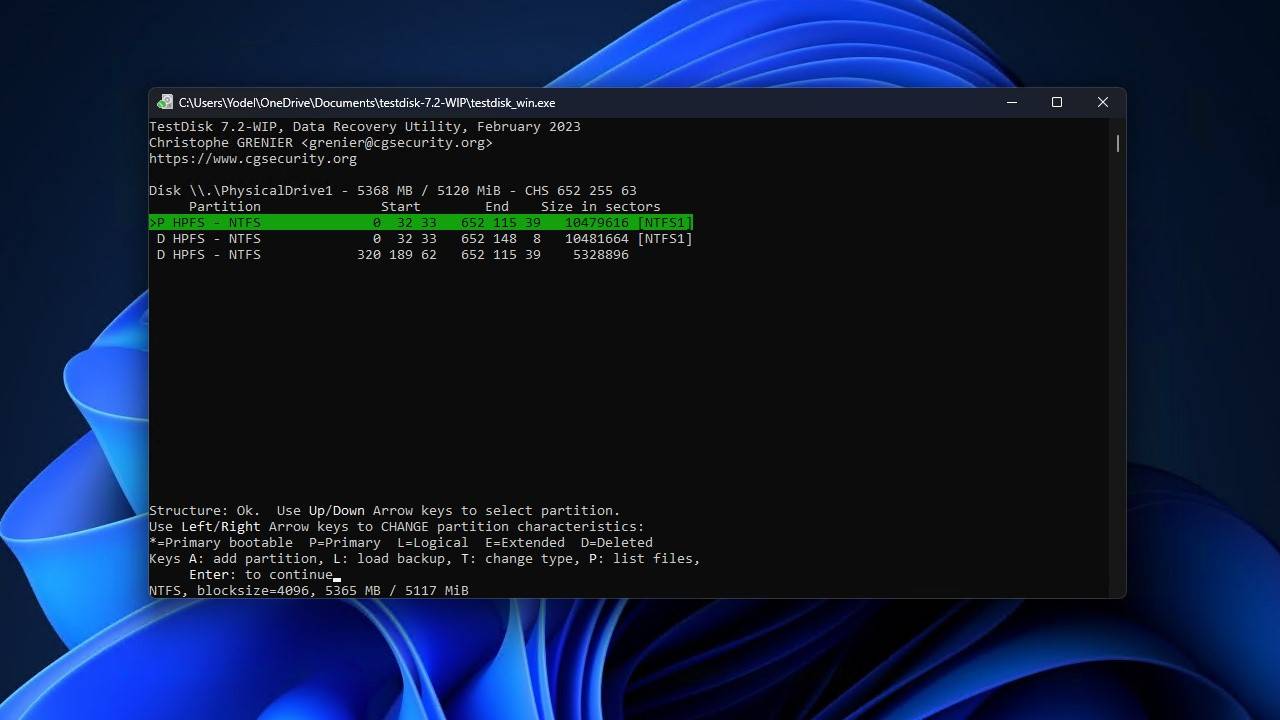
- Highlight the Write option, then press Enter.
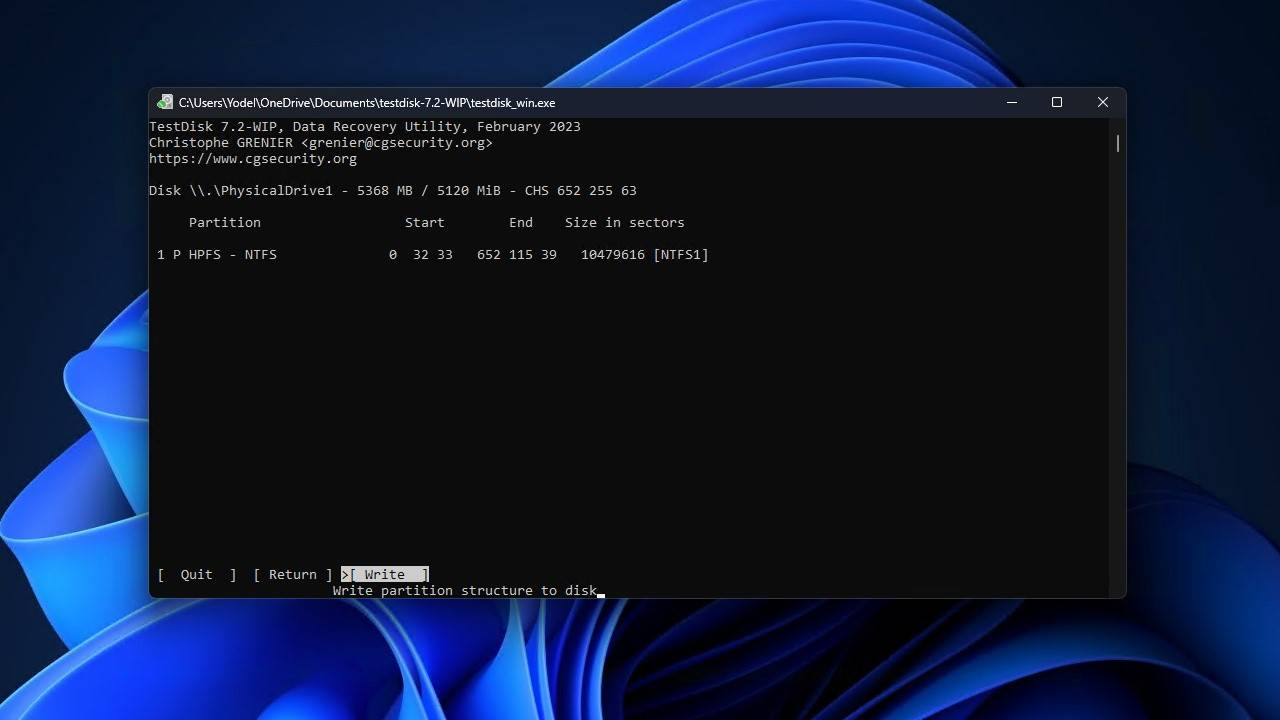
- Press Y to confirm.
Method 2: Restore From Backup and Restore (Windows 7)
Our second method to recover deleted files from NTFS is using Backup and Restore. Backup and Restore was introduced as a backup solution for Windows 7, but it’s also present and usable in later versions of Windows (including Windows 10 and 11). If you’ve configured Backup and Restore to run at regular intervals, there’s a good chance you can restore the file from here.
This method will only work if you previously set up Backup and Restore (Windows 7) to back up the files you need to restore. If this was not done, move onto restoring your files using File History.
- Press CTRL + S and search Control Panel. Open it.
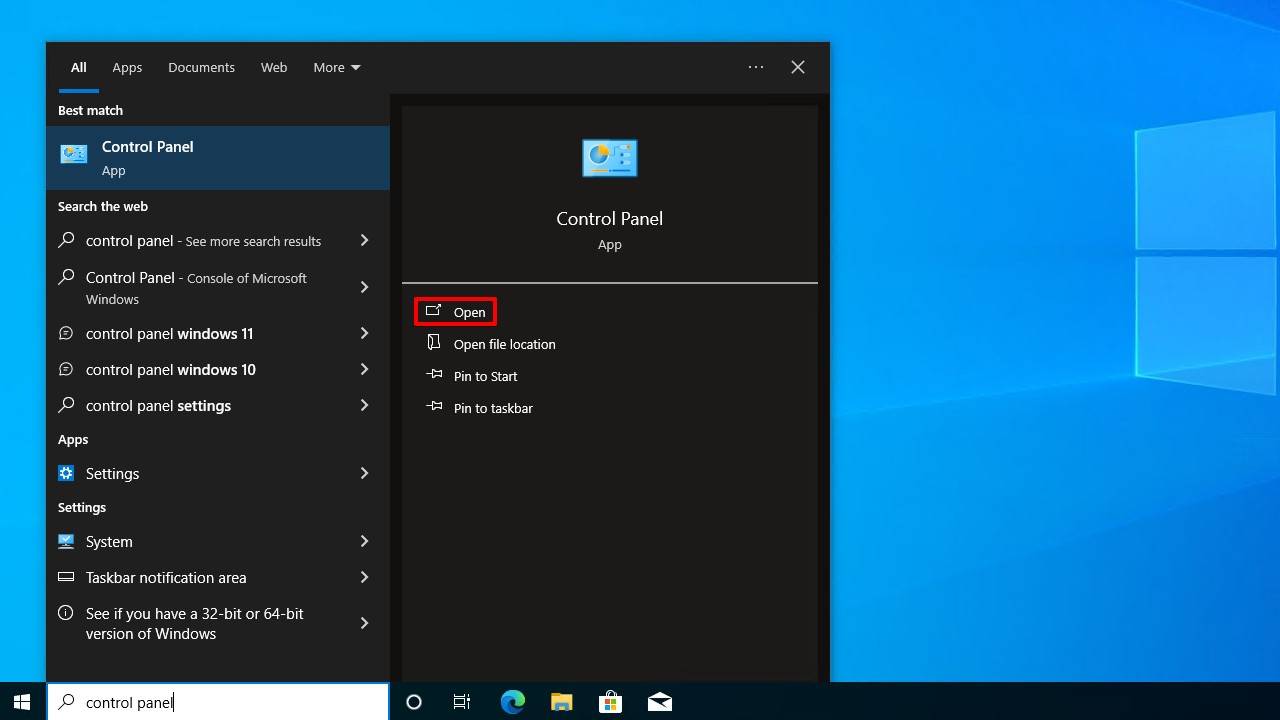
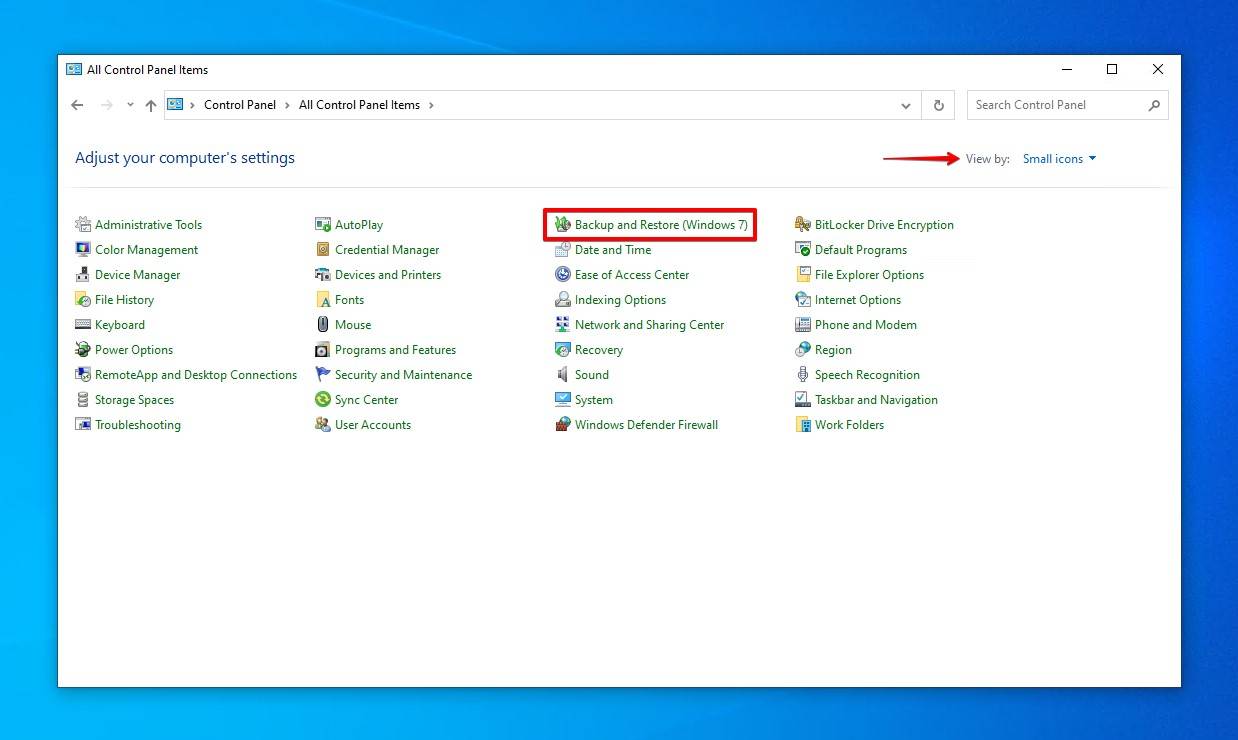
- Click Backup and Restore (Windows 7). If you don’t see it, make sure your view is set to Large icons or Small icons.
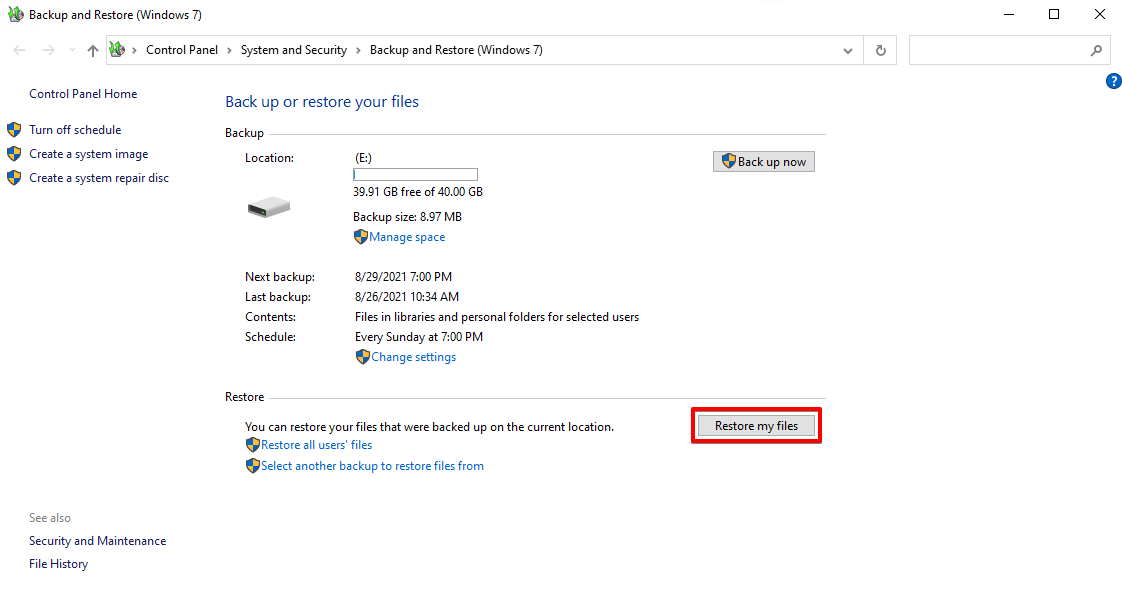
- Click Restore my files.
- Click Browse for files.
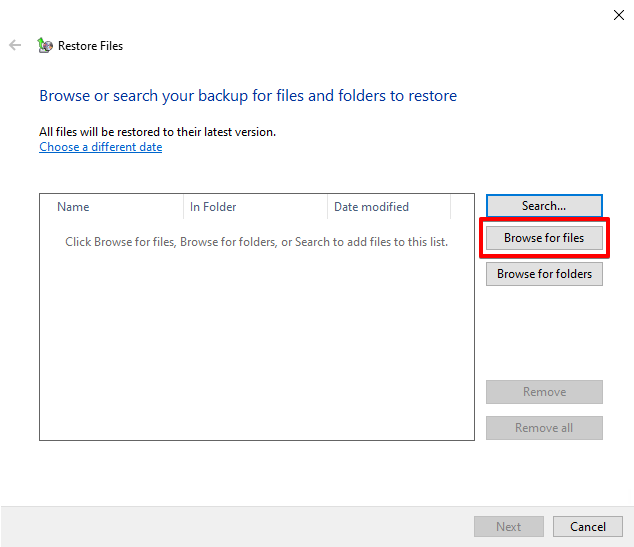
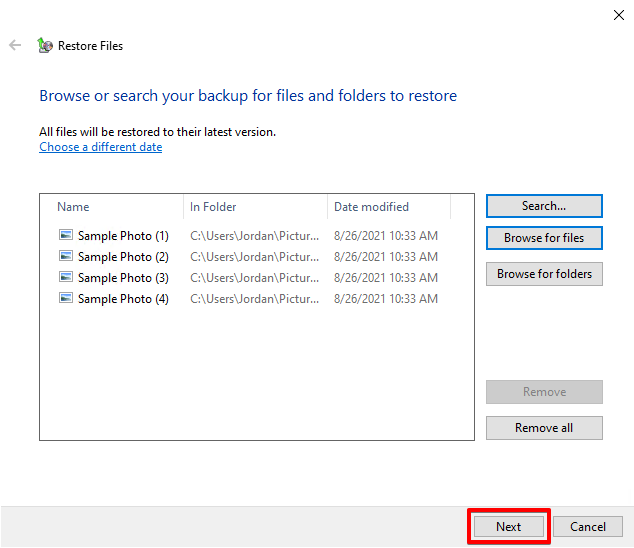
- Select the files you want to restore. Click Add files.

- Click Next.
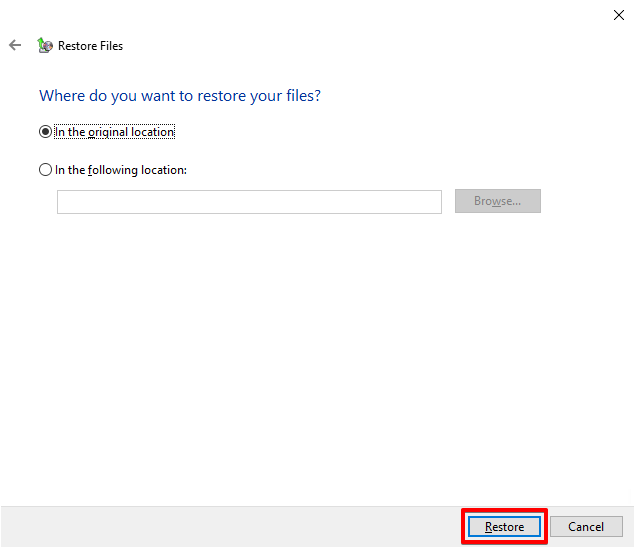
- Decide whether you want to restore the files to their original location or another. When ready, click Restore.
Read also: How Recover Deleted Files on Windows 7
Method 3: Restore Using File History
The next method to recover deleted data from NTFS is using File History. File History is the new way of backing up your files. With File History, you can mark what files you want to keep backups of. As time goes on, File History will make regular backups of the files and create an entire version history of each. If one file is ever lost, deleted, or damaged, you can choose a version of that file you want to restore instead of just restoring the latest backed up version.
Note: Again, like Backup and Restore (Windows 7), this method is only available if you’ve previously configured File History to make regular backups of the files or folders you want to restore. If you haven’t, move onto recovering your data with data recovery software.
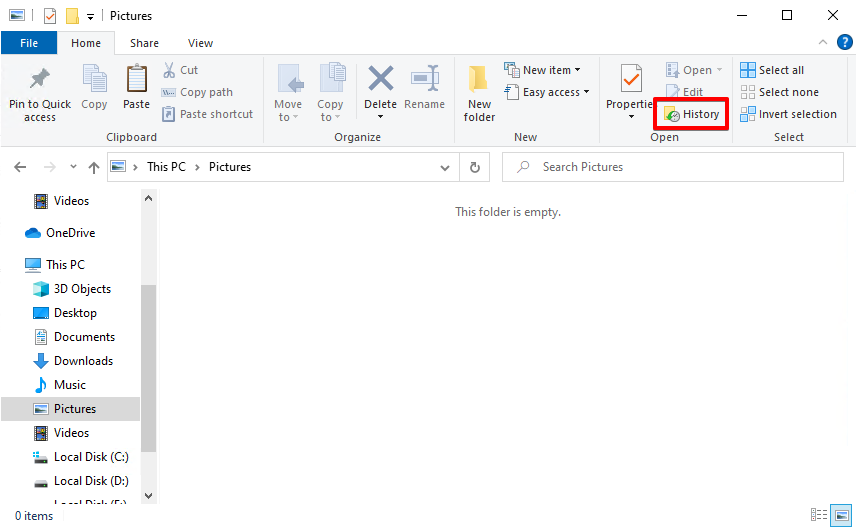
- Navigate to the folder that contained the files before they were deleted. Expand the Home tab and click History.
- Select the files you want to restore. If needed, view previous versions using the left and right navigation arrows. When ready, click on the green restore button with an encircling arrow.
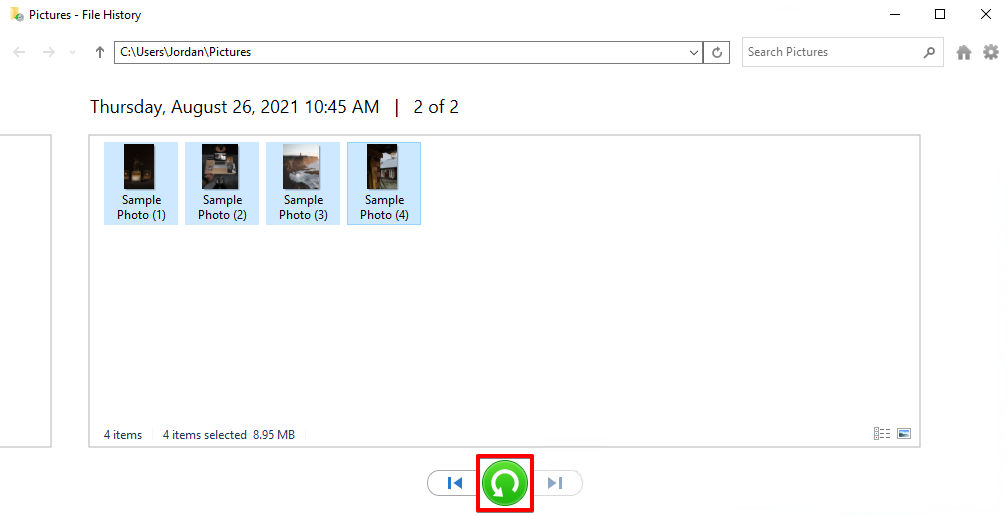
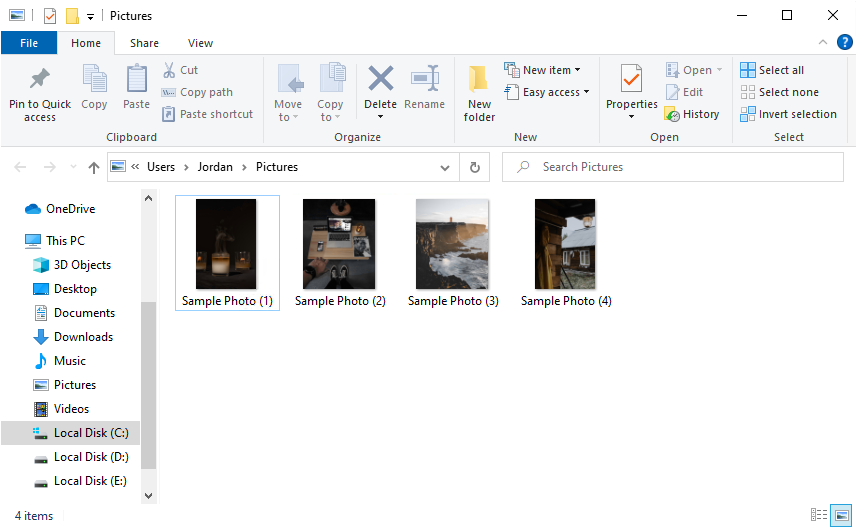
- The files will be restored to their original location.
Protect Against NTFS File Loss
Trying to recover your data after it has already been lost can be challenging. There’s also no guarantee that you’ll be able to get all of it back. Some files may have already been overwritten or partially overwritten to the point that the file is no longer whole.
Instead of being unprepared for next time, let’s look at a few things you can do now to protect yourself against data loss going forward:
- 💽 Created scheduled backups – Without a doubt, backups are the best way of retaining your data in the event of data loss. Nothing beats having up-to-date copies of the files you were working on that can be restored in a matter of seconds. Consider using File History in Windows to create regular backups that give you the option to restore to previous versions of the file if needed.
- 🔌 Power down safely – Never hold the power button to turn your computer off unless you need to. Forcing your computer to shut down puts you at risk of corruption as your computer doesn’t have time to stop all processes safely. This is particularly true if data is being written, an update is applying, or a format is in process.
- 🤏 Eject storage media safely – As mentioned above, interrupting a write process can be dangerous. Many are unaware that you need to safely eject storage media before removing them from a computer. Next time you remove your USB drive or external hard drive, be sure to eject it safely before removal.
- ⚡ Invest in a UPS – If you want to be extra careful, consider buying a UPS (Uninterruptible Power Supply). In the event that your building loses power, the UPS will kick in immediately and start delivering power to your electronics from a battery. This gives you time to safely stop any process you’re doing and shut down your computer.
By taking care of your data, you may never be in a position where you need NTFS data recovery software.
FAQ
How are NTFS files deleted?
When a NTFS file is deleted, the information that allowed your system to locate and access that file is cleared. As a result, the physical location where your data is stored is marked as available. As you write data to your drive, it will gradually overwrite the data that was once there.
Is it possible to recover deleted files from NTFS?
Yes, you can recover deleted files from an NTFS-formatted drive. Your best chance at recovering your data is right after it has been deleted as there’s less chance the data has been overwritten.
If your data is overwritten, it becomes very difficult to recover yourself and may require the assistance of a professional recovery service.
What causes NTFS file system corruption?
There are a few causes behind NTFS file system corruption. Let’s look at a few of the common issues that result in a corrupted NTFS file system:
- Hardware failure – Gradual decline in the hardware of your computer could be the cause behind the corruption. This is especially true for disk drives that are a few years old.
- Malware – In some cases, malware can attack your file system directly, causing it to become corrupted so you cannot access your files.
- Power failure – Sudden power loss can interrupt important processes that are running. Powering down safely is always recommended as it gives your computer a chance to close everything appropriately.
Can permanently deleted data be recovered?
The term ‘permanently deleted’ is sometimes questionable when it refers to data. If you empty the Recycle Bin on your Windows computer, that data is said to be permanently deleted. However, using data recovery tools, you can actually recover it.
When your data is deleted, the information used by your system to locate and access the file is wiped. This allows for new data to overwrite the old data at that location. Until that data is overwritten, it’s very much recoverable. When it does become overwritten, it may still be recoverable by experts.
Can you recover an NTFS partition?
A partition is used to organize and manage the data on your disk drives. If you lose an entire partition, all of the files that were on that partition will either be lost or become inaccessible. You can recover individual files from this partition or you can recover the entire partition itself.
Recovering an entire partition is slightly different from recovering an individual file. But, it’s definitely still possible. You will need to repair the partition table using data recovery tools. Take a look at how to recover an entire partition if you need to restore a lost NTFS partition.
Conclusion
File loss, in most cases, cannot be predicted. But, just because you don’t know when it will happen, doesn’t mean you shouldn’t be prepared for when it does. Proactively taking care of your data can save you hours, potentially days, of recovering what was lost.
Using the solutions outlined in this article, you can restore your files that were lost, deleted, corrupted, or formatted.
This article was written by Jordan Jamieson-Mane, a Staff Writer at Handy Recovery Advisor. It was also verified for technical accuracy by Andrey Vasilyev, our editorial advisor.
Curious about our content creation process? Take a look at our Editor Guidelines.