This article will help you find misplaced or lost files on your Windows 10 system using a variety of different built-in and third-party methods. We cover virtually every technique that can be used to find a file on a Windows 10 machine to locate those important files that seem to have disappeared.
Using partitions to separate your data is a good way of keeping everything organized. However, if you don’t stay on top of where everything is stored, the abundance of data can quickly become overwhelming and cause you to lose track of where some files are stored.
For example, old data may be hidden in an obscure subfolder that you forgot about long ago. Or, you may have accidentally moved or deleted some files without realizing it. Either way, the fact remains that you have some data that you need to locate.
To help you locate your missing files, here is a list of all the methods to find a file in Windows 10.
10 Best Methods to Find Files on Windows 10
Method 1: Check Your Recent Files
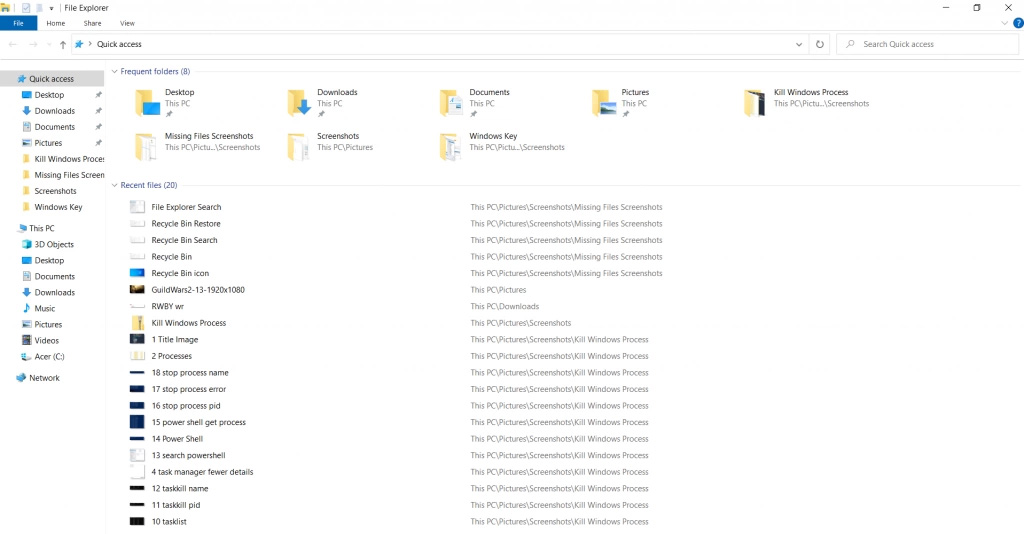
The first location to check for pictures or documents that you cannot locate is Recent Files. This is a section of File Explorer with a list of all the files you have opened recently. It doesn’t matter which drive or folder the file belongs to – if you opened it, the file will be here.
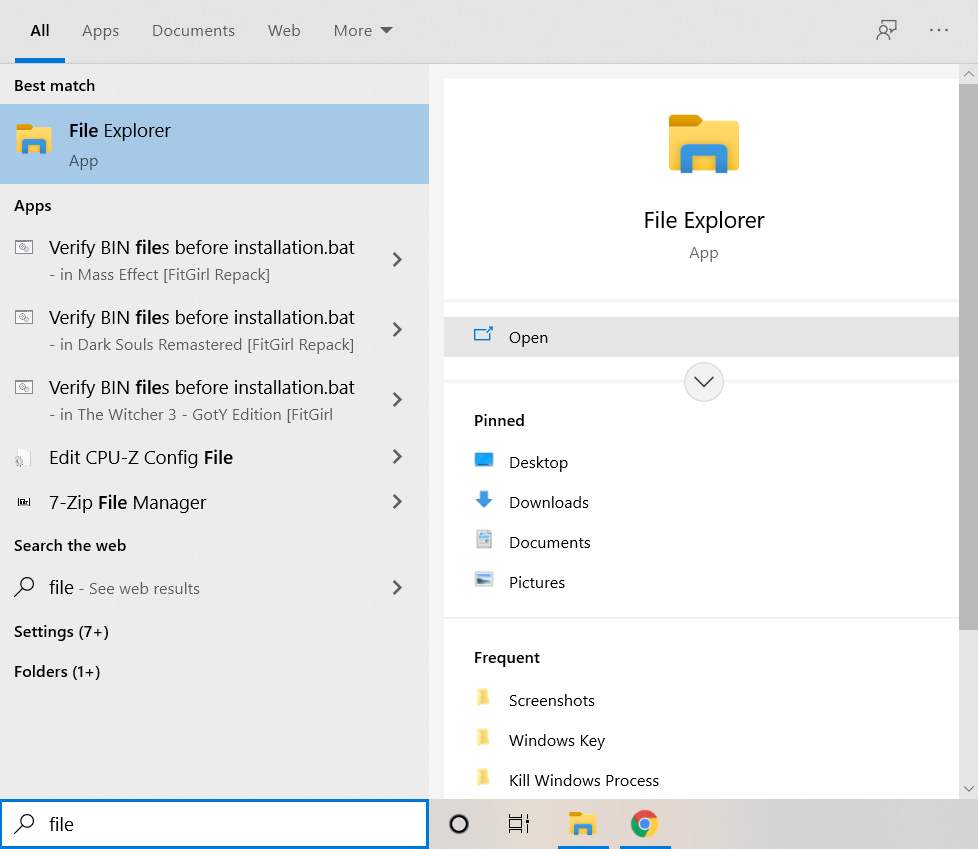
- To check your Recent Files, open up File Explorer. You can search for it from the search bar if you have trouble locating it.

- By default, File Explorer opens at Quick Access, which includes a list of your Recent files below.
Method 2: Look in the Recent Items Folder
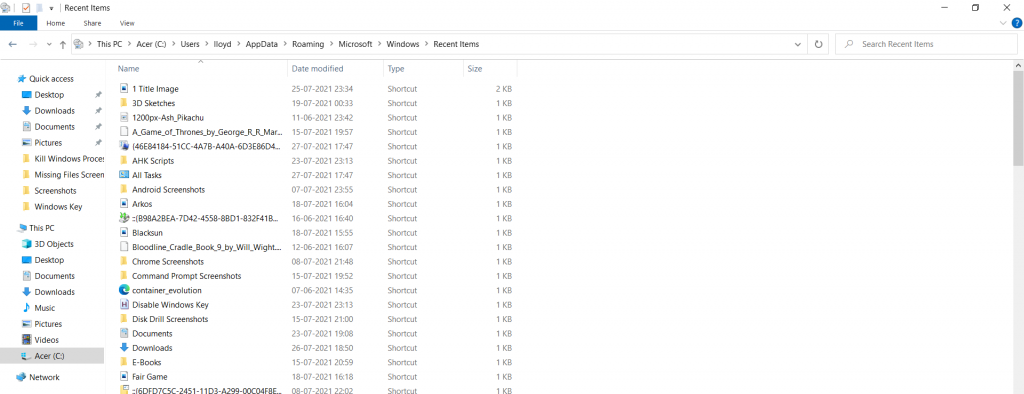
In addition to the small list displayed in Recent Files, Windows keeps a more extensive log of files you have interacted with in the past. Interestingly, this includes a history of your ‘actions’ on the computer, rather than just data.
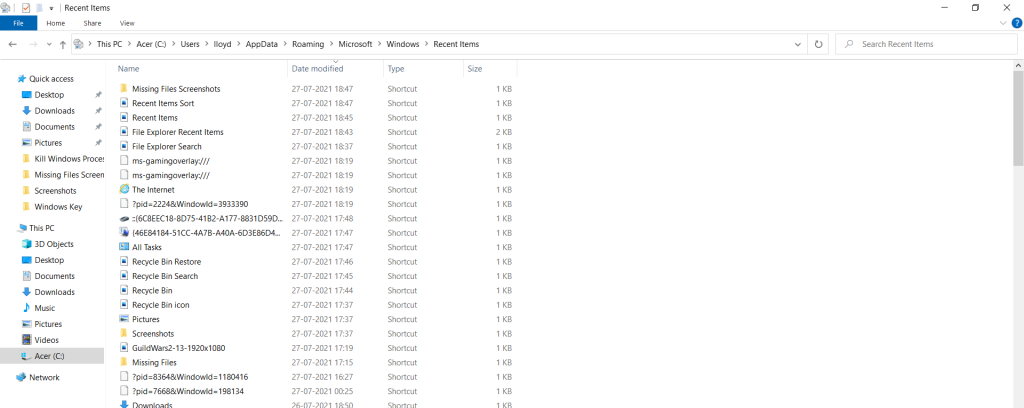
- Accessing this list is simple. Navigate to %AppData%\Microsoft\Windows\Recent\ by entering this location in the address bar. The Recent Items folder will open up.
- Like any other folder, the files are normally sorted by name, which isn’t very useful in this case. Right-click on any empty space and select Sort by > Date modified to get recent items first.
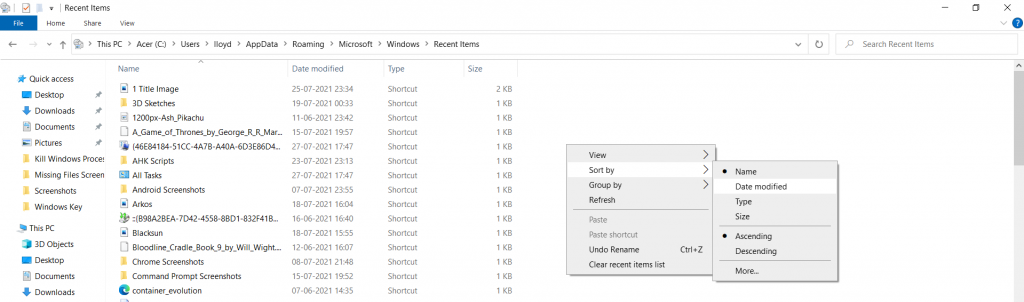
- Now you can scroll down to see your files arranged by the date you interacted with them. You can also search this folder from the search box on the top right.
Method 3: Search Your Computer
A good way to find your missing files is to, well… search for them. The search functionality built into Windows is no slouch, and can quickly locate lost files with the right keywords.
- To search for files on your computer, you can use the Search Box on the Taskbar or open File Explorer. The explorer is recommended as it shows the files in a much easier to parse view.
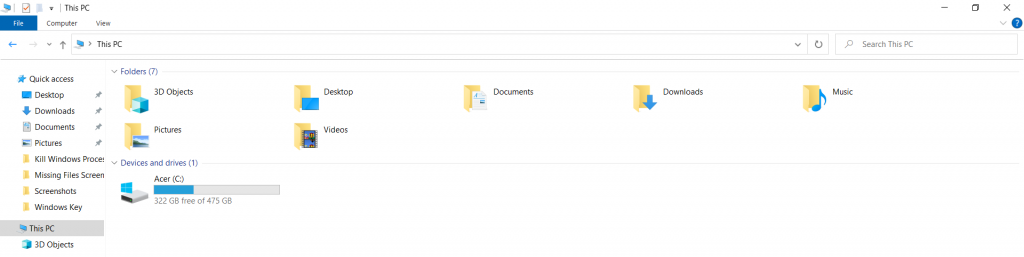
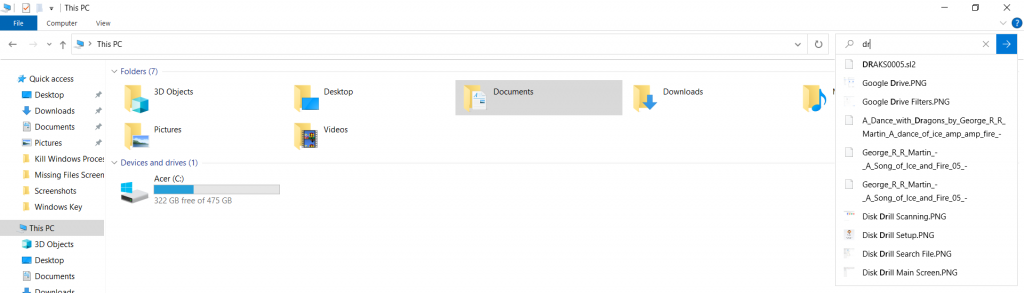
- Navigate to This PC in File Explorer. This ensures that your search will include every location on your computer. To search, begin typing in the search box on the top right.
- As you start typing, a drop-down menu will autosuggest similar items. Click on any of these entries or enter your query to start searching.
- The search results show up along with their respective file locations, sizes, and the date modified.
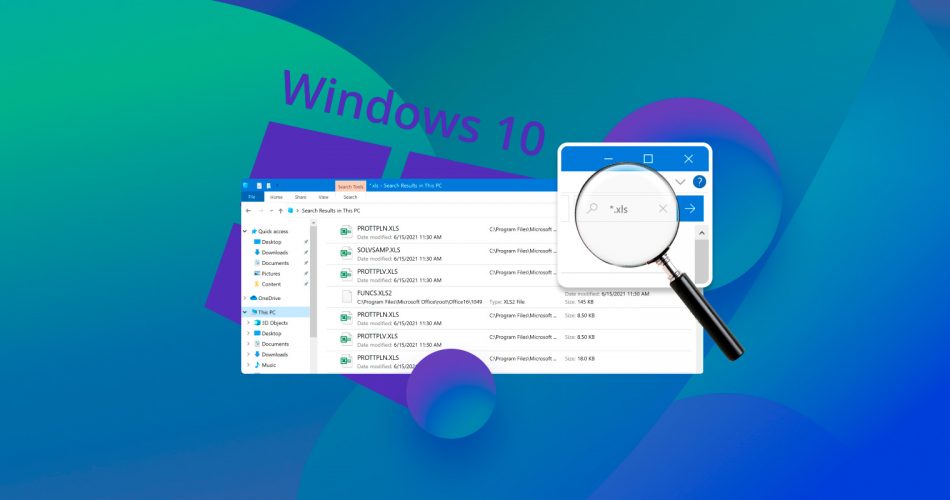
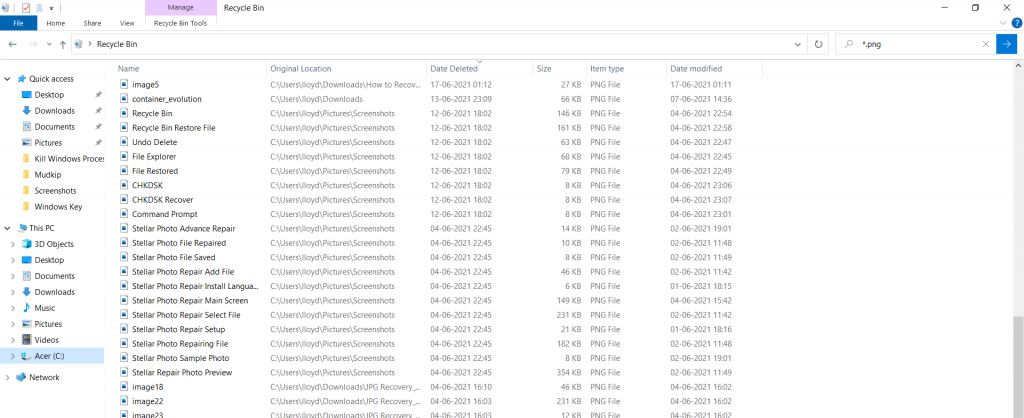
Search by File Type
If you don’t remember the name of the file in question, it might be a good idea to bring up a list of all the files of the same type. You can do this easily by using the wildcard character (*) in conjunction with the respective file extensions.
For example, if you want to search for all the PNG files on your computer, you can type *.png in the Search Box. This will show you all PNG files on the computer. Similarly, search for *.jpg, *.jpeg, *.doc, etc. to find all the files with the respective extensions.
Show Hidden Files
Sometimes, it is possible that the file you are looking for is hidden. This can be accidental or due to a virus. Regardless of the reason, you need to be able to view hidden files to find such files.
You can do this easily in File Explorer by checking the Hidden Items checkbox under the View tab.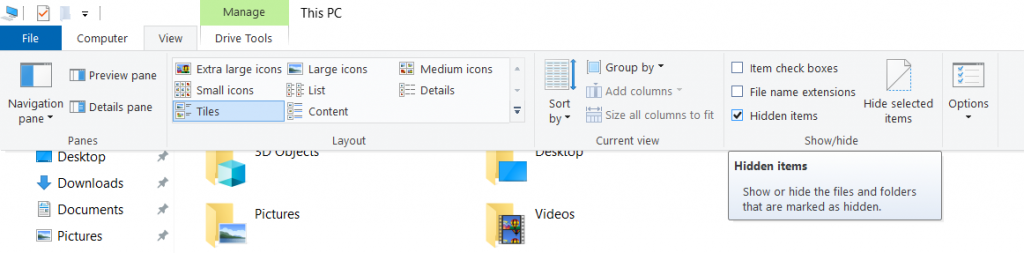
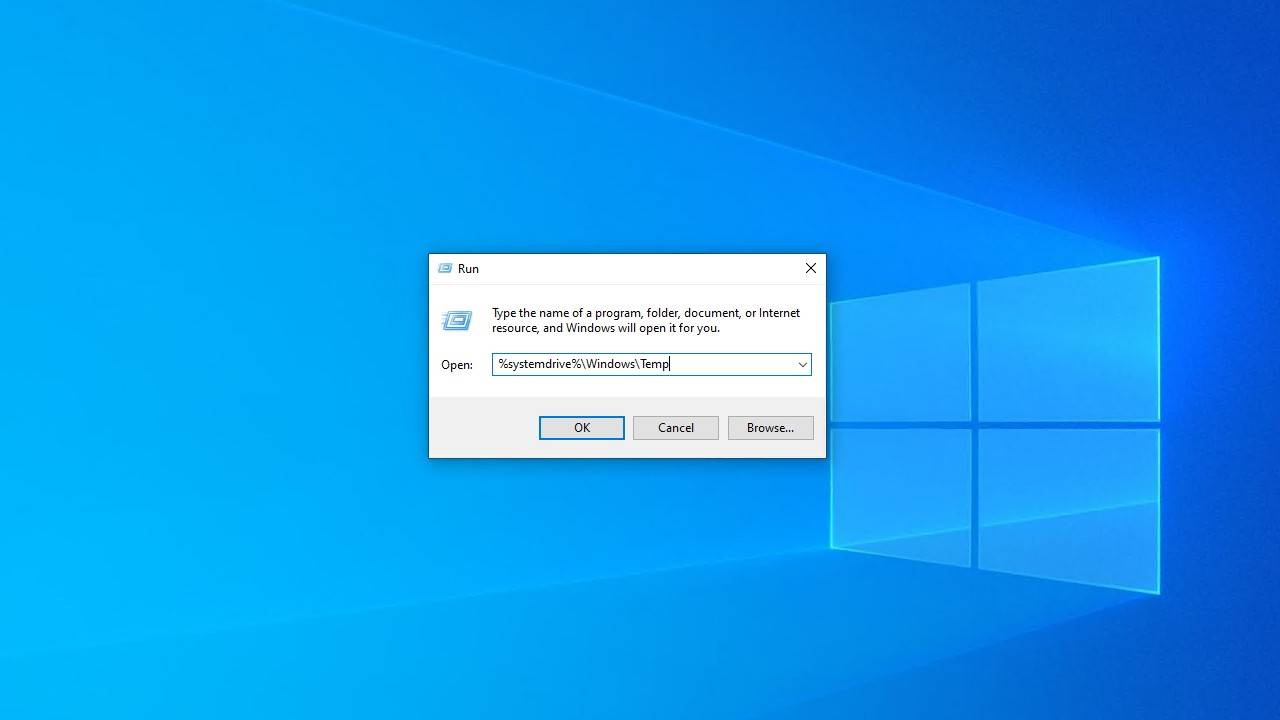
Method 4: Look in Temporary Files
Following an application crash or failed update, there’s a small chance your files may be sent to one of two Temp folders in Windows. On the off chance that one of your files may have ended up here, it’s a good idea to check them, just in case.
Follow these steps to check both the Temp folders in Windows:
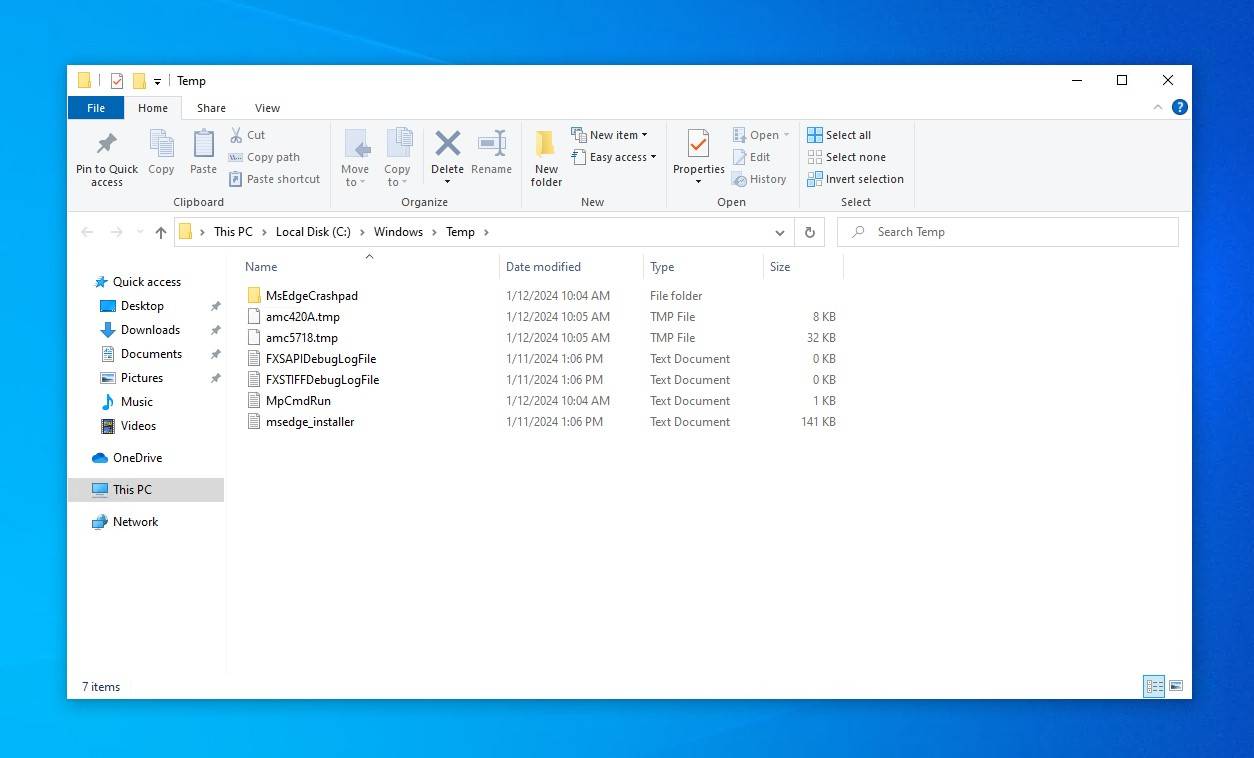
- Press Windows Key + R on your keyboard. Type %systemdrive%\Windows\Temp and press Enter.
- Look for your lost files. Make use of the search box if you can remember the name or file extension. If you cannot find the files, try the next step.
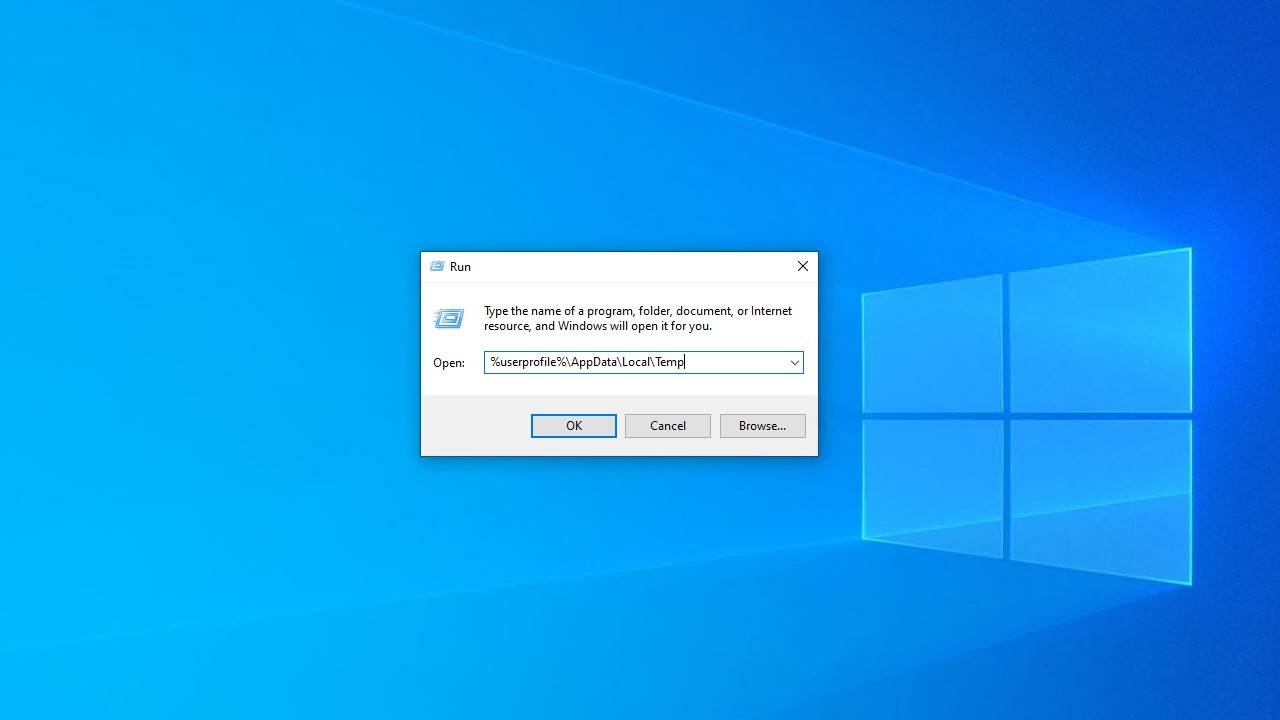
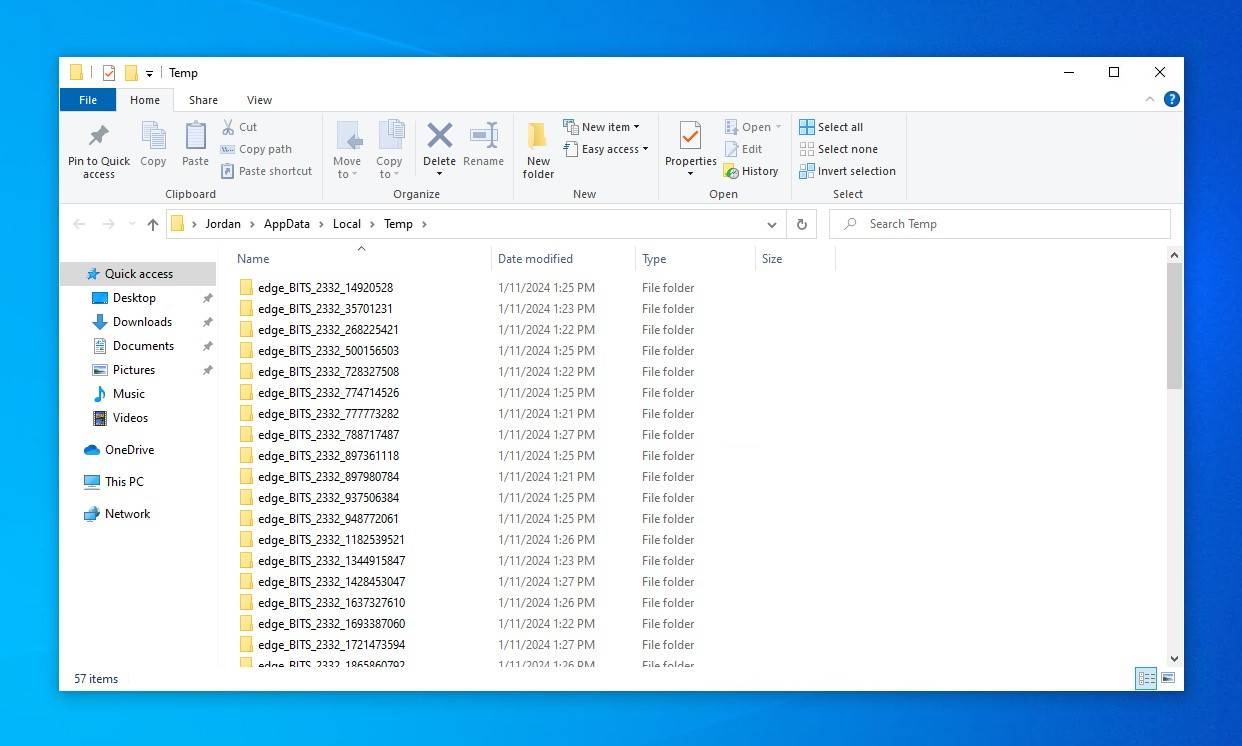
- Press Windows Key + R again. This time, type %userprofile%\AppData\Local\Temp and press Enter.
- Search for your lost files and move them to a new location if you can find them.
Some applications, like Microsoft Word, have their own temp folders where they store unsaved work following an application or system crash. Search to see if the application you’re using has similar functionality.
Method 5: Look in Online Backups
Often, the files you cannot find on your computer have backups on the cloud. But how do you search for them? Well, if you use Microsoft Onedrive, you don’t need to worry.
If you are logged into Onedrive, Windows will search its contents automatically. You don’t need to do anything else.
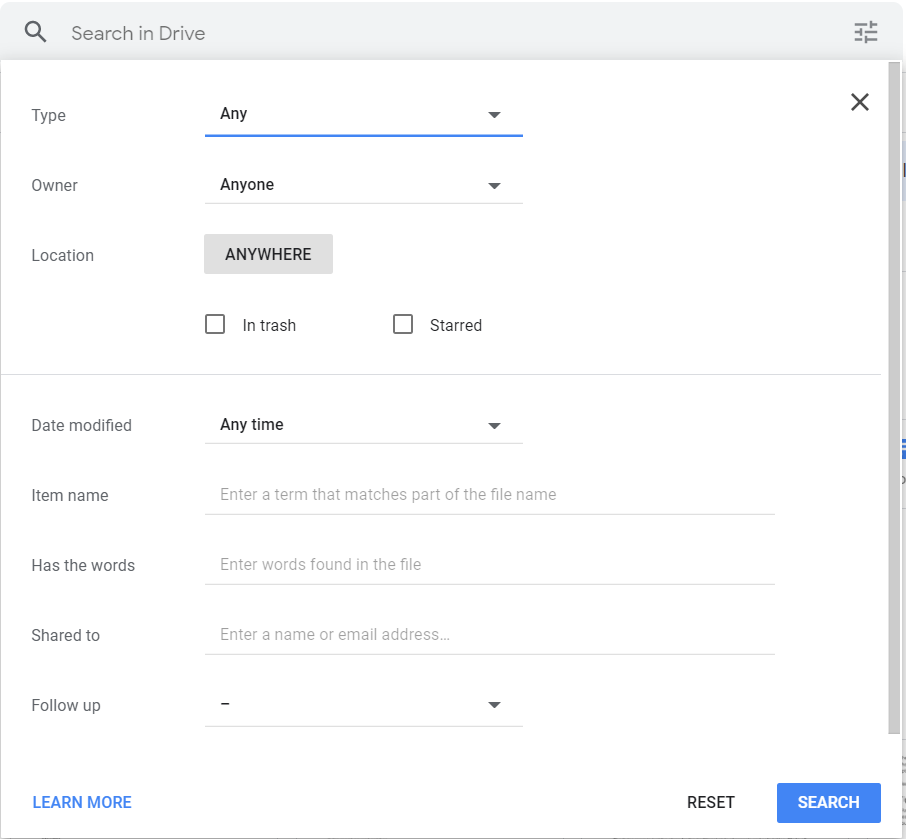
- To search the contents of your Google Drive, open it in a new tab of Chrome.

- You can look for your files using the search bar on the top. Click on the Search Options icon on the right of the bar to get a number of ways to filter the search. You can filter by the type, owner, date, and even the contents of the file.
Method 6: Search in Email Attachments
Your email attachments are another overlooked location that can contain important documents and files. As emails are stored on the cloud, their attachments do not show up in a regular file search on your computer.
- To search your emails, open Gmail in a fresh tab. You can see a search bar at the top.

- Click on the search options icon on the right of the bar to bring down the filters. Check the Has attachment checkbox to limit the search to results with file attachments. You can even specify the size and a range of time to further narrow down the search.

Method 7: Check in the Recycle Bin
When you delete a file on your computer, it isn’t permanently removed at once. It is compressed and stored in the Recycle Bin instead. This allows you to restore an accidentally deleted file quite easily.
Since the Windows search does not include the contents of the Recycle Bin, you need to find your missing files in the Recycle Bin separately.
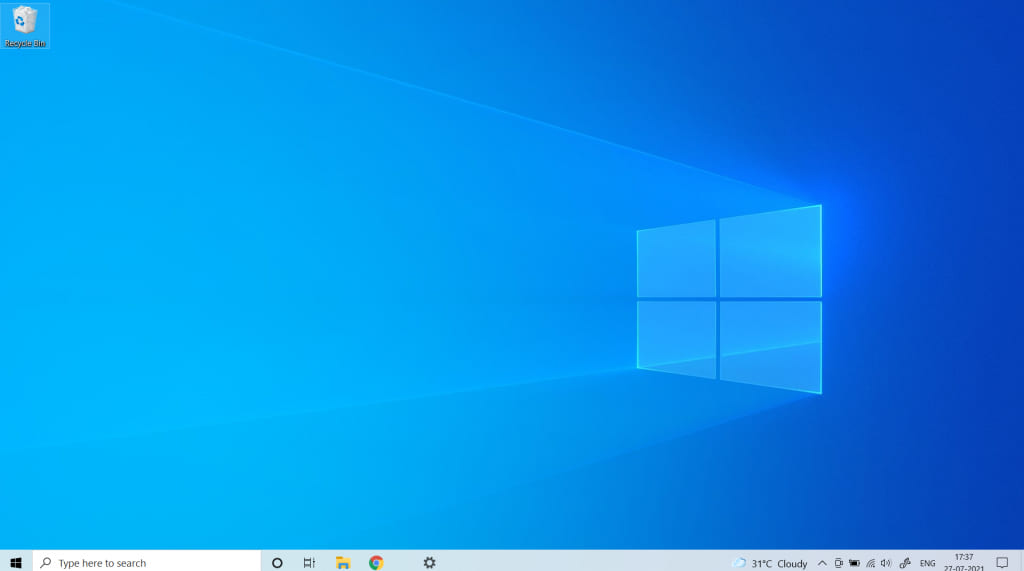
- To begin, double-click on the Recycle Bin icon on your desktop.
- A File Explorer-like window opens up, displaying all the deleted files on your computer.
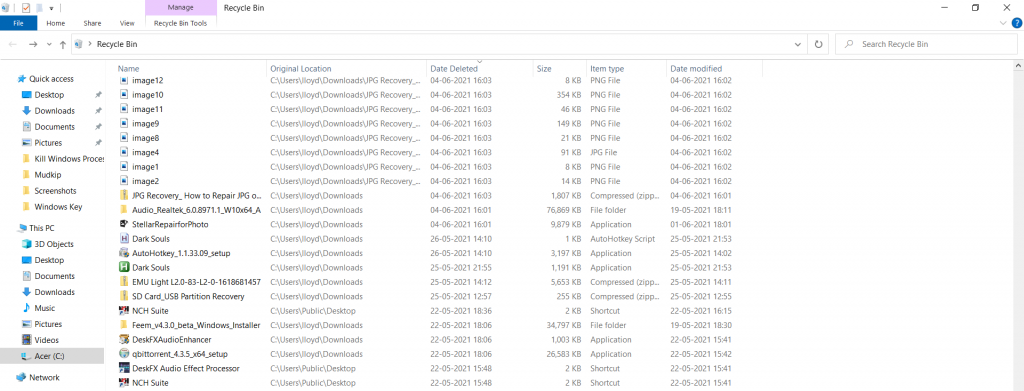
- Manually looking through the whole list can be a bit time-consuming, so use the search box on the top right. Just like a normal file search, you can use a filename or search for a file type using the wildcard (*) character.
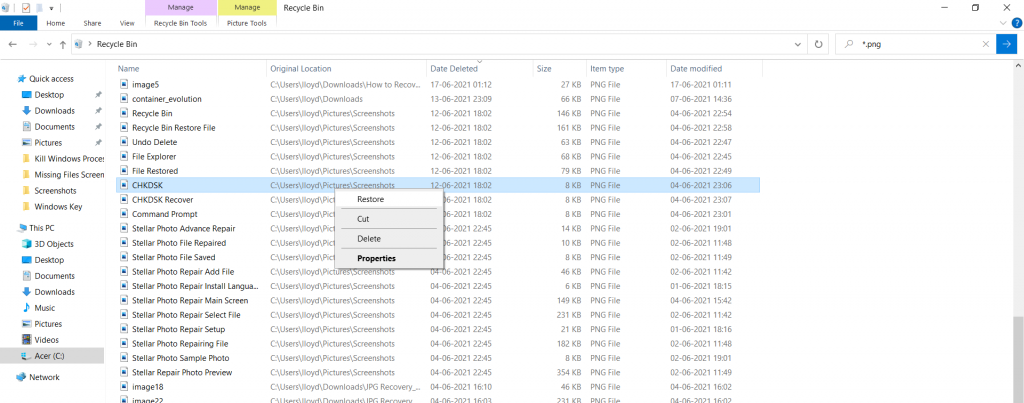
- If you find a file you wish to keep, right-click on it and select Restore. The file will be sent back to where it was originally deleted.
If you find that your Recycle Bin has already been emptied, you must try something else.
Method 8: Scan with a Data Recovery Tool
Once you have exhausted all the common file locations and are still coming up empty-handed, it is time to try something else. There are many reasons why your files cannot be found; they may have been permanently deleted, corrupted by a virus, or wiped out in a formatted drive.
Now, you can try out the individual methods for each of these causes, or just use data recovery software. Leading data recovery applications are designed to recover files lost due to any reason, and it will be able to retrieve your missing files in most cases.
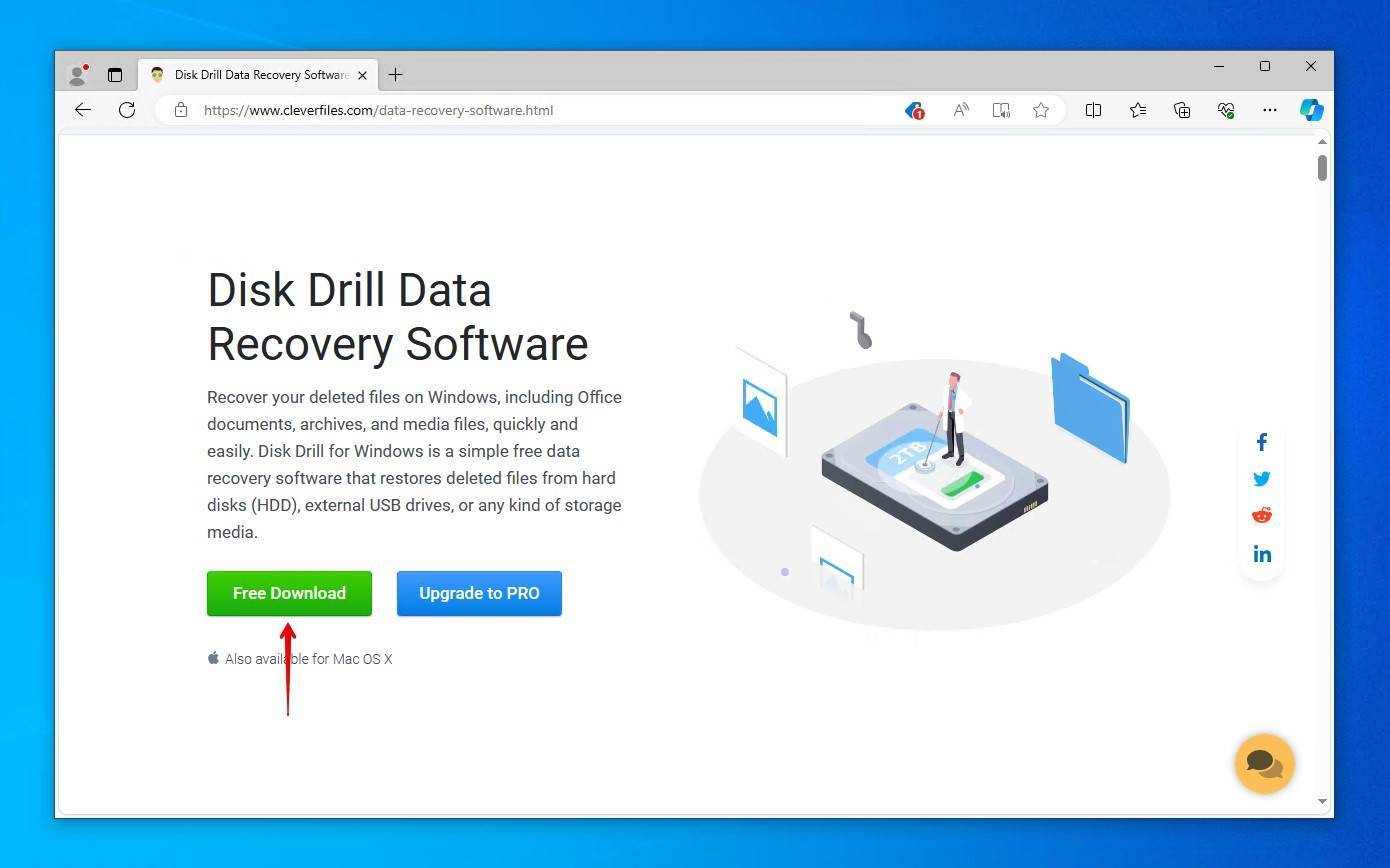
For this guide, we will be using the free version of Disk Drill Data Recovery as we have found it to be one of the best data recovery tools based on performance. And since it has a free plan that allows up to 500 MB of recovery without any time limits, you can follow along without having to buy a license.
- To get started, download and install Disk Drill from the official website.
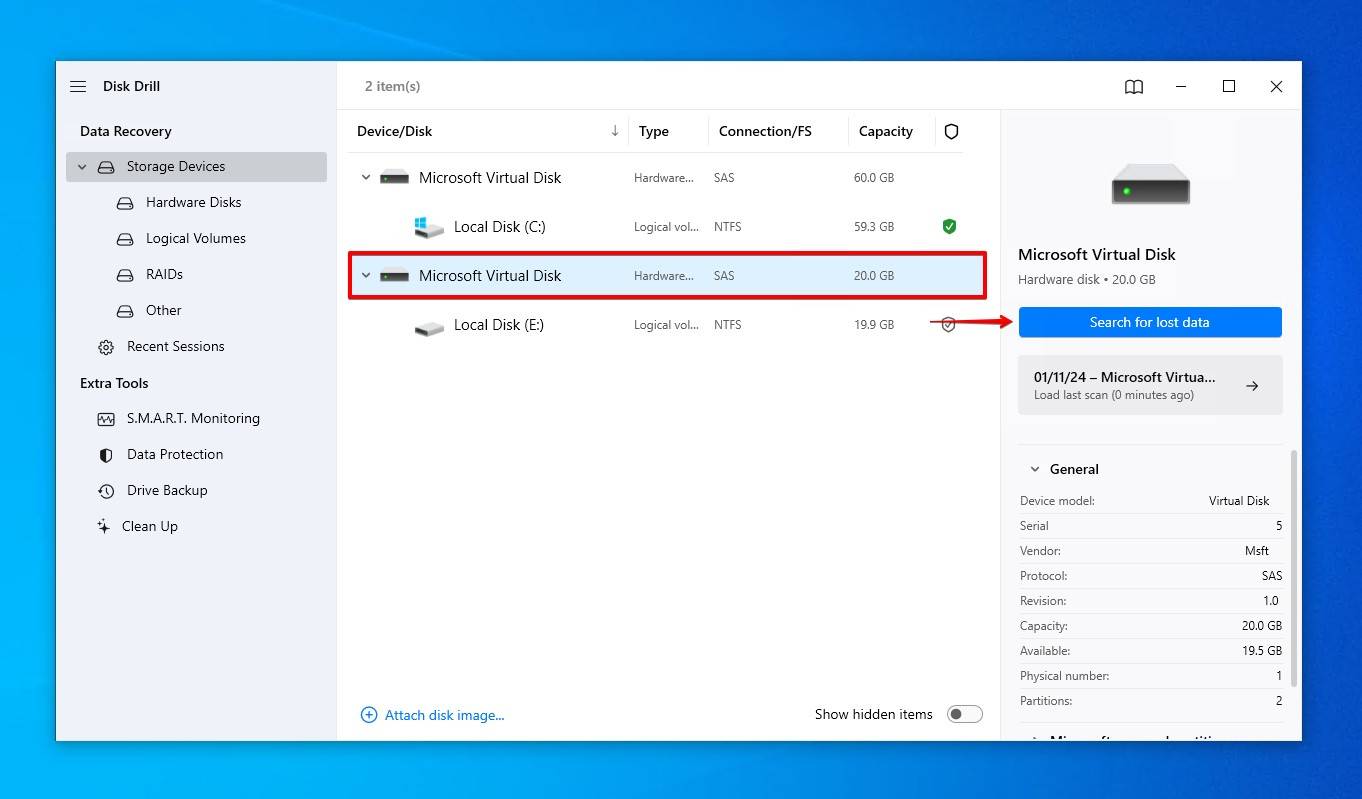
- The main window will open up, showing all the storage devices connected with your computer. Select the drive containing your missing files and click Search for lost data.
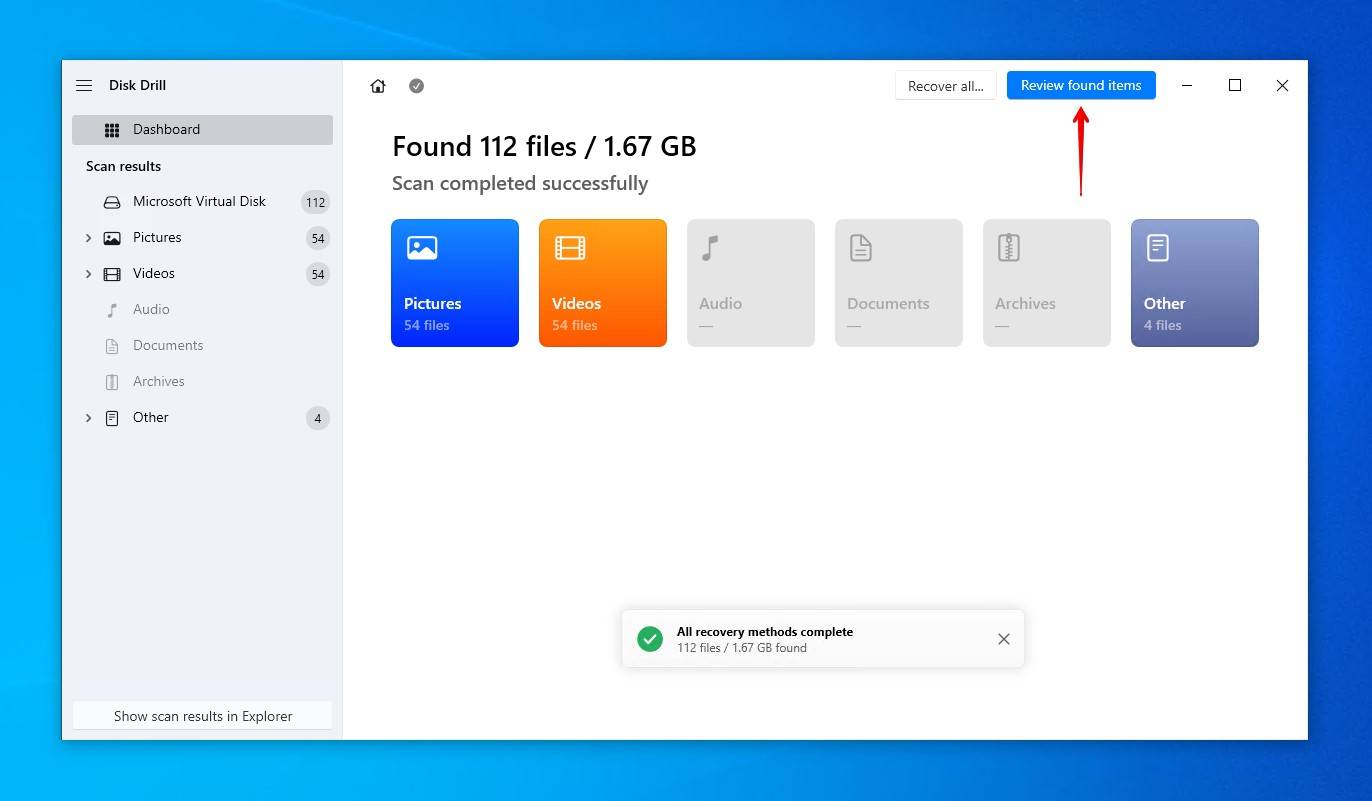
- Once the scan is complete, you can click Review found items to see what Disk Drill found. Alternatively, you can click one of the colored file type icons to filter the data, or click Recover all to recover everything at once.
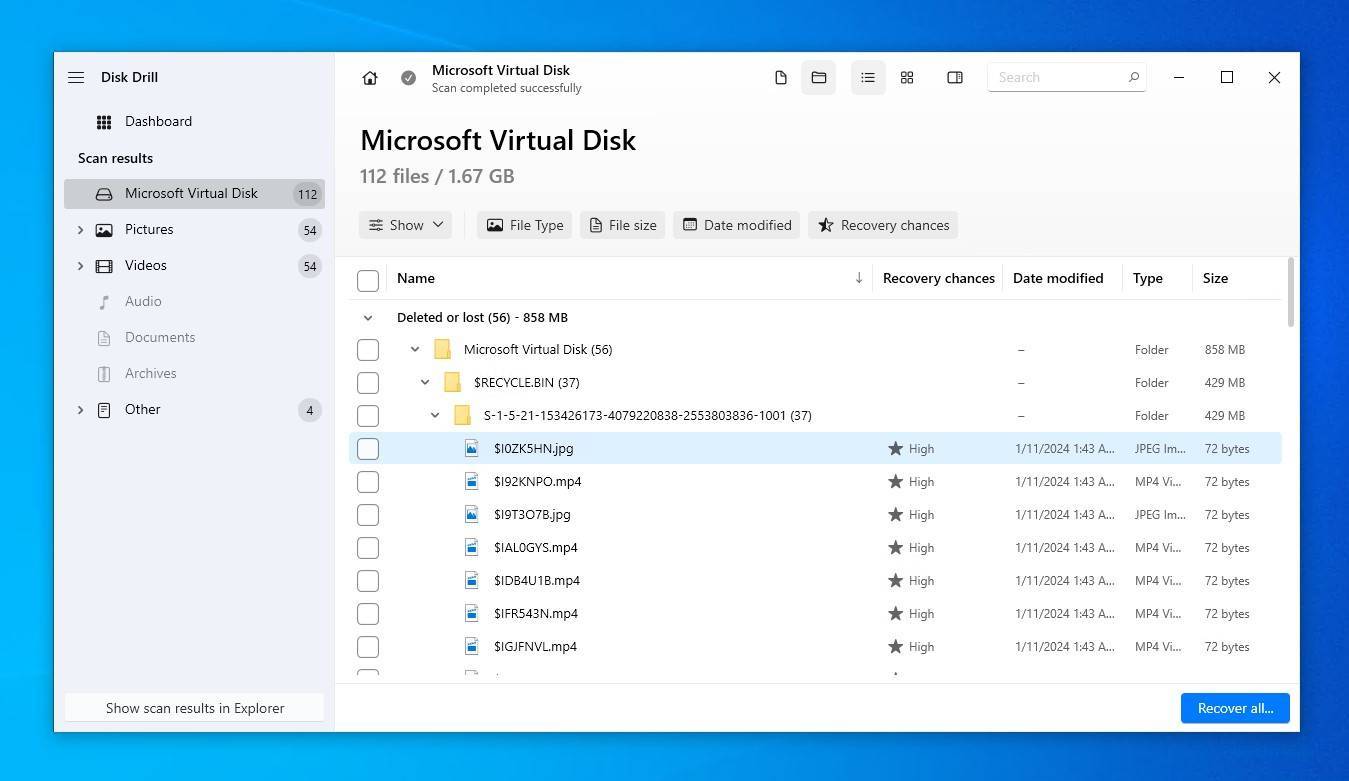
- Find your missing files using the dropdowns or by clicking one of the file formats on the left side. If the data was deleted, it can be found in the Deleted or lost or Reconstructed dropdowns. Existing data will also be shown in the Existing dropdown.
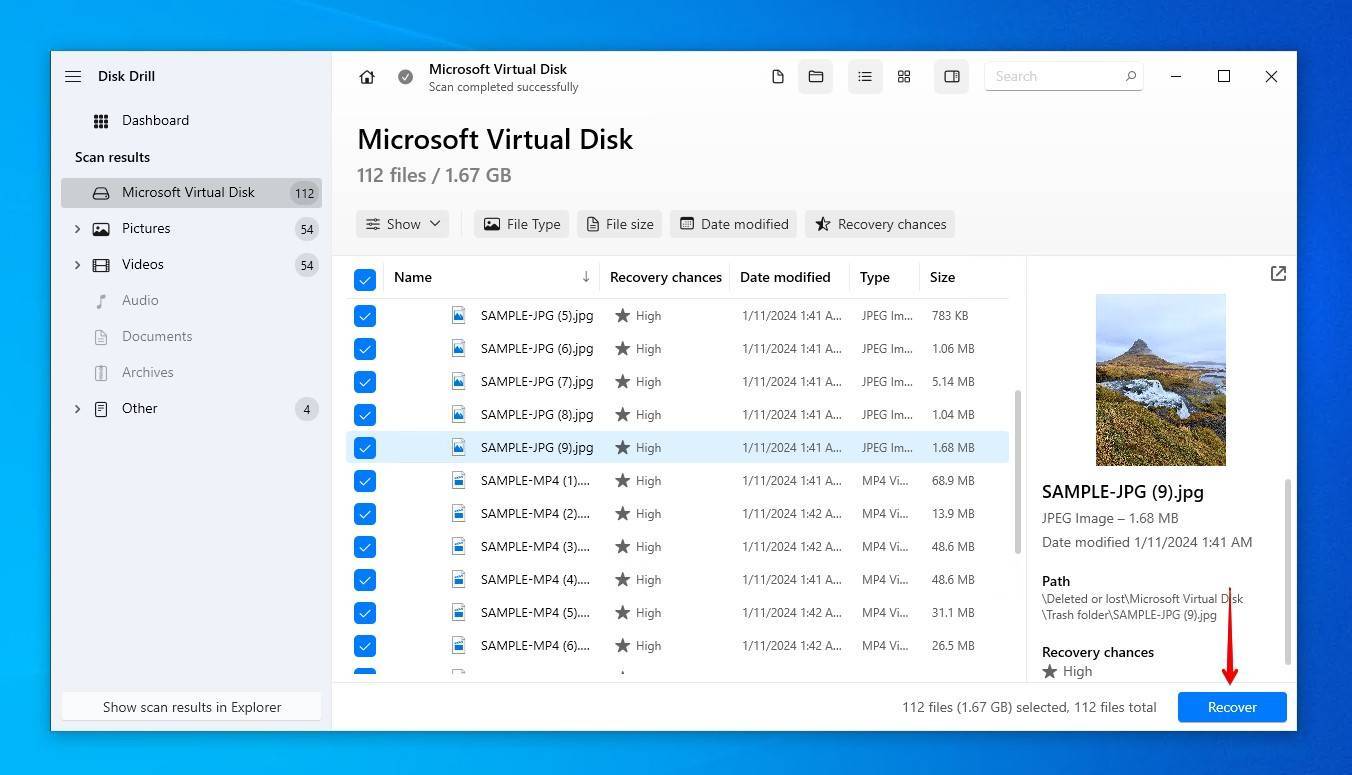
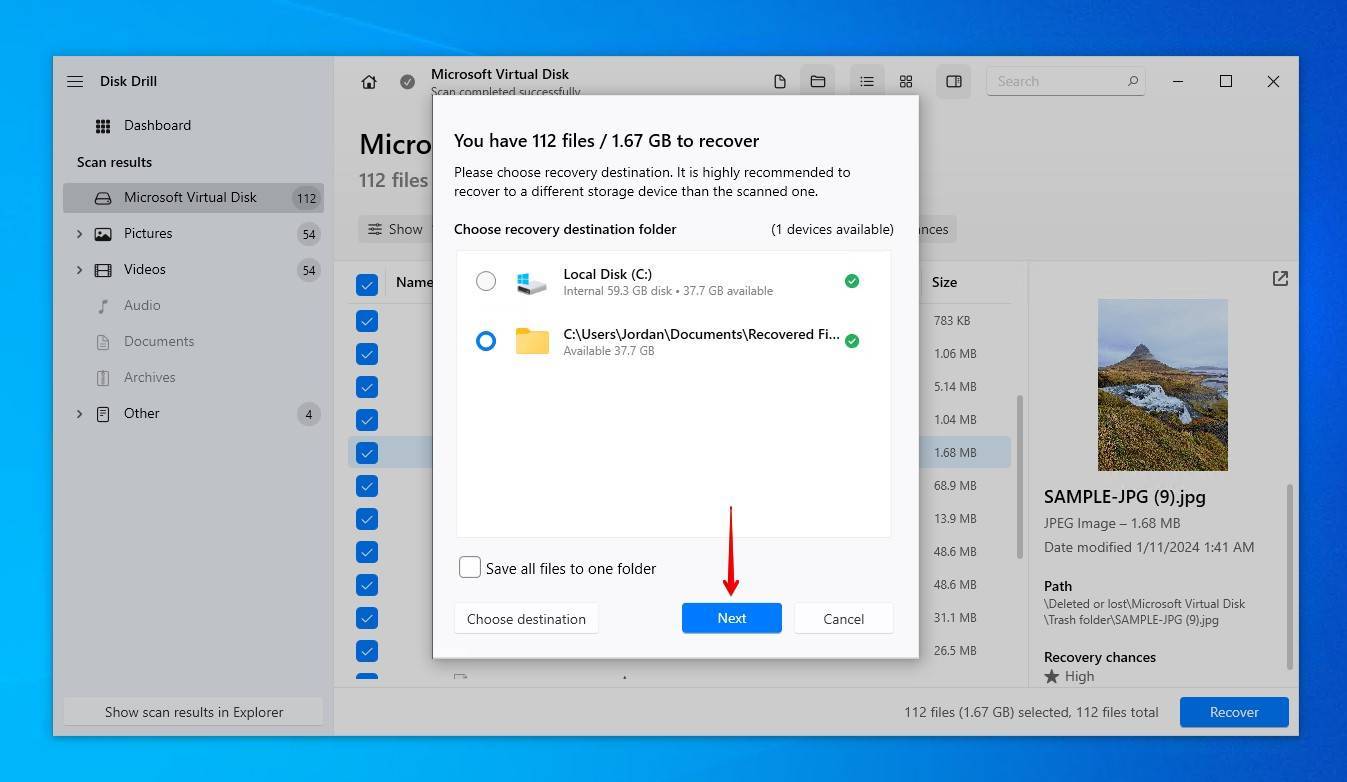
- Click the preview icon on a file to see if it’s still intact. You can also check the Recovery chances column. If there’s a lot of data to check, use the search function at the top of the application. Select the data you wish to recover, then click Recover.
- Specify a recovery location. If you’re recovering deleted data, don’t choose a location on the same disk you’re recovering from. When ready, click Next to complete recovery.
Method 9: Restore a Previous Version
A more difficult situation is when you have made changes to an existing file. Data Recovery software can only bring back a deleted file, not a previous version of it.
But there is a feature in Windows that can do just that. File History is a data backup system in Windows that allows you to revert a file or a folder to a past state. It achieves this by storing periodic backups of specified folders in your computer to an external drive.
If the folder containing the files in question is included in your File History backup, then you can easily revert them to a previous version. Do keep in mind, though, that File History needs to be set up on your computer beforehand.
- To restore the previous version of a file or folder, open File Explorer to navigate to it.
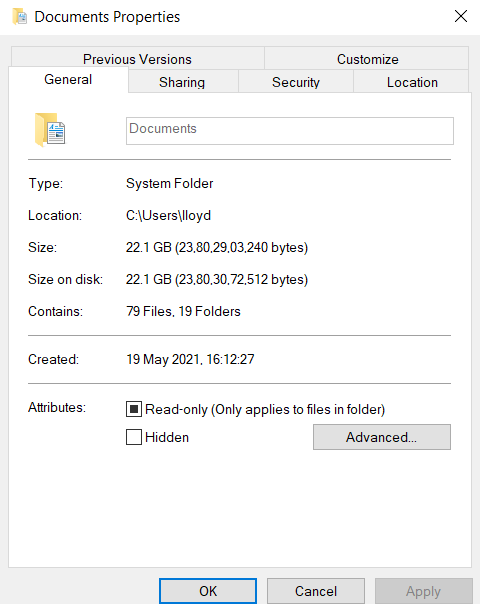
- Right-click on the file or folder in question, and select Properties.
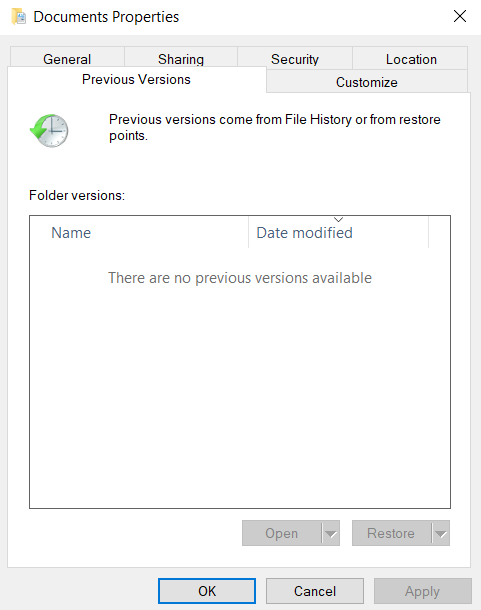
- In the new window that pops up, switch to the Previous Versions tab.
- In this tab, you can see all the previously backed-up versions of the folder. Select the version you want and click on Restore to revert to that version.
Method 10: Utilize File History to Retrieve Lost Files
File History is the primary backup utility for Windows 10 that’s ideal for restoring multiple files that have disappeared. If you had set it up before the data was lost, not only can you restore the files, but also any previous versions of the files that were saved.
These instructions will guide you through the process of restoring an entire folder, as opposed to a single file, compared to the previous method, which will recover any files that were lost:
- Navigate to the folder that once held the lost data.
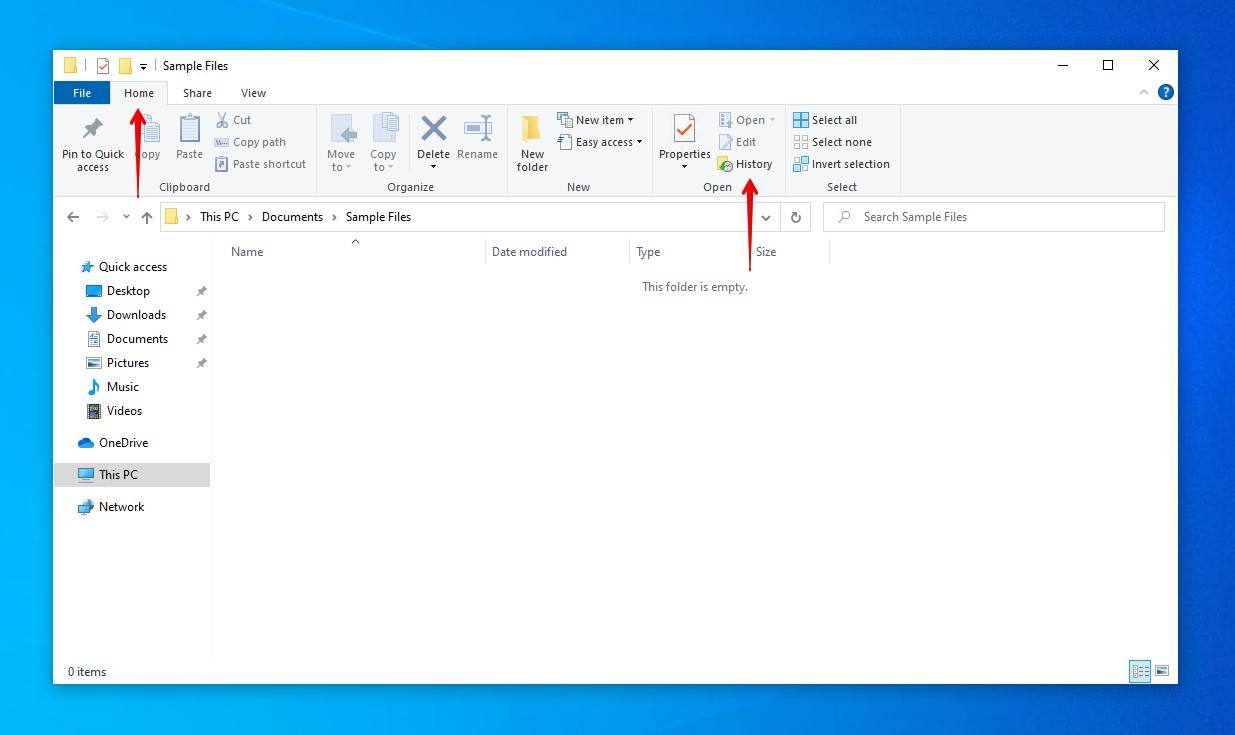
- Click Home, then History.
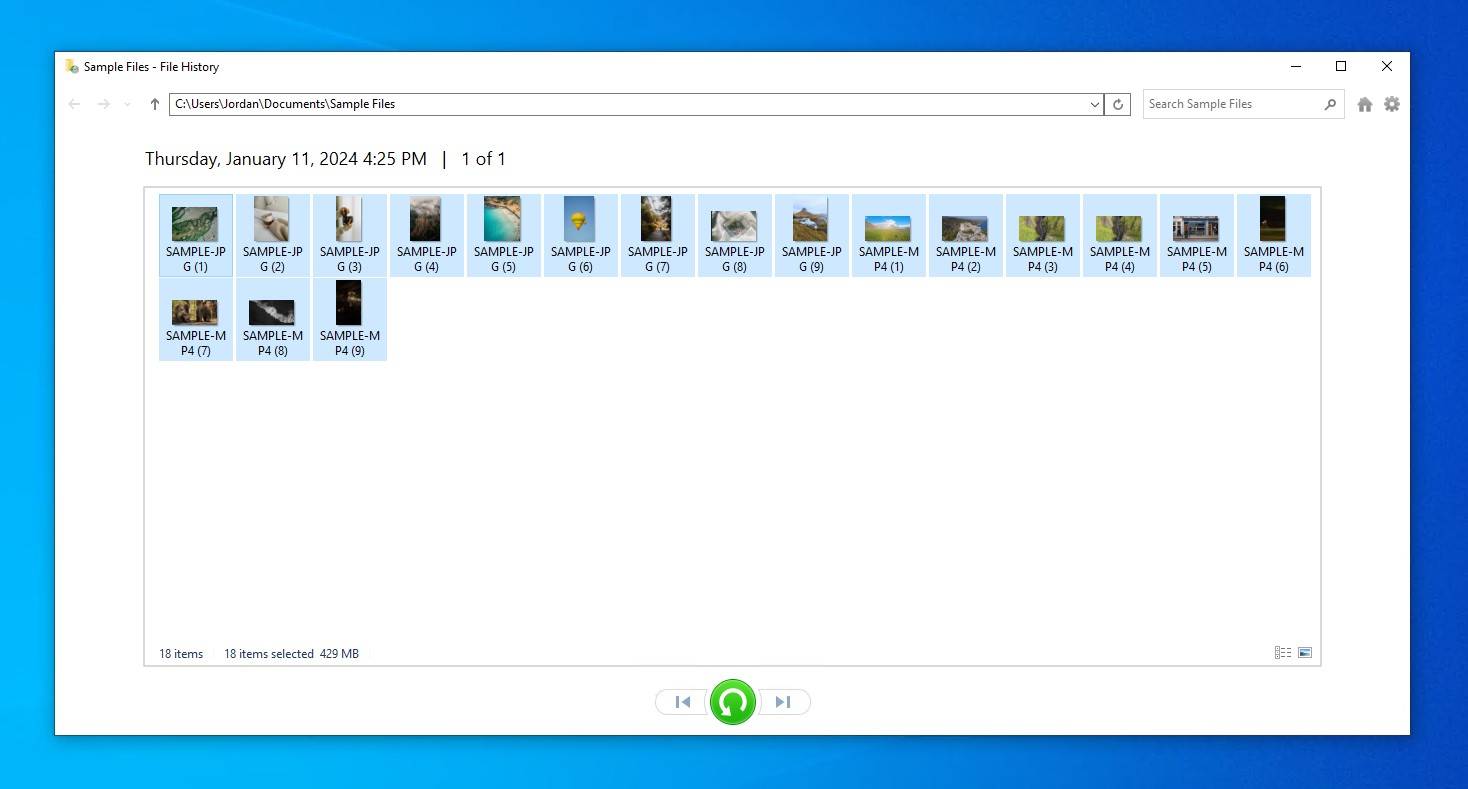
- Select the files you wish to restore. If you want to restore a previous version, use the left and right navigation buttons at the bottom.
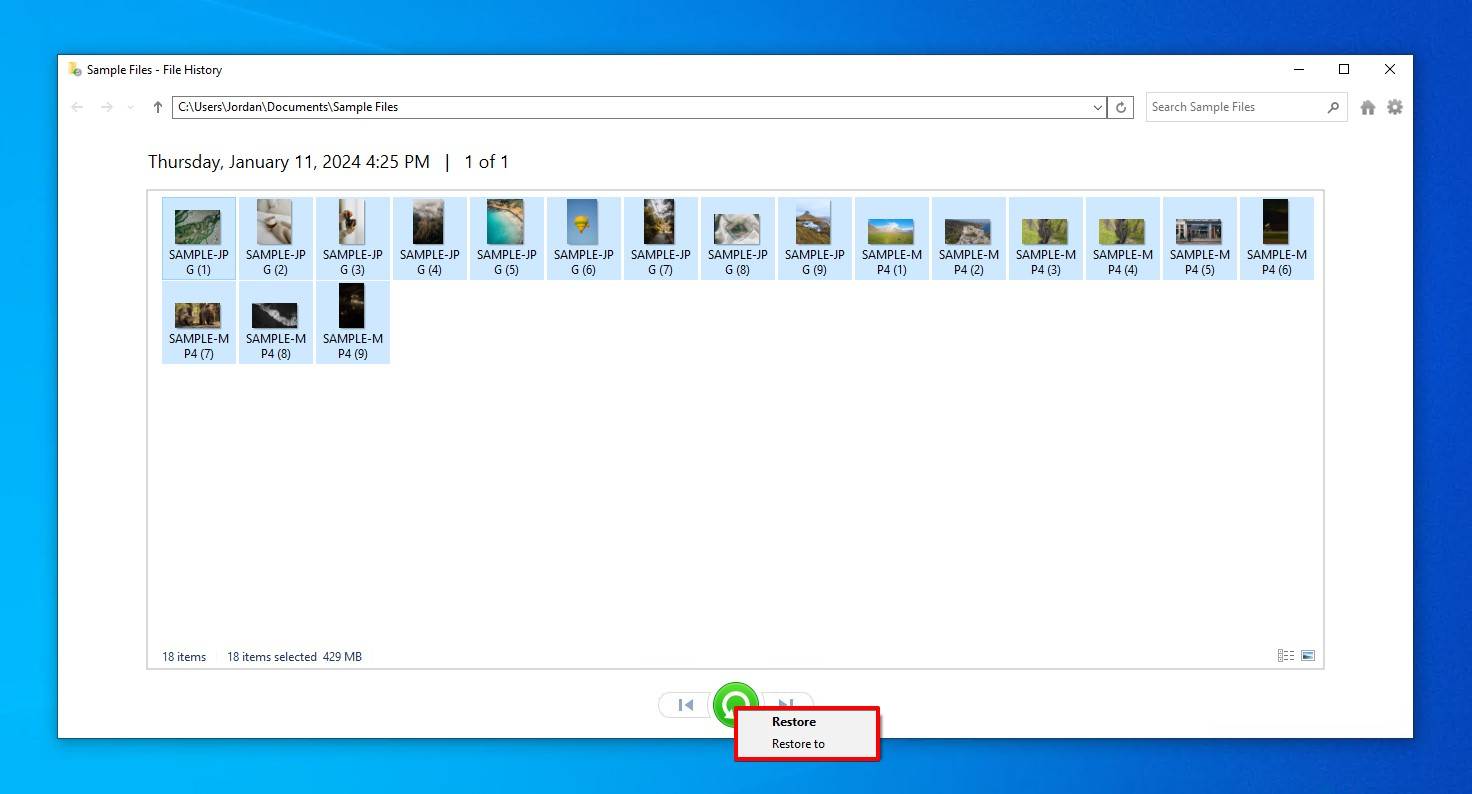
- When you’re ready, right-click the green button and either click Restore to restore them to the original location or Restore to if you want to restore them somewhere else.
FAQ
How do I search for a file in Windows 10?
You can search for a file in Windows 10 by using the Search Box in the Taskbar. Simply enter the search term and hit enter. It will automatically search both in your computer’s drives and the Onedrive.
In case you don’t remember the name but the file extension, use the wildcard (*) character in your search. Prepending * to a file extension shows you all the files of that type.
For example, entering *.txt will bring up all the text files on the computer.
How do I find recently opened documents?
Recently opened documents can be found in the Recent Files section of the File Explorer. To access this list open File Explorer and head to Quick Access. The recent files will be listed below.
Where can I find deleted files?
When a file is first deleted it is stored in the Recycle Bin. Open the Recycle Bin by double-clicking on its icon from the desktop and search for the file from the search box at the top of the window.
If your file isn’t there, chances are it has been removed from the Recycle Bin too. In that case, your best bet is to use a data recovery tool to scan the whole hard disk and recover it.
Is there any way to find email attachments?
Yes. Gmail includes a complete search feature. You can filter the results to include emails with attachments, and even specify a size range for it.
How do I search all files of a single type?
By using the wildcard character (*). Basically, the asterisk symbol matches every name. So if you enter *.png in the search box, it will show you all png files on the computer. Similarly, use * followed by .doc, .jpeg, .jpg, .pdf etc. to find all files with those extensions.
Conclusion
Windows includes a number of methods to help you find a missing file. From the Recent Files to its integrated search function, you should have no trouble locating a file you used in the past few days.
The problem begins when these options fail. That can either mean that your files aren’t on the computer at all, or have been deleted.
There are many ways to recover deleted files on Windows 10, from the Recycle bin to using a data recovery tool. Don’t forget to check online sources too; your Onedrive, Google Drive, and even your Gmail attachments might contain the missing files.
This article was written by Levin Roy, a Contributing Writer at Handy Recovery Advisor. It was recently updated by Jordan Jamieson-Mane. It was also verified for technical accuracy by Andrey Vasilyev, our editorial advisor.
Curious about our content creation process? Take a look at our Editor Guidelines.