
In this article, we look at multiple techniques that can be used to recover deleted photos from any type of disk-based storage device. We cover native methods for macOS and Windows systems as well as third-party solutions that can recover valuable images that have been accidentally lost or deleted.
You just deleted some irreplaceable photos taken at a family event and you are not sure what to do next. Don’t panic, as there is a good chance you can get your photos back safely. We have you covered with a guide to recovering deleted photos from any type of storage device. In some cases, the images are right there and you just need to know where to look. In other instances, you might need to use a software tool to restore your valuable photos.
Read This Before You Do Anything Else
Stop using the affected storage device as soon as you suspect that you have accidentally deleted photos.
This is the most important action that you can take to improve the chances of a successful recovery. Using the device risks potentially overwriting the storage locations containing your deleted files. Once they are overwritten they cannot ever be recovered. So stop using the device immediately. In the case of an SD card or other type of removable storage, take it out of the camera or mobile device until you can recover the lost data.
How to Recover Deleted Photos
- Download and install Disk Drill.
- Connect the device where the deleted photos were located.
- Select your device and click on “Search for lost data”.
- Select the photos you want to recover and click “Recover”.
- Choose a safe recovery destination and hit “Next”.
Dive into the comprehensive guide below for an in-depth exploration of photo recovery methods.
Part 1: Recovering Deleted Photos from an SD Card
SD cards are one of the most popular storage devices for photos and videos. They are widely used in digital cameras, smartphones, and other mobile devices to extend their storage capacity.
Here are the ways you can retrieve photos that were deleted from an SD card using either a Windows or Mac computer.
Method 1: Clearing the Card of Possible Virus Infections
Your SD card may be infected with a virus that needs to be removed before infecting other devices. Here are two possible methods you can use to clean an SD card.
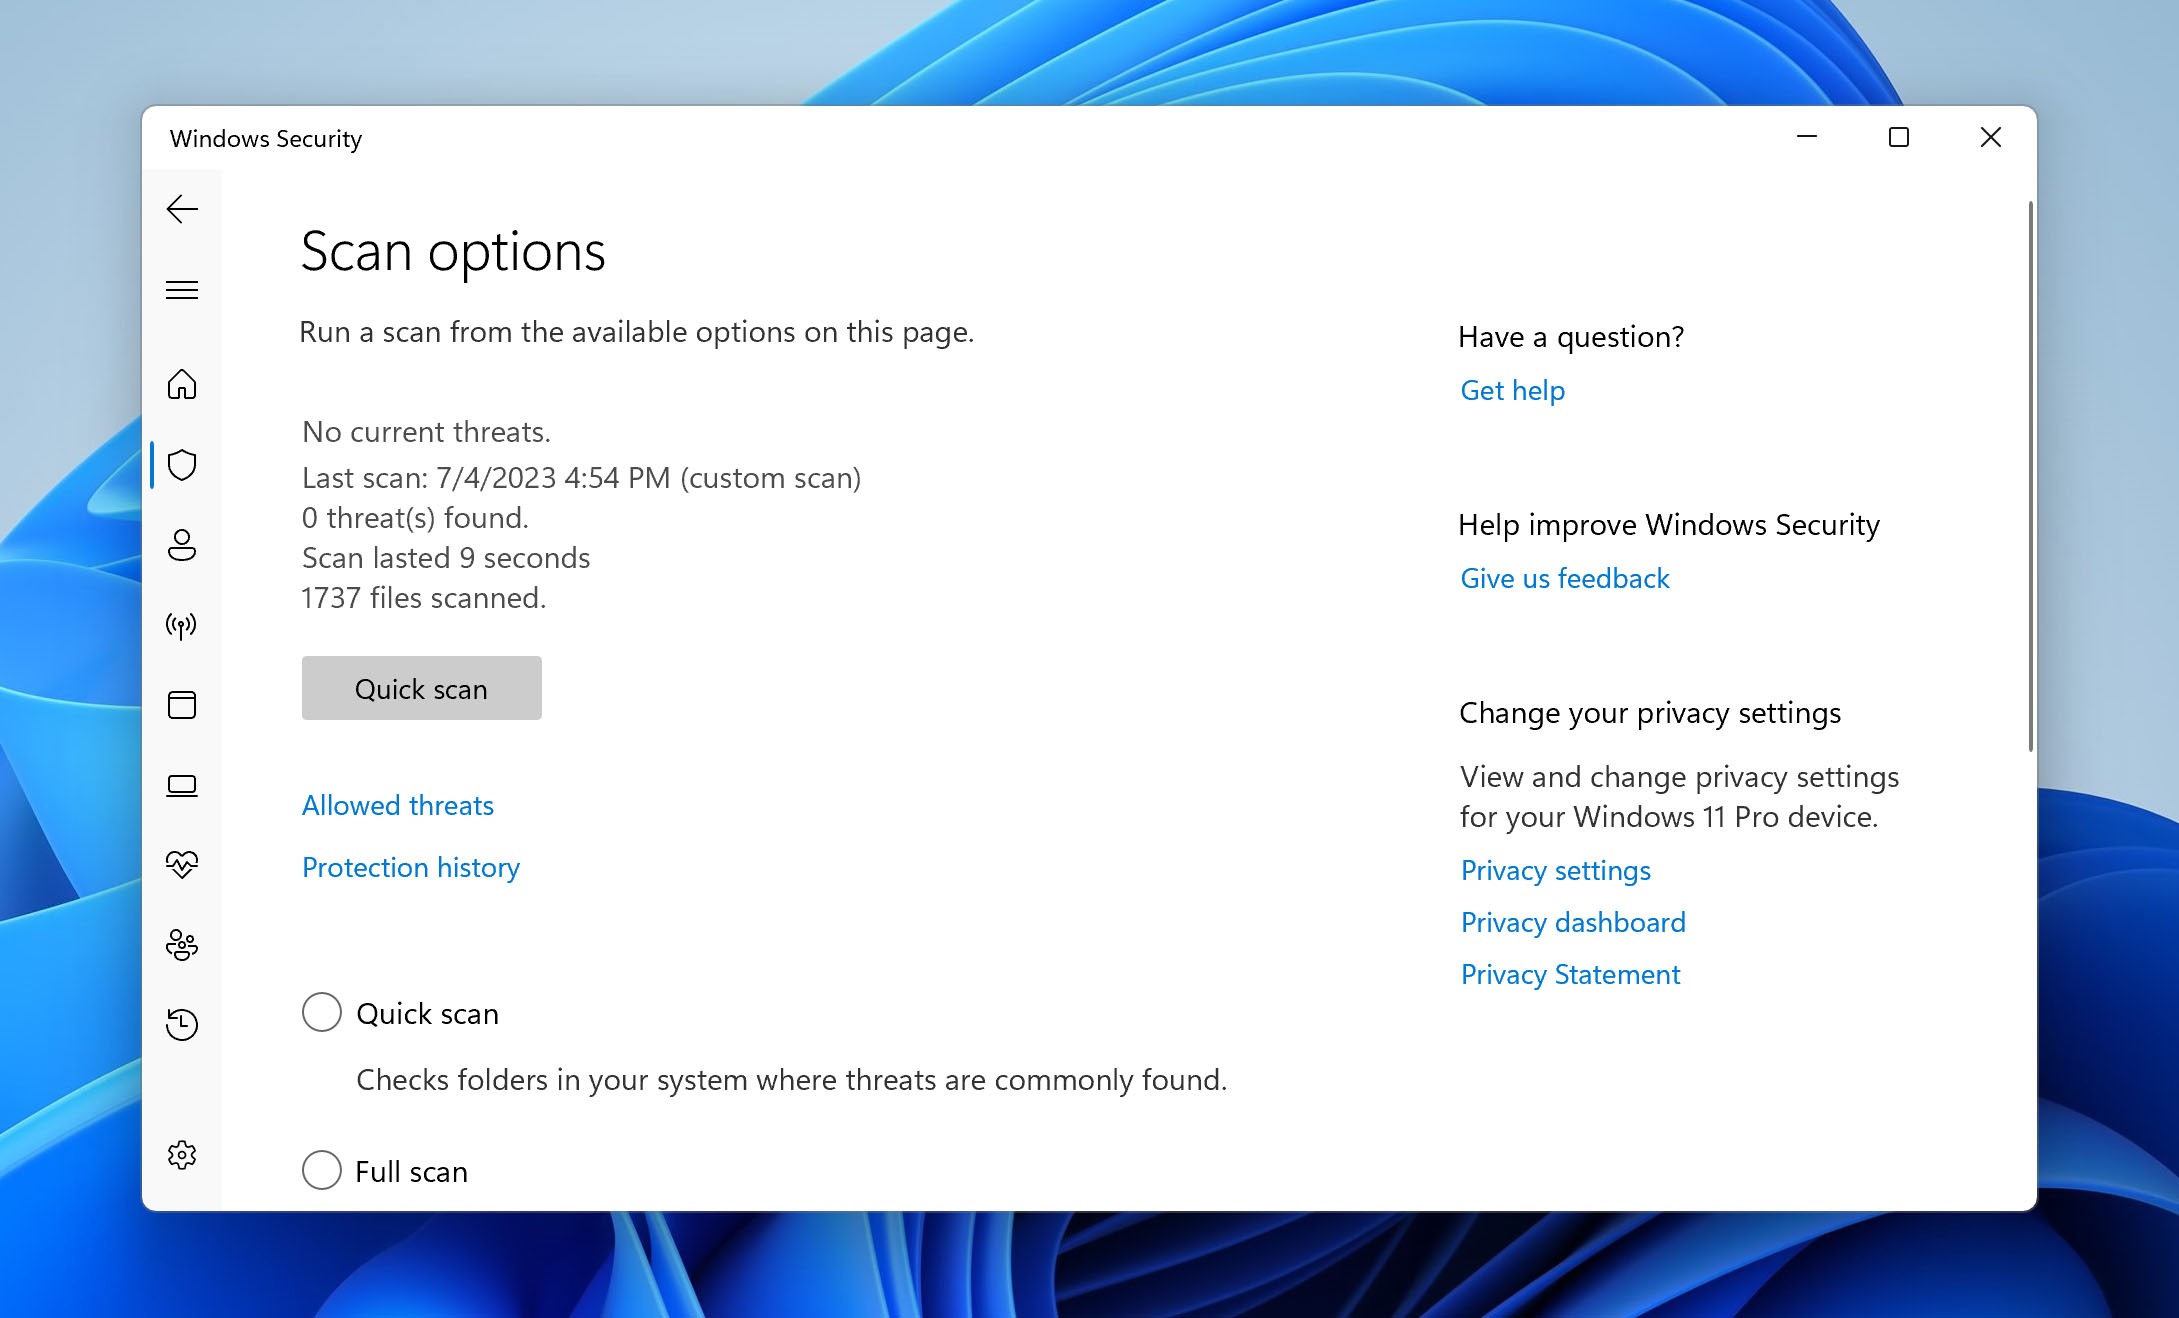
Scanning the Card with an Antivirus Program
- Insert the SD card into your computer’s card reader.
- Start the antivirus tool and direct it to scan the SD card.
- Remove any virus files that are detected.
- Examine the SD card and see if you can now access deleted photos.
Read also: How to Recover Files Deleted by Antivirus
sing the Command Prompt on Windows Systems
- Click Start -> select Run -> type cmd -> hit Enter.
- Type this command in the command window: attrib -h -r -s /s /d E:\*.* and then Enter. Replace E with the drive letter assigned to the SD card.
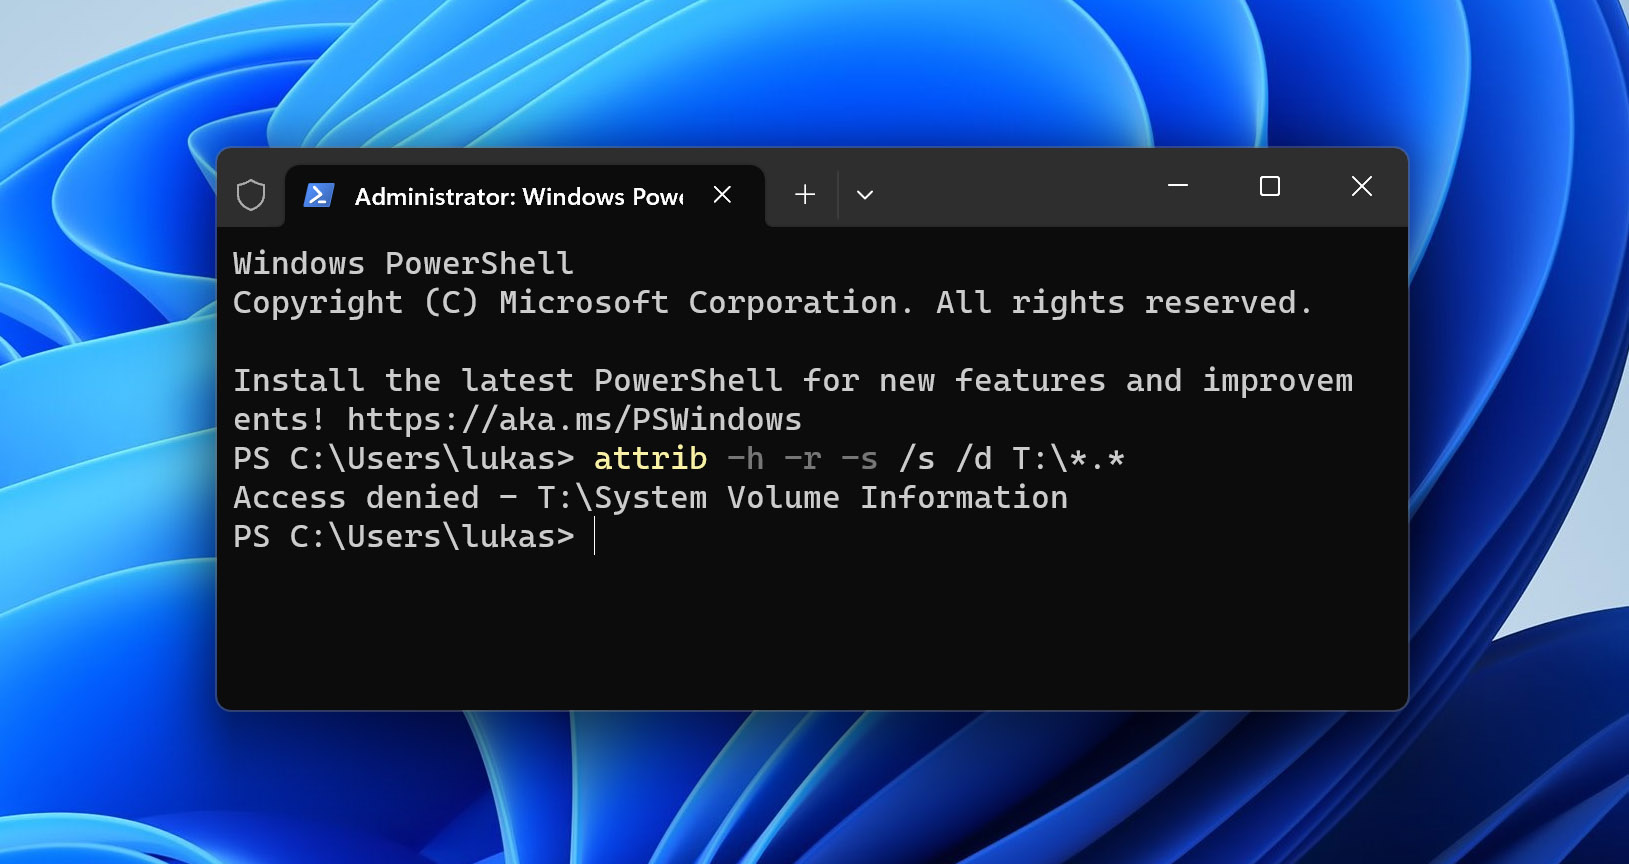
- Windows will attempt to repair the card. When the command finishes, check the card for the deleted photos.
Method 2: Checking for SD Card Corruption
Make sure the SD card is not corrupted. To try to fix a corrupted drive, follow these steps.
- Verify you are using a card reader that supports the type of card you are using.
- Try using a different reader if you get error messages like “Please insert disk into drive E:”.
- Attempt to scan the card with OS utilities and try a repair. On Windows systems, use the attrib command discussed in the previous section. Mac users need to use the First Aid function of Disk Utility.
- Try to assign the SD card a name or drive letter.
Method 3: Searching in Temporary Storage
If you were using the SD card as a storage device for your computer, the deleted files may be in its temporary storage location. Here’s where you can look to see if that’s where your lost files can be found.
For macOS and Mac OS X Systems
Open the Terminal application and enter this command to view items in your Mac’s temp folder – open $TMPDIR.

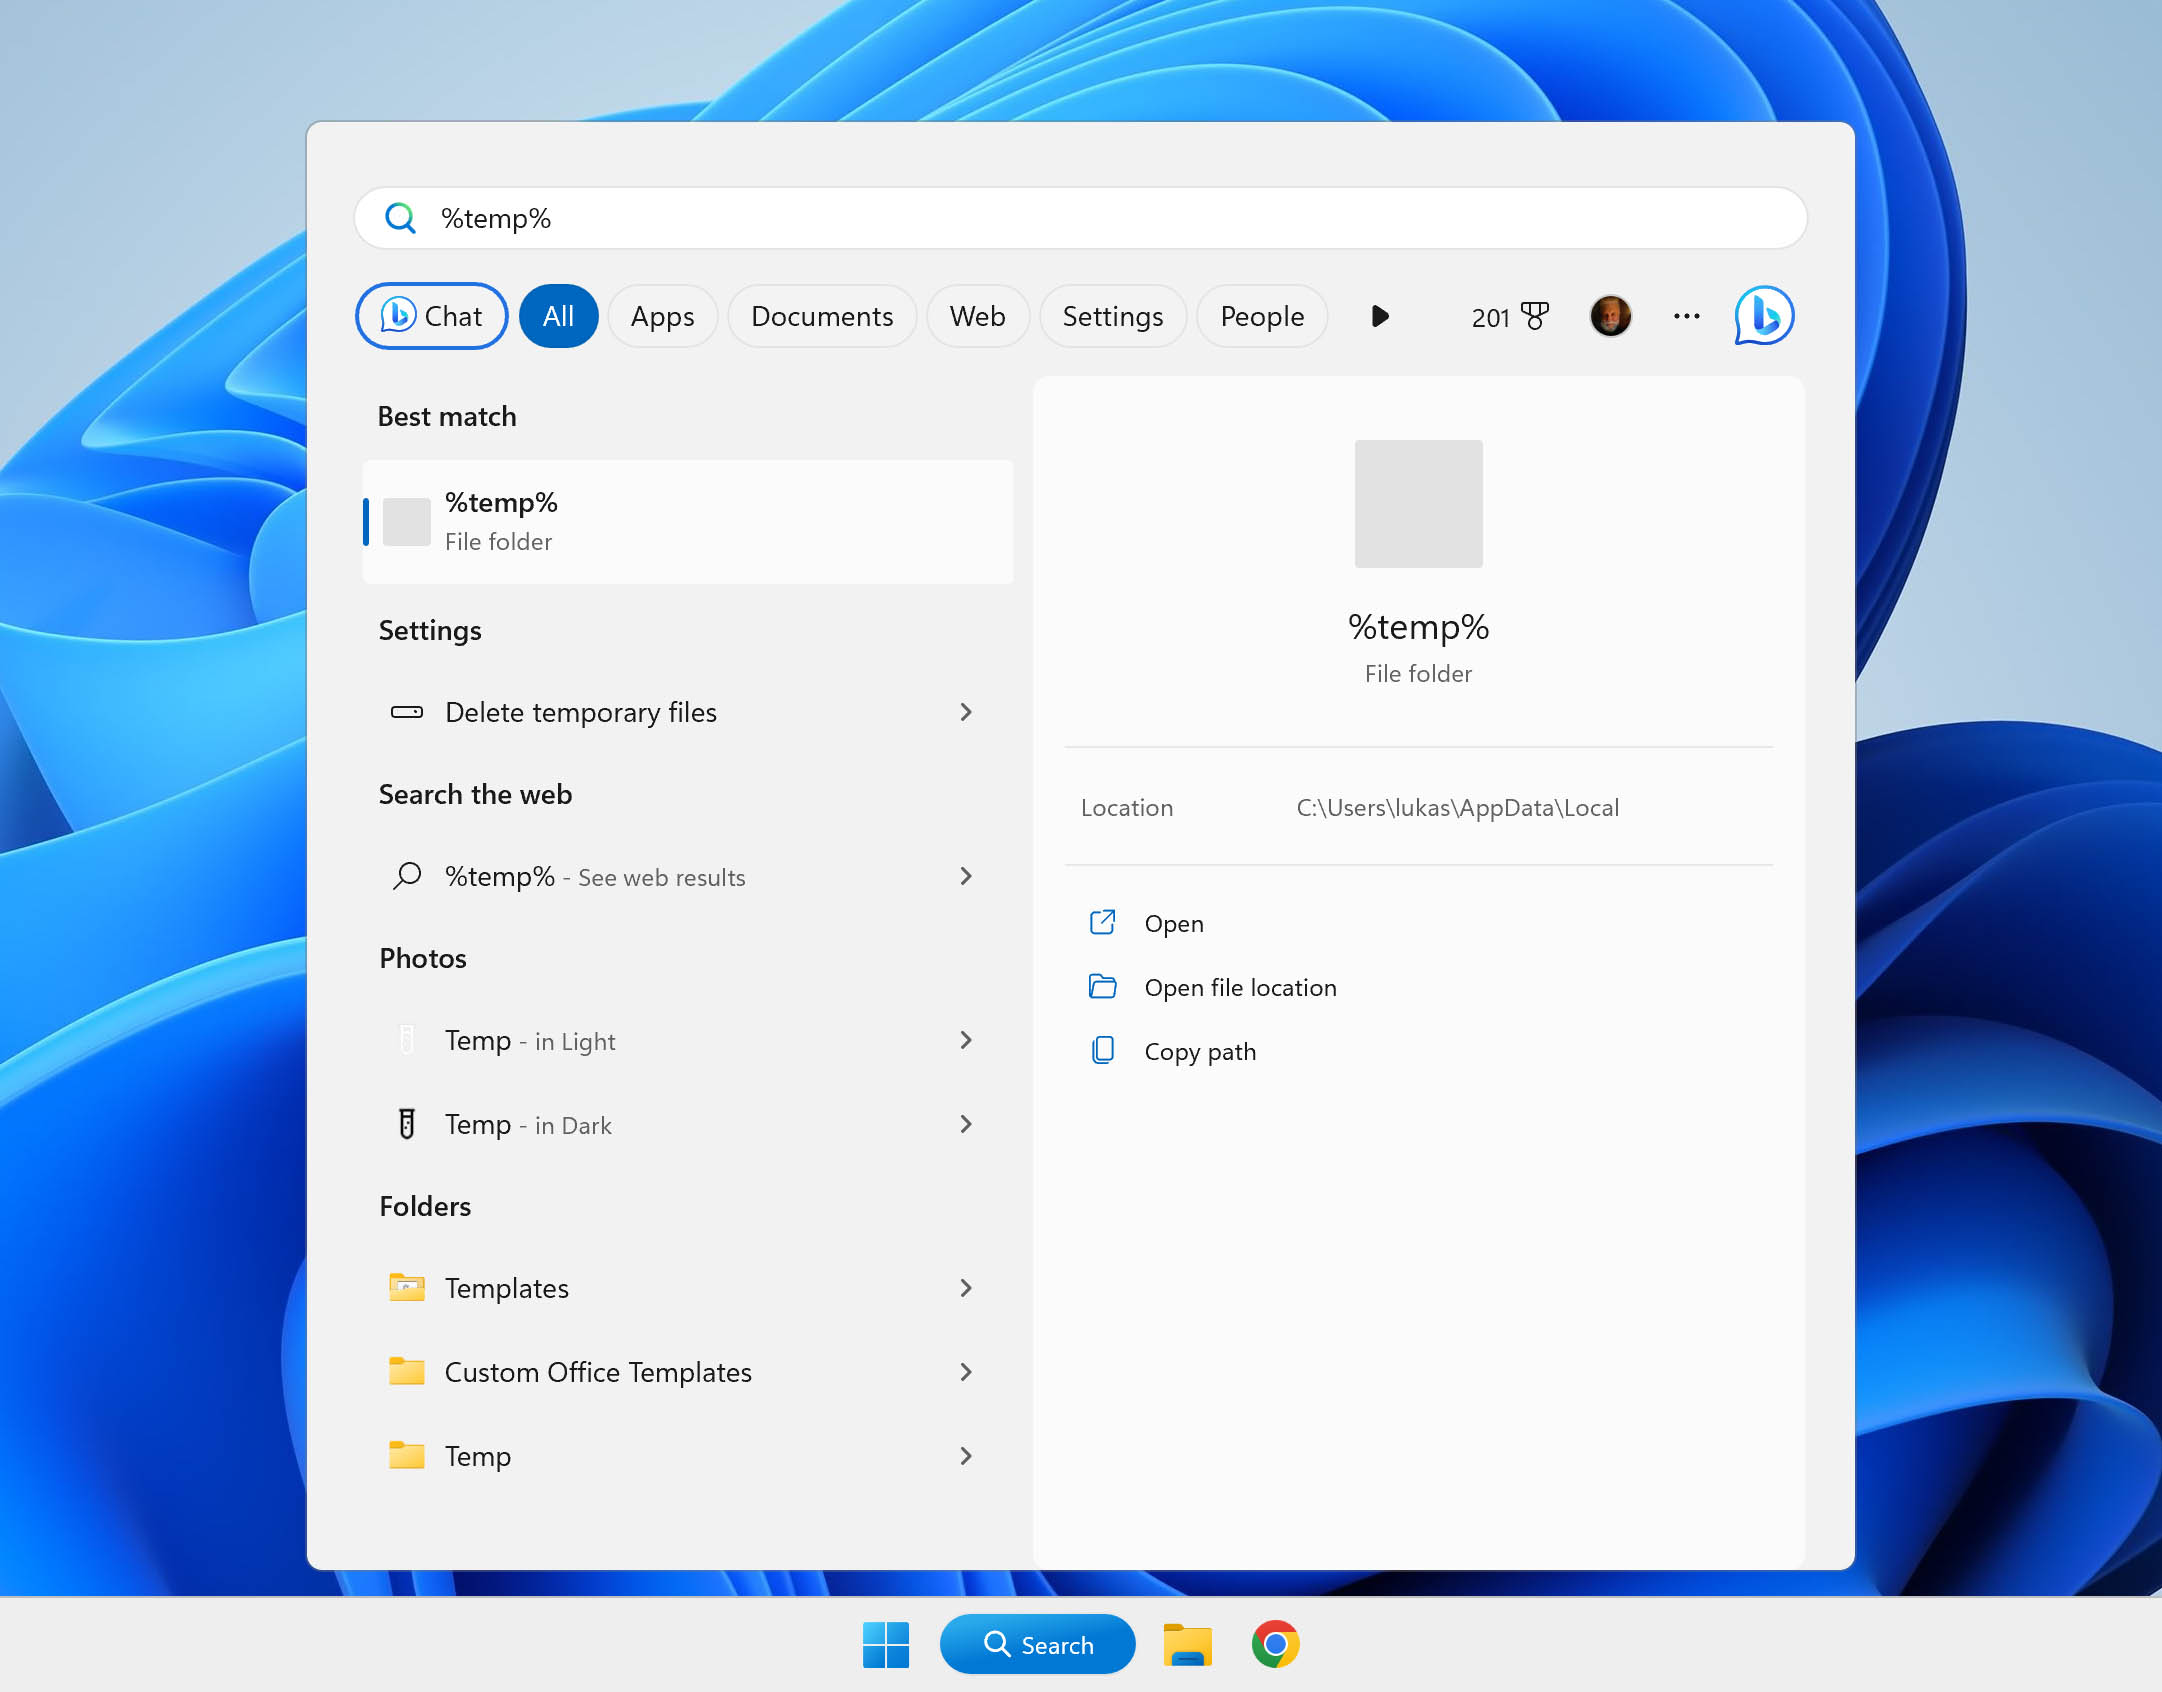
For Windows Systems
Open the Start menu and type %temp% in the Search field. Press Enter to open the folder and view its contents.
Method 4: Restoring from a Backup
If you have backed up your SD card before it experienced data loss, you can easily recover the deleted photos.
The most likely backup methodology would have you transfer the photos on the card to a folder on your computer and then back up the machine. You can use the built-in backup and restore tools that come with your operating system or opt for a third-party solution.
Let’s look at how to get back lost photos with Mac’s Time Machine or the Windows Backup and Restore tool.
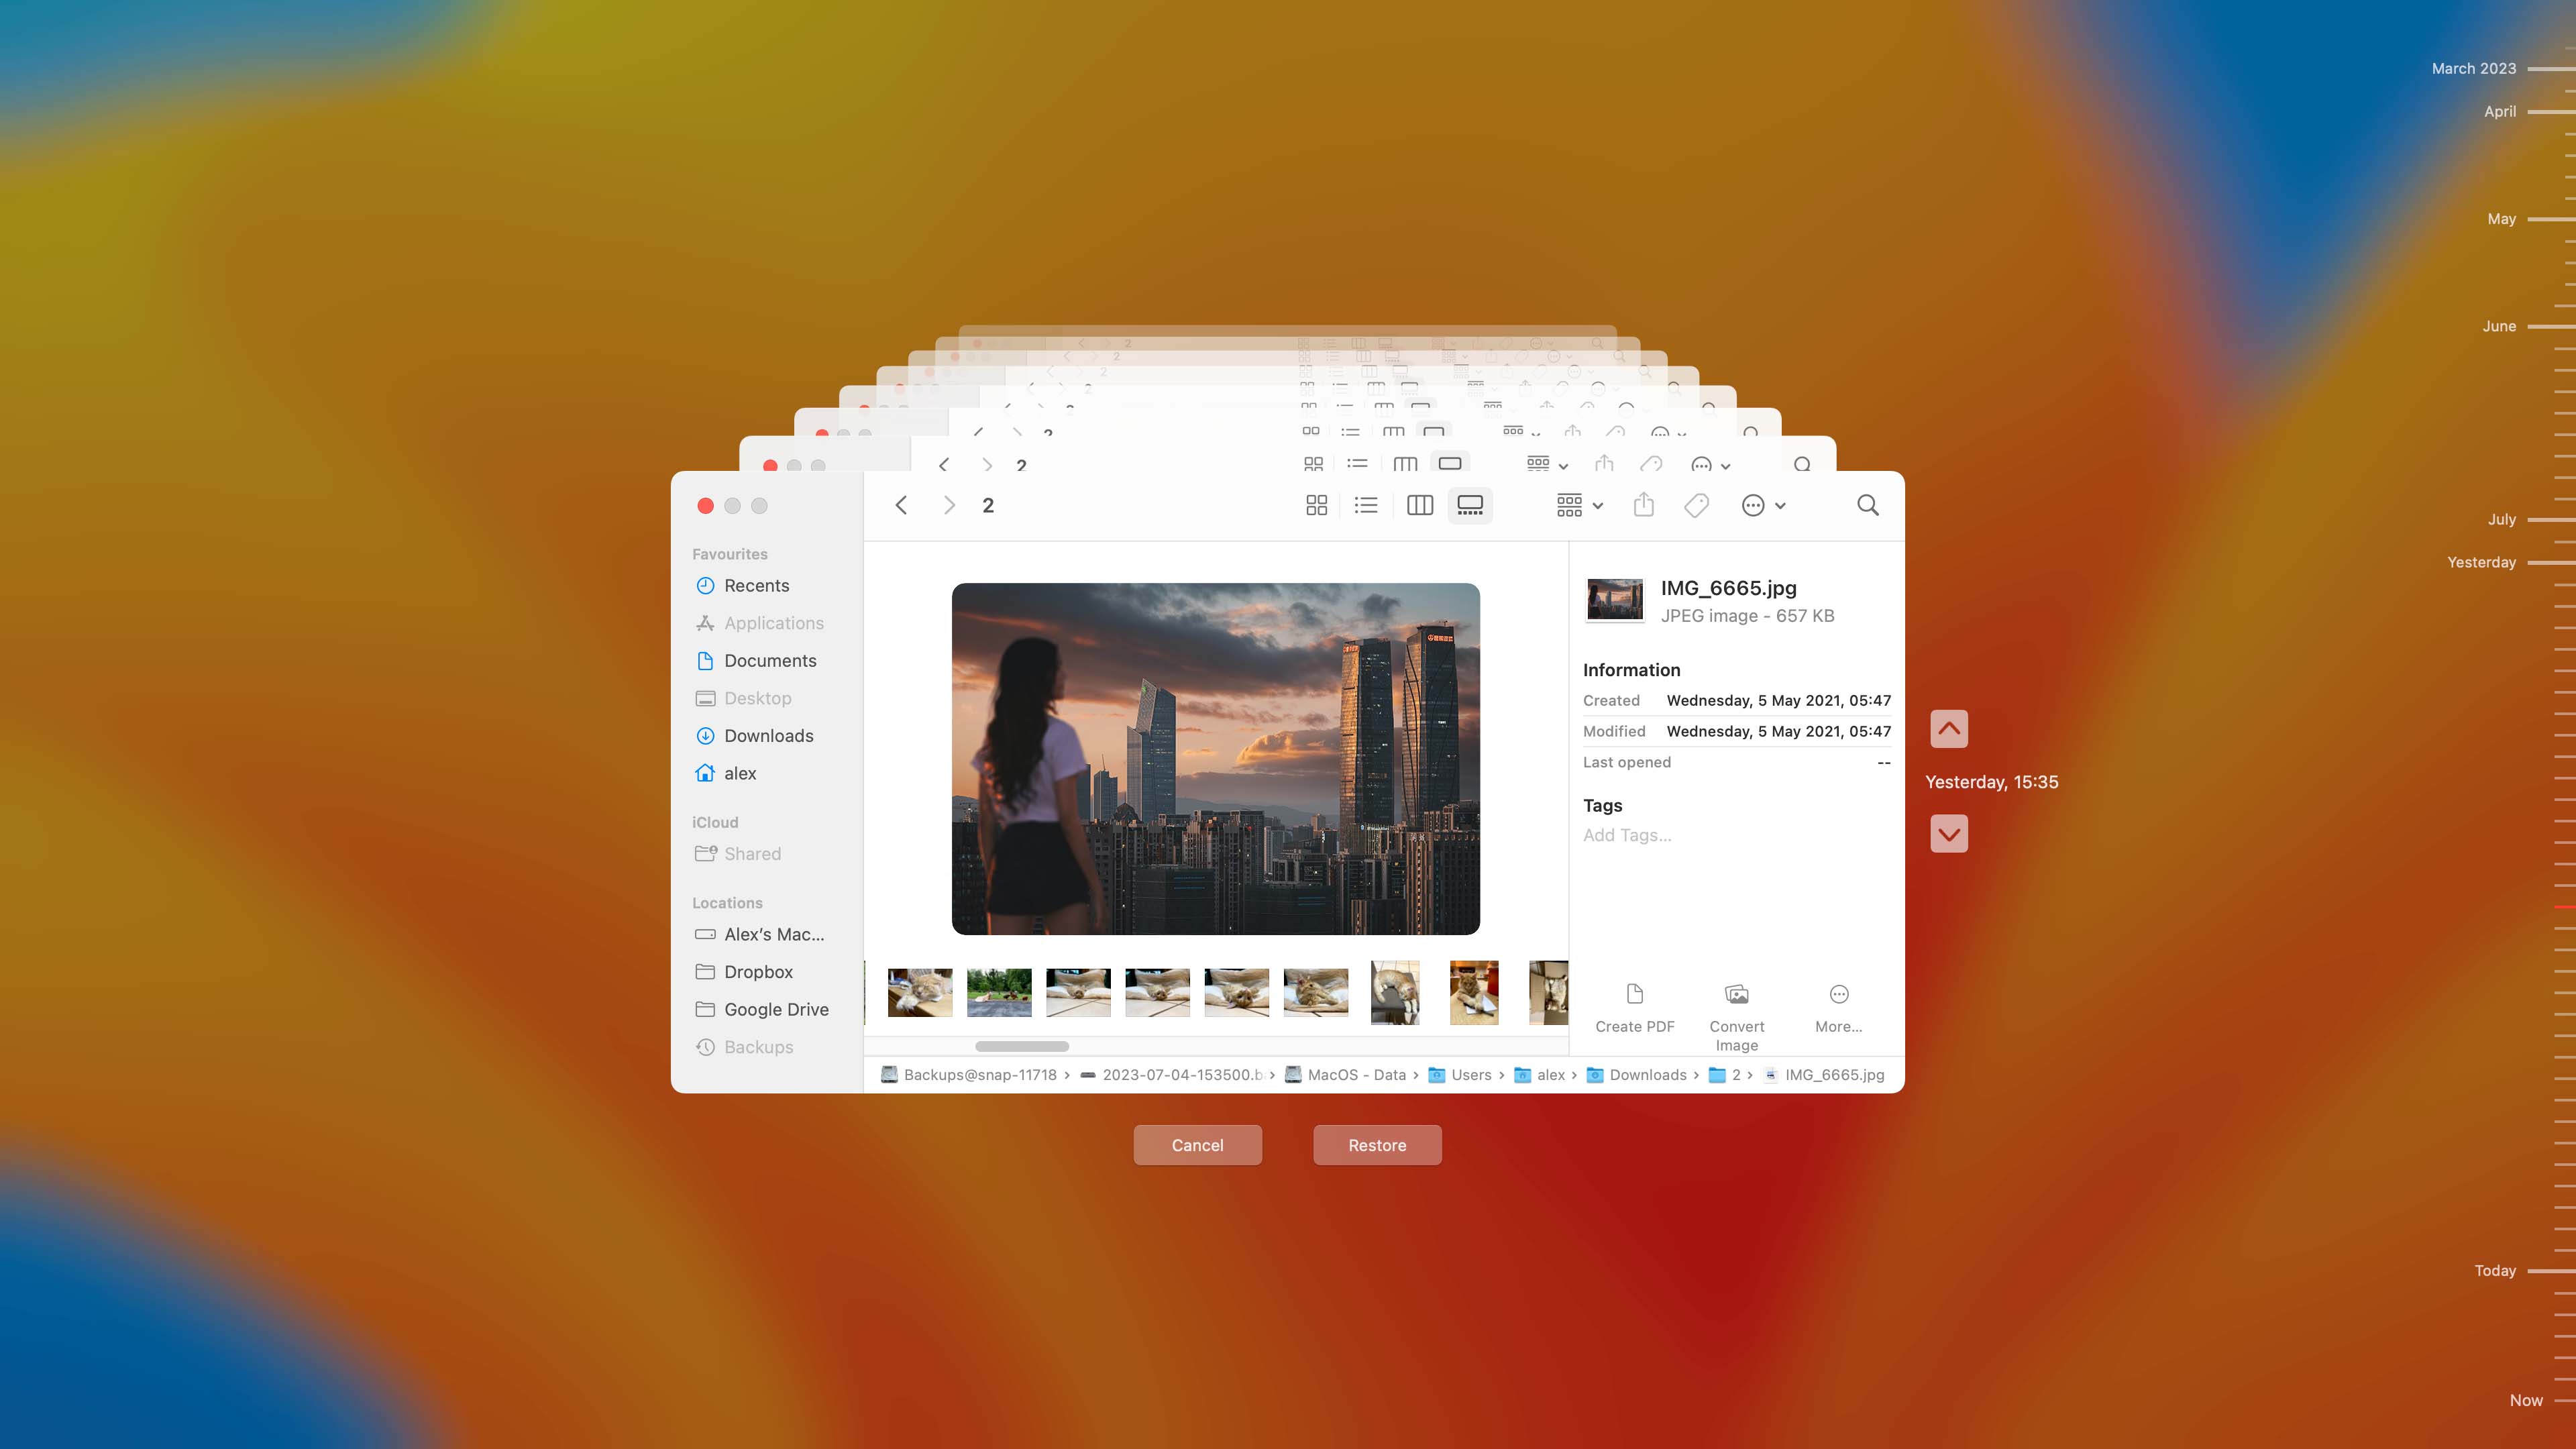
Using Time Machine
- Connect the disk containing Time Machine backups to your computer.
- Open the folder where the photos were last located.
- Open Time Machine by clicking the clock icon on the menu bar.
- Use the on-screen navigation to locate the files you want to recover.
- Press the Space Bar to preview the file.
- Click Restore to recover the item.
Using Windows Backup and Restore
Based on the version of Windows you are running, you will either use File History (Windows 10) or Backup and Restore (earlier versions than Windows 10). Both tools offer intuitive help to guide you through the process.
Method 5: Employing Data Recovery Software
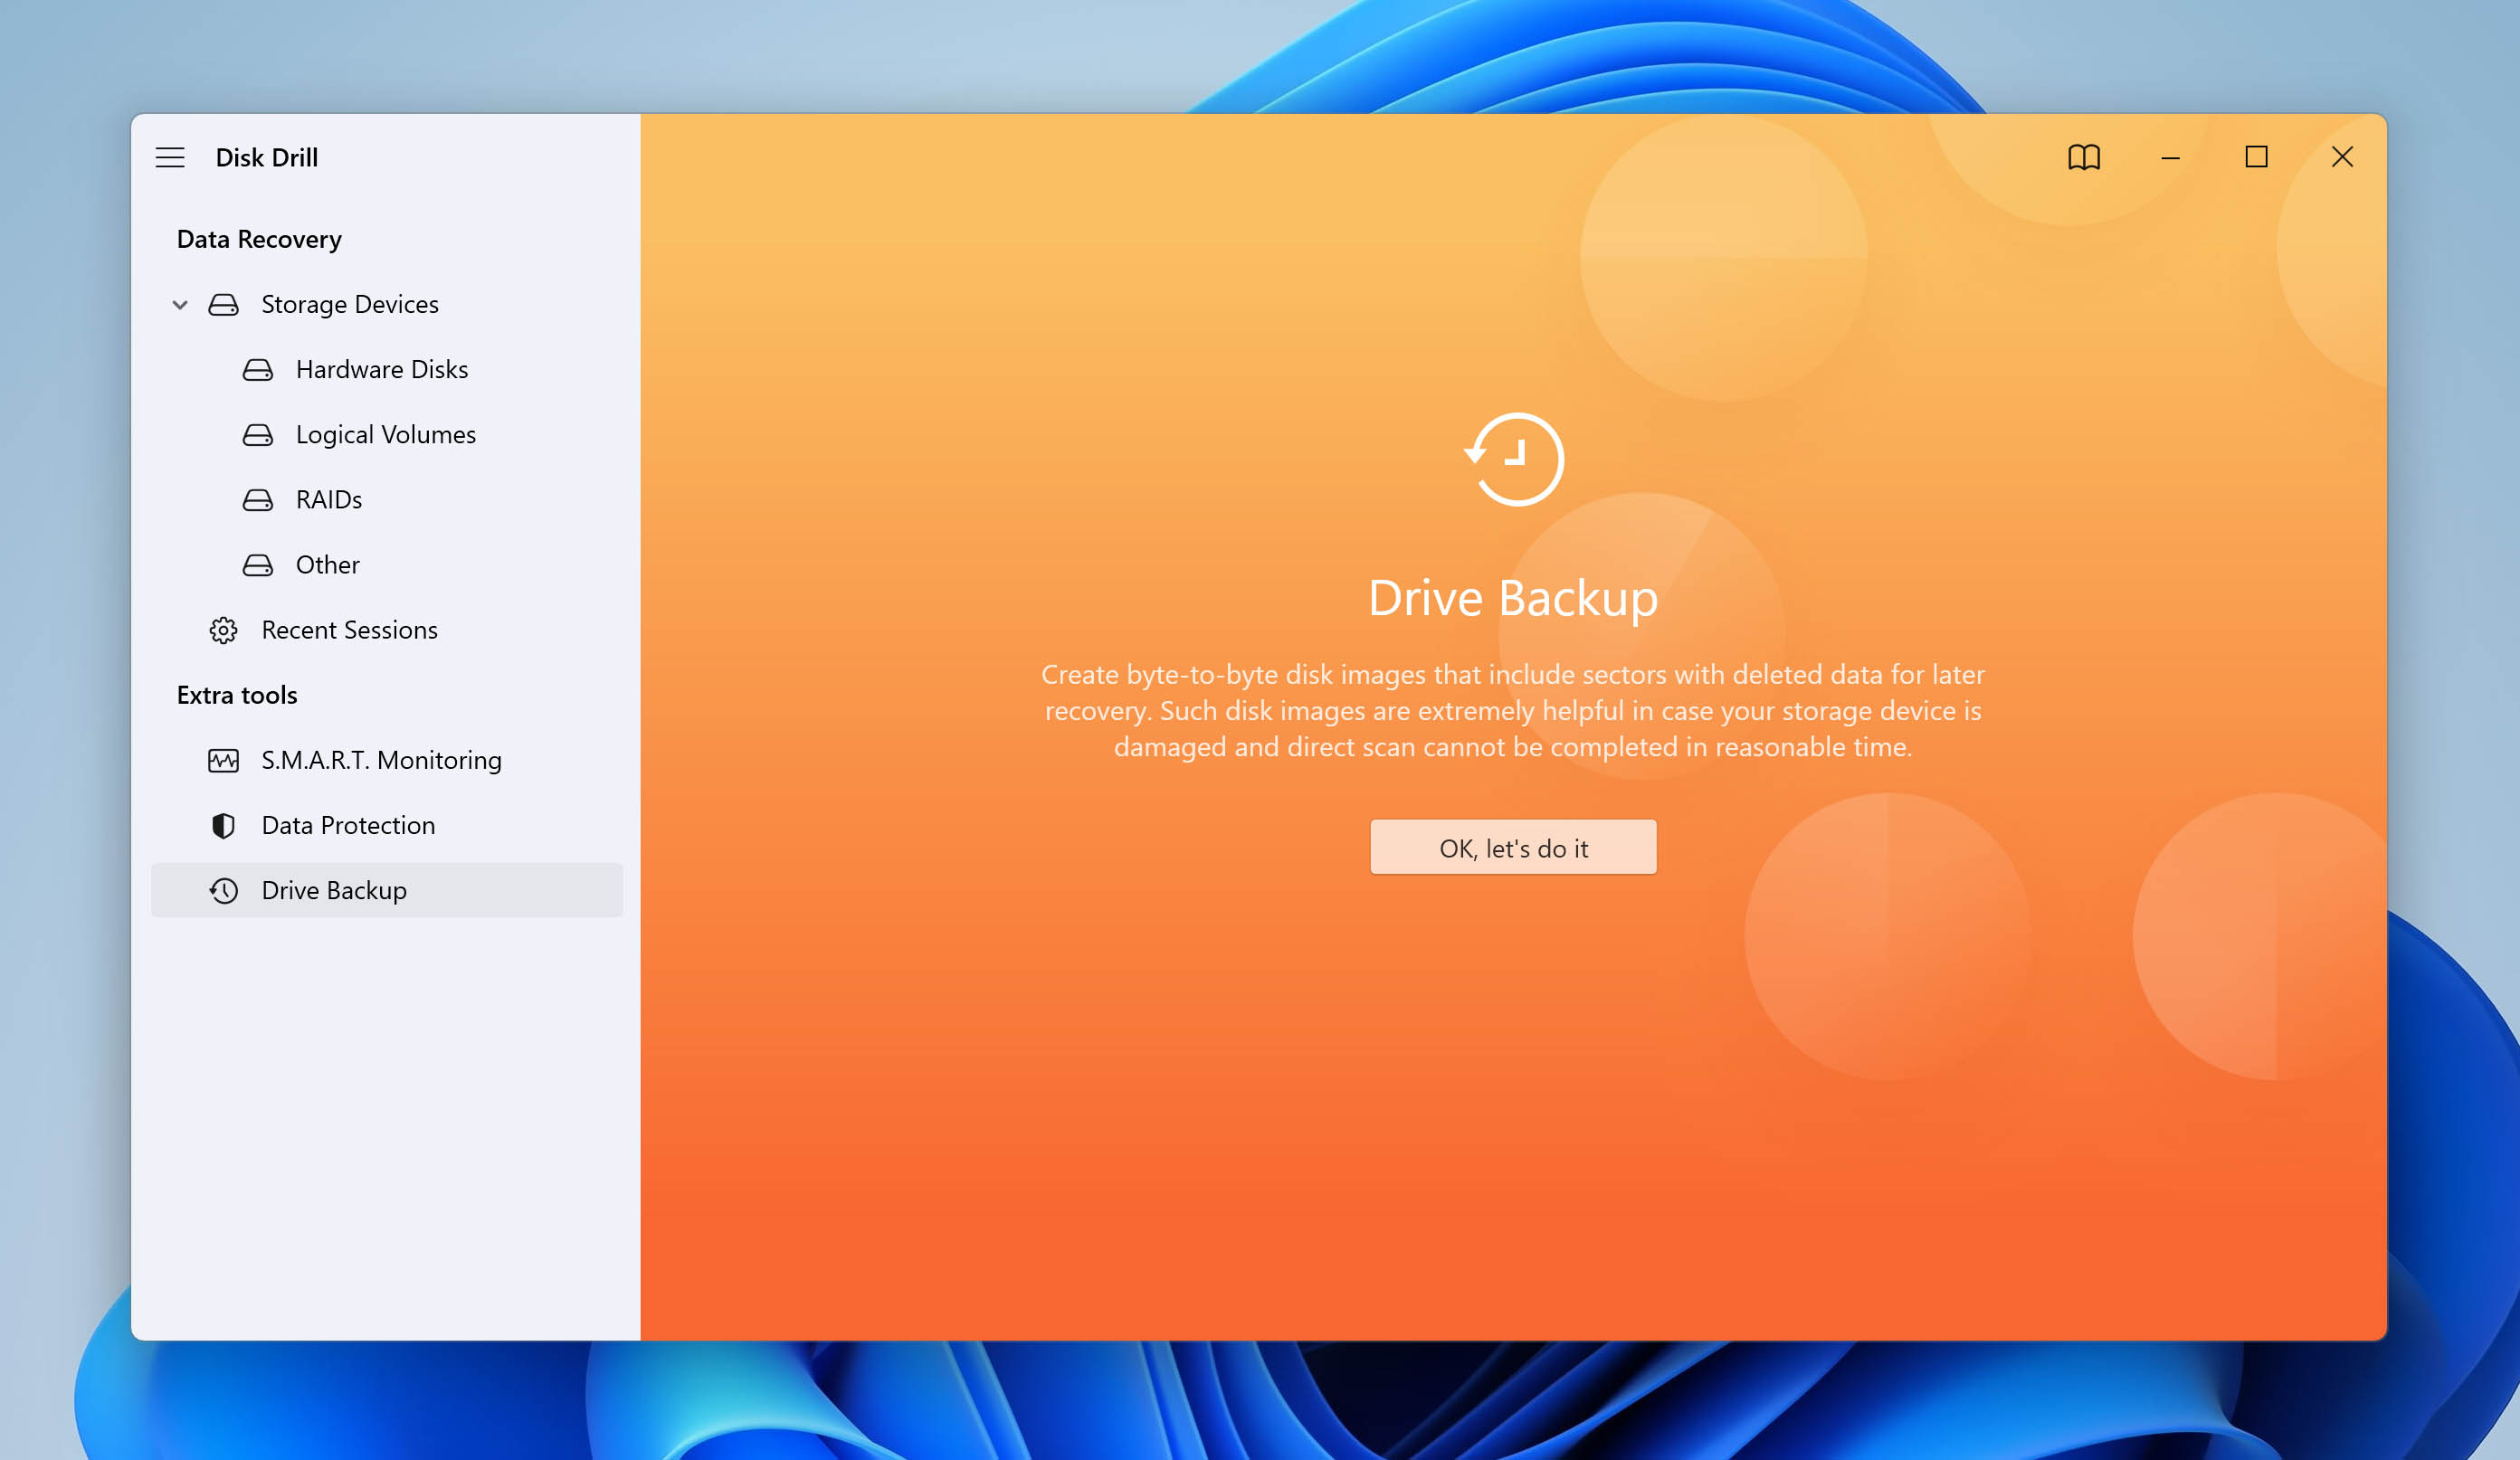
Use data recovery software to find deleted pictures on an SD card. Both paid and free data recovery software is available for Windows and Mac systems. In some cases, using a free solution like Recuva or PhotoRec may be all that you need for your situation. Other scenarios may demand more functionality and require a freeware solution such as Stellar Data Recovery, Recoverit or Disk Drill.
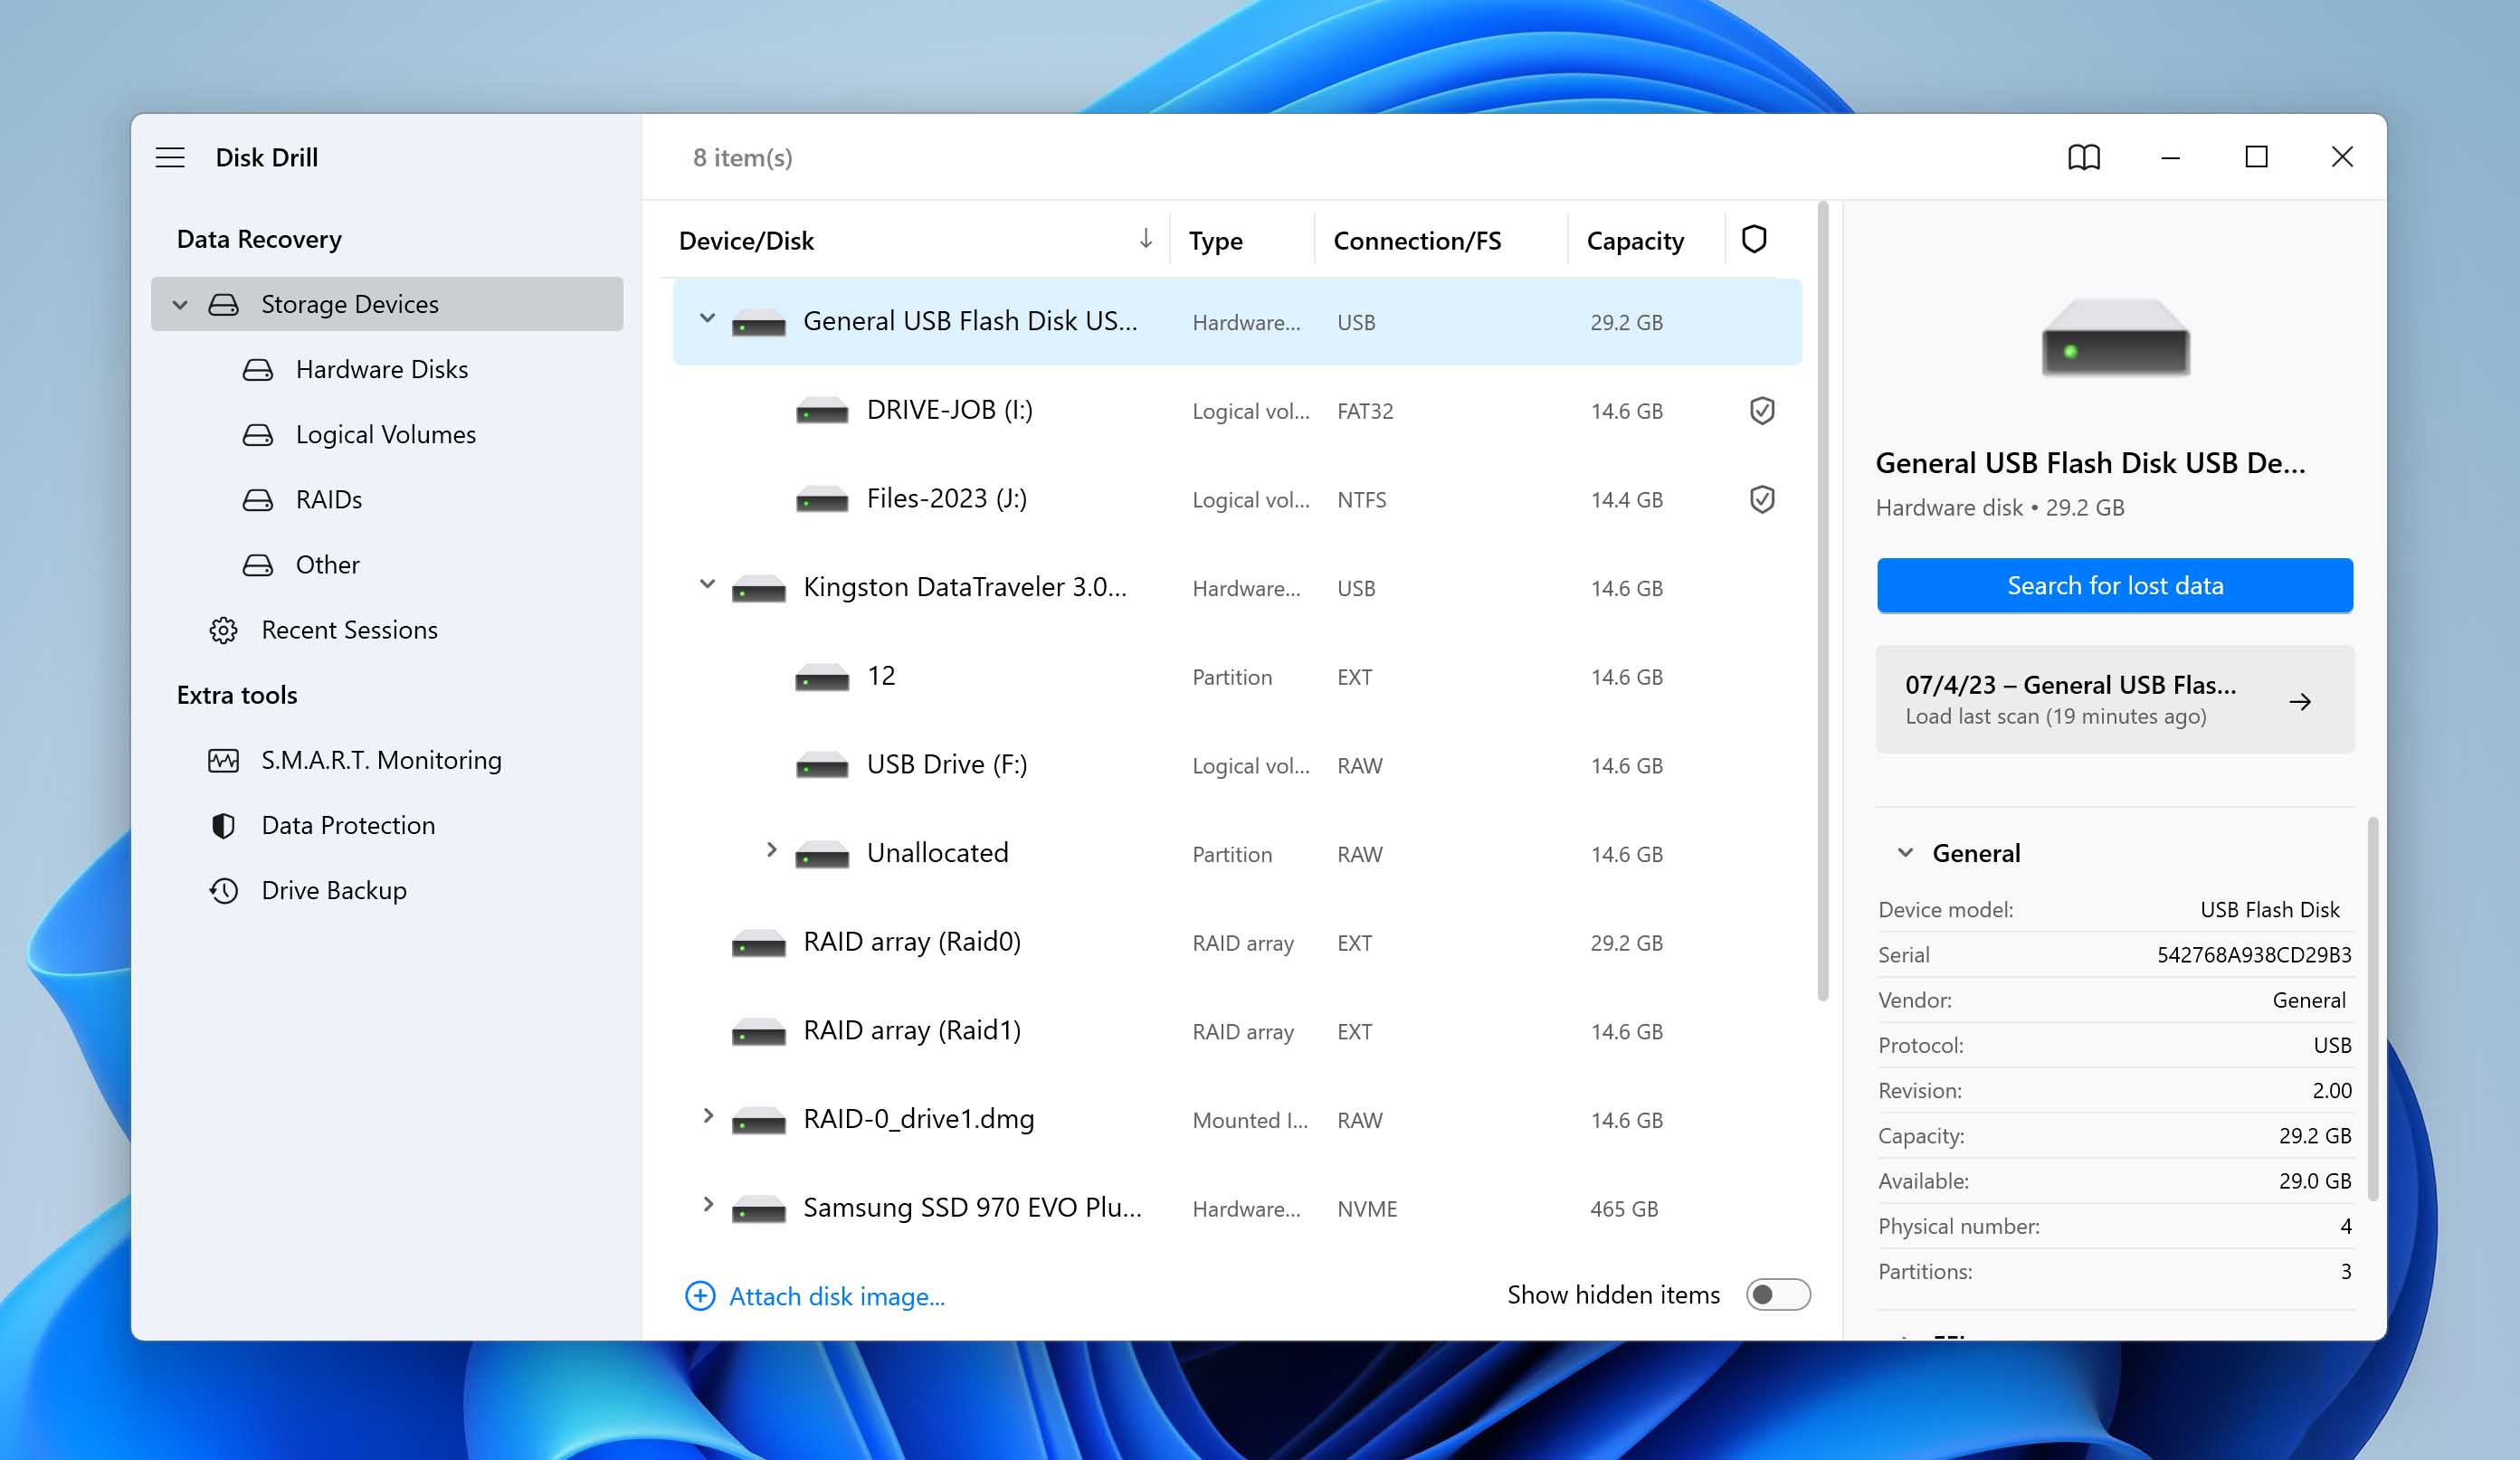
We are using Disk Drill Data Recovery for our demonstration since we feel it is a great option that allows Windows users to recover 500 MB of data for free.
Disk Drill data recovery software is a reliable and user-friendly application that can recover lost data from just about any disk-based storage device. We will go through the procedure for the Windows and Mac versions of the tool since they vary slightly.
Use the procedure for your type of system.
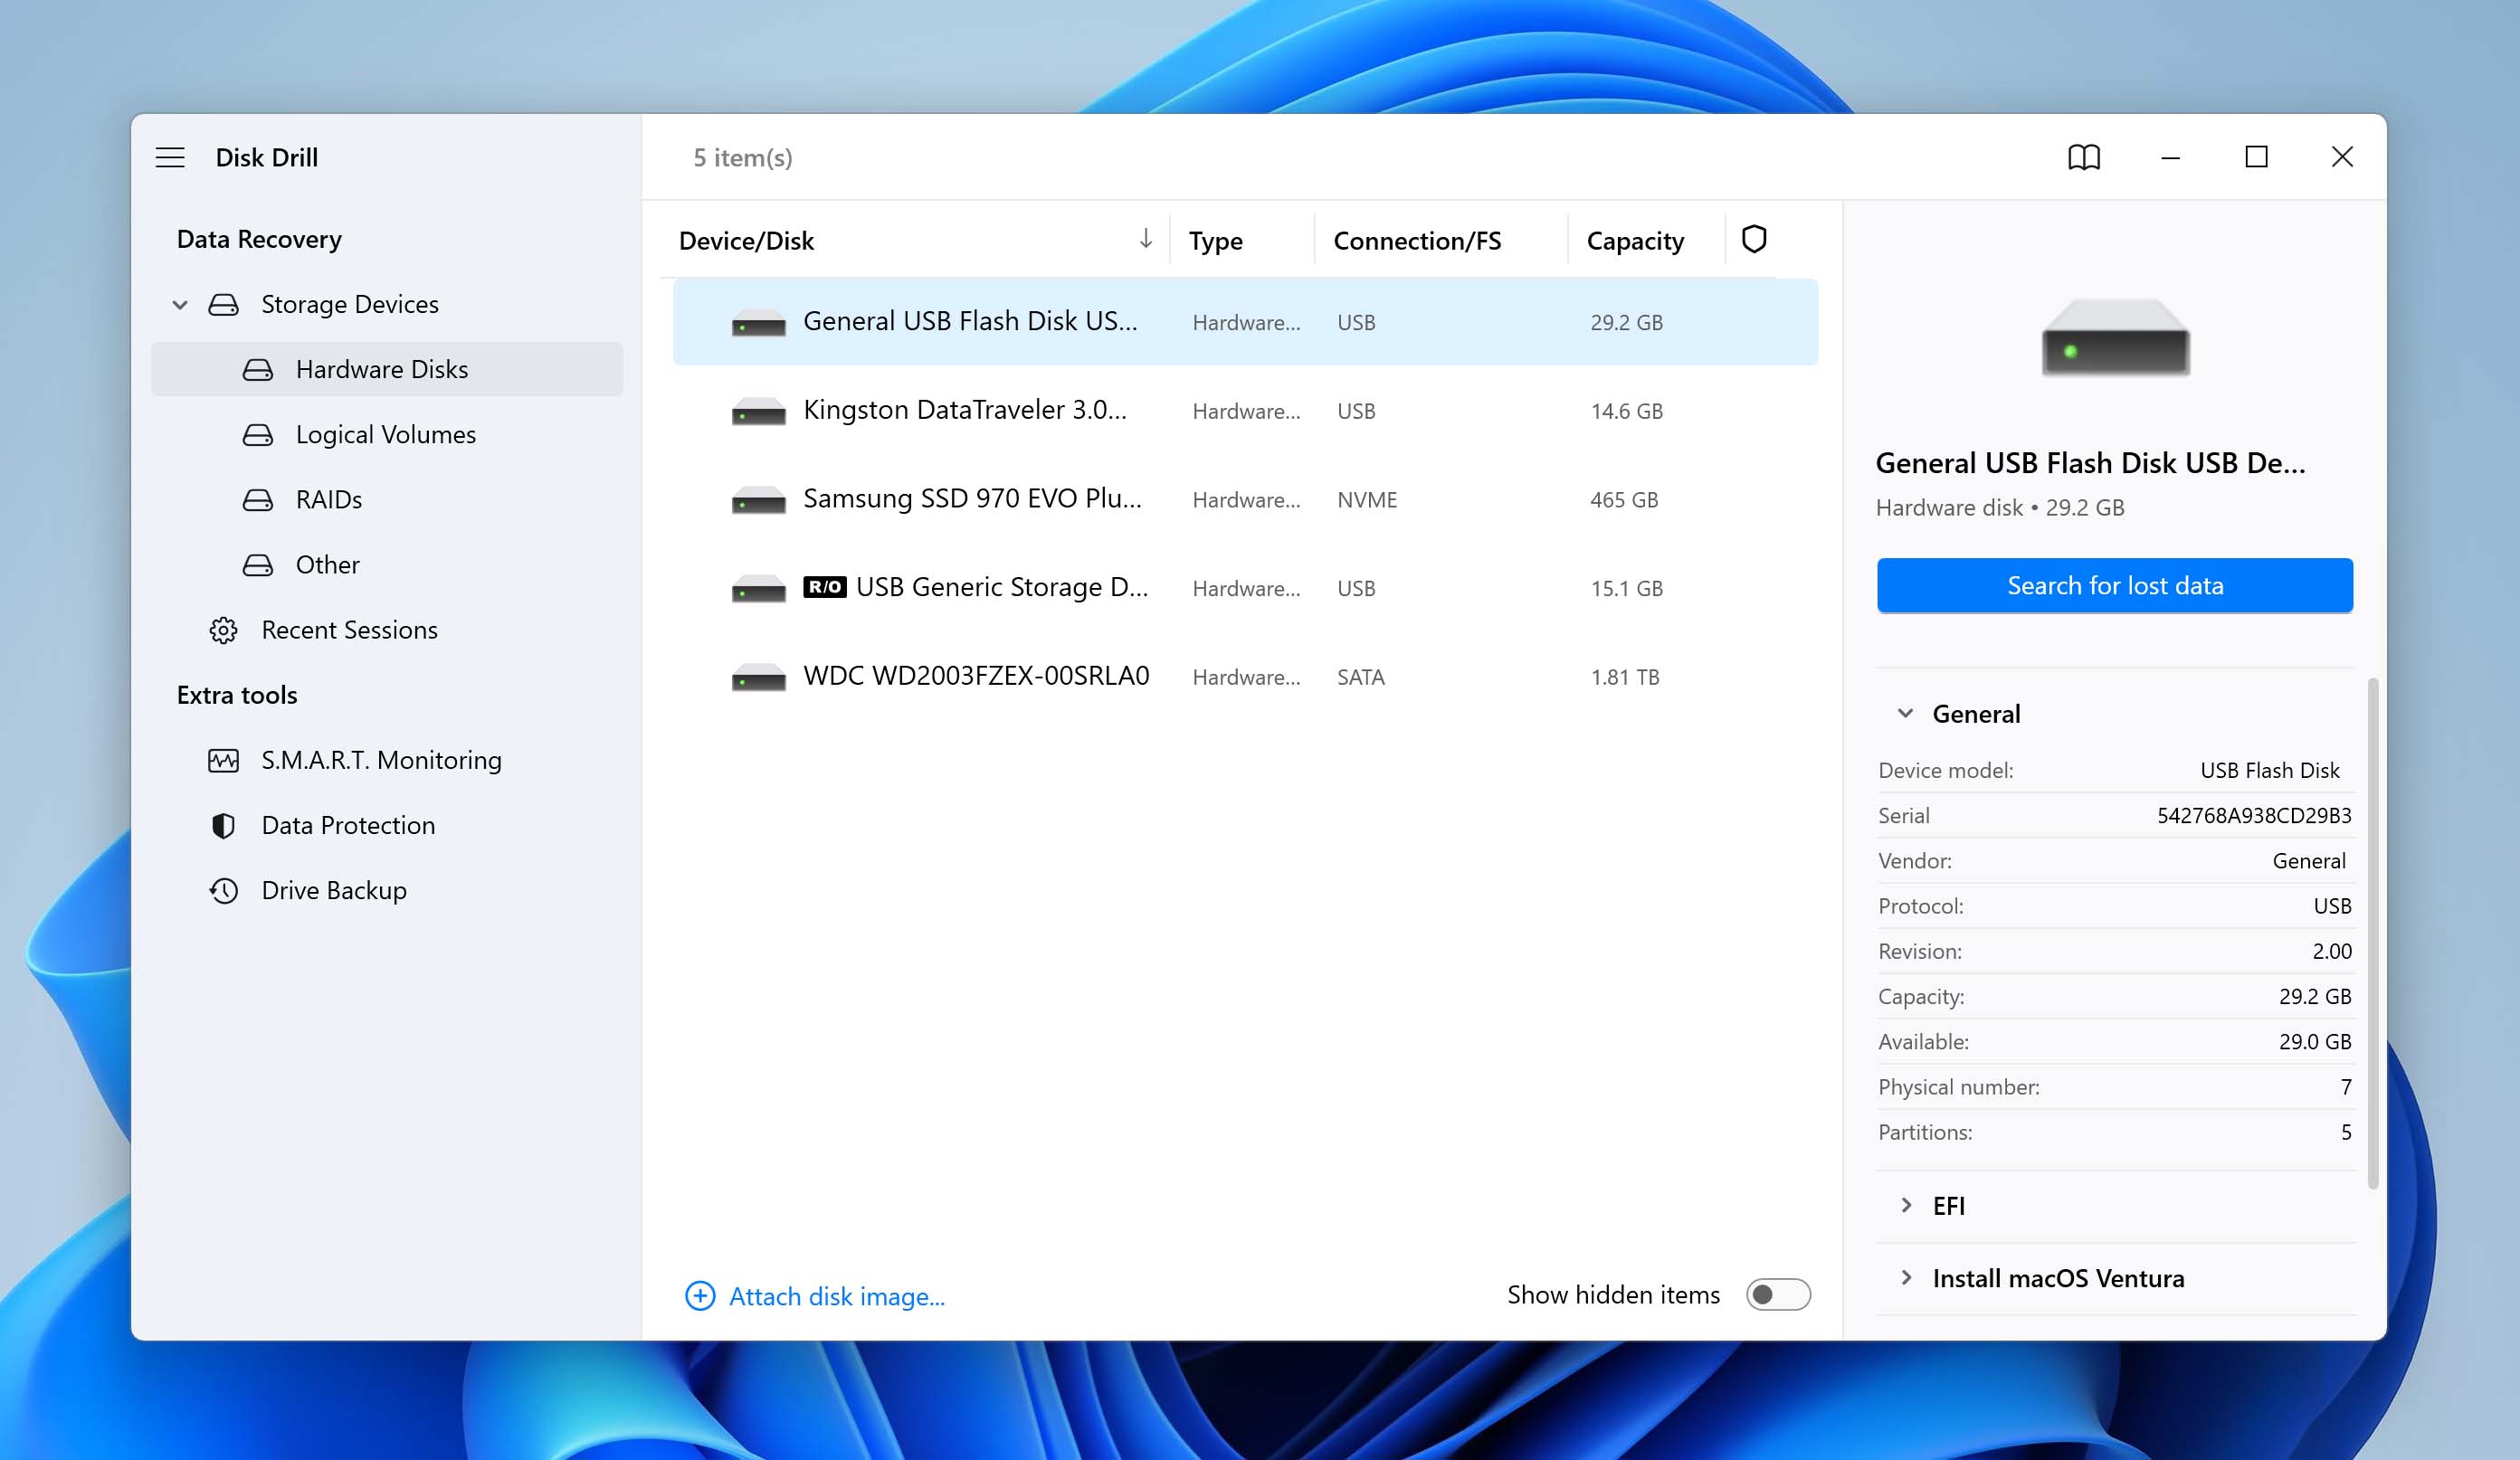
For Windows Systems
- Download and install Disk Drill for Windows.
- Insert the SD card into the computer’s card reader and launch the application.
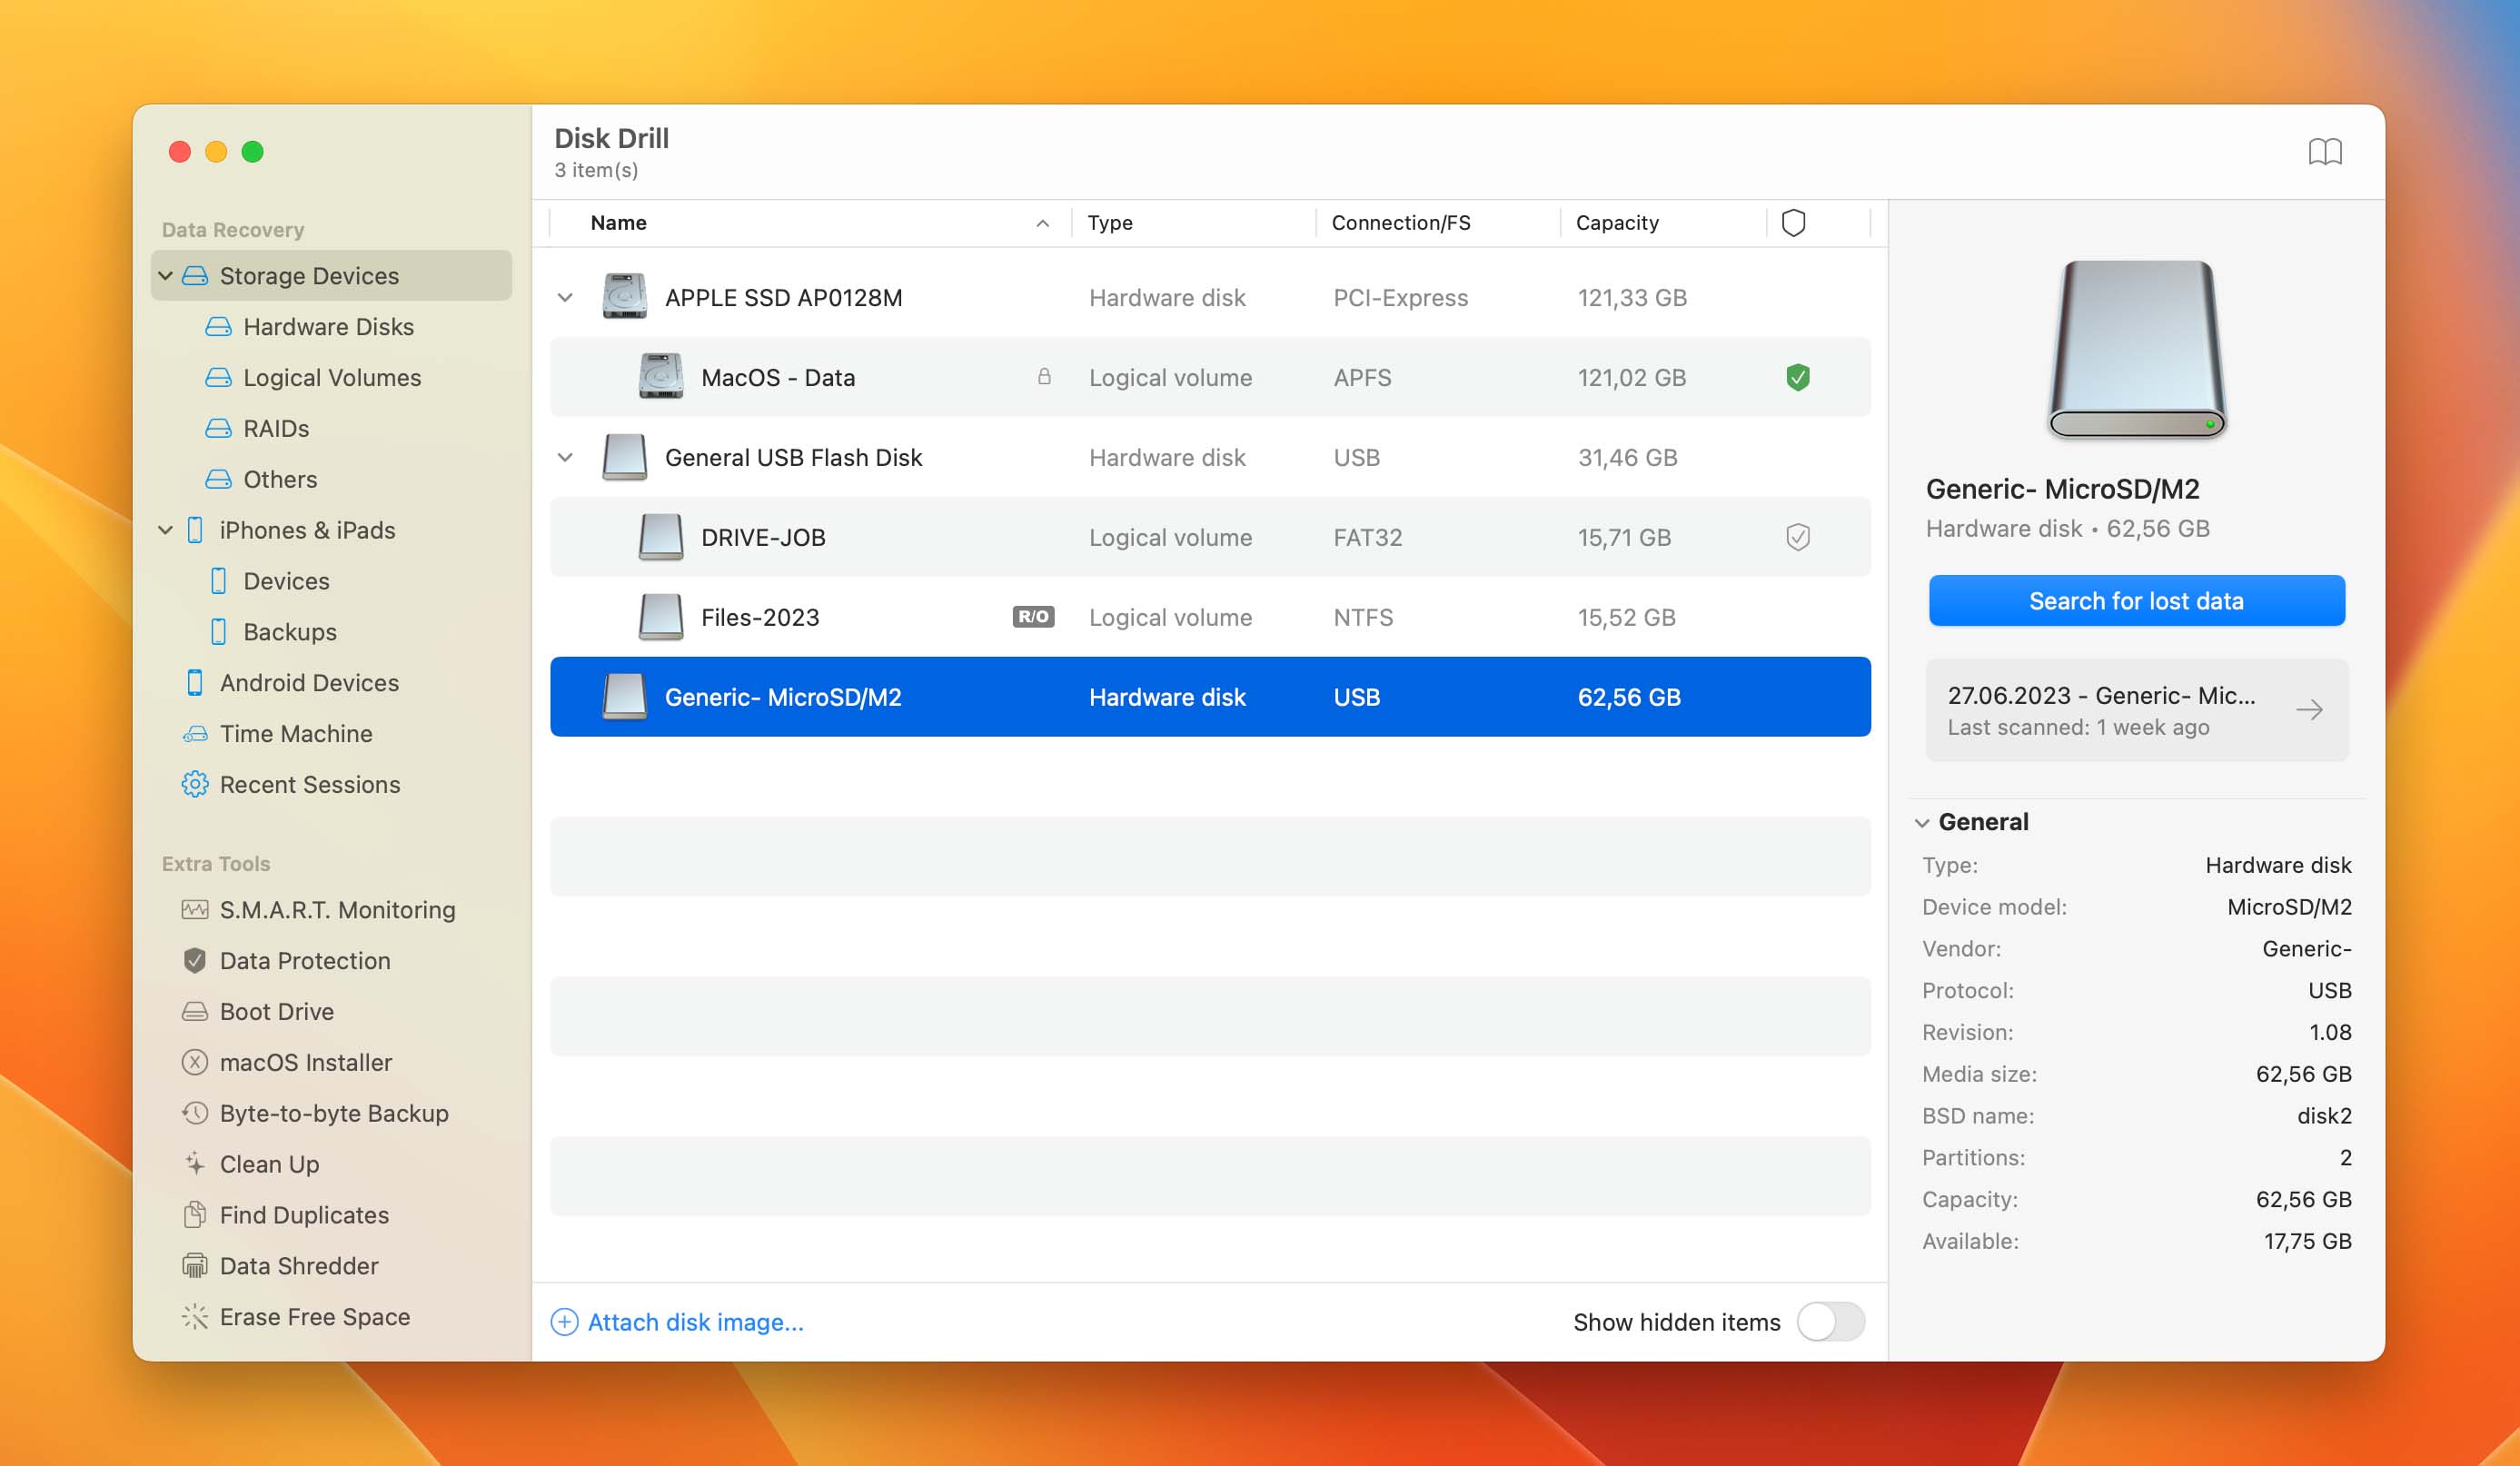
- Select the SD card from the list of disks the program displays.
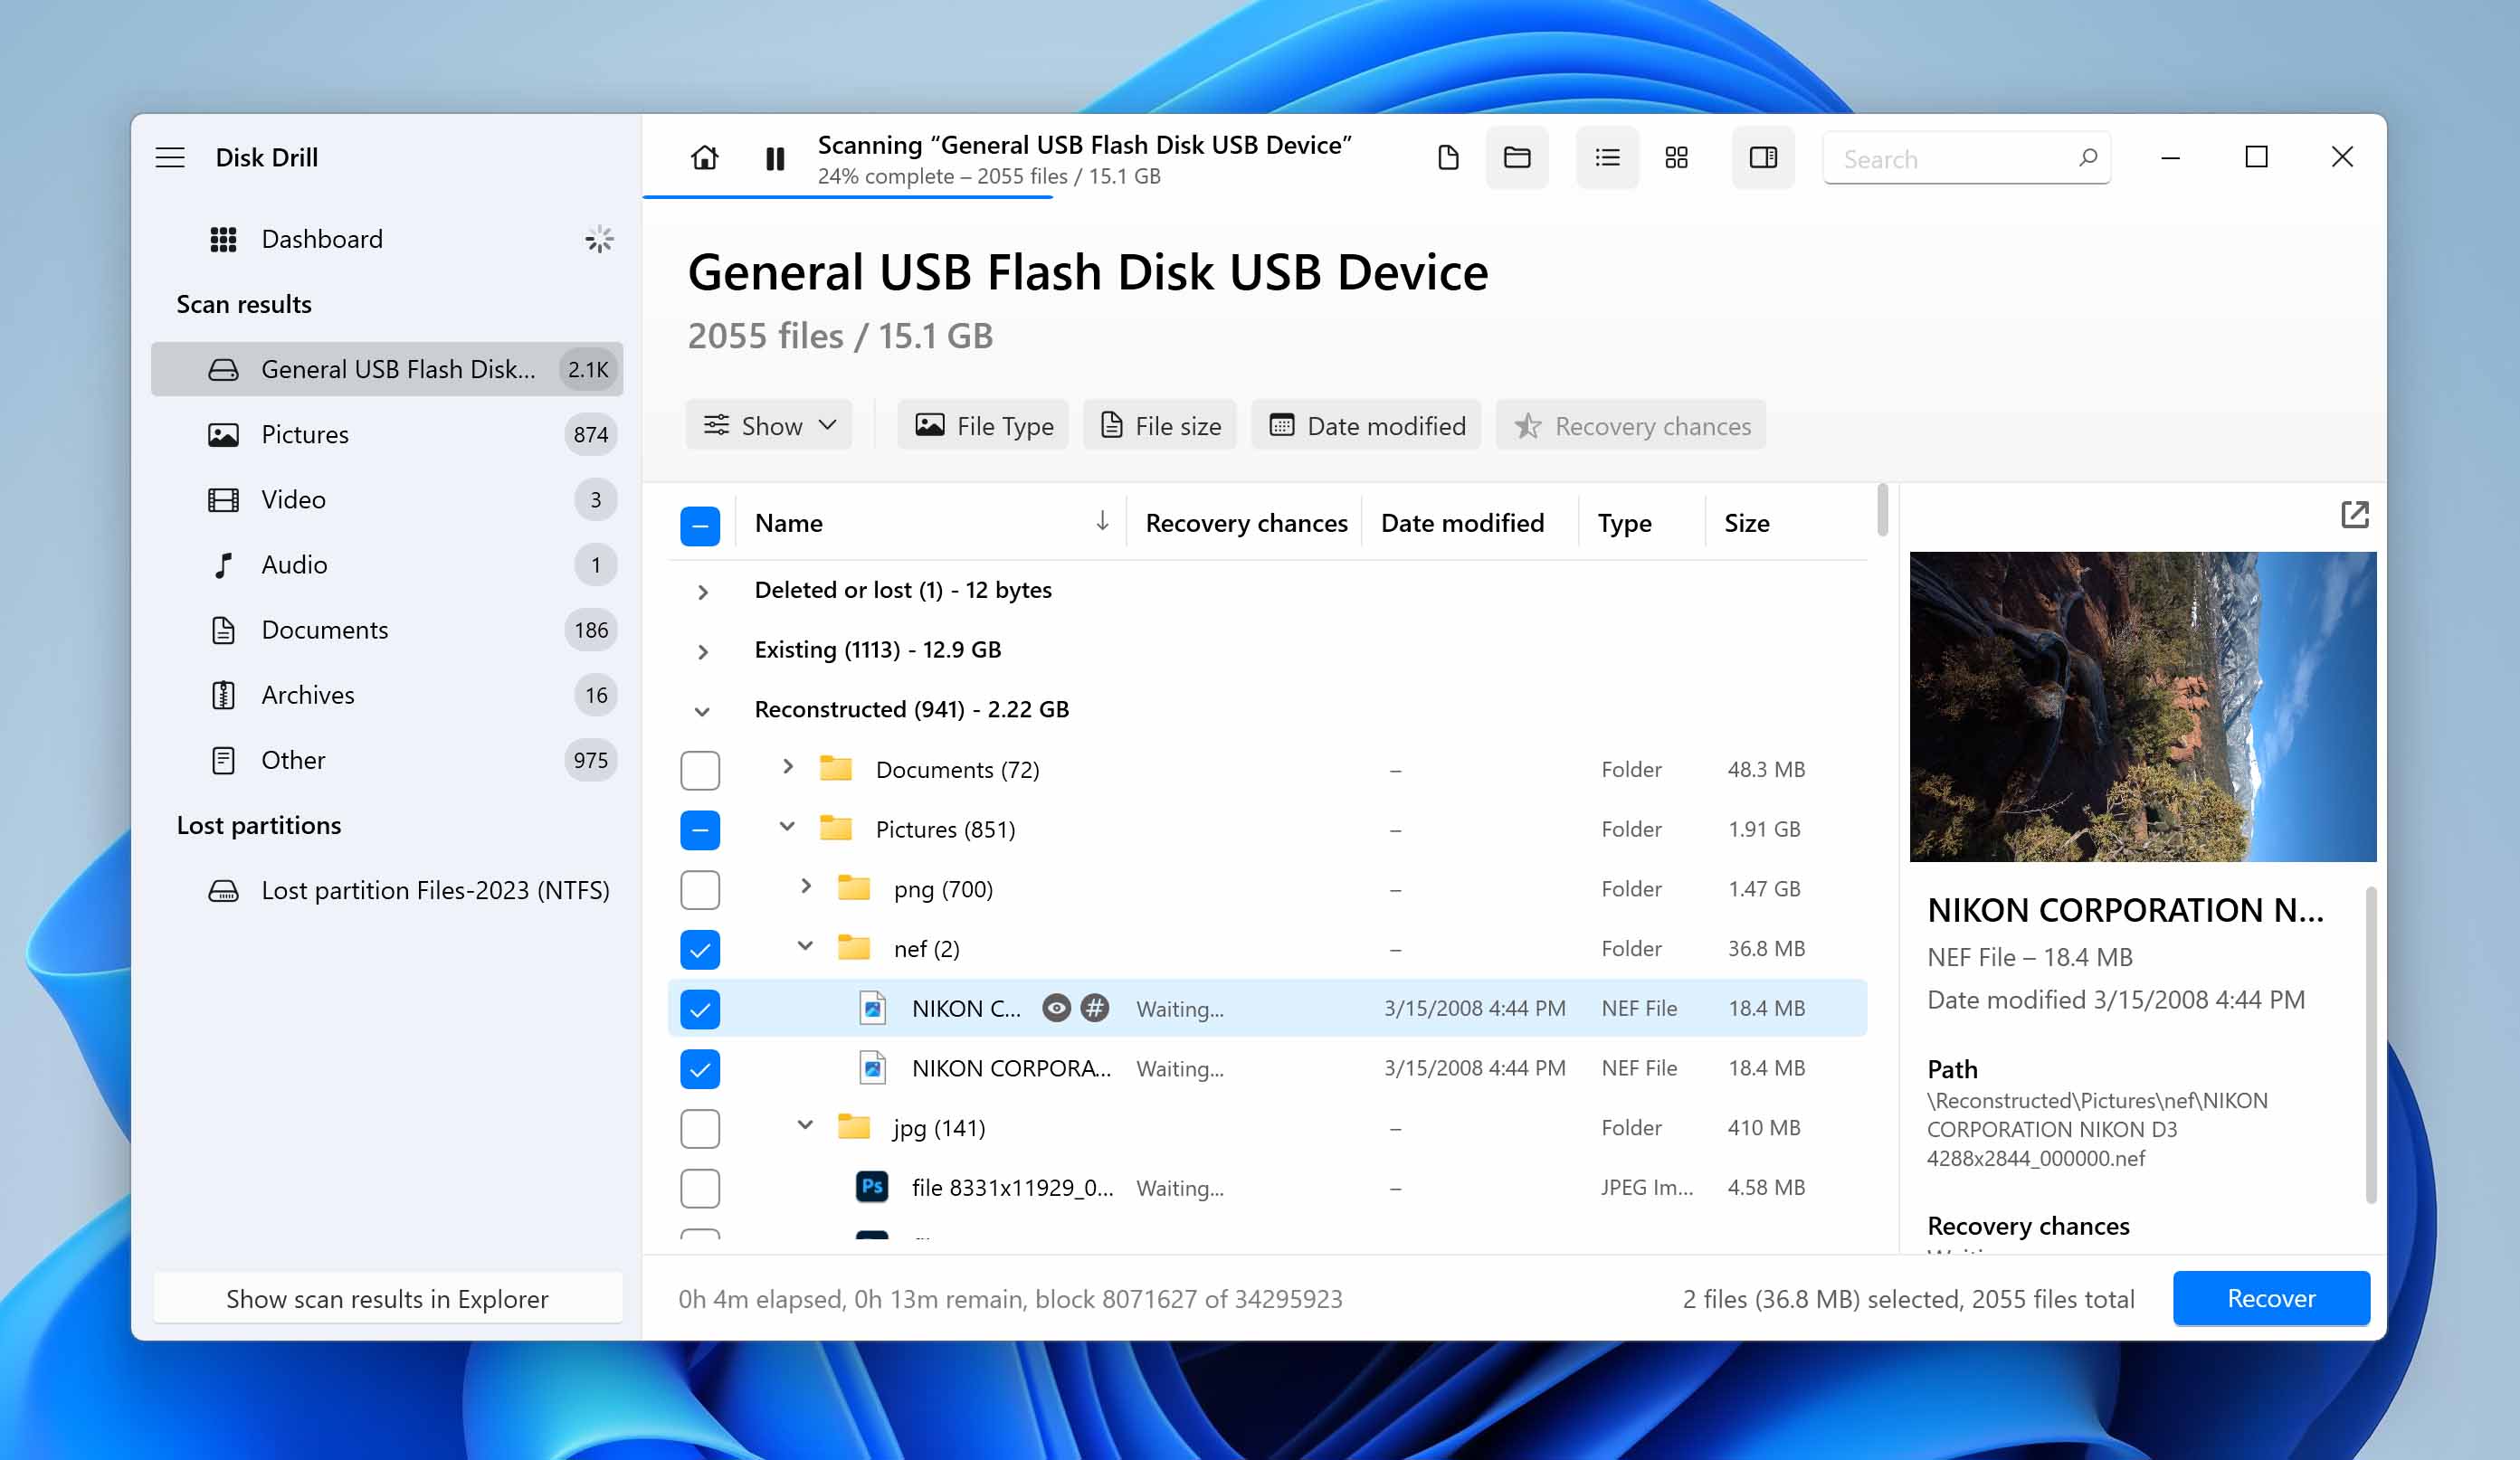
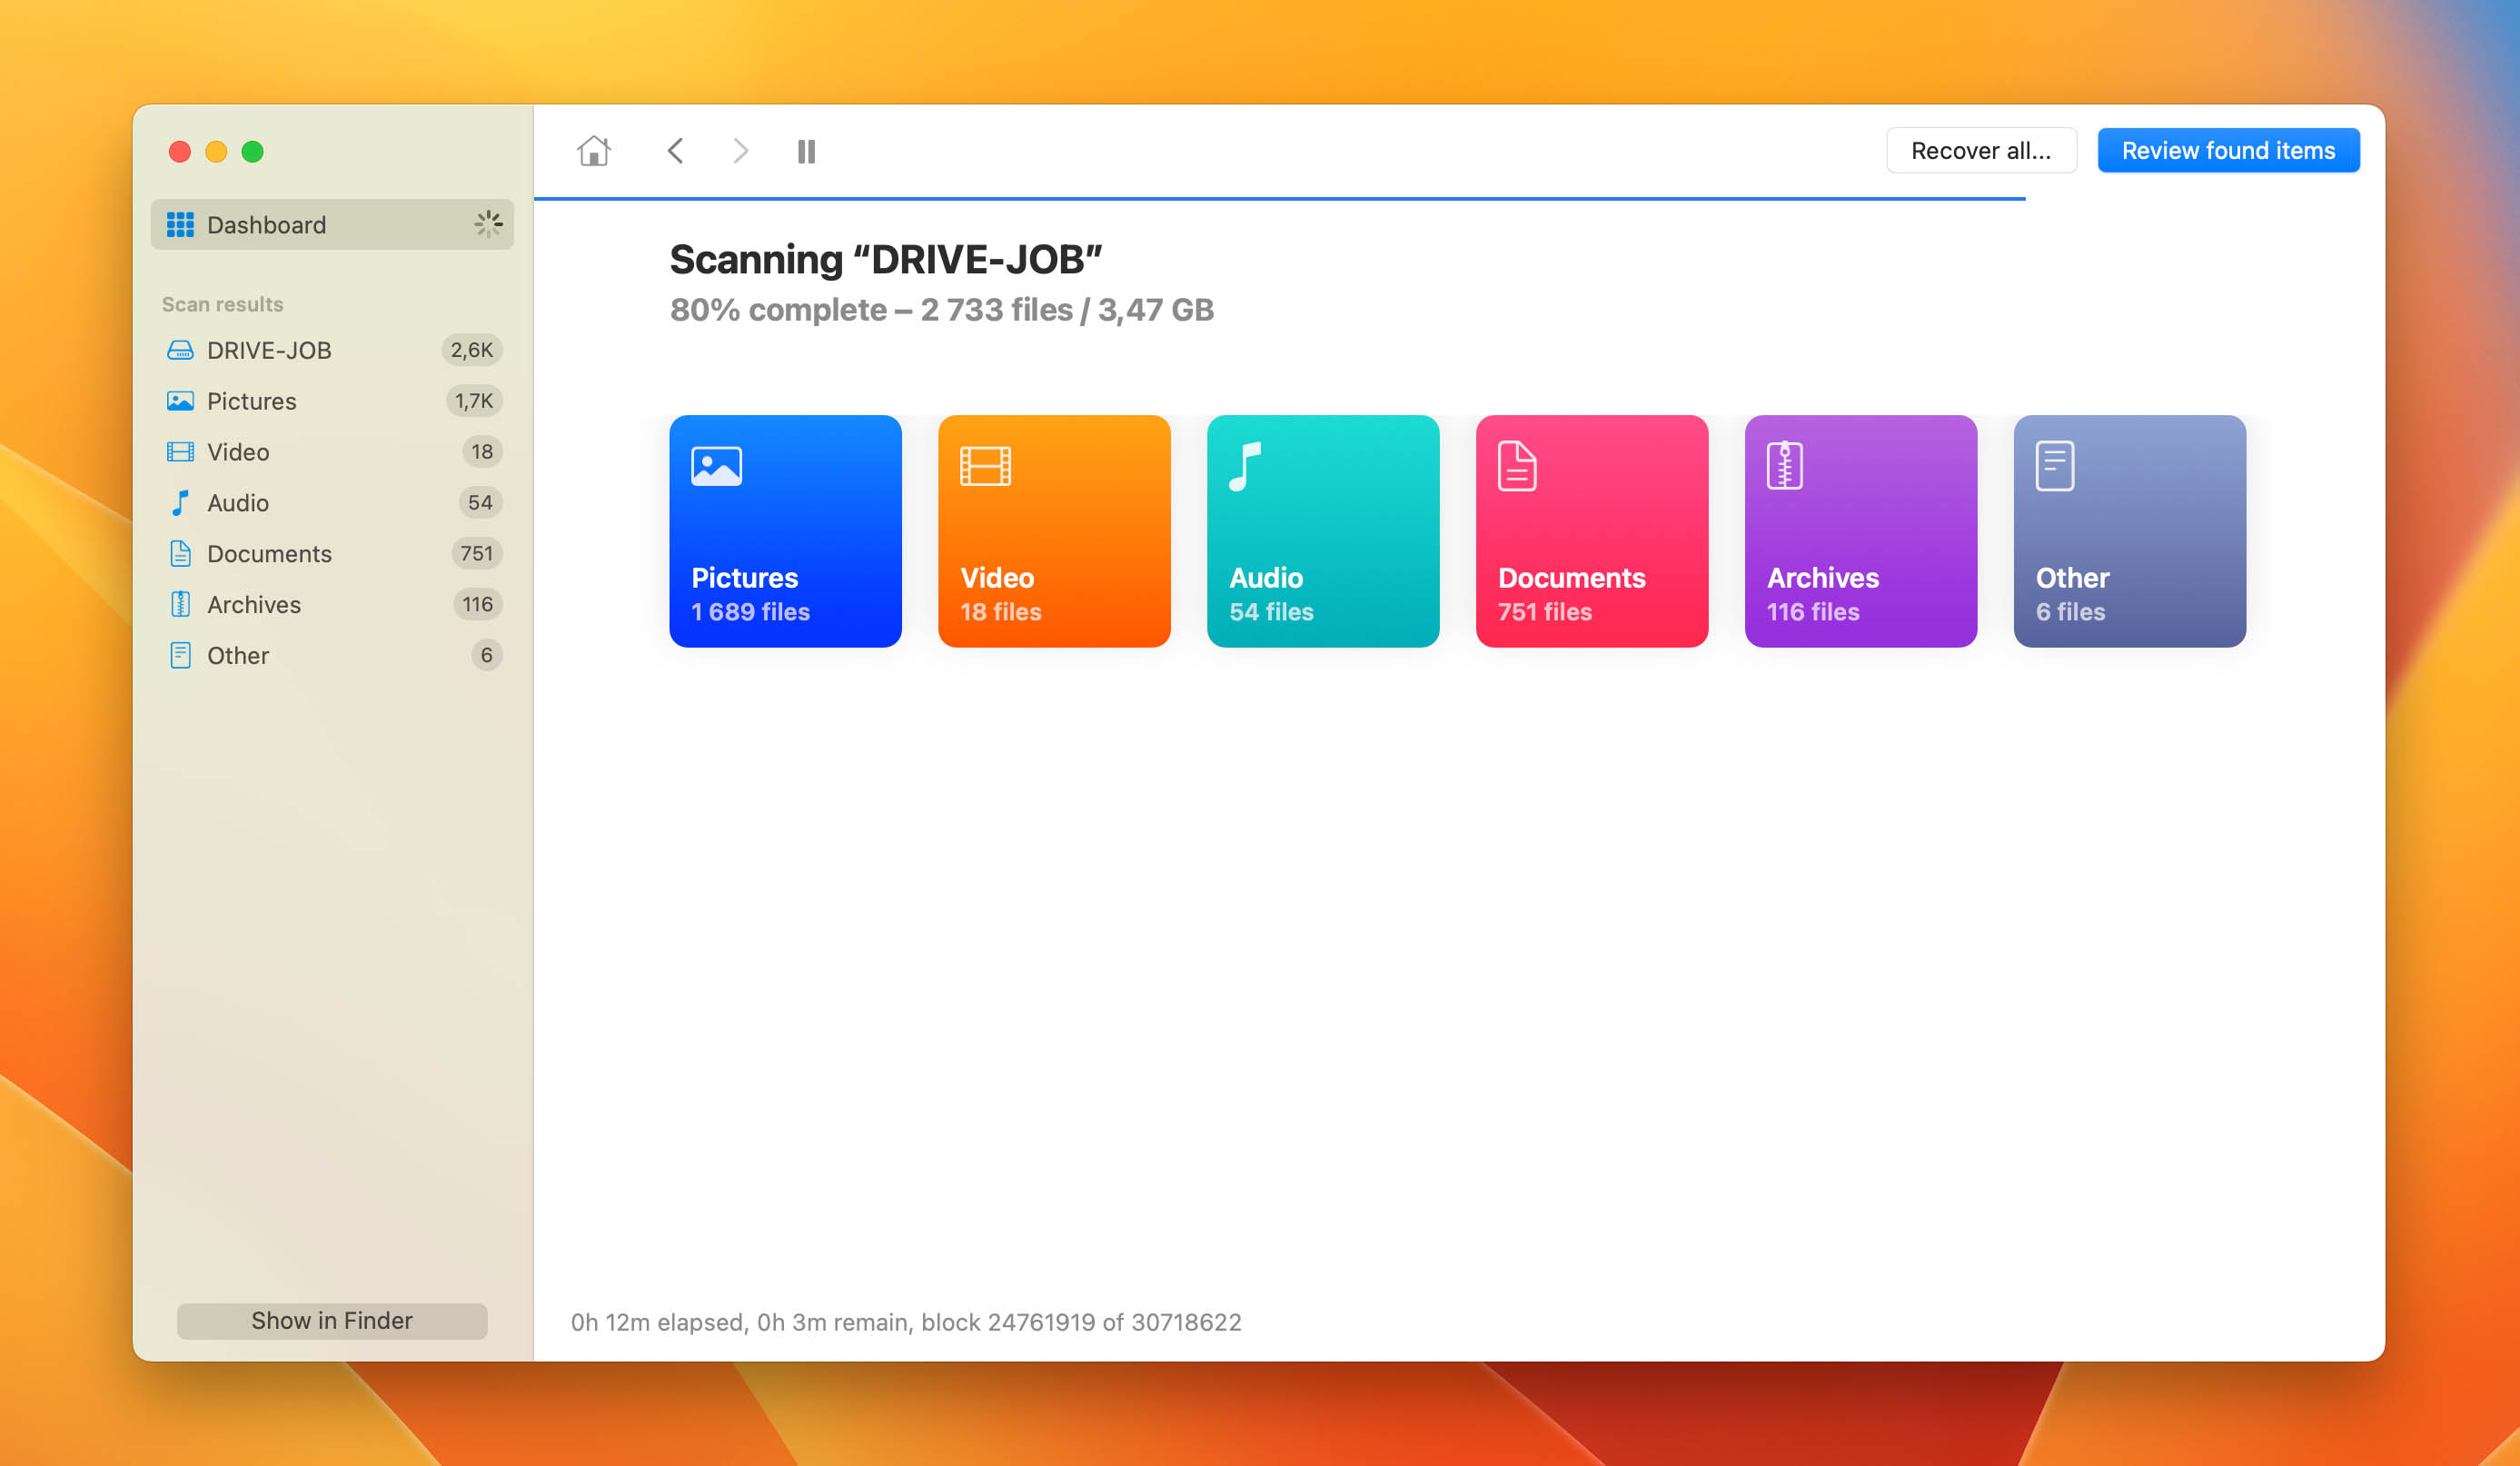
- Click the Search for lost data button to scan for lost photos.
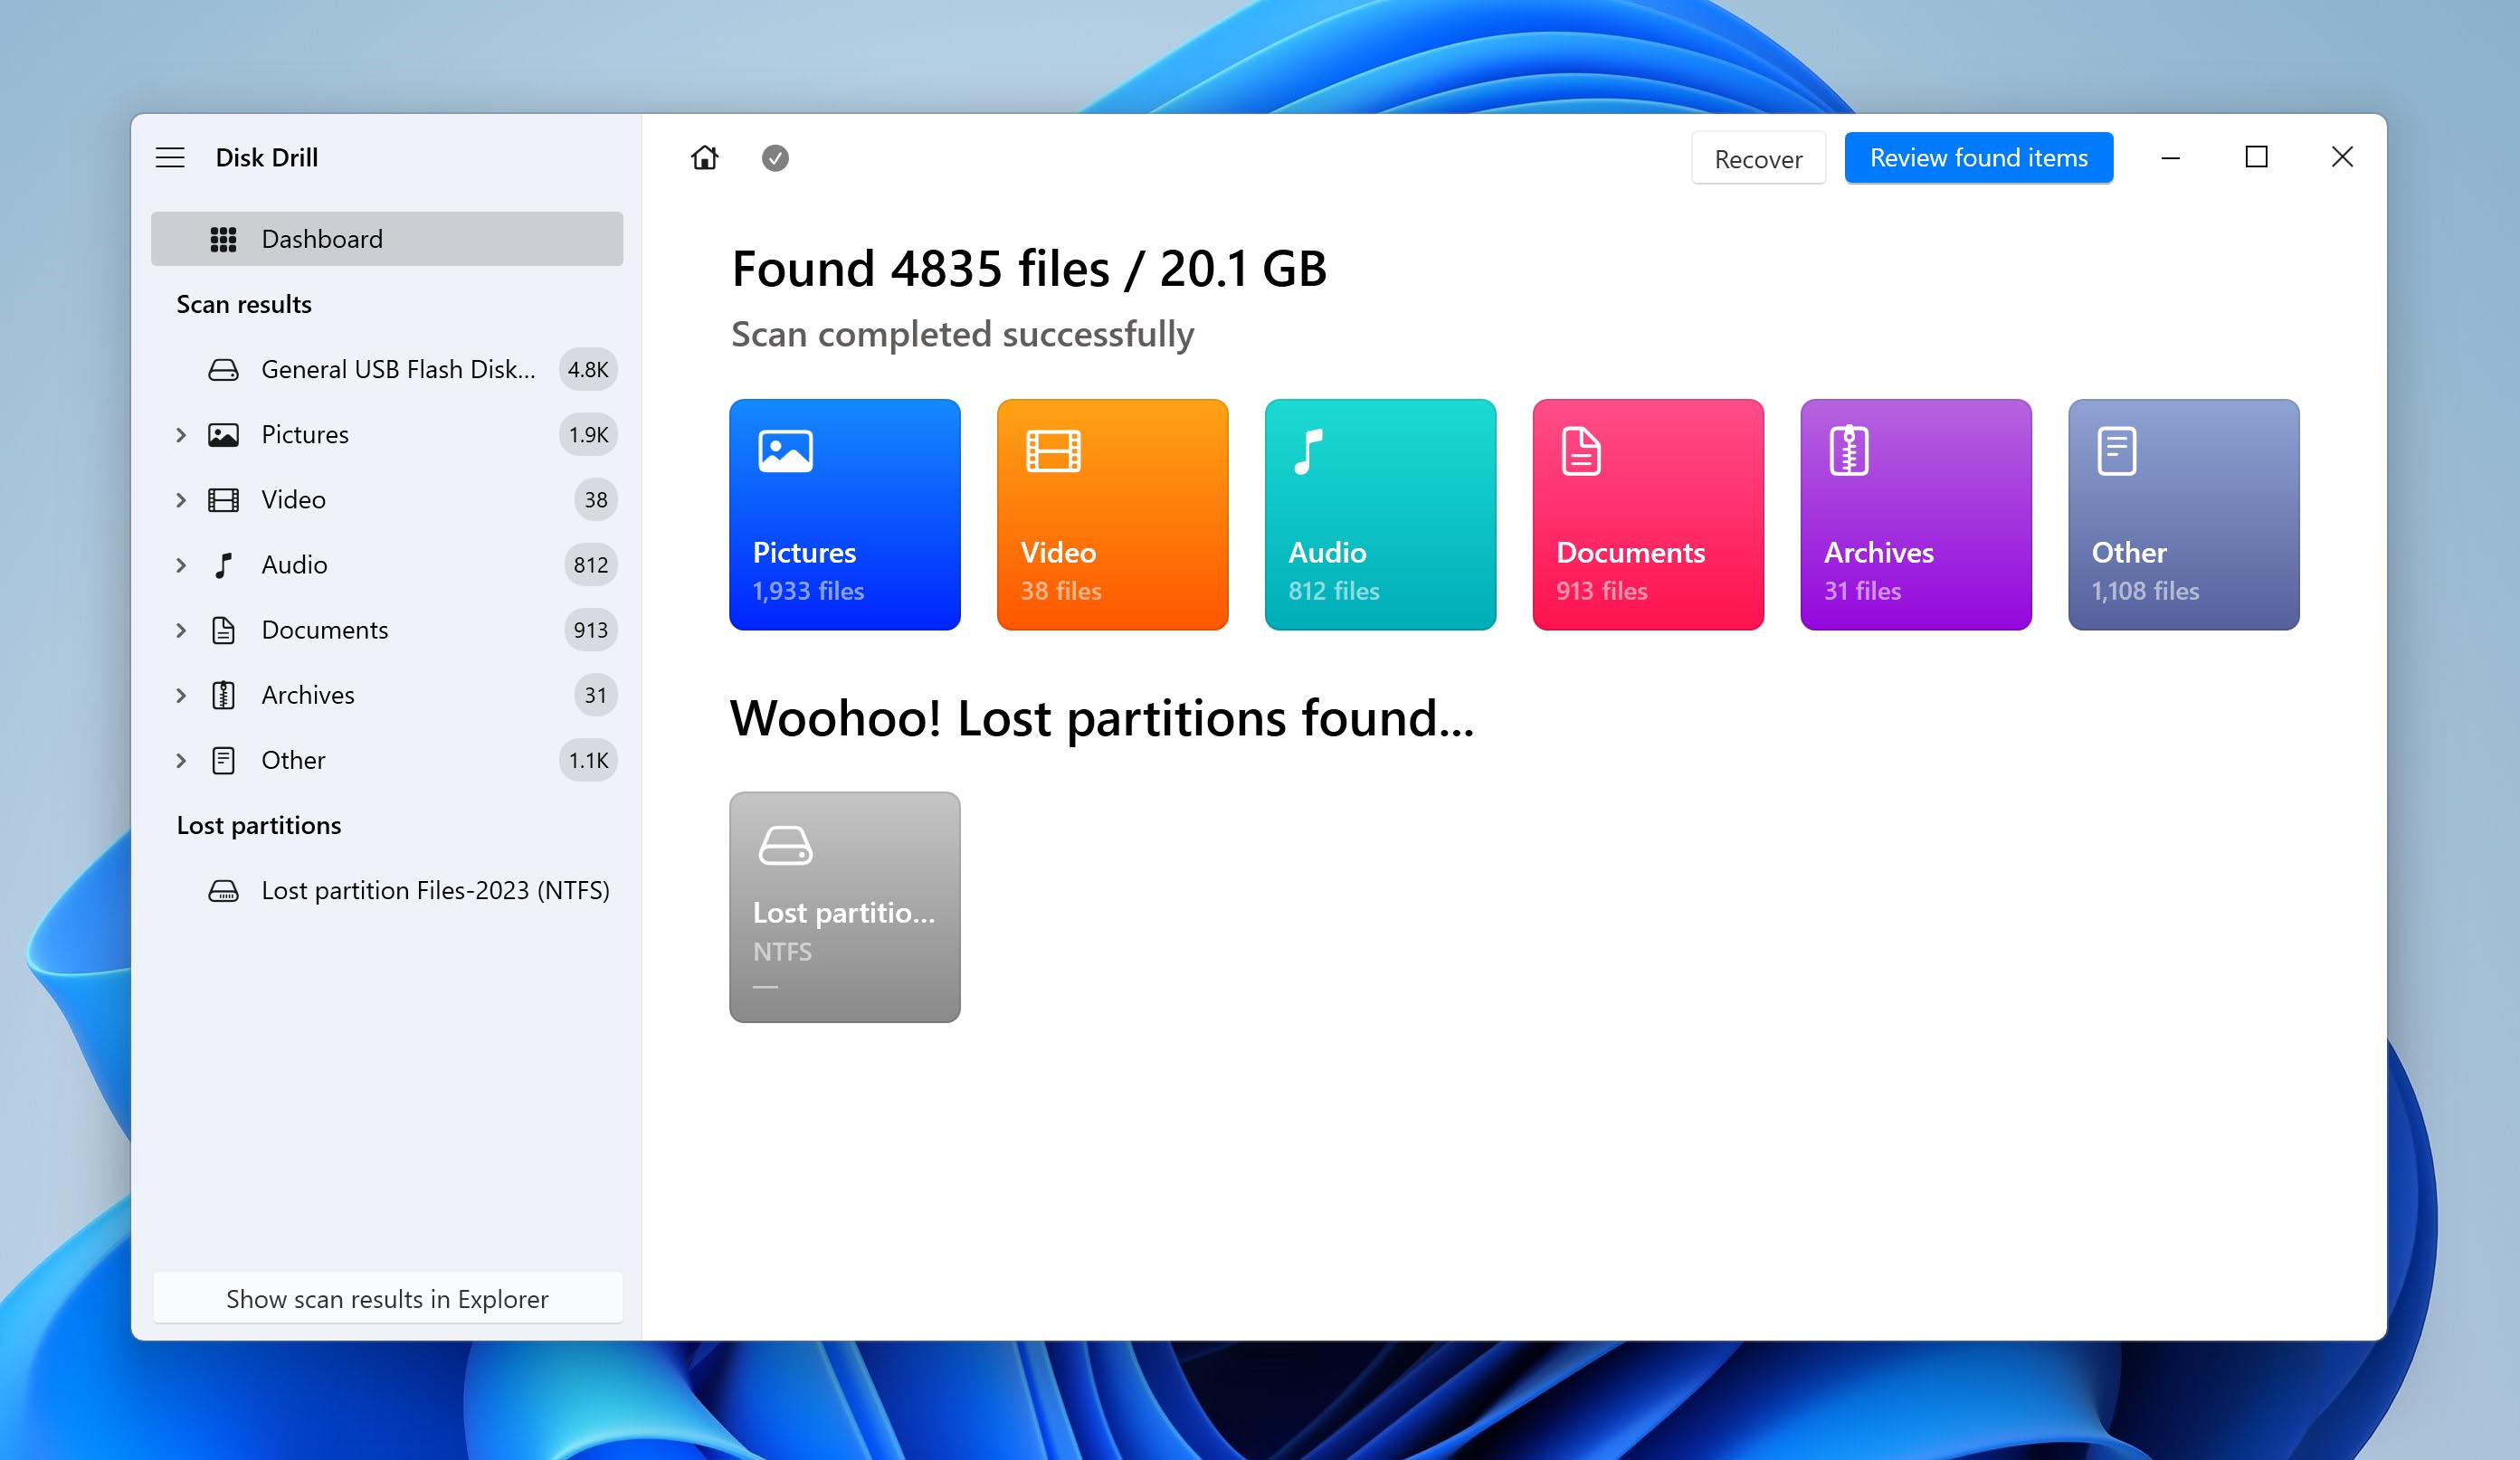
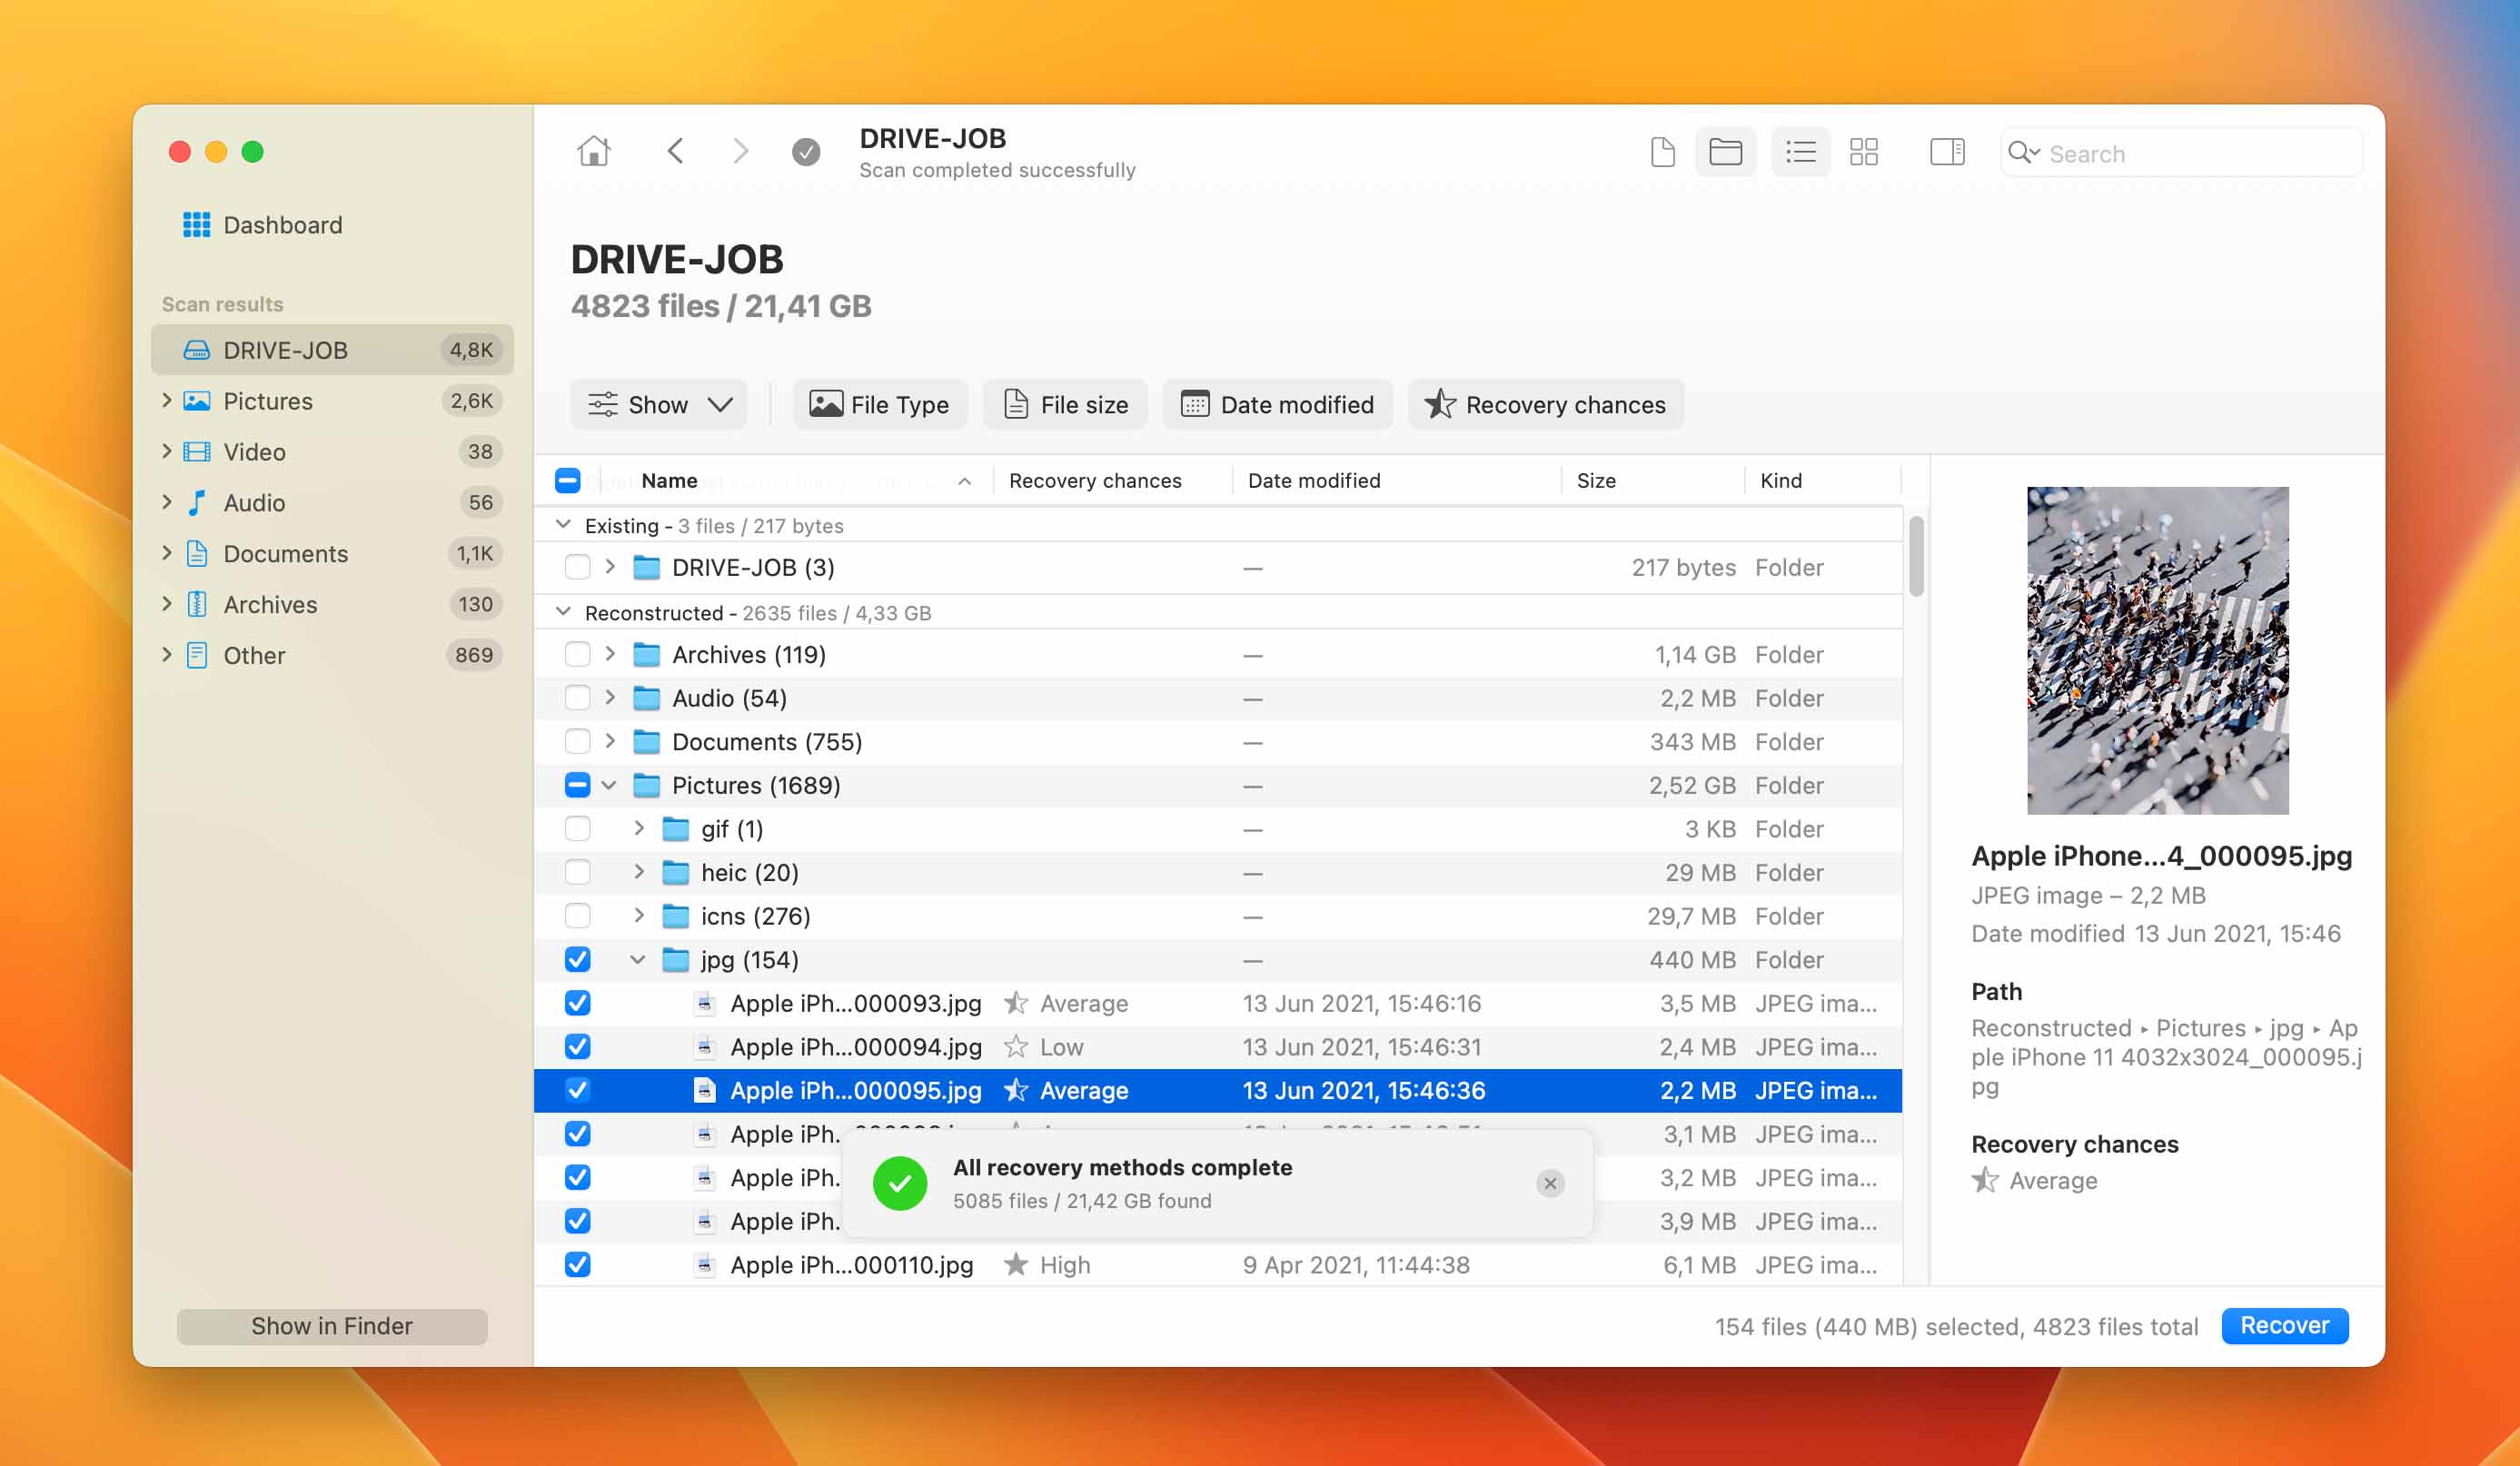
- Preview the found files and select the ones that you want to recover.
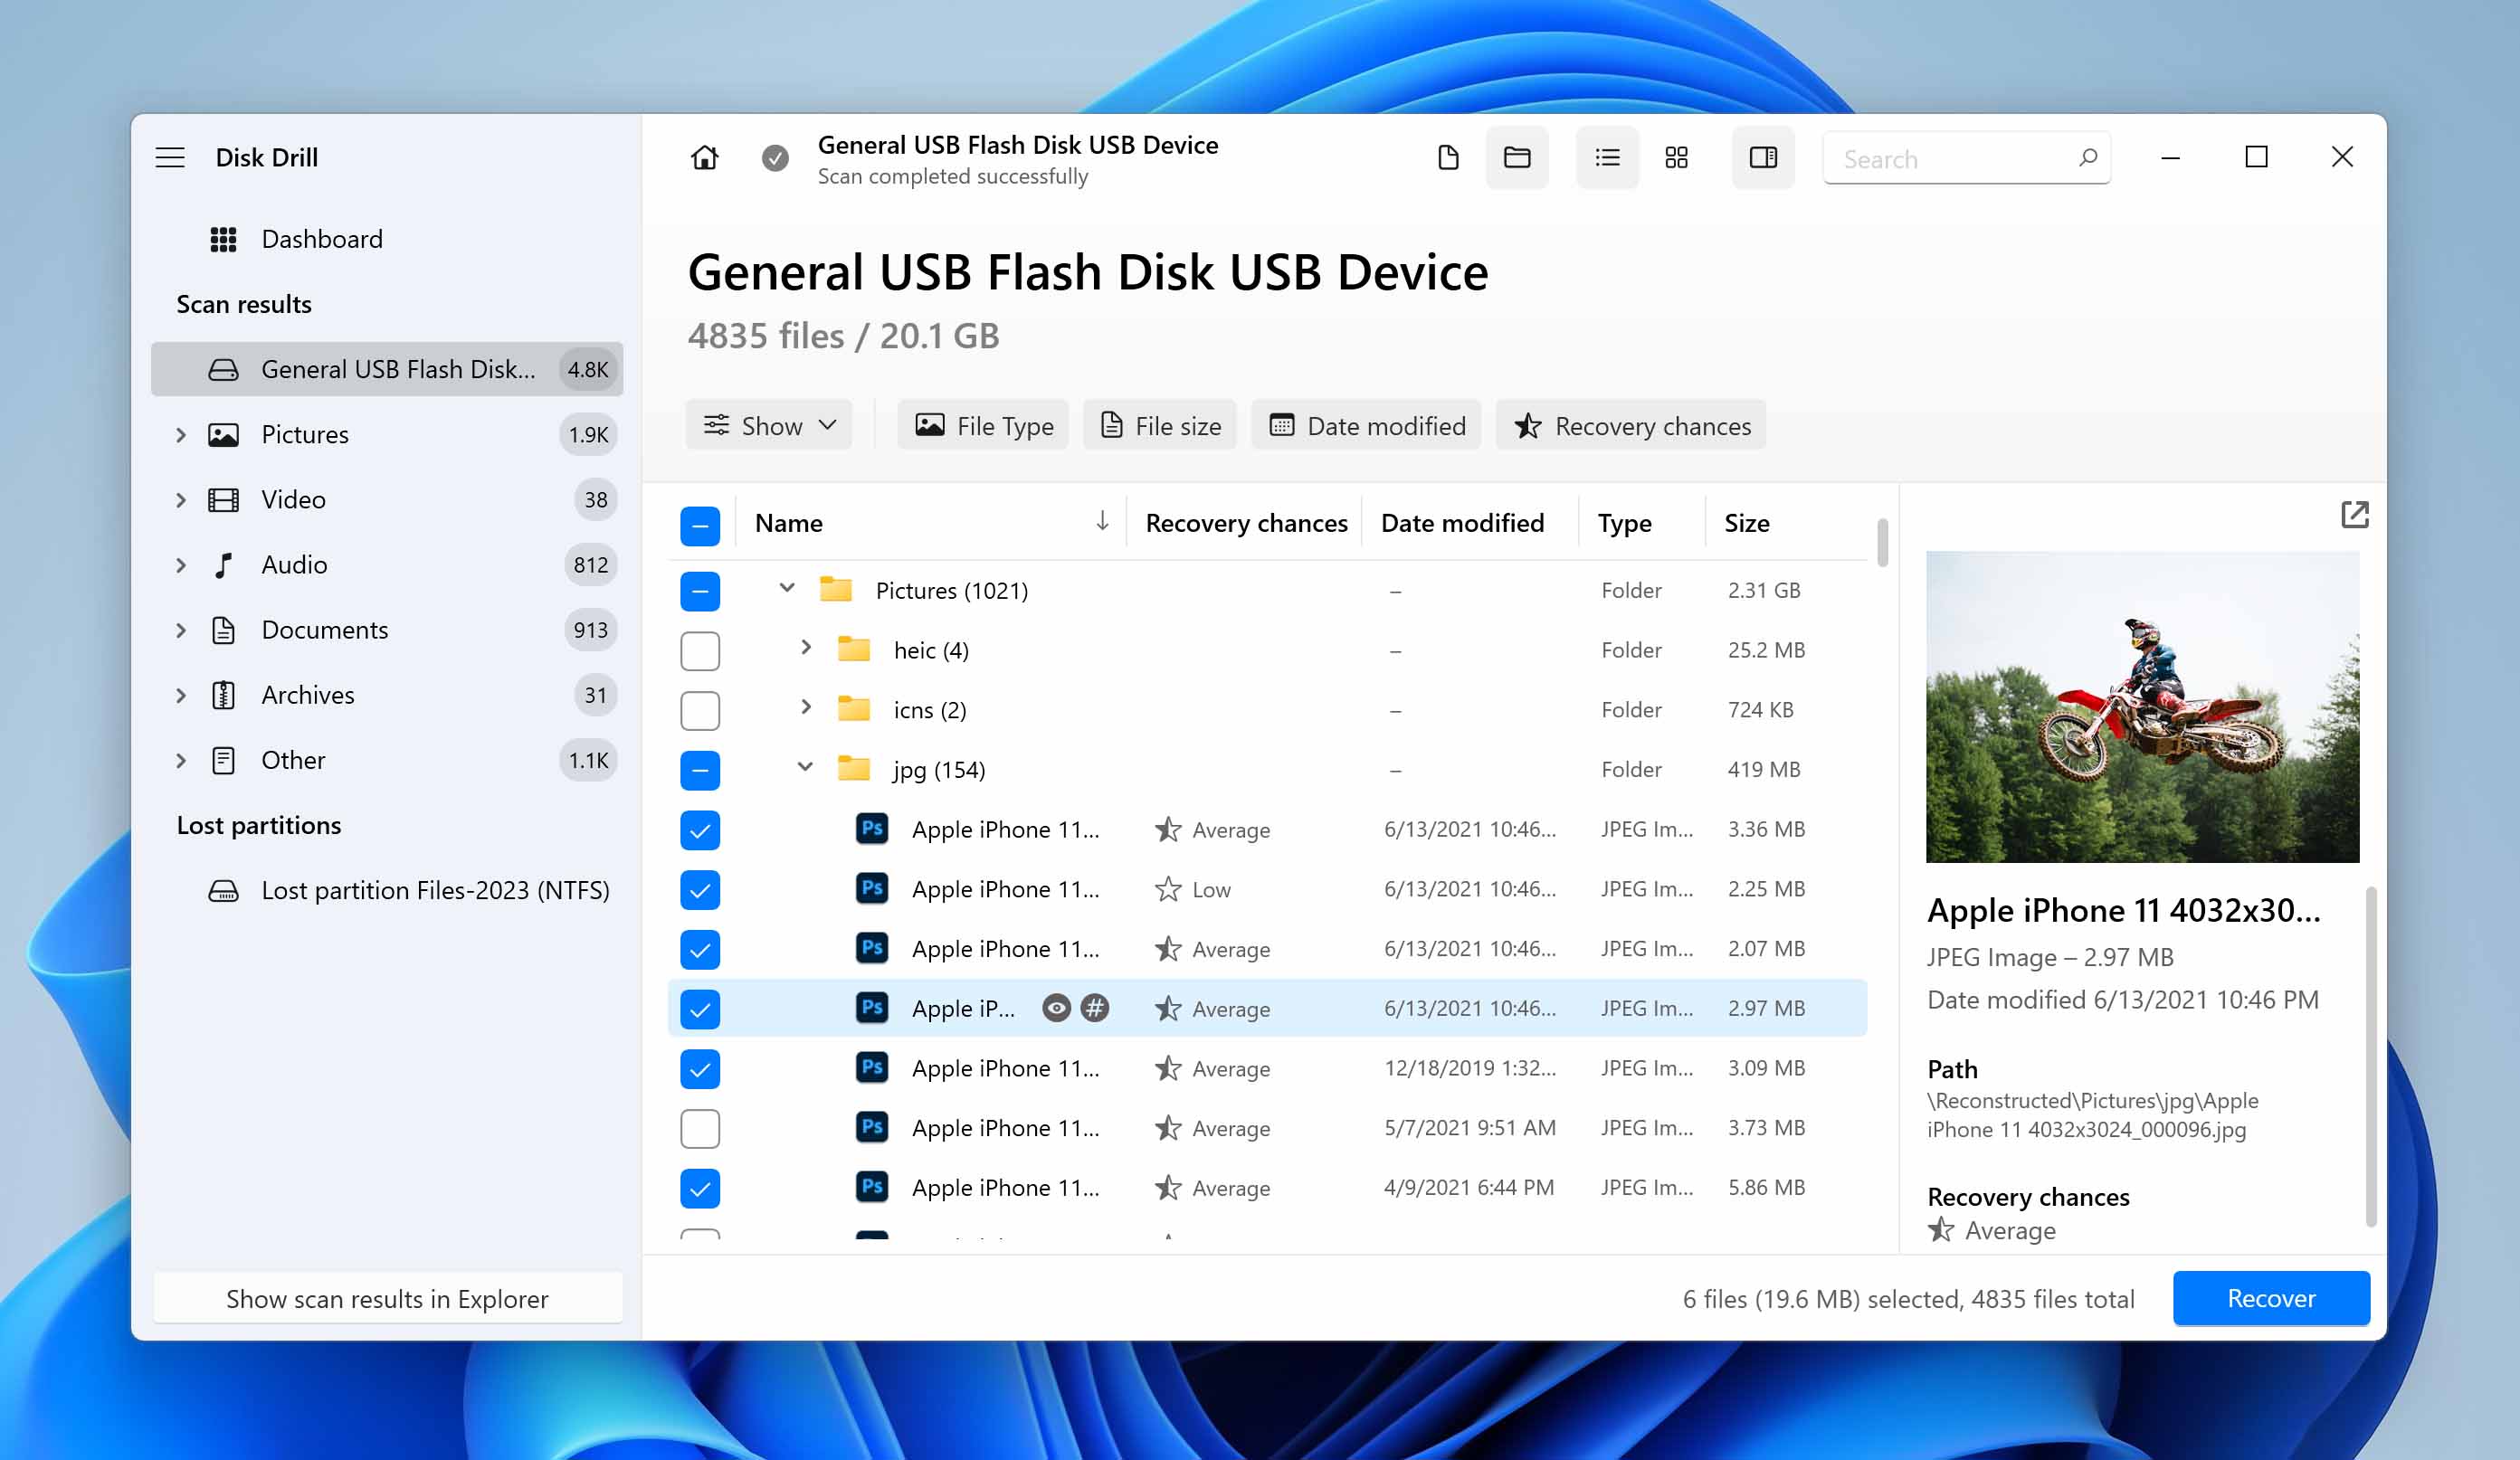
- Click the Recover button and select a new location for the restored photos.
❗️
Do not save them to the original SD card.
For Mac Systems
- Download and install Disk Drill for Mac.
- Insert the SD card into the computer’s card reader and start the program.
- Select the SD card from the program’s list of disks.
- Click the Search for lost data button to scan for lost photos.
- Preview the found files and select the ones that you want to recover.
- Click the Recover button to select a new storage location that is not on the original SD card.
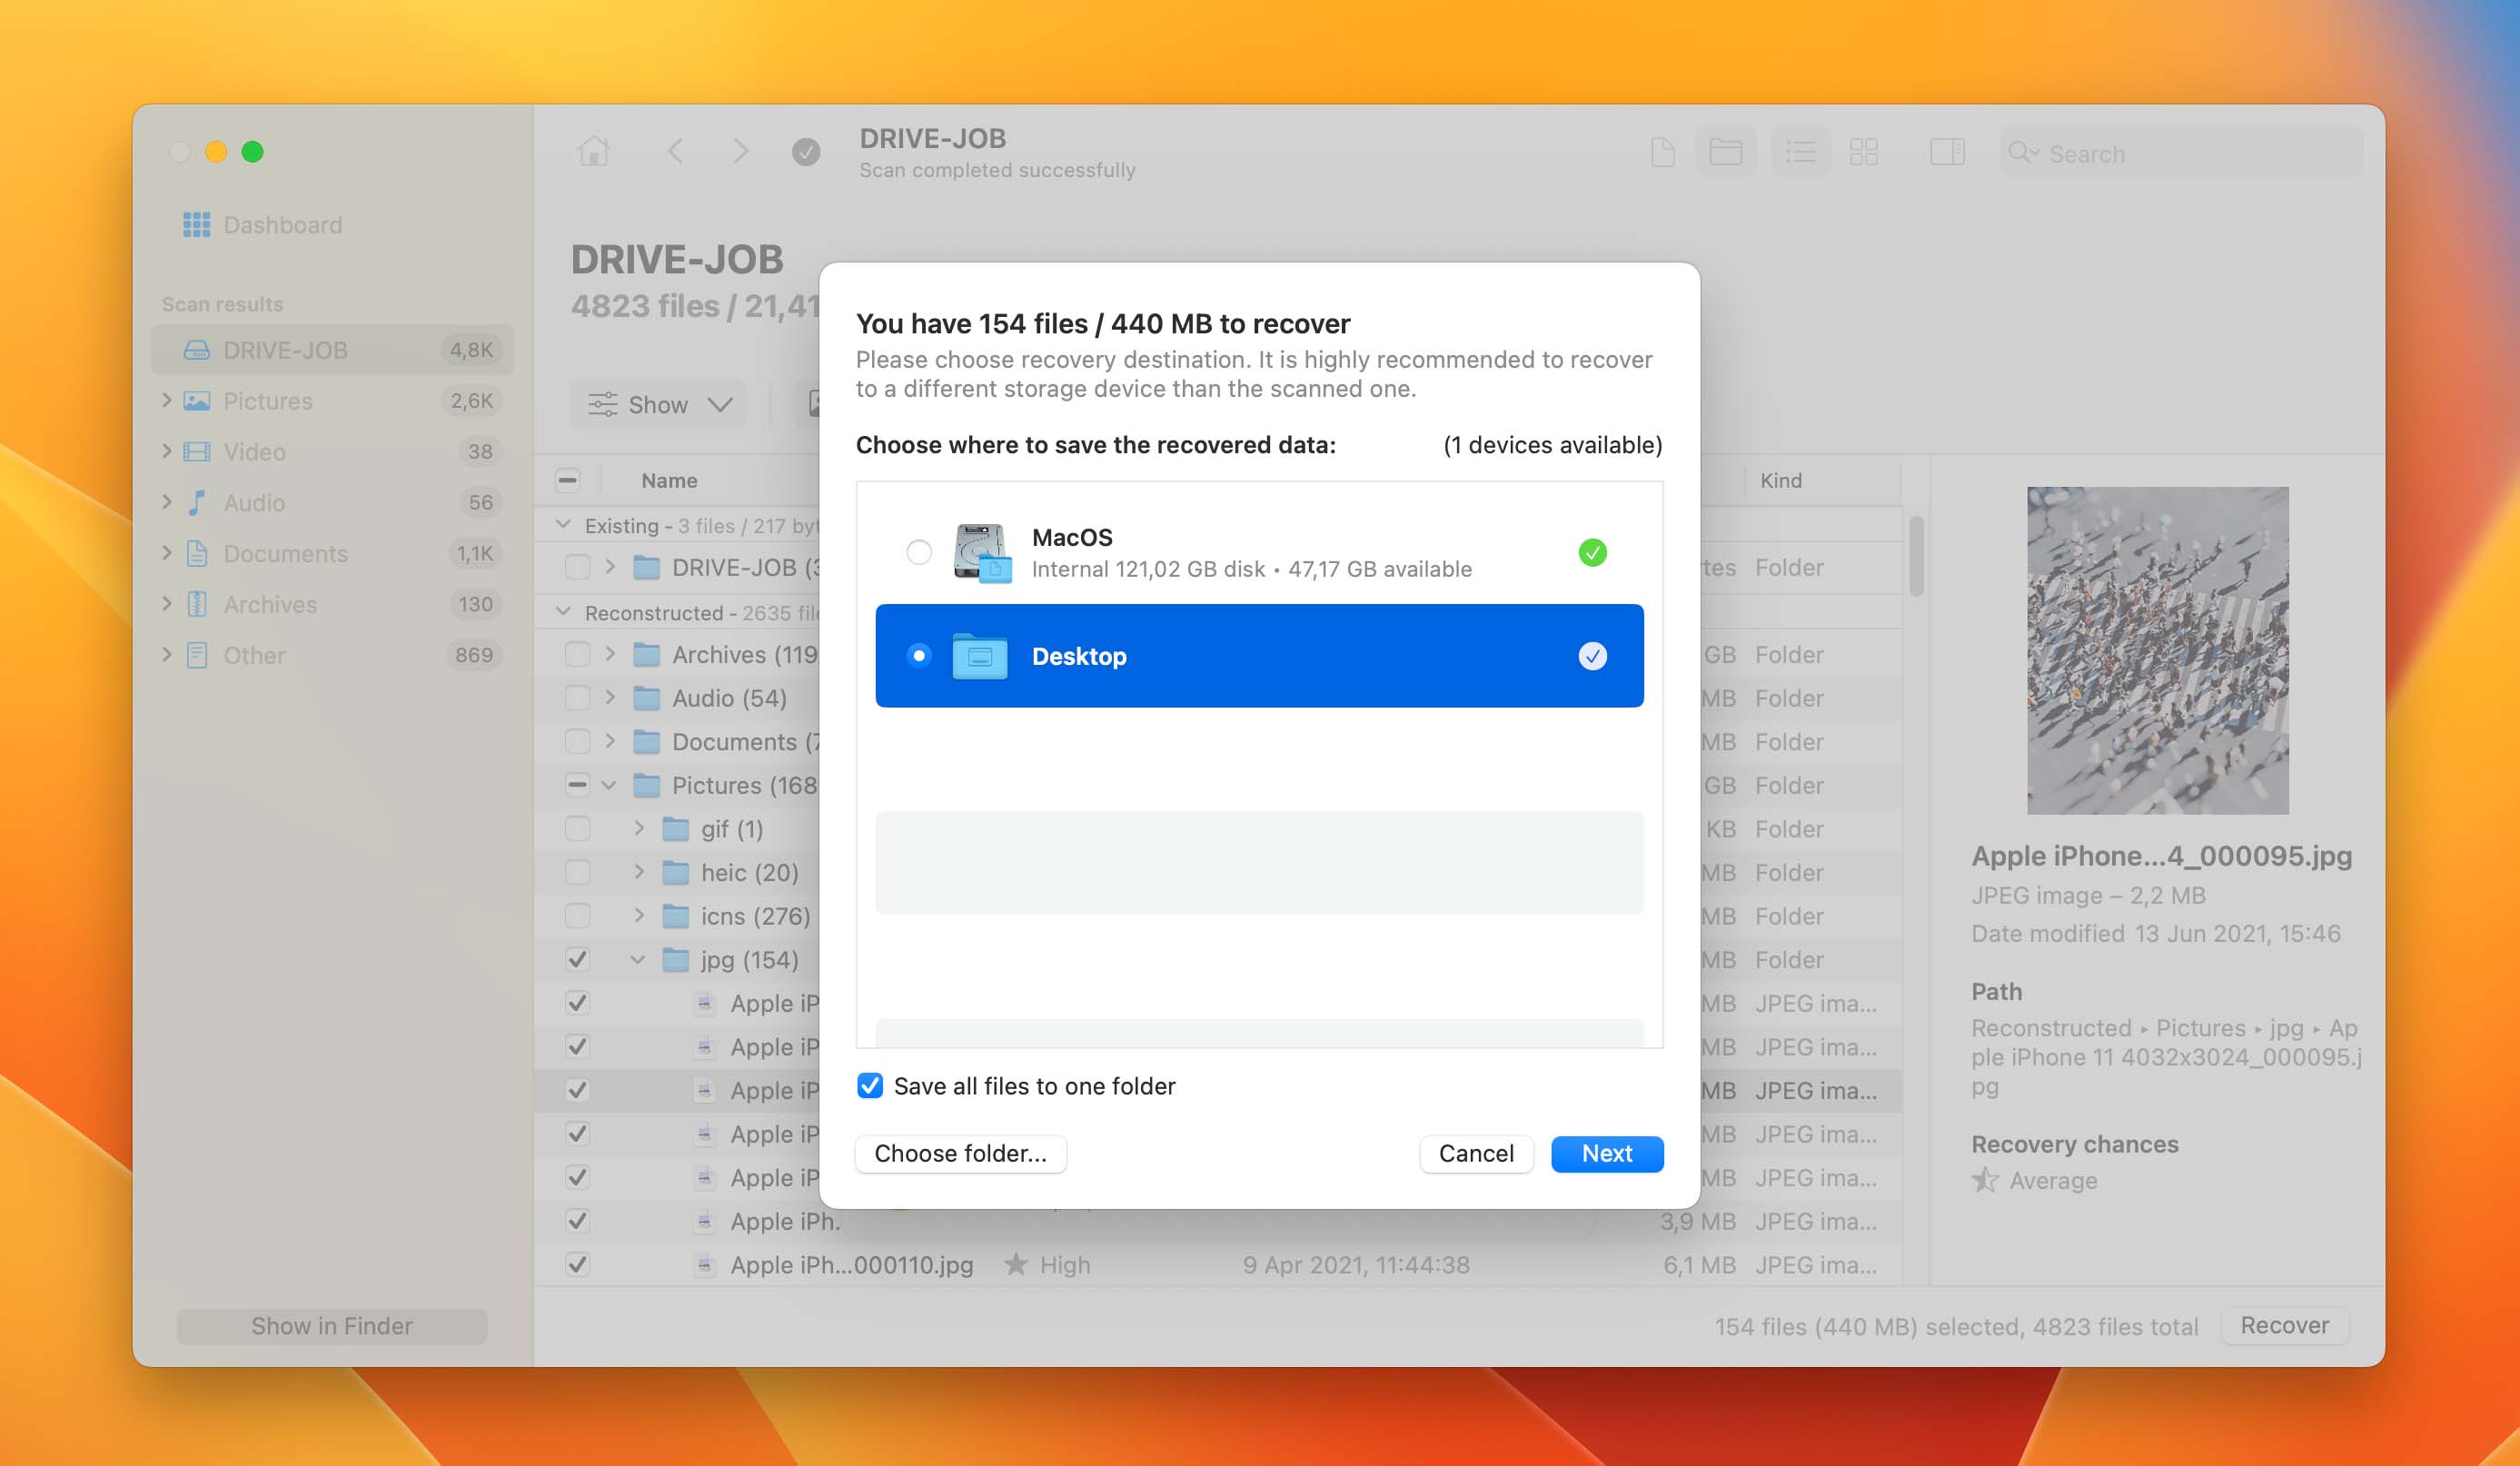
- Click the Next button to restore your photos.
Part 2: Recovering Deleted Photos from a Mobile Phone
The cameras on mobile phones are used to take and store a lot of photos. Just like any other storage device, photos can be accidentally deleted.
So let’s look at how to recover deleted photos on iPhones and Android devices.
For Android Phones
Android devices are extremely popular with the public. They are manufactured by many companies including Samsung, Motorola, Panasonic, and Sony. In many cases, an SD card is used to extend the phone’s storage capacity. If you’ve lost photos from an Android SD card, refer to the first section of this article, which describes how to recover deleted data from such a device.
Here are other options for recovering lost photos from an Android phone.
- Open the Google Photo App on your Android device.
- Tap Menu in the top left and then Trash.
- Touch and hold the item you want to recover.
- Tap Restore at the bottom of the display to complete the recovery.
Data recovery software can be used to recover deleted photos from an Android phone. You can use the DiskDigger Android app to recover data from the internal memory of the phone. However, it has limited scanning capabilities, and it can’t preview the scanned files. To scan and recover photos from your phone’s memory card, you can also use data recovery software like Disk Drill. Not only can Disk Drill scan memory cards, but it can also scan Android phones. But this only works on the Mac version and only for rooted phones.
Android phones have their own Recently Deleted folder. It stores all the recently deleted photos and videos for up to 30 days before permanently deleting them. This folder can usually be accessed through your phone’s Gallery app.
To recover your deleted photos from the Recently Deleted folder, follow these steps:
- Access the Recently Deleted folder.
- Select the photos you want to recover.
- Choose the option to restore the selected photos.
Also, check out: ‘Best Android Data Recovery Software‘ and ‘Best Apps for Recovering Data from an SD Card on Android‘.
For iPhones
Let’s look at ways to recover photos deleted from an iPhone camera roll. Depending on if and how you backup your phone’s data, you may have additional recovery options. Recovering from a backup will overwrite the data currently on your iPhone, so use these methods with caution.
Open the Photos App on your iPhone. Select the Recently Deleted folder. Tap the photo you want to restore and select Recover Photo to get the photo back.
Launch the Mac’s Finder. Attach your iPhone to the computer. Select the iPhone from the location list in the left panel. Click the Restore iPhone button in the General tab. Click the Restore button to confirm the recovery.
Log into your iCloud account from a web browser. Select Photos from the webpage. Click on the Recently Deleted album. Choose the photos you want to restore and click Recover.
Open iTunes. Connect your iPhone to the computer with your Apple cable if it’s available. Select the Restore Backup option. Choose the backup you wish to use. Click Restore and wait for the process to complete.
Editor’s Choice: As with Android devices, you can connect your iPhone to your computer and use data recovery software to scan it. This might enable you to retrieve your photos. Even images not found in the ‘Recently Deleted’ folder could potentially be accessed through iPhone data recovery software.
Part 3: Recovering Deleted Images from the Main Hard Drive
Let’s take a look at what you can do if the deleted photos were on your computer’s main hard drive.
Some of the methods will essentially be the same as those used for SD cards.
Method 1: Utilizing Operating System Resources
Both Windows and Mac users can take advantage of the facilities built into their operating systems that store recently deleted data.
Recovering Photos from the Windows Recycle Bin
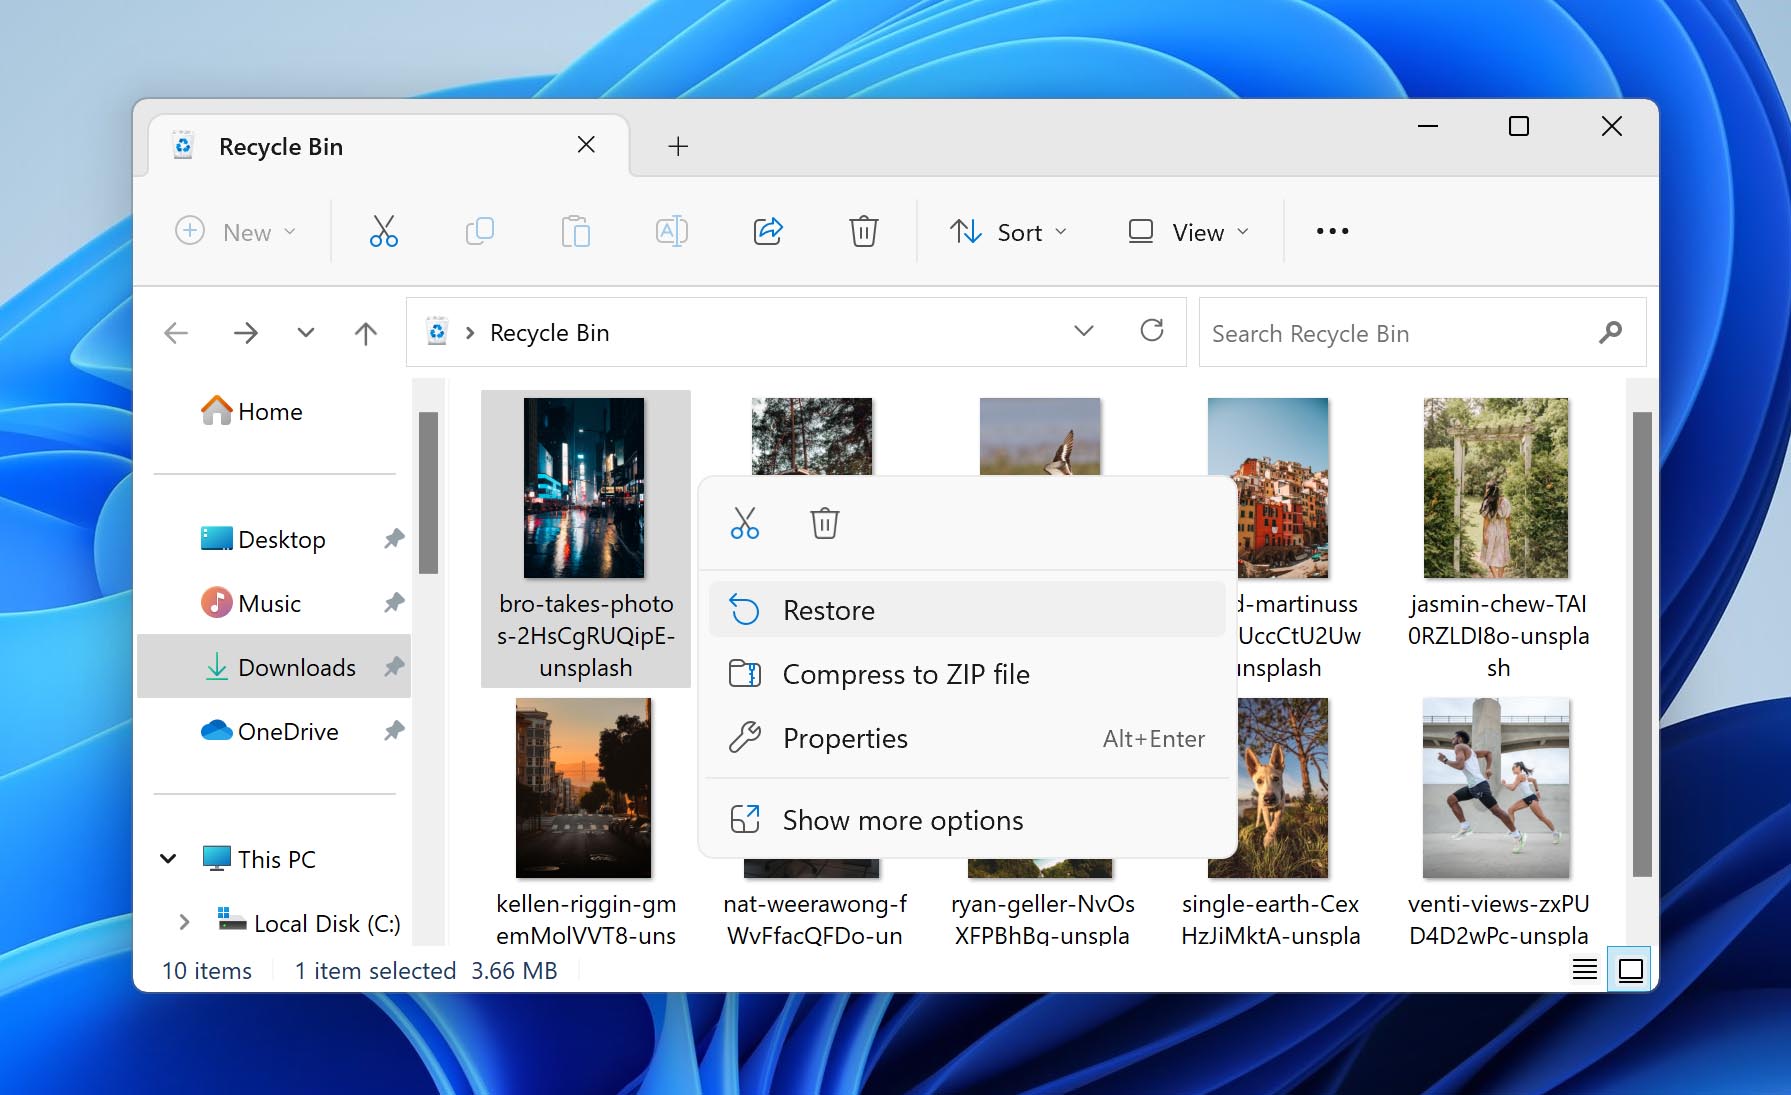
- Open the Recycle Bin by clicking on its icon.
- Find the files you wish to restore.
❗️
Note their original location as this is where they will be restored.
- Click or tap on Restore to recover the photos.
Locating Recently Deleted Files in the Trash for Mac Users
- Open the Trash by clicking on its icon.
- Identify the photo you want to recover.
- Right-click on the item to select it and click Put Back.
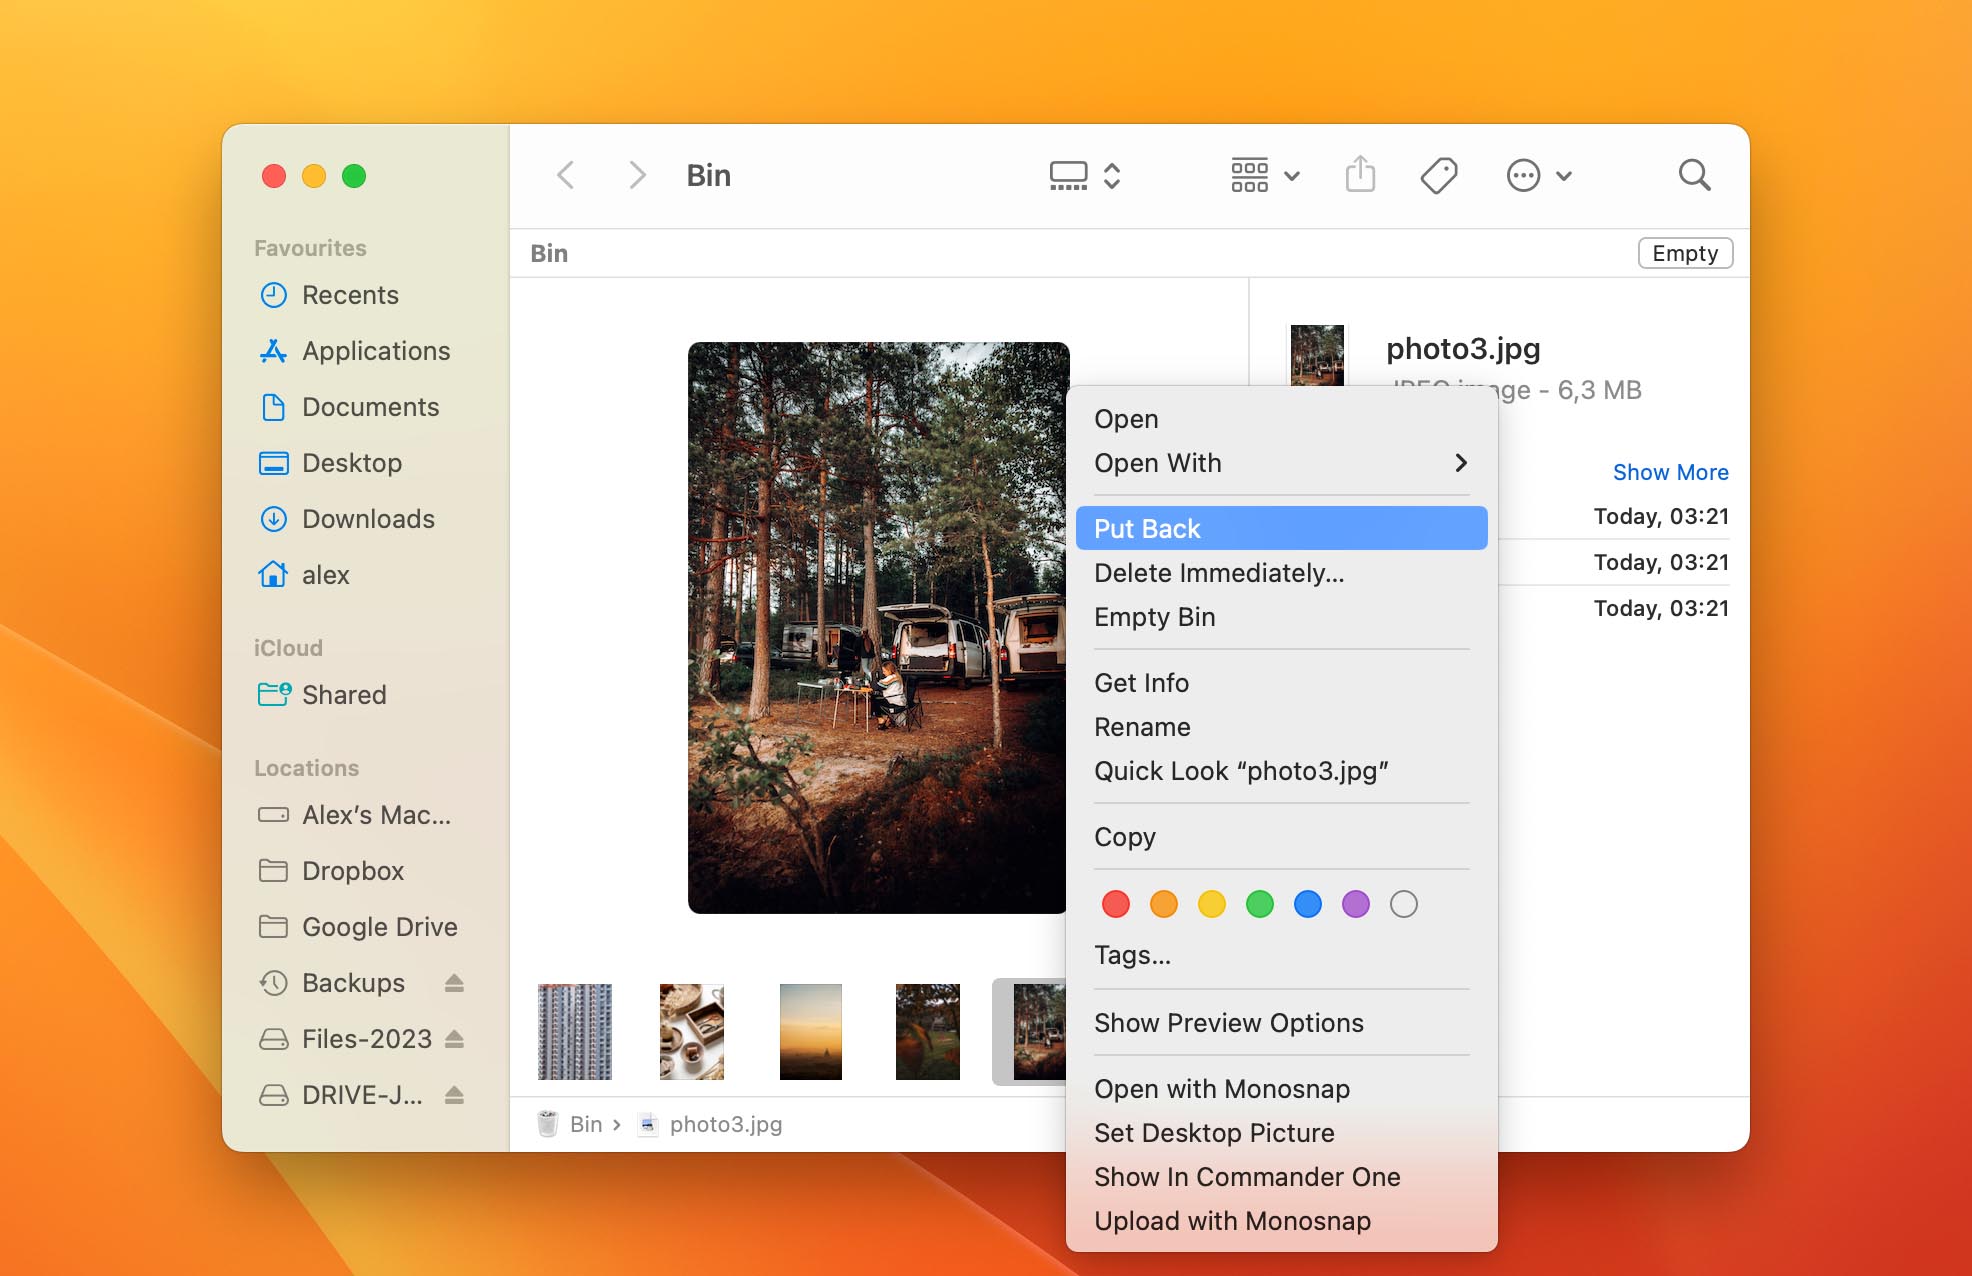
The photo will be restored to its original location.
You might also like: How to Recover Accidentally Emptied Trash on Mac
Method 2: Using Your System’s Search Capabilities
You may just have misplaced the photos and saved them to an unknown location. Then, when you go to look for them, they are not there and you suspect they have been deleted. Try letting your OS search for them.
For Windows Users
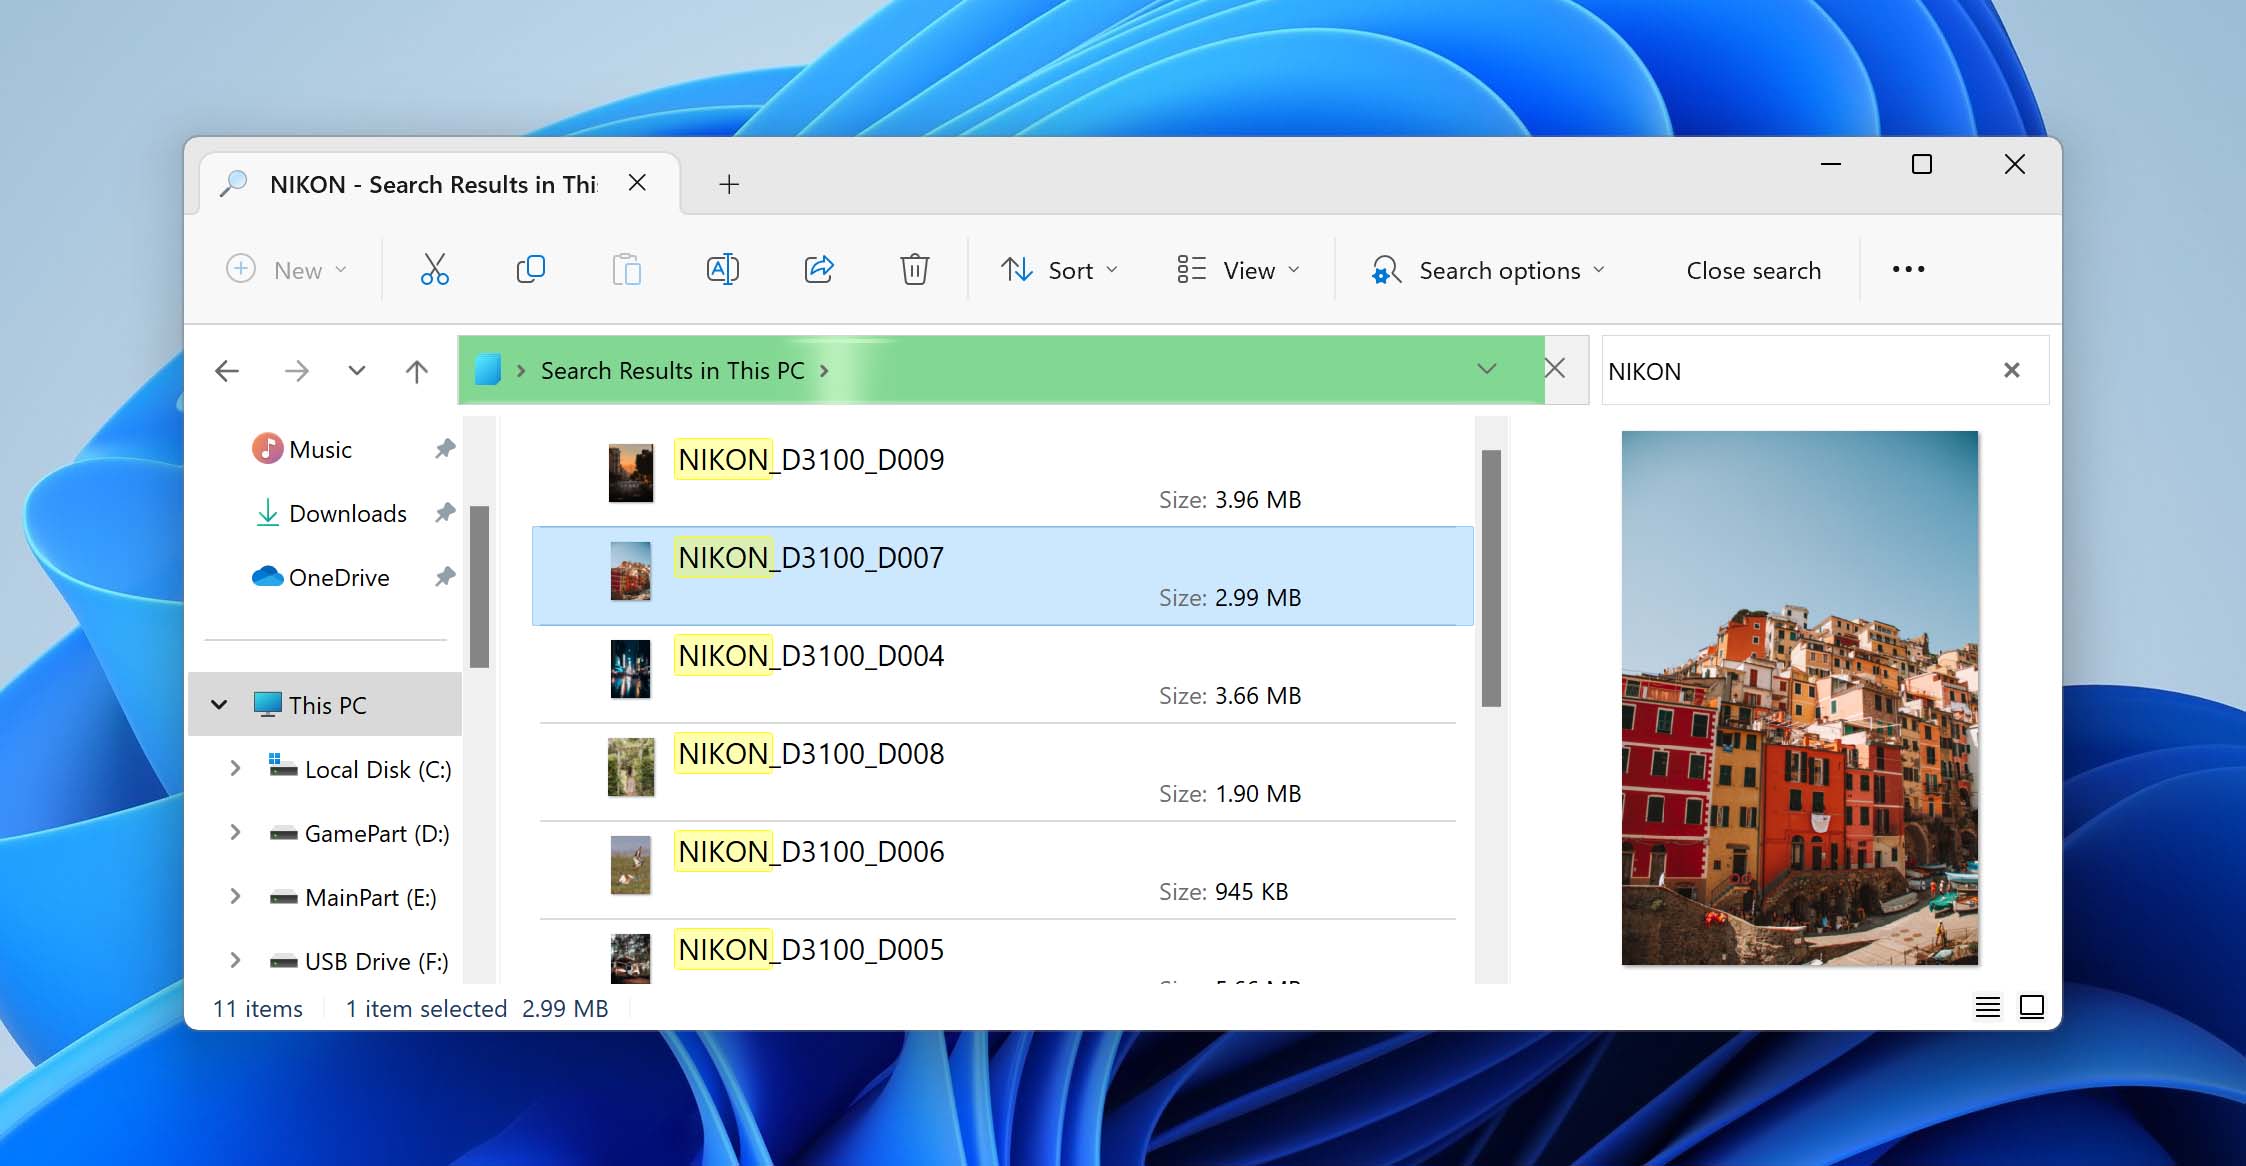
- Use the search facility on the Start menu.
- Use File Explorer and select the Search option from the menu bar.
See also: How to Find Missing Files on Windows 10
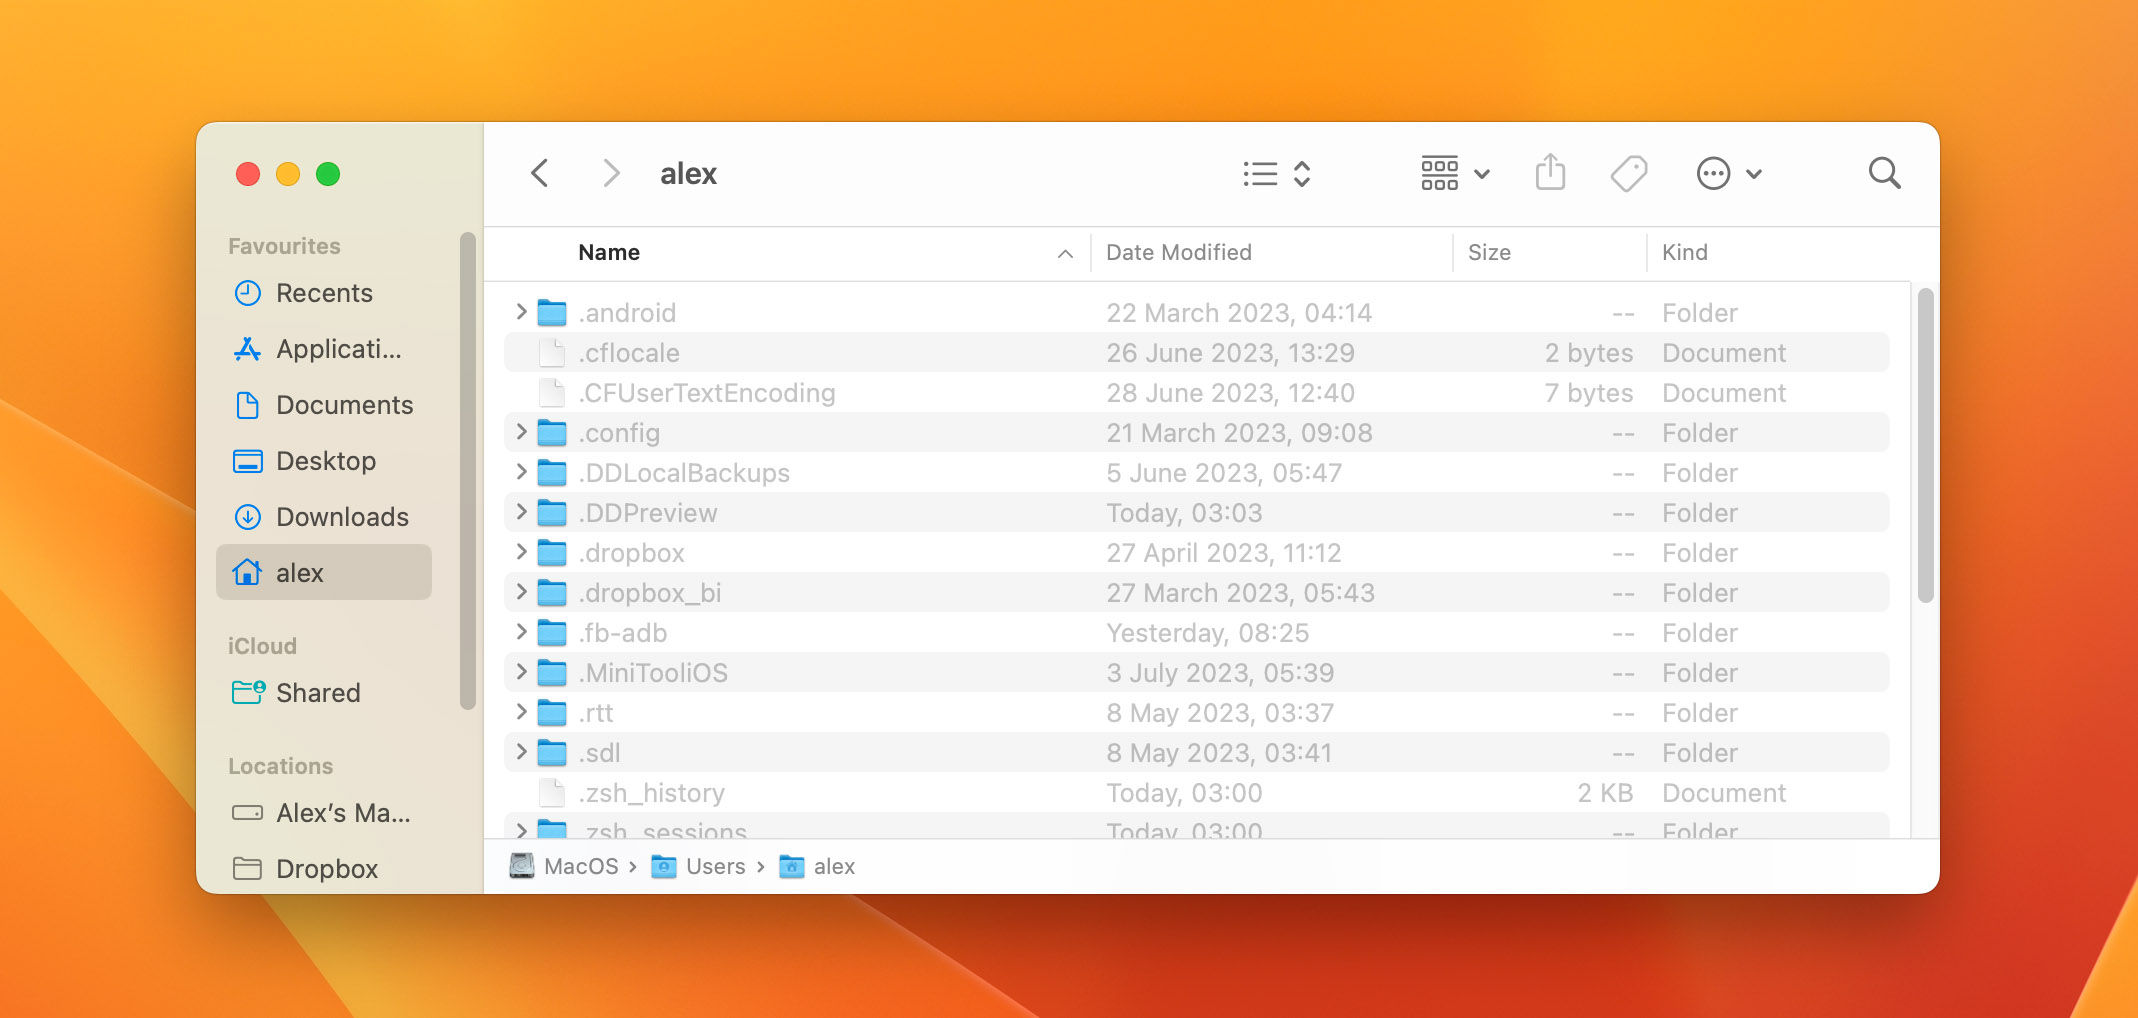
For Mac Users
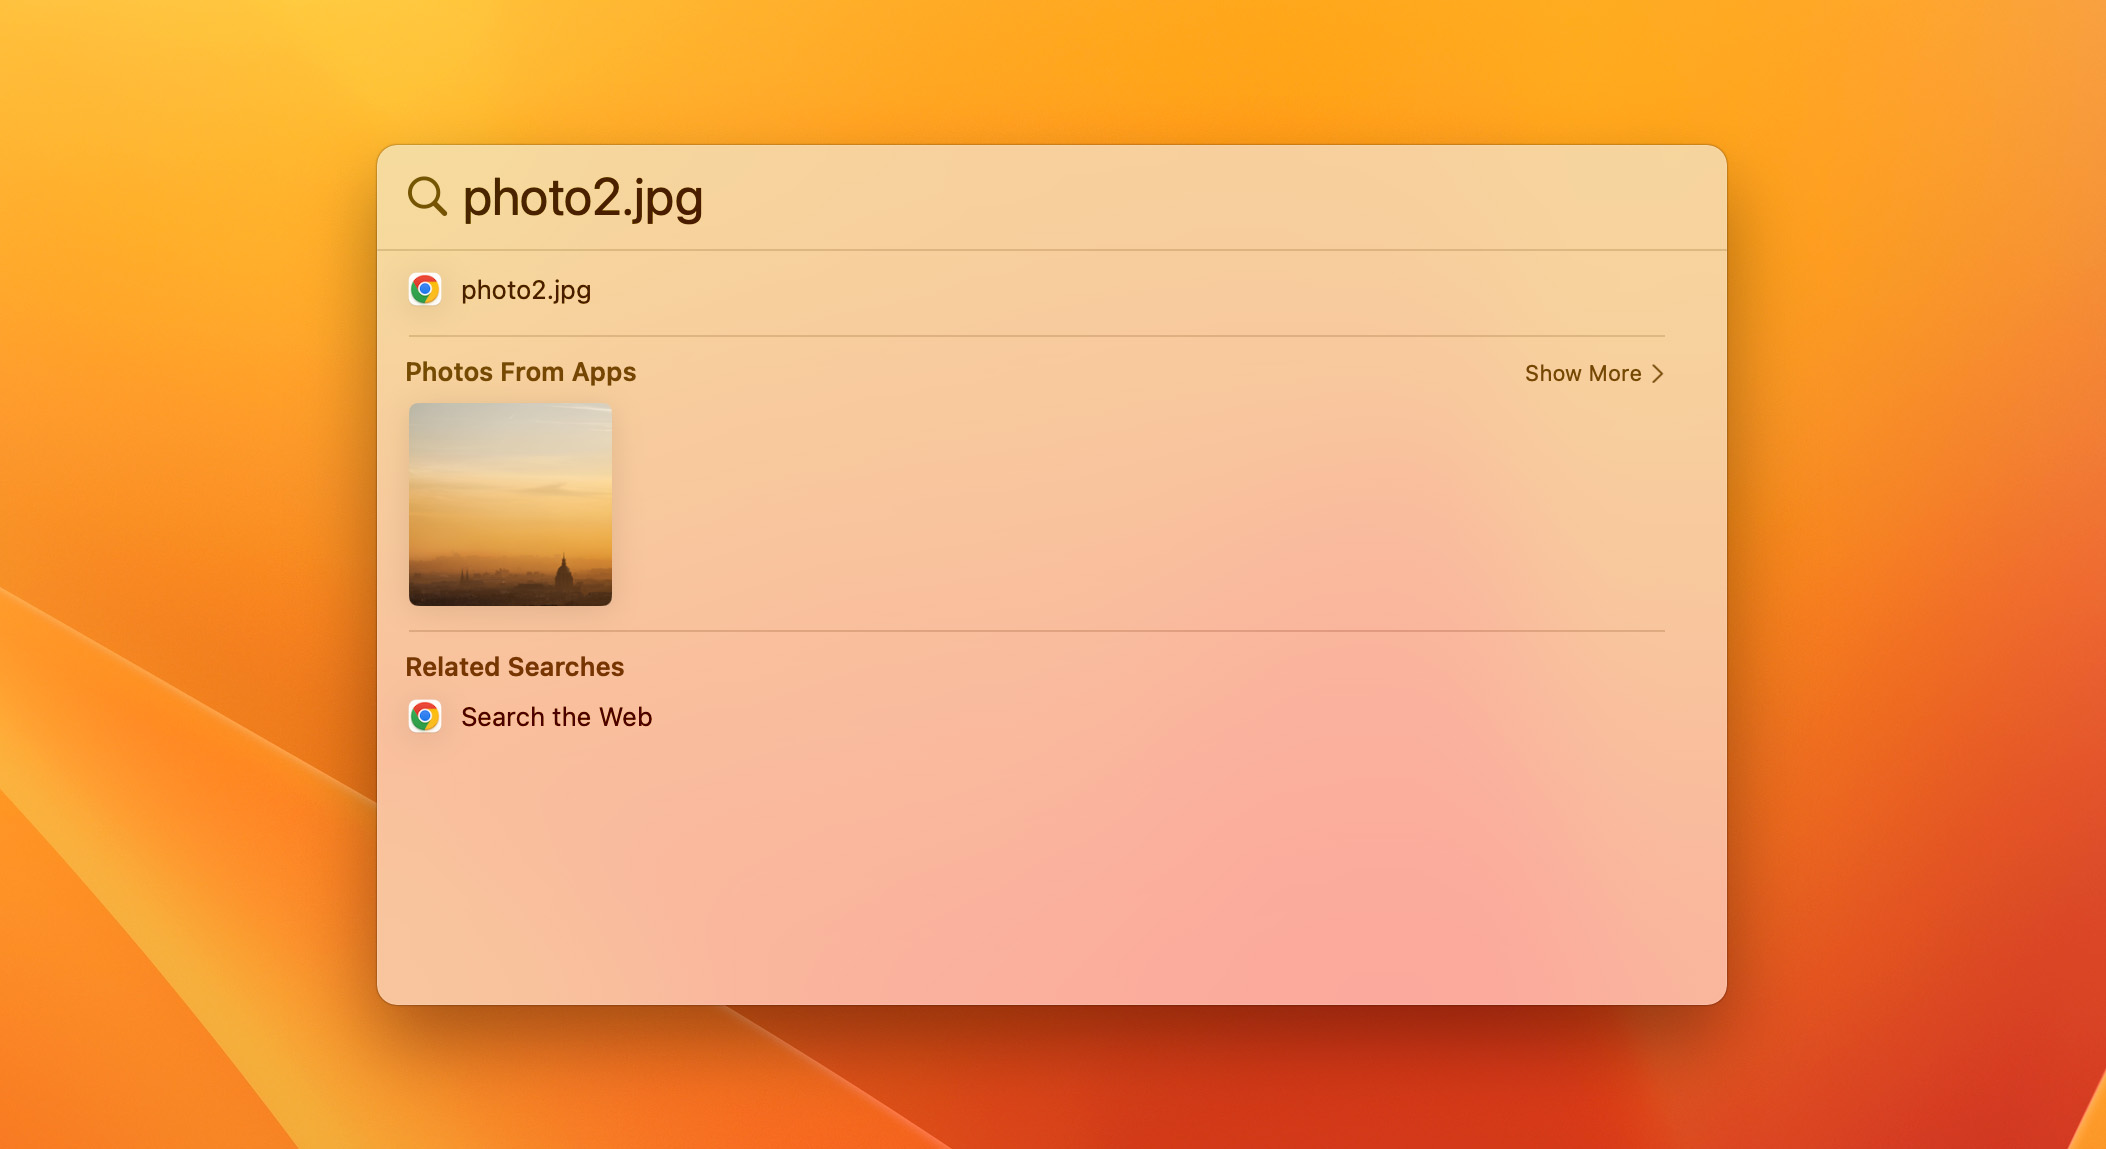
- The Search box in Finder can be used to try to locate your photos.
- Open Spotlight by clicking the magnifying glass icon in the top right of your screen and type in the name of the files you want to find.
Method 3: Enabling the Display of Hidden Files
You might have a situation where the files are simply hidden and are not being displayed. You can ensure hidden files can be seen with these procedures.
For Windows Systems
- Navigate to Folder options.
- Select Advanced settings, select Show hidden files, folders, and drives, and then choose OK.

Explore more: How to Recover Hidden Files on a Windows PC
For Mac Systems
The keystroke combination of Cmd + Shift + . (dot) will show hidden files in the current folder.
Also recommended: How to Show Hidden Files and Folders on Your Mac
Method 4: Using the Command Prompt
You may be able to recover deleted photos and other files by using the command line on your system.
For Windows Systems
- Press the Windows + R keys together in a search box.
- Type CMD In Command Prompt window.
- Type chkdsk ‘drive letter’: /f and press Enter.
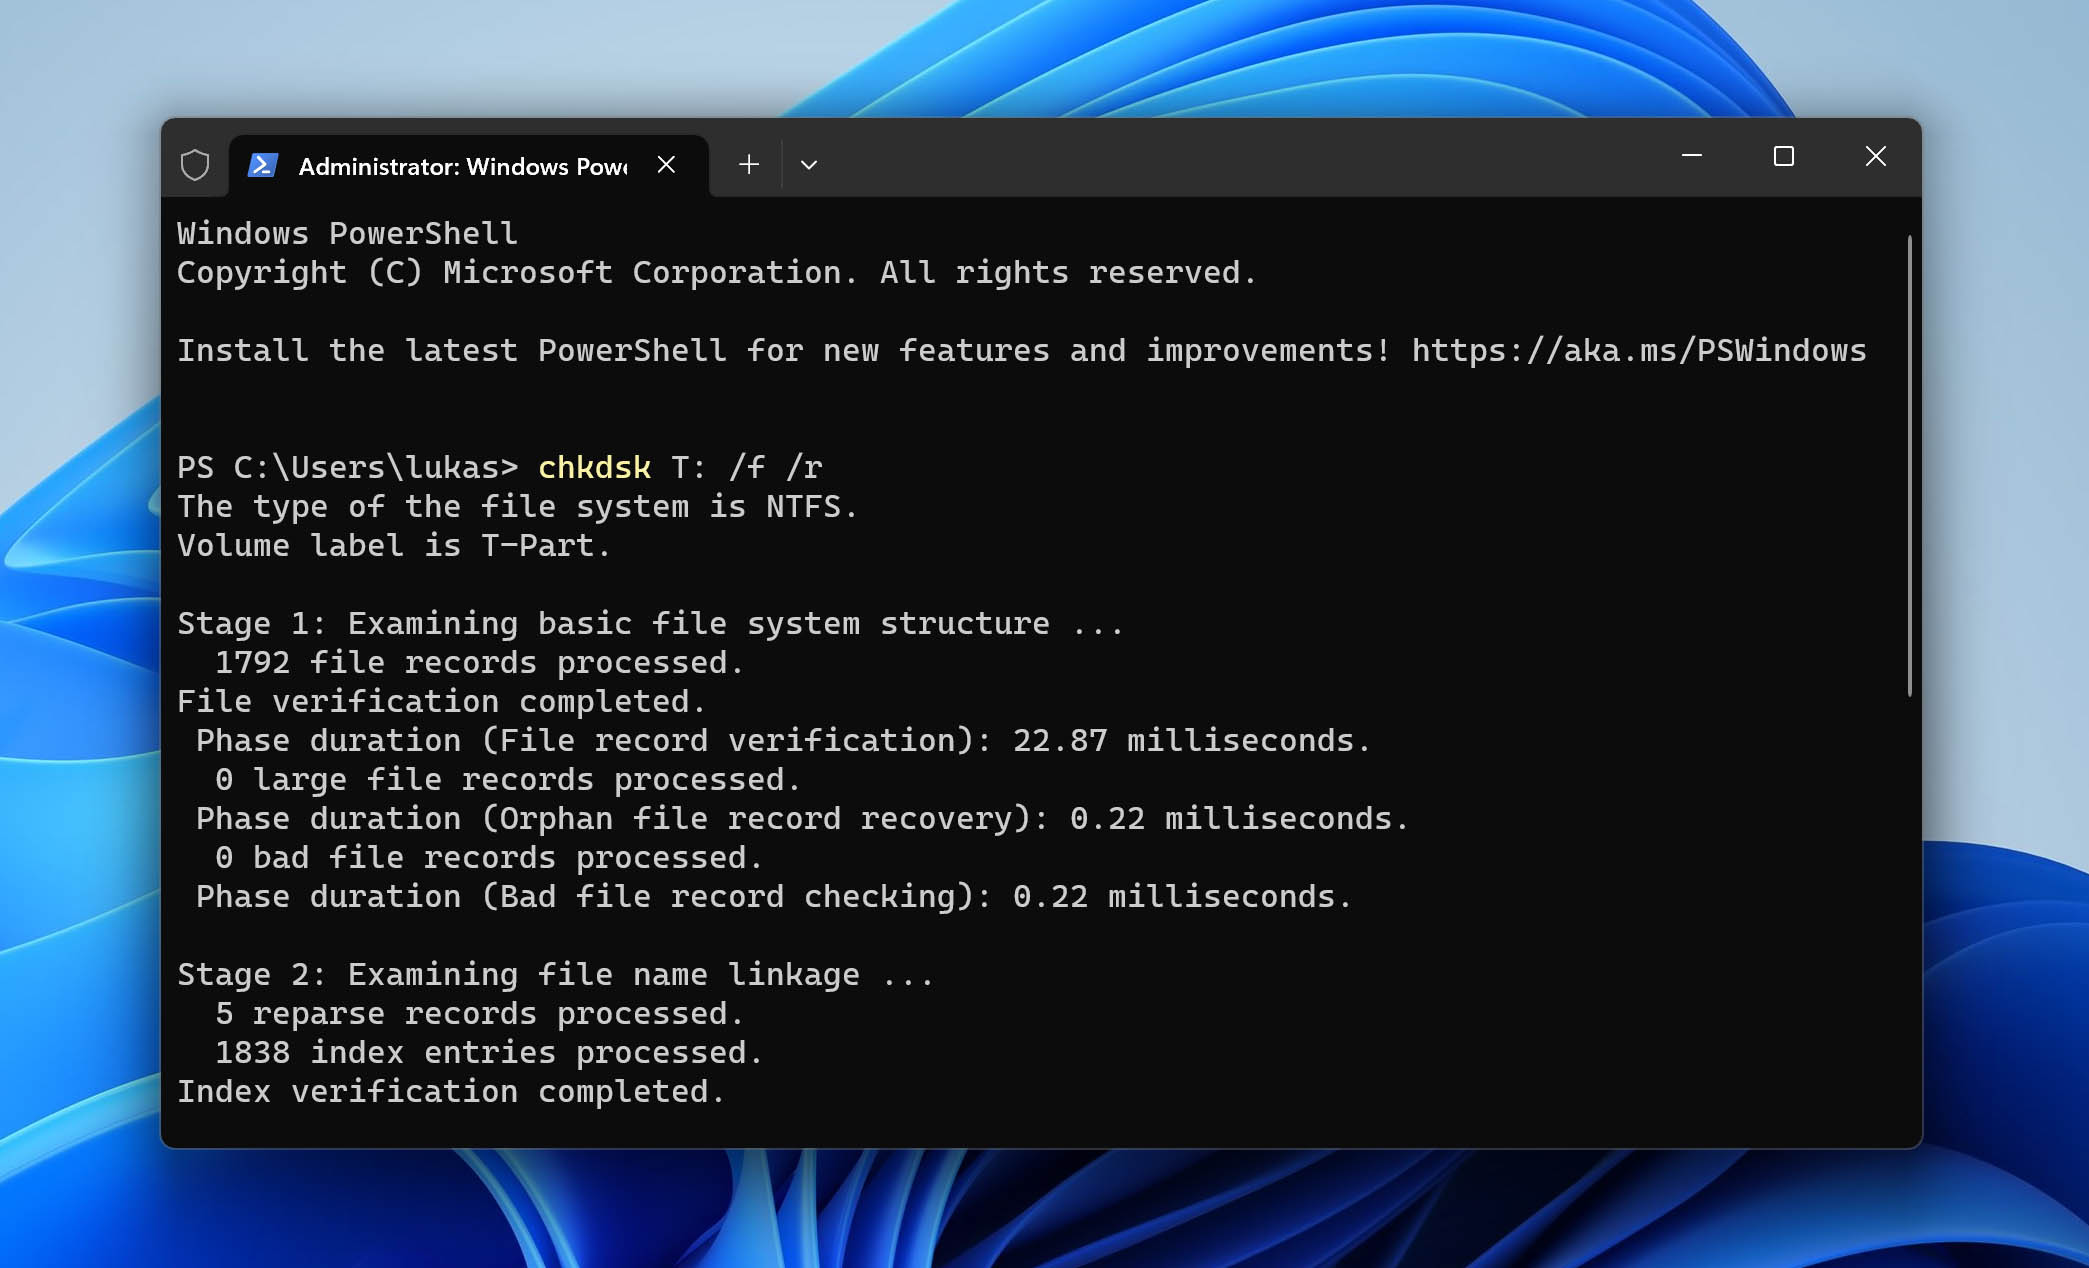
- Press Y until the command line reappears.
- Type the drive letter and hit Enter.
- Enter this command: drive letter: attrib -h -r -s /s /d ‘drive letter’:*.*
For Mac Systems
- Open the Terminal application.
- Type the command cd .Trash.
- Hit Return.
- Use this command with the filename you want to recover: mv Filename ‘destination folder’.
- Hit Enter and then Quit Terminal.

- Open Finder and search for the requested file.
- Drag the file to the location of your choice.
Method 5: Utilizing Photo Recovery Software
Use the appropriate procedure for the operating system you are using. These general steps will work with your choice of recovery application, whether you’re trying to recover photos from Windows 10, Windows 11, or Mac computers.
For Windows and Mac Systems
- Download and install the recovery software. Use an external device like a flash drive for the download and installation to avoid overwriting data you may want to recover.
- Launch the application and select the drive from within the application.
- Use the app’s interface to scan for lost photos.
- Preview the found files and select the ones that you want to recover.
- Select a new location for the restored photos and recover them. Do not save them to the disk that suffered data loss to prevent file corruption.
Method 6: Recovering from a Backup
We again refer you to the procedure for recovering from a backup used in the SD card section of the article. It works the same way for any files that you have previously backed up.
Part 4. Recovering Deleted Images from External or USB Drives
Many people use thumb drives, flash drives, and other types of removable storage devices that attach a router through a USB port. Recovering from a pen drive is basically the same as recovering from an internal hard drive, with the exception that the device needs to be connected to the machine to enact the recovery. We will highlight any differences in the procedures below, and refer you to the previous section of the article for recovery methods.
Method 1: Using Data Recovery Software
If you choose to use data recovery software, these are the general steps you should follow. They will work for Windows and Mac systems with the software solution of your choice.
For Windows and Mac Systems
- Download and install the recovery software.
- Connect the USB drive to your computer and launch the application.
- Select the removable drive from the list of disks the program displays.
- Scan for lost photos using the software’s user interface.
- Preview the found files and select the ones that you want to recover.
- Choose a new location for the restored photos and perform the recovery. Do not save them to the USB drive to avoid file corruption.
You may also be interested in: Our Ranking of the Best USB Recovery Software
Method 2: Utilizing Backups
It is good practice to backup important data that resides on external drives. You can use the same procedures outlined above to recover from a backup of your flash drive or external hard drive.
Part 5: Recovering Deleted Photos from a Digital Camera
Recovery from a digital camera such as those manufactured by Canon, Sony or Nikon can be done in two different ways. One method is used if the lost photos were on an SD card used to expand the camera’s capacity. If that’s your situation, remove the card from the device and use the SD card recovery procedures discussed earlier in this article.
You can also attempt a recovery directly from the camera. Most cameras have onboard navigation that allows you to look at the recently deleted folder contained in internal storage. This should be the first place you look, as it offers the quickest and simplest way to get your photos back.
You can also treat a camera recovery in the same way as that of an external hard drive using data recovery software. Attach the camera as you would a flash drive and allow the software to scan it for lost data. Recover found files to a new location and not to the camera’s internal storage.
Part 6: Recovering Deleted Images from Cloud Storage
Recovering lost photos from cloud storage providers is done the same way for both Windows and Mac users. You will be using the web browser of your choice to access the site. Here’s what you need to do with some of the most popular cloud storage vendors.
- Sign into your Dropbox account.
- Click Files in the left sidebar.
- Click Deleted files in the left sidebar.
- Check the boxes next to the items you want to recover.
- Click Restore to complete the procedure.
Interesting read: More Options to Recover Deleted Files From Dropbox
- Open your Google drive.
- Select Trash from the sidebar.
- Locate the file you want to recover.
- Right-click on the item and select Restore.
- Log in to MEGA.
- Navigate to the Rubbish Bin.
- View the deleted files and select the ones you want to recover.
- Use the Move button to move the selected items to the main cloud drive.
- Log in to your OneDrive account.
- Select the Recycle Bin from the navigation pane.
- Point to the items you want to recover and click the circle check box to select them.
- Click Restore.
Key Points for Successful Photo Recovery
There are some best practices and activities you can follow that make it more likely you can successfully recover lost photos. These recommendations apply to all types of files stored on your devices.
🛡️ Backing Up Your Data
This is one of the first things that computer users are advised to do if they value their data. The inclusion of free methods to backup your Mac or Windows computer makes it inexcusable for this simple solution to be ignored. Large capacity external hard drives are relatively inexpensive and are an excellent place to store your backups.
💊 Caring for Physical Storage Devices
Users with physically damaged devices may not be able to use any of the methods discussed to recover lost photos. In these cases, you may need to resort to sending your device to a data recovery center to try and get your data back. Physical damage that can contribute to data loss can be caused in many ways.
- Shock from dropping a device.
- Excessive heat or moisture.
- Electrical surges.
- Wear and tear indicated by clicking and grinding noise coming from the device.
👾 Avoiding Viruses and Malware
An infection with a virus or malware can result in unexpected data loss. To minimize the risk of infecting your storage devices, you should always have an updated antivirus program on your computer. Care needs to be taken with external storage devices and SD cards when sharing them or connecting them to unknown machines. You may inadvertently pick up a virus from an unprotected computer.
🖼️ Exercising Caution when Deleting Photos
Human error is the leading cause of data loss, and accidentally deleting pictures is a common mistake. Make it a habit to think twice before hitting that delete button. Verify that you really want to delete those items before going ahead with the process. Those few extra seconds can save a lot of recovery time later.
Conclusion
You should now be well informed regarding the multitude of ways to recover lost photos from a digital storage device. One of the solutions above should be able to help you get your valuable photos back. Good luck, and keep taking those pictures!
This article was written by Robert Agar, a Staff Writer at Handy Recovery Advisor. It was recently updated by Princess Lescan. It was also verified for technical accuracy by Andrey Vasilyev, our editorial advisor.
Curious about our content creation process? Take a look at our Editor Guidelines.