Every user will at some pointer encounter an issue with their internal hard drive and face the possibility of data loss. Fortunately, recovering data from an internal hard drive is tricky, but not impossible – even if you’re doing it by yourself.
For users who lost data due to accidental deletion, drive corruption, or even a crashed drive – this article will guide you through recovering data efficiently, using the best method for your specific situation. Read on.
What Is the Difficulty of Recovering Data From an Internal Drive?
Recovering internal hard drives can seem complicated, but let’s break it down to the fundamentals.
💬 What happens when a file is deleted?
Whenever a file gets deleted, it’s still lying dormant in the drive – however, it’s marked as “free to be overwritten.”
Whenever a file is saved to the drive, it takes the space of the old “marked” data by overwriting it. It’s why we always recommend saving recovered data to a separate drive – saving it to the same drive you’re recovering from can overwrite the files in the queue.
💬 How do internal drives affect data recovery difficulty?
This “overwriting” behavior is what makes it tricky to restore internal hard drives since we typically use them to run Windows (it’s where we store our operating system). So if we boot into windows and download new files to our computer, it overwrites old marked data in the internal drive.
This even includes downloading a data recovery software or saving any recovered files back into that drive – any data that is newly downloaded overwrites the old data. In fact, it’s highly recommended that you immediately stop using your internal drive if it’s missing any data to avoid this situation.
💬 Does this apply to all internal hard drives?
Not all internal hard drives will face this problem – it all comes down to how the drive is used and partitioned. First of all, not all internal hard drives are system drives, so those that aren’t don’t have the same issue.
Second, if your internal hard drive has multiple partitions and the data loss only happened in one partition, you can download a data recovery tool on the “safe” partition and use it to scan and restore the problematic partition. For example, if accidentally deleted data on disk C, you can download a data recovery tool on disk D. You can then use that to scan and restore files from disk C.
💬 What about external drives?
Recovering an external hard drive faces the same problem, but at least you’re not running Windows on it. This article provides easy-to-follow step-by-step guides for the unique process of recovering an internal hard drive or recovering a partition on the internal hard drive, and we tailor each instruction based on the specific problem the user is facing.
How to Recover Data From Internal Hard Drive
The process of data recovery is slightly different depending on the situation. This section covers the 3 methods of data recovery for drive issues that users commonly encounter. Scroll to see which instructions apply to your situation, or jump to the relevant sections using the links below.
- You accidentally deleted data on your drive.
- Your drive won’t boot.
- Your drive got corrupted (Common symptoms: freezing and slowdowns, BSODs, inaccessible files, recently suffered from a virus attack, etc.).
How to Recover Accidentally Deleted Data From Internal Hard Drive
If you accidentally deleted your files, recovering your data is relatively simple. You’ll need to install data recovery software onto an external storage device (like a USB flash drive) and use it to scan your internal hard drive. This is to avoid overwriting any data on your drive.
If your internal hard drive has multiple partitions and you deleted data from only one partition, then the process is even simpler. You just have to make sure to download and install the data recovery tool onto the “safe” partition. For example, if you deleted data on disk C, then download and install the software on disk D. These instructions will also work if you need to recover data from a formatted hard drive or partition.
For this method, we’ll be using Disk Drill. It’s one of the best data recovery apps, it’s free (for up to 500MB of data recovery), easy-to-use, and has a highly successful track record in the industry. Here’s how to use it:
- Download Disk Drill. If your drive only has one partition (for example, only “Local Disk C”), then download the software to another computer. If your computer has multiple partitions and you only deleted data on one partition, save Disk Drill to one of the “safe” partitions then skip to step 3.
- Plug in your external storage device, and create a “Disk Drill” folder to store the installation.
- Launch the Disk Drill installer we just downloaded.
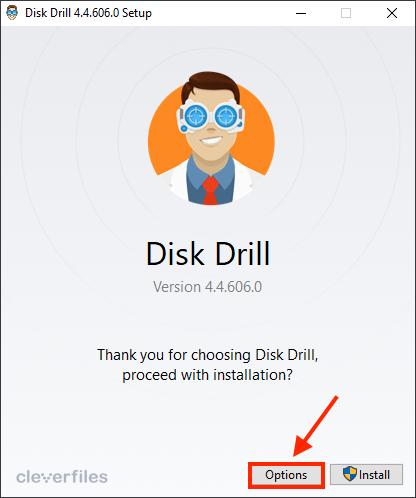
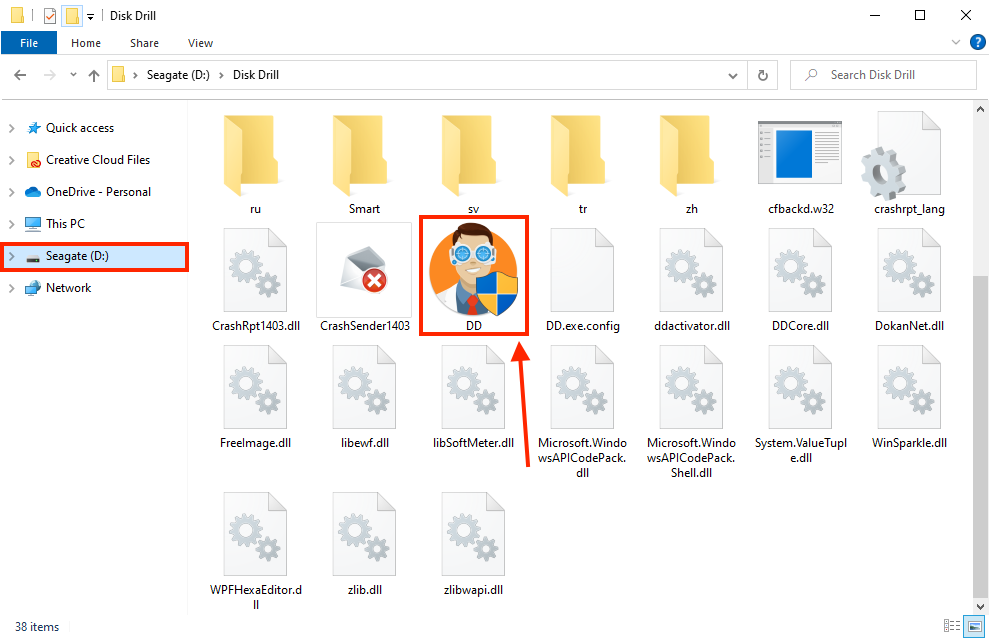
- On the installer’s initial window, click “Options.”
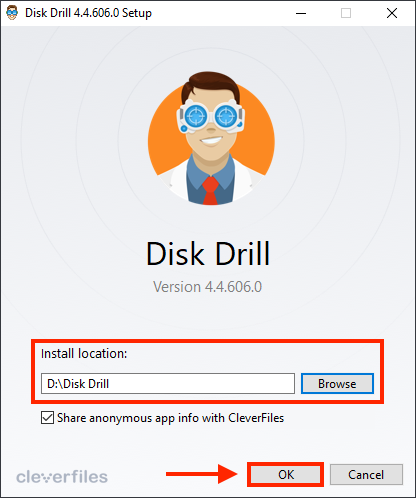
- Click the “Browse” button. Select either the “Disk Drill” folder we created on your external drive, or create an installation folder on your “safe” partition (the one that doesn’t contain your deleted files). Then, click “OK.”
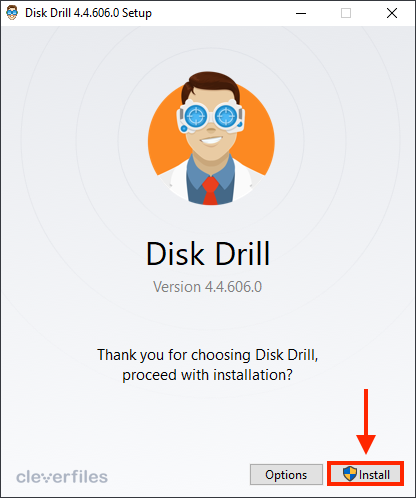
- Click “Install” to proceed (allow Administrator access if prompted).
- Wait for the setup progress to complete, then click “Close.”
- If you installed Disk Drill on an external drive, plug it into the machine that connected to the internal drive you want to recover data from. Then, launch Disk Drill.
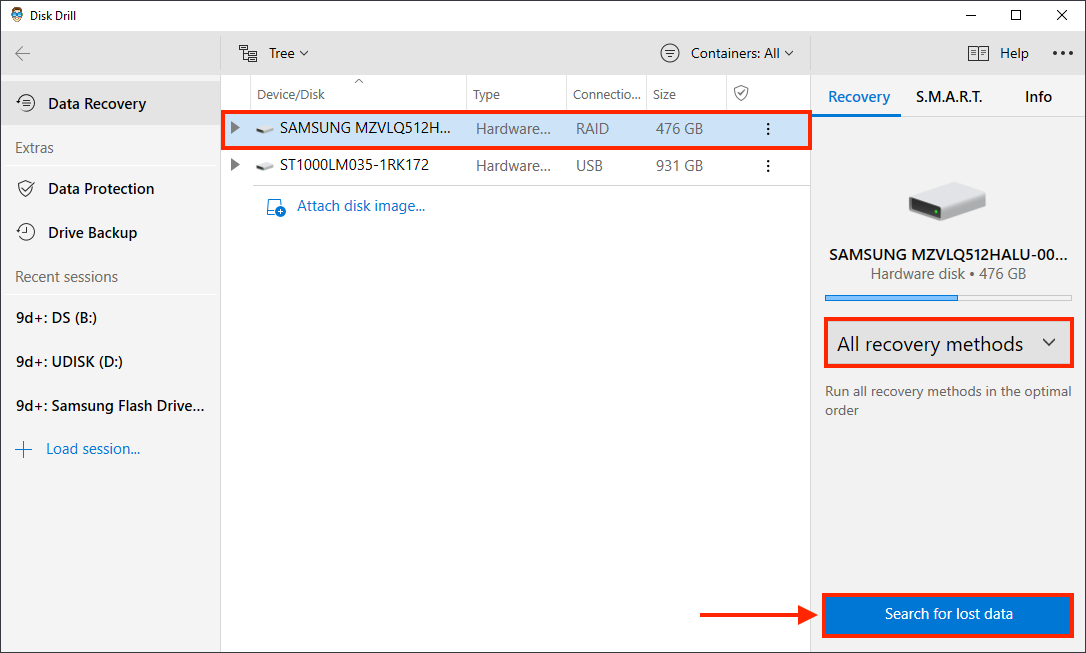
- In the initial Disk Drill window, select your internal hard drive or a specific partition on that drive, leave scan settings to default, then click “Search for lost data.”
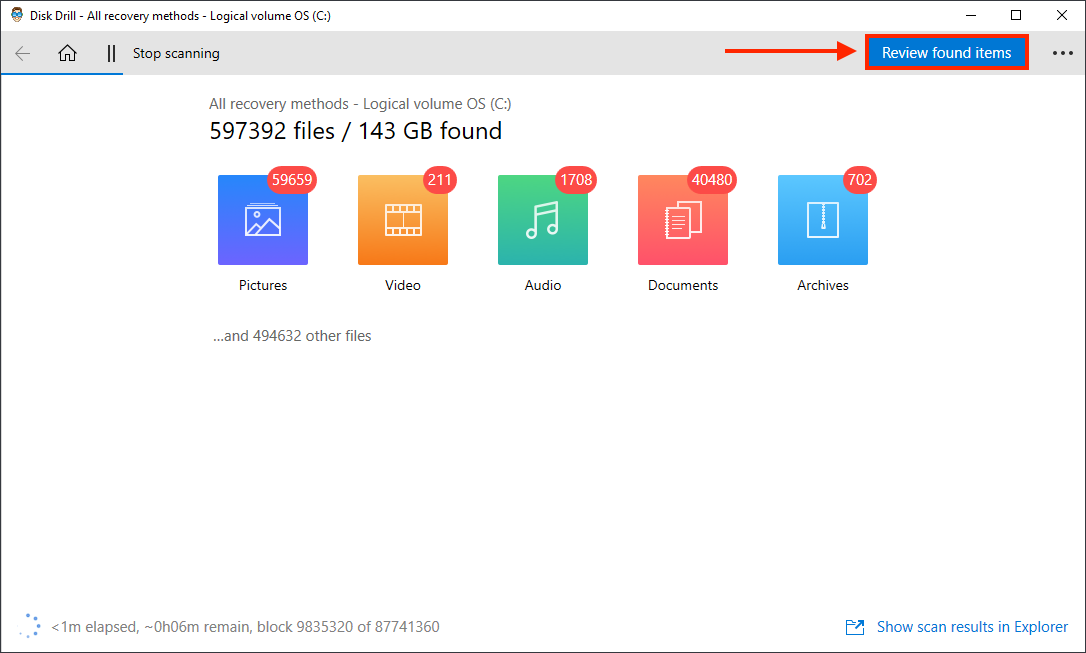
- You can begin clicking through file categories to browse the data Disk Drill already found. You can also wait for the scanning process to complete, then click “Review found items.” Either way, Disk Drill will continue to populate scan results as it finds new data.
- Locate your files – you can filter the results by file type using the left sidebar, or use the search bar in the top-right corner of the window.
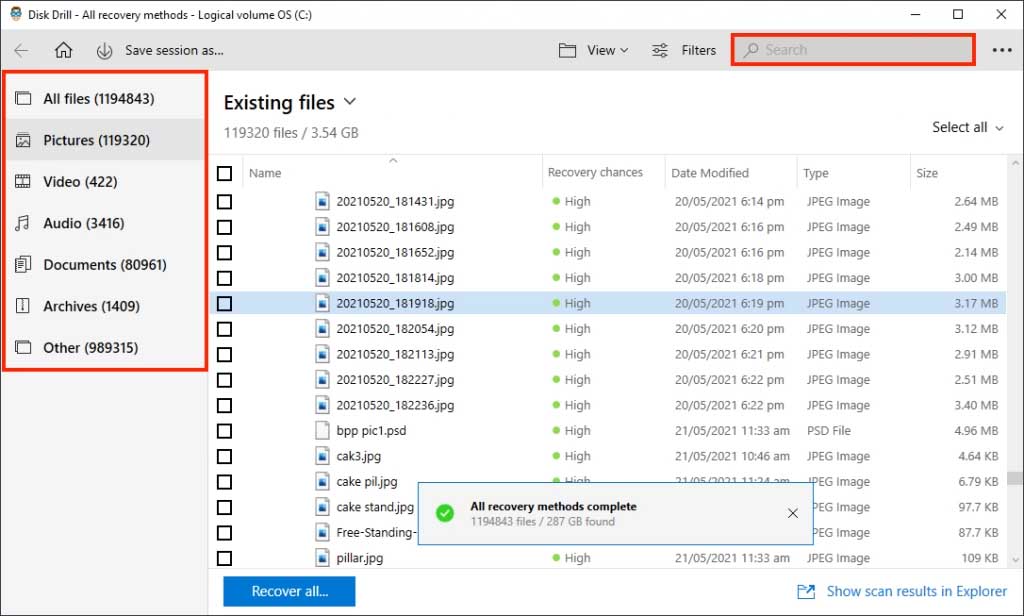
- Before proceeding, it’s a good idea to preview your files to make sure they’re recoverable. Hover your mouse pointer to the right of each file name and click the eye button that appears.

- Check each file preview on the right sidebar. Then, select the files you want to recover by ticking the checkboxes to the left, then click “Recover.”
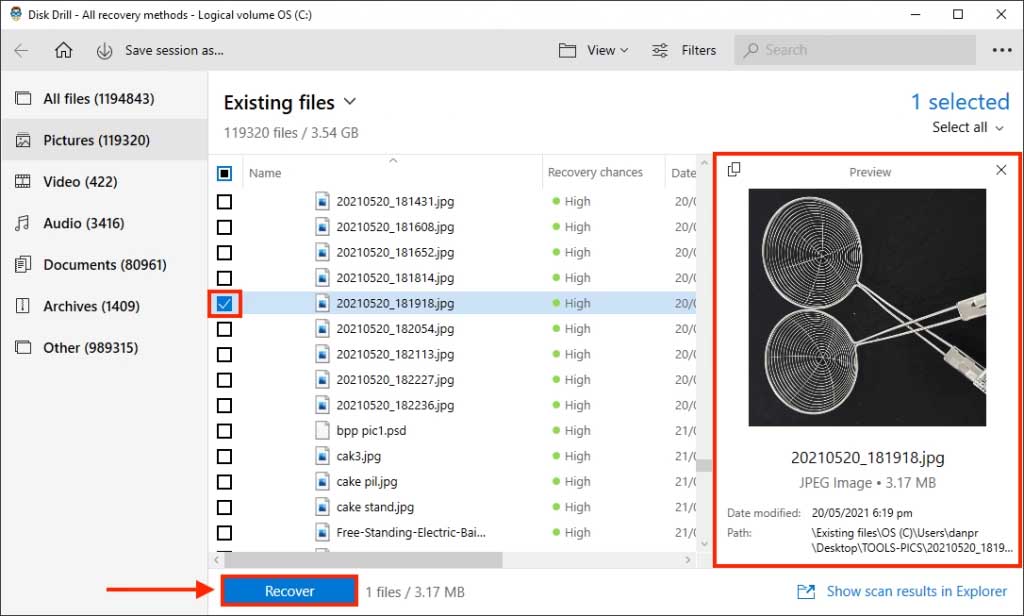
- On the dialogue box that appears, use the dropdown menu to select a destination for your recovered files. Make sure you choose a location other than your internal drive (you can recover it to your Disk Drill USB stick).

For a more in-depth look at Disk Drill and all the features it offers, read our full Disk Drill review.
How to Recover Data From a Crashed Internal Disk
A crashed hard drive means that it won’t boot – so we can’t use it to run an application like Disk Drill. Instead, we’ll have to connect it as an external drive to another computer. This instruction requires a little more preparation, as you’ll have to purchase an enclosure for your internal drive so you can use it as an external hard drive.
Once that’s sorted, you can use the other computer to run a data recovery process on that drive. Note that data recovery tools can even read external hard drives that aren’t showing up, as well as uninitialized disks.
This time, let’s use DiskGenius instead of Disk Drill – we’ll be writing a review on DiskGenius soon, and this is a great chance to showcase it. We’re most interested in its ability to create image backups (Disk Drill has a similar feature called Byte-to-Byte Backup), which is faster and more reliable than traditional file backups. Today though, we’ll use it to recover data from your crashed hard drive.
- On a working Windows computer, download and install DiskGenius.
- Plug in your crashed drive to the working Windows computer via USB.
- Run DiskGenius by double-clicking its icon.
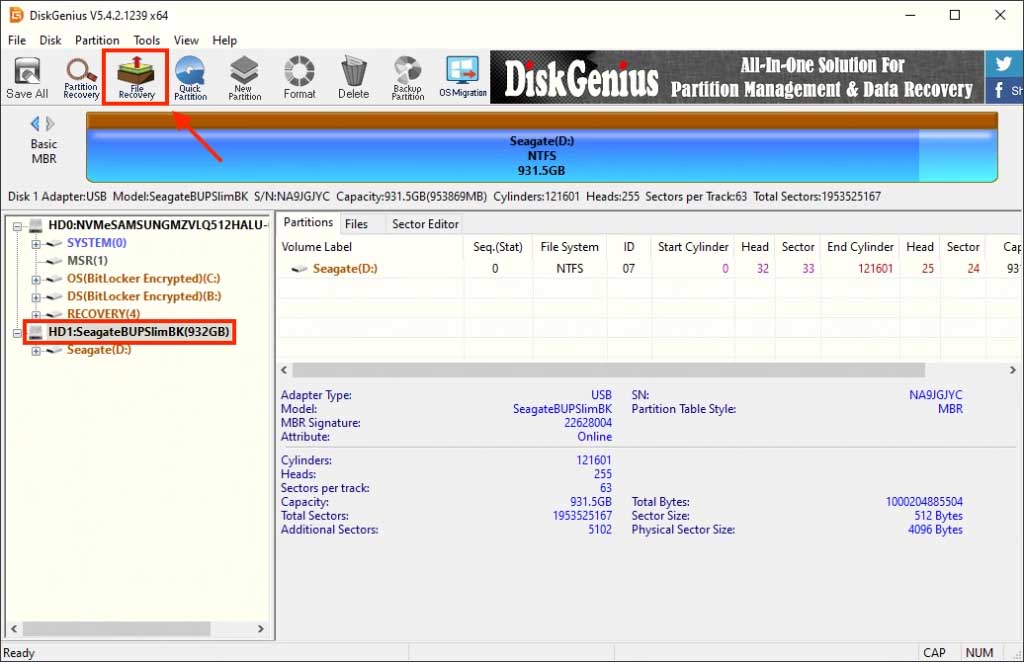
- Select your drive on the left sidebar, then click the “File Recovery” button on the toolbar at the top of the window.
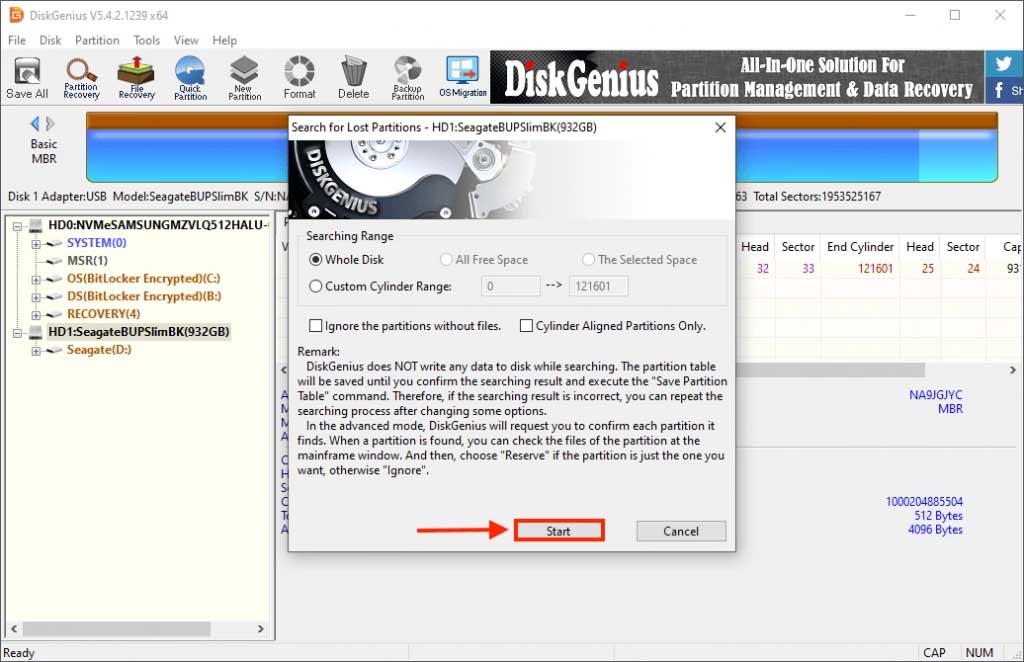
- On the popup that appears, leave all settings to default and click “Start.”
- Wait for DiskGenius to finish searching cylinders, then use the tree structure on the left sidebar to quickly navigate through your recovered files. Clicking the filename shows a small preview at the bottom of the window.
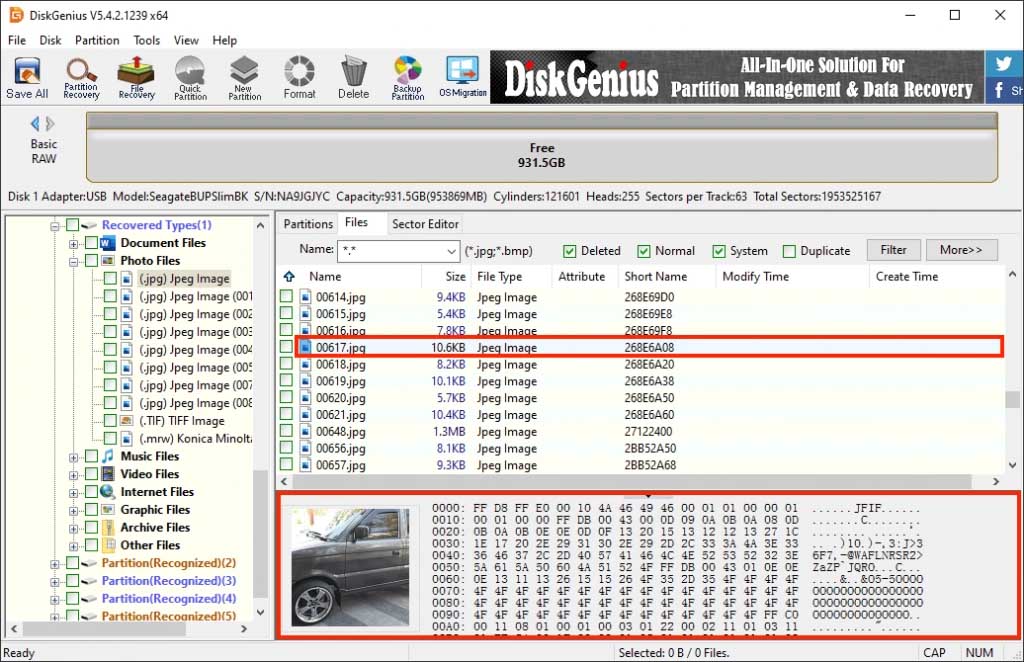
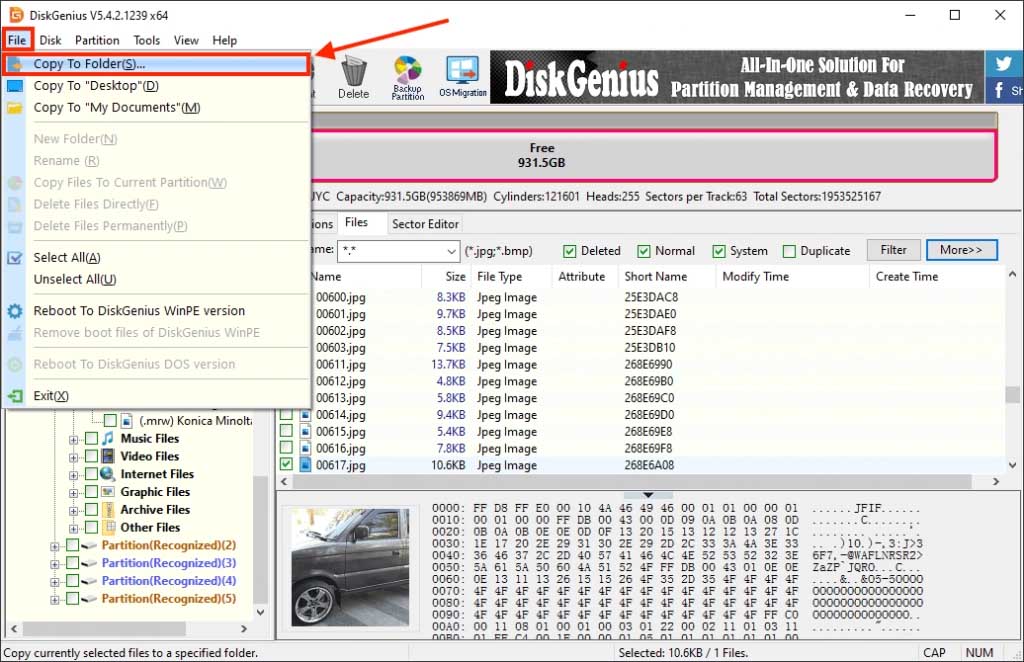
- To select the files you want to recover, tick the checkboxes to the left of the filename. Then on the menu bar, click File > Copy to Folder(S)… and select the destination folder for your recovered files.
Make sure you save your recovered files to a different location or drive than the one you’re recovering data from. Otherwise, saving your downloaded files may overwrite the data.
How to Recover Data From Corrupted Internal Hard Disk
Drive “corruption” manifests itself in different ways, so the solutions can be different. Some users experience slowdowns, random freezing, and inaccessible files. For these users who can still boot into Windows, you can follow the instructions in the first method. Once you’ve recovered data, only then should you attempt to fix your corrupted hard drive.
Other users encounter constant BSODs or non-booting. We’re better off treating this as a crashed hard drive, and we’ll be using a similar process as we used for crashed drives. This time, let’s use Disk Drill instead of Disk Genius.
Again, this process requires plugging in your internal hard drive into another computer as an external hard drive. You’ll need an enclosure for your drive to do this.
- Download and install Disk Drill on a working Windows computer.
- Make sure your internal hard drive is in its enclosure, then plug it into the working computer.
- Launch Disk Drill by double-clicking its icon on your desktop.
- Select your internal drive (now displayed as an external drive), leave scan settings to “All scan methods” for the best results, then click “Search for lost data” on the bottom-right corner of the window.

- Wait for Disk Drill to complete its scan, then click “Review found items” on the top-right corner of the screen.

- Locate your files by type clicking through the left sidebar or narrow your search by using the search bar.
- Before restoring them, preview your files by hovering your mouse on the right side of their file names and clicking the eye button that appears.
- Preview your files on the right sidebar. Then, to make your selection, tick the checkboxes to the left of each file, then click “Recover.”
- On the dialogue box popup, choose a location on the working computer to save your files.
FAQ
How to recover data from an internal hard disk that is not being detected?
Without an interface to work with, you will have to plug in your drive to another computer. To do this, you’ll need to buy an enclosure for your internal drive. Then, do the following:
- On a working computer, download a data recovery tool like Disk Drill or DiskGenius.
- Plug in your drive to the computer. Don’t worry, data recovery tools can usually detect drives that Windows file explorer can’t.
- Use the data recovery tool to scan your drive and restore the data to a location other than your internal drive to avoid overwriting other data.
How to recover data from laptop hard drive that won’t turn on?
Since you can’t access the interface, you’ll need to work on your laptop hard drive using another computer. You’ll need an enclosure to turn your laptop hard drive into an external hard drive, which you can then plug into another computer. Then, do the following:
- Download a data utility like Disk Drill or DiskGenius onto a working computer.
- Plug in the enclosure that houses your laptop hard drive.
- Scan your drive with the data recovery tool – it will read the drive as if it were a working external hard drive (even if Windows file explorer can’t detect it).
- Retrieve your lost files and save it to a location other than your laptop hard drive to avoid overwriting old data.
How to get data off an old hard drive?
If you can’t simply copy-paste files off an old hard drive, it’s possible that the drive is either corrupted, infected, or experienced data decay. Download a data recovery tool like Disk Drill or DiskGenius, which are capable of restoring data from formatted, dead, or corrupted disks.
However, if the drive is physically damaged, stop interacting with it immediately. Using it further may cause permanent data loss. Instead, send it to a professional data recovery center, who have the right tools to carefully extract data from a physically damaged drive.
Conclusion
Internal hard drives are a little trickier to recover because they house the operating system. Internal drives are also prone to corruption due to the installation of many programs on the local disk volume. Having a program like Disk Drill or Disk Genius will ensure that you won’t get caught in a critical situation with no way to access your data. To avoid these problems altogether, make sure to always backup your files!
This article was written by Alejandro Santos, a Staff Writer at Handy Recovery Advisor. It was also verified for technical accuracy by Andrey Vasilyev, our editorial advisor.
Curious about our content creation process? Take a look at our Editor Guidelines.