This article will show you how to resolve the problem of an external hard drive not showing up on your Windows computer. The techniques discussed include simple solutions as well as more advanced methods that enable you to recover data from drives that cannot be accessed through Windows Explorer.
Few things are more frustrating than plugging your external hard drive into your computer and finding that it’s not being detected by your system. The sudden realization that your data is no longer accessible can start to make you panic.
Before you spiral at the thought of your data being lost forever, know that there are many different ways you can fix the problem of your external hard drive not showing up. In this article, we’re going to cover multiple proven solutions to ensure your external hard drive becomes readable and accessible.
Reasons Why External Hard Drives Become Unreadable or Unrecognizable
While your external hard drive not showing up on Windows 10/11 may seem random at first, there’s a good chance that there are some underlying problems that have caused the drive to become unreadable when you plug it into your computer.
💥 Faulty hardware |
This could be anything from a faulty cable all the way to a busted hard drive. If there’s one hardware component that’s no longer working, it could be affecting the performance of the entire drive. |
🔧 Outdated or corrupted drivers |
Drivers enable your operating system to communicate with your external hard drive and other devices. If the drivers are outdated, you may be missing out on important compatibility updates. Or, your existing drivers may have become corrupted, rendering them unusable. |
🤷♂️ Unsupported filesystem |
If your drive is formatted with Apple’s HSF+ file system, Windows won’t detect it. Instead, it will suggest you format it with one that’s supported. This will happen to any drive that’s using a file system that’s not recognized by the host operating system. |
⚠️ Logical errors |
Logical errors can occur when the file system on the external drive gets corrupted, resulting in unreadable data or the drive appearing as RAW and asking to be formatted. |
🔨 Physical damage |
External hard drives can become unreadable if they suffer from physical damage due to drops, impact, or exposure to extreme temperatures or humidity. |
⚡ Insufficient power |
If you have a USB 3.0 external hard drive, be sure to connect it to a USB 3.0 port. A USB 2.0 port may not be able to supply enough power to support operation. Also, if your drive requires external power, ensure it’s plugged into a power outlet when being used. |
How to Recover Files From an External Hard Drive That’s Not Showing Up
Our statistics show that a high number of users face data loss when attempting to fix errors preventing their system from detecting external drives. Therefore, we want to provide you with essential tips on how to recover data from your disk and keep it safe.
Through the use of data recovery tools, you can scan and recover that data in just a few clicks. This works even for devices that aren’t accessible through Windows File Explorer. As long as the external hard drive is visible in the Device Manager, you can recover data from it. For this demonstration, we’re using Disk Drill Data Recovery because of its proven reliability and added features that we’ll touch on next.
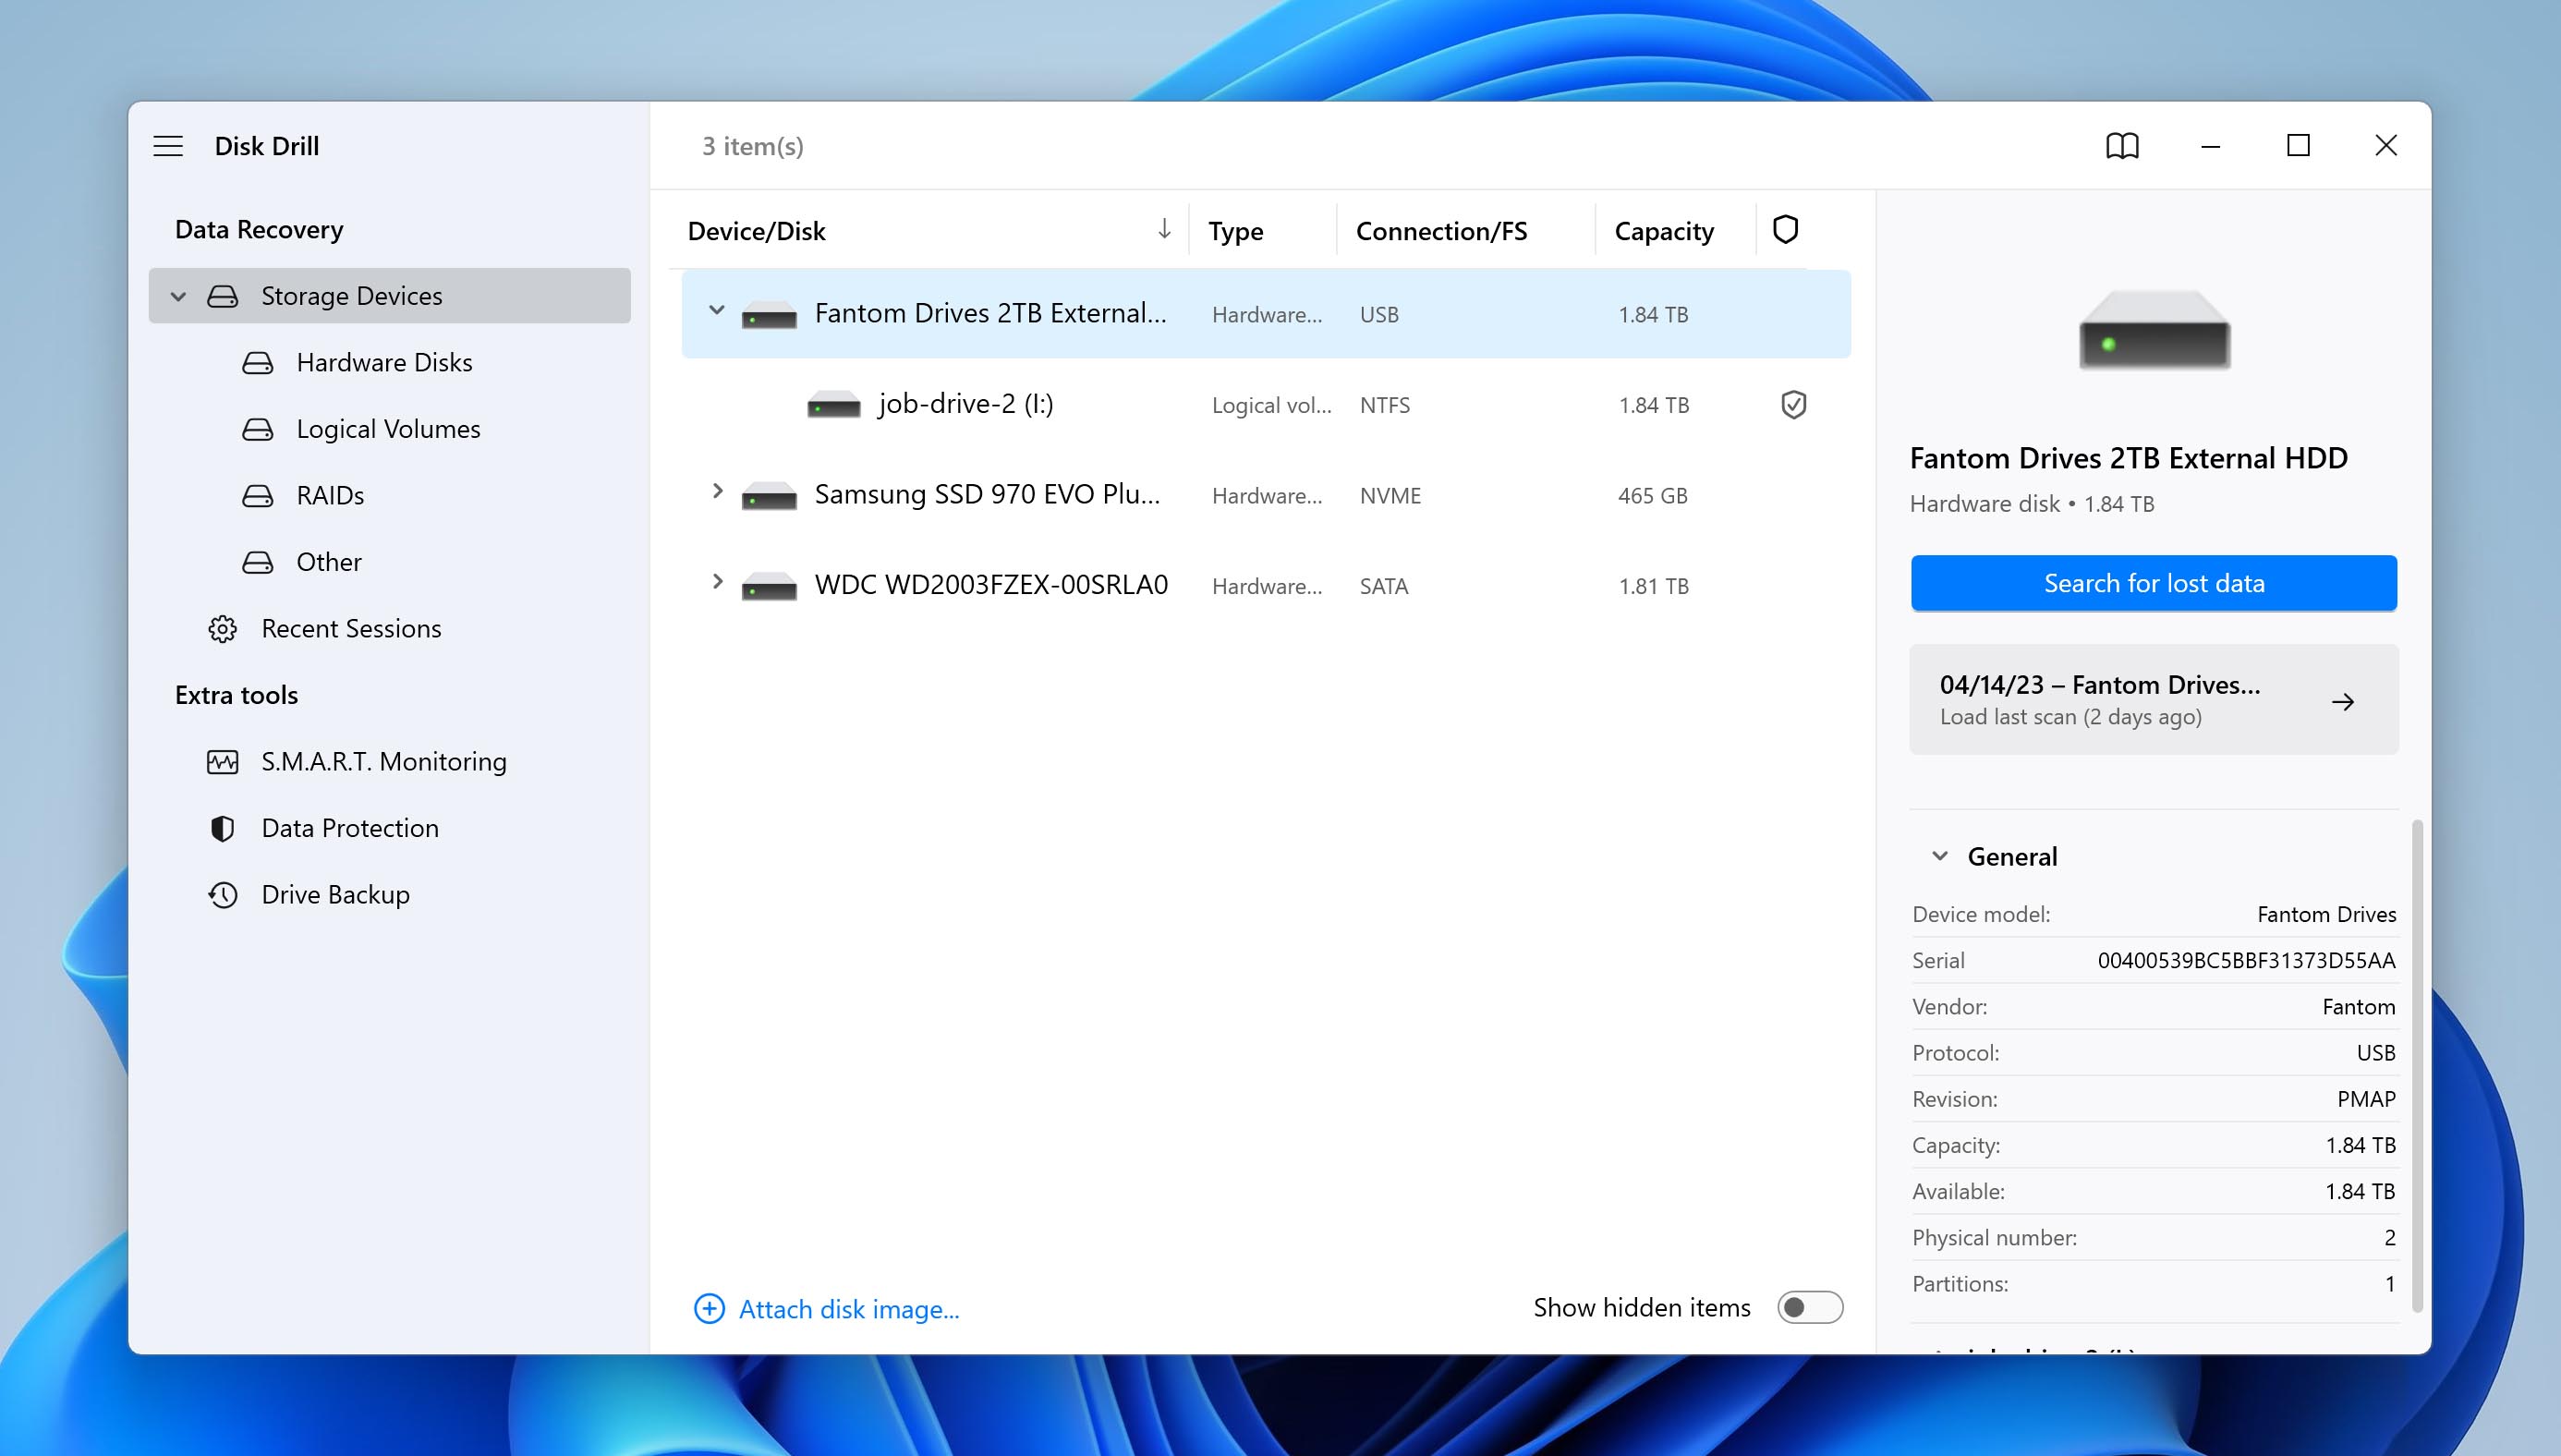
- Make sure the drive is plugged in. Download, install, and open Disk Drill.
- Select your external hard drive that is not visible in File Explorer from the list and click Search for lost data.
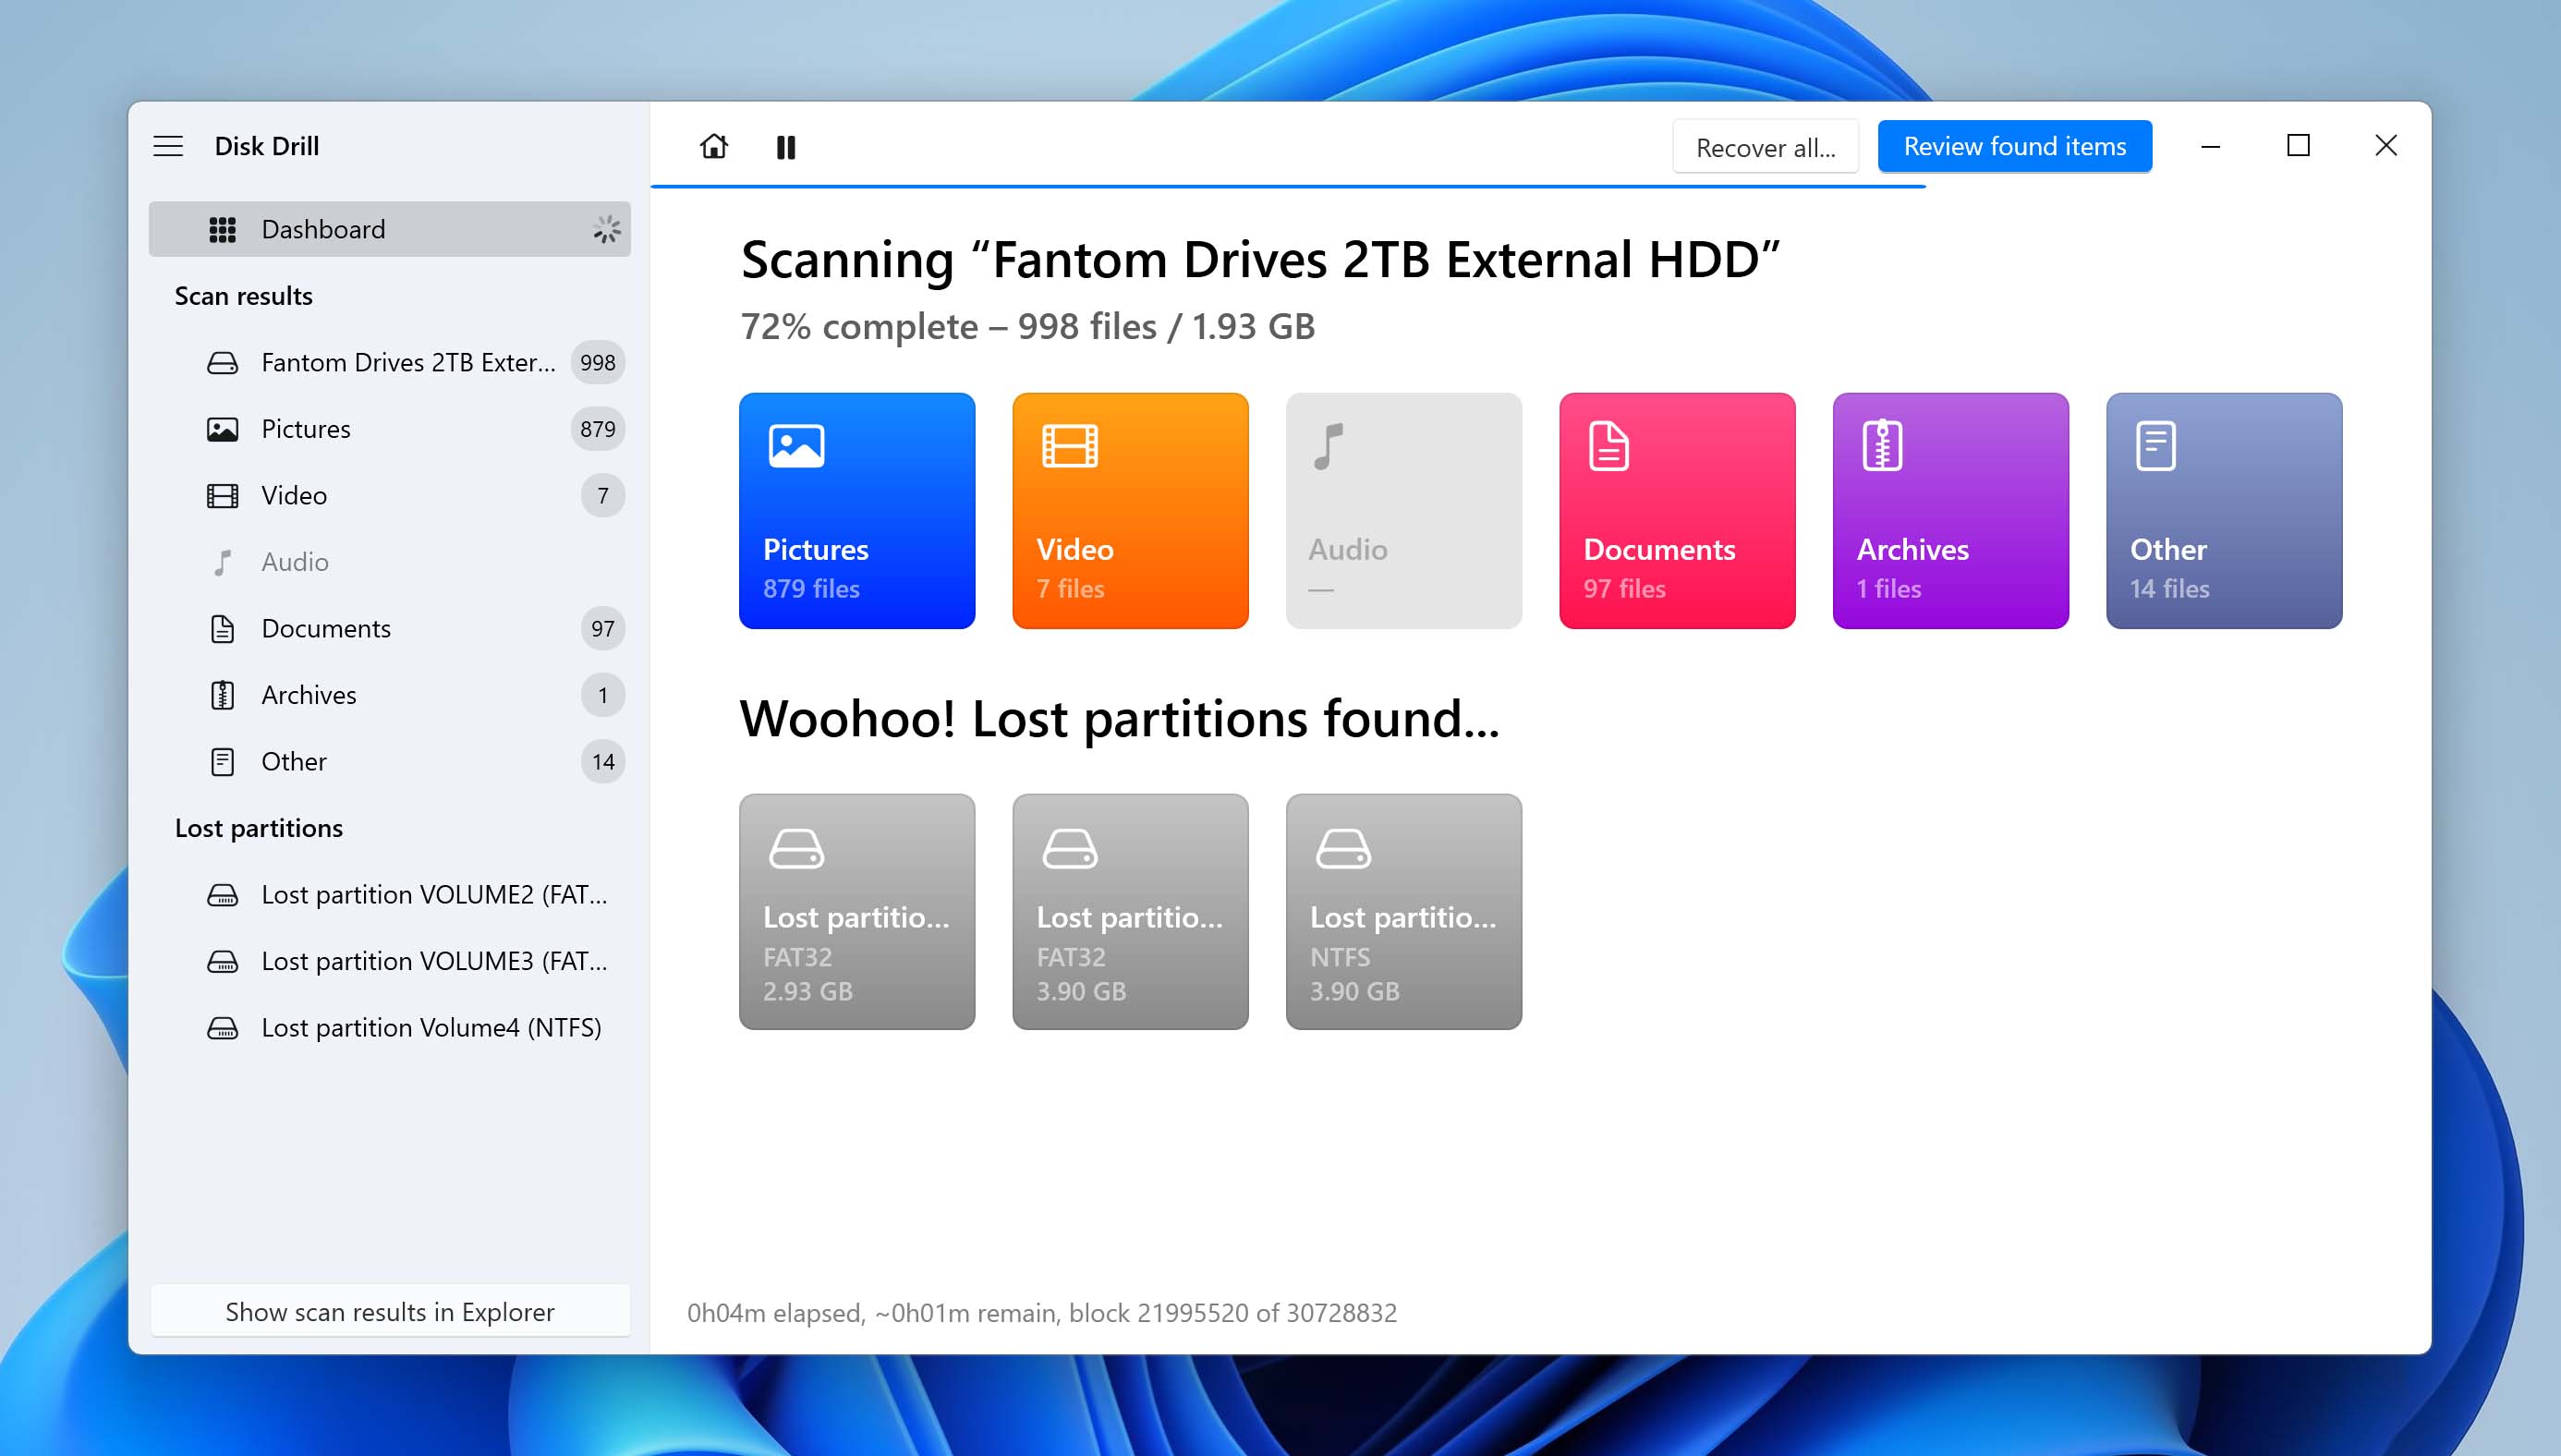
- The scan time will vary depending on how much data there is and how large your drive is. The found data will appear in real-time, but we advise you to wait until the scanning process is complete. When ready, click Review found items.
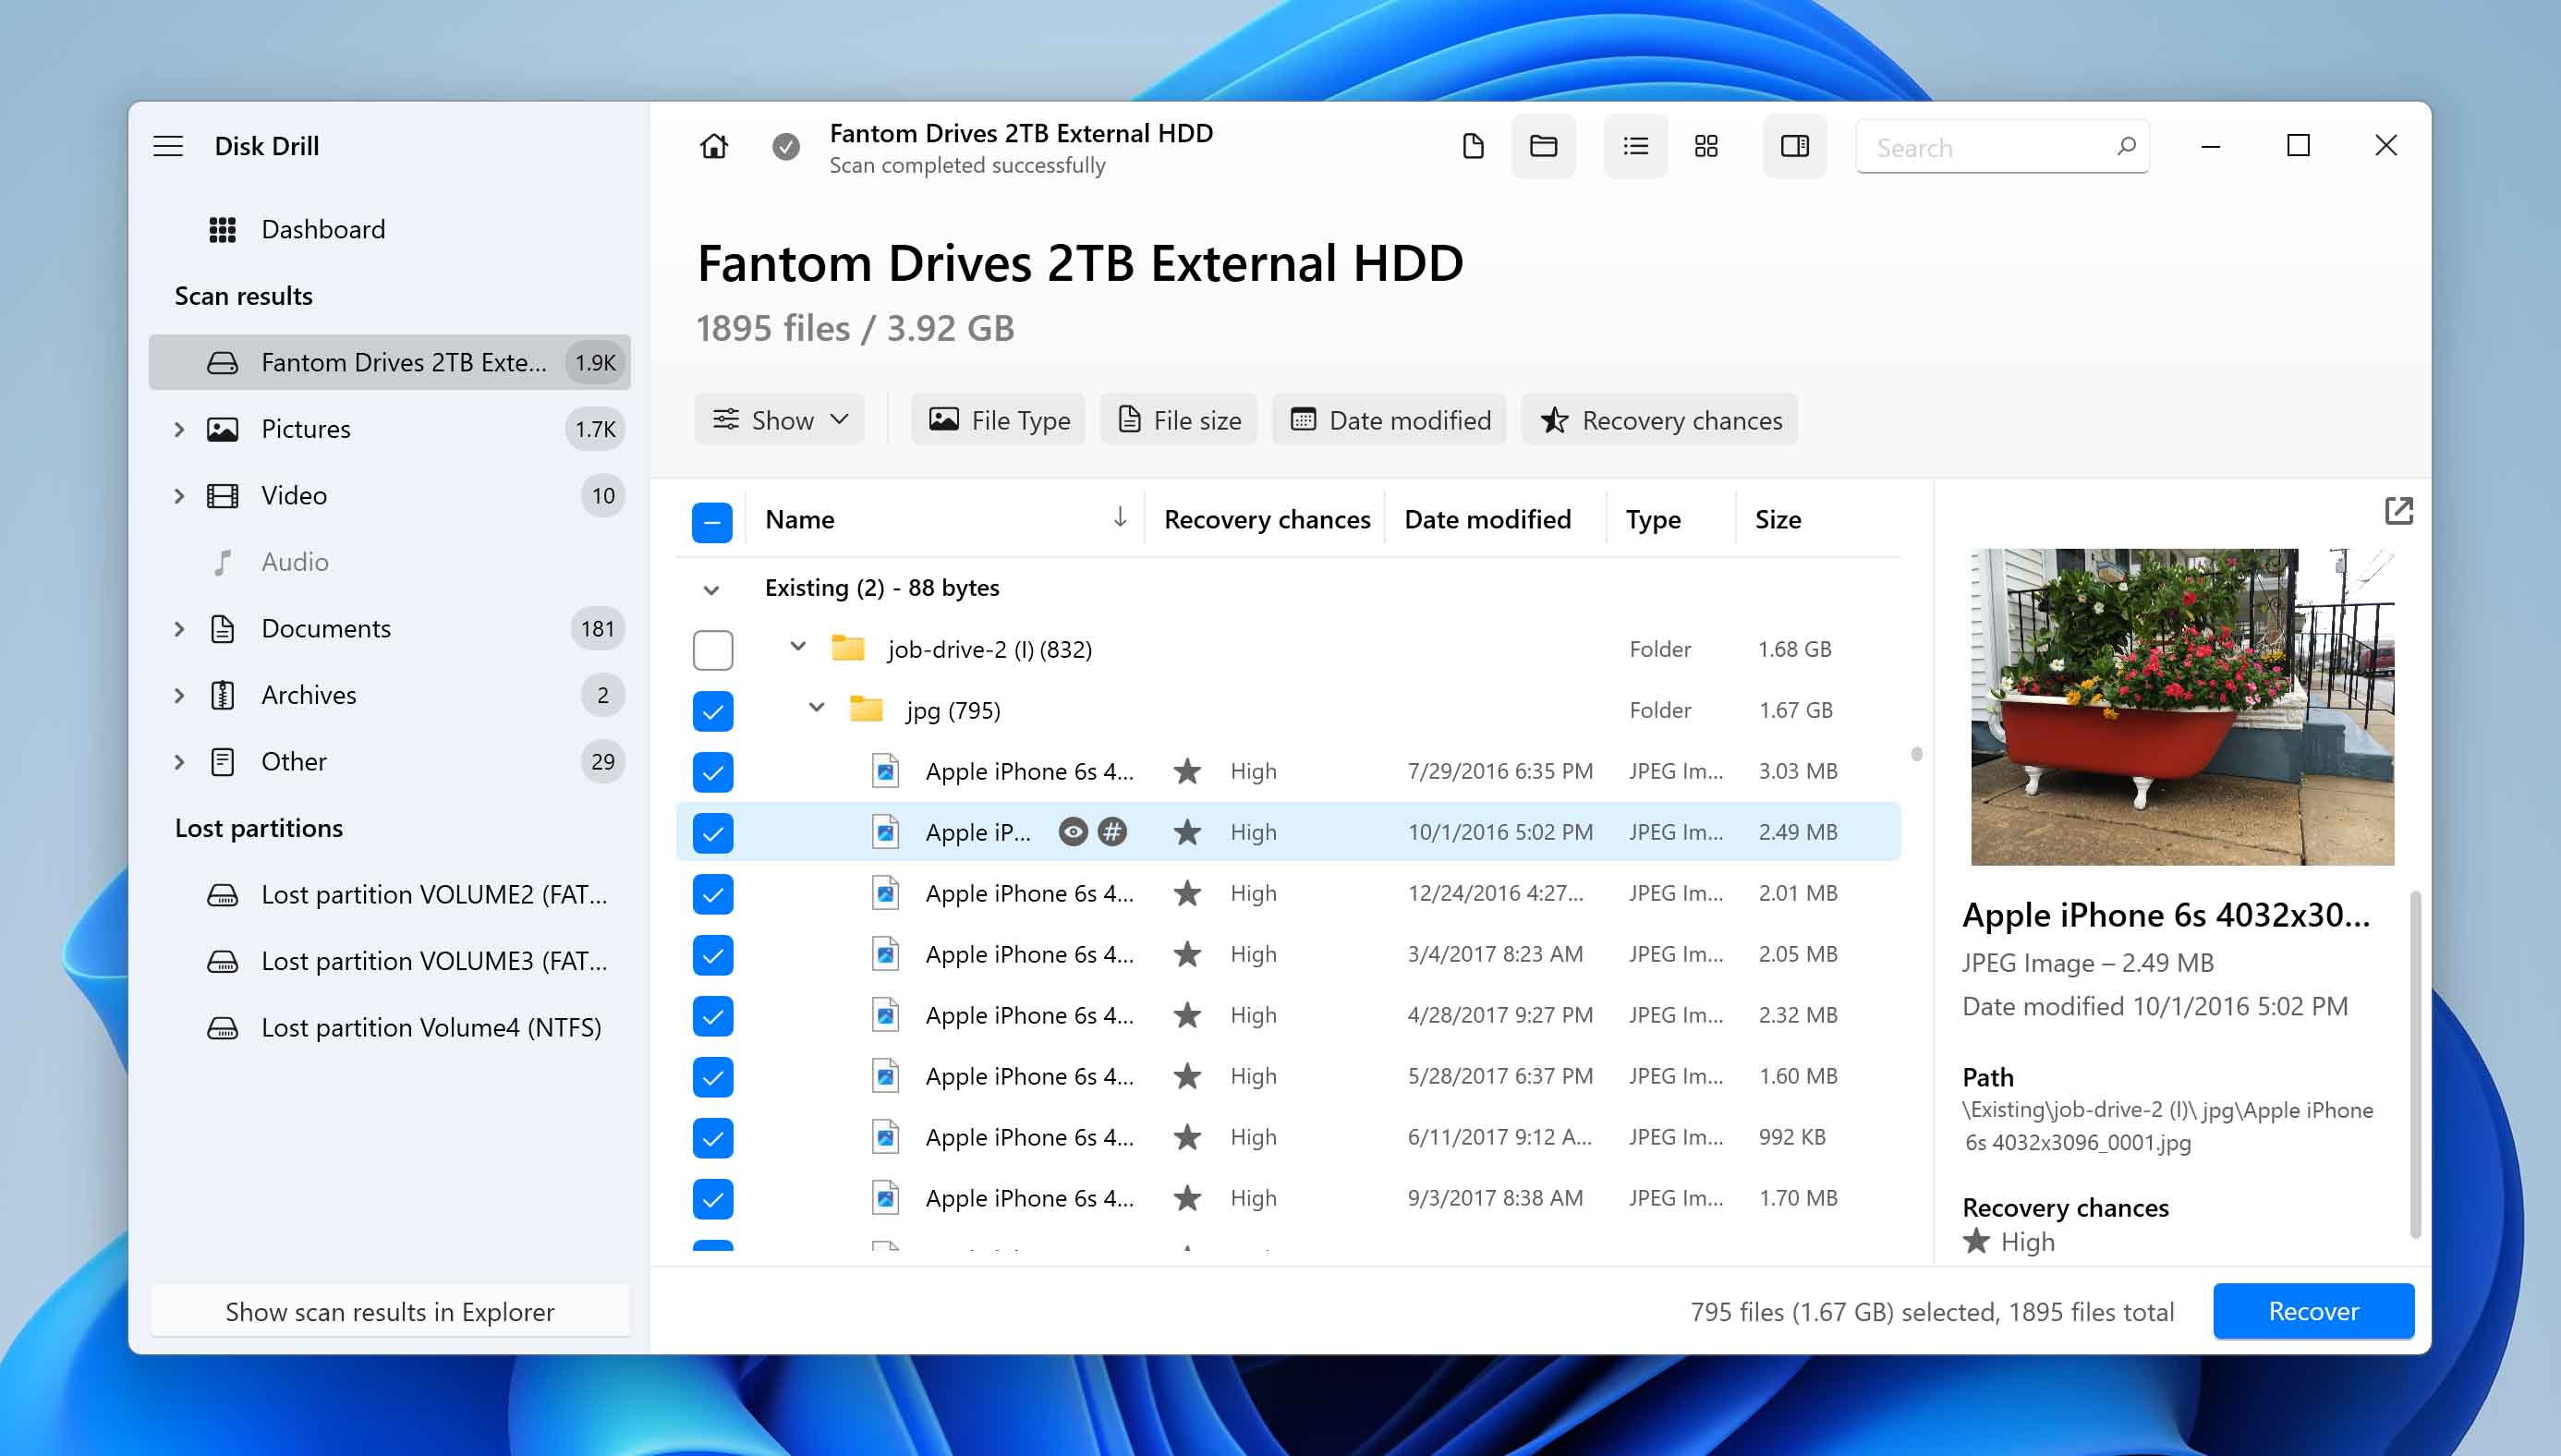
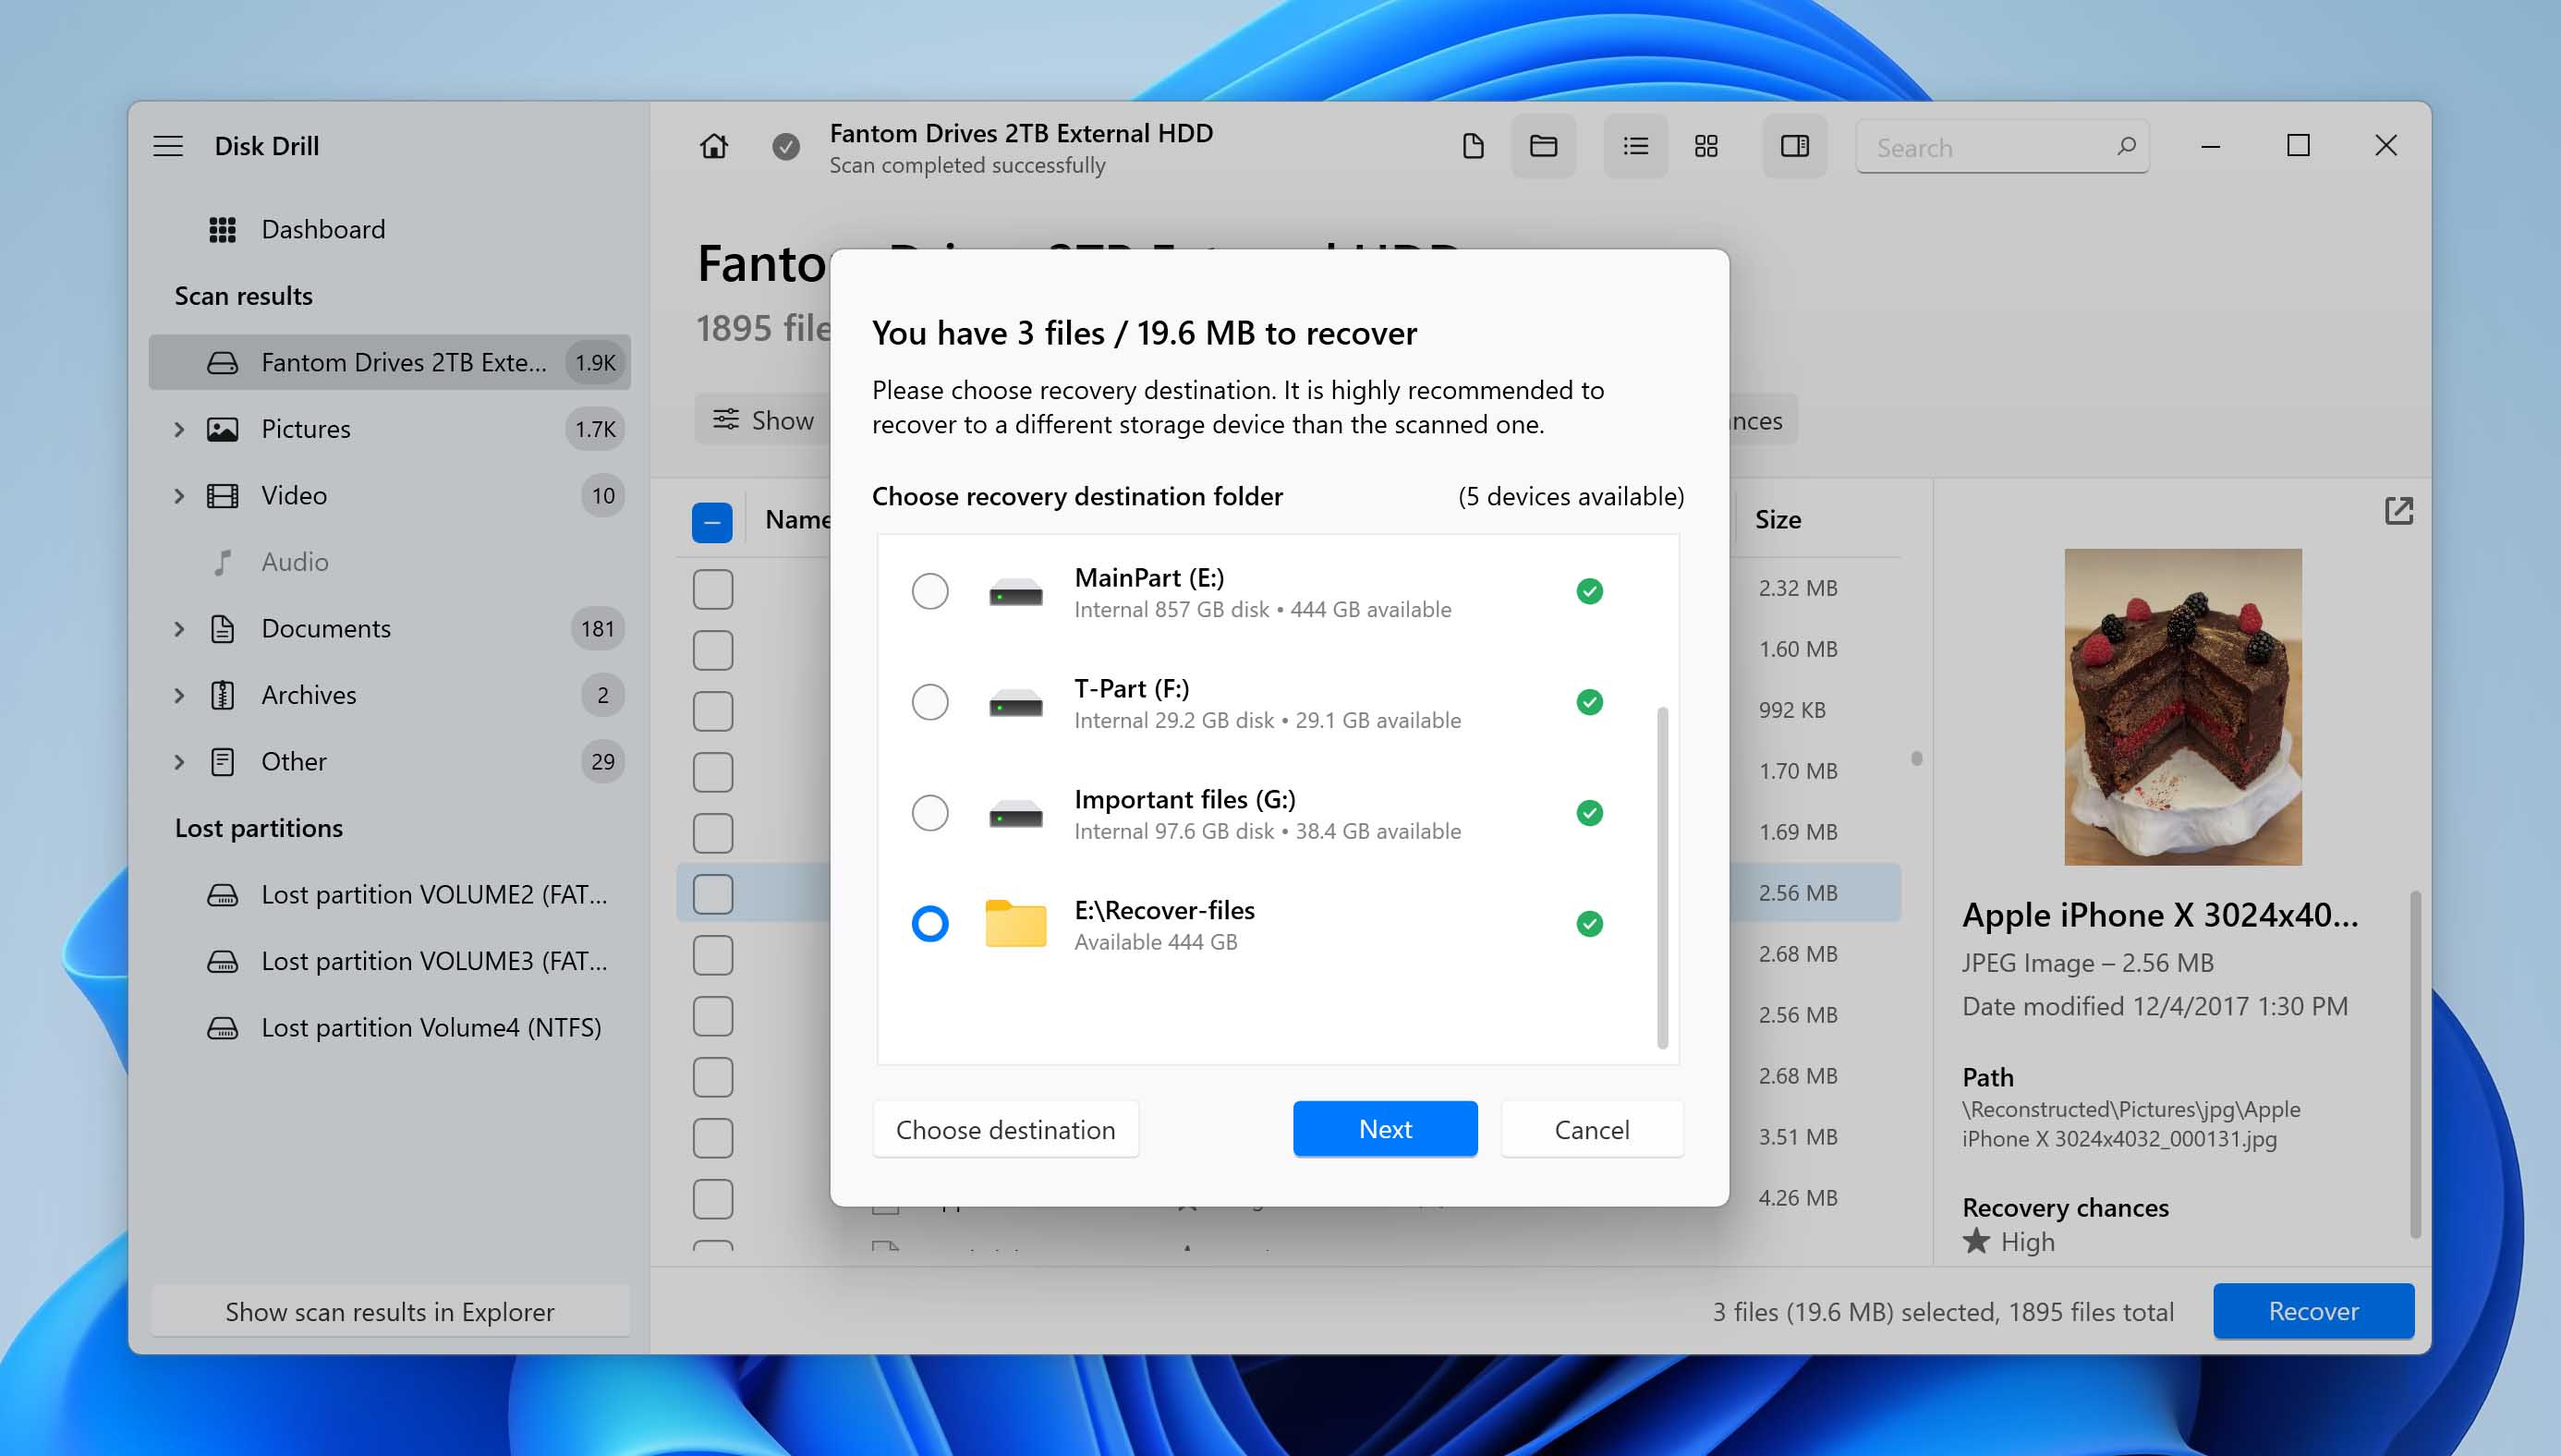
- Using the dropdown menus, find the files you want to recover and add a tick to their checkbox. Assuming that your objective is to locate files that are currently present on the disk, rather than those that have been deleted, you can make use of the Existing filter located at the top of the window. When ready, click Recover.
- Specify where you want the recovered files to go to. It’s best to choose a location that doesn’t reside on the external hard drive. Click Next when ready.
Having ensured the safety of your data, let’s now work on identifying and resolving the issue that’s causing your operating system to fail in recognizing your disk.
7 Proven Methods to Fix External Hard Drives Not Showing Up or Being Recognized on Windows 10/11
The below methods will guide you through making your external hard drive visible and accessible on your computer. Implement each solution in the listed order of this article to ensure you don’t miss any details.
Method 1: Connect to a Different Port
More often than not, it could simply be a bad USB port. Try connecting the hard drive to another USB port. If that fails and you still can’t access the external hard drive, try connecting it to another computer. Lastly, you can try using a different cable to connect the drive to your computer. Eliminating these steps first can save you countless hours of unnecessary troubleshooting if it’s a hardware-related problem.
Some external hard drives require more power to operate than a USB port can provide. If this is the case with yours, make sure it’s connected to a power outlet in addition to the USB port.
Method 2: Initialize the Drive
When you have a brand new drive or a drive that has been de-initialized, it will not be usable until you initialize it or create a partition on it. However, it’s important to note that initializing a disk does not necessarily erase all data on it. Only creating a new partition or formatting the disk, which are later stages of disk initialization, will erase the data.
Therefore, it’s recommended to only initialize a drive if it’s a brand new drive with no data on it, or if you have a backup of the data on the drive that you can recover from. If you don’t have a backup of your data, you should use data recovery software to try to recover the data before initializing the drive.
- Right-click Start and click Disk Management.
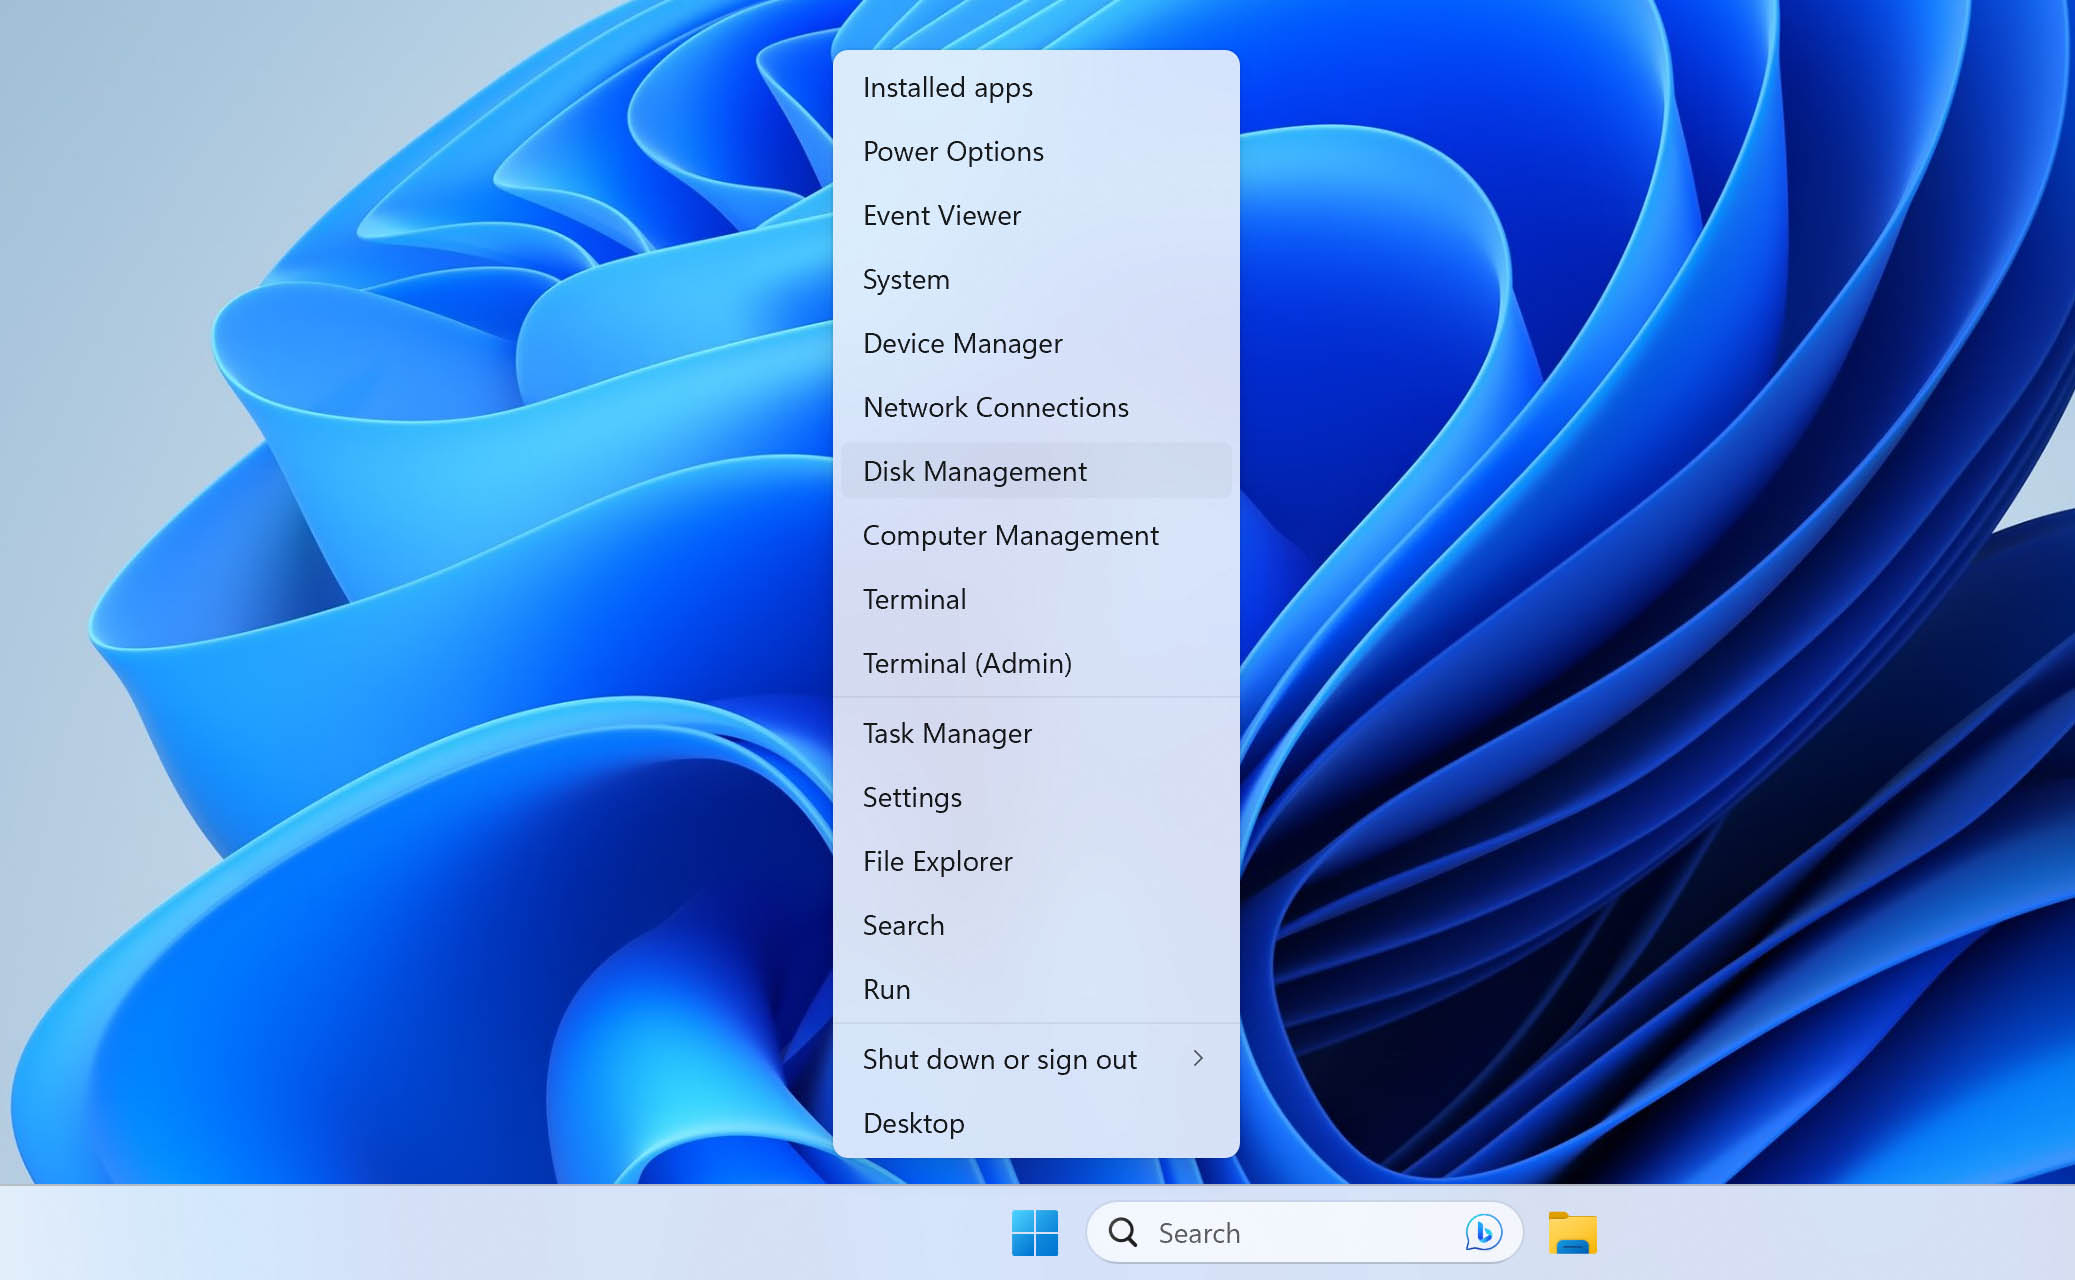
- Right-click the external drive that says Not Initialized and click Initialize Disk.
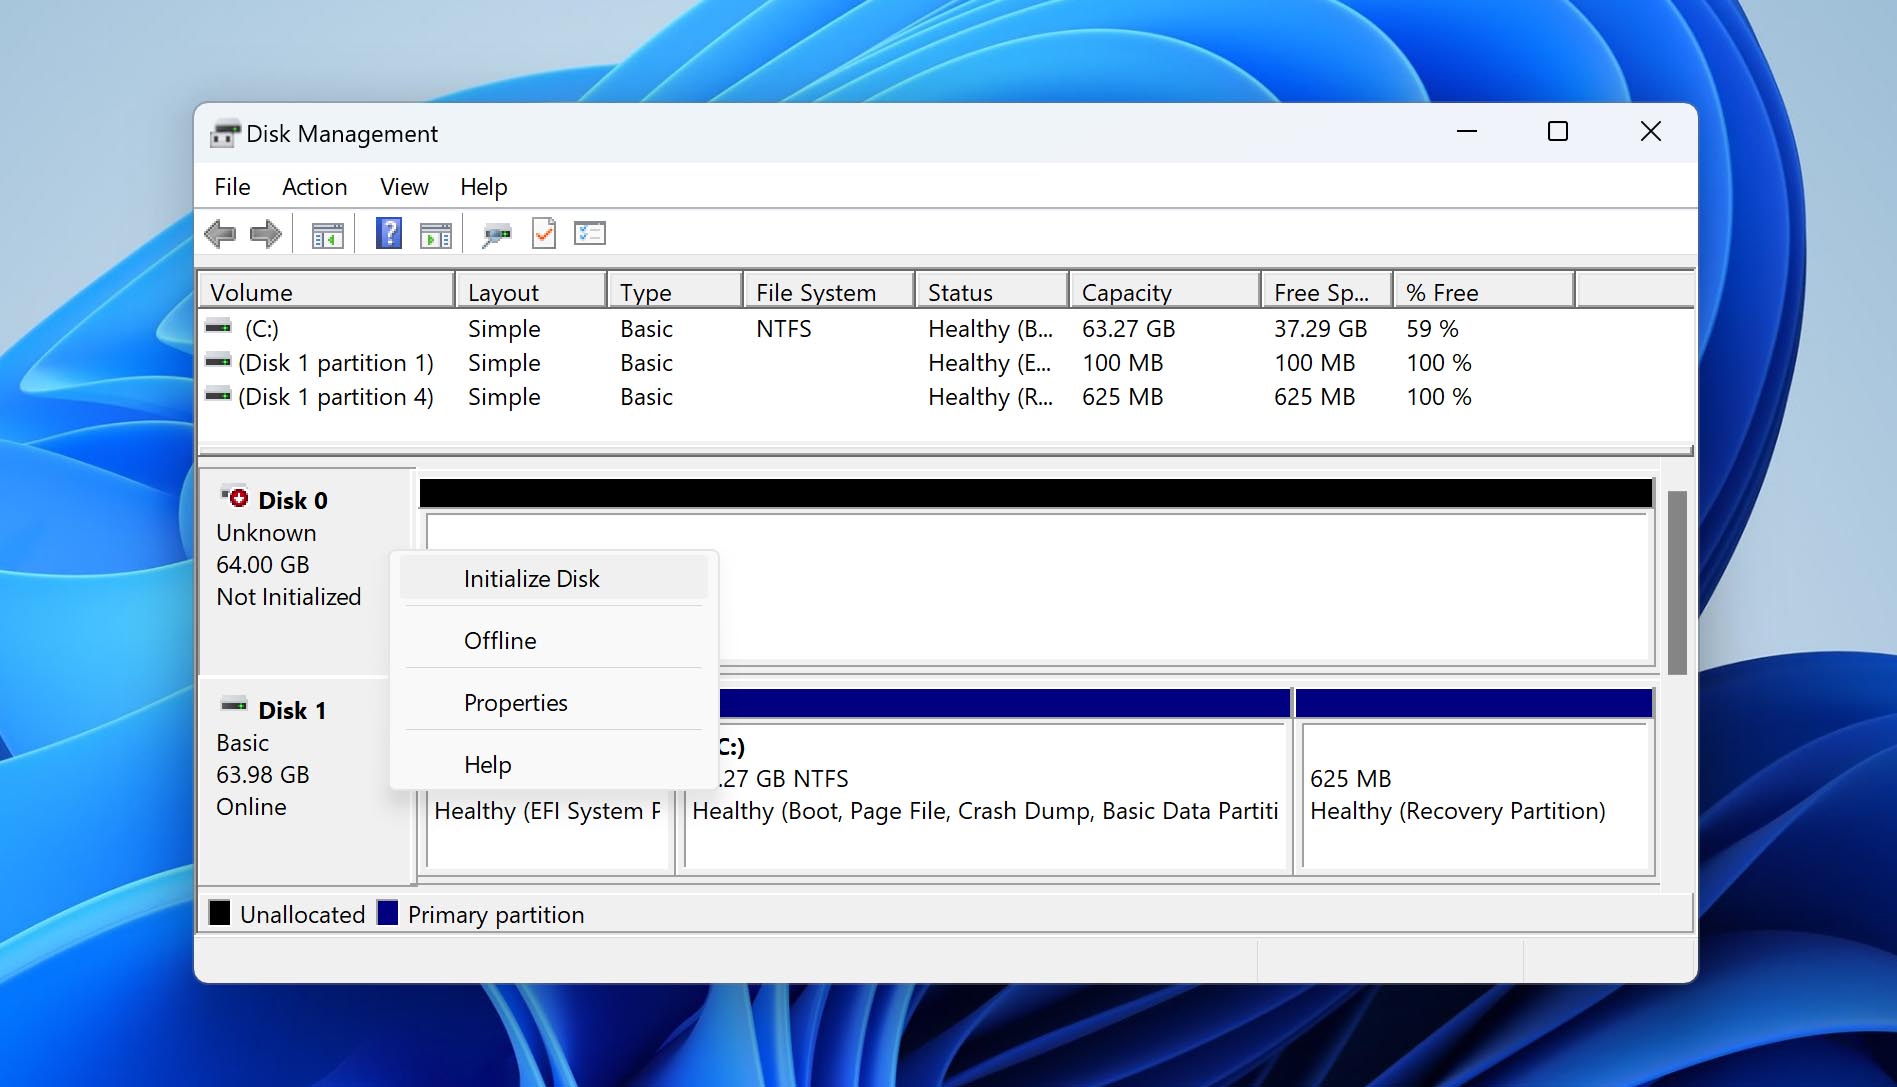
- Press OK.
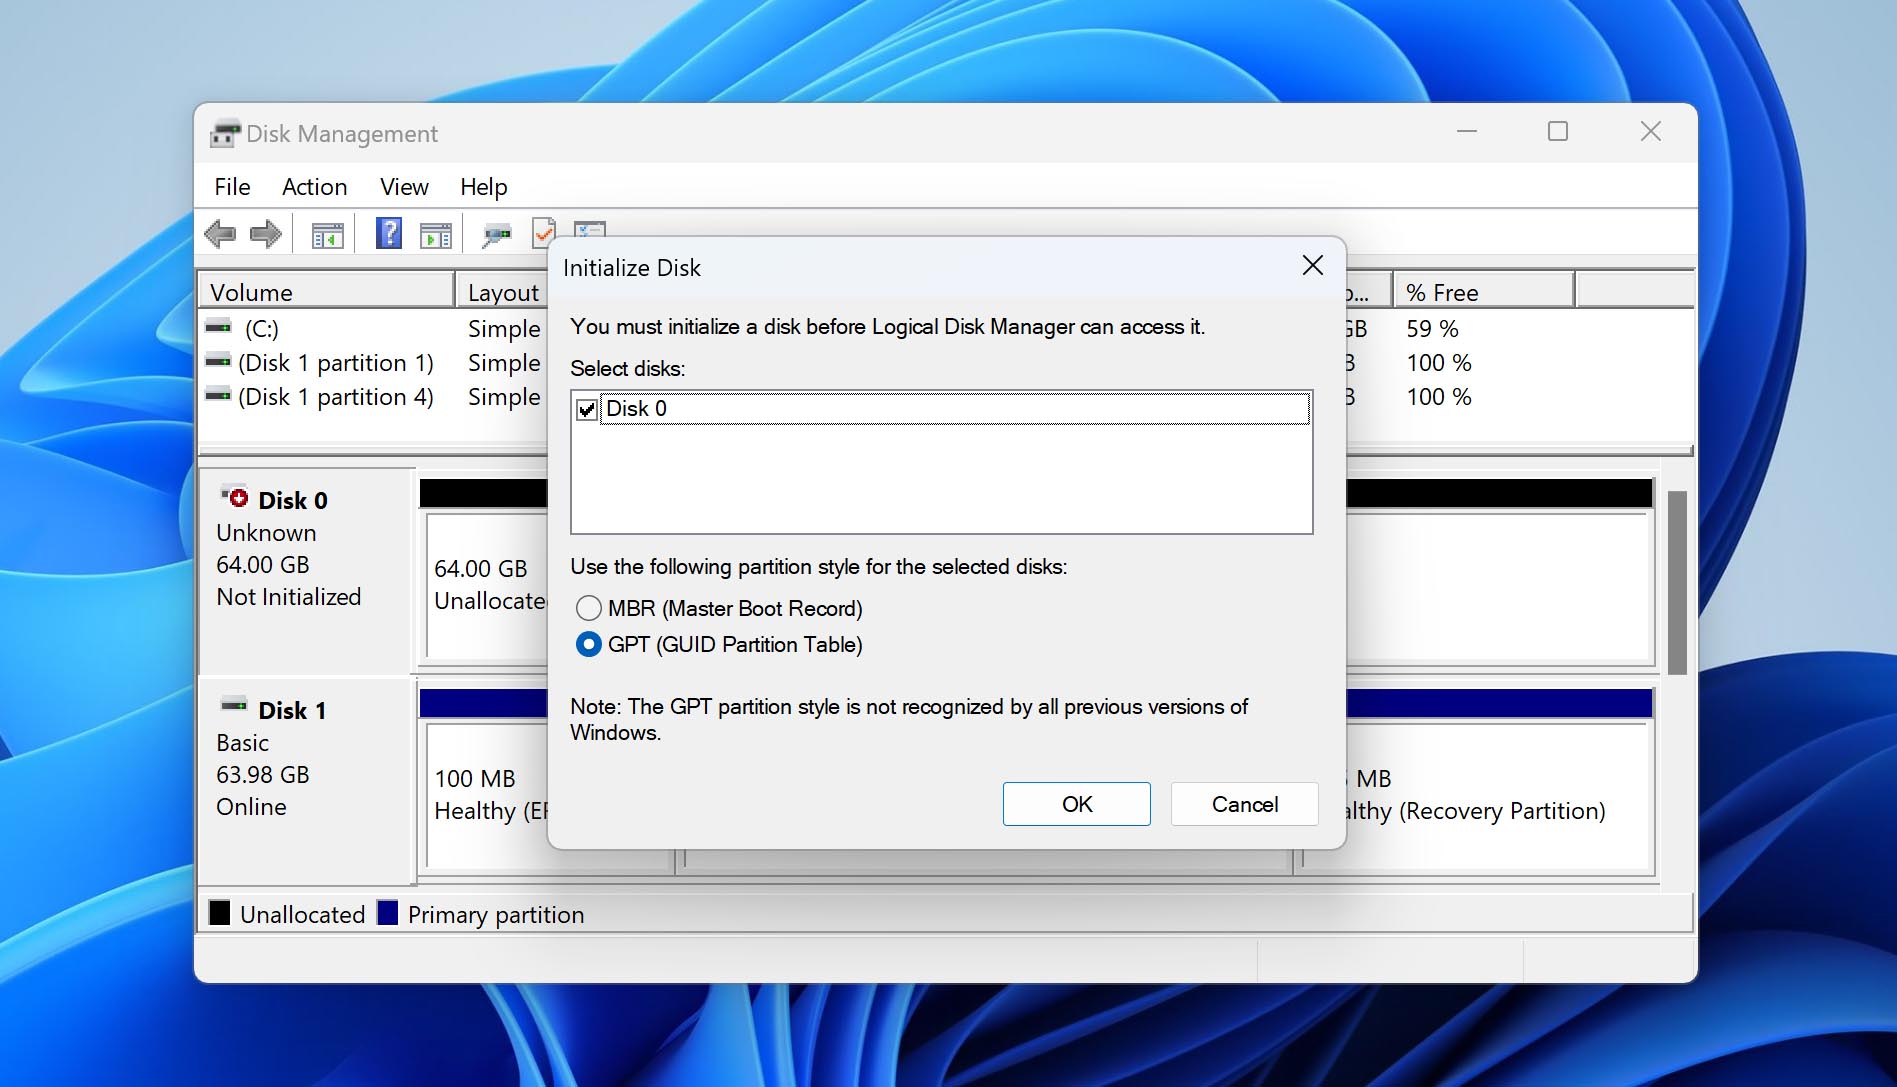
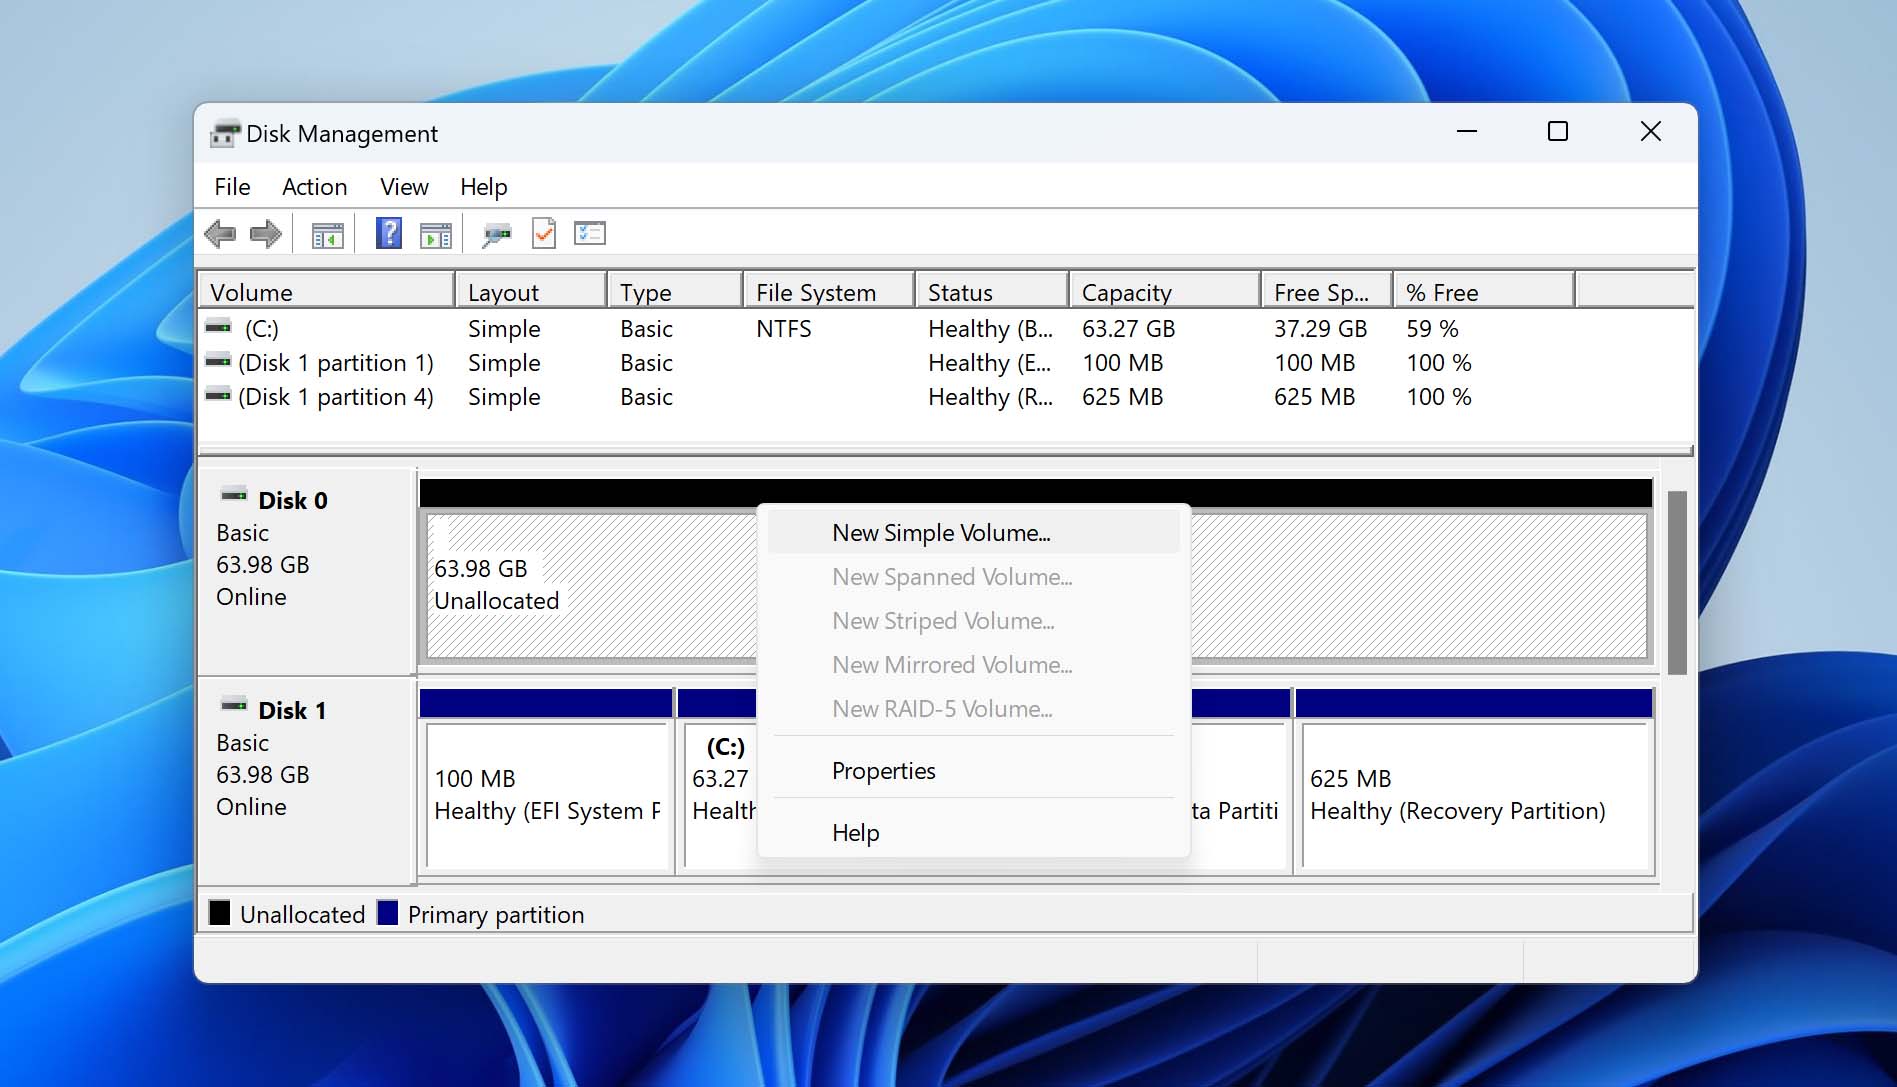
- Then, to use the disk, you need to format it. Right-click the unallocated space and click New Simple Volume.
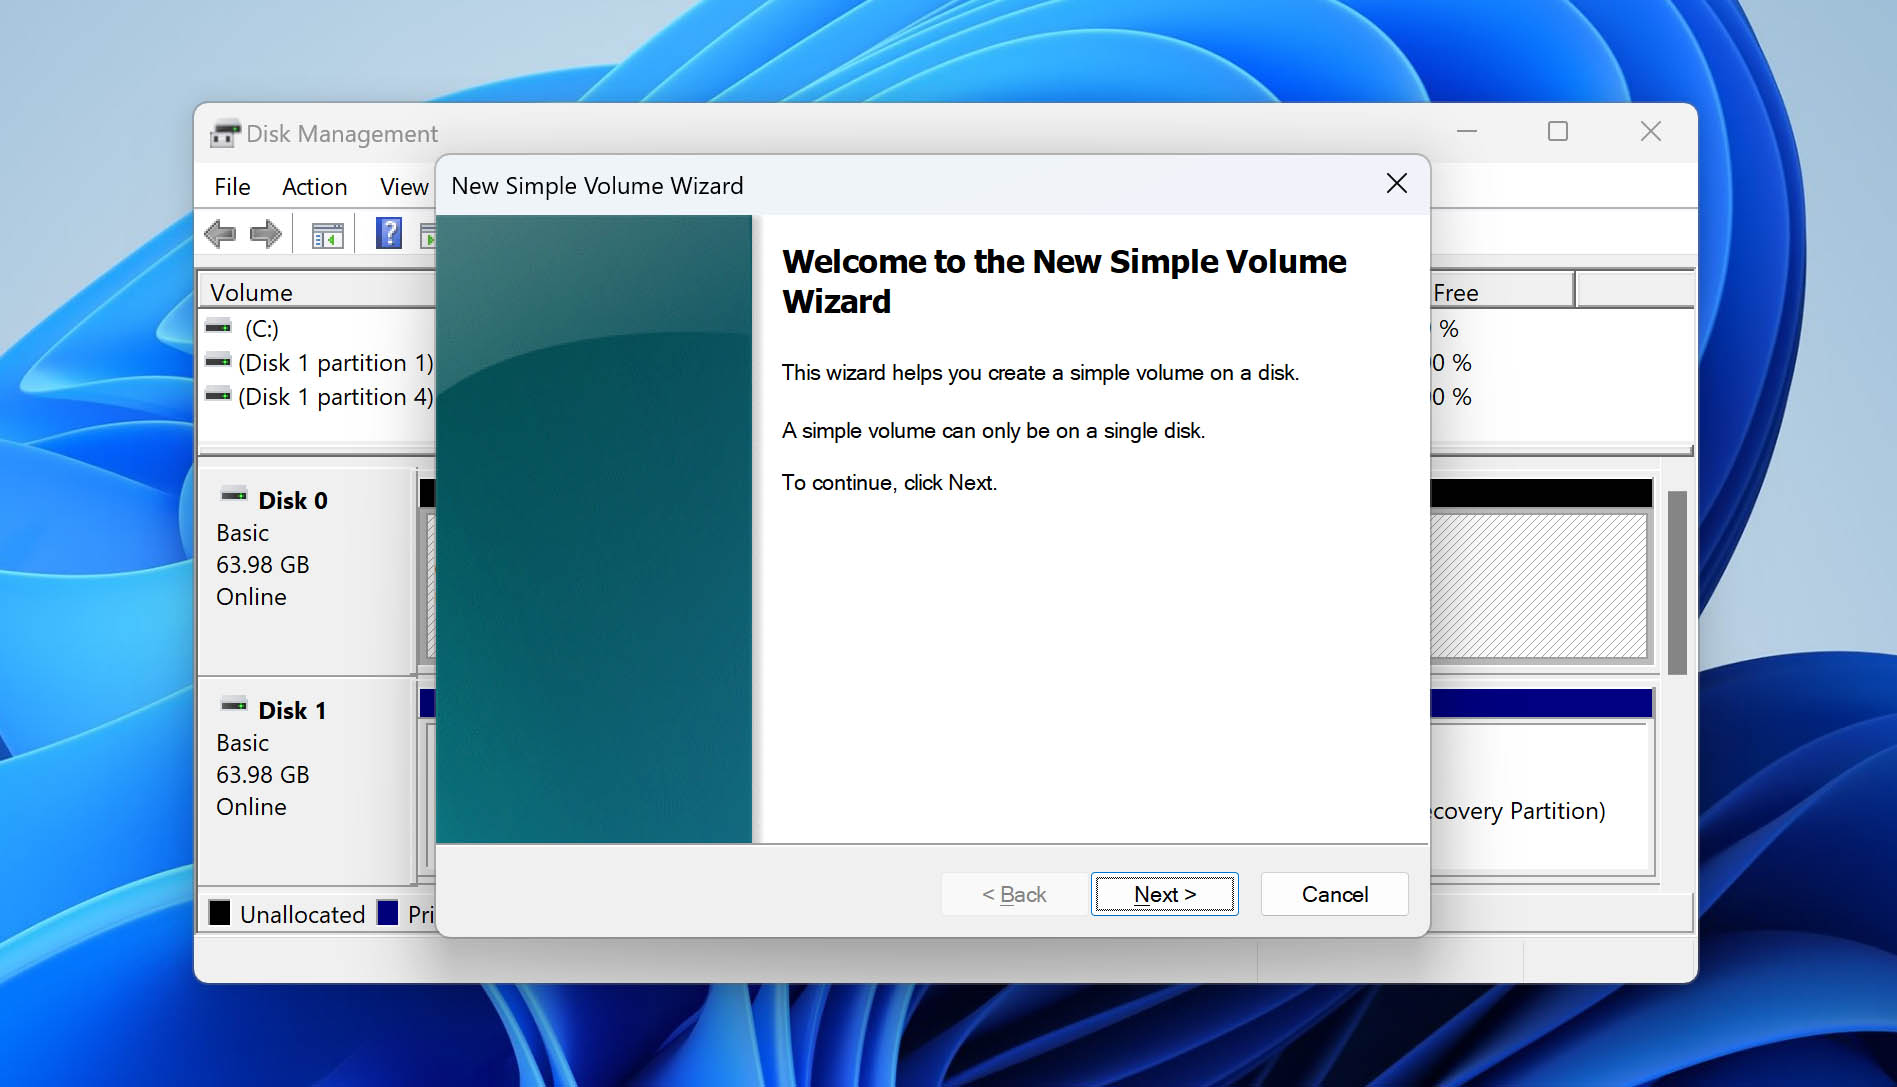
- Click Next.
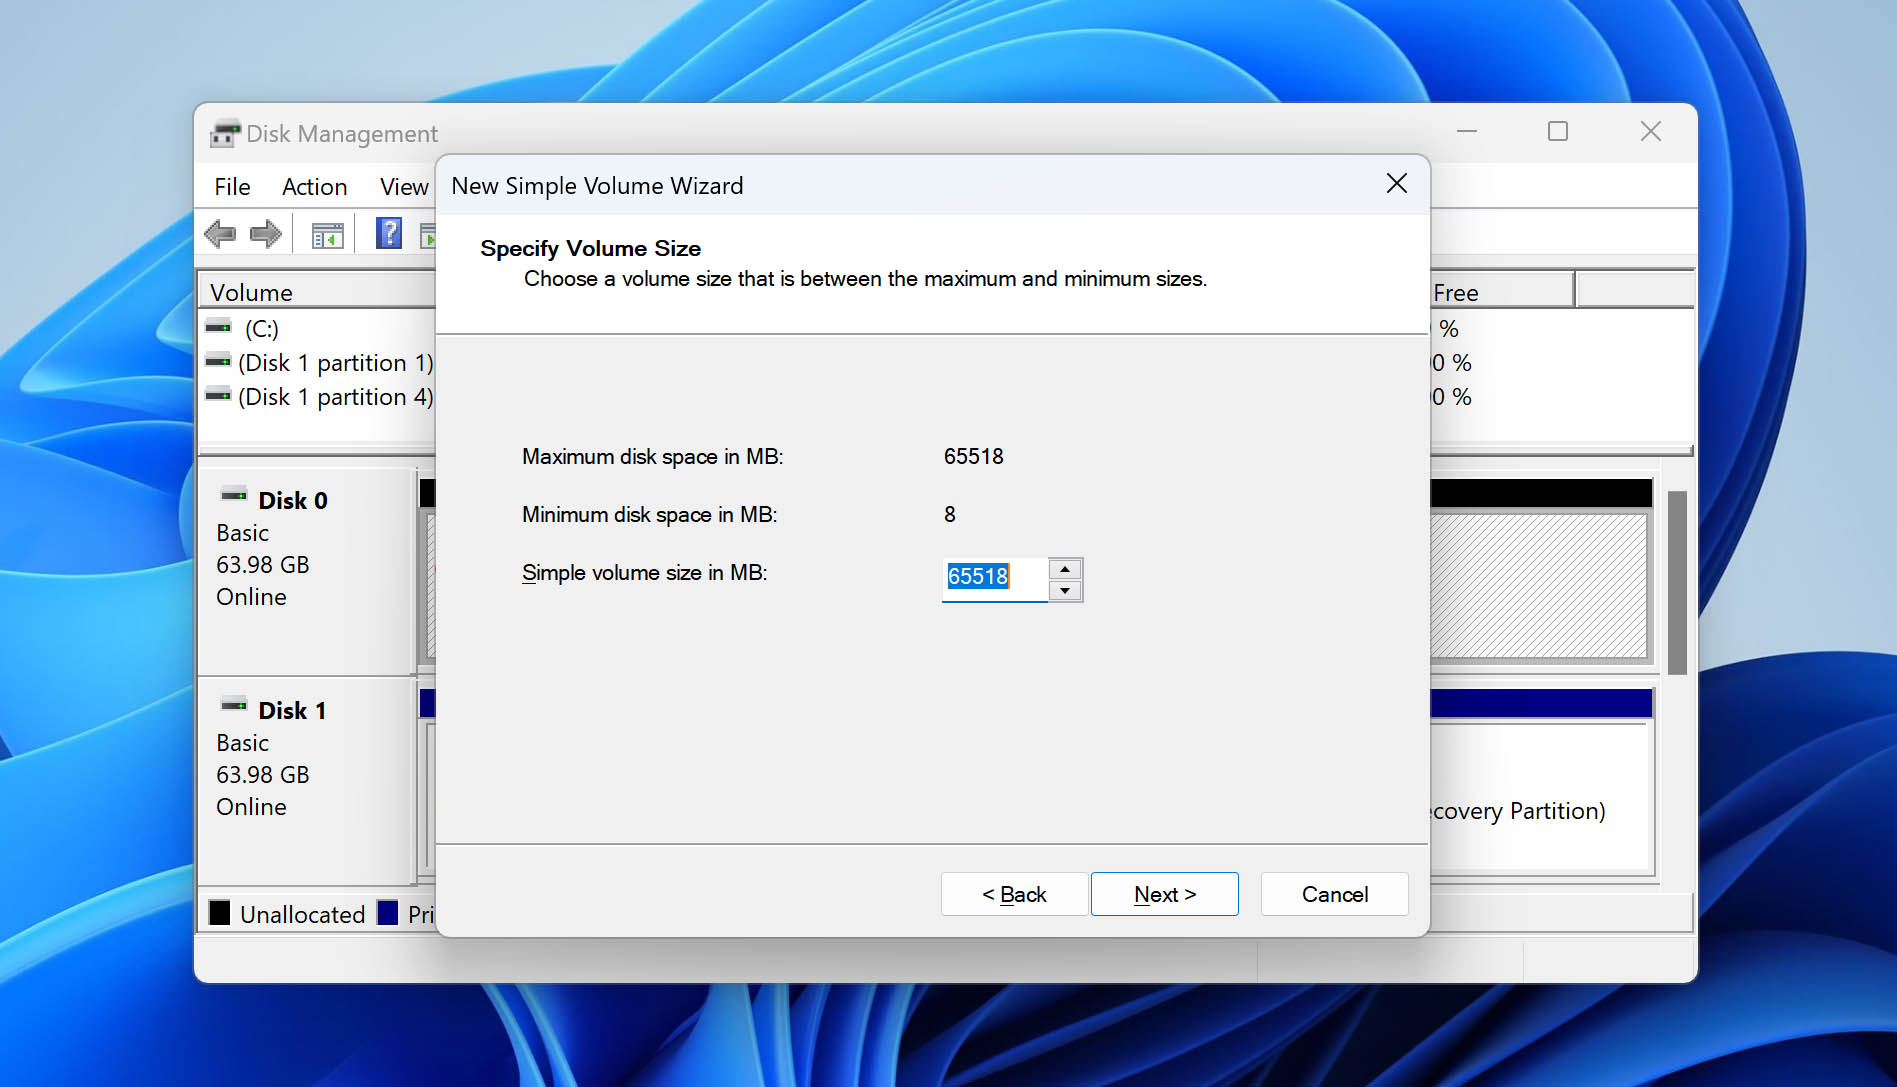
- Specify how large you want the volume to be in MB. Click Next.
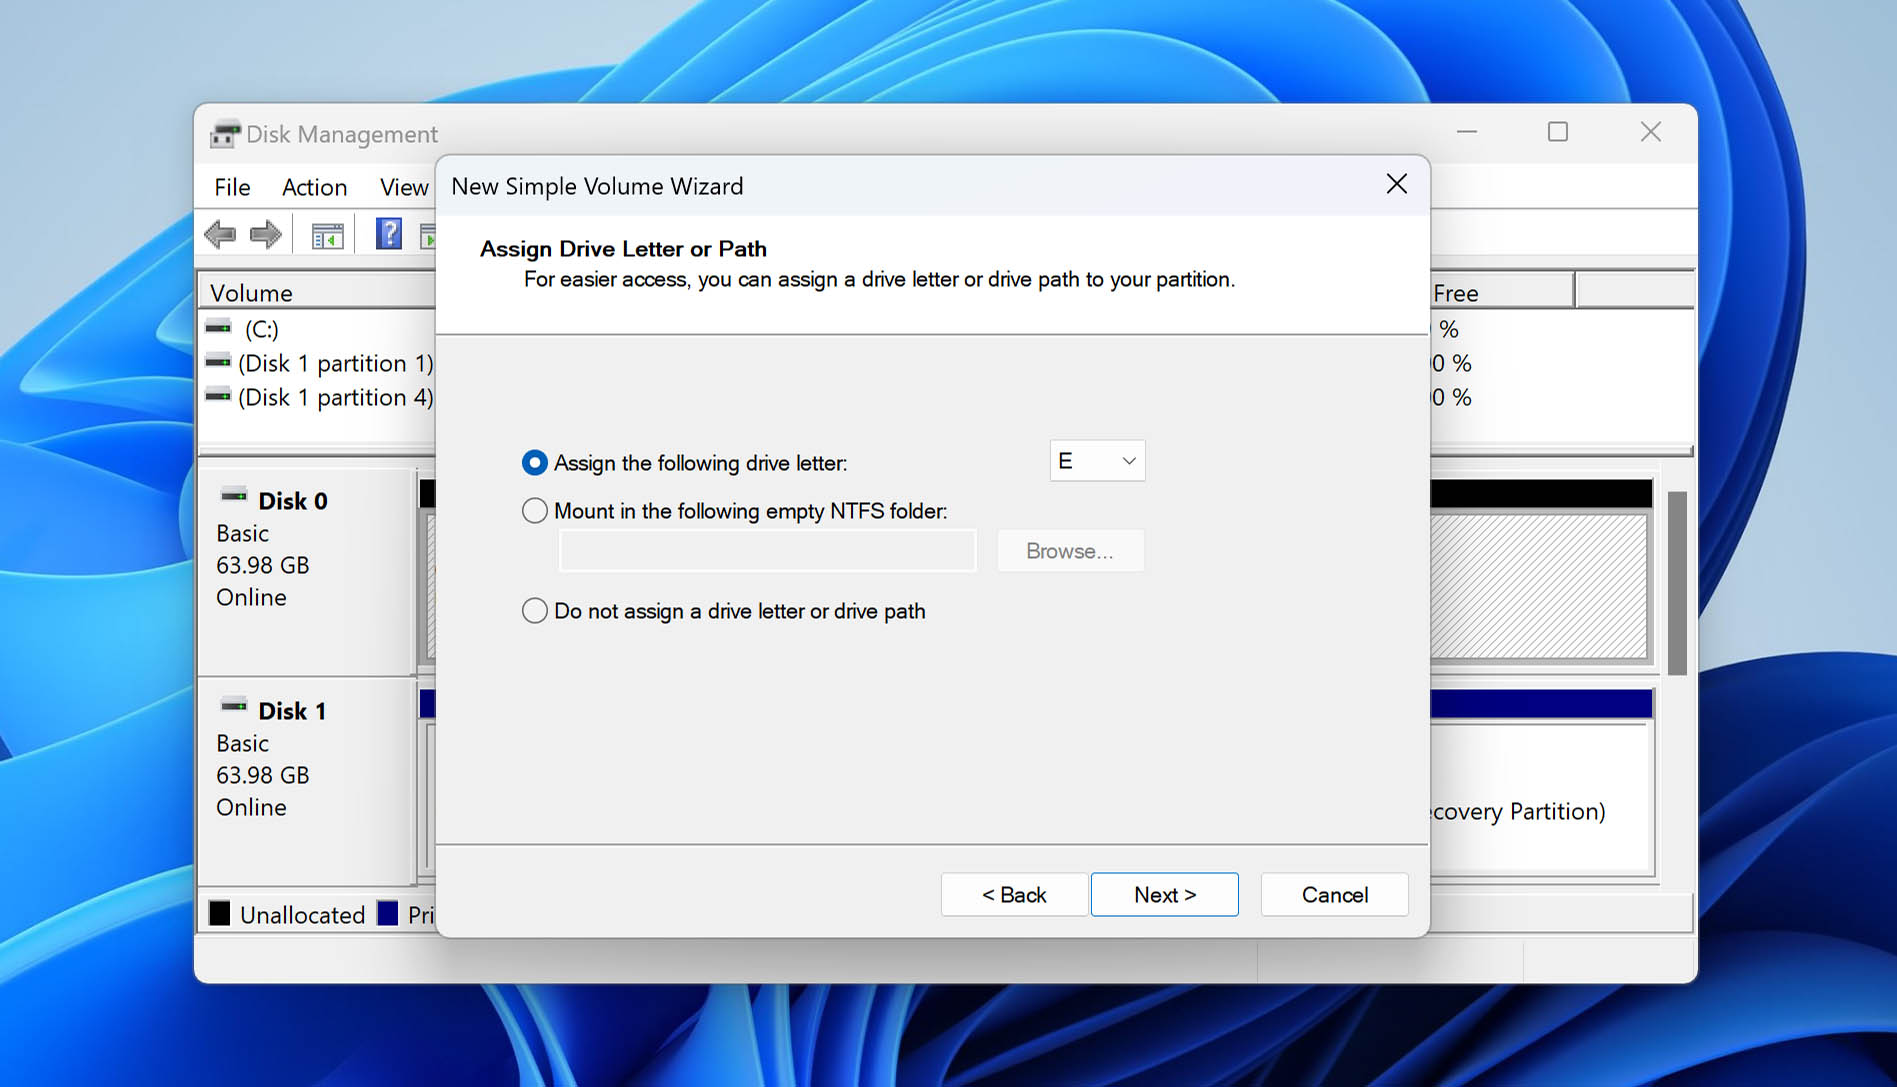
- Assign a drive letter. Windows will automatically assign an available one so click Next.
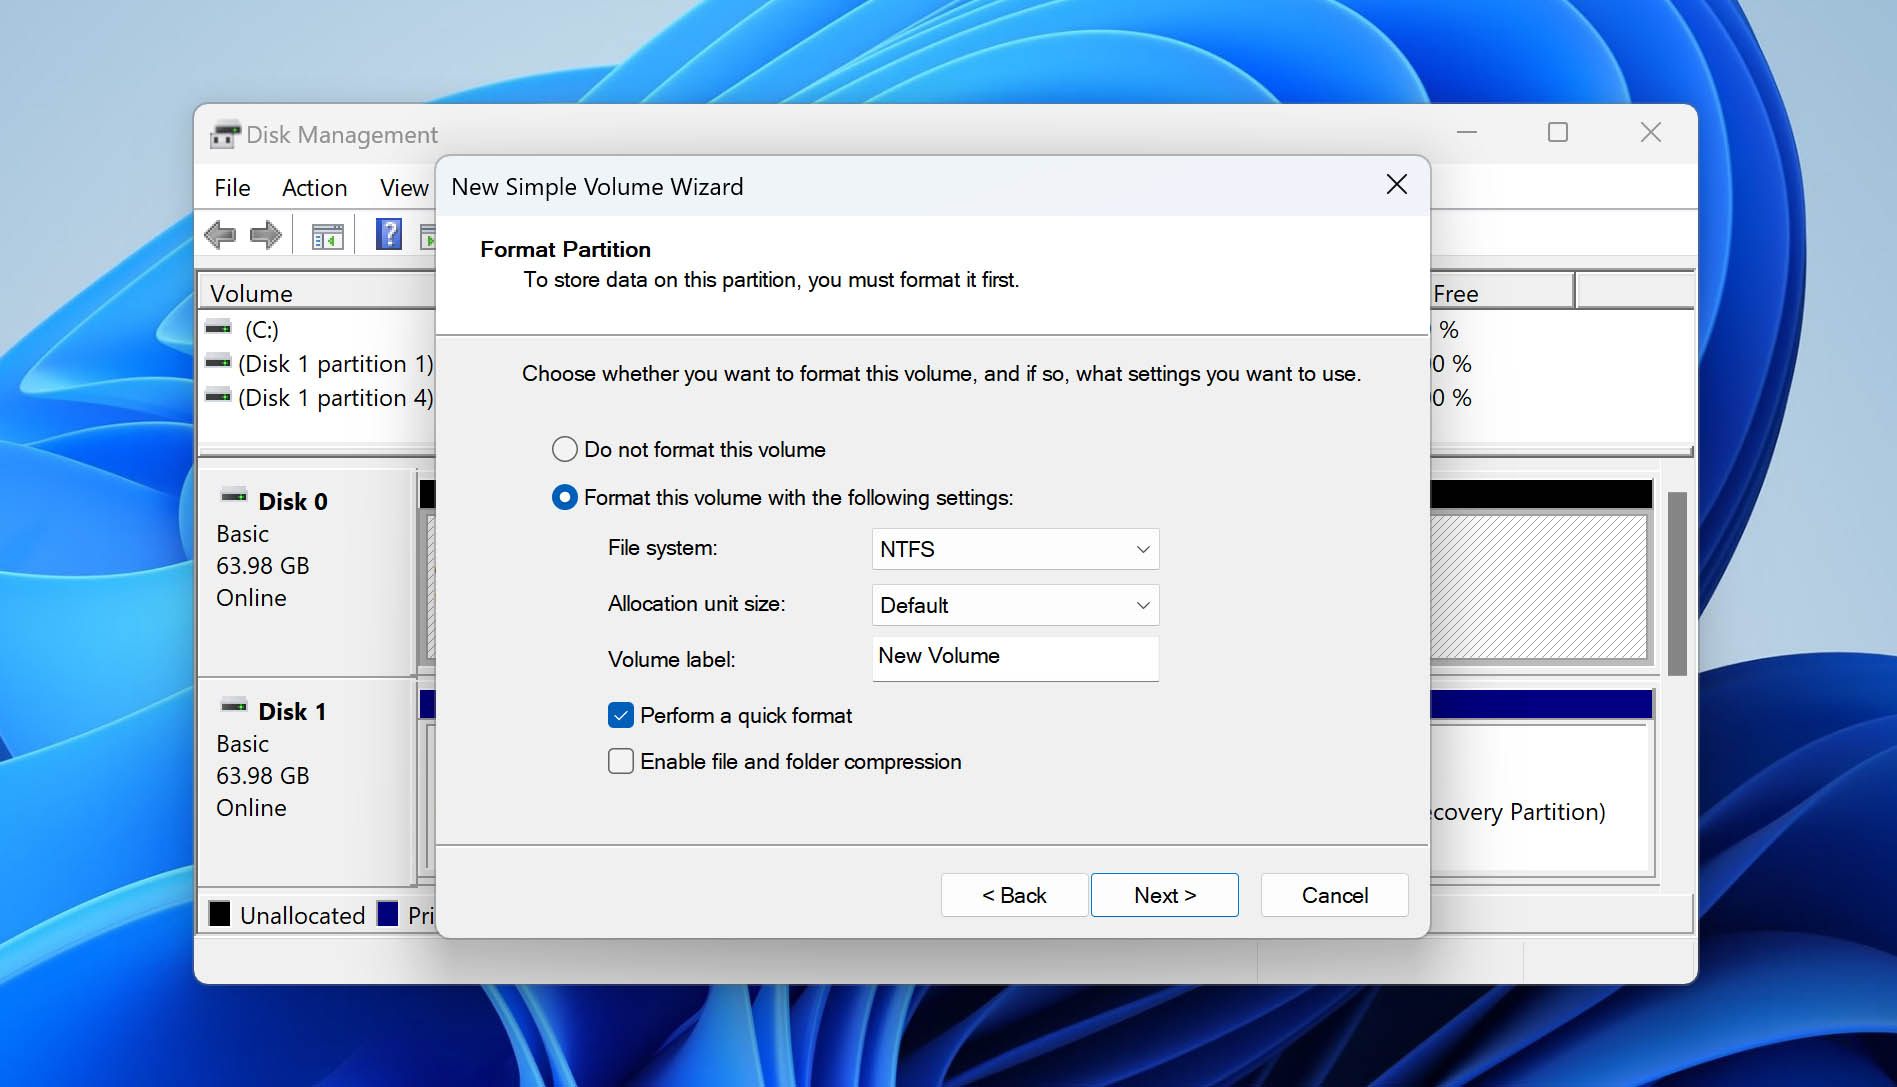
- Specify what you want the volume called, as well as the file system. If you want, you can leave these settings as default and click Next.
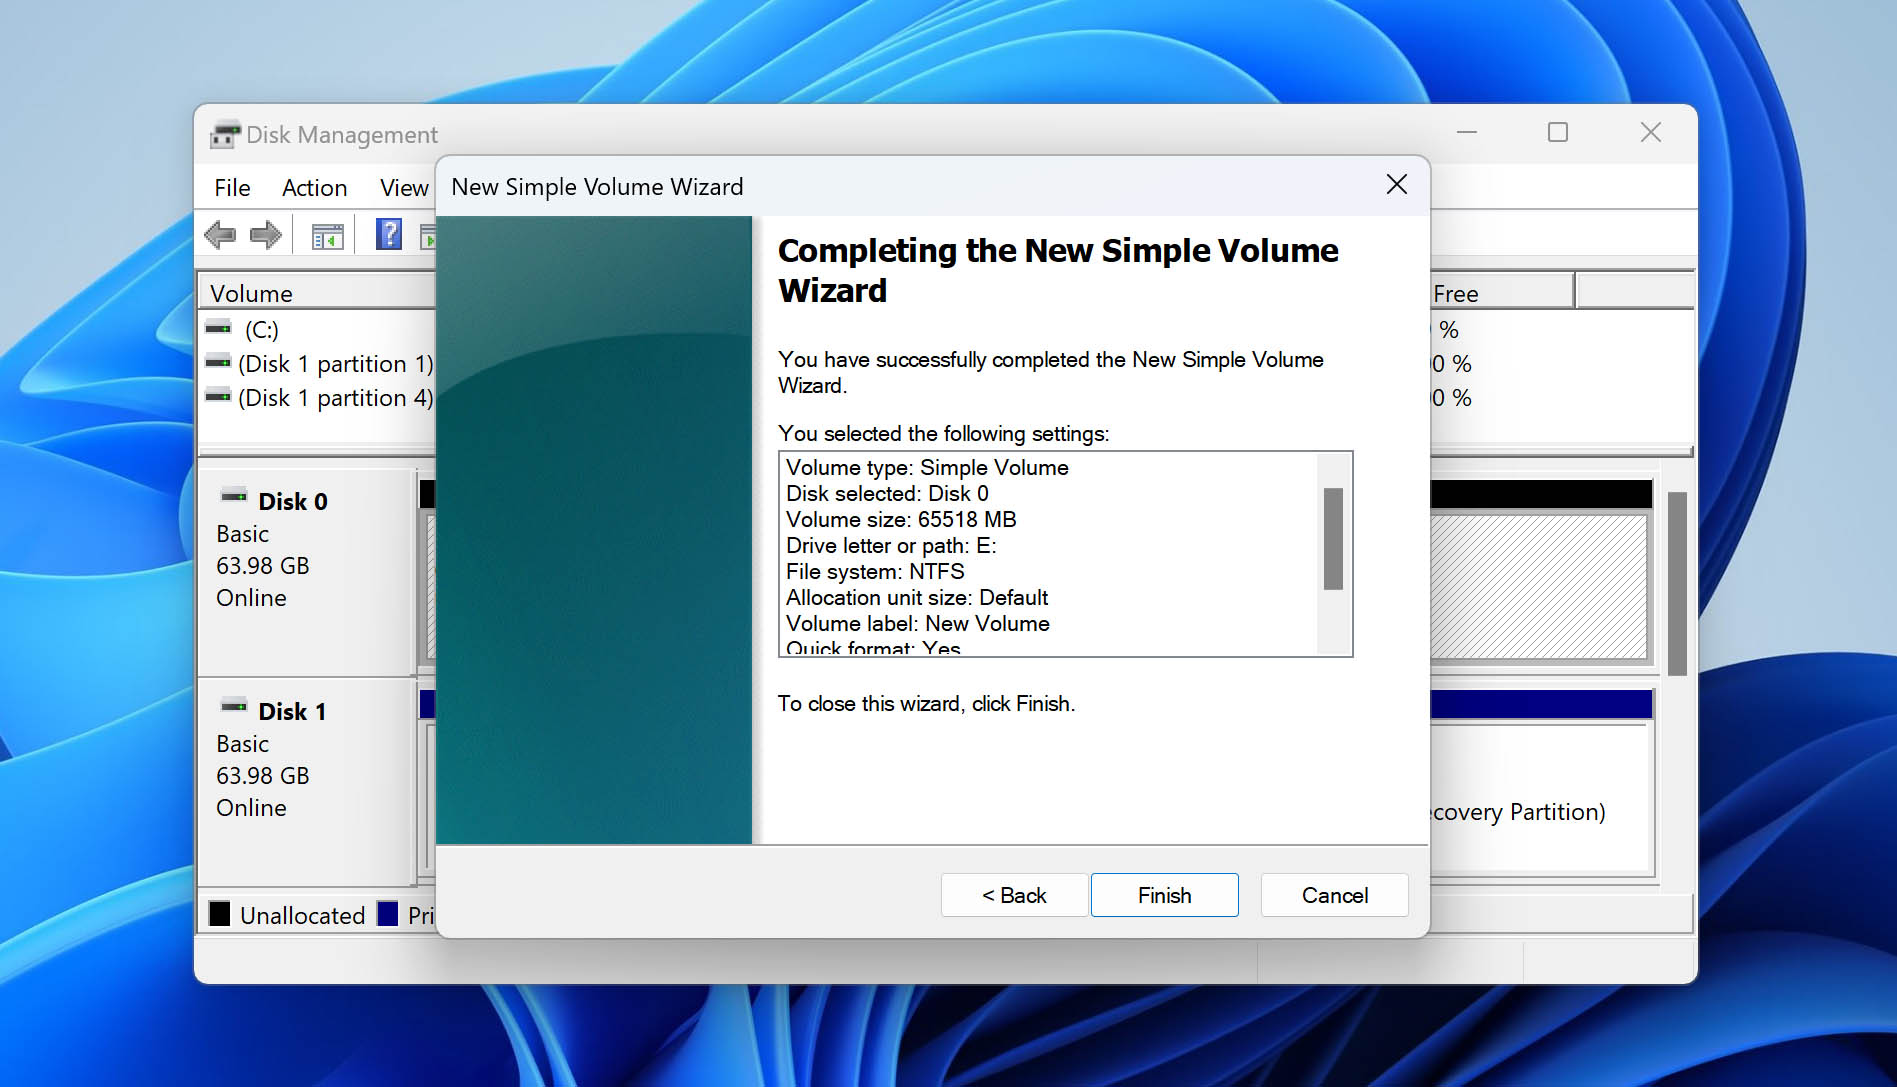
- Finally, click Finish. Afterwards, the drive should be usable.
Method 3: Run a Troubleshooter
Windows, by default, comes with various troubleshooters that specialize in fixing specific problems. One such troubleshooter can be used to scan and resolve hardware-related issues like your USB hard drive not showing up. Before moving on, try running a scan with the troubleshooter to make sure it’s nothing that can be fixed automatically.
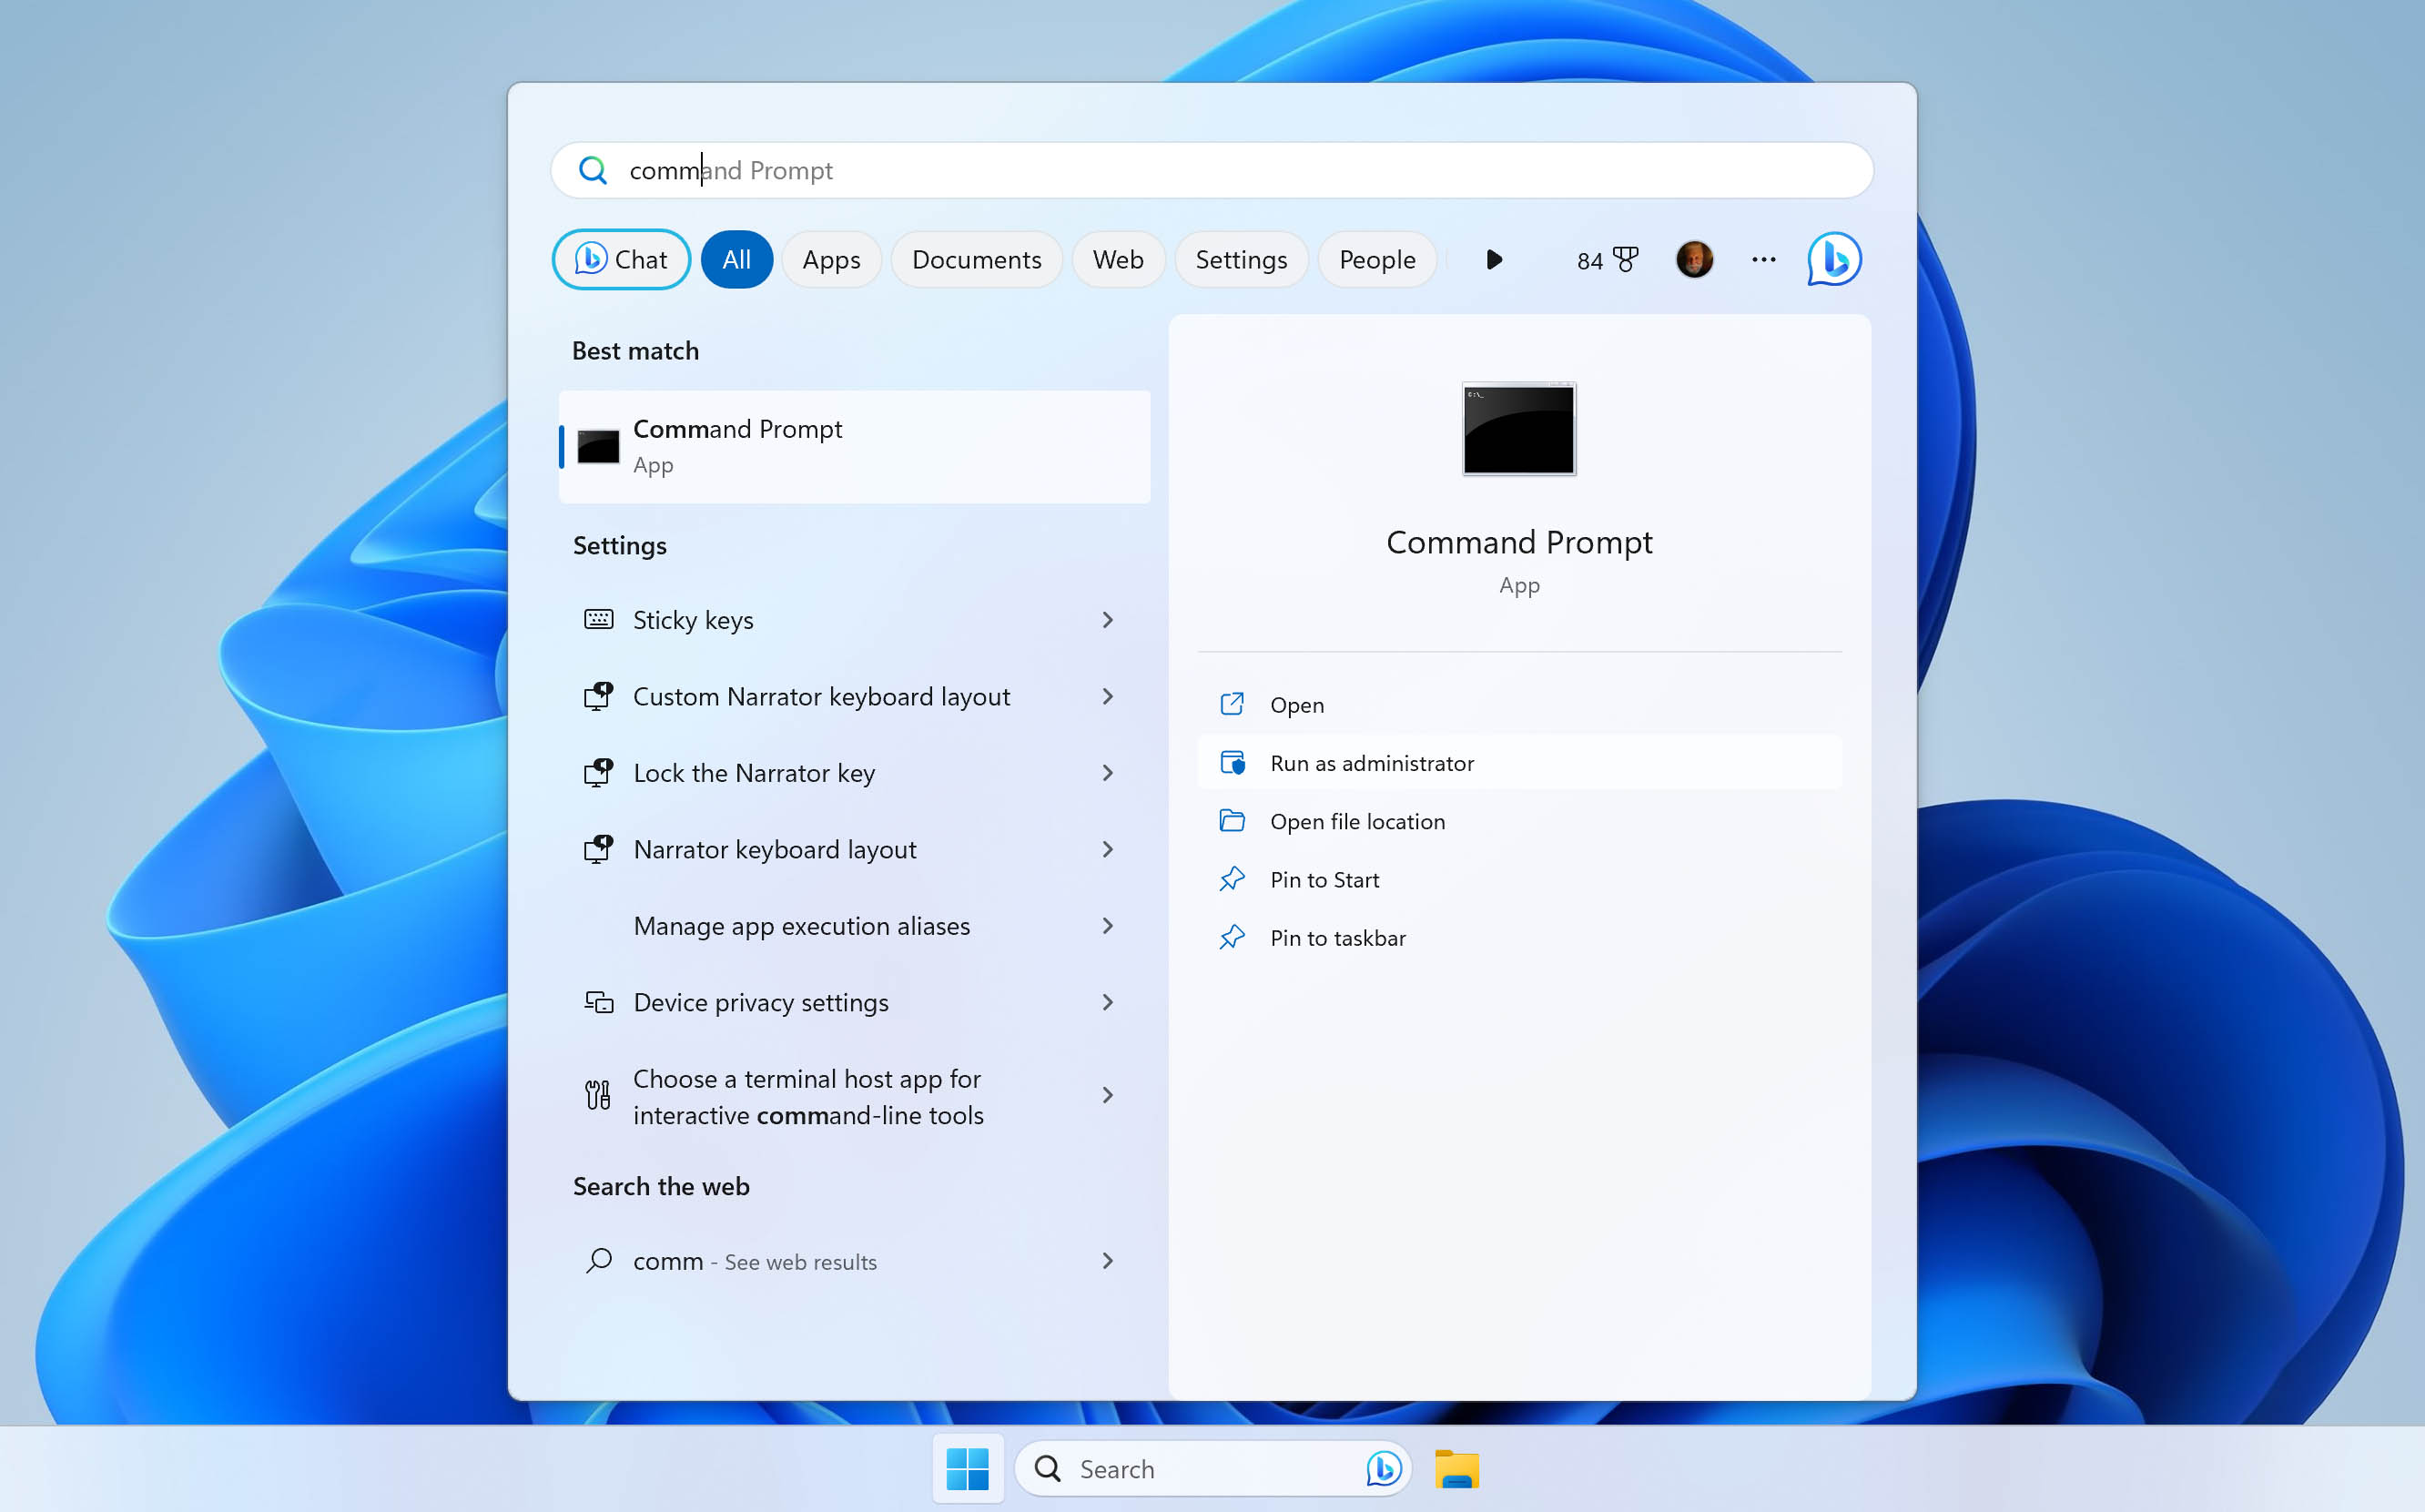
- Press Windows Key + S and search Command Prompt. Right-click the first result and click Run as administrator. If you’re prompted to allow access, click Yes.
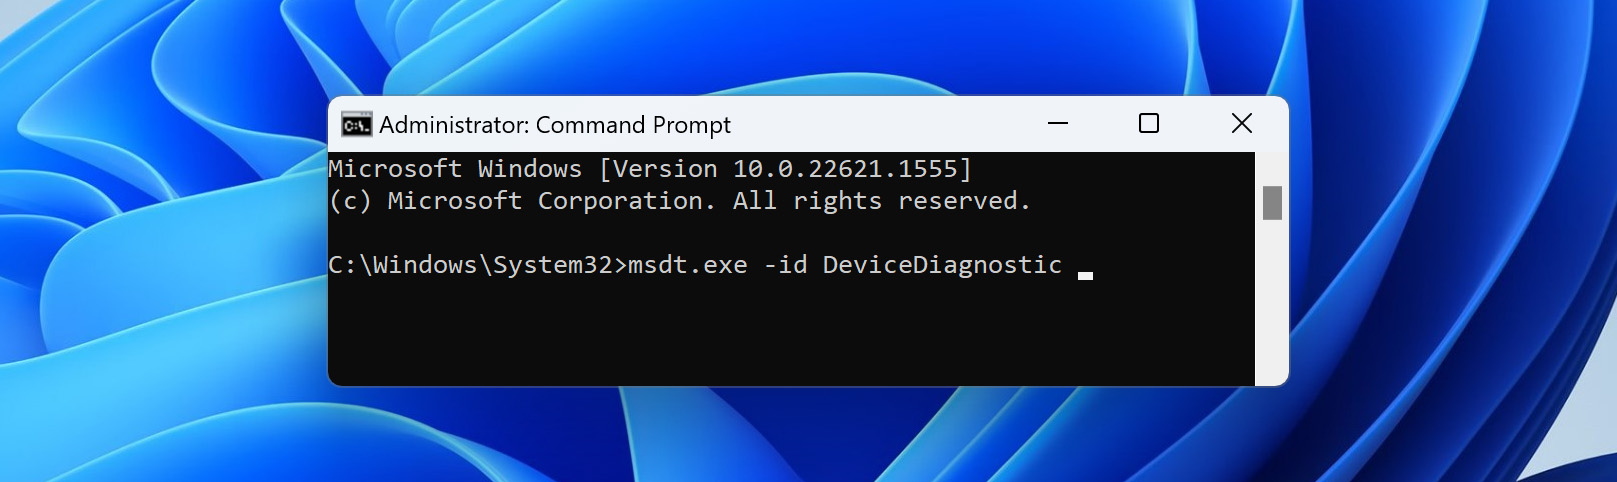
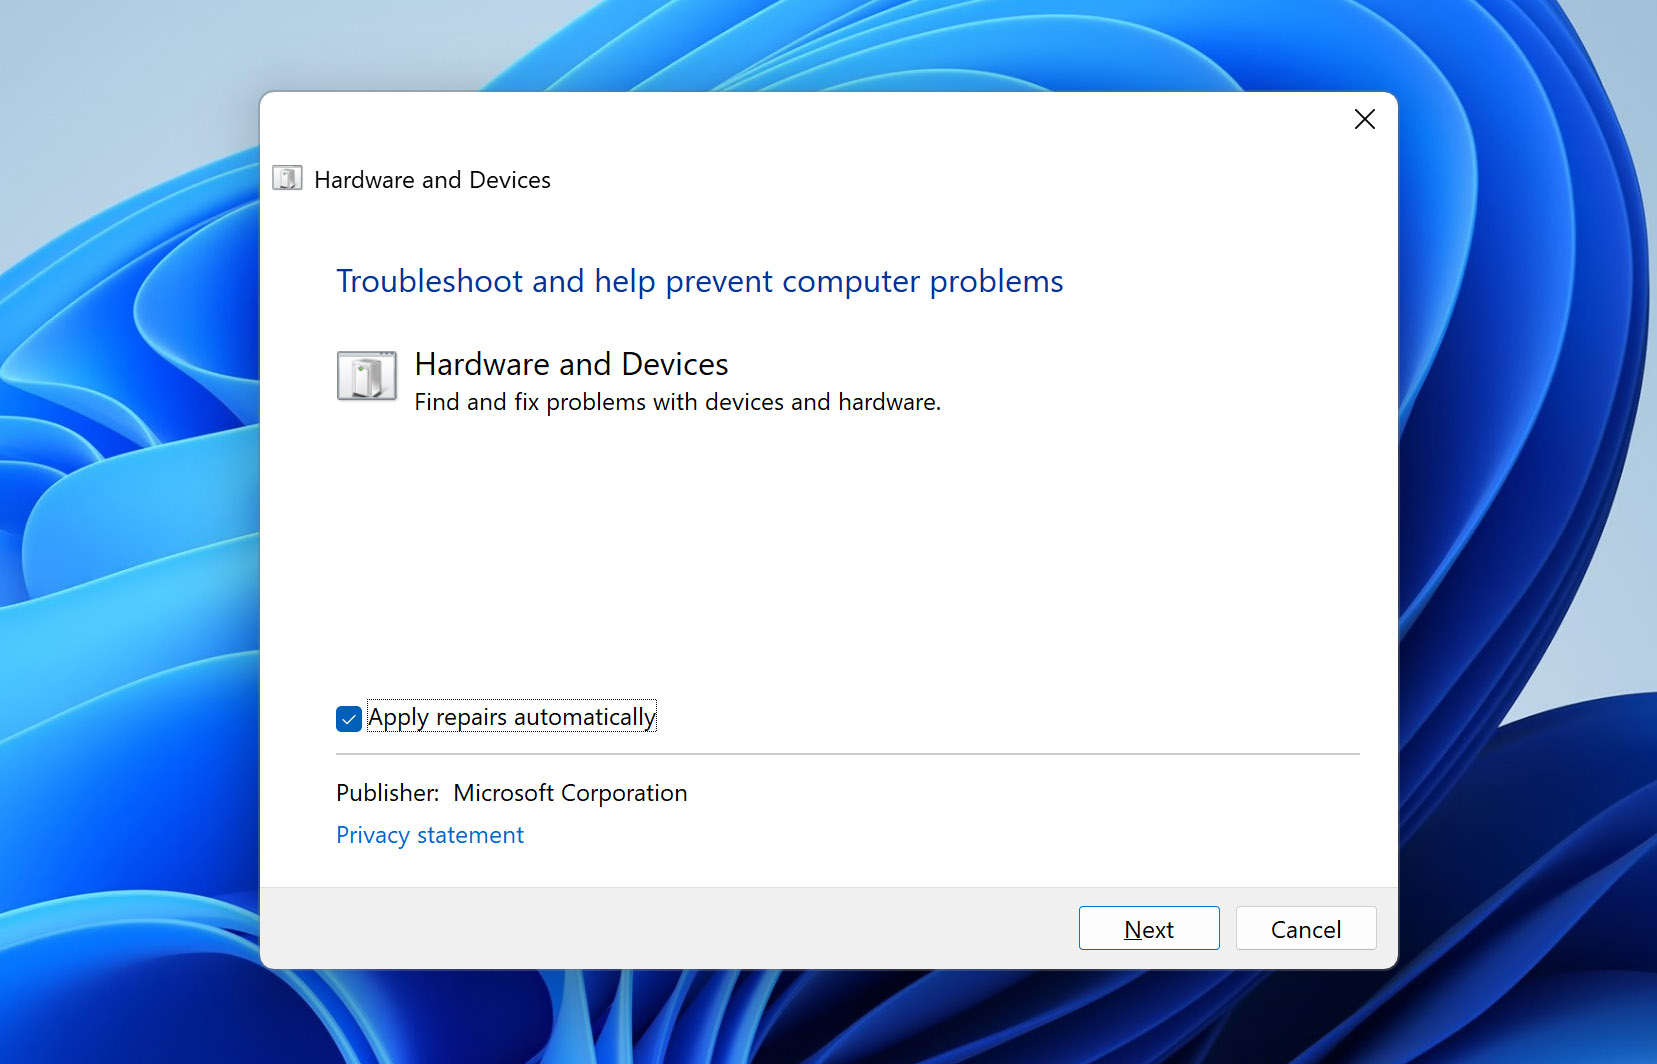
- Run the command msdt.exe -id DeviceDiagnostic to bring up the troubleshooter.
- Click on Advanced and make sure Apply repairs automatically is ticked. Click Next. The troubleshooter will start to scan your system for potential issues.
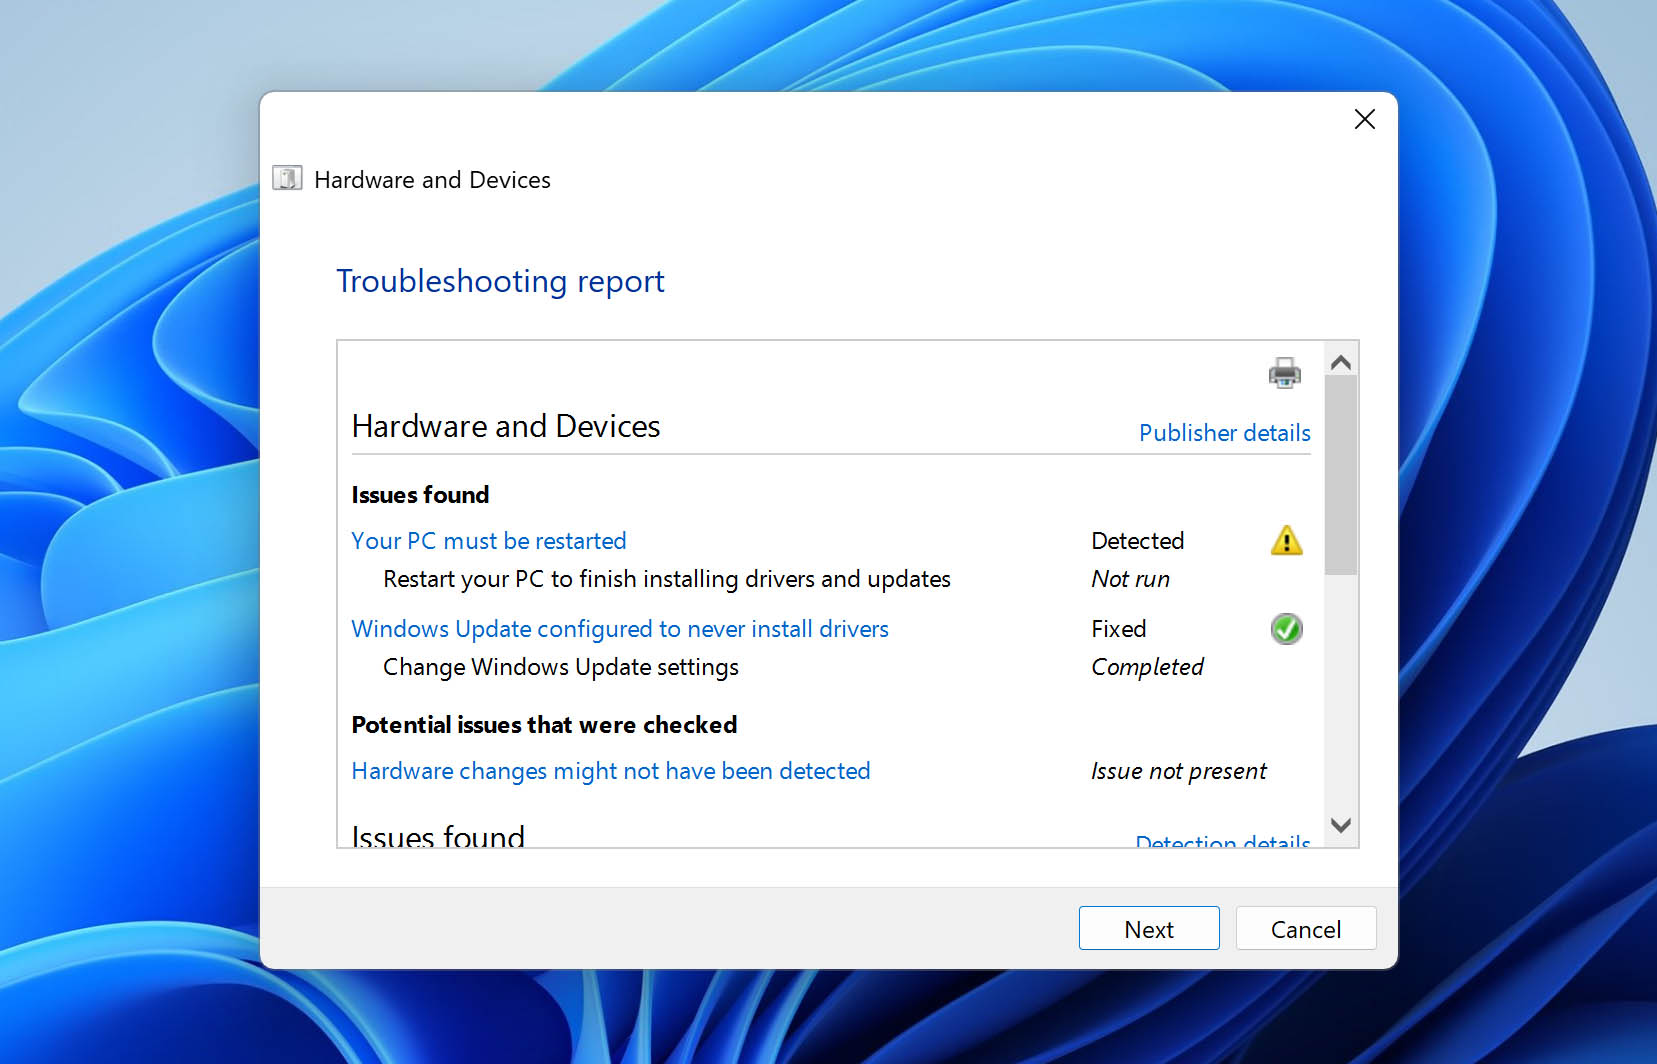
- When the scan has finished, you can click View detailed information to see an overview of the scan.
Method 4: Update or Reinstall Your Drivers
Drivers allow your external hard drive to communicate with the computer and its operating system. Without drivers, the drive won’t appear or function properly. You can update your drivers to ensure there’s no compatibility issues. If they’re already updated, try reinstalling them in-case they’ve recently become corrupted.
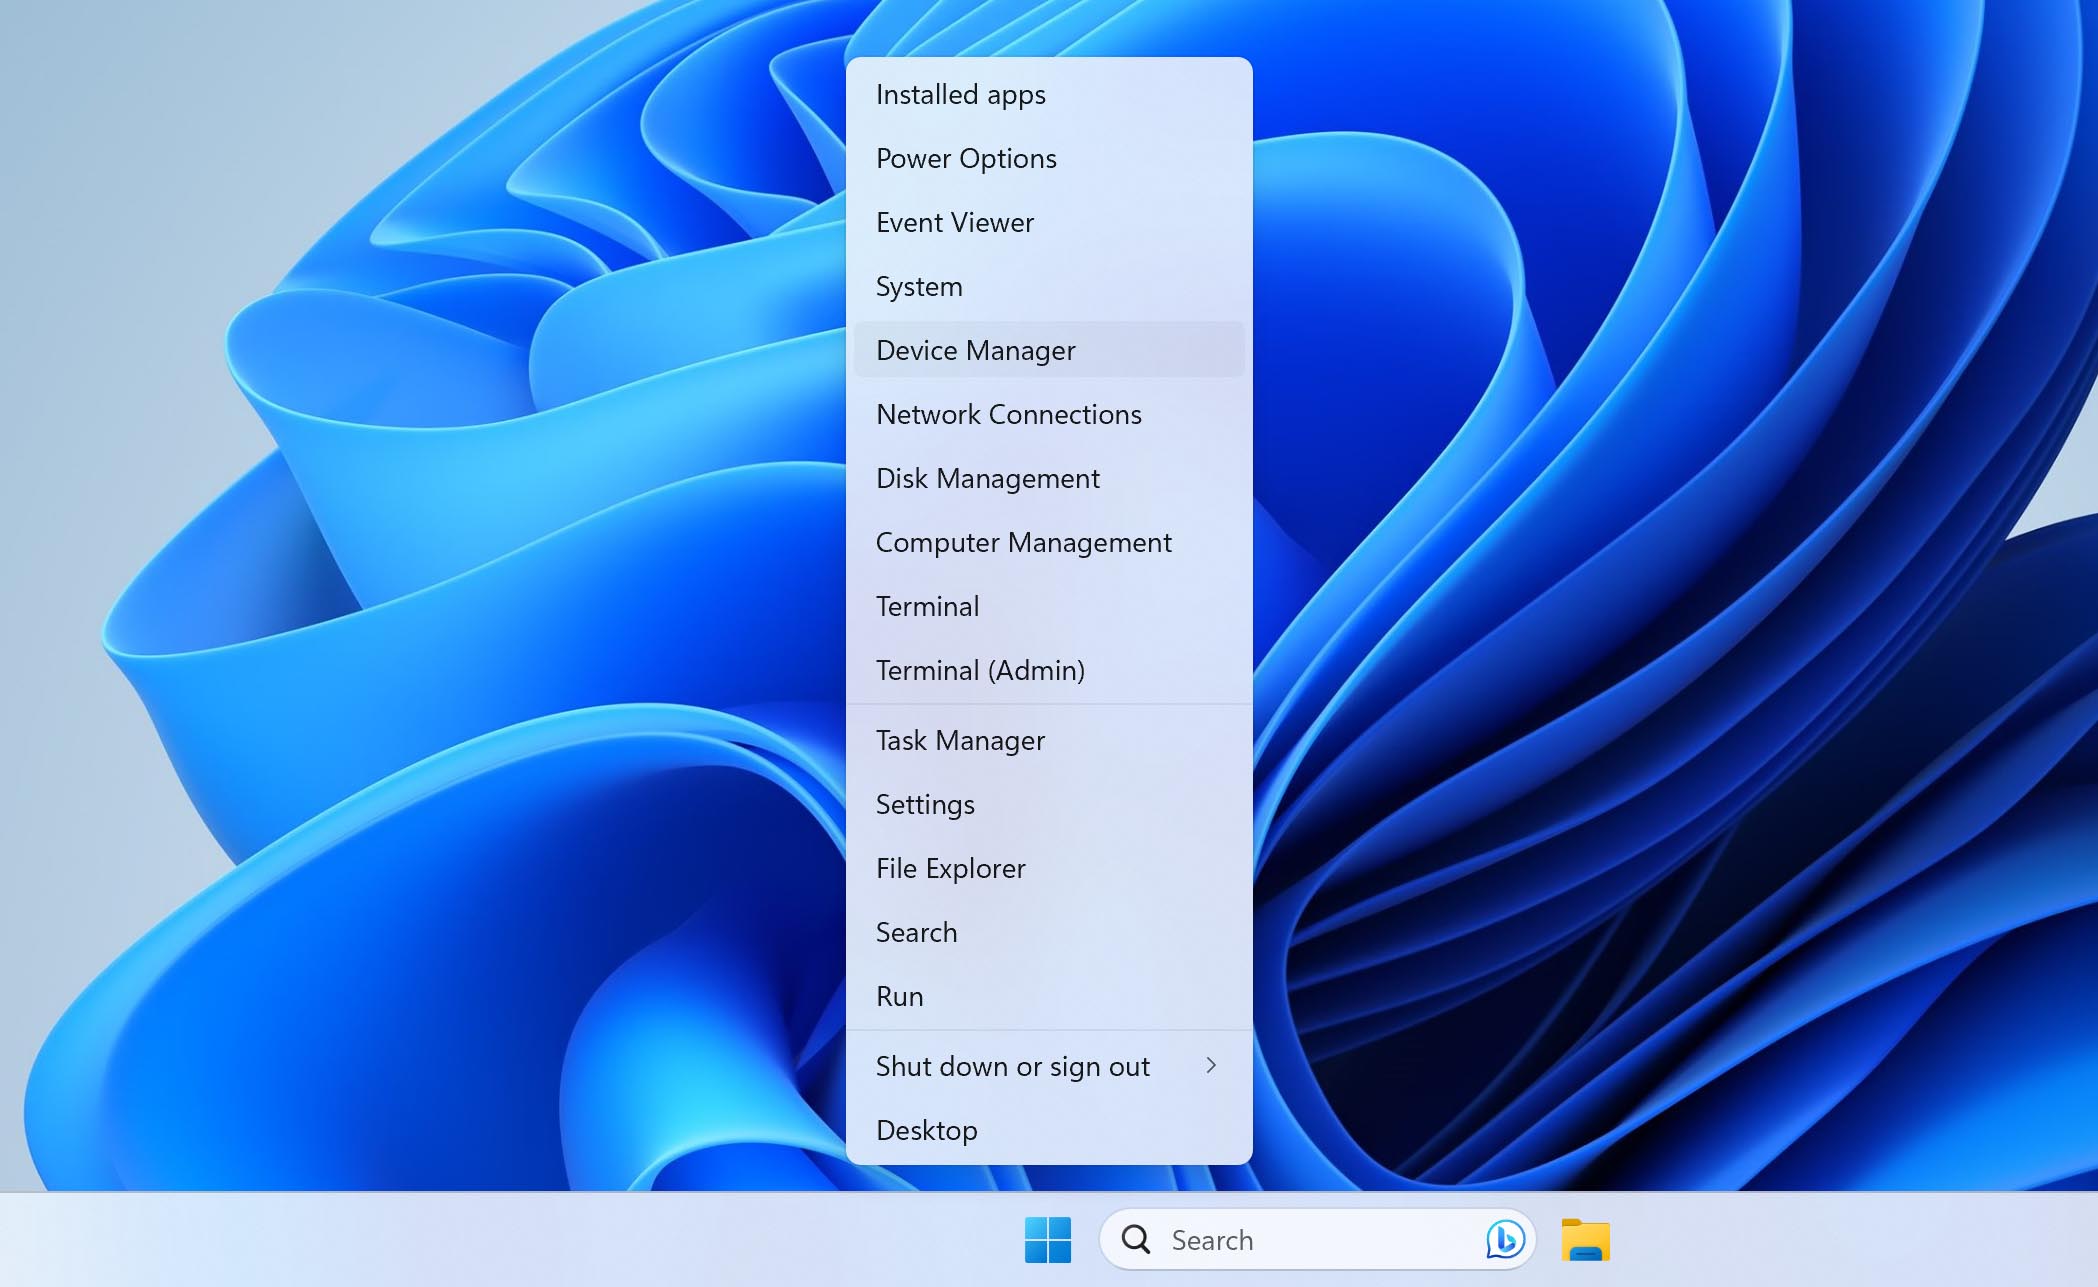
- Right-click Start and click Device Manager.
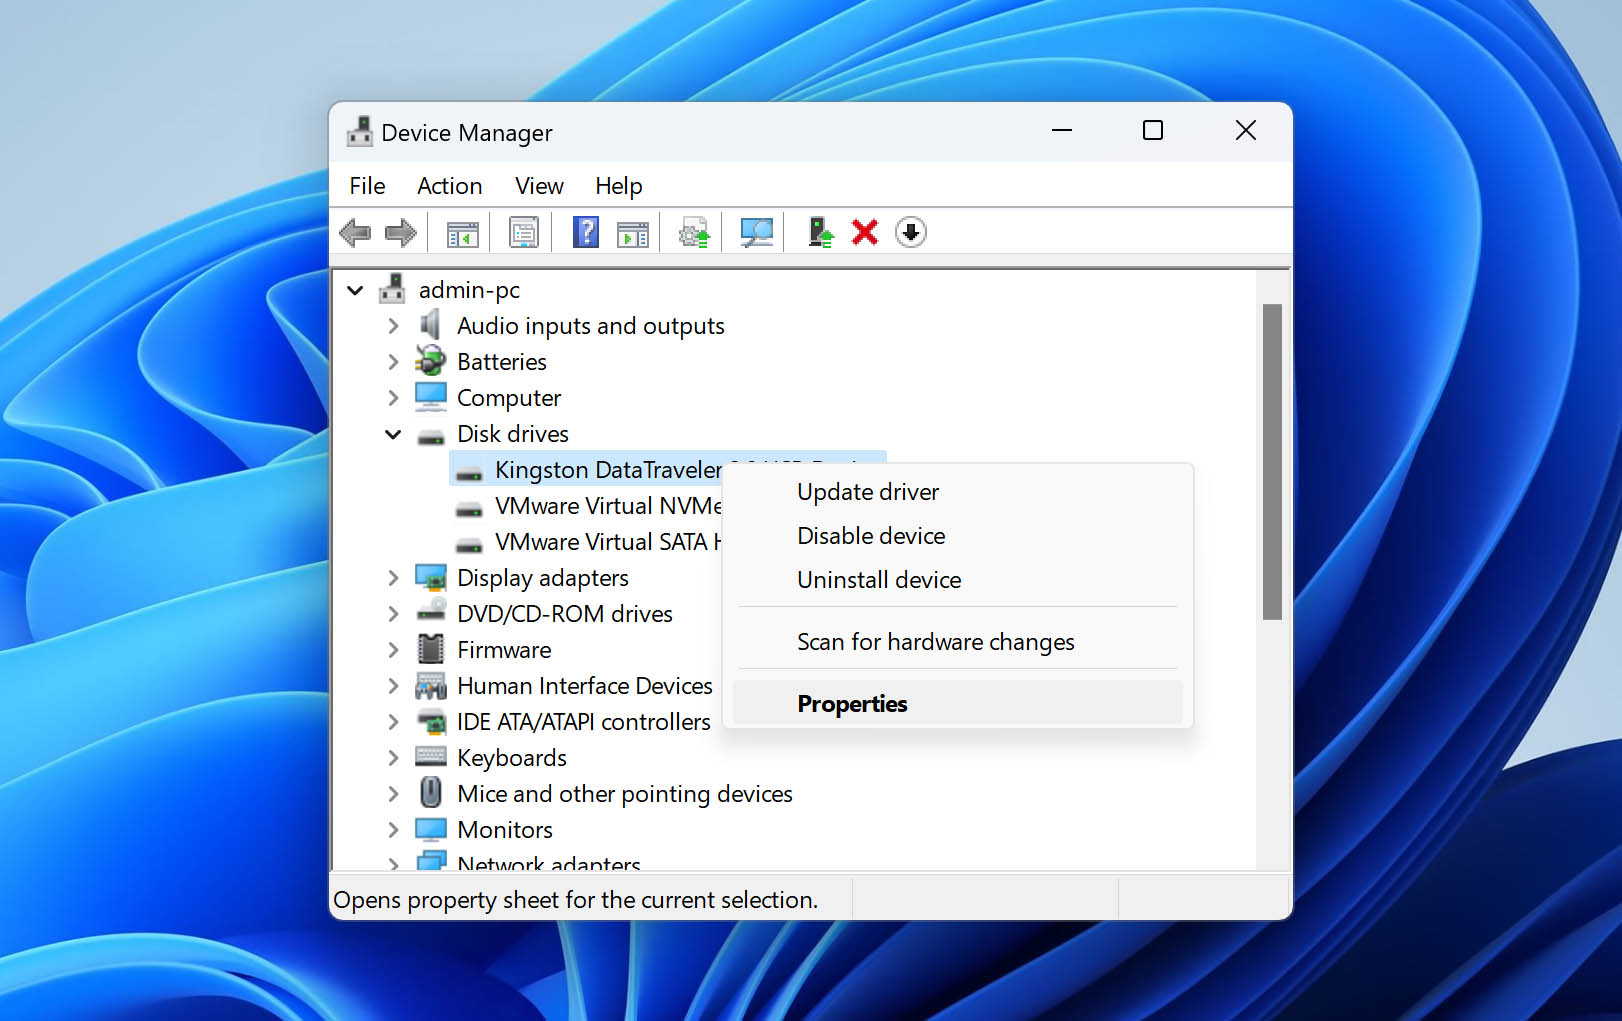
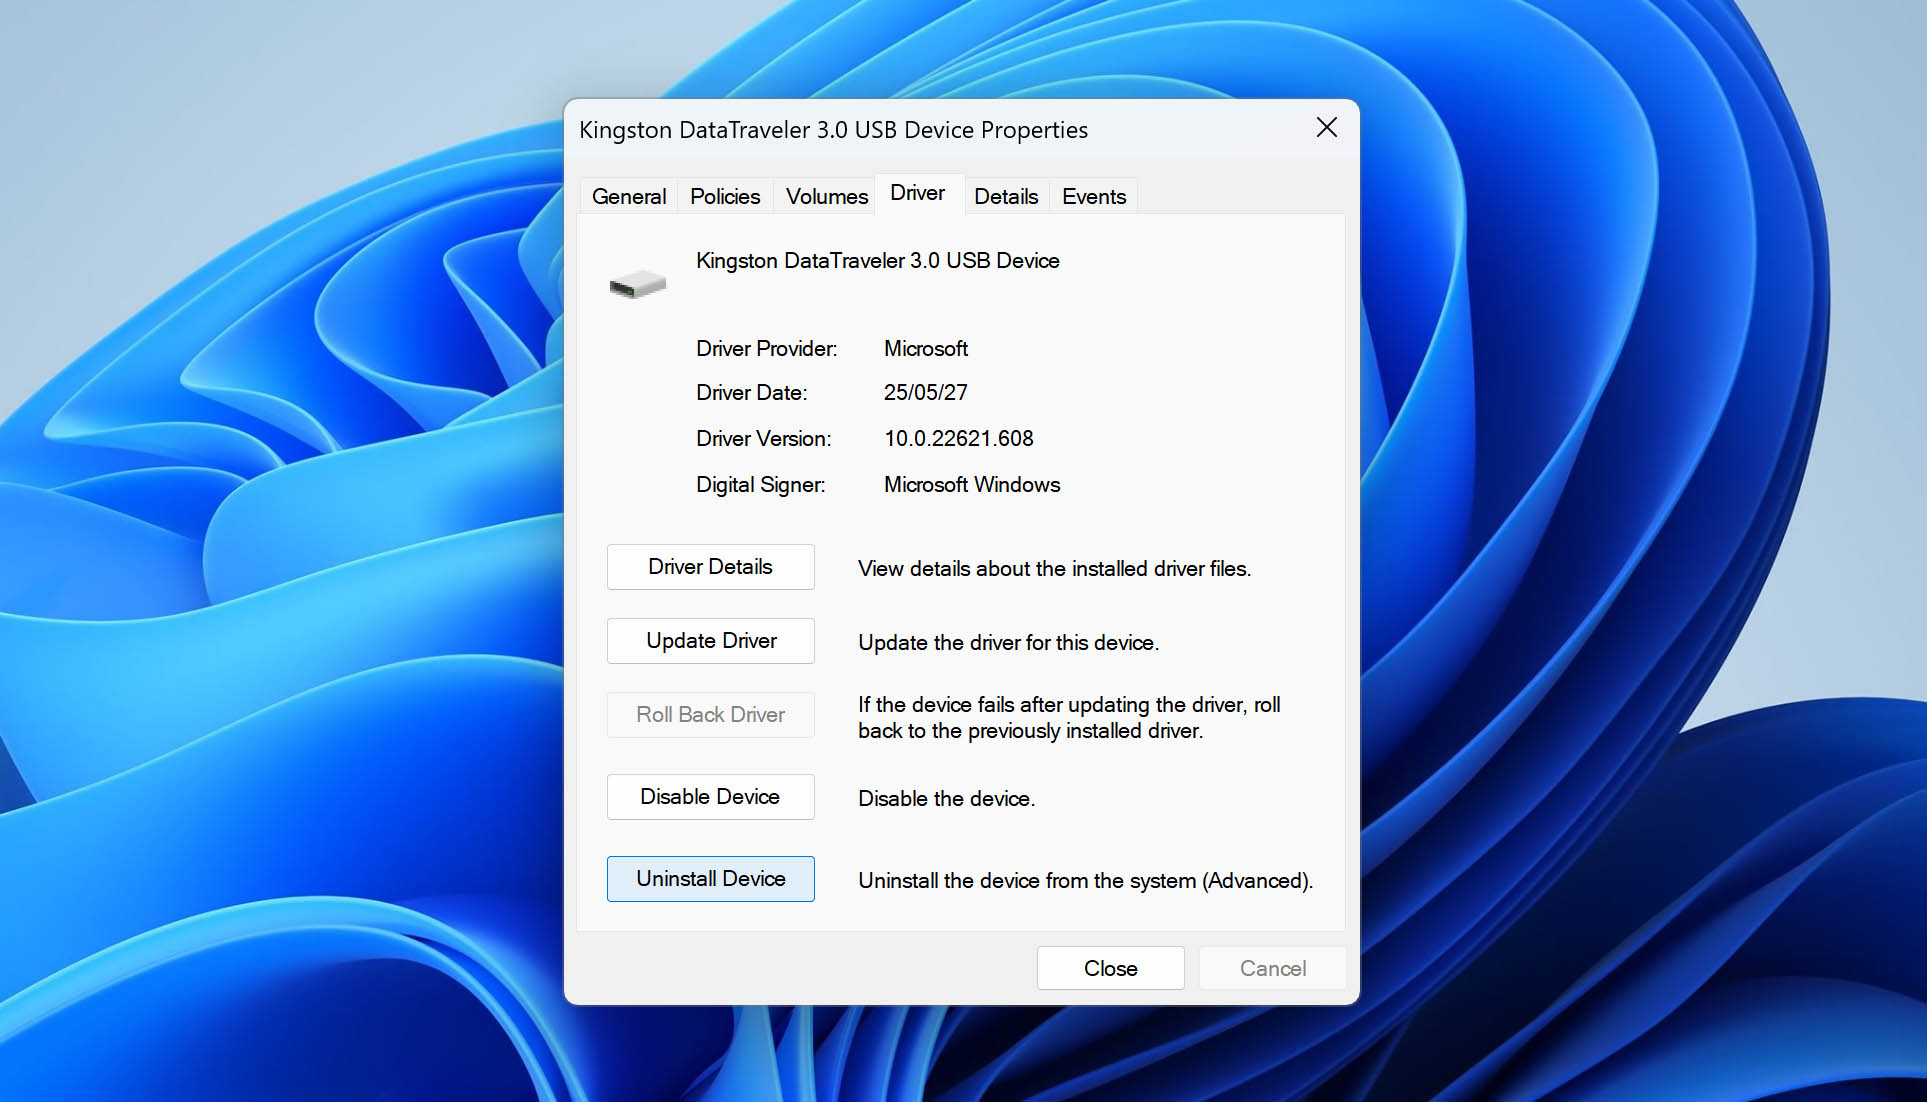
- Expand Disk drives. Right-click your drive then click Properties
👀
The hard drive name may be different in your system.
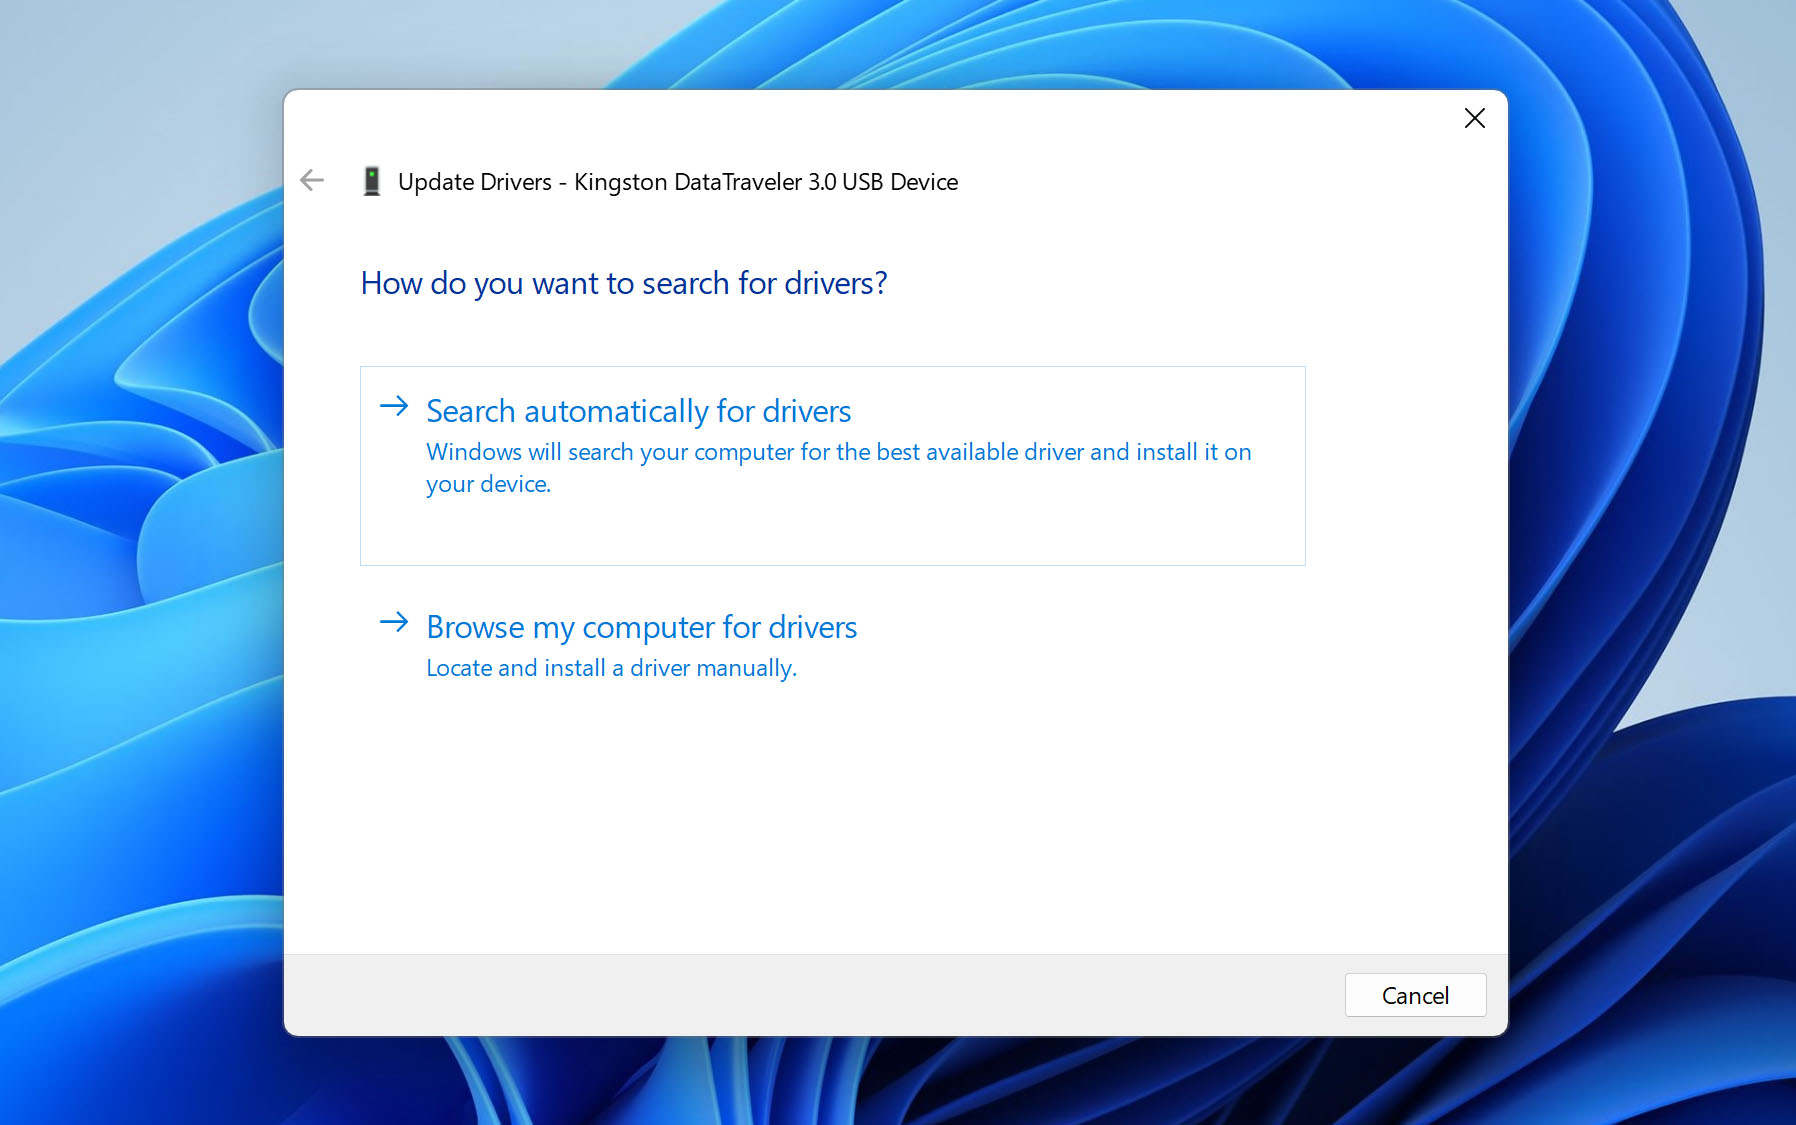
- Click onto the Driver tab, then click Update Driver.

- Click Search automatically for drivers. This will scan the internet for compatible up-to-date drivers and automatically download and install them.
- If this hasn’t worked for you, go back and click Uninstall Device. This will uninstall the existing drivers from your system. Unplug the drive then plug it back in again for the drivers to be reinstalled.
Method 5: Disable USB Selective Suspend
USB Selective Suspend is a setting within Windows that allows it to power down individual USB ports to save power when they’re not in use. This works great for the most part but sometimes Windows gets it wrong and keeps the port powered down, even when it needs to be used. You can disable this setting entirely to eliminate this problem.
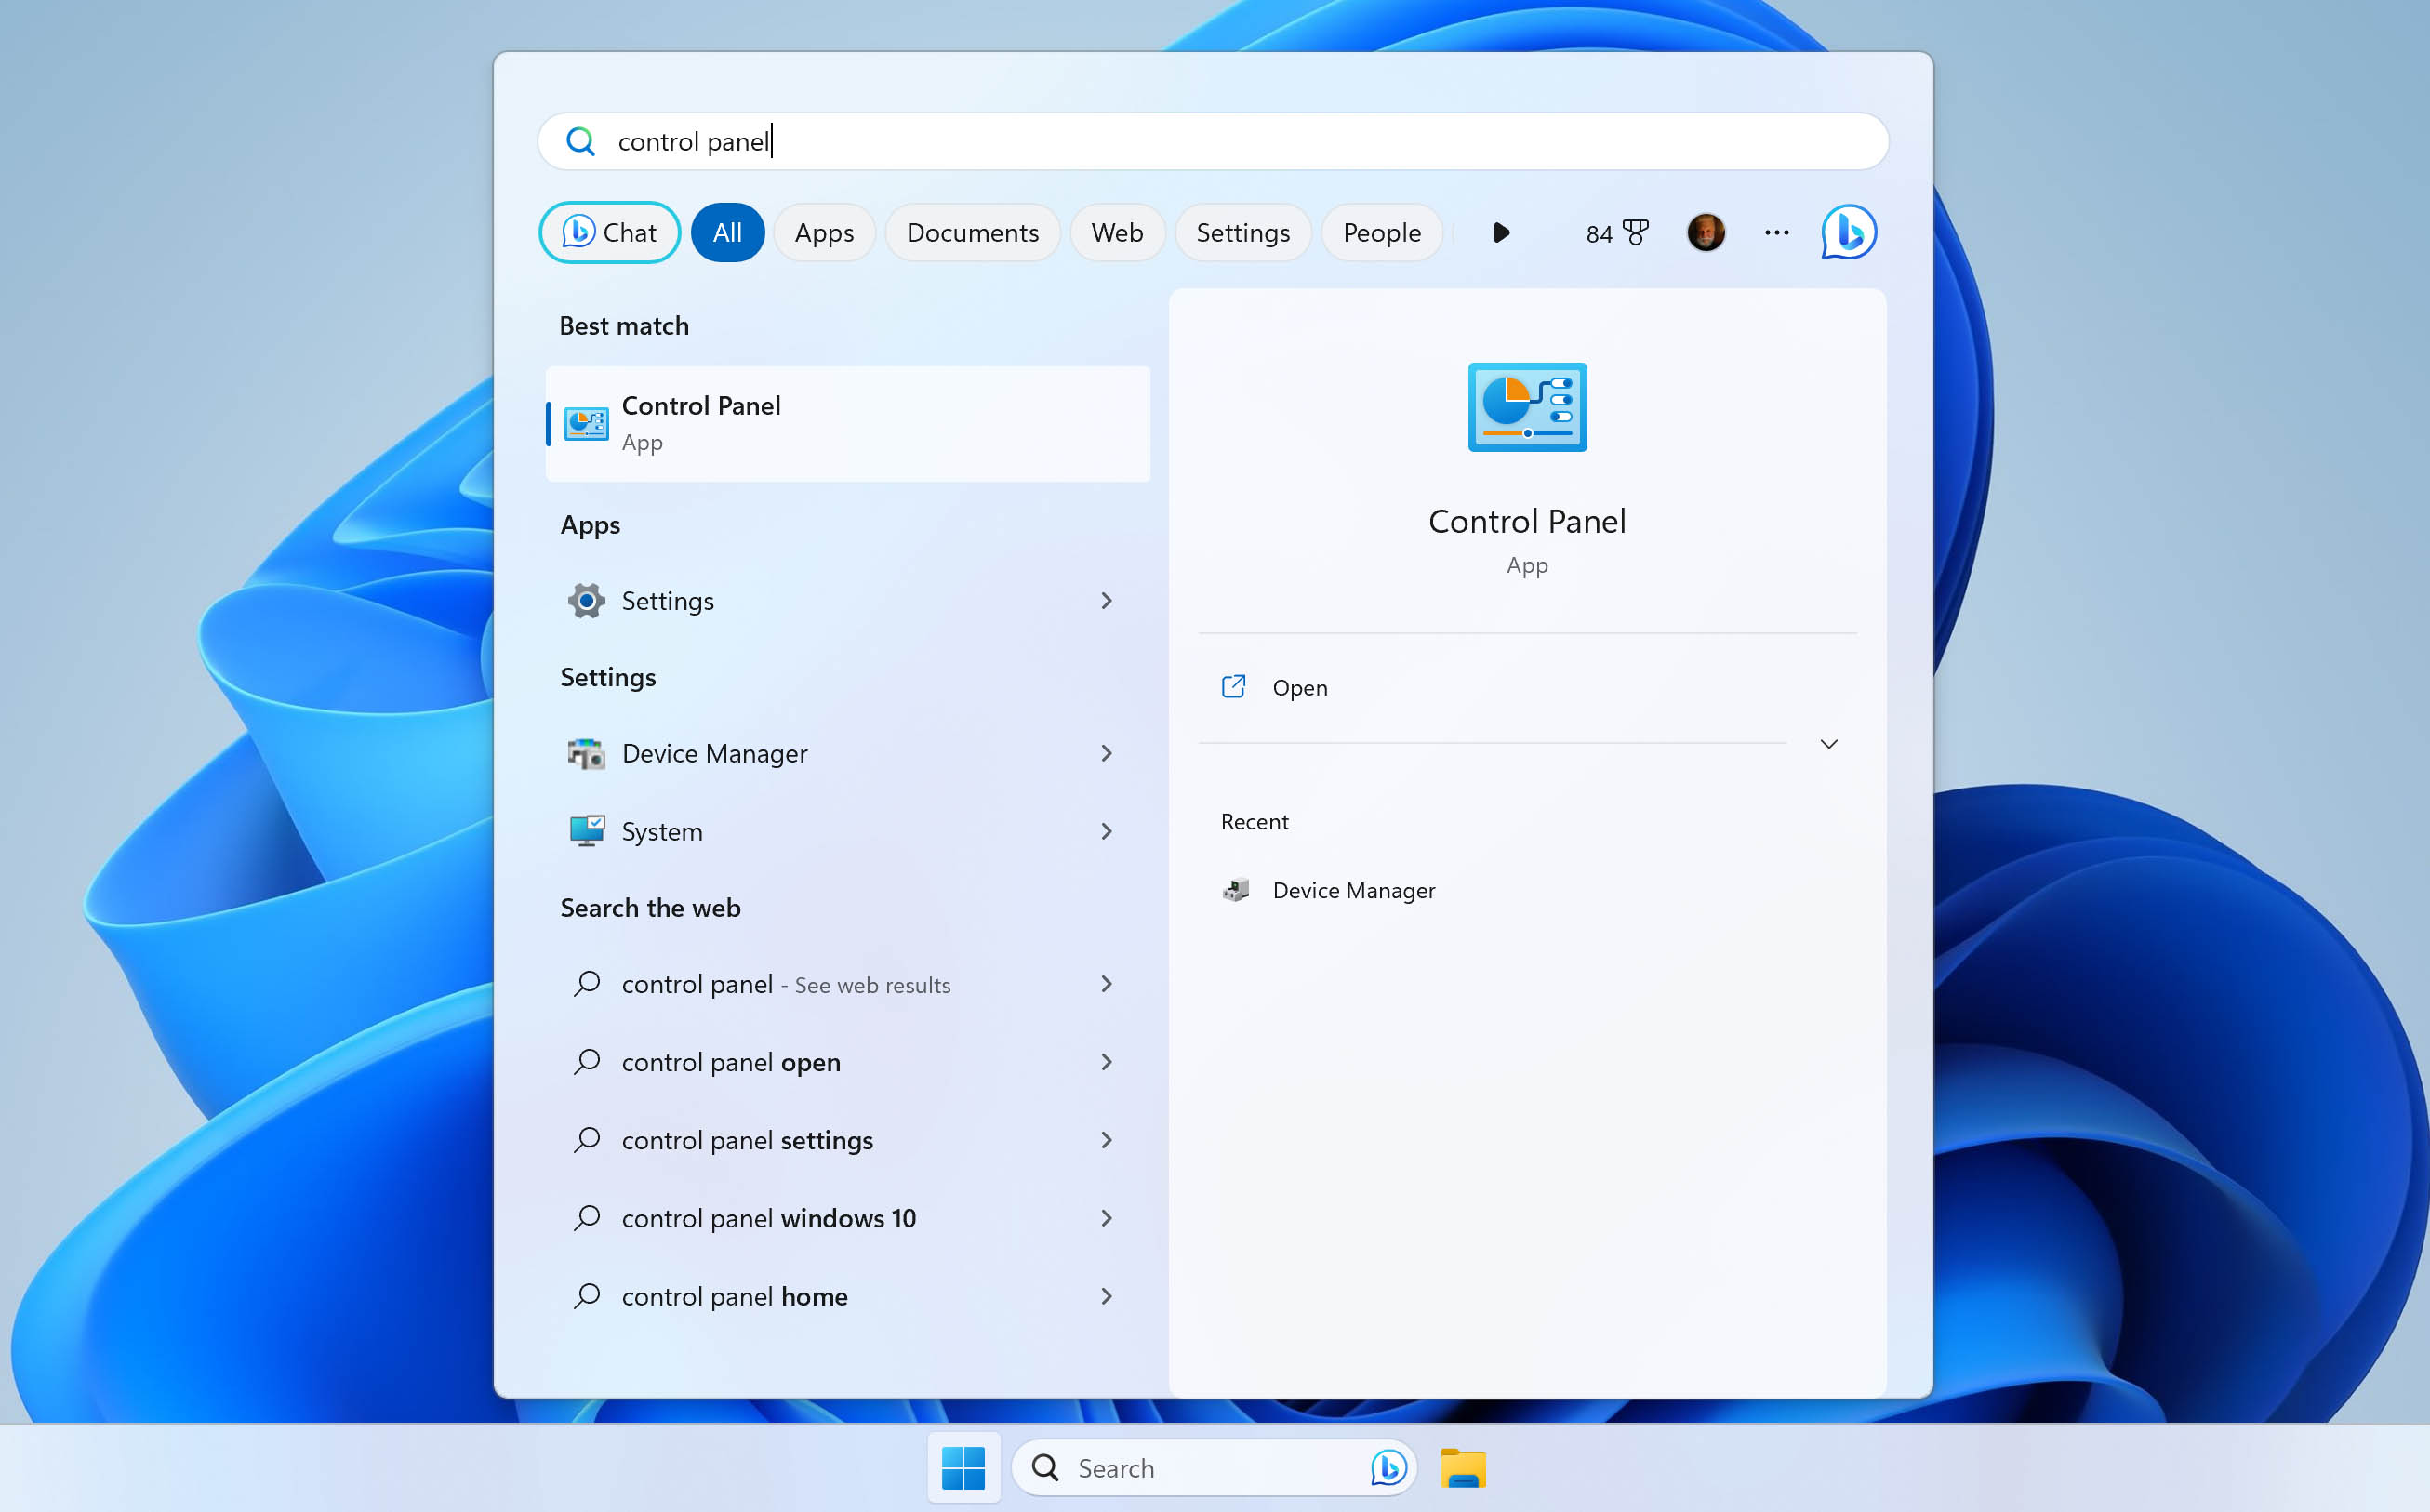
- Press Windows Key + S and search Control Panel. Open the top result.
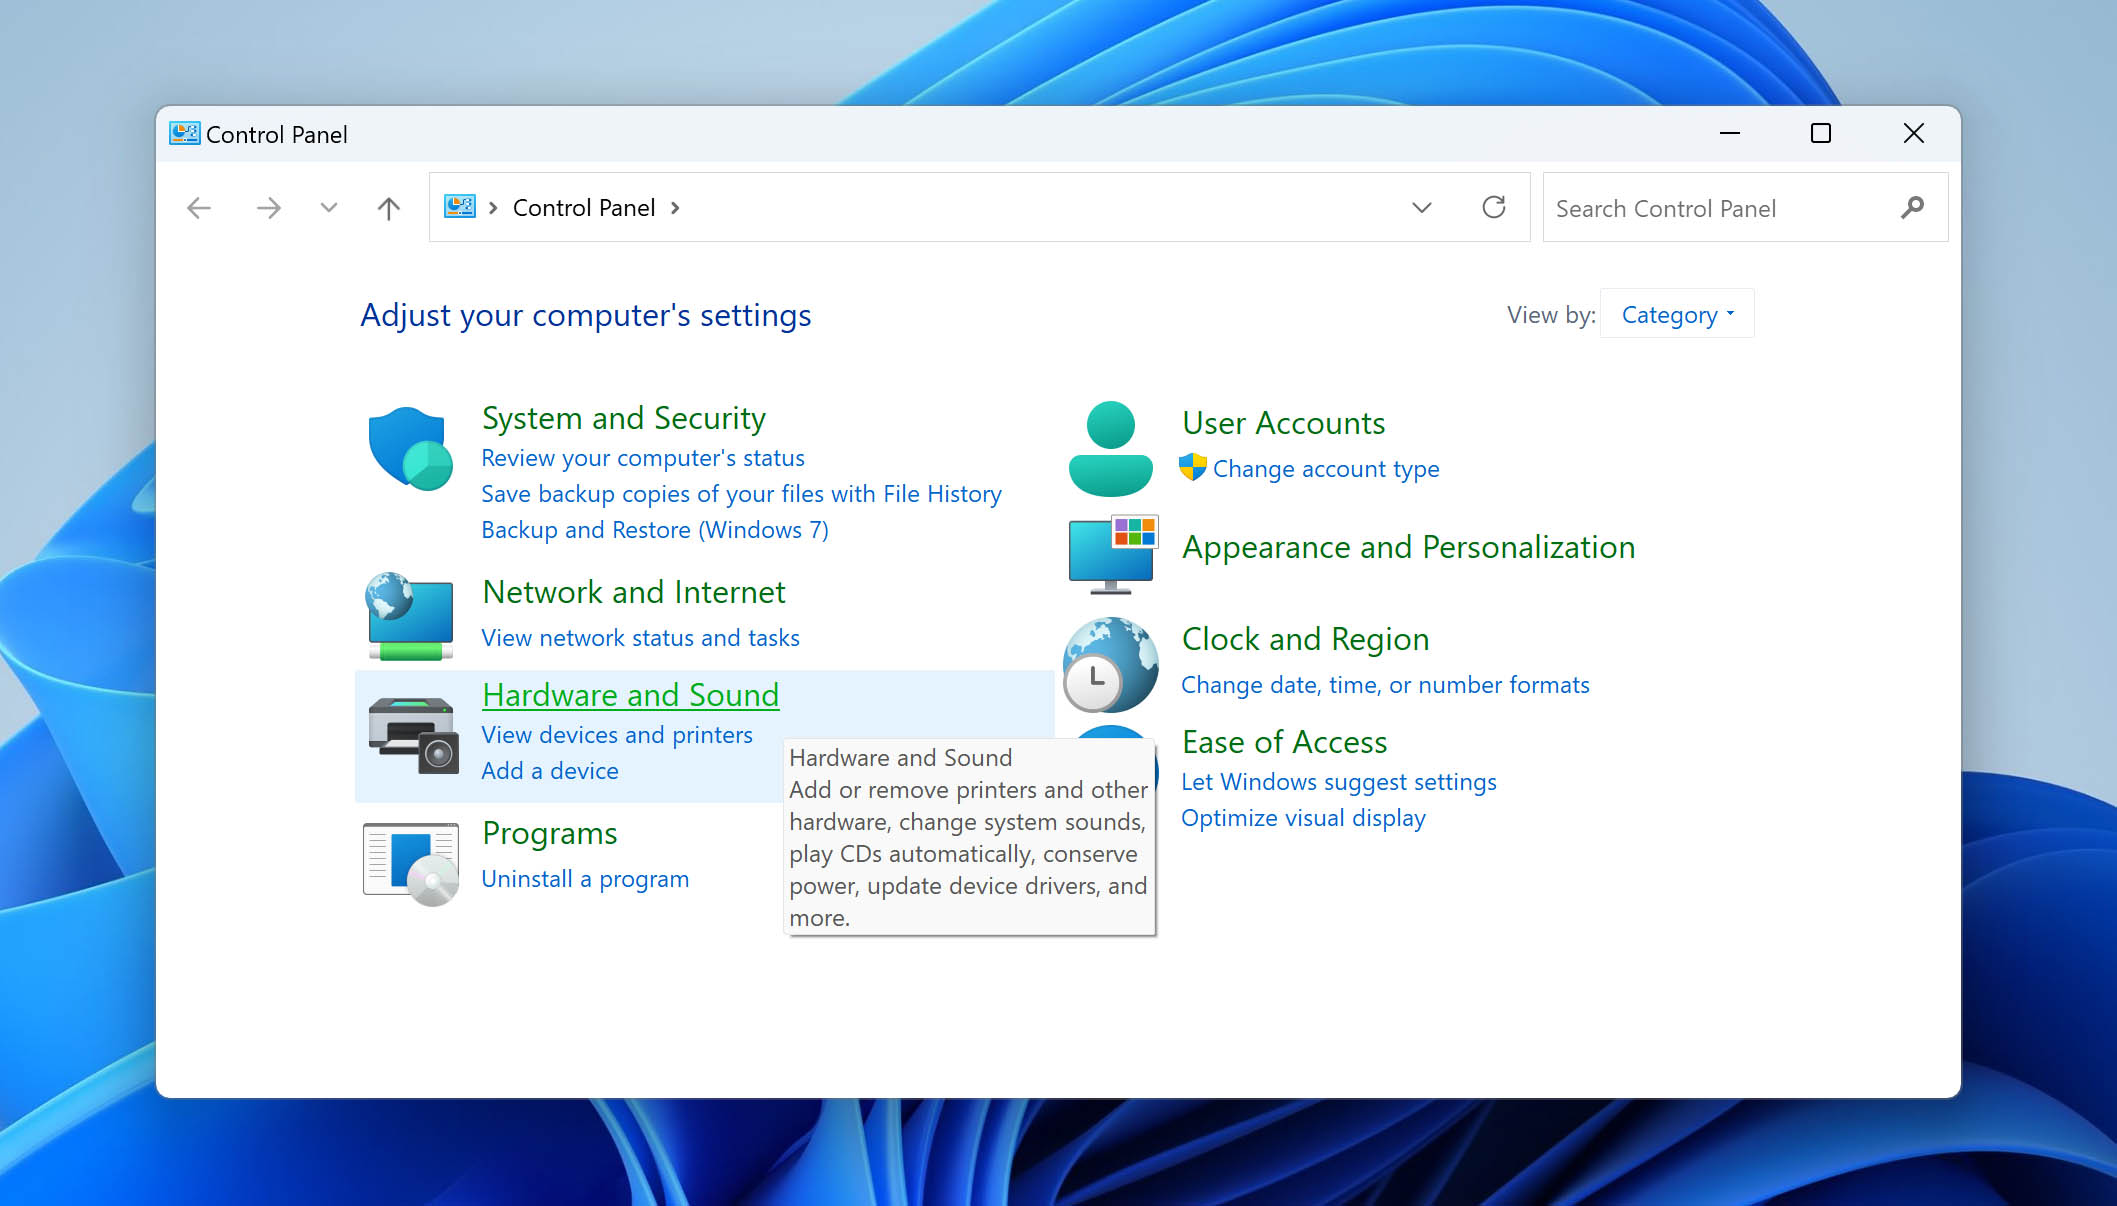
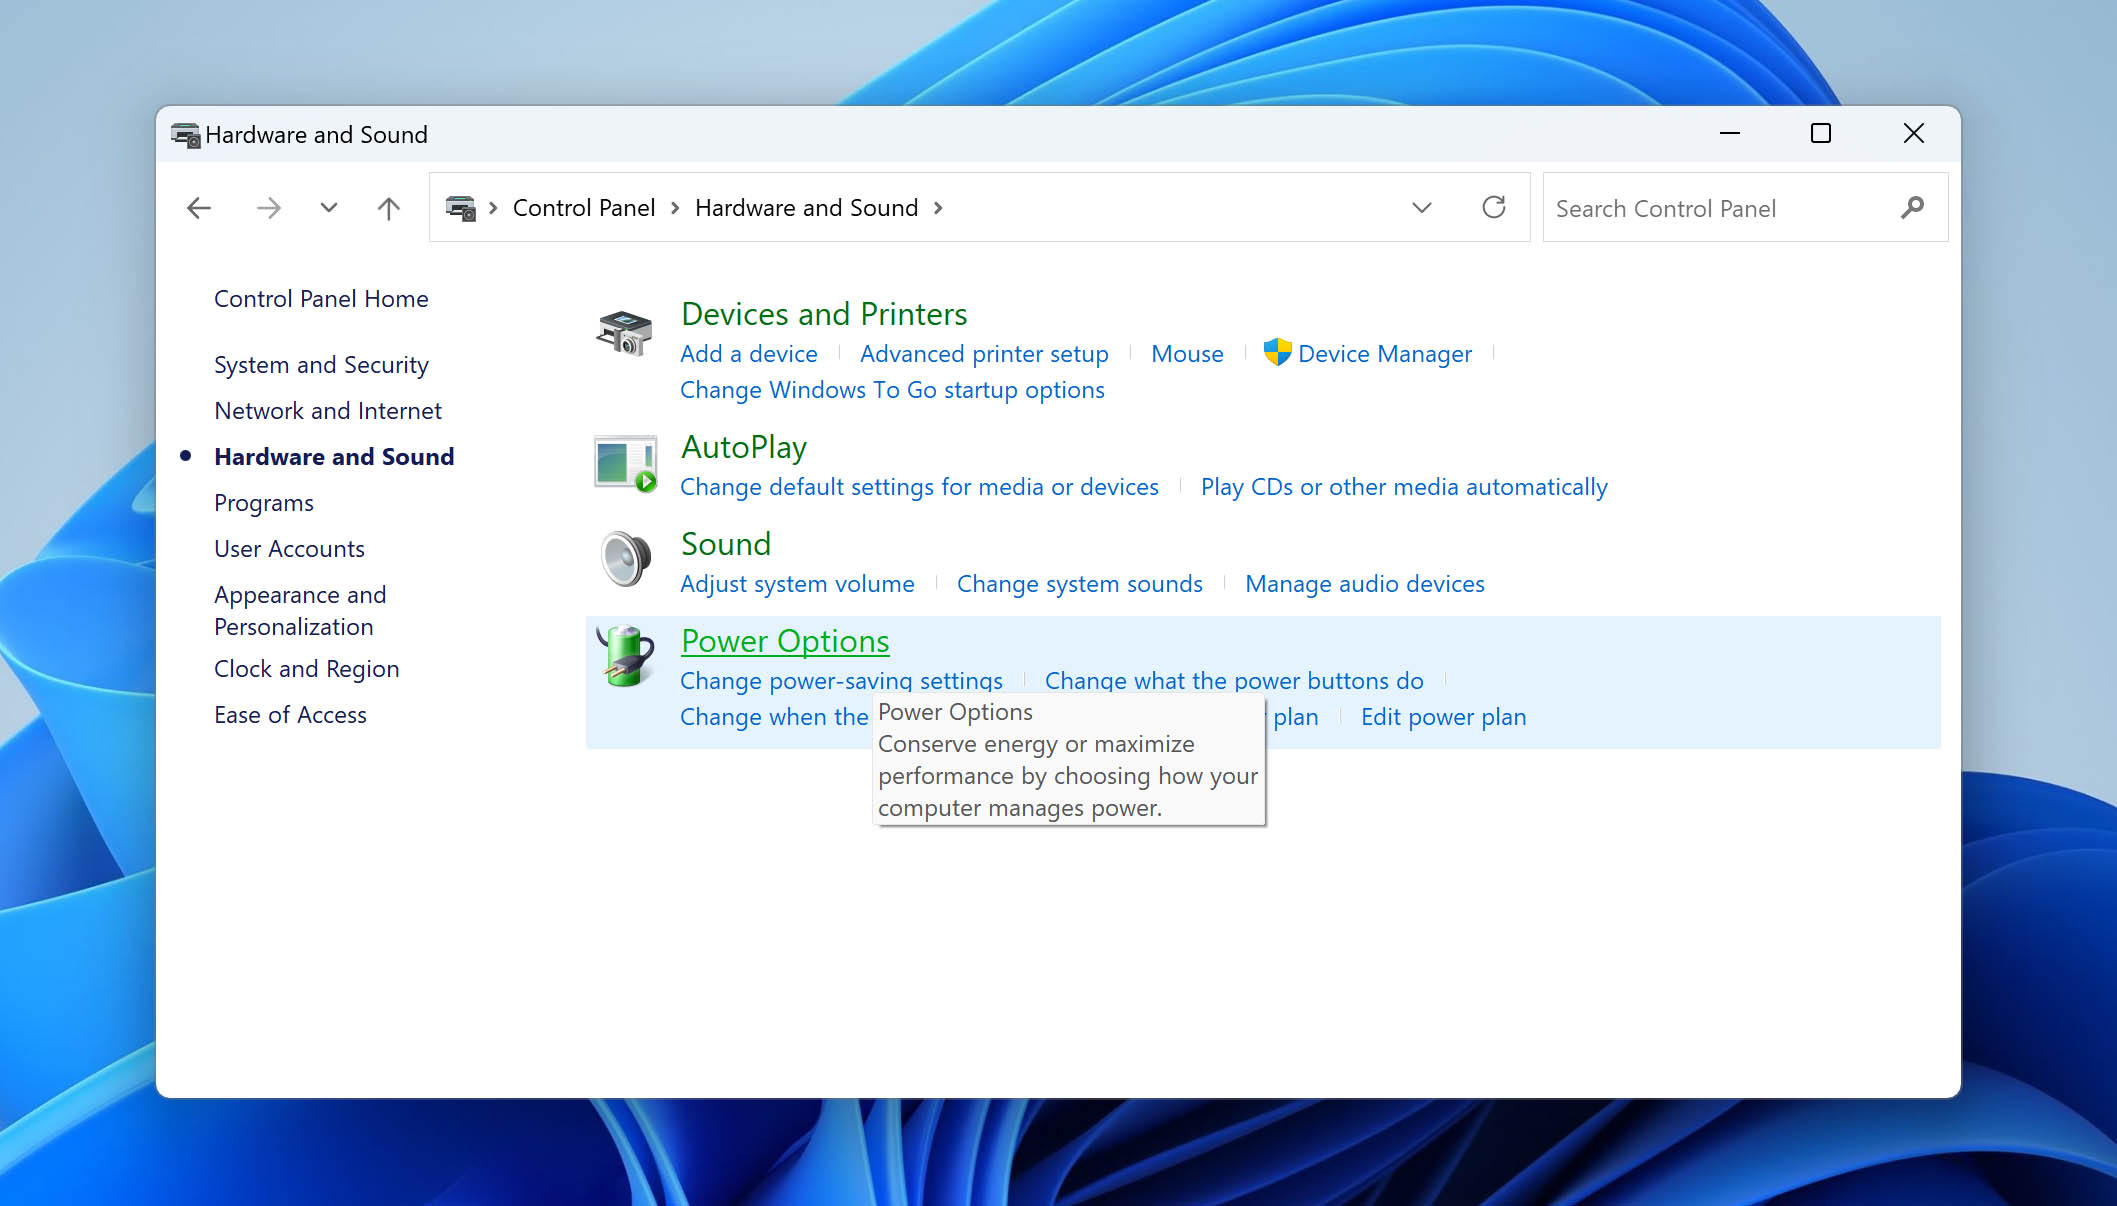
- Click Hardware and Sound.
- Click Power Options.
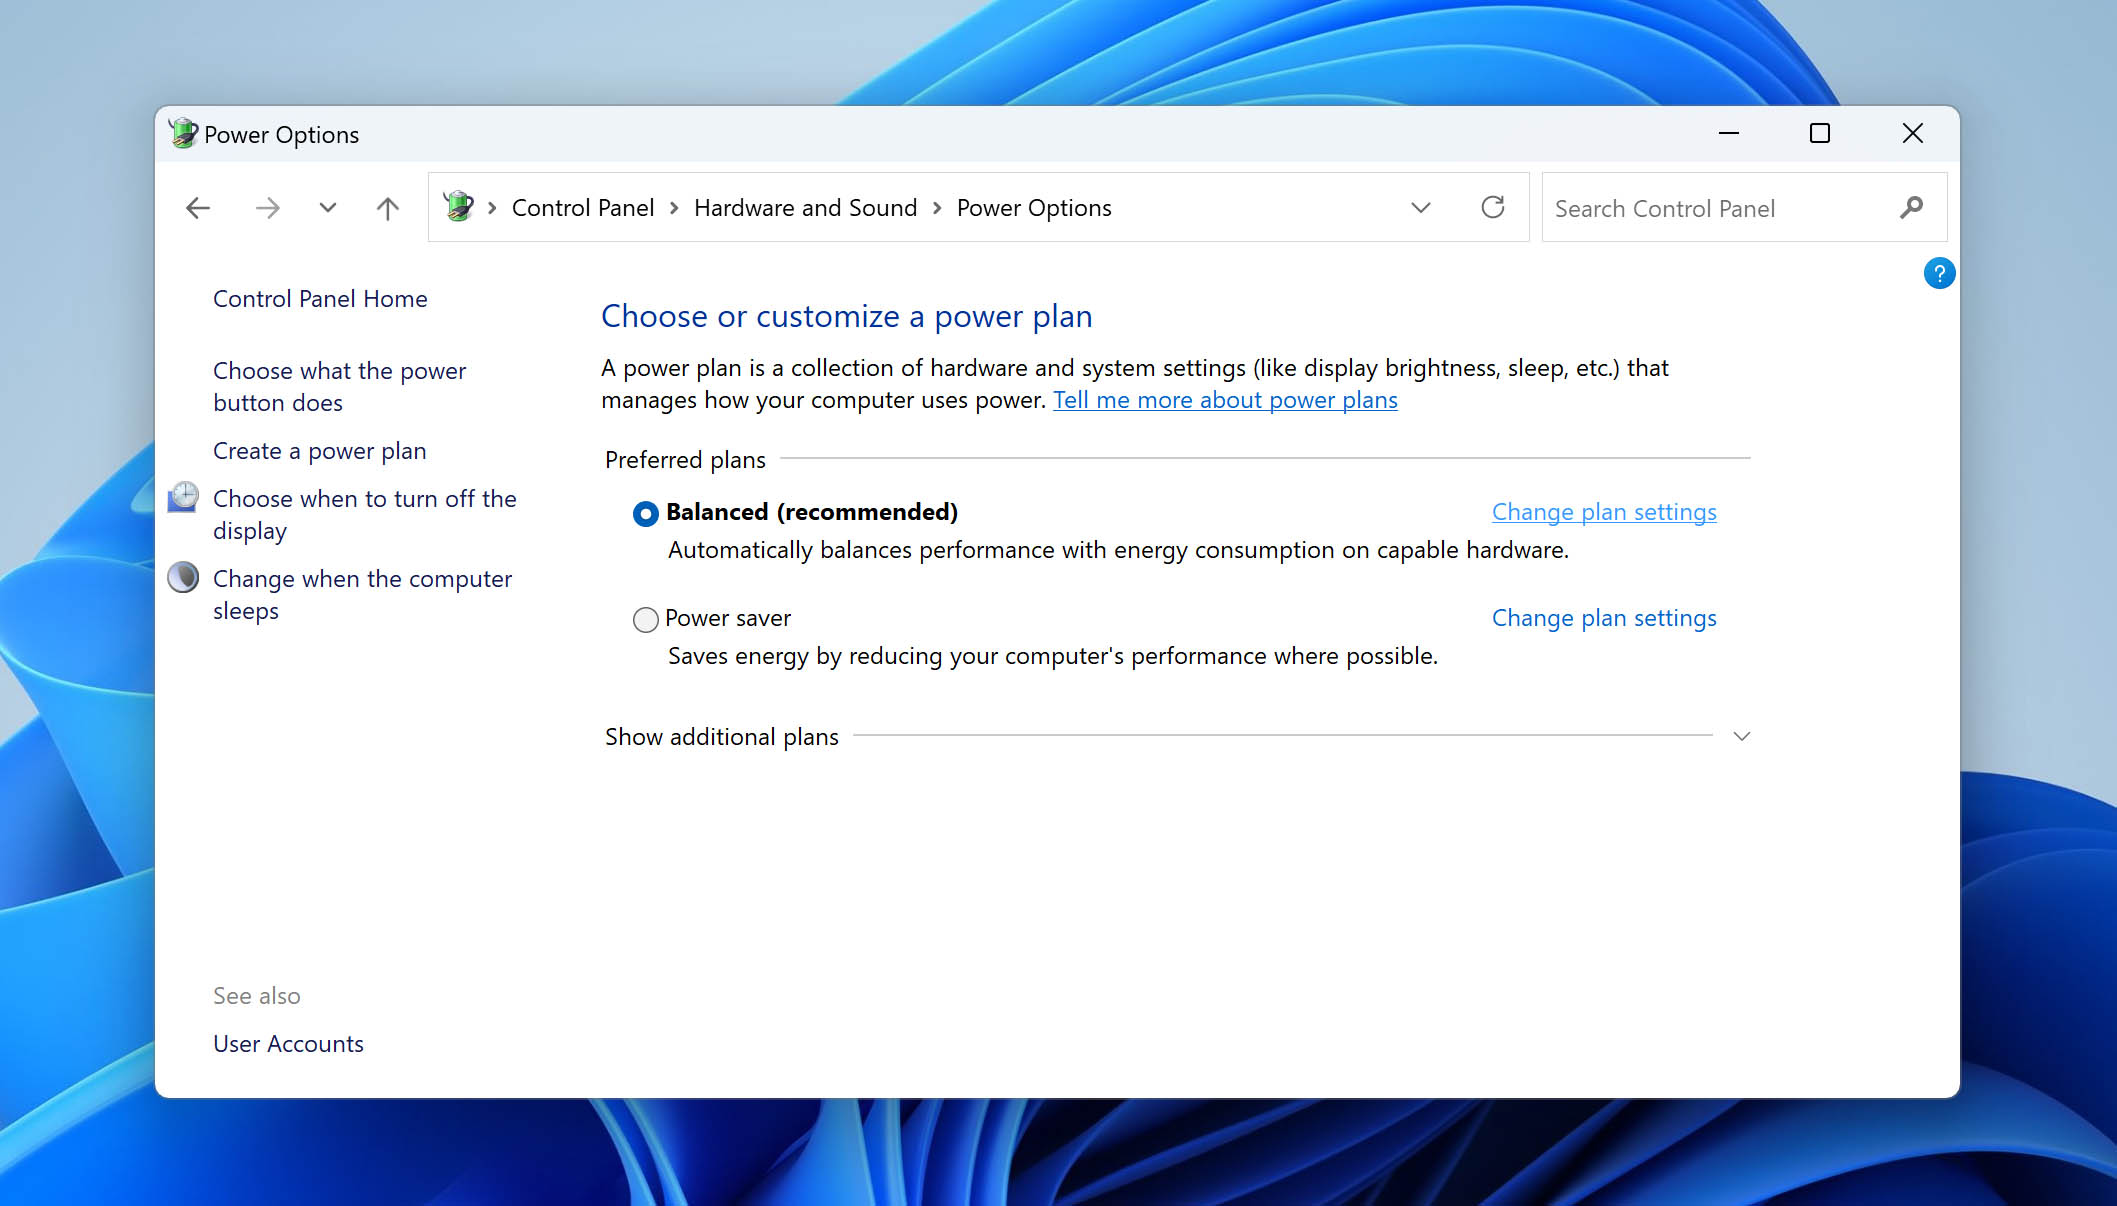
- Click Change plan settings on the power plan that’s currently enabled.
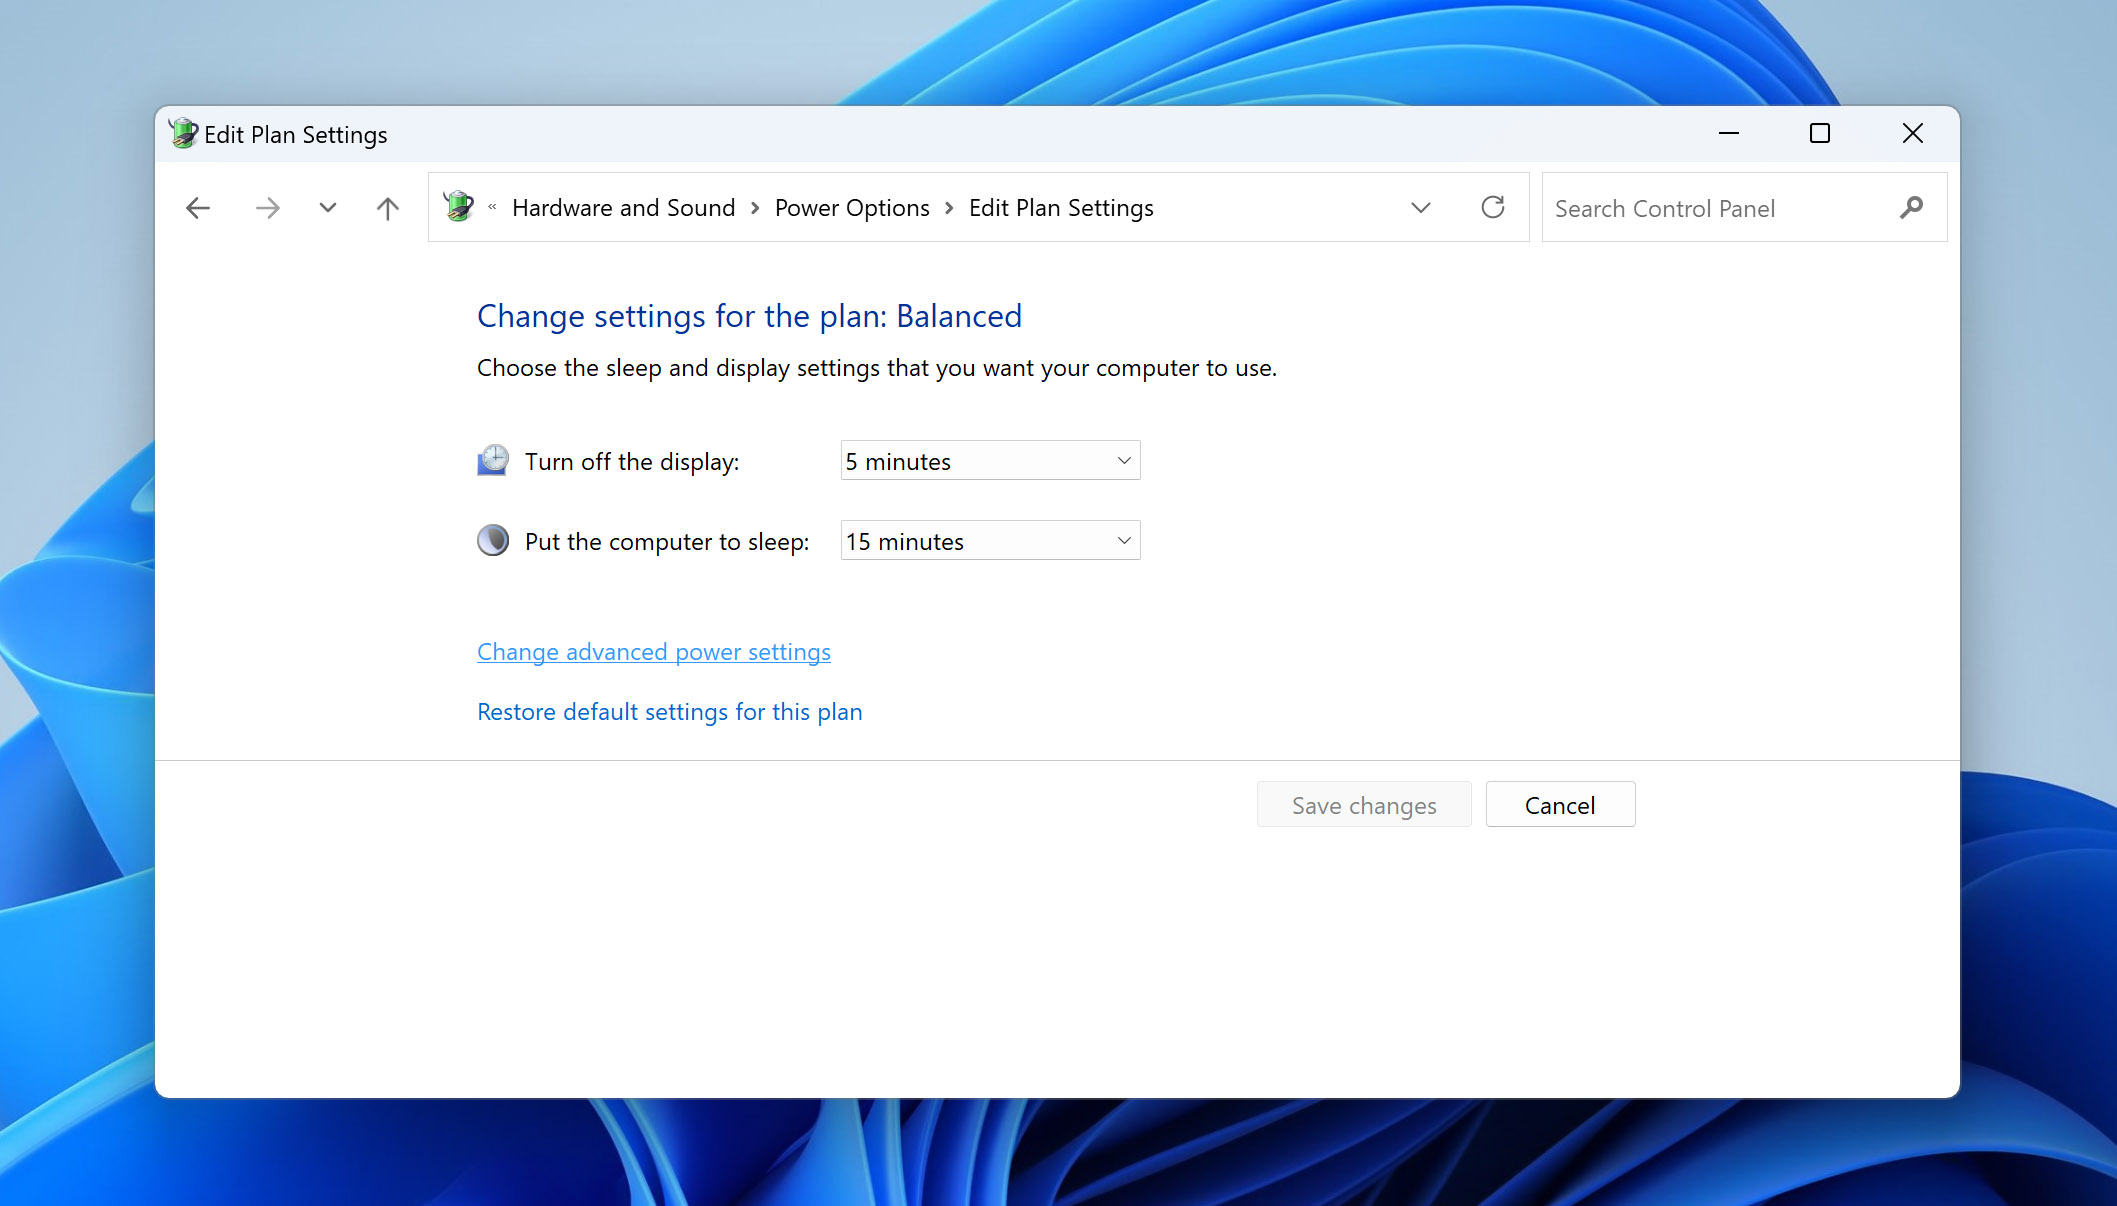
- Click Change advanced power settings.
- Expand the USB settings dropdown, then USB selective suspend setting. If you’re on a desktop, change the setting to Disabled. If you’re on a laptop, you can choose to disable this setting for either one or both of the On battery and Plugged in settings.
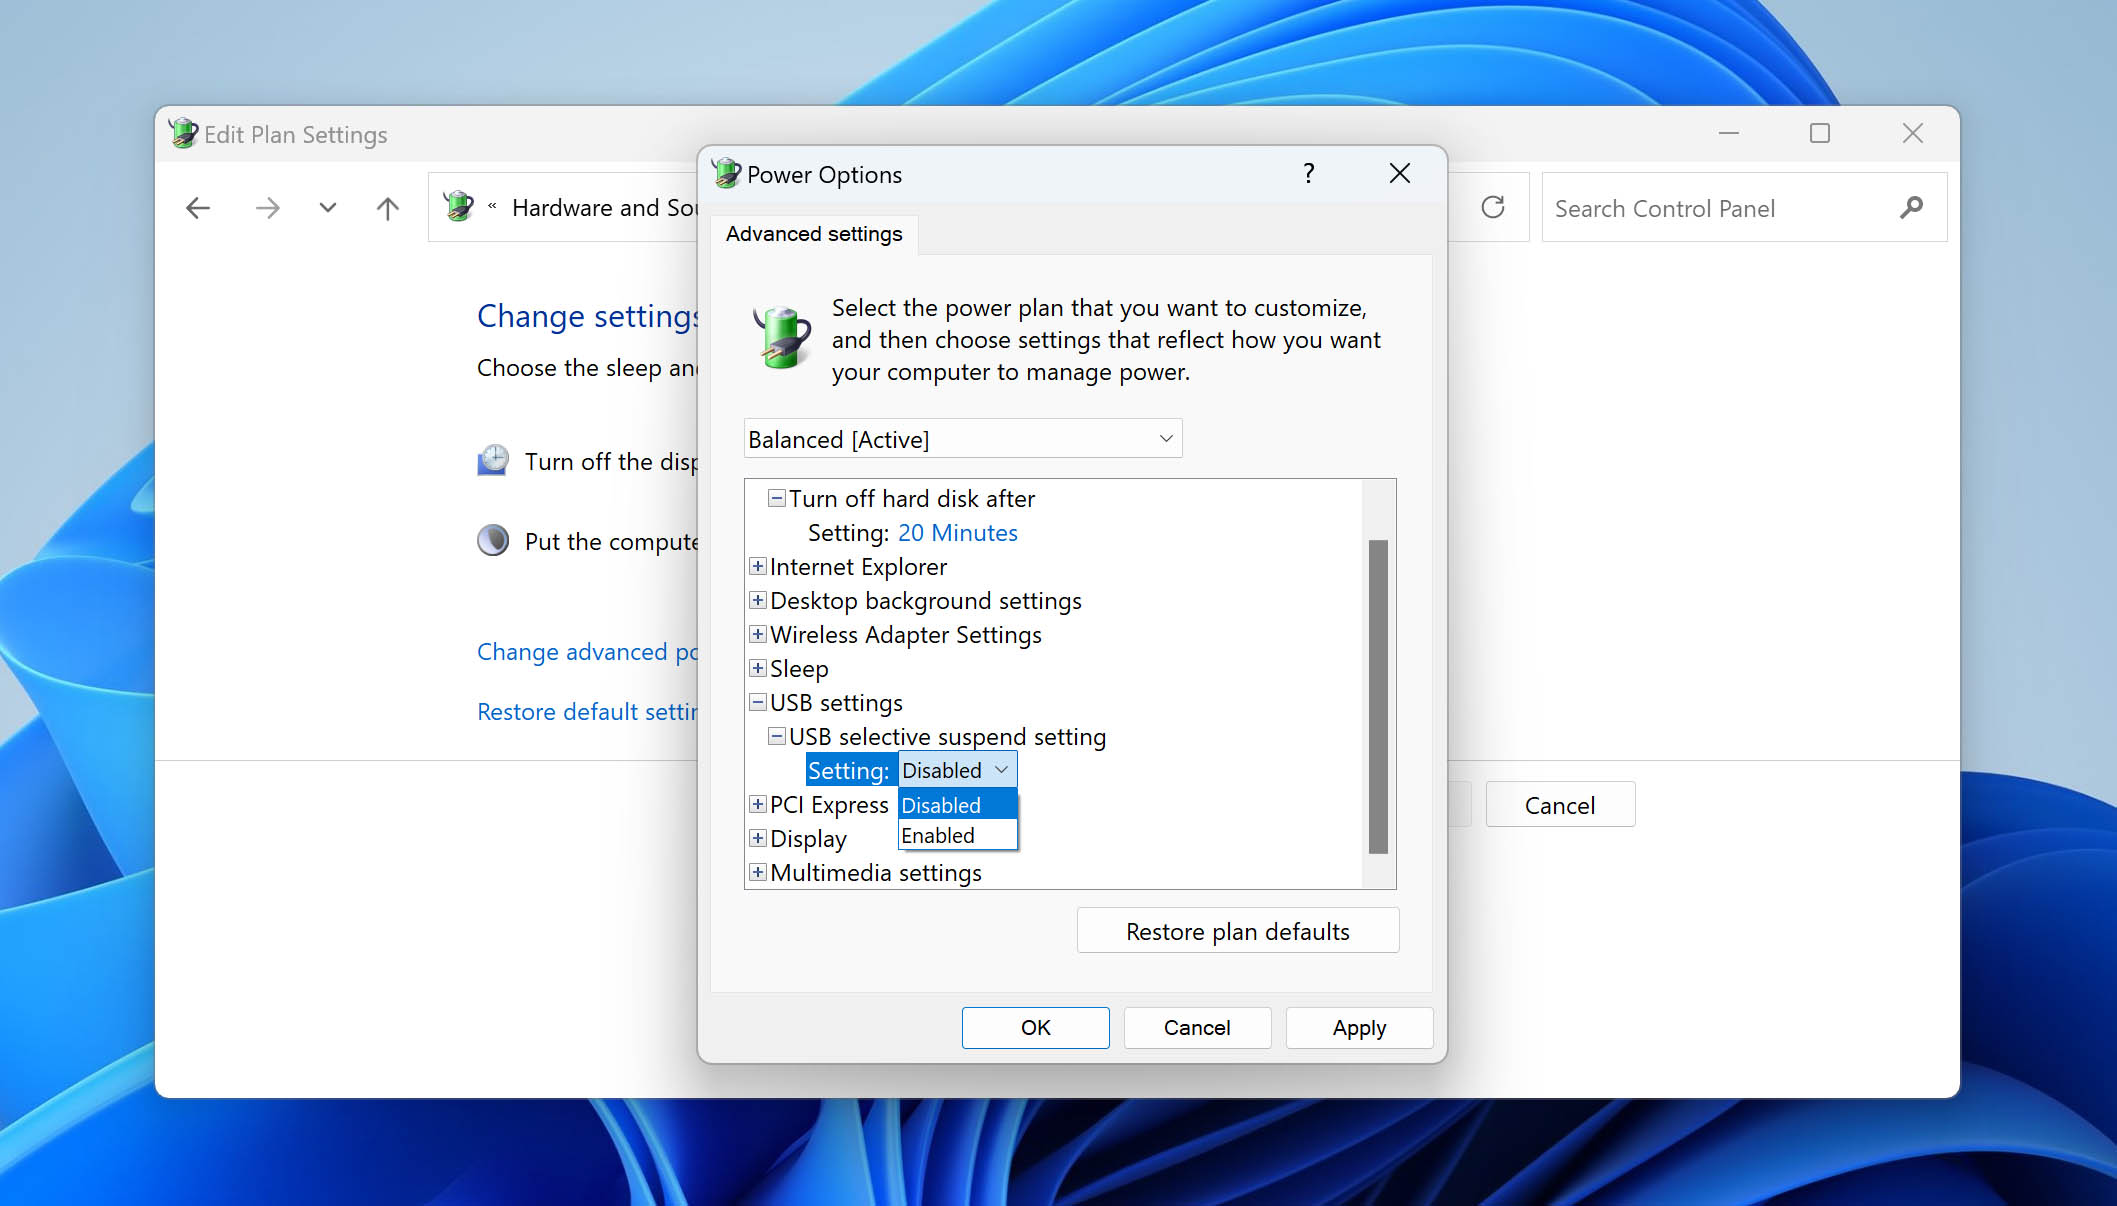
- When complete, click Apply and close the windows.
Method 6: Add or Change the Drive Letter
Windows assigns a drive letter to all connected storage devices. If the drive hasn’t been assigned one, this will result in it being inaccessible due to Windows not recognizing the external hard drive. This can easily be fixed by assigning a drive letter or changing the existing one.
- Right-click Start and click Disk Management.
- Right-click on your external hard drive and select Change Drive Letter and Paths.
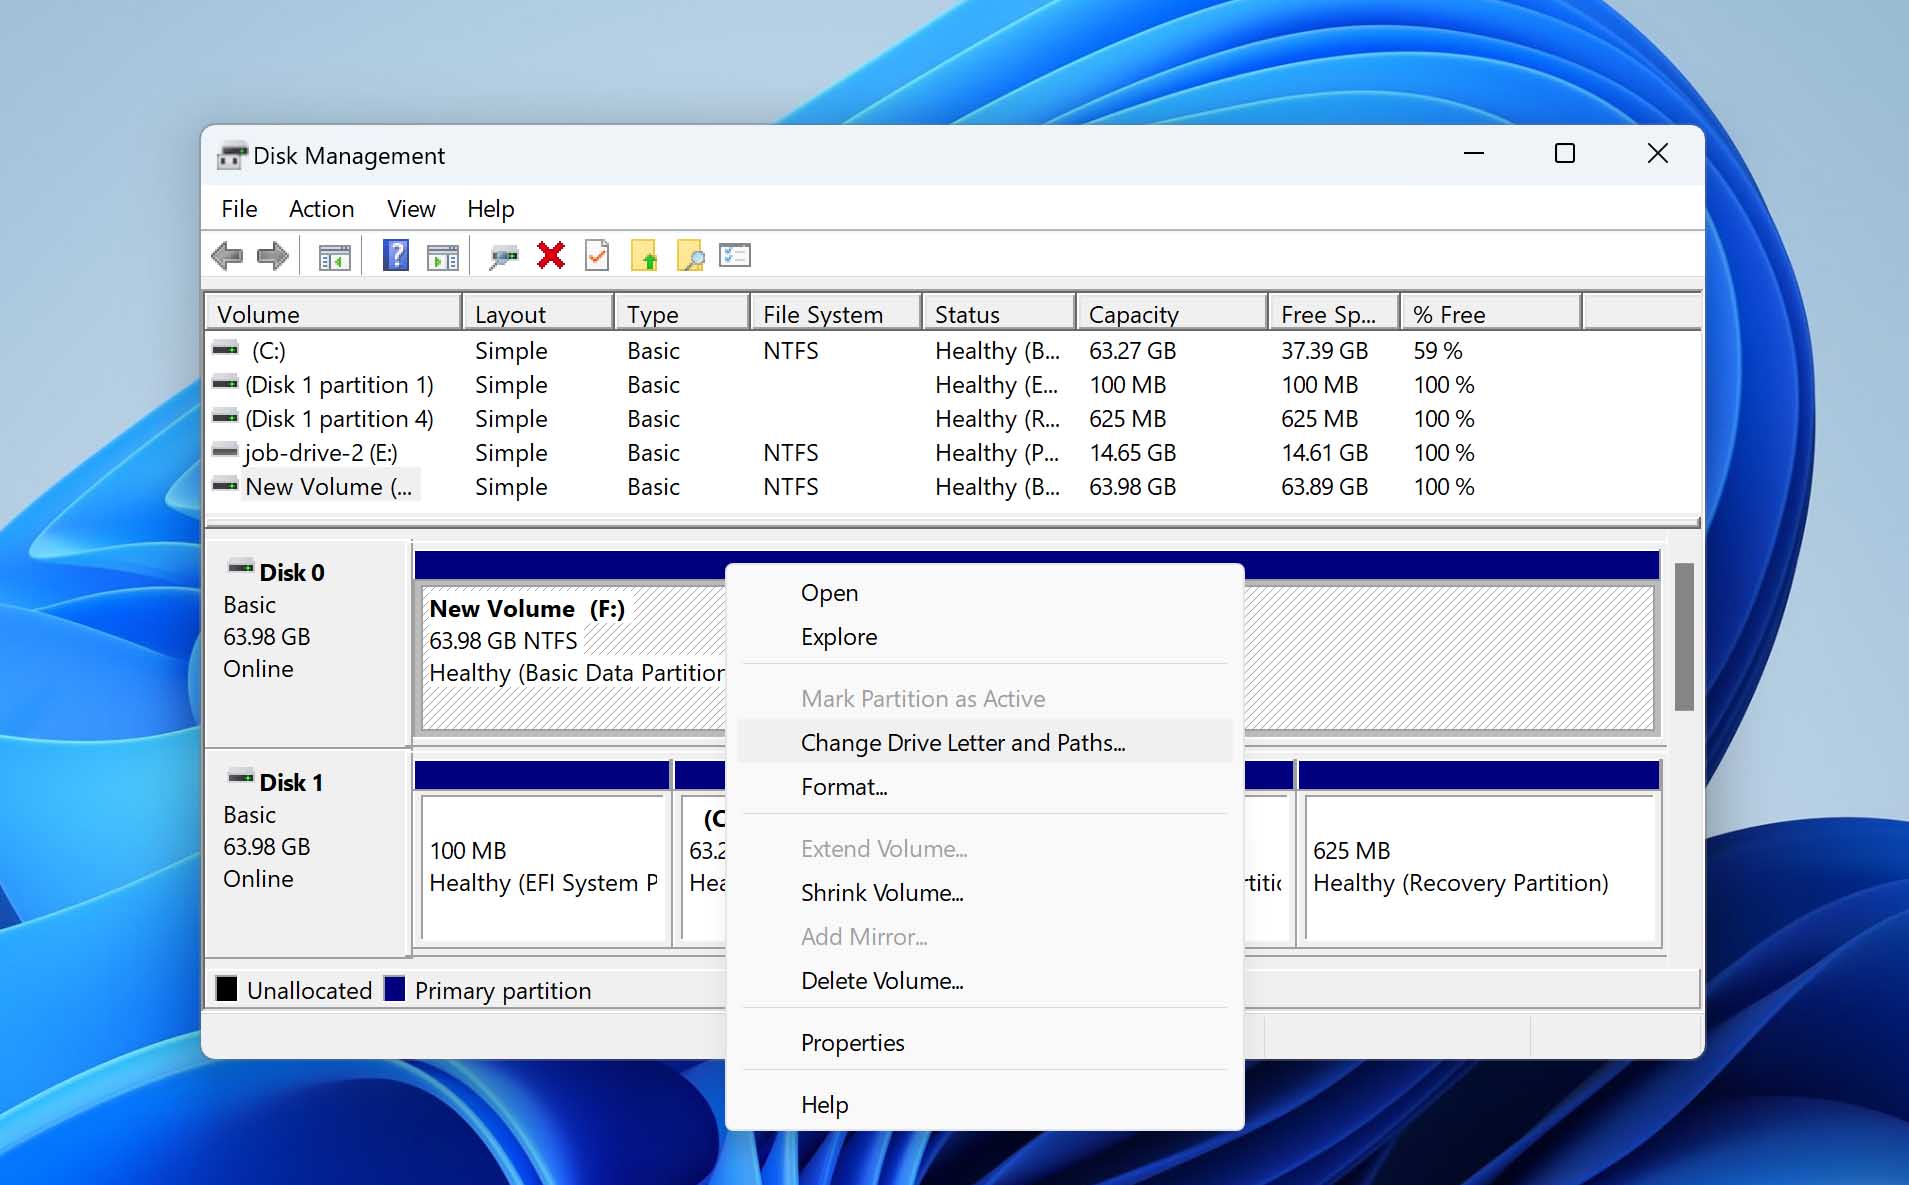
- If you have an existing drive letter, select it then click Change. If there’s no drive letter, click Add.
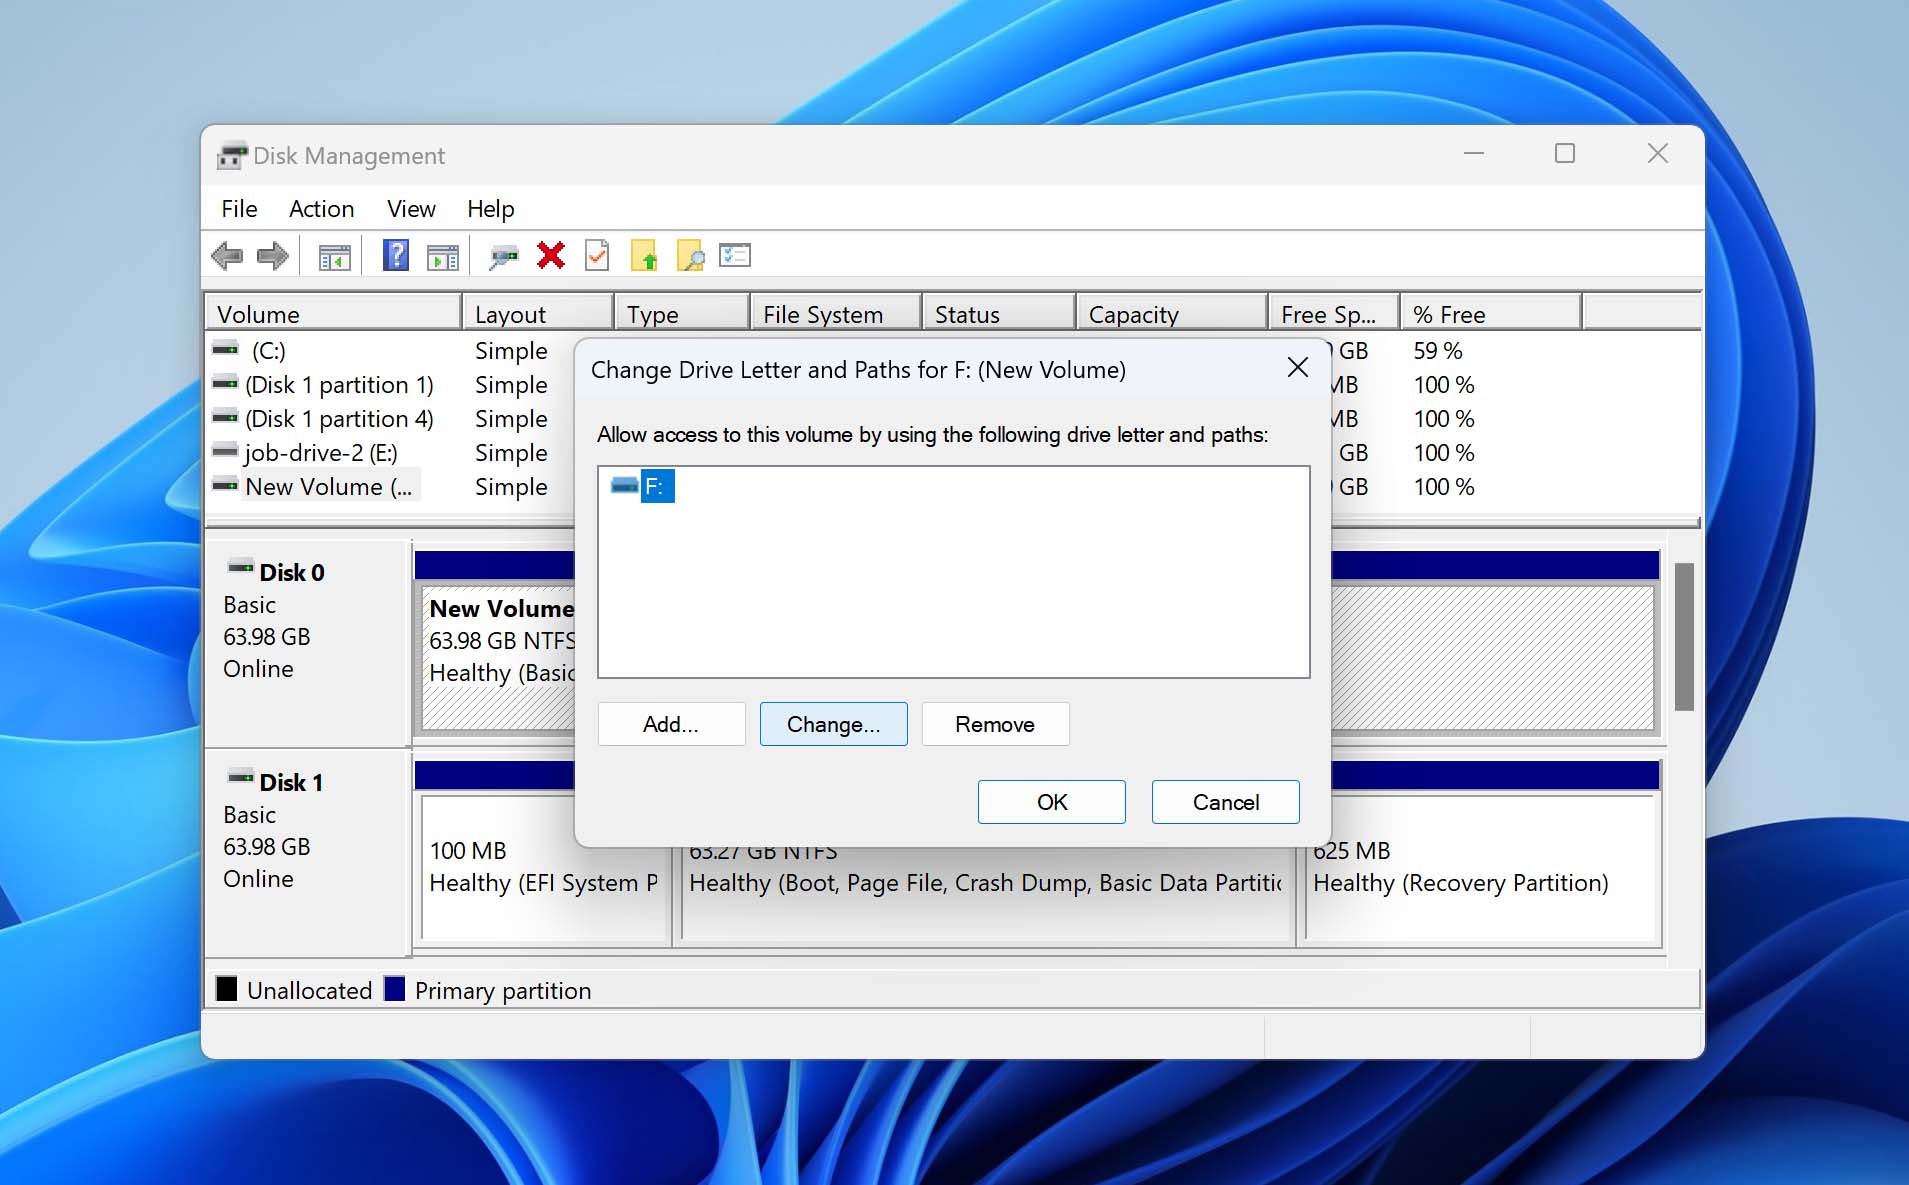
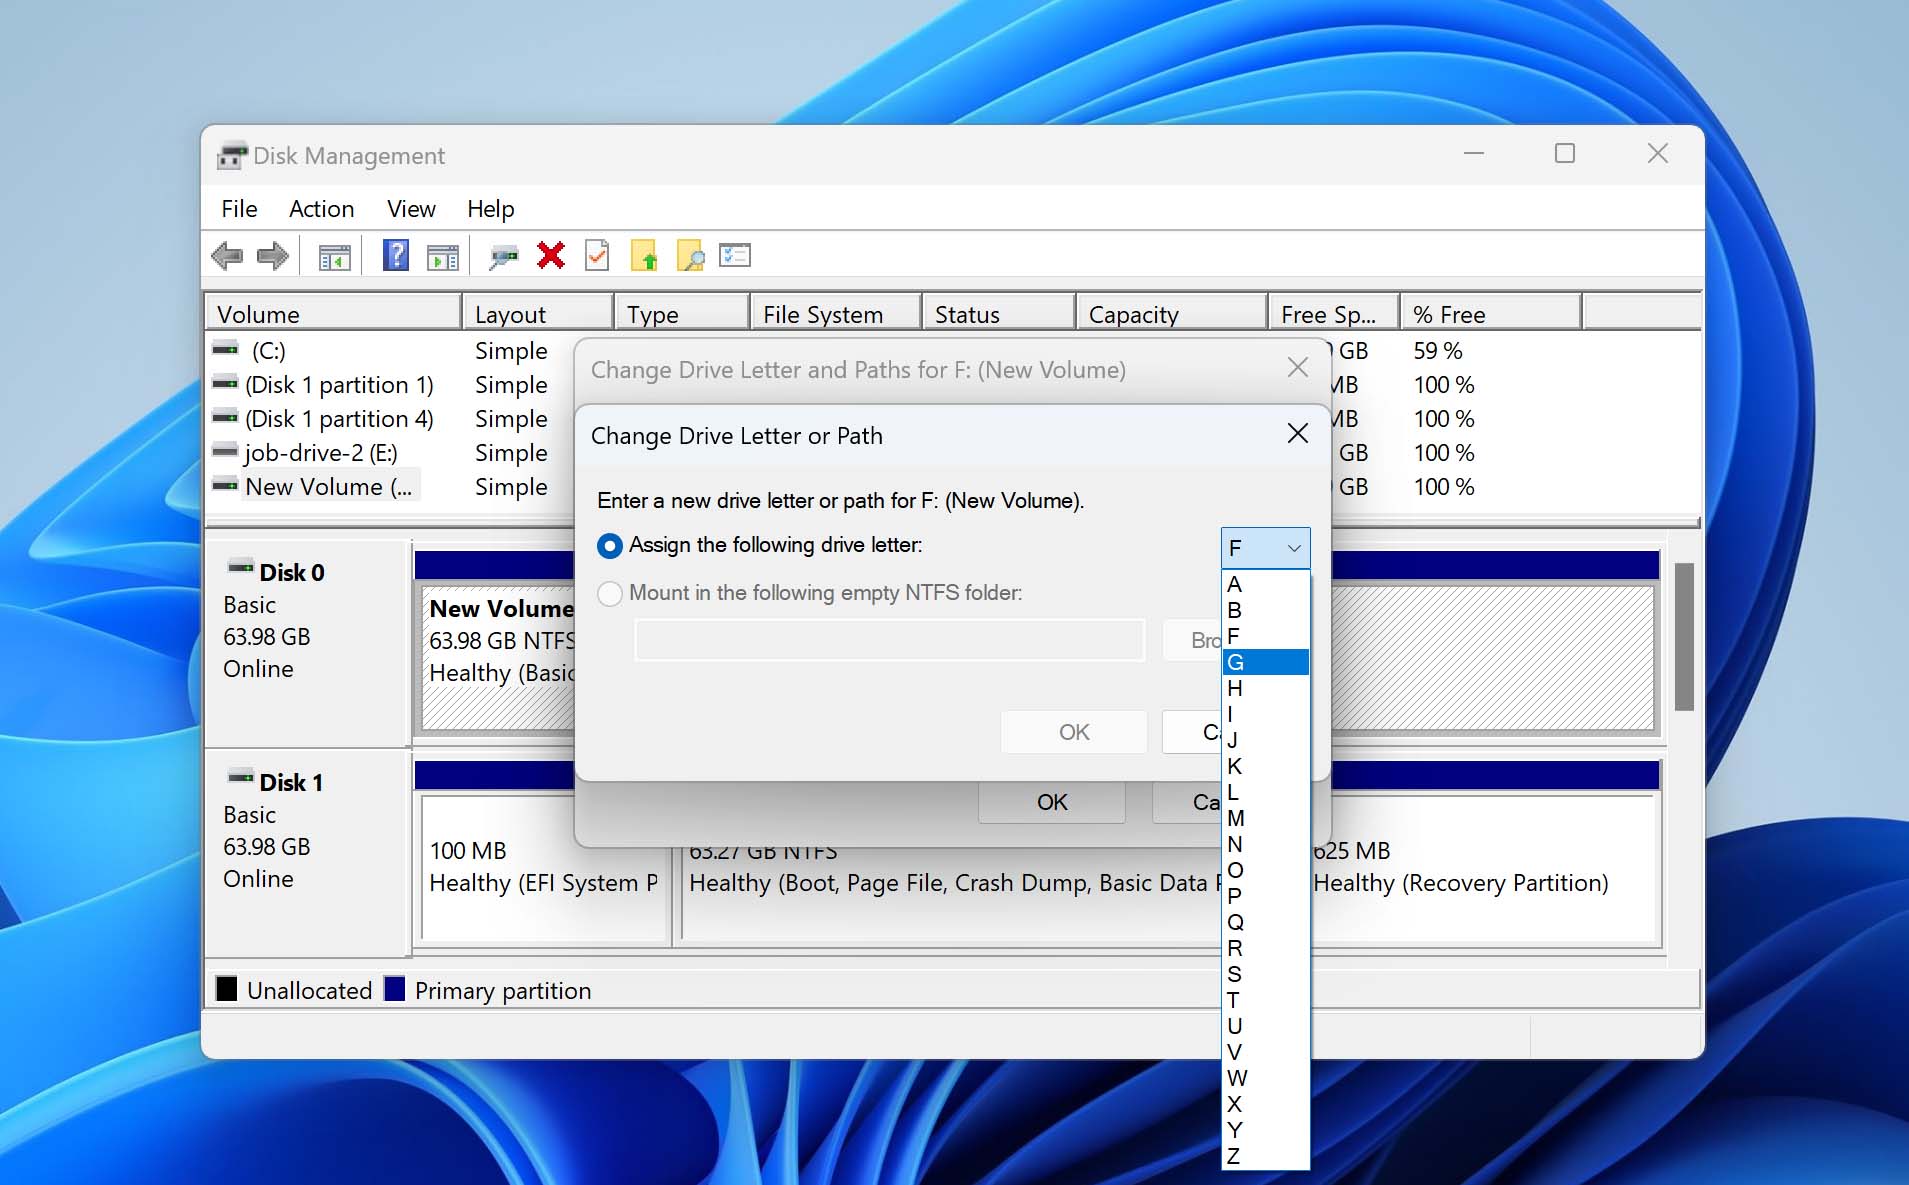
- From the dropdown menu, select a drive letter and press OK, then OK again to close the dialogue windows.
Method 7: Format the Drive
Performing a format has been a common way of fixing various logical issues with external and internal hard drives. In fact, a new hard drive not showing up may be the result of a missing file system. It involves wiping the hard drive of its contents and basically restoring it to factory settings. If all else has failed, you can try formatting the drive to see if it becomes recognizable.
Formatting the drive will delete all of the contents on it and should only be done as a last resort. Before formatting, you should recover your data through the use of data recovery software.
- Right-click Start and click Disk Management.
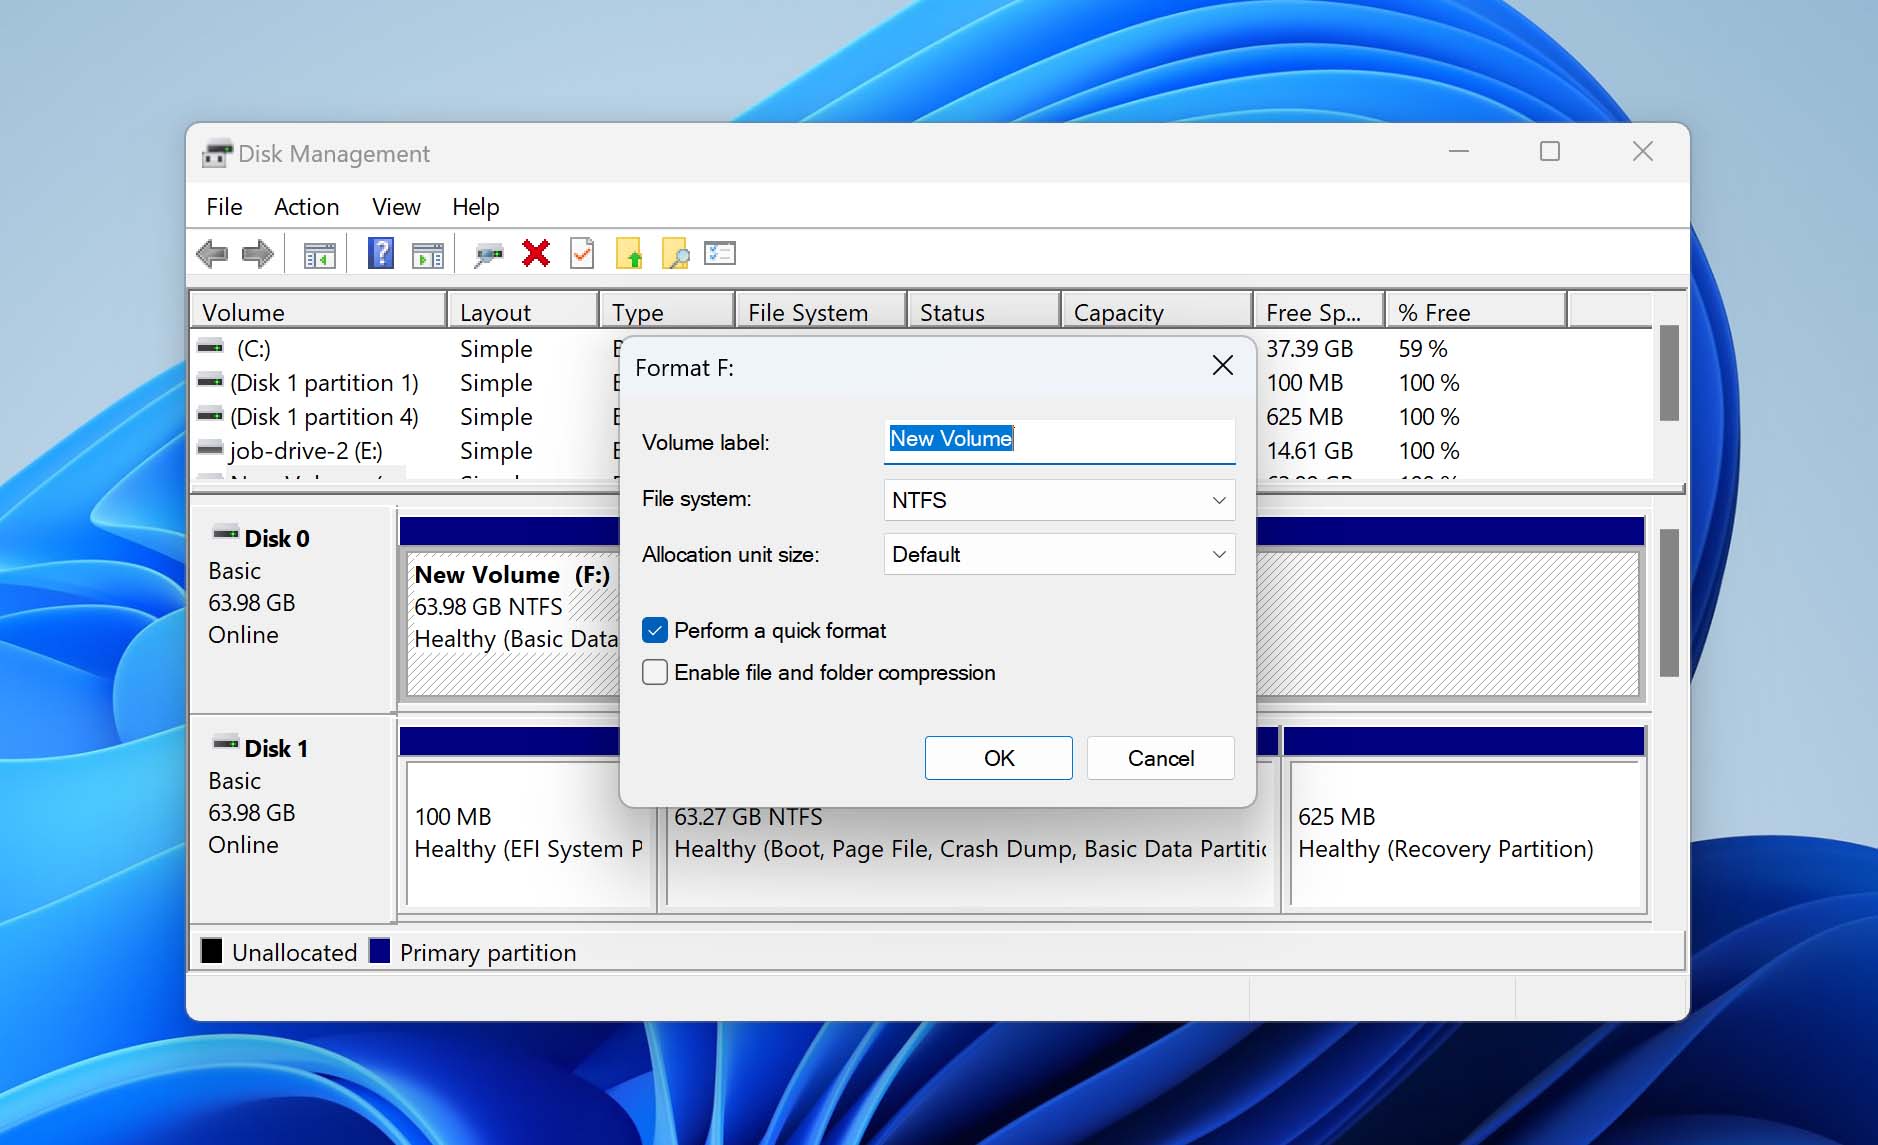
- Right-click the volume of your drive and click Format.
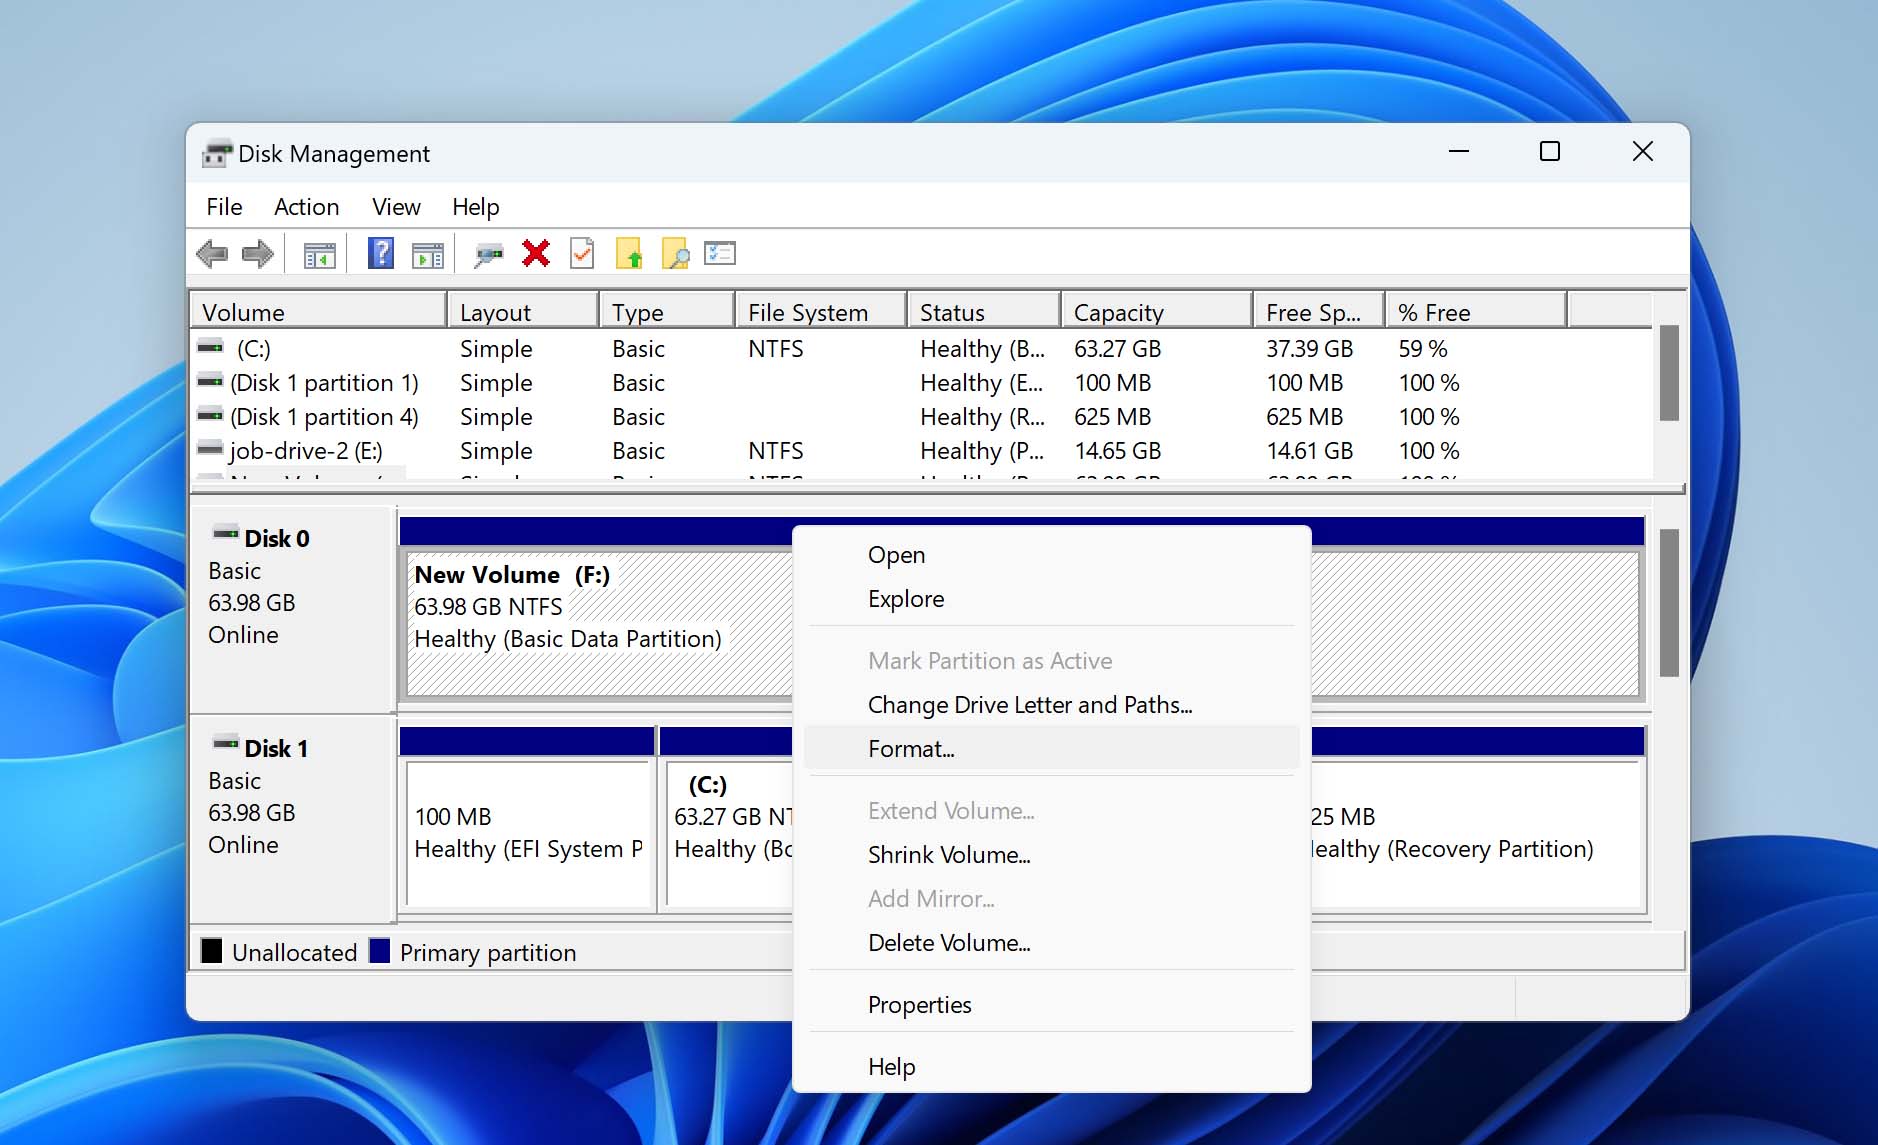
- Specify a name for the drive, as well as a file system. Ensure Perform a quick format is ticked. Otherwise, untick it for a full format. When ready, click OK.
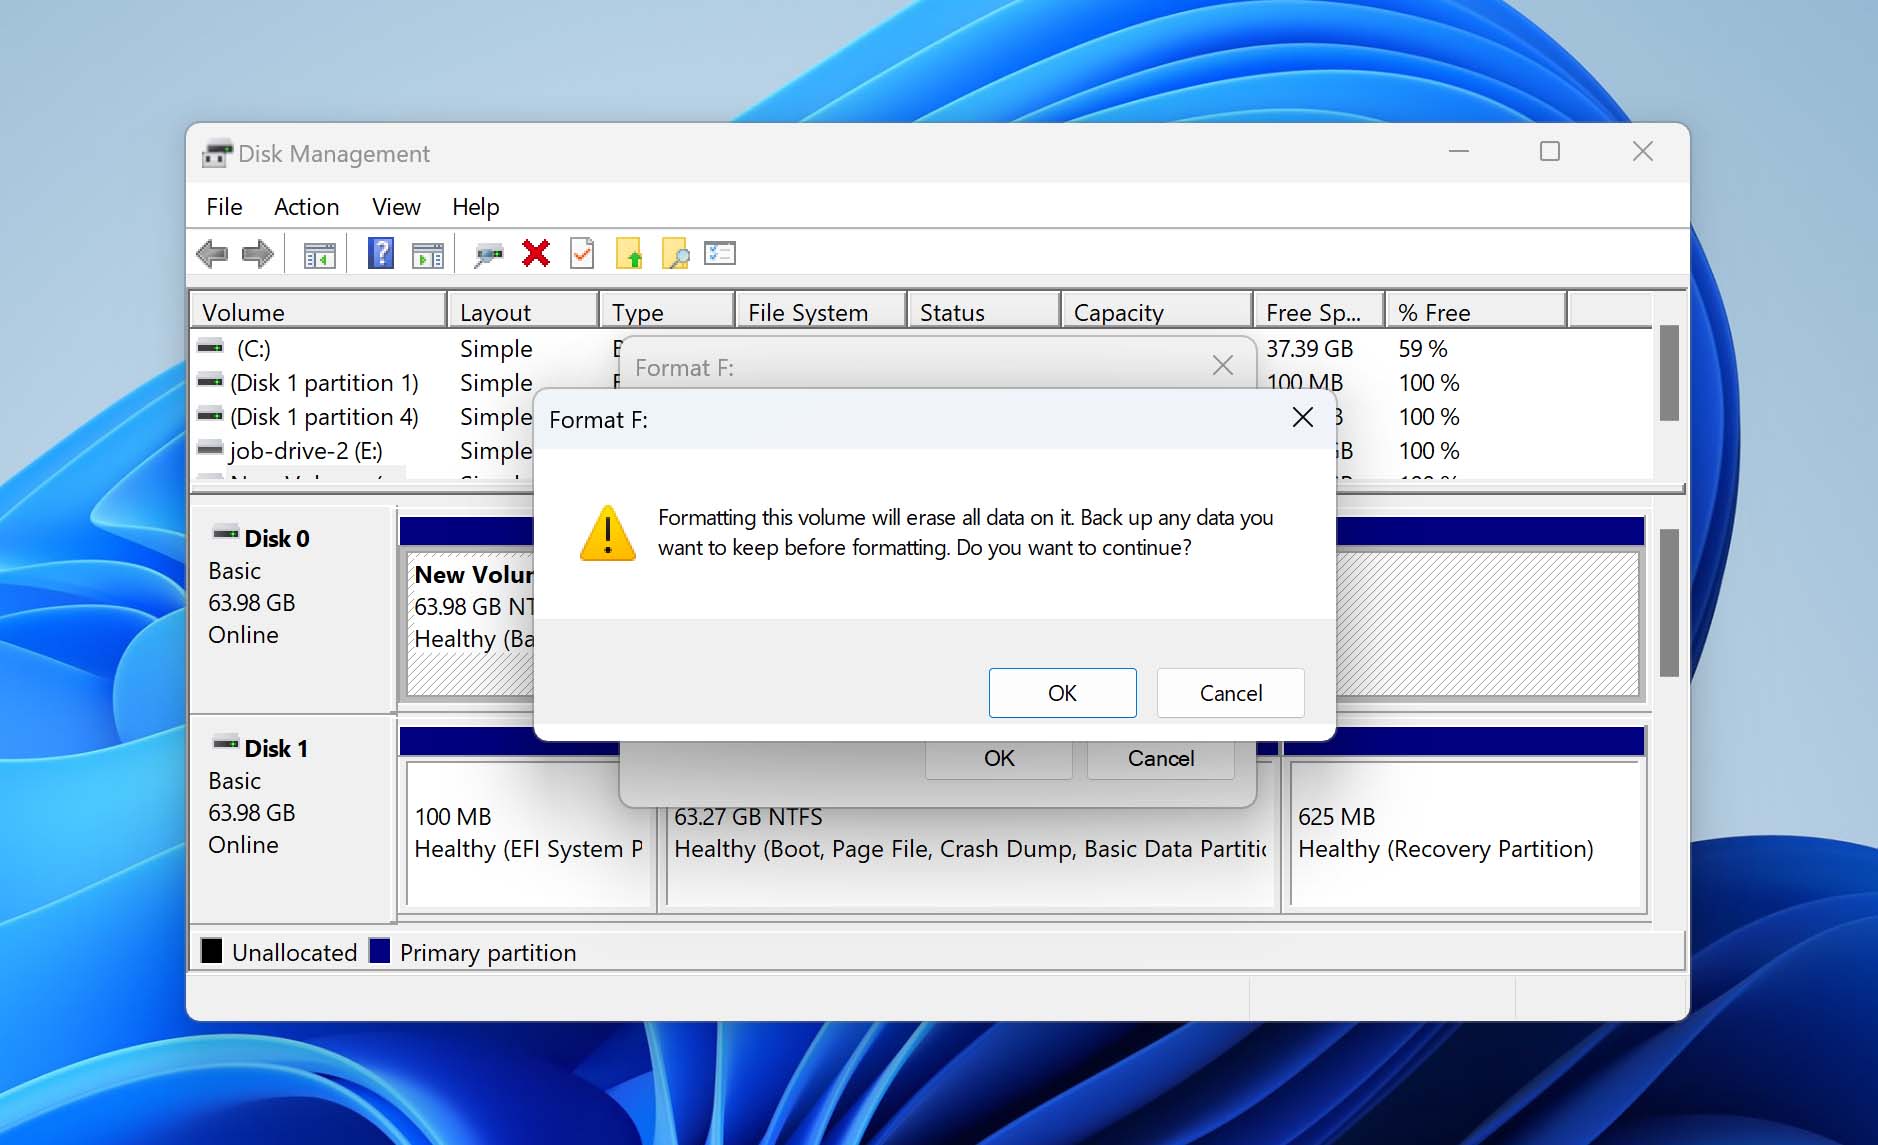
- Confirm the format by pressing OK on the warning box that appears.
How to Monitor Your External Hard Drive’s Health
Hard drives, because they contain moving components, are susceptible to issues over time. Because of this, hard drives come with their own way of measuring their performance and reliability. This is called S.M.A.R.T. (Self-Monitoring, Analysis, and Reporting Technology).
Through the Command Prompt
Windows doesn’t offer an in-depth way of checking this information natively, but you do have the option to get a basic run-down through Command Prompt.
- Press Windows Key + S and search Command Prompt. Right-click the first result and click Run as administrator. If you’re prompted to allow access, click Yes.
- Run the command wmic diskdrive get status.
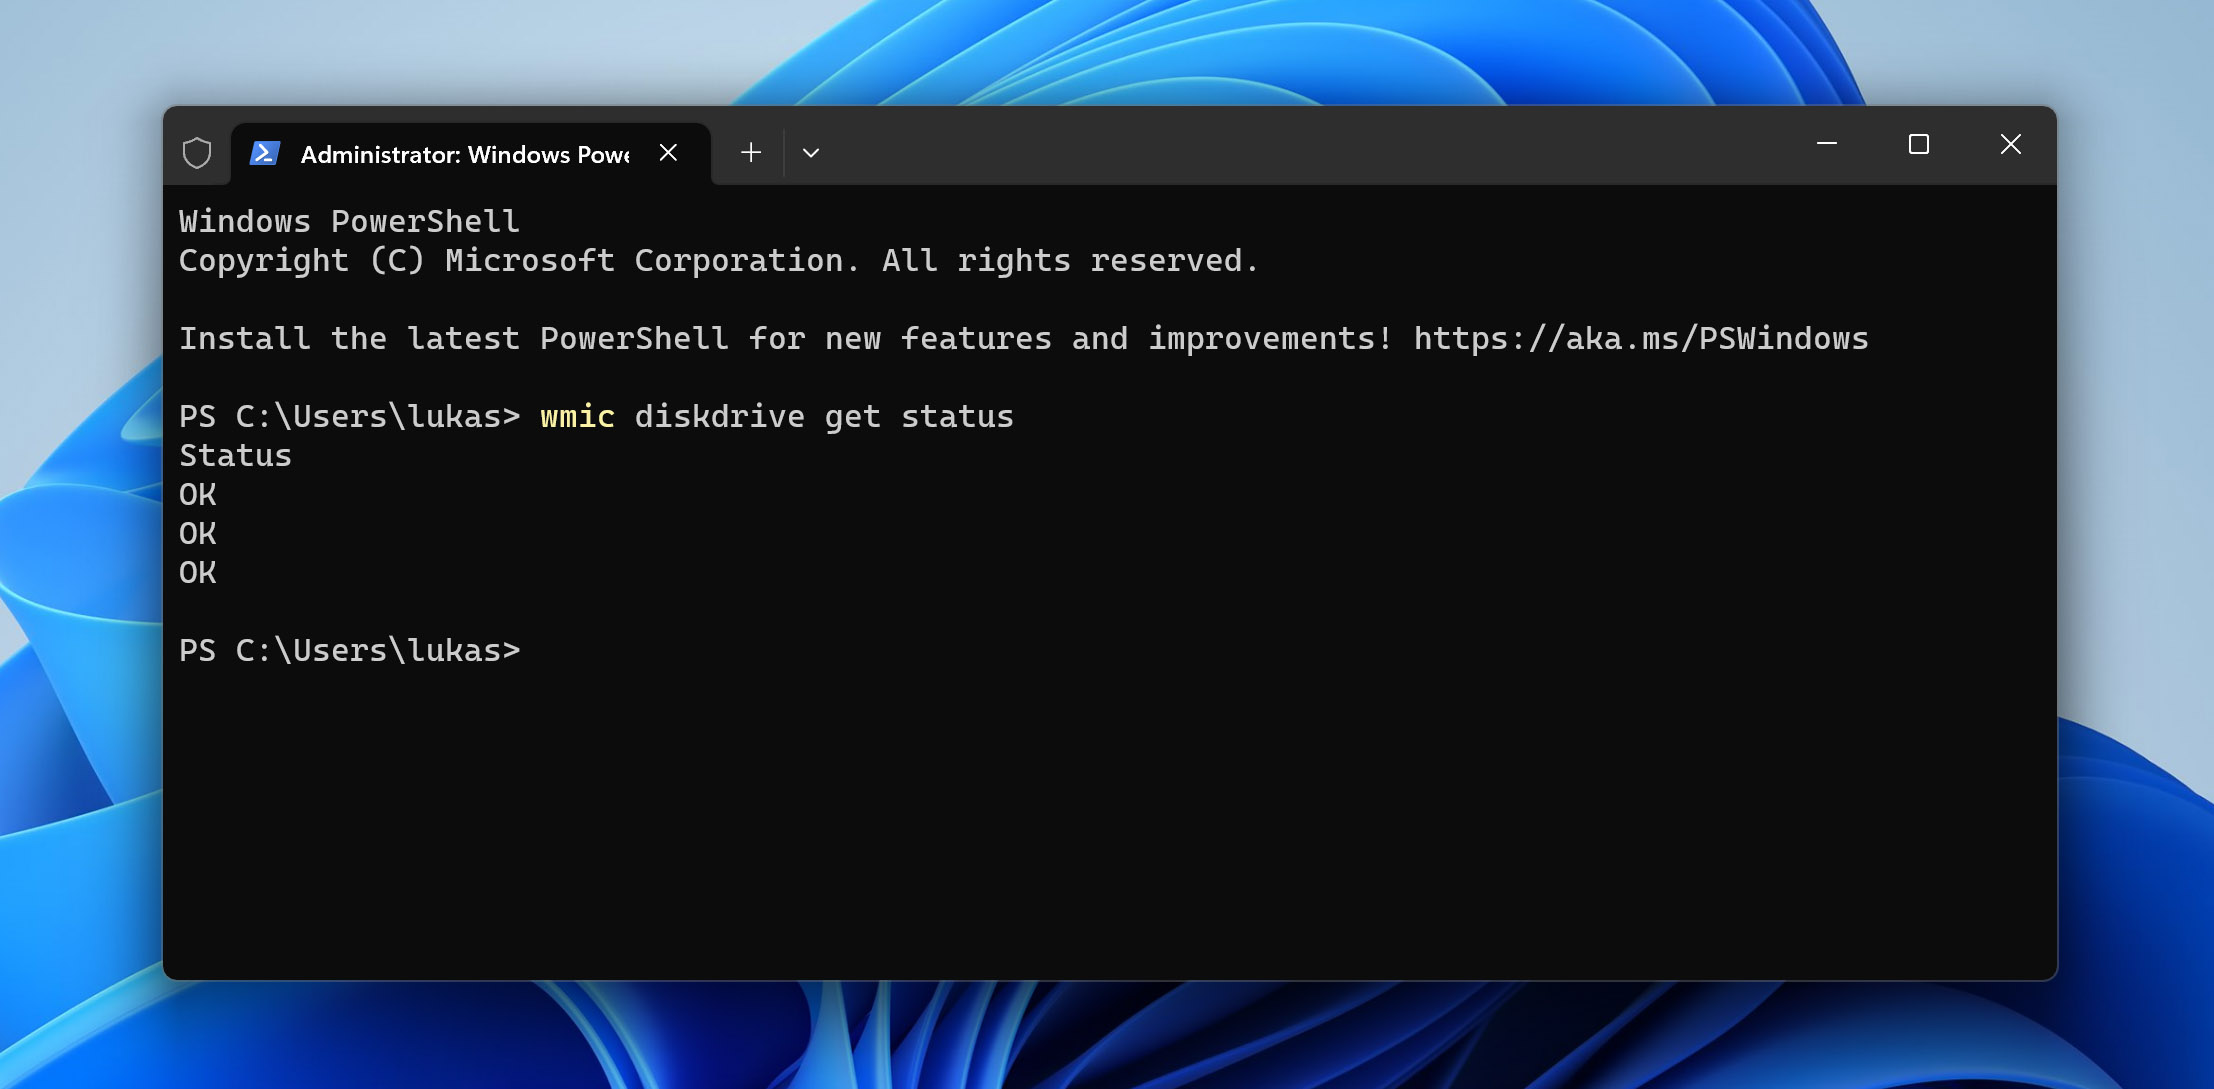
If the command returns the “OK” status for your drives, there’s nothing to worry about. However, if you see “Bad”, “Unknown”, or “Caution”, you should consider performing a full health check using third-party software to do an in-depth scan of the S.M.A.R.T. data.
Through Disk Drill
As we mentioned previously, Disk Drill is a feature-rich data recovery tool. Not only can it recover data, but it can also monitor your drive’s health and alert you if there’s anything of concern. Here’s how you can do one-off checks as well as let Disk Drill handle it for you.
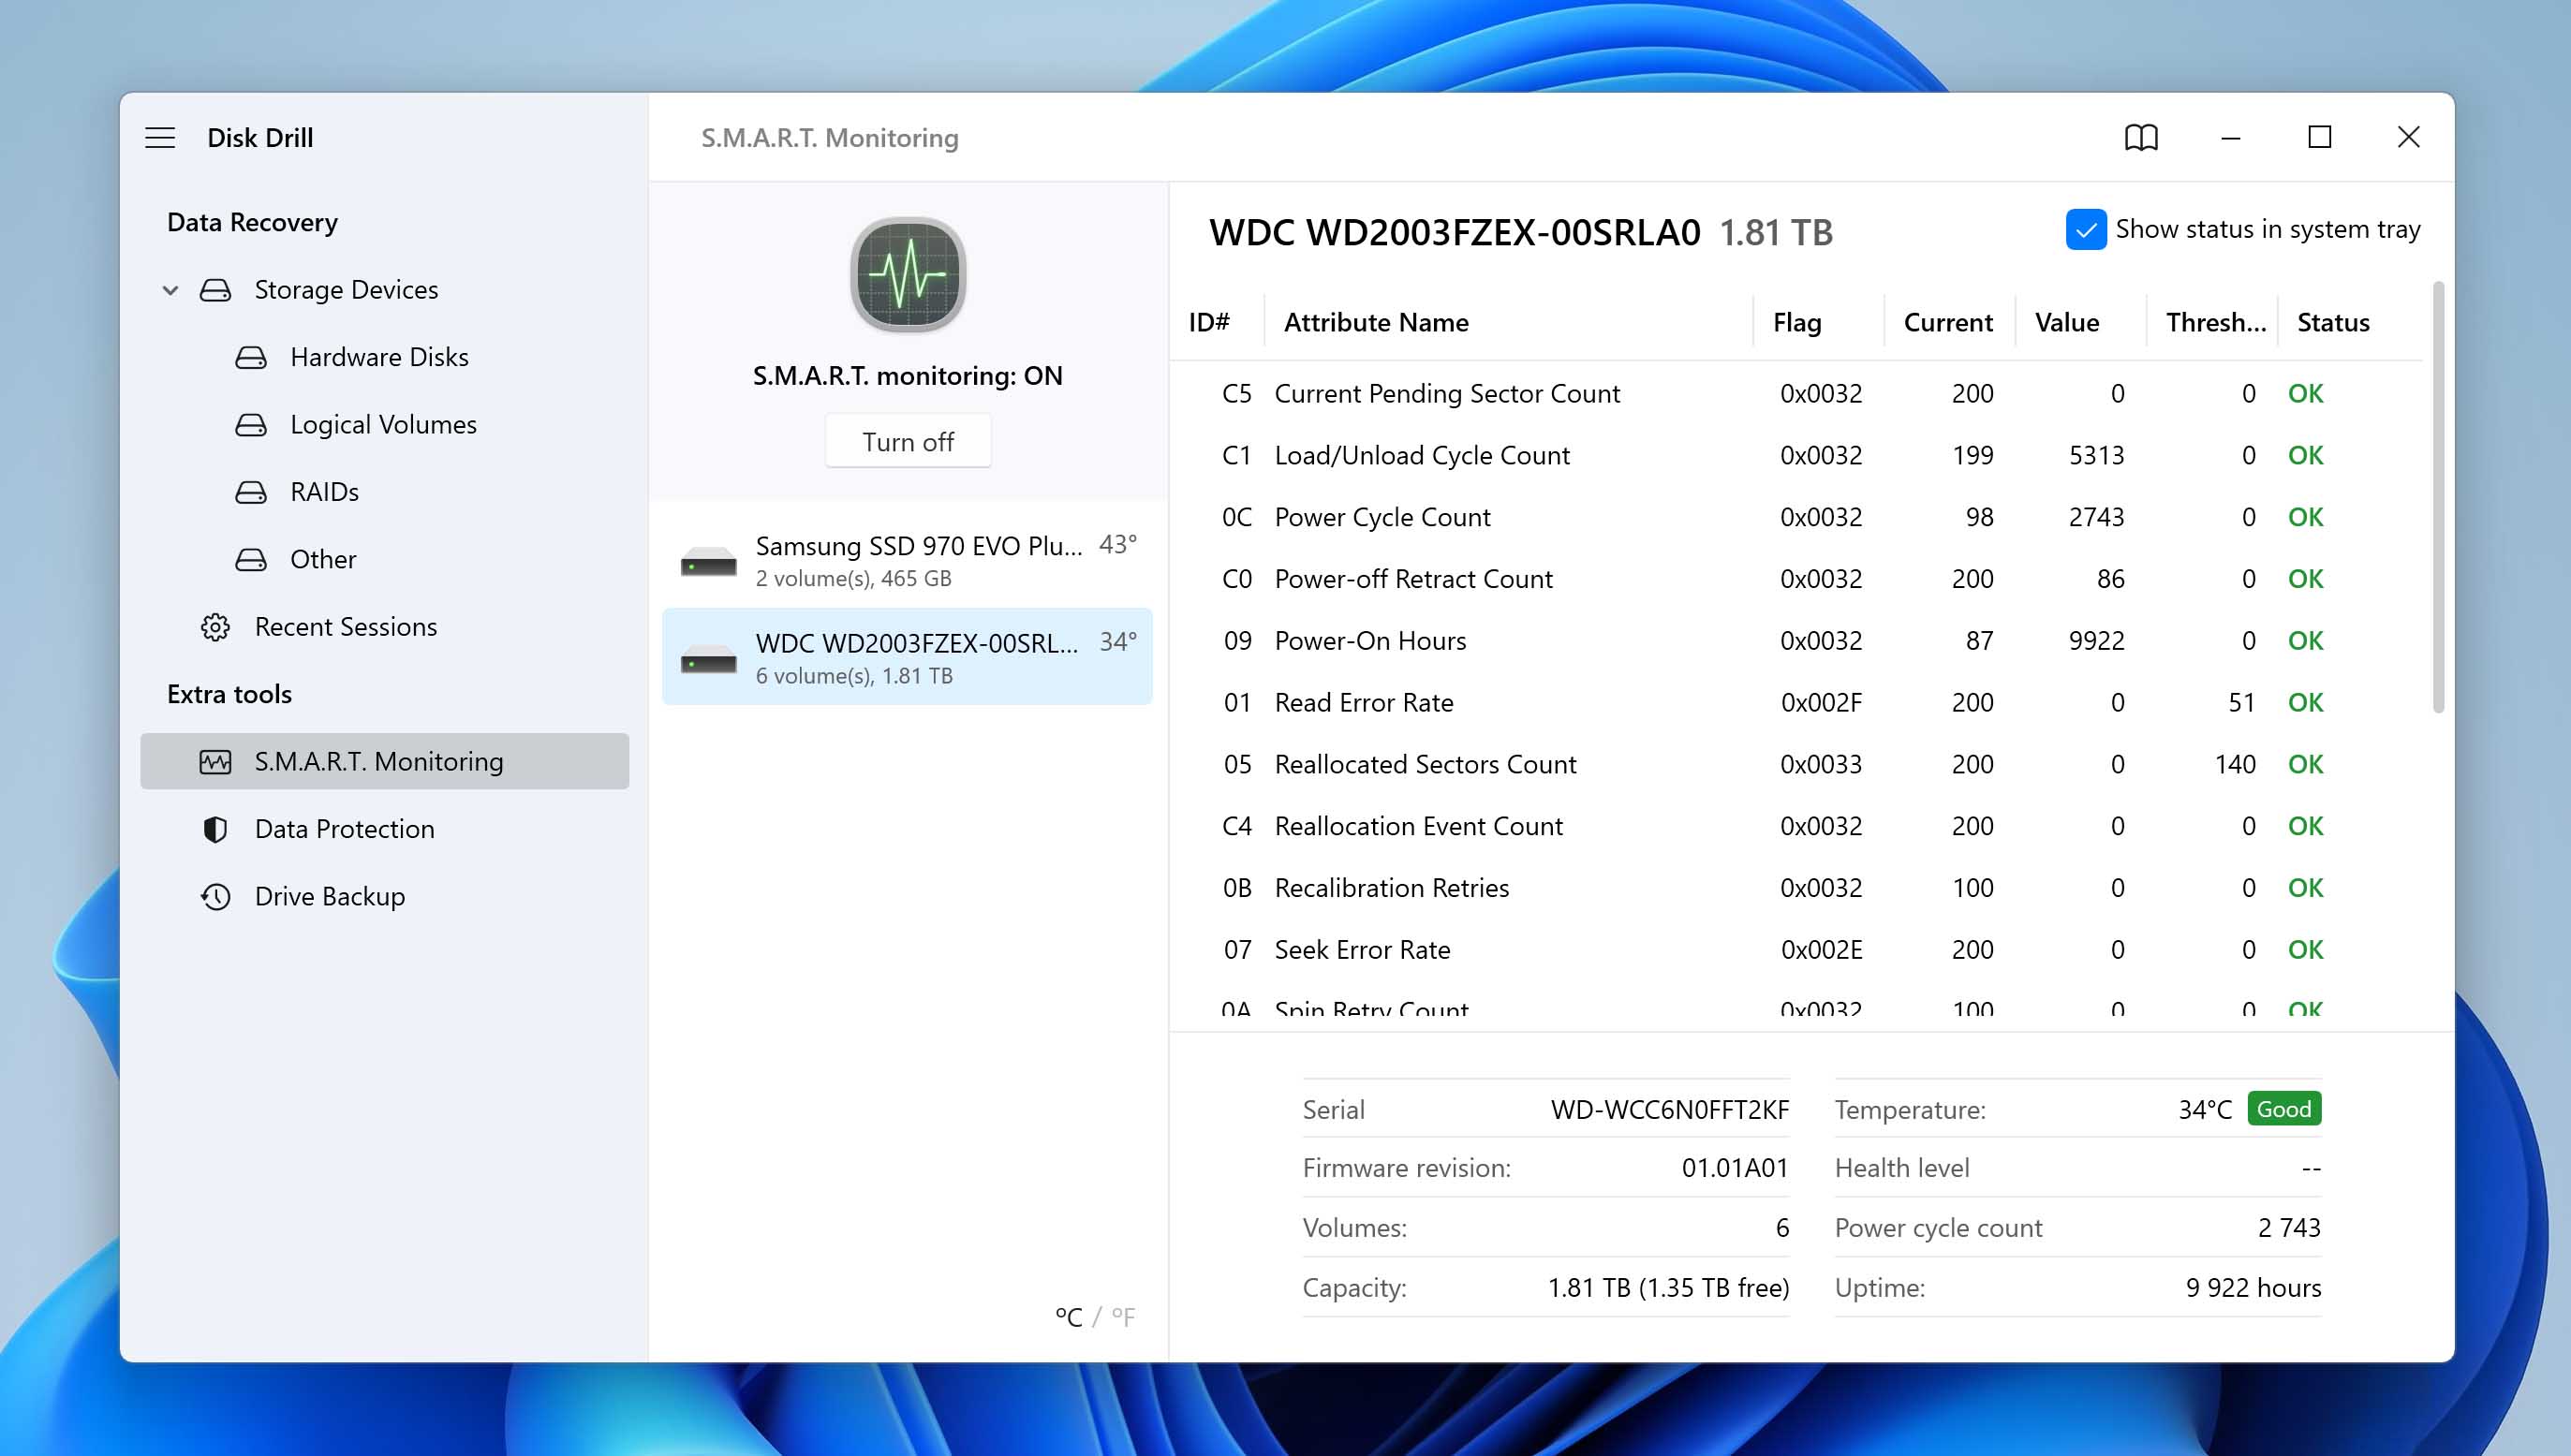
- Open Disk Drill and select the S.M.A.R.T. Monitoring extra tool in the left pane.
- Click the “Turn on” button to enable the S.M.A.R.T. Monitoring feature.
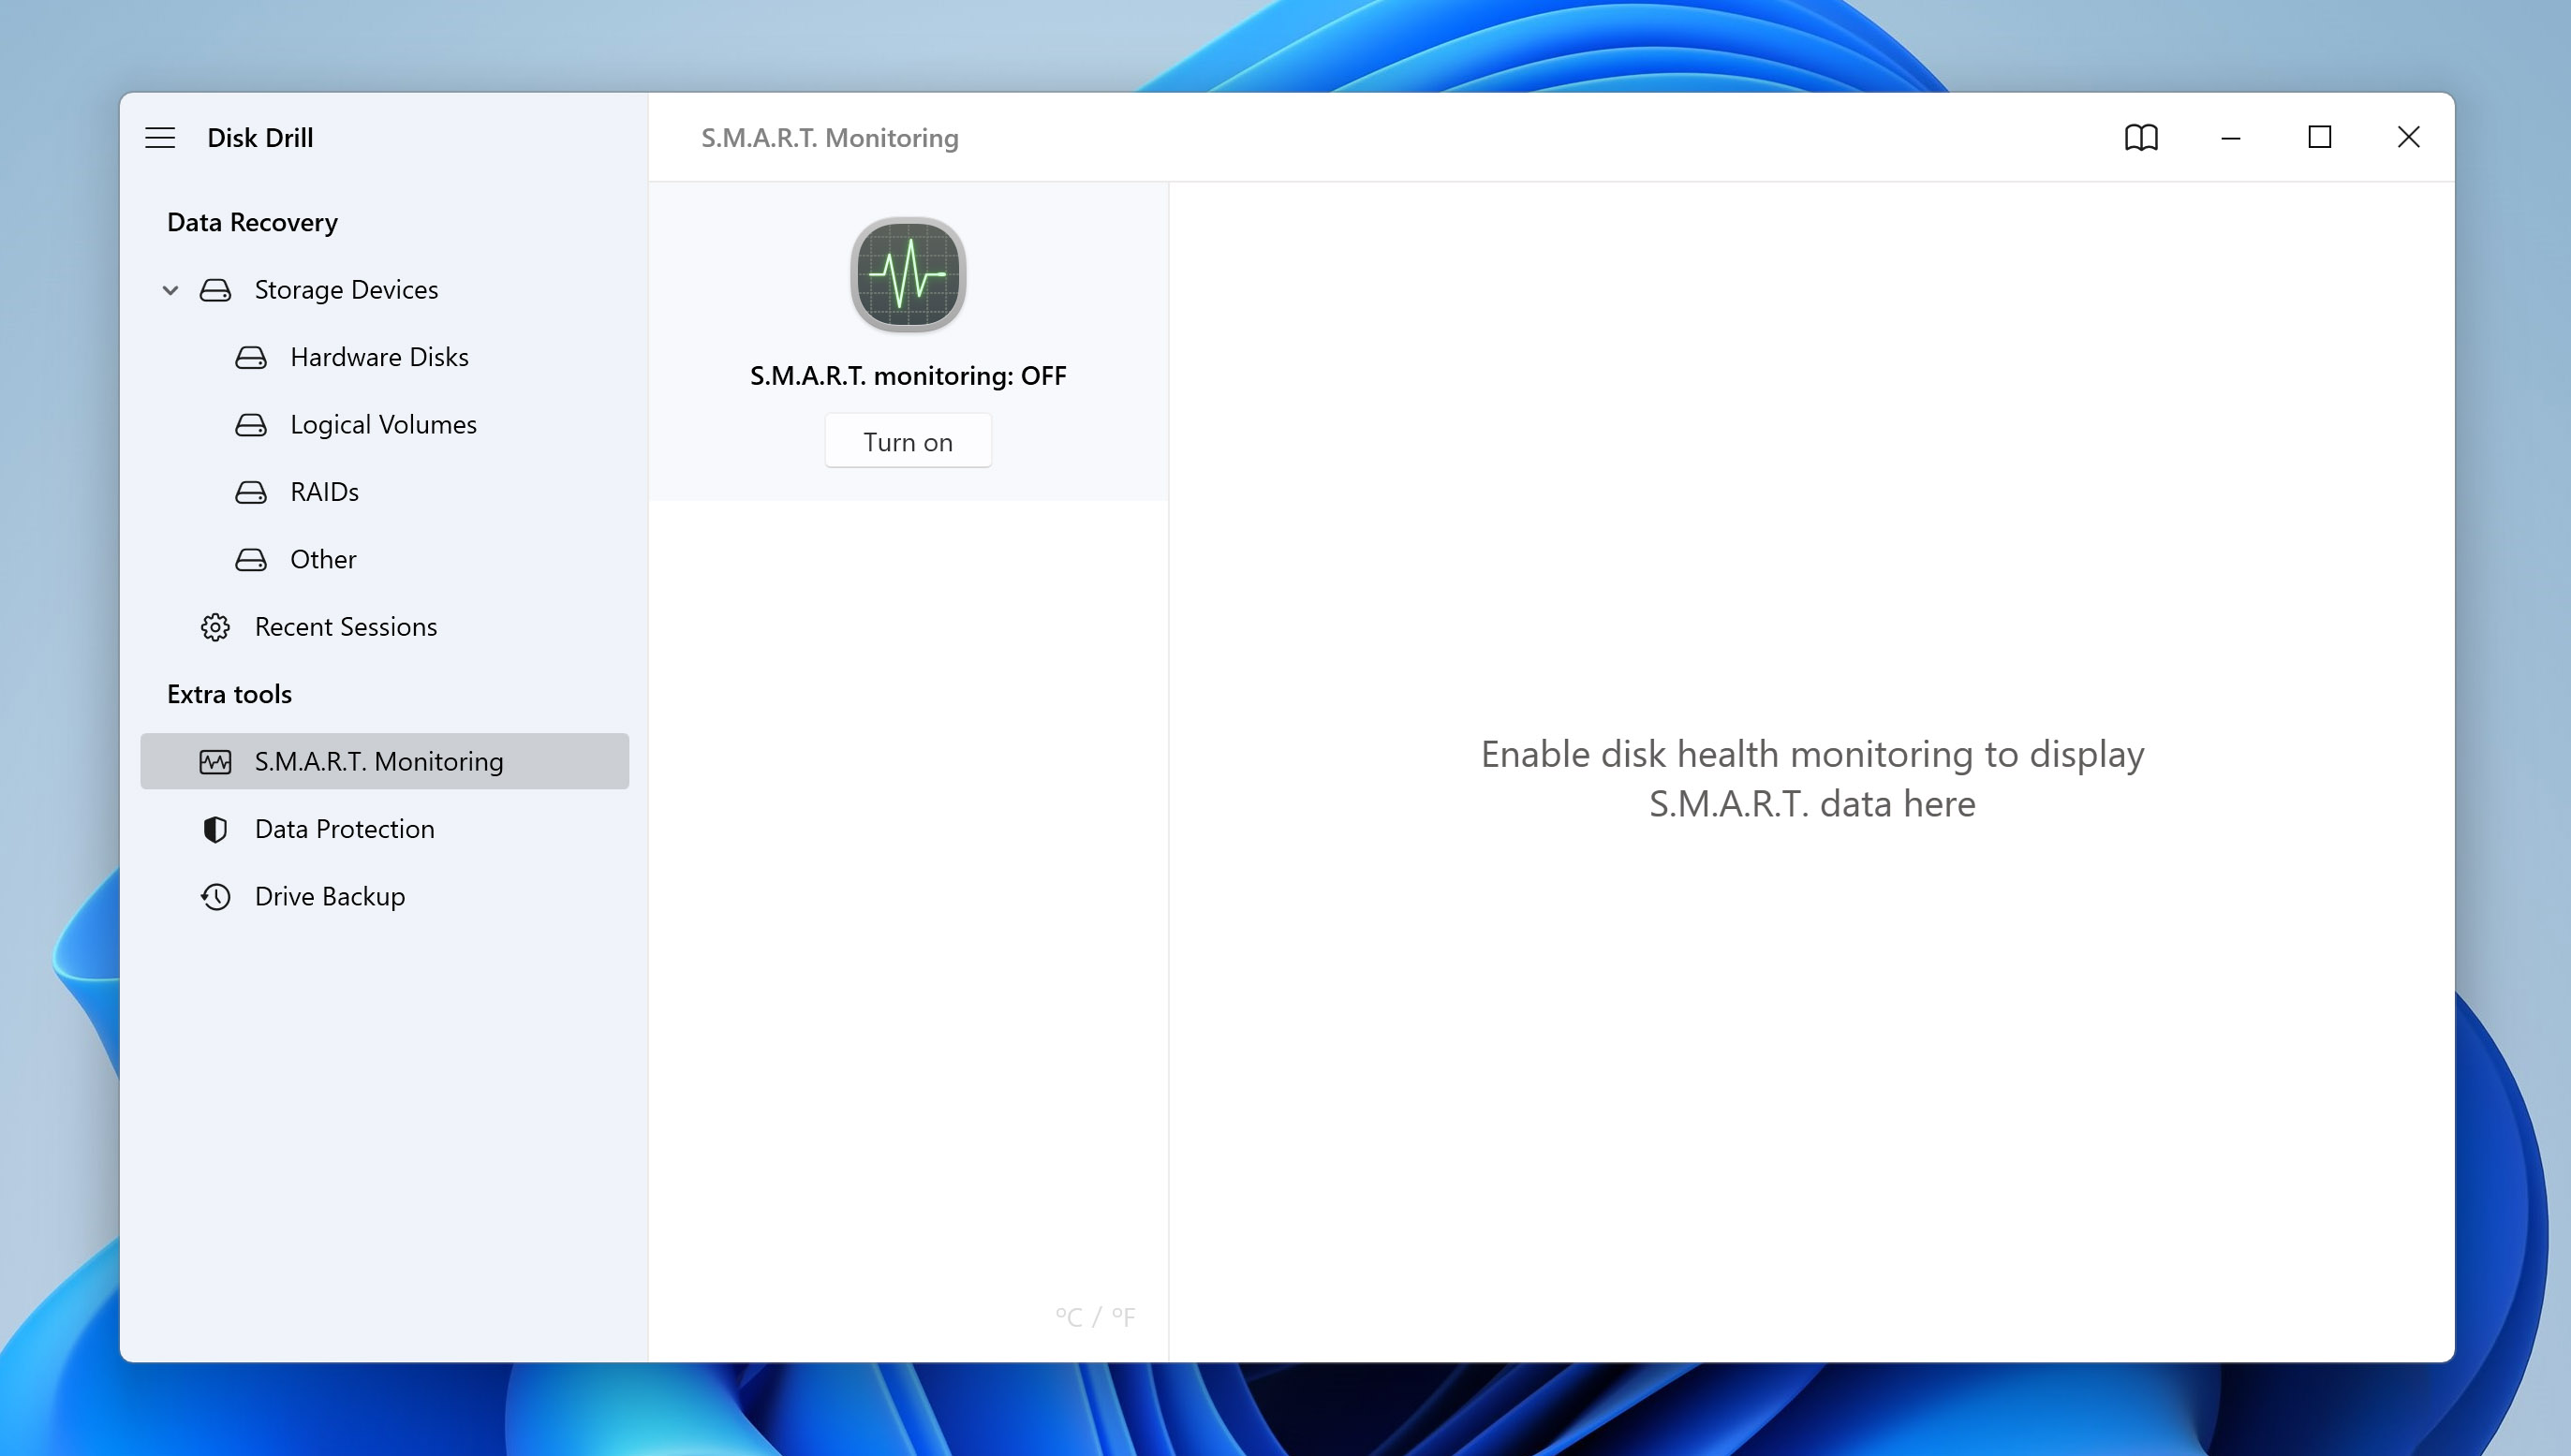
- Select the hard drive you want to monitor from the list of available storage devices. Optionally, you can click the “Show status in system tray” option so that you can conveniently see the temperature of your storage device at a glance.
Taking a proactive approach and actively checking the health of your external hard drive can help prevent issues that would usually result in your external hard disk not being detected.
FAQ
Why can't I find my external hard drive on Windows 10?
There are various issues that could result in your external HDD not showing up. Logical issues are relatively easy to fix. Physical issues may require the assistance of a professional. Common issues include:
- Outdated drivers – Your existing drivers may be corrupted. Or, they may need updating to establish communication between the external hard drive and your system.
- Faulty connection – Try plugging the external hard drive into a different port to see if it’s a port-related issue. If this still fails, try connecting it to a different computer.
- Unsupported filesystem – A filesystem that Windows doesn’t recognize (like HFS+) will result in the disk either not appearing or appearing empty.
- Insufficient power – If you’re using a USB 3.0 drive, connect it to a USB 3.0 port to ensure it receives enough power.
- Logical errors – If the file system on an external drive becomes corrupted, it may lead to logical errors that result in data becoming unreadable.
- Physical damage/b> – When external hard drives are subjected to drops, impact, or exposure to extreme temperatures or humidity, they can sustain physical damage that renders them unreadable.
Why does Windows 10 not recognize my external hard drive?
When an external hard drive isn’t recognized, it will show a message along the lines of “USB device not recognized”. Aside from trying a different USB port and device, you can try updating or reinstalling the necessary drivers:
- Right-click Start and click Device Manager.
- Expand Disk drives and right-click your external hard drive. Click Properties.
- Click to the Driver tab then click Update Driver.
- Click Search automatically for drivers. If your drivers are already up-to-date, go back to the previous window and click Uninstall device.
- Unplug the device and plug it back in again to force the drivers to install again.
How do I reset my external hard drive?
You can reset your external hard drive by formatting it. Formatting involves deleting the hard drive’s existing contents and specifying a file system. Because this process involves deleting all of the data on your drive, you should back up your files if you want to keep them safe.
If there is data on the drive, you should back it up or attempt to recover it using data recovery software if it’s inaccessible through regular means. You can find more information about this in our article on recovering formatted disks.
- Right-click Start and click Disk Management.
- Right-click on the volume of your external hard drive and click Format.
- Specify a name for the external hard drive, as well as a file system. If you want to perform a quick format, keep Perform a quick format ticked. Otherwise, if you want a more thorough format, keep it unticked to perform a full format. When ready, click OK then OK again to complete the process.
What do I do if my external hard drive is not detected?
If your external hard drive hasn’t appeared after plugging it in, try plugging it into another port or device. This can help isolate whether it’s an issue with the specific port, computer, or hard drive. Afterwards, you can try using the troubleshooter offered by Windows to automatically scan for and resolve problems:
- Ensure the external hard drive is connected to the computer.
- Press Windows Key + S, search Command Prompt. Right-click the first result and click Run as administrator.
- Run the command msdt.exe -id DeviceDiagnostic to bring up the troubleshooter.
- Click on Advanced and make sure Apply repairs automatically is checked. Click Next. The troubleshooter will start to scan your system and fix potential issues.
Conclusion
Hard drives are an invaluable component for storing and transporting our data. For that reason, anything that puts us in a position where we can’t access external hard drive can be frustrating. Luckily, using the methods outlined in this article, you can fix the issues that resulted in your computer not recognizing external hard drive.
This article was written by Jordan Jamieson-Mane, a Staff Writer at Handy Recovery Advisor. It was also verified for technical accuracy by Andrey Vasilyev, our editorial advisor.
Curious about our content creation process? Take a look at our Editor Guidelines.