
Windows can prompt you to initialize a drive because of two reasons–it’s a brand new hard drive, or something caused logical damage to the partition table of an existing disk. In the latter case, you’d still want to recover data from disk before you proceed to initialize it. In this guide, we’ll show you how to effectively initialize the disk without losing data.
TL;DR: Does Initializing a Disk Erase Data?
Yes. The Windows hard drive initialization process is a sum of two parts–Windows first writes a partition table to the drive (either MBR or GPT), and then formats the drive to a recognized file system. It’s important to note that it’s the second step that is destructive, as it removes all the data from your drive.
If you’re unsure whether initializing a disk deletes data or not, you can read more about it in our related article.
Hard Drive Initialization Troubleshooting Guide
Depending on the specific scenario, there are different ways you can initialize a disk without losing data or recover data after initializing a disk. Depending on what caused a disk to be uninitialized and what stage of the initialization process was complete on the disk, it will show up differently in Windows Disk Management.
To know which solution to use in your scenario, you first need to open Windows Disk Management (simply search for it in Windows Search [Windows Key + S]), then use the following table as a guide.
Scenario |
Description |
Solution |
The hard drive asks to be initialized, but you haven’t initialized and formatted it yet. |
In this case, the drive will show up as Unknown, Not Initialized in Windows Disk Management. |
Create a byte-to-byte backup copy of the drive using Disk Drill, and scan it for recoverable data. After recovery, you can proceed to initialize and format the disk. |
The hard drive was initialized but wasn’t formatted. |
The hard drive will show up in Windows Disk Management, but with all its space unallocated. The data is still recoverable. |
Scan the hard drive for the data using Disk Drill. |
The hard drive was initialized and formatted. |
The formatting process will erase your data. However, if the Quick Format option was checked, you can still recover some of the data using a data recovery program. |
If a Quick Format was performed, use Disk Drill to scan the hard drive to recover the missing data. Contact a professional data recovery service if you performed a Full Format or are unsure. |
FYI: What is the difference between MBR and GPT (Partition)?
MBR (Master Boot Record) and GPT (GUID Partition Table) are the partition schemes used in HDDs and SSDs. When attempting to initialize a disk, Windows will prompt you to choose between the two. In modern disks and operating systems, the typically used partition scheme is GPT.
There are several differences between the two partition schemes. Some of these include:
Category |
MBR (Master Boot Record) |
GPT (GUID Partition Table) |
Storage and partition support |
Supports up to 4 partitions and up to 2 TB of disk space. |
Supports unlimited partitions and up to 9400000000 TB of disk space. |
System architecture |
Works on 32-bit and 64-bit systems. |
Works only on 64-bit systems. |
Operating System support |
Only works with Windows. No support for Mac. |
Works on 64-bit versions of Windows 7 and Windows Vista. It also supports Windows 8, Windows 10, and Windows 11 by default. Compatible with macOS by default. |
Boot speed |
Slower boot speeds as it only works with legacy boot mode in motherboards. It doesn’t work with UEFI. |
Faster boot speeds as it supports UEFI motherboards and can take advantage of the extra speed. |
How to Initialize a Disk Without Losing Data
The ideal way to initialize an HDD or SSD without losing data is to first restore the previous data and then proceed to initialize the disk.
An excellent way to get back your data, is to use third-party DIY data recovery apps. In our tutorial, we’ll use Disk Drill Data Recovery since it is easy to use, while being highly effective. It supports all storage device types including HDDs, SSDs, SD cards, USB drives, external hard drives, and more. To test the program, you can take advantage of Disk Drill’s free trial which lets you recover up to 500 MB of data for free.
Method 1: Create a Byte-to-byte Backup of Your Drive and Recover Data
Disk Drill lets you create a byte-level disk image of your drive using its Byte-to-byte backup feature. You can then scan the disk image and retrieve existing data from your drive. It also prevents further stress to the physical disk drive.
Here is how you create a disk image using Disk Drill:
- Download Disk Drill and install it.
- Connect the uninitialized drive to your PC or, in case of an internal drive, select it from the list that’s displayed in step 4.
- Open Disk Drill and click the Drive Backup option under Extra Tools. You can find this in the left navigation bar.
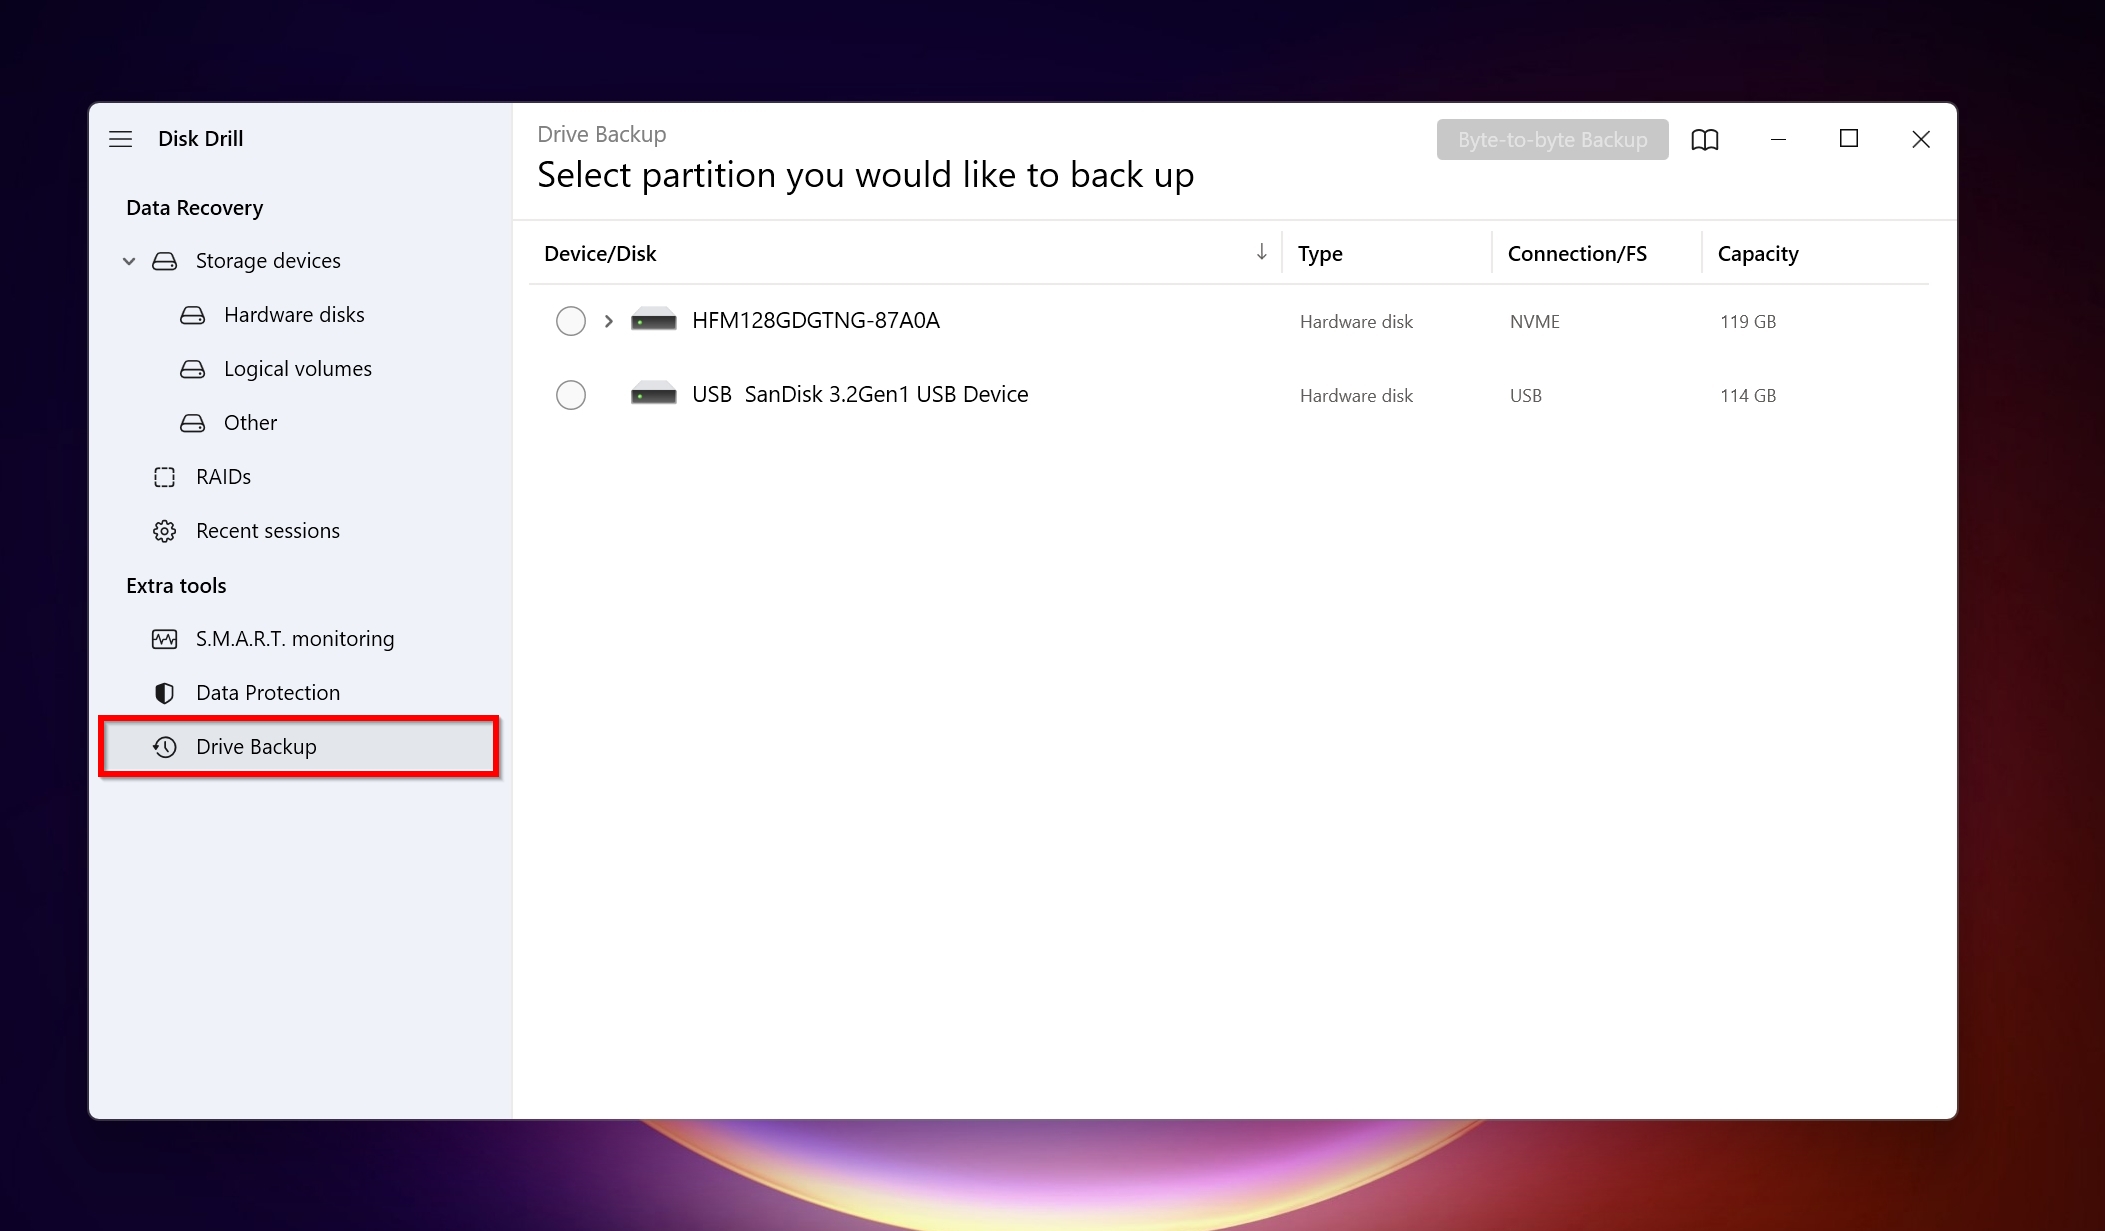
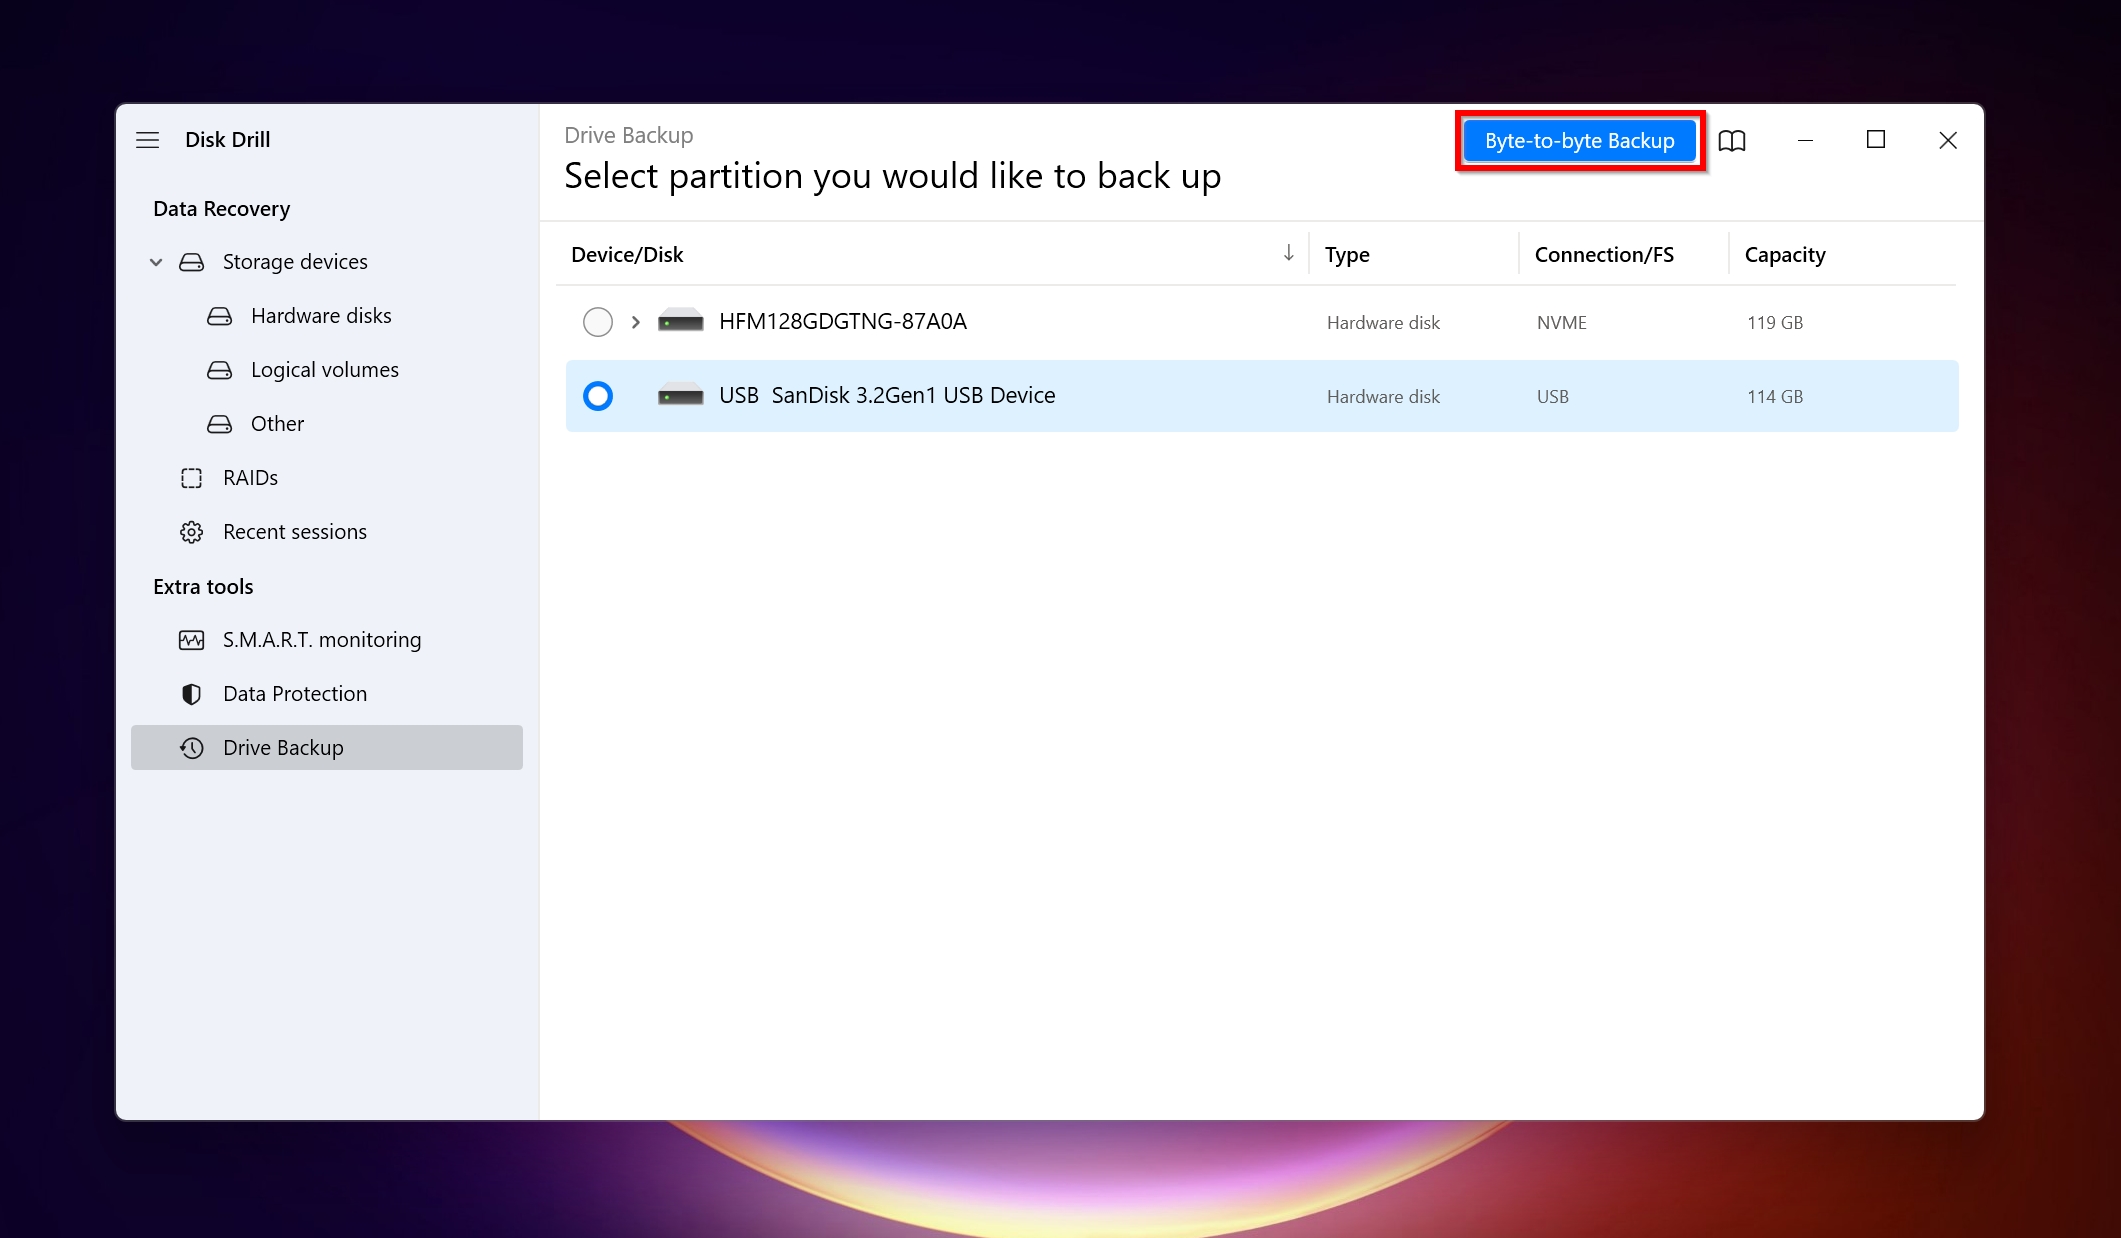
- Select the uninitialized disk and click the Byte-to-byte Backup button.
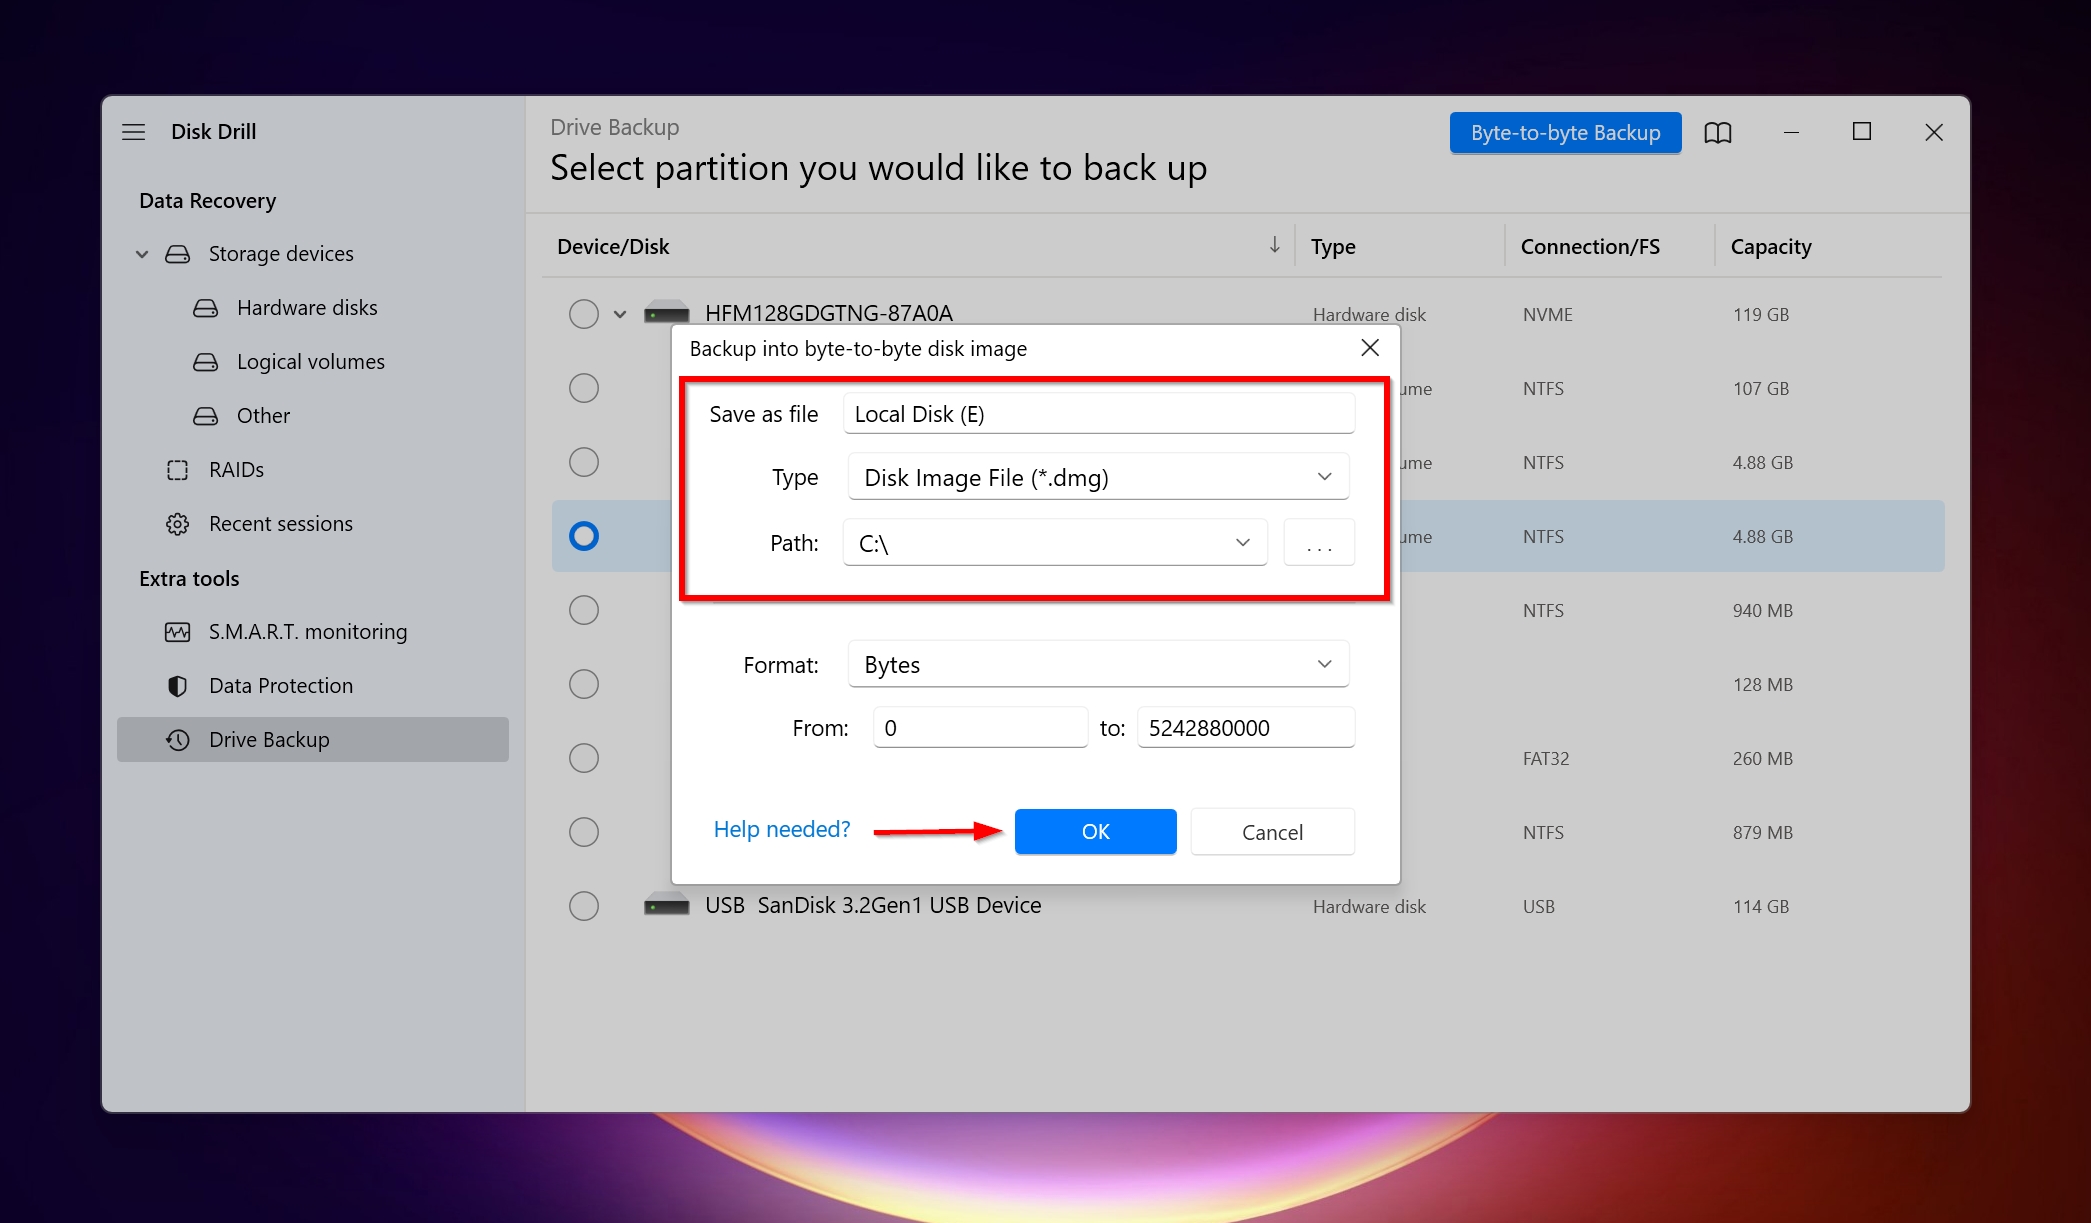
- Choose a recovery destination in the Byte-to-byte Backup parameters Windows. Make sure you have enough free space. The disk image will the same size as the drive. Click OK.
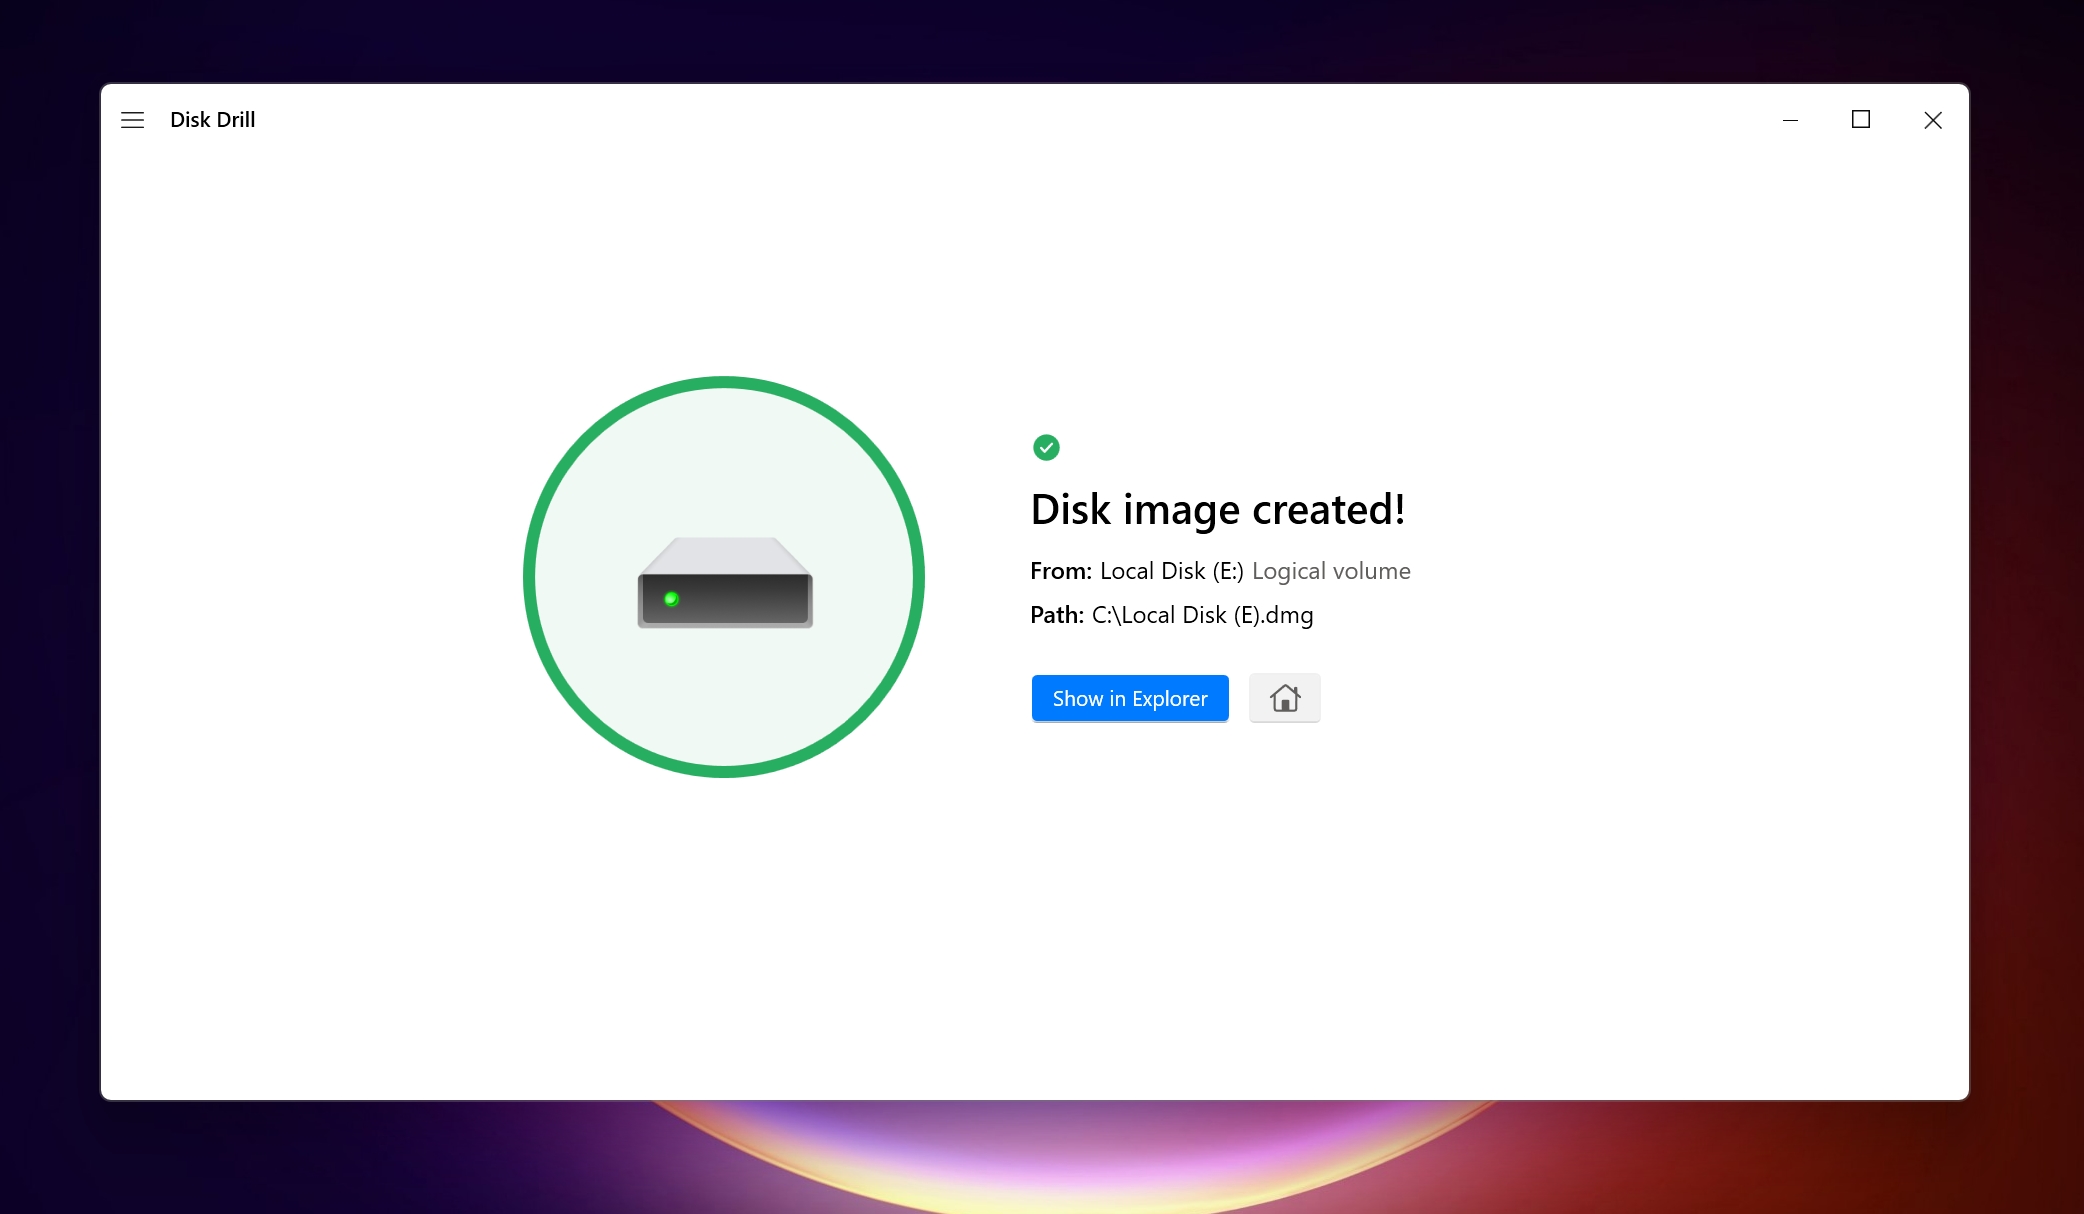
- Disk Drill will create the disk image, and you can proceed to recover data from the uninitialized disk’s disk image.
After creating a byte-to-byte disk image of the disk, scan the image and find your files. You can do that in Disk Drill itself.
Here is how:
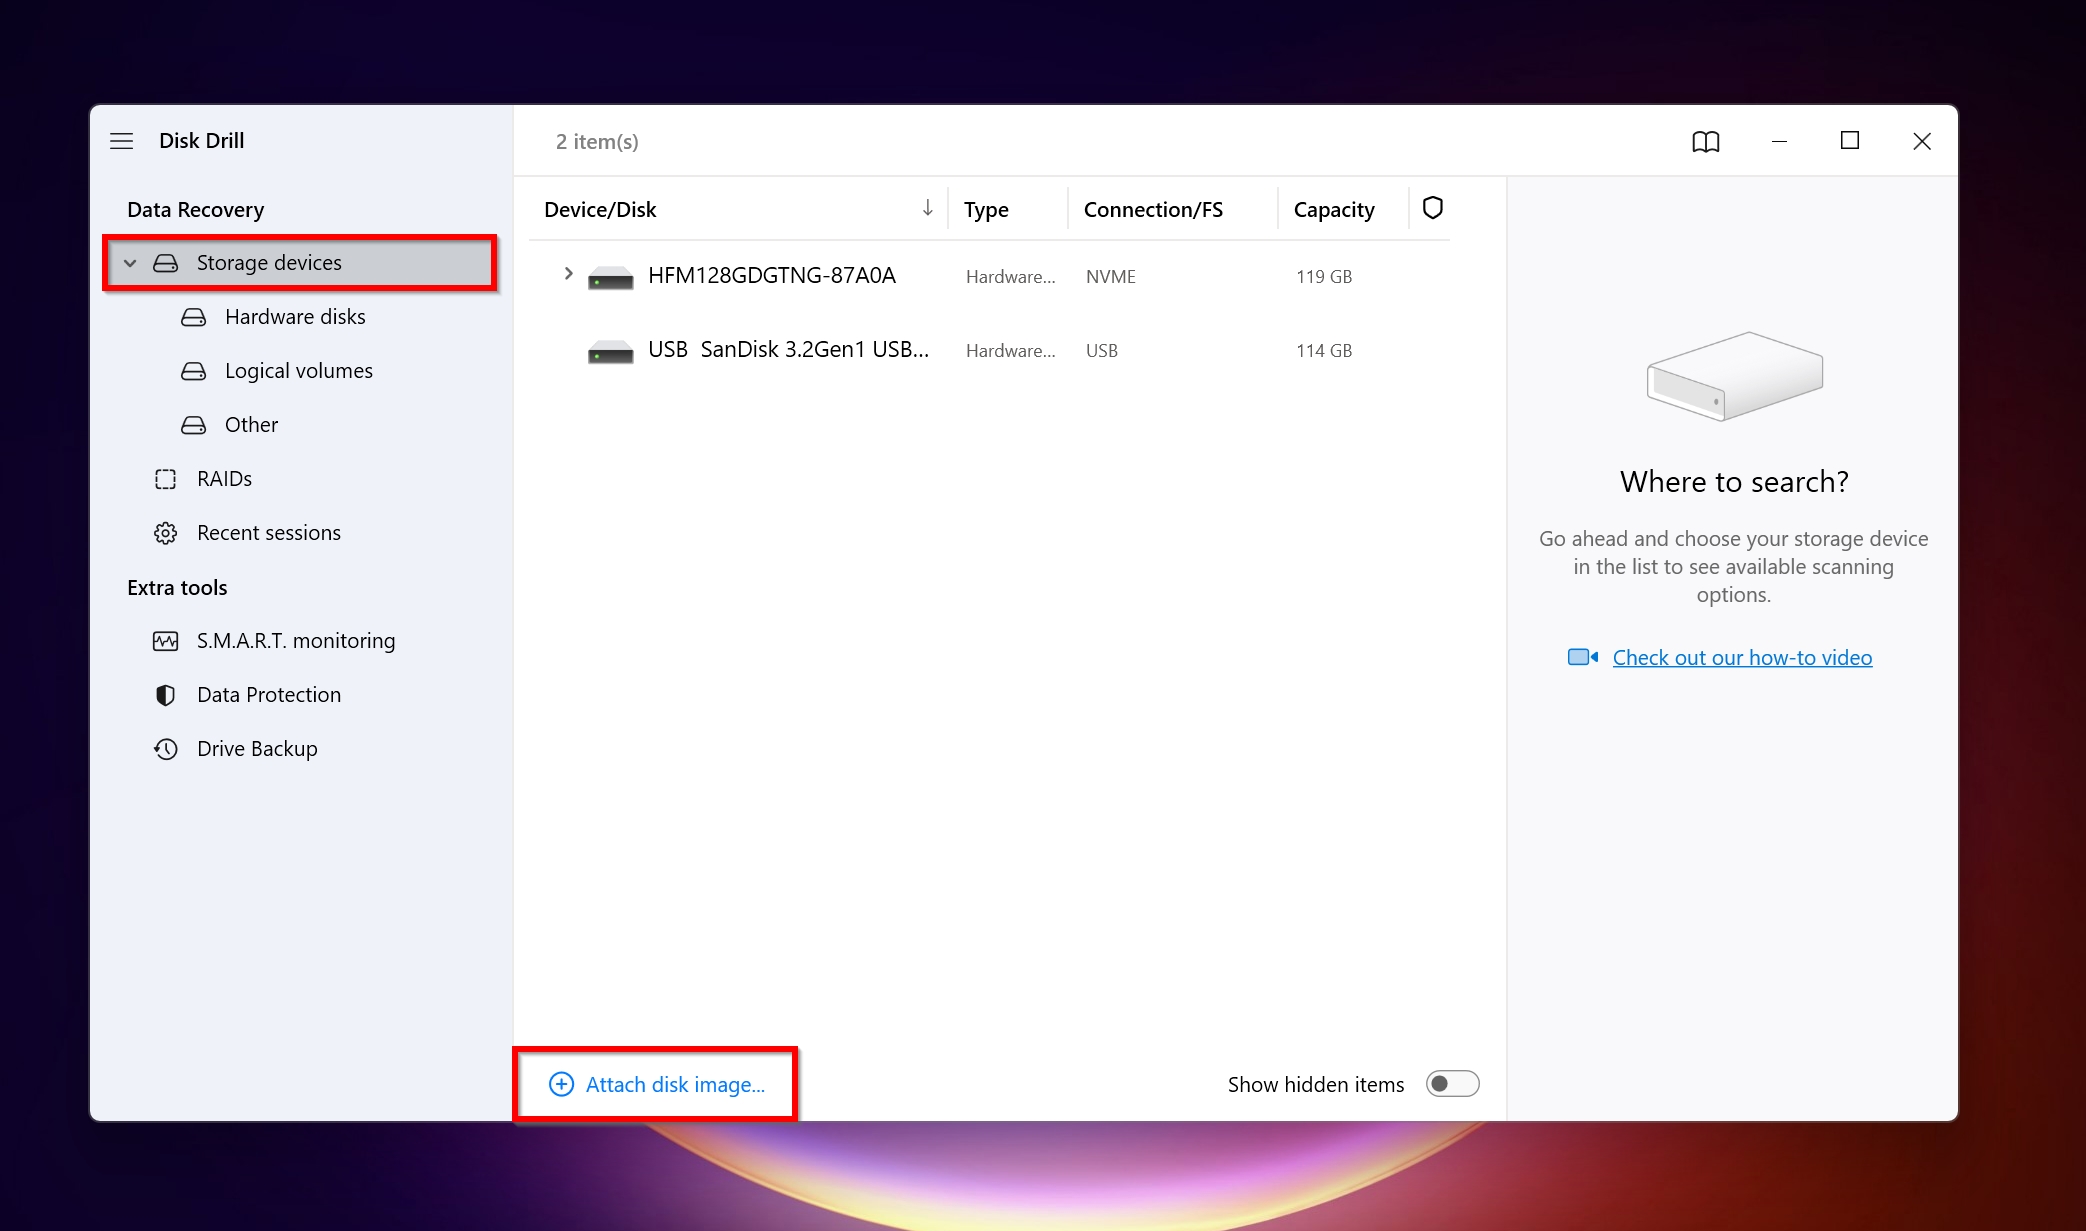
- In Disk Drill, ensure you’re on the Storage devices tab.
- Click on the Attach disk image option in the lower-left corner of the program. Find the previously created disk image and click Open.
- Now, select the disk image within Disk Drill, and click Search for lost data.

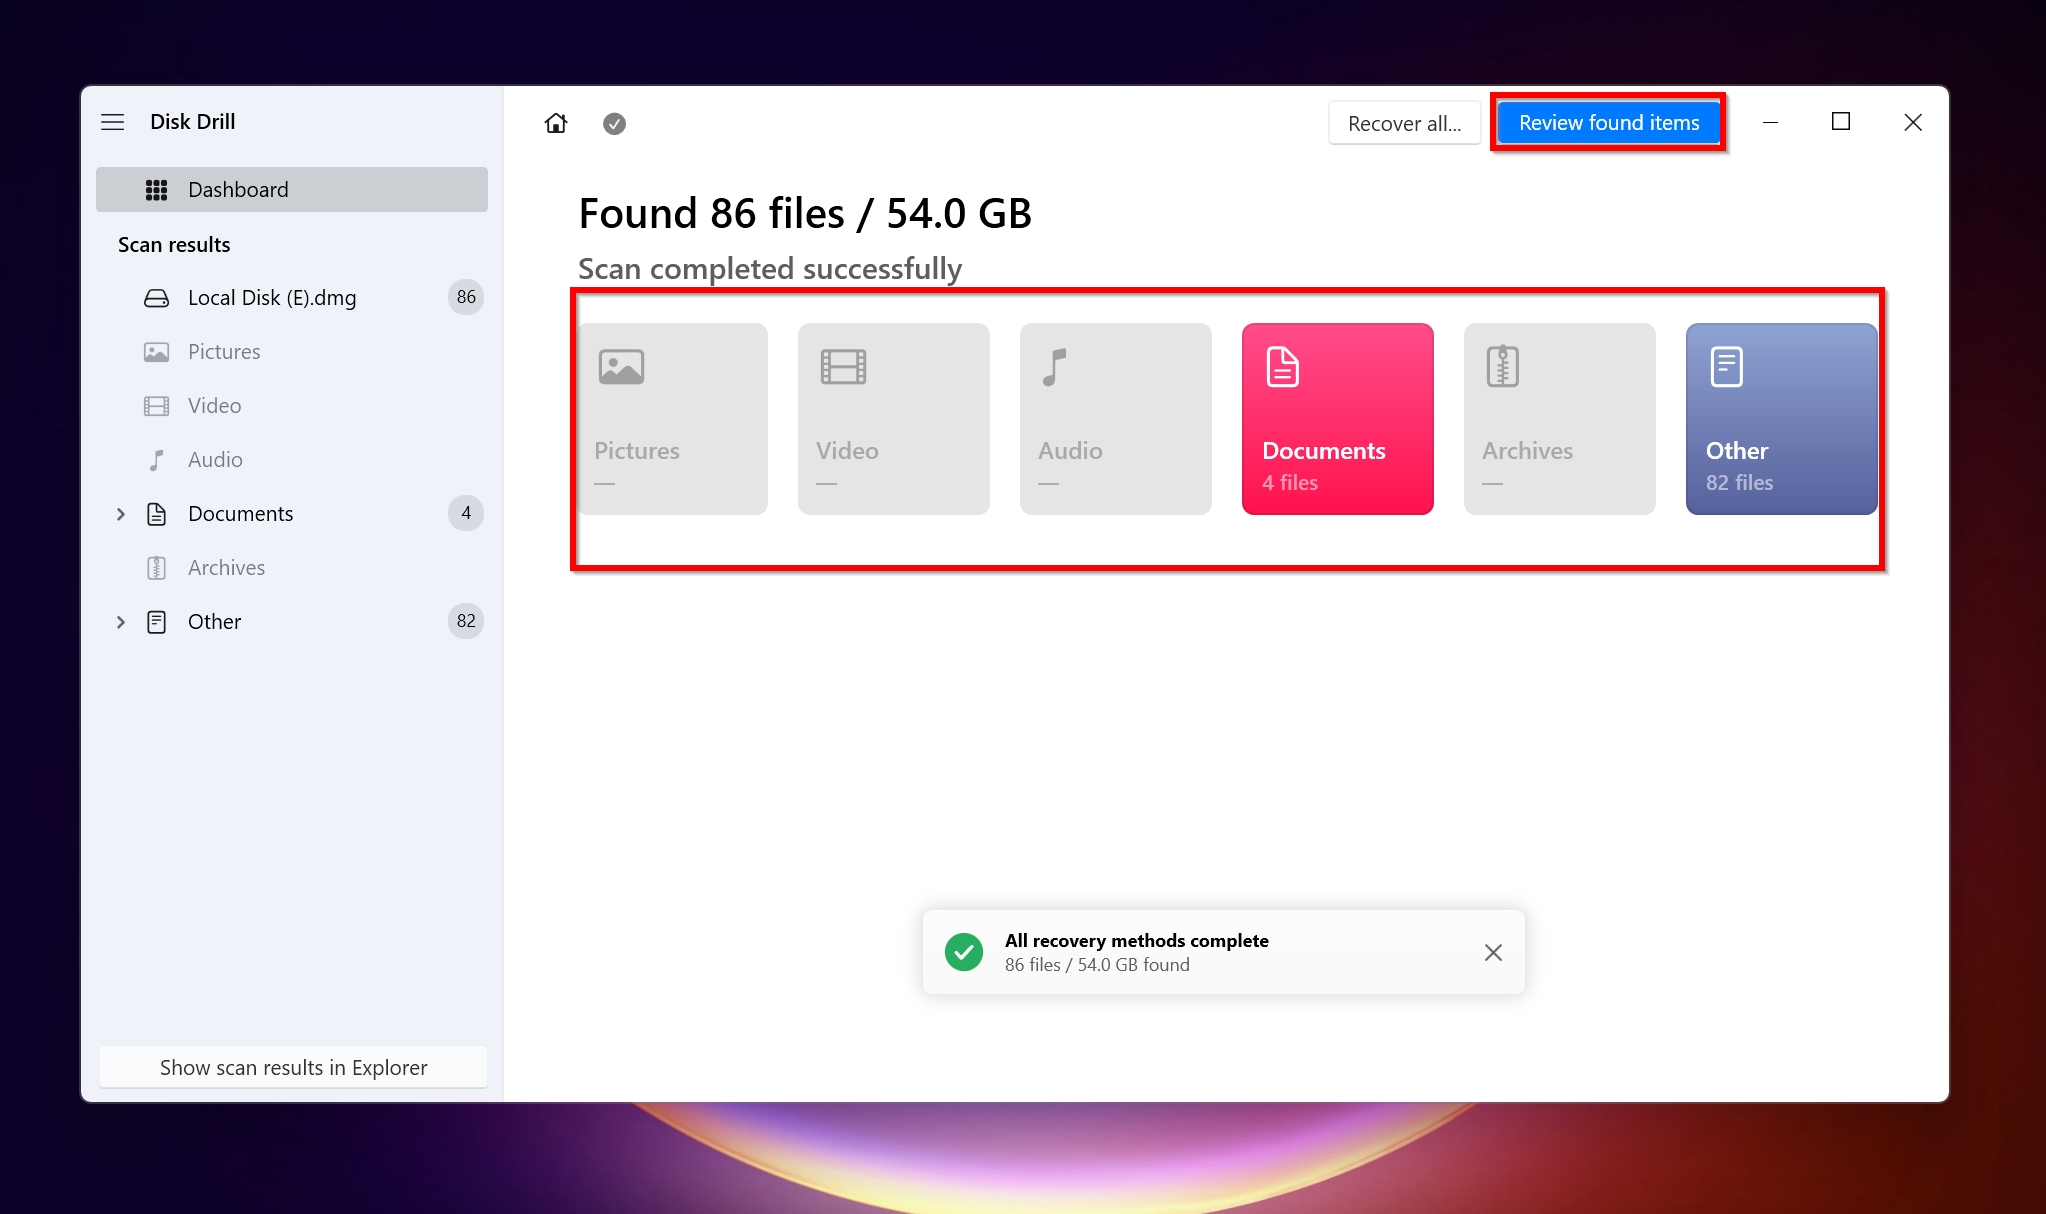
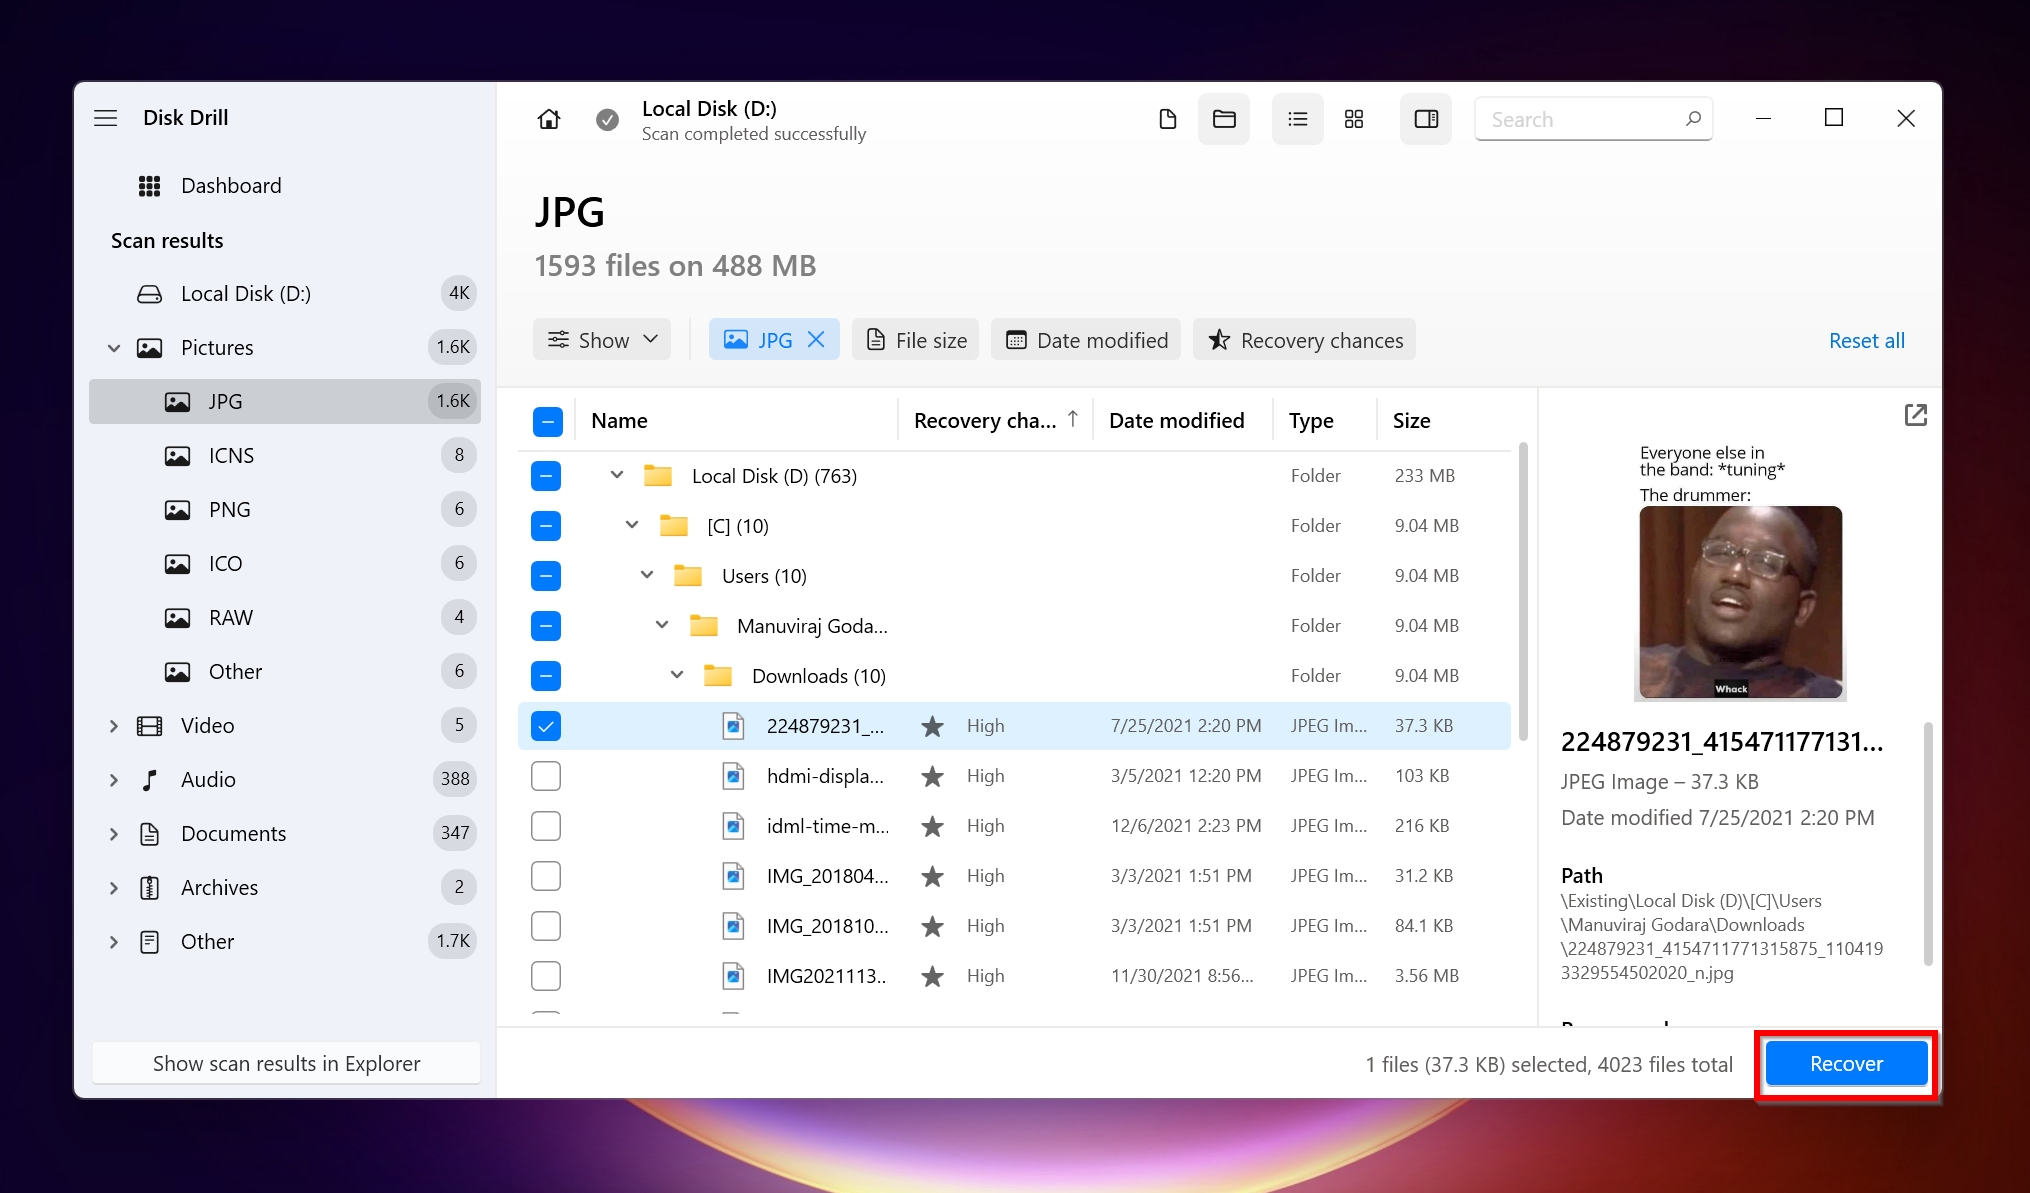
- Click on Review found items or any file type option (Pictures, Video, Audio, Documents, Archives, and Other) to view recoverable files.
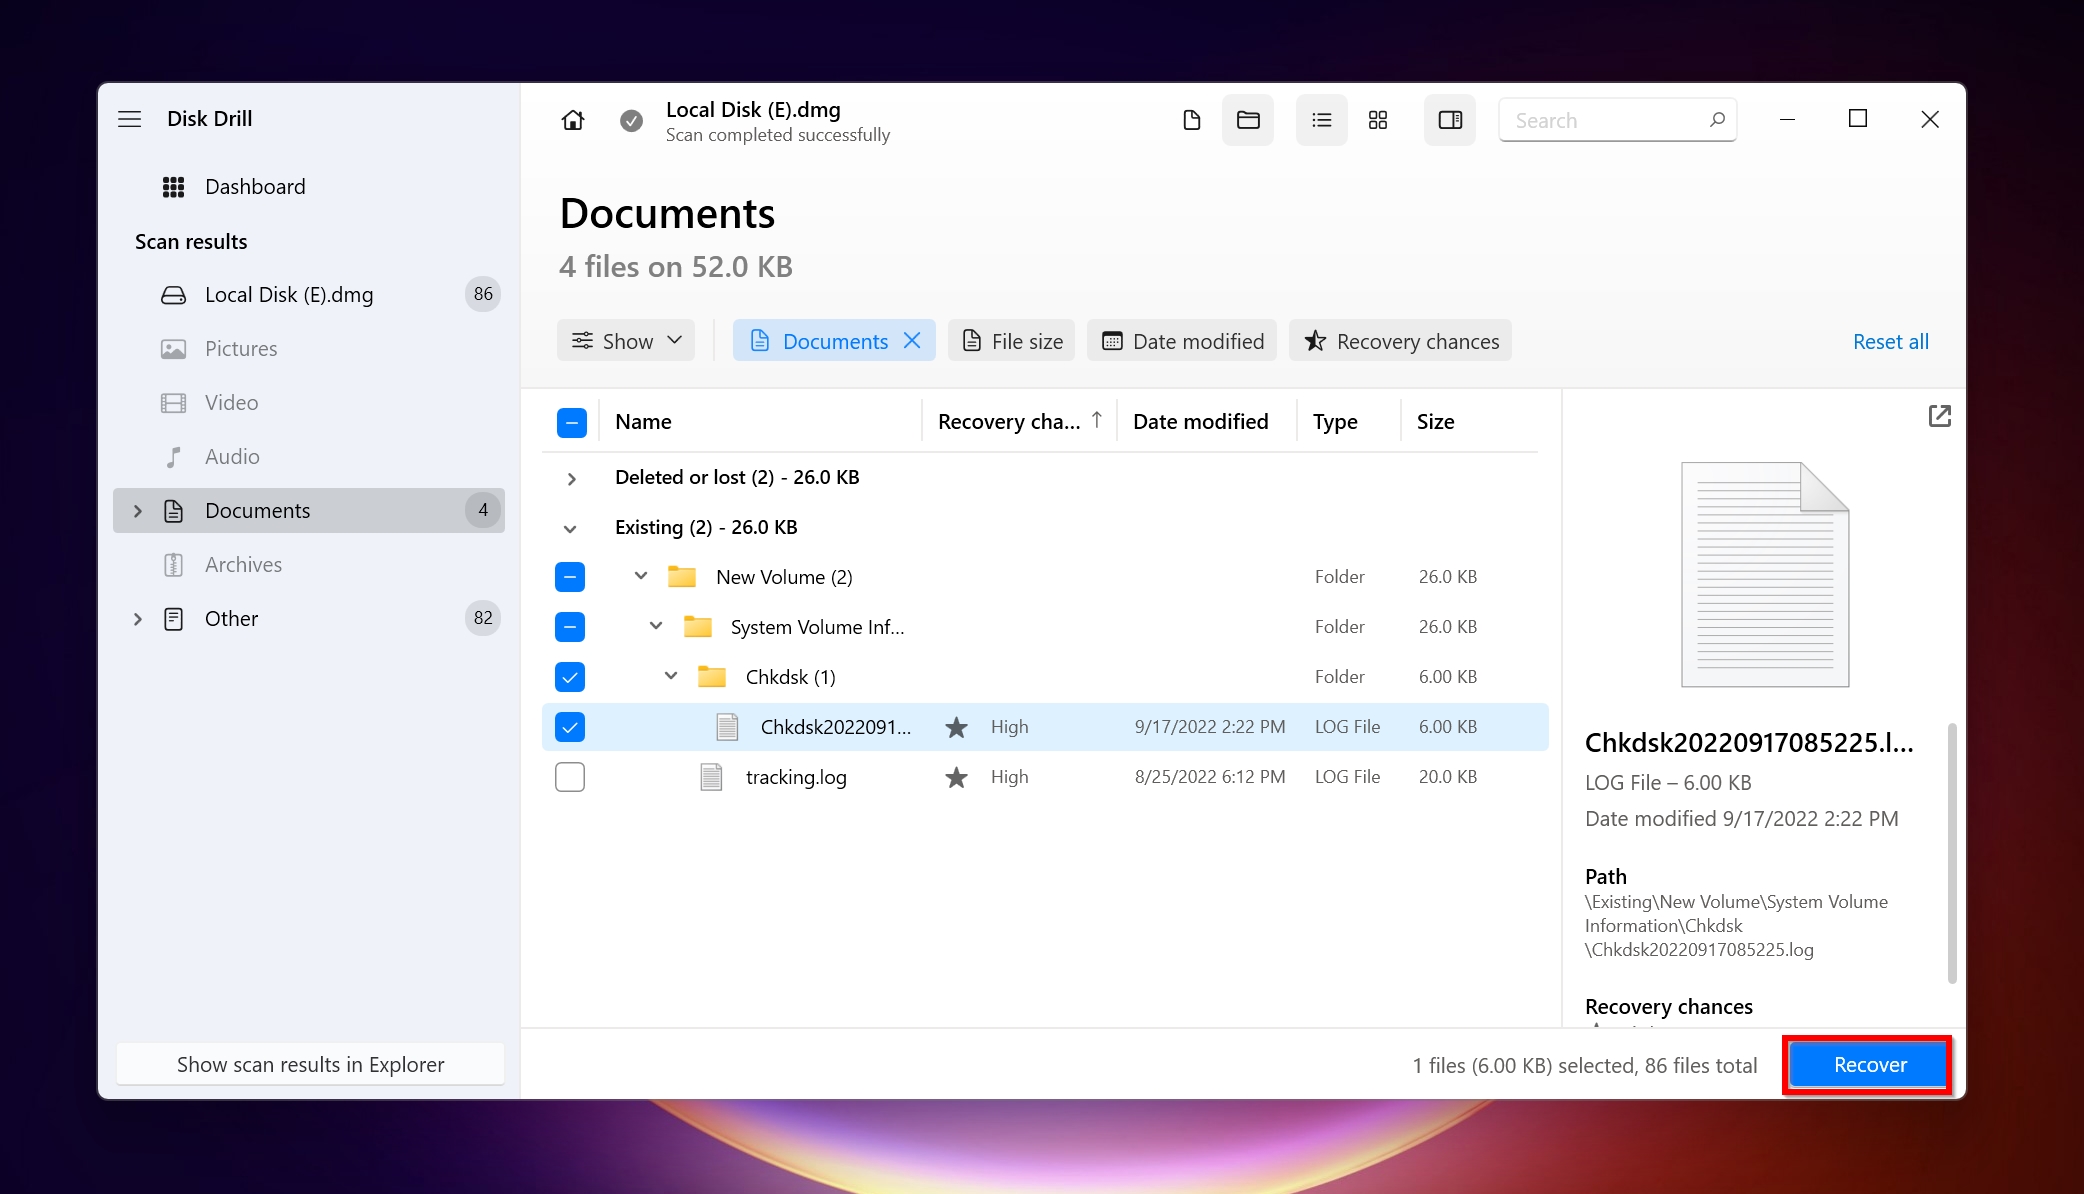
- Expand the Existing tab and select the files you want to recover from the uninitialized disk. Click Recover after confirmation.
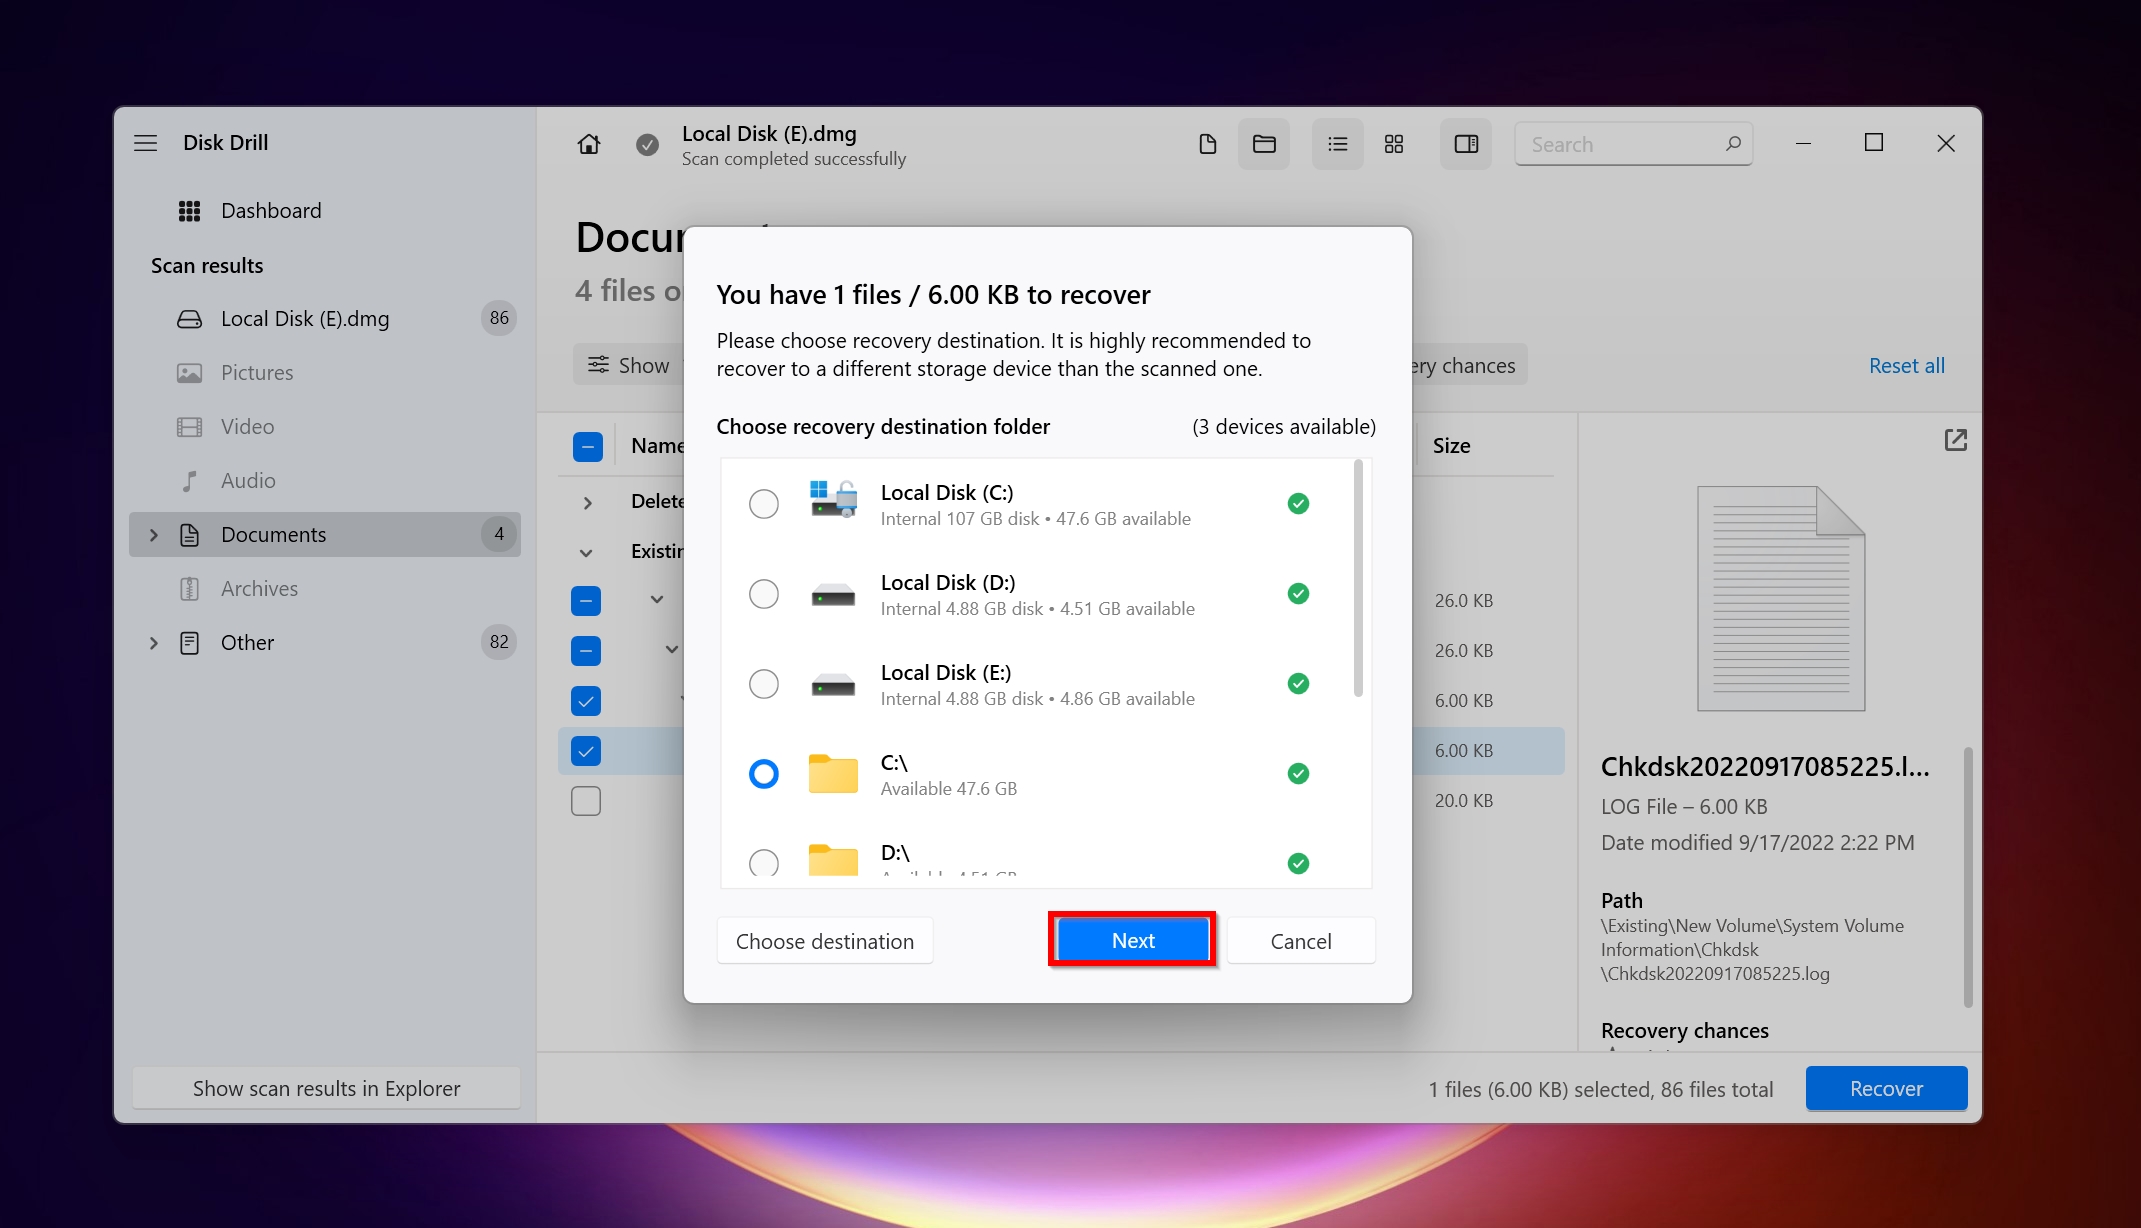
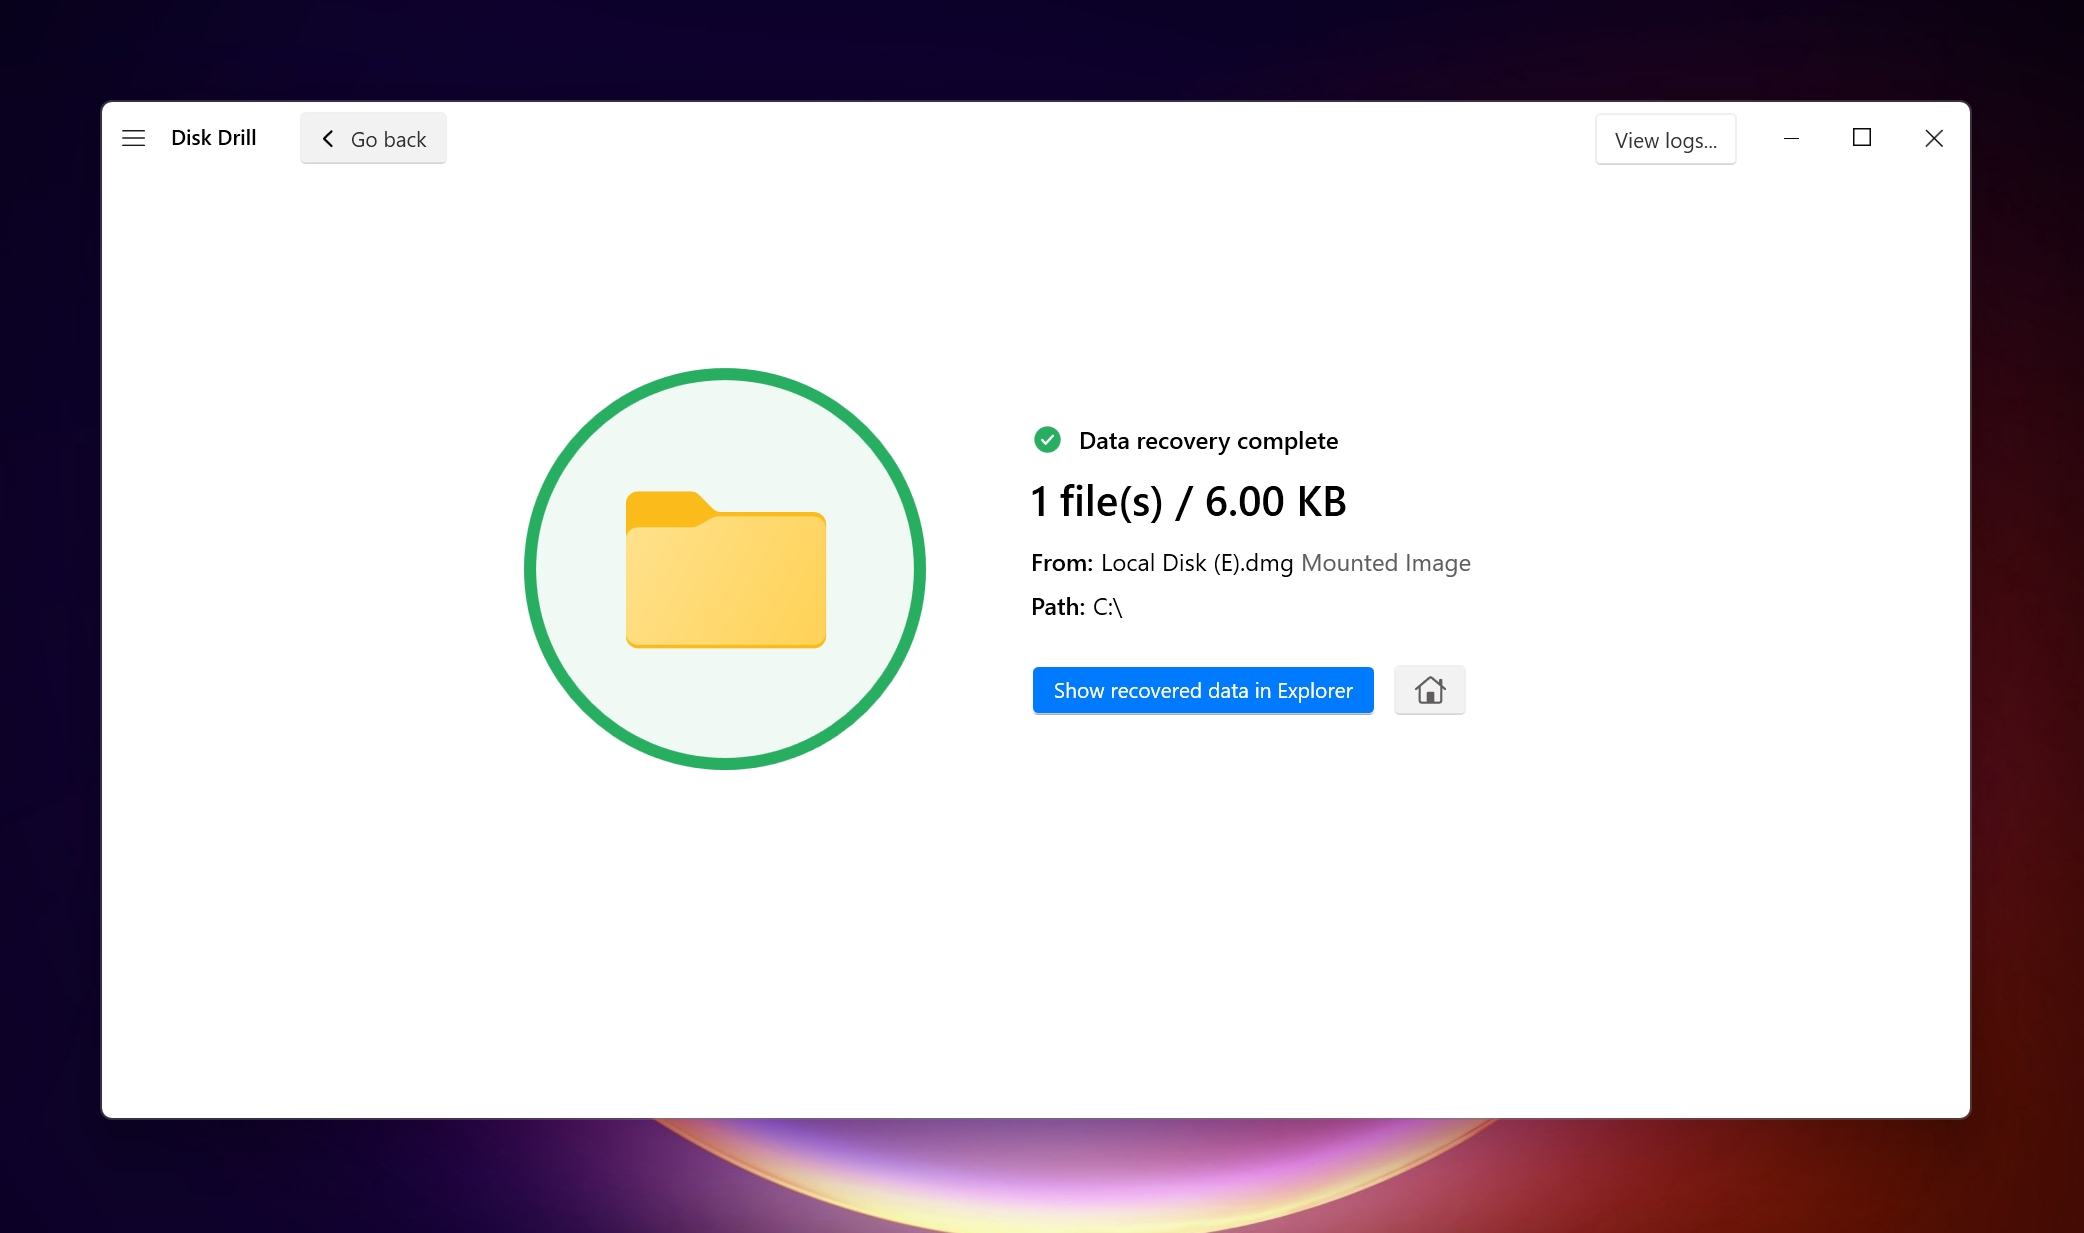
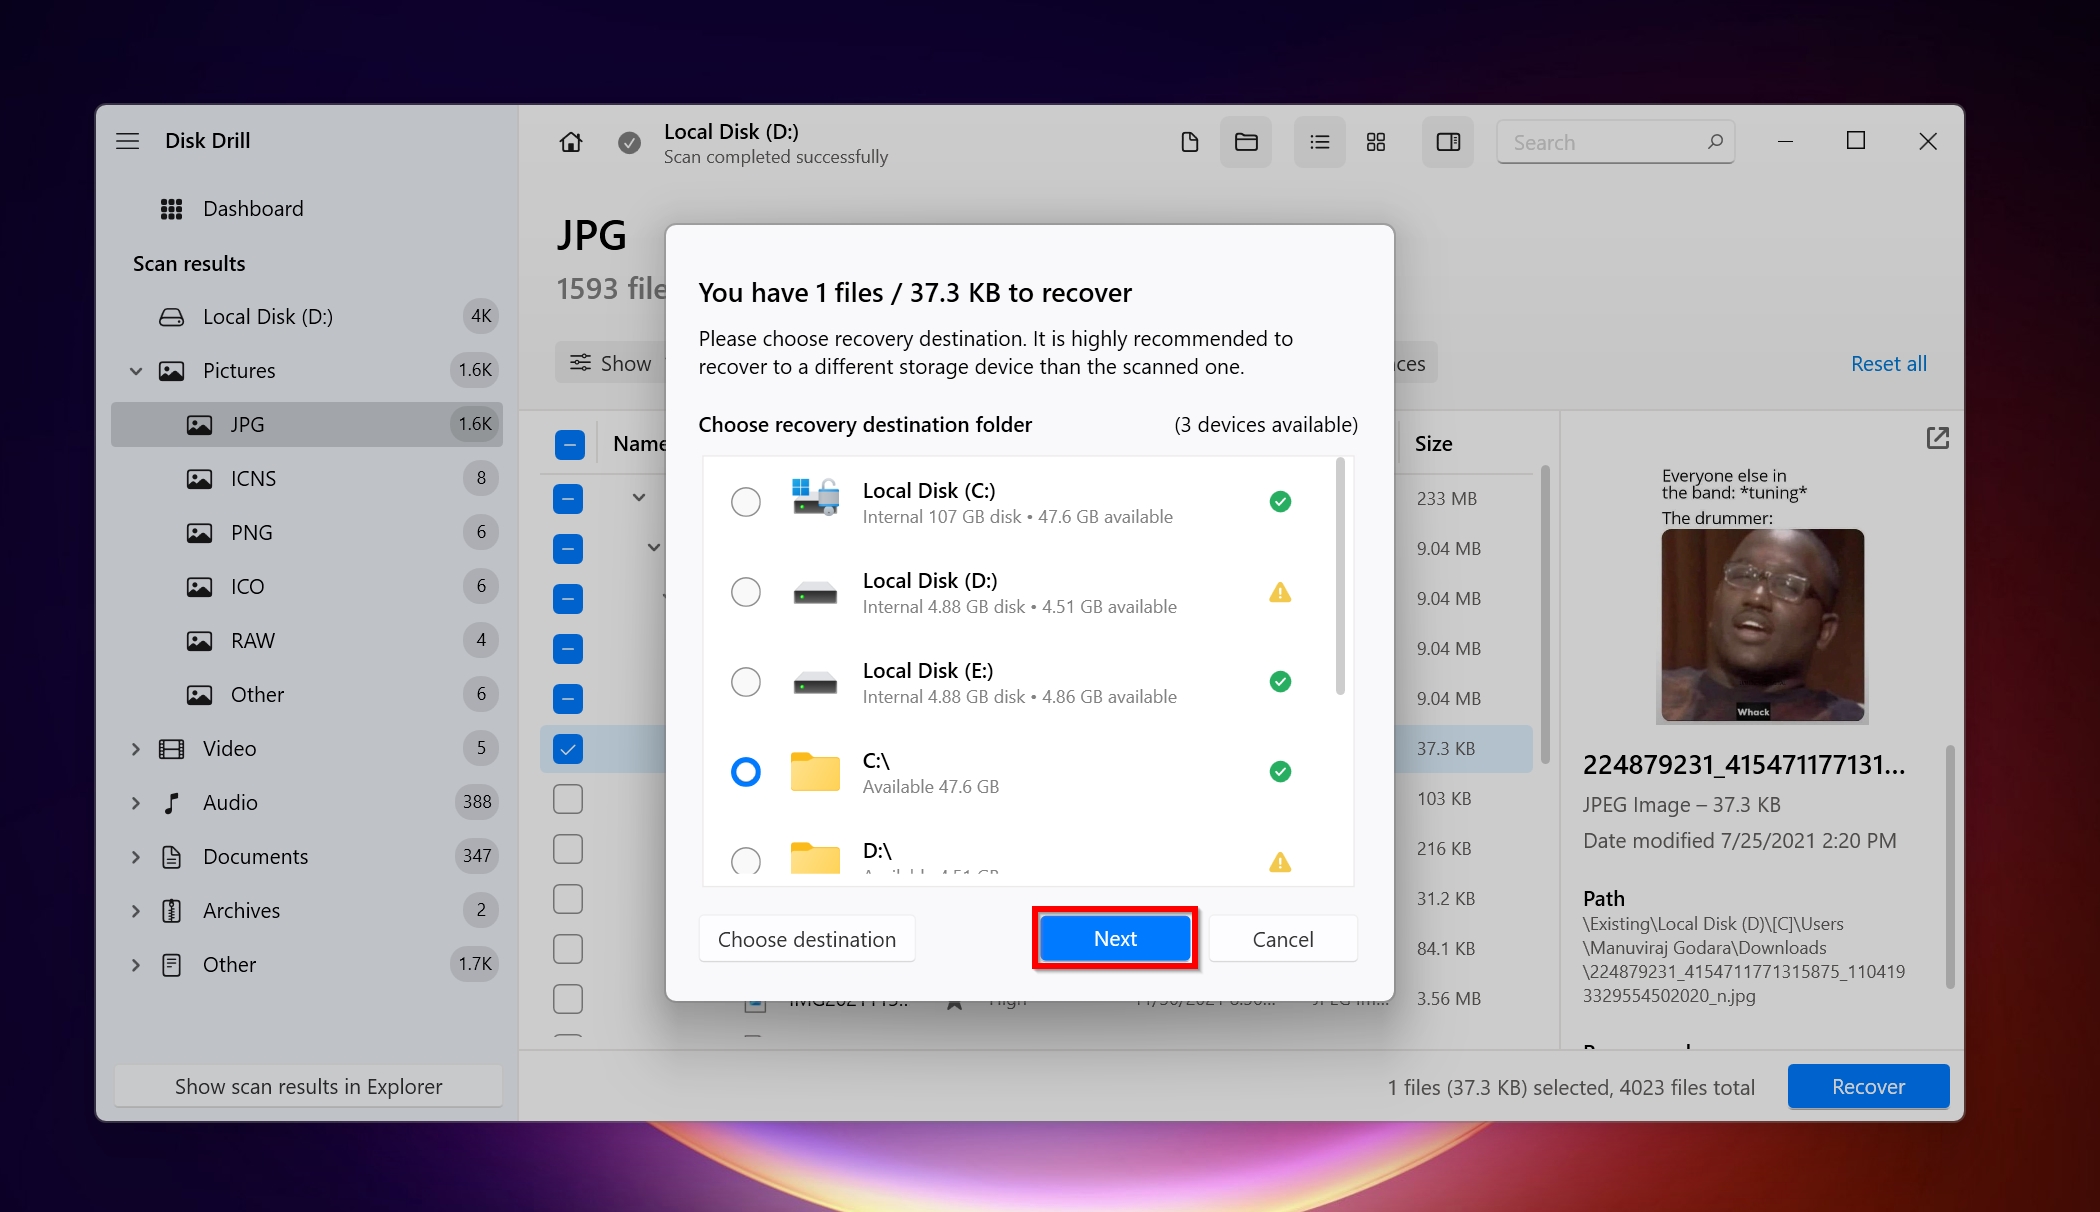
- Choose a recovery destination for the files and click Next.
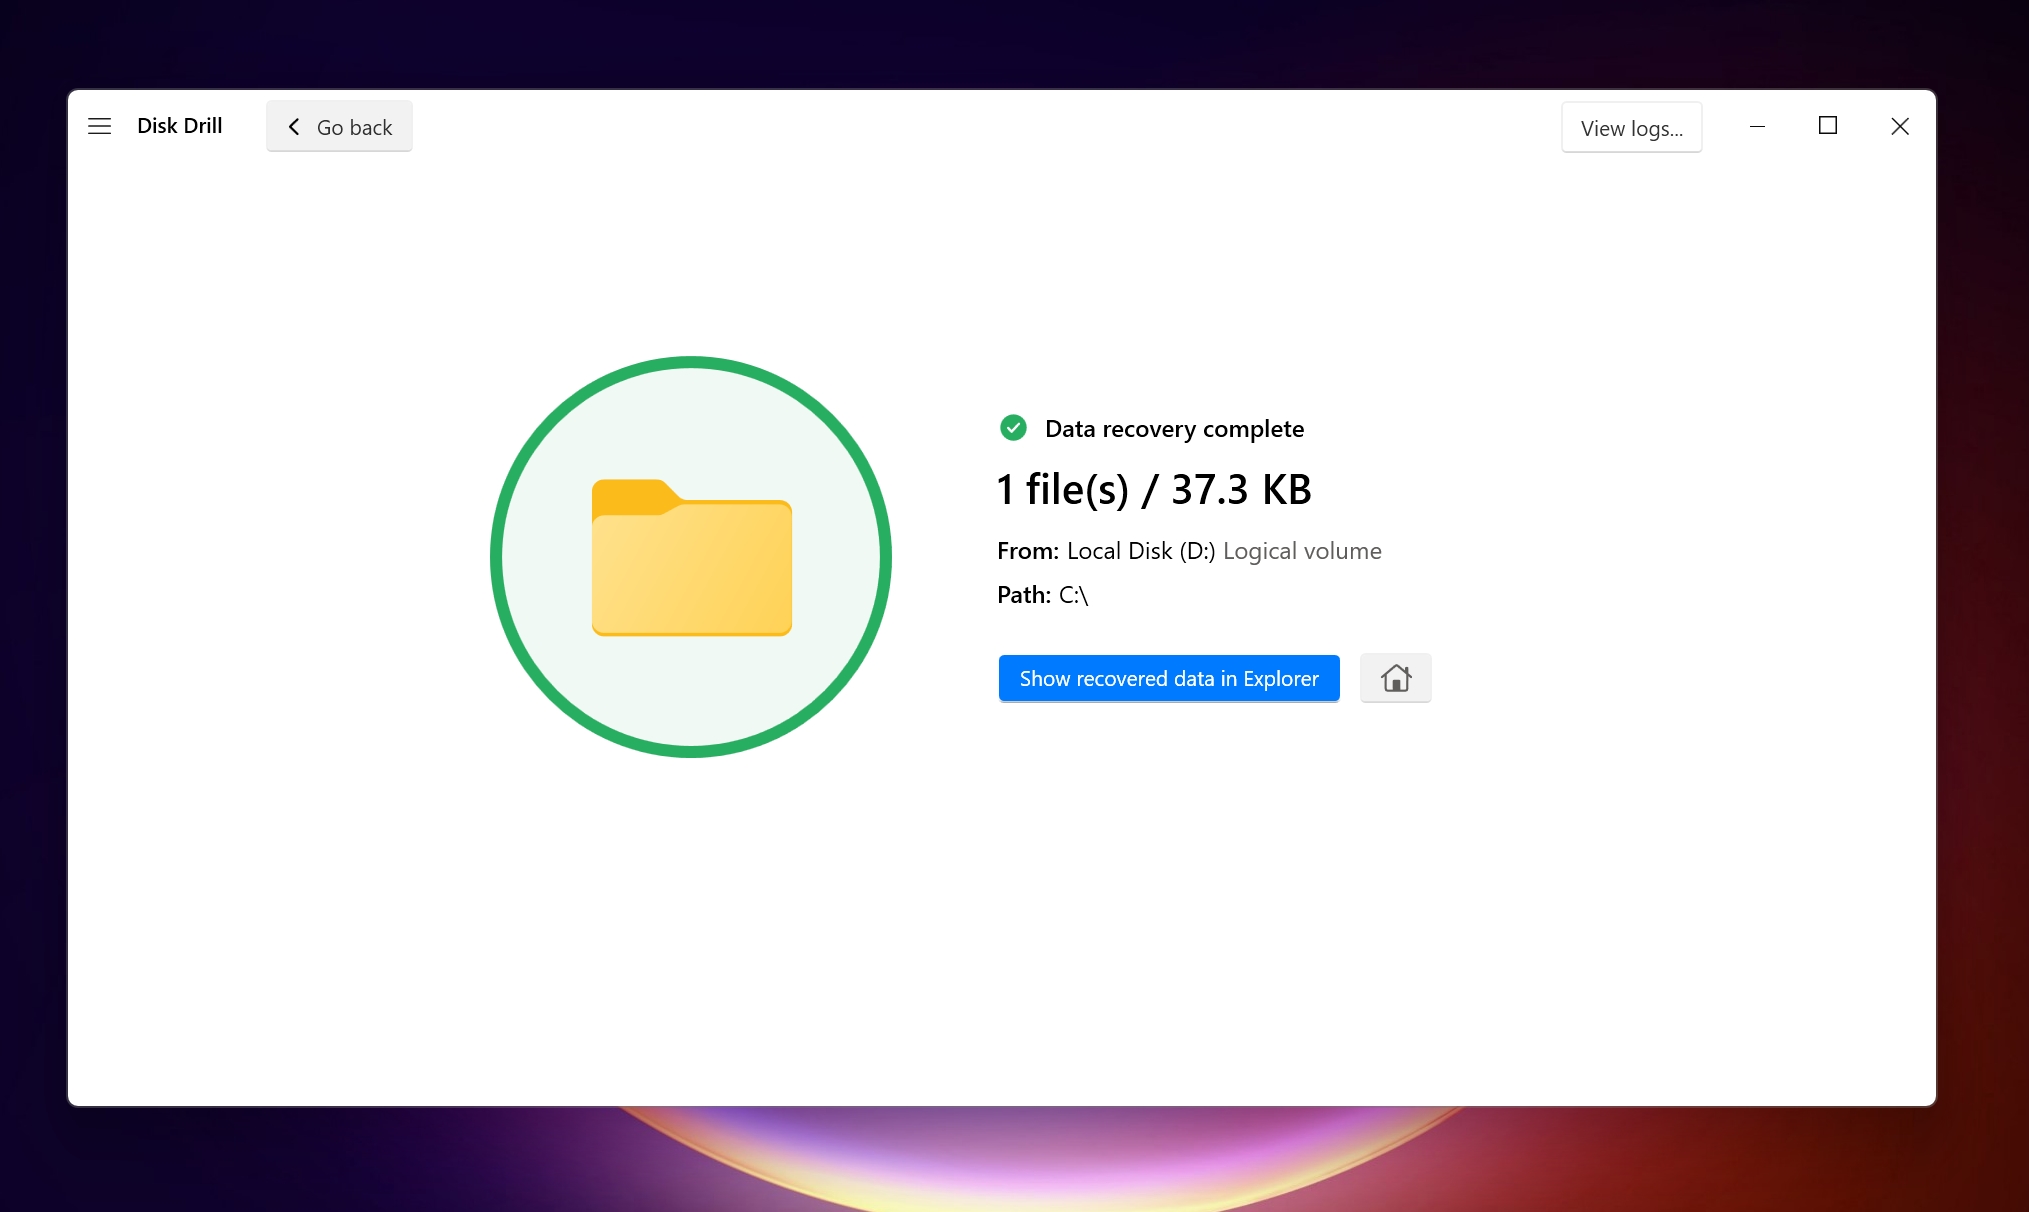
- Disk Drill will recover the data. Post this, you can proceed to initialize the disk without losing data.
Method 2: Initialize the Disk & Scan It With a Data Recovery Tool
As long as you don’t format the drive, it’s possible to first initialize the disk and then scan it with a data recovery tool like Disk Drill.
There are several ways to initialize an MBR or GPT disk without losing data. These include using Disk Management, CMD, or PowerShell.
In the tutorial below, we’ll show you how to initialize a disk using Windows Disk Management:
- Open Windows Search [Windows Key + S], and type disk management.
- Click Create and format hard disk partitions from the search results.
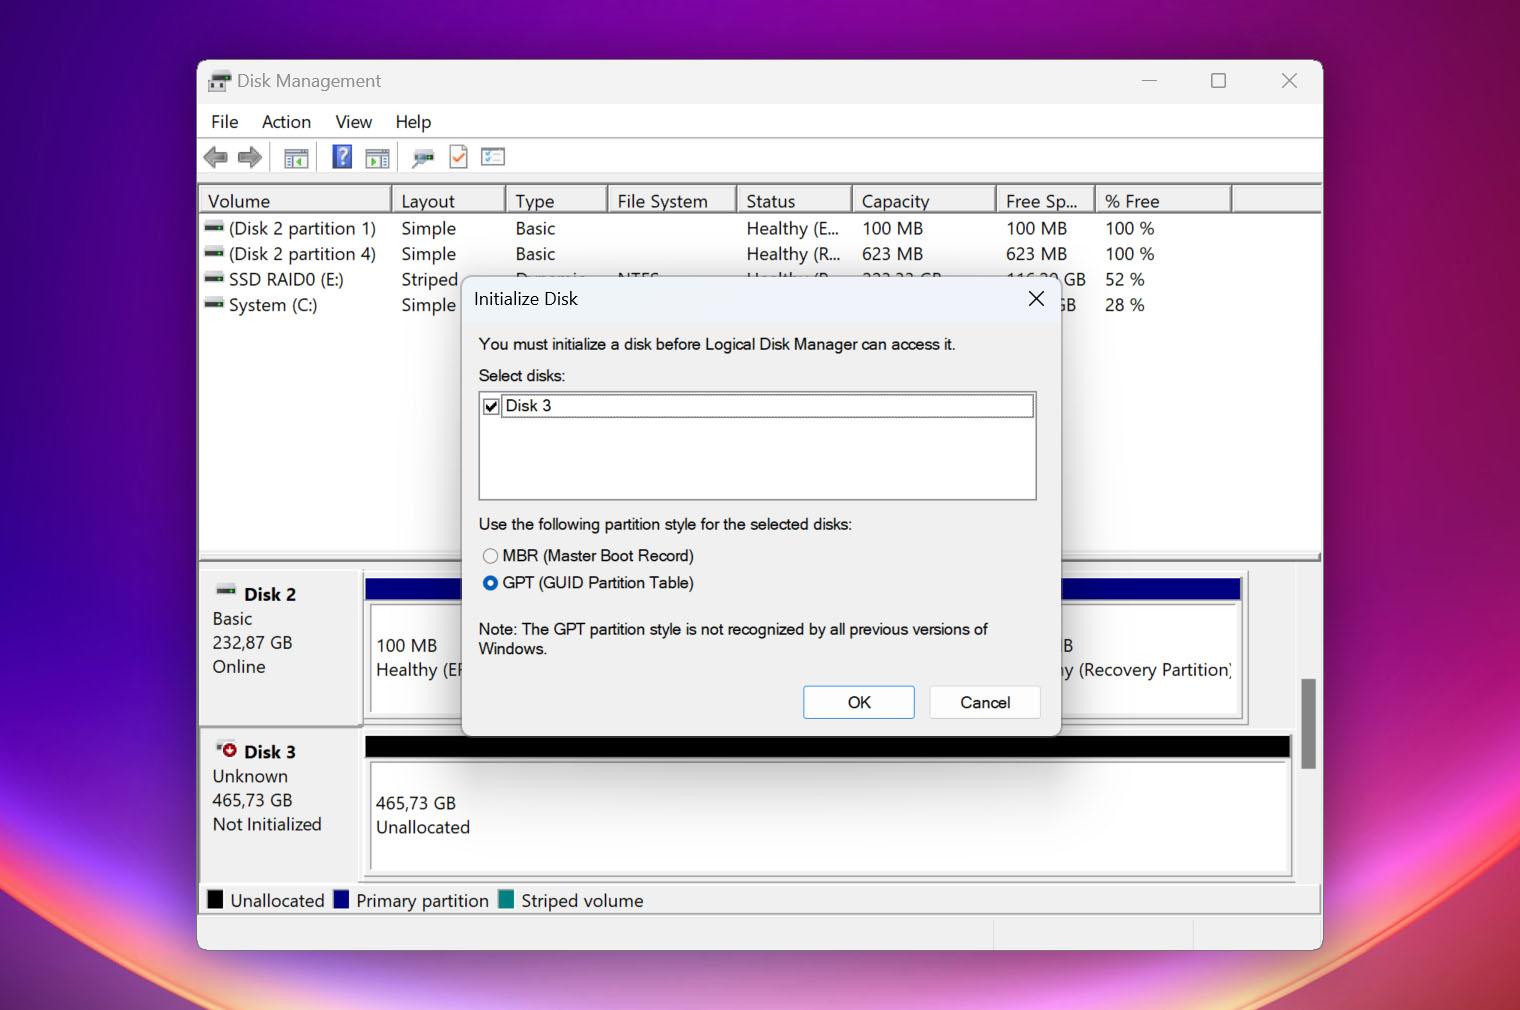
- Right-click on the uninitialized disk towards the bottom of the Window and click Initialize Disk. Your disk could be offline too. In this case, first, right-click and click Online, then follow the aforementioned steps.
- Select the disk and choose the partition scheme. It’s best to leave the default option checked.
- Click on OK.
After initializing, you can move to data recovery. Disk Drill is a perfect choice here because it supports data recovery from RAW (unallocated) partitions and allows you to filter files by type, size, recovery chances, and more.
To scan the initialized disk using Disk Drill, follow these steps:
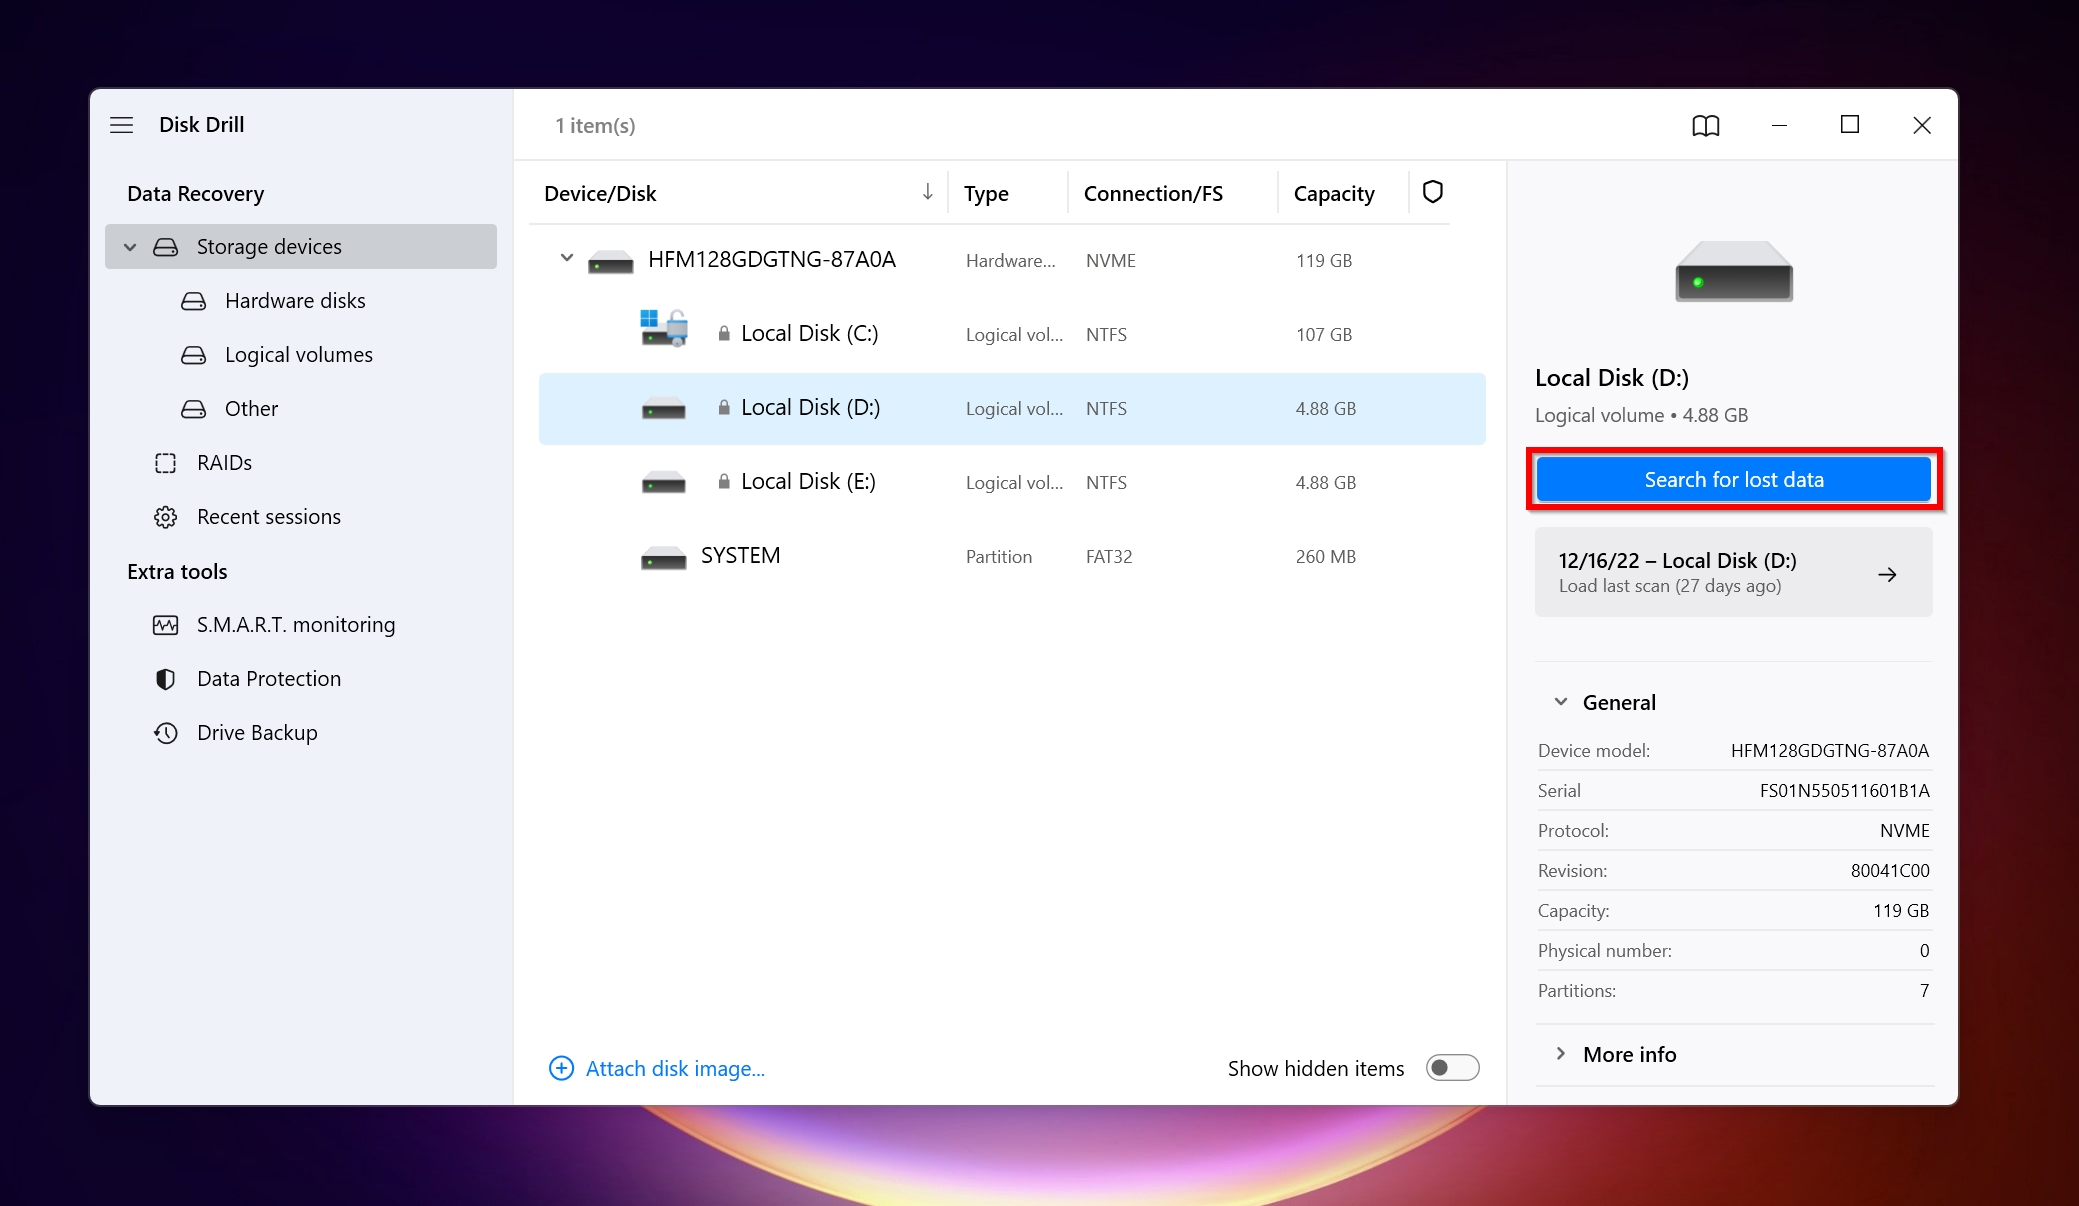
- Open Disk Drill.
- Select the initialized drive and click Search for lost data.
- Click Review found items or directly click on the relevant file type on this screen.
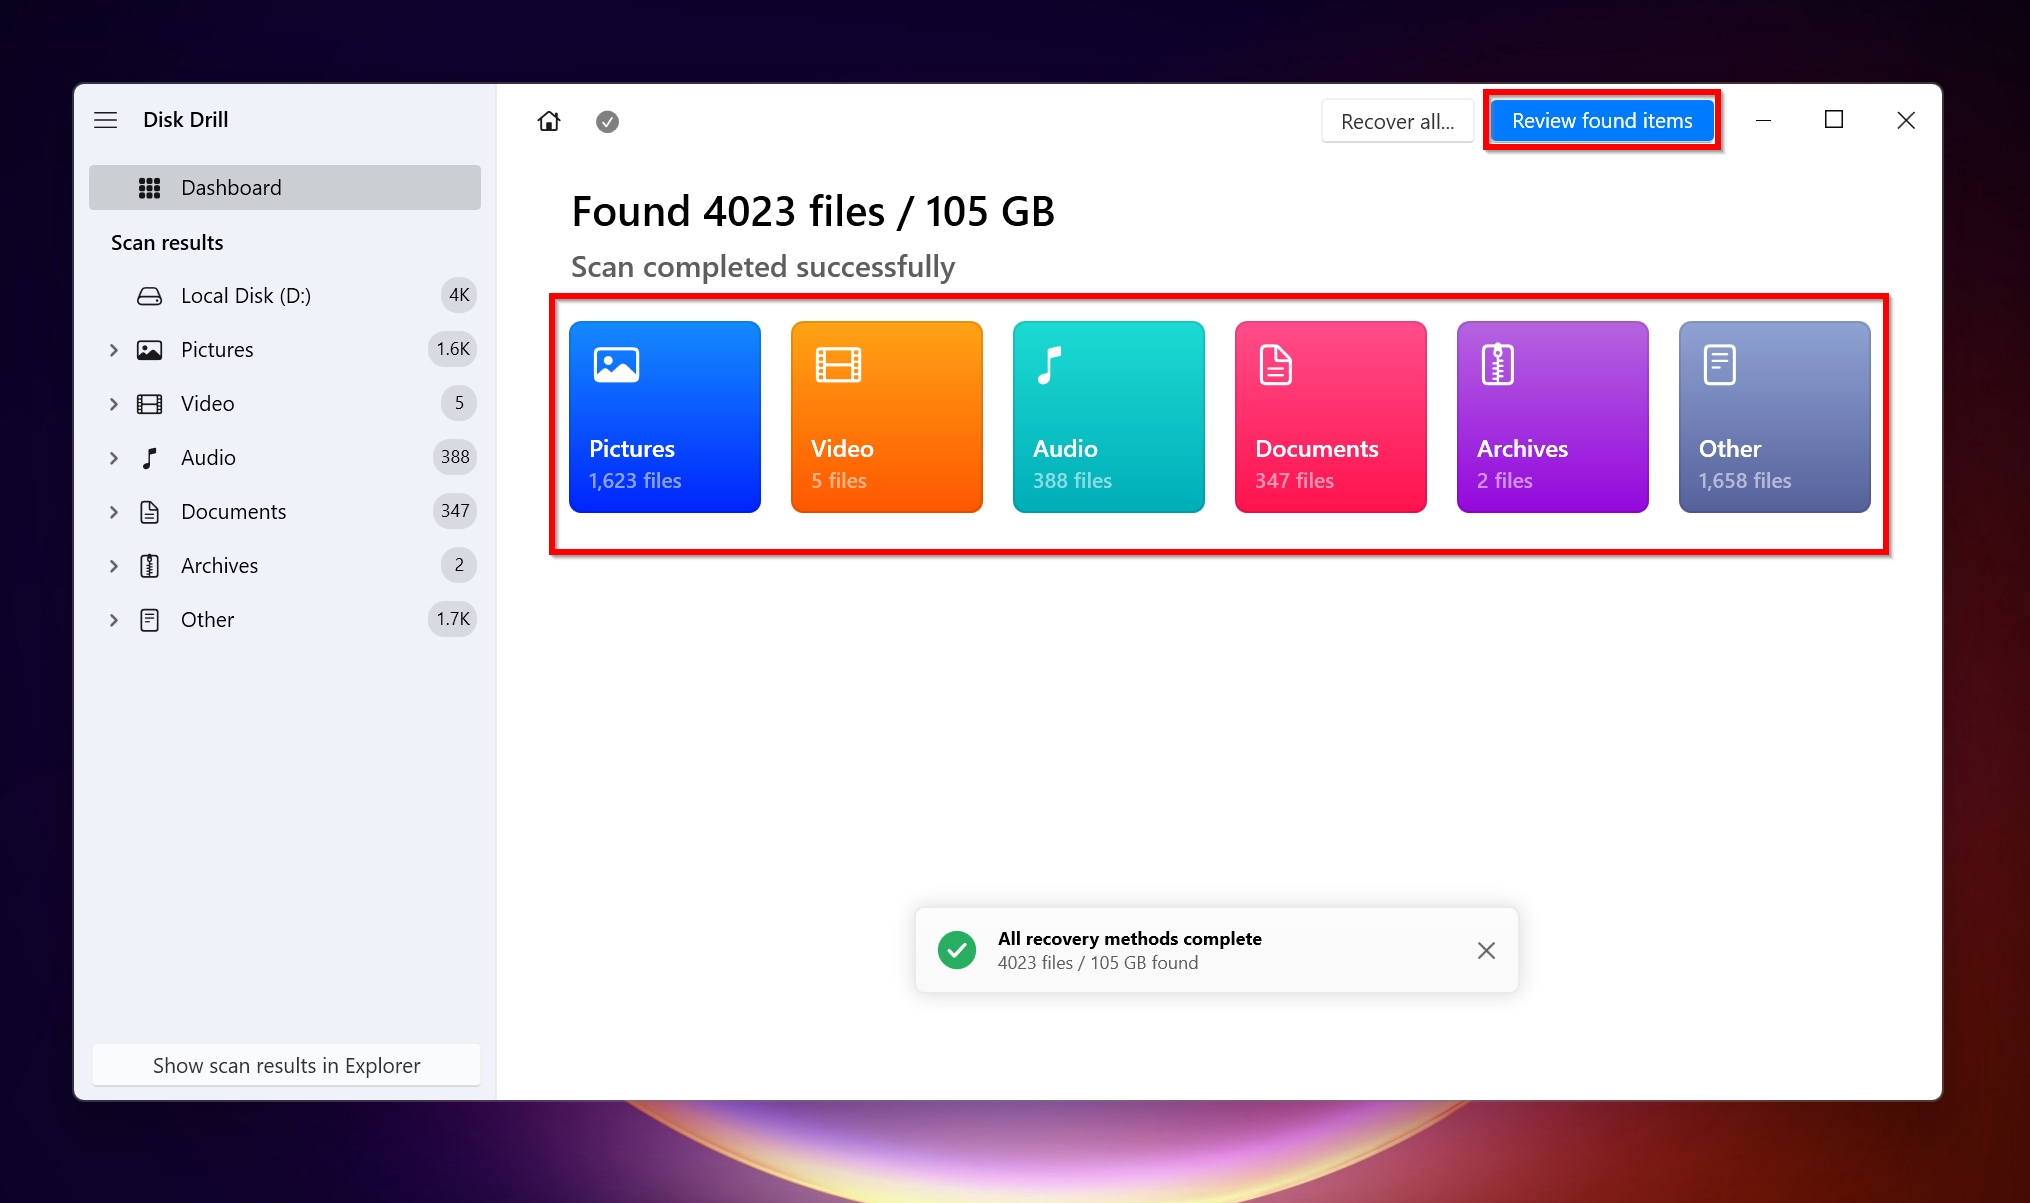
- Expand the Existing section. Use the checkboxes next to each file to select them. After confirmation, click on Recover.
- Choose a recovery destination and click Next.
- Disk Drill will effectively let you recover the data even after initializing the disk.
FAQ
What does initializing a disk do?
Disk initialization writes a partition table (GPT or MBR) to the drive, which then lets users format it, create partitions, and use it to store data.
Will initializing a disk erase data?
Since initialization is followed by a format, it will erase the data on your drive. The initialization process itself, i.e., just writing the partition table to the drive, will not wipe your data. However, there are still ways to recover data after a Quick Format. In case of a full format, the data is practically irrecoverable.
How do I recover data after initializing a disk?
Here is a bite-sized guide to recover data after initializing a disk:
- Download and install Disk Drill.
- Run Disk Drill.
- Select the initialized disk and click Search for lost data.
- Click Review found items.
- Select the files you want to recover and click Recover.
- Choose a recovery destination and click Next.
How to initialize a disk using CMD?
To initialize a disk using CMD, follow these steps:
- Type cmd in Windows Search [Windows Key + S], then right-click on Command Prompt > Run as administrator.
- In the console, type diskpart and press Enter.
- Now, type list disk and press Enter.
- Here, type select disk x (replace “x” with the number of the uninitialized disk). To find the number, you can determine it using the storage size or open Disk Management to check which drive is showing the Unknown, Not Initialized error. Press Enter.
- Lastly, type convert GPT and press Enter. If you’re using an older drive, you can replace GPT with MBR. However, in most cases, you’ll use GPT.
- The disk will be initialized.
Conclusion
Data recovery programs like Disk Drill make DIY data recovery possible in many data loss scenarios. But, it’s no substitute for good data recovery backup etiquette and knowing when to invest in a professional data recovery service. If your data is critically important, you shouldn’t hesitate in contacting experts.
This article was written by Manuviraj Godara, a Staff Writer at Handy Recovery Advisor. It was also verified for technical accuracy by Andrey Vasilyev, our editorial advisor.
Curious about our content creation process? Take a look at our Editor Guidelines.