Are you wondering how to recover data from an uninitialized disk because you can’t access important files? If so, then you should know that you’re not the only one looking for a solution to this distressing problem.
The good news is that the solution you’re looking for does exist. In fact, there are several ways to recover an uninitialized disk, and we describe the most effective ones in this article. All you have to do is follow our detailed step-by-step instructions.
What Is Disk Initialization?

For any storage device to be usable, it needs to have at least one partition with a supported file system, such as NTFS, FAT32, or APFS. Information on how the partitions, containing file systems, are organized is stored at the very beginning of the storage device, in a special area called the partition table.
Disk initialization is the process of creating the partition table using one of two possible partition styles:
- MBR (Master Boot Record): Until not too long ago, the MBR partition scheme dominated across DOS, Microsoft Windows, and Linux (among others) on PC-compatible computer systems. Today, it’s considered to be a legacy alternative to GPT because it limits the maximum addressable storage space of a partitioned disk to 2 TB.
- GPT (GUID Partition Table): This modern partition scheme forms a part of the Unified Extensible Firmware Interface (UEFI) standard, allowing a maximum disk size of 264 sectors, which is 64 ZiB for disks with 4,096‑byte sectors.
Once a partition table has been created during the disk initialization process, you can proceed with the creation and formatting of individual partitions. From there, the storage device should be ready for use.
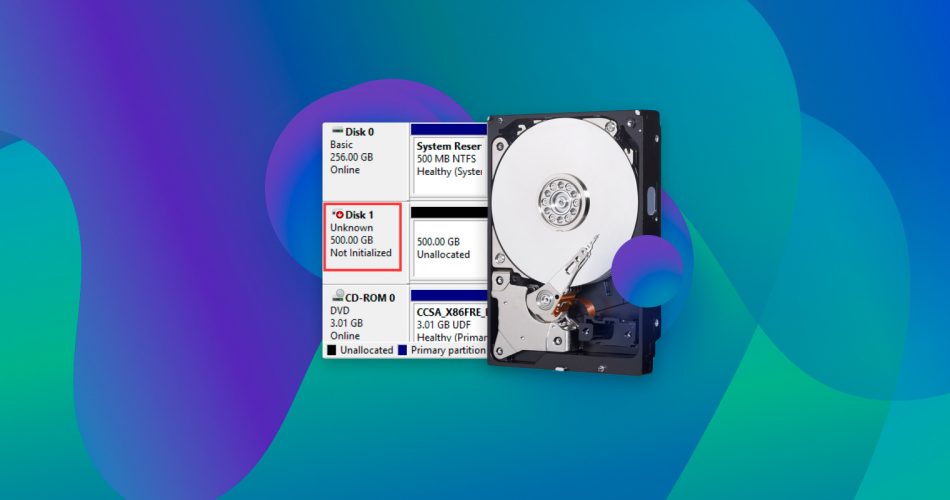
Why Is My Disk Uninitialized?
We understand that you’re eager to recover data from your uninitialized disk, but your recovery success rate is guaranteed to increase substantially if you take the time to understand why disks are sometimes labeled as uninitialized.
🆕 The disk is new |
While relatively uncommon these days, you may encounter a manufacturer that ships hard drives in the uninitialized state, leave it up to customers to go through the initialization process (we explain how to initialize a disk without losing data at the end of this article). |
🧹 Previous owner wiped the disk clean |
When selling a used storage device online, it only makes sense to wipe it clean and overwrite it with random data to make data recovery impossible, and that’s exactly what many sellers do. |
💥 Partition table damage |
As we’ve already explained, the partition table stores vitally important information on how the partitions are organized. This information can be damaged by malware or corruption, or it can be accidentally erased by the user himself or herself. |
💻 Operating system error |
When you connect a storage device to your computer, your operating system automatically attempts to retrieve information about it. If something interrupts this initial handshake, the storage device may be incorrectly labeled as uninitialized. |
⚠️ Formatting gone wrong |
Although file system formatting should never cause a disk to become uninitialized, there are many users of various third-party formatting utilities and partition wizards who know that theory and reality don’t always match completely. |
3 Proven Methods to Recover Data from an Uninitialized Disk
Let’s take a closer look at three proven methods to recover data from an uninitialized disk. The methods are described in the same order we recommend you try them. This way, you can achieve the best results with the least amount of effort.
Method 1: Reinsert the Disk
There’s a small but real chance that your disk isn’t actually uninitialized—only your operating system thinks it is. That’s why you should start by turning your computer off, reinserting the disk, and turning it on again.
If you’re lucky, the disk will be recognized, and you will be able to access all your files without any issues. No luck? Then don’t despair and move on to the other four methods described below.
Method 2: Use Data Recovery Software
The best data recovery software applications can retrieve lost data even from uninitialized hard drives. We recommend you perform hard drive not initialized recovery of data before attempting to fix the actual underlying problem (damaged or missing partition table) since your repair attempts could make the data loss even worse.
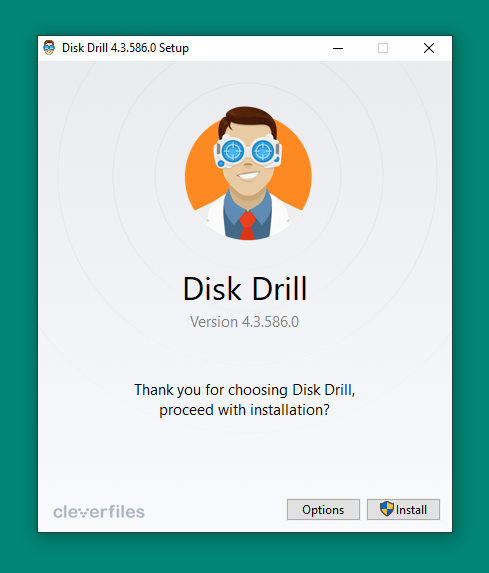
You can choose from a variety of different data recovery software solutions. One great option is Disk Drill. Why? Because it runs on Windows and macOS, previews an unlimited amount of data for free, and is extremely intuitive and easy to use.
This is what you need to do to recover data from an uninitialized disk using Disk Drill:
- Download and install Disk Drill on the computer to which your uninitialized disk is connected to.
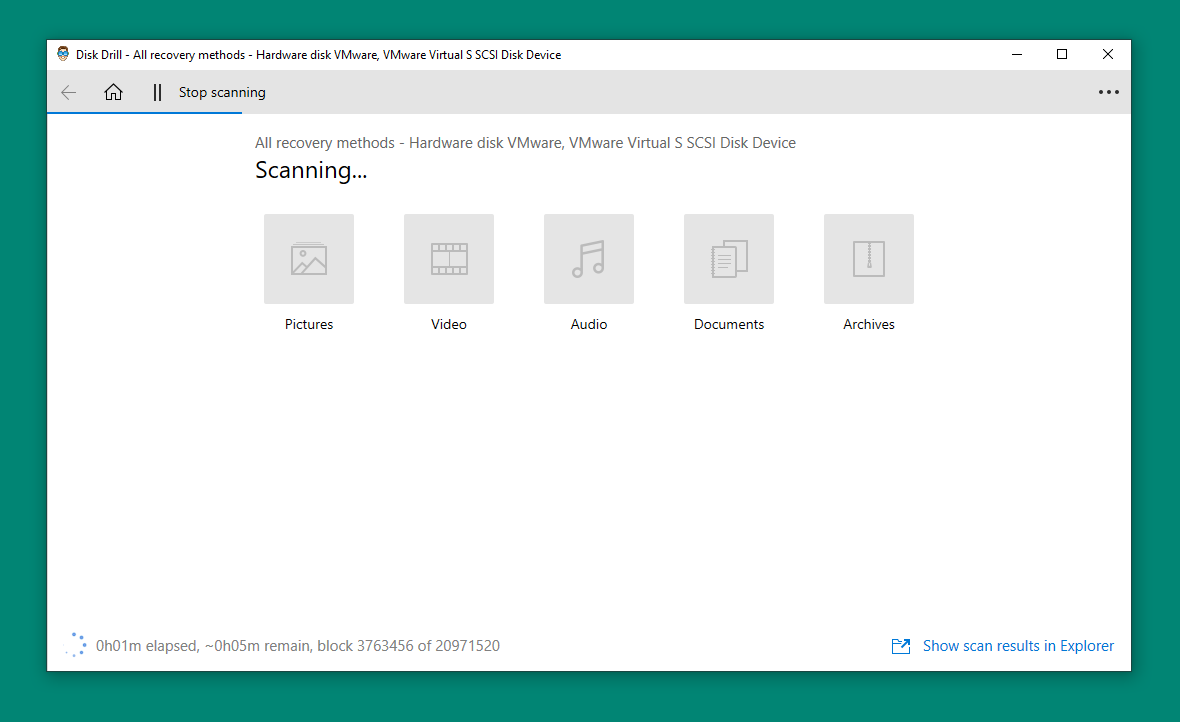
- Launch Disk Drill and scan the uninitialized disk.
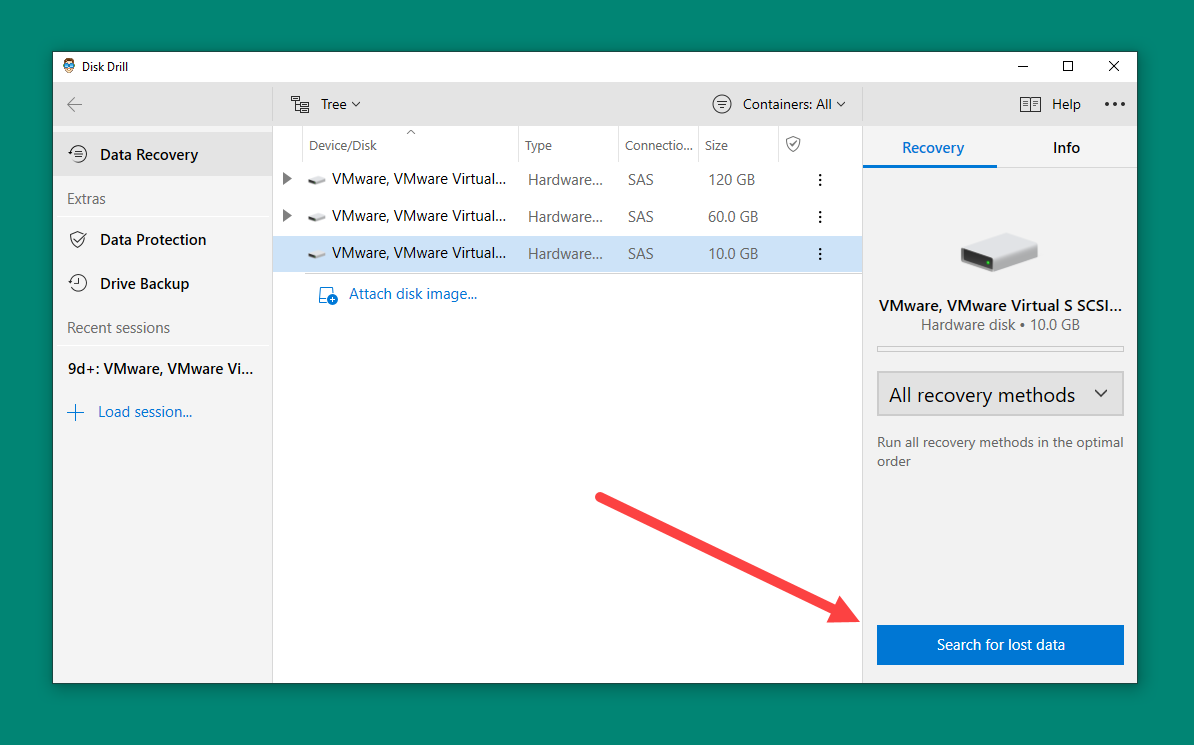
- Either wait for the scan process to finish or choose to view real-time scan results.
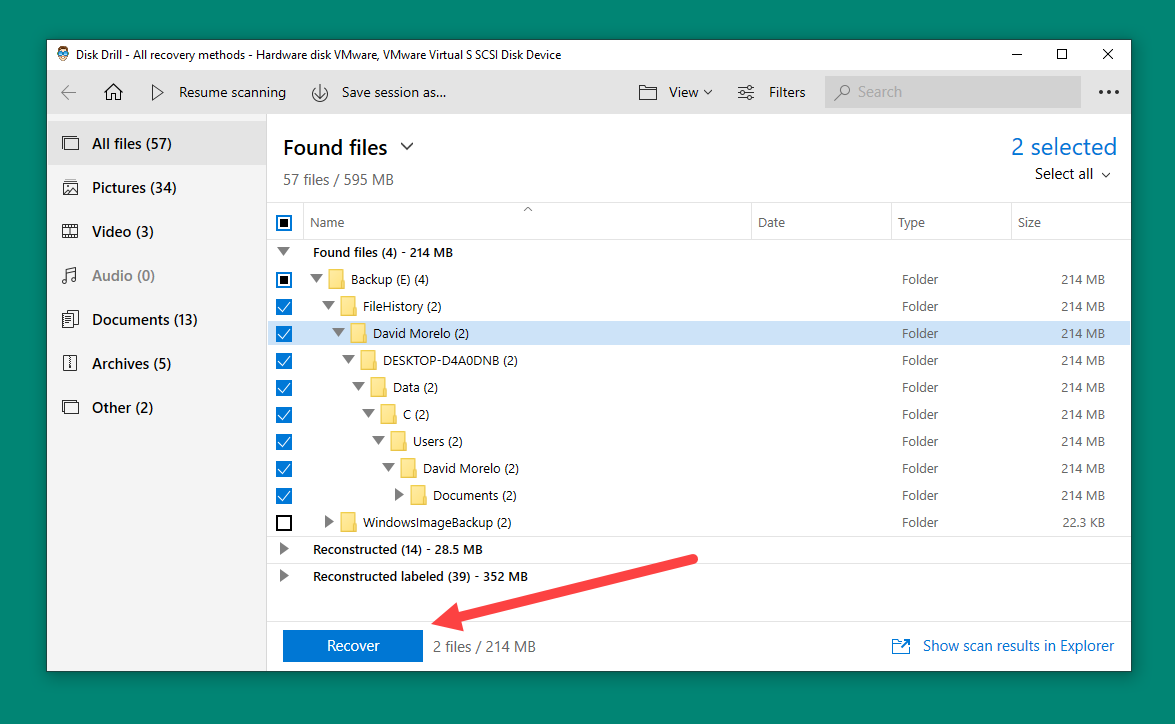
- Preview recoverable files and select each file you want to recover.
- Click the Recover button and specify the recovery directory.
Method 3: Perform the Disk Initialization Process
While this may seem like the obvious fix to your disk initialization issues, there’s a good reason why we’ve decided to describe how to perform the disk initialization process as the last solution: it’s unlikely that it will help you access your data.
To initialize a disk:
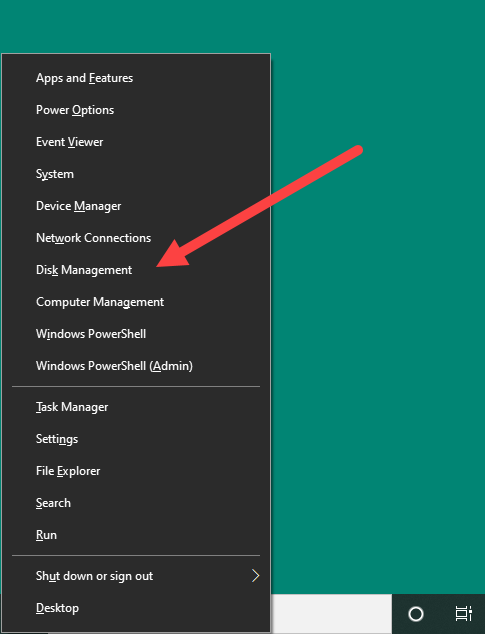
- Press CTRL + X and select Disk Management.
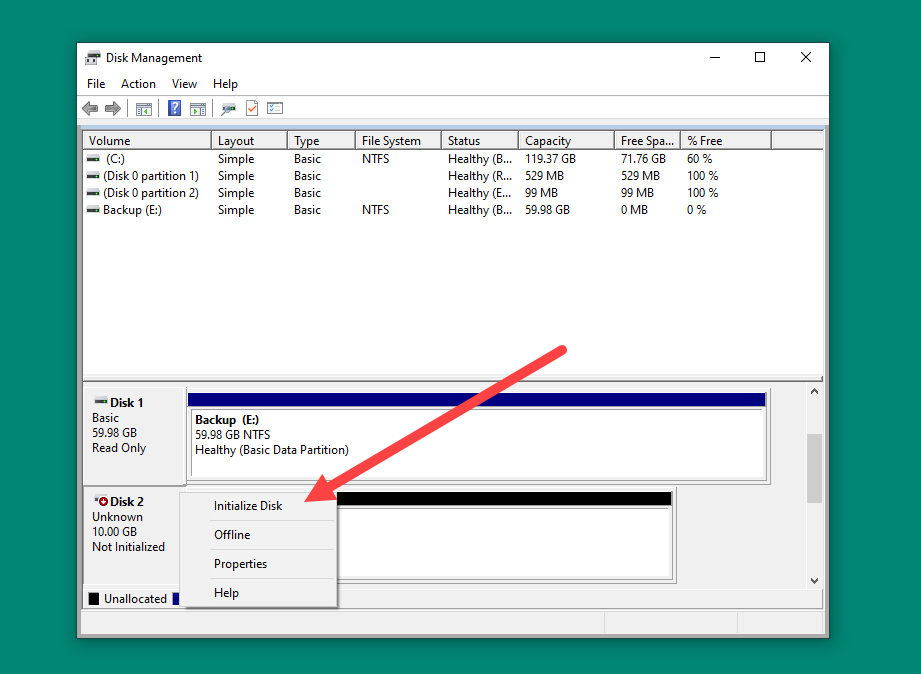
- Right-click your uninitialized disk and select the Initialize Disk option.
- Choose your preferred partition style (GPT is the best choice unless you’re worried about compatibility with older computers) and click OK.
The disk initialization process will create a new partition table, allowing you to create one or more partitions on the disk and format them as you see fit. In other words, you will be left with a blank slate and a usable disk—but not your data.
Sure, you can then use data recovery software to attempt to get your data back from the formatted partitions, but that’s not the best course of action you can take. Continue reading this article to learn how to initialize a hard drive without losing data.
How to Initialize a Disk Without Losing Data
![]() Disk initialization is, by nature, a destructive process, but that doesn’t mean that you can’t initialize a disk without potentially making your data loss situation even worse.
Disk initialization is, by nature, a destructive process, but that doesn’t mean that you can’t initialize a disk without potentially making your data loss situation even worse.
The trick is to first create a byte-to-byte backup of the entire disk so that you can later recover lost data from this backup.
You can create a byte-to-byte backup of your uninitiated disk using countless different backup software applications, but you can make your life a lot easier by creating it using the Drive Backup tool that’s included for free in Disk Drill.
Why is Disk Drill’s native backup feature superior to dedicated backup software applications? Because Disk Drill lets you attach the resulting disk image and scan it just like a regular disk.
Here’s a step-by-step summary of all the steps you need to follow to initialize a disk without losing data:
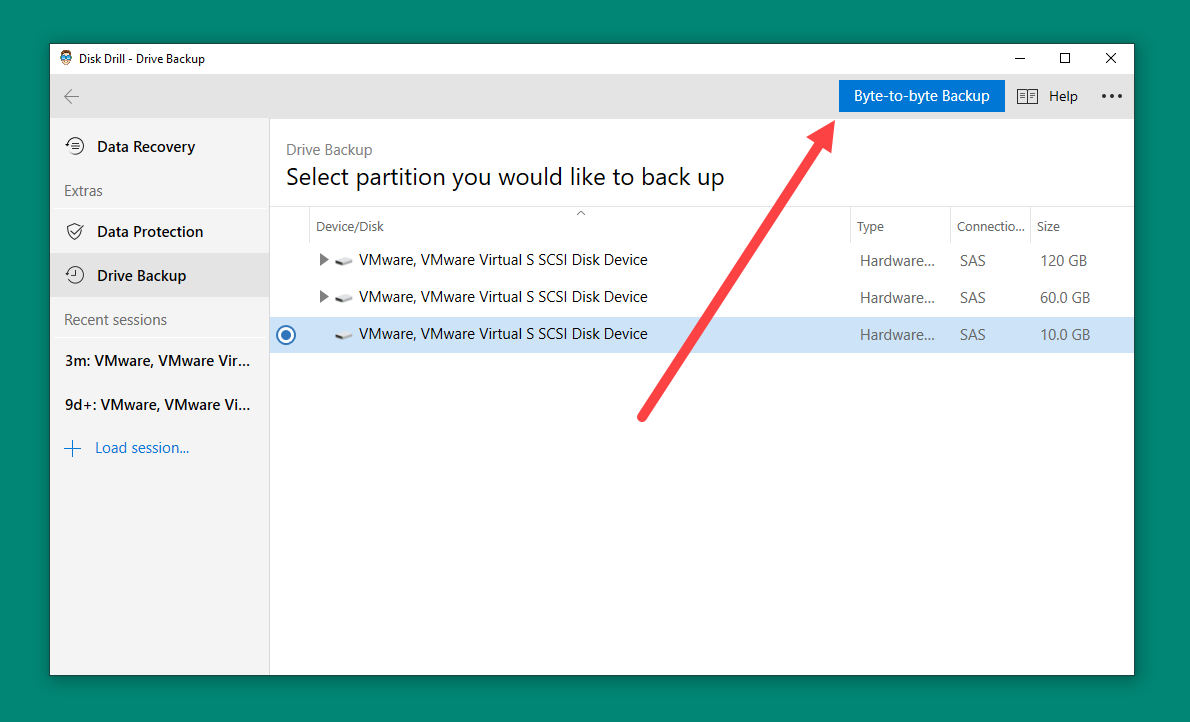
- Launch Disk Drill and select the Drive Backup feature.
- Choose the uninitialized disk and click the Byte-to-byte Backup button.
- Initiate the disk using the instructions provided in the previous chapter.
- Return to Disk Drill and switch to the Data Recovery tab.
- Click Attach disk image and select your backup image.
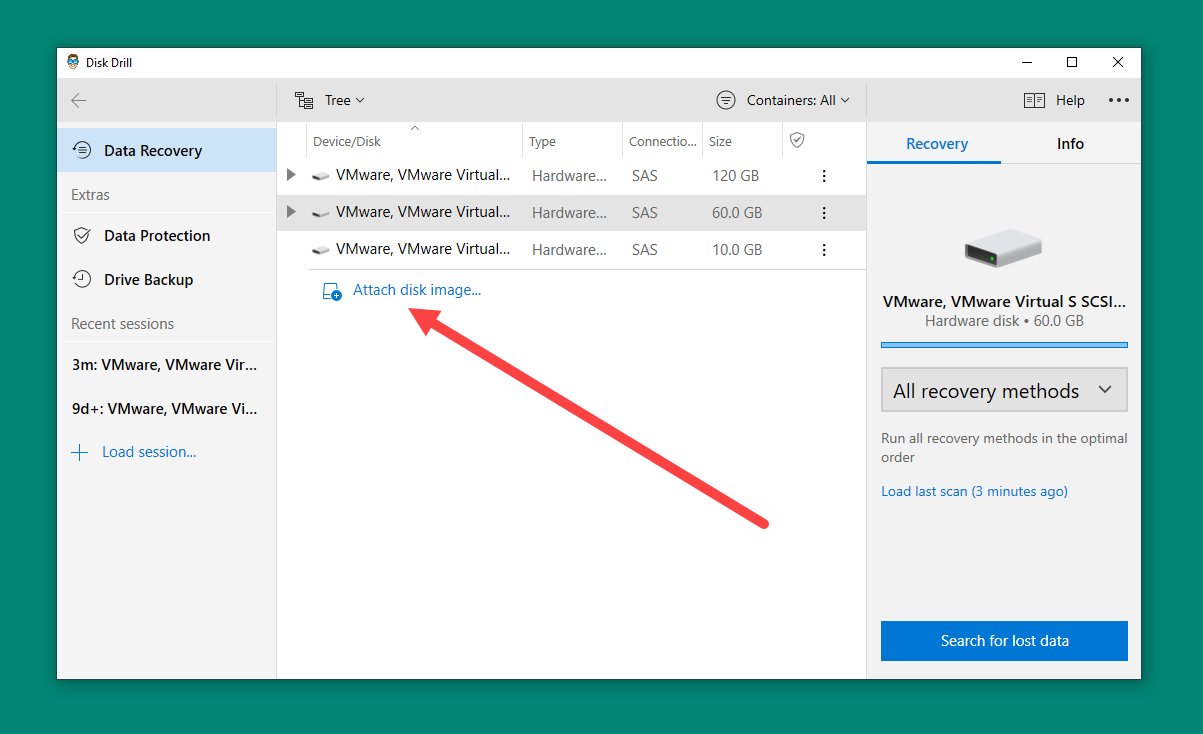
- Select the attached image and click Search for lost data.
- Complete the recovery process as you would normally (see Method #2 for more information).
If you’re interested in learning how to initialize a disk without losing data, check out our comprehensive article on the subject. It provides detailed information on the process and can help you avoid any potential data loss.
FAQ
Is it possible to initialize a disk without losing data?
Disk initialization is a destructive operation because it recreates the partition table. To avoid data loss, you should create a complete disk backup beforehand. Alternatively, you can use data recovery software to retrieve files that can no longer be accessed.
How can I initialize an uninitialized disk?
To initialize an uninitialized disk:
- Press CTRL + X on your keyboard and select Disk Management.
- Right-click your uninitialized disk and choose the Initialize Disk option.
- Choose your preferred partition style and click OK.
Can CHKDKS fix an uninitialized disk?
No, the CHKDSK utility is unable to fix an uninitialized disk because such a disk doesn’t have a fully functioning file system.
What’s the difference between a RAW and an uninitialized disk?
A RAW disk contains a valid partition table and at least one partition without a file system. An uninitialized disk doesn’t have a valid partition table. The good news is that both RAW disk recovery and uninitialized disk recovery can be performed using readily available data recovery software.
Should I use MBR or GPT when initializing a disk?
That depends mainly on the age of your computer and your operating system of choice. If you’re using older hardware with an older operating system, then you may have to use MBR for compatibility reasons. In all other situations, GPT is the better choice.
Conclusion
It’s entirely possible to recover data from an uninitialized disk, and we described how in this article. To increase your data recovery chances, we recommend you use the best data recovery software you find and begin the recovery process as soon as possible. Of course, you can always create a byte-to-byte copy of the entire uninitialized disk and recover your data from this copy, which can be handy if you’re in a hurry to initialize the disk so you can use it again.
This article was written by David Morelo, a Staff Writer at Handy Recovery Advisor. It was also verified for technical accuracy by Andrey Vasilyev, our editorial advisor.
Curious about our content creation process? Take a look at our Editor Guidelines.