The web is full of confused Windows users who are trying to figure out the difference between Quick format and Full format. Unfortunately, it’s not full of accurate answers that really get to the bottom of this age-old question. That’s a problem because the choice between the two types of storage device formatting has far-reaching consequences, especially when it comes to data recovery outcomes.
Let’s dive into the main differences between Full format vs Quick format and emerge with a clear understanding of what happens when you choose one over the other.
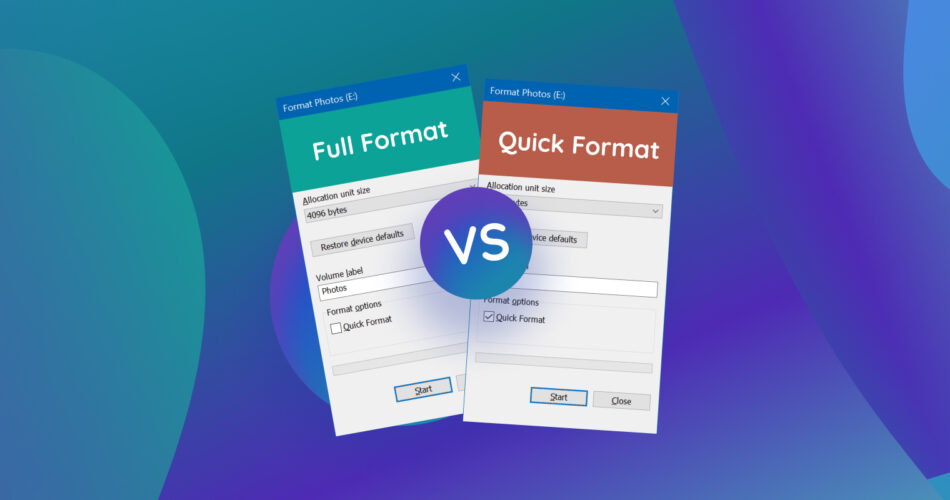
Quick Format vs. Full Format: A Detailed Comparison
|
Quick Format |
Full Format (Windows Vista and later) |
What Happens |
Recreates the file system |
Recreates the file system, zeroes the entire storage device (00), and checks for bad sectors, which are defective storage areas. |
Speed |
Faster (usually takes just a few seconds). |
Slower (can take several hours, depending on the speed and size of the formatted storage device). |
Data Recovery Chances |
High (data is still on the hard drive and can be recovered using data recovery software). |
Low (data is erased by writing zeros over it, making its recovery nearly impossible). |
Bad Sectors |
Do not scan or mark bad sectors as unusable. |
Scans the formatted partition for bad sectors and attempts to fix them by marking them as unusable. |
Security |
Less secure (data can still be retrieved with relative ease). |
More secure (overwrites data with zeros, making it virtually impossible to recover a formatted SSD, HDD, and other storage devices). |
Use Cases |
Suitable for a quick wipe of the storage device when data security is not a high priority. |
Ideal for storage devices with suspected bad sectors, or when data security and permanent deletion are crucial, such as when selling a storage device. |
Quick format and Full format in Windows are like the hare and the tortoise:
- Quick format, the speedy hare, zips through the process by simply recreating the file system, which is a method used by operating systems to manage and organize files on storage devices, including USB flash drives, hard disk drives (HDDs), solid-state disks (SSDs), and memory cards (SD cards, MMC cards, etc.).
- Full format, the patient tortoise, takes its time to not just recreate the file system but also overwrites the entire storage device with zeroes and ensures there are no bad sectors left on it. That’s why so many people have struggled to recover data from an SD card formatted using the Full format option.
Does this mean that the Full format always wins the race just like the tortoise in the well-known fable? Not really. It just means there’s more than one way to reach the finish line, so the choice between the two methods depends on your specific needs and situation:
In that case, you should use—you’ve guessed it—Quick format. Regardless of how large your storage device is, it will recreate the file system and effectively erase all data in a few seconds.
Then, Full format is an easy choice because it overwrites the entire storage devices with zeroes. Even the most advanced data recovery software applications can’t recover files from a formatted hard drive or some other storage device if the Full format option is used.
In this scenario, a Full format is also a good option because it checks for bad sectors and marks them accordingly. That said, you can also use Quick format and combine it with chkdsk or the Error checking tool.
What Happens When You Use Quick Format and Full Format
Let’s illustrate the difference between Quick format and Full format in Windows in practice by formatting a USB flash drive using the two methods. We’ll start with the Quick format option and then proceed with the Full format option.
To show you what’s really going on under the hood, we’ll use a freeware hex editor called HxD. This handy tool can show us the raw contents of the USB flash drive—the same raw content data recovery software applications see when they unformat USB drives.
Here’s what our USB flash drive looks like prior to formatting:
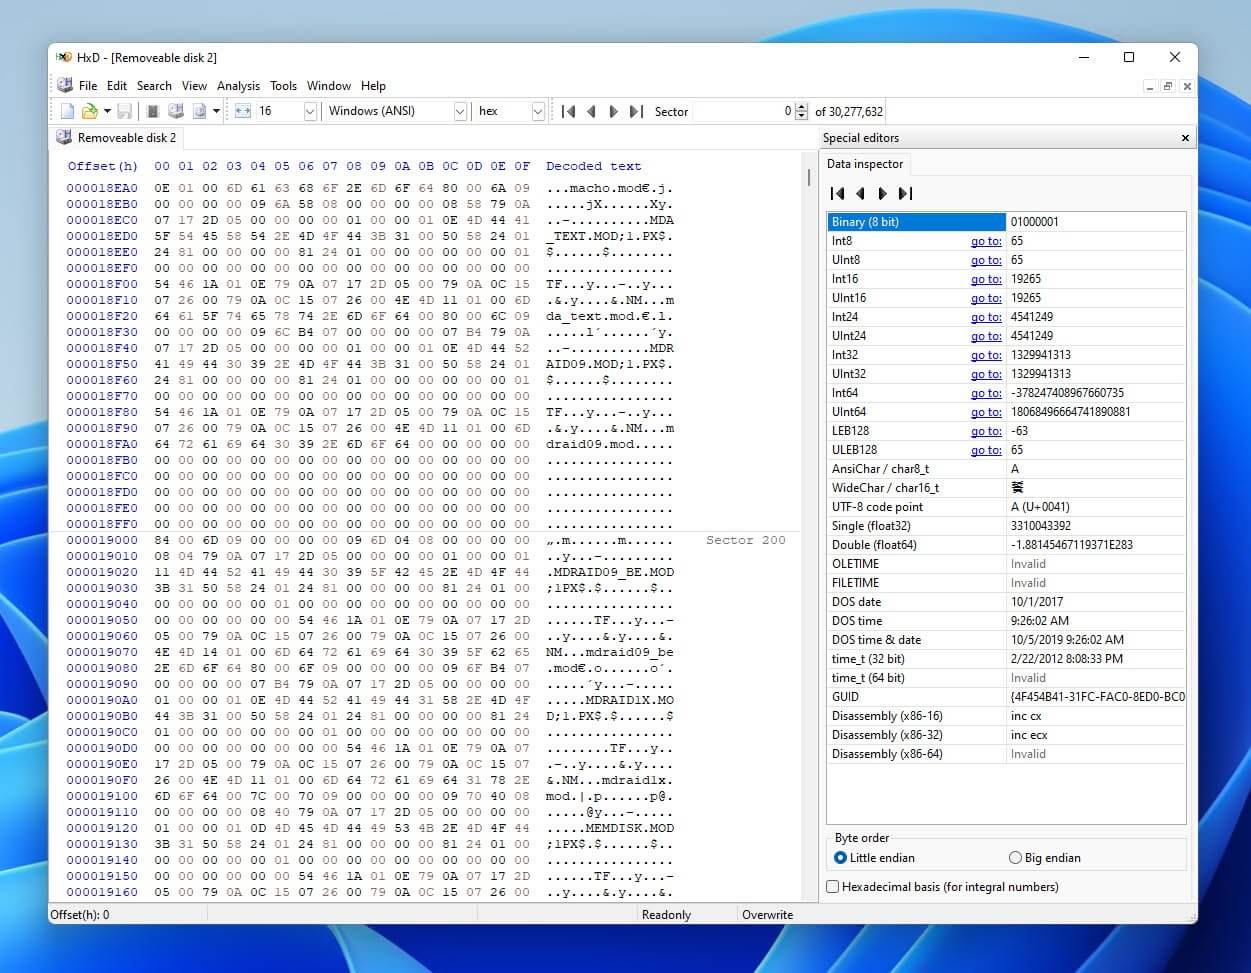
The pairs of numbers and letters represent data in the hexadecimal format. Now, let’s format the drive using Quick format and see what happens:
As you can see, Quick format left all data intact, which is why it’s possible to recover data from a formatted USB drive when this format method is used. But what happens when we use the Full format? It’s time to find out:
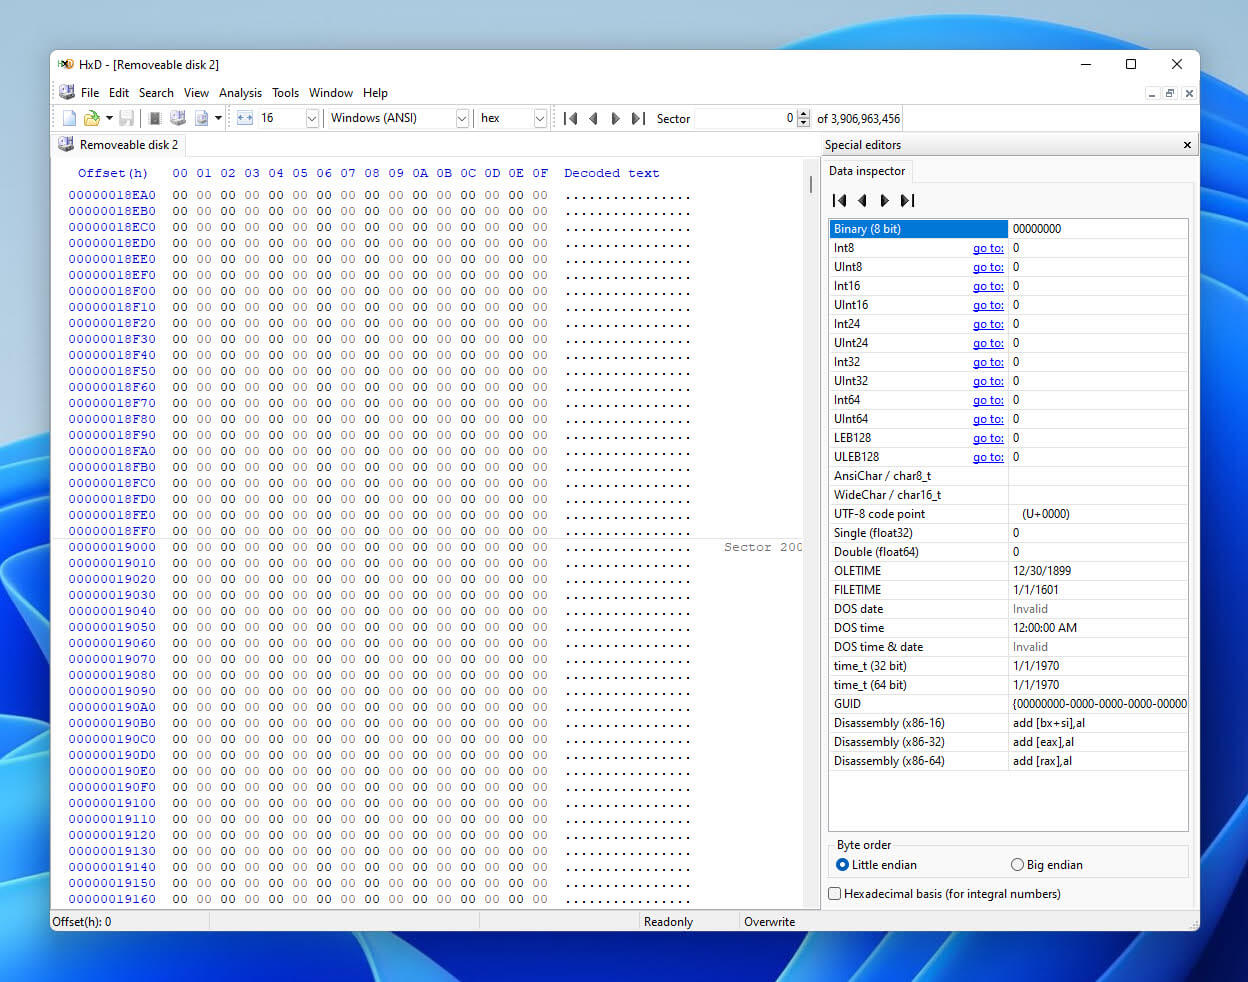
Except for the first boot sector (sector 0), Full format replaced all data that was stored on our USB flash drive with zeroes (00), leaving no chance for data recovery software to undelete them. That’s the difference between quick format vs full format on Windows.
Quick Format vs Full Format In Windows XP and Older
Everything said above is true only for Windows Vista and newer. Older versions of Windows don’t overwrite data with zeroes when the Full format option is selected.
That’s why it’s possible to unformat hard drives and other storage devices that have been formatted on Windows XP and older. It’s also why there’s so much conflicting information about Quick format vs Full format online.
Step-by-Step Guide to Formatting a Drive
Now that you understand what Quick format and Full format do and do not have in common, let’s explore three different methods for formatting a drive in Windows, providing step-by-step instructions for each.
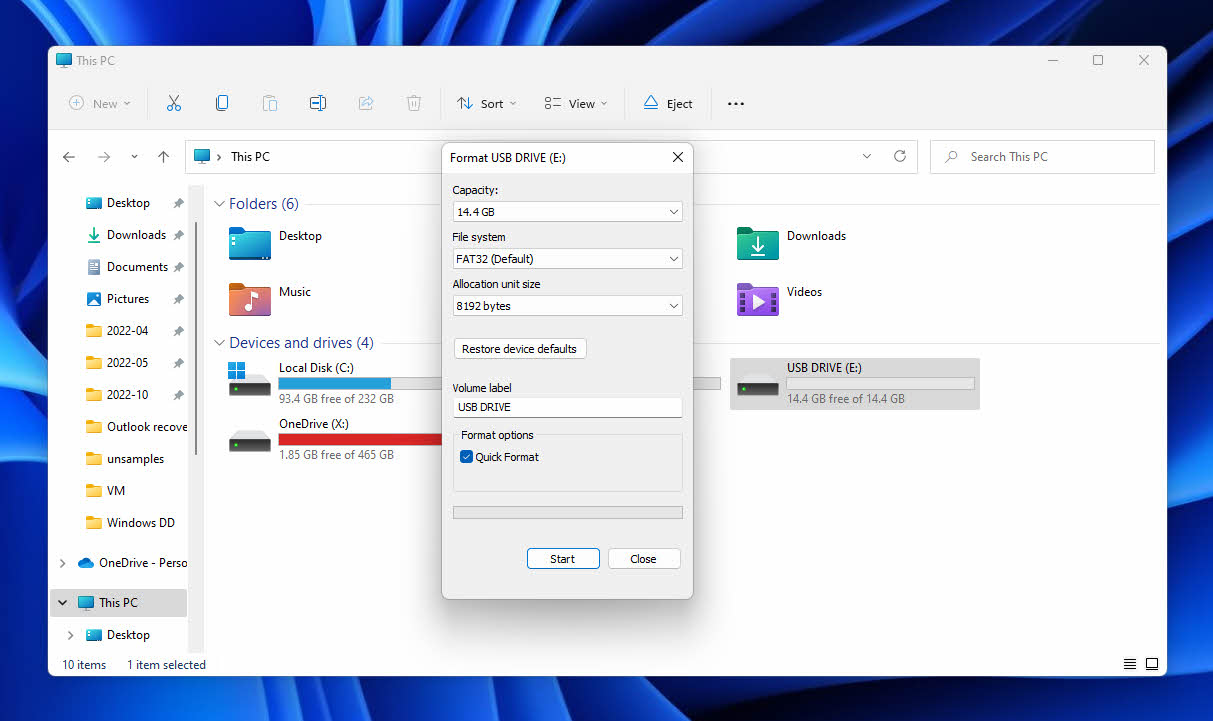
Method 1: File Explorer
You can easily format a drive in Windows from File Explorer, the operating system’s built-in file manager:
- Launch File Explorer by clicking its taskbar icon or pressing the Win + E keyboard shortcut.
- Navigate to This PC.
- Locate your drive and right-click on it.
- Choose the Format option from the context menu.
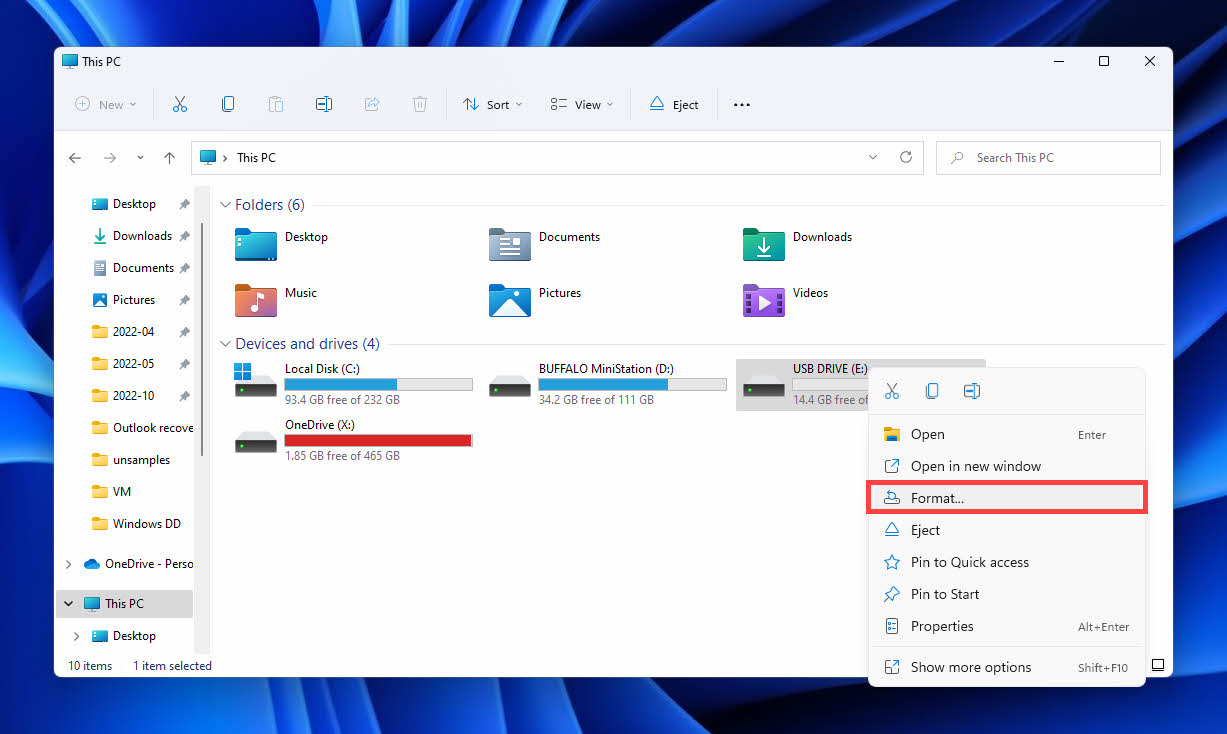
- Pick the desired file system, name the drive, and, optionally, check the Quick format option.
- Click Start to begin.
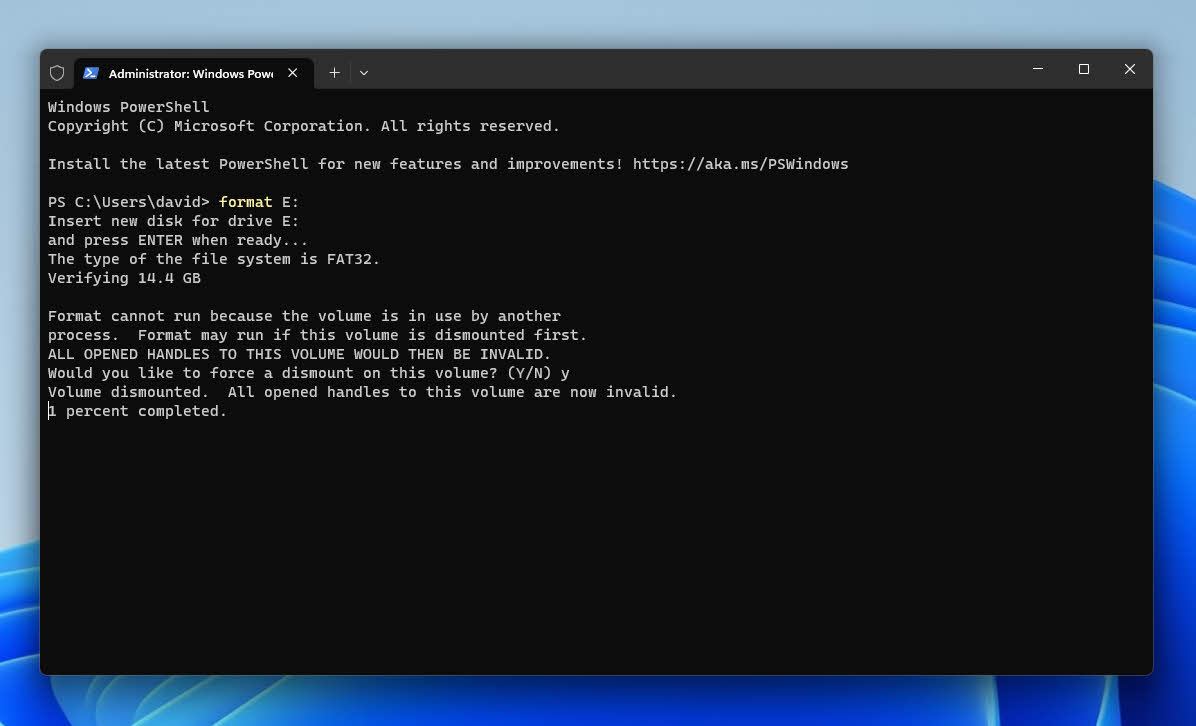
Method 2: Command Prompt
If you ever find yourself unable to launch File Explorer or even boot into Windows, then you can format your drive using Windows Terminal:
- Launch Windows Terminal as administrator by pressing the Win + X keyboard shortcut and selecting the Windows Terminal (Admin) option.
- Enter the following command and press Enter: format x: (replace x with the latter assigned to the drive you want to format)
- Confirm your choice and wait until your drive is formatted, and then close Windows Terminal.
The format command accepts many different parameters that let you customize the formatting process according to your needs. Here are some commonly used parameters:
- /Q — performs a quick format
- /V:<label> — specifies the volume label
- /FS:filesystem — lets you choose the file system type
For more parameters and information about them, visit the official format command support page.
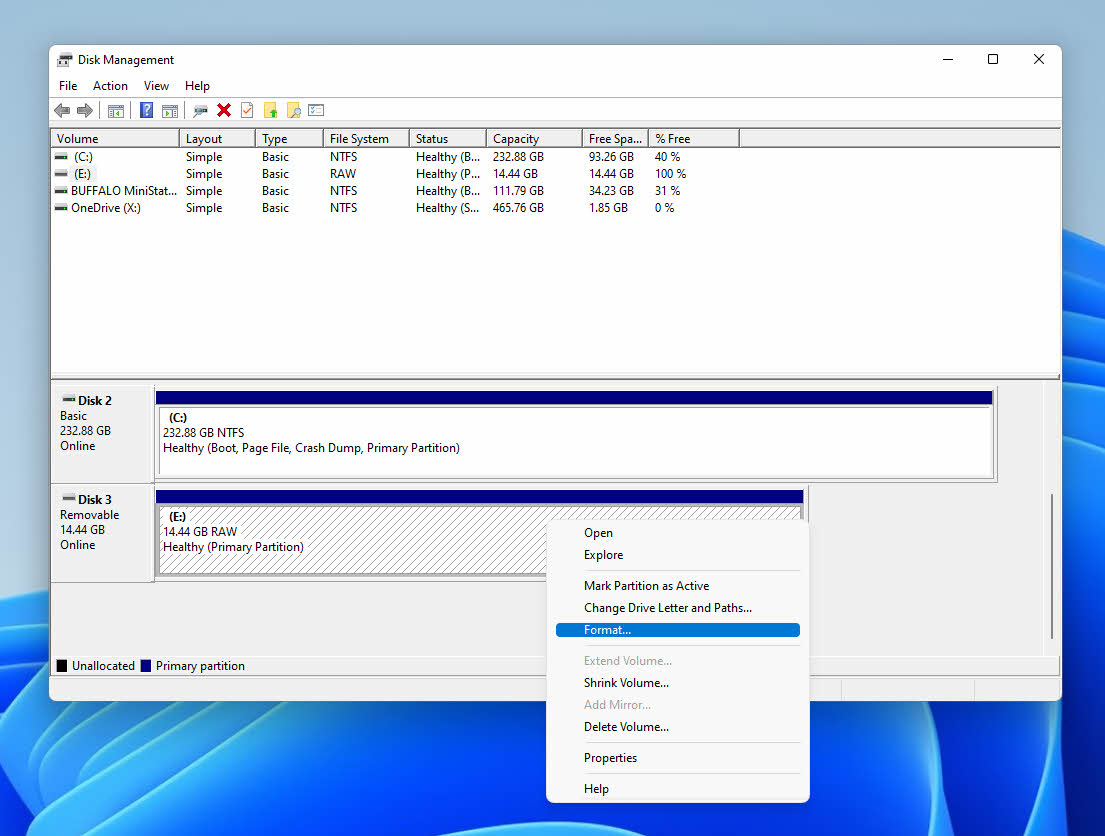
Method 3: Disk Management
File Explorer doesn’t always list all connected storage devices—only those with drive letters assigned to them. To format a storage device without a drive letter, you can use the Disk Management tool:
- Launch Disk Management by pressing the Win + X keyboard shortcut and selecting the Disk Management option.
- Locate the drive you want to format and right-click it.
- Choose the Format option.
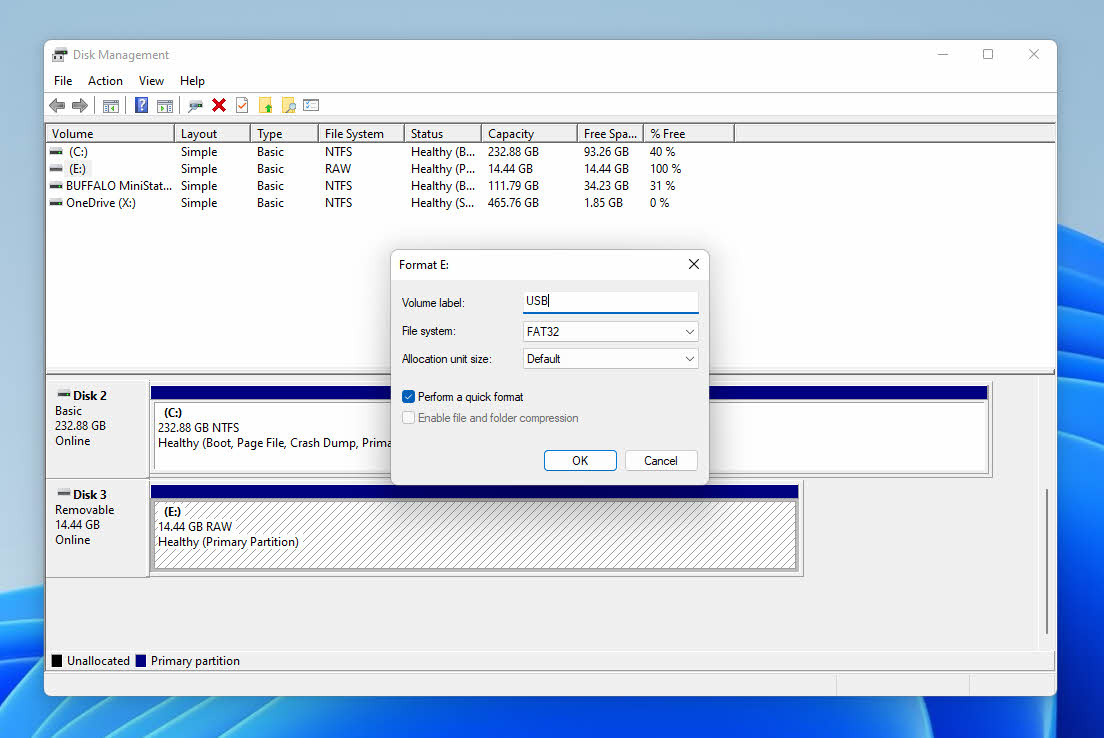
- Name the drive, choose the desired file system, and decide if you want to perform a Quick format.
- Click OK to begin.
Best Practices for Formatting a Drive
There’s nothing scary about formatting a drive, but you should adhere to the following best practices to avoid common pitfalls that could lead to data loss and other problems.
- ✅ Pick the right format method: Quick format is great if you’re not concerned with data security, and the fact that it’s possible to perform a Quick format recovery, allowing you to format your drive in a few seconds. Full format, on the other hand, is the ideal choice when data security and permanent deletion are essential. Plus, Full format also checks for bad sectors, which is a nice bonus.
- 🗃️ Use a suitable file system: When formatting a drive, you also need to choose a suitable file system—not just a suitable formatting method. For Windows users, NTFS is a great choice for internal drives, while FAT32 and exFAT are commonly used for external storage devices because of their compatibility with other operating systems. That’s why it’s usually possible to unformat a USB drive or unformat an SD card on any platform.
- ❌ Don’t interrupt the process: The worst thing you could do is interrupt the formatting process before it’s complete. Why? Because it could cause your storage devices to disappear from File Explorer. Then, you would have to fix it using the Disk Management tool.
- 💽 Back up then format: If you’re formatting your drive because you want to fix bad sectors, then you need to back it up beforehand since the Full format option permanently erases all data. Just know that it’s possible to recover an internal or external hard drive even without formatting.
As long as you keep these best practices in mind, you shouldn’t run into any issues whatsoever.
FAQ
What does formatting a hard drive do?
That depends on which method of formatting you choose. A Quick format only recreates the file system, while a Full format also overwrites the content of the formatted hard drive with zeroes and checks for bad sectors.
Does Full format erase all data?
Yes, the Full format option on Windows Vista and newer overwrites all data with zeroes, making it impossible to recover it.
How long does a Full format take?
A Full format can take anywhere from a few minutes to a few hours—it all depends on the speed of your storage device, its storage capacity, and the data transfer rate of the interface through which the storage device is connected to your computer.
Will formatting my hard drive fix bad sectors?
Formatting can help you recover data from a corrupted hard drive, but you need to use the Full format method because it includes a thorough scanning process that identifies and marks bad sectors as unusable, telling the operating system to avoid writing data to them in the future.
Conclusion
We hope that this article has helped you understand the difference between Quick format vs Full format and equipped you with the knowledge you need to decide which of the two formatting options is better for you. Ultimately, you’re in control of your data’s destiny, so it’s paramount to make informed decisions based on your specific needs and circumstances.
This article was written by David Morelo, a Staff Writer at Handy Recovery Advisor. It was also verified for technical accuracy by Andrey Vasilyev, our editorial advisor.
Curious about our content creation process? Take a look at our Editor Guidelines.