Your computer has numerous hidden files that cannot be accessed by simply opening Windows Explorer and looking for them. Windows hide some system-related folders by default. Often, these are folders or files that you don’t need to access during the normal usage of your PC. But, if you do need to access these files for any reason, you can view them, and if they’re still missing, recover these, and other hidden files on Windows. The guide below explains how.
How to Recover Deleted Hidden Files on a Windows PC
Hidden files and folders are as susceptible to data loss as any other data on your PC. The next section in this article explains how you can enable the view hidden files option on your computer to view and access these files.
But, what if the folders you require are still not visible? They’ve most likely been deleted from your computer.
In this case, third-party data recovery apps present themselves as a convenient and effective way for hidden file recovery. You can use them to recover hidden photos, videos, applications, and more.
Note: Perform data recovery as soon as you realize that data is missing. Delaying it increases the chances of you overwriting the deleted files, or them being overwritten due to system processes.
In our tutorial, we’ll use Disk Drill Data Recovery, as it is fast, easy to use, and has a high data recovery rate. The program also restores the original folder structure of the files, so you can find them exactly where they went missing from.
As a Windows user, you can take advantage of Disk Drill’s free trial that’ll let you recover up to 500 MB of data for free. The program is compatible with older versions of Windows, and you can also use it to recover hidden files on Windows 10/11.
Instructions on how to recover hidden files on a Windows computer, using Disk Drill:
- Download and install Disk Drill.
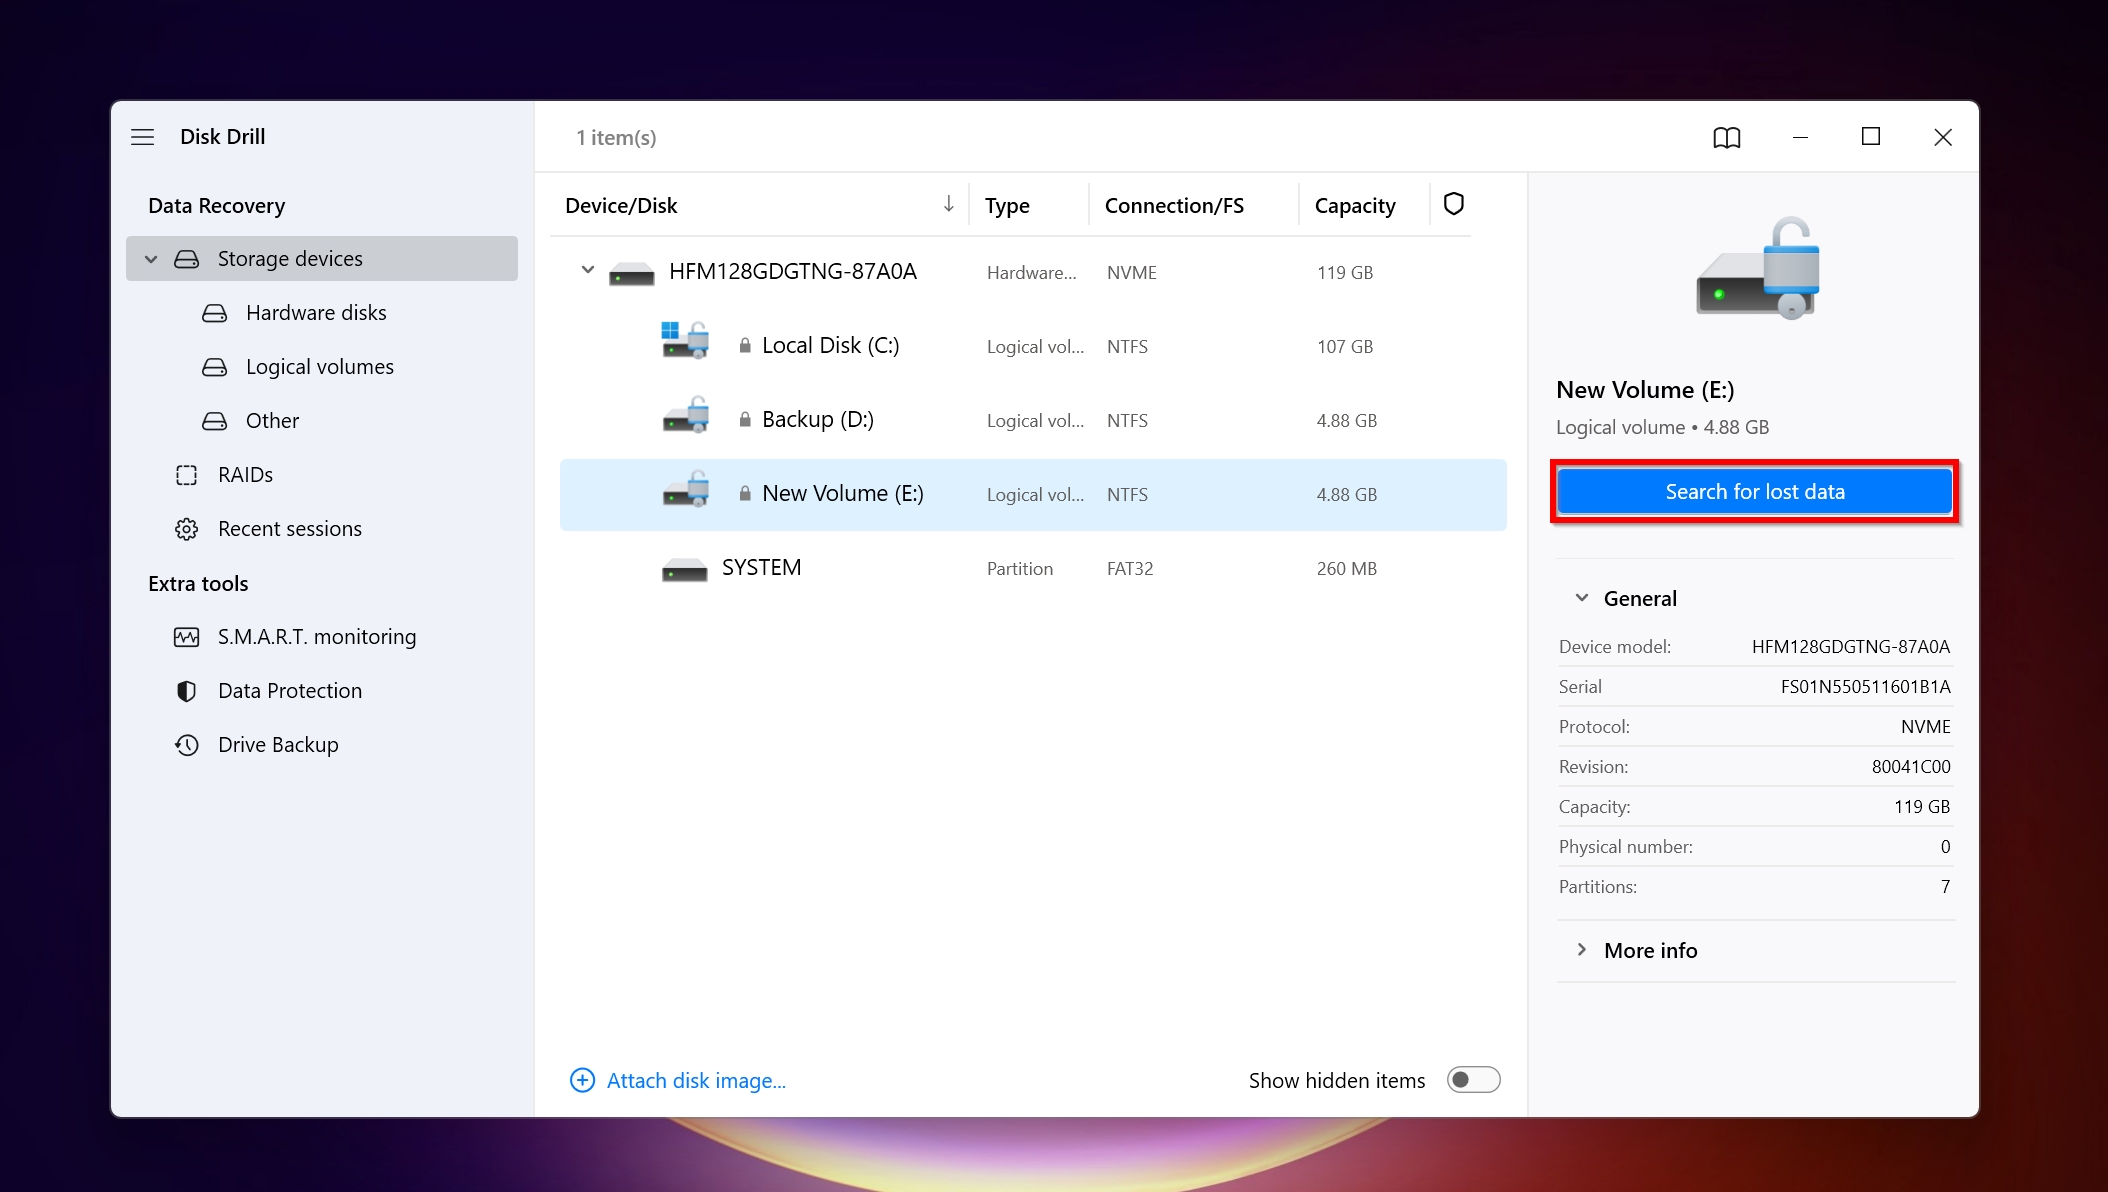
- Open Disk Drill, select the drive or partition which contained the hidden files you’re looking to recover, and click on Search for lost data.
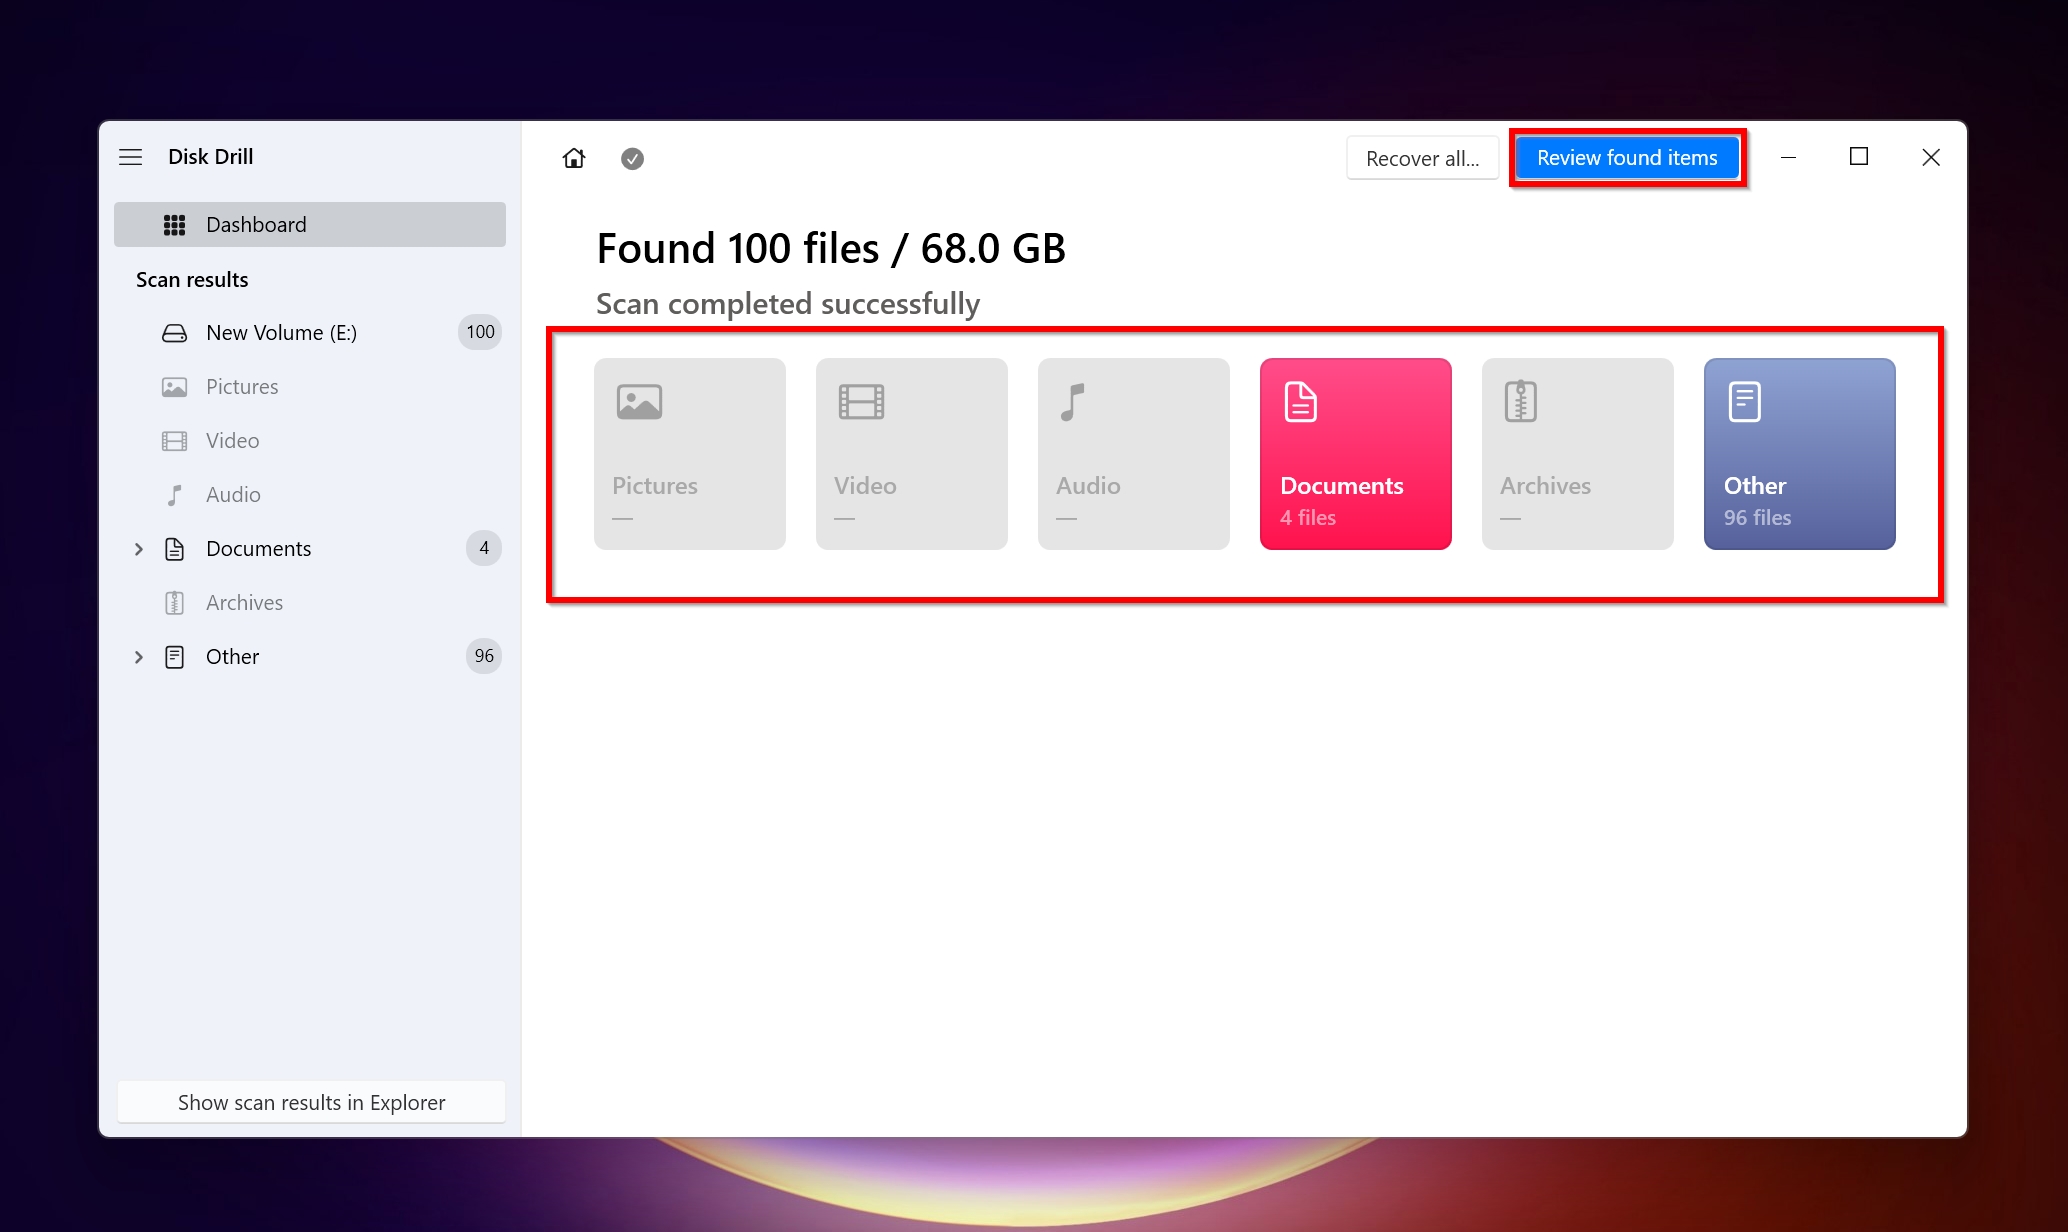
- Click Review found items to view the recovered files. To filter out your files, you can directly click on the relevant file type, such as pictures, videos, audio, documents, archives, and other.
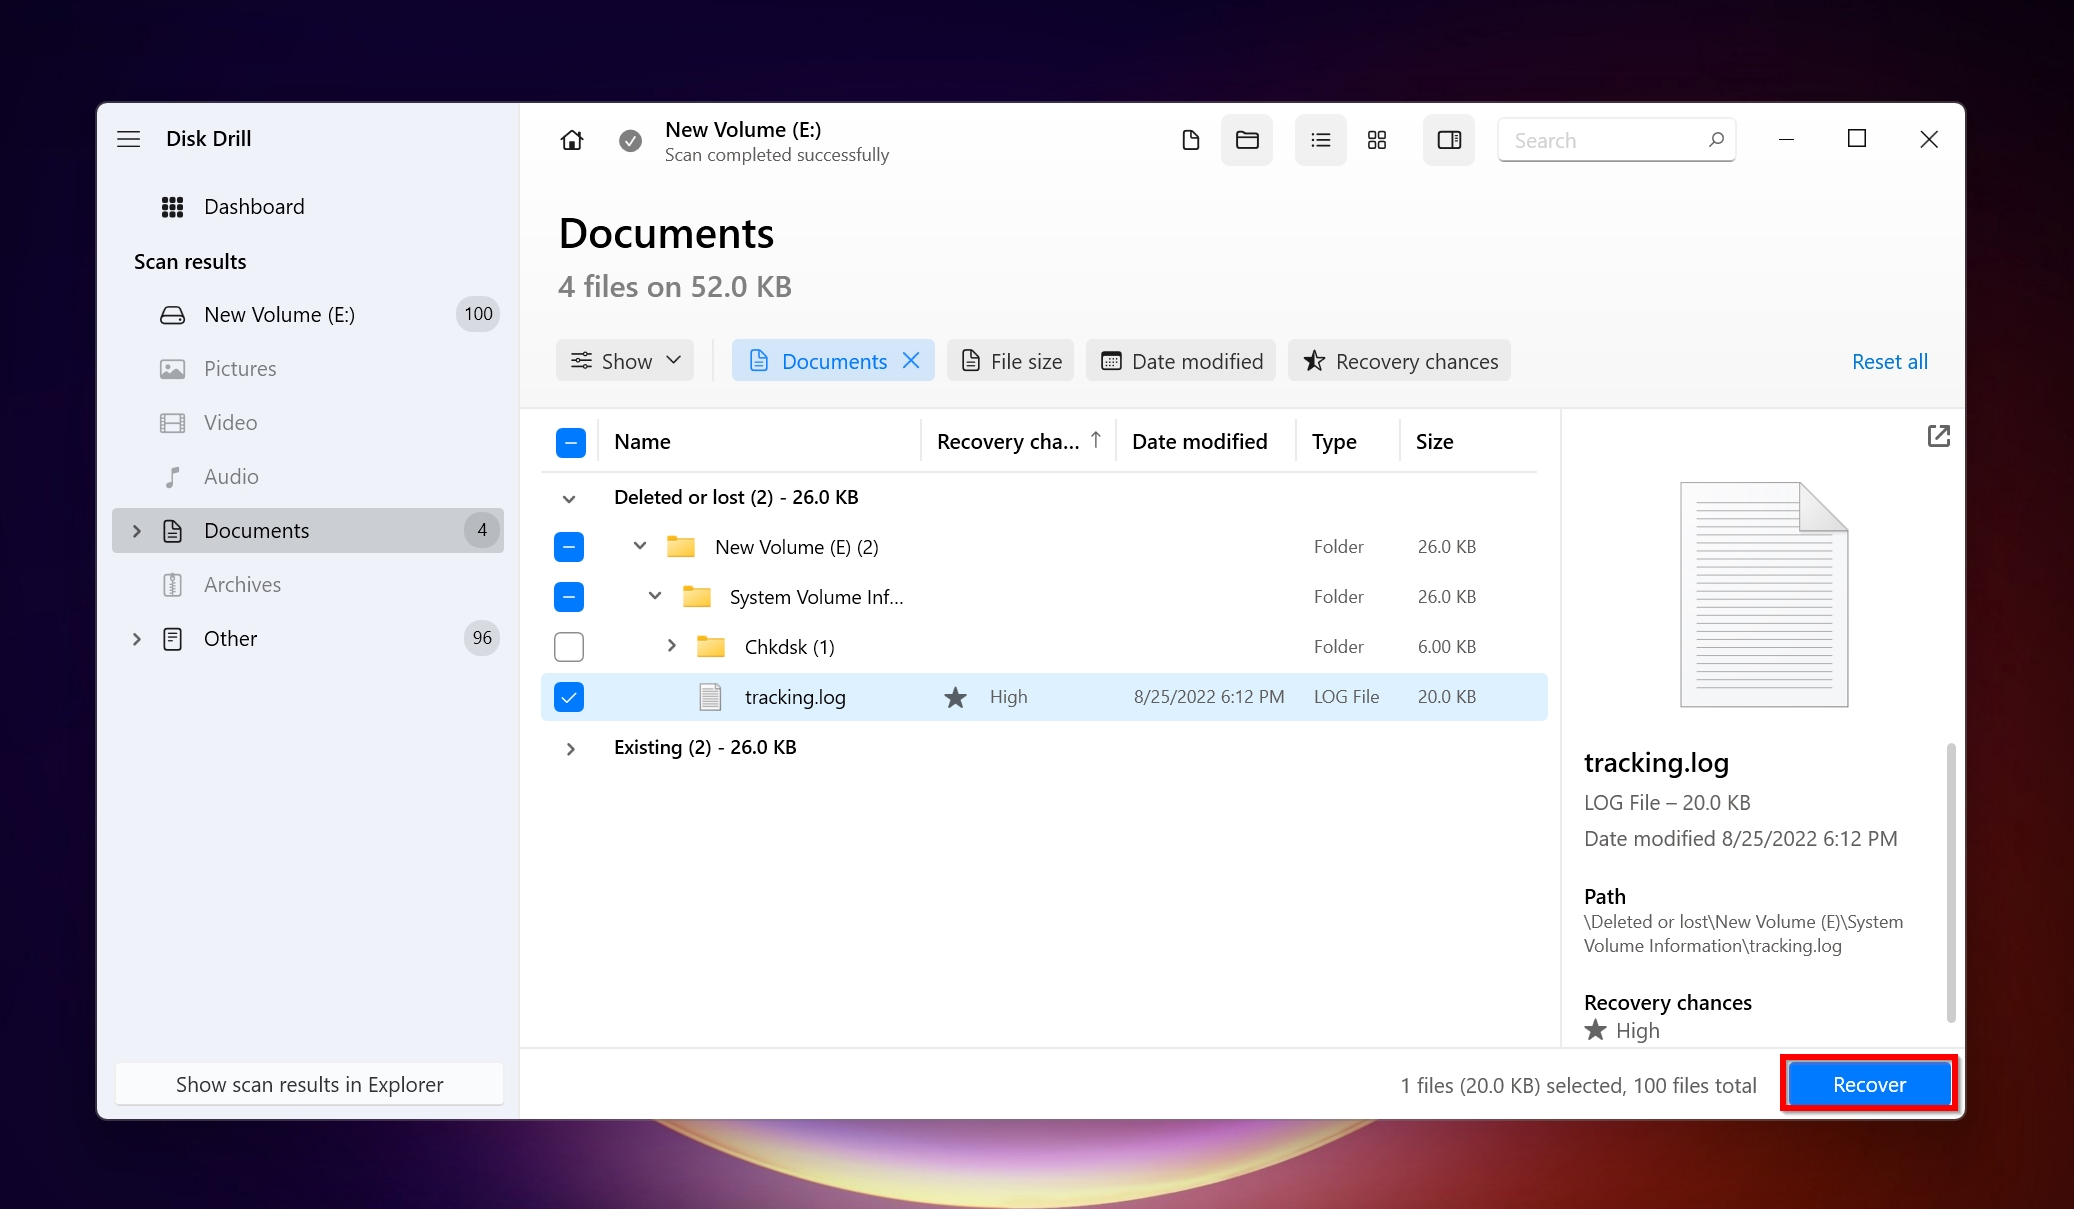
- Select the files you want to recover, by ticking the checkbox next to them. Disk Drill will display a preview of the file on the right side of the UI. Click the Recover button after confirmation.
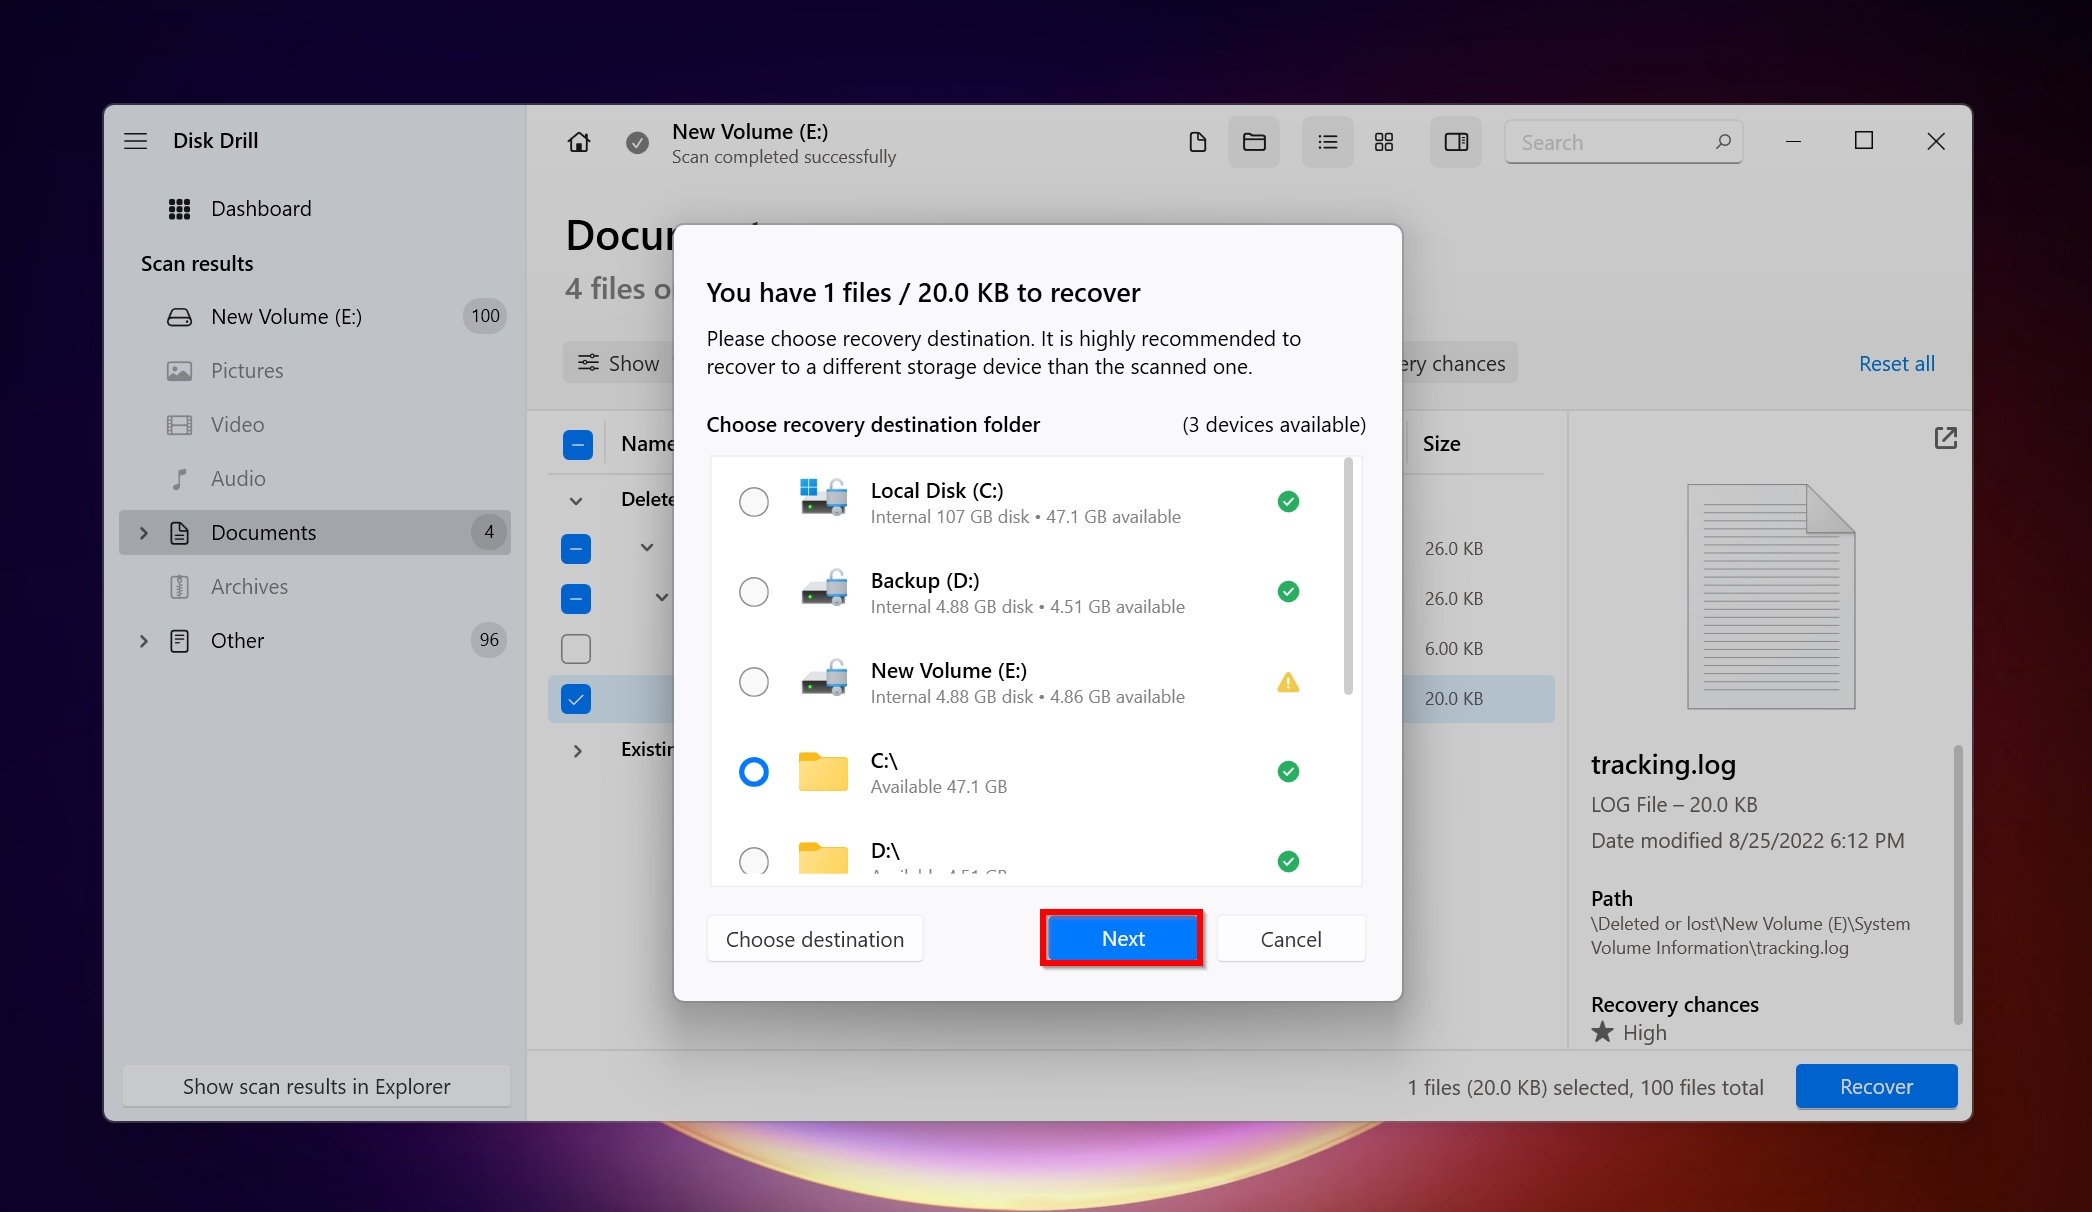
- Select a recovery destination for the files. Click Next once you’re done.
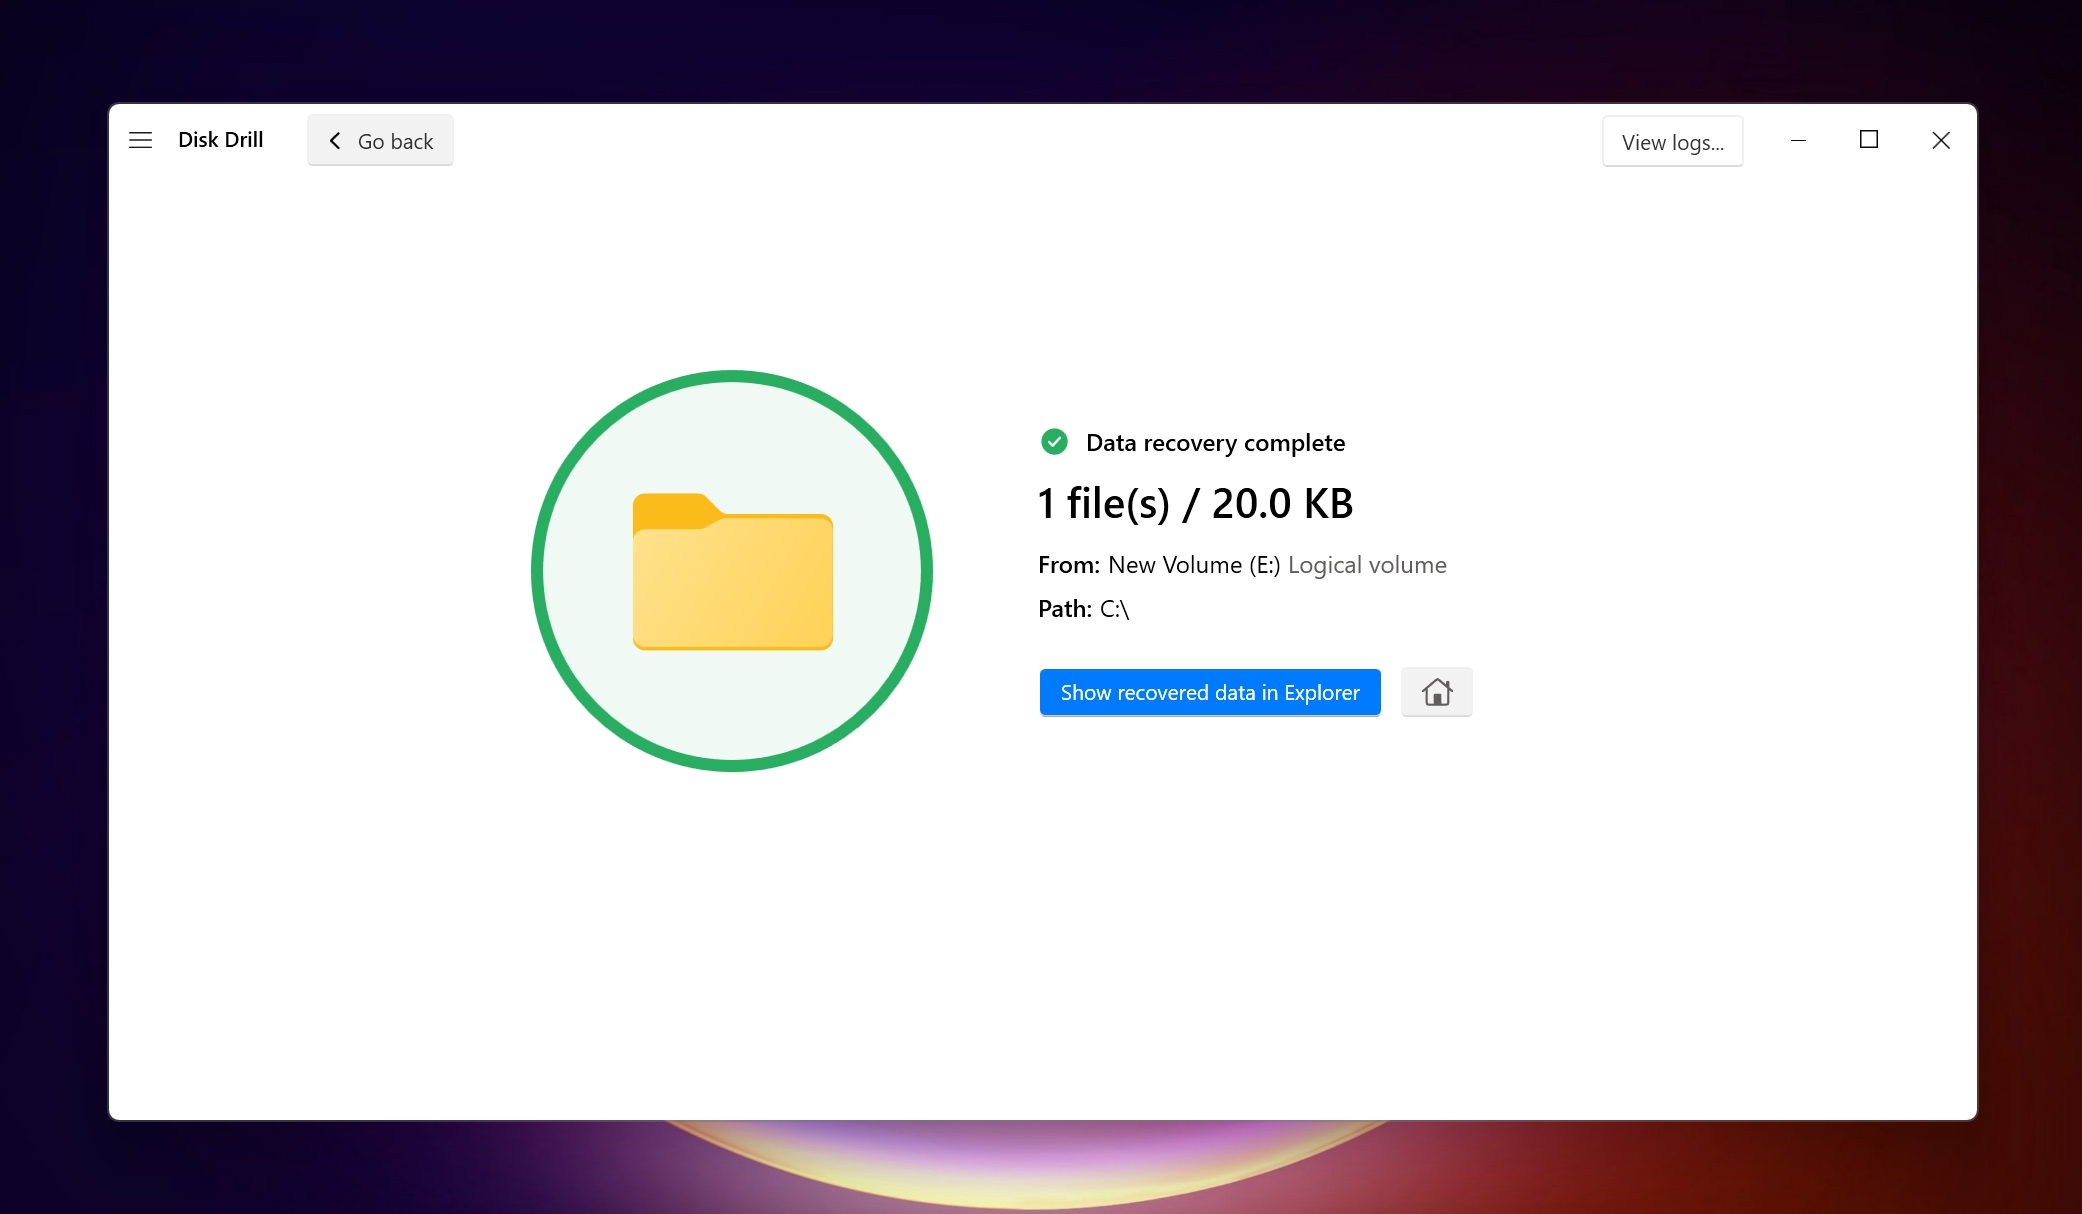
- Disk Drill will restore the hidden files for you.
Our in-depth Disk Drill review delves further into the program’s feature set and how to make the most out of it.
How to Show Hidden Files on a Windows PC
Depending on the Windows version your computer runs on, there are several ways to view hidden files/folders and make them accessible. Remember, that this method only lets you view hidden files that are currently stored on your storage drive. If the files were deleted because of disk formatting or some other reason, you’ll need to recover them using data recovery software.
Show Hidden Files on Windows 7
- Click on the Start button and open the Control Panel.
- Click on Appearance and Personalization.
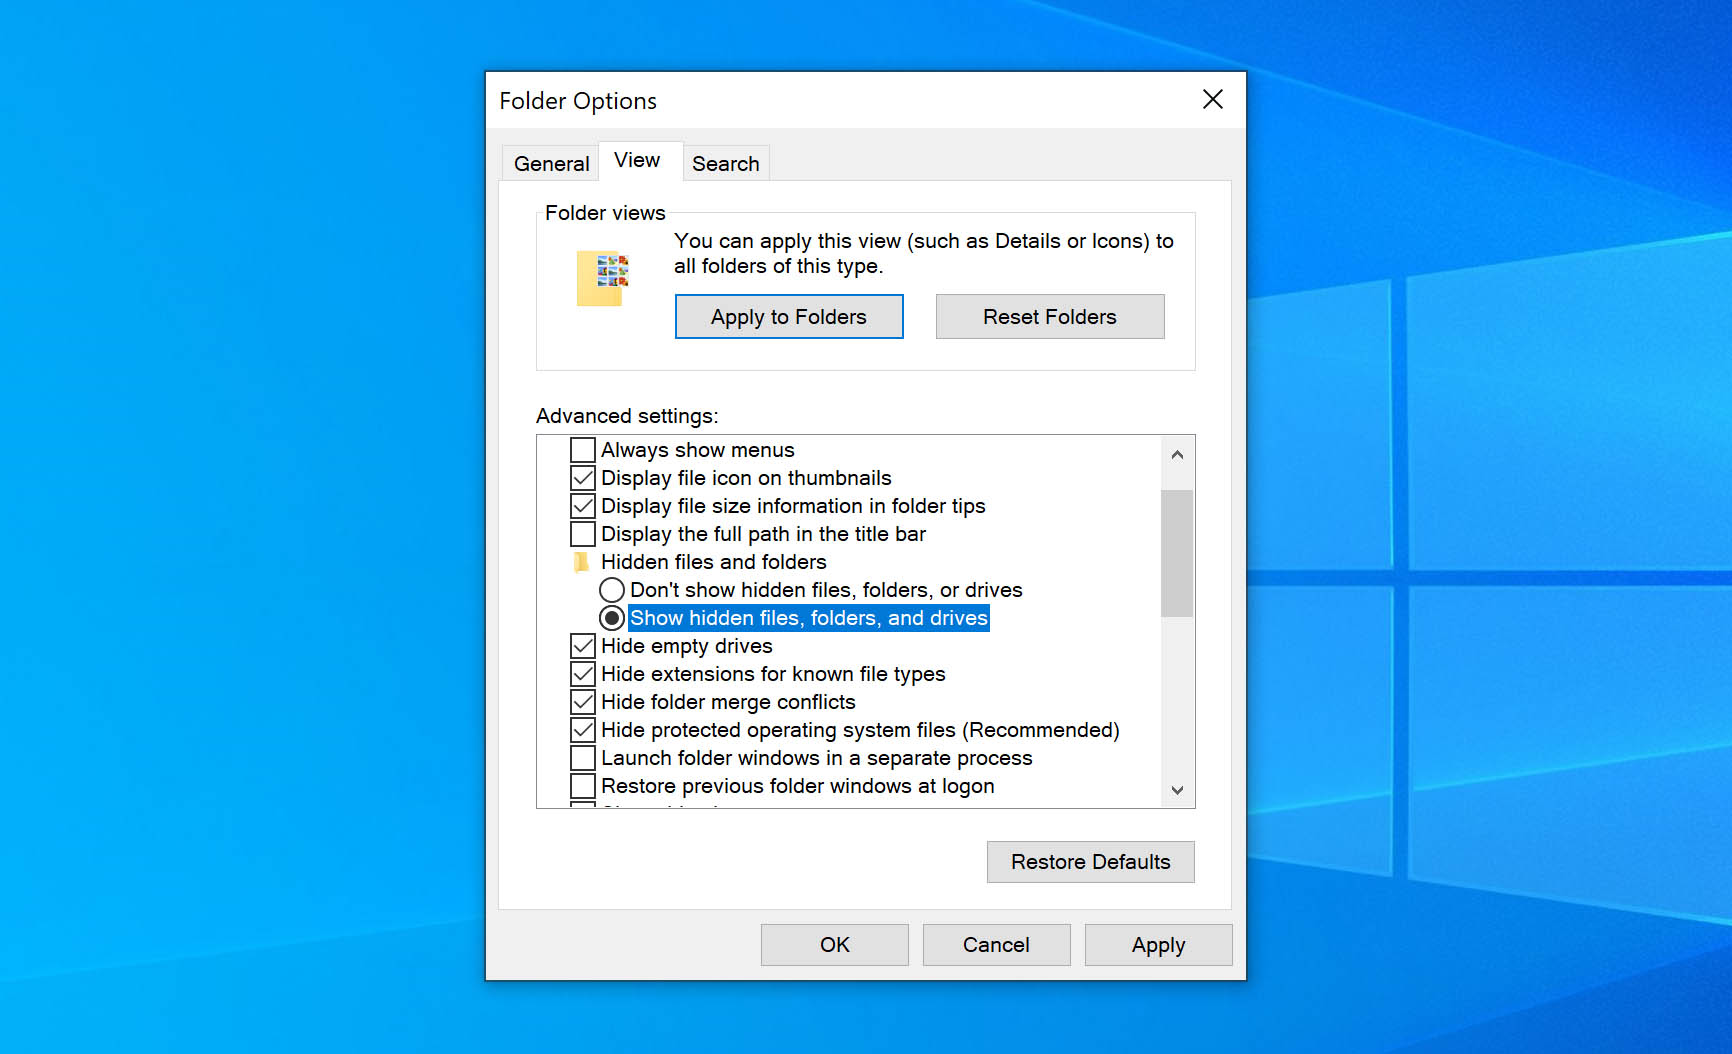
- Here, choose Folder Options and then navigate to the View tab.
- Below Advanced Settings, select the Show hidden files, folders, and drives option. Click OK.
View Hidden Files on Windows 10
To show hidden folders on Windows 10, follow this guide:
- Open File Explorer.
- Click on View > Options > Change folder and search options.
- Now, click on the View tab, and under Advanced settings, tick the Show hidden files, folders, and drives option. Click OK.
See Hidden Files on Windows 11
- Open File Explorer.
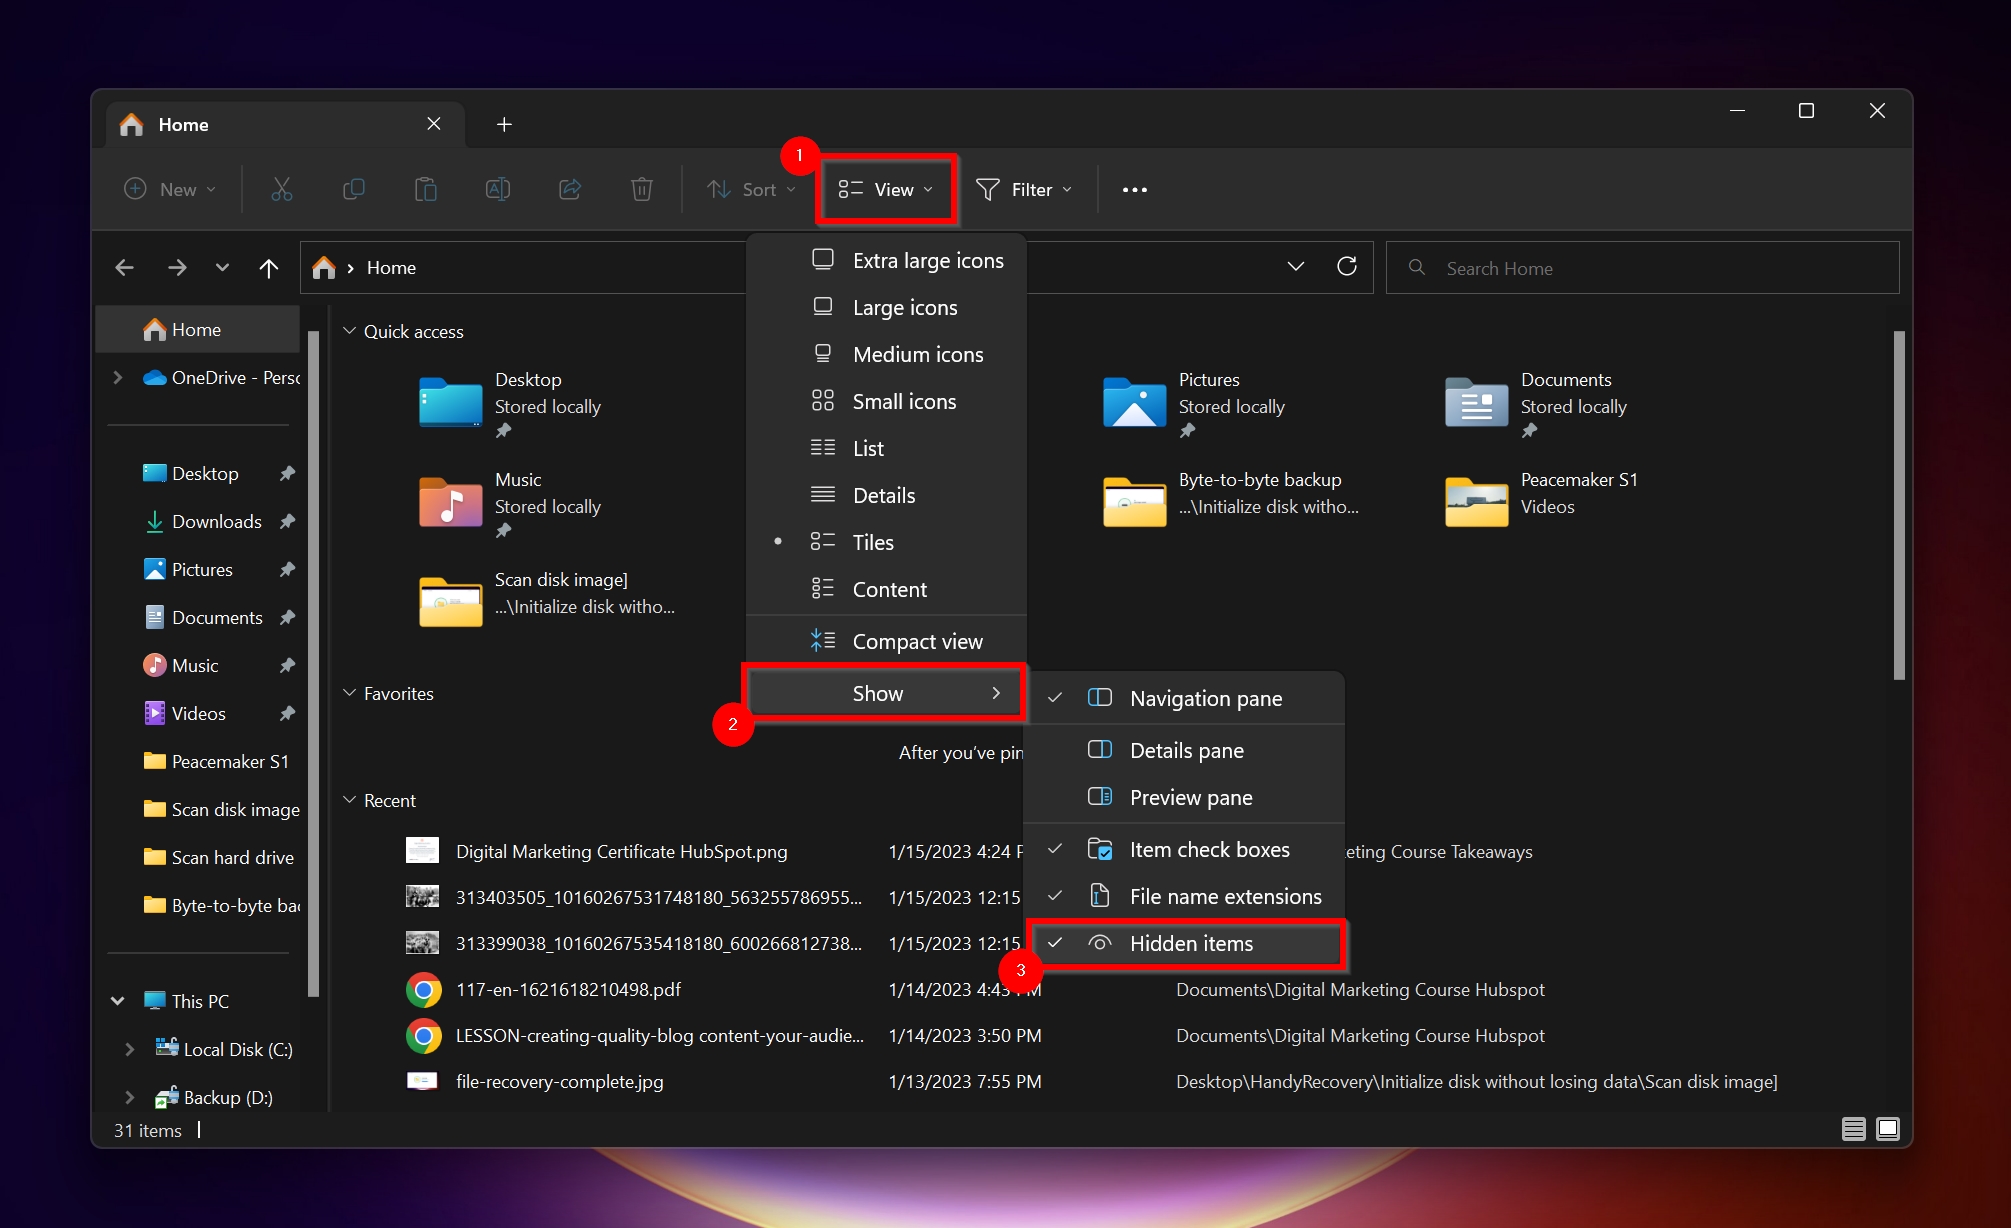
- Click on View > Show.
- Tick the Hidden items option.
How to Unhide Hidden Files & Folders
A hidden folder or file doesn’t have to necessarily remain hidden. After you restore a deleted hidden file, you can modify its properties so that it’s visible even if you disable the view hidden files and folders option on your computer. There are two ways to unhide a file or folder in Windows–using the file Properties option, or via the Command Prompt.
Uncheck Hidden Attribute in Properties
- Ensure hidden items are viewable.
- Open File Explorer, and navigate to the folder you want to unhide.
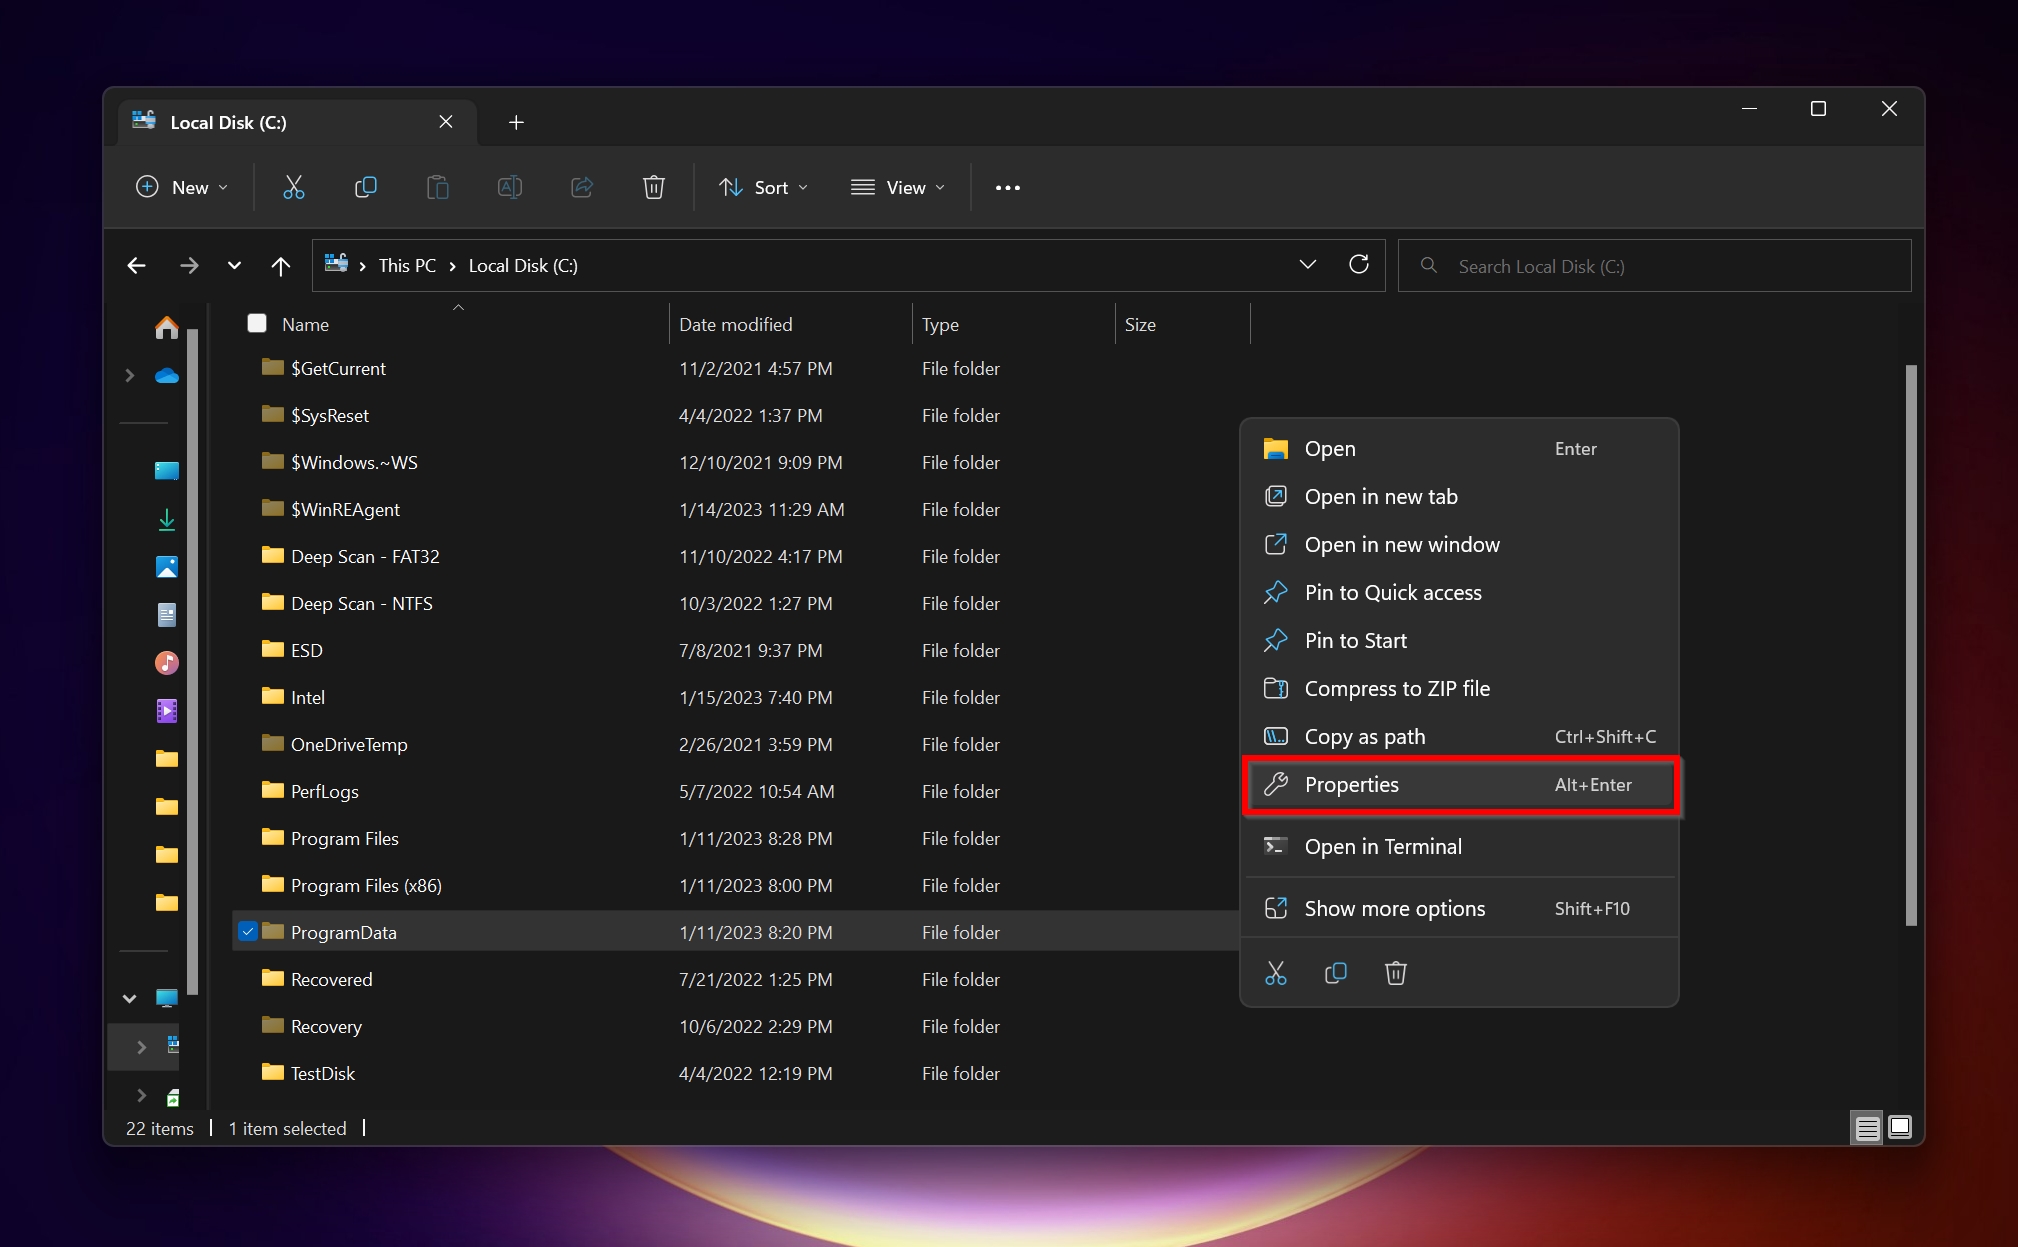
- Right-click the folder and select Properties.
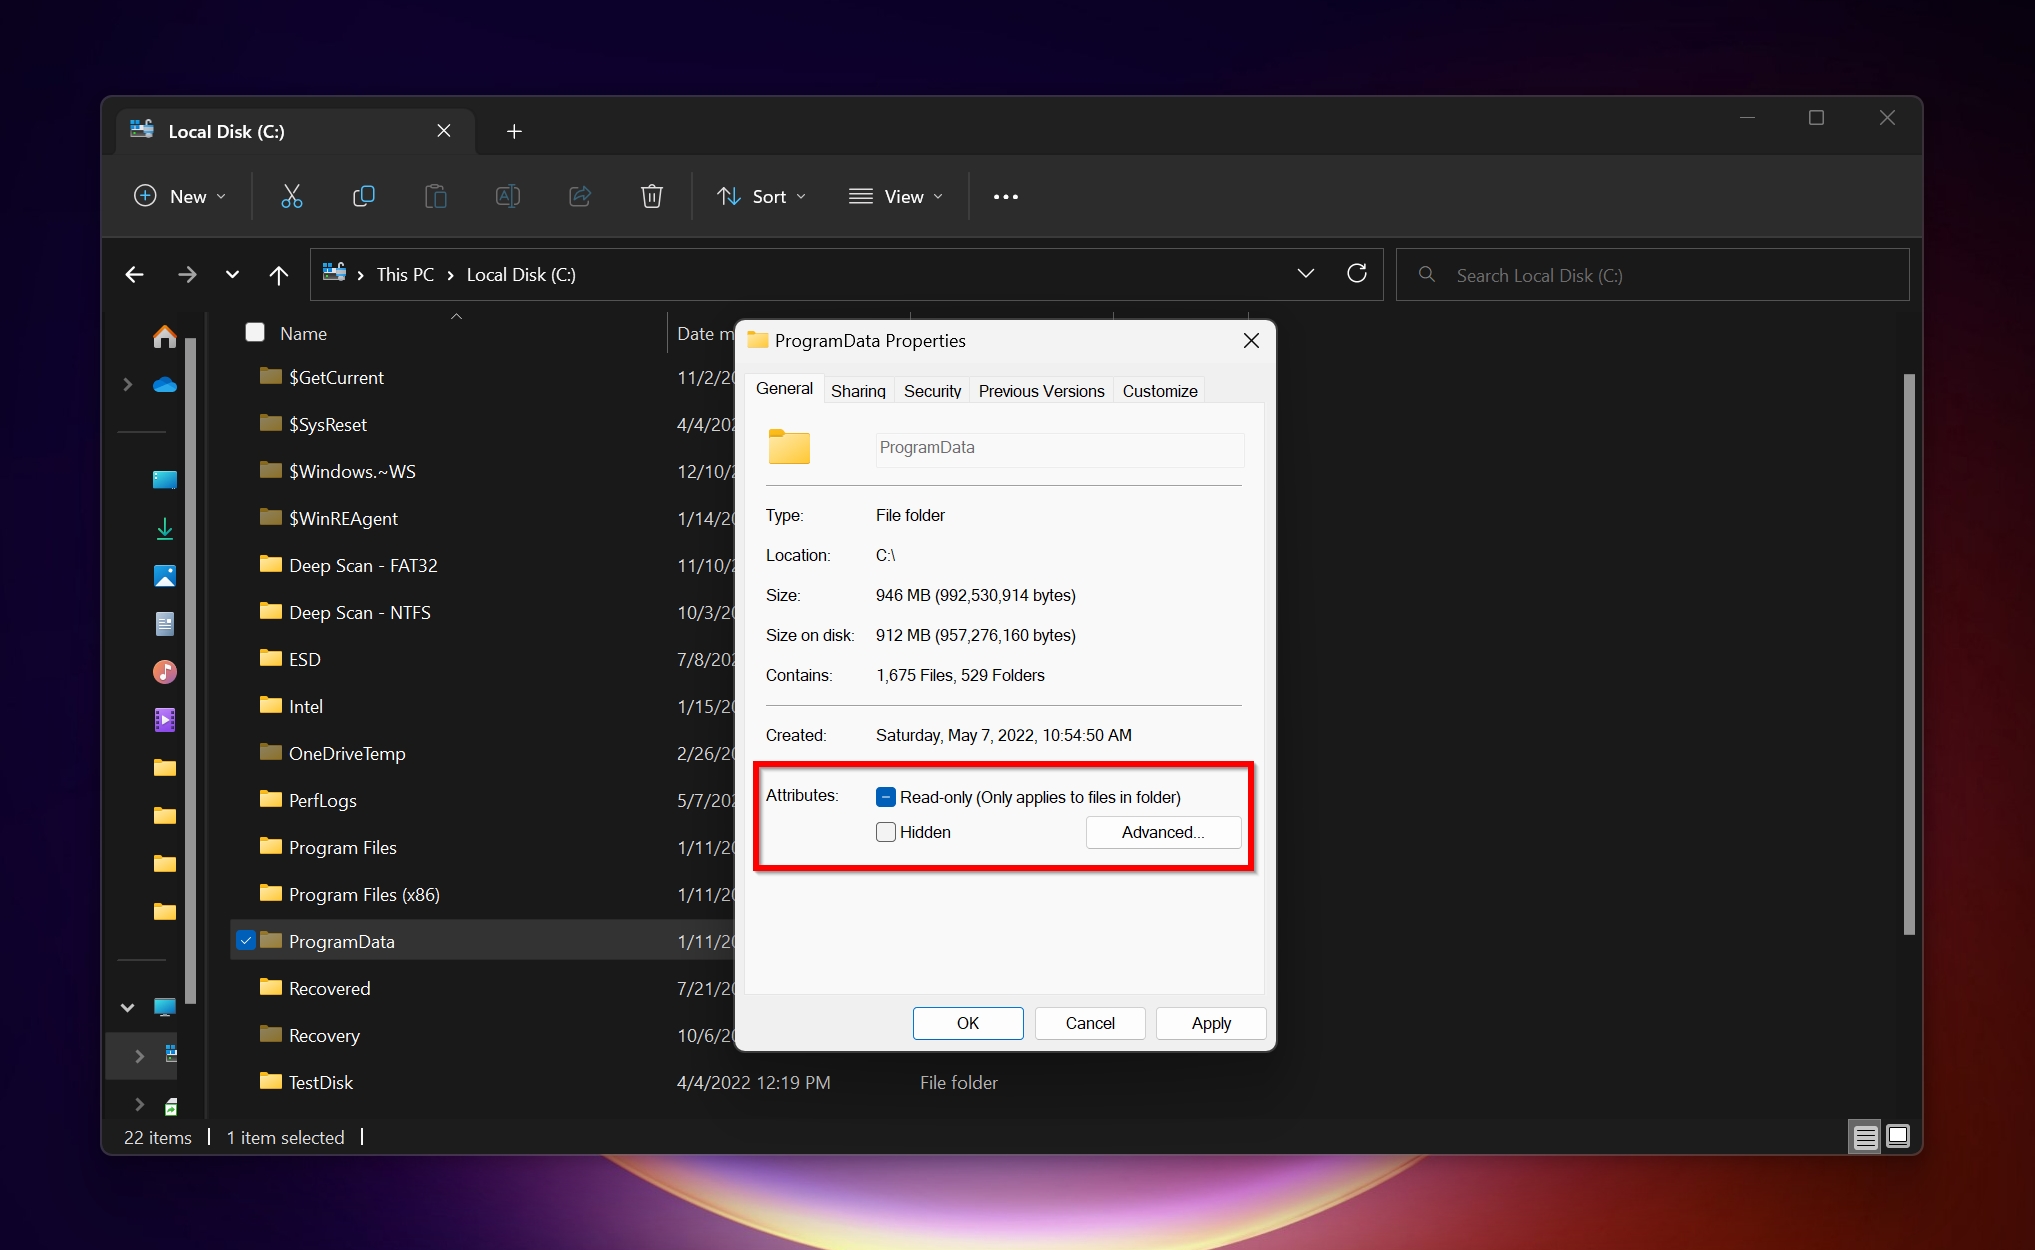
- Under Attributes, uncheck the Hidden checkbox. Click OK.
Unhide Using CMD
The Command Prompt method is only recommended if you’re comfortable using a command line interface.
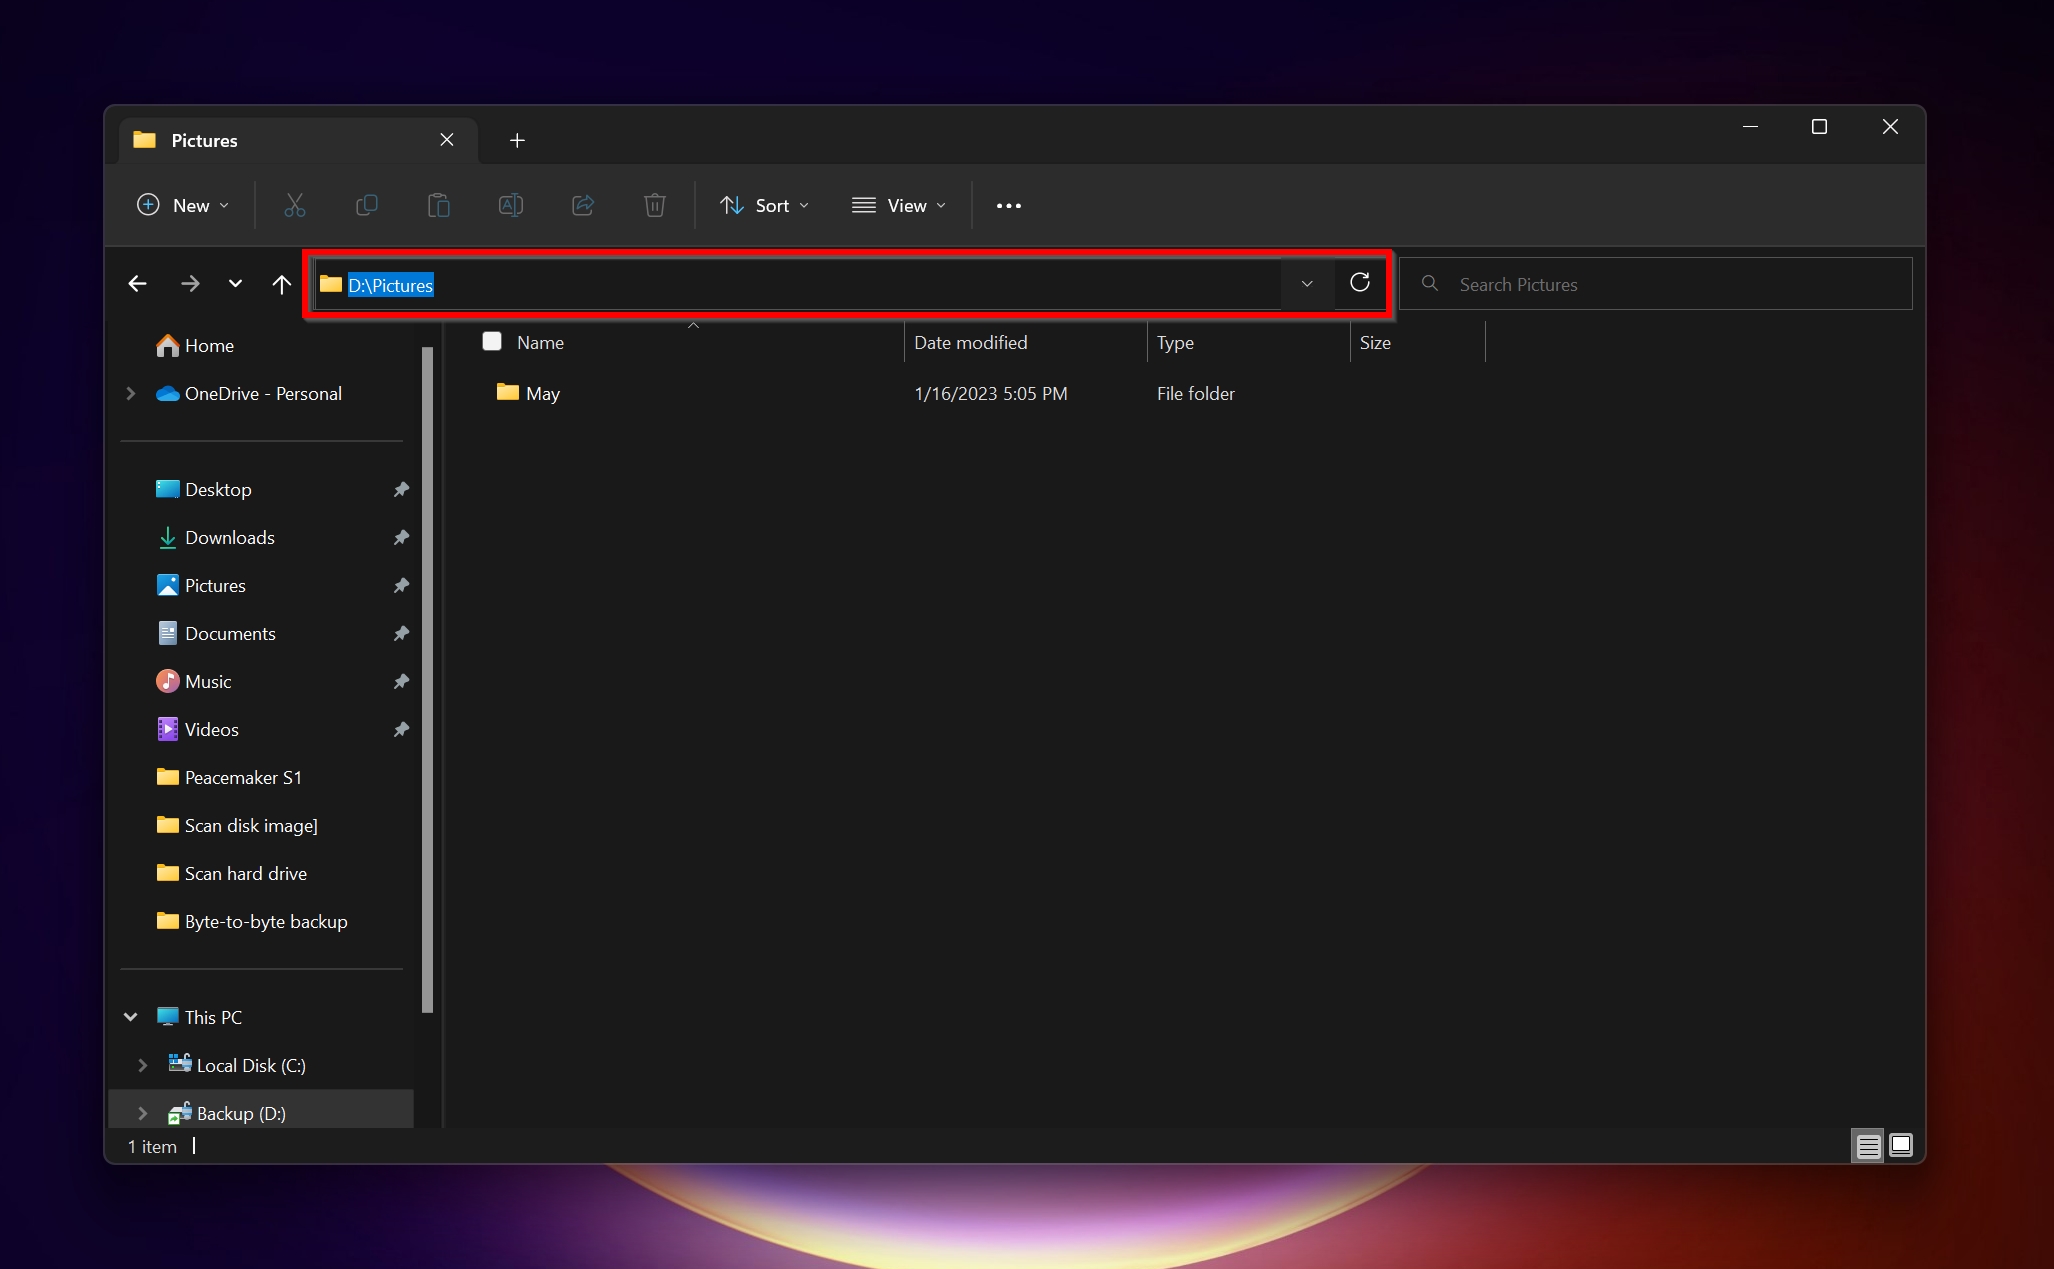
- Open File Explorer and navigate to the folder or file you want to unhide. Copy the address in the address bar. In our case, it’s the Pictures folder in the D: partition.
- In Windows Search, type cmd. From the search results, right-click on Command Prompt > Run as administrator.

- In the Command Prompt console, type attrib -h X:\Folder\Filename.extension. Replace “X” with the partition letter of the drive and “Folder\Filename.extension” with the folder/file you want to unhide. In our case, it’s D:\Pictures. Press Enter.
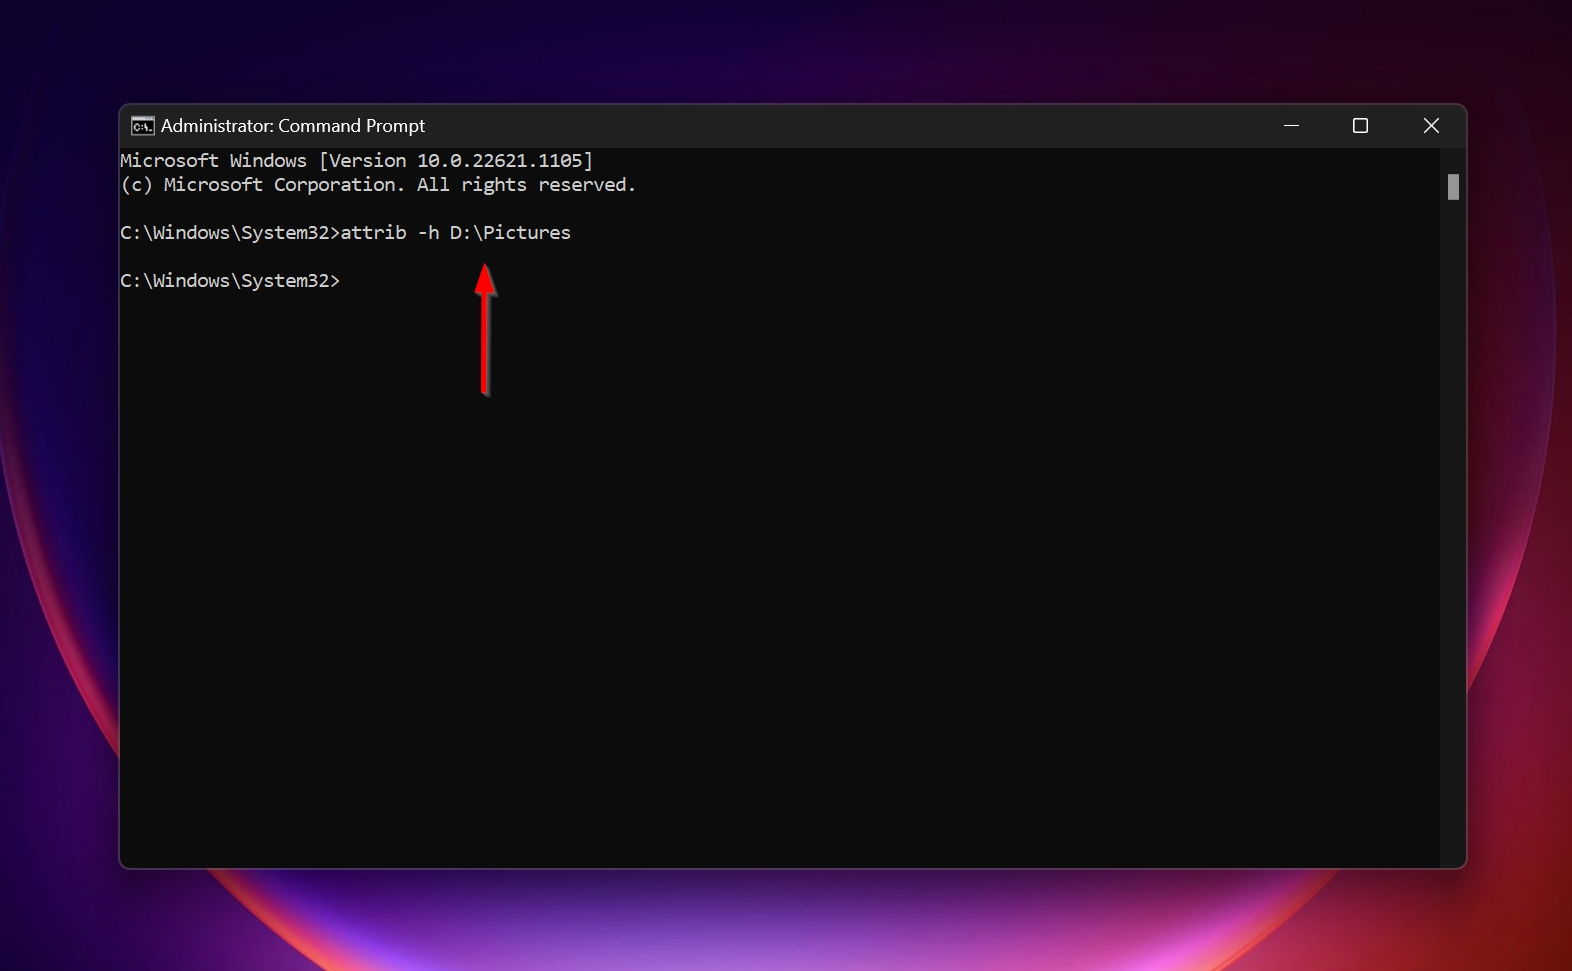
- The folder or file will no longer be hidden. You can now close Command Prompt.
Bonus Tip: How to Find Hidden Files
The File Explorer search bar is an easy way to find a disappeared file or folder, or one that’s hidden. You can simply type in the first few letters of the folder or file. However, it will only work if you first enable the view hidden files and folders option on Windows.
FAQ
How to recover deleted hidden files on a Windows laptop?
Here is a super-easy guide on how to recover deleted hidden files on a Windows laptop:
- Download and install Disk Drill.
- Select the drive where the hidden files were located.
- Click Search for lost data and wait for the scan to finish.
- Select the files you need to restore and click Recover.
- Choose a recovery destination and click Next.
How to recover hidden files on Android mobile?
To view the hidden files on your Android device, simply open the File Manager, go to settings and look for the show hidden files option. If the files were deleted, use a data recovery program that supports Android recovery.
How to recover hidden files from USB?
To show hidden files on a USB, enable the view hidden files option. If they’re still not visible, they may have been deleted. In this case, use a data recovery program to perform DIY recovery or contact a professional data recovery service.
How to see hidden files on Mac?
To view hidden files on a Mac, follow these steps:
- Open Finder.
- Press the Command + Shift + .(period) keys together to toggle between being able to view hidden files and folders or not.
Conclusion
Now that you know how to view and recover hidden files and folders, it’s also important to realize that many Windows folders are hidden because the user has no need to access them, i.e., they are system folders. Even if your hidden files and folders option is set to view, it’s important to not move or modify these folders, as it can potentially damage your system.
This article was written by Manuviraj Godara, a Staff Writer at Handy Recovery Advisor. It was also verified for technical accuracy by Andrey Vasilyev, our editorial advisor.
Curious about our content creation process? Take a look at our Editor Guidelines.