
To help you recover deleted photos on Mac without wasting precious time, we explain how to find them in the Recently Deleted folder, how to restore them from iCloud, and how to recover them using third-party data recovery software. Try them in the listed order or start with the most promising method.
We take photos of some of the most important memories of our lives. These can be moments of accomplishment, of loved ones, or of things that we never want to forget.
If we lose these precious moments, it can be devastating as we want to hold onto them to look back or show us how far we have come. Luckily, there are some tested and proven ways to recover deleted photos on Mac and we’re going to go through the top 3 best ones in this article.
Note: If your photos are not in the Photos app or in iCloud, then you will want to stop using your Mac immediately as using it further could overwrite the photos that you’re trying to recover. Going down to, “Recover Permanently Deleted Photos Using Data Recovery Software” is where you will want to start.
Best 3 Ways to Recover Deleted Photos on a Mac
Let’s see which Mac photo recovery methods have the best rating.
Method 1: Recover Photos using the Recently Deleted Folder
The Photos app on Mac comes with a recently deleted folder that will allow us to recover deleted pictures on Mac that have been deleted in the last 30 days. This isn’t something that you need to install as it comes built right in, is free, and can help us recover disappeared photos.
Think of this as a safety net should we delete a photo recently and want to recover it. We can go into the folder and undelete the picture using this built-in software feature. This will also work for videos if we delete them and then decide that we want to recover them.
- Open the Photos app on your Mac.
- Go to the Recently Deleted folder on the left-hand side.
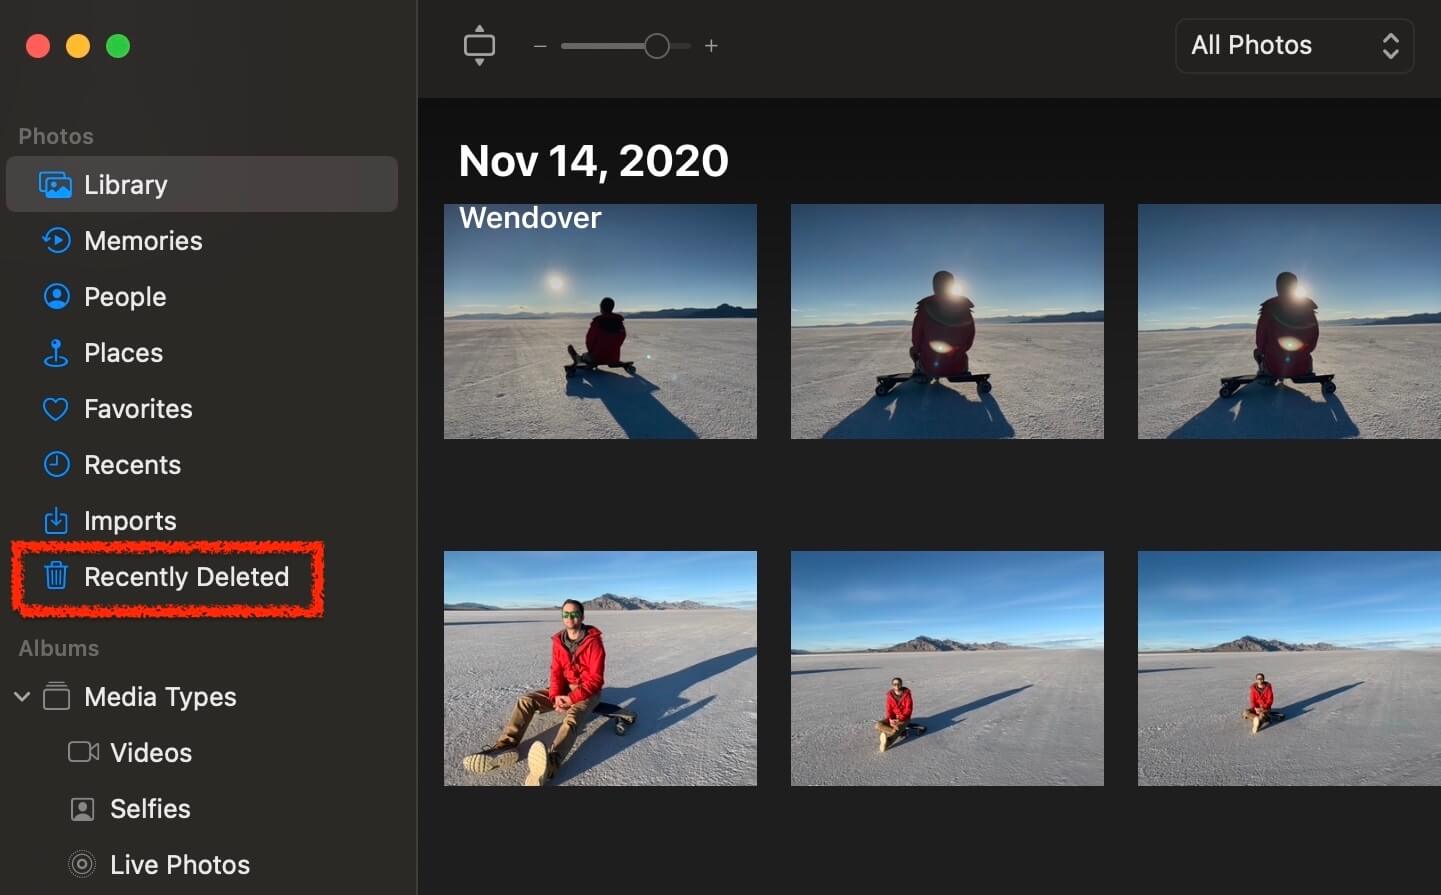
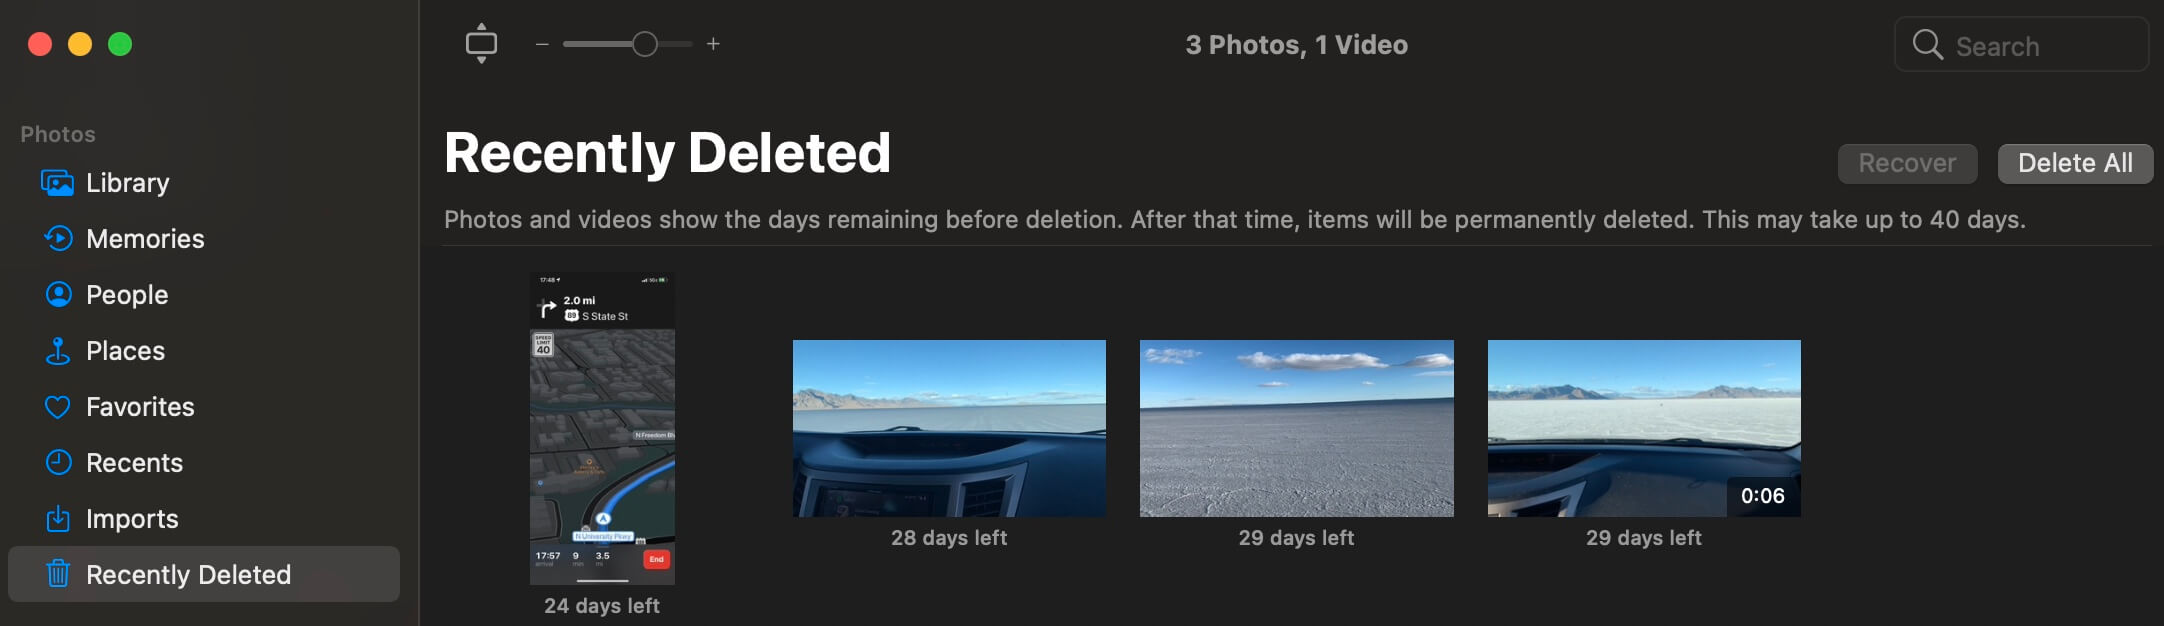
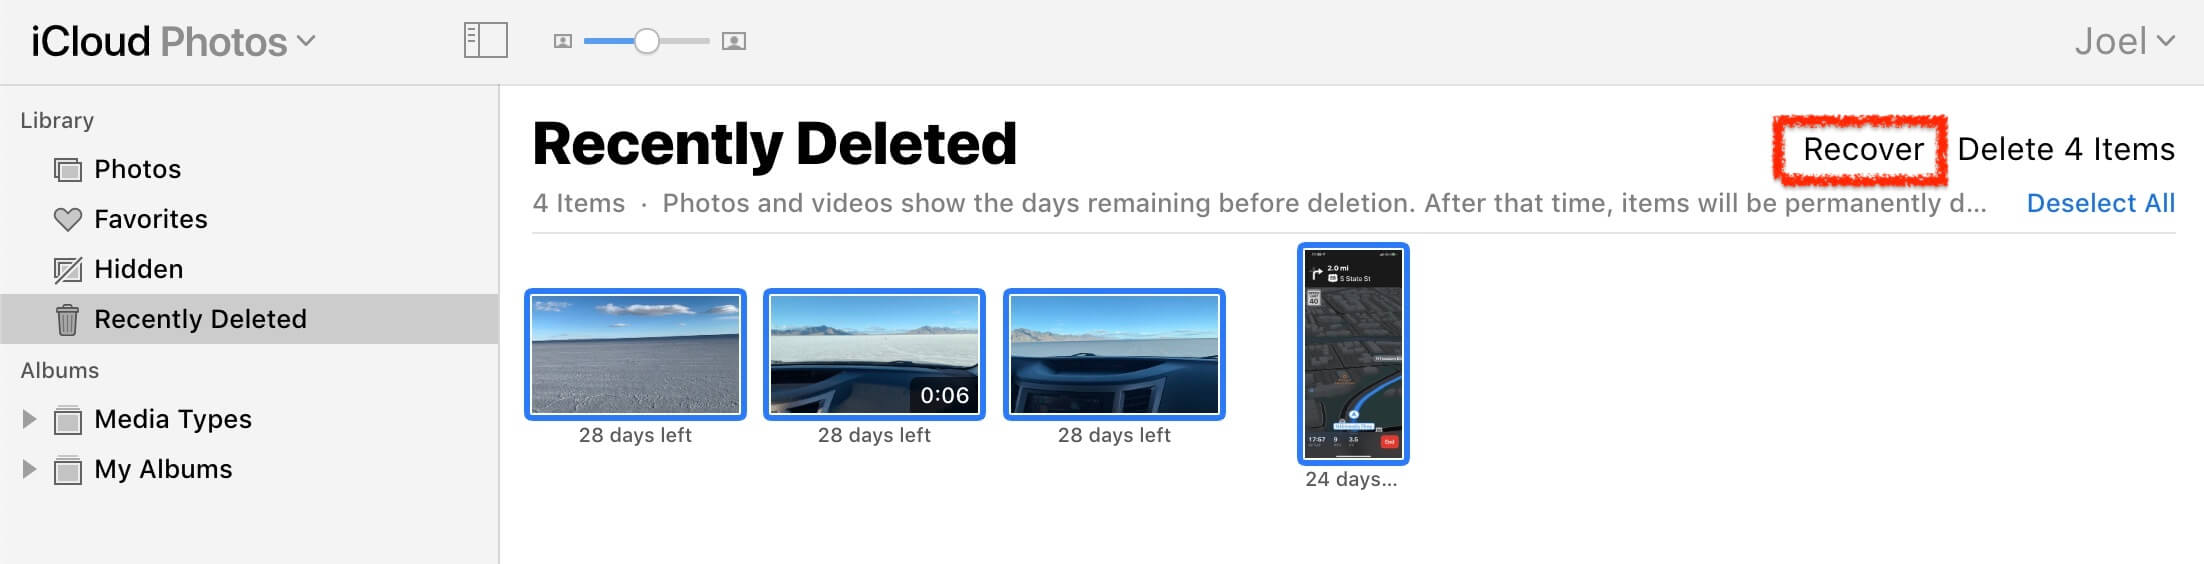
- Once inside the folder, we can view the pictures that are still retrievable and we can see the days remaining left that we have to recover them. Normally, we have around 30 days to recover them if we change our mind but sometimes it can take up to 40 days so there should be plenty of time if we delete something and then decide that we want to put it back into our All Photos View.
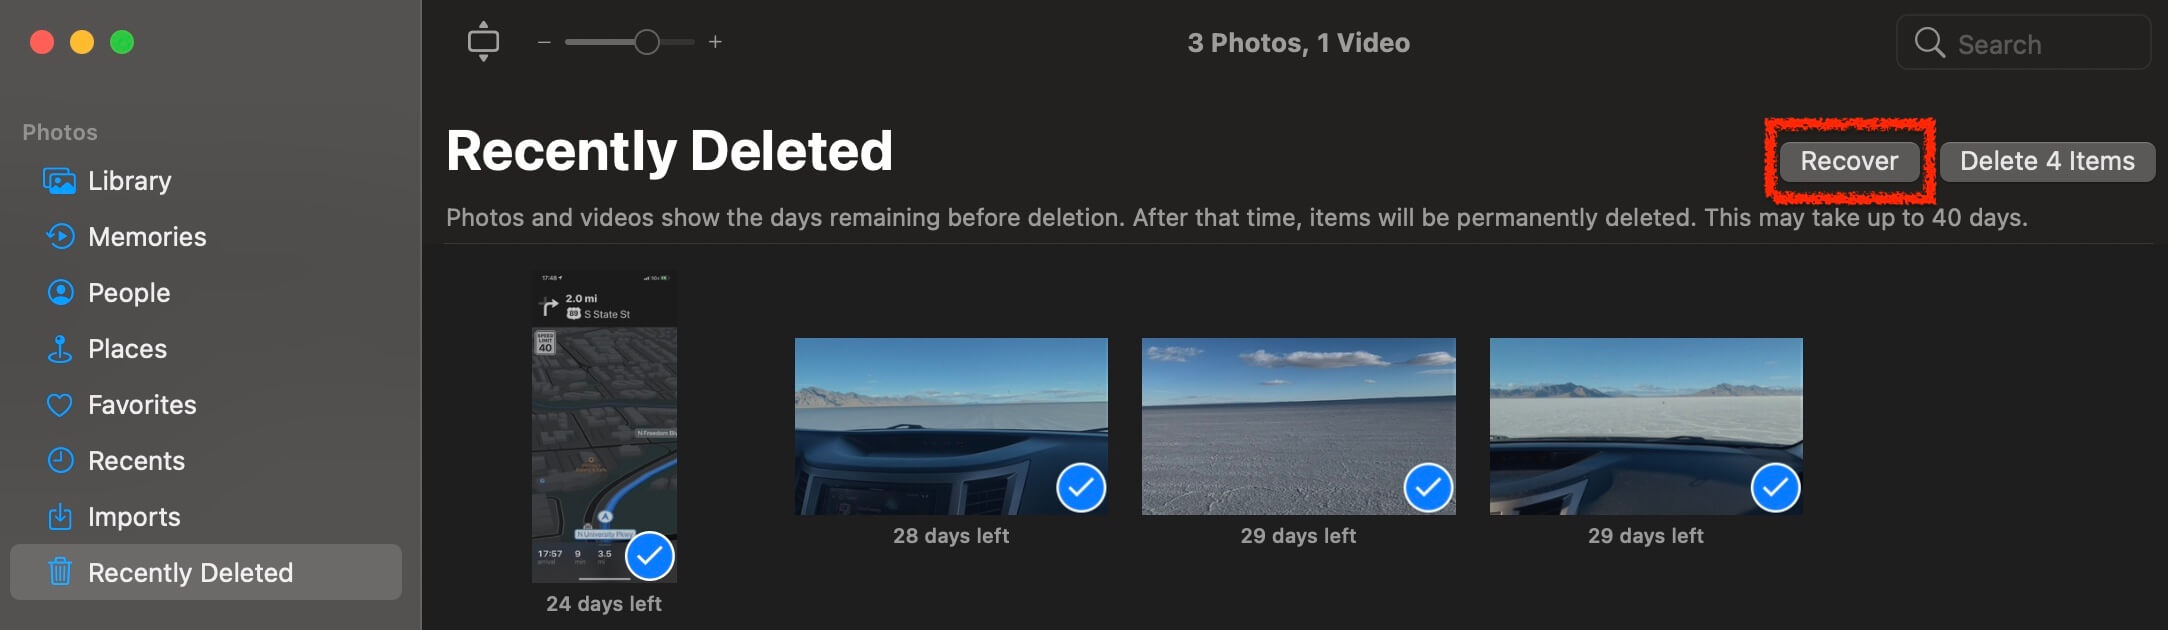
- Select the recently deleted photos that you want to recover and click on them. Then, click on the Recover button to put them back into your photo library.
You can delete photos from the Recently Deleted view as well if you know for sure you don’t want them or you’re looking to free up space on your Mac and don’t want to wait 30 days.
Method 2: Restore Deleted Photos from iCloud
iCloud is another way to restore deleted photos. Since iCloud Photo Library stores all of the photos we take with our iPhones in the cloud, we can go to iCloud.com and recover them from there. I am using a MacBook Pro for this example, but it is the same on any computer.
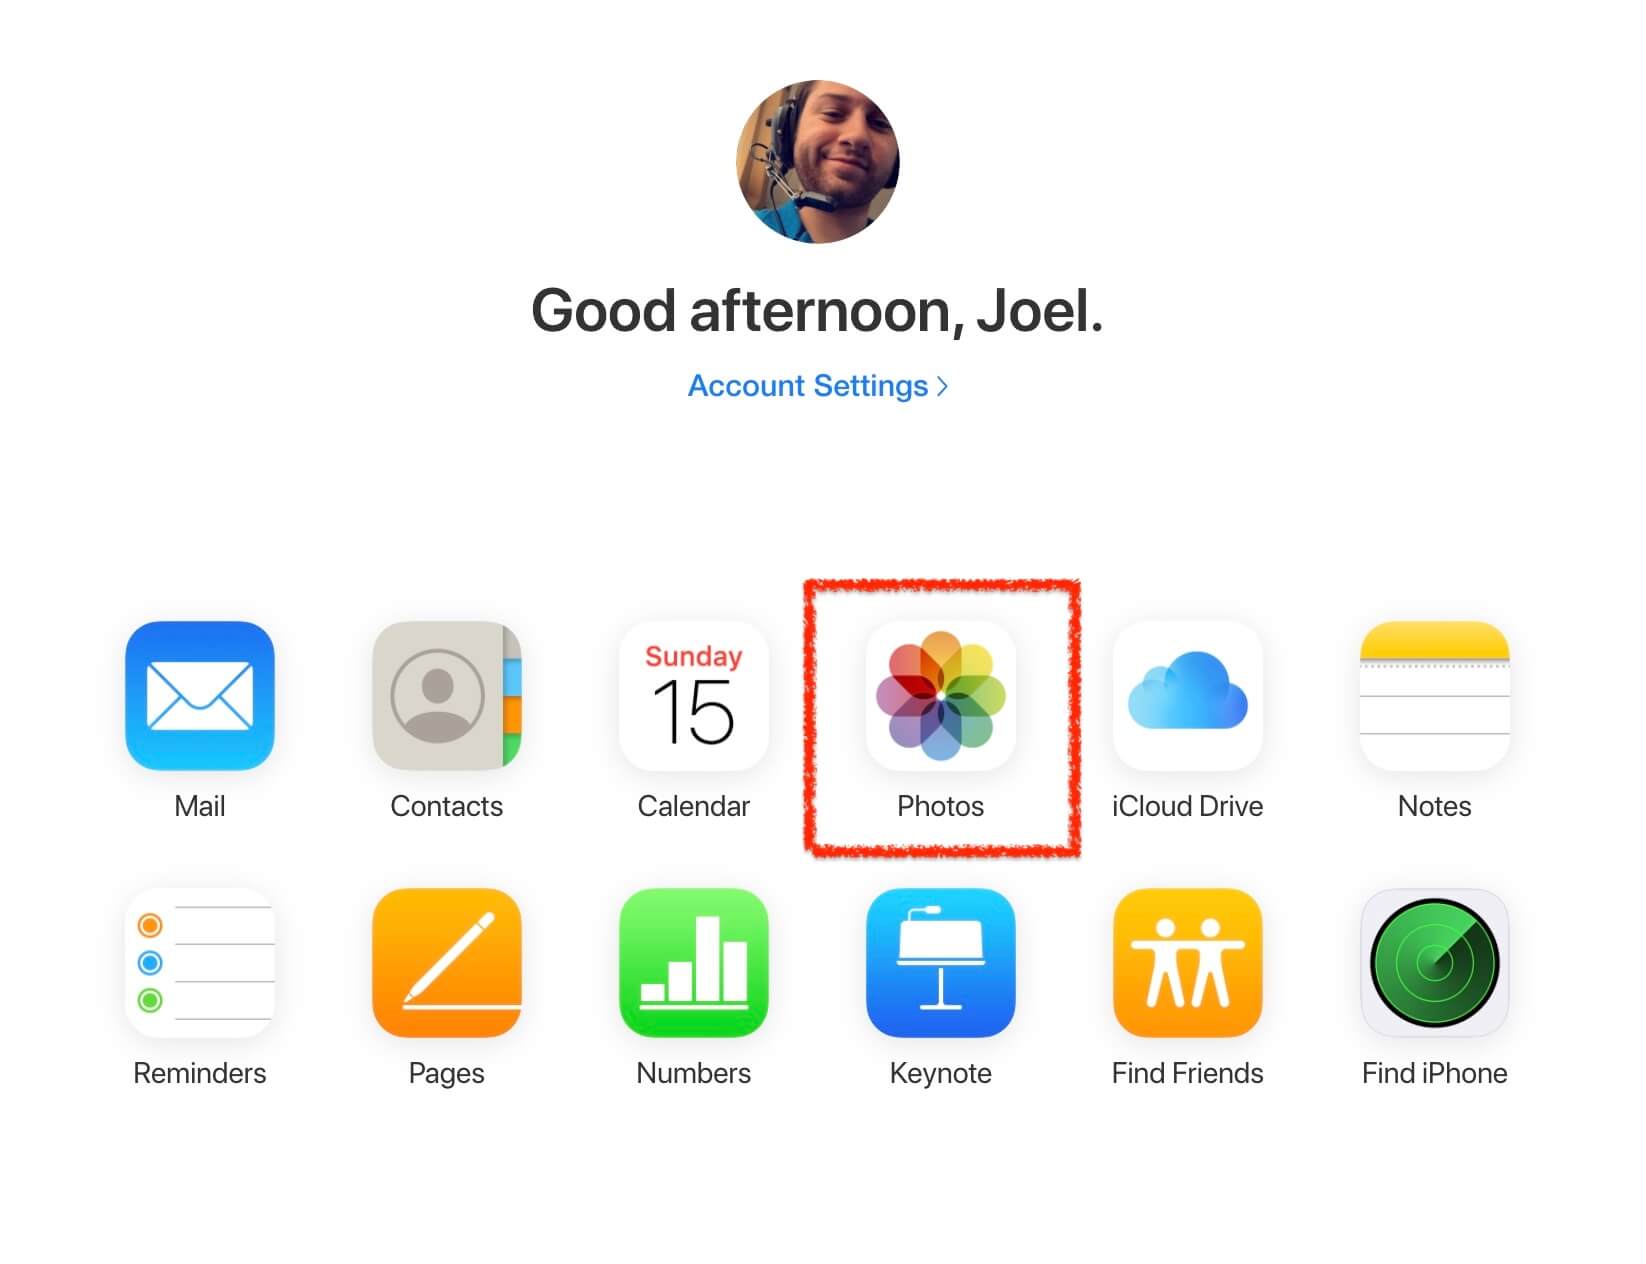
- Go to iCloud.com and navigate to Photos. You will see also that you can access not only your Photos, but contacts, iCloud Drive, and many other Apple services. You can do this process in any web browser of your choosing, and it can also be done if you’re using a Windows machine as well.
- Click the Recently Deleted folder in the sidebar. This will allow us to access our photos no matter where we are and is super handy if we don’t have our Mac with us but want to recover a photo or share one.
- Select the pictures that you want to restore and click Recover. You can also delete photos from the Recently Deleted folder here as well if you would like to.
Method 3: Recover Permanently Deleted Photos Using Data Recovery Software
If your photos aren’t in the recently deleted folder, then it’s time to use data recovery software<. Most of the time, they should be recoverable using the steps above but if they're no longer on our computer, then using data recovery software will get them back onto our computer. Disk Drill is a data recovery software tool that can recover data such as our pictures even if we can’t see them on our computer anymore, even if you have emptied the trash. When we delete pictures from our Mac, the data is still there it is just marked as free space for our computer to overwrite new information too.
We’re using Disk Drill in this example as I have used it before to recover pictures from my iPhone in the past and it has worked quite well. It was able to find the location of them and even found some that I had deleted years ago.
It’s important that if we notice that the pictures are gone, we stop saving things to our computer and install Disk Drill on an external hard drive or thumb drive if we have this option. This will increase the likely hood of the recovery software being able to successfully recover permanently deleted photos from Mac.
- Download and install Disk Drill for your Mac.
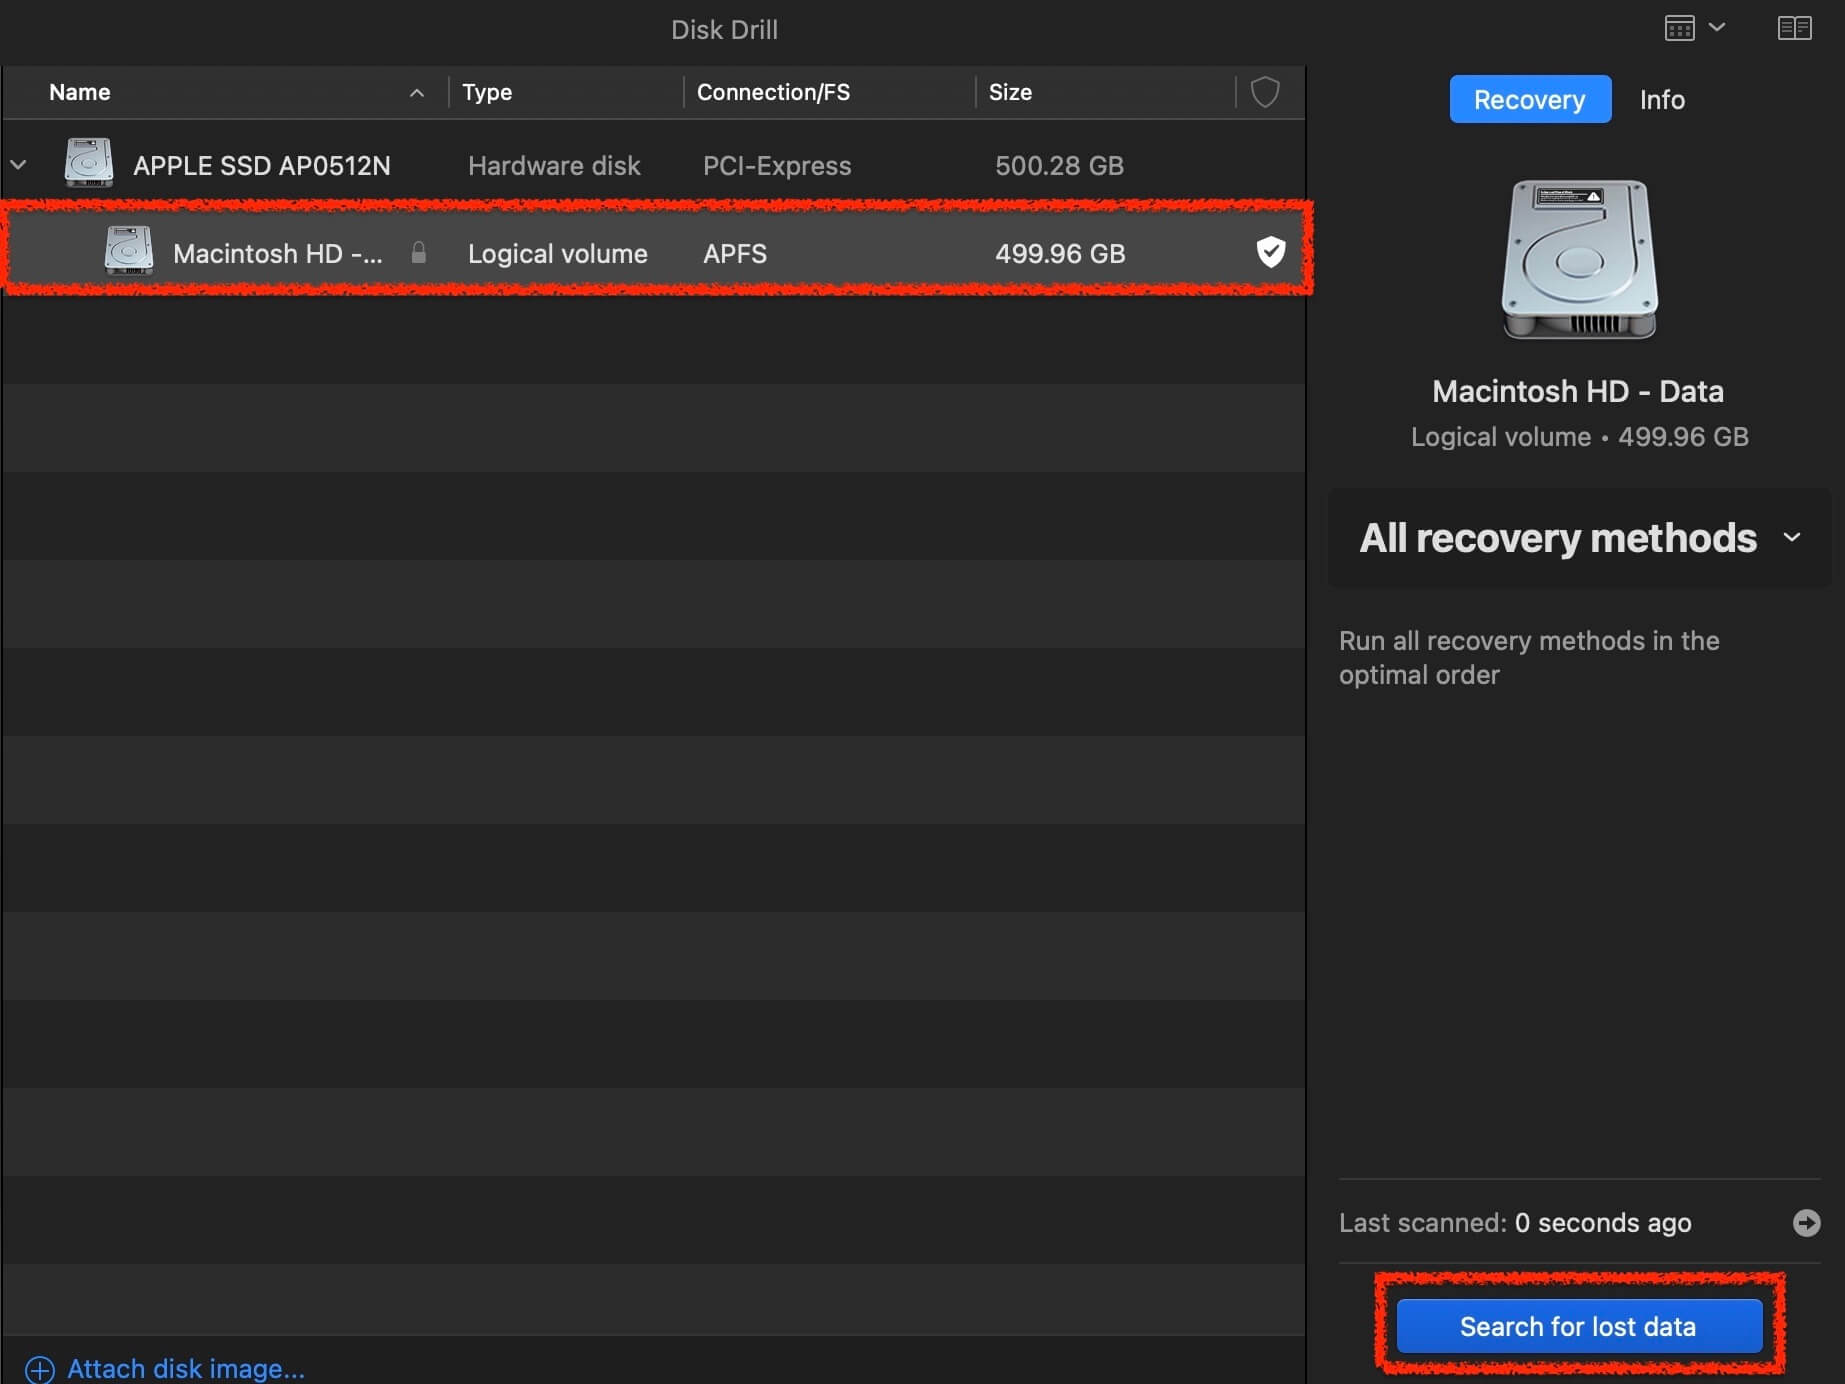
- Select what hard drive you would like to scan. Disk Drill can recover photos from the internal hard drive built into your machine but can also recover them from an external device as well. You can also search your iPhone for deleted pictures which I have done in the past and it works really well.
- Initiate a scan on your Mac. This can take some time but will depend on how much data you have on your computer. You can preview files before the scan is finished and see if Disk Drill found the pictures early, but if not, wait for the scan to finish as it won’t take too long.
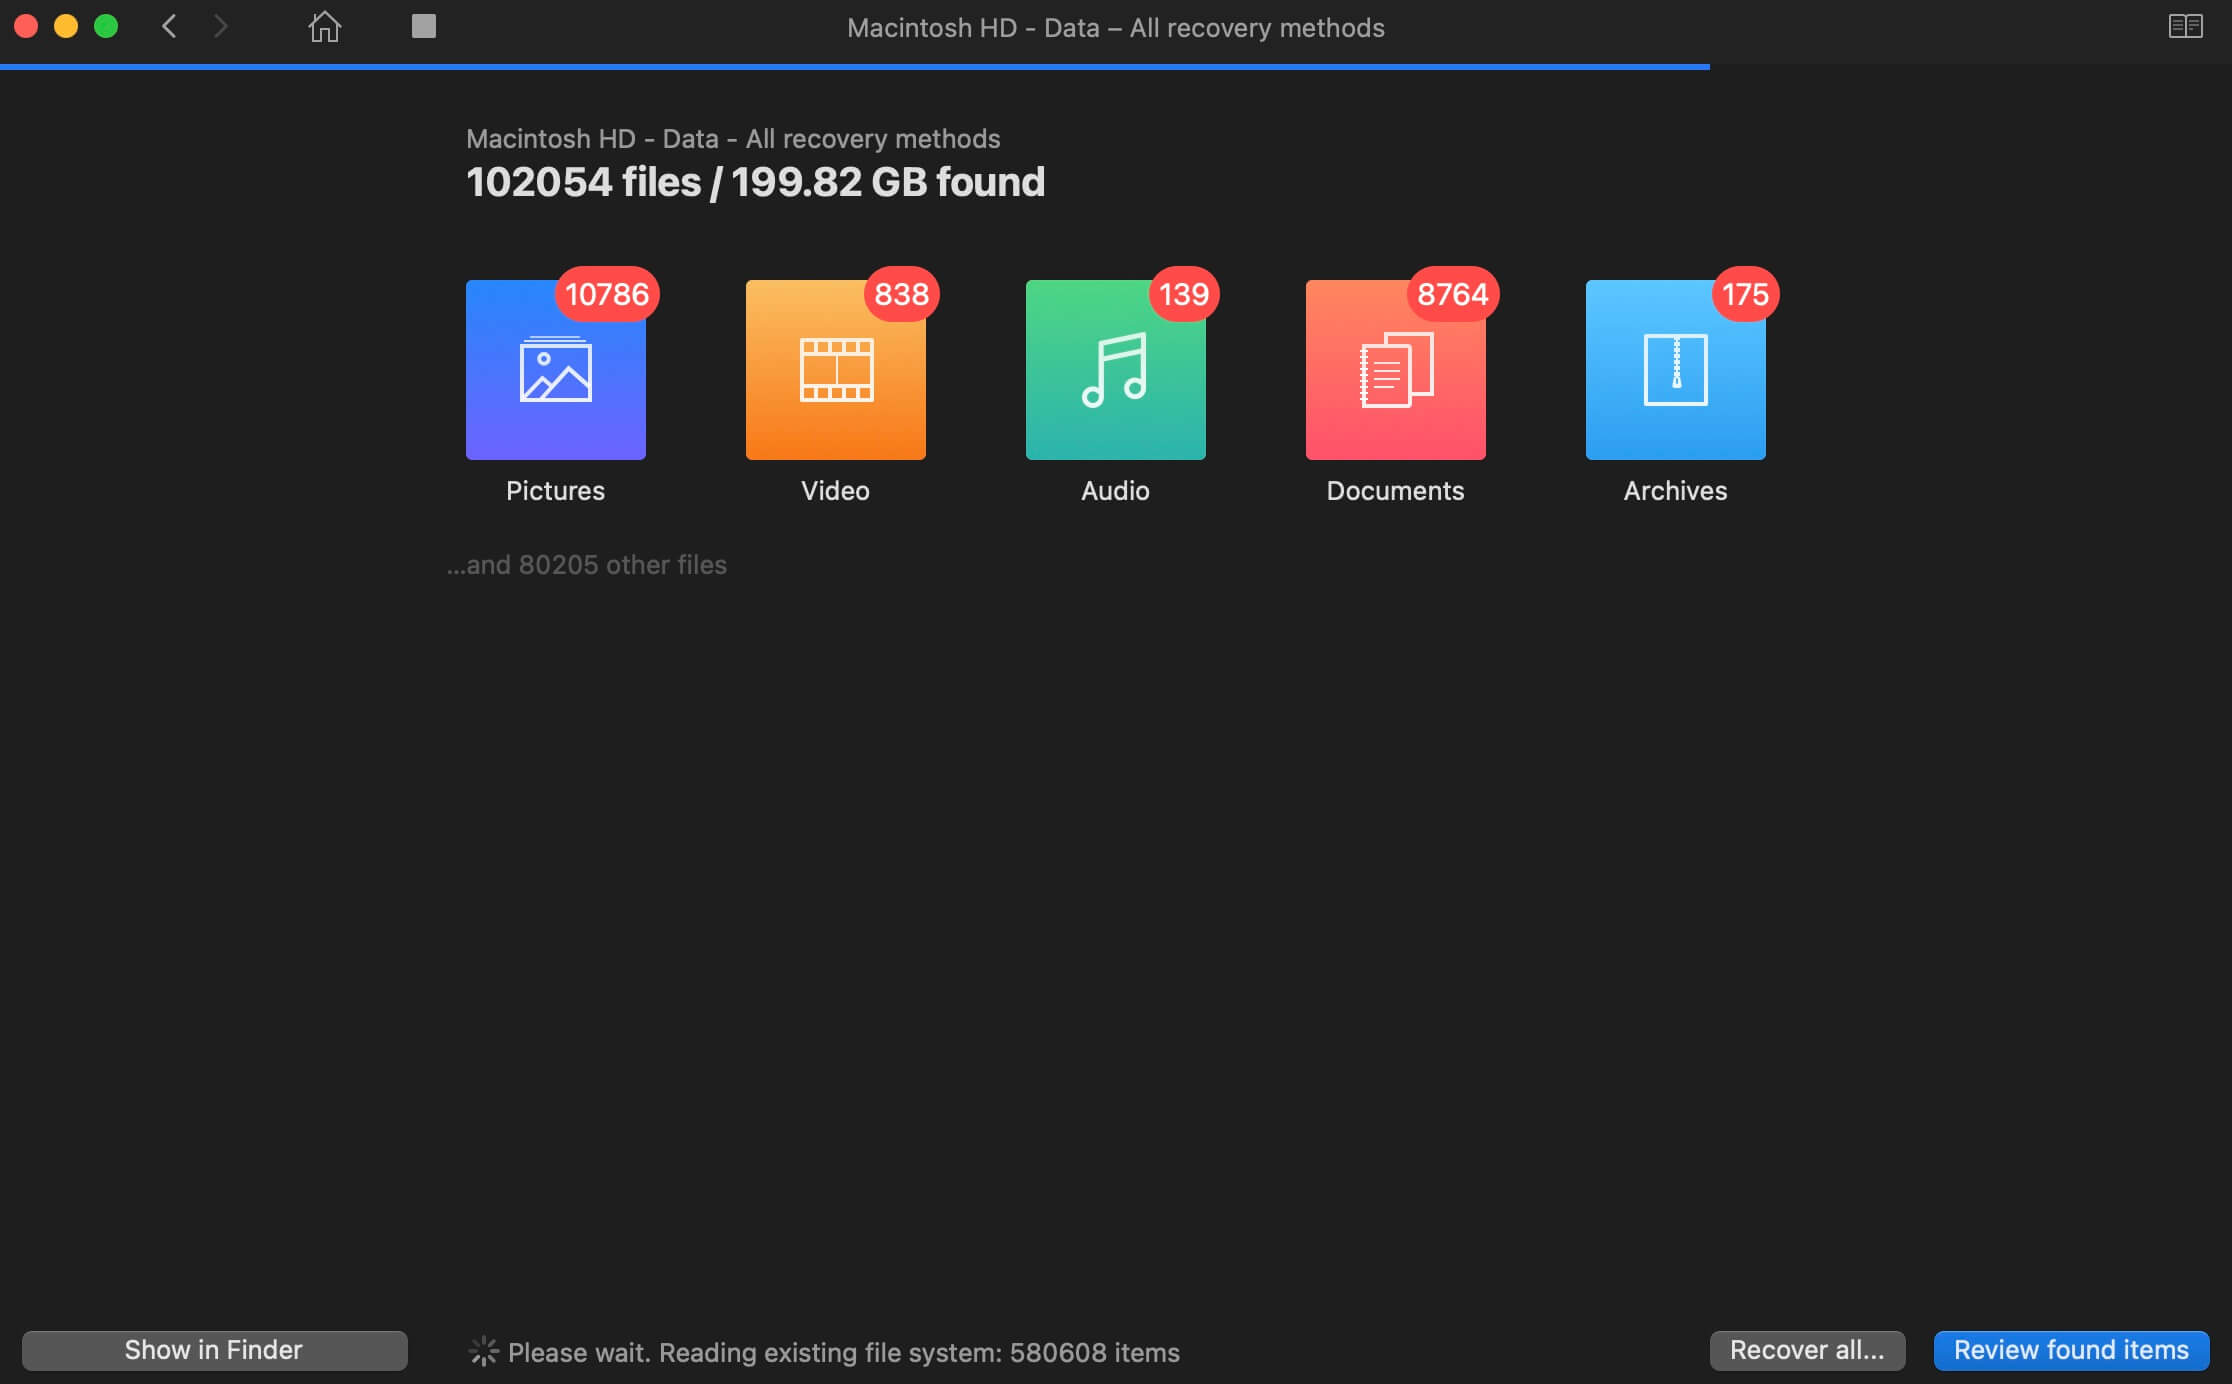
- Once the scan has completed, you can review the photos that you want to recover and put them back onto your computer. Keep in mind that if you’re looking for a picture that you accidentally deleted a while ago, it may not be here as it may have gotten written over by new data on your Mac.
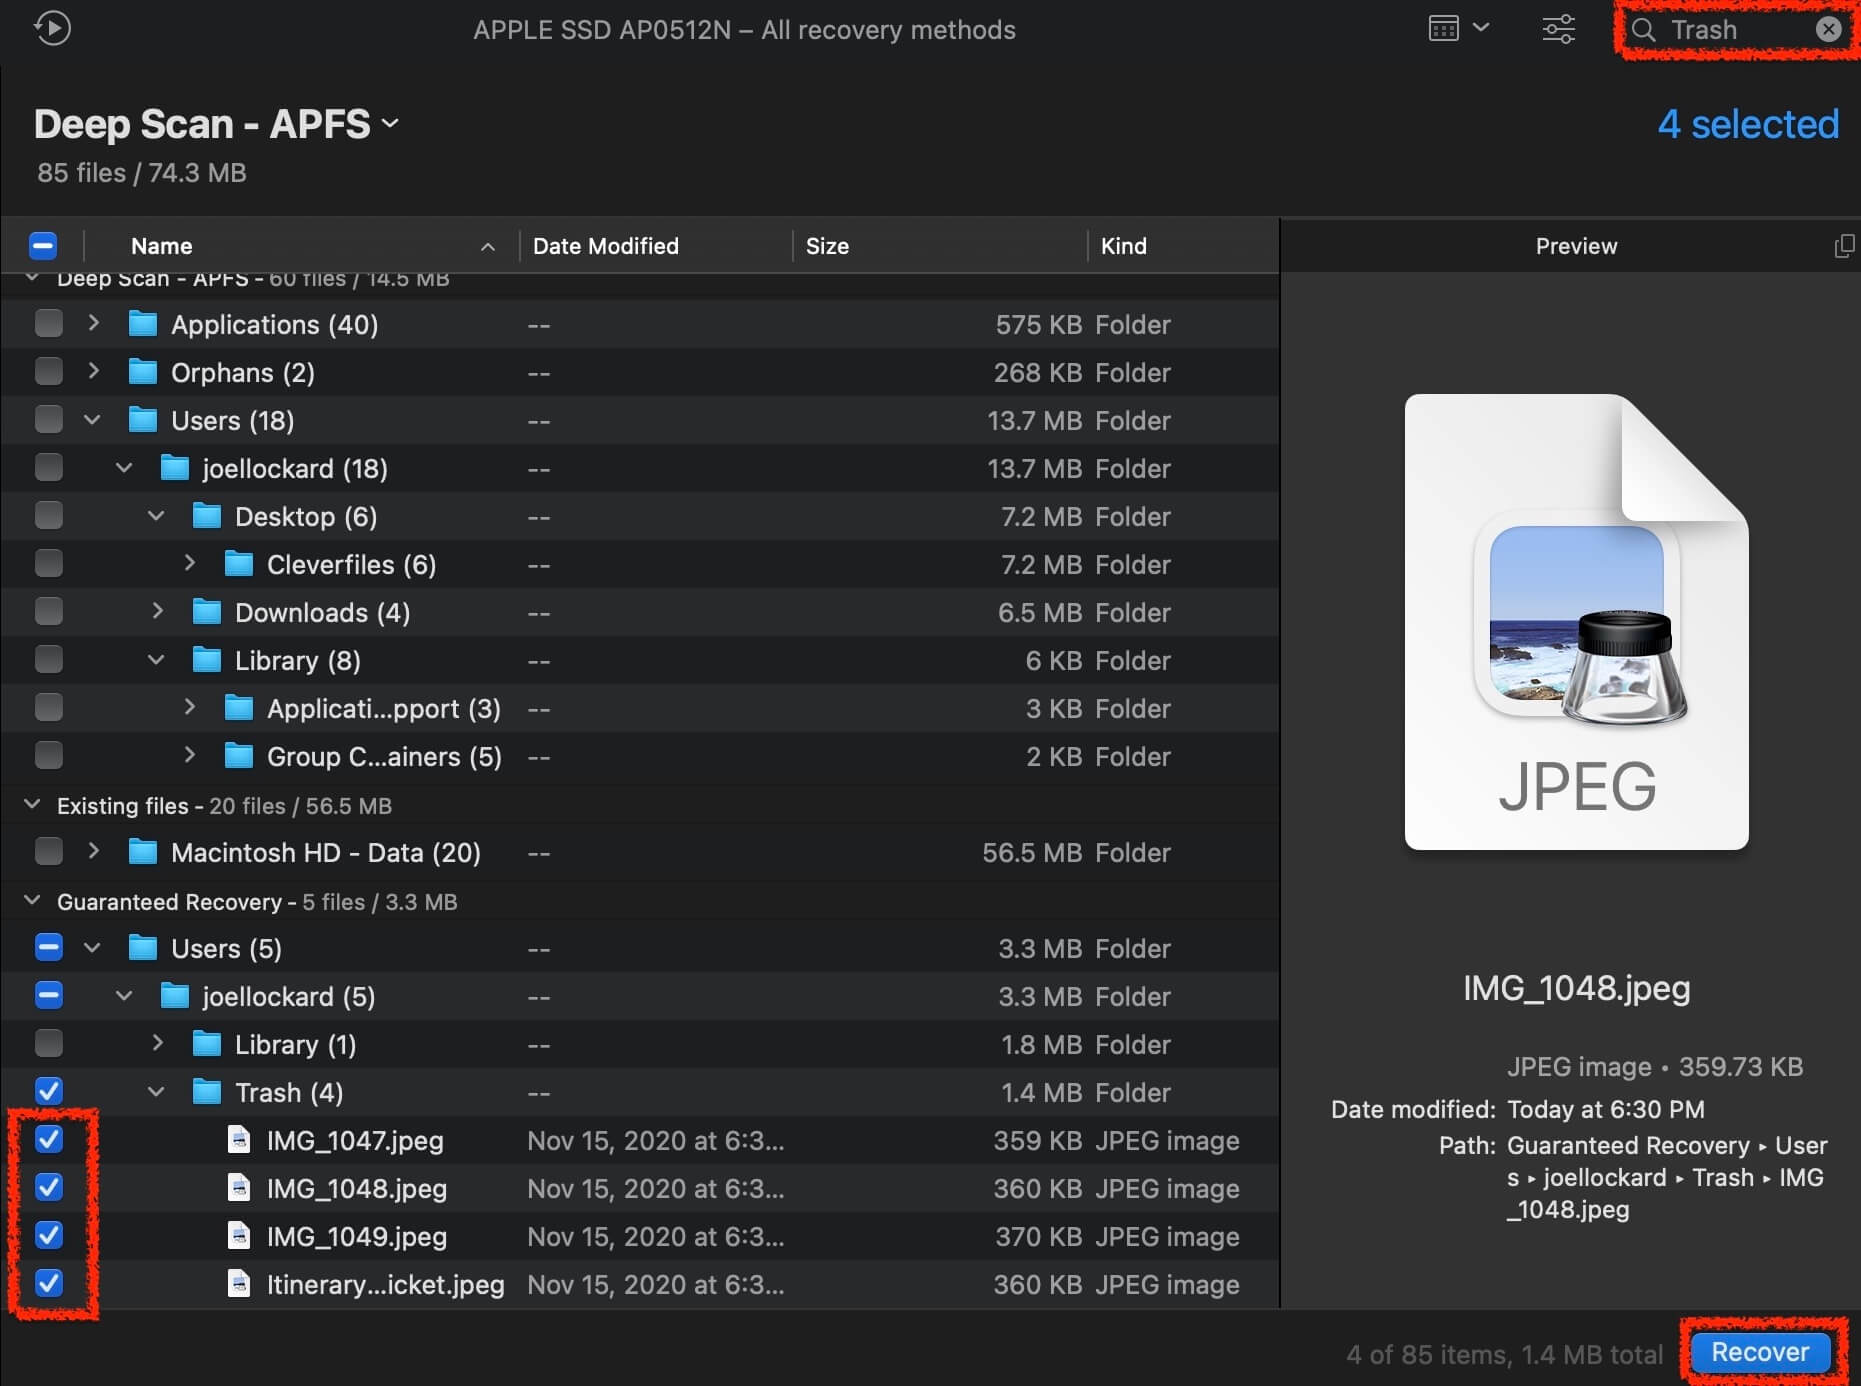
- Select the pictures that you would like to recover. I have some in my trash that I deleted that I am going to get back. I searched “Trash” in the upper right-hand corner and then was able to pull up my trash. I found the files that I wanted and then to recover them, I can click the box that is next to them to “checkmark” them. Then, click the blue Recover button.
- Choose a path for the permanently deleted pictures to restore to. You will have the most success if you can save them to an external hard drive or thumb drive as saving them to the device you’re using will write new data to it lowering the chances of successful data recovery.
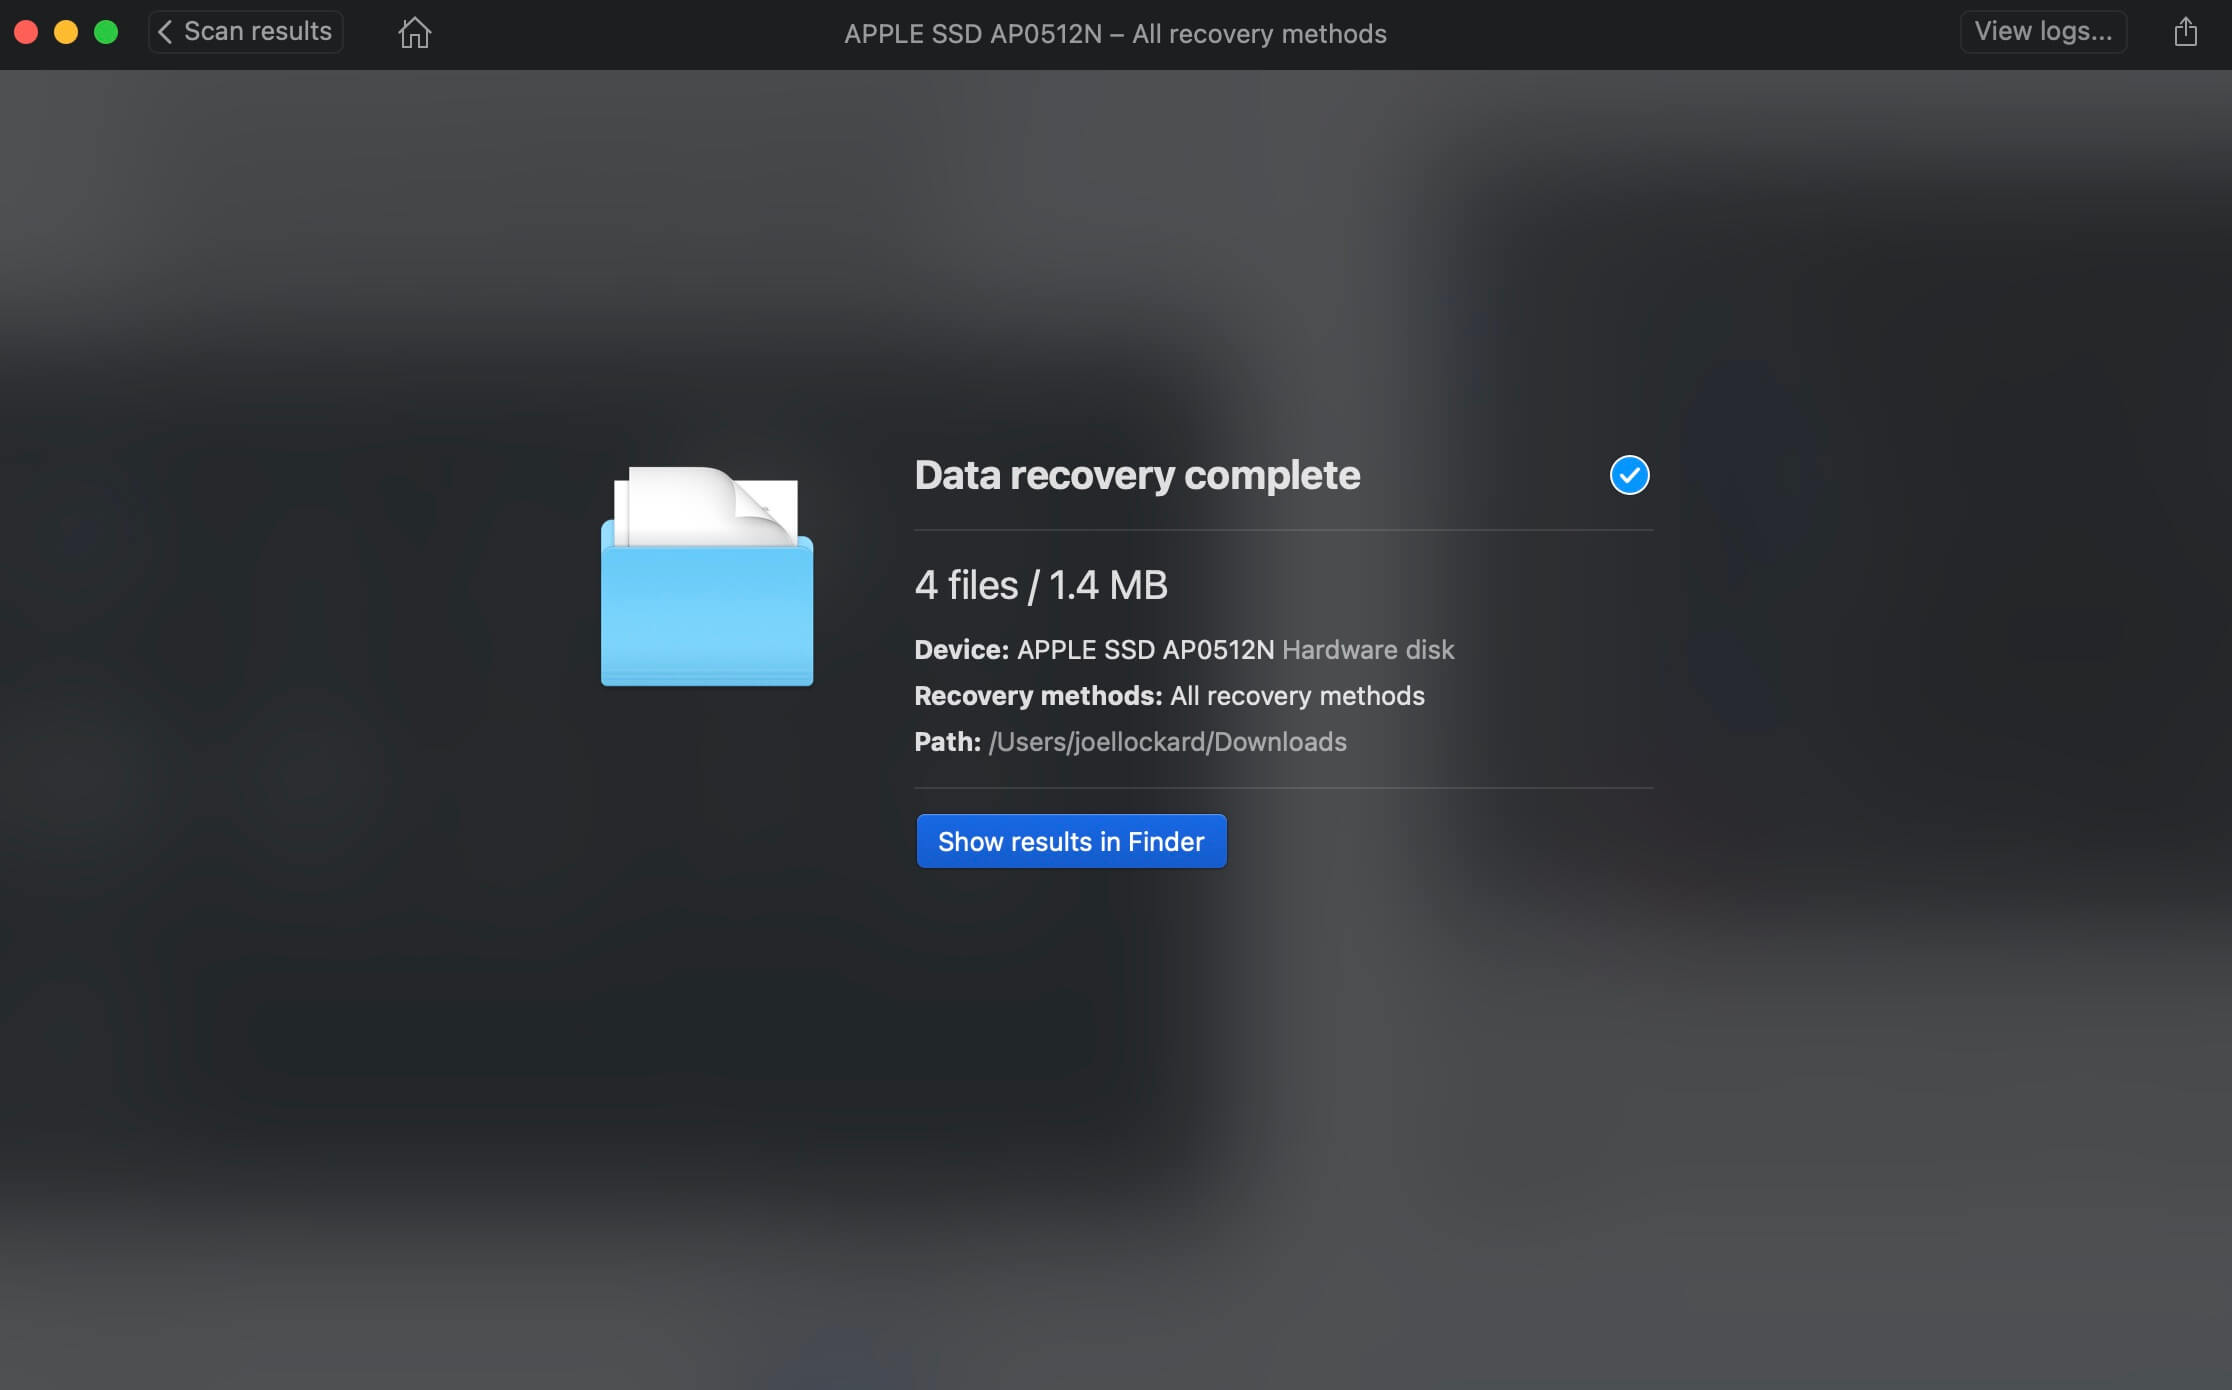
- After confirming recovery, you will receive a confirmation message that Disk Drill was able to retrieve the pictures successfully and you can view the location of them right then if you would like to.
Restoring your pictures to an external hard drive will help guarantee a more successful data recovery as you’re not writing data to the hard drive that we’re retrieving data from. You can also use an external thumb drive if you have one handy.
The photos that we take capture some of the most important moments of our lives and knowing how to recover them should something happen, can help us rest easy should we lose one again in the future.
With the Recently Deleted folder, iCloud, and third-party recovery software we now have an arsenal of powerful tools under our belt that we know how to use should we lose a photo and need to recover it. This makes Mac photo recovery much more powerful and efficient.
FAQ
How to recover permanently deleted photos from iPhoto?
iPhoto hasn’t been updated since 2015 and doesn’t come installed on Macs anymore nor is it available for download. If you’re using a Mac, chances are it has been updated to the Photos app. If your photos are not showing up, follow the steps above to recover them.
Where do recently deleted photos on my Mac go?
If you delete a photo from within the Photos app, then they will go into the Recently Deleted folder and they can be recovered using the steps provided above.
What is the best Mac photo recovery software?
As for my preferences in photo recovery software, I used Disk Drill in this example because it offers a high chance of successful photo recovery and boasts an interface that is clean and easy to understand. I have used it in the past to recover photos from my iPhone, and it worked quite well.
This article was written by Joel Lockard, a Contributing Writer at Handy Recovery Advisor. It was also verified for technical accuracy by David Morelo, our editorial advisor.
Curious about our content creation process? Take a look at our Editor Guidelines.