
You kept working on a file, saved a new version, but decided you preferred one of its previous versions. Or maybe you’ve deleted a directory filled with old files, and after replacing its contents with “new stuff”, realized you needed one of them. Perhaps an OS installation ISO.
We could go on with various examples, all leading to the same question: can you get your old, seemingly overwritten data back? Is it possible to recover replaced files?
Although the technical answer is “no”, sometimes “yes” is a realistic possibility. Let’s see when, and more importantly, how.
Is It Possible to Recover Overwritten Files?
If we told you that it’s possible to recover truly overwritten files, strictly from a technical standpoint, we’d be lying. At least, if talking about the literal meaning of the phrase “overwritten files”.
The easy way to understand why is by picturing your available storage as a series of empty containers like packing boxes. Each of those boxes is called a “cluster” (hence the “cluster size” setting when formatting a storage device), and a file can occupy more than one, depending on its size.
A file is really overwritten only when the following apply:
- ❌ A file occupying some storage space is marked as “deleted”.
- 💬 The space it occupies is marked as “available” for the storage of other files.
- 🚫 There’s no more free space available in the storage device.
- ♻ New data is written on the same spot the file occupied.
- ❗ No backup, versioning, or cloning solutions are available.
We talked about clusters because even if a file is partially overwritten, it might be possible to recover its parts that haven’t been overwritten. The parts that reside in clusters that haven’t been re-used.
You’re not interested in restoring overwritten files to their past glory, but in locating lost files that somehow disappeared instead? Make sure to check our guide on precisely how to find lost/missing/disappeared files (on Windows 10).
Alternative Ways to Restore Overwritten Files
Even if it’s theoretically possible, how can you get back a file replaced by another file with the same name? How can you recover overwritten files or revert the ones you’re working on to a previous state?
- With most popular storage setups today, older files aren’t immediately replaced by newer data. Instead, they’re flagged to be deleted when there’s no more actual free space available on a storage device. Thus, their previous versions might still “linger” in your storage, invisible under standard usage patterns.
- Depending on the app responsible for the files’ creation or management, the underlying OS, or third-party software, you might have extra options to restore your overwritten files. Maybe even more than one.
Thus, even if your older files seem gone, there’s still (more than) a chance you can get them back. We’ve already covered many ways you can recover deleted files on Windows 10, but let’s see some approaches that might be better when dealing with overwritten files.
Solution #1: Revert Your Files To Past States With Multi-Step Undo
Did you update a document mere minutes ago but decided that you prefer it the way it was before and would like to revert it to a previous state? Maybe you can undo your way back to that optimal spot.
Most modern applications include undo functionality and have it mapped to the same shortcut: CTRL+Z. So, you can possibly revert the file you’re working on to a previous (but relatively recent) state by pressing CTRL+Z multiple times.
If you overdo it, you can also usually go the other way around: press either CTRL+Y or CTRL+Shift+Z to re-apply a change you undid.
Solution #2: Get Your Lost Files Back with Disk Drill
If older versions of your files still linger in your storage and aren’t really deleted, a data recovery tool like Disk Drill can locate them and help you get them back.
To recover your files with Disk Drill, head over to its official site, download, and then install it like any other app. Run it, and then…
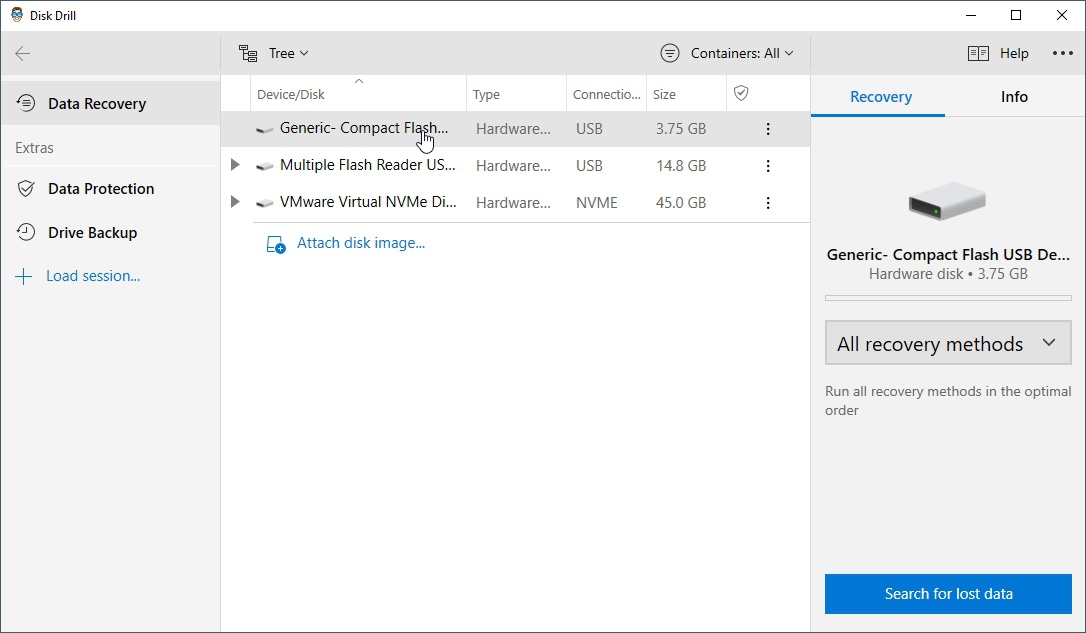
- Choose from where you want to recover your files from Disk Drill’s main device list. Then, click on Search for lost data on the bottom right of its window.
- Allow Disk Drill the time to locate your lost files.
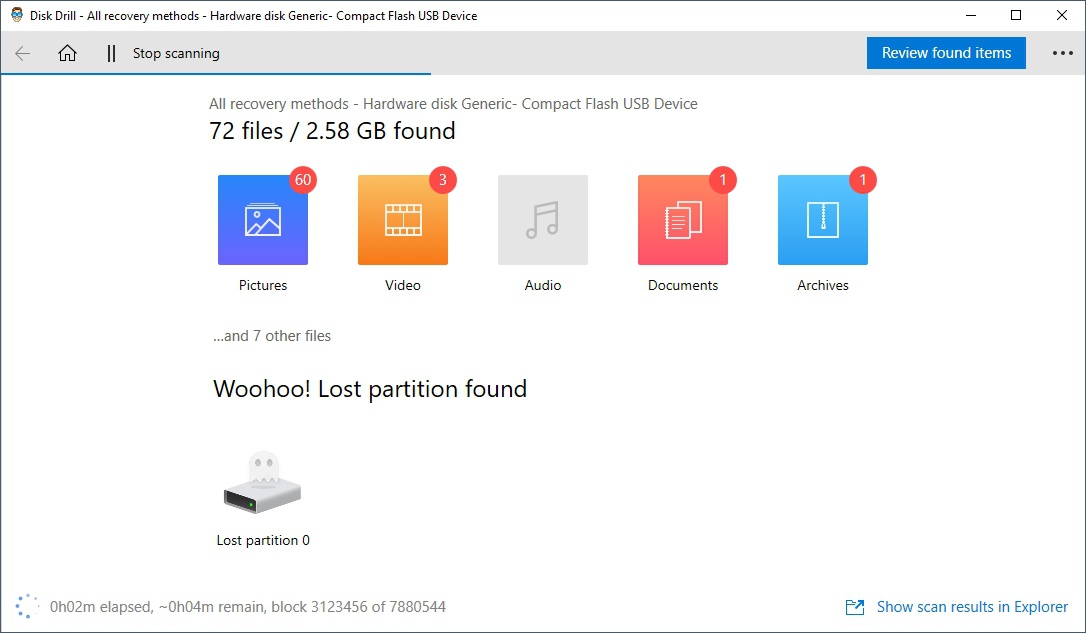
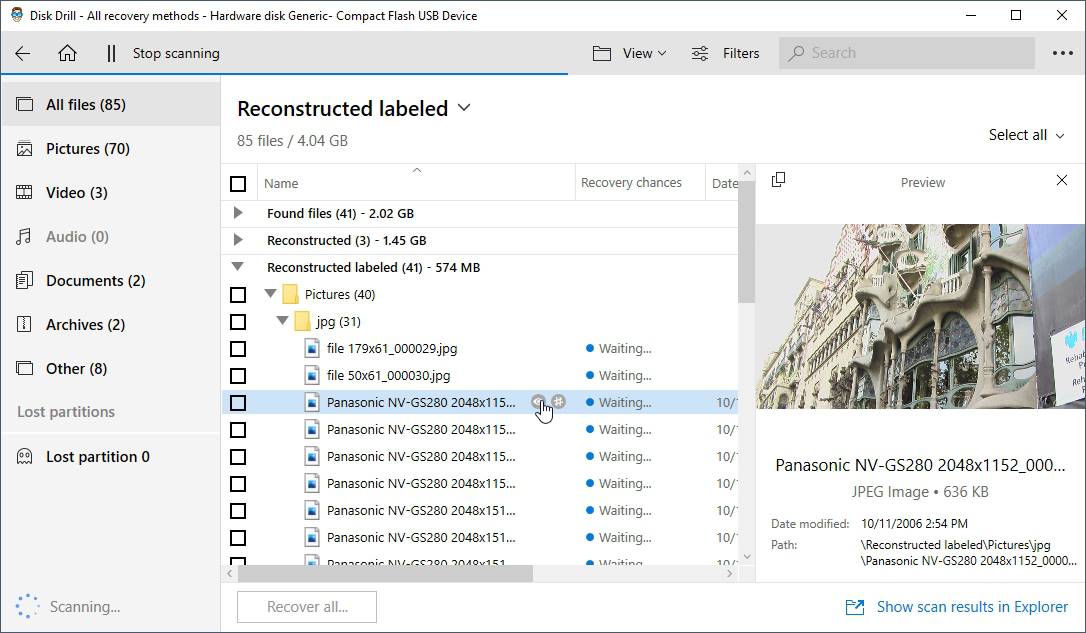
- When the scan process completes, click on Review found items, on the top right of Disk Drill’s window, to check out the files it found. You can also preview files by:
- Double-clicking on them
- Clicking on the little “eye” icon when you hover your mouse cursor over them
- Right-clicking and choosing “preview”.
- It’s worth noting that if Disk Drill locates the files you want before its scan completes, you can interrupt the process and jump directly to their recovery. To do that, click on Stop scanning on the top left of Disk Drill’s window, and then answer positively when asked if you are sure you want to cancel the current operation.
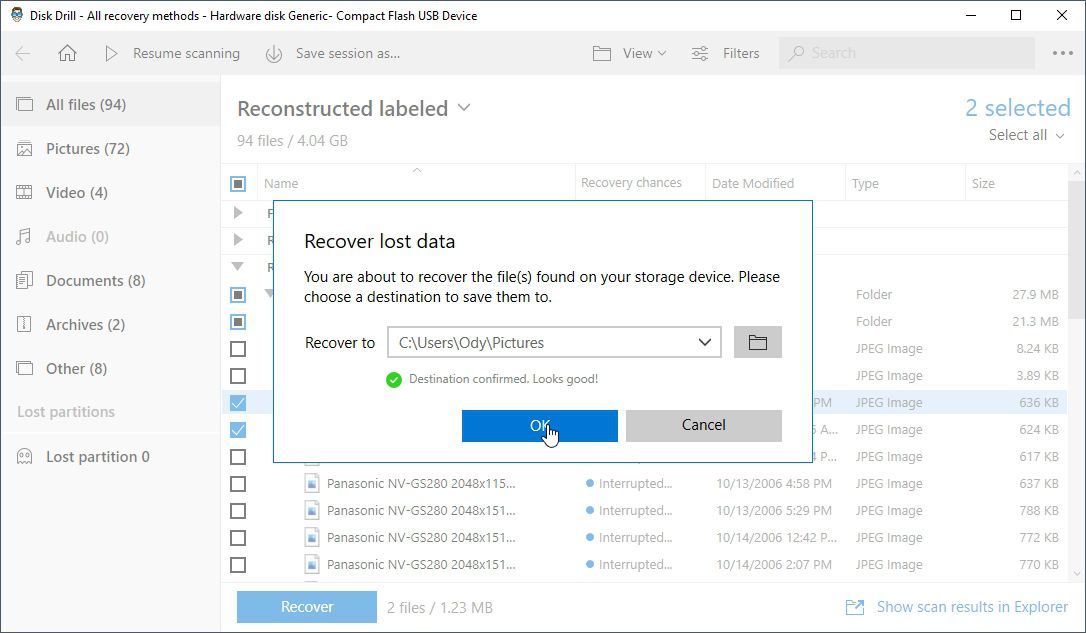
- Continue by placing a checkmark to the left of the files you want to recover. Then, click on the blue Recover button on the bottom left of Disk Drill’s window.

- Disk Drill will ask you to choose a destination to save your recovered data. Click on the folder icon on the right, and choose the directory where you want to store your files. Then, click OK.
- Once more, wait a bit for Disk Drill to undelete your lost data.
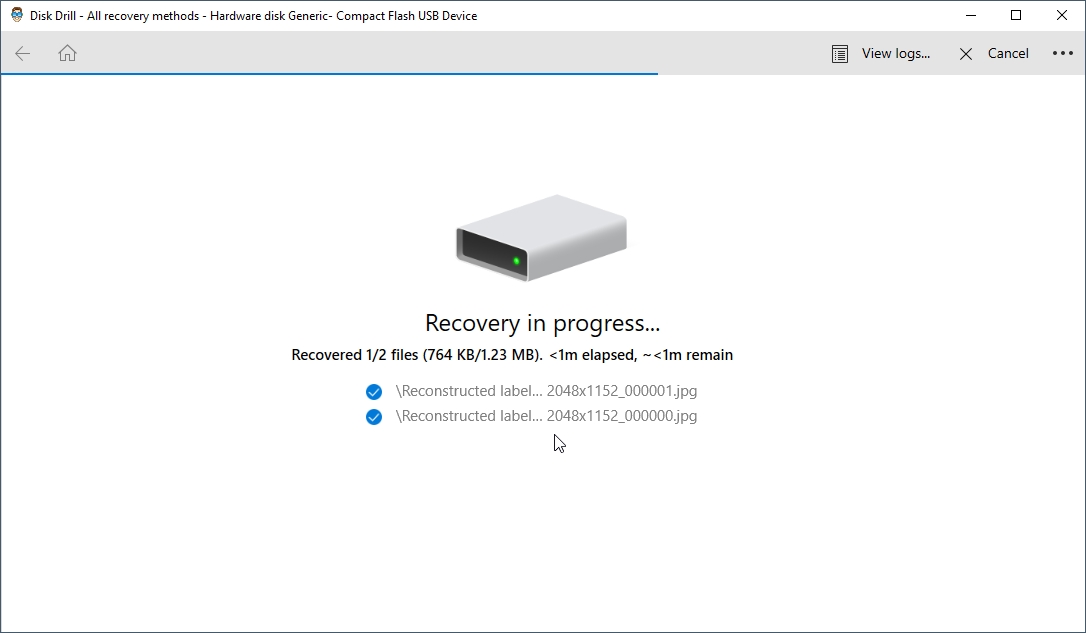
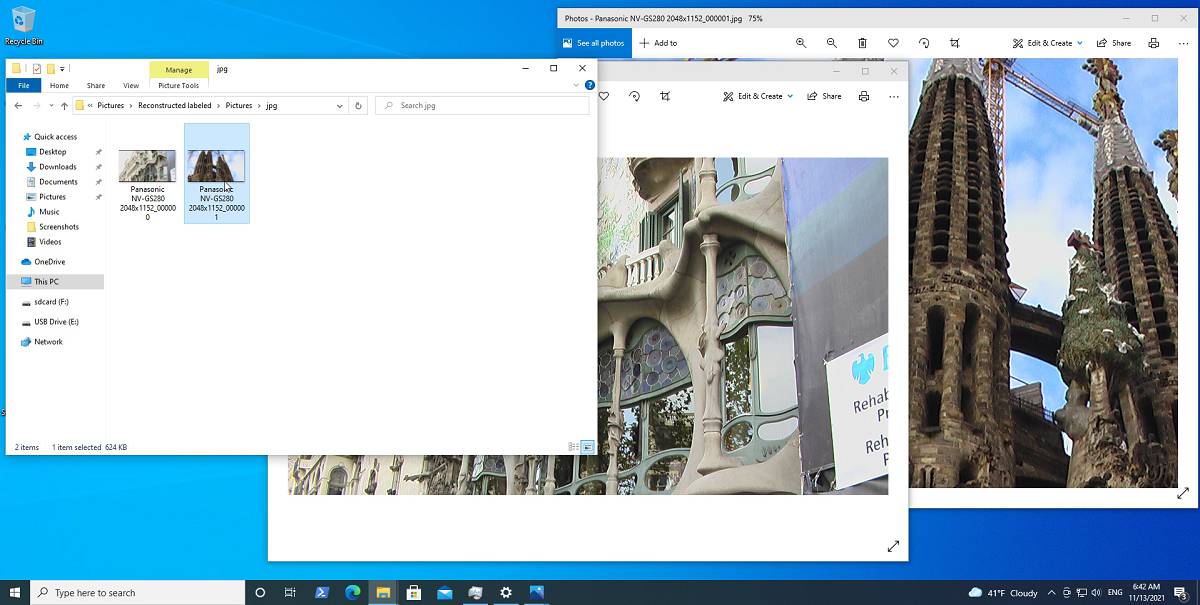
- When the process completes, usually in under a minute, you’ll find your recovered files in the folder you selected in the previous step.
Solution #3: Look For Previous (Shadow Copy) Versions of Your Files
If your overwritten files were deemed necessary by the Operating System itself, maybe there are backups available thanks to Shadow Copy. Tied to Restore Points, Shadow copy can keep track of multiple versions of files, allowing you to restore their past incarnations.
For the feature to work, you should have created at least one Restore Point in the past and enabled protection on the volume where your files reside. To do that:
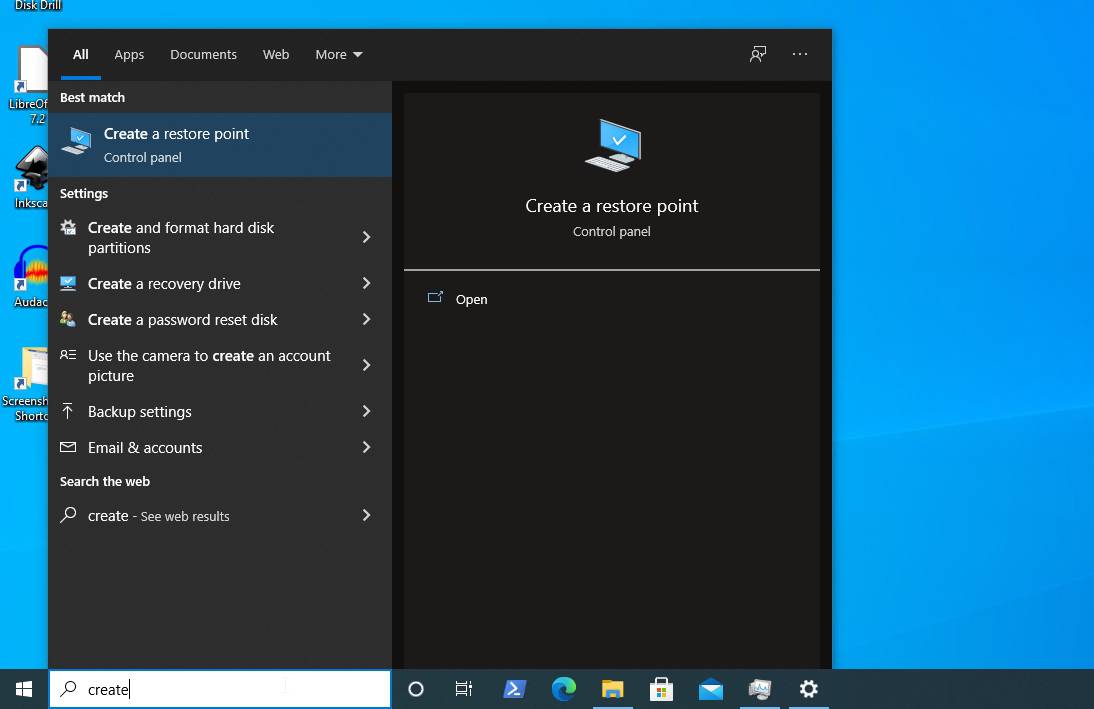
- Use Windows 10 built-in search functionality to look for “Create a restore point”, and open that Control Panel entry.
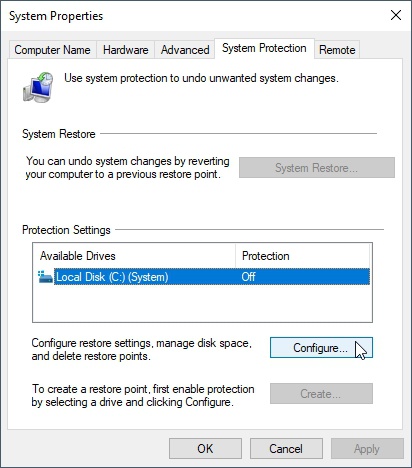
- Choose the drive on which you want to enable protection from the list under “Protection Settings”. Then, click on “Configure…”.
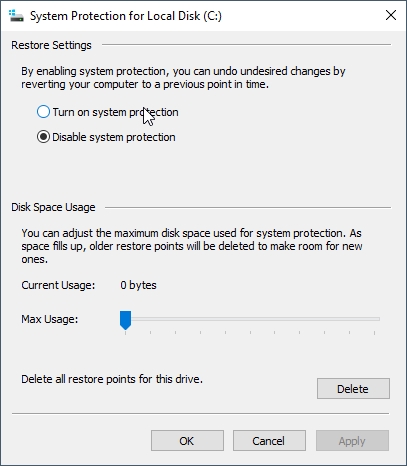
- Enable “Turn on system protection” under “Restore Settings”, and adjust the disk space you want to dedicate to the feature from the Max Usage slider below. Click on OK to enable the new settings.
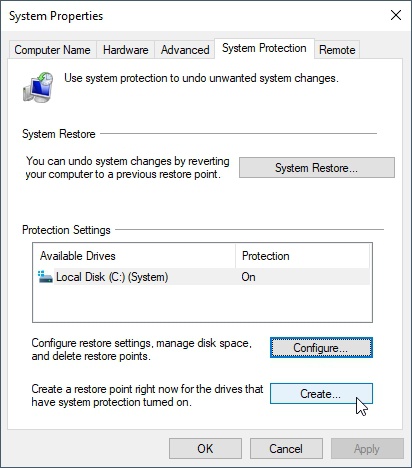
- With protection turned on the selected drive, create your first Restore Point with a click on “Create…” on the bottom right of the window.
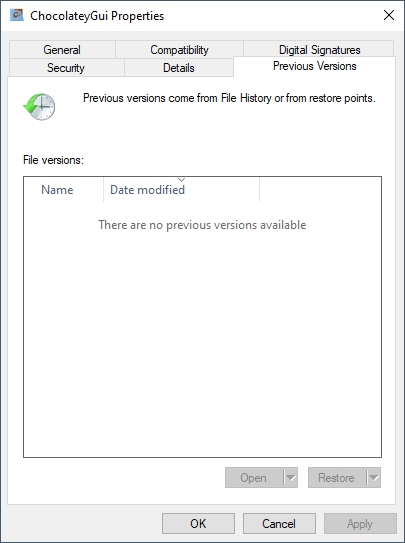
- To revert a “protected” file to a previous state, right-click on it and choose properties. From there, move to the “Previous versions” tab and select the one you want back. Then, click on the “Restore” button under the list. Unfortunately, as you can see in our screenshot, not all files are considered important enough to backup automatically. Thus, it’s pretty probable you might not find any previous version of the file you’re interested in.
Solution #4: The Magic Of Versioning
Many apps keep backups or previous versions of the files you create or edit in them. Let’s see how you can enable such features in the first place in some of the most popular pieces of software.
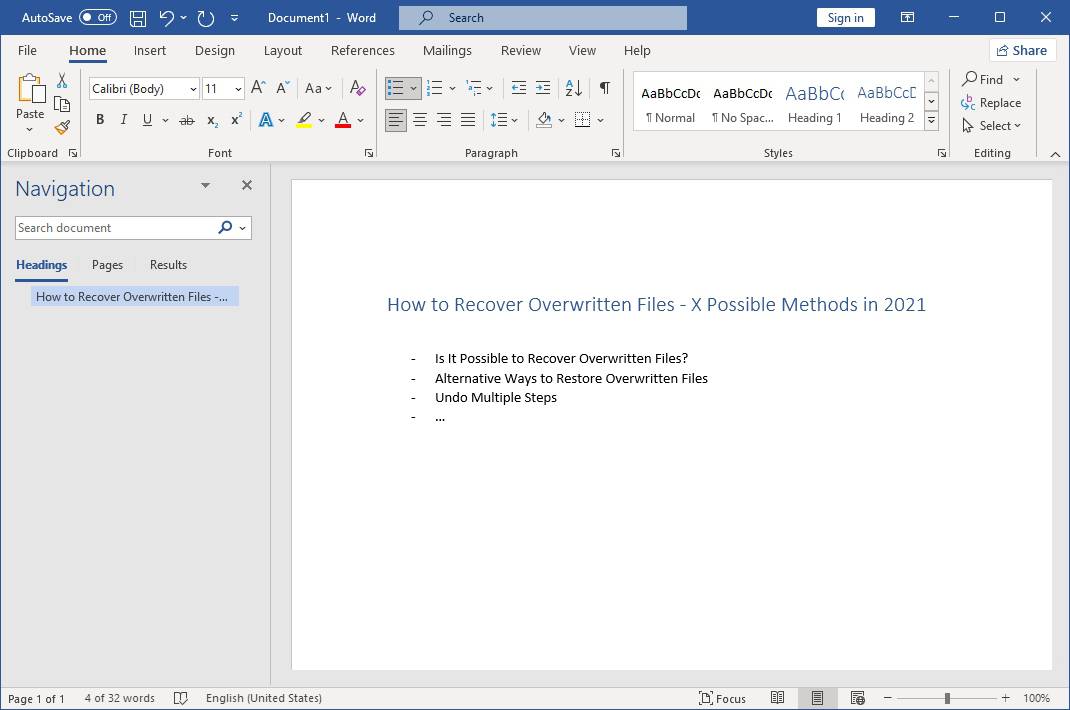
Microsoft Office – Word
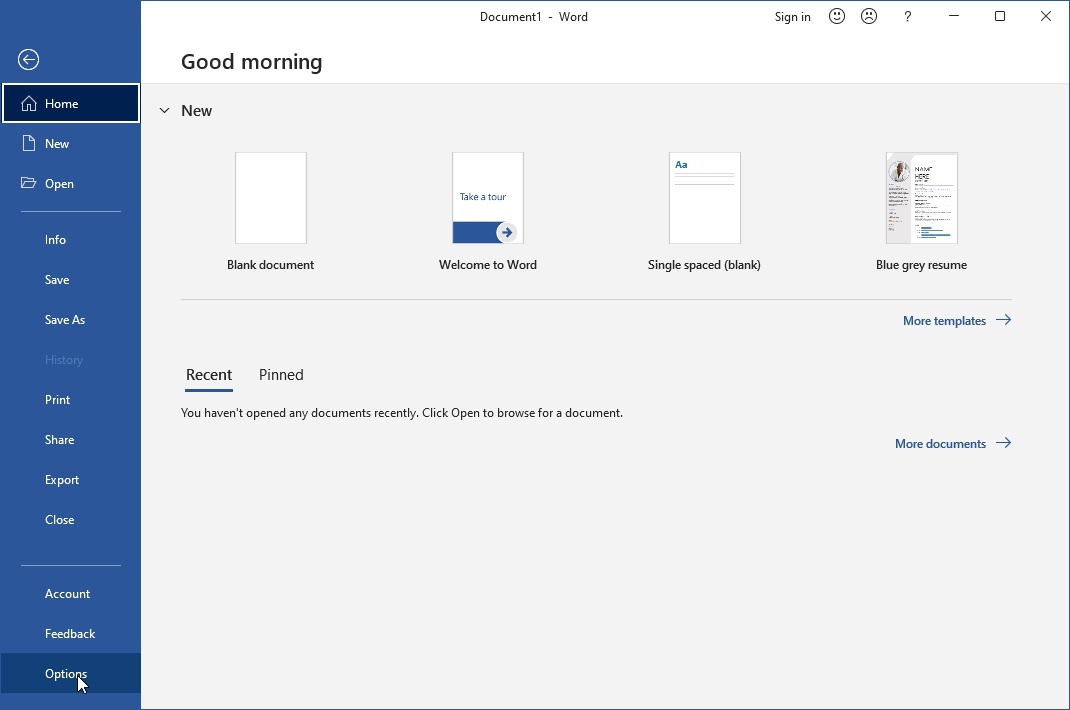
- Choose “File” on the top left of Word’s main menu.
- Click on “Options” at the bottom of the list on the left.
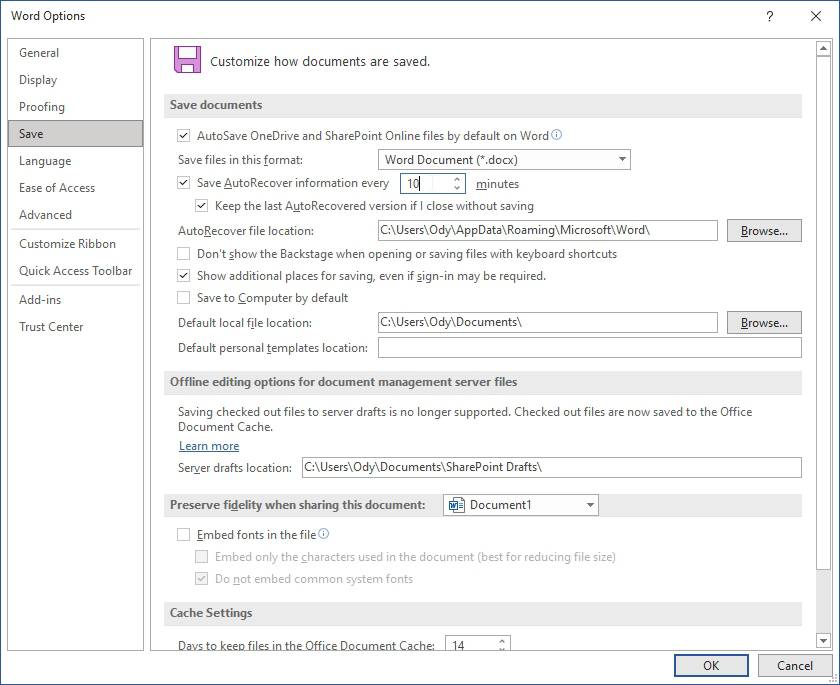
- Enable both “Save Auto Recover information every X minutes”, and “Keep the last AutoRecover version if I close without saving”. With those options active, Word will automatically keep backups of the documents you create or edit with it. You will find them in the path defined next to “AutoRecover file location”.
Still, there are even more ways to potentially get your files back, as we saw on our extensive tutorial on how to recover deleted or unsaved Word documents (on Windows).
💡 The same feature is available in other applications of Microsoft’s Office suite, like Excel. You can find it at a similar (or usually precisely the same) spot.
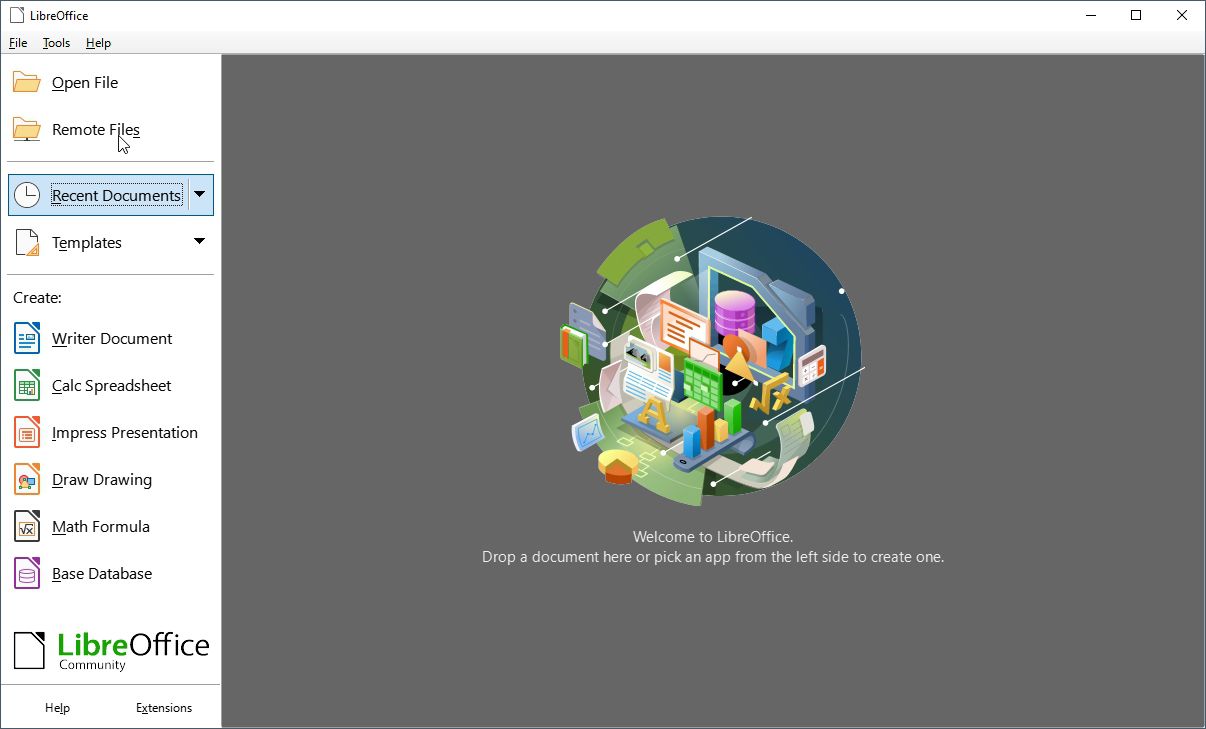
LibreOffice
- The quite popular LibreOffice open-source alternative to Microsoft Office also supports automatic backups. To enable the feature, from LibreOffice’s main launcher, move to its options instead of running an app.
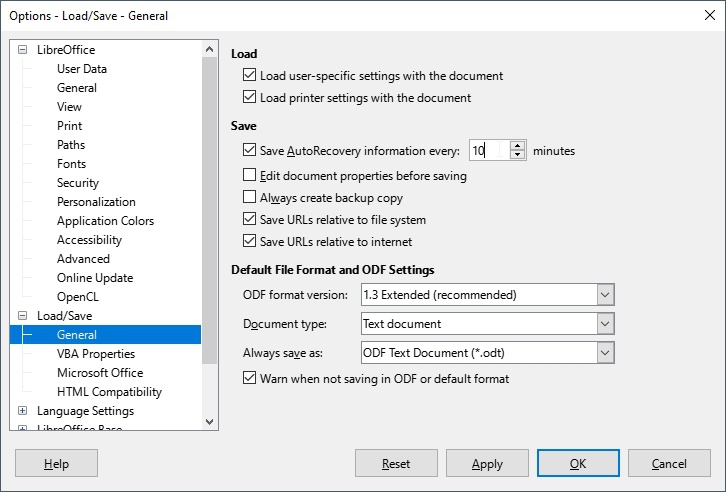
- There, expand the “Load/Save” group of options from the list on the left, and select “General”. Enable “Save Auto Recovery information every X minutes” and “Always create backup copy”.
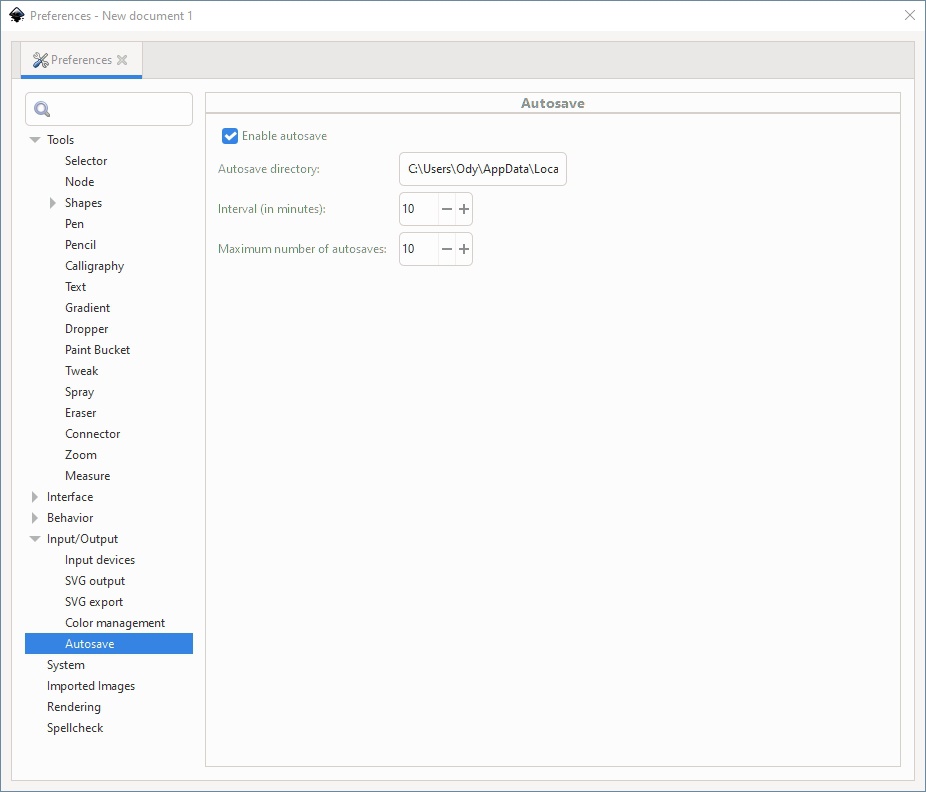
InkScape
- To enable automatic backups in the InkScape sketching app, pay a visit to its Preferences and expand the “Input/Output” group of options from the list on the left. Move to the “Autosave” page, and make sure “Enable autosave” is active. Use the other options to define where you want to save automatic backups, how many to keep, and the interval among them.
InkScape is popular and free, but, admittedly, Photoshop remains the king for media manipulation. If you’re a fan (and customer) of Adobe, and it’s PSD files you’re trying to get back, make sure to check our article dedicated to recovering unsaved or deleted PSD (Photoshop) files.
Dropbox
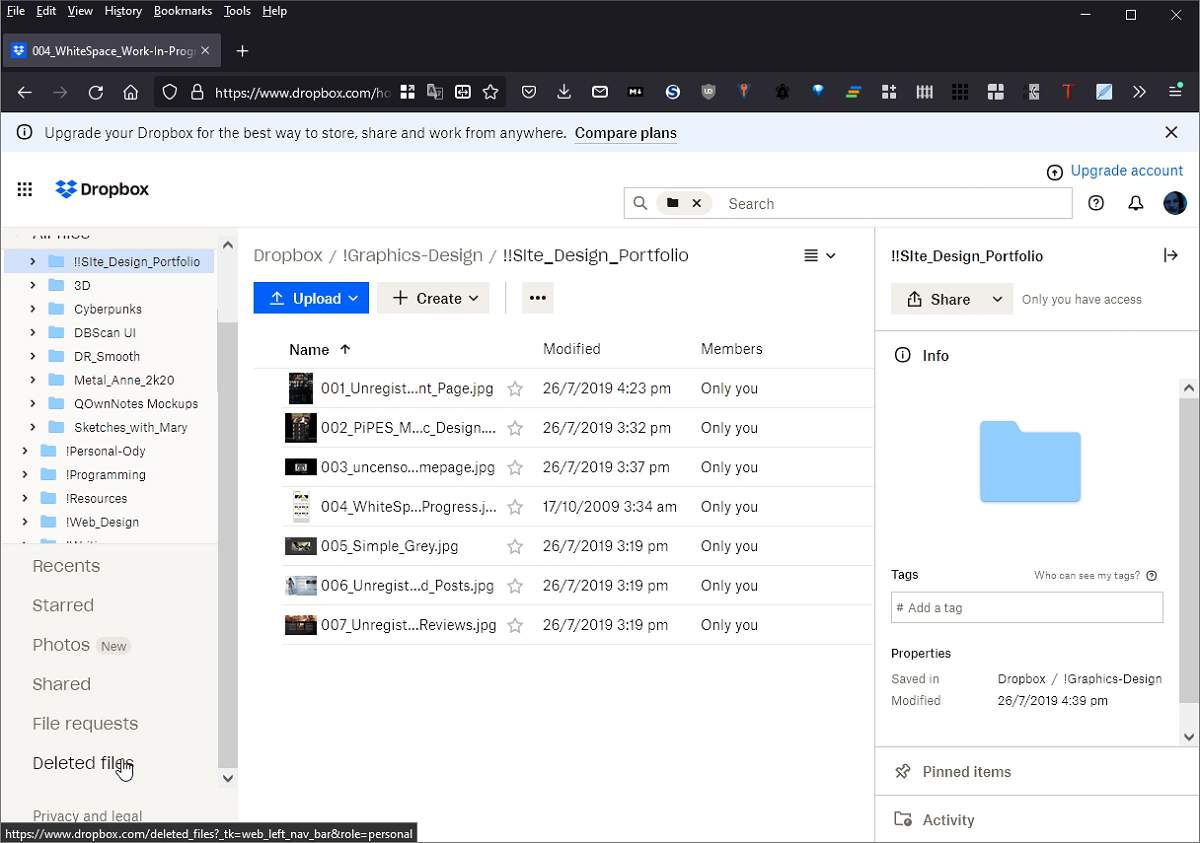
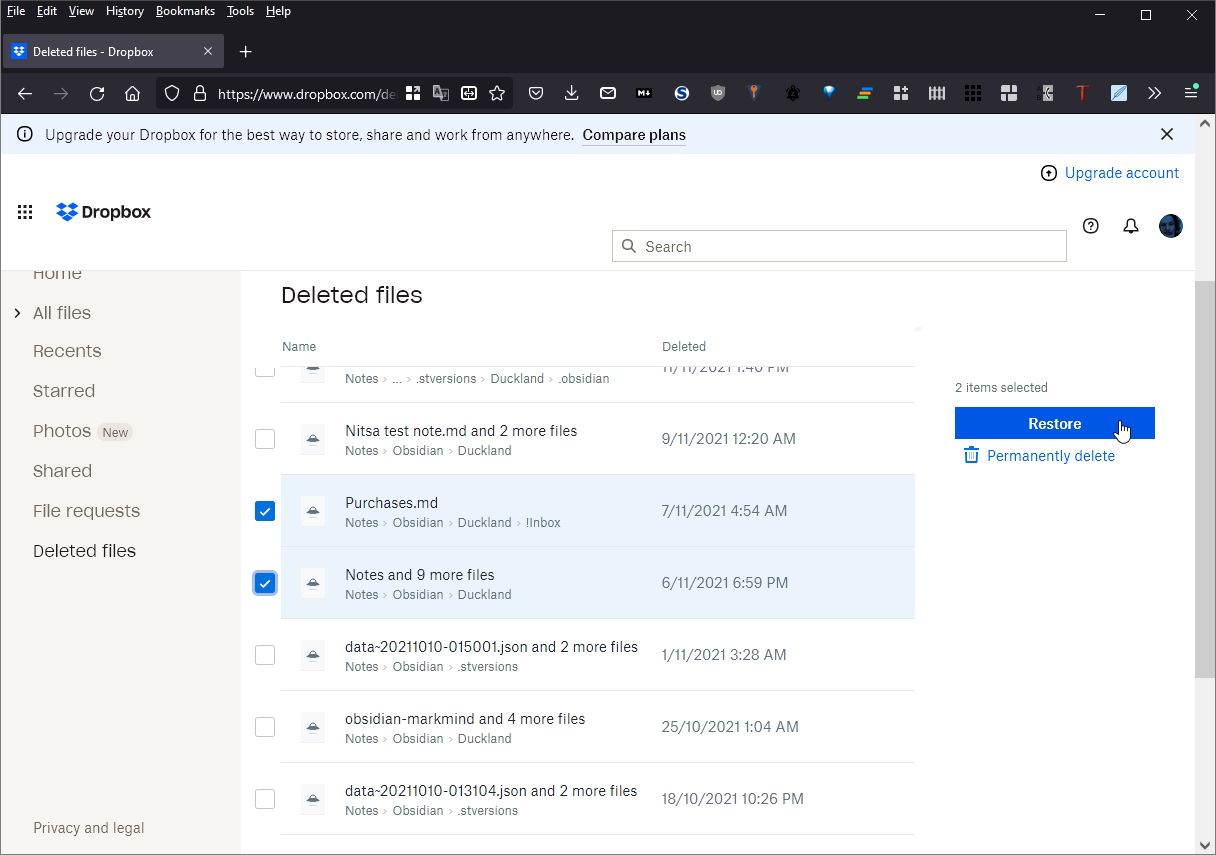
- Dropbox keeps deleted files and previous versions for up to 30 days, or even longer on paid accounts. However, they aren’t accessible through its apps but only from its web interface. Thus, to recover replaced files from it, you will first have to visit its site. Log in with your credentials, and when “you are in”, click on “Deleted files” from the list on the left.
- To get back any of your deleted files from dropbox, place a checkmark on their left. Then, click on “Restore” on the right of the list.
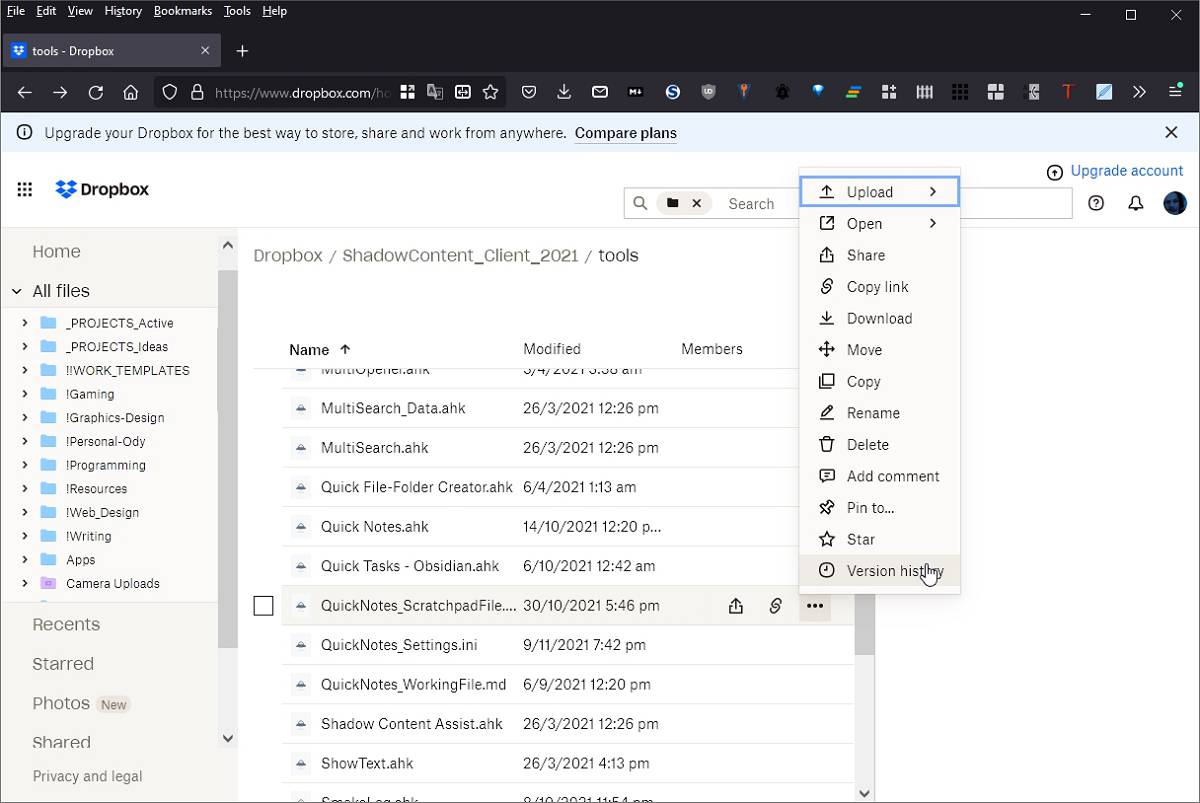
- If you want to restore a previous version of an overwritten file instead, right-click on it and choose “Version history” from the menu that pops up.
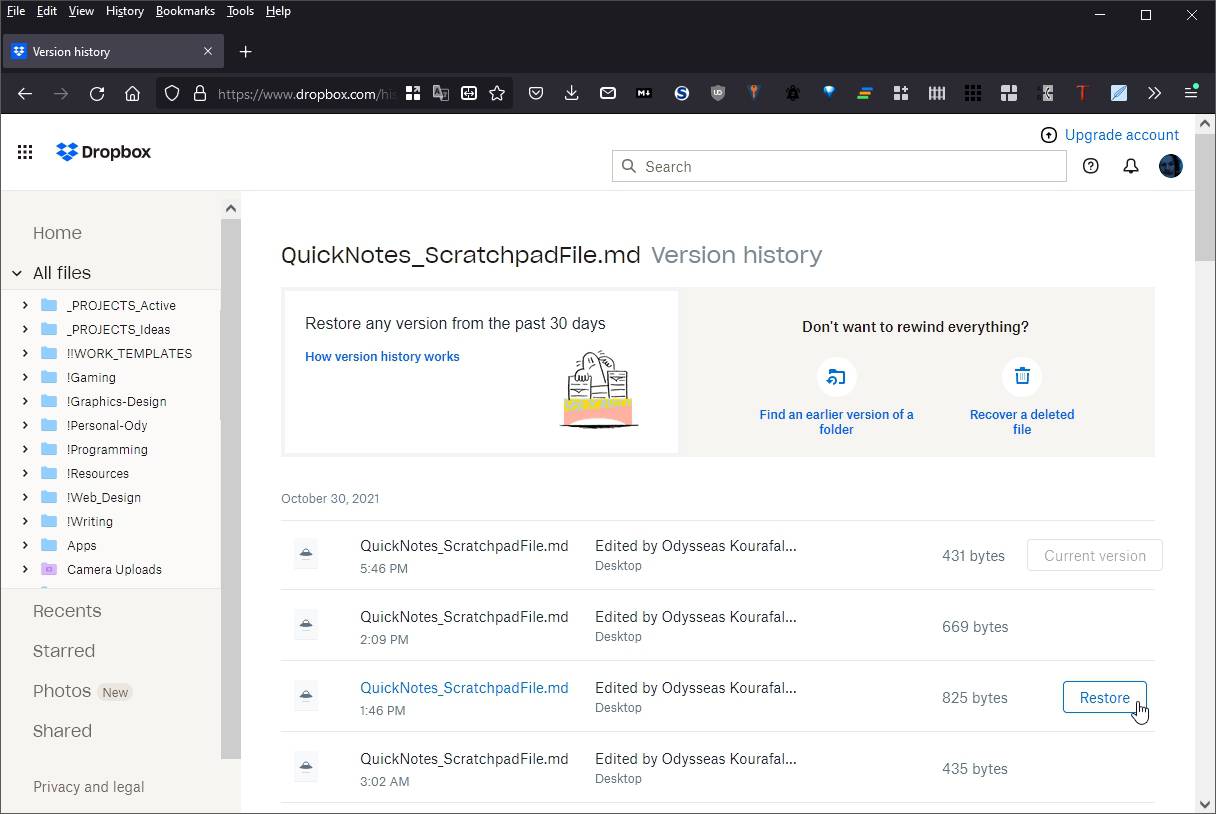
- Dropbox will show you a list with all stored versions of the file, with the current one at the top. To revert to a previous one, click on the “Restore” button that appears on the right of an entry when you hover the mouse cursor over it.
Still, as far as Dropbox goes, you have even more options for getting back your overwritten files, as you’ll find by checking our post with 5 proven solutions to recover deleted files from Dropbox.
Google Drive
- Just like Dropbox, Google Drive allows you to revert any file to a previous version if you access it through its web interface. Pay a visit to its site, and log in with your account.
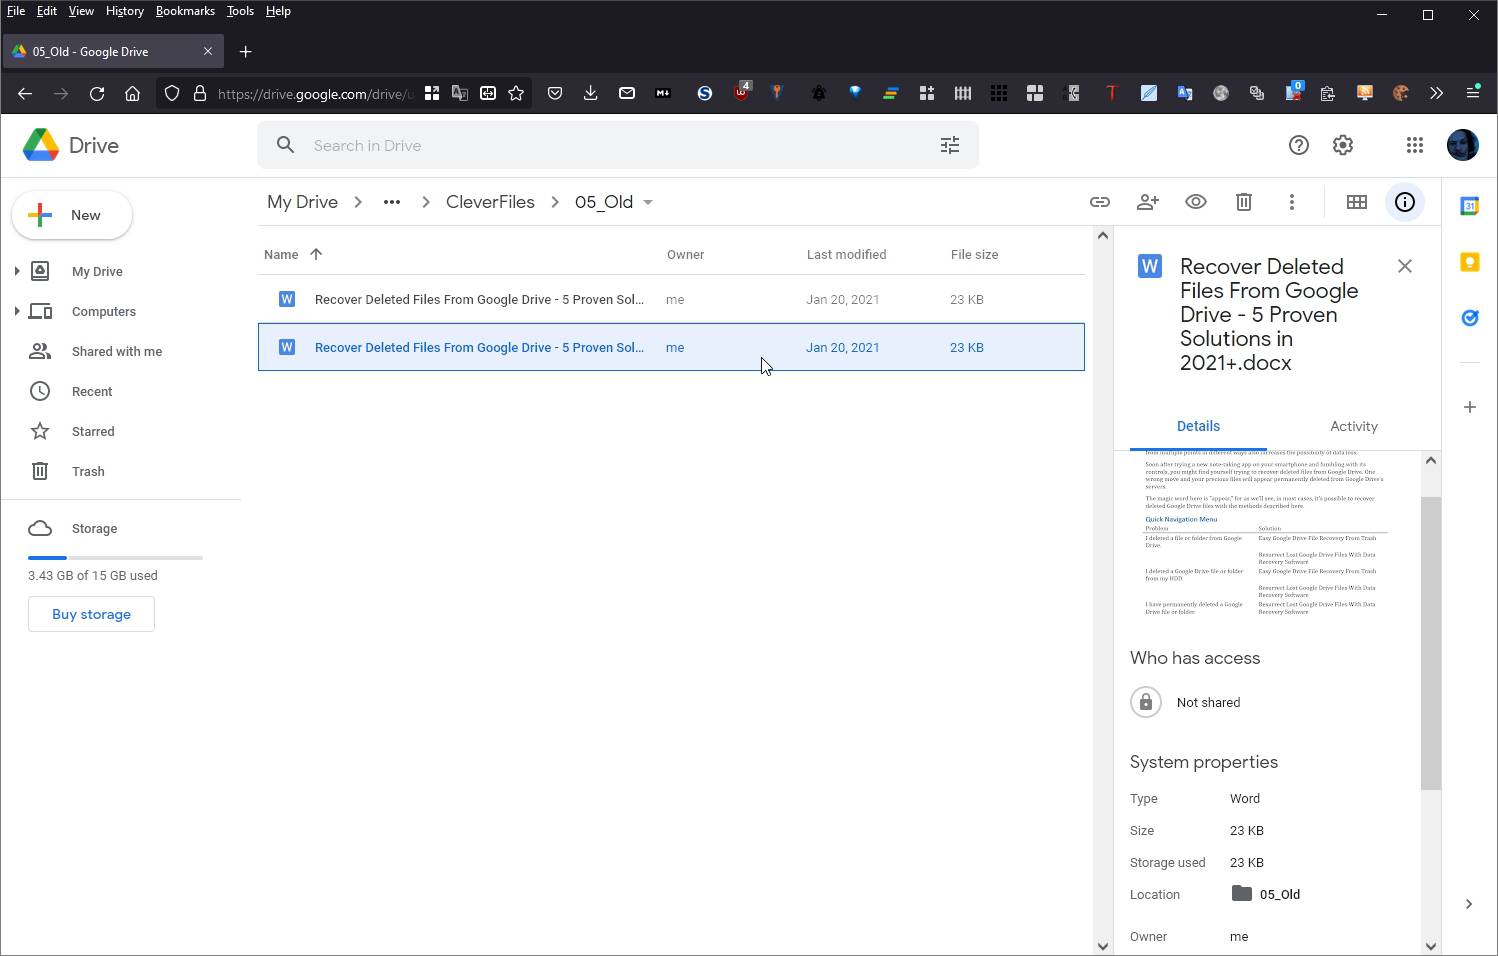
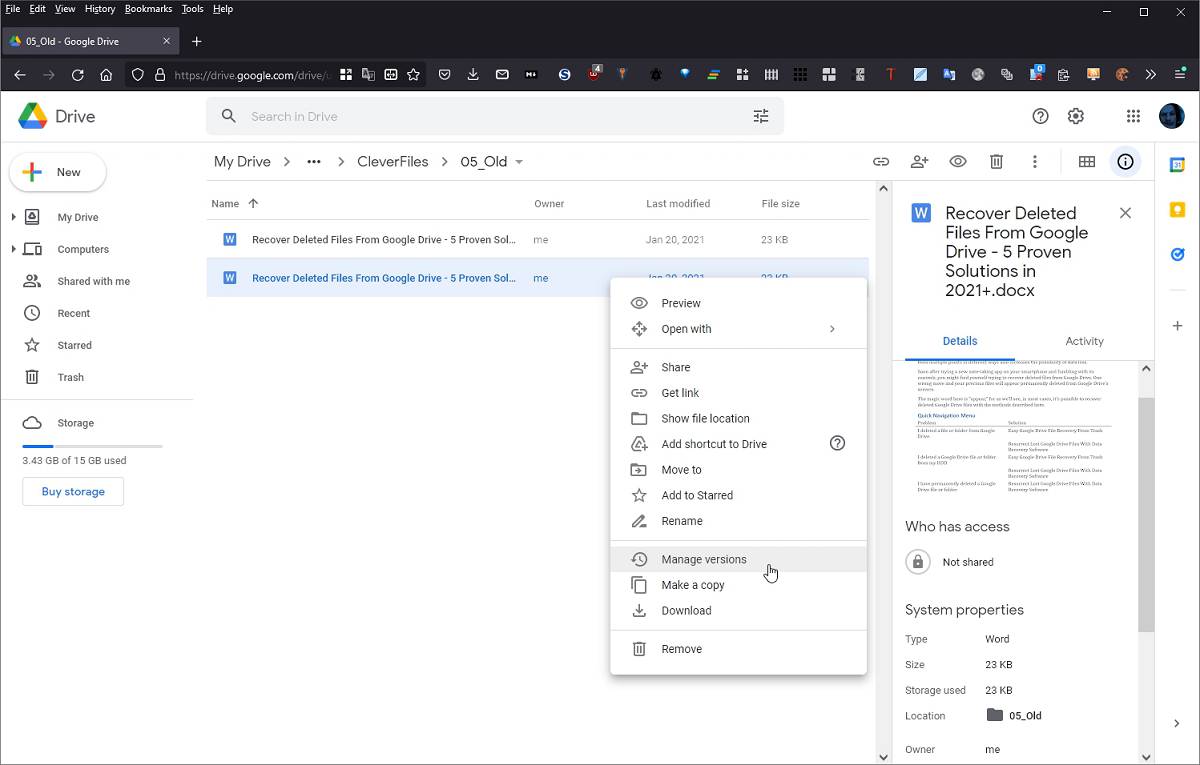
- Locate the file you accidentally replaced with newer but not as valuable data. Right-click on it and choose “Manage versions” from the menu that pops up.
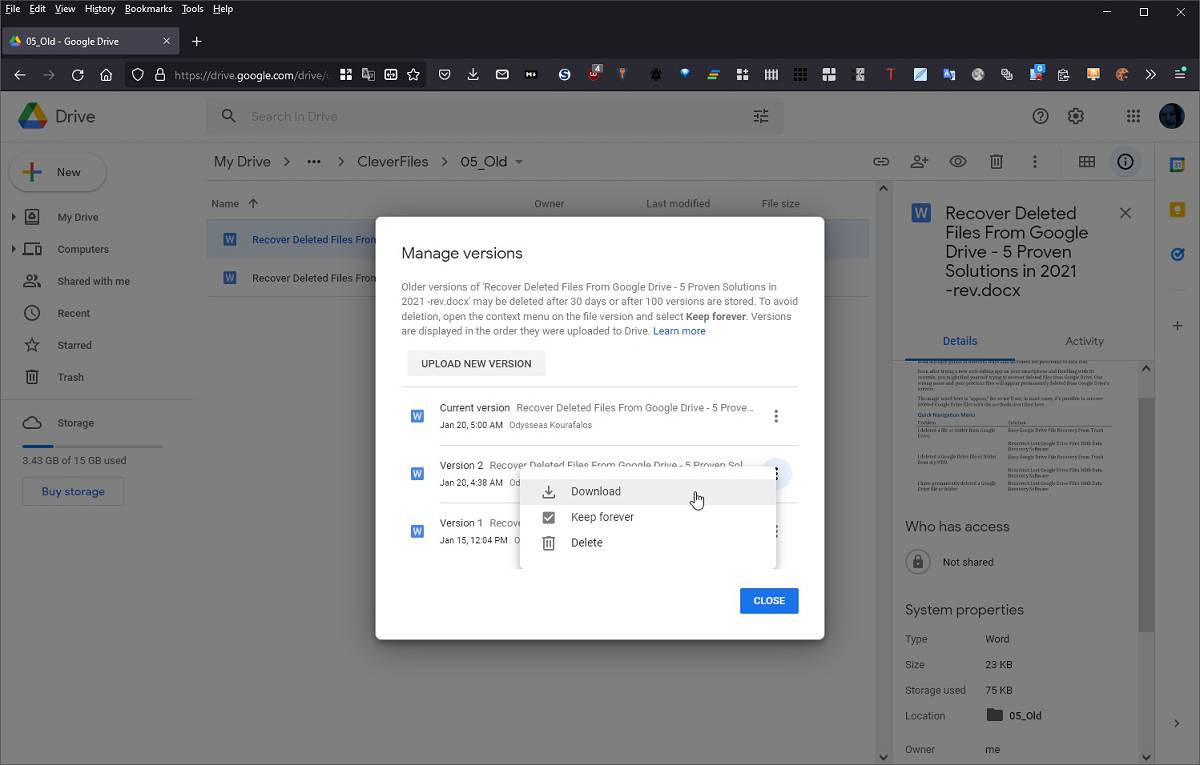
- Google Drive will present a list of past versions of the selected file. Locate the one you prefer and click on the three dots on its right. A mini menu will pop up, allowing you to download this version, keep it forever, or delete it.
That’s only one way of getting back your lost files from Google Drive. Want more alternatives? Check our article where we go over 5 proven solutions to recover deleted files from Google Drive.
Local PDF Files
PDF files are no exception, and you also have more than one ways to get them back. However, to avoid repeating ourselves, if that’s what you’re interested in, we believe it’s better to point you to our complete guide on how to recover deleted or even unsaved PDF files on Windows 10.
Solution #5: Restore Your Data With Windows Backup
If you were already using Windows Backup or had enabled File History for some of your folders in Windows 10, getting past versions of your files is easy. However, let’s take it from the beginning and see how those who weren’t using those features can take advantage of them.
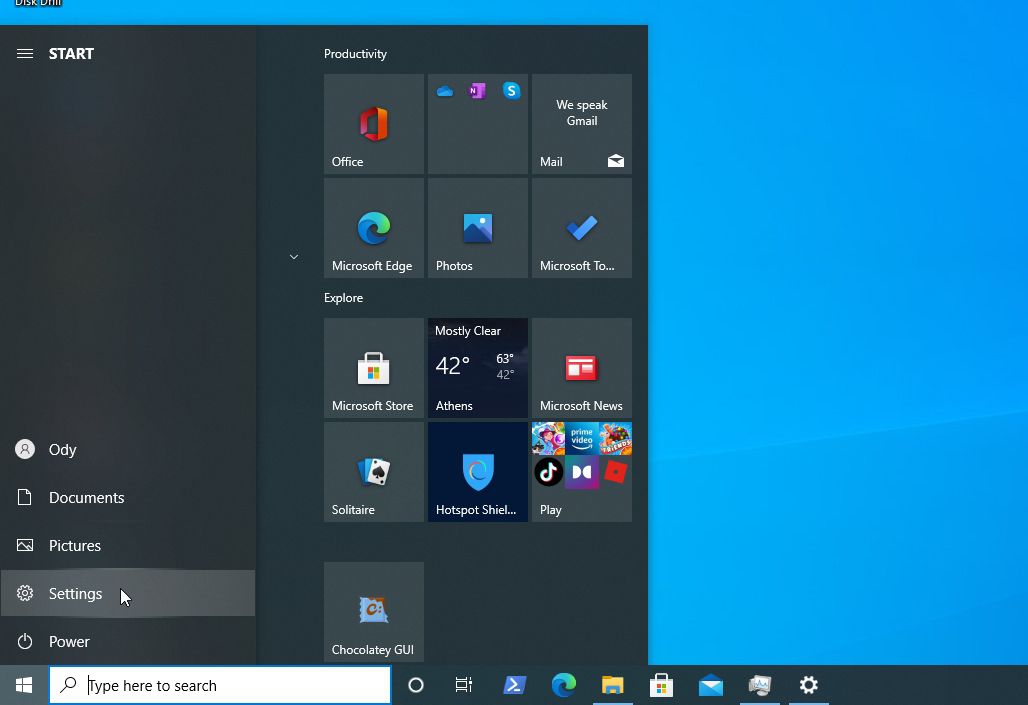
- Open the Windows 10 start menu and click on Settings.
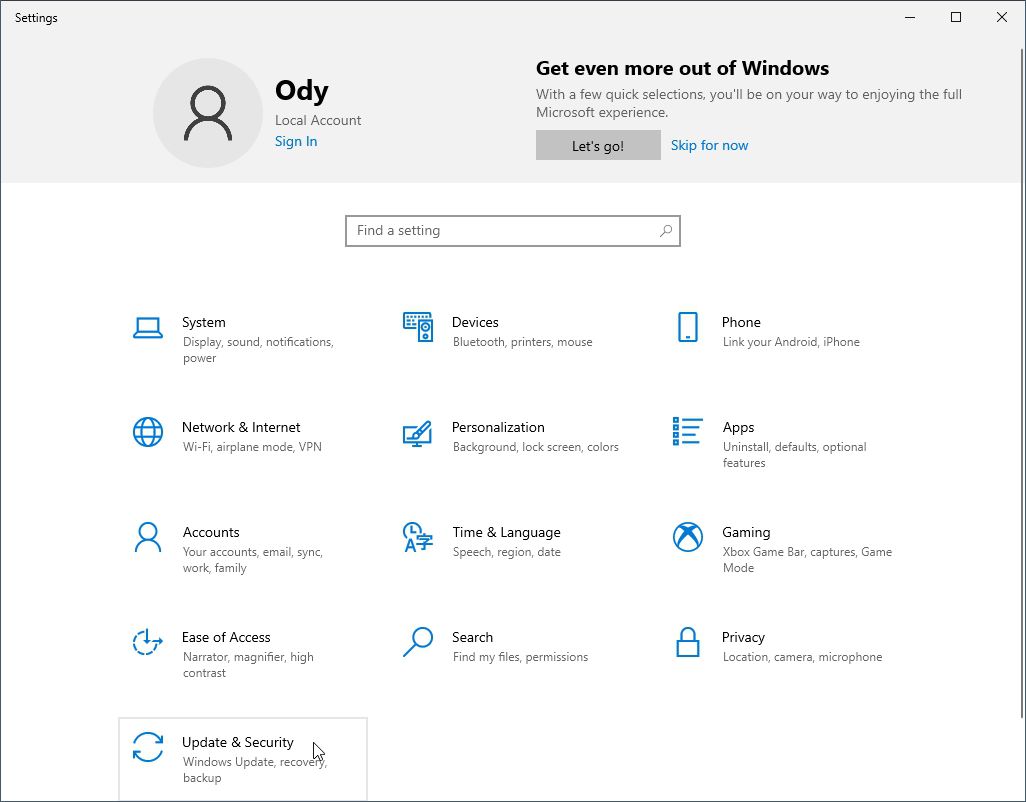
- From the Windows 10 Settings window, choose the last option, “Update & Security”.
- Move to the “Backup” options page from the list on the left.
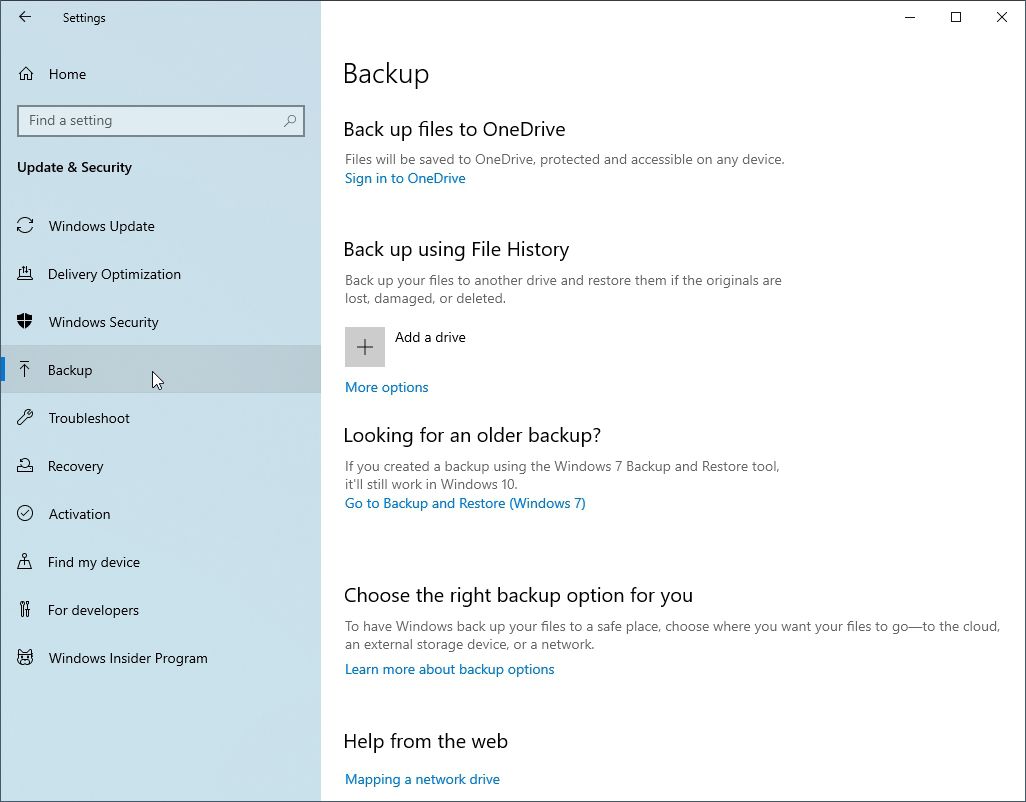
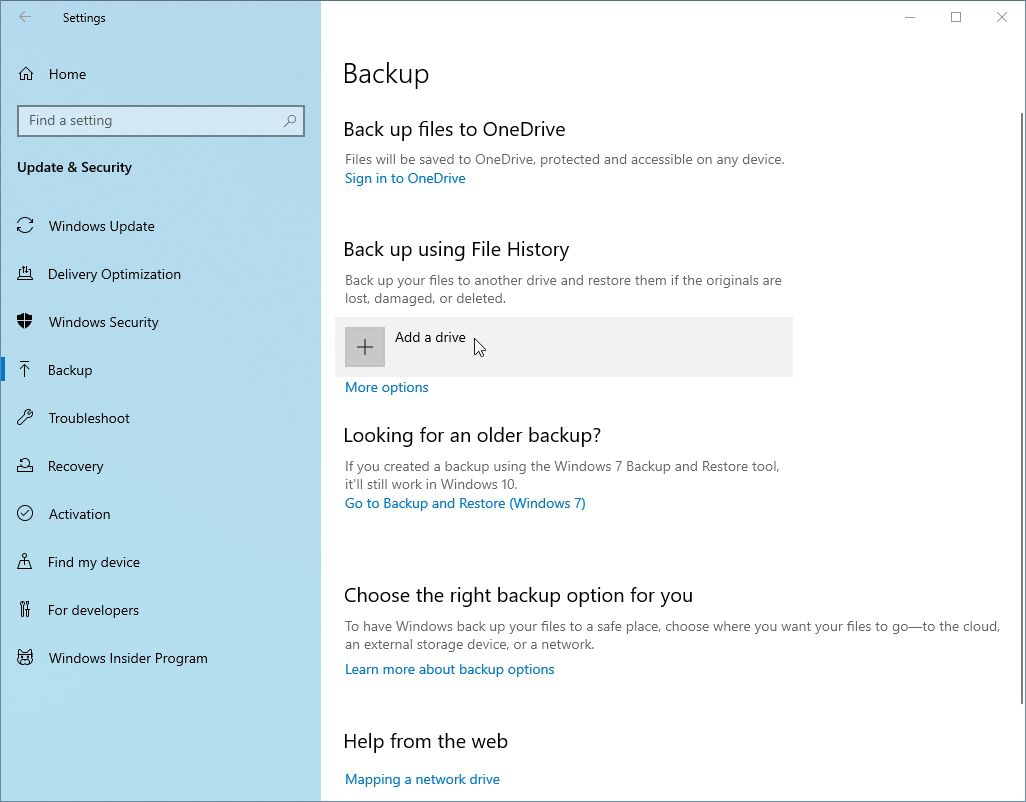
- Click on “Add a drive” under “Back up using File History”.
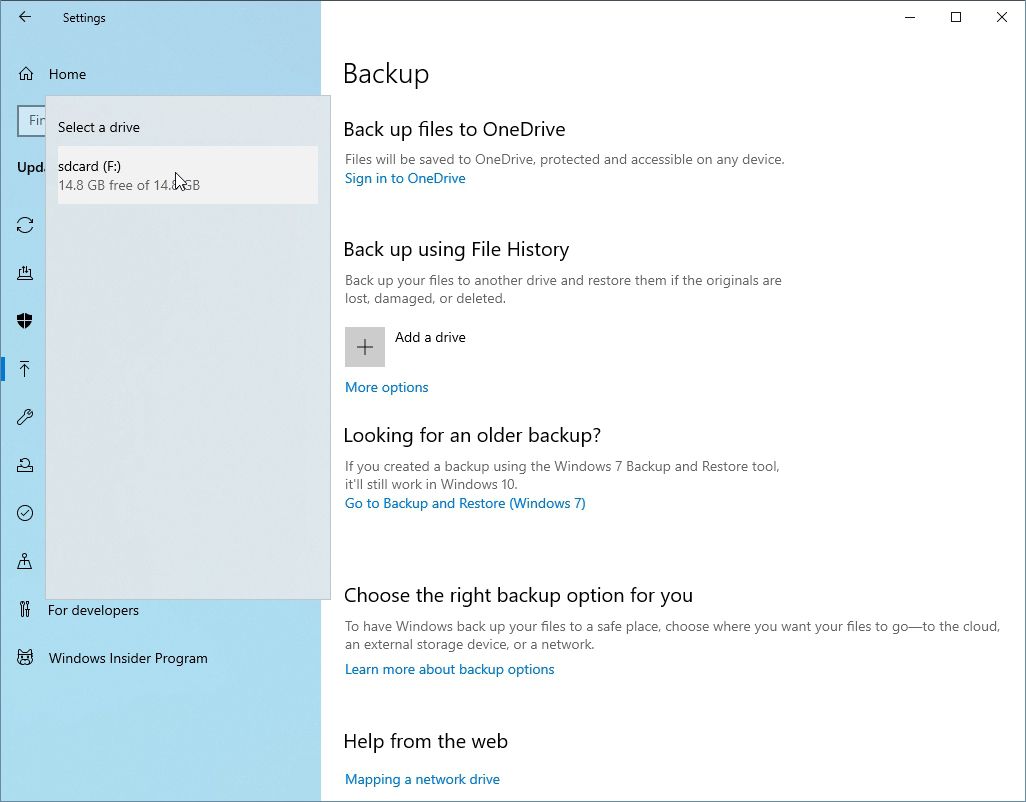
- Choose a secondary storage device where you want Windows 10 to keep its backups. It doesn’t have to be a large external Hard Disk Drive – even a USB flash drive or an SD card will do.
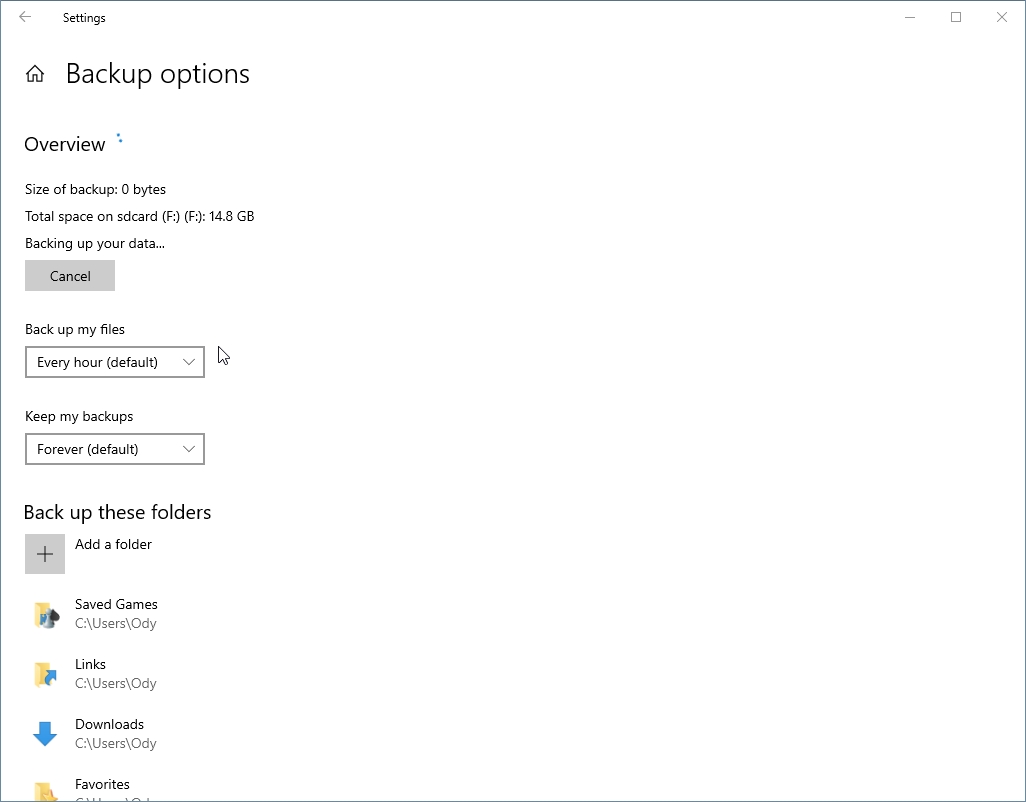
- Click on “More options” and use the two pull-down menus to define:
- How often Windows 10 will create new backups
- How long they will be kept.
Use “Add a folder” under “Back up these folders” to add more folders to the list and have their contents also backed up.
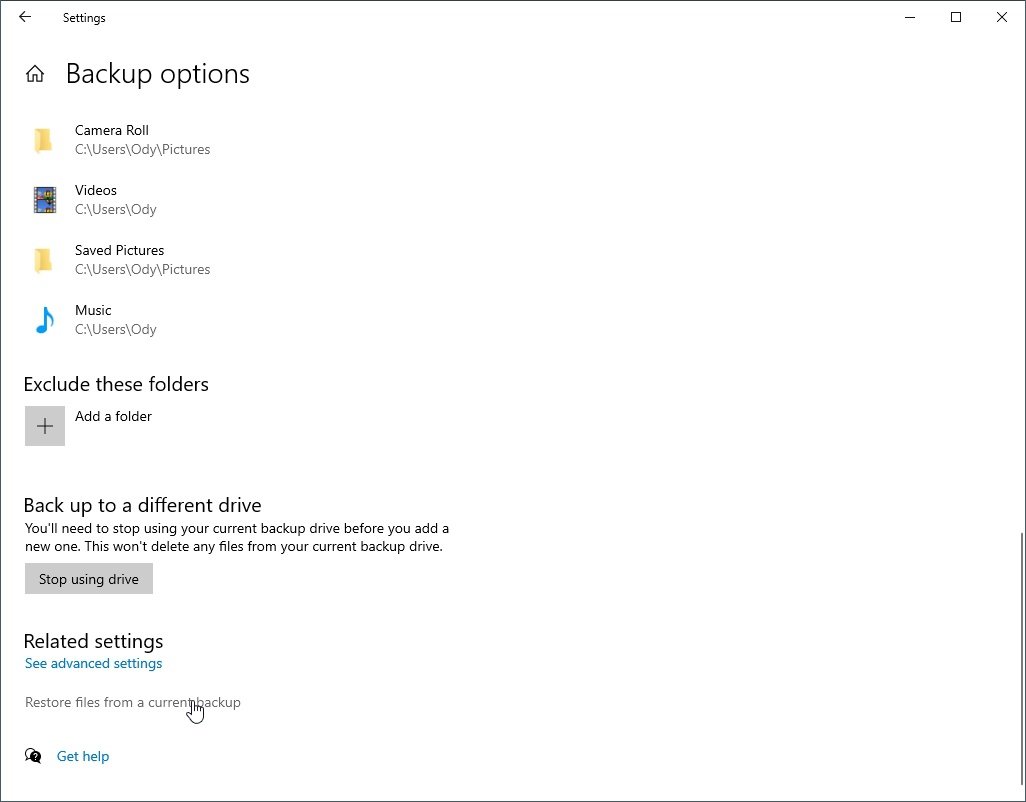
- Whenever you want to restore previous versions of your files from those backups, visit the same spot, and scroll to the end of the “More options” page. Click on “Restore files from a current backup”.
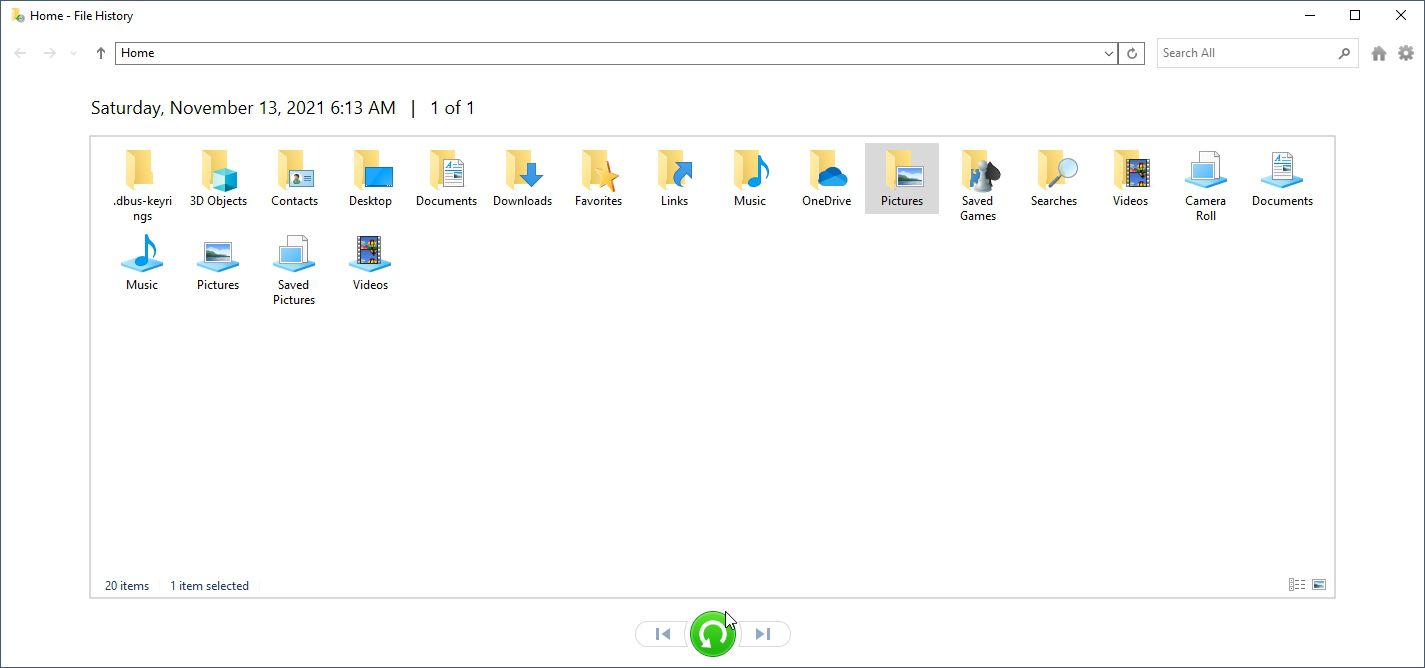
- Choose the files and folders you want to revert to a previous version from the following window. Click on the button with the green arrow at the bottom center of the window to begin their recovery.
Solution #6: System Restore
If you don’t want to restore a particular overwritten file to a previous state, but the whole operating system, System Restore can help with that.
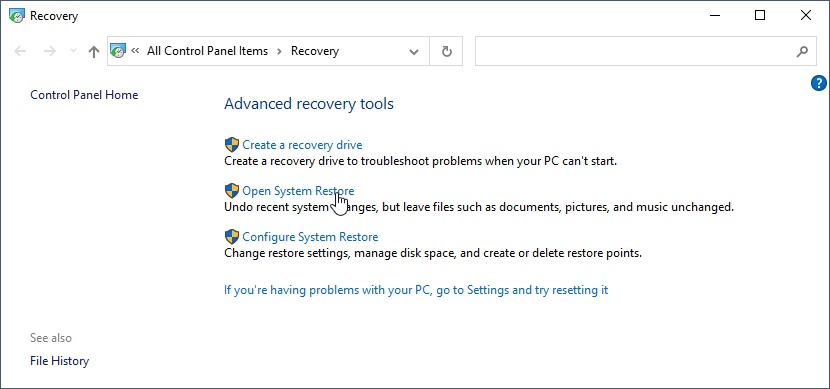
- Use the Windows 10 search function to search for “recovery”. Open the Control panel entry that will appear.

- From the “Recovery” window that will show up, choose “Open System Restore”.
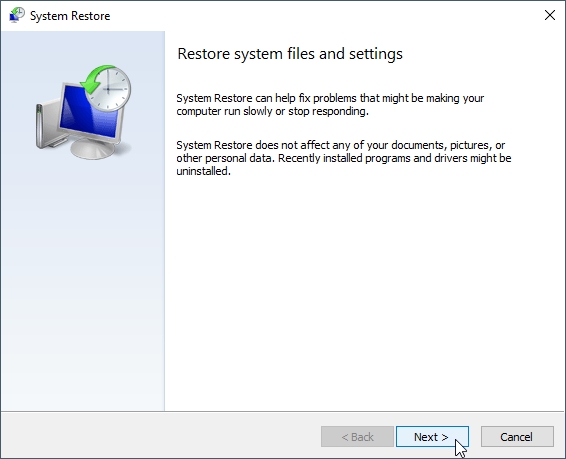
- Click “Next” on the “System Restore” window that follows.
- Choose the Restore Point to which you want to revert your system if there is more than one available.
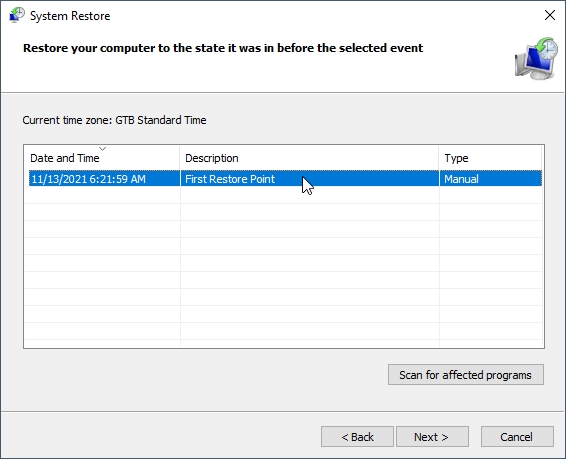
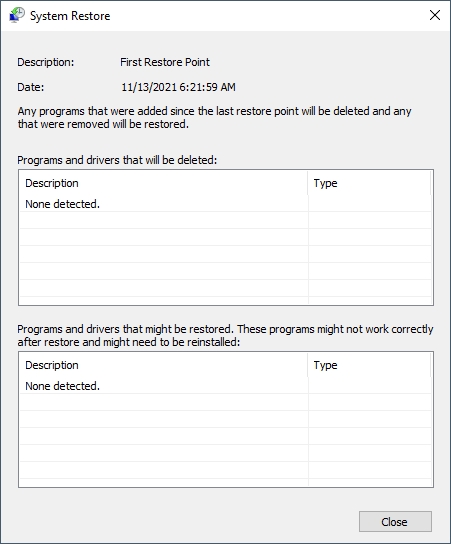
- You can click on “Scan for affected programs” underneath the list to check if any of your installed software might stop working afterward.
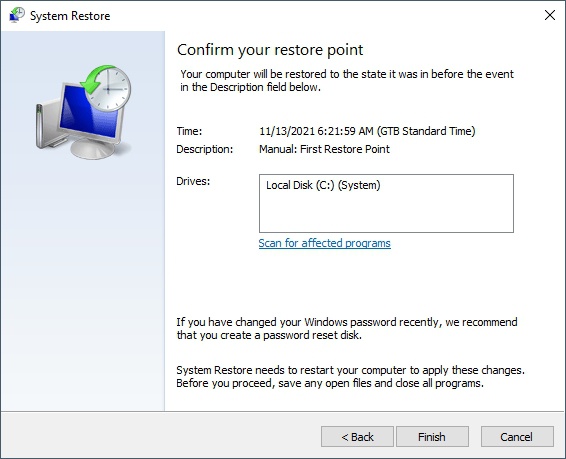
- If you’re sure you want to proceed, click Next, double-check everything one last time, and then click on “Finish” to revert your computer to the chosen Restore Point’s state.
💻 Have you, like many others, already moved to Microsoft’s latest OS? Then, maybe it would be better if you checked our overview of available data recovery features & software for recovering deleted files on Windows 11.
Solution #7: Recover Overwritten Files From 3rd-Party Backups
If you have been using a tool like CloneZilla to keep backups of your data, you can restore your overwritten files from them. However, each backup solution is different, leading to various ways of getting back your accidentally replaced files.
Some of them allow you to “open” a backup through their interface and “fish out” individual files. For others, like CloneZilla, you might have to “mount” a backup file as a virtual drive. You could then copy your files from it as if it were a standard storage device, using a file manager.
Thus, we won’t go over such solutions, for each is different in its approach. Check out your backup solution‘s documentation to find out how you can restore your overwritten files from the backups you have available.
Recovering Overwritten Files? ImPossible!
As we saw, there are multiple ways you can recover your accidentally deleted data even if technically, and when talking literally, that’s impossible. Thanks to the safeguards built in our modern operating systems and software, the impossible can become quite possible.
Even if you can’t really recover truly overwritten files, and the methods we saw are solutions for sidestepping the problem, it doesn’t matter if they lead to the intended result: getting your precious data back.
FAQ
Why is it hard to recover overwritten files?
It’s not merely hard; it’s impossible if they’ve been fully overwritten because all of their data will have been replaced by new files.
What are the solutions for getting back overwritten files?
Most are different types of backups, created by third-party tools, the operating system, or the app from where they originated. Do your files still exist in some form or alternate version on a storage device? You can probably get them back using a specialized data recovery solution.
Which is the best way to recover overwritten files?
It depends on many factors, so, unfortunately, there isn’t a definitive answer to this question. Did you keep backups? Were they stored in Dropbox or Google Drive? Were you using System Restore? What might be “the best way” for one will not work for another.
How can I minimize the chances of losing overwritten files in the future?
Enable all safeguards in your operating system and individual applications for taking automated backups and keeping previous versions available. Then, add manual System Restore points and third-party backup tools to the mix to almost eliminate any chance of data loss in the future.
Is it possible to recover overwritten files when no previous versions are available?
Does “no previous versions available” translate to no versioning, backups, or shadow copy? Then, a specialized data recovery tool like Disk Drill is probably your last resort. Such a tool might be able to recover remnants of your files that haven’t yet been fully overwritten.
How does recovering overwritten files on an external hard drive differ compared to internal storage devices?
Theoretically, there is no difference. Practically, an external hard drive might not have been included in automated OS backups or had OS “protection” enabled on it. Thus, you might have fewer options for getting your files back from it.
Can I recover overwritten files on Windows 10 as I did on past versions of Windows?
Mostly yes, since Windows 10 includes all backup tools and data protection functionality of its ancestors. However, older versions of third-party backup software might be incompatible with it. Thus, you might have to upgrade them to recover data from backups you created with them in a previous version of Windows.
How can I recover overwritten files that resided on an external hard drive connected to my Mac?
Recovering from an external hard disk drive on a Mac shouldn’t be different than recovering from internal ones.
Is it also possible to recover overwritten files if I'm using Linux?
Yes, but it still depends on many factors, like the apps you were using, if you had third-party software backing up your data, the filesystem of the storage device where the files resided, etc.
I'm sure I've read that it is possible to really recover overwritten files on Reddit or some other forum. Without backups, nor the solutions you mention here. Are there any other secret/alien/voodoo-like solutions that can somehow make my lost files magically re-appear?
Unfortunately, the answer to this is a single, simple, clear, and direct “nope”.
This article was written by Odysseas Kourafalos, a Editor-in-Chief at Handy Recovery Advisor. It was also verified for technical accuracy by Andrey Vasilyev, our editorial advisor.
Curious about our content creation process? Take a look at our Editor Guidelines.