There may come a time when you’ll need to recover or transfer data from a Mac hard drive to a PC. Even though you can’t just connect the drive to your Windows-powered computer and drag and drop the files, it’s still possible to transfer the needed information from one device to another.
In this article, we’ll walk you through the main methods that can be used to retrieve data from a Mac HDD on a Windows PC.
Situations Where You May Need to Recover/Read a Mac Hard Drive on a PC
So why would you need to transfer files from a macOS-powered device to a Windows one? Here are a few situations when knowing how to do it may come in handy:
- Switching from Mac to PC: Maybe it’s obvious, but if you’ve bought a new Windows PC after using a Mac for a while, you might want to transfer important files from your old device to the new one;
- Sharing files for collaboration: You may be working with others who use Windows PCs, and you may need to transfer files between your Mac and their computers for collaboration;
- Accessing files on different devices: Simply when you want to transfer a few files from your Mac HHD to a PC to have access to that information at all times and on all of your devices;
- Data recovery from a Mac: If your Mac has just died, and you have all of the data from your device stored on an HFS+ or an APFS drive. Or, you may have lost some data from a Mac-formatted external hard drive but only have a PC to recover them. By knowing how to recover data from such drives to a PC, you’ll be able to access all of your files on a Windows-powered computer.
We’ll start by examining methods for more extreme cases, such as dead MacBooks or data deleted from Mac-formatted drives, followed by those for everyday scenarios. But first, let’s talk about a few challenges you may face when recovering Mac data to Windows.
Difficulties You May Encounter Recovering/Reading Mac Data on Windows
As it was already mentioned, recovering a Mac hard drive on Windows is possible, but not as easy as one might hope. With each solution, there is a chance that you will encounter some difficulties.
Just for you to be fully prepared, here are some things that you should know before recovering data from Mac HDD to Windows:
- Some macOS app files may not function natively on Windows (for example, Pages, Keynote). But still, you’ll be able to transfer them to your PC. We then advise using alternative viewing options (e.g., online versions, file converters);
- APFS file system is also not compatible with Windows-based computers, but with the help of third-party software, you’ll be able to recover your files;
- It’s impossible to use a docking station to recover files from newer Macs (the ones equipped with an internal SSD);
- If your PC doesn’t recognize your Mac hard drive, try to run third-party software to help (it’s possible that your hard drive is not correctly formatted).
How to Recover Data from a Mac Hard Drive to a PC
It’s incredibly easy to recover deleted files directly on a Mac, but what if your Mac isn’t functioning properly, and you need to retrieve data from its storage to a PC? Or what if you know there are some files deleted on an external hard drive formatted for Mac that you need back, but you only have access to a Windows PC? Or what if you know there are some files deleted on an external hard drive formatted for Mac that you need back but you only have a Windows? Well, as you may have already discovered, that’s a bit more complicated because Apple’s file systems are not natively supported by Windows. Fortunately, there are software applications that can recover files from both HFS+ and APFS drives directly on Windows.
One such software application is Disk Drill, a powerful data recovery tool whose highly sophisticated signature scanner can read the contents of a drive removed from a malfunctioning Mac in many dire situations because it doesn’t rely on information stored in the file system.
Unlike other similar tools, Disk Drill is complicated only under the hood, featuring an elegantly simple interface that reduces the recovery process into a few straightforward steps:
- Plug in the HFS+ or APFS drive to your PC. We are leaving the choice of connection method to your discretion, as it depends on the type of device. A popup window may appear, asking you to format the drive. Click Cancel.
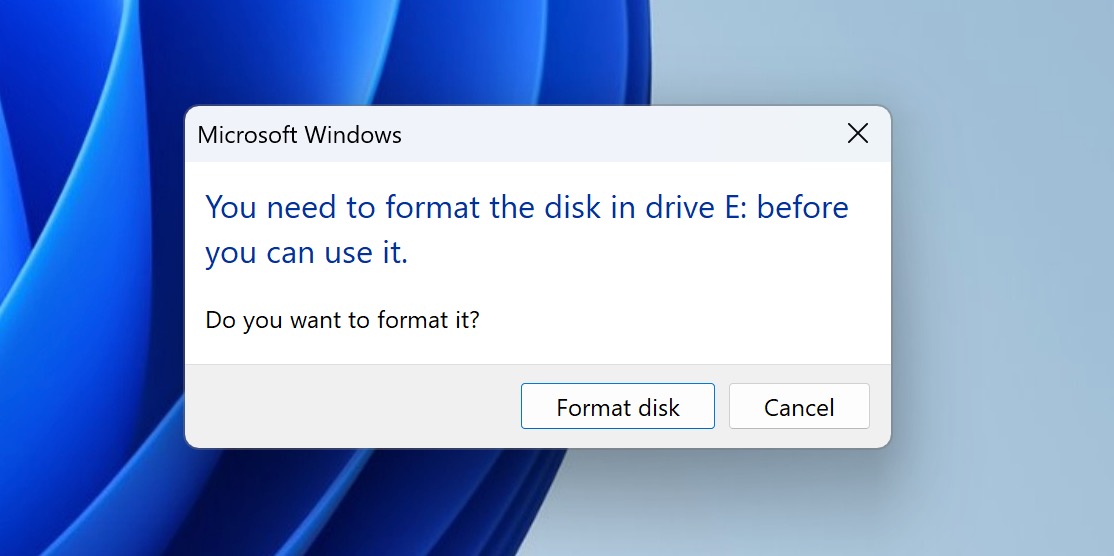 ❗️
❗️DO NOT format your HFS+ or APFS drive. This will delete all your data and make it harder to extract the needed files, so remember to click Cancel when the popup window appears.
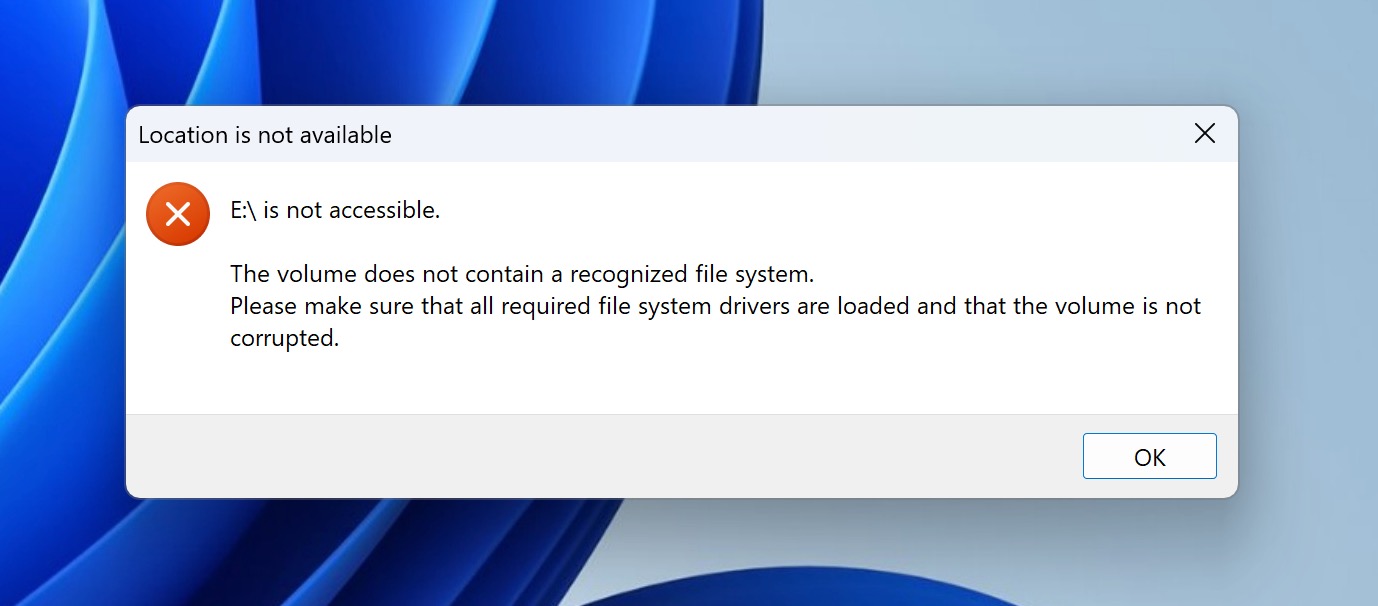
- You’ll see another popup window saying that Windows cannot read the drive. Ignore the warning since Disk Drill can read the drive on its own.
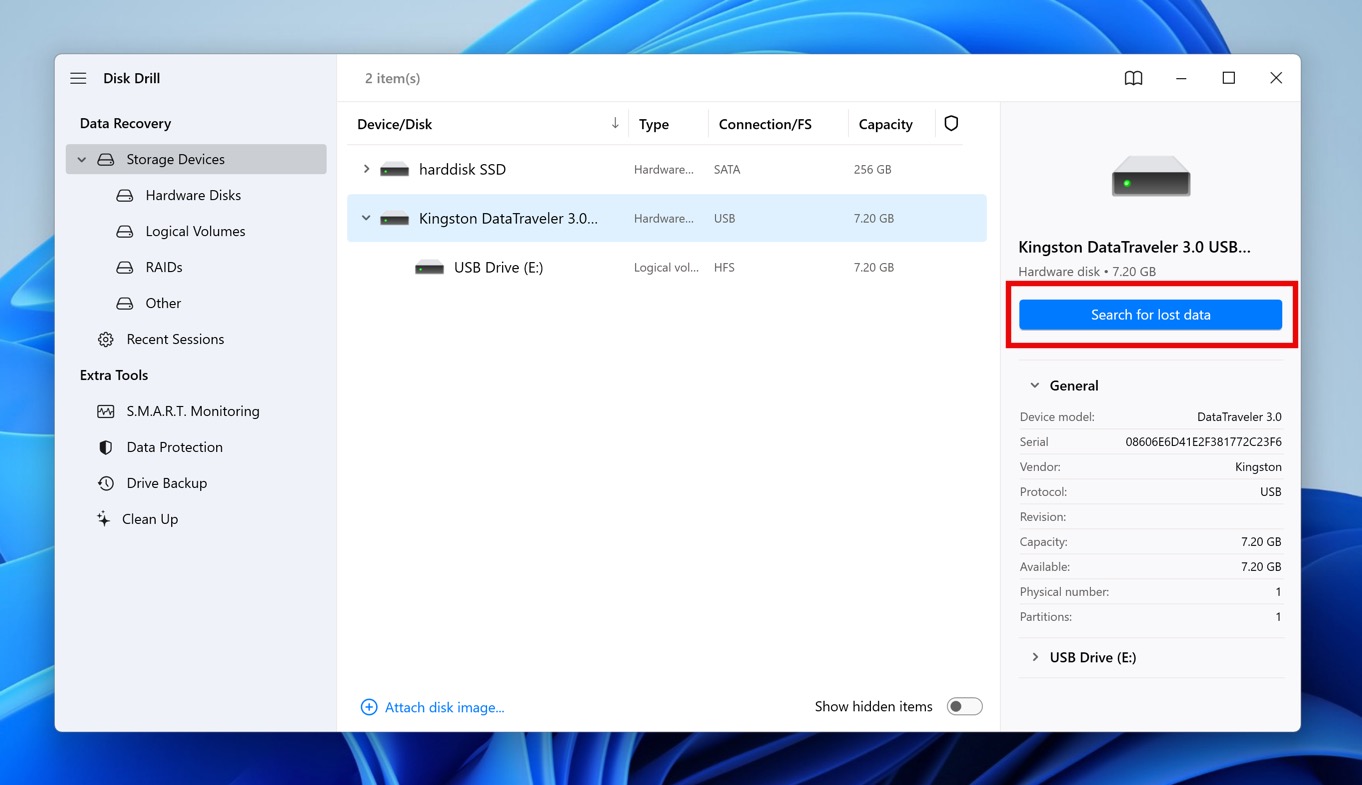
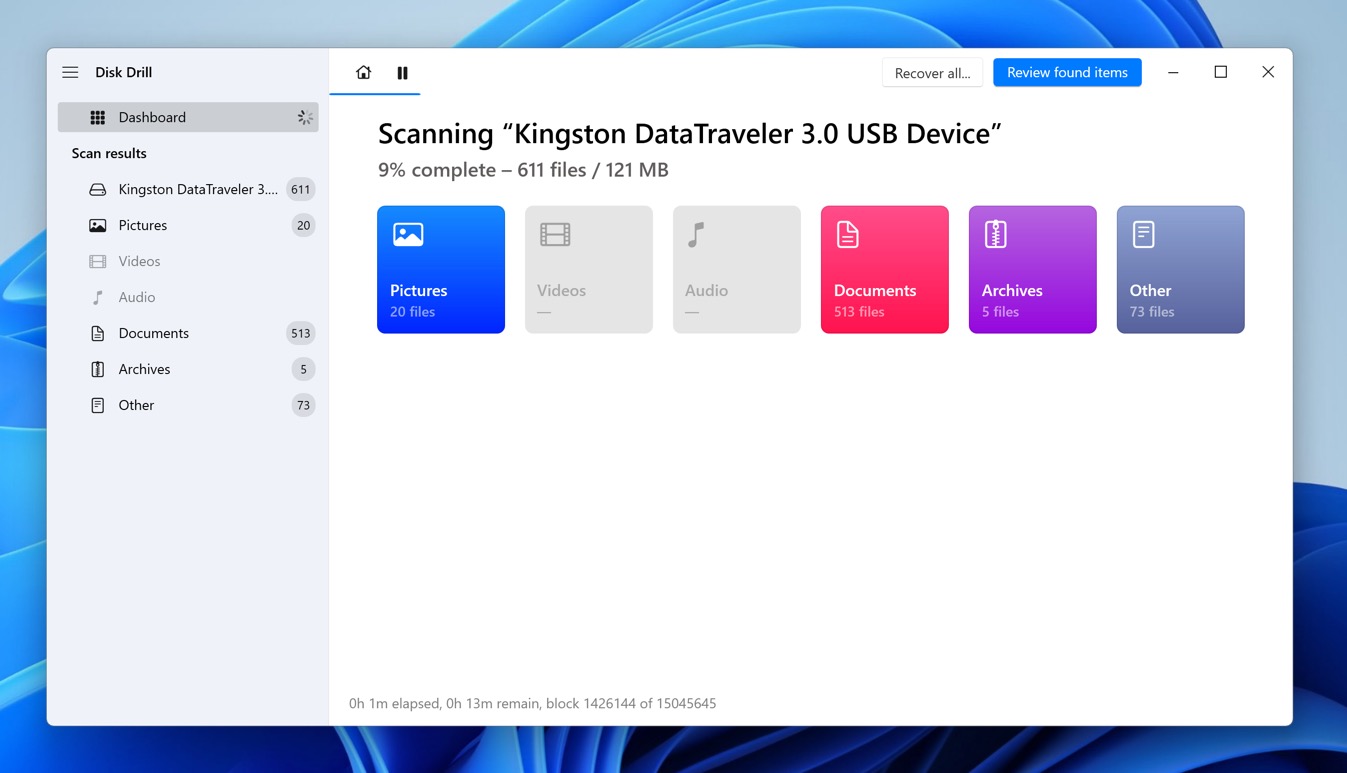
- Launch Disk Drill and select the Mac drive. Click Search for lost data to scan the drive.
- Wait for the process to complete and click Review found files (in the top-right corner of the screen).
- Go through the list of found files and select all data you want to recover from the Mac drive. Disk Drill can retrieve both existing and deleted data, so use this to your advantage. You can also filter the scan results and preview files directly in the app to confidently and quickly select what you need.
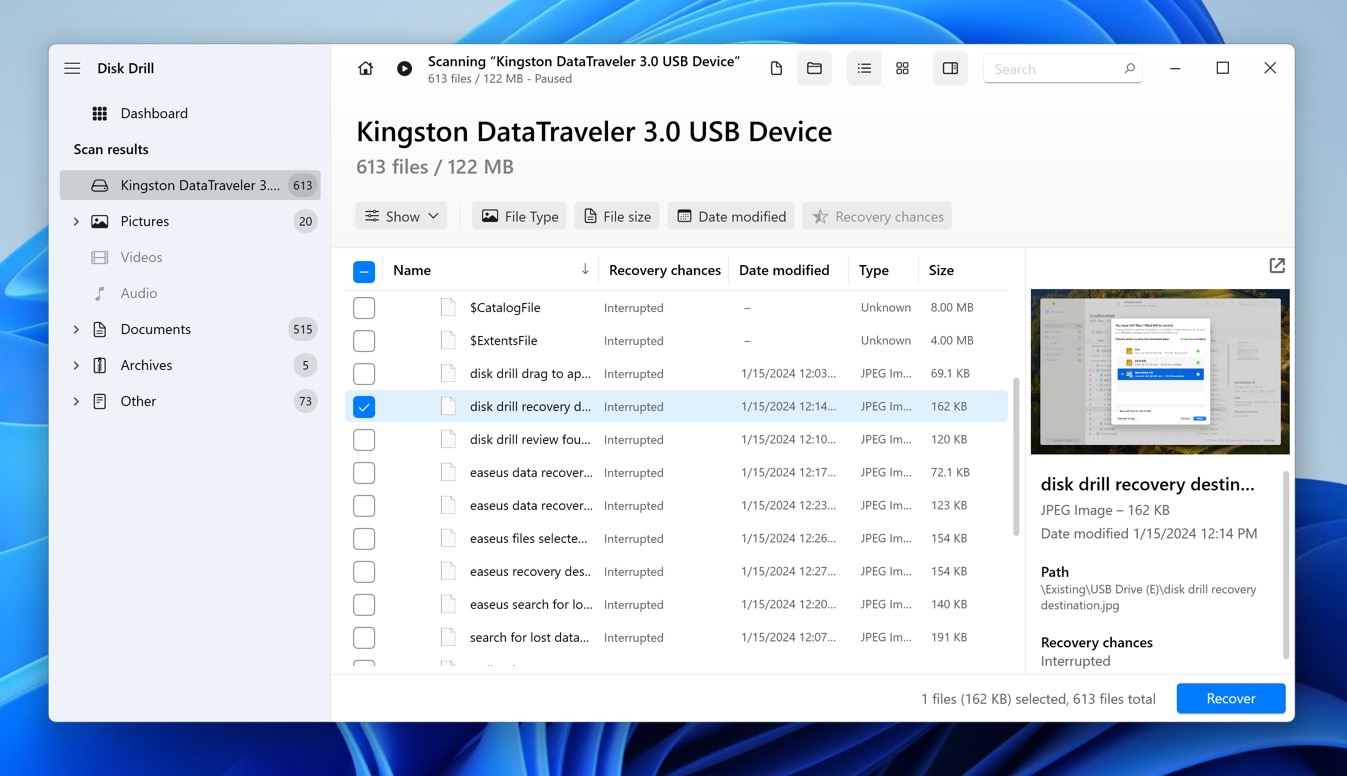
- Once you’ve selected all important files, click the Recover button in the bottom-right corner and select a suitable recovery destination.
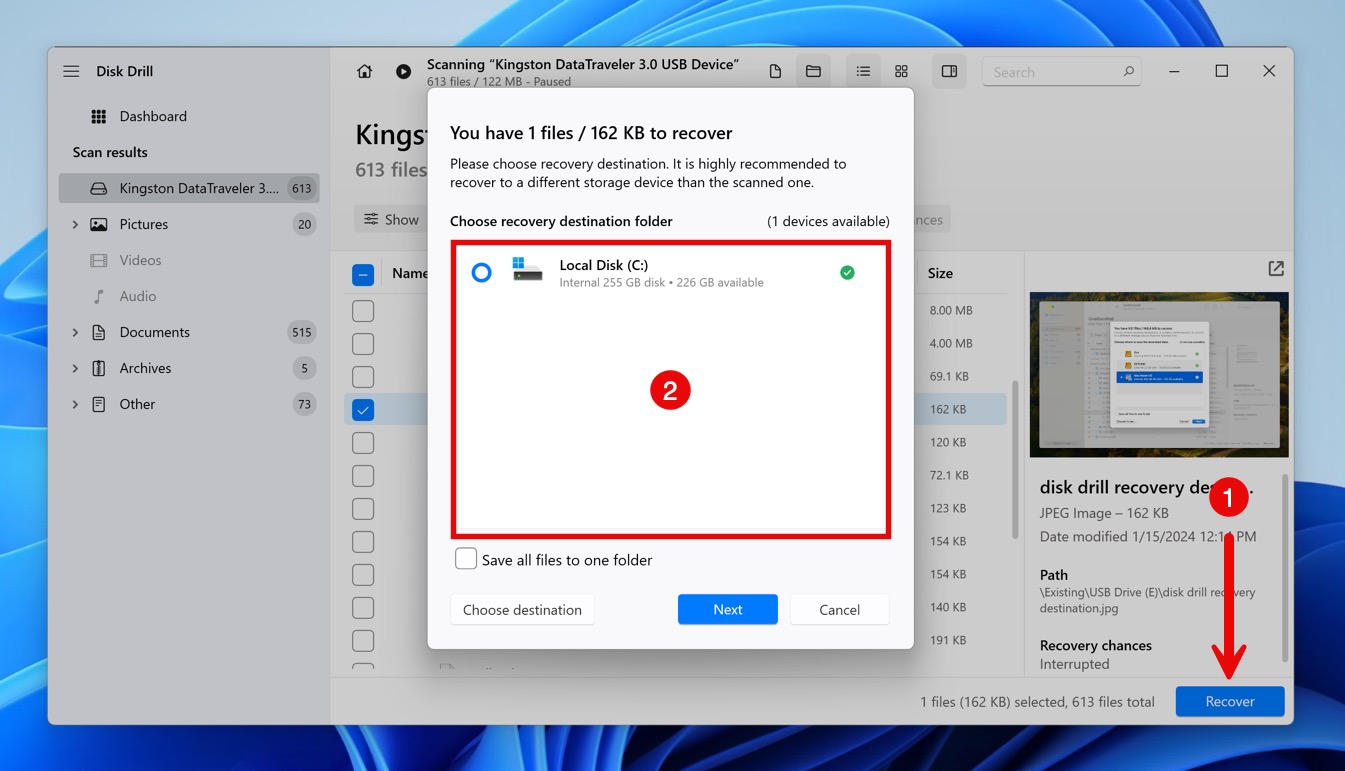
- Confirm your recovery destination choice to complete the process. You can then view the recovered files in File Explorer.
Once you’re done moving the files, you’ll be able to access them on your PC whenever you want.
Interested in learning more about Disk Drill? We’ve got you covered with an overview of its recovery capabilities and safety. It’s also important to note that more complex data recovery software exists, offering features like reading HFS/APFS data directly on Windows at the file system level and attempting to recover file names and folder structures. Examples include R-Studio and DMDE.
How to Read/Transfer Data from a Mac-Formatted Hard Drive to a PC
All methods that can be used to read/transfer data from a Mac-formatted hard drive to a PC have one thing in common: they act as bridges between the world of macOS and the world of Windows. To help you solve your data loss problem as efficiently as possible, this section describes six such methods—you just need to select the best one for you.
Method 1: Use a Properly Formatted External Drive
The primary option to transfer files from your Mac to your PC is using a properly formatted external drive (or USB flash drive). So if you have a clean drive, you can first format it, export the needed files from your Mac onto the drive, and only then open it on your PC.
Format the Drive
For the external drive to be recognized by both macOS and Windows, it should be formatted as exFAT or FAT32. The best way to format your drive is via Disk Utility.
Once you format your external drive, everything located on it will get erased. So make sure that you use a drive that doesn’t contain any important data.
Here’s how to format an external drive (USB flash drive) on your Mac using Disk Utility:
- Plug your USB flash drive into your Mac.
- Open Launchpad from Dock and launch Disk Utility.
- Choose the name of your external drive on the sidebar.
- Click Erase. When you see a new window appear, type in a name for your drive, and select the exFAT format. If you’re using an external physical disk (not an external physical volume), also choose the GUID Partition Map from the Scheme options.
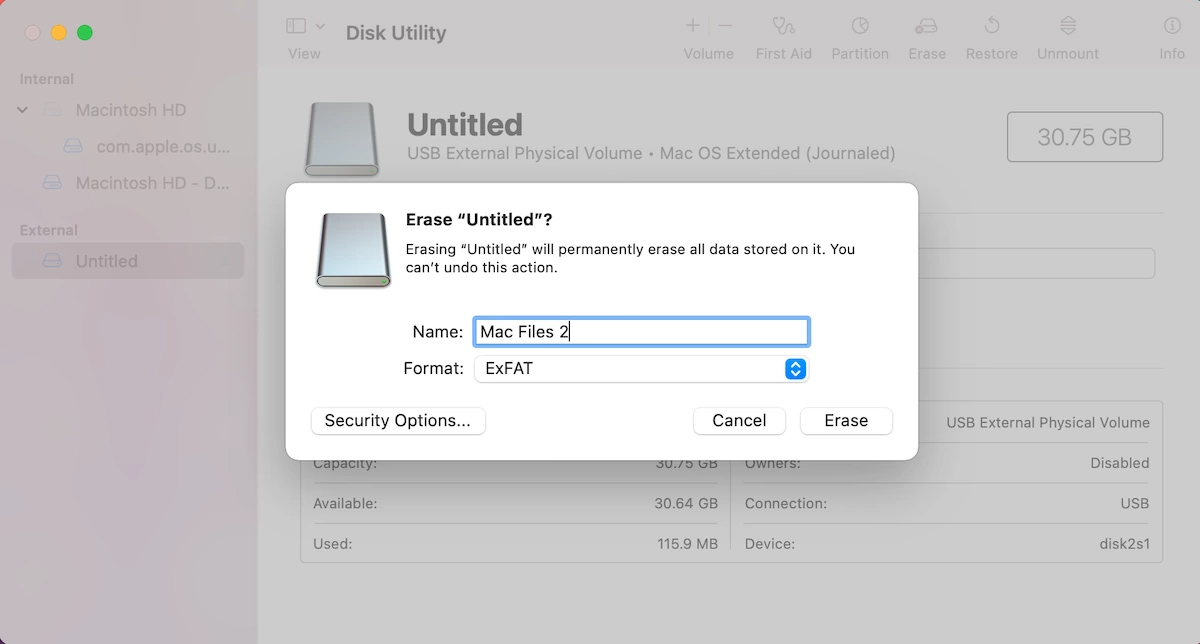
- Click Erase to start the formatting process.
Transfer Your Files
Now that you’ve formatted your drive, you can move on to transferring your files.
Here’s what you should do to move your Mac files to the external drive:
- Plug in your external drive (USB flash drive) into your Mac.
- Open the drive. From the top menu, click File > New Folder. Type in the name for your folder (it can be anything you want) and hit Return.
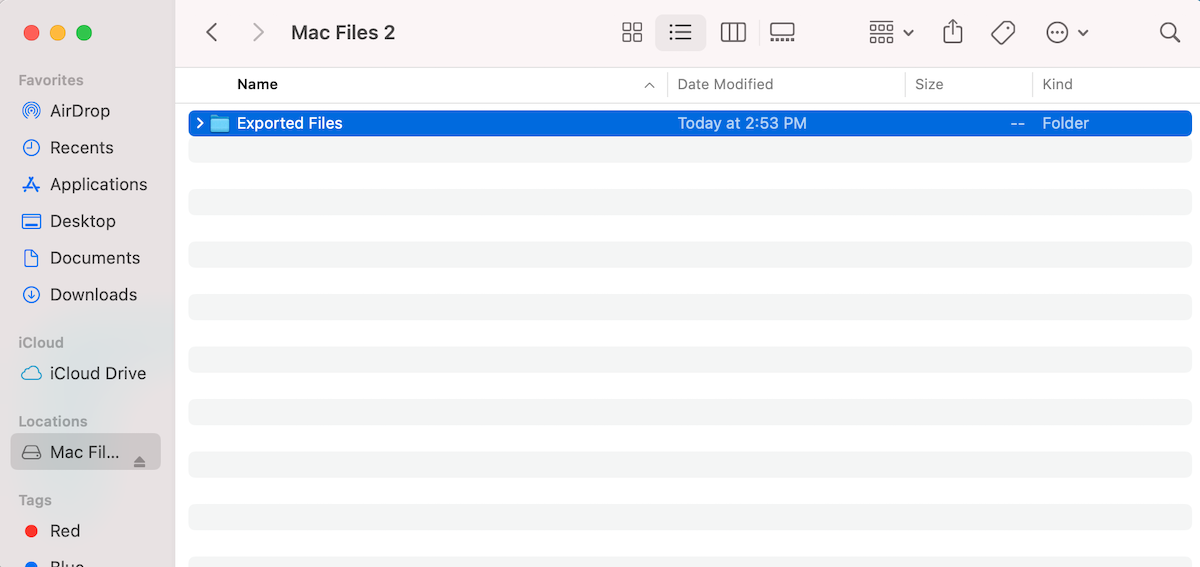
- Manually select the files that you need and export them to the external drive. If you want to export all your folders with files, then open Finder, hold Command, and click on the needed folders to select them. Then drag them over to your external drive in the side menu.
- Once you’ve exported all of the needed data, eject your external drive by clicking the Eject icon next to it in Finder.
Access Your Files on Your PC
Here’s how to open the exported files from your external drive:
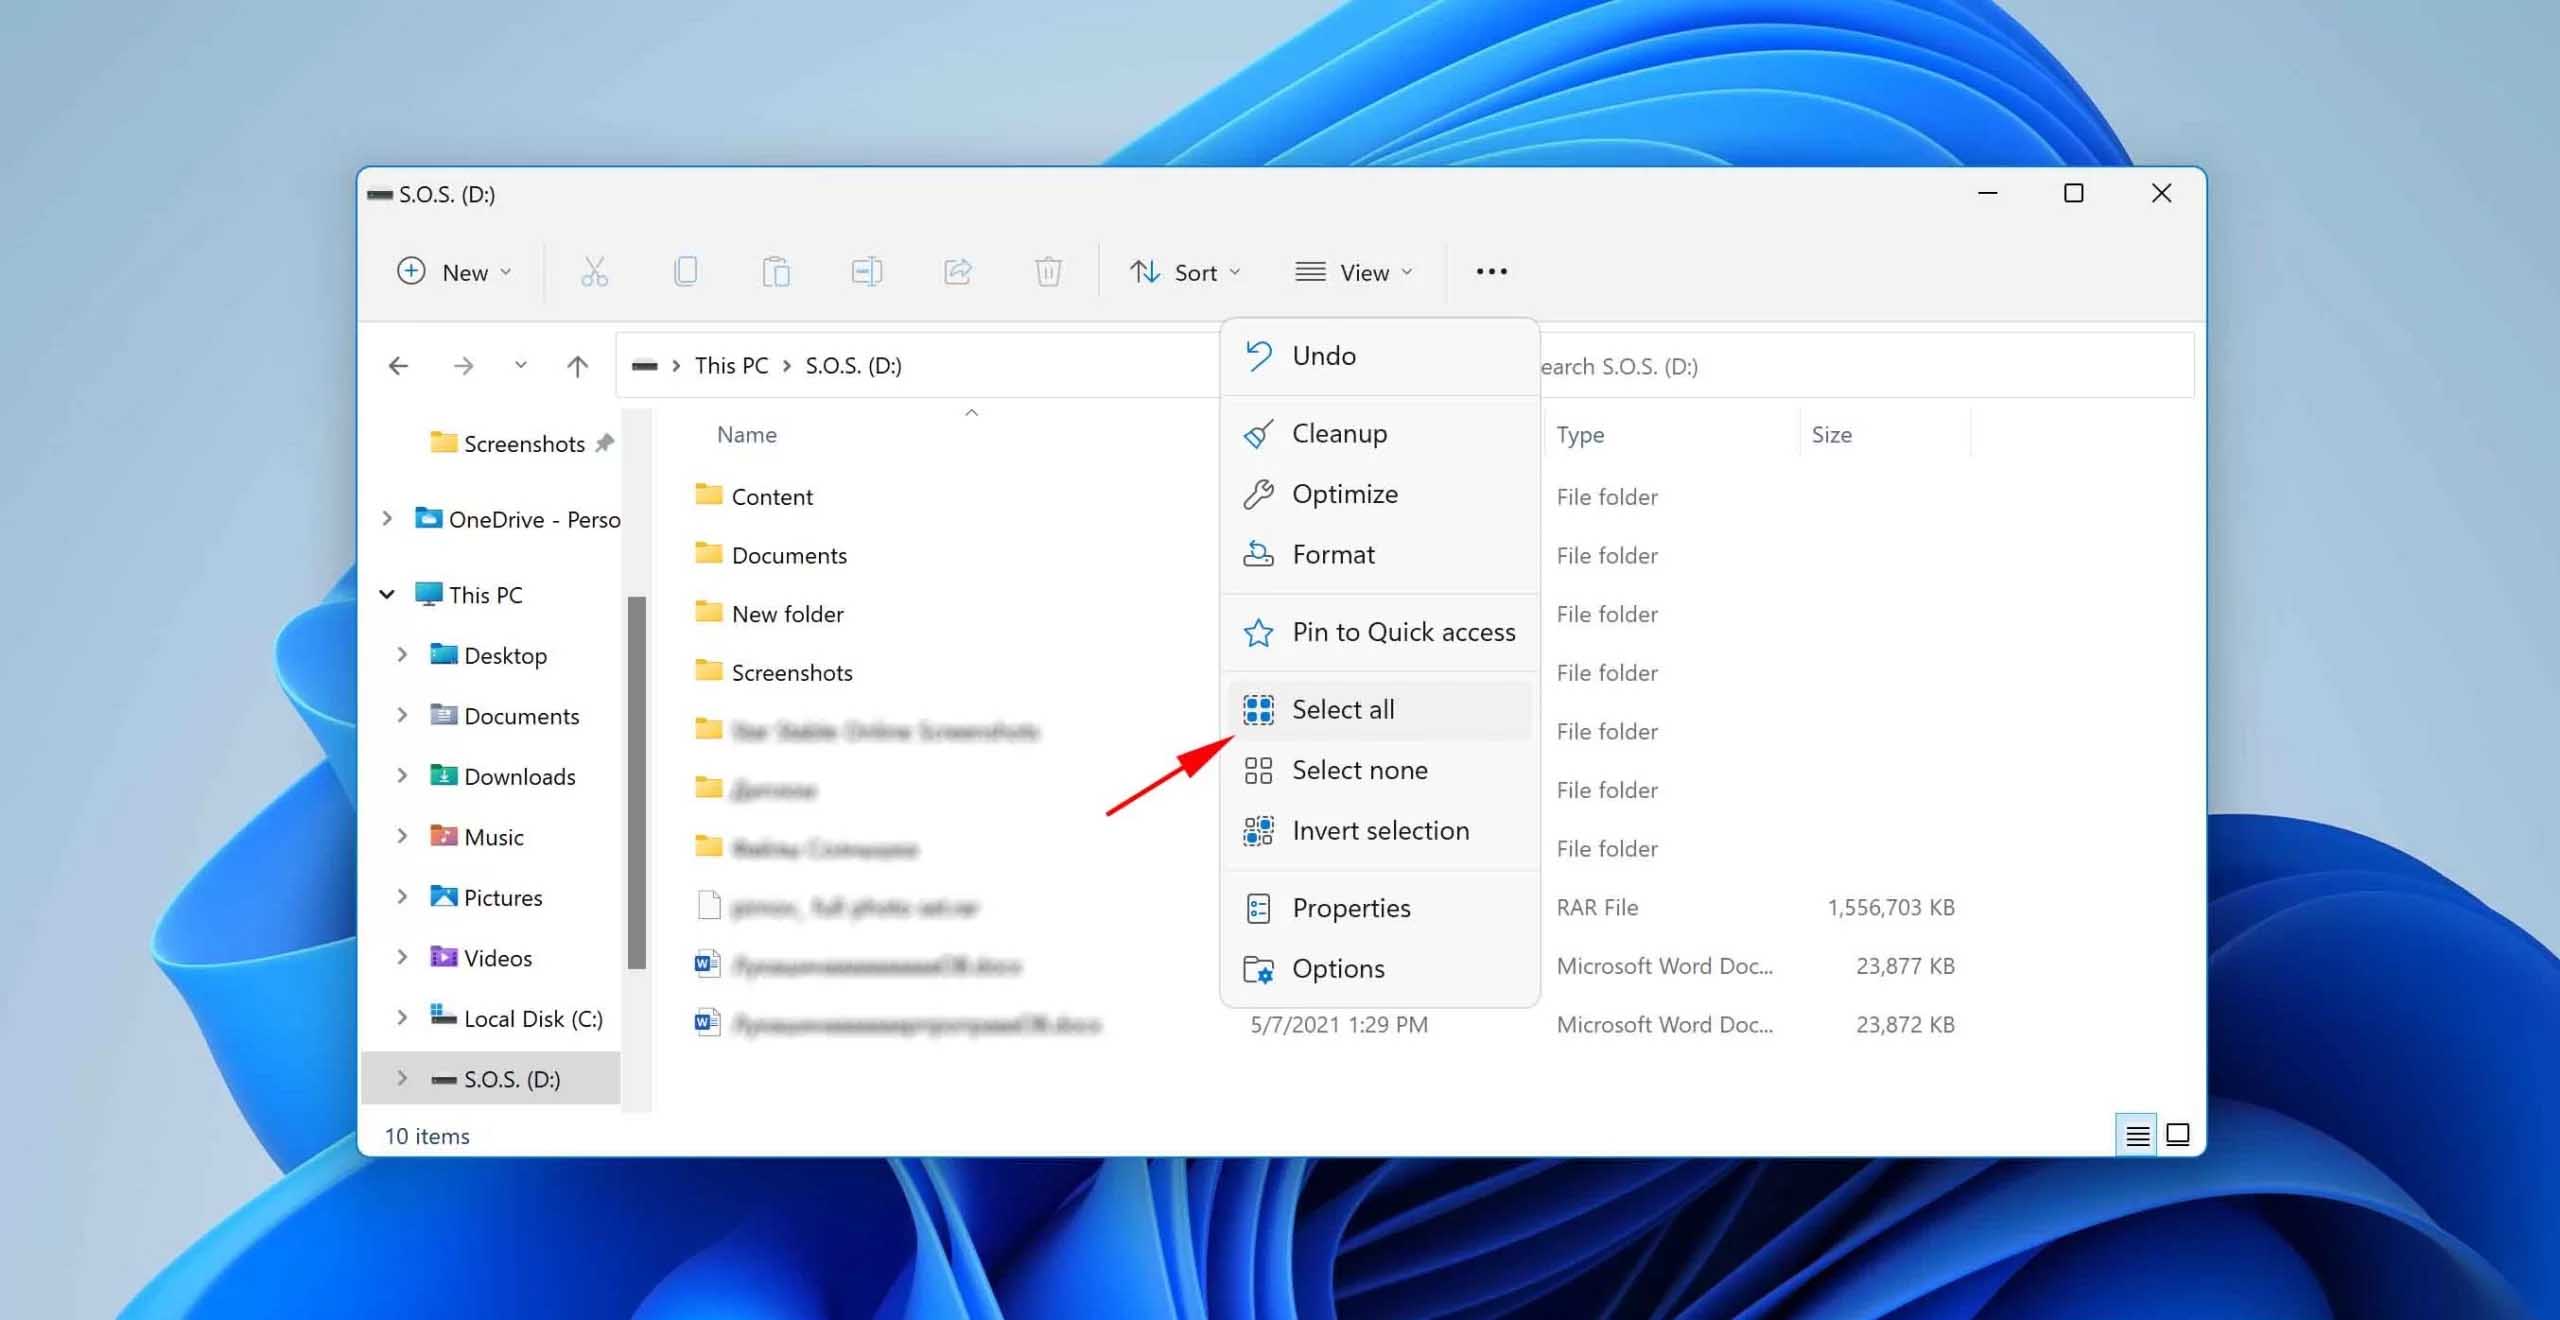
- Plug in your external drive into your Windows PC.
- Double-click the drive to open it.
- Double-click the folder containing the files.
- If you want to move all of the files to your PC, click Select all from the top menu. Then drag and drop all of the files to the needed folder on your PC.
That’s it! Now you can access all of the files from your Mac on your Windows PC.
Method 2: Use Hard Drive Management Software
The fact that Windows doesn’t natively support Apple’s file systems has created an excellent opportunity for third-party providers of hard drive management software like Paragon for HFS, Paragon for APFS, or HFSExplorer.
These easy-to-install applications let you access HFS+ (in the case of Paragon for HFS and HFSExplorer) and APFS (in the case of Paragon for APFS) storage devices from Windows almost as easily as Windows-native storage devices.
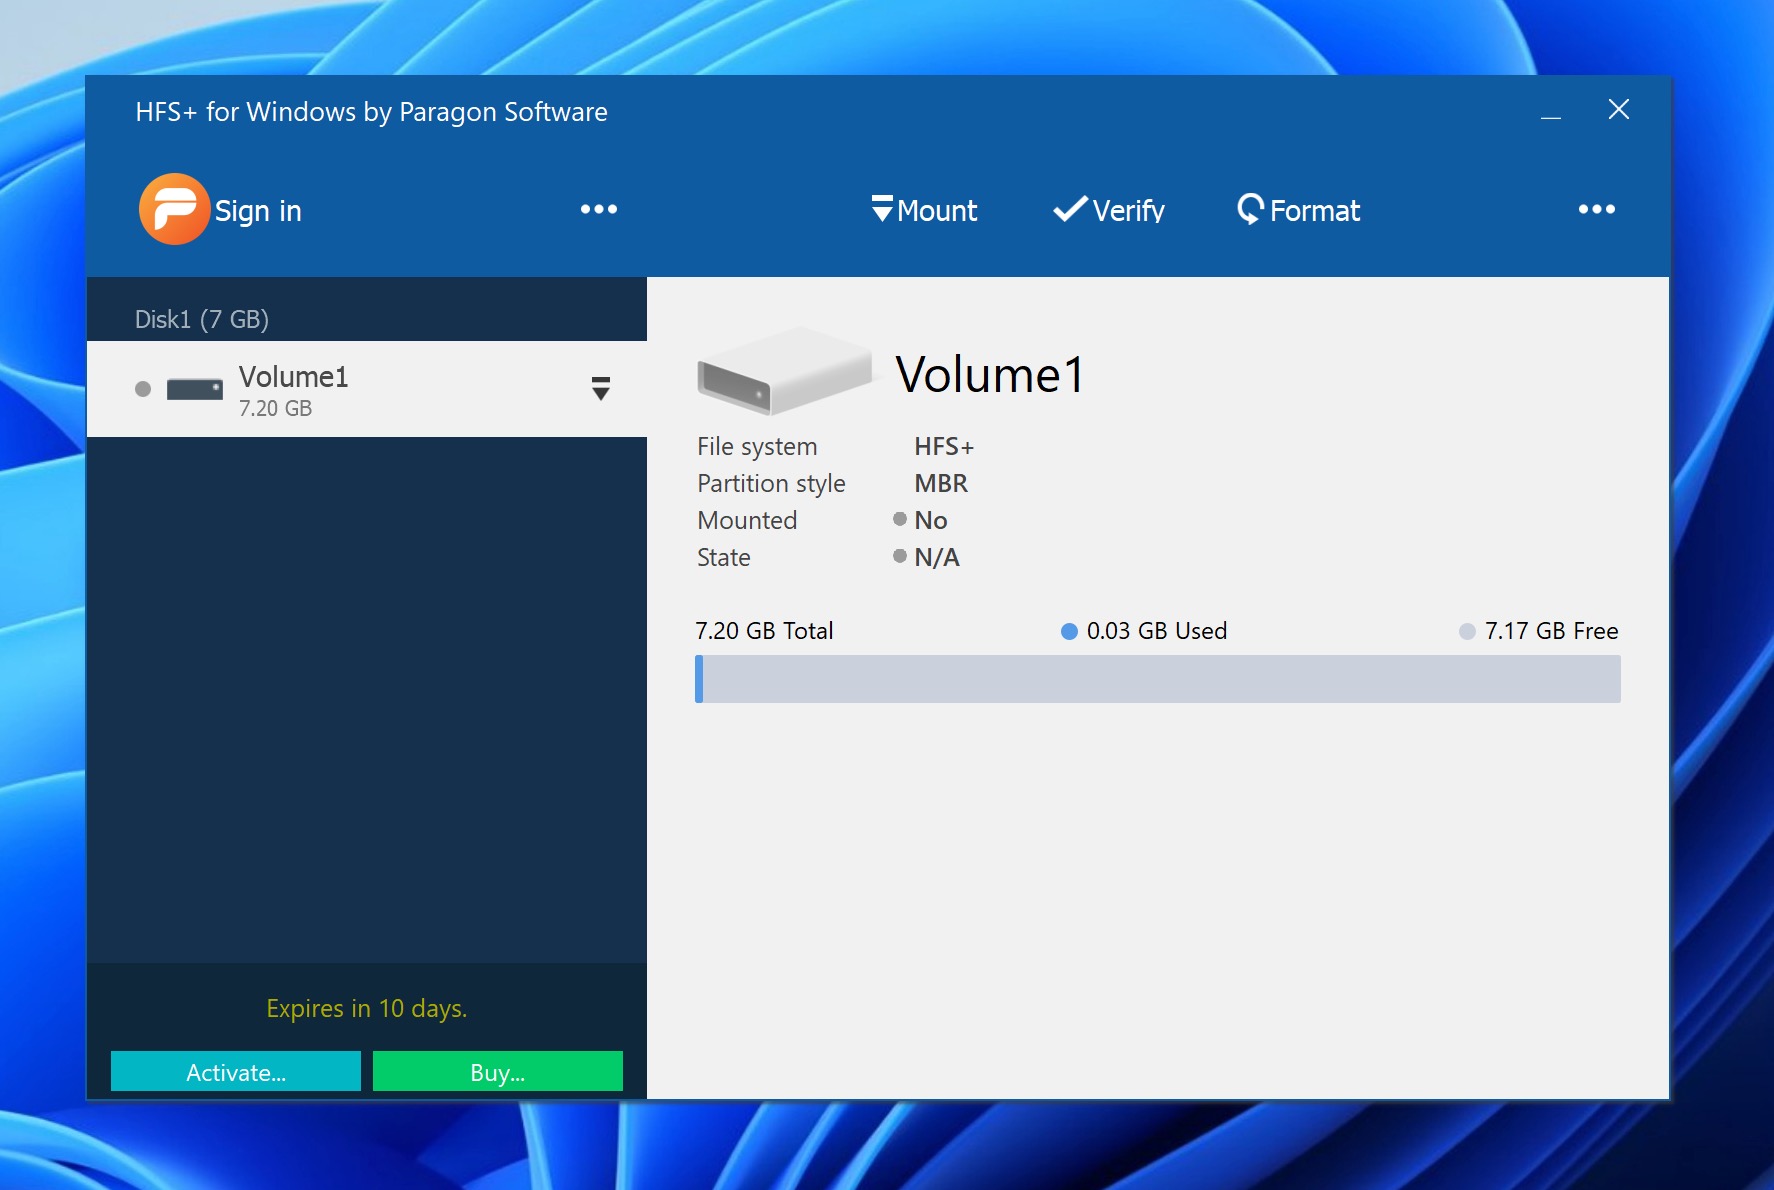
For example, here’s how to recover data using Paragon for HFS:
- Download and install Paragon for HFS from its official website.
- Restart your computer and launch Paragon for HFS.
- Select your HFS+ drive and click the Mount button to access its contents.
Method 3: Use a Docking Station to Transfer Data From Mac to PC
Another way to transfer files from your Mac to a Windows PC is to use an external hard drive docking station. There are many ways you can use a docking station, including connecting a Windows-powered laptop with a macOS one.
Of course, not all docking stations come with this feature. For a docking station to work, it should be compatible with both macOS and Windows-based laptops, provide the needed ports for connectivity, and have built-in file transfer software.
However, there are a few things that you should be aware of:
- It will be impossible to apply this method with the Macs equipped with an internal SSD (newer Macs);
- It’s possible that older Mac drives won’t be visible in Explorer because of their file system;
- Some models may require an external power source to connect to your PC;
Method 4: Use an Ethernet Cable to Connect Your Mac with PC
You can try to transfer data from Mac to PC with the help of a standard Ethernet cable.
Follow these steps to connect both of your devices by creating a small local network between them:
- Connect your computers with an Ethernet cable (or with a USB-to-Ethernet adapter if your Mac doesn’t have an Ethernet port).
- Turn on file sharing on your Windows PC.
- Turn off the Internet Connection Firewall on the Windows computer.
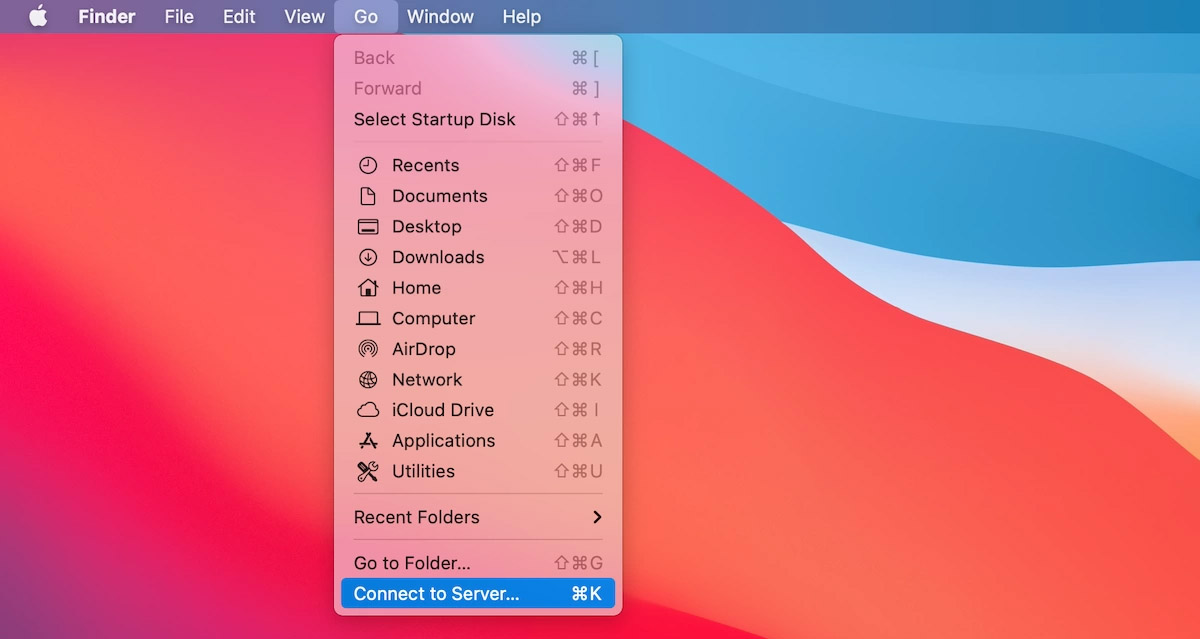
- On your Mac, click Go > Connect to Server > Browse. Look for the needed network address in the Server Address field.
Method 5: Use a Cloud Service to Sync Files
There are numerous cloud services that are compatible with both macOS and Windows-powered devices. It’s quite easy to use such a service: you just use your Mac to upload the needed files to the cloud client and use the other computer to view and download them.
If you’ve never used a cloud service, here are a few good options that you can try:
Method 6: Get Professional Help
If none of the above-described solutions works for you, there is one last thing that you can try—resort to a data recovery laboratory service. Since such specialists are equipped with all the needed tools, they should be able to succeed in even the most complicated repair.
There are many professional data recovery services on the market, so it’s natural to be unsure of which one to choose. If that’s the case, check out our article on the best (and affordable) hard drive data recovery services.
FAQ
What is the best way to extract data from a Mac hard drive?
The best way to do it is by connecting the hard drive to a computer (it can be either a macOS or Windows-based one). Then you can run a data recovery scan to make sure that you don’t skip any files and retrieve all of the data onto your device with the help of a third-party app.
Why is my Mac hard drive not showing up on PC?
If your Mac HDD is not showing up on your PC, it’s possible that your hard drive’s format isn’t compatible with the Windows operating system. Or in the worst-case scenario, your hard drive might be corrupted or faulty.
What is the best HFS data recovery software for Windows?
There are many reliable software options to choose from. Disk Drill is a great example — this app is highly user-friendly, has advanced data recovery features, and can provide quick results with an HFS+ system.
Is it possible to recover data from a MacBook Pro hard drive that won’t boot?
Even though it is a bit complicated, it’s still possible. However, in some severe cases, the only way to recover data from such a hard drive is by getting help from a professional data recovery service.
The Bottom Line
Recovering/transferring data from a Mac hard drive to a PC can be quite an overwhelming process. However, since the above-described solutions are proven to be effective, you should be able to successfully recover/transfer your files from your Mac HDD to your Windows-based computer.
This article was written by Romana Levko, a Staff Writer at Handy Recovery Advisor. It was recently updated by David Morelo. It was also verified for technical accuracy by Andrey Vasilyev, our editorial advisor.
Curious about our content creation process? Take a look at our Editor Guidelines.