Well, exFAT data recovery is not a myth and is very much possible. There’s a popular misconception that exFAT files once deleted can’t be recovered. We are here to prove otherwise.
Are you frustrated over files deleted from your exFAT hard drive? All you have to do is follow our step-by-step instructions to recover your files.
Want to skip the theory part and jump to the recovery guide right away? Click here.
What Is the exFAT File System Format?
Extended File Allocation Table (exFAT) is a file system format designed for flash memory devices such as USB flash drives and SD cards. Large storage devices such as external hard drives use the exFAT format due to its compatibility with Windows and Mac computers.
Benefits of Using an exFAT Drive
Here are some of the reasons why the exFAT file system trumps its counterparts:
- 💻 Windows OS and macOS/macOS X support: exFAT is quite versatile across operating systems as the format works well with Windows, Linux, and Mac. For instance, macOS restricts NTFS hard disks to operate strictly on a read-only mechanism – thus not allowing you to write any data. Interestingly, the exFAT is also commonly known as a “better FAT” as it overcomes the shortcomings of the older FAT32 file system.
- ⚙️ More Compatibility: The NTFS file system isn’t the most friendly format considering multimedia hardware like media players, cameras, or even TV sets. At times, the media doesn’t get detected or the file playback isn’t as expected. Enter: exFAT which is much more compatible and evergreen – as the exFAT works well with old and new multimedia devices.
- 📈 Support for Greater File Sizes: The predecessor of the exFAT: the FAT32 could house a maximum volume size of 32GB, with a maximum file size of 4GB on Windows. That blue-ray 4K 9GB Avatar movie you wanted to copy – can’t happen on a FAT32 device. The exFAT supports a maximum file size of 16 exabytes – which is absolutely insane!
Causes of Data Loss on exFAT Systems
Any of the following can cause data loss on exFAT systems:
- Formatting your exFAT external drive
- Accidental or Intentional deletion
- System error
- Bad sectors
- Virus attack
- Drive corruption
Any of the above culprits can result in minor or major data loss. As a result, it’s critical to initiate the data recovery process ASAP.
What to do Right After You Notice You Need Data Recovery?
Before you try to recover data from your exFAT hard drive, please read our article to the end to prevent data loss. Make sure of the following to maximize your chances of complete data recovery.
- Stop using the drive. Continued use of the drive will increase the risk of overwriting deleted data.
- Prepare a storage device large enough to store all your recovered files, such as an external or network drive.
- Do not try to save files on the disk from which you are going to recover them. Using the same disk drive can lead to file overwriting.
- Use professional and reliable hard drive data recovery software.
Now that the essential whys and whats are out of the way, let’s get right down to business.
How to Recover Files from exFAT Hard Drives
Several methods can help you with exFAT data recovery. We have shortlisted three ways, tried and tested by our experts, to recover data from your exFAT hard drive.
Method 1: Check the Recycle Bin
On Windows, most deleted files from internal disks and external hard drives or SSDs go to the Recycle Bin unless they are permanently deleted (using Shift + Delete). The first step to recover any data should always be to check Recycle Bin for any deleted data from such exFAT system.
It’s important to note that files deleted from removable flash drives or SD cards, do not go to the Recycle Bin by default on Windows. If you’re trying to recover data from such a device, this method won’t help you.
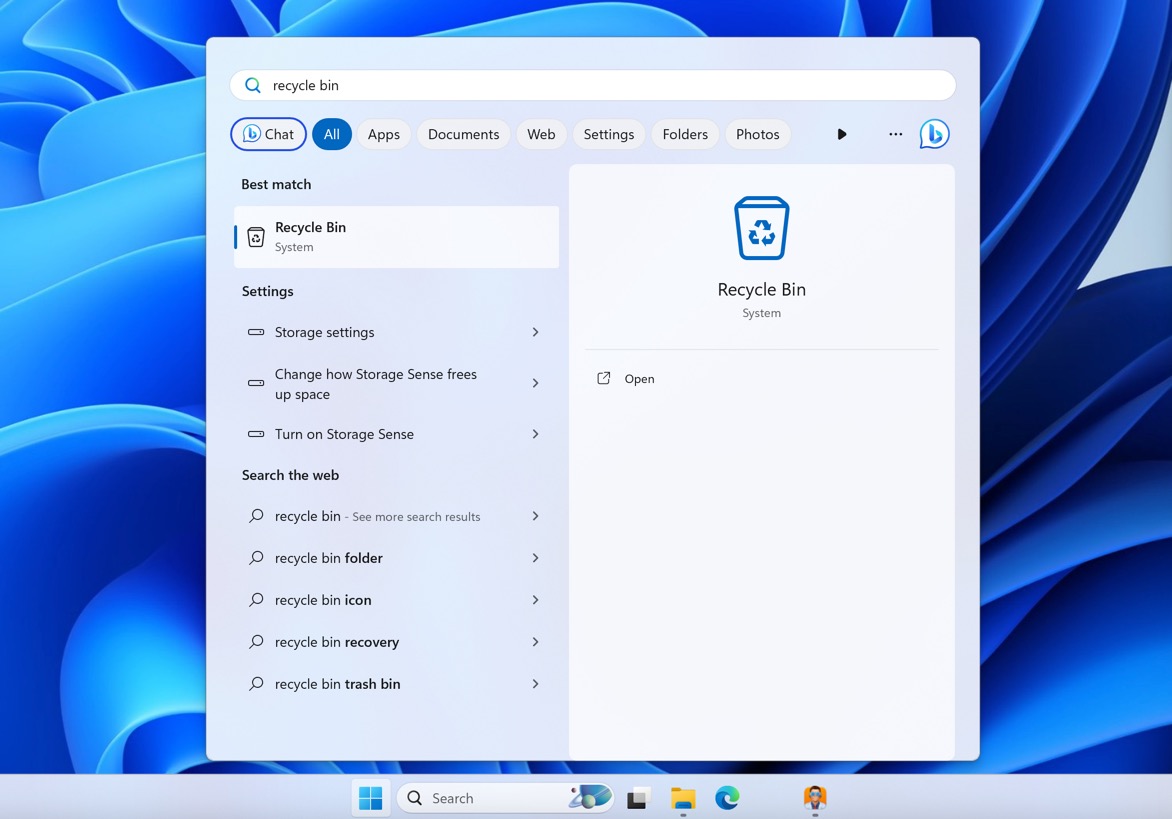
- You can open the recycle bin using the icon on your Desktop or by typing Recycle Bin in the Search Bar and then clicking on the icon.
- Search for the files in the window that opens. If you see your deleted files, select them.
- Right-click on the selected files and click Restore. Alternatively, click on Restore the selected items in the Menu Bar.
 .
.
If your files are in the Recycle Bin, you can recover them successfully with this method. However, go to the following method if you cannot perform exFAT file recovery from the Recycle Bin.
Interesting Read: How to Recover Deleted Files from the Recycle Bin (Even AFTER Empty)
Method 2: Backup and Restore
Windows’ in-built feature Backup & Restore is very powerful to recover data from the exFAT system, provided you made a backup of it before. To restore such a backup:
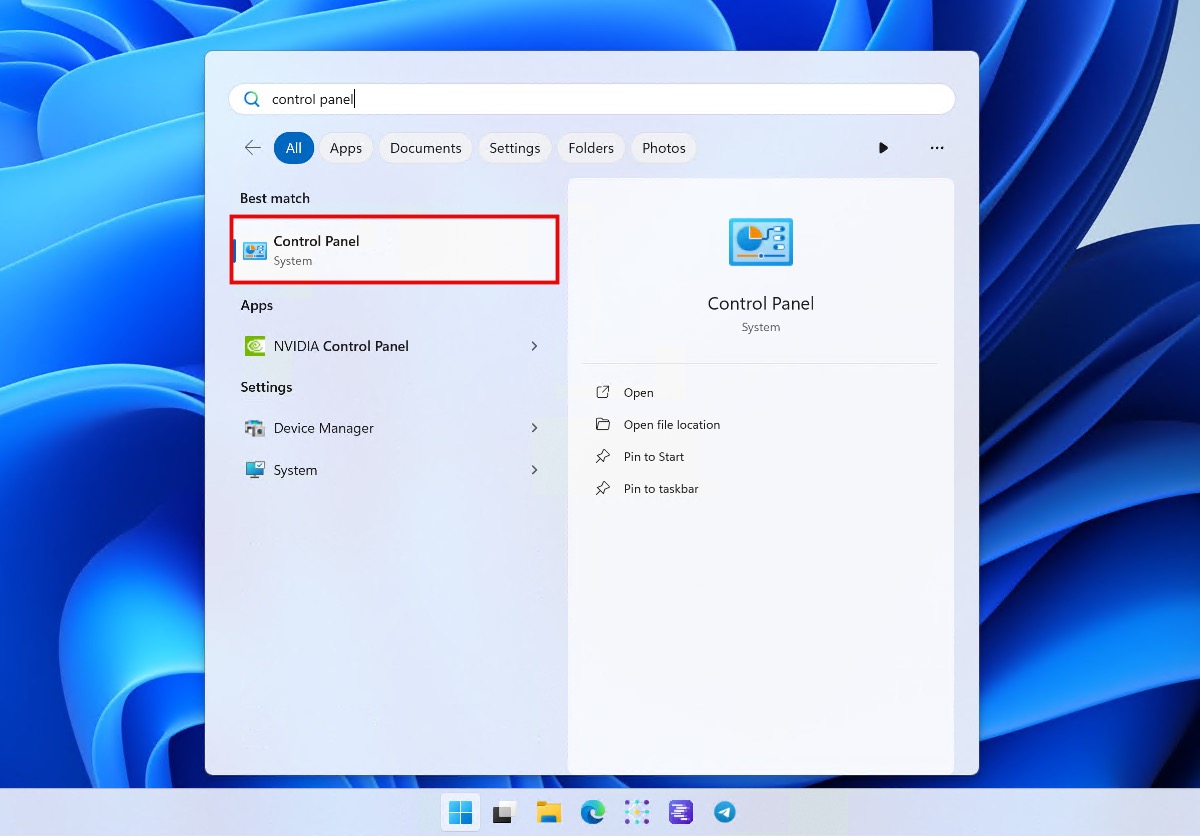
- Open the Start Menu, search for “Control Panel” and the open it.
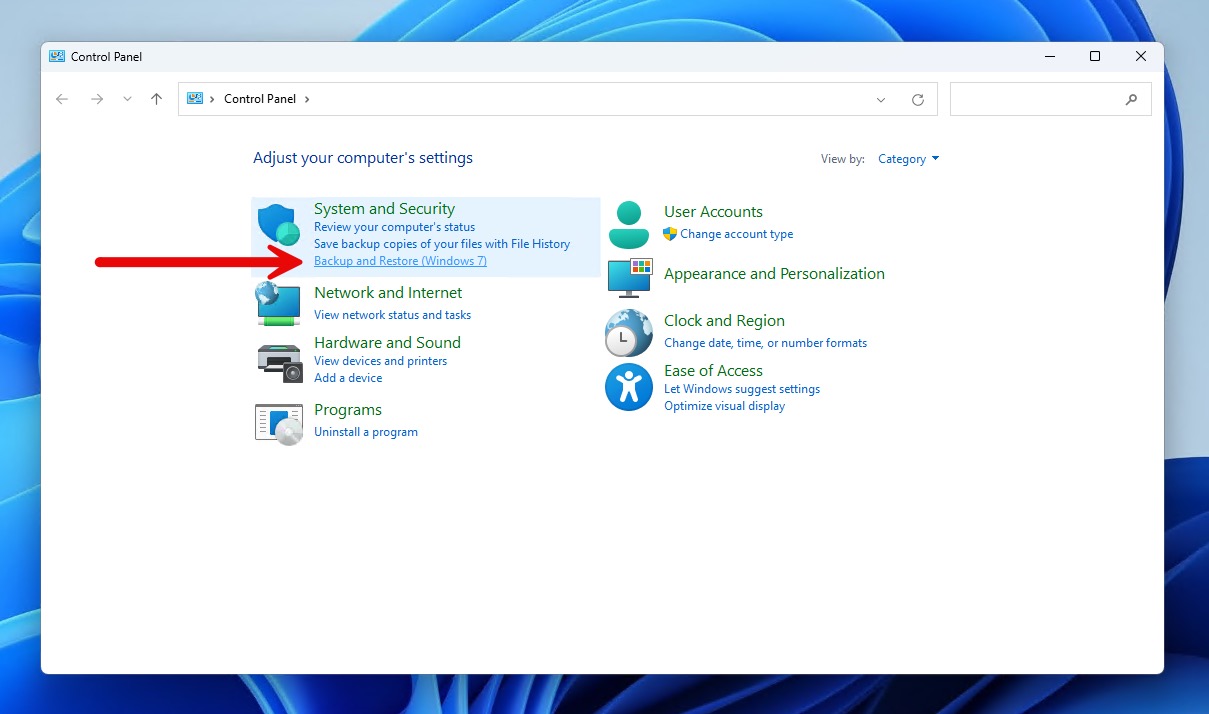
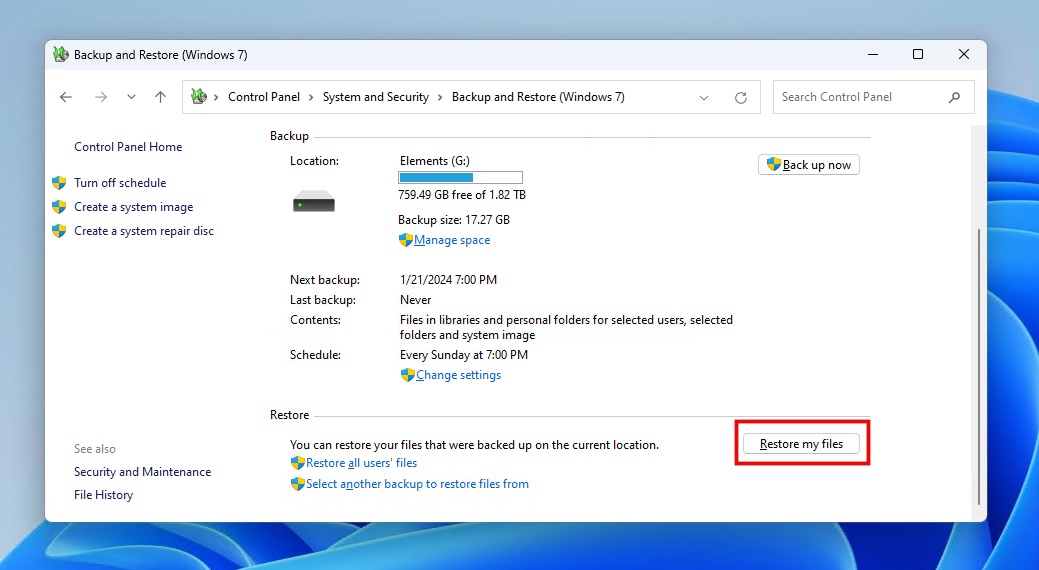
- Select the Backup and Restore (Windows 7) option in Control Panel.
- Click the Restore my files option.
- Browser or search for the missing exFAT data to add them to your recovery queue.
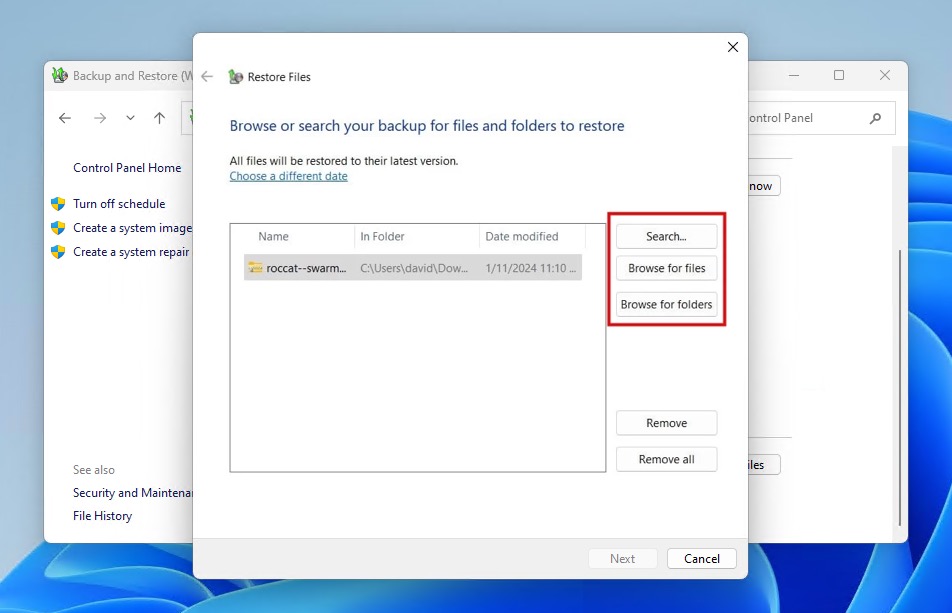
- Once you’ve added all files you want to recover, you can click Next. You will be asked to select the desired recovery location to complete the recovery process.
This step will restore your files to your exFAT hard drive. However, keep in mind that this method only works if you have previously made a backup of your drive. To know how to set up backup and restore, go to our FAQ section.
Suppose these steps for exFAT file recovery did not work for you. In that case, the simplest and best option is to use data recovery software.
Method 3: Use Third-Party Software for exFAT Data Recovery
In situations where native recovery methods in Windows are unable to recover data from your exFAT storage device, you should turn your attention to third-party exFAT data recovery software.
With such software, you can:
- retrieve files that have been permanently deleted,
- recover data from formatted exFAT drives,
- extracting data from corrupted file systems,
- repair corrupted file systems.
To help you take advantage of the most effective third-party software for exFAT data recovery, we picked three solutions that have performed exceptionally well in our tests.
Option A: Disk Drill
Disk Drill Data Recovery is compatible with both Windows (including Windows 11) and macOS (including macOS Sonoma). We will use it to demonstrate how to recover files from exFAT hard drives.
Here are the steps to follow:
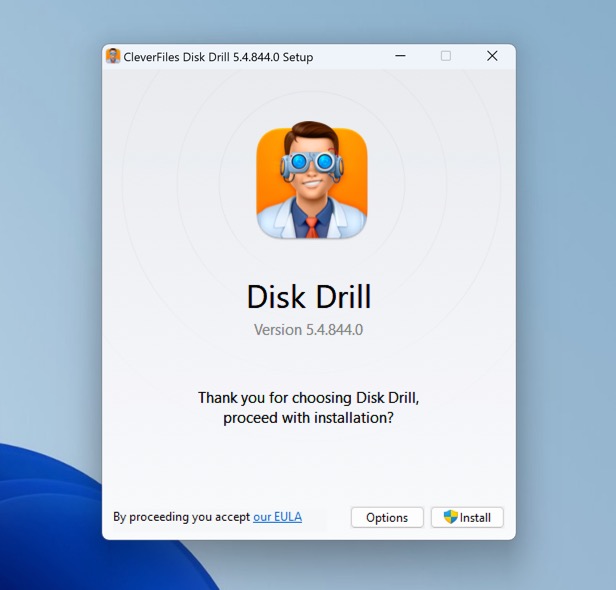
- Download and install Disk Drill: The Windows version of Disk Drill has a free version that provides up to 500 MB of free data recovery and access to extra data protection tools. Download the setup from the official website and install it. Disk Drill requires the administrator’s credentials to run correctly, so you must grant it admin access.
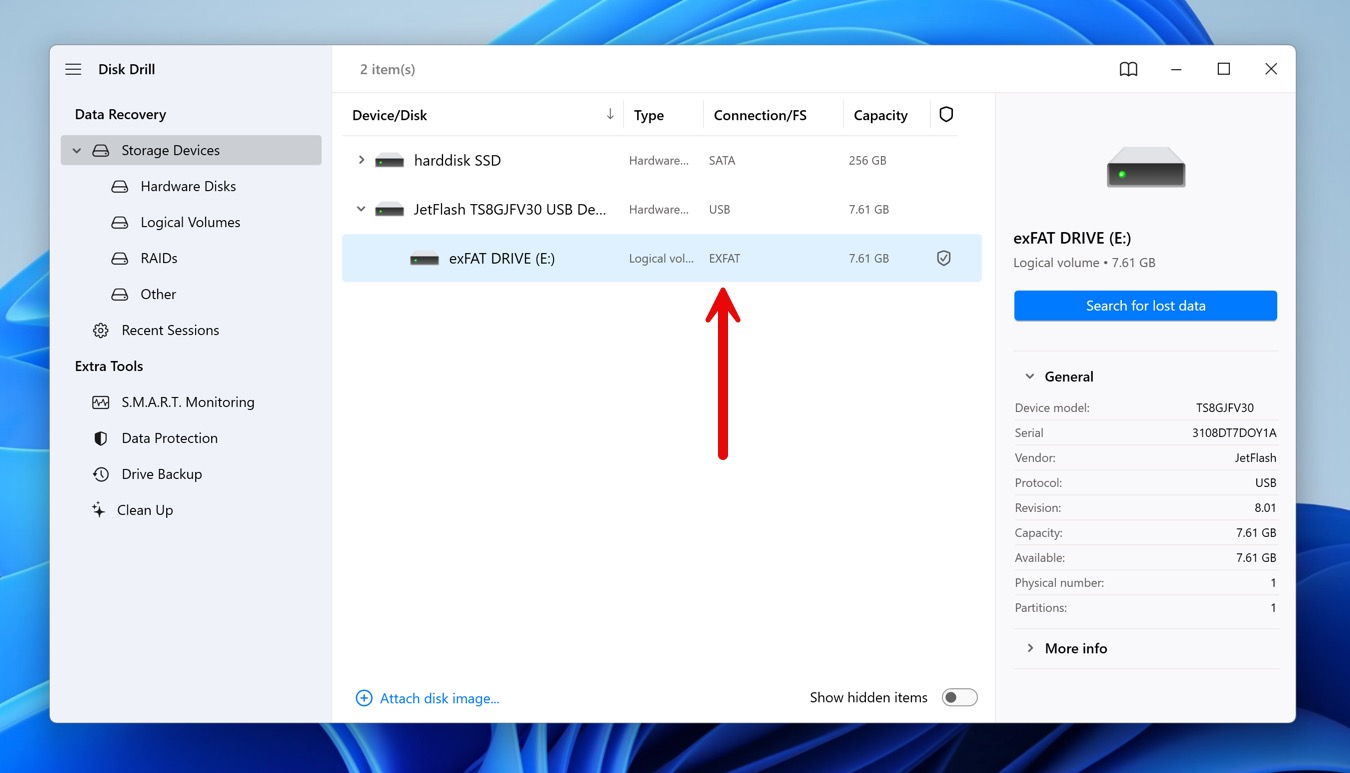
- Open Disk Drill and select the exFAT drive for data recovery: When you open Disk Drill, a window will open with a list of all drives connected to your device. Select the exFAT drive from which you want to recover data.
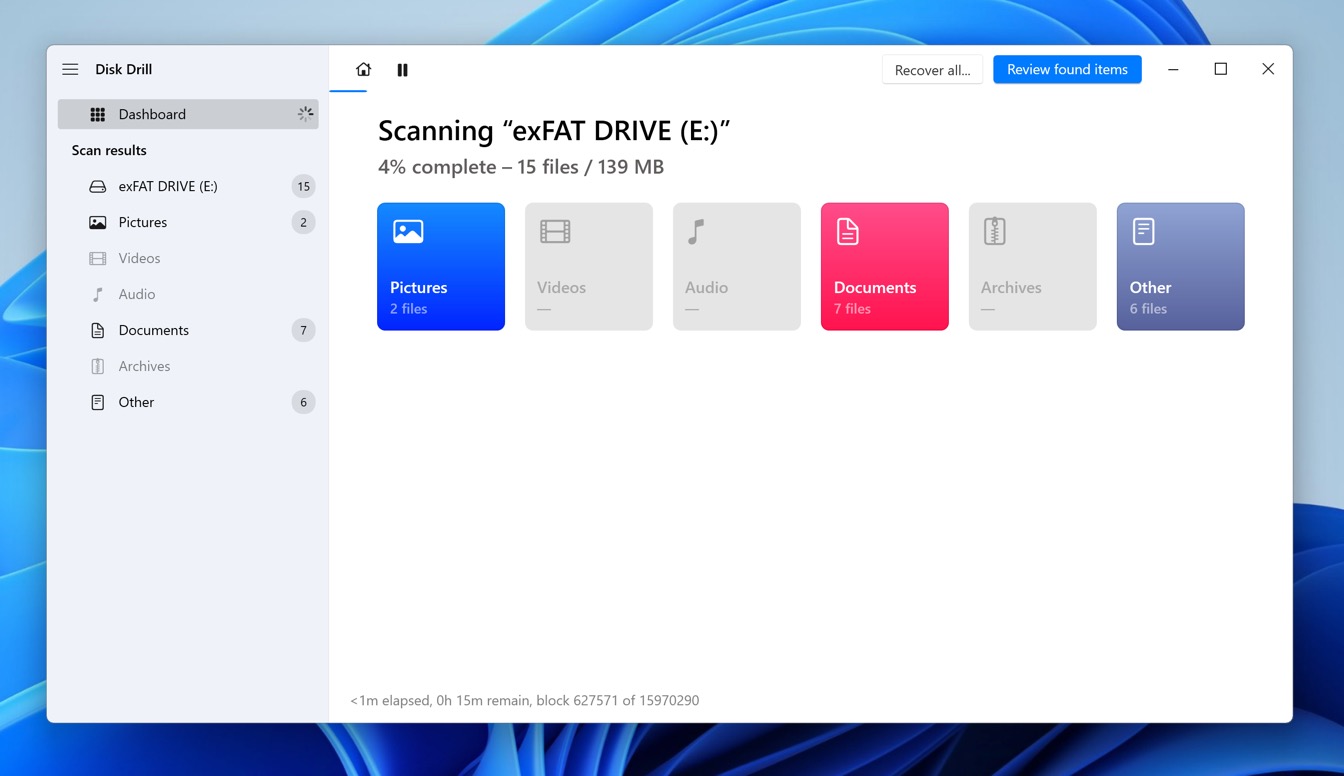
- Search for lost data: After choosing the exFAT drive, click on Search for lost data. As the scanning will progress, a status bar will reveal the progress at the top of Disk Drill’s window, along with the number of files found and their total size. For best results, you should allow the scan to complete. Else you can pause it to check the files already identified.
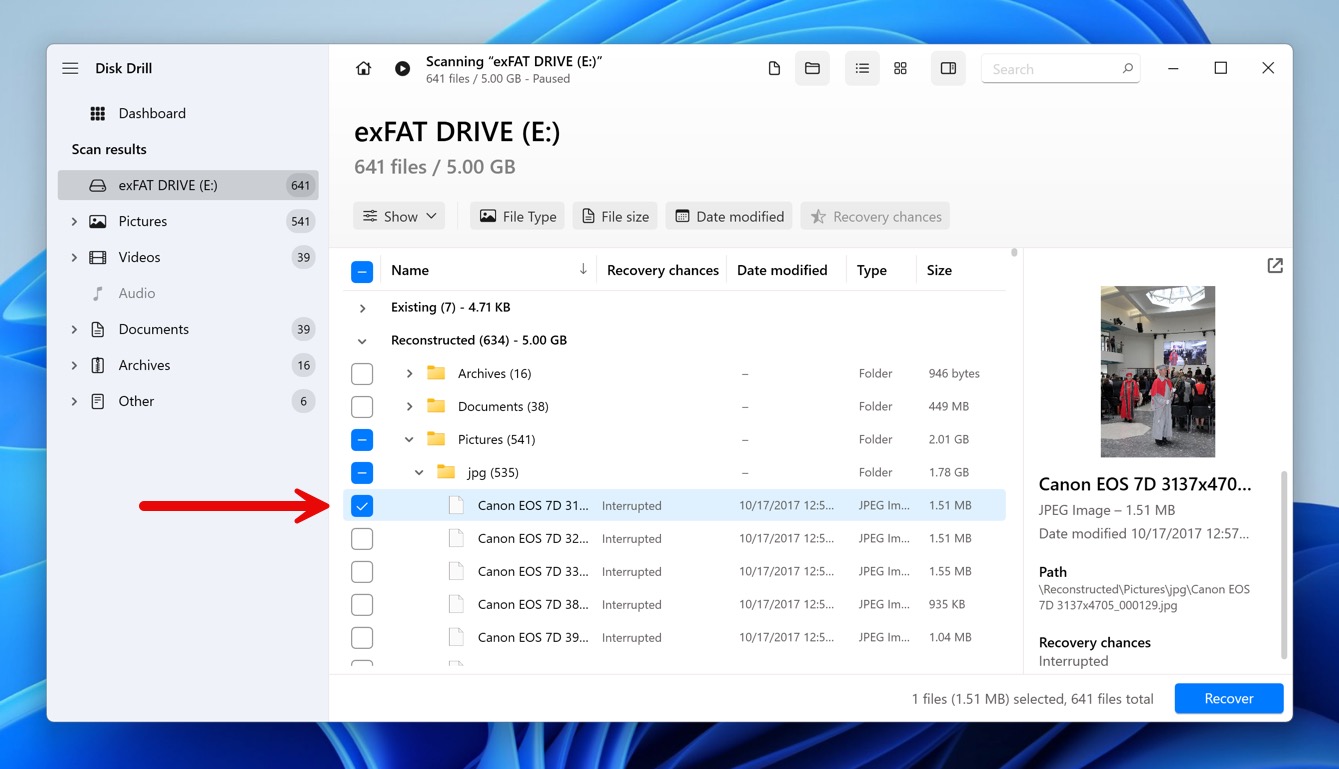
- Select the files to recover: When the scan is complete, you can preview files found by Disk Drill before you recover them. They are listed by their file types, making it easier to use filters to narrow them down. You can also use the search box at the top to find *.jpg or *.doc files.
- Recover deleted data: Once you have selected files for exFAT data recovery, click on Recover. Alternatively, to recover all files from your exFAT hard drive, click on Recover all. A pop-up window will prompt you to choose a recovery location. Remember not to use the same disk which contains the lost files as this can cause file corruption or overwrite data during recovery. Once you select the recovery location, click OK.

Once recovery is complete, will see a dialogue box with details about your exFAT files. They will be available in the location you selected during recovery.
Option B: PhotoRec
PhotoRec is an amazing open-source tool that can help you recover deleted files from an exFAT hard disk based on their file signatures. This means it can deliver great results even when the file system has been severely damaged. The downside of signature-based file recovery is that file names and folder structures can’t be recovered.
Here’s how you can get started:
- Download the PhotoRec software suite from here.
- Launch PhotoRec – which would have a command line-based UI.
- Plugin your hard disk.
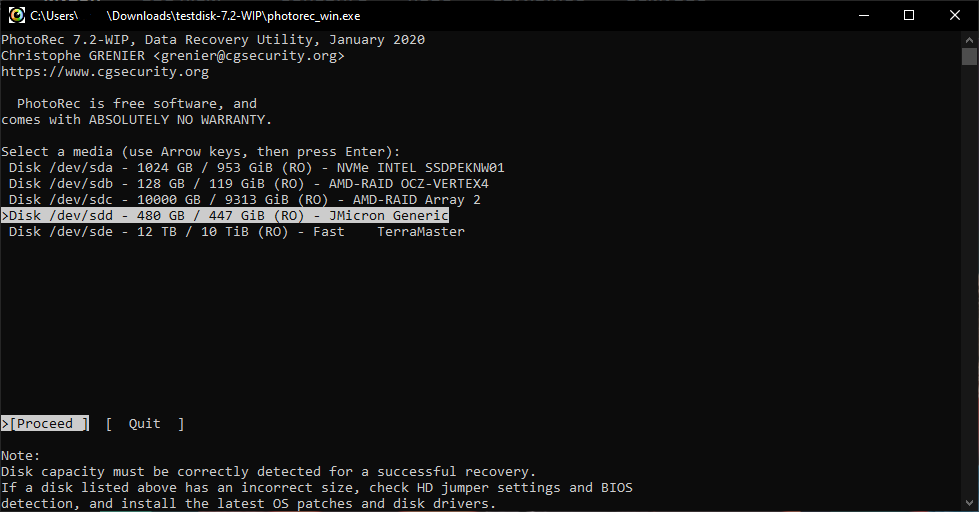
- Select the disk you want to recover.
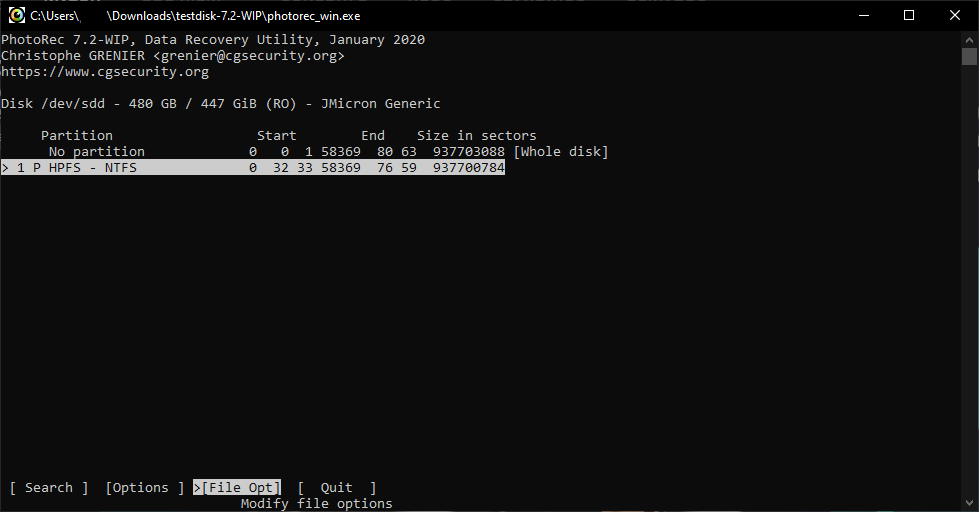
- Now, use your arrow keys and click on [File Opt].
- By default, all file extensions would be selected. To disable all, press s and then scroll using the arrow keys while pressing the spacebar to select your desired file types. In this case, we are selecting ‘mov’.
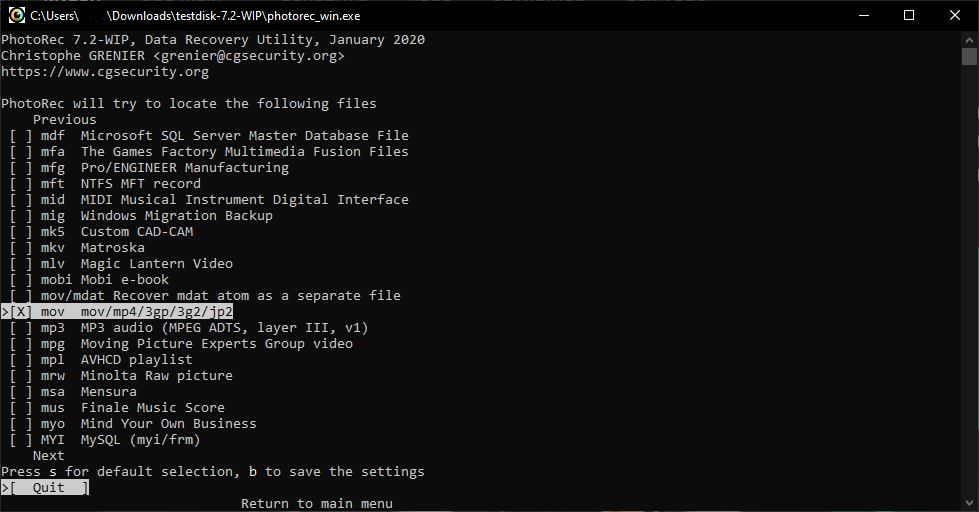
- Save your settings by pressing b and then select quit to return to the previous partition page.

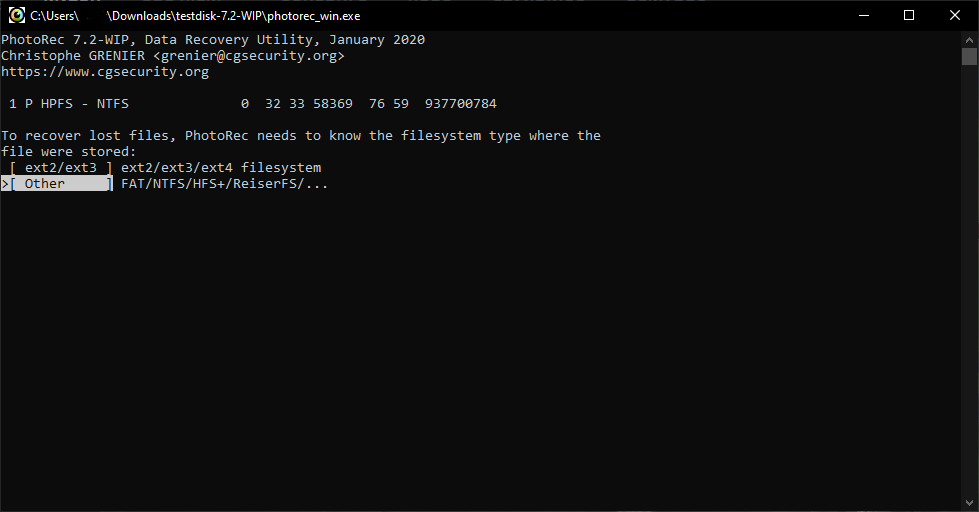
- Now select other as your file type as we are dealing with an exFAT.
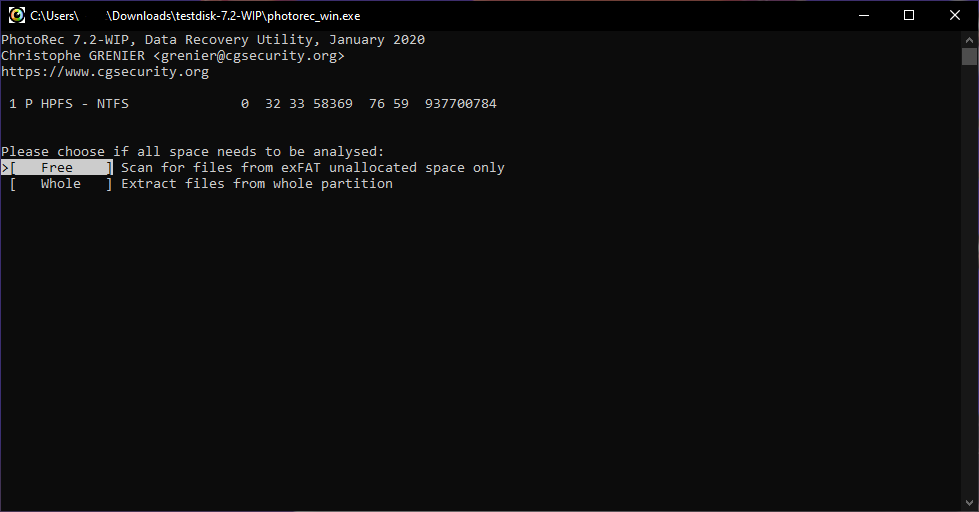
- Now select Whole to trigger a complete partition search for your deleted data.
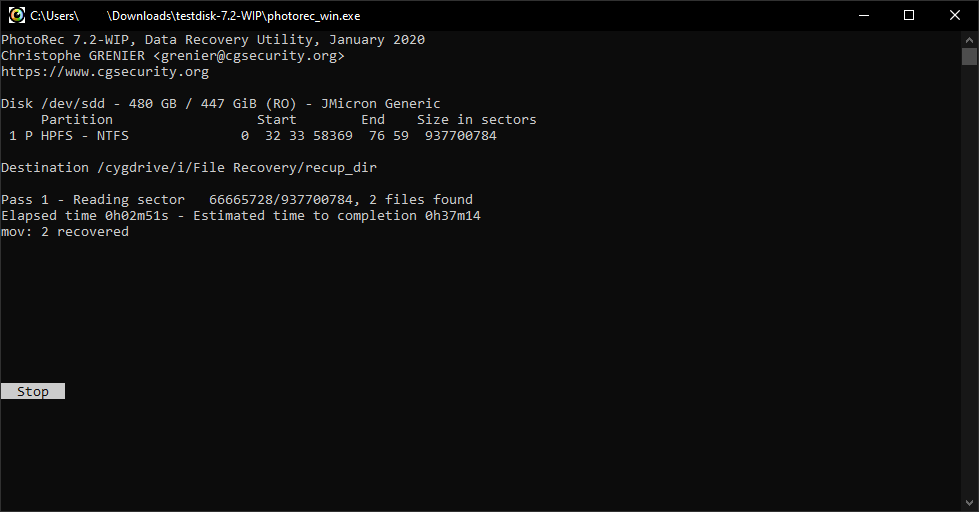
- Chill down a bit and watch the magic happen as your files resurrect from the bottomless pits of deletion. Your files should be back right back where you last saw them.
Total Eyeopener: PhotoRec Review: Is the Software Still Worth Using?
Option C: TestDisk
TestDisk is a powerful open-source data recovery software designed to recover lost partitions and fix boot issues. It’s developed by the same person as PhotoRec and distributed alongside it, so if you’ve already downloaded PhotoRec, then TestDisk is already on your computer, ready to recover lost partitions from your exFAT storage device.
Here’s how you can get started with TestDisk:
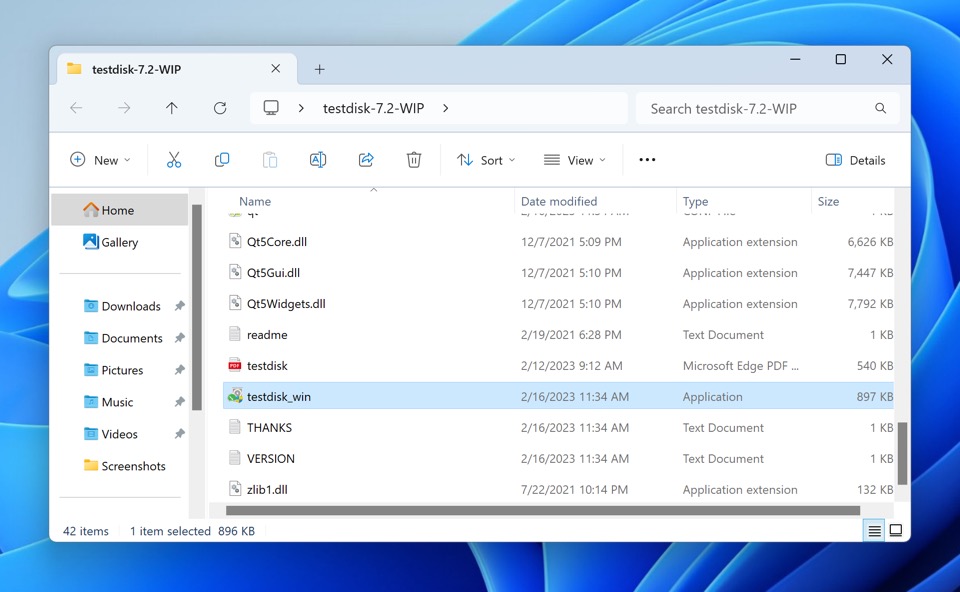
- Download TestDisk from the official website and extract the folder to your preferred location. You can then open the folder and launch the testdisk_win application.
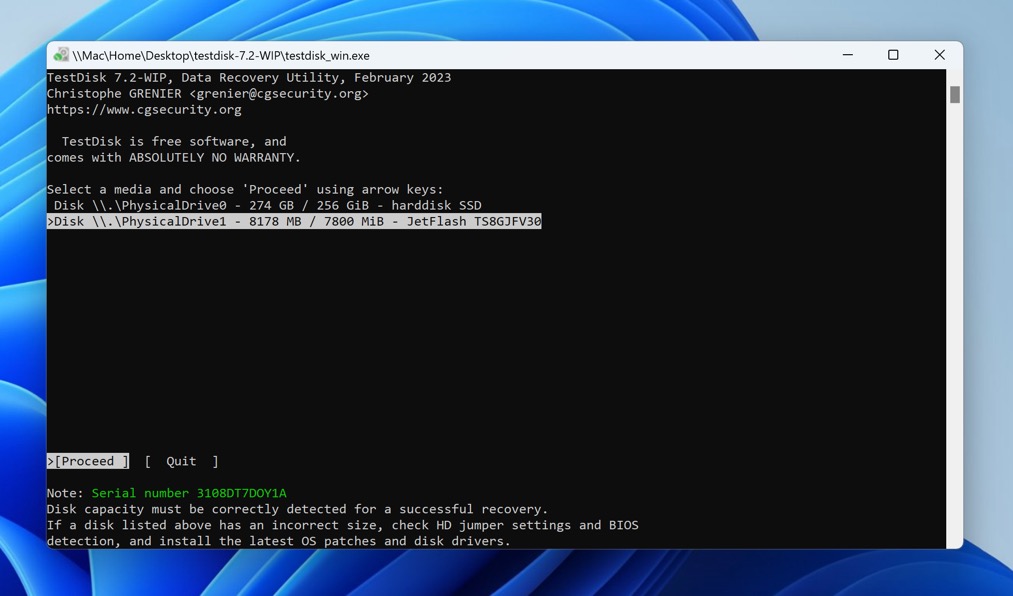
- Create a log file and select the exFAT storage device you want to recover.
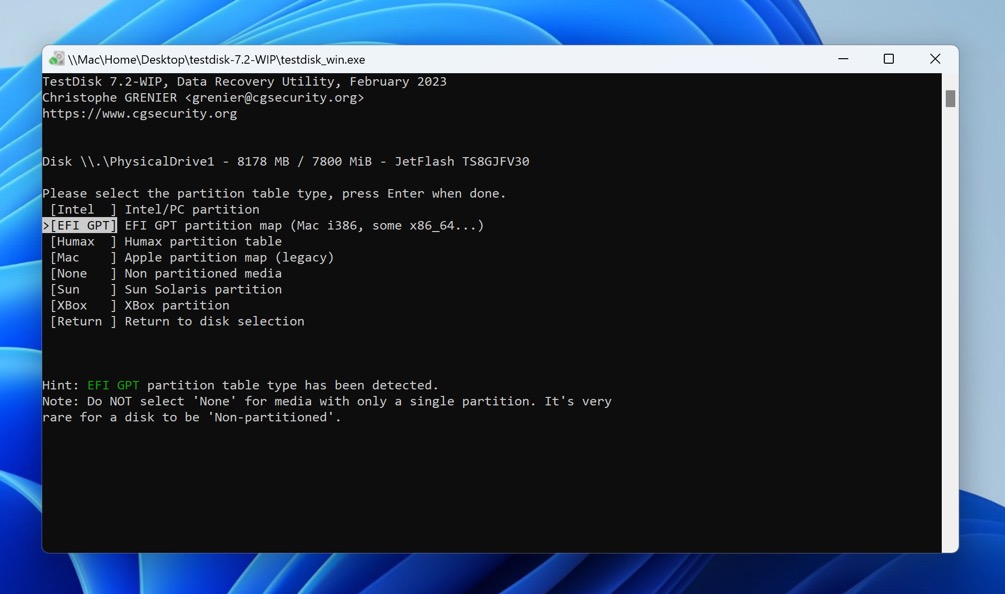
- Choose the partition table type, typically Intel or EFI GPT for Windows PCs, and press Enter.
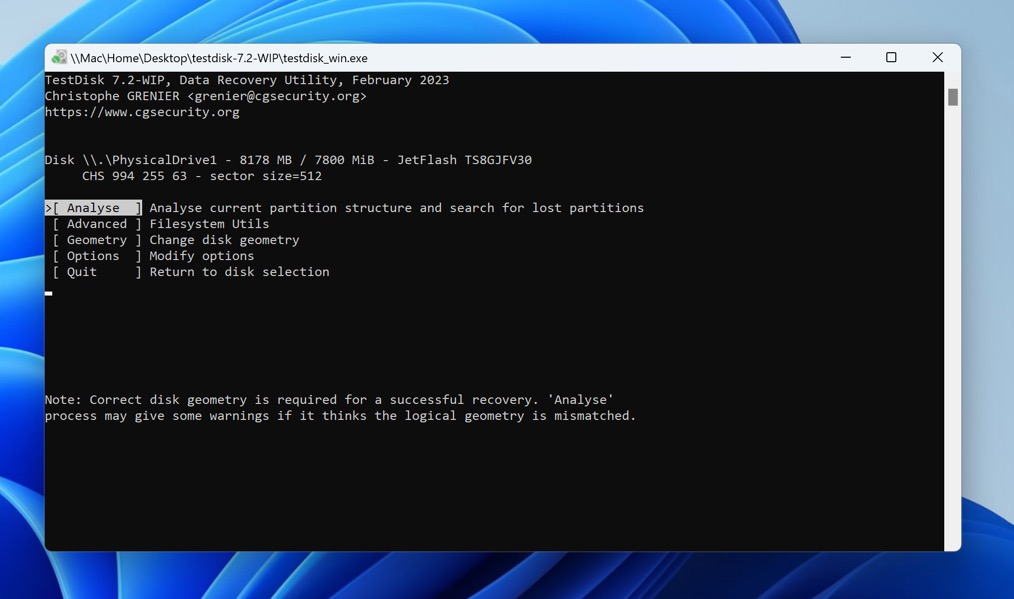
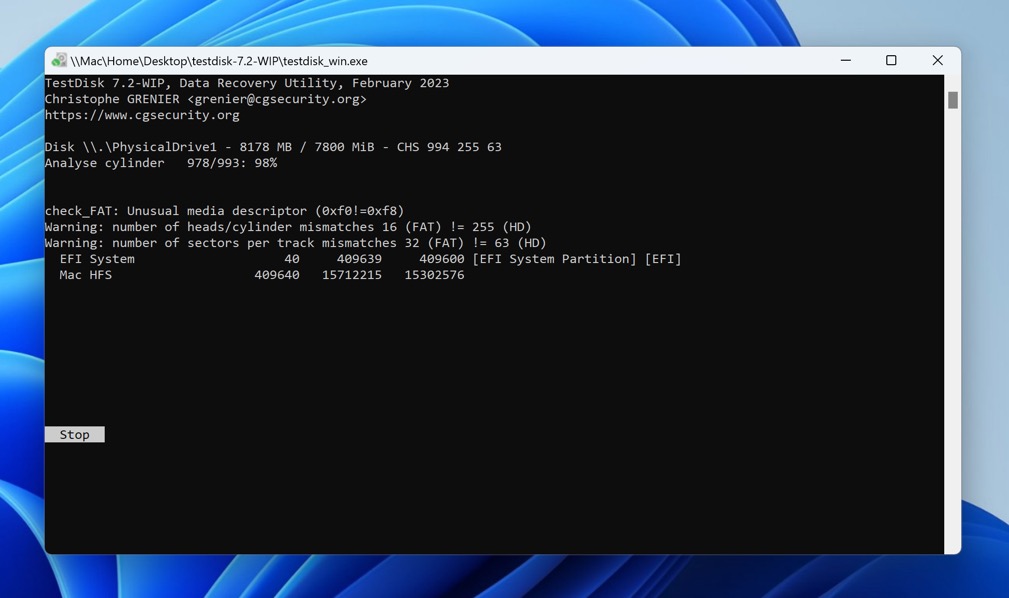
- On the next screen, select Analyze and press Enter for TestDisk to analyze the selected disk.
- Choose Quick Search and hit Enter. If Quick Search doesn’t find anything, select Deeper Search for a more thorough partition scan.
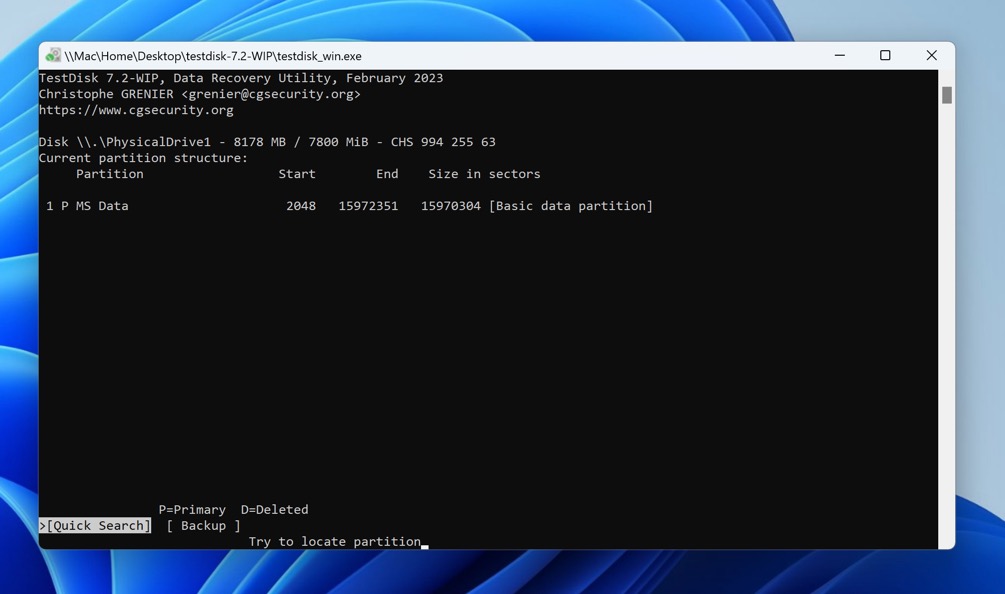
- Once the scan completes, TestDisk will list recoverable partitions. Select the desired one for recovery and choose the Write option.
More information: TestDisk Review: Scan Results, Pros, Cons & Our Verdict
Unraveling the Popular exFAT Recovery Scenarios
In this section, we have pitched solutions to frequent exFAT issues. Stay tuned:
Case #1: Recover Deleted Individual Files from exFAT Disk
You can try using a tool like Disk Drill or PhotoRec to recover your files. In Disk Drill, you can pause your data recovery scan and terminate the recovery process if you have already located the individual file you are looking for.
Case #2: Recover Formatted/Corrupted exFAT Disk/Partition
TestDisk is a highly effective solution for recovering data from formatted or corrupted exFAT disks and partitions. Its robust capabilities extend to restoring partition tables and retrieving deleted partitions, making it an excellent tool for complex data recovery tasks.
Case #3: My exFAT Drive is Not Detecting
If your exFAT Drive isn’t being detected, we have compiled quite a few nifty techniques as a workaround. Some prominent methods include initializing the drive letter, using Window’s troubleshooting, and updating your drivers. Check out the following article for a fully-fledged guide.
Case #4: My exFAT Drive is Broken/Malfunctioning
If you hear mechanical noises coming from your exFAT disk, it’s best you consult a data recovery service centre.
FAQ
How is exFAT different from FAT32?
FAT32 is the most widely compatible file system. However, it only supports files up to 4GB and works on partitions up to 8TB. exFAT is an improvement on FAT32, which has no limitations on file sizes and partitions. Another plus for exFAT is that it is faster at writing and reading data than FAT32.
How can I perform exFAT file recovery with a third-party data recovery tool?
There are numerous data recovery tools available that can assist with exFAT file recovery, including well-known options like Disk Drill, PhotoRec, and TestDisk. While each tool has its unique features, the general steps for data recovery are quite similar across different software:
- Download and install your preferred data recovery software.
- Run the program with administrative privileges.
- Choose the exFAT drive you wish to recover data from and select an appropriate scanning algorithm.
- Initiate a scan to search for lost data on your exFAT hard drive.
- Once the scan is complete, browse through the found files and select the ones you wish to recover.
- Choose a save location for the recovered files, preferably different from the original exFAT drive to prevent overwriting.
Can I recover exFAT files on a Mac?
Yes, you can recover exFAT files on your Mac. To do this, you’ll need data recovery software compatible with macOS. Here’s a general process you can follow:
- Download and install a macOS-compatible data recovery software from a reputable source.
- Run the software with administrator permissions.
- Choose the drive where your exFAT files were stored and search for lost data.
- Select the exFAT files you wish to recover.
- Pick a different drive than the one you’re recovering from to avoid potential data overwriting.
How to use File History for exFAT hard drives?
File History is a Windows feature designed to back up your data files on its internal drives. Windows will regularly back up data from your internal exFAT hard drive to an external drive by turning on File History.
- Open Windows Settings (Win + I or from the Start Menu) and select Update & Security.
- Select Backup on the left navigation panel, then select Add a drive under Backup using File History.
- Choose the external hard drive you want to use for backup.
- Windows will now make regular backups of your internal exFAT drive to the external drive.
When should I approach a recovery service center?
If there are software problems, all of the exFAT hard drive recovery methods we listed will work for you. However, suppose your exFAT hard drive has suffered physical damage, such as a fall, water, or high heat. In that case, it isn’t easy to recover data from it. In many cases, physical damage makes it impossible to recognize your exFAT hard drive. If this happens, you must approach a reliable data recovery center where professional technicians will recover your data.
What Next?
With our methods, you will be able to recover data from your exFAT hard drive quickly. Remember to minimize using the exFAT drive that is to be recovered and make regular backups of your data. The simplest and most reliable way to recover your data is to use trusted third-party software to help you with quick exFAT data recovery.
This article was written by Joshua Solomon, a Contributing Writer at Handy Recovery Advisor. It was recently updated by David Morelo. It was also verified for technical accuracy by Andrey Vasilyev, our editorial advisor.
Curious about our content creation process? Take a look at our Editor Guidelines.