
I think we all agree that data loss sucks. Unfortunately, it’s way too common; accidental deletion, formatting, infection, corruption – all these scenarios and more can cause you to lose your data. Normally, we would suggest using third-party data recovery software as it’s the fastest and safest way to restore your files.
However, it’s not the only way. This article will teach you how to recover deleted files on Windows 10 without software – using Windows’ own native tools.
Common File Deletion Scenarios on Windows 10
In the introduction, we briefly mentioned the usual causes of data loss on Windows 10. But it’s important to figure out what exactly caused it in order to determine the best solution.
To help you out, we prepared a menu of all the most common reasons for data loss along with jump links to sections of the article that will teach you how to fix them.
Scenarios |
Solution |
Files were accidentally sent to the recycle bin. |
Try Method 1. |
Files were deleted permanently, files were too large for the Recycle Bin, files were shift-deleted, or the Recycle bin has been emptied. |
If you created a backup or restore point, use Method 3. If you use cloud storage or received the file as an attachment, try Method 6. If you have no backups and the file isn’t in the cloud or in your email, use Method 2. |
Files disappeared due to hard drive corruption. |
Check out Method 4. |
The antivirus has quarantined the file. |
Use Method 5. |
Best 6 Methods to Recover Deleted Files on Windows 10 Without Software
Below are 6 reliable methods (along with step-by-step guides) to restore files and recover deleted folders in Windows 10 without software. However, note that each method recovers data by resolving a specific problem – in other words, you’ll get the best results by choosing the solution that best addresses your situation.
If you need help figuring out which guide to follow, check out the menu we prepared in the last section.
Method 1: Check the Recycle Bin
The first place deleted files go is the Recycle Bin and they will stay there until you manually empty it. You can usually find your computer’s Recycle Bin on your desktop.
If you used the Shift + Delete keys to erase a file, it will have bypassed Recycle Bin entirely. You can recover shift deleted files using Method 2.
Undeleting files and recovering folders on Windows 10 from the Recycle Bin is easy – right-click any file or folder and click Restore.
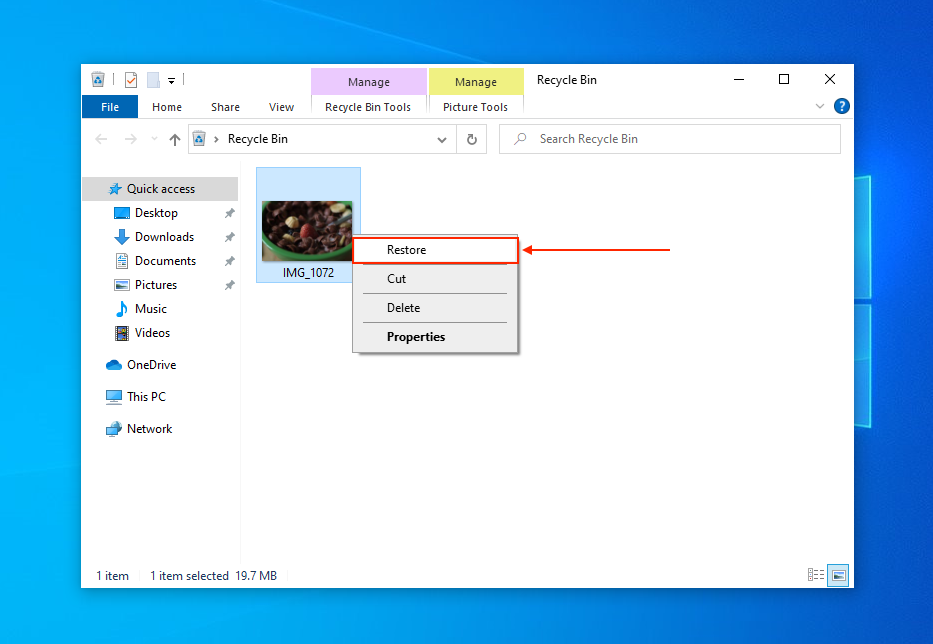
You should find your recovered files in the folder they were stored in before deletion.
Files will only be sent to the Recycle Bin if they are equal to or smaller than the set individual file size limit. When you attempt to delete a file and get an error that says something like “The file is too large for the destination file system. Do you want to permanently delete it?”, it likely bypassed the Recycle Bin. To recover files too large for the Recycle Bin (or if you emptied your Recycle Bin), proceed to the next method.
Method 2: Recover Files Using Microsoft’s Windows File Recovery
What if you emptied your Recycle Bin or your files were too big for it? That means your data has been permanently deleted and you can no longer access them via File Explorer.
But that doesn’t mean you can’t restore them. While this article is technically about how to recover permanently deleted files on Windows 10 without software, Windows File Recovery is a free and native Windows tool that can pull deleted data from the file system.
Windows File Recovery is a command line app (similar to Command Prompt), so there are some commands involved – but as long as you follow the steps we outlined below, you’ll do fine!
To restore files on Windows 10 using Windows File Recovery:
- Connect the drive you want to restore to your computer. If you want to restore data from your system drive, connect a drive for the purpose of storing the recovered files.
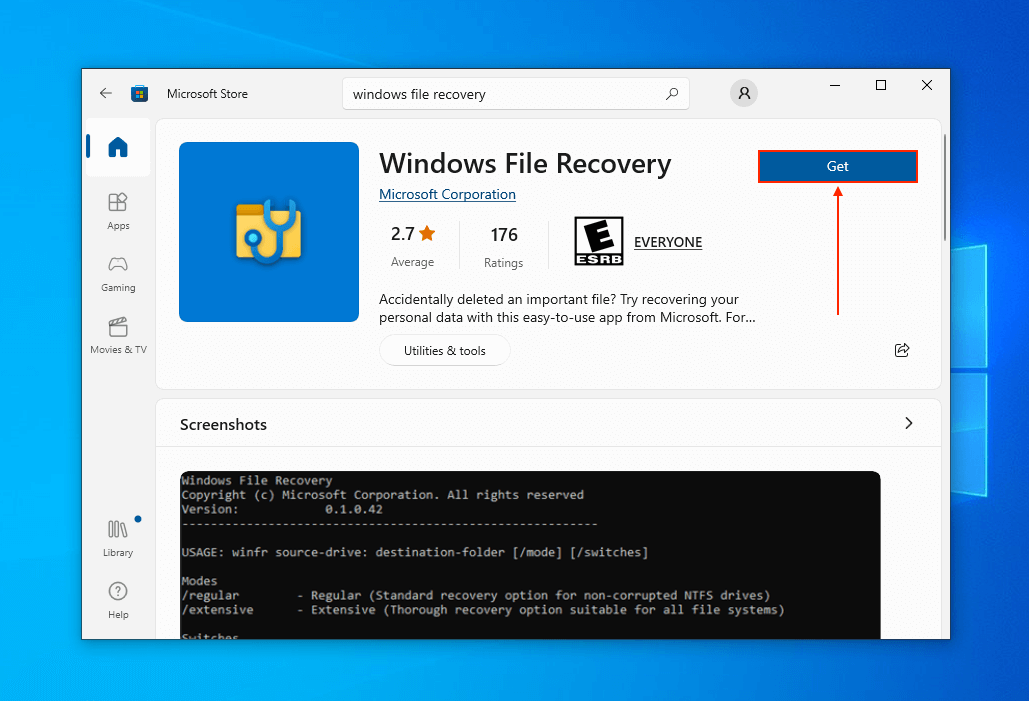
- Download Windows File Recovery from the Microsoft Store.
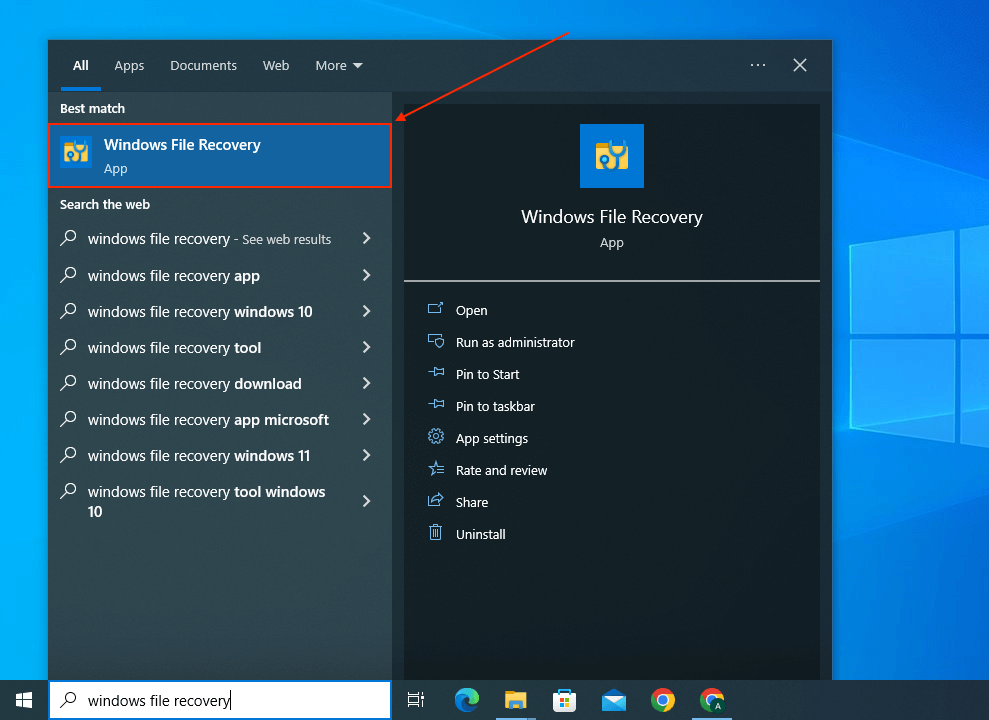
- Launch Windows File Recovery via the Start menu (if you want to restore data from an external drive, connect that to your computer first). If prompted, click Yes to allow the app to make changes to your computer.
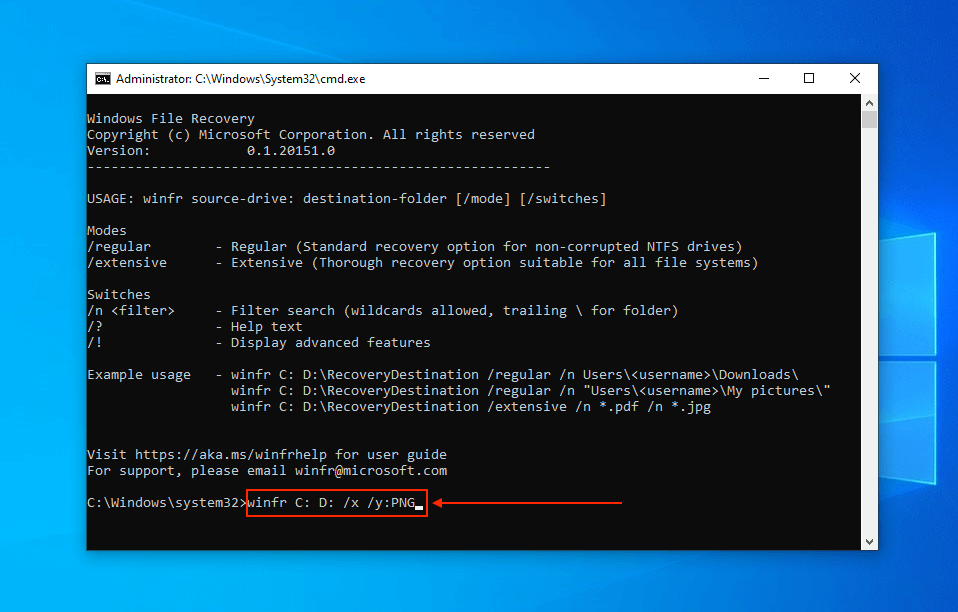
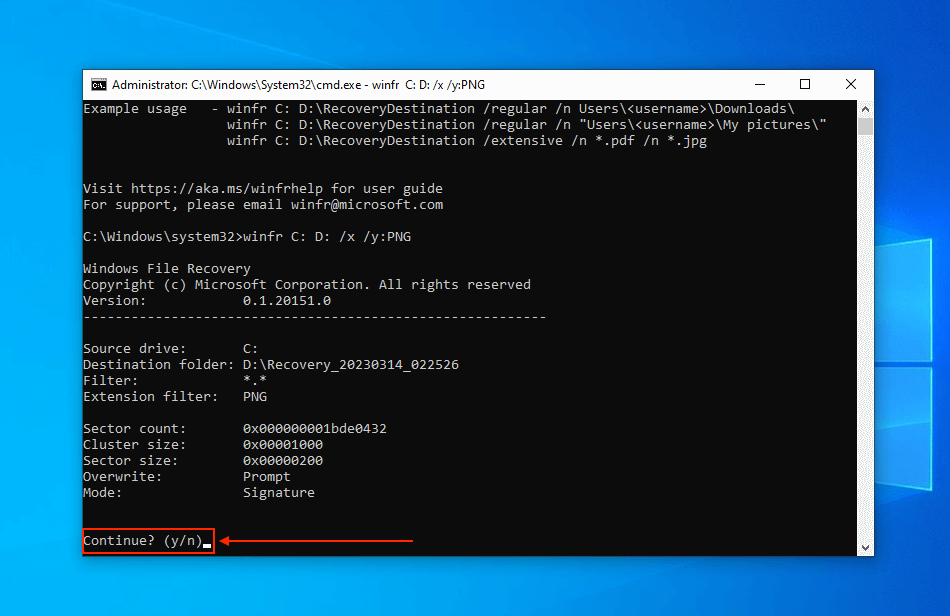
- Type the following command and hit Enter:
winfr C: D: /x /y:PNG
Replace C with the letter of the drive you want to restore data from and replace D with the letter of the drive you want to restore data to. Finally, replace PNG with the file type you want to restore.
- When prompted, hit Y to continue.
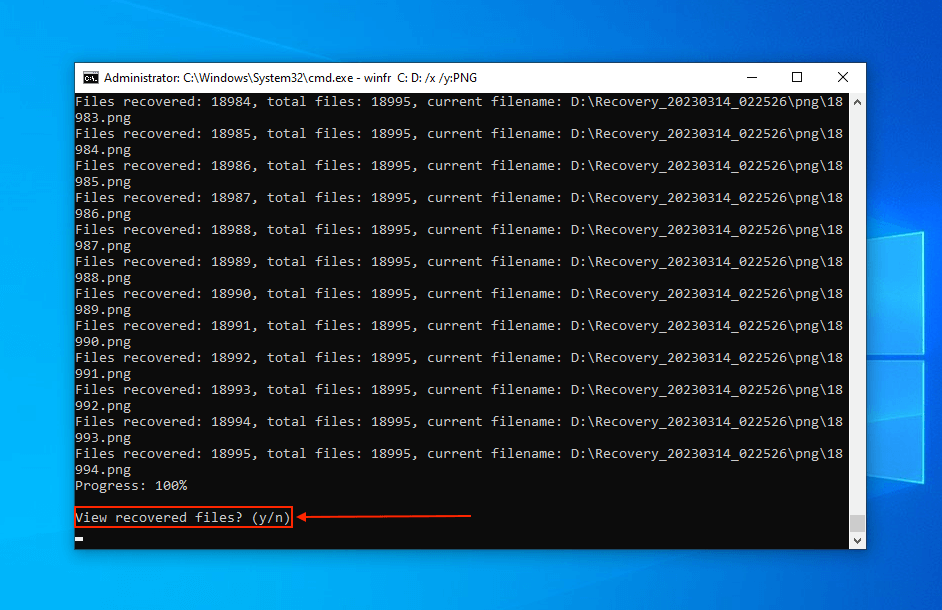
- To review your files, hit Y when prompted.
To see more advanced commands and parameters, you can find them on the Microsoft website. If you want to know more about Windows File Recovery before installing it on your device, read our full Windows File Recovery review.
Method 3: Restore Deleted Files From Native Windows Backups
If you enabled Previous Versions or Windows Backup & Restore on your computer before deleting your files, you can easily restore old saves of your data. For this method, you don’t need to download anything – all required tools come with the Windows installer package.
Using Previous Versions
Previous Versions (otherwise known as shadow copies) are older saves of your files and folders that Windows stores as part of a restore point or File History.
If you enabled either of these options, you can access the previous version of the folder that stored your missing files. You can then restore it to the state it was before deletion occurred. To do so, right-click the folder > Restore previous versions.
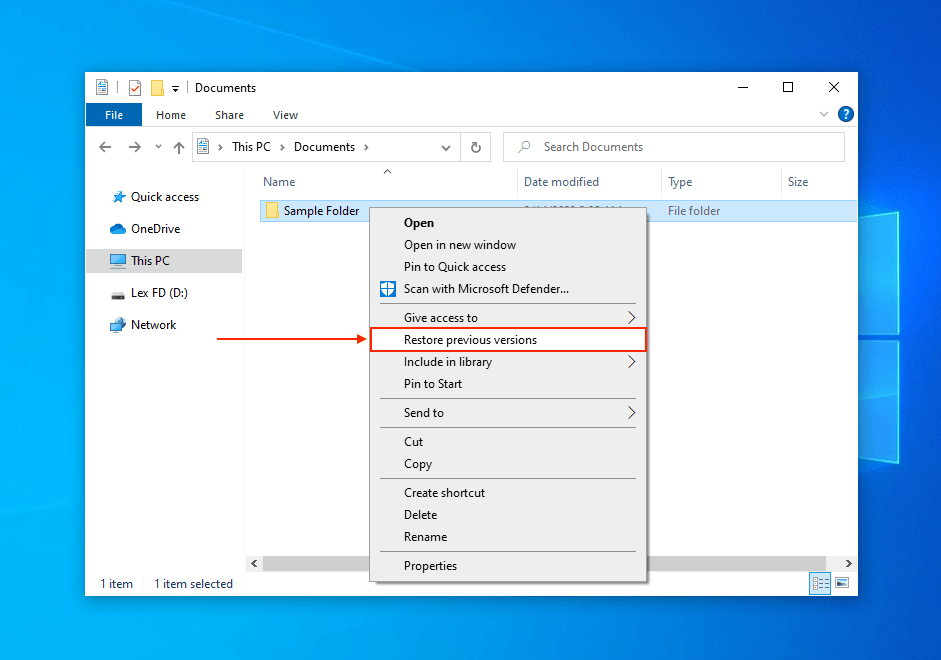
You should see a list of that folder’s previous versions along with its last modified date and location. To restore your data, select a version and click Restore…
Using Backup & Restore
Backup & Restore is a native Windows tool that allows users to save backups of their data to an external drive. Similar to Previous Versions, Windows Backup & Restore should have been enabled before deletion for it to work.
To access your backups:
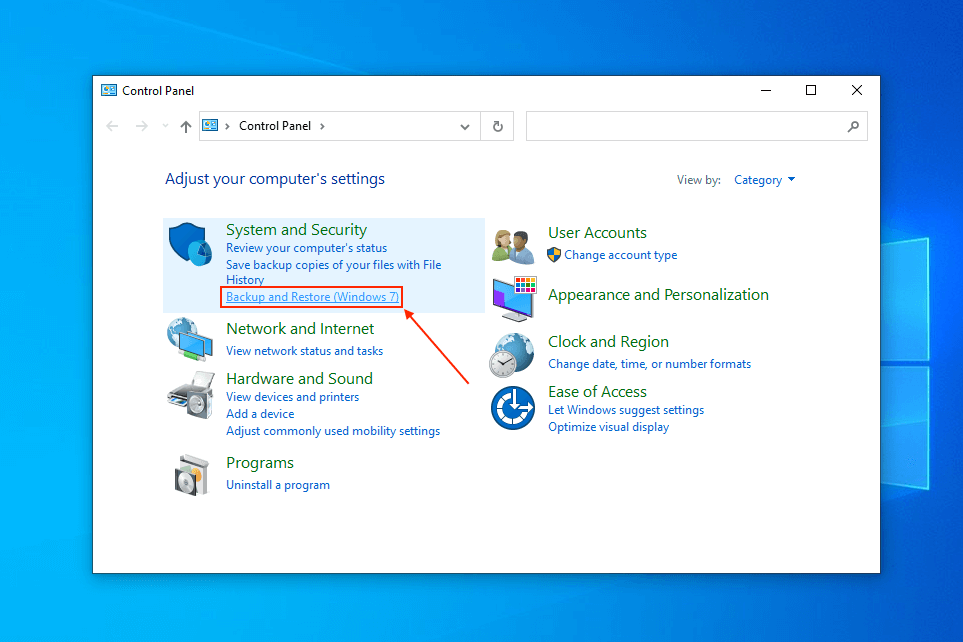
- Open Control Panel via the Start menu.
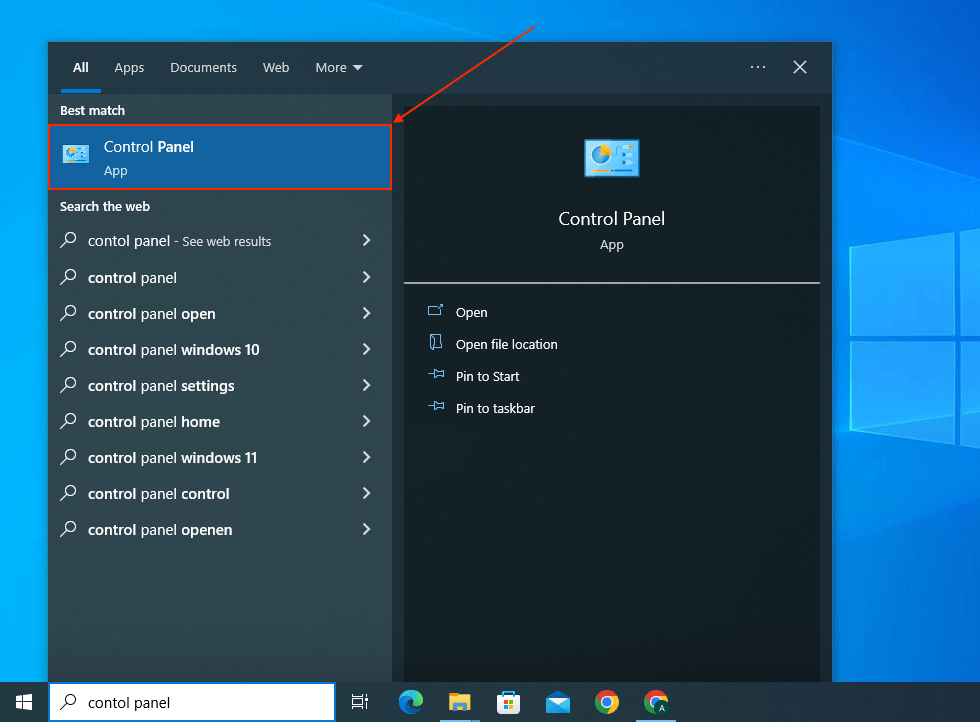
- Under System and Security, click Backup and Restore (Windows 7).
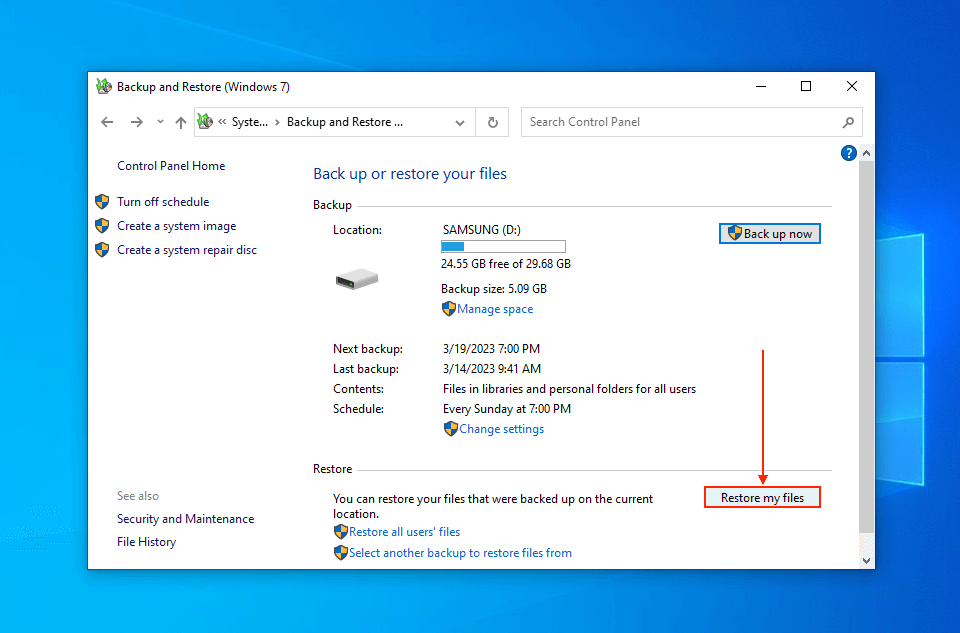
- Under the Restore section, click Restore my files and follow the wizard to proceed with the recovery.
Method 4: Restore Data By Fixing the Corrupted File System Using CMD
CHKDSK is a super useful command that can automatically find and fix errors on your drive that may have caused corruption. Following this idea, CHKDSK can “recover” data that has become unreadable due to corruption by making it readable again.
If your drive is suffering from severe corruption, CHKDSK and other repair tools may cause permanent data loss. We recommend that you recover data from an HDD with bad sectors before using repair tools.
- If restoring files from an external drive, connect it to your computer. If restoring files from your system drive, proceed to the next step.
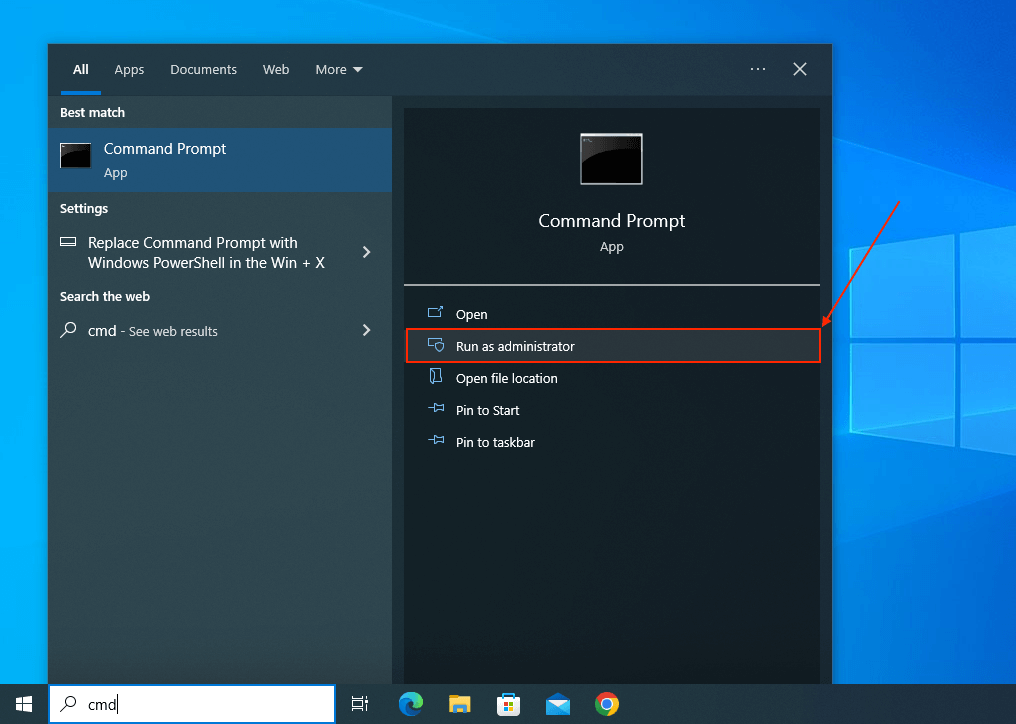
- Launch Command Prompt as Administrator via the Start menu.
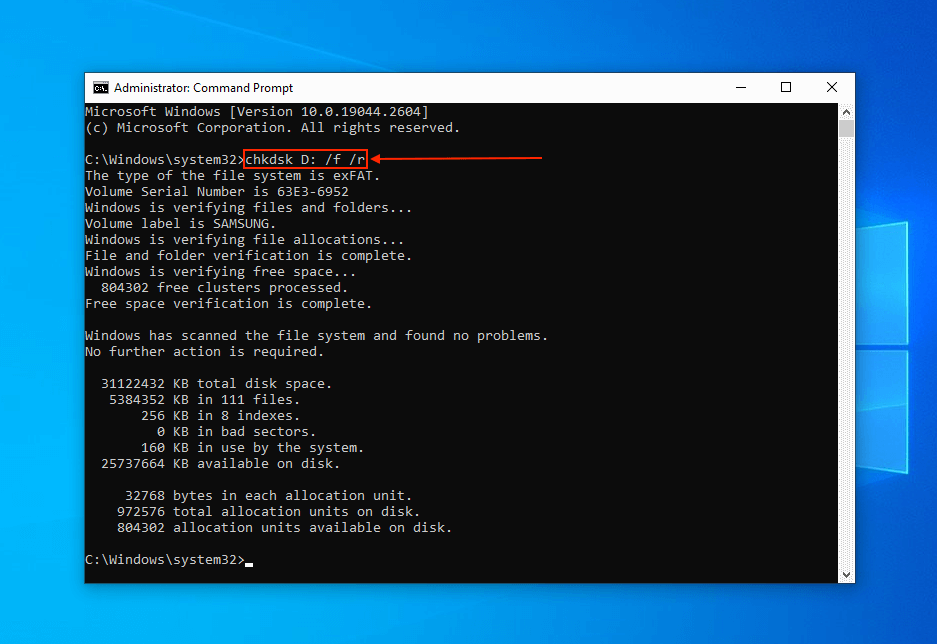
- Type the following command and hit Enter:
chkdsk D: /f /r
Replace D with your external drive’s assigned letter. If scanning your system drive, you can omit D: entirely – however, chkdsk will only run upon restarting (you will be prompted to confirm this with the Y key).
- If CHKDSK finds any errors, hit the Y key when prompted. This will automatically run a disk check after restarting your computer.
Once CHKDSK is done with the scan and repair, restart your computer and let the disk check run uninterrupted if you were prompted in Step 4.
This method is only worth trying if you suffered data loss due to corruption. CHKDSK can’t literally recover deleted files. In case of accidental deletion or formatting, try methods 1, 2, and 3 instead.
Method 5: Retrieve Quarantined Files From Microsoft Defender
If your antivirus showed a warning around the same time you lost your data, it’s possible that it “quarantined” your files to protect the system from further infection.
When a file is quarantined, it’s moved to a different folder that is meant specifically to store quarantined files – you will no longer be able to find it in its original location. However, we suggest restoring these files via Windows Defender and not copying them from the quarantine folder through File Explorer. See the steps below.
The quarantine folder for Windows Defender users is located in the hidden folder C:\ProgramData\Microsoft\Windows Defender\Quarantine (you will need to show hidden items to find it). Other antivirus programs should have their own corresponding folders.
- Launch Windows Security via the Start menu.
- In the left sidebar, select Virus & threat protection.
- On the right pane, scroll down until you see Current threats and click See threat history.
- Select the file you want to restore and click See details.
- Click Start actions to remove any threats.
- Under Quarantined items in the Threat history window, select your file and click Restore.
Depending on the severity of the infection, Windows Defender might be able to disinfect a file without deleting it. However, in the worst-case scenario, it may deem a file too dangerous to keep and delete it. Fortunately, you can recover files deleted by Windows Defender, but you will have to use data recovery software.
Method 6: Check Cloud Storage and Email Attachments
Do you have OneDrive or any other cloud storage service (such as Google Drive or Dropbox) enabled on your computer? You may find your disappeared files in the cloud. Even if you deleted your file from the synced folder (which would delete the file from the cloud as well), some cloud services provide their own version of the Recycle Bin.
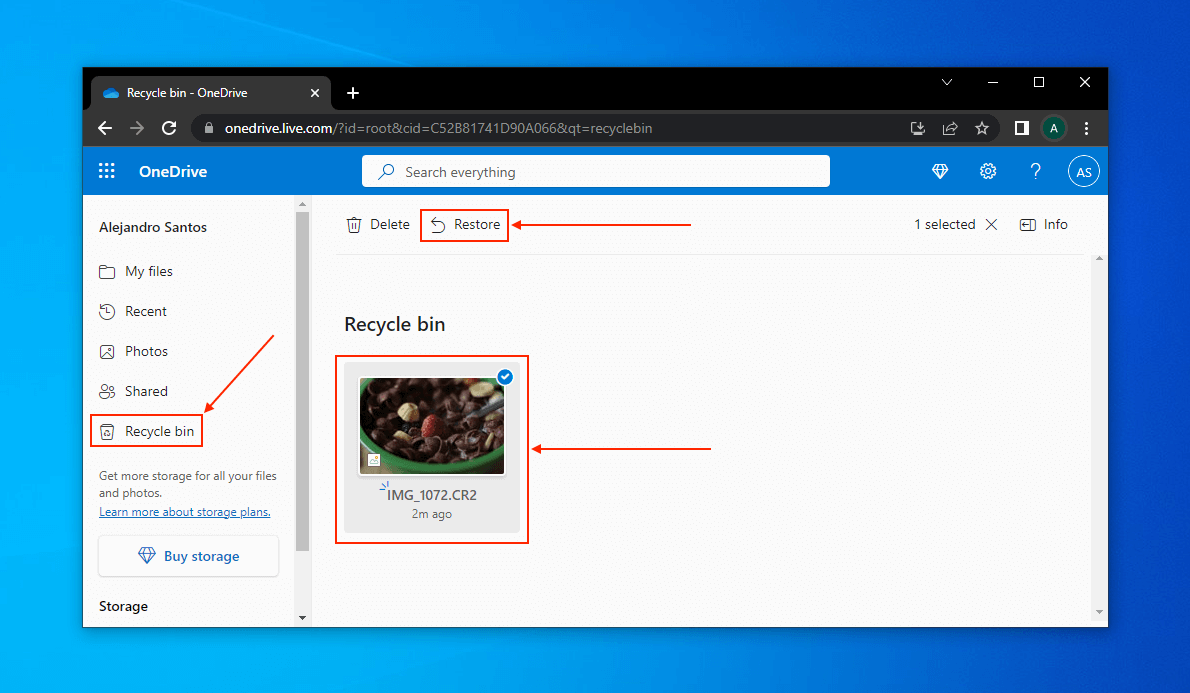
In the case of OneDrive, deleted files are stored in the recycle bin for 30 days before getting permanently deleted. You can find the recycle bin on the OneDrive website. To restore a file to its original folder, right-click it and click Restore.
Another place to look for files you need is your email attachments. Even if you deleted attachments from local folders, they remain as attachments to your emails. OneDrive also has an email add-on feature called Save to OneDrive – when enabled, attachments are automatically saved to the cloud.
FAQ
Where do permanently deleted files go in Windows 10?
On Windows 10, deleted files go to the Recycle Bin first. If the size of the files exceeds Recycle Bin’s per-file limit, or if you emptied Recycle Bin after deletion, your data becomes permanently deleted. You can no longer find them in File Explorer but they still exist in your drive’s file system and are earmarked for deletion. To recover deleted files that bypassed Recycle Bin, you’ll need to use data recovery software.
How to recover lost files on Windows 10?
To recover lost files on Windows 10, try the following methods:
- Check the Recycle Bin.
- Use the Windows File Recovery tool (free software from the Microsoft Store).
- Recover your files from Previous Versions of the containing folder or from a Windows backup.
- If your files have been made unreadable by corruption, use the CHKDSK command to repair your drive.
- If your files were quarantined due to a virus infection, retrieve them via your antivirus.
- Check your cloud storage (and your cloud’s own recycle bin) for copies of the missing files.
- If you received these files via email, check your email client’s attachments.
How can I restore permanently deleted files from my PC?
To restore permanently deleted files from your PC, download Windows File Recovery from the Microsoft Store and use the following command for NTFS file systems (replace D with the letter of your external drive):
winfr C: D:
For ExFAT or FAT32 file systems, use the following command instead:
winfr C: D: /x
Can you recover permanently deleted files from Windows 10 using CMD?
Yes, you can recover permanently deleted files from Windows 10 using CMD, but you will have to install Windows File Recovery from the Microsoft Store to access this function. Once Windows File Recovery is installed, use the following command in CMD (as Administrator):
winfr C: D:
Replace D with the assigned letter of drive.
Conclusion
While there are many ways to lose your files on Windows 10, the operating system provides just as many tools to recover them. However, remember that the safest and most effective way to restore your files is by using the correct method for your specific case.
To avoid risking permanent and irreversible data loss (which can happen once your deleted files are overwritten), we highly recommend that you enable System Restore and regularly back up your data via Windows Backup & Restore.
This article was written by Alejandro Santos, a Staff Writer at Handy Recovery Advisor. It was also verified for technical accuracy by Andrey Vasilyev, our editorial advisor.
Curious about our content creation process? Take a look at our Editor Guidelines.