
A lot of people use Microsoft Word to create documents on their Macs or MacBooks. The .DOC and .DOCX formats used by Word have become de-facto standards in the computing community. Fans of Apple computers can work with Microsoft Office for Mac for their word processing needs.
If you’re like most users, eventually you will need to recover deleted Word documents on a Mac. Data loss can occur for a wide variety of reasons and usually at the worst possible time. We now present multiple methods that can be used to recover a lost Word doc on Mac.
Quick Navigation
Problem |
Solution |
I have recently deleted the Word document in question. |
Check your Mac Trash for the lost file. (Solution 1) |
I have accidentally deleted an important Word file on my MacBook and it’s not in the Trash. |
Try data recovery software or recovering from a backup. (Solution 3 | Solution 4) |
I need to recover Word files after I force quit Word. |
Use the Word AutoRecovery feature. (Solution 2) |
My Word app froze and I could not save my document. |
Try AutoRecovery or search in your Mac Temp folder. (Solution 2 | Solution 5) |
Word crashed and I did not save my document. |
Try AutoRecovery or search in your Mac Temp folder. (Solution 2 | Solution 5) |
I need to recover an unsaved Word document but I didn’t have AutoRecovery enabled. |
Search the Mac temp folder or try recovering from within the Word app. (Solution 5) |
I use Microsoft 365 and want to restore an earlier version of a Word document on my Mac. |
You can recover an earlier version of a file from OneDrive. (Solution 6) |
Recover Deleted/Unsaved Word Document on a Mac
Depending on how or why a Word file was lost or deleted, one of the following methods should work to get it back. Use the recovery process that best addresses your situation.
accidently deleted a 6000 word notes file for an essay i hadn’t started composing yet that is due in about 36 hours – tried to retrieve it for 3 hours and failed. i am now lying in bed drinking diet coke with a bowl of bran flakes. in this house we call it self-care xx
— crawf (@crawfsmith_97) May 4, 2021
Method 1. Recover Deleted Word Documents on Mac from the Trash
The first place to look for deleted files on a Mac is the Trash Bin. This special folder holds recently deleted items for a designated length of time until it is manually emptied. More information on how to use the Trash effectively can be found on this Apple support page.
The following simple steps enable you to recover your lost file if it’s in the Trash.
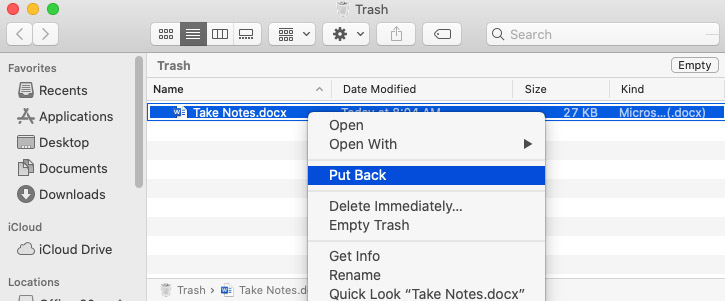
- Click the Trash icon to open this special folder.
- Search the folder for the Word file you wish to retrieve.
- Right-click on the chosen file and click Put Back to restore the word document to its original location.
If you’re lucky, you can close this article and get back to working with your Word document. Don’t panic if the lost file was not in the Trash. Read on for more recovery methods.
Method 2. Recover an Unsaved Word Document on Mac with AutoRecovery
You can lose important updates to a Word document through no fault of your own, such as a sudden power surge or system crash before you have time to save your changes. There is, however, a chance that the app may have saved a copy automatically. If so, you can recover the saved changes and continue with your work.
Use the following procedure to recover an unsaved Word file when faced with an unexpected system crash with Microsoft Office’s AutoRecovery feature.
- Use the Command+Shift+Dot (.) keystroke combination to make hidden folders visible on your Mac.
- Navigate to this folder: /Users/<username>/Library/Containers/com.Microsoft/Data/Library/Preferences/AutoRecovery
- Search for your file and open it in Word. Save it to a new location to protect the document.

Method 3. Recover Word Documents on Mac with Data Recovery Software
Another method that may be able to restore your lost Word files is to use data recovery software. Data recovery software works by scanning your storage device for files that have been made logically inaccessible by macOS when it performs a deletion. If the item still physically exists on the device, recovery software repairs the logical links so the file can be used by your applications.
The trick is to use recovery software while the lost data is still physically present on the storage device. Once it gets overwritten by new data, it is impossible to retrieve it with recovery software. For this reason, it is very important to stop using the storage device as soon as you suspect data loss has occurred.
Stop using the device until you have finished recovering the lost data.
➡️ Selecting a data recovery solution
Choosing the right data recovery software can have a big impact on your ability to successfully restore your lost information. To get a good idea of the available options, we point you to our review of the best data recovery software for Mac.
The following factors represent some of the things to look for when choosing data recovery software.
- You want a tool with a user-friendly interface and a simple recovery procedure.
- The tool should be able to reliably recover the type of data in question.
- A good data recovery program should be reasonably priced.
- An excellent data recovery program offers free tools to protect your valuable data.
We like Disk Drill because it checks all the boxes listed above. It’s an easy-to-use and reliable tool that can recover lost Word files as well as data in over 400 other types of file formats. It comes with a bunch of free data protection tools that help you keep your data safe. You can read a full review of Disk Drill for more information about this excellent data recovery solution.
➡️ How to recover deleted Word documents on a Mac with Disk Drill
Use the following procedure to restore lost and deleted Word documents with Disk Drill.
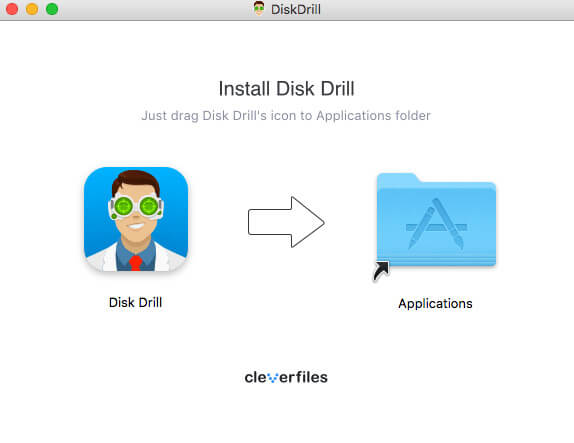
- Download and install Disk Drill for Mac on your computer. Don’t download and install the software on the storage device that contained the files you want to recover. Using an external storage device for the download and installation will prevent you from overwriting the data you want to recover.
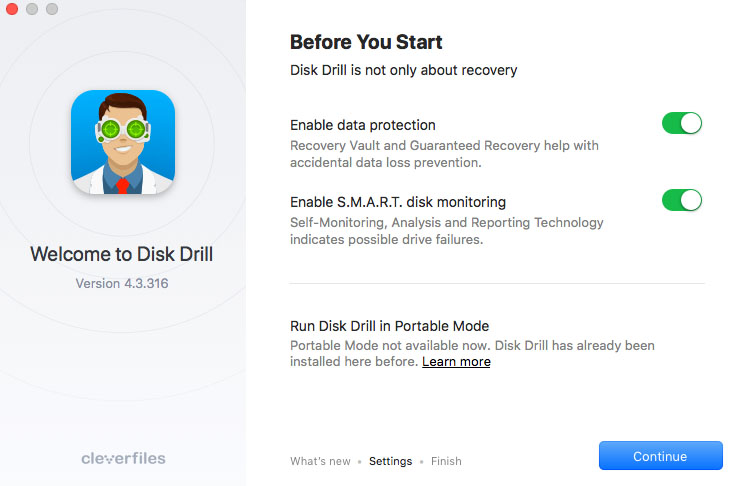
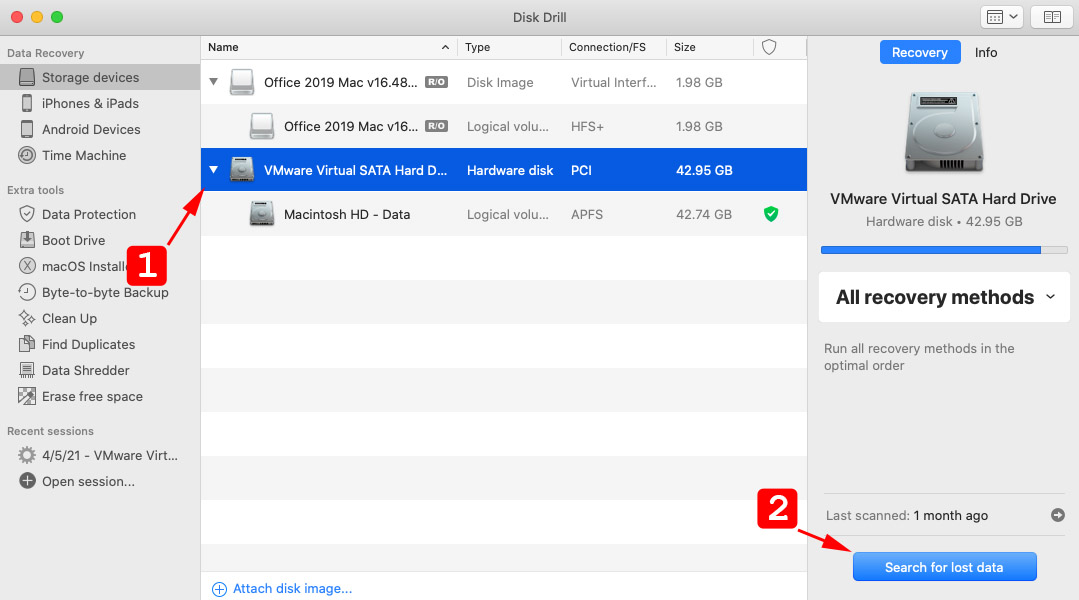
- Start Disk Drill and choose the disk where the Word docs were previously located.
- Click the Search for lost data button to scan the storage device for recoverable data. The default scanning mode will produce the best recovery results.
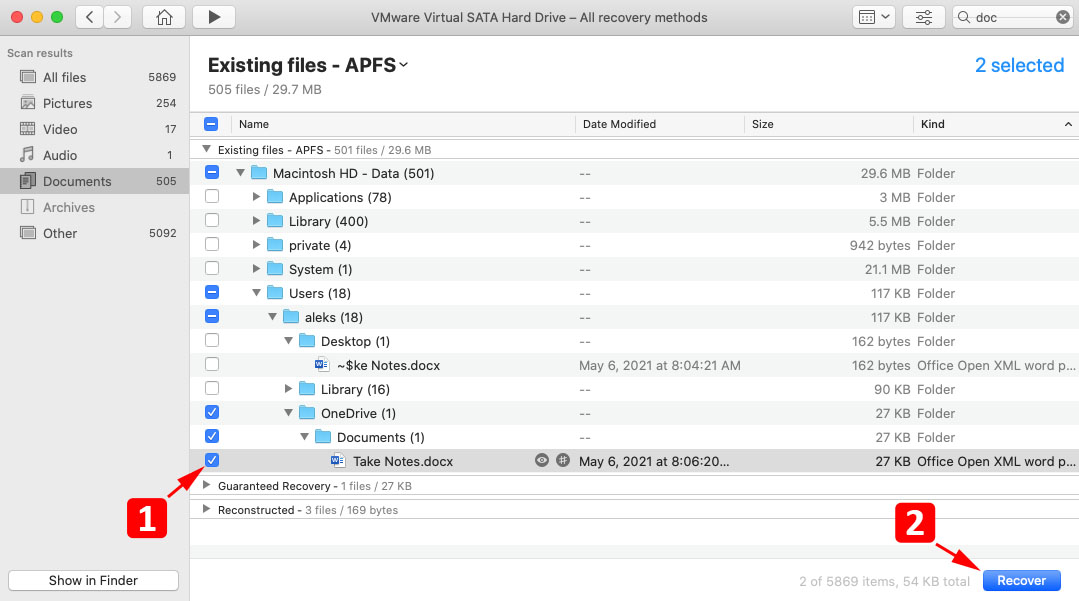
- Preview the files that have been found and select those you wish to recover. Designate a storage location that is not on the original disk to preserve your data.
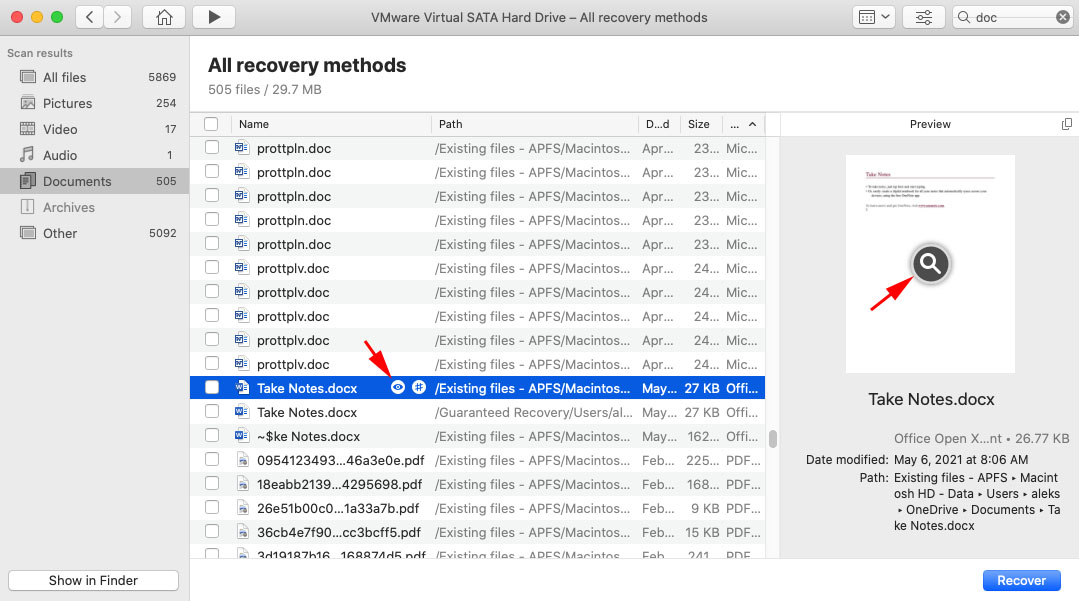
- Click the Recover button to perform the recovery. The Word files will be restored to your designated storage location.
The key to using data recovery software is to perform the recovery before the deleted data is overwritten. You should stop using the device as soon as possible to avoid overwriting data and making it impossible to recover with software.
Method 4. Use a Time Machine Backup to Recover a Lost Word Doc on Mac
You may be able to use a Time Machine backup to recover deleted Word documents on Mac. Of course, for this method to be viable you need to be using Time Machine to create backups of your Mac. If you’re not doing so already, perhaps now is the time to start. Backups offer a reliable way of recovering from a data loss scenario.
Use the steps below to recover lost Word files from a Time Machine backup. For a more in-depth discussion of recovering lost data from Time Machine backups, we direct your attention to our guide and suggest you check it out.
- Connect the storage device with the Time Machine backup files to your Mac or MacBook.
- Open a Finder window in the folder that previously stored the lost Word file.
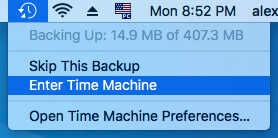
- Launch Time Machine by clicking the Time Machine icon on the menu bar.
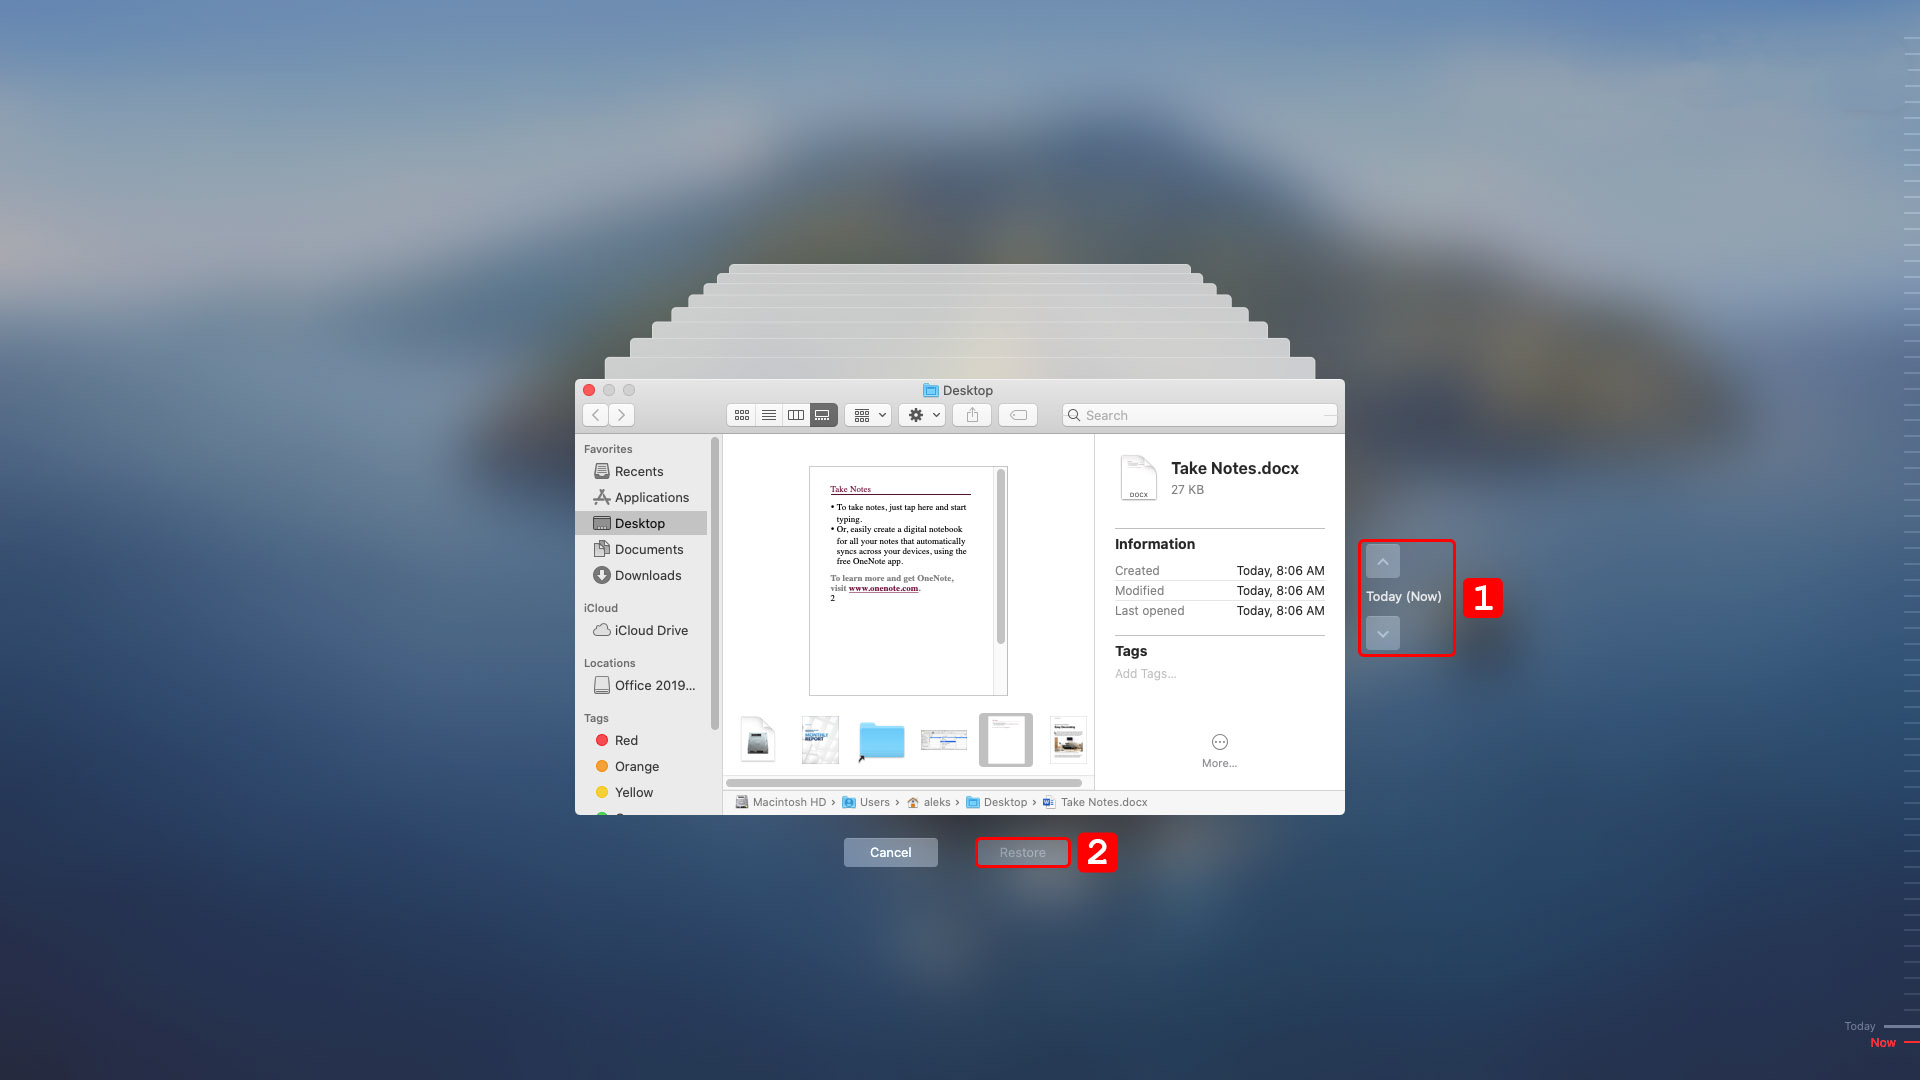
- Search through the snapshots and backups using Time Machine’s timeline and arrows to locate the Word document that you want to recover.
- Select the file you want to retrieve and click the Restore button. Your Word file will be restored to its original location in the chosen folder.
Time Machine is a great free feature of macOS and we recommend that all Mac users create backups of their valuable data with the tool.
Method 5. Recover Lost Word docs on Mac from the Temporary Folder
You can also check your Mac’s temporary folder. It may have the lost Word file you need. The following steps enable you to search the temporary folder.
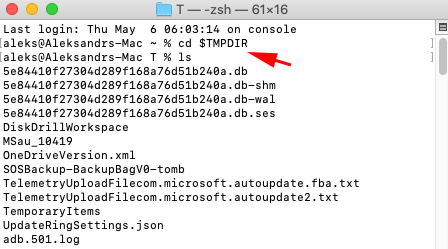
- Open Terminal.
- Type: cd $TMPDIR.
- Type: ls to display the files in the directory. Look in the TemporaryItems subfolder.
- Search for your files. If you find a Word doc you want to keep, copy it to a new storage location.
Method 6. Restore a previous version of a Microsoft 365 Word file from OneDrive
The last method we will discuss involves attempting to recover a previous version of a Microsoft 365 Word file from OneDrive. For this technique to work, you need to be saving your Word files to OneDrive. Use the following steps to perform the recovery from OneDrive.
- Open the most recent version of the Word file you want to recover.
- In Word go to File > Browse Version History.
- A panel will be displayed that shows all previously saved versions of the file.
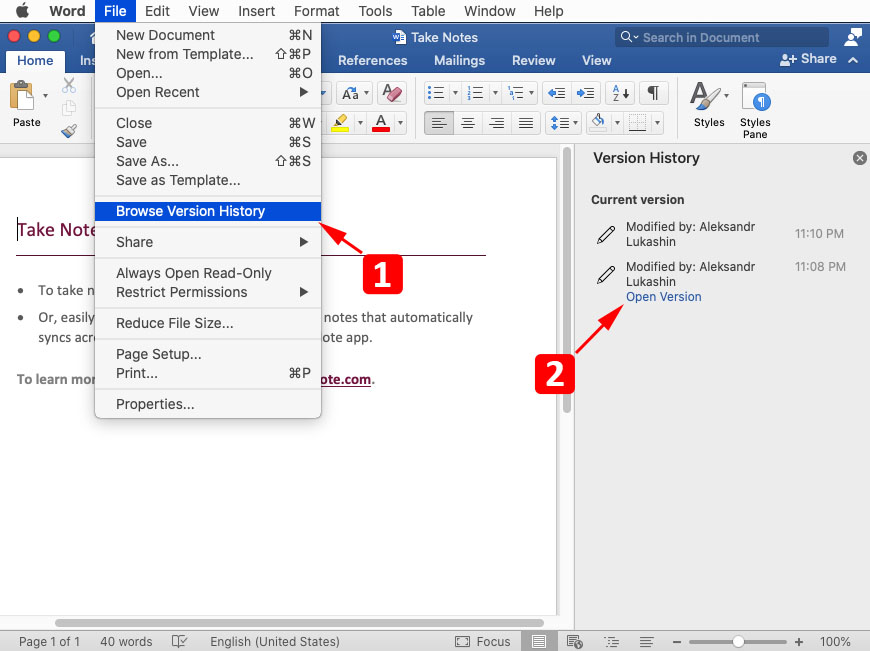
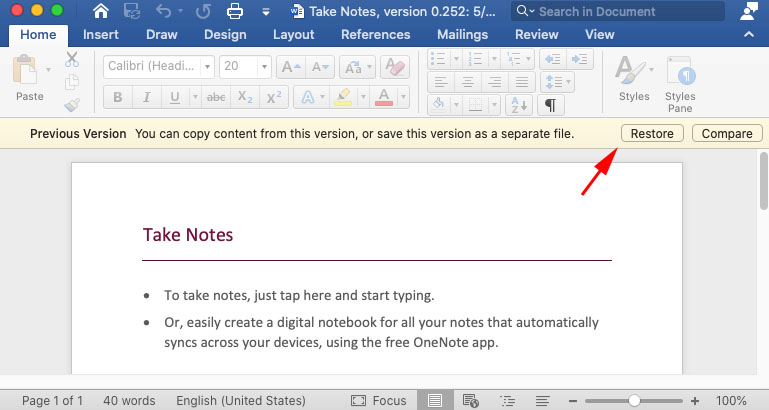
- Select the version you want to recover and choose Restore to complete the process.
Avoid Losing Important Word Files in the Future
There are several steps you can take to avoid losing any of your important Word files in the future. If you value your data, you probably should consider implementing some of these precautionary measures against data loss.
- 💽 Backups are an essential solution for protecting your valuable data. You should get in the habit of regularly backing up your machine. In cases where you are working on very important files, it’s worth your time to take an extra backup when you’re finished working. Those few minutes spent now can save a lot of time down the road.
- 🗑️ Check the Trash before manually emptying it to ensure that no important files have inadvertently been placed there. Again, a few seconds of investigative work can save you a lot of time recovering a file that could have easily been rescued from the Trash.
- 🔄 Turn on AutoRecovery. This Microsoft document explains the process. It’s a great way to automatically protect your Word files.
- 🛡️ Run Antivirus software – Malware and virus infections can lead to data loss. Run a reputable antivirus tool and make sure it’s always kept updated.
- ✅ Use Guaranteed Recovery – This free tool is included with the trial version of Disk Drill. You can configure the tool to protect your Word files and other valuable data. The tool acts as a supplemental Trash Bin and offers a one-click data recovery method.
FAQ
Can you recover deleted Word documents on Mac?
Yes, you can recover deleted Word documents on Mac using data recovery software:
- Download and install Disk Drill on your Mac.
- Scan the storage device for deleted Word files.
- Select the Word files you wish to recover.
- Сhose a save recovery destination.
- Perform the recovery to complete the process.
Where do I find AutoRecover files in Word for Mac?
The AutoRecover files for Word for Mac are located in this folder:
/Users/<username>/Library/Containers/com.Microsoft/Data/Library/Preferences/AutoRecovery
Is it possible to recover an overwritten Word document on a Mac?
Yes, it is under certain circumstances. You might be able to recover a previous version of the file from within Word itself, but the best method is to recover from a backup. We outline recovery using the macOS Time Machine backup and recovery app, but any backup tool will enable you to recover an overwritten file if that item has been previously backed up.
Conclusion
We have demonstrated several methods of recovering a deleted Word document on Mac. Based on your situation, one of them should work for you. Some methods, like using the Trash or a backup require certain circumstances to be viable. The file may have already left the Trash or you may not have a backup.
Data recovery software is the most effective way of getting your lost Word, or any other type of file, back on your Mac. A reliable tool like Disk Drill can be a lifesaver when an important Word file goes missing. Good luck recovering your lost data!
This article was written by Robert Agar, a Staff Writer at Handy Recovery Advisor. It was also verified for technical accuracy by Andrey Vasilyev, our editorial advisor.
Curious about our content creation process? Take a look at our Editor Guidelines.