
Storing files and folders on your Desktop is super easy. For some, the Desktop acts as a home screen that can be used to access everything on the computer. It can store photos, videos, and shortcuts to other parts of the computer for easier access.
But what happens if the data on your Desktop is deleted? Or worse, what are you supposed to do if the entire Desktop folder itself is deleted? Deletion can happen easily at the slip of a finger.
Luckily, there are solutions. We’re going to show you different methods of recovering deleted files from the Desktop folder in Windows 10. Please note that most of these methods also apply to Windows 11, with only slight differences in the steps.
Note: To make sure your data can be recovered safely, refrain from writing anything to your system disk until you’ve finished reading this article. If deleted data is overwritten, it can become impossible to recover.
Quick Navigation
Problem |
Solution |
I have recently deleted an important file from my desktop |
|
I have permanently deleted some files from the desktop and they are not in the Recycle bin |
|
I have accidentally deleted the desktop folder |
|
I can find the file I saved to the desktop |
|
I want to restore an earlier version of my desktop folder |
|
My desktop icons disappeared |
How to Recover Deleted Desktop Files & a Deleted Desktop Folder
There are different ways you can go about recovering lost or deleted Desktop files and folders. Each method includes easy-to-follow instructions, and if one doesn’t work for you, move onto the next.
Method 1: Restore Deleted Desktop Files from the Recycle Bin
When files are deleted, they first go to the Recycle Bin before becoming permanently deleted. This gives you a chance to restore it before it’s permanently erased from the drive.
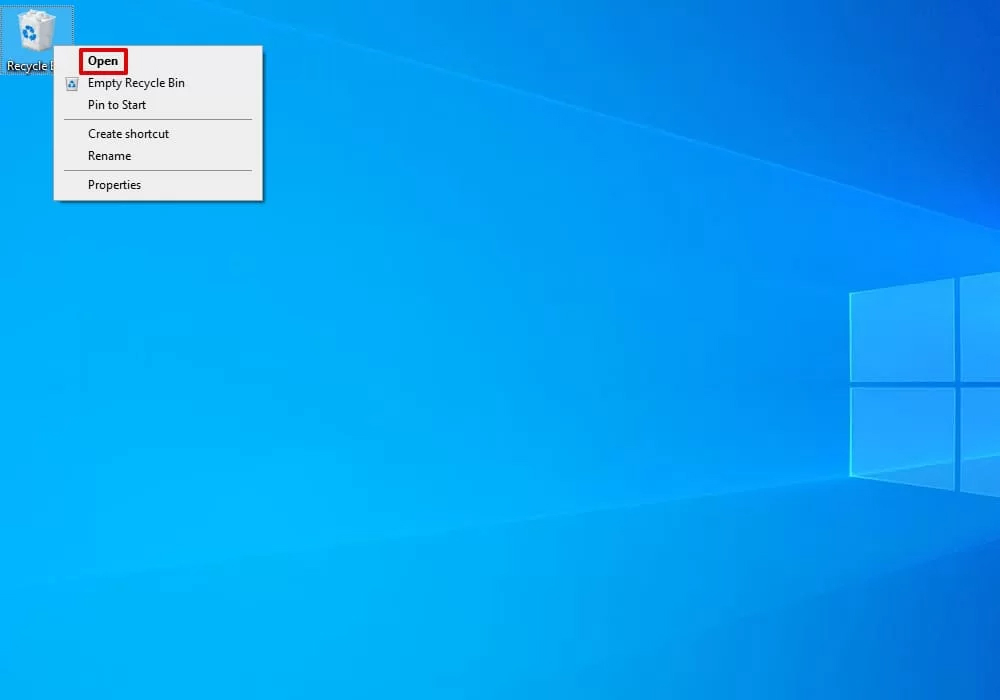
- On your Desktop, right-click the Recycle Bin and click Open.
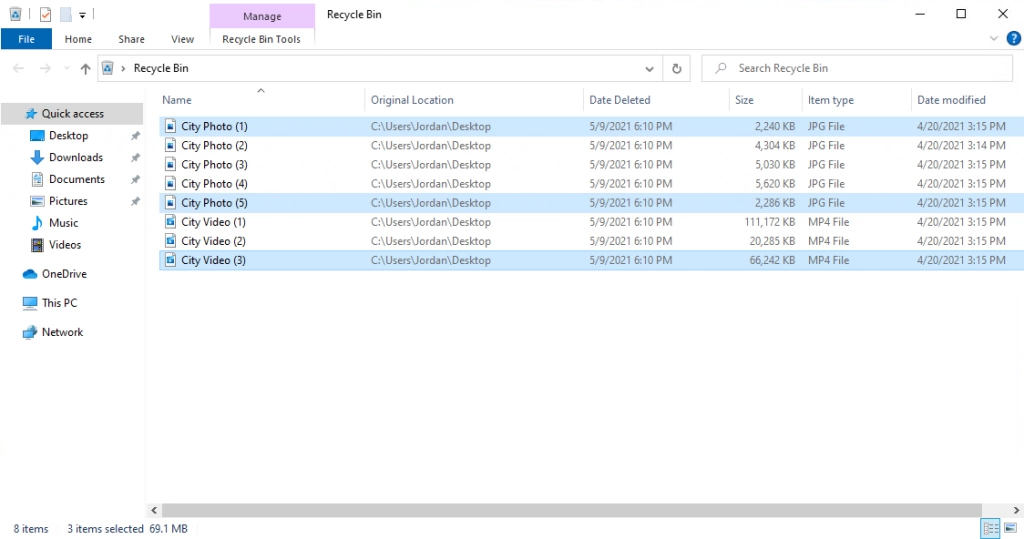
- Select the file you want to restore. If there are multiple, you can hold CTRL and click on each file you want to restore.
- Click on Recycle Bin Tools at the top of the window, then click Restore the selected items.
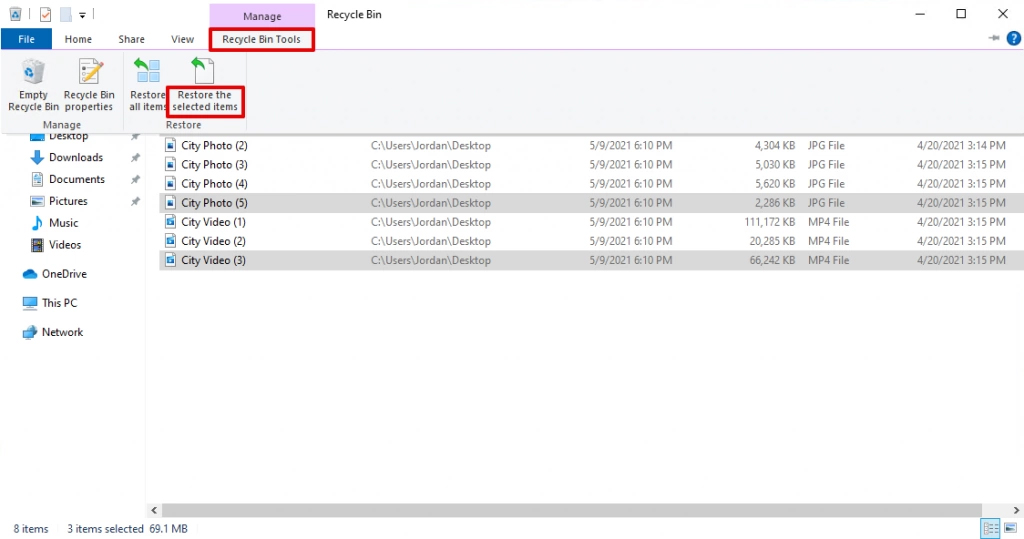
When the files are restored, they will return to their original location. In this instance, it will be your Desktop.
Your Recycle Bin will only hold files that are under a maximum size. This maximum size can be changed, and it depends on the size of your drive. To check yours, right-click on the Recycle Bin and check that your maximum size is set to. Anything over this size will be automatically permanently deleted instead of going to the Recycle Bin.
Method 2: Recover Accidentally Deleted Desktop Files or the Desktop Folder Using Recovery Software
If your files can’t be restored from the Recycle Bin, the next step to recover deleted files from the desktop is to attempt recovery through the use of data recovery software. For this scenario, we’re using Disk Drill since it’s powerful, easy to use, and has a proven recovery success rate. Additionally, you can download the free version that allows up to 500MB of recovery before you need to pay anything.
-
Download the Tool:
Download and install Disk Drill. To reduce the risk of overwriting data, especially since the Desktop folder is usually on the system drive, try not to install it on the system disk or partition. After installation, open Disk Drill

-
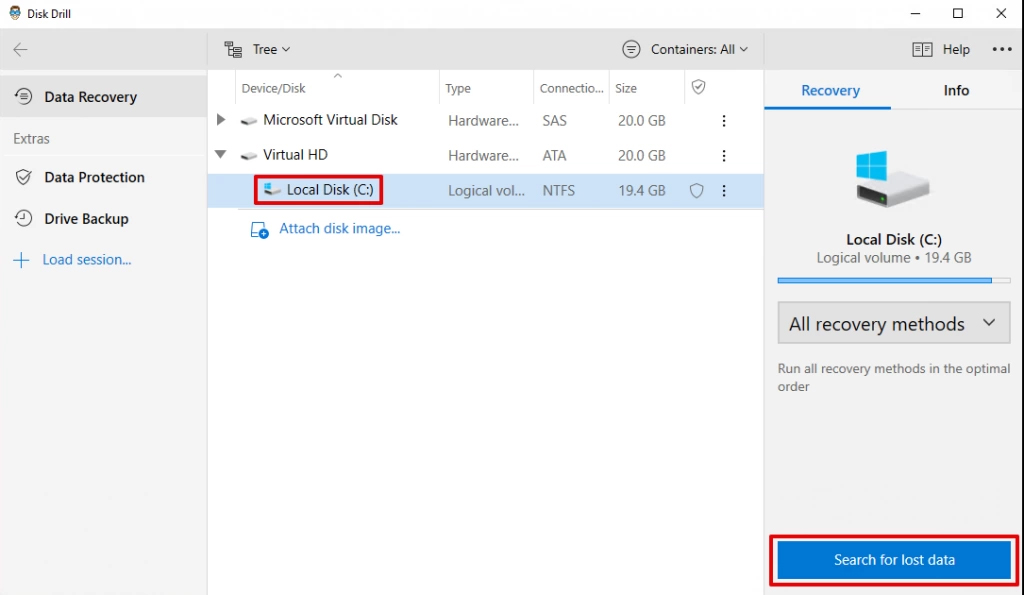
Select the Drive:
Select the drive (or volume) that stored your Desktop files and click Search for lost data. Disk Drill will begin scanning the drive for lost or recoverable data.
-
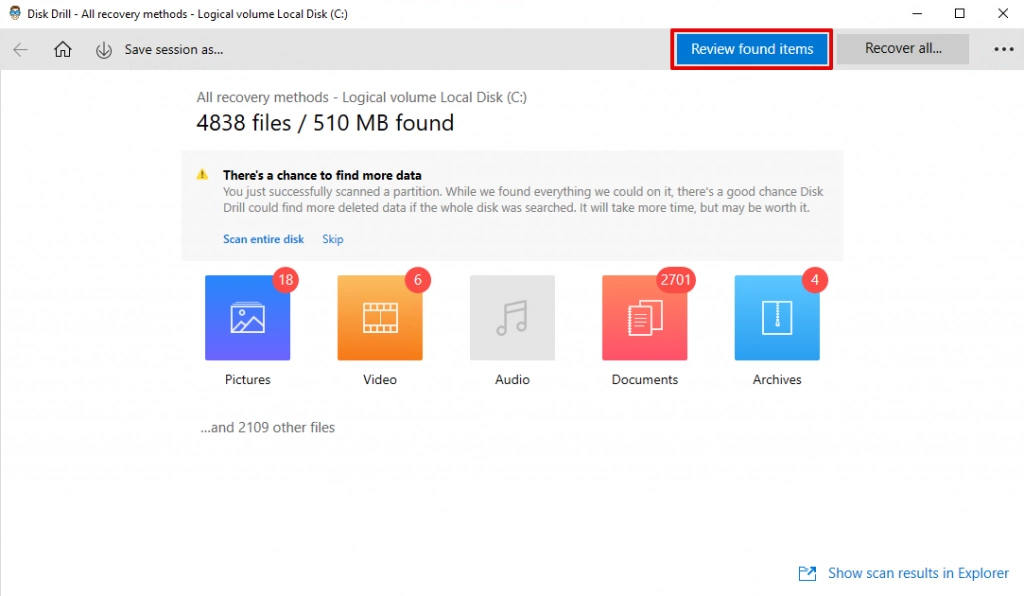
Review Found Items:
When the scan has finished, click Review found items.
-
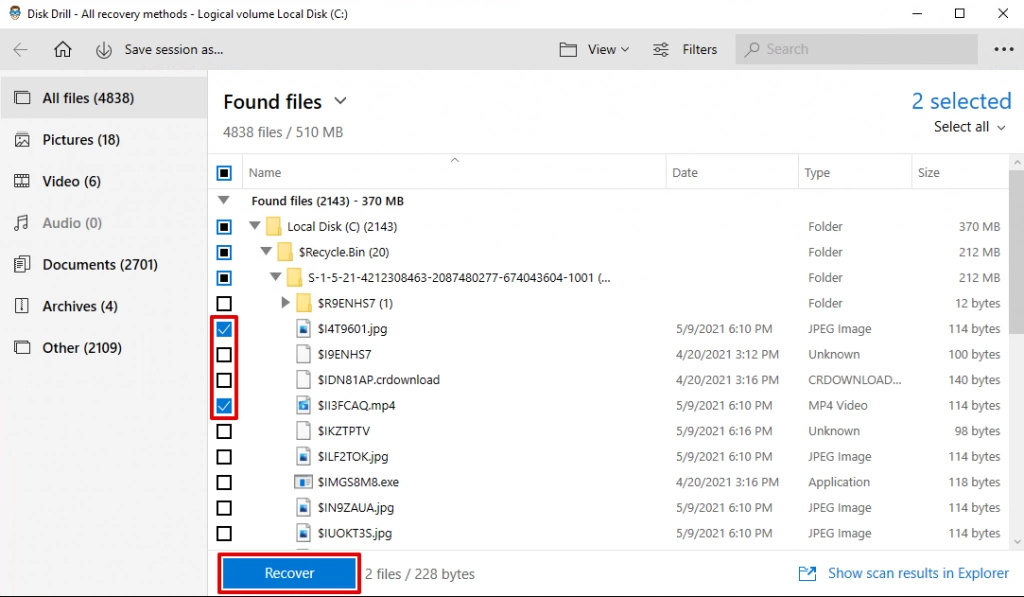
Select the Files:
Select the files you want to recover by checking their checkboxes. When ready, click Recover.
-
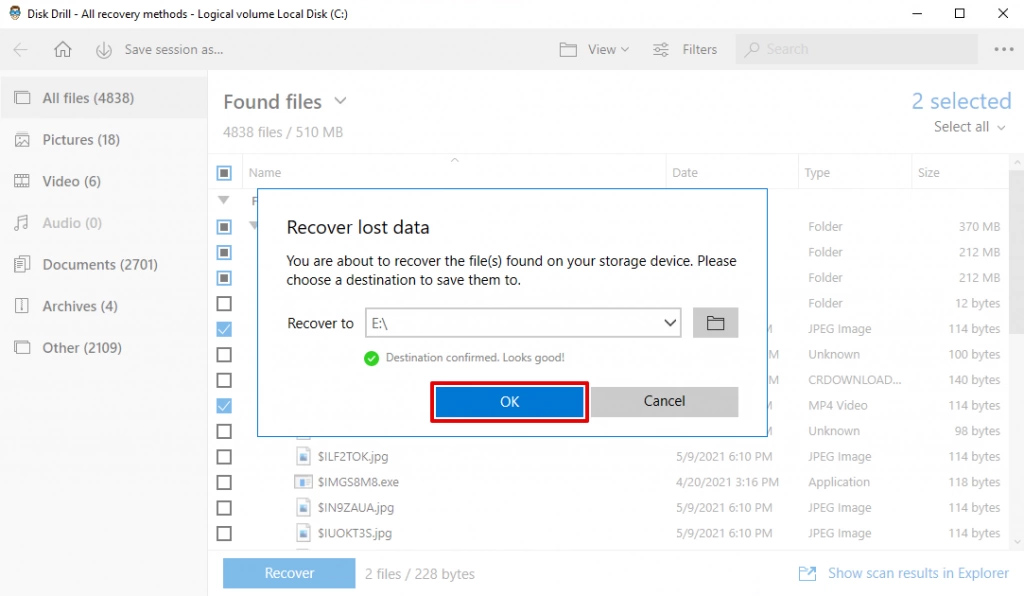
Specify a Location:
Specify a location that the recovered data can be saved to. It’s a good idea to recover to a different drive to avoid any chances of data being overwritten. Click OK.
Were you aware that we conducted two separate reviews of Disk Drill? In our initial review, we assessed Disk Drill’s features and recovery capabilities. Following that, our second review centered on evaluating its safety aspects.
Method 3: Restore Your Desktop to a Previous Version
Windows includes a feature that allows you to restore files and folders to previous versions through the use of File History. However, this is only possible if File History was enabled before the files or folders were lost.
Follow these steps to restore from a previous Desktop version if there is one available:
- Go to C:\Users\<Your Name>. Right-click Desktop and select Restore previous versions.
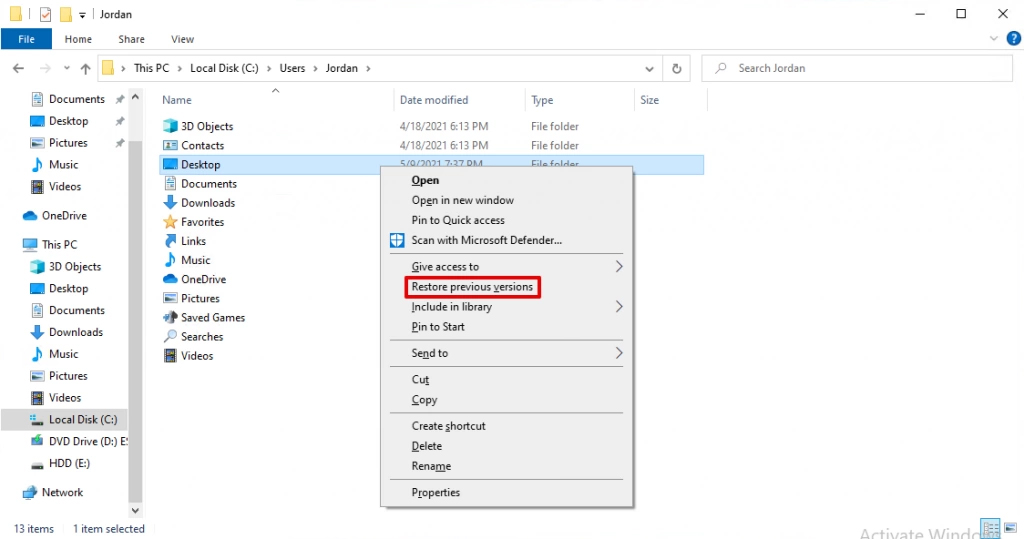
- Select a folder version that was saved prior to the loss of data. Click Restore.
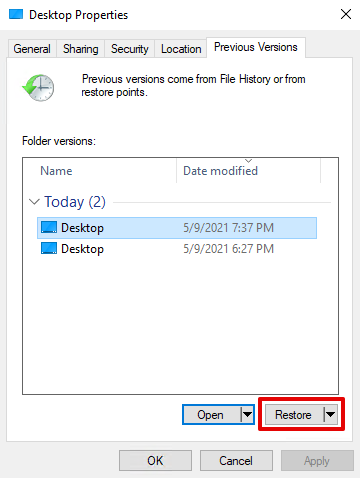
After you restore, the lost contents will be restored to the Desktop.
Method 4: Check and Restore from a Backup
Backups are a sure-fire way of recovering your files. However, you need to have created a backup before you can make use of it. If you’ve configured your machine to regularly back up its contents, you can restore your lost data from a backup.
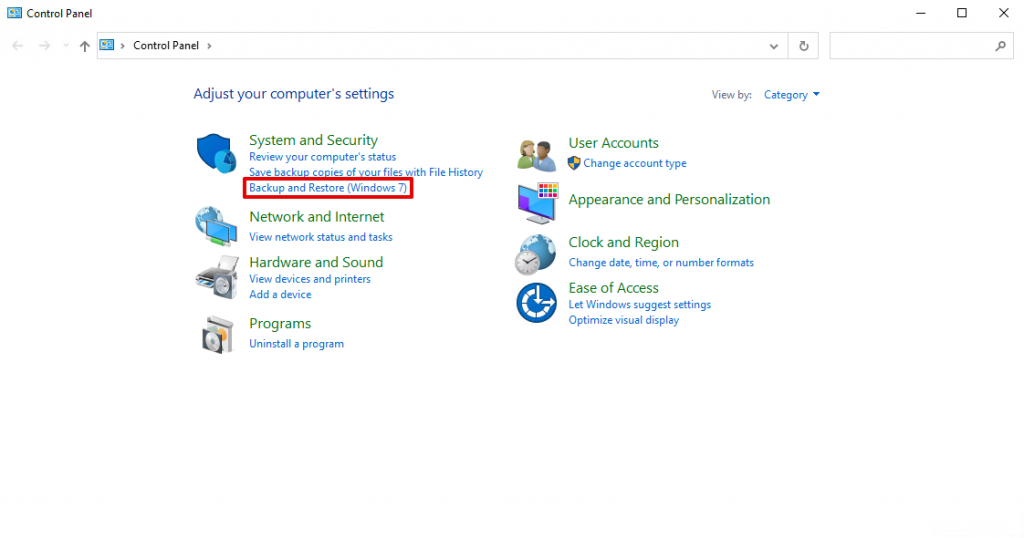
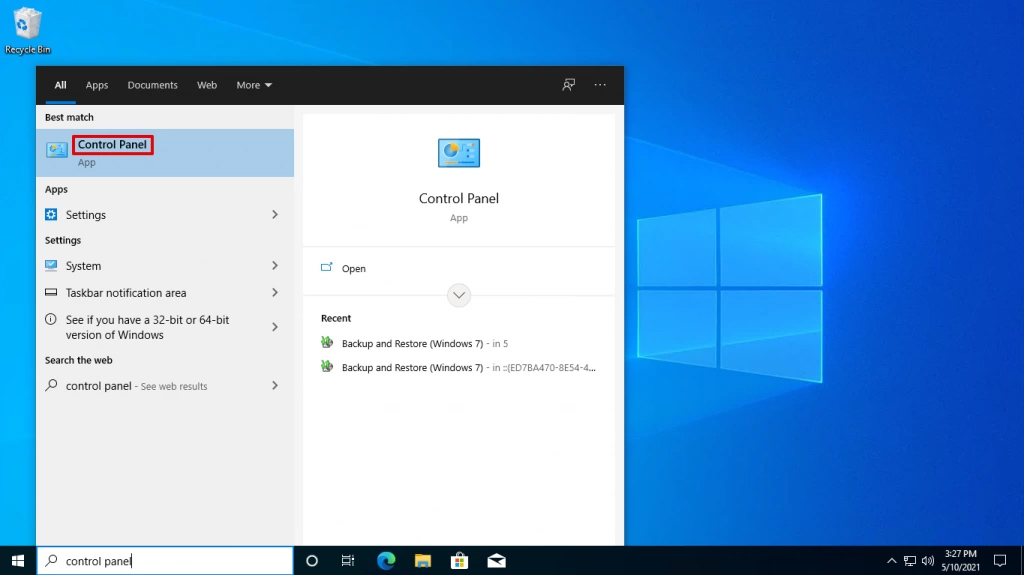
- Click Start, and search for the Control Panel. Click it.

- Below System and Security, click Backup and Restore (Windows 7).
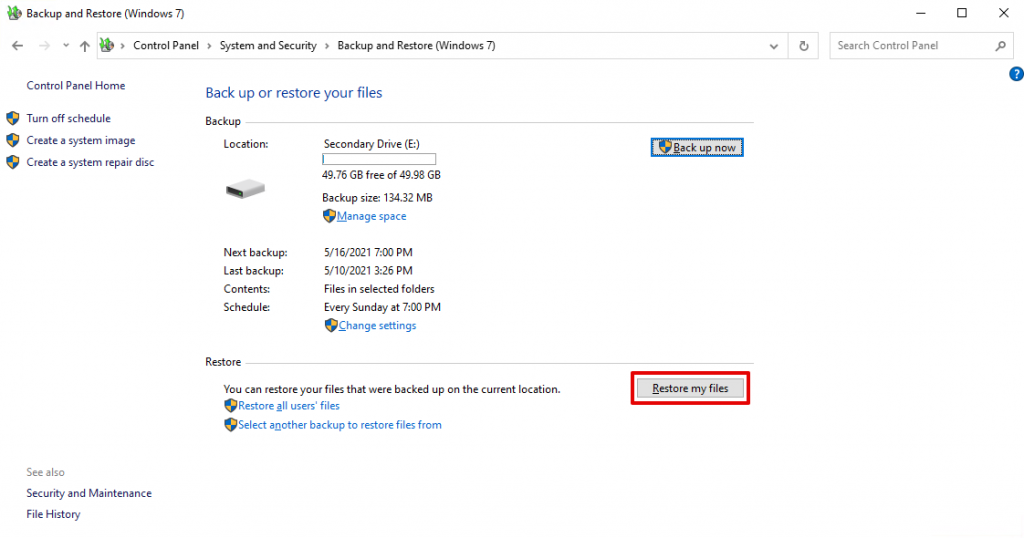
- Click Restore my files.
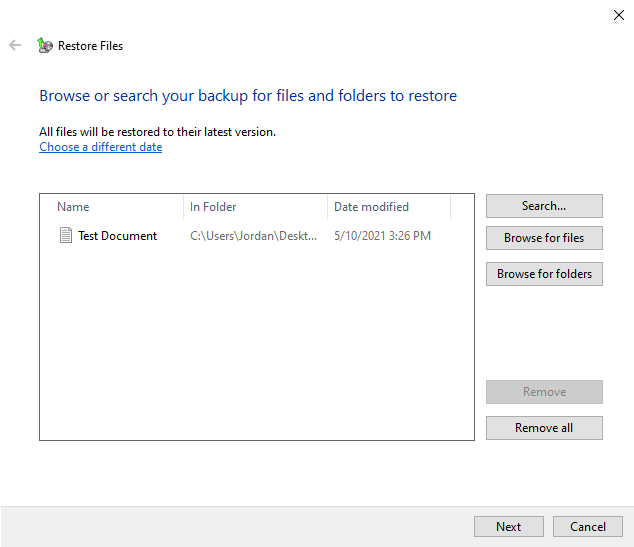
- Now you can either search for files using their filename by click Search, or you can manually search for files by clicking Browse for files. Either way, find and select the files you want to restore from the backup. Click Next when finished.
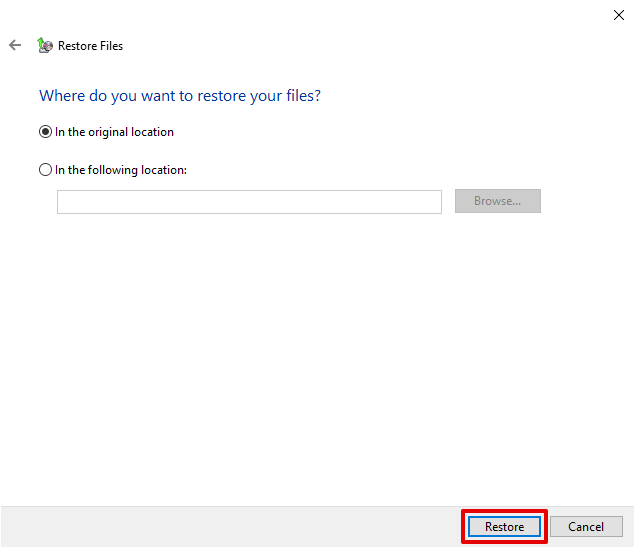
- Select whether you want to restore the files to their original location or a different one. Click Restore when ready.
Method 5: Search Your Computer for Lost Data
In some cases, your data might just be in a different location on your computer instead of deleted. Just like deletion, accidentally moving files to another folder is too easy and can happen by mistake.
With File Explorer, we can scan our entire drive for files based on their filename. By scanning the whole drive, we don’t have to go through the trouble of checking each and every folder ourselves.
- Open File Explorer by clicking on the icon in your taskbar or searching in the Start menu.

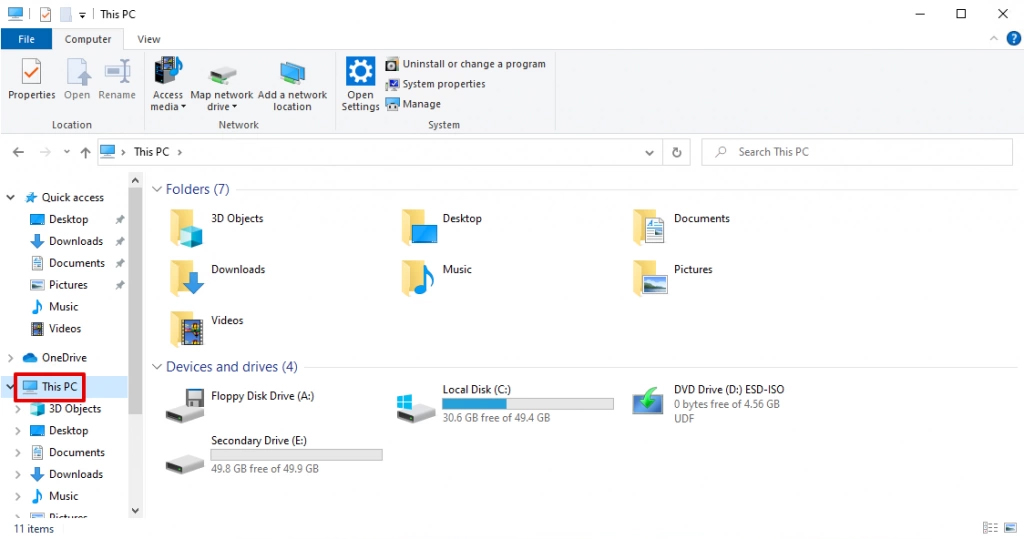
- Click on This PC in the left panel.
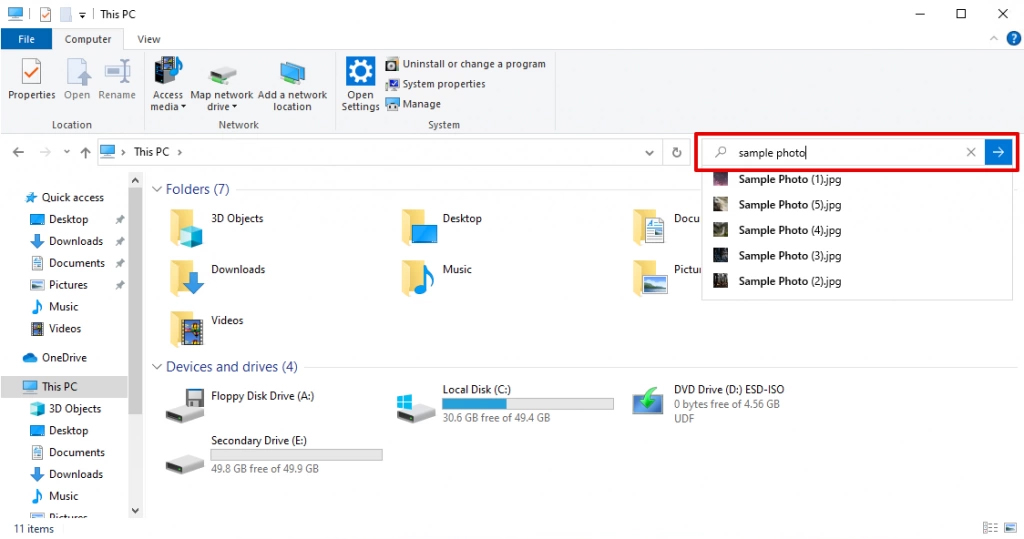
- In the search box at the top right, type the filename you’re searching for. Press Enter. Windows will begin searching your computer for the file. 👀
If you want to reduce search times, try going to a parent folder that you think the files might be in before searching.
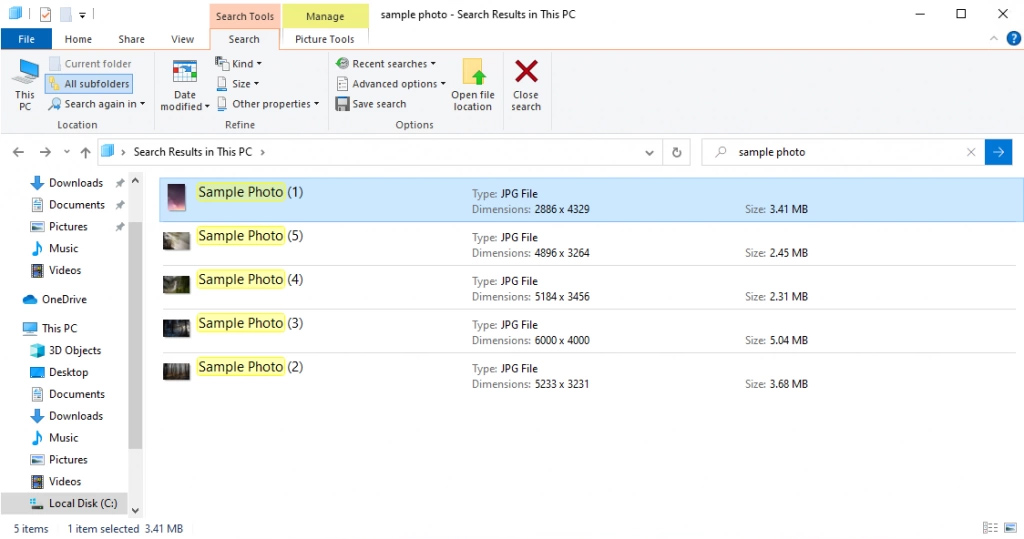
- Once you find your files, you can either select them and drag them to a new location, or right-click them and click Open file location to see where they’re currently located.
Method 6: Restore the Default Location of Your Personal Folders
If you’ve ever changed the default location for your personal folders, you may have trouble finding where exactly your data is being stored. This can easily be fixed by restoring the default location, which is usually the C: drive for most computers.
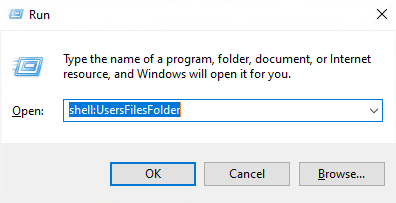
- Press CTRL + R to open Run. Type shell:UsersFilesFolder and press OK.
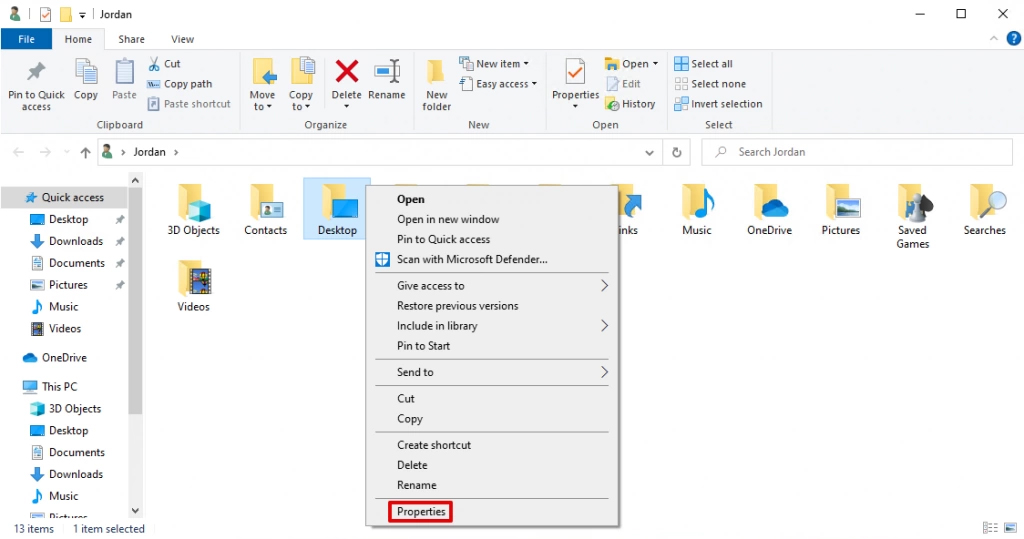
- Right-click the personal folder you’d like to reset the location for and click Properties. In this instance, we’ll choose Desktop.
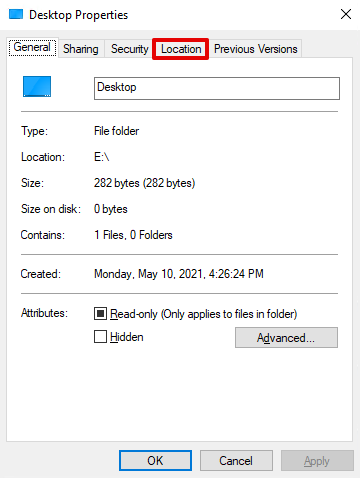
- Click the Location tab.
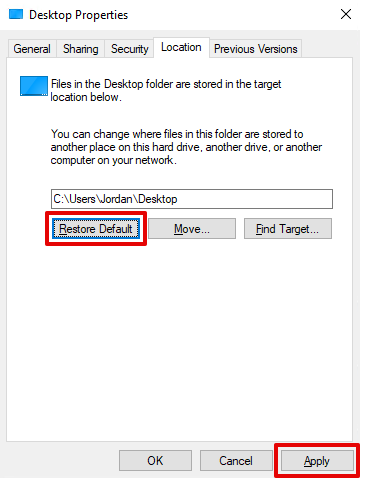
- Click Restore Default then Apply.
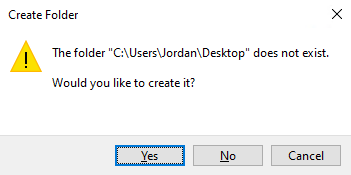
- If you’re prompted to create a new folder, click Yes.
- On the confirmation screen, click Yes to confirm you want to move all files from the old location to the new one.
Protect Your Data by Backing It up on Windows 10
To protect yourself from future data loss scenarios, create a scheduled backup so your data is safe and secure at all times. This can give you peace of mind. And, the best part about it is you don’t have to do anything once the backup is set! It will automatically back up the selected folders periodically.
- Click Start, and search for the Control Panel. Click it.
- Below System and Security, click Backup and Restore (Windows 7)

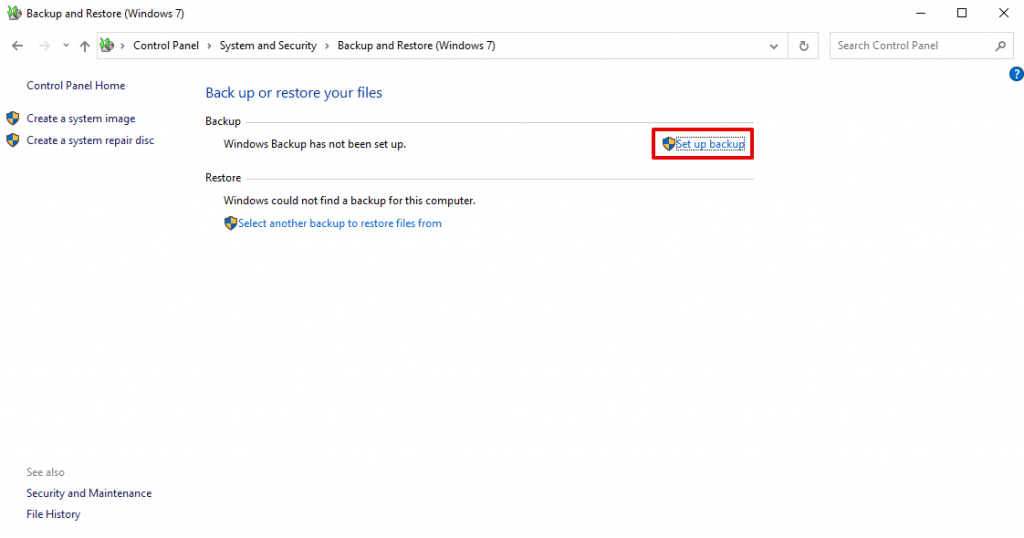
- Click Set up backup.
- Select the drive you want the backup to be saved to. Click Next.

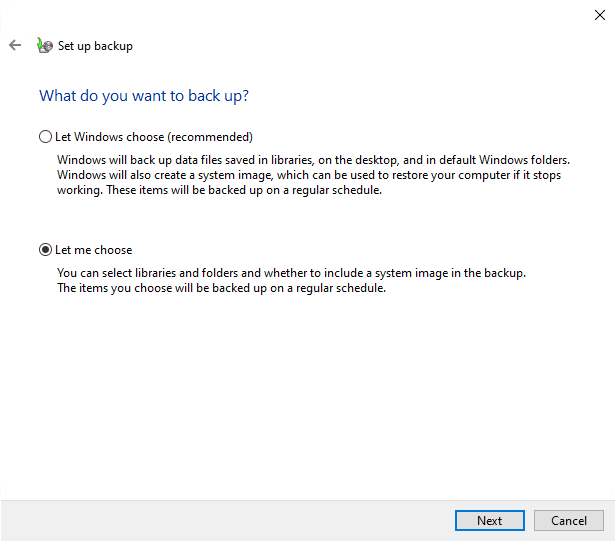
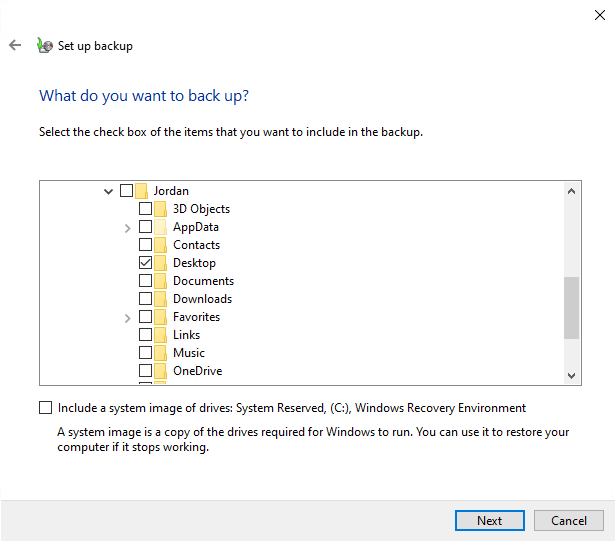
- You can let Windows choose what to back up, or, you can choose yourself. For this example, we’re going with Let me choose. Click Next.
- This screen is where you choose exactly what to back up. Select what you want the backup to include by checking the checkbox next to each item. In this example, I’m only going to back up my Desktop folder. Click Next.
- You can change the backup schedule by clicking Change schedule. When ready, click Save settings and run backup.
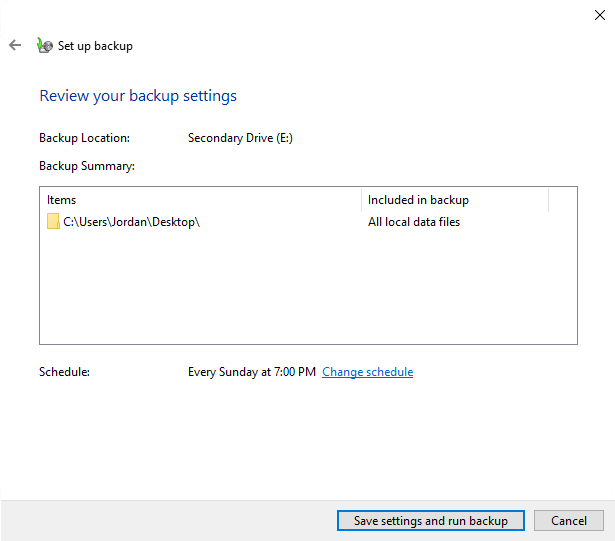
When complete, Windows will automatically create a backup of your system straight away so you have something to restore to.
FAQ
How do I recover a deleted folder on my desktop?
When a folder is deleted, it will go to your Recycle Bin so you still have a chance to recover it.
- On your Desktop, right-click the Recycle Bin and click Open.
- Select the file you want to restore. If there are multiple, you can hold CTRL and click on each file you want to restore.
- Click on Recycle Bin Tools at the top of the window, then click Restore the selected items.
If the folder is not in your recycle bin, you can try using data recovery software to recover it.
How do I restore a deleted desktop folder?
If your Desktop folder is deleted, the first place it would go is your Recycle Bin. You can restore it easily by following these steps:
- Open the Recycle Bin.
- In the Recycle Bin, right-click on the Desktop folder then click Restore.
Once restored, the Desktop folder will return to its original location. To add it back to your Quick access, go to C:\Users\<Your Name>, right-click Desktop then click Pin to Quick access.
Why has my desktop folder disappeared?
Your desktop folder could have disappeared for one of many reasons.
- Virus attack – Some viruses can be designed to delete data from your computer. If you’re the victim of a virus attack, there’s a chance that your Desktop folder was deleted because of that.
- Accidental deletion – Sometimes all it takes is an accidental misclick for your Desktop folder to disappear.
- Hidden folder – Windows hides important files so that users don’t accidentally delete or modify them. Users also have the option of marking files and folders as hidden. Something may have caused the Desktop folder to become hidden.
How do I recover lost desktop icons?
If you’ve lost default Desktop icons like the Recycle Bin, you can easily restore them using the below steps:
- Right-click the Start button and click Settings.
- Click Personalization.
- Click Themes.
- Scroll down and click Desktop icon settings.
- Select the Desktop icons you want to display by checking their checkbox. Click Apply when finished, then OK.
Conclusion
If you’ve accidentally deleted some files from your Desktop (or the Desktop folder itself), don’t panic. The solutions presented in this article will help you get yourself back on track in no time.
In the event that you’ve exhausted all of your options and you’re still unable to recover your files, consider using a professional data recovery service. Your data will be left in the hands of an expert who can use commercial-grade equipment to attempt to recover deleted files in the desktop folder.
This article was written by Jordan Jamieson-Mane, a Staff Writer at Handy Recovery Advisor. It was also verified for technical accuracy by Andrey Vasilyev, our editorial advisor.
Curious about our content creation process? Take a look at our Editor Guidelines.