Organizing your files into different partitions of your computer’s storage drives is always a good feeling. But storage drives are very delicate and all it takes is an unexpected shutdown, improper formatting, or even a simple virus, and a part of your storage drive goes corrupt.
The panic starts when you log back into your PC and find out that a big chunk of our files is missing. Lucky for you, no matter how hopeless the situation may seem, there are many ways to recover data from a corrupted Mac partition and fix your drive. Read on to find out.
What Is a Corrupted Partition & What Causes It?
When a partition of your drive becomes unreadable or when it stops accepting any new read or write request, the partition is said to be damaged or corrupt. There are a number of things that can cause partition damage. Most commonly, it’s caused by:
- 👾 Malware or Virus Attack – Perhaps the most prominent danger to your hard drive, a virus attack can compromise your partitions and render them useless. Many viruses are capable of latching onto the sectors of your storage and disk partitioning table. Not only do they corrupt the data, but they can also make the partitions disappear altogether. Thankfully, there are many antivirus software available online that can fix this issue easily.
- 🚫 Disk Conversion Failure – If your MacBook shuts down during any disk modification processes like expanding or shrinking the storage volumes, you will most probably be left with a corrupted partition. This is because, during conversion, your storage drive becomes highly volatile as its system files are rewritten. To avoid such a situation, make sure to plug your macOS device into a reliable power source before starting any expanding or shrinking process.
- 🔍 Bad sectors – Bad sectors can be caused by both physical and logical damage to the drive. It is basically a physical space on your drive that stops reading or writing any data on it and that area becomes inaccessible. In case of logical damage, you can fix the bad sectors by overwriting them with zeros but if the drive has sustained physical damage, you might have to replace it.
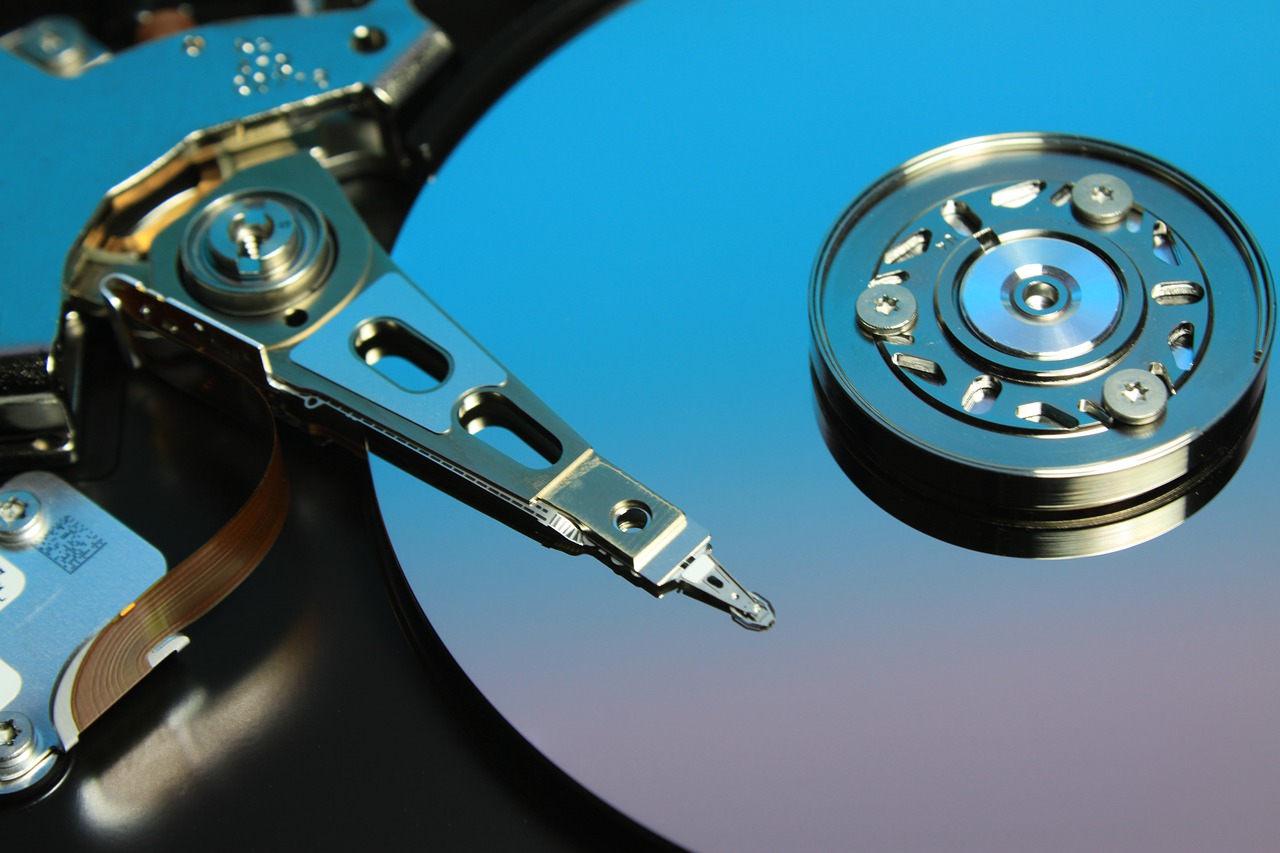
- 💥 Physical damage – A hard drive is composed of several moving parts, including physical disks that read and write information. No matter how solid they may look from the outside, a small drop can damage their internals and affect the drive’s performance. If your drive has encountered significant damage, it can displace the internal moving part which can prevent the drive from reading or writing new information. Even though SSDs have no moving parts, they are also made up of delicate components and a single scratch on the circuitry can cause them to fail. If your drive has sustained serious physical damage, you might have to send it to a good data recovery center.
- ⚠️ Corrupted or damaged partition table – All the information related to the partitions of your drive is stored in a partition table. It includes sensitive information like what type and how many partitions a drive has and also what areas the OS can access. If this partition table is damaged, it can result in corrupting or damaging one or several partitions on your disk as well.
Symptoms of Corrupted/Damaged Partition On a Mac
 Now that we know what are the possible causes behind a damaged partition, let’s take a look at a few telltale signs that you might be dealing with one:
- Sudden Partition Loss – If one of your disk drive partitions suddenly stops showing up one day when you boot into your MacBook, it might have been corrupted during the booting process. To make sure, open Disk Utility and check the number of original volumes it lists. If it seems less than what it should be, your storage is suffering from a partition loss.
- Non Accessible Partition – A corrupted partition may show up as inaccessible when you try to use it. If you’re being flashed with error messages such as “Access is Denied”, “A Disk Read Error Occurred”, etc. on your Mac while you try to access it, your partition table is most probably damaged.
- Boot Failures – When experiencing a malfunction in your boot partition, the operating system may cease to function properly. This could manifest in several ways: a flashing folder with a question mark, a progress bar that doesn’t complete, or the computer might continually restart, preventing successful boot-up.
- Partition Overlap – Partition overlap is another problem that might occur due to a corrupted partition table. In such a case, the overall capacity of all partitions and free space is shown to be more than the actual space on your physical disk. It is caused when two or more partitions overlap with each other and the issue can very well spread among them.
- Disk Utility Errors: You may encounter several issues when using Disk Utility to check your system partition. Disk Utility might report errors it cannot repair, or it could take an exceptionally long time to complete routine checks. Additionally, there can be failed attempts to repair a corrupted partition using the First Aid feature. In some cases, the file system might even be unrecognized.
Is It Possible To Recover a Damaged/Corrupted Partition Without Losing Data On a Mac?
It is an absolute nightmare to lose your data to a damaged partition, but it is possible to recover a corrupted partition on a Mac without losing the data stored in it. However, it depends on the level of damage your drive has sustained.
If the corruption is caused due to physical damage, it might not be easy to recover all the data by yourself, and you might have to send it to a data recovery center. But if your drive is corrupt due to logical damage, there’s a high chance of getting all your important files back and there are a lot of ways to do so.
How To Recover Files From a Corrupted Partition On macOS?
Since operating systems can’t access a corrupt partition, your best resort is to use good partition recovery software. These software can easily access the unreadable partitions and even recover files from RAW external hard drives.
Method 1: Disk Drill
Disk Drill is undoubtedly the best partition recovery software out there and is popular for its easy-to-use interface. It is packed with features for an in-depth analysis of your drive, and robust functionality that allows you to recover corrupted partitions on a Mac. Follow the steps mentioned below to get started:
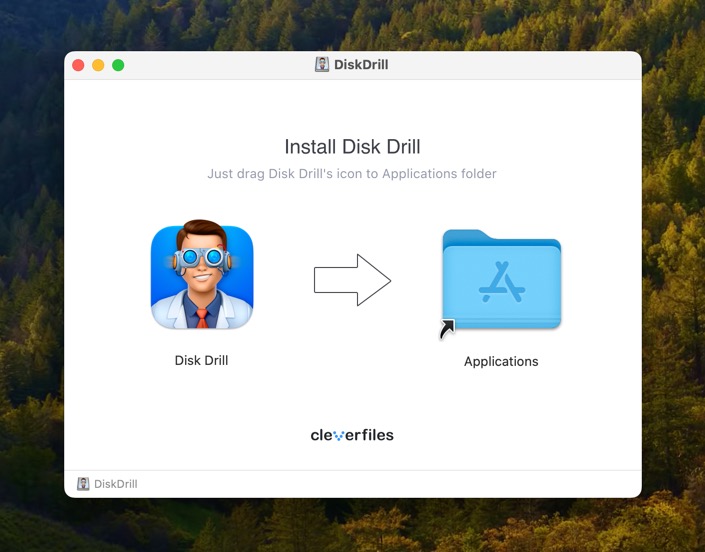
- Download Disk Drill for Mac from the official website. Launch the installer and drag the Disk Drill icon into the Applications folder.
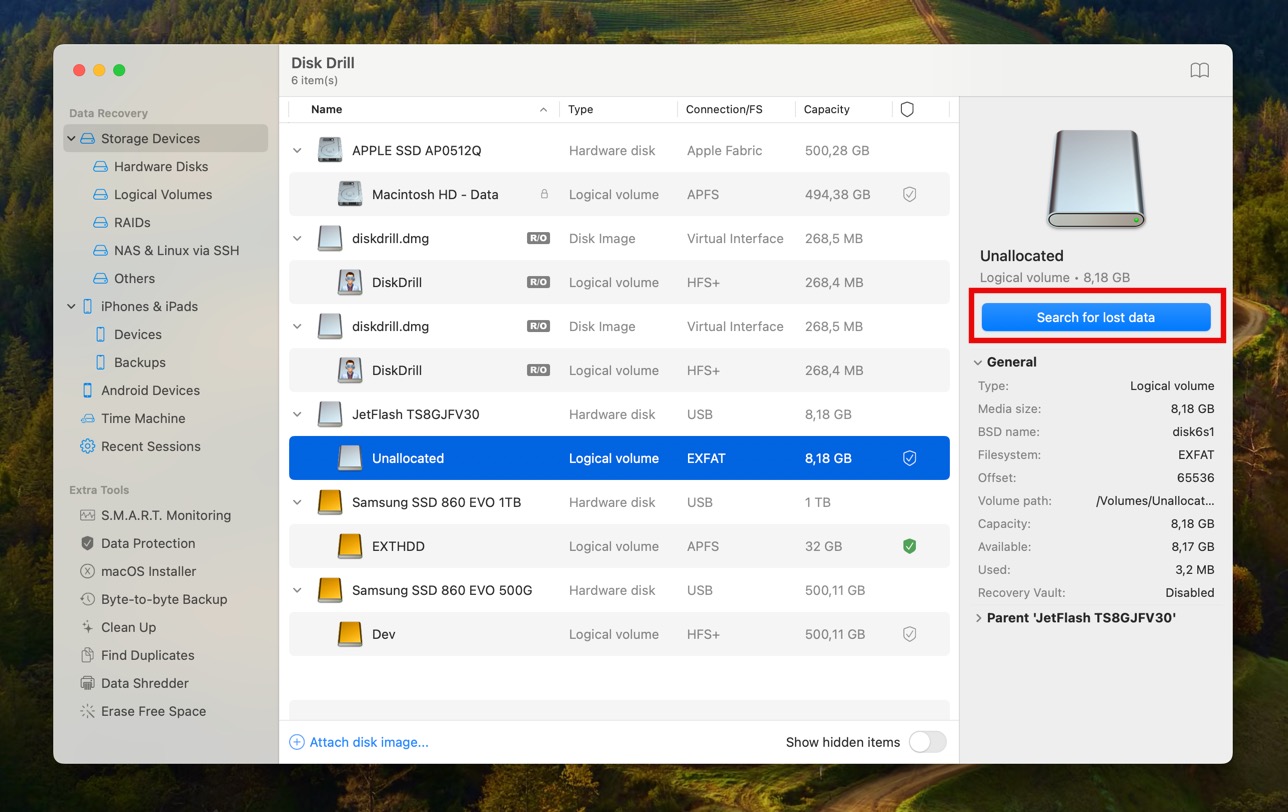
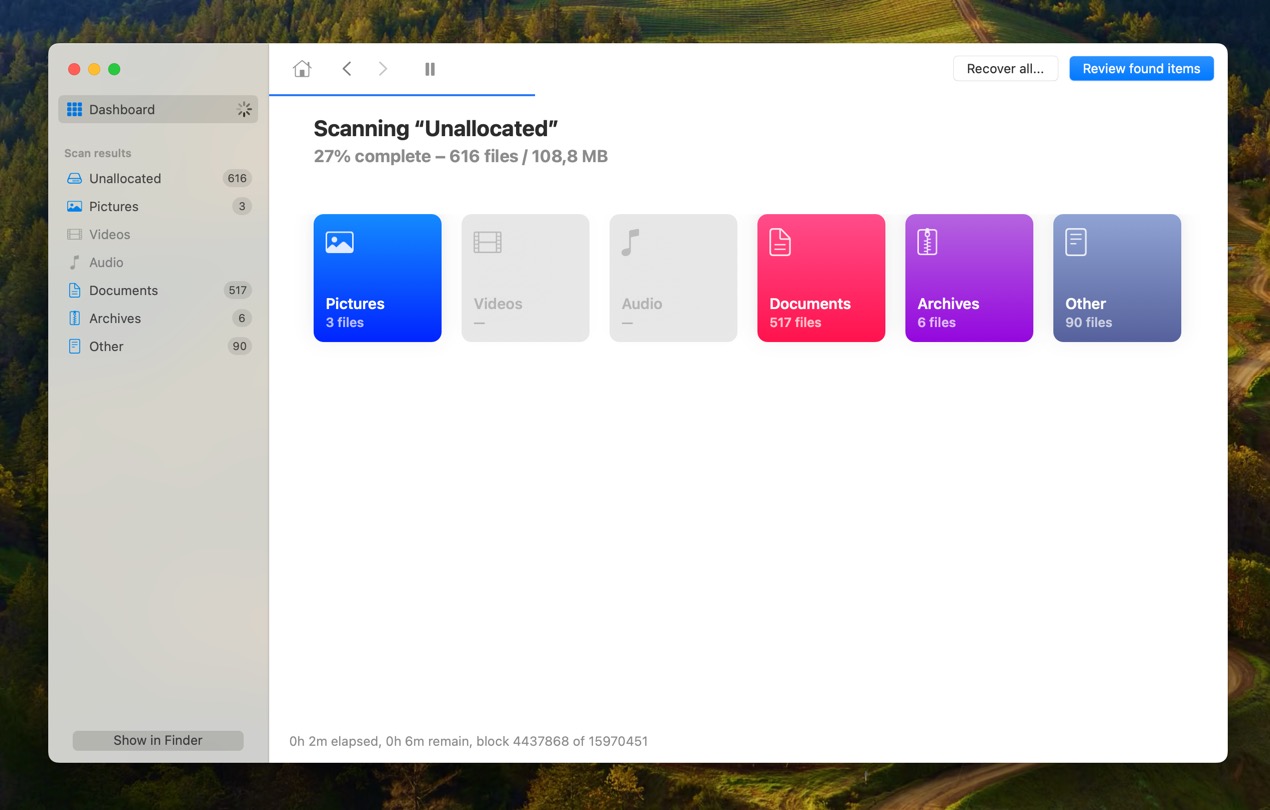
- Launch Disk Drill and select the partition you want to recover. Then hit Search For Lost Data. This process will run a scan of the corrupted partition and retrieve any lost files.
- View the recovery analytics by clicking on Review Found Items. You can review recoverable files with scanning still going on.
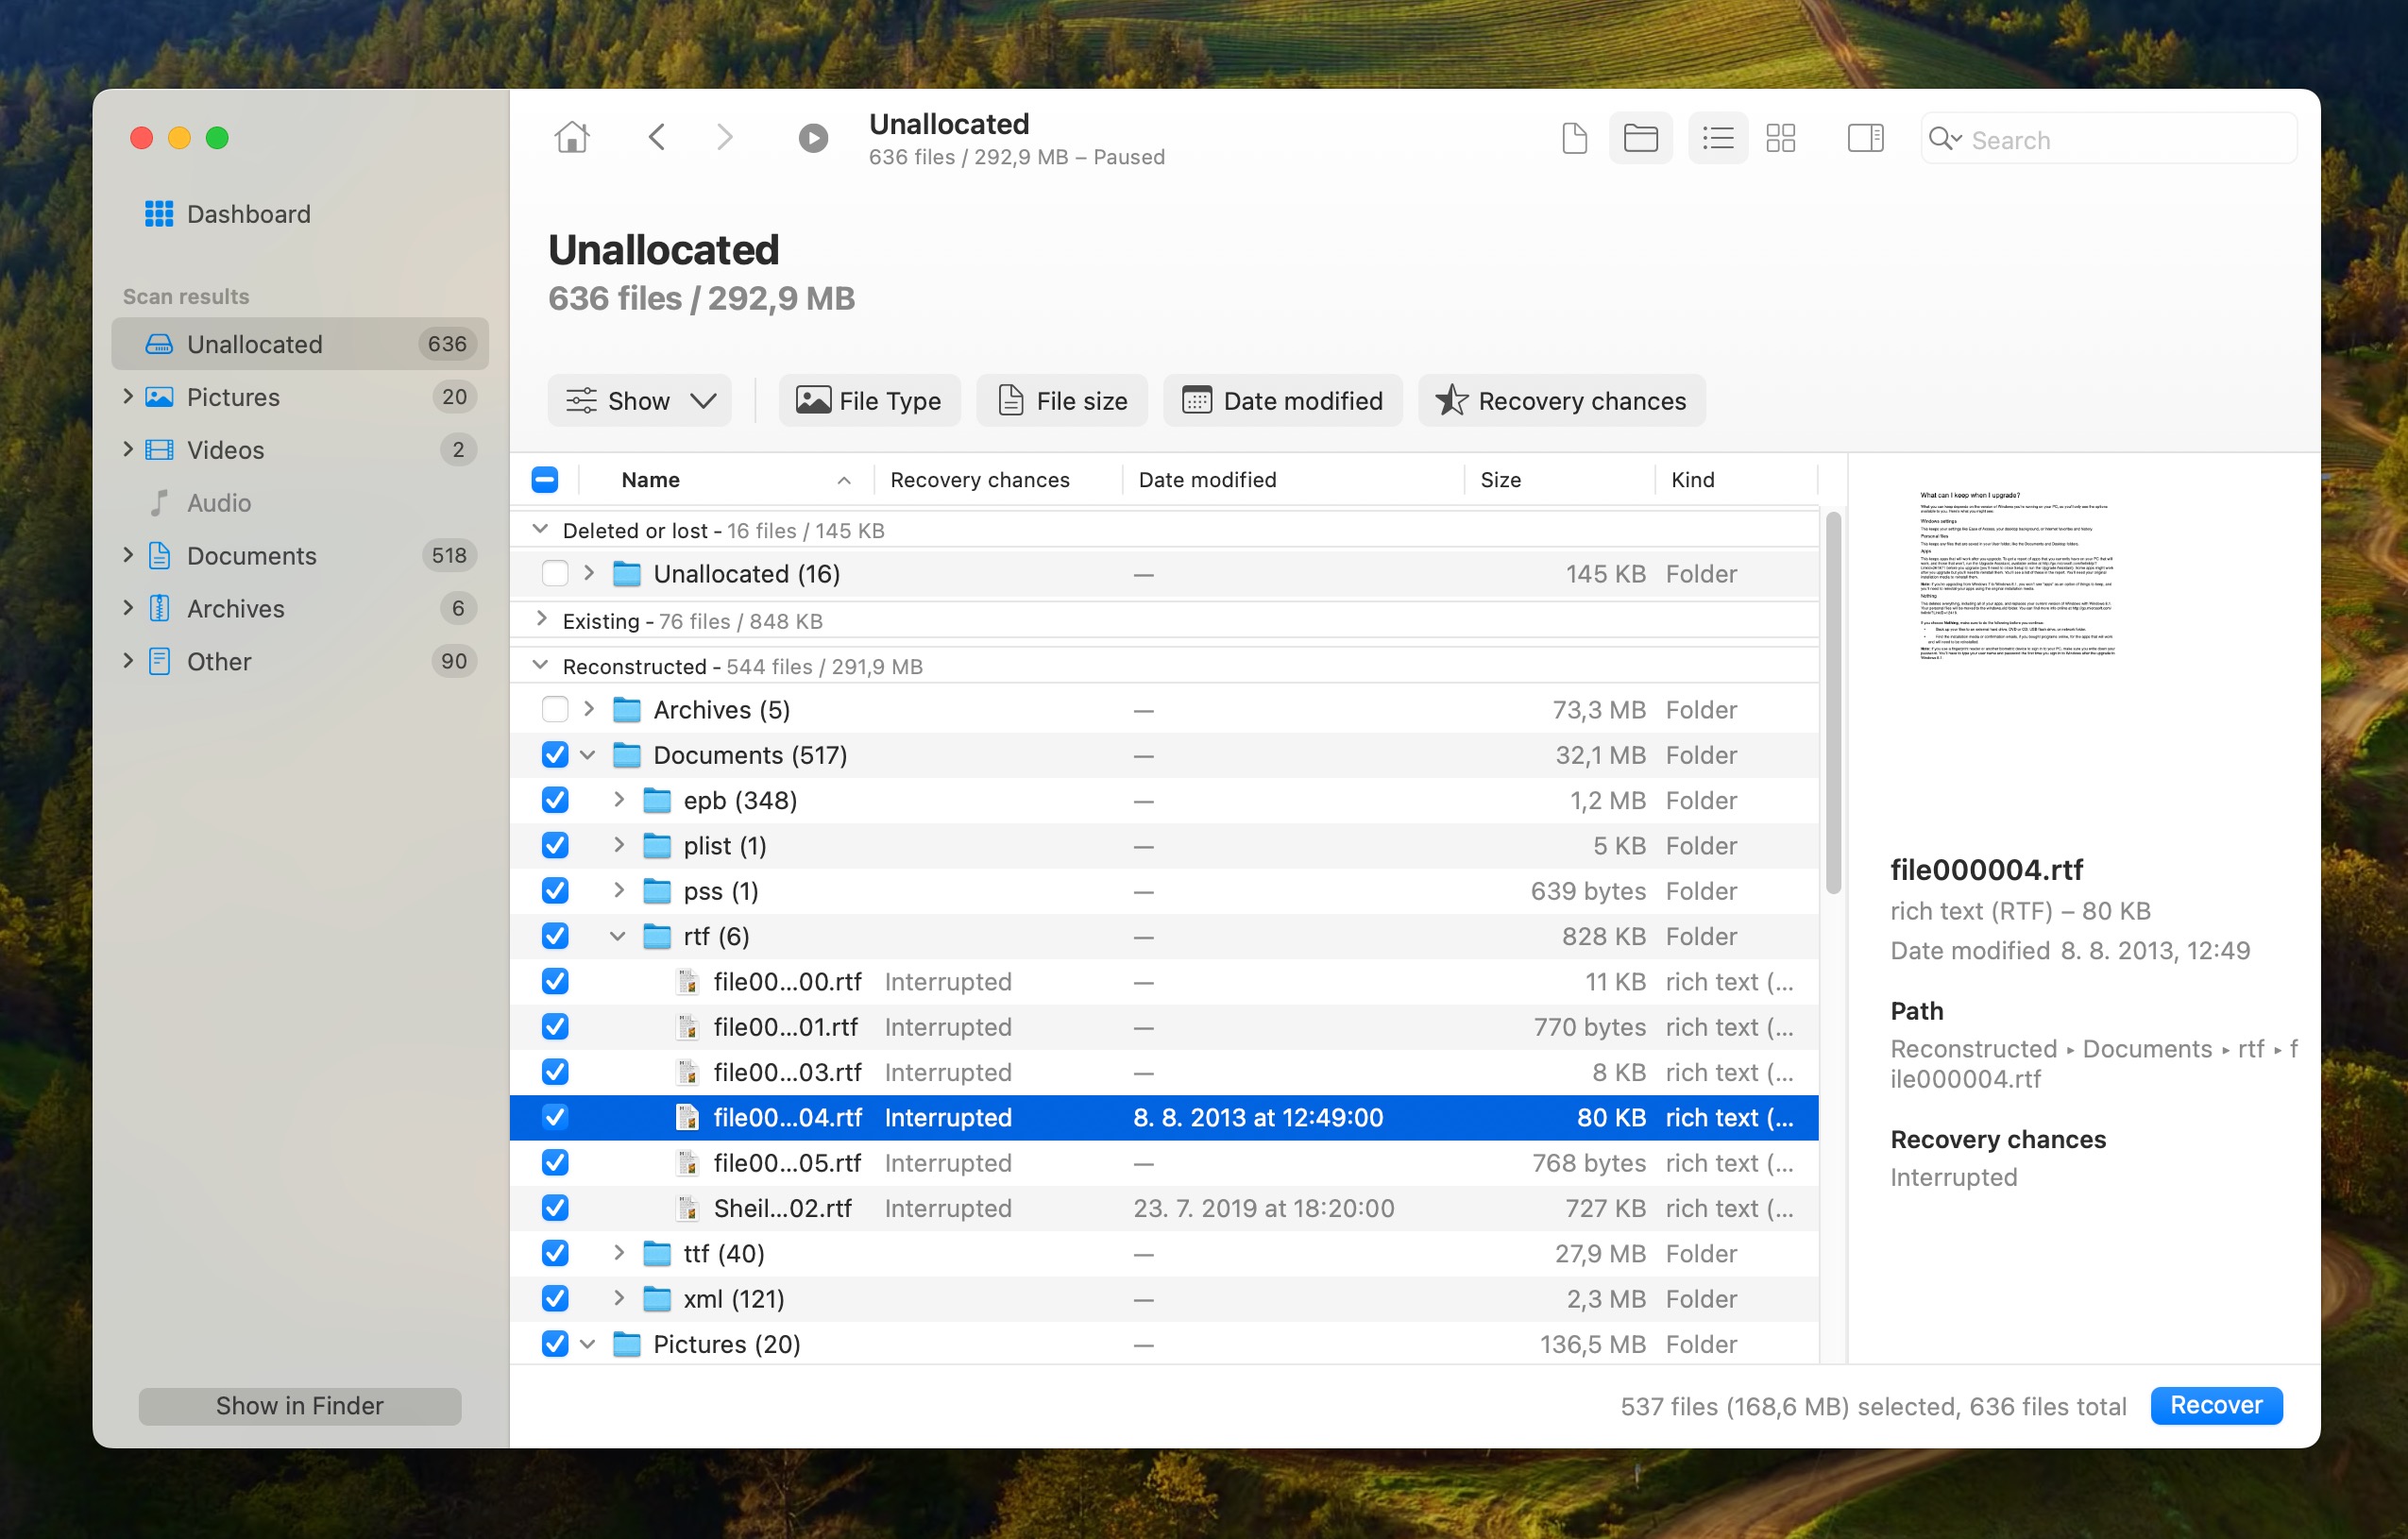
- Now select the files that you want to recover from the corrupted partition and click on the Recover button. You can narrow down the scan results by enabling the filters in the left pane or above the list of recoverable files.
- Browse and select a landing destination for your files and select OK. Once the recovery process is complete, you will be notified by a dialogue box.
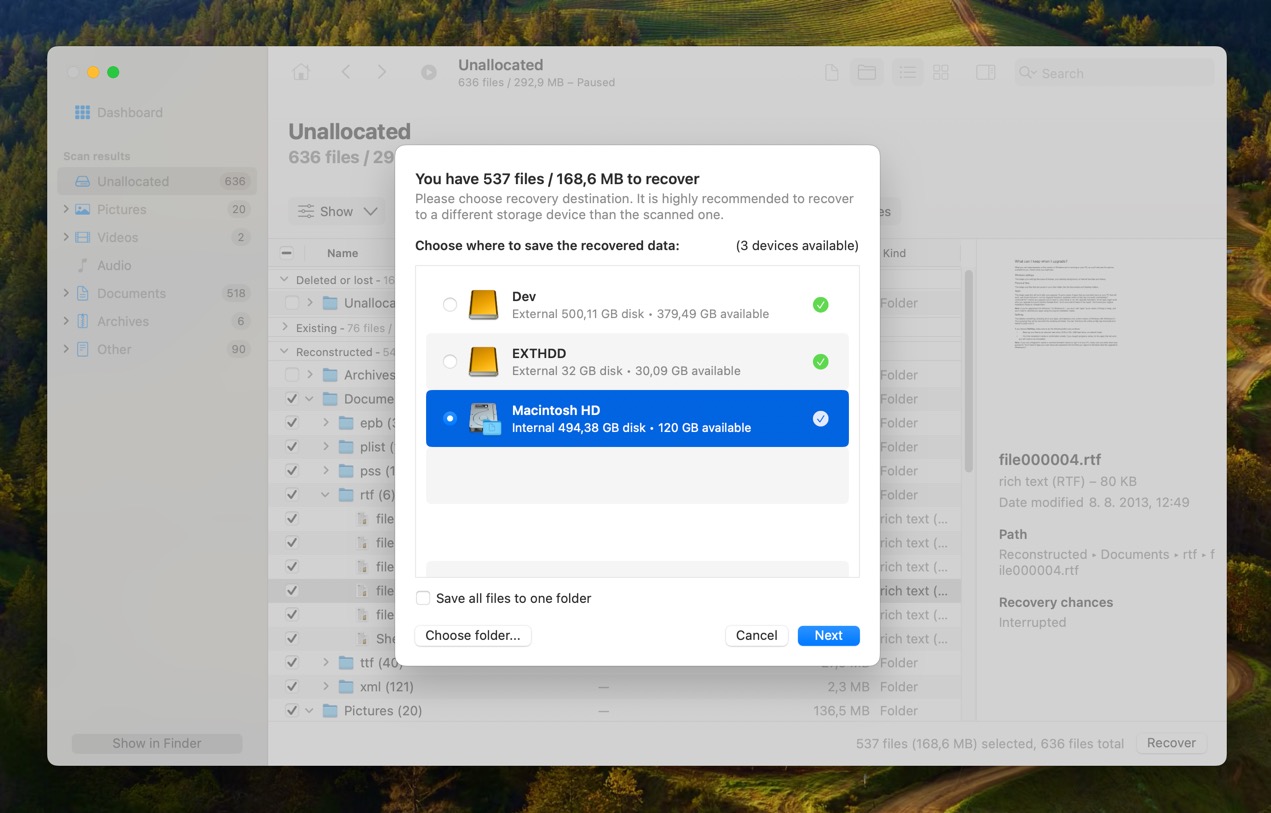 ❗️
❗️Make sure to select a different partition to store your recovered data.
Method 2: EaseUS Data Recovery Wizard
EaseUS is another easy-to-use and straightforward data recovery software that is available on the macOS as both paid and free. Follow the steps mentioned below to recover your data using EaseUS.
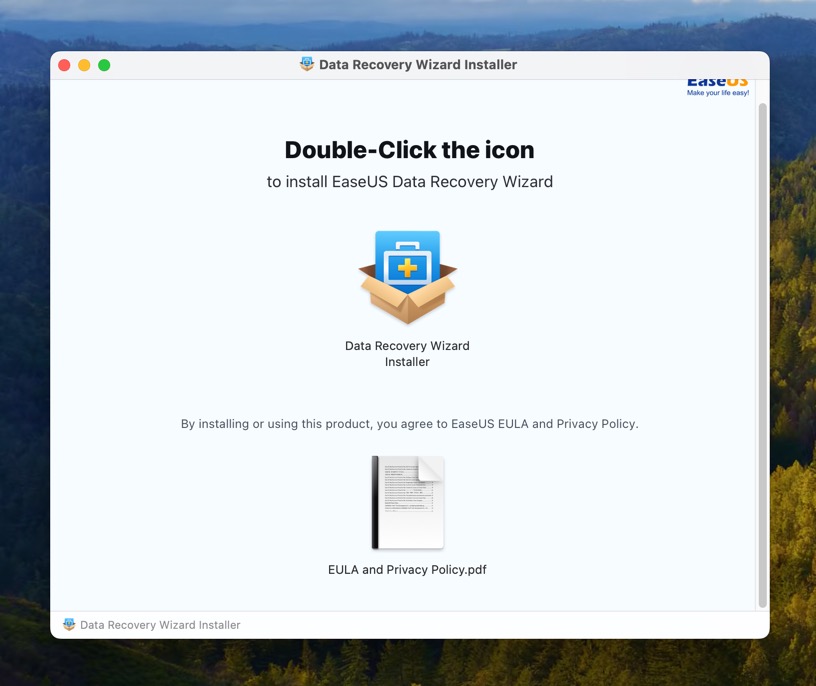
- Download EaseUS Data Recovery Wizard for macOS from the official website and then start the setup wizard to install EaseUS on your Mac. Wait for the installer to download and automatically launch the latest version of the software.
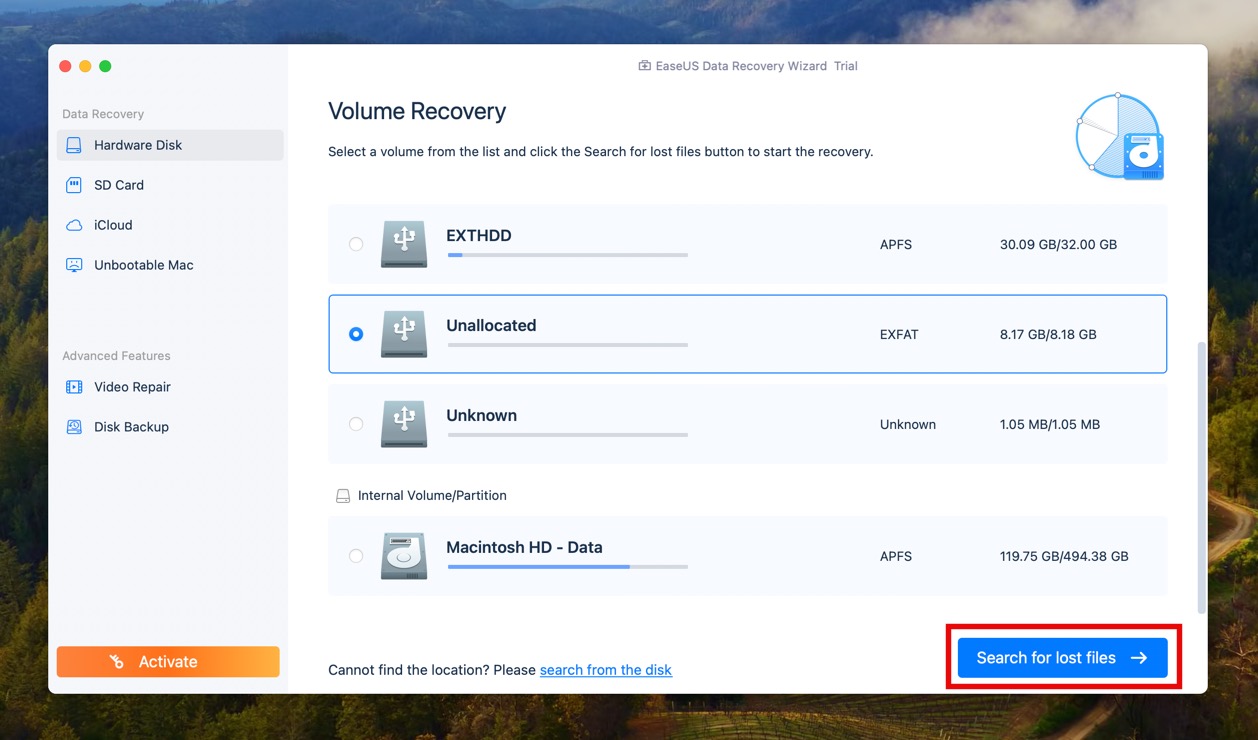
- Select the disk that you want to recover and click Search for lost files. (It can be an internal HDD/SSD or an external storage).
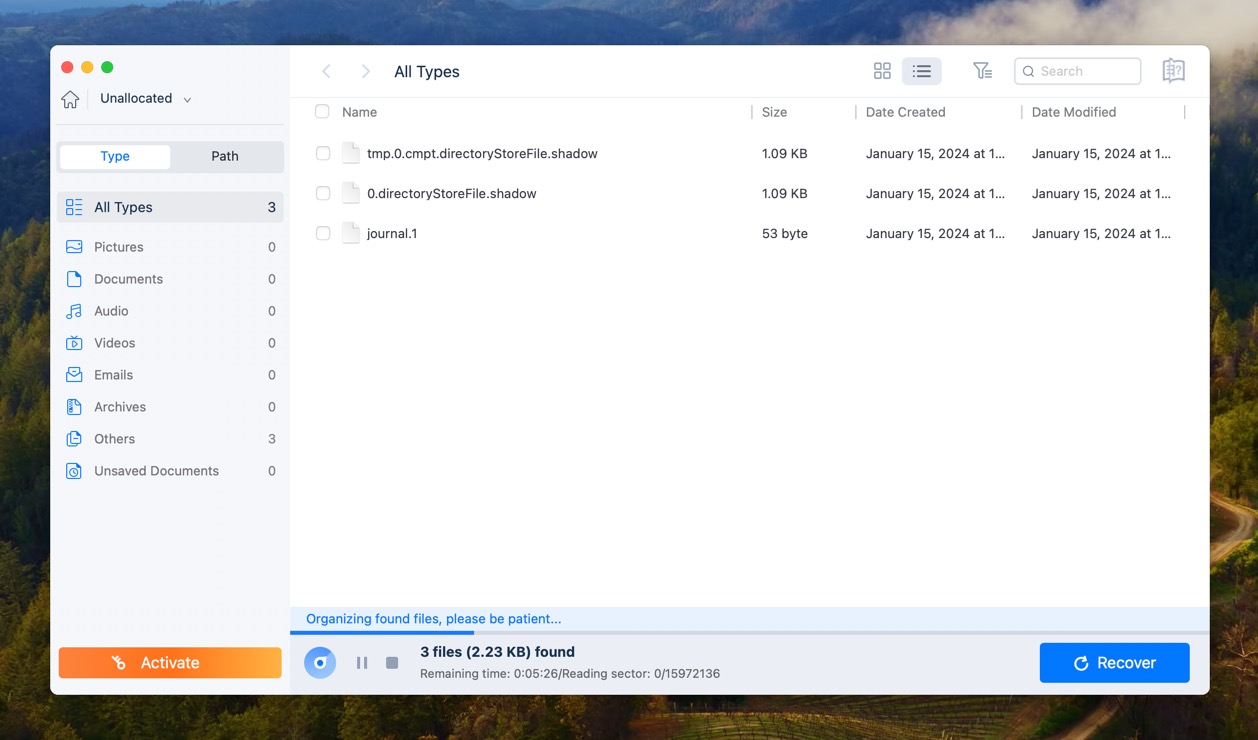
- EaseUS will start scanning your selected partition for lost files. Recoverable files will be categorized in the left panel and listed in the main pane.
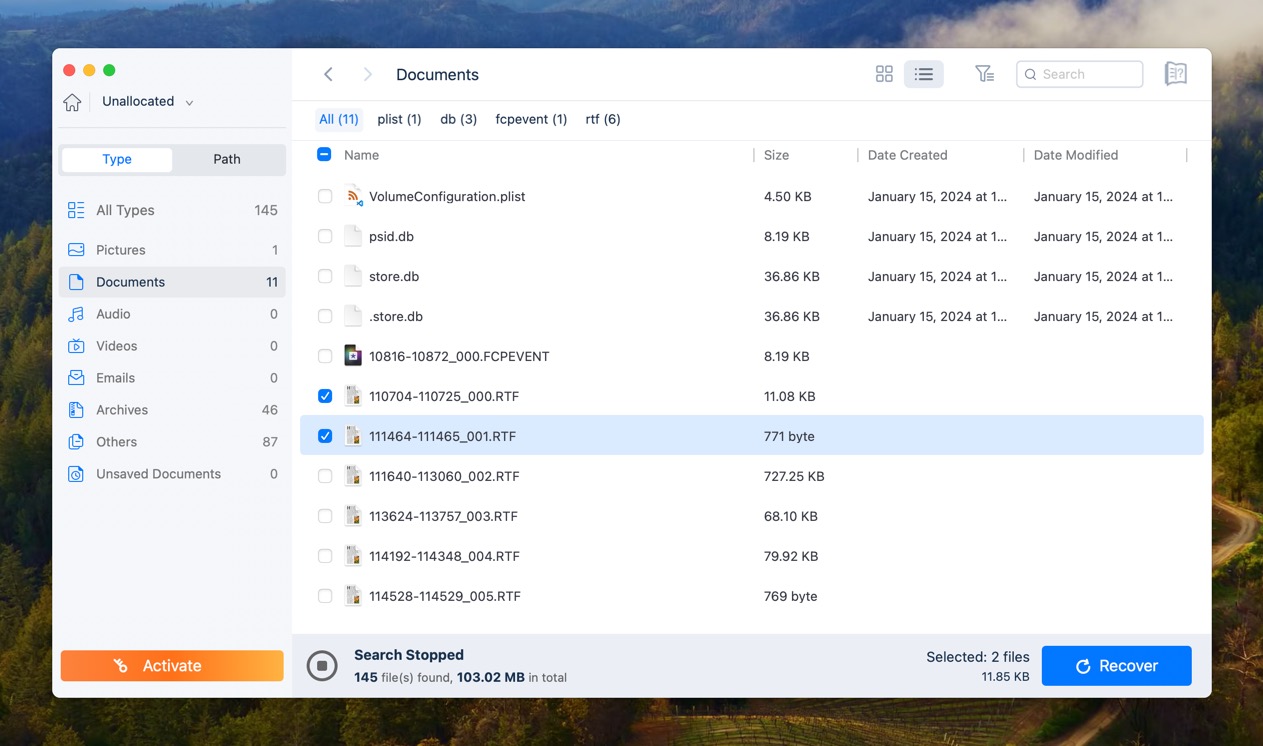
- You can click on any of the available categories to focus on specific file types. Click the checkboxes next to the files you want to recover and then click the Recover button. Unfortunately, the free version of EaseUS Data Recovery can’t preview files beforehand.
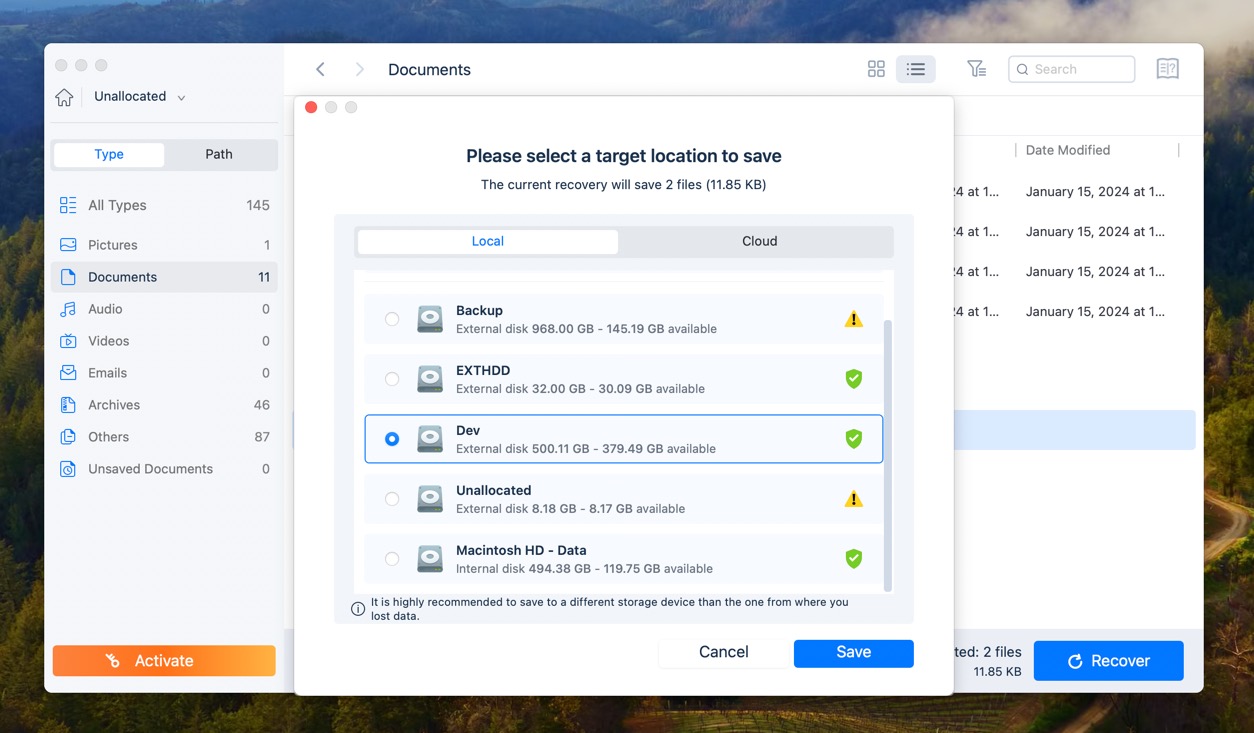
- Finally, click the Recover button and tell EaseUS where it should recover your files. Confirm by clicking Save.
Method 3: Stellar Data Recovery Professional For macOS
Stellar Data Recovery Professional is another simple DIY software that allows you to recover files from a corrupted partition on a Mac with ease. Follow the steps mentioned below to get started:
Stellar data recovery is a paid software and you need to buy their license to be able to recover your data.
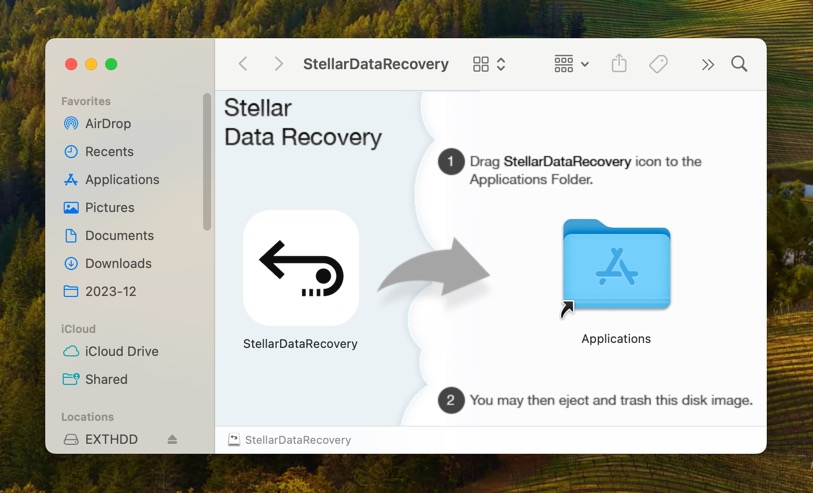
- Download and install Stellar Data Recovery Professional on your Mac as instructed by the disk image.
- From the home screen, select the type of files you wish to recover and click Next.

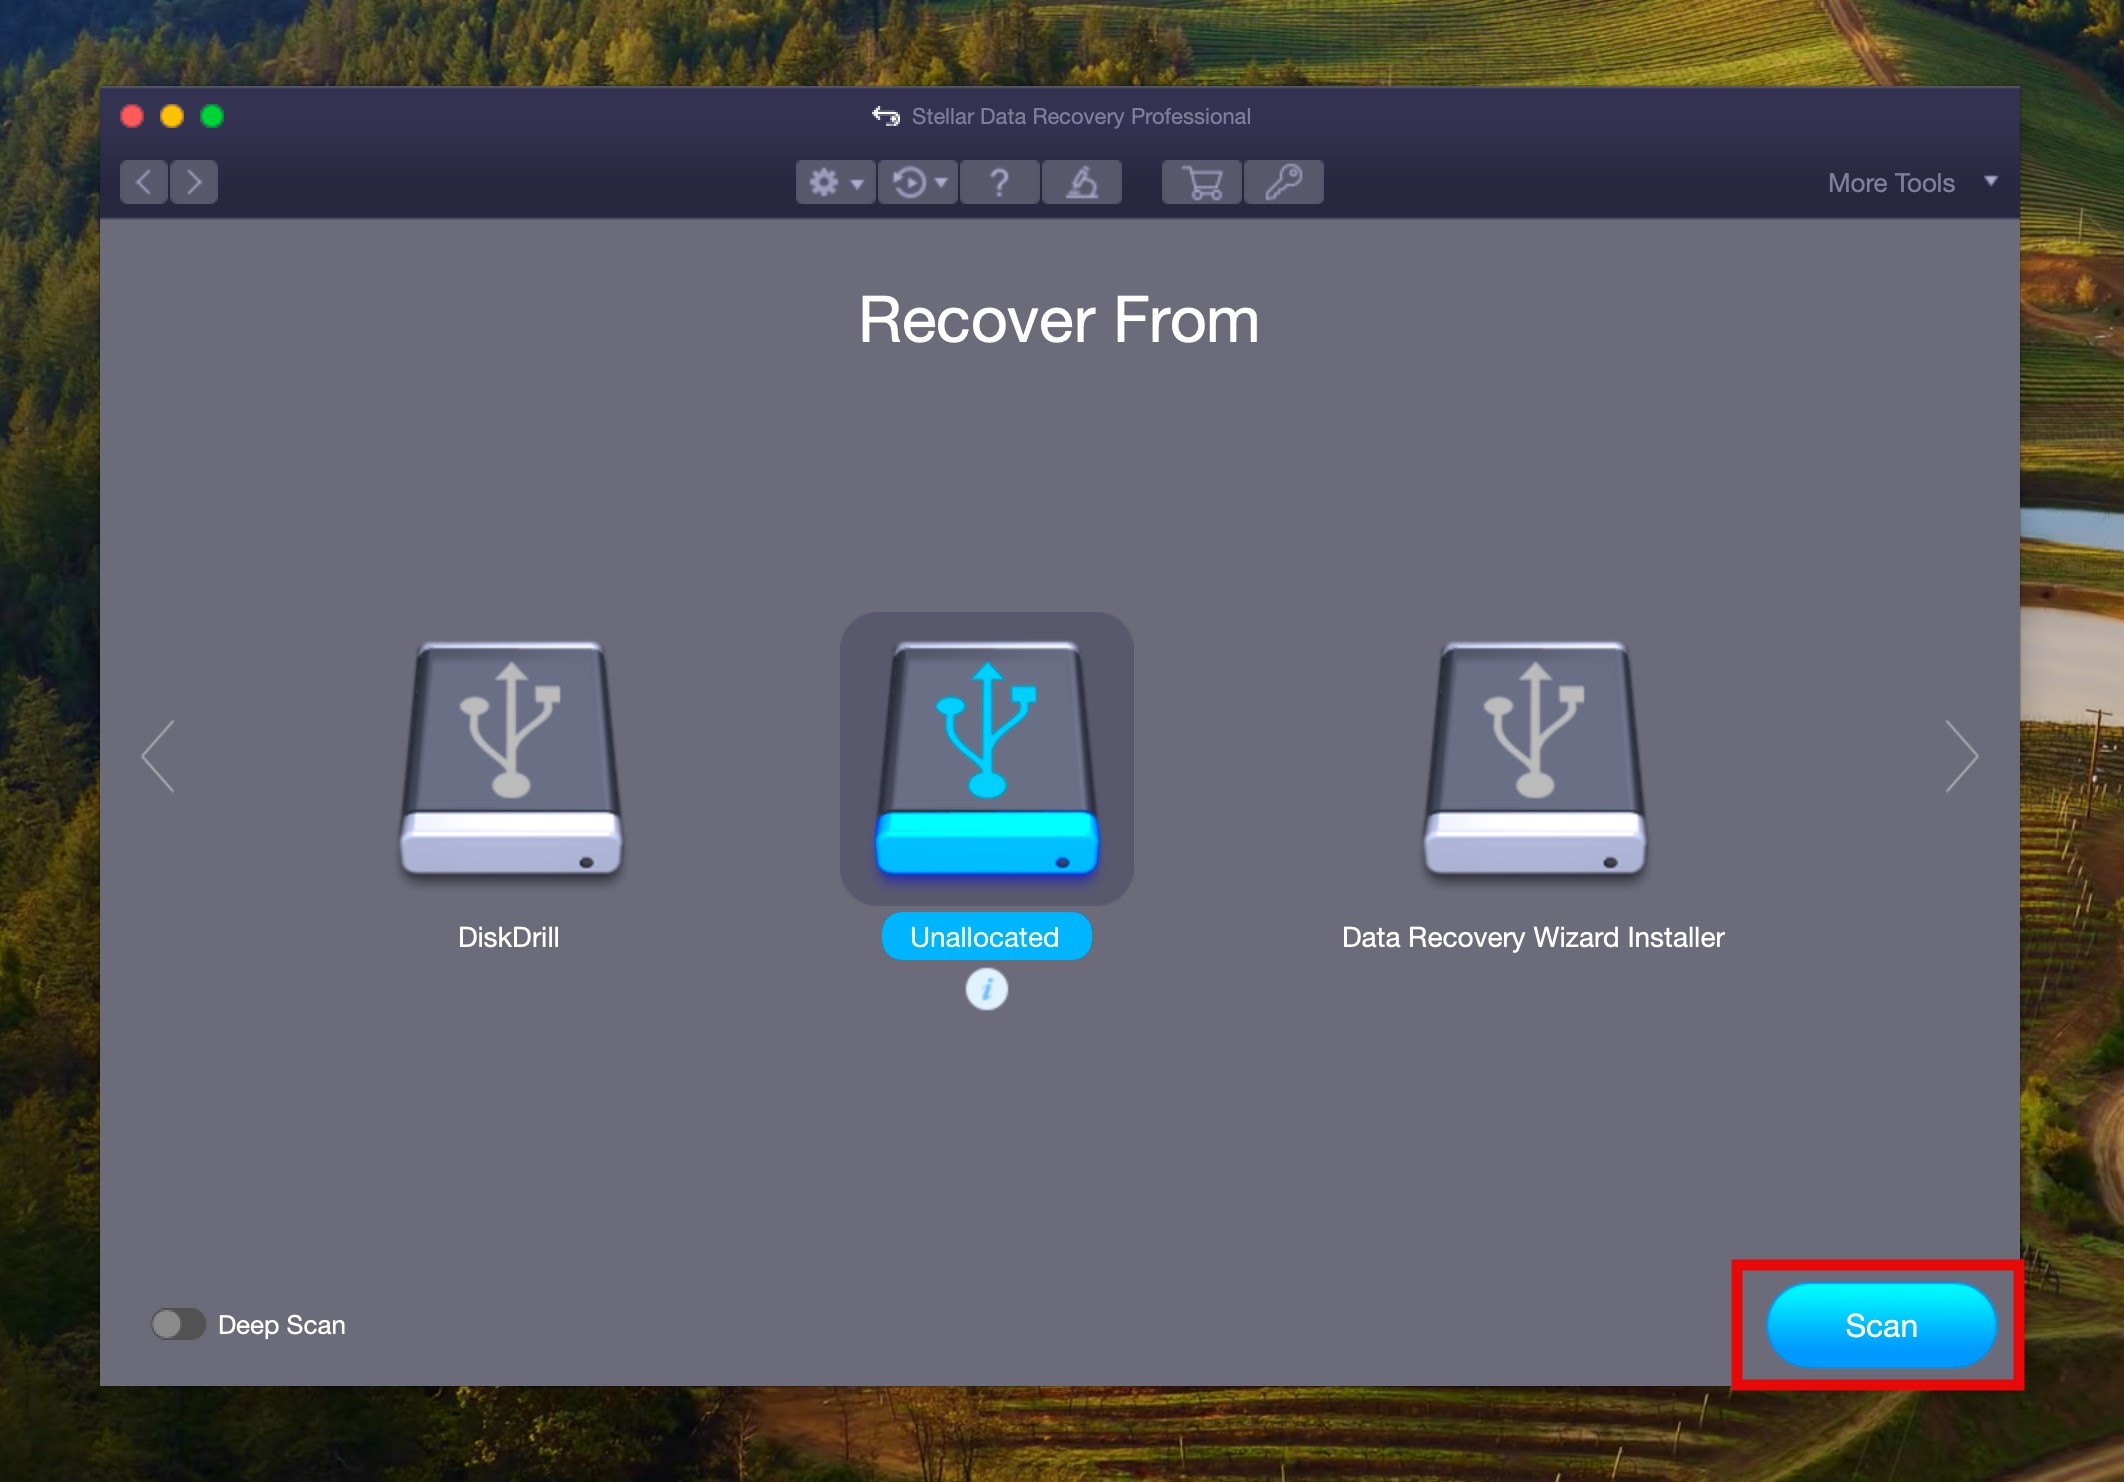
- Now, select the corrupted partition and hit Scan.
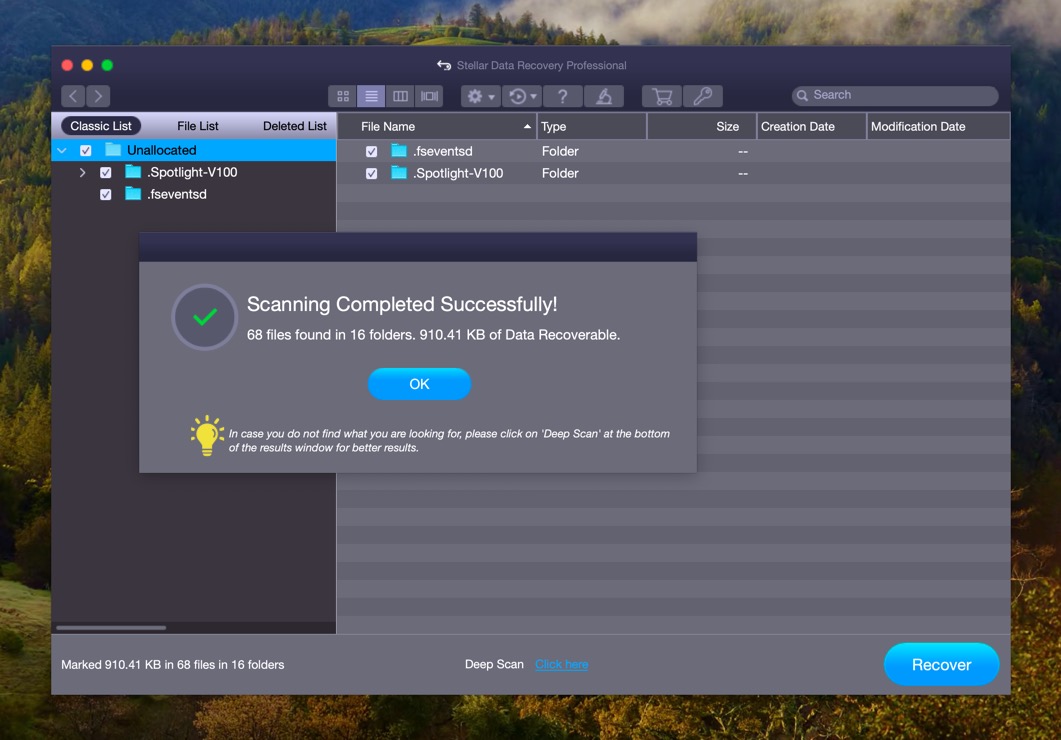
- The Stellar tool will run a scan to find recoverable files from your unallocated partition. Once the process is complete, a pop-up will appear saying Scan Completed Successfully. Click OK.
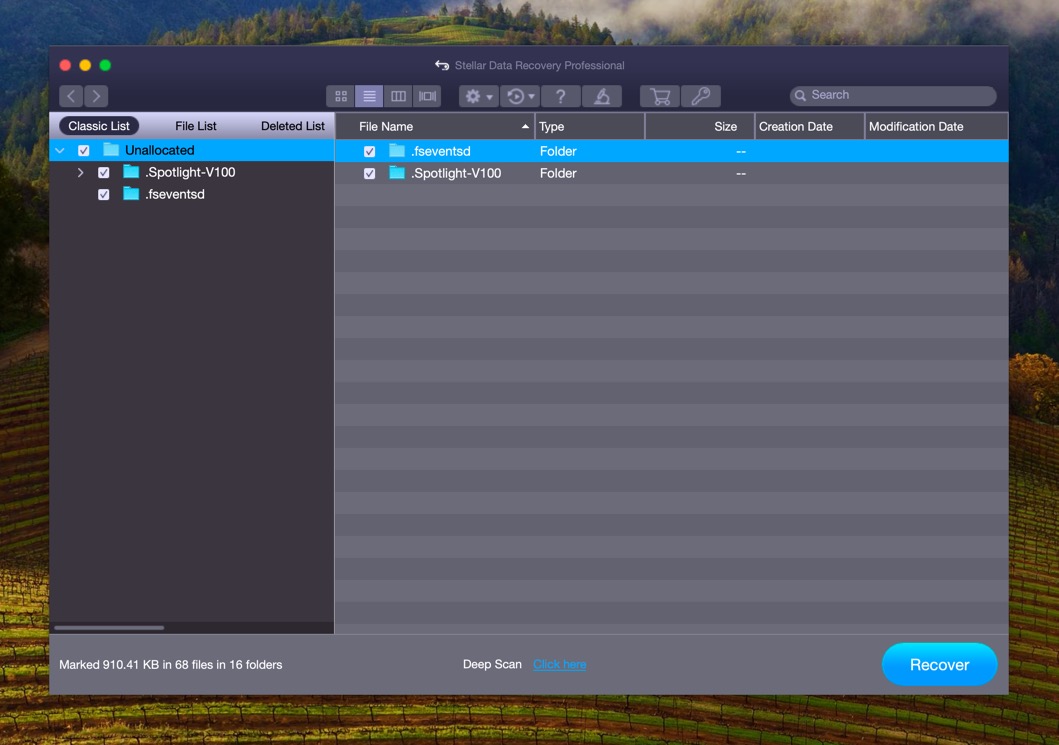
- Finally, you can select the files you want to recover from the list and click on the Recover button. If the list of recoverable files doesn’t include what you’re looking for, you can click on the Deep Scan link in the middle of the bottom section of the app instead.
How to Fix & Recover Corrupted Partition On macOS If You Do Not Need To Keep The Data
By using any of the software mentioned above, you can easily carry out a corrupted partition recovery process and recover all your lost data. But what If the data you had stored on the corrupt partition of your drive is not valuable enough to be restored, and you just want to recover your corrupted partition on Mac to make it usable again?
In that case, you can fix your drive without using any third-party application. Here are three methods to do so:
Method 1: First Aid
If you have a corrupt volume on your storage, you can use the inbuilt Disk Utility tool on your macOS to verify and fix this issue. Follow these steps:
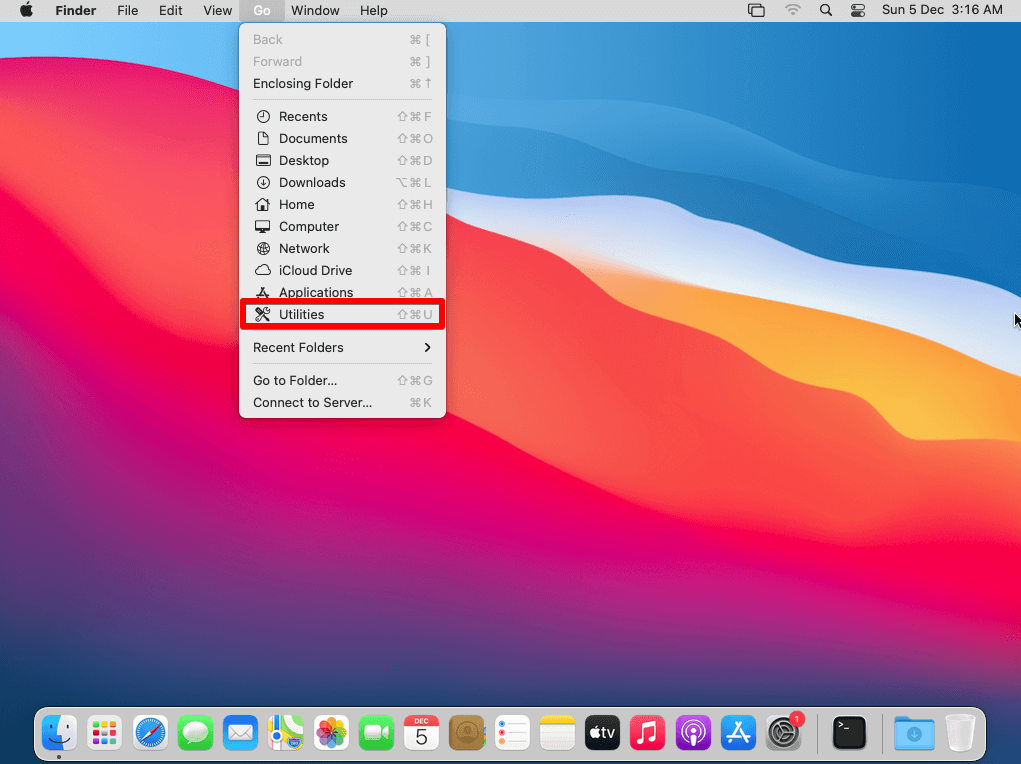
- Click on the “GO” button on the Dock and select the utilities.
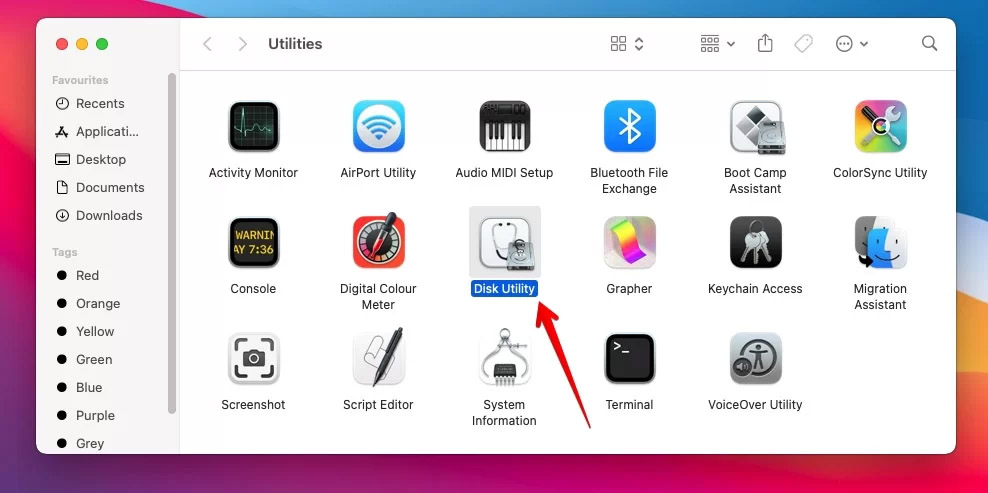
- Locate and open Disk Utility.
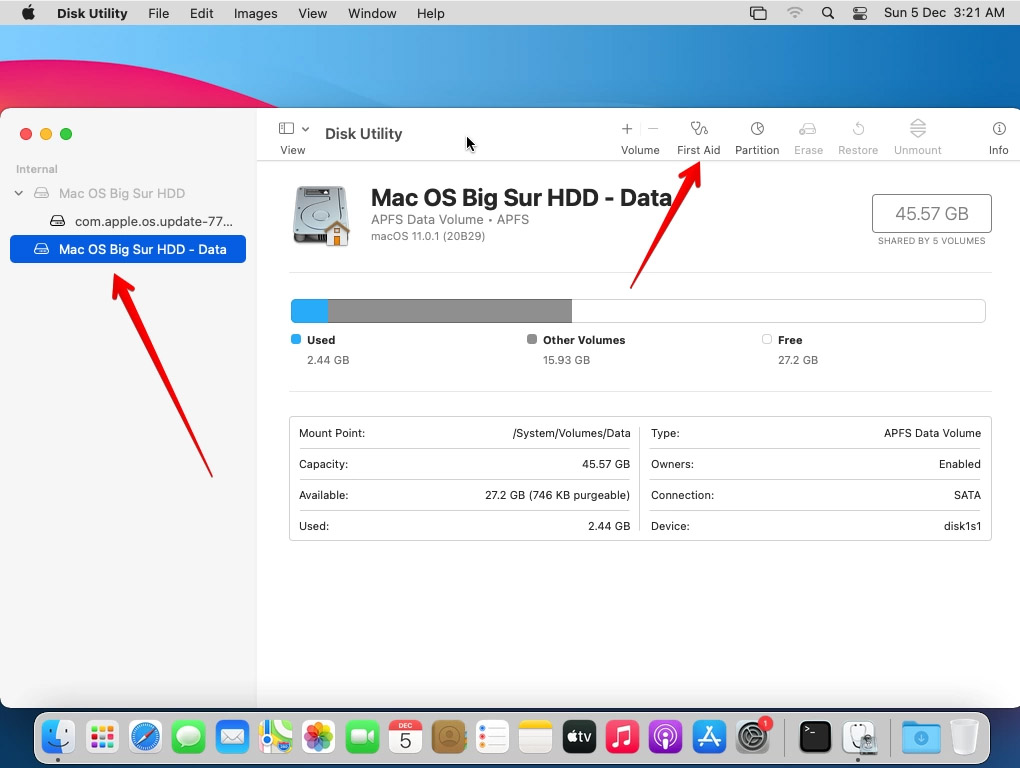
- After opening Disk Utility, select the corrupt partition or drive you want to fix, and click on the First Aid button.
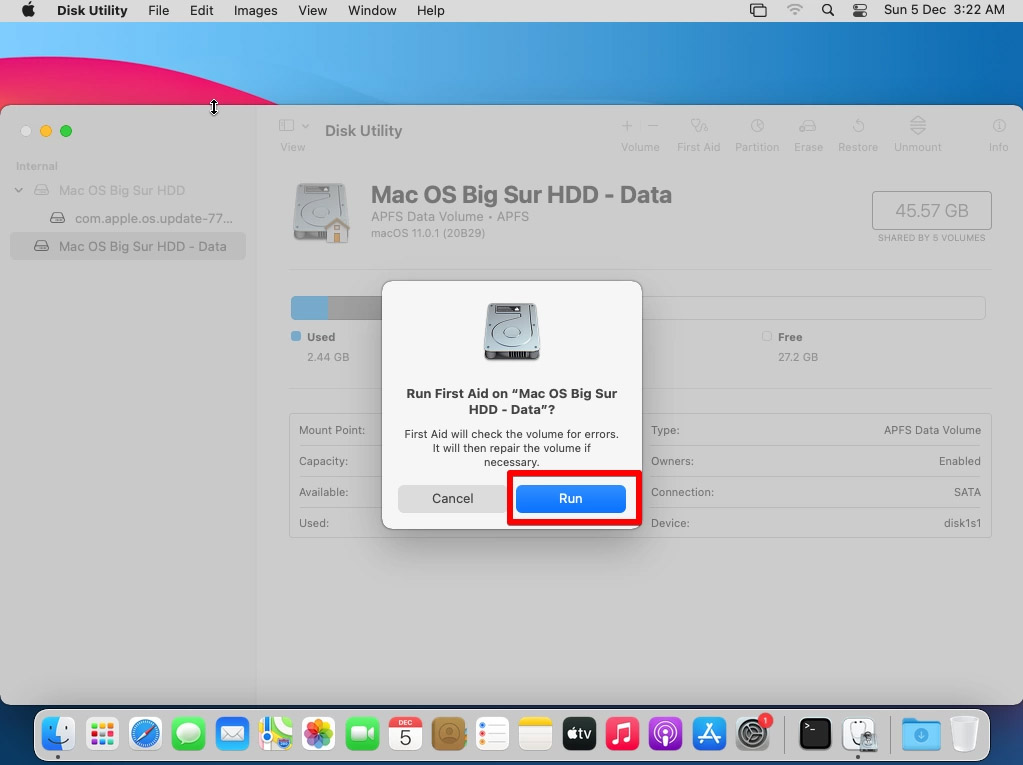
- After you click on the First Aid button, you will be greeted by a pop up window to confirm the process. Click Run.
- After you start the first aid process, Disk Utility will scan the corrupt partition for errors and even fix them automatically. After the repair process is complete, you will see a green tick mark sign.
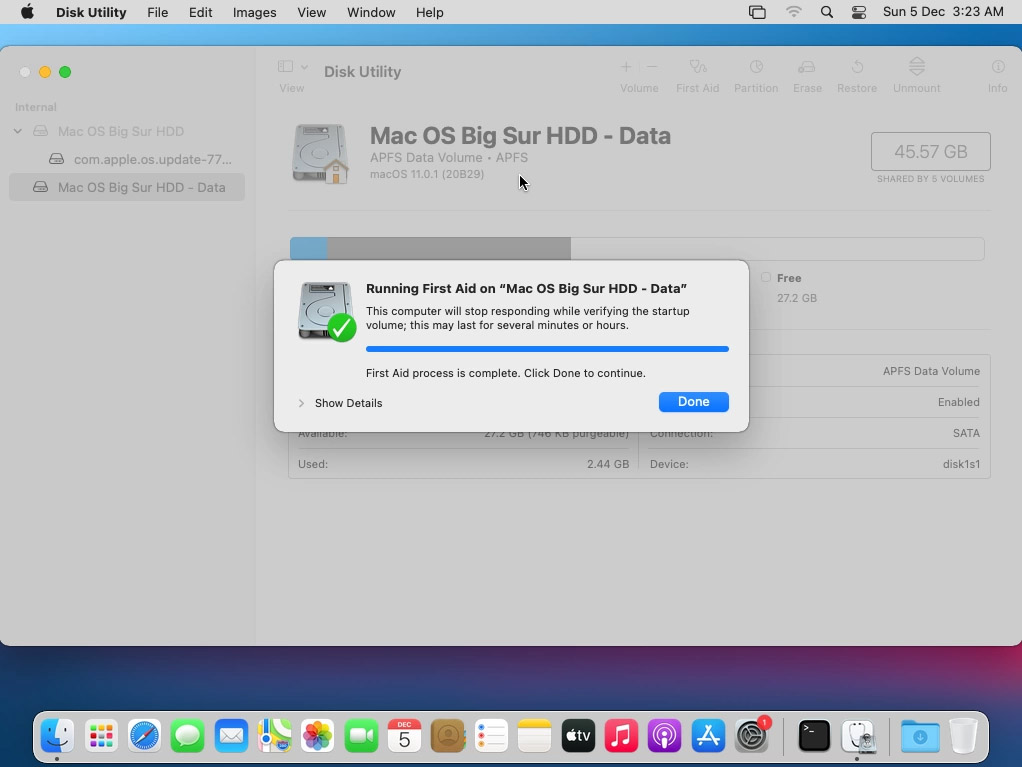
The whole process can take anywhere from a few minutes to a few hours depending on your drive’s size. If you are using an older version of Mac, you might be asked to manually choose to repair the disk if any errors are detected.
Method 2: “fsck” Command
If your internal or external hard drive is not showing up in the Disk Utility, or if it is unable to recognize the errors on a corrupt partition, you might have to use the Terminal app to manually fix it. Using the Terminal app, you can run the File System Consistency Check (fsck) command with specific parameters to fix corrupt APFS or HFS partitions. Follow these steps:
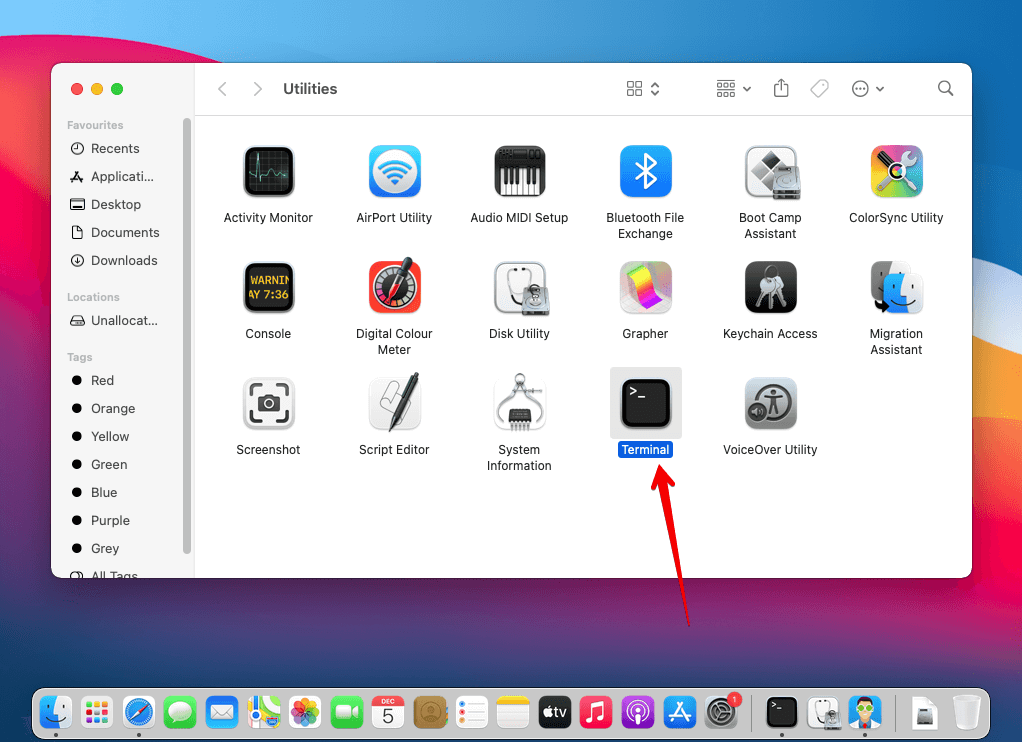
- Click on the Go button on the dock and select Utilities
- Locate and launch Terminal.
- In the Terminal window, type command—
diskutil list. This will list out all the available drives on your Mac. Identify the drive you want to fix and note down its identification number. In our case, it’s disk2.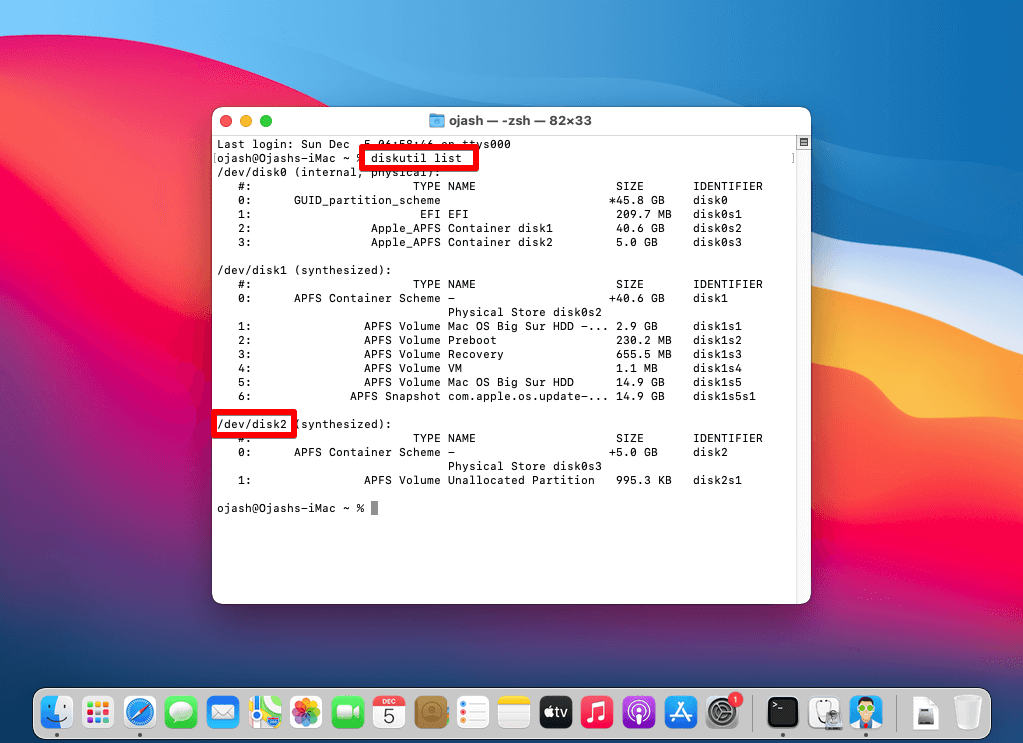
- Due to security reasons, Mac OS does not let you run fsck commands from inside the OS. So, you need to reboot your Mac into Single User Mode. To do that, restart your Mac and press ⌘ Command + S during the whole booting phase. You will see a few command lines getting executed which will stop when the screen prints
Localhost:/ root#in the end.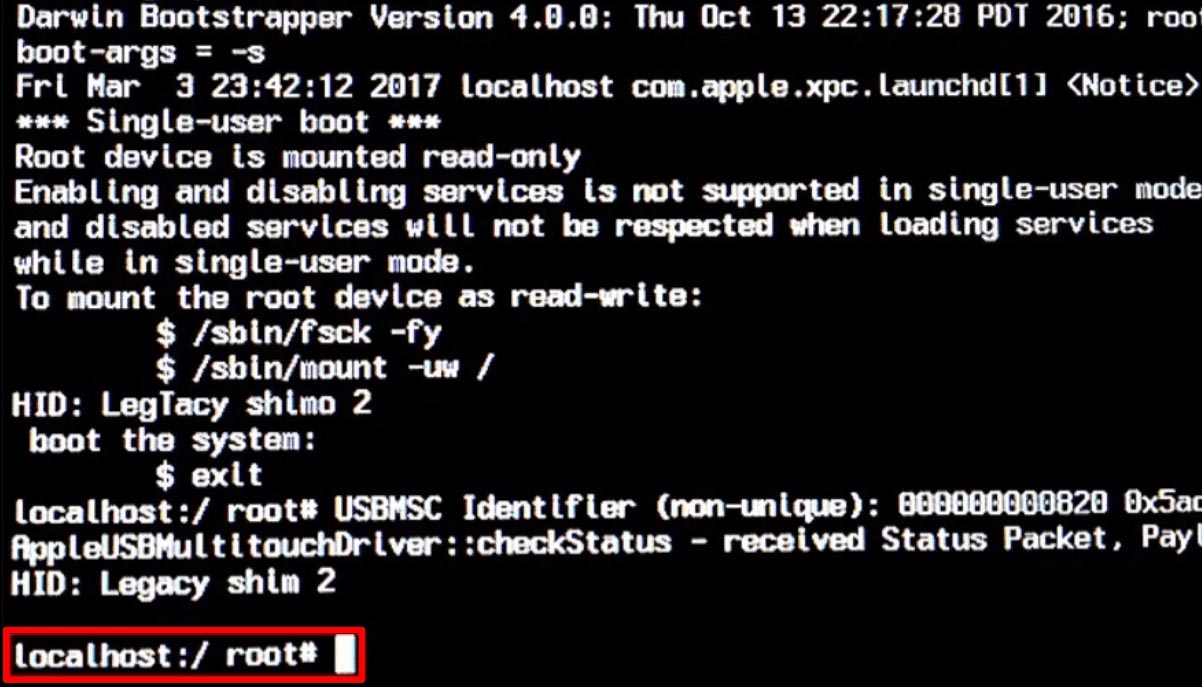
- Enter
/sbin/fsck_hfs -fy /dev/disk2to repair the corrupt partition and press Enter.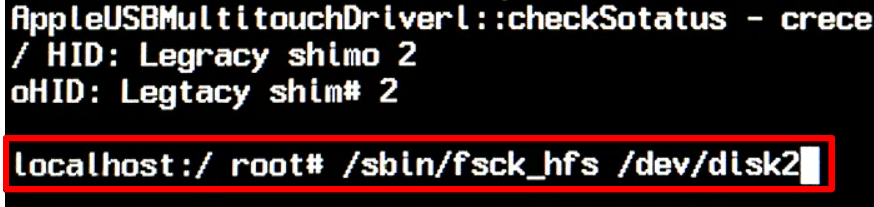 👀
👀Don’t forget to replace “disk2” with the variable of the disk you want to repair. fsck will scan the drive for any errors and automatically fix them. If it does not find any damage, it will print “OK” and exit. After fsck is done repairing your drive, type “reboot” and press enter to restart your Mac.
Method 3: Time Machine Backups
Restoring a Time Machine Backup is another way to restore some of your files that were initially stored in the corrupted partition. But before you begin the restoration process, you need to make sure that your corrupted partition is ready to store new data again.
- Open Disk Utility from the Utilities folder.
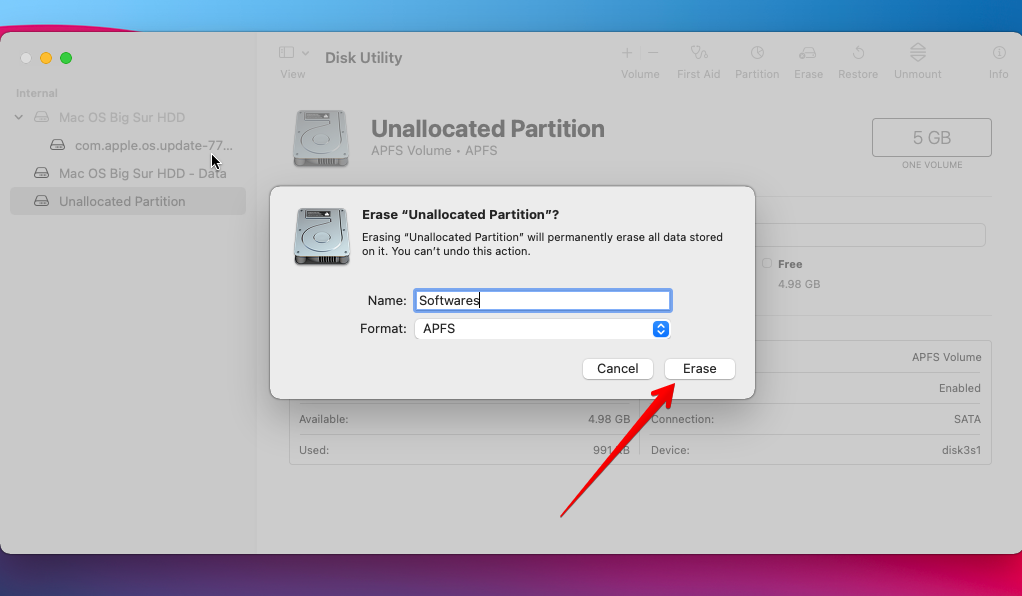
- Select the corrupt partition and click on the Erase button. This will reset the partition to default settings.
- Rename the drive and click on the Erase button.
- Connect your Time Machine backup drive to your Mac.
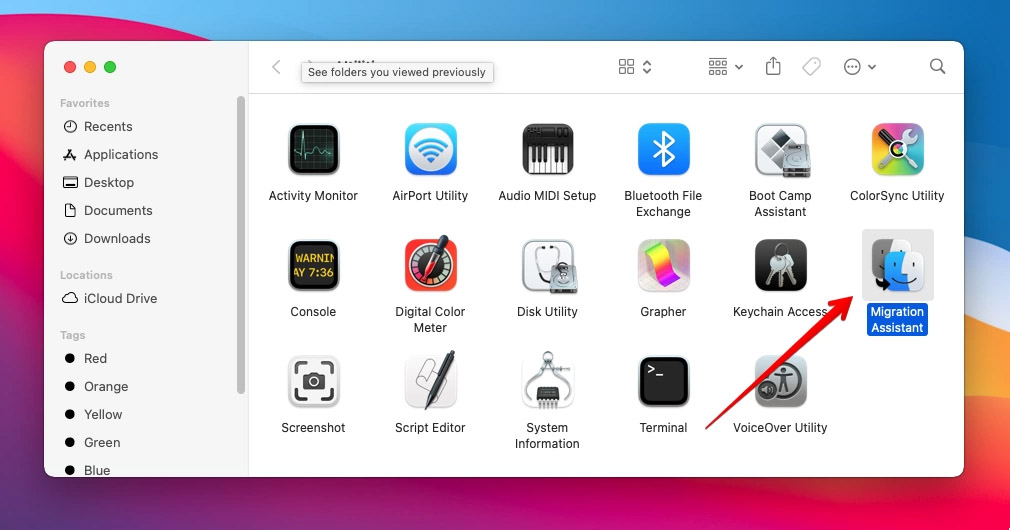
- Open the Utilities folder again and select Migration Assistant.
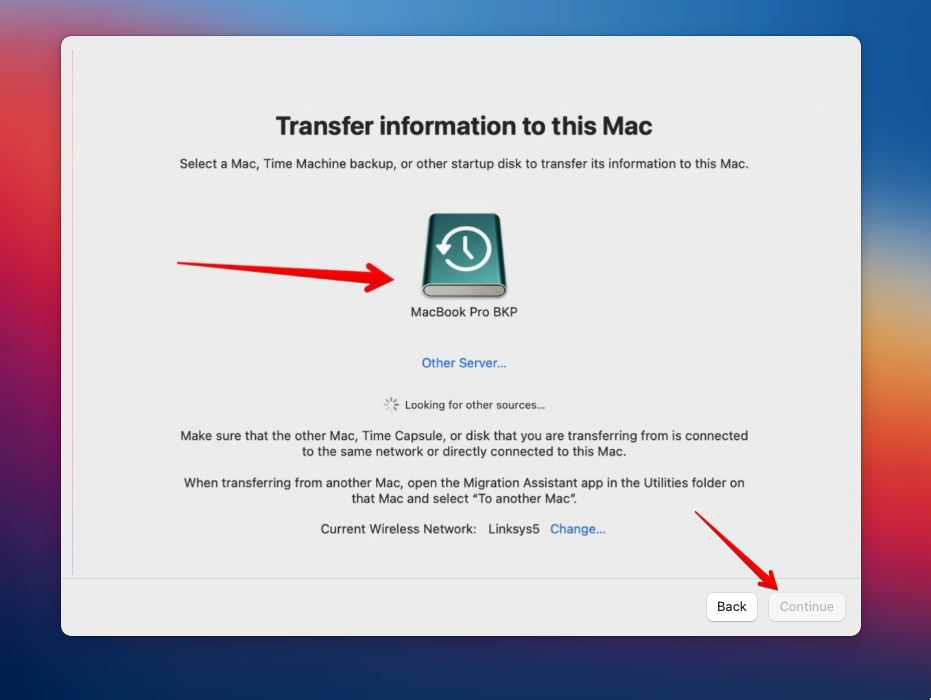
- After launching Migration Assistant, you will be asked to choose the data transfer method to be used for the migration. Simply select the option that says “Transfer From a Mac” and click Continue.
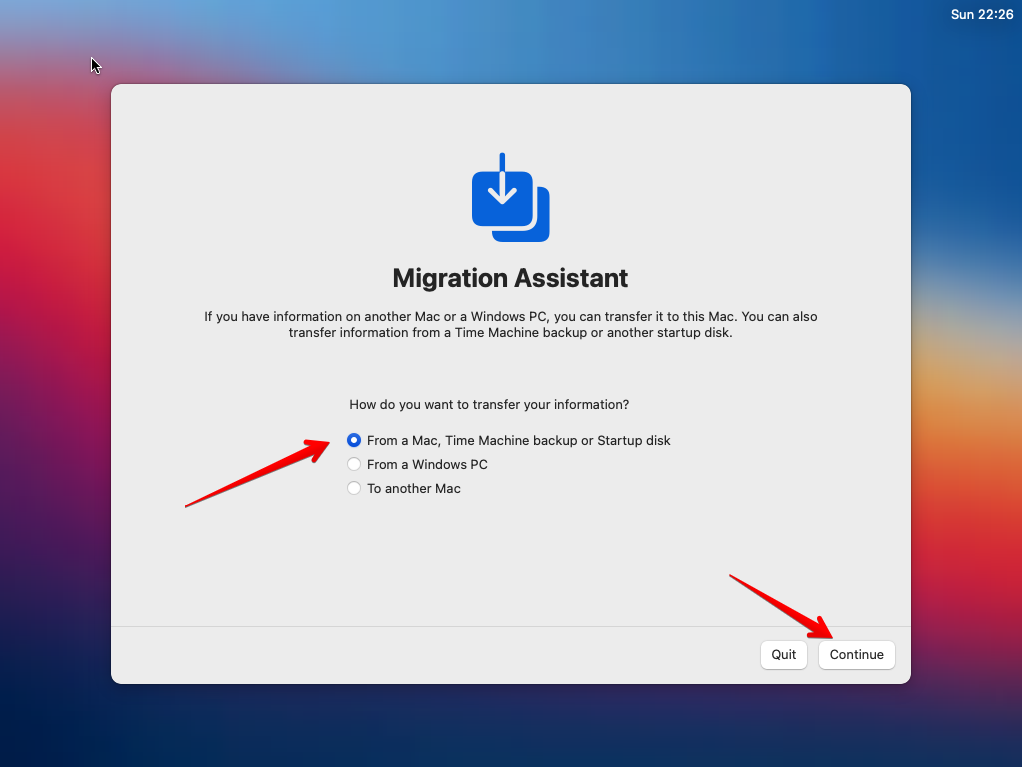
- You will be prompted to select a Time Machine backup that you want to restore. Select your desired backup and all the information you want to recover and Click Continue to start the recovery process.
Fix: You must have an up-to-date backup file uploaded to your Time Machine app for this method to work.
Method 4: TestDisk
Despite its name, TestDisk isn’t just for testing; its main purpose is to recover lost partitions and fix partition-related issues, including, damaged boot sectors, broken partition tables, and other forms of corruption. It doesn’t cost any money to recover a corrupted partition using TestDisk because the tool is completely free and open source.
However, corrupted partition recovery with TestDisk might cost you some time, especially if you’re not familiar with command-line software. That’s because the tool runs entirely in the Terminal app and has only a basic text-only interface. It also doesn’t support the APFS file system, which is used by default by all modern versions of Apple’s operating system since macOS 10.13. Fortunately, HFS+ is supported, and so are all standard Windows and Linux file systems.
You can find a detailed guide on how to use TestDisk on its official website, but here’s a quick summary to get you started:
- Download TestDisk using Homebrew or from the download section of its website.
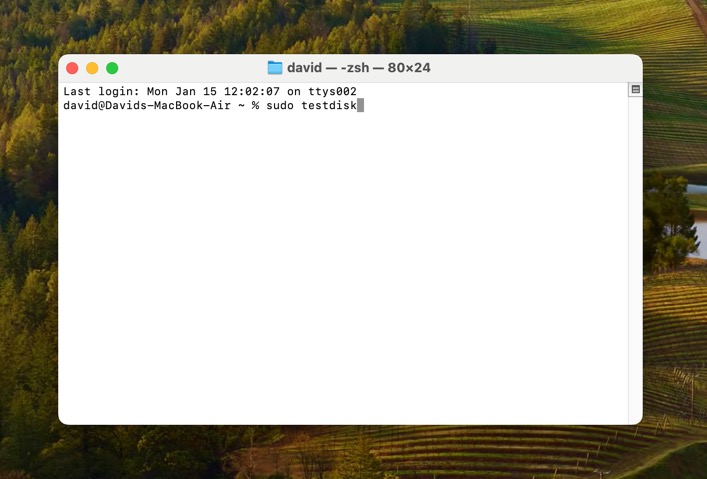
- Launch TestDisk as administrator from the Terminal app (you can simply enter “sudo testdisk” if you’ve installed it using Homebrew).
- Create a new log file and select the storage device where the damaged partition you want to fix is located.
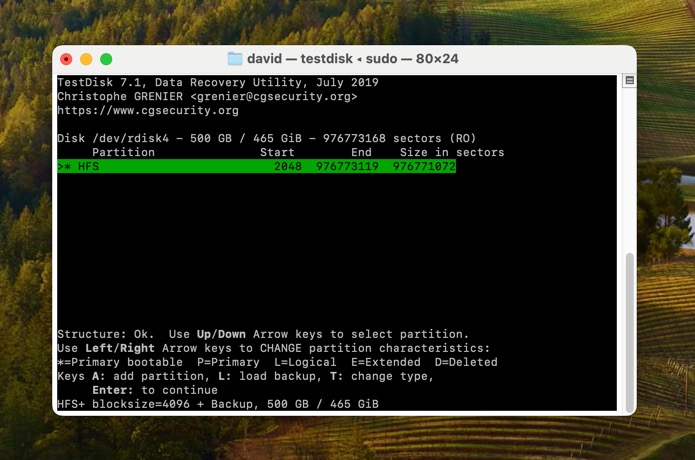
- Select the partition table type and press Enter.

- Analyze the current partition structure to locate lost partitions using the Quick Search method.

- Depending on how satisfied you are with the results, you can choose to also perform a Deep Search.
- Recover your lost partition or partitions.
FAQ
Can a Corrupted Hard Drive Be Recovered?
Yes, It is possible to recover a corrupted hard drive. If your drive has sustained logical damage, you can easily recover it by using any of the following methods—
- Scan the hard drive for viruses
- Use fsck command to scan and fix the drive errors
- Update or reinstall drivers
- Format the drive
you might not be able to recover your data using any software and you might also have to send it to a data recovery center.
How Do I Fix A Corrupted Hard Drive Without Formatting?
There are many ways to fix a corrupted Hard Drive and recover data without having to format it. The most common methods are to—
- Scan the drive for any viruses
- Use fsck to fix system errors
- Use a data recovery software
Is It Possible To Recover Data from a Formatted Partition on macOS?
When we format a storage device, the data stored in it does not disappear. Instead, your operating system clears the entries for the storage arrays and marks them as vacant. If the old data isn’t overwritten with new files, it is highly likely that you will be able to recover your data from a formatted disk using data recovery software.
How Do I Recover an Unallocated Partition on macOS?
There are three ways you can recover an unallocated partition on your Mac. The first one is to use the Disk Utility tool from the Terminal app. The second method is to run an “fsck” command, which will allow you access to the corrupted partition. Otherwise, if you have up-to-date Time Machine backups, you can simply restore all your data to your MacBook.
Wrapping Up
No matter how expensive they get, almost all storage drives fail someday or the other, and more than not, it happens unexpectedly. Luckily, using the methods explained in this article, you can easily recover the damaged partition of your storage drive and also the data stored in it.
However, as the saying goes, ‘prevention is better than cure,’ it’s best to prepare for such shortcomings that might reoccur in the future by creating a backup on a timely basis.
This article was written by Ojash Yadav, a Contributing Writer at Handy Recovery Advisor. It was recently updated by David Morelo. It was also verified for technical accuracy by Andrey Vasilyev, our editorial advisor.
Curious about our content creation process? Take a look at our Editor Guidelines.