
Many Windows users report facing a problem in which the computer deleted files by itself. There can be a multitude of reasons for this issue, and we’ll take a look at the most common ones. This article will describe how you can resolve the issue as well as get back any missing files.
Click here if you want to skip the introduction part and go to the recovery guide.
Can a Computer Delete Files by Itself?
Yes, it’s absolutely possible that your PC may delete files without your consent. Now, this could be due to enabling certain settings, malware infections, or a hardware malfunction. In some cases, antivirus software can falsely flag safe files as malware, and subsequently delete them as a safety measure.
The following table delves into possible cases of files getting deleted automatically on Windows 10 and the reasons for them:
Case |
Reason |
Solutions |
Files getting deleted automatically when clicked |
A malfunctioning mouse or trackpad, a stuck delete key on the keyboard, or firmware/driver issues. |
Connect a different mouse, ensure the delete key isn’t stuck, and reinstall/update mouse drivers using Device Manager. |
Files getting deleted automatically after Windows restart |
A misconfigured Windows Defender, using a temporary user account, or a corrupt user account. |
Perform an SFC scan, add an exclusion to Windows Defender, and use a new user account. |
Windows deleting downloaded files automatically |
Storage Sense has been configured to clean up the Downloads folder |
Modify Storage Sense settings to not clean up the Downloads folder. You can also recover previously deleted files from the Downloads folder. |
Files automatically going to Recycle Bin |
This ties in with hardware or firmware malfunction with your input devices, or a possible case of malware. |
Use a different mouse and perform a full antivirus scan of your computer. Perform Recycle Bin recovery. |
EXE files automatically deleted |
The antivirus detects the EXE file as a virus or there is an actual malware infection on your computer. |
Add an exclusion for EXE files to Windows Defender, but first perform a full scan for malware. |
How to Recover Files That Were Deleted Automatically
It’s quite easy to recover the various files deleted automatically on Windows 10. Your best bet is using third-party data recovery software. Not only are these programs easy to use, they also provide the best bang for your buck, even when compared to professional data recovery services.
We’ll take a look at two of the best data recovery programs and how you can get back automatically deleted files on Windows 10.
Option A: Disk Drill
![]() The first data recovery software, we’ll take a look at, is Disk Drill. A few standout features of the program include–a market-leading data recovery rate, an easy-to-use UI, and in-built tutorials within the program. Windows users also get a free trial that offers up to 500 MB of data recovery at no cost.
The first data recovery software, we’ll take a look at, is Disk Drill. A few standout features of the program include–a market-leading data recovery rate, an easy-to-use UI, and in-built tutorials within the program. Windows users also get a free trial that offers up to 500 MB of data recovery at no cost.
For an in-depth look at Disk Drill’s functionality, check out our review of Disk Drill.
Let’s take a look at the process for retrieving deleted files using Disk Drill:
- Download Disk Drill and run the downloaded setup file.
- Simply click on Install to begin the installation. You need administrative privileges to do so.
- After installing the program, run Disk Drill.
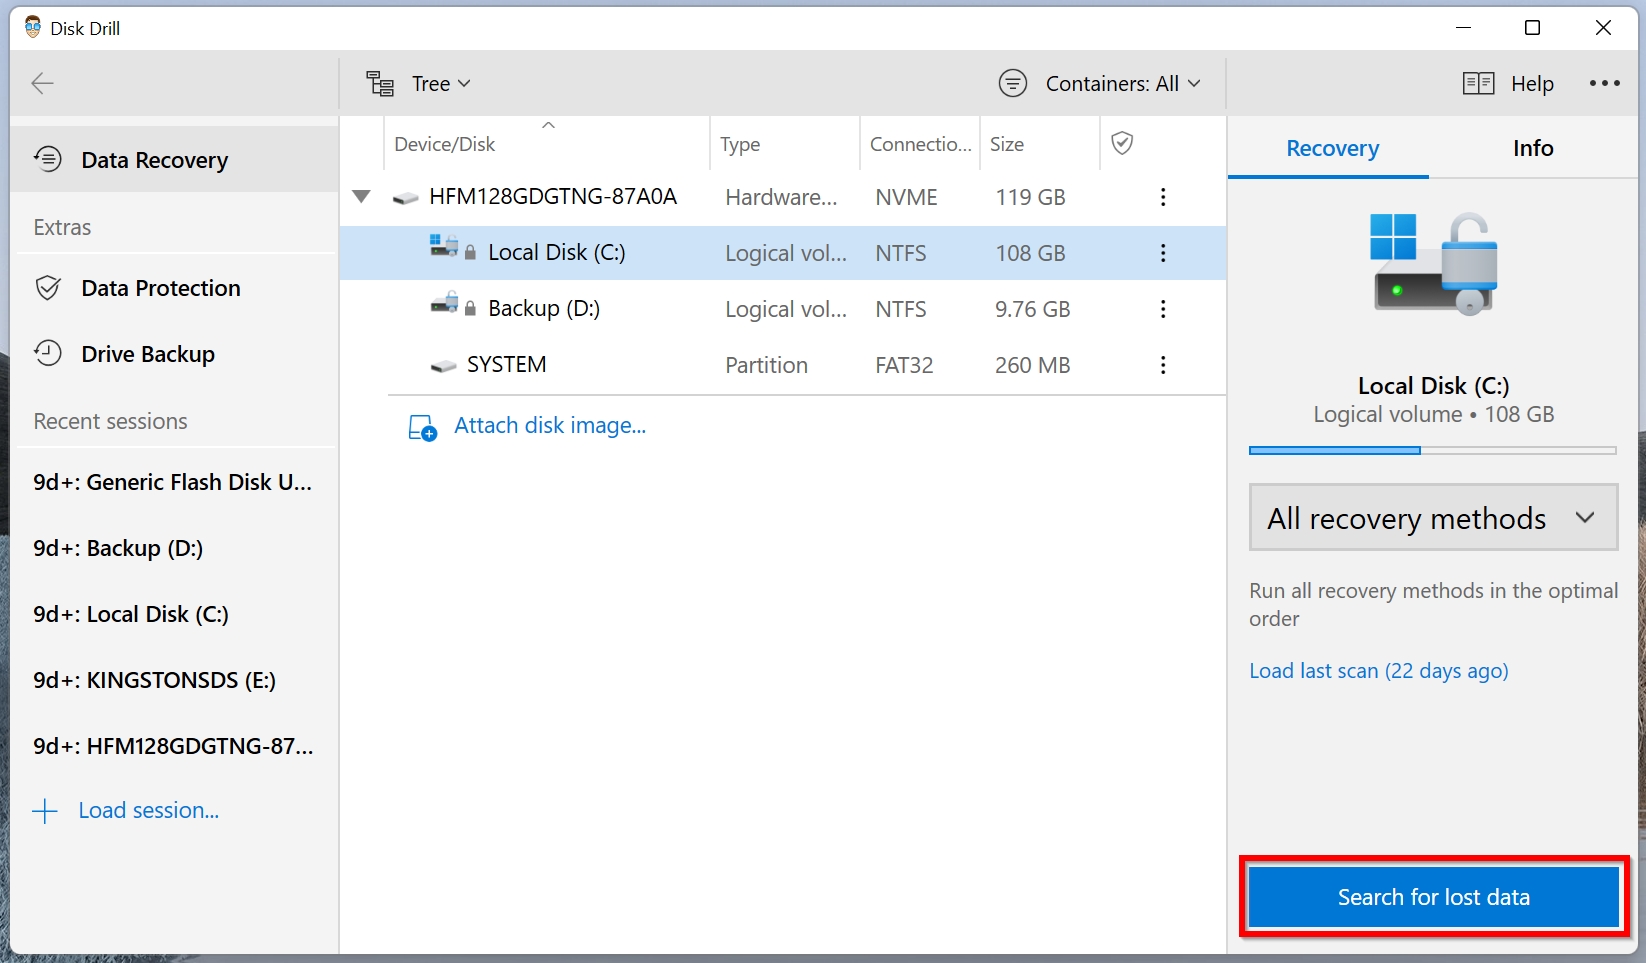
- Now, select the storage device or the partition you want to scan for automatically deleted files. Click on Search for lost data.
- Wait for Disk Drill to finish scanning.
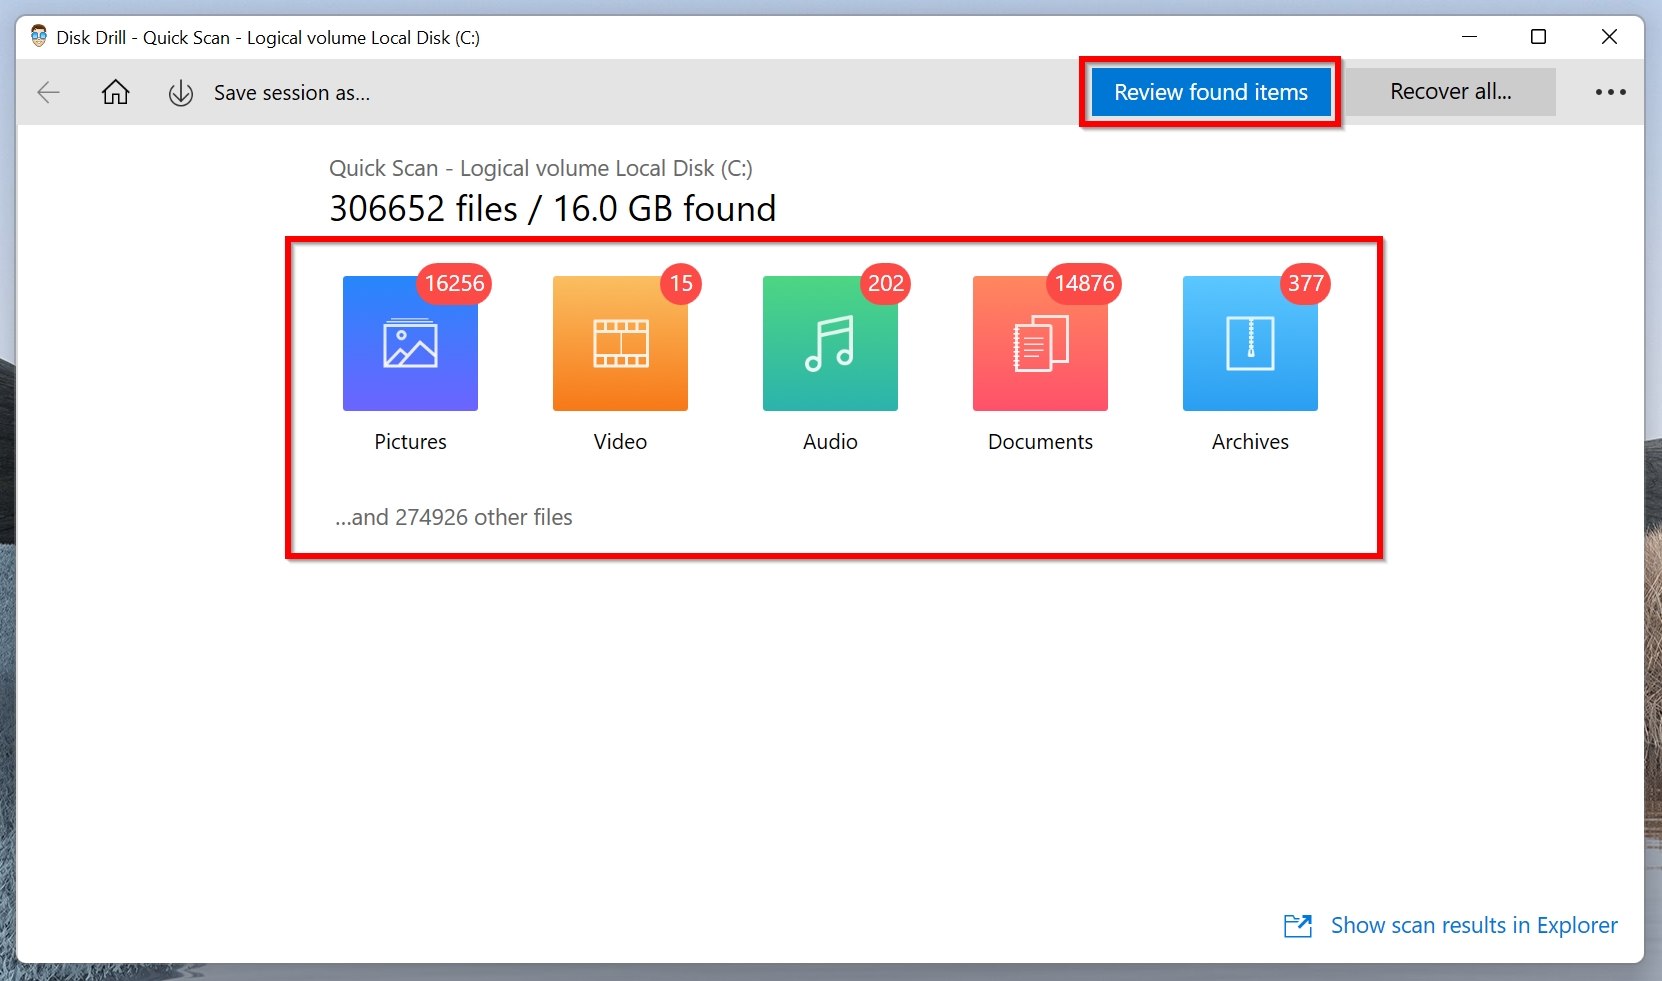
- Click on Review found items If you want to recover specific types of files, e.g. photos, simply click on Pictures or any other file type on the same screen.
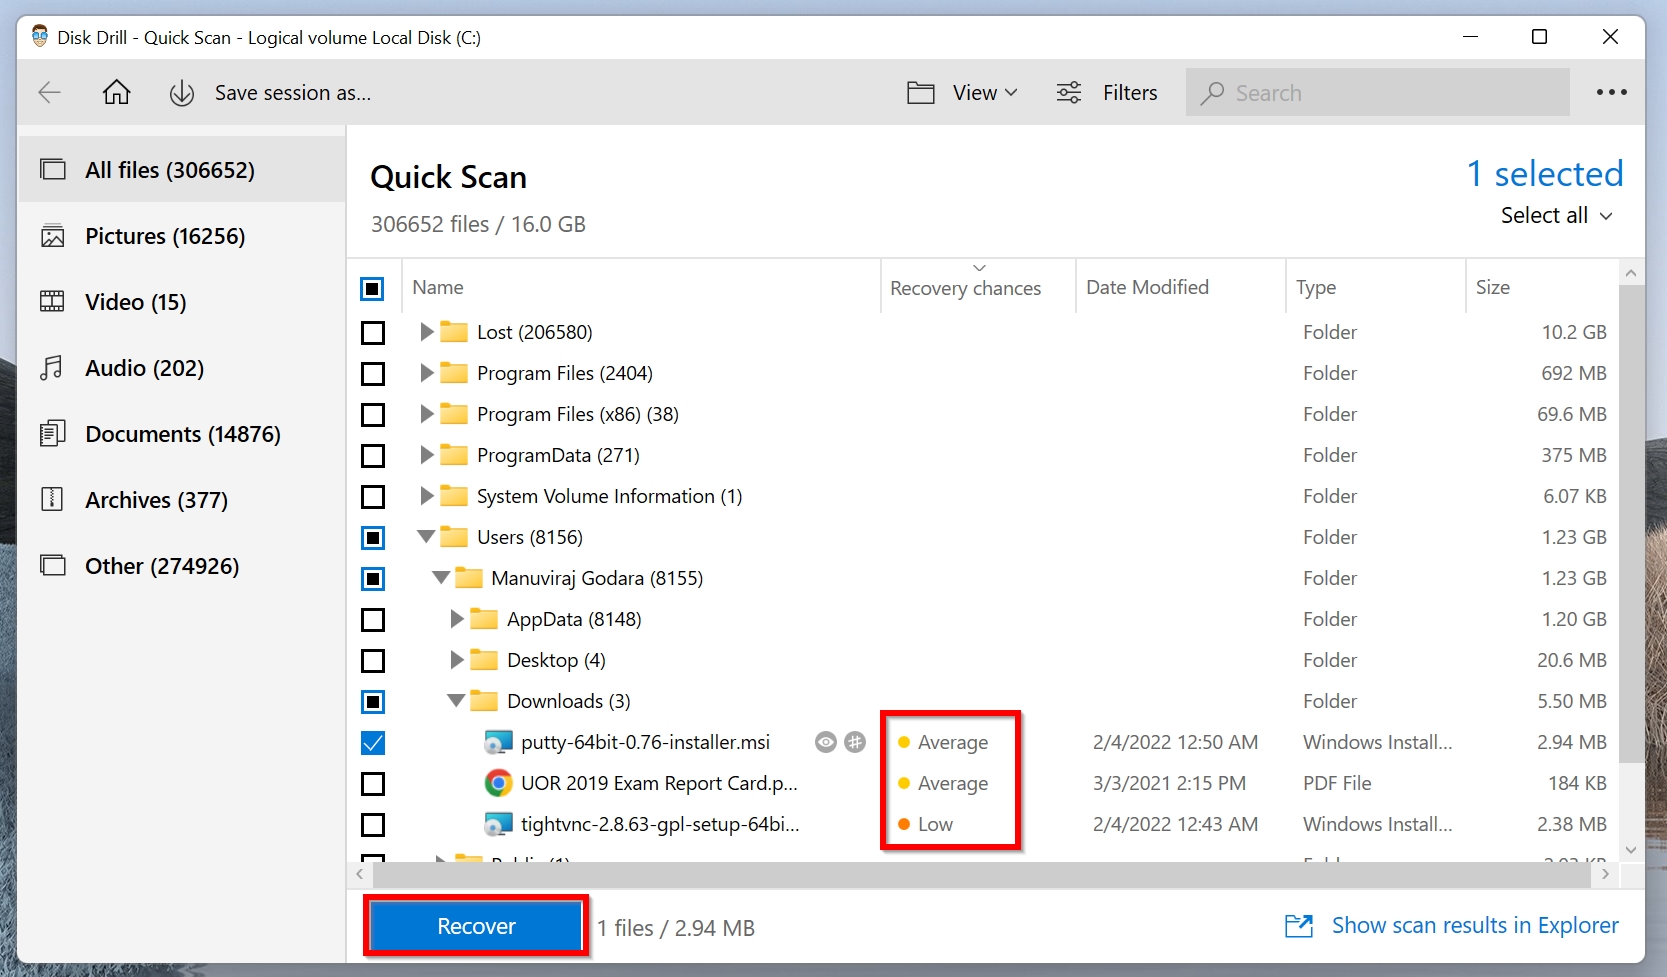
- Select the files you want to recover, by ticking the checkbox next to them. Disk Drill will display the recovery chances for each file next to it.
- Click on Recover.
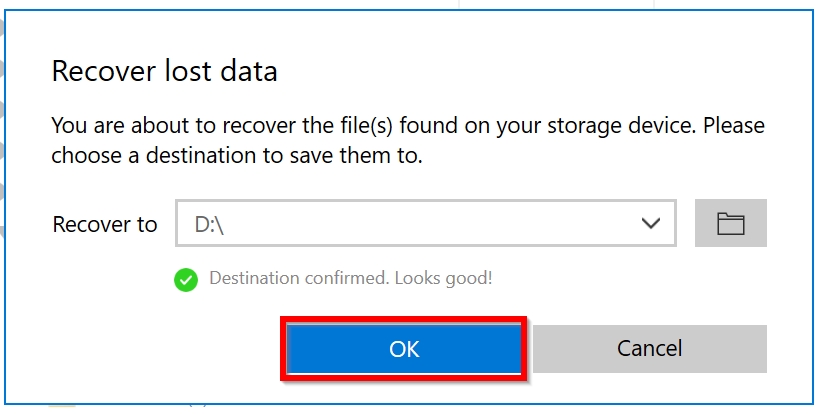
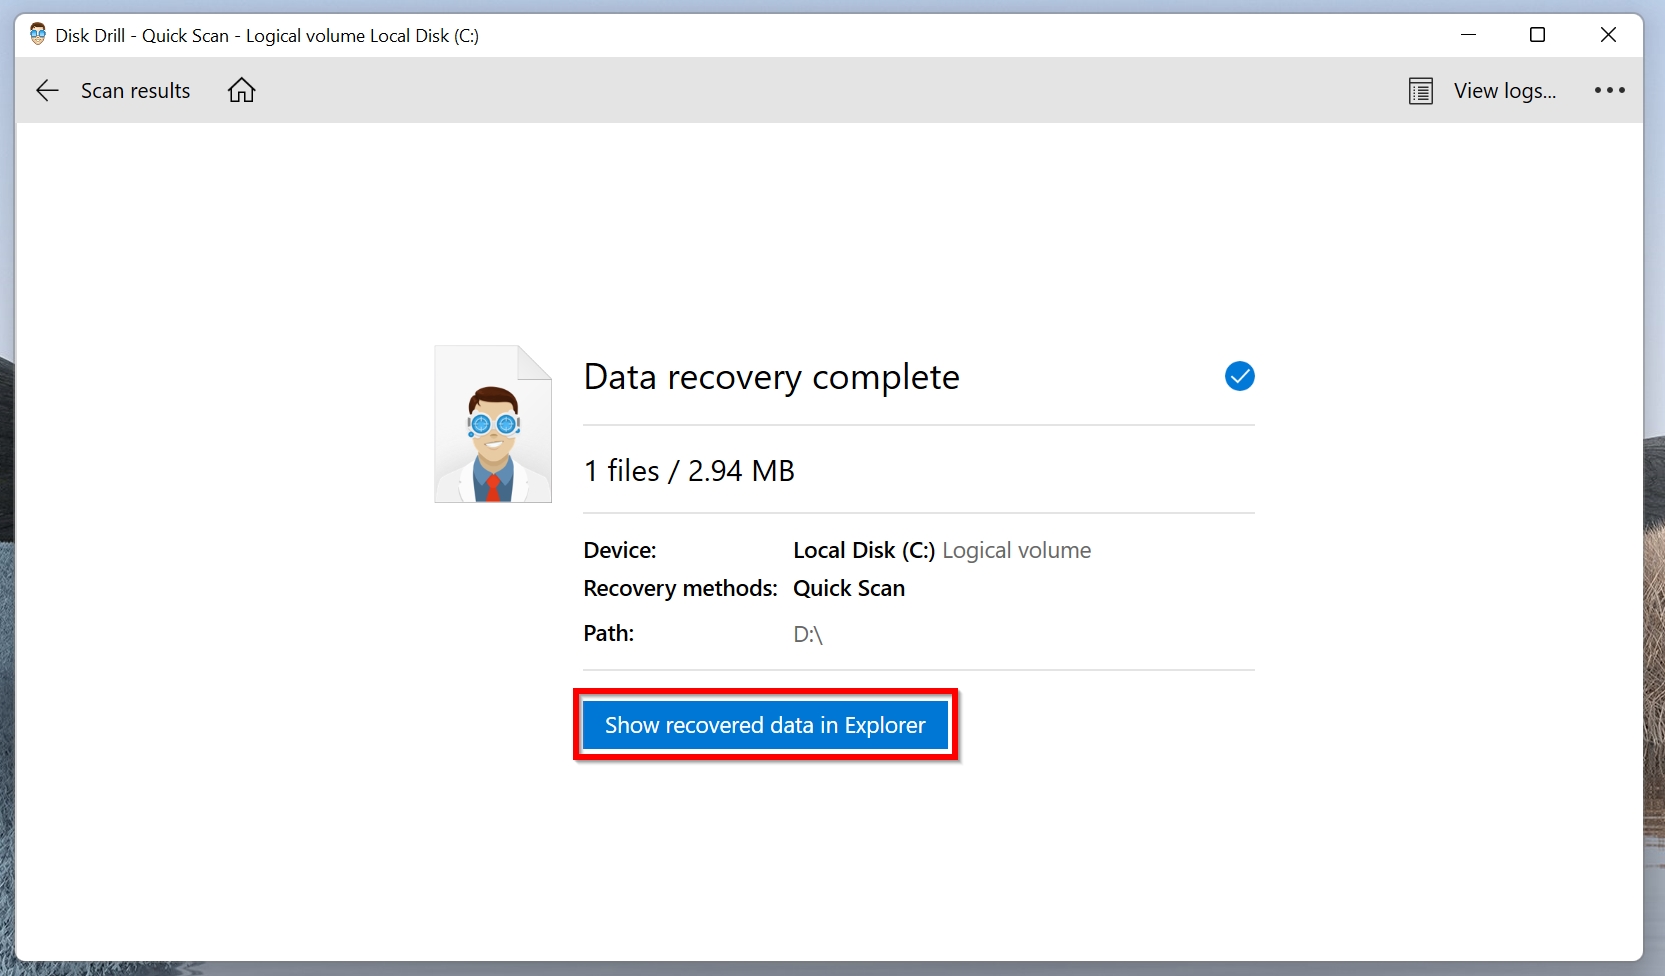
- Choose a recovery destination for the files. Click on OK.
- After data recovery is complete, click on Show recovered data in Explorer to view the recovered files in Windows Explorer.
Option B: Recuva
![]() Recuva is another well-reviewed data recovery program. Its wizard-based approach to data recovery is helpful for new users, while a good data recovery rate provides you with peace of mind. It also has a filter feature along with secure delete to permanently delete any sensitive files.
Recuva is another well-reviewed data recovery program. Its wizard-based approach to data recovery is helpful for new users, while a good data recovery rate provides you with peace of mind. It also has a filter feature along with secure delete to permanently delete any sensitive files.
Here’s an overview of how to recover data using Recuva:
- Download Recuva and install the program.
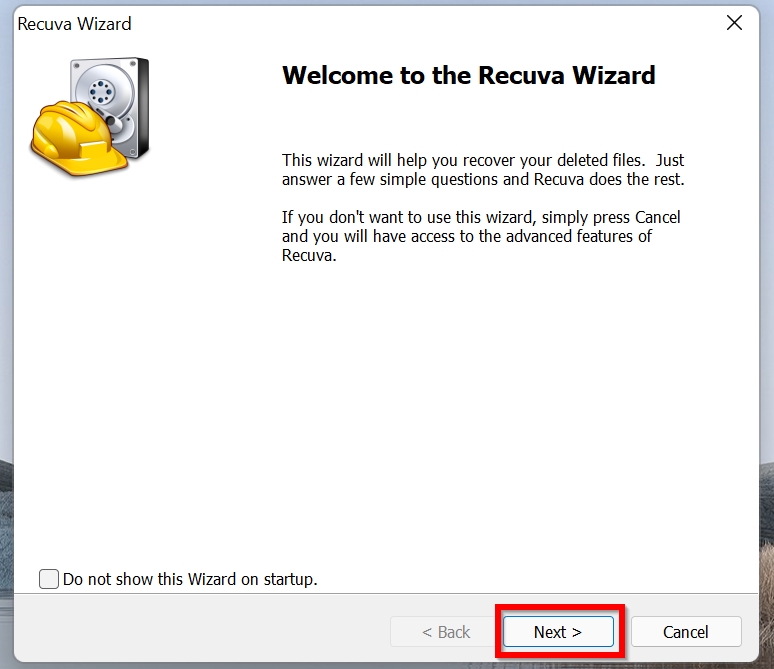
- Launch Recuva.
- You’ll be greeted with a data recovery wizard screen. Click Next.
- Now, select the file types of you want to recover. We’ll choose All files for this tutorial.

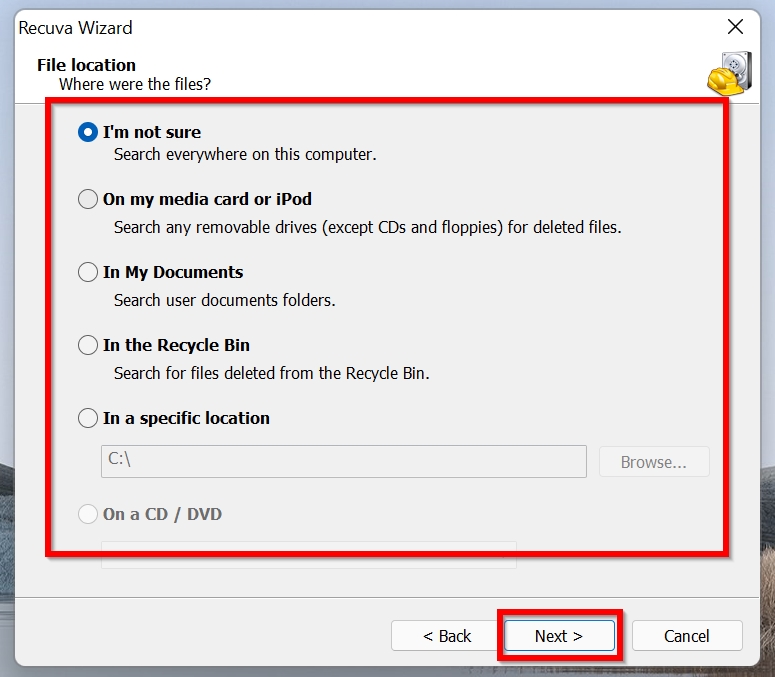
- Select a scan location. Leave I’m not sure selected to scan your entire PC for automatically deleted files. Click on Next.
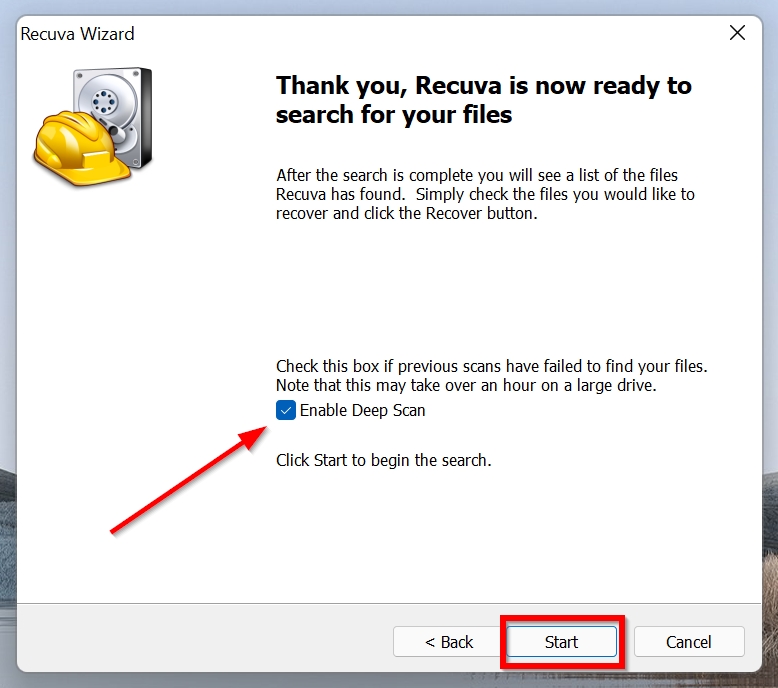
- On the next screen, ensure that Enable Deep Scan is ticked for a more thorough scan. Click on Start to begin the scan.
- Again, using the checkbox next to each file, select the files you want to recover. Click on Recover.
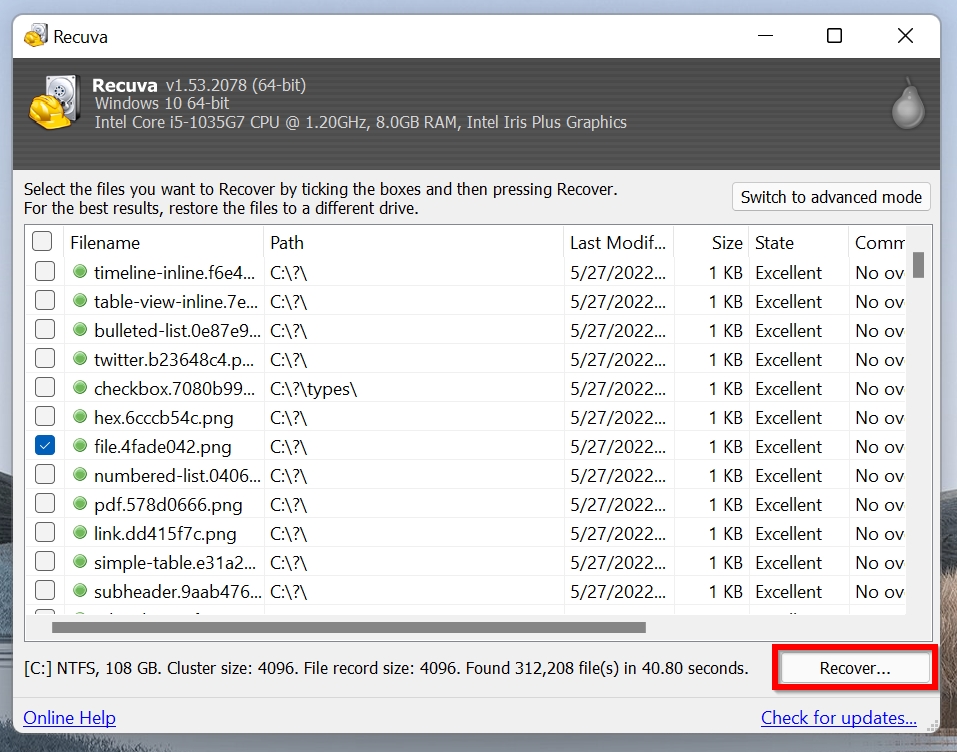
- Browse for a location to save the files you want to recover. Click on OK.
- Recuva will recover the selected files.
How to Stop Windows 10 Deleting Files Automatically
While data recovery software can help you recover deleted files on Windows 10, ideally, you should aim to resolve the issue of Windows 10 deleting files automatically. Let’s take a detailed look at how to diagnose and fix the automatic deletion problem in Windows 10:
Method #1: Configure or Turn Off Storage Sense
Storage Sense is a feature that automatically frees up space on your computer. It can also delete useful files if not properly configured, especially from the Downloads folder. You can configure it to not delete essential files or turn it off entirely:
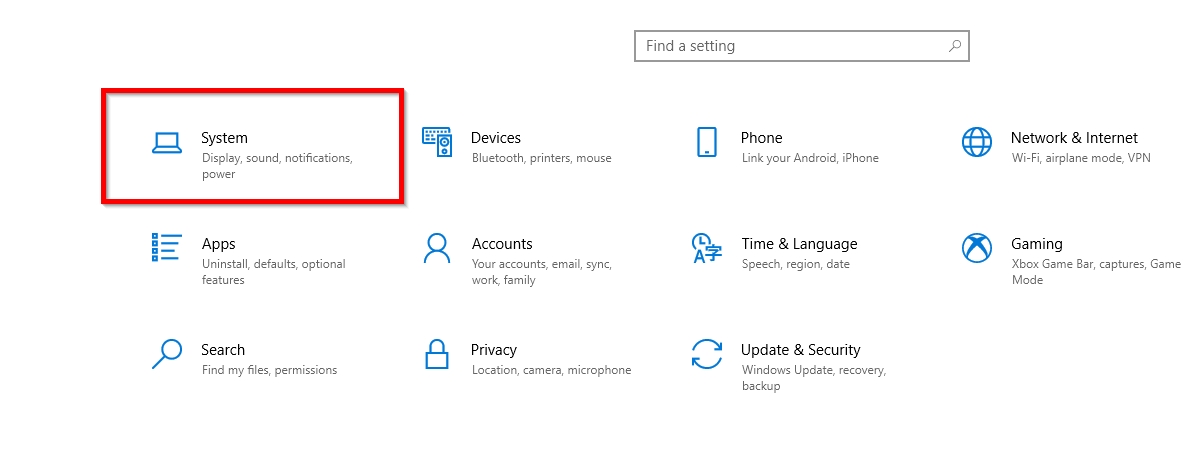
- Right-click on the Start button and click on Settings.
- Click on System.
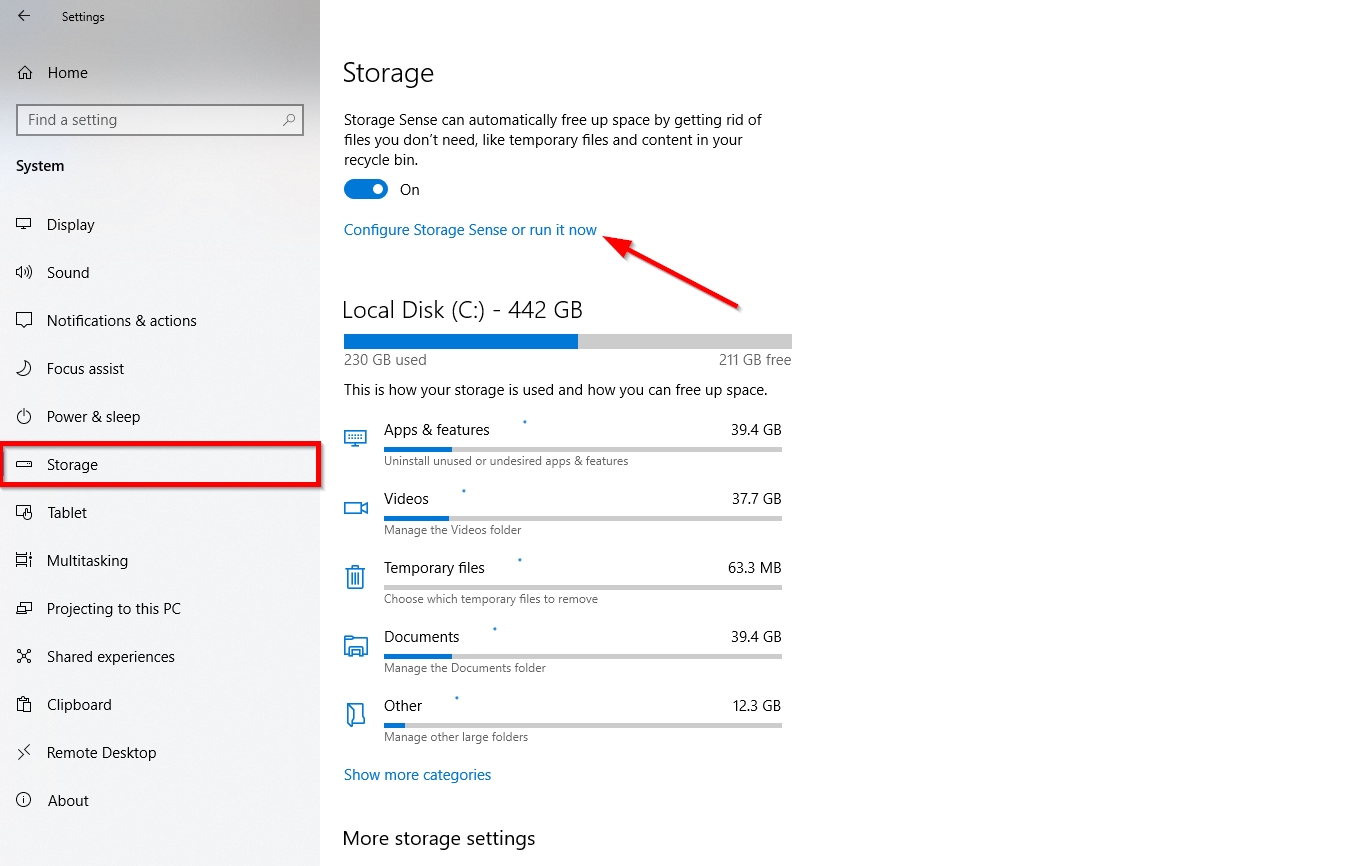
- Click on Storage in the left navigation pane.
- Select Configure Storage Sense or run it now.
- Now, you could either turn off Storage Sense entirely using the slider or set the Delete files in my Downloads folder if they haven’t been opened for more than: to Never.
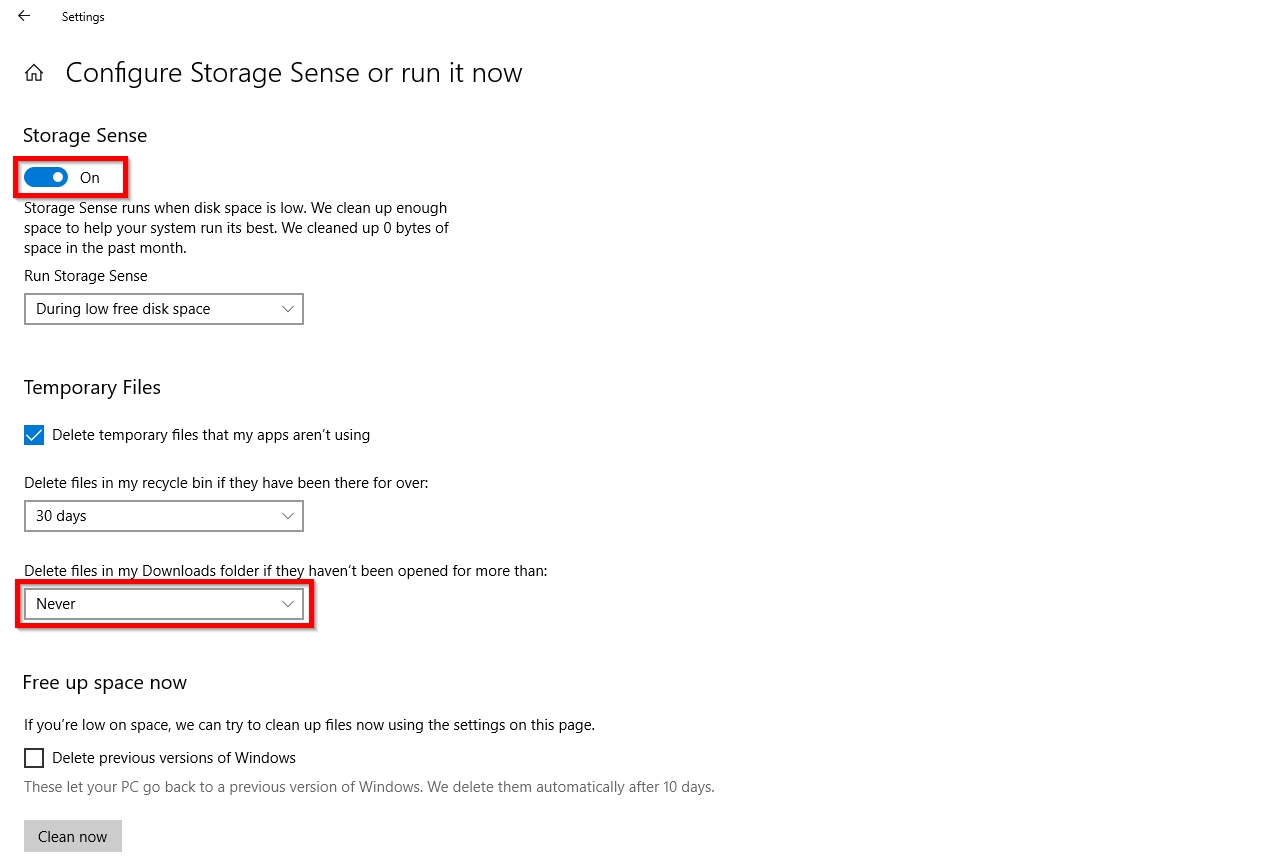
- You can also turn off the automatic deletion of files in the Recycle Bin using the drop-down menu on the same screen.
Method #2: Add an Exclusion to Windows Defender
Windows Defender can sometimes falsely flag a file, and thereby result in files getting deleted automatically on Windows 10. The simplest way to solve this problem is by adding an exclusion for the folder or file to Windows Defender.
Note: Only do this if you’re sure the file or folder is completely safe and devoid of any viruses and other malware.
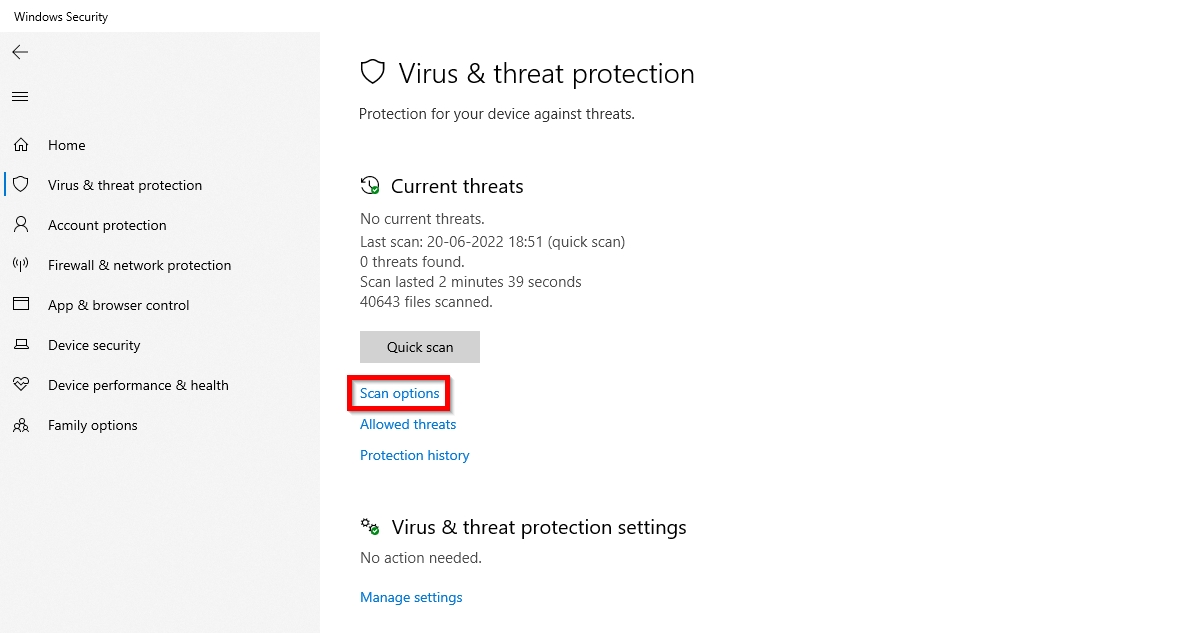
- On Windows Search (Windows Key + S), type Windows Security, and open the app from the search results.
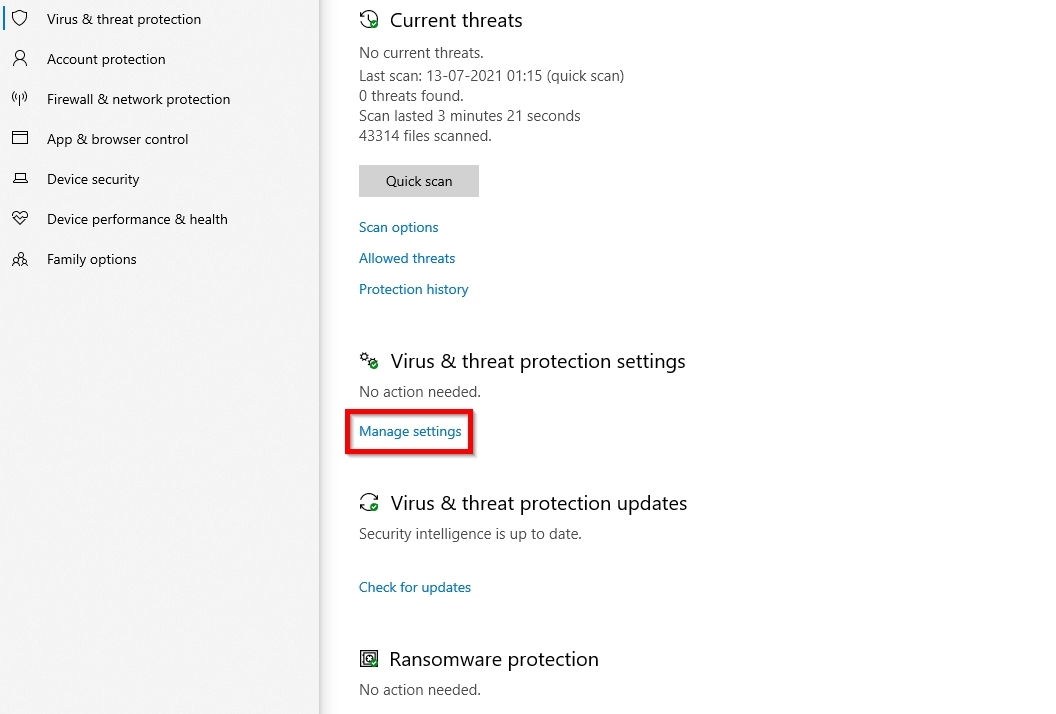
- Click on Virus & threat protection.
- Under Virus & threat protection settings, click on Manage settings.
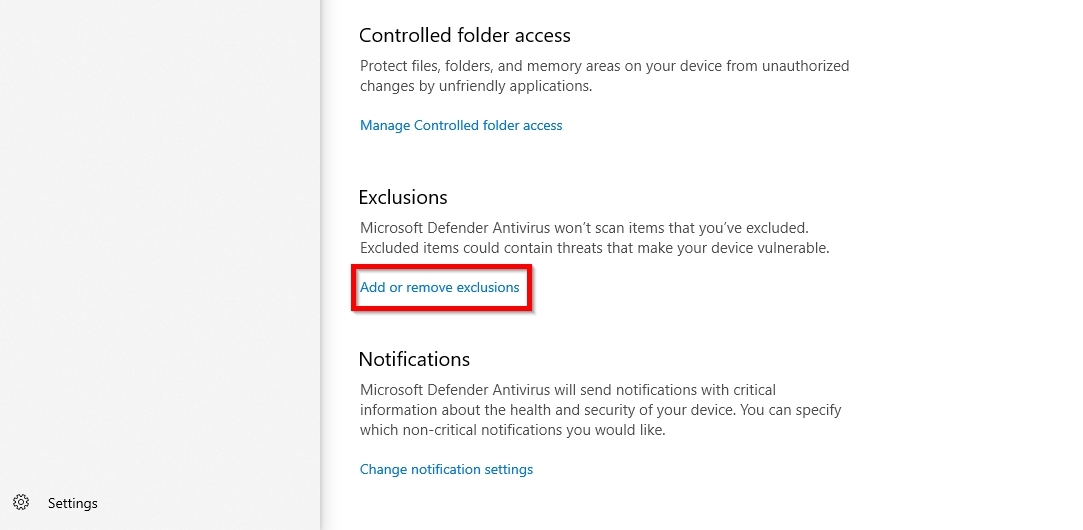
- Scroll down to find the Exclusions section. Here, click on Add or remove exclusions.
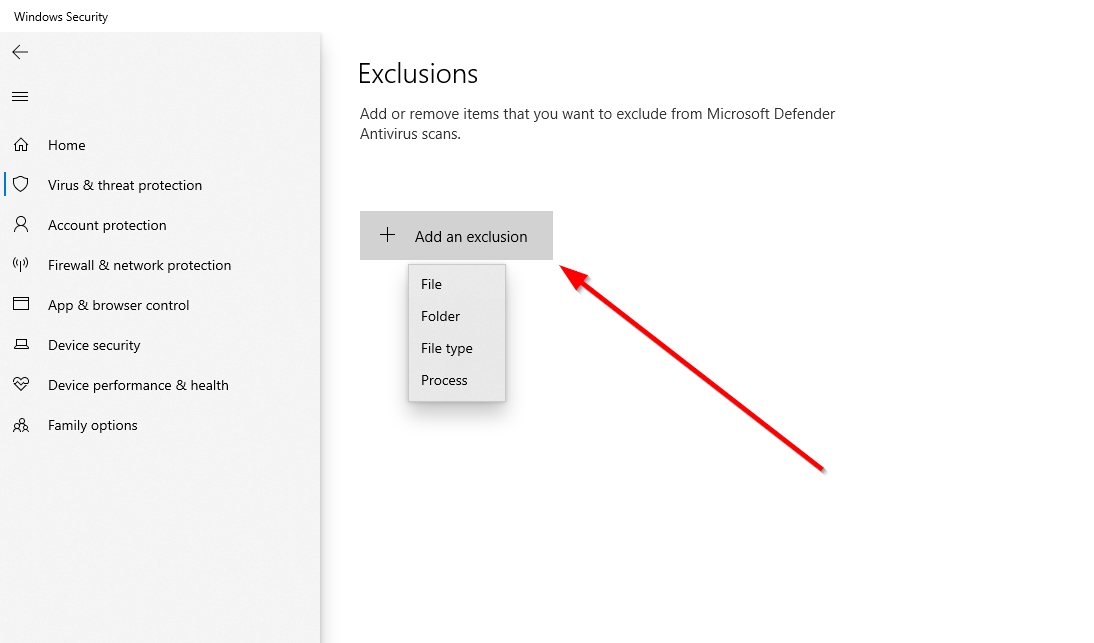
- Click Add an exclusion and browse for the file or folder you want to exclude from Windows Defender. Click Open to add it to the exclusion list.
Method #3: Diagnose Hardware and Firmware Issues
If you experience that clicking a file automatically deletes it, your mouse or trackpad may be malfunctioning, or there’s a faulty driver involved. The first step of action should be to connect a different mouse to the computer and see if the error persists. Additionally, check if the Delete key of your keyboard isn’t stuck.
If you’re still experiencing the files getting deleted automatically error, it may be worthwhile to update or reinstall the drivers for your mouse. You can do this using Device Manager:
Update Mouse Drivers
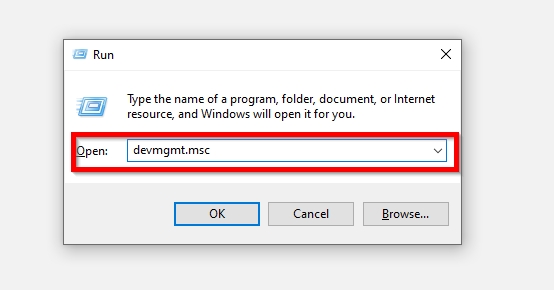
- Press Windows Key + R to open the Run application.
- Type devmgmt.msc in the text box and press Enter.
- Expand the Mouse and other pointing devices section.
- Right-click on your mouse and select Update driver.

- On the next window, click on Search automatically for drivers option.
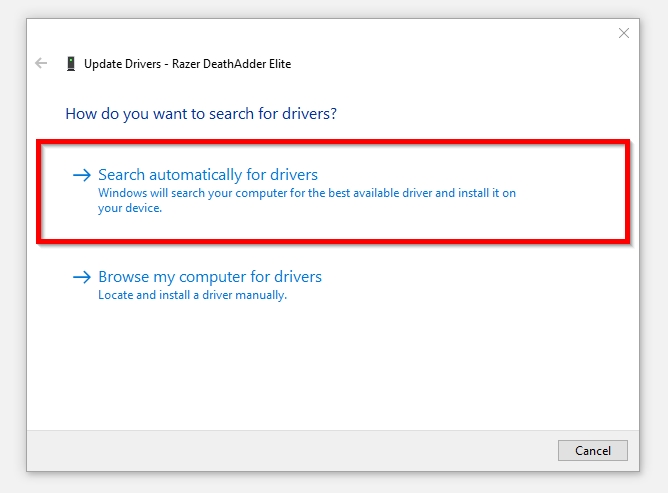
- Windows will search for and download the latest drivers for your mouse.
Reinstall Mouse Drivers
- Again, open Device Manager using steps 1 and 2 in the section above.
- Ensure you expand the Mouse and other pointing devices section.
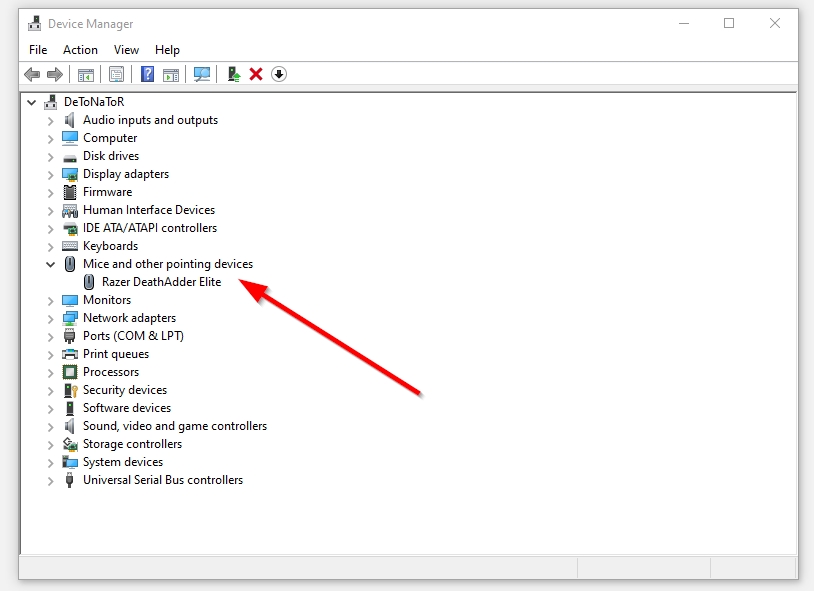
- Right-click on the name of your mouse and click Uninstall device.
- In the prompt that appears, tick the Delete the driver software for this device checkbox. Click on Uninstall,
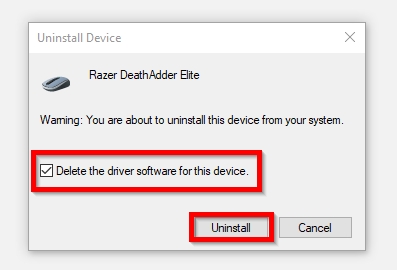
- Reboot your computer and Windows will reinstall the drivers again. Your mouse may not work after you uninstall the drivers, so use the ALT+F4 shortcut to close any windows and shut down your PC.
Method #4: Try Running an SFC Scan and Scan for Malware
Now, there are various reasons why Windows may be deleting your files automatically after you reboot your computer. It could be due to a failure in loading your user file, a faulty update, or Windows Defender deleting safe files. You can fix the last one by adding an exclusion to Windows Defender.
Run SFC Scan
A good first step to fix this issue is to run a System File Checker (SFC) scan:
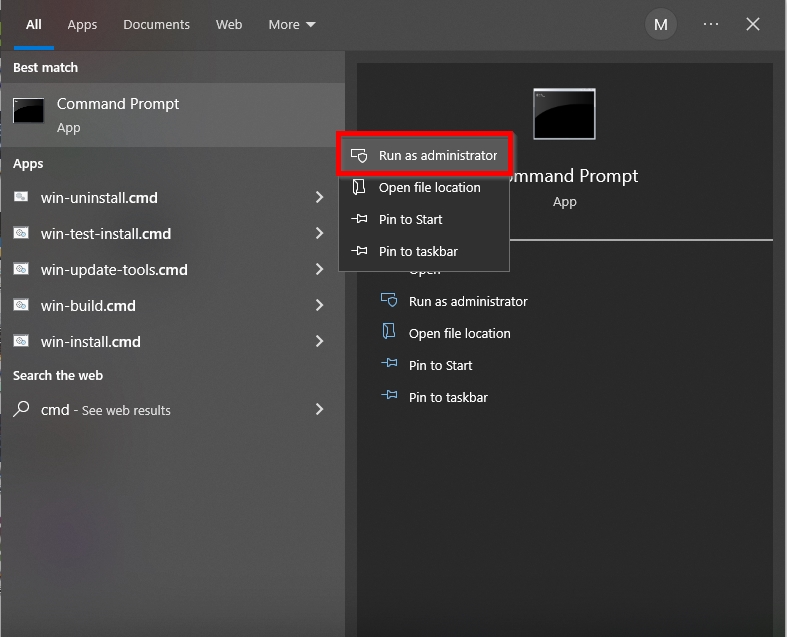
- In Windows Search (Windows Key + S), type cmd. Right-click on Command Prompt and select Run as administrator.
- In the Command Prompt console, type sfc /scannow and press Enter.
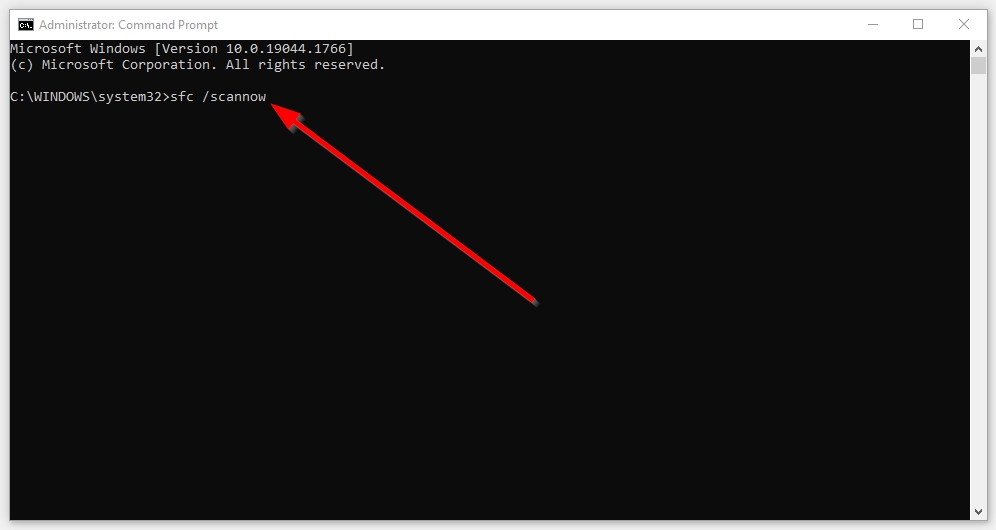
- Wait for Windows to scan and fix the integrity of your system files.
- Once it’s done, Reboot your PC to see if the problem persists.
Create a New User Account
It’s possible that Windows fails to load your user profile and logs you in with a temporary user account instead. A good way to fix this would be to create a new user account and then see if the problem of files getting deleted automatically on Windows 10 still remains.
Here is a simple way to create a new user account on Windows:
- Click on Start > Settings.
- On the Settings dashboard, click on Accounts.

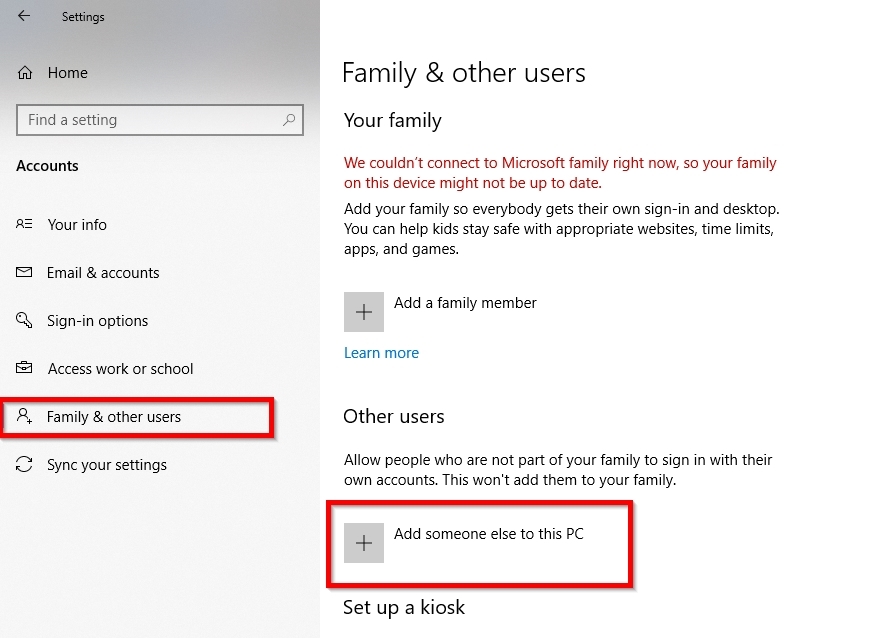
- On the Accounts window, click on Family & other users in the left navigation pane.
- Click on Add someone else to this PC. Enter the required credentials and Windows will create a new user account.
Scan for Malware
Computer viruses can impede the normal functioning of your Windows PC and this includes the issue of files getting deleted automatically. It’s recommended you use a good antivirus program and perform regular full computer scans. Windows Defender does a decent job at protecting you from viruses.
But, it only performs Quick Scans regularly. Users have to manually perform a full scan using Windows Defender:
- In Windows Search (Windows Key + S), type Windows Security and open the app.
- On the Windows Security dashboard, select Virus & threat protection.
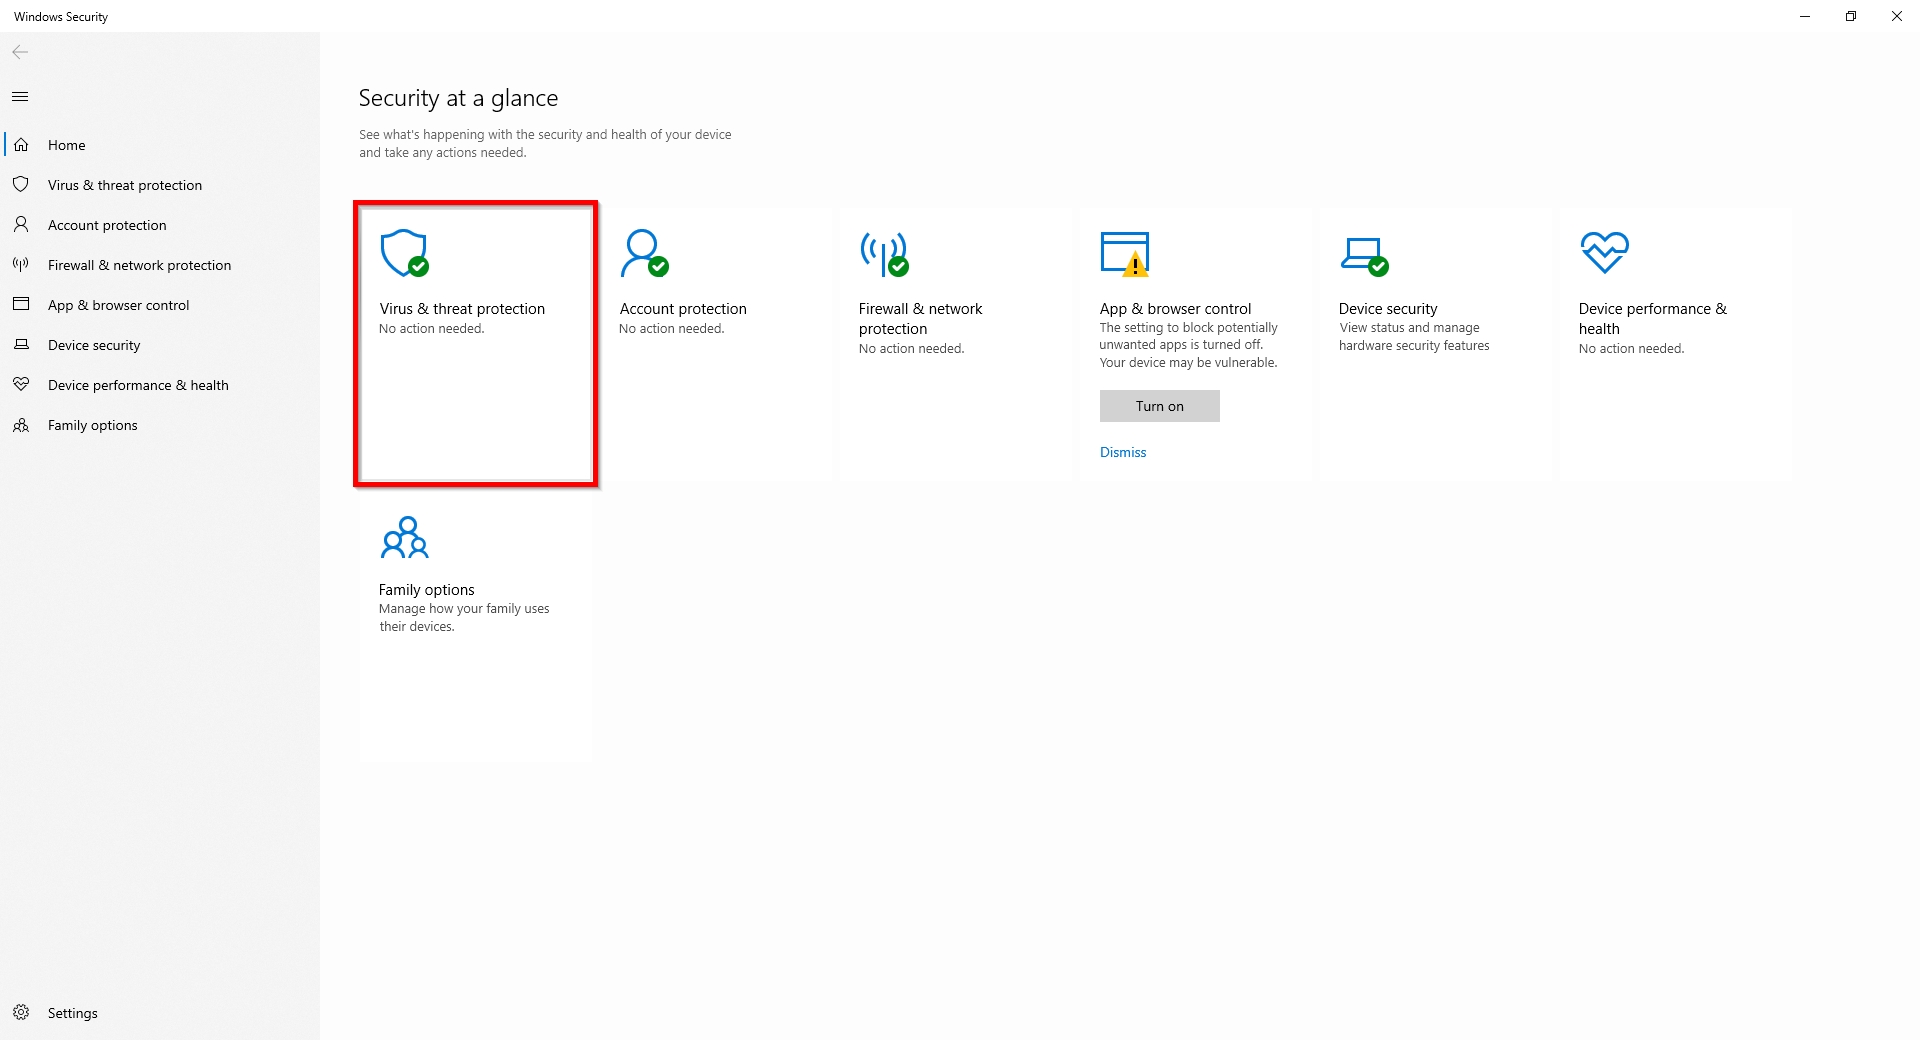
- Under Current Threats, click on Scan options.
- Select Full Scan and then click on Scan now.
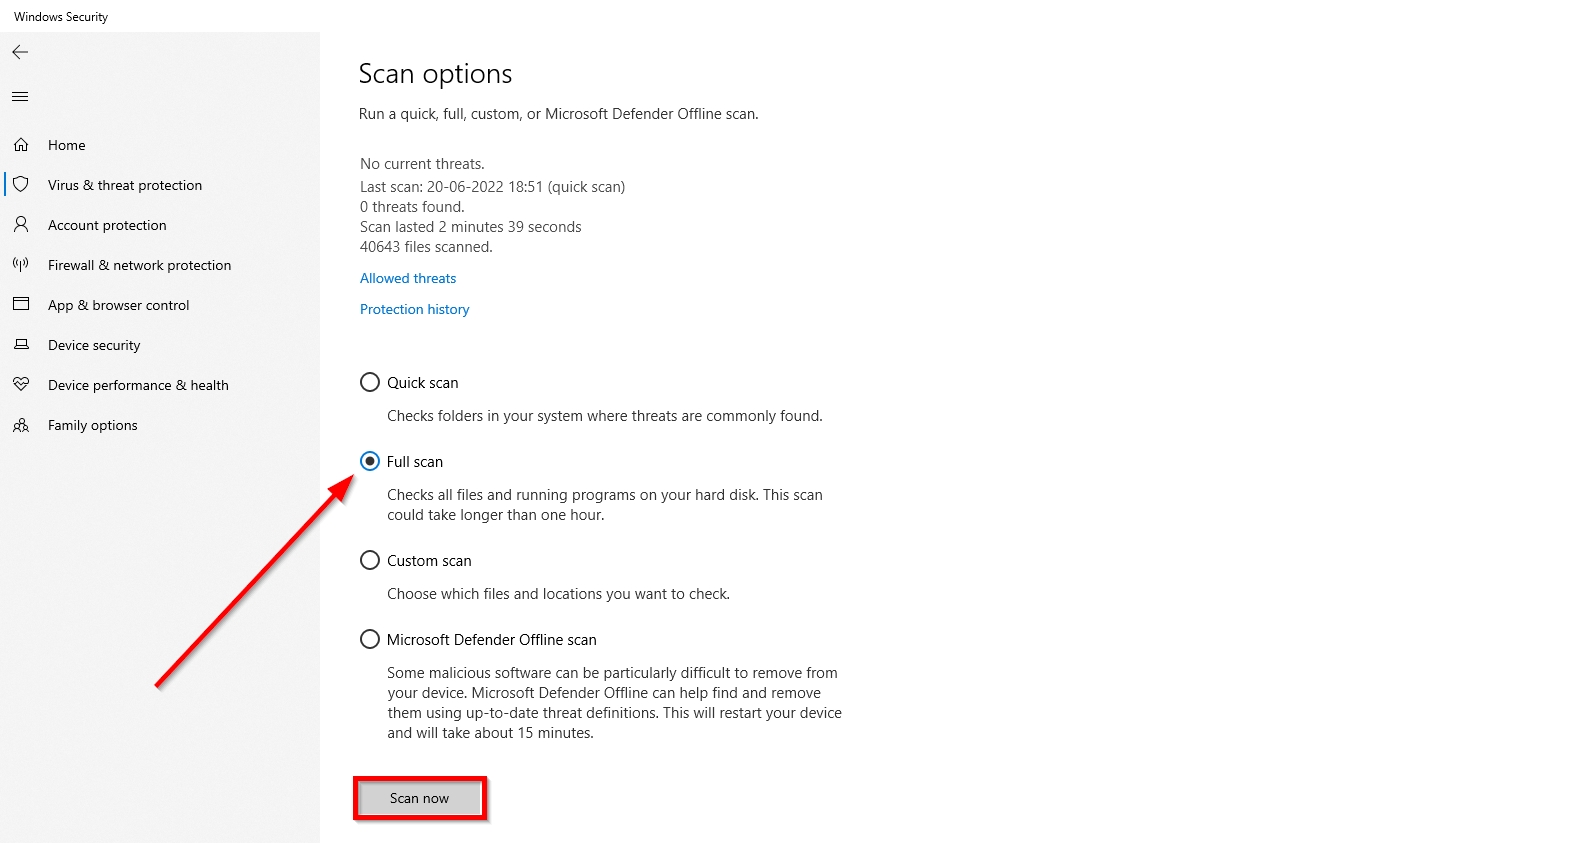
- It may take a while for Windows Defender to scan your entire hard disk drive. Also, your computer may work slower than usual during the scan.
FAQ
Why does Windows 10 keep deleting files?
There are numerous reasons why your Windows 10 computer is automatically deleting files. Some of them include–Storage Sense being turned on, the drivers for your mouse being faulty, a malware infection, and harmless files being detected as a virus.
How come, when I click on files, they automatically get deleted?
The main reason for files getting deleted as soon as you click on them is a faulty mouse or keyboard. This could either be a hardware issue (such as a stuck delete key on your keyboard), or a firmware/driver problem.
Why are my files getting deleted automatically on Windows 11?
The reasons for automatic file deletion in Windows 11 are largely the same as in Windows 10–a misconfigured Storage Sense feature, false flagging of files by Windows Defender, malfunctioning drivers, and faulty input devices such as mice and keyboards. If you recently updated to Windows 11, it is a possibility that the deleted files were stored in the Windows.old folder, which Windows automatically deletes after a certain period of time.
You can use programs like Disk Drill to recover deleted files from Windows 11 as well.
Why my laptop is automatically deleting files?
Your laptop may be running low on space, prompting Storage Sense to clear up files. You could either modify Storage Sense settings or clear up space manually by deleting unused files. Other common reasons could be–computer viruses, or a problematic touchpad.
Conclusion
It can sometimes be tricky to narrow down the exact cause behind why your Windows 10 is automatically deleting files. Even if you have lost some important files, it’s important not to panic, because data recovery programs can help you recover those lost files. You can then go about determining the reason for Windows 10 deleting files automatically.
This article was written by Manuviraj Godara, a Staff Writer at Handy Recovery Advisor. It was also verified for technical accuracy by Andrey Vasilyev, our editorial advisor.
Curious about our content creation process? Take a look at our Editor Guidelines.