It’s probably not too far-fetched to say that most of us don’t check the health of our hard drives regularly. If everything’s running smoothly, it’s easy to forget. As a result, problems like bad sectors, lost clusters, and directory errors can unknowingly build up in the background and cause data loss or system instability.
Thankfully, there exists an invaluable repair tool that many go without knowing until they’re put in a situation where it’s needed: CHKDSK. Today, we’re going to look at CHKDSK and instruct you on how to run CHKDSK to diagnose and fix disk-related problems on Windows 10 and 11.
Notice: While CHKDSK is generally considered safe to use, there is always a risk of data loss or corruption when working with any system utility that modifies file systems. This has been confirmed through reports from various users.
What Is CHKDSK?
CheckDisk (CHKDSK) is a command-line utility tool that was introduced in 1980 with 86-DOS, which would later become MS-DOS. Windows CHKDSK can be used to scan and repair problems with the file system of your storage device. You can use the CHKDSK command with terminal programs such as Command Prompt, Windows PowerShell, and Terminal.
What CHKDSK Does
The functionality you get out of the CHKDSK utility is dependent on the parameters you use. On its own, the Check Disk command will only scan your disks for errors and report them back to you. However, when used with , one of the more popularly used parameters, CHKDSK will also scan the drive for bad sectors and attempt to correct them in addition to the other errors it finds.
How it handles the bad sector depends on whether it’s a soft bad sector or a hard bad sector:
- Soft bad sector – Appears when data is written incorrectly. CHKDSK will repair these bad sectors.
- Hard bad sector – Appears as a result of physical damage. CHKDSK will mark these sectors as unusable so they’re not used again.
Since it’s scanning the file system, it works on hard drives, solid-state drives, USB flash drives, SD cards, and most other forms of storage media. Although, some parameters are limited to certain file systems (which we’ll look at later).
If your disk is showing as RAW, CHKDSK may not work straight away as it cannot identify the file system. Check out our guide on how to bypass the “CHKDSK is not available for RAW drives” message.
How to Run CHKDSK on Windows
There are a few ways you can run CHKDSK on Windows 10 and 11 to fix file system-related errors. Check out the various methods below.
If your disk contains data that’s important to you, make sure you recover your data before attempting to fix the drive with CHKDSK.
Method 1: Run CHKDSK Using Command Prompt
Running the CHKDSK command using Command Prompt (or another terminal application) gives you the most control over the scan. With the use of parameters, you can customize what actions the scan performs.
Here is a CHKDSK command list, with a description for each parameter:
Parameter |
Description |
<volume> |
The drive letter (colon included), mount point, or volume name of where you want to run CHKDSK. |
[<path>]<filename> |
Only necessary for FAT and FAT32. Allows you to scan a file (or files) and check for fragmentation. |
/f |
Fixes any errors that it finds after scanning your drive. This is useful for fixing corrupted hard drives. |
/r |
Includes the same functionality as /f, but also locates bad sectors. |
/v |
Shows the name of every file on the drive as they’re checked. |
/x |
Has the same functionality as /f, but forced the volume to dismount first. |
/i |
Another type of scan that is less thorough but faster. NTFS only. |
/c |
Avoids checking cycles within the folder structure to reduce the time of the scan. NTFS only. |
/l |
Updates the log file size to the specified size. If no size is specified, it displays the current size of the log file. NTFS only. |
/b |
This parameter does two things: removes the current list of bad sectors and rescans the allocated and free clusters for errors. Includes the same functionality as /r. NTFS only. |
If your drive is suffering from bad sectors, it may be unstable. You should recover data from a hard drive with bad sectors as soon as possible, preferably before you run CHKDSK.
This is how you run CHKDSK using Command Prompt, PowerShell, or Terminal on Windows 11:
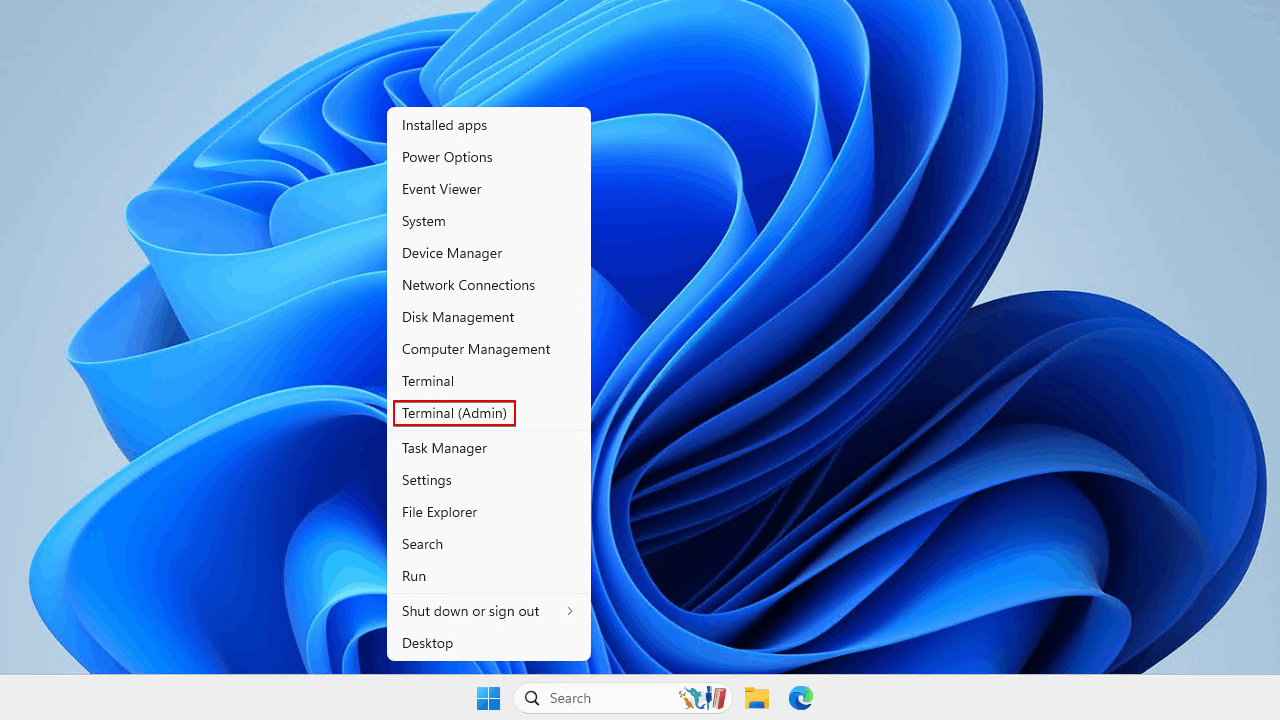
- Right-click Start and click Terminal (Admin). On Windows 10, click Windows PowerShell (Admin) instead.
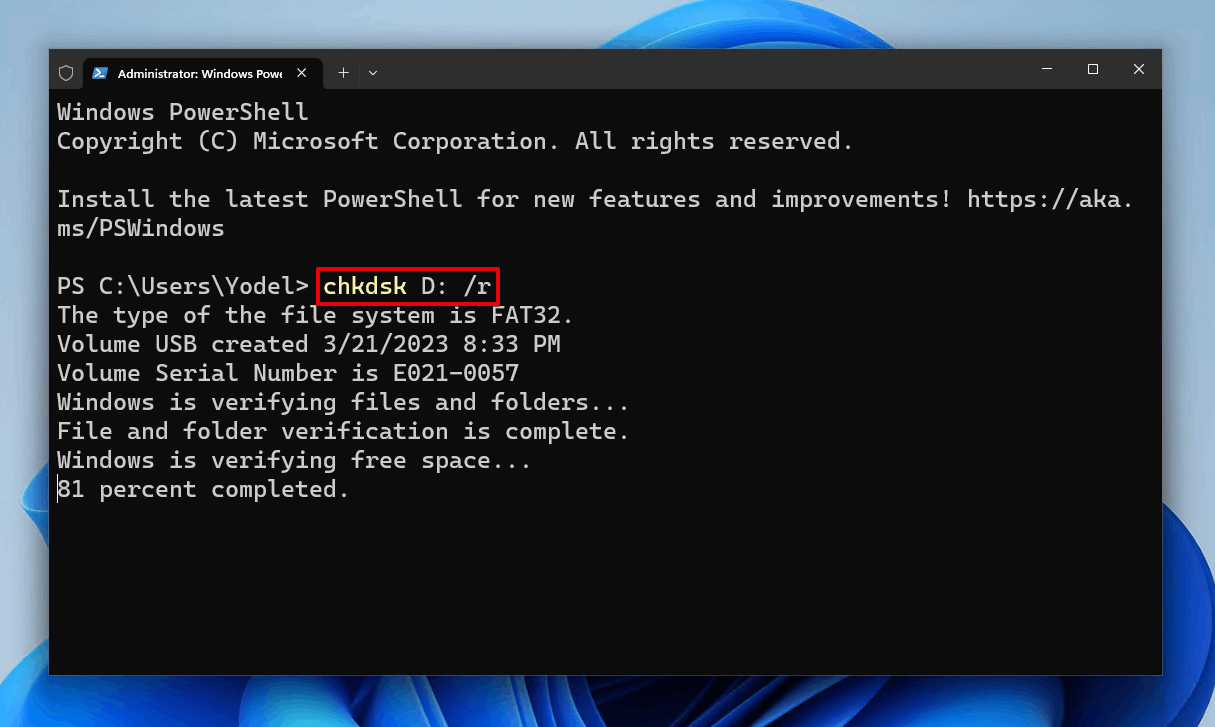
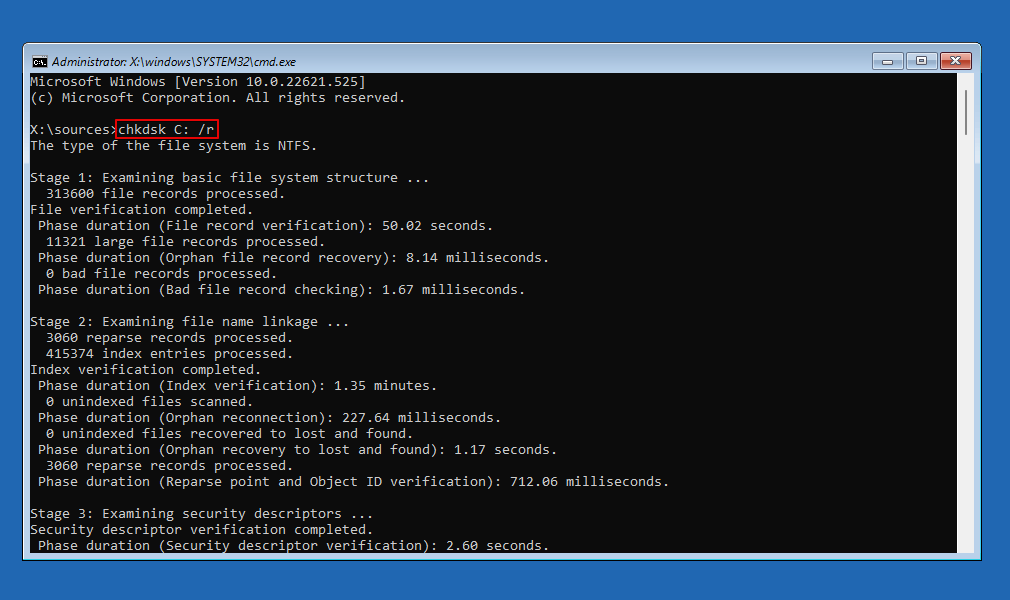
- Type chkdsk *: /r. Replace * with your own drive letter. The /r parameter will instruct CHKDSK to find errors, as well as bad sectors, and fix them. Press Enter.
Method 2: Repair Storage Using Error Checking Tool
Ever used the disk error checking feature on your hard drive? If you have, you may be surprised to know that it’s actually just the CHKDSK repair command with a user interface. It’s meant to be a simplified way of utilizing the functions of CHKDSK without the difficulties of using it in a terminal window. While this is great, the downside (for some) is that you don’t get the same amount of control over your scan, as you cannot specify parameters. It will simply scan your drive for errors and attempt to correct them.
Here’s how you can access the disk error checking tool:
- Open File Explorer.
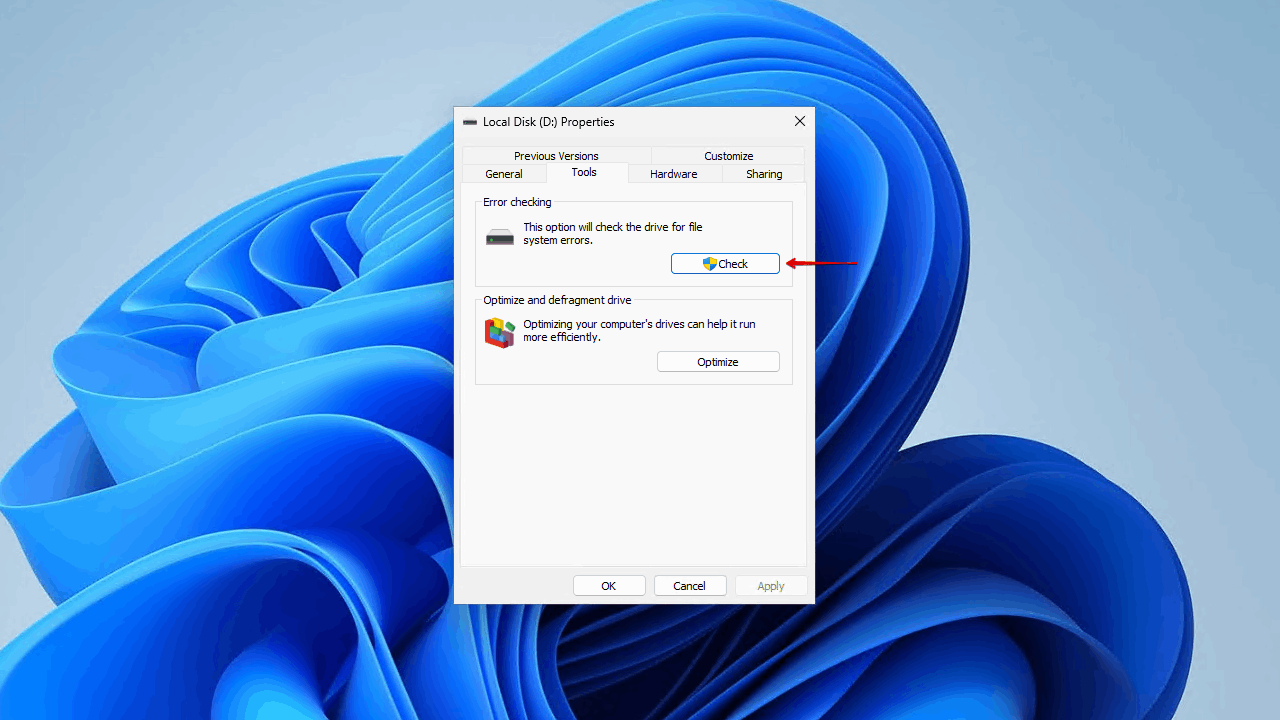
- Right-click your hard drive and click Properties.

- Click Tools.
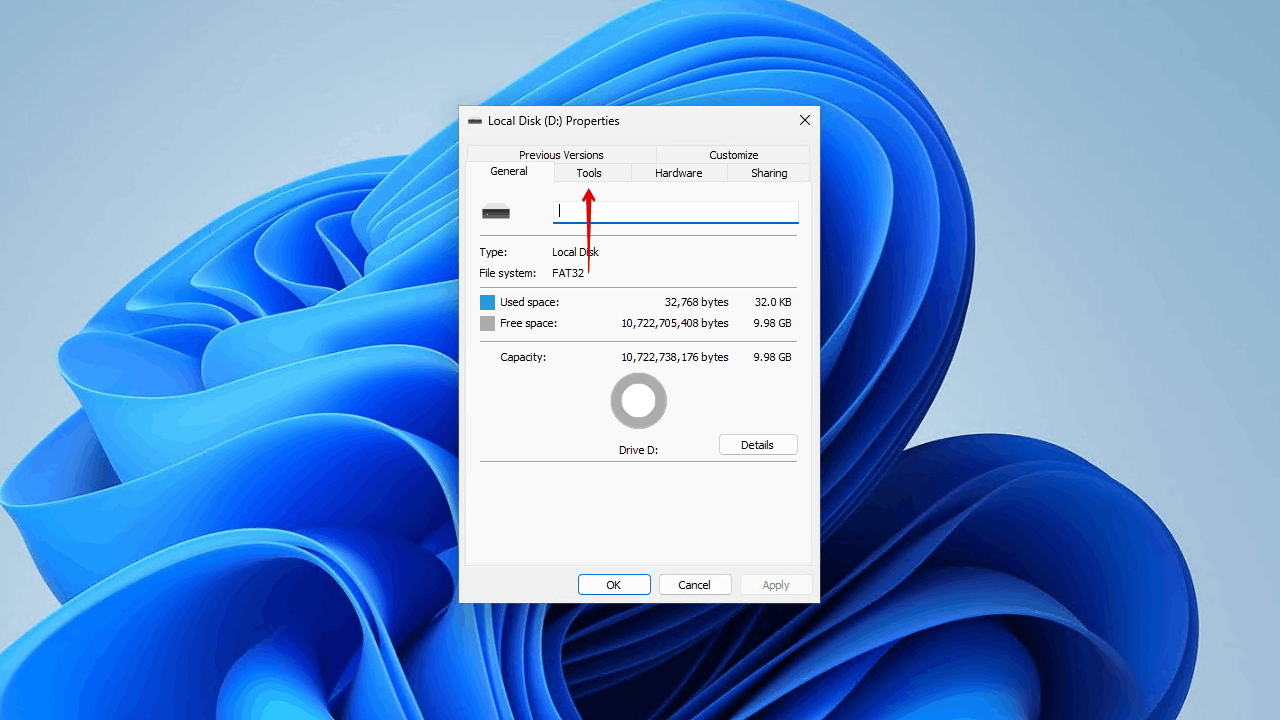
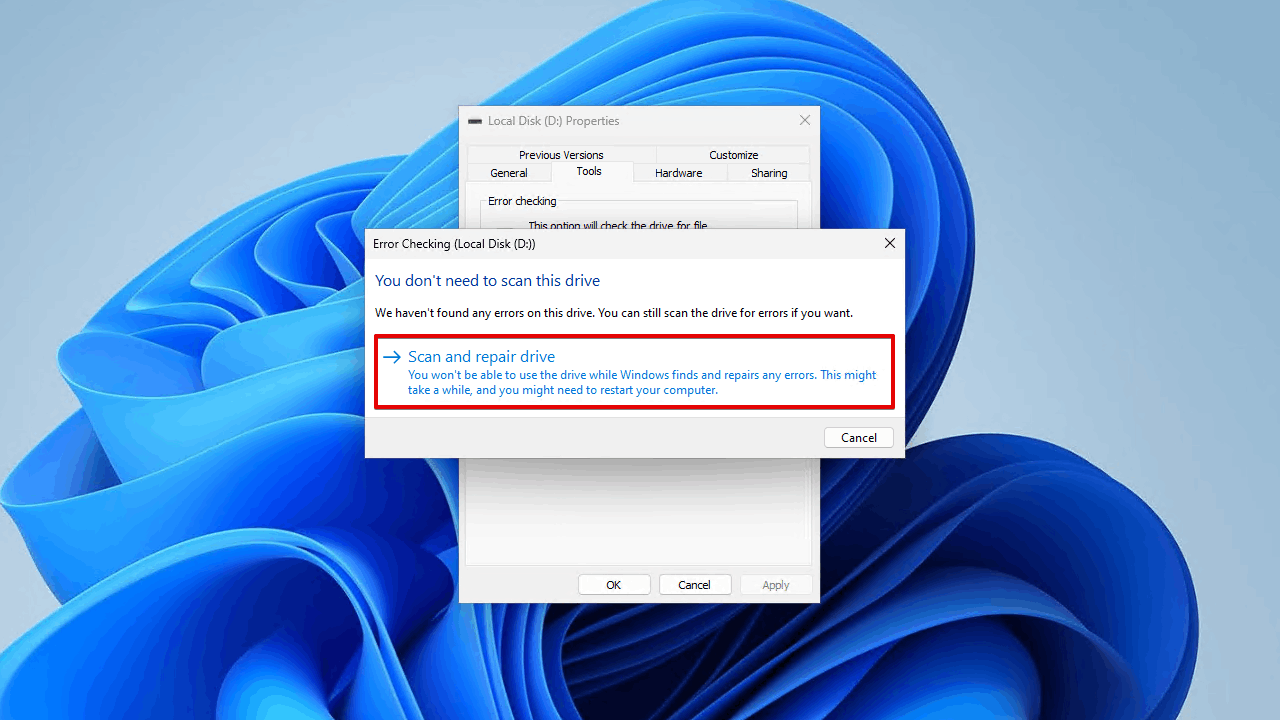
- Click Check.
- Click Scan and repair drive.
Method 3: Run CHKDSK from WinRE
When your system drive is the one that’s facing problems, the previous methods won’t work since you can’t get into Windows. Even in times like this, CHKDSK can be used to fix the problem. To use this method, you’ll need your Windows installation media. This allows you to boot into Windows Recovery Environment (WinRE) and make use of CHKDSK.
Before starting, connect/insert your Windows installation media and adjust the boot order in your BIOS so it’s at the top.
This is how you can run CHKDSK in WinRE to troubleshoot your system drive:
- Boot into WinRE.
- Select your language and click Next.

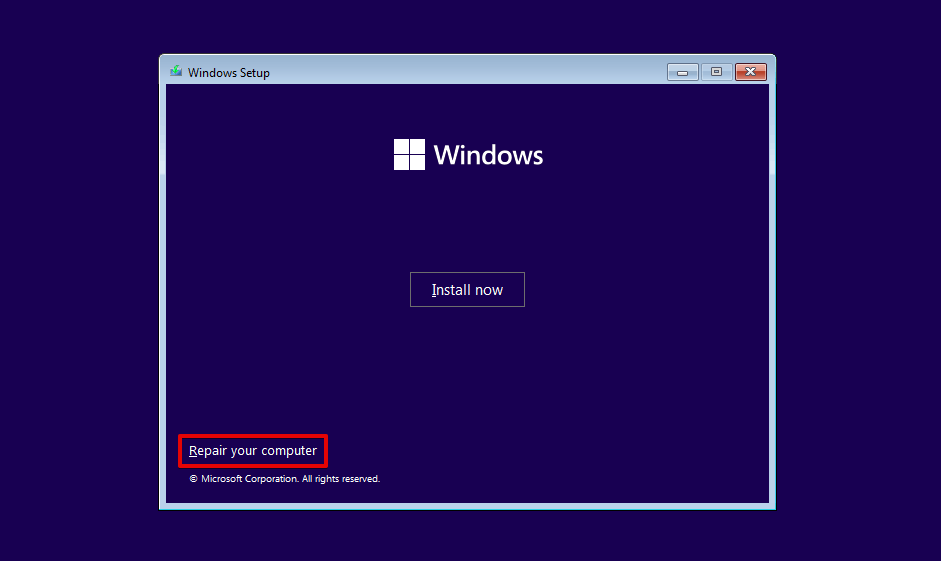
- Click Repair your computer.
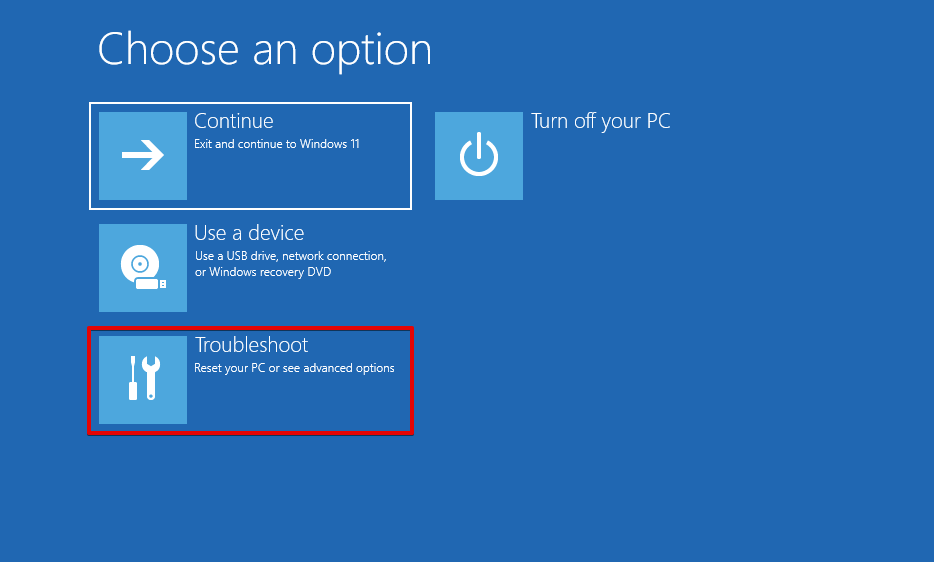
- Click Troubleshoot.
- Click Command Prompt.
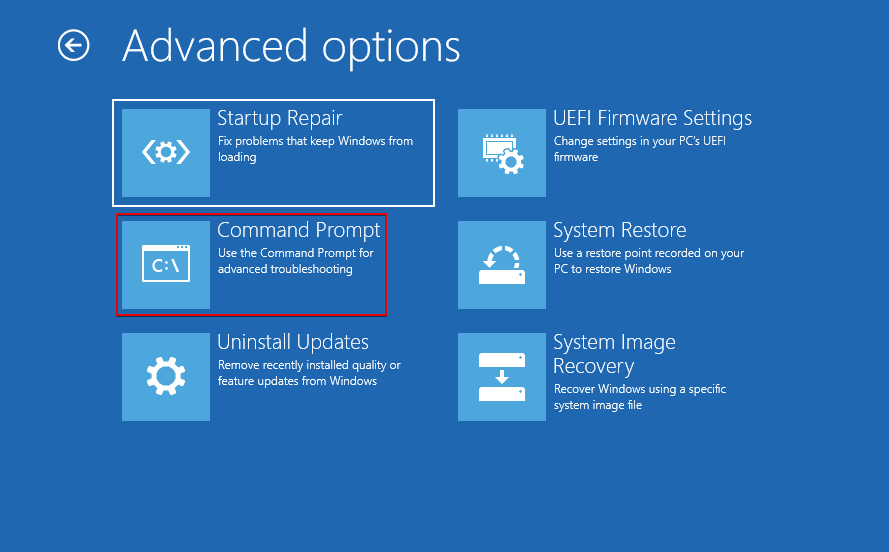
- Type chkdsk *: /r. Replace * with your drive letter. Press Enter.
How to Access CHKDSK Logs
You can extract logs from CHKDSK to go back and look exactly at what you did to fix the problem. Log extraction can be done in two ways: Event Viewer or PowerShell.
Event Viewer
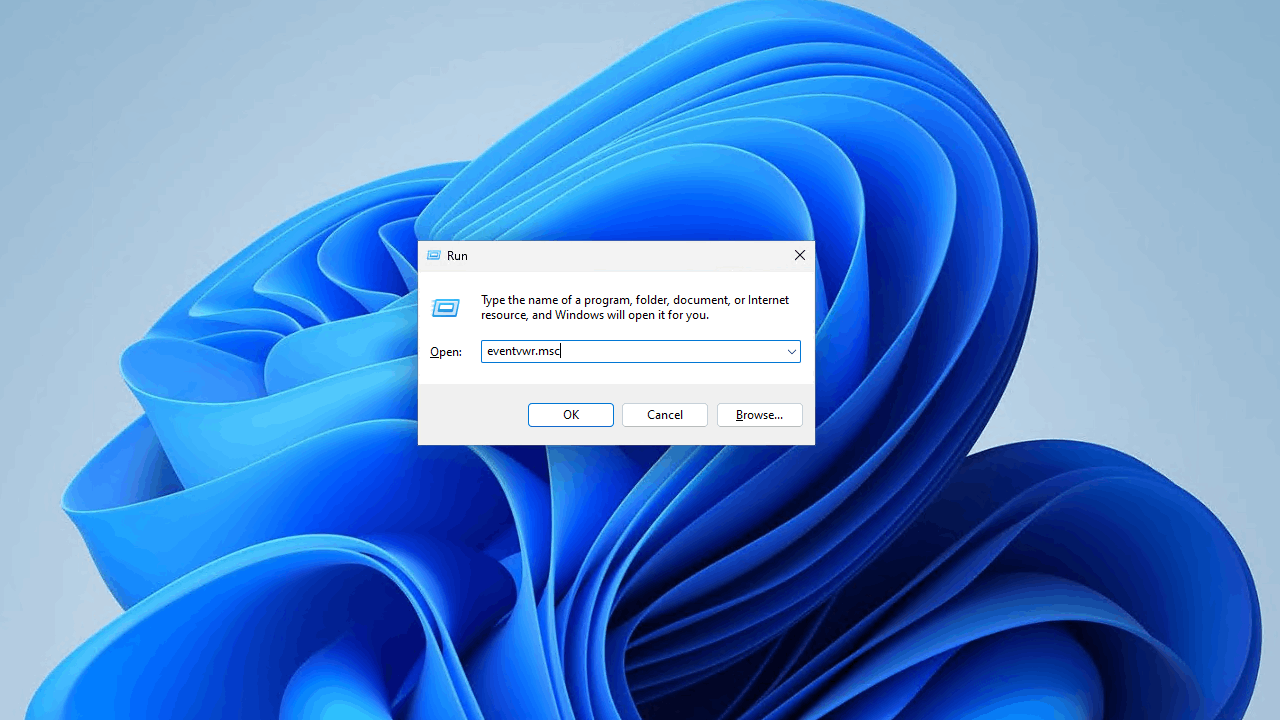
- Press Windows Key + R and type eventvwr.msc. Press Enter to open Event Viewer.
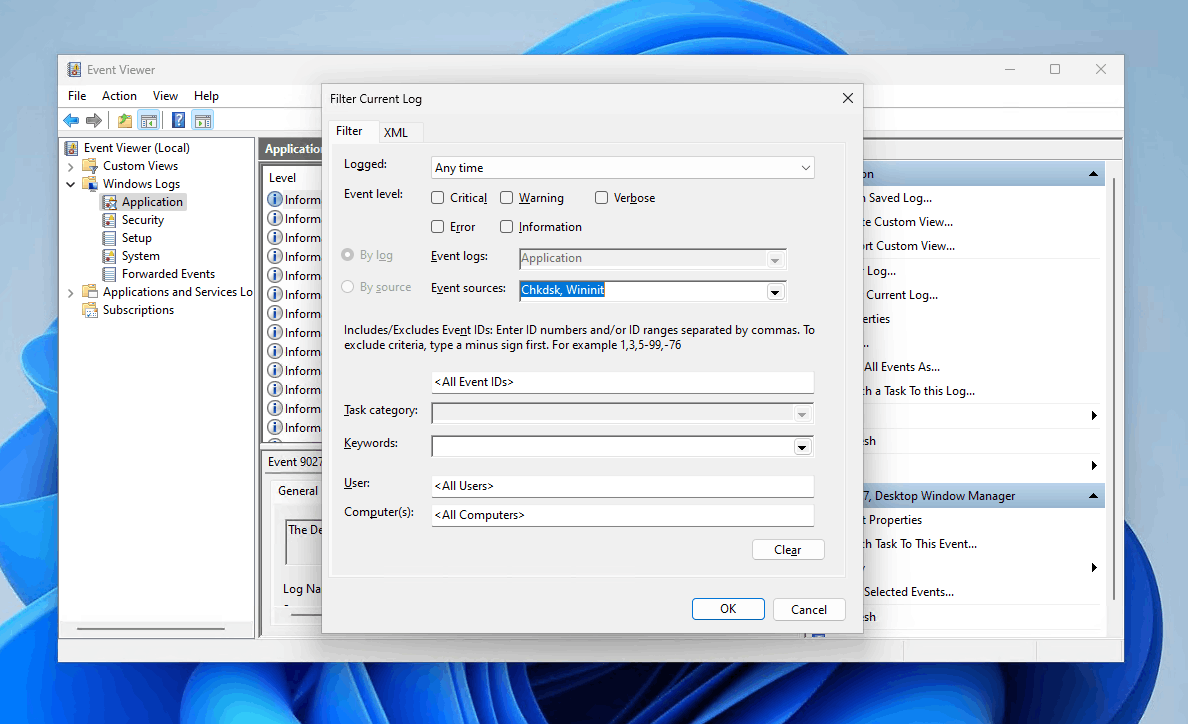
- Expand Windows Logs and right-click Application. Click Filter Current Log.
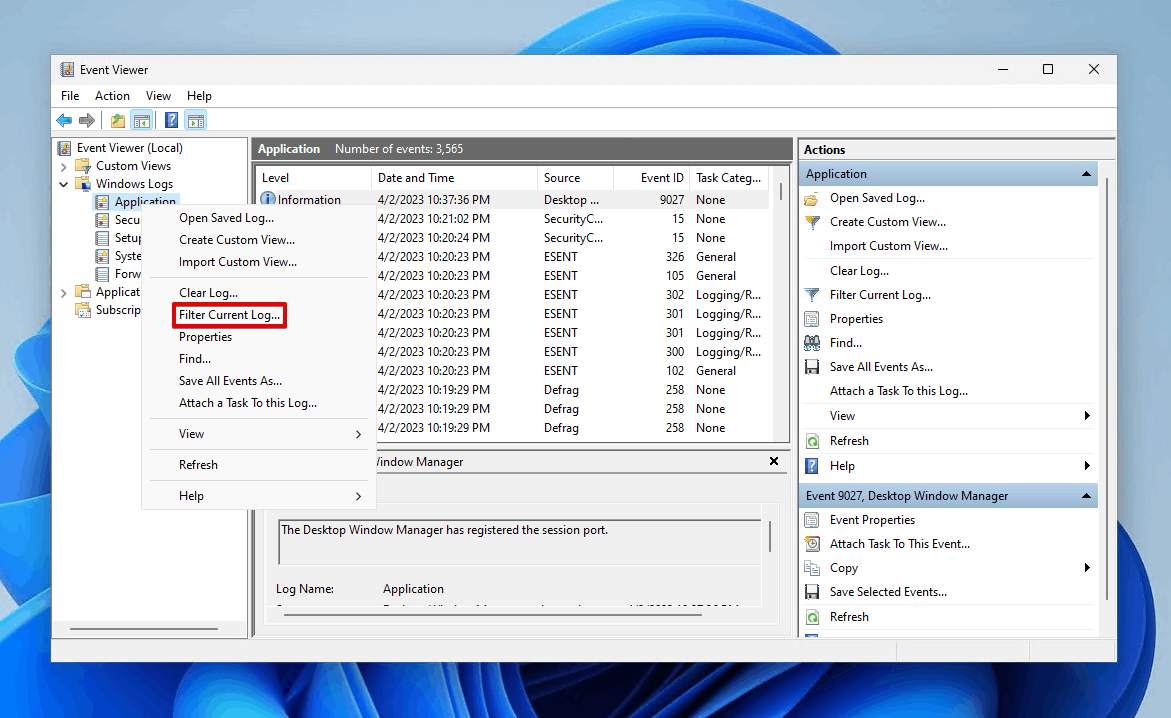
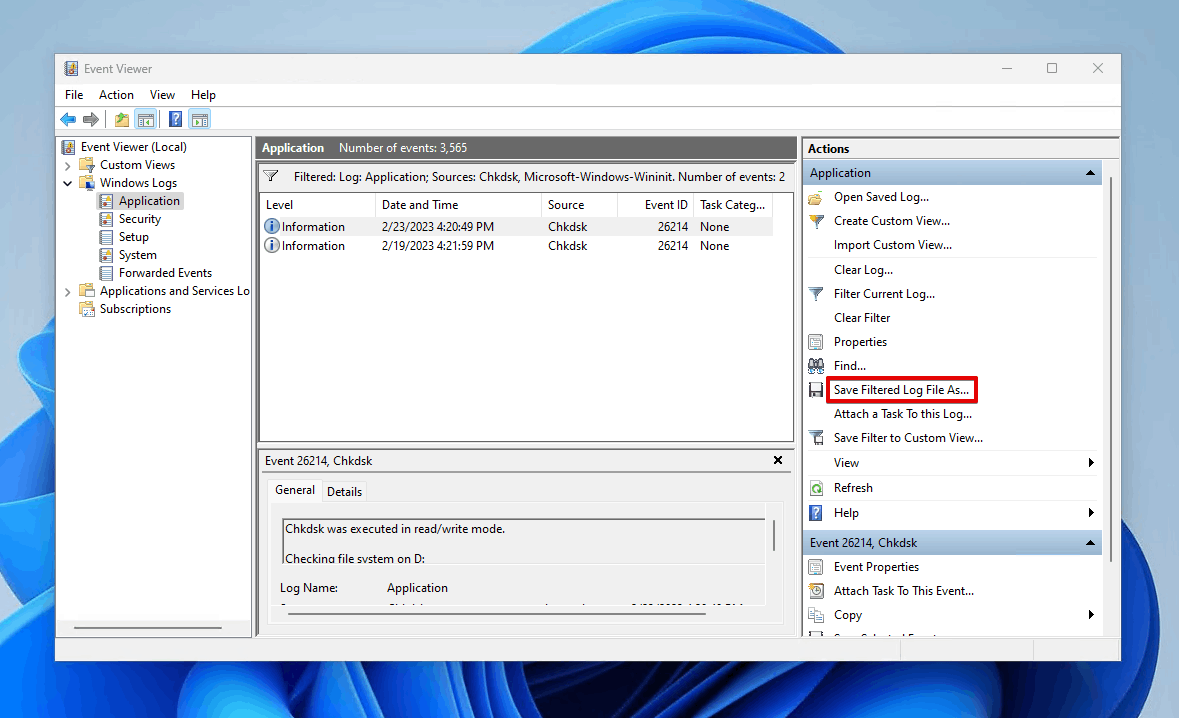
- Select Chkdsk and Wininit from the Event sources dropdown. Click OK.
- Click Save Filtered Log File As and name the exported file.
PowerShell
- Right-click Windows and open Terminal. On Windows 10, click Windows PowerShell (Admin).
- Type the following command and replace <pathandname> with your own output location and filename (e.g. C:\Users\Jordan\Documents\chkdisk-export.txt).
get-winevent -FilterHashTable @{logname="Application"} | ?{$_.providername -match "chkdsk"} | fl timecreated, message | out-file "<pathandname>"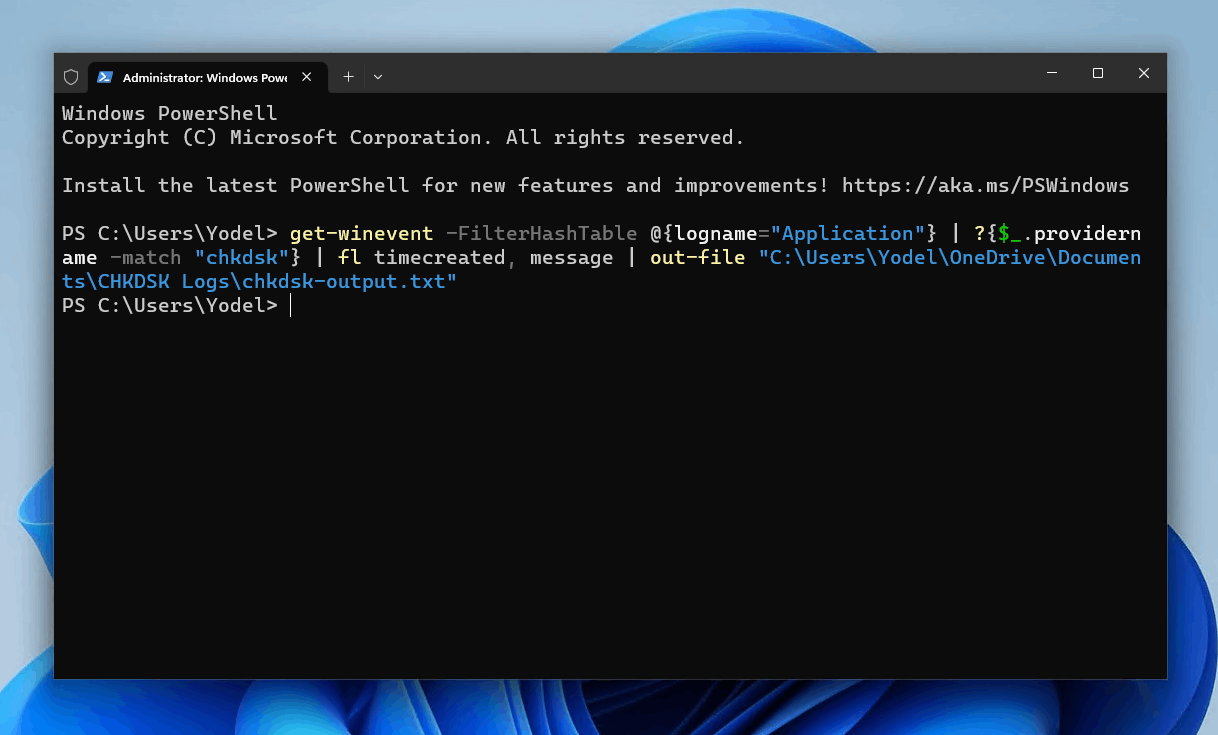
- Navigate to the output folder and open the log.
Can You Recover Lost Files Using CHKDSK?
CHKDSK is popularly mistaken as a means of data recovery. This misconception likely stems from the official CHKDSK documentation that states the /r parameter “locates bad sectors and recovers readable information”. However, this does not mean that it recovers your data. Rather, it’s referring to data on soft bad sectors that it finds and relocates to a working sector.
Running CHKDSK in hopes that it will recover your data is unwise, as it may end up doing the opposite. The CHKDSK command may cause your data to become corrupted, causing it to become even more challenging to recover (and in some cases, impossible).
To avoid losing your data, perform data recovery before running CHKDSK. If your system drive is the one that’s compromised, remove it and connect it to another computer as an external drive to perform data recovery. If you’ve already run CHKDSK and lost some data, check out our guide on how to recover files deleted by CHKDSK.
FAQ
Does CHKDSK fix corrupt files?
No, Windows Check Disk does not fix corrupted files. It is intended to repair file system-related problems on your drive, such as file system corruption.
Does CHKDSK fix bad sectors?
Yes, it can fix bad sectors, but it depends on the type of bad sector your drive has. There are type types:
- Soft bad sector – This can happen when data is incorrectly written to a sector. CHKDSK can repair soft bad sectors.
- Hard bad sector – A hard bad sector appears as a result of physical damage. CHKDSK cannot repair hard bad sectors but marks them so no new data is written to them.
What does CHKDSK /f /r /x means?
The /f, /r, and /x parameters allow you to get more use out of CHKDSK. Here is what each parameter does:
- /f – Allows CHKDSK to fix the errors that it finds on the disk. This requires the disk to be locked.
- /r – Includes the same functionality as /f and allows CHKDSK to locate and fix bad sectors.
- /x – Includes the same functionality as /f but forces the volume to dismount first.
Which is better CHKDSK R or F?
Both have their uses. The /f parameter instructs CHKDSK to fix the errors that it finds on the disk. The /r parameter includes the same functionality as /f, but also scans for bad sectors and attempts to fix them.
How to run CHKDSK from BIOS?
When your system drive is not bootable, you can run CMD CHKDSK from Windows Recovery Environment (WinRE). In order to do this, you will need your Windows installation media. Before starting, make sure you:
- Connect/insert the Windows installation media.
- Adjust your boot order so the Windows installation media boots first.
Here’s how you run CHKDSK from startup:
- Boot into WinRE.
- Select your language. Click Next.
- Click Repair your computer.
- Click Troubleshoot.
- Click Command Prompt.
- Type chkdsk *: /r. Replace * with your drive letter. Press Enter.
Conclusion
CHKDSK is one of the most useful diagnostic tools when it comes to fixing problems with your hard drive. It’s used to check your volume’s file system and file system metadata for logical and physical errors. With the use of parameters, it can also fix them.
You can run CHKDSK through a terminal application, like Command Prompt, Windows PowerShell, and Terminal. If you want to use a graphical user interface, you can access the Error checking tool in your drive’s properties which utilizes CHKDSK.
If your hard drive contains data that you need, we recommend performing data recovery before running CHKDSK to ensure none of your data is lost, as CHKDSK can render some of your data unrecoverable when it’s in such a delicate state.
This article was written by Jordan Jamieson-Mane, a Staff Writer at Handy Recovery Advisor. It was also verified for technical accuracy by Andrey Vasilyev, our editorial advisor.
Curious about our content creation process? Take a look at our Editor Guidelines.