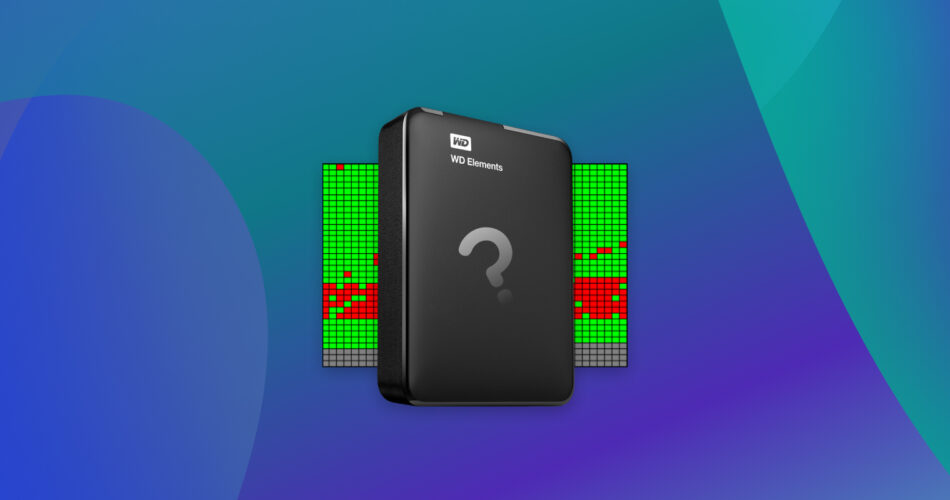
Are you frustrated over bad sectors on your hard drive? A bad sector refers to a damaged disk sector on your hard drive. Think of your hard disk as a pizza, while a bad sector is similar to a missing pizza slice – this “slice” poses a threat of data loss.
The good news is that you can fix bad sectors on an external hard drive and retrieve your precious data. This article covers some essential theories on bad sectors and their origins. If you want to skip to the data recovery tutorial, click here.
Bad Sectors 101: Types, Causes, and Impact on External Hard Drive Performance
Bad sectors comprise “physical” and “logical” bad sectors translating to hard and soft bad sectors, respectively:
Exploring Hard Bad Sectors
Hard or physical bad sectors refer to physical damage on your external hard drive. A notable instance of physical damage includes a head crash – which occurs when the read-write head of your external hard drive touches the rotating platter. The result is damage to the platter’s sensitive magnetic surface. Hard bad sectors often require expert intervention to rectify the issue physically: like removing debris or recalibrating the drive head. In such cases, it’s best to consult a data recovery service center.
Here are the causes of hard bad sectors:
- 🛠️ Mechanical Damage: Significant physical blunt force can result in hard drive mechanical damage – causing bad sectors to develop. Additionally, physical shocks and moisture also inflict mechanical damage.
- ⚓ Manufacturing Defects: Both external HDDs and SSDs sometimes contain bad sectors while shipping.
- 📜 Wear & Tear: Prolonged use of a hard drive results in hundreds of overwriting sequences – which causes bad sectors to develop.
Researching Logical Bad Sectors
Logical or soft bad sectors refer to storage clusters that throw errors when the OS attempts to access these sectors. Consequently, these sectors get marked as bad sectors. You can fix logical bad sectors using techniques like formatting, CHKDSK functionality, or other bad sector repair tools.
Here’s what causes logical bad sectors:
- 💻 Software issues: Glitches arise from abrupt power outages, especially when a data writing process is interrupted.
- ❌ Error Correction Code Mismatch: Sometimes, sectors on your hard drive don’t match assigned Error Correction Codes (ECCs) – giving birth to soft/logical bad sectors.
- 🦠 Viruses and malware: Viruses like boot infectors can cause bad sectors to develop on your external hard drive. Boot sector viruses reside in specific disk sectors instead of a program file – and target vulnerabilities in the booting process.
How Bad are Bad Sectors
The consequences of bad sectors are chilling, including data corruption and eventual data loss on your external hard drive. When your computer encounters a so-called “bad” sector, the OS ignores it for future operations.
A few bad sectors aren’t the end of the world. However, if you notice that your external hard drive is frequently developing bad sectors, this is a forerunner of hard drive failure.
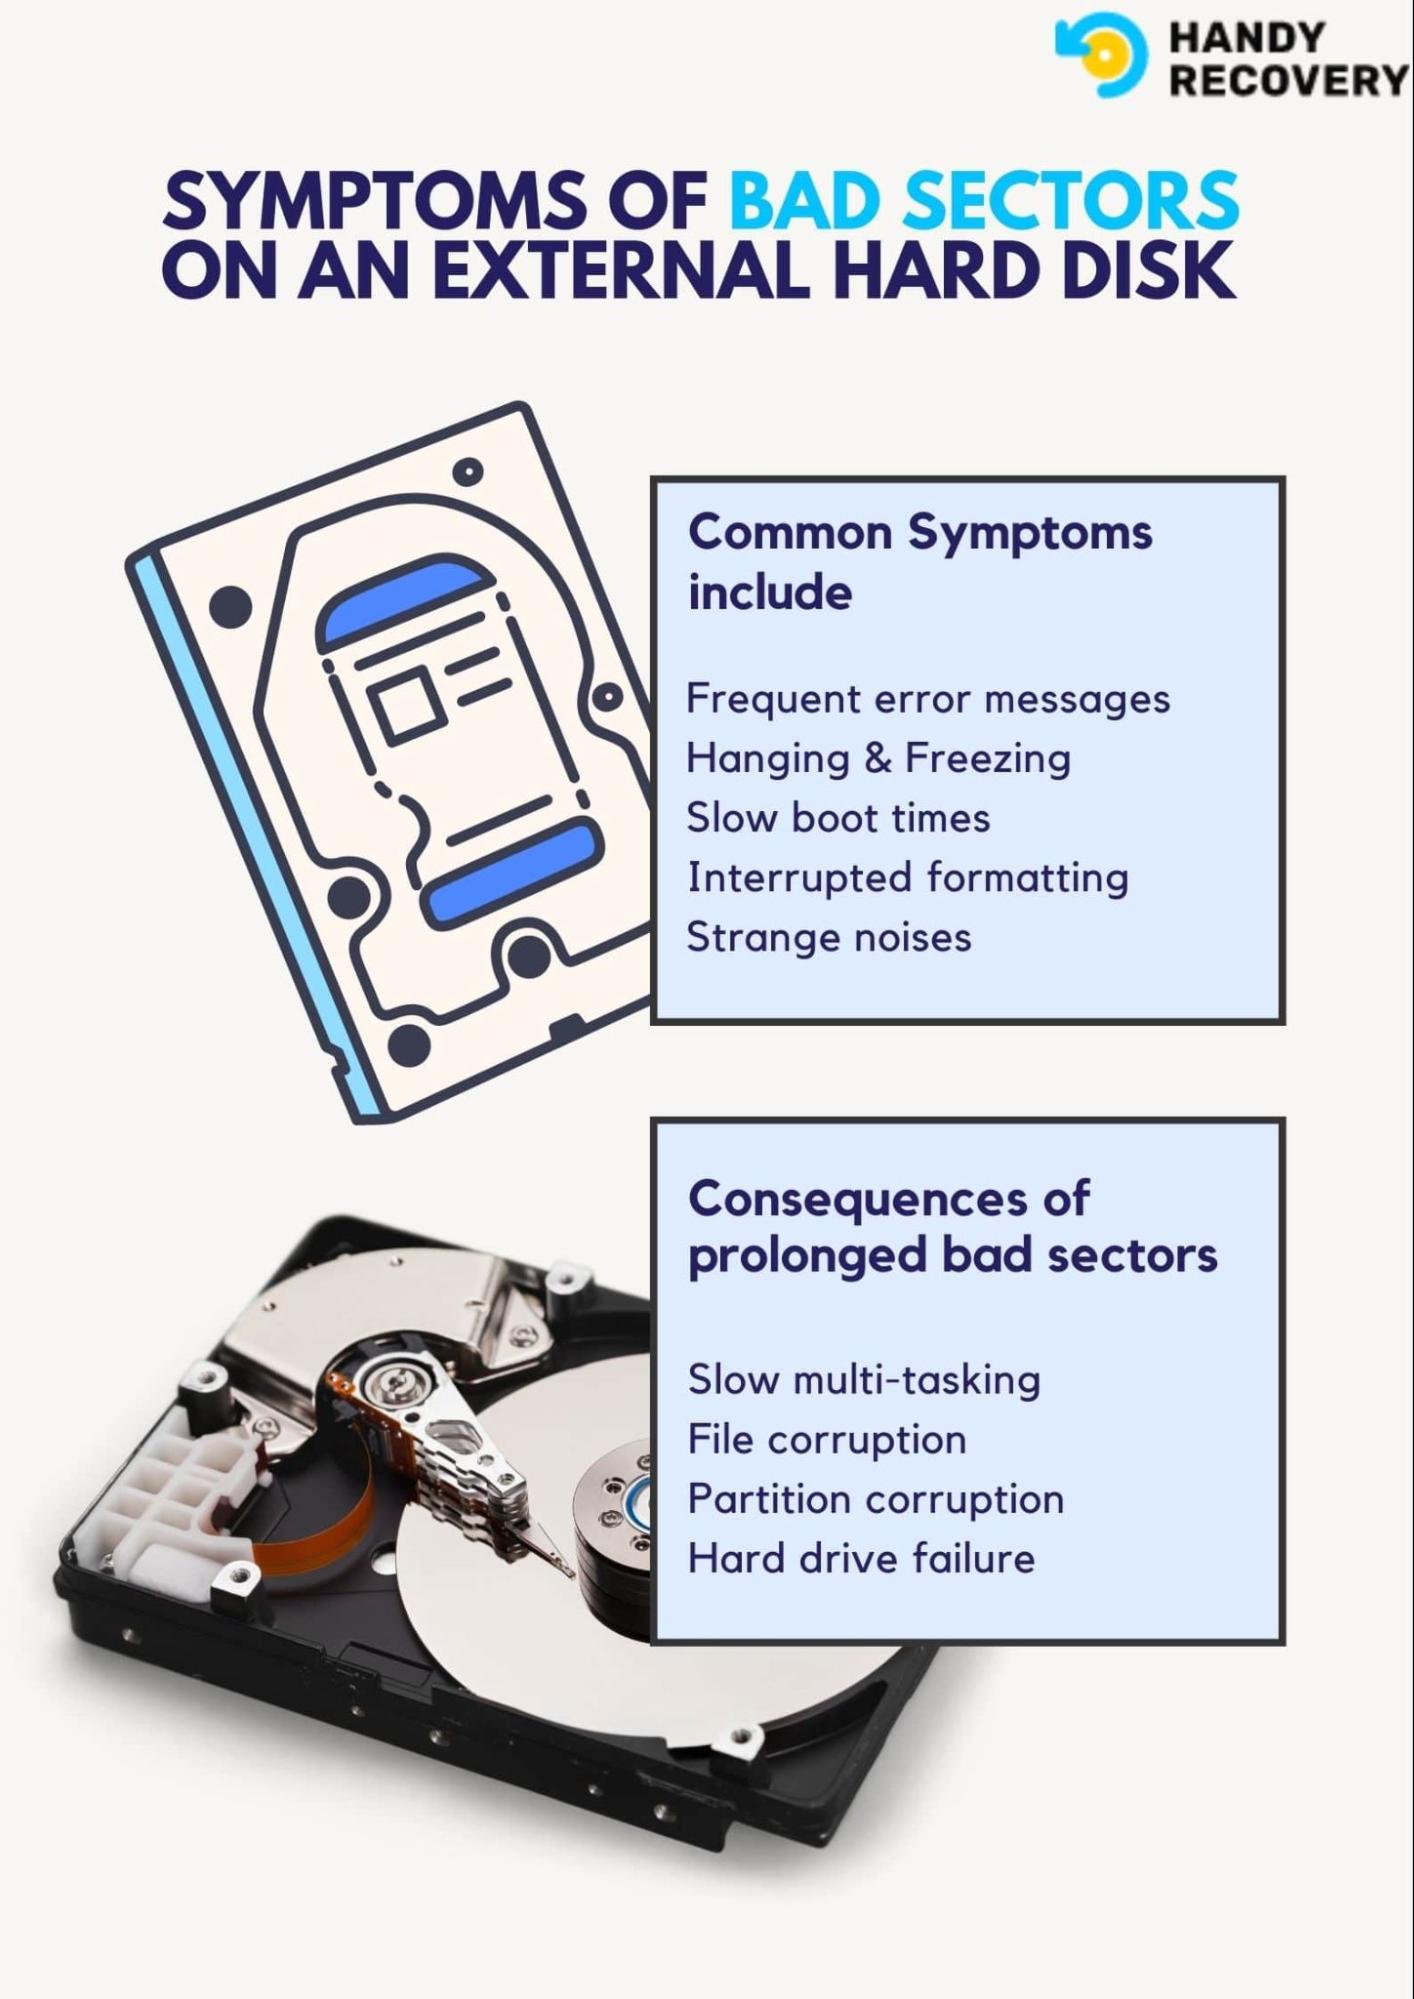
Bad sectors can massively impact the performance of your computer by slowing down parallel processes, corrupting files and partitions, and affecting boot times.
Unusual hanging, freezing, and error messages are common symptoms of bad sectors. If you notice these symptoms, it’s highly critical to quickly perform a backup of your external hard drive – to stay insured against disk corruption and data loss.
How to Recover Data from an External Hard Drive That Needs Fixing
When you encounter bad sectors on an external hard drive, your first instinct must be to perform a backup. While there are many backup options, our editorial team commends a tool for external hard drive recovery called Disk Drill. Amongst popular data recovery apps, Disk Drill stands apart thanks to its intuitive UI and extensive feature set.
While dealing with bad sectors on an external hard drive, time is crucial. It’s just a matter of time before your external hard drive begins to malfunction and corrupts data. Each R/O operation inflicts stress on your external hard disk. As a result, it’s critical to create a disk image (essentially a carbon copy) of your external hard disk – instead of merely scanning the disk multiple times.
Using Disk Drill, you can perform a byte-to-byte backup of your external hard drive (as long as the storage device gets identified on Disk Management and doesn’t display the “No Media” error). This process clones your hard drive and compiles all information to the byte level into a disk image (DMG) file. You can then harness Disk Drill to scan this disk image to view existing files on your hard disk (even if your HDD is corrupted and hinders proper access to files). Finally, the tool scans your disk image to recover data from your HDD with bad sectors.
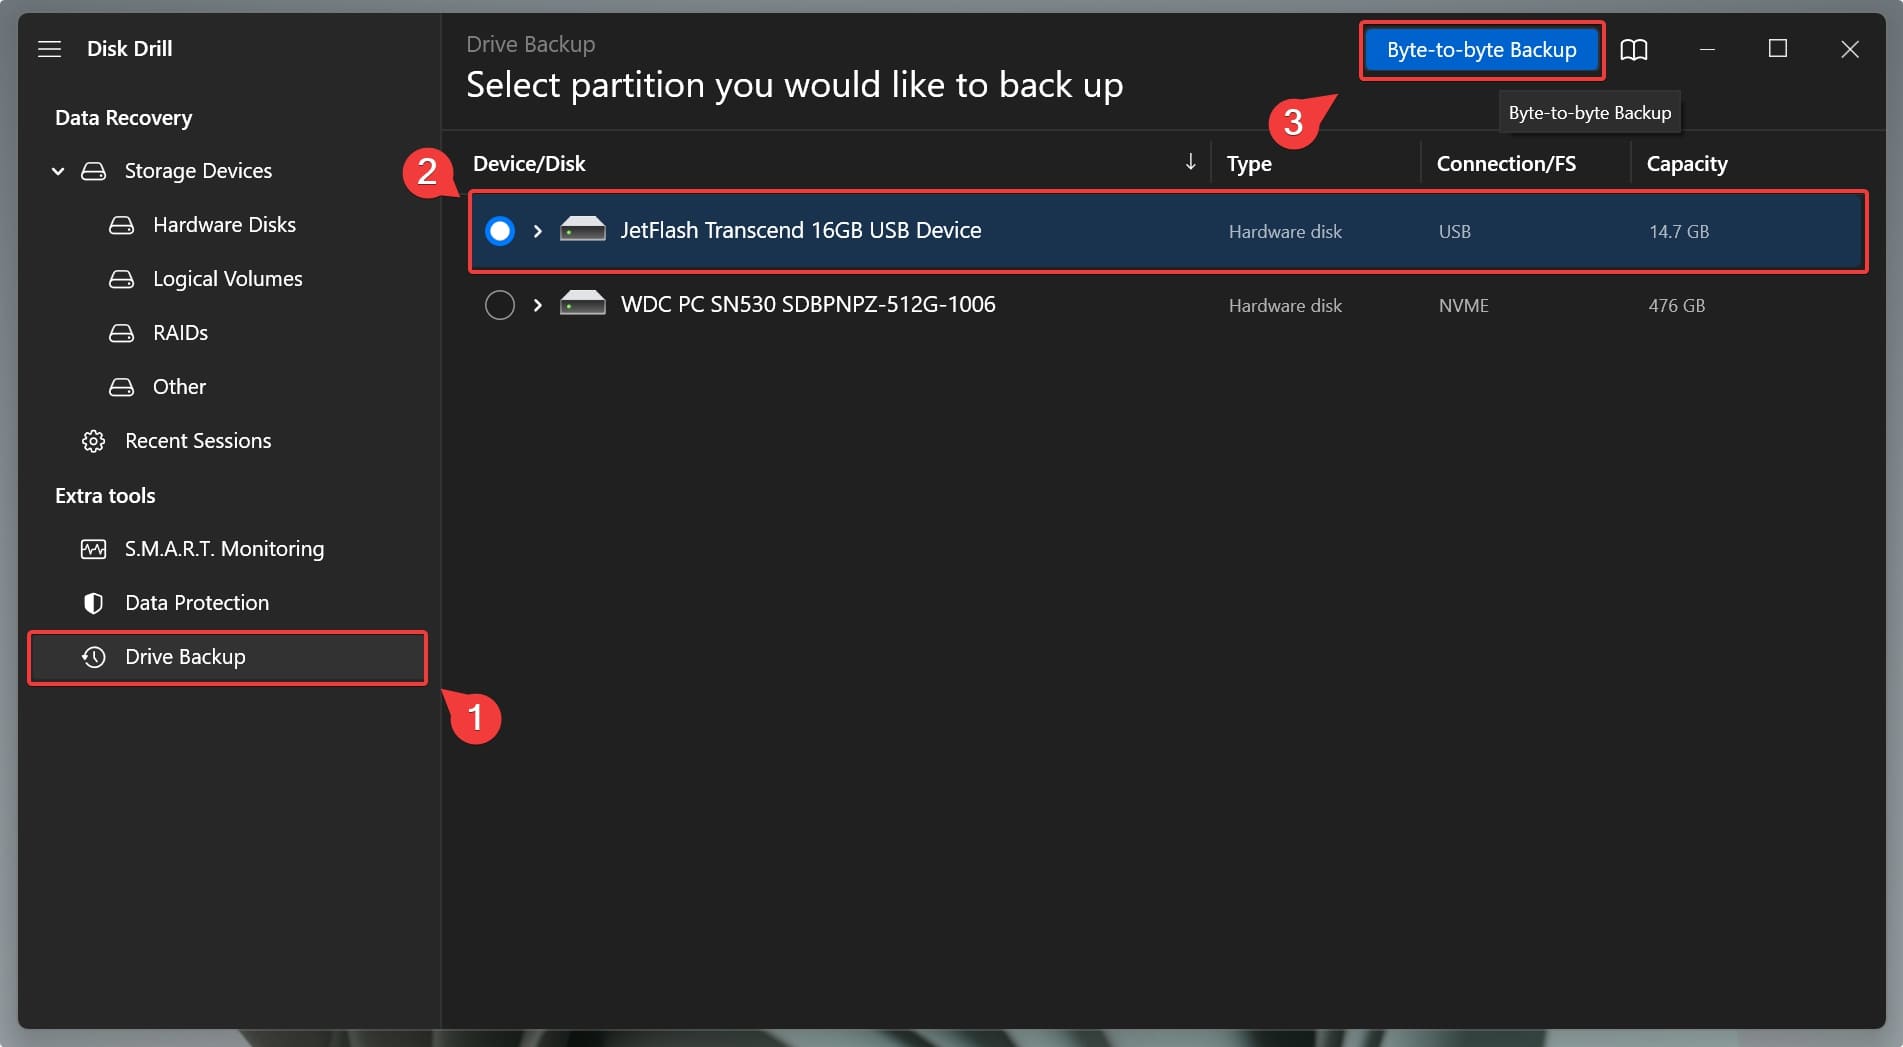
Here’s how you can use Disk Drill to create a byte-to-byte backup of your hard drive with back sectors:
I’ve used a USB flash drive for this tutorial. However, the steps are identical for an external hard drive like the WD My Passport.
- Download, install, and launch Disk Drill.
- Connect your external hard drive with bad sectors to your PC.
- Head over to Disk Backup under Extra Tools. Select the affected hard drive and click on Byte-to-Byte backup.
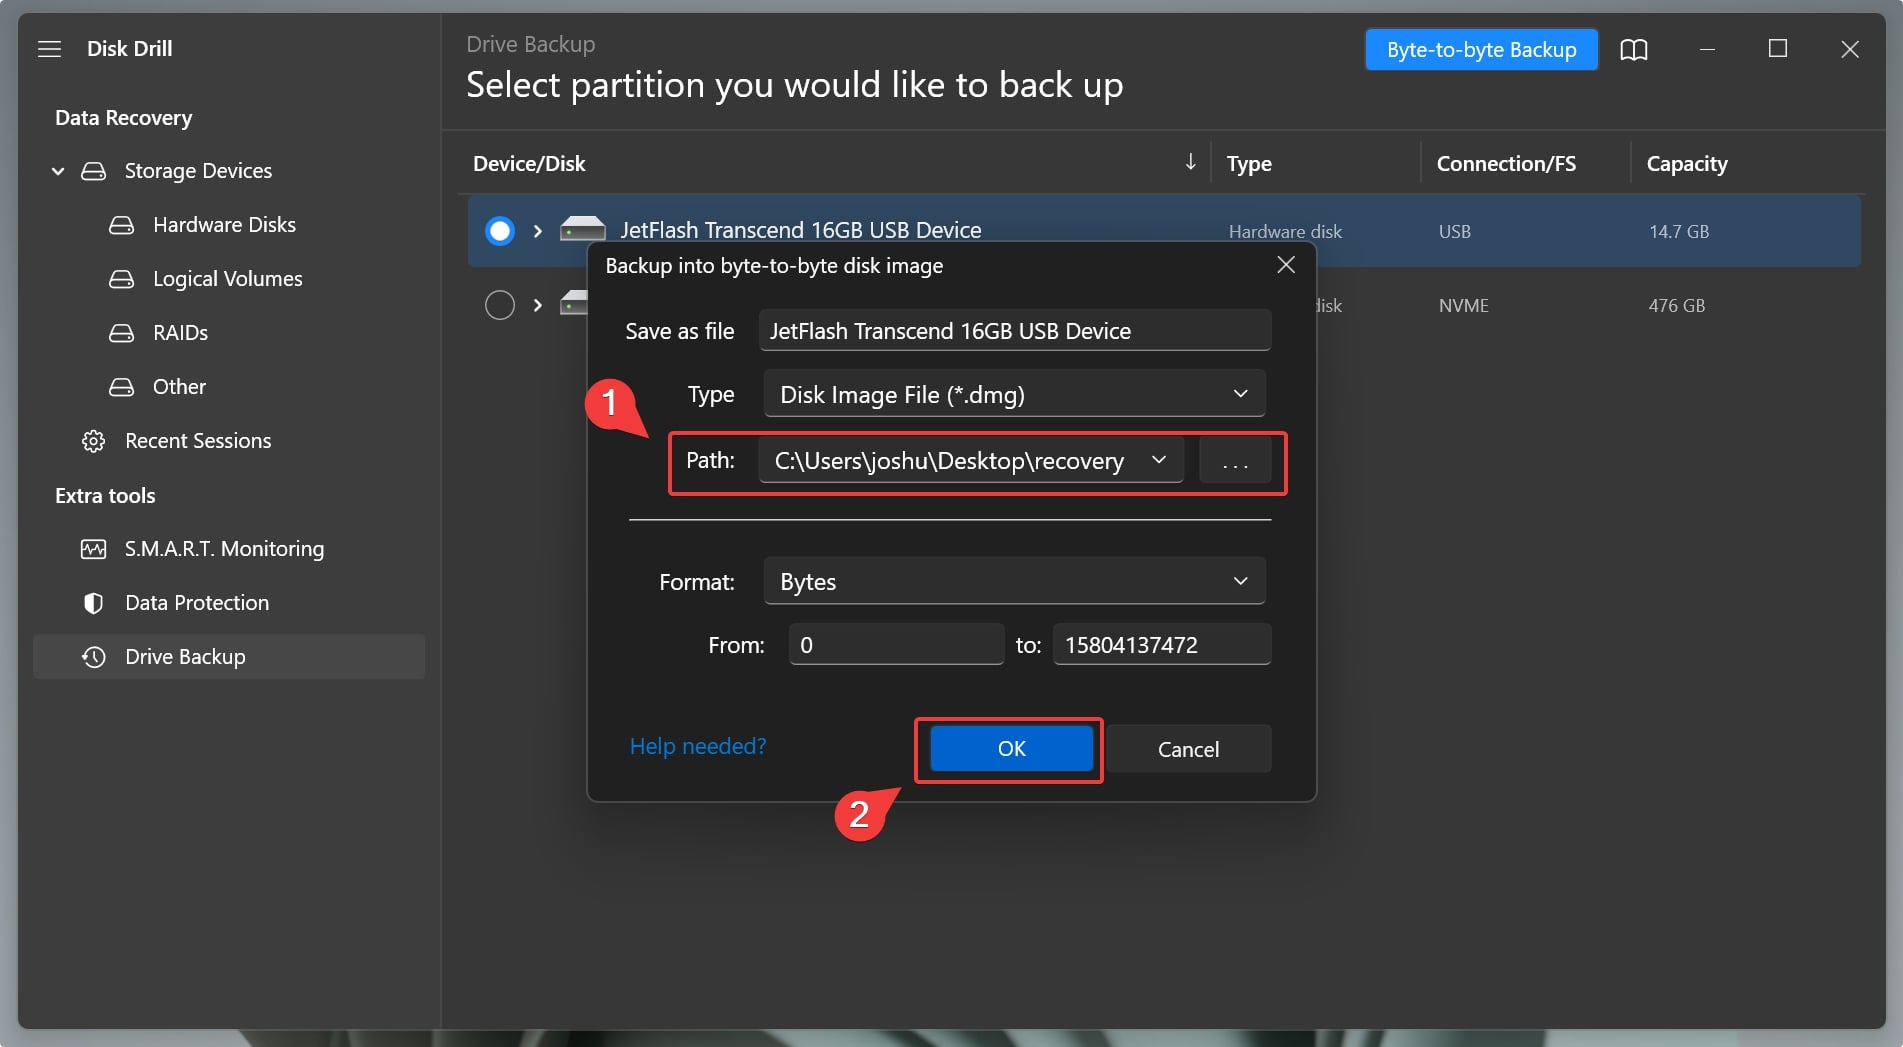
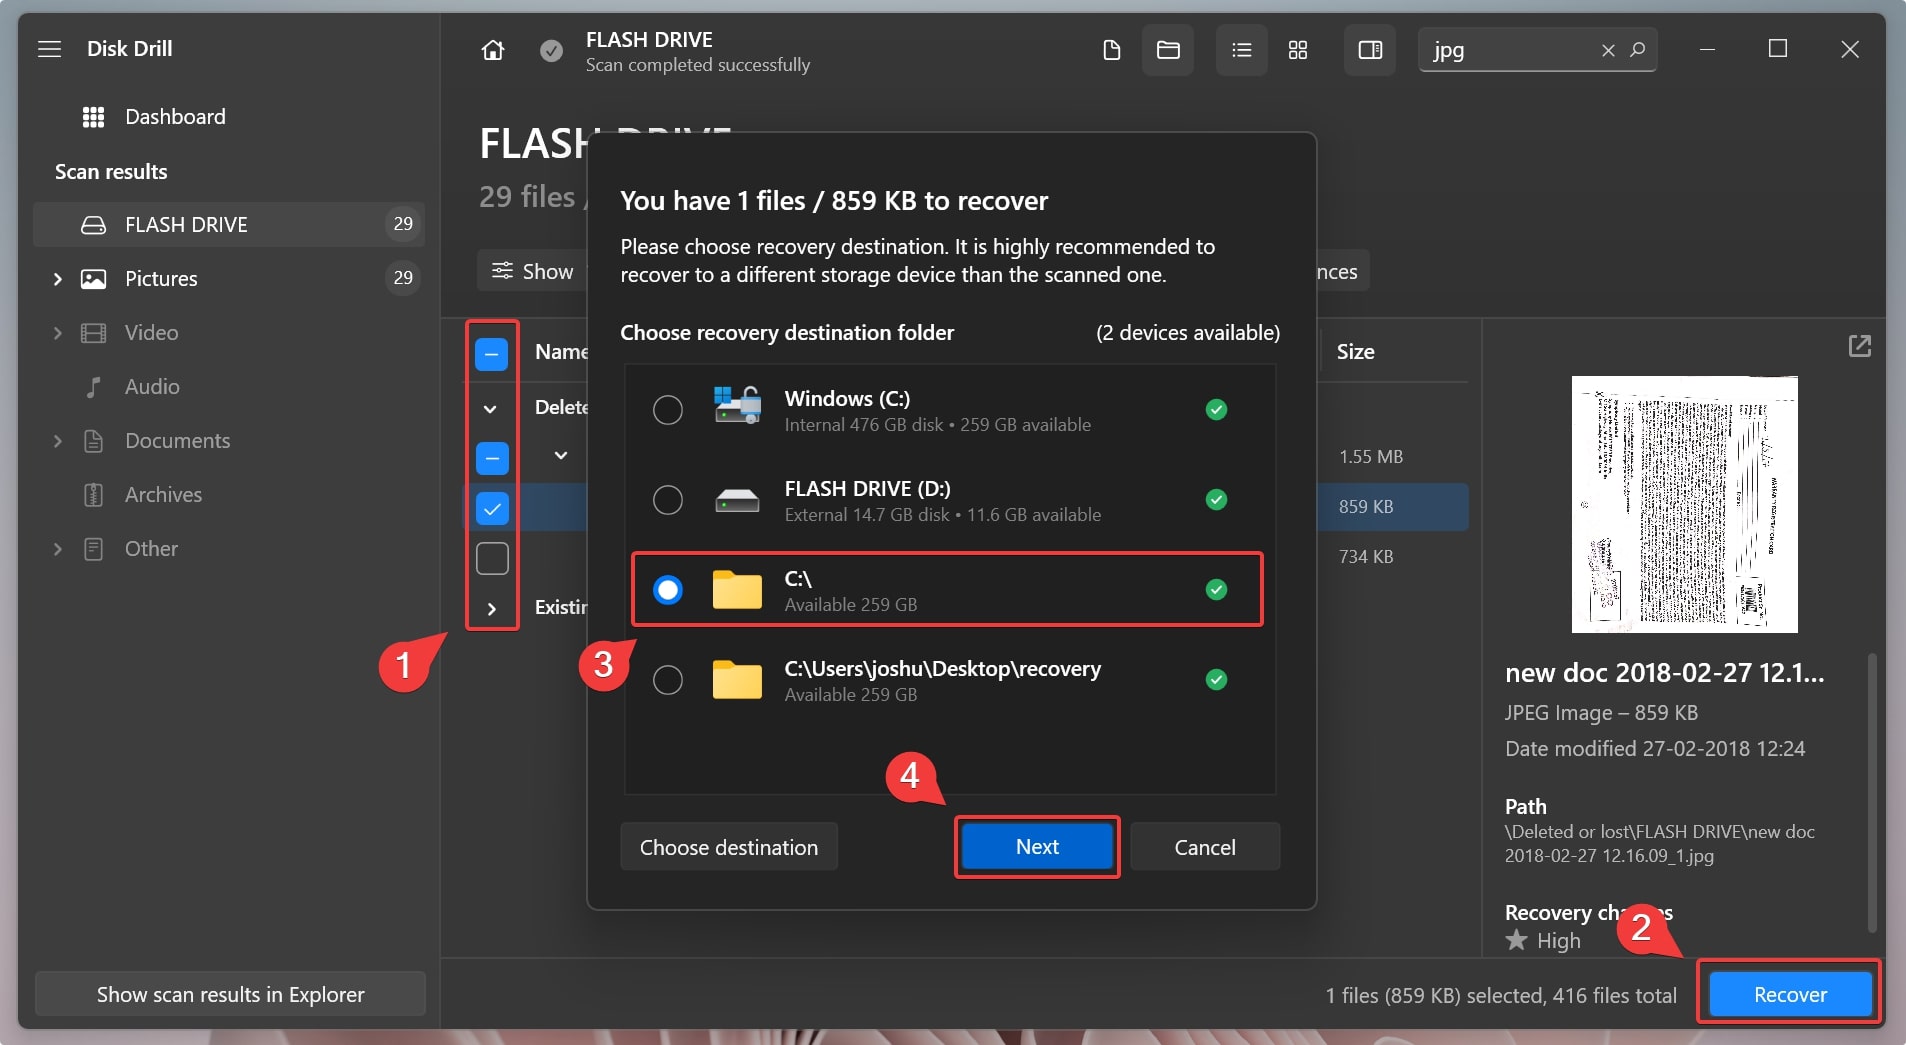
- Specify a destination for your external hard drive’s disk image, and click OK.
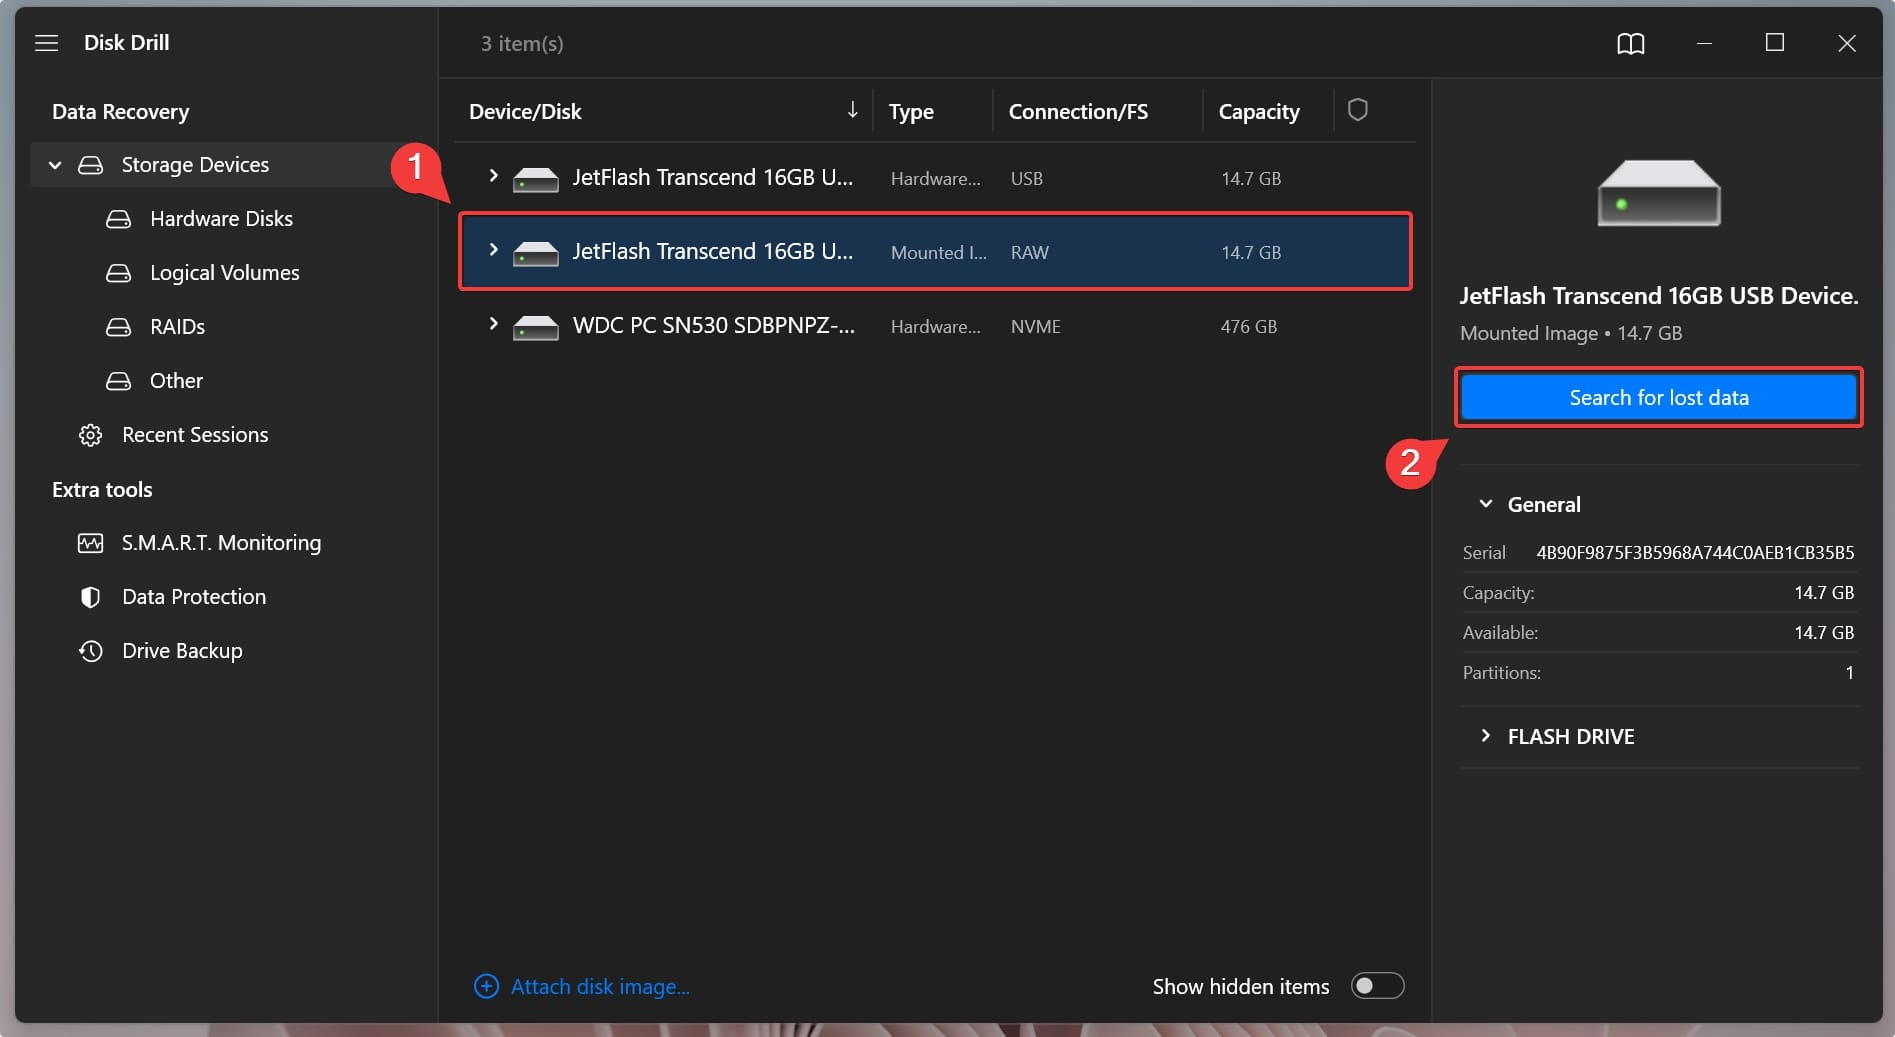
- Wait for the disk image creation process to terminate. Now, attach the disk image.
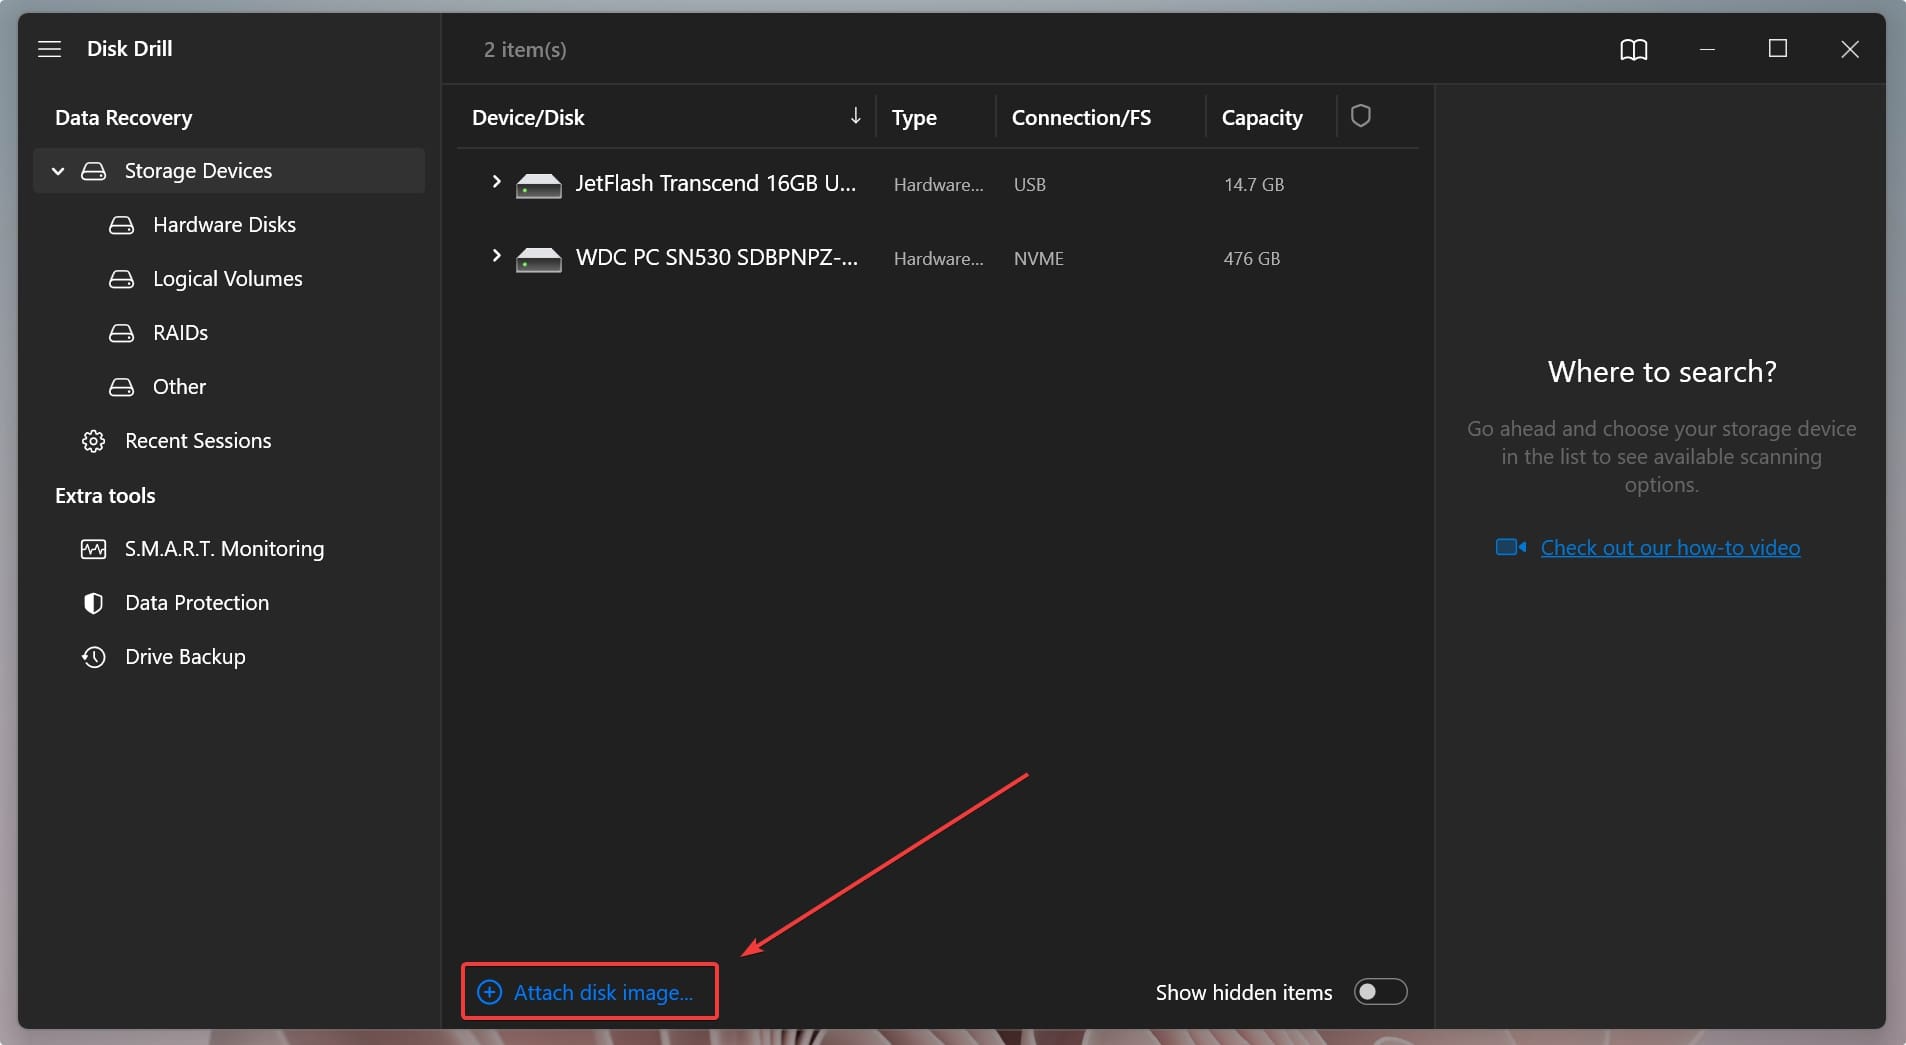
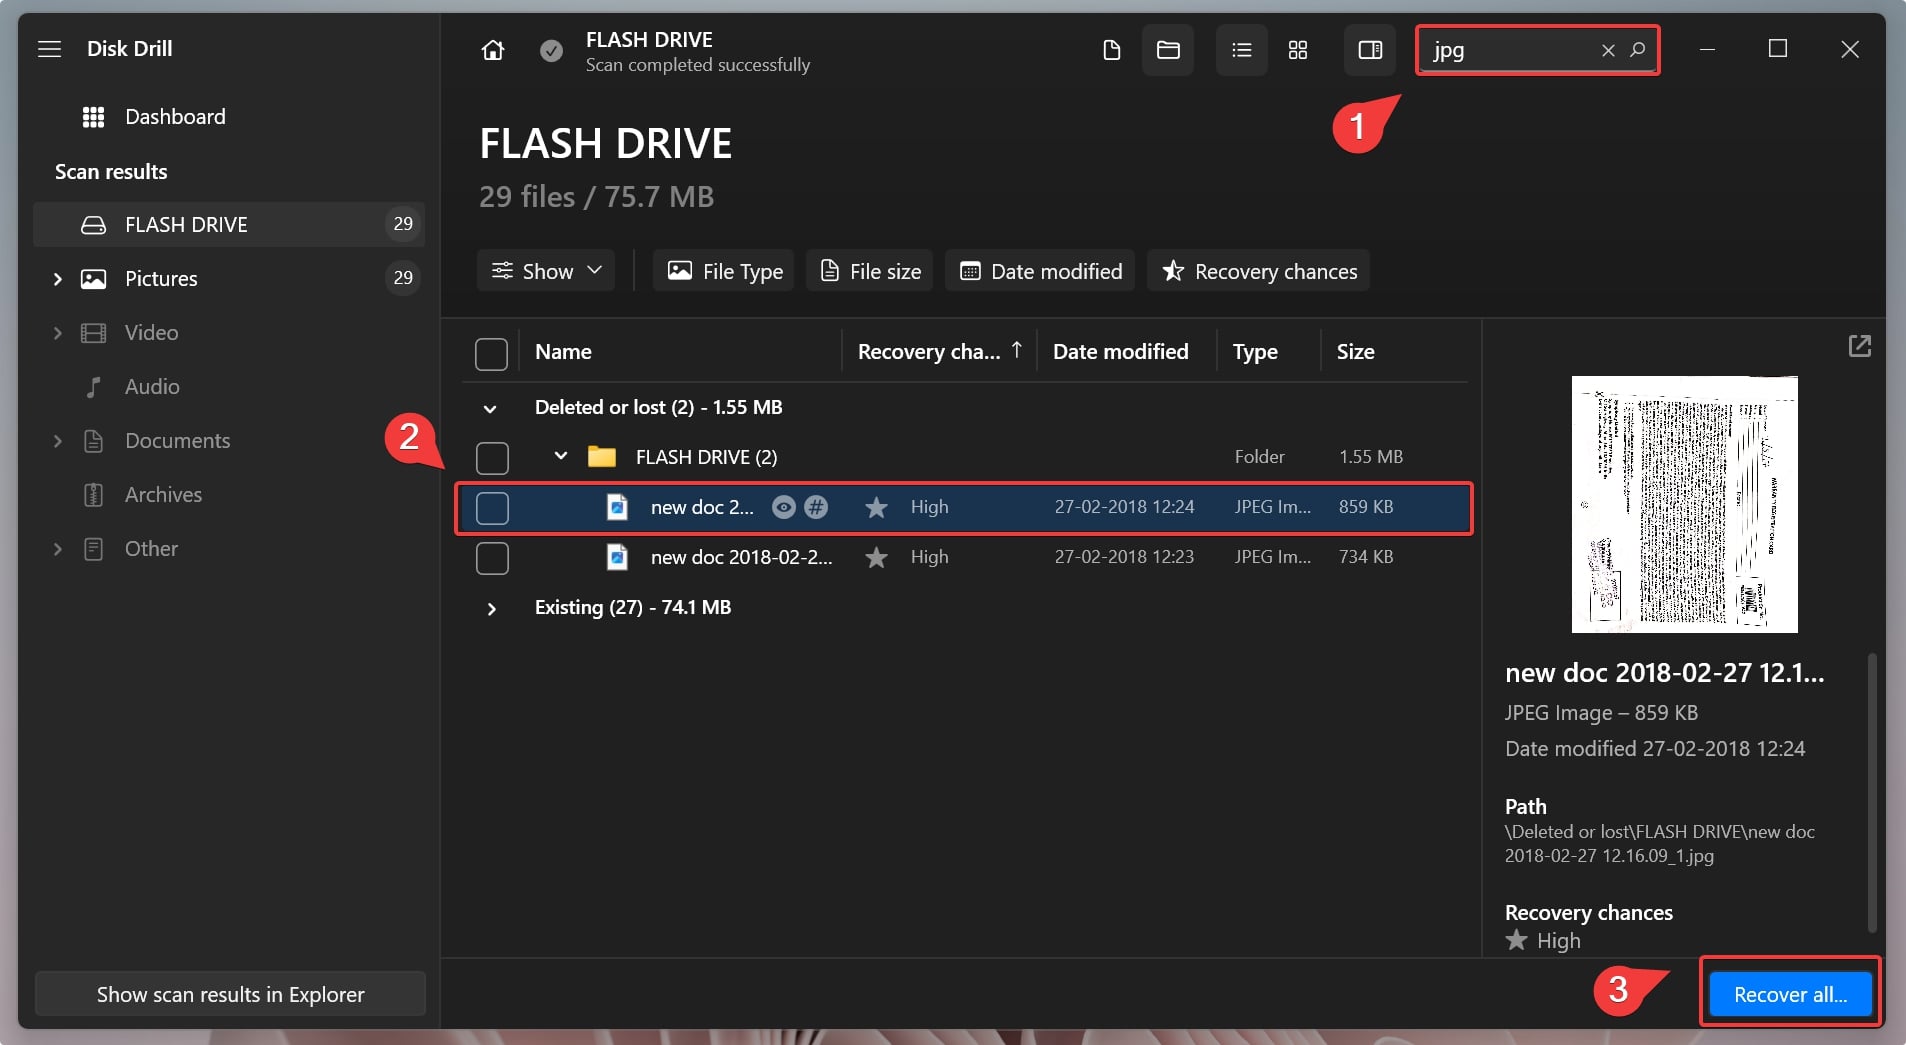
- Click on the mounted disk image, and click Search for Lost Data.
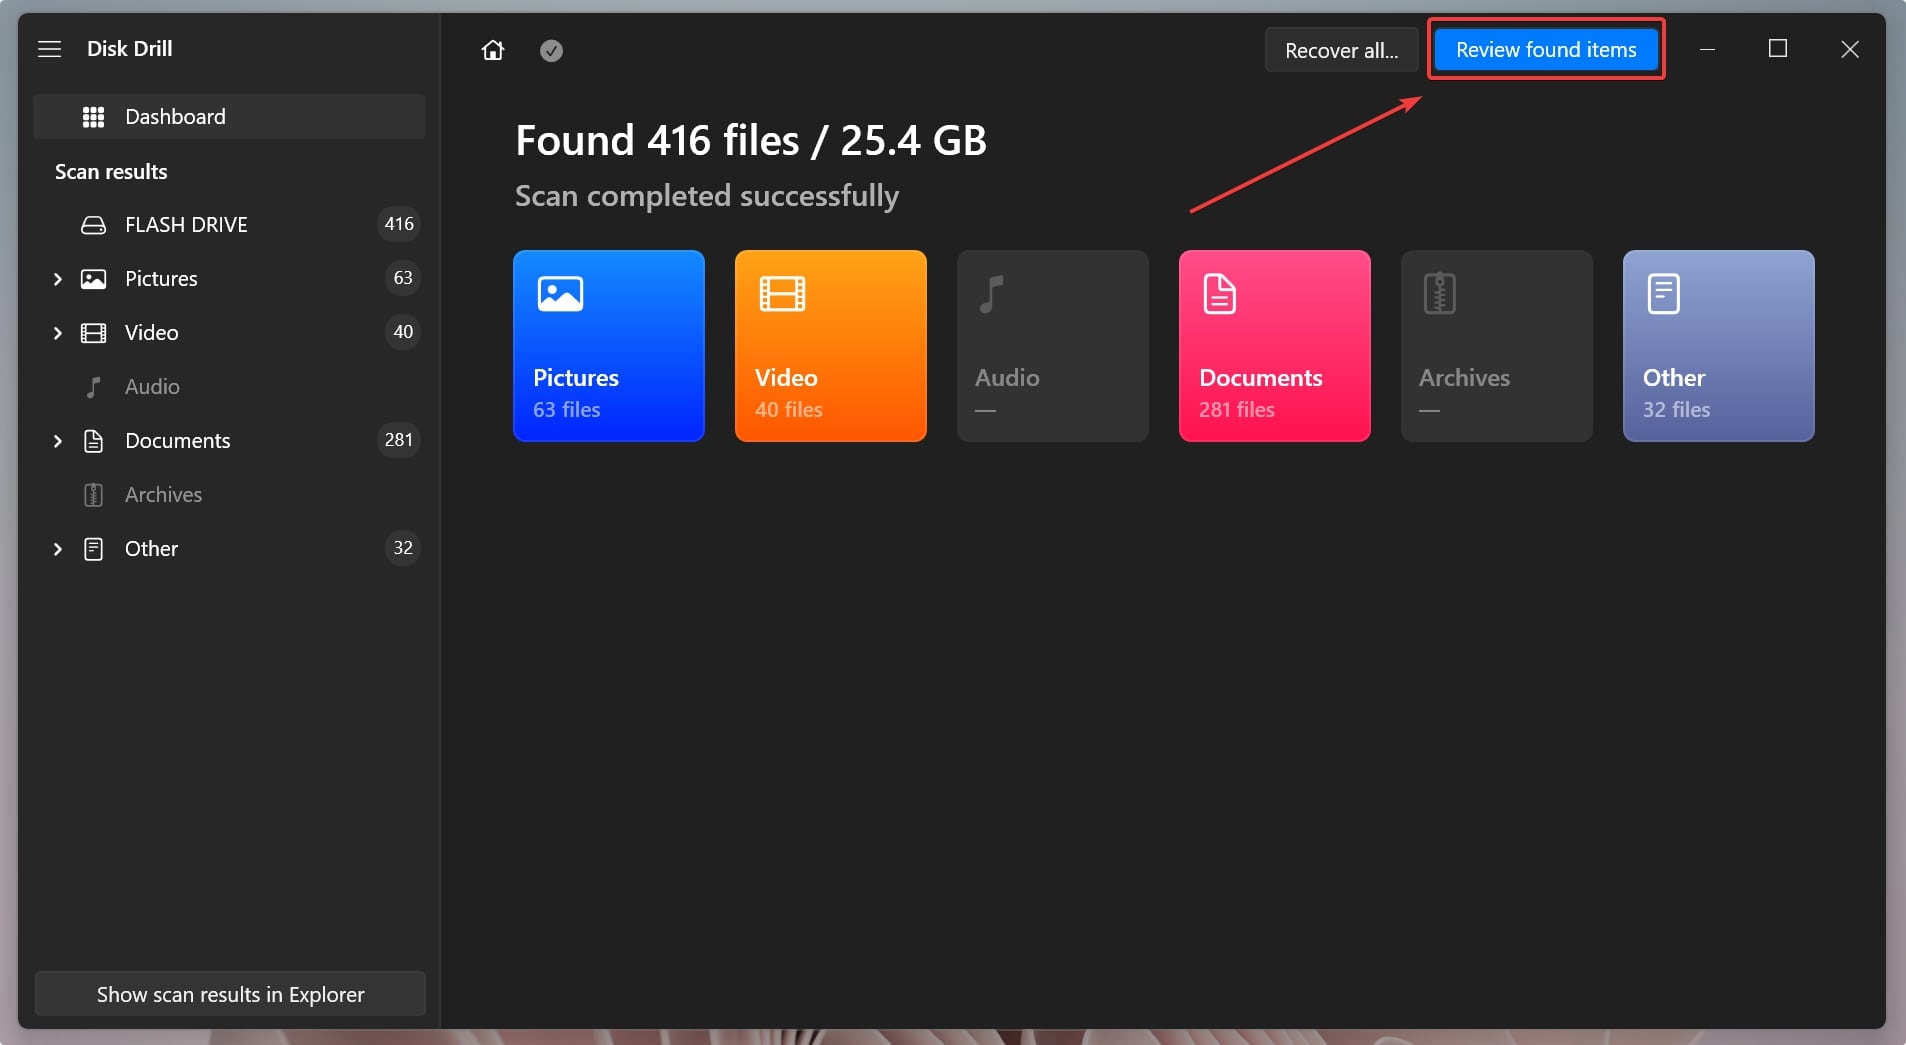
- Once the scan ends, click on Review Found Items to view recoverable files on your hard drive with bad sectors.
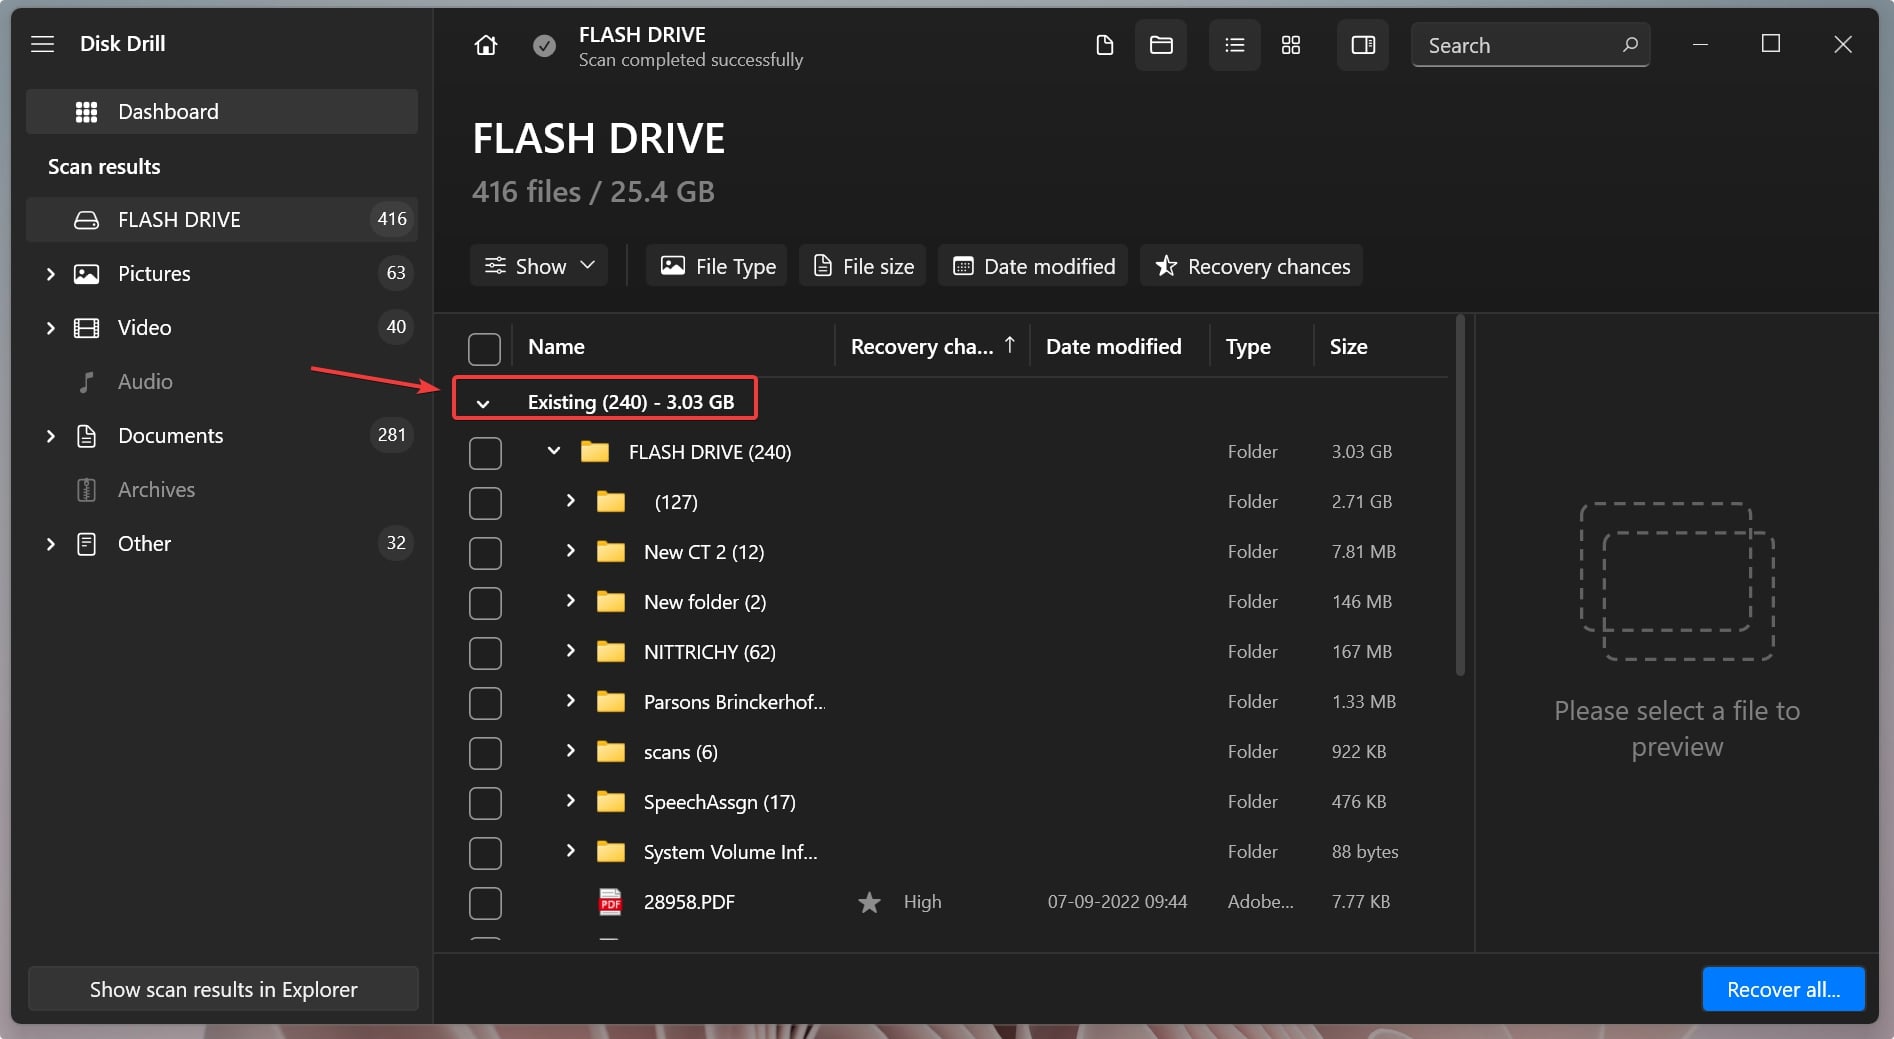
- Click on Existing to explore files on your external hard drive with bad sectors. Alternatively, click on Deleted or lost to recover files you may have accidentally deleted.
- Select the files you would like to recover and click Recover.
Alternatively, you can refine the search results by searching for a specific file type by searching for it in the top right hand corner.
- Specify the destination for saving the recovered data, and click Next to finalize the data recovery from your hard disk with bad sectors.
You can also use the byte-to-byte backup feature for recovering data from a failed hard drive. Check out our comprehensive Disk Drill review to unravel the other use cases the tool addresses. If you’re worried about installing third party tools, read through our safety assessment of Disk Drill – that dispels all your security concerns.
How to Fix Bad Sectors on an External Hard Drive
Here are a few techniques to fix bad sectors on your external hard drive:
Method 1: Allocate Bad Sectors Using CMD
You can leverage Window’s native terminal application – CMD, to eliminate bad sectors on your hard disk. To fix logical bad sectors on your hard disk, CMD has a nifty command called CHKDSK.
Before proceeding, ensure that you completely back up your hard drive because this method can result in data loss. Here’s how you can use the CHKDSK utility to repair bad sectors on your external hard disk for free:
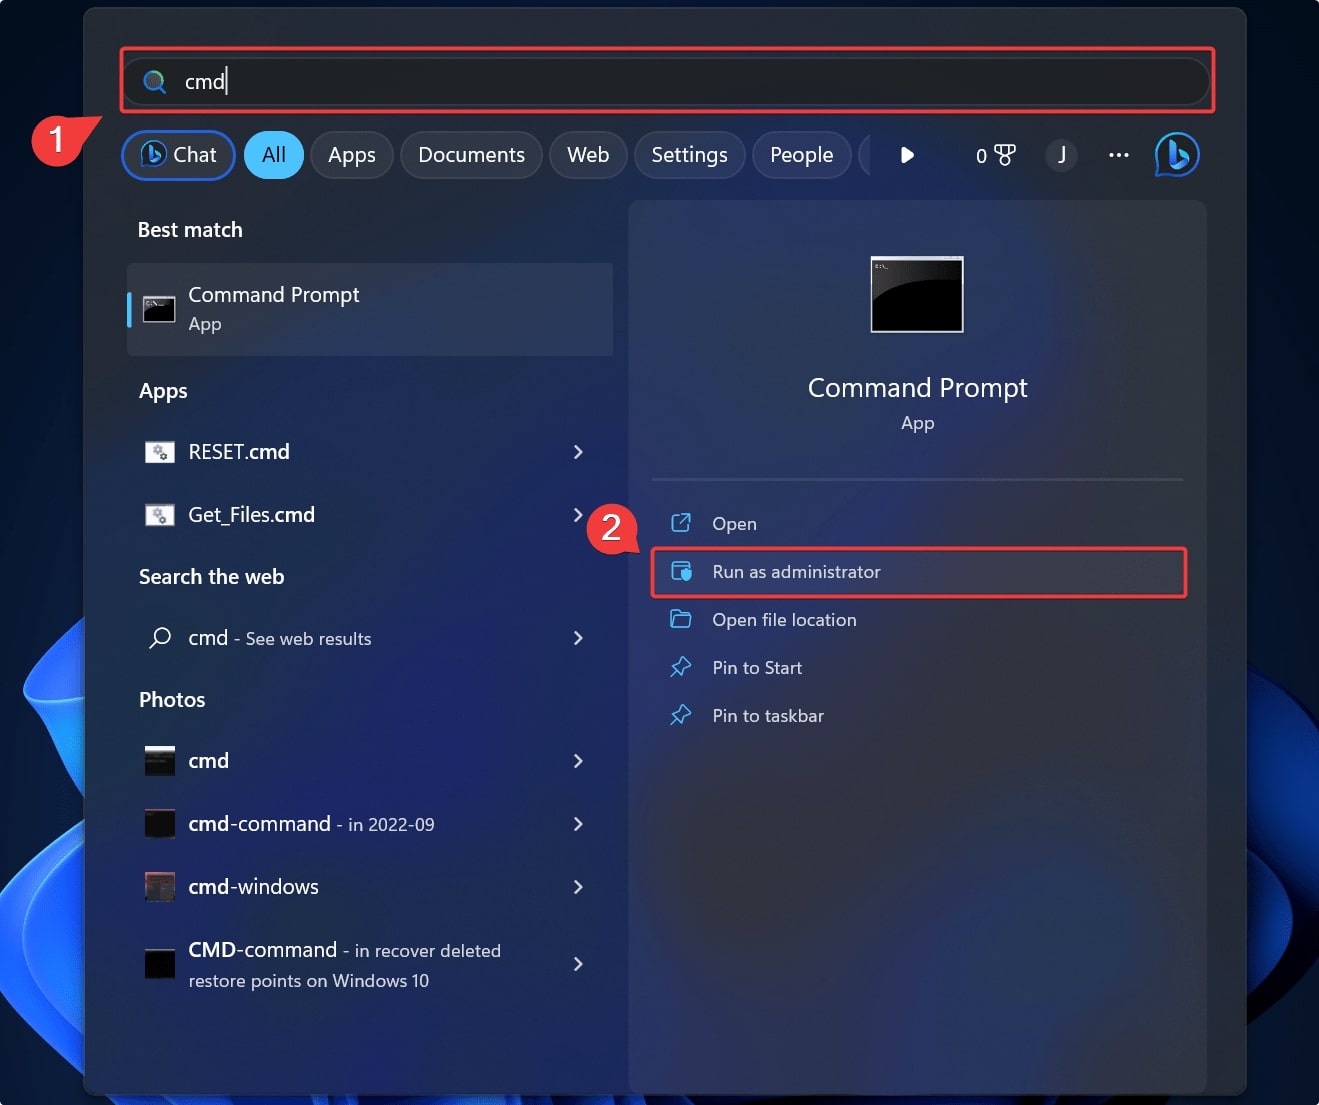
- Press the Windows key, and search for CMD. Click Run as administrator.
- Key in the following command:
chkdsk E: /f /r /x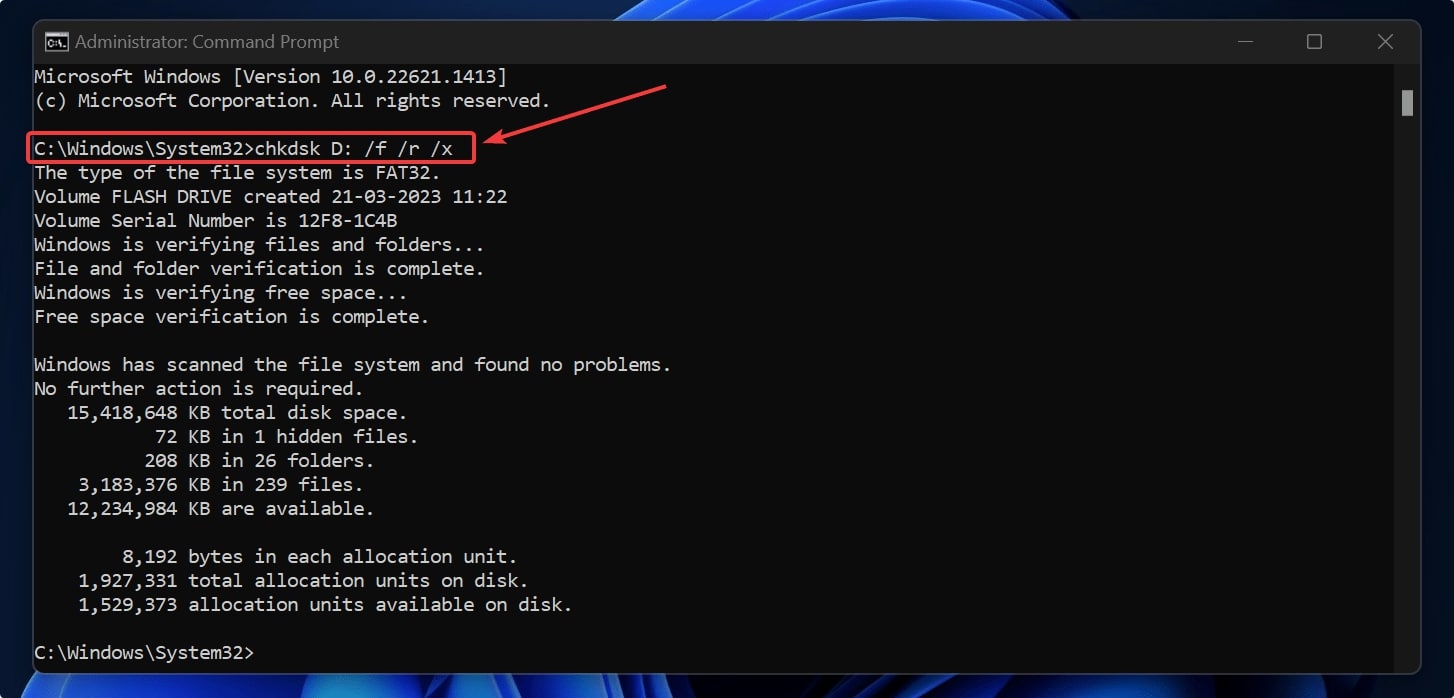
Understanding the command: “E” corresponds to your drive letter. The “/f” parameter instructs CHKDSK to rectify errors found, and “/r” tells CHKDSK to recover information from these bad sectors. Finally, “/x” dismounts the drive before starting the scan.
If you dislike working with CMD, there’s another effective method featuring the error-checking tool.
Method 2: Run Error Checking Tool
The error-checking tool is a fancier, more graphical alternative to the bland-looking CMD window. Here’s how you can use the error-checking tool to implement an external hard drive bad sectors fix:
This external HDD bad sector repair tutorial is applicable for both Windows 10 and Windows 11 users.
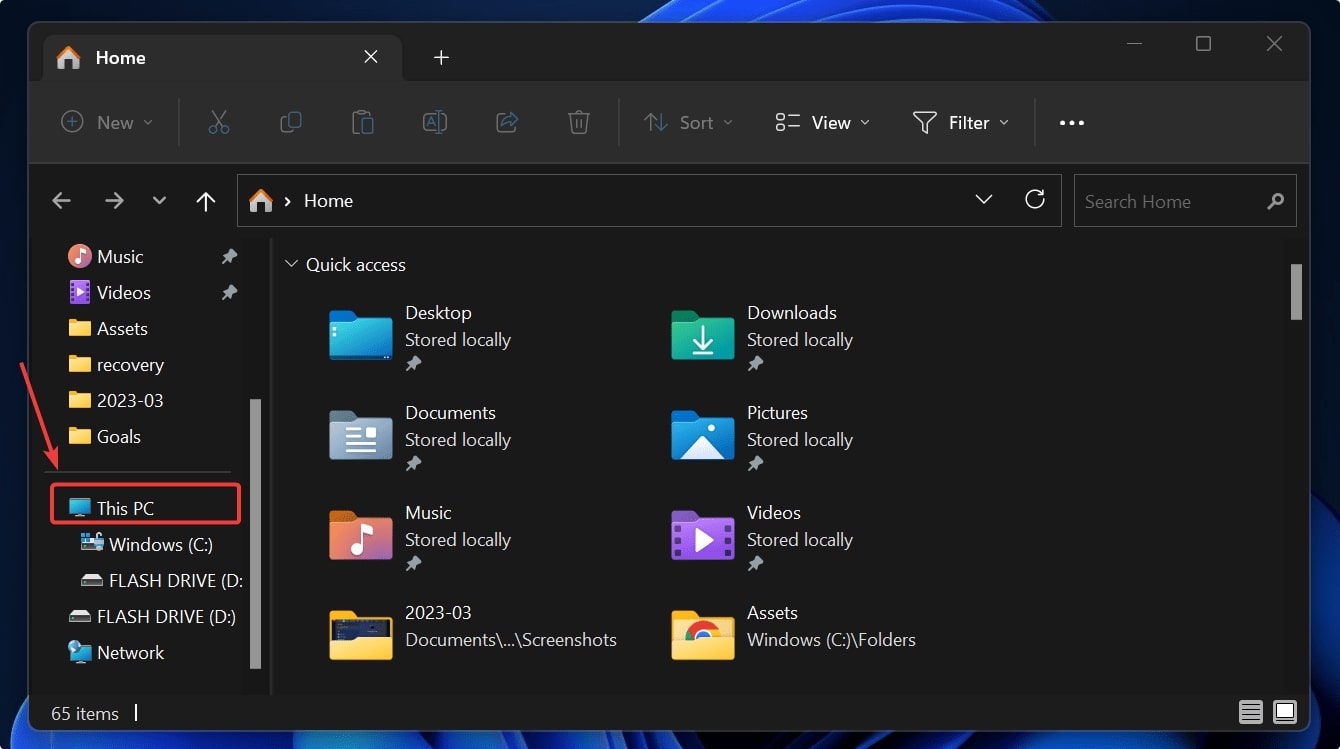
- Use the shortcut Windows key + E to open up File Explorer. Alternatively, you can right-click the start button and then click File Explorer.
- Click on This PC.
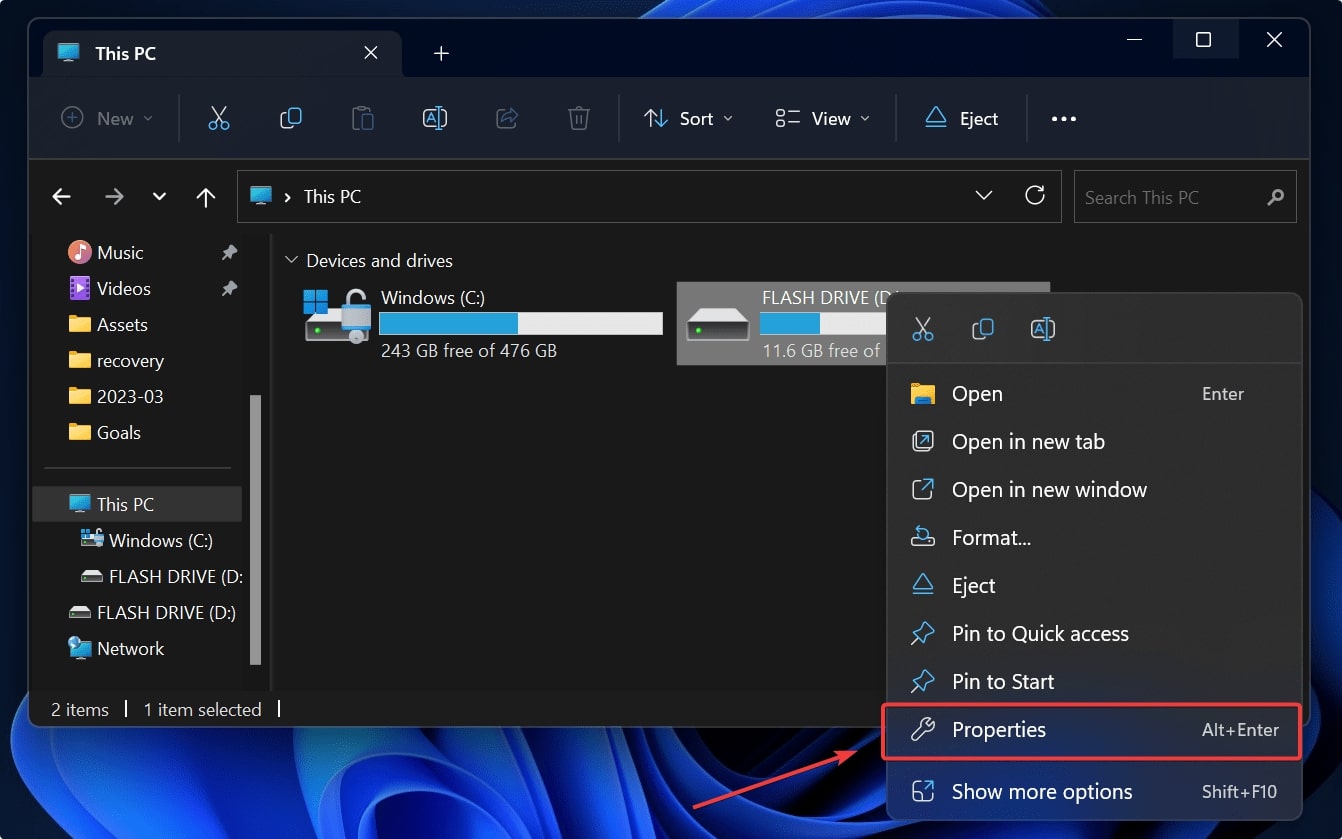
- Right-click the drive you want to scan to identify bad sectors, and click Properties.
- Navigate to the tools tab. Click Check > Scan and repair drive.
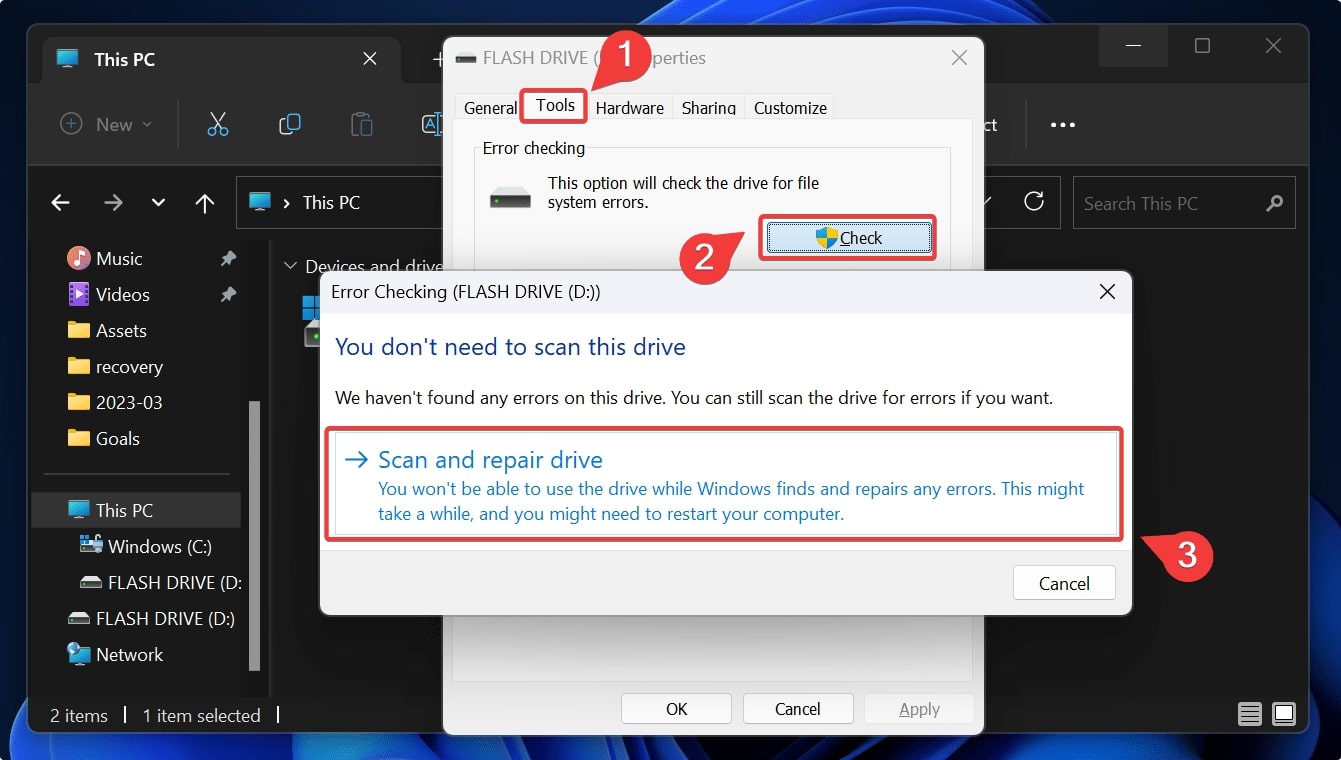
- Wait for the error-checking tool to scan the hard drive for bad blocks. Note: If you encounter the “Windows can’t check the disk while it’s in use” error, select Schedule disk check and restart your PC. While booting up, you will notice the error-checking process getting initiated.
- Implement the advice the tool suggests. Upon finding errors, the error-checking tool will prompt a system restart.
Method 3: Format an External Hard Drive to Exclude Bad Sectors
An effective technique for fixing hard drive issues is executing a disk format. Usually, a quick format does the trick. However, we recommend performing a full format when dealing with bad sectors.
A full format thoroughly scans your hard disk and hunts down bad sectors. Interestingly, identifying bad sectors constitutes the major time your OS takes to format the disk.
Here’s how you can perform a full format to fix bad blocks on your hard drive:
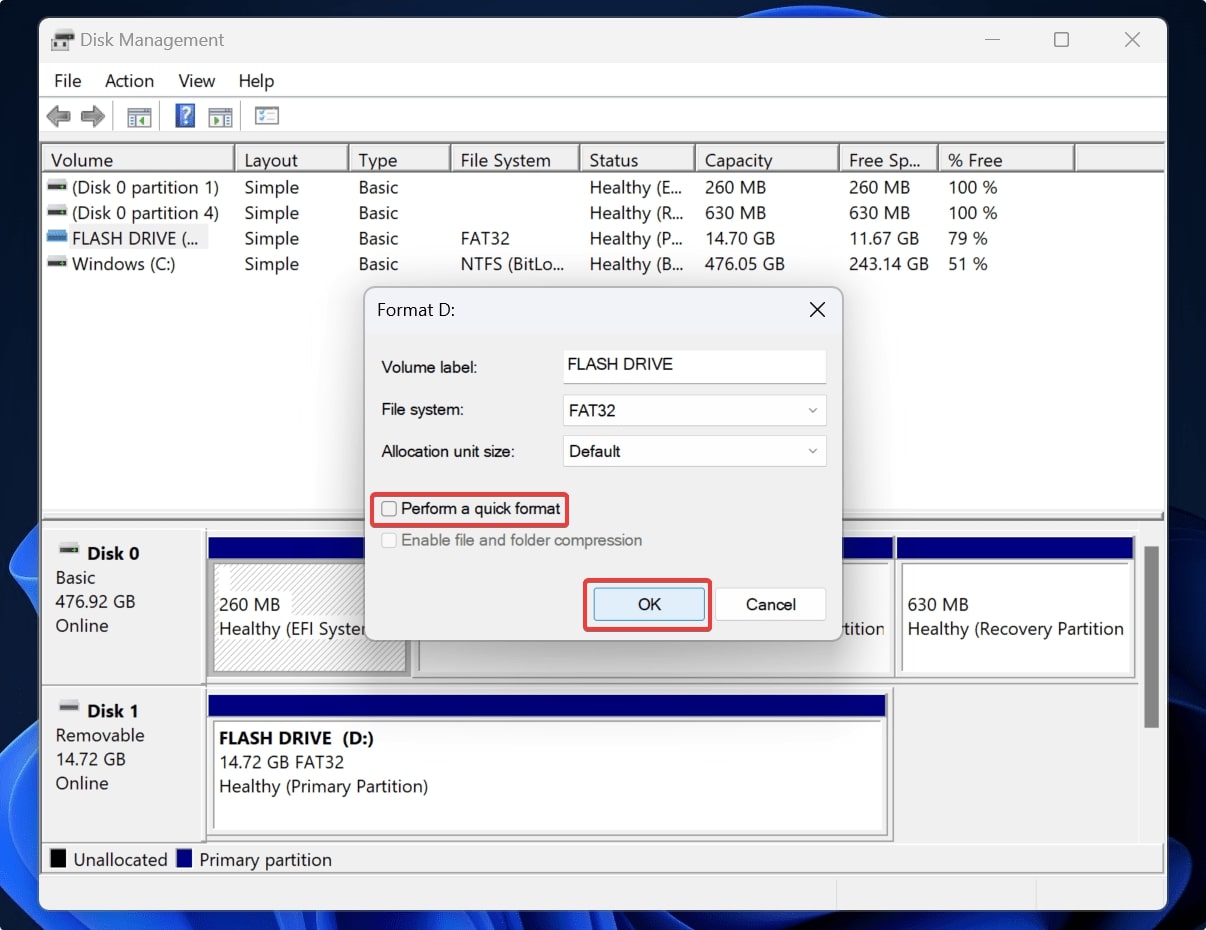
- Use the shortcut Windows key + X to access the quick link menu. Click on Disk Management.
- Right-click on your hard disk, and click Format.
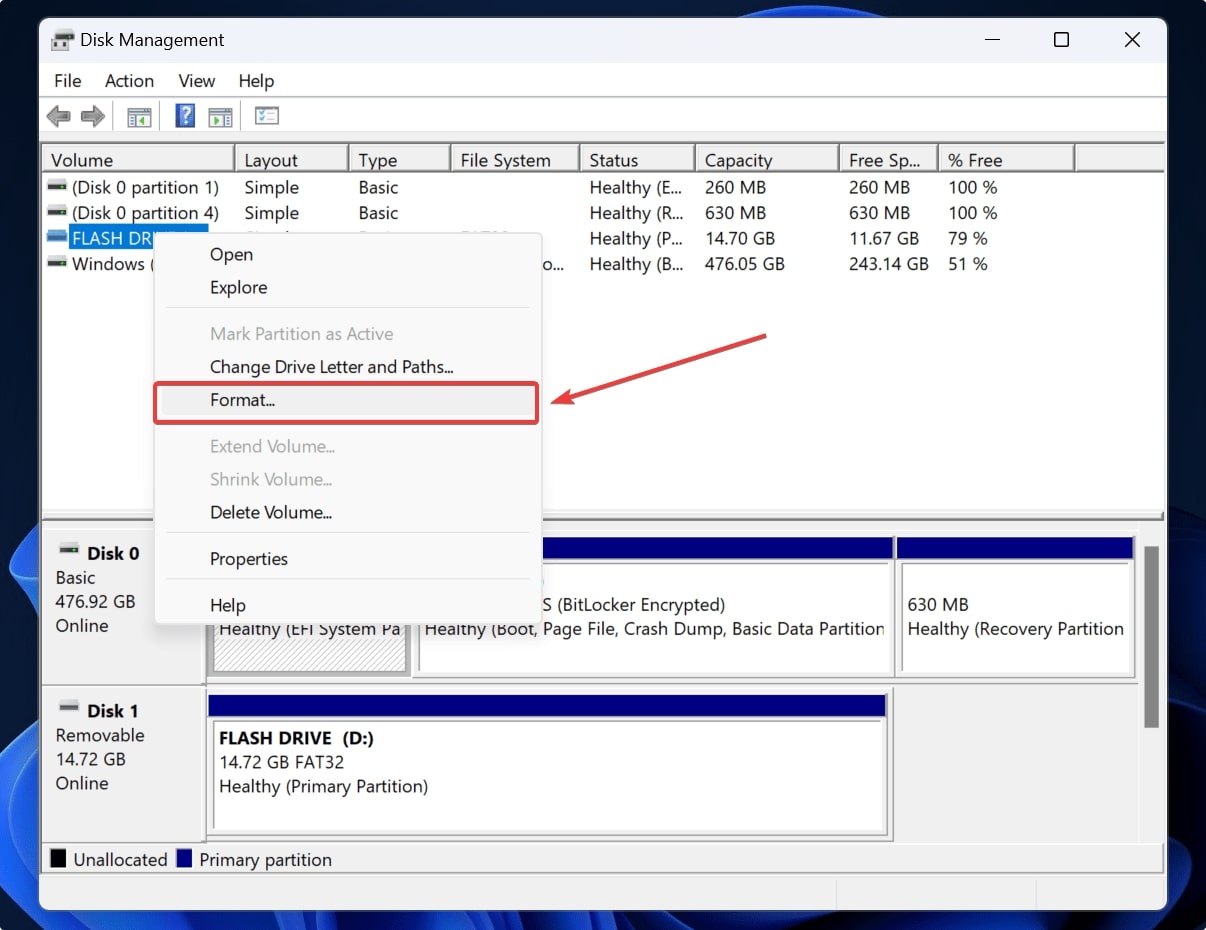
- Specify the file system and disk name. Ensure that you untick the “Perform a quick format” option. Click OK.
There’s a common misconception that formatting usually precedes data recovery. Check out our tutorial on how to recover external hard drive data without formatting.
Method 4: Remap Bad Sectors Using Victoria
Victoria is a free Windows tool that helps diagnose and fix hard drive-related issues. The tool is an effective external hard disk bad sector repair software that locates and remaps bad sectors by replacing the bad sector with a “good” one.
Here’s how you can use Victoria:
- Download, install, and launch Victoria.
- Select your hard drive with bad sectors, and click Test & Repair.
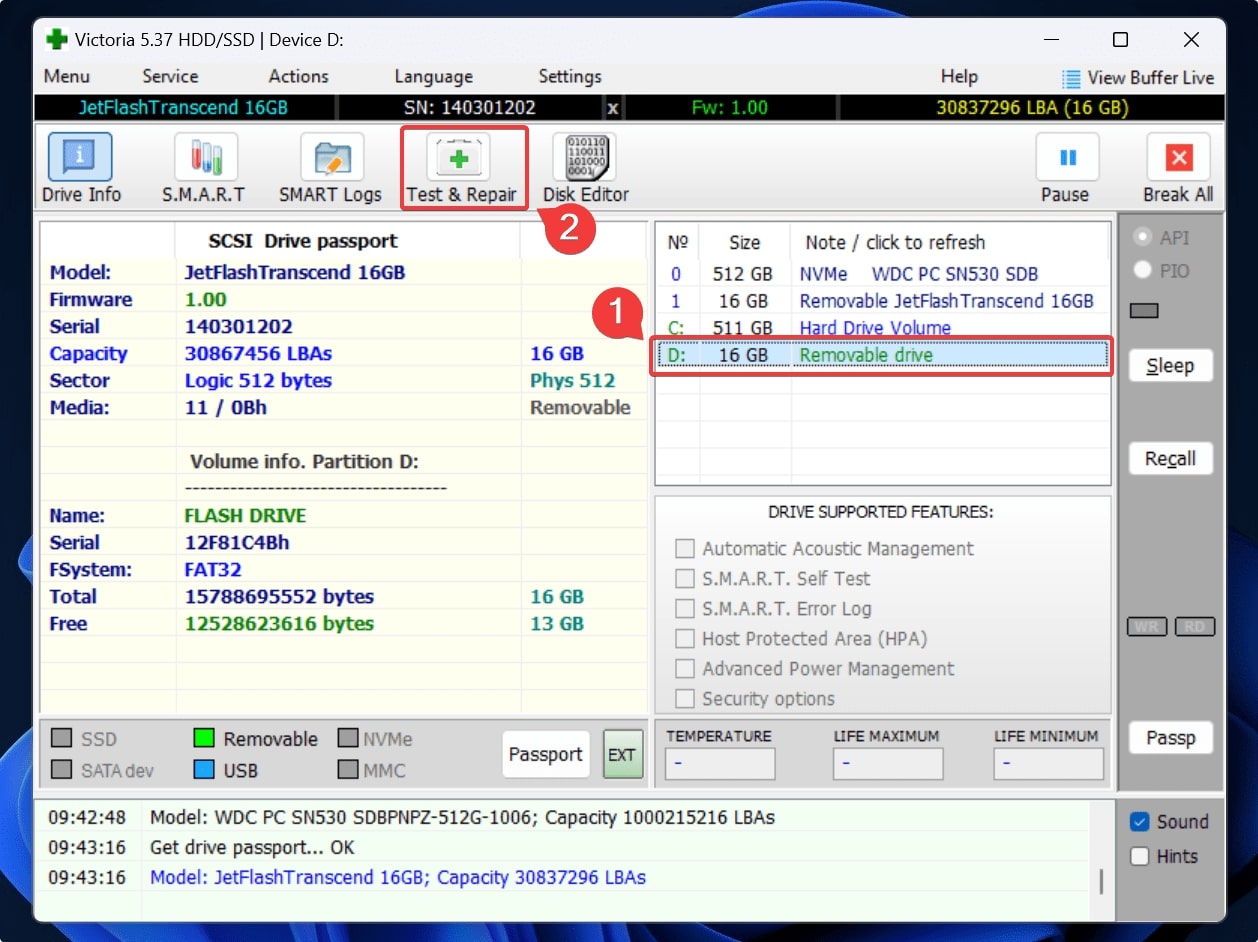
- Select Remap > Scan.
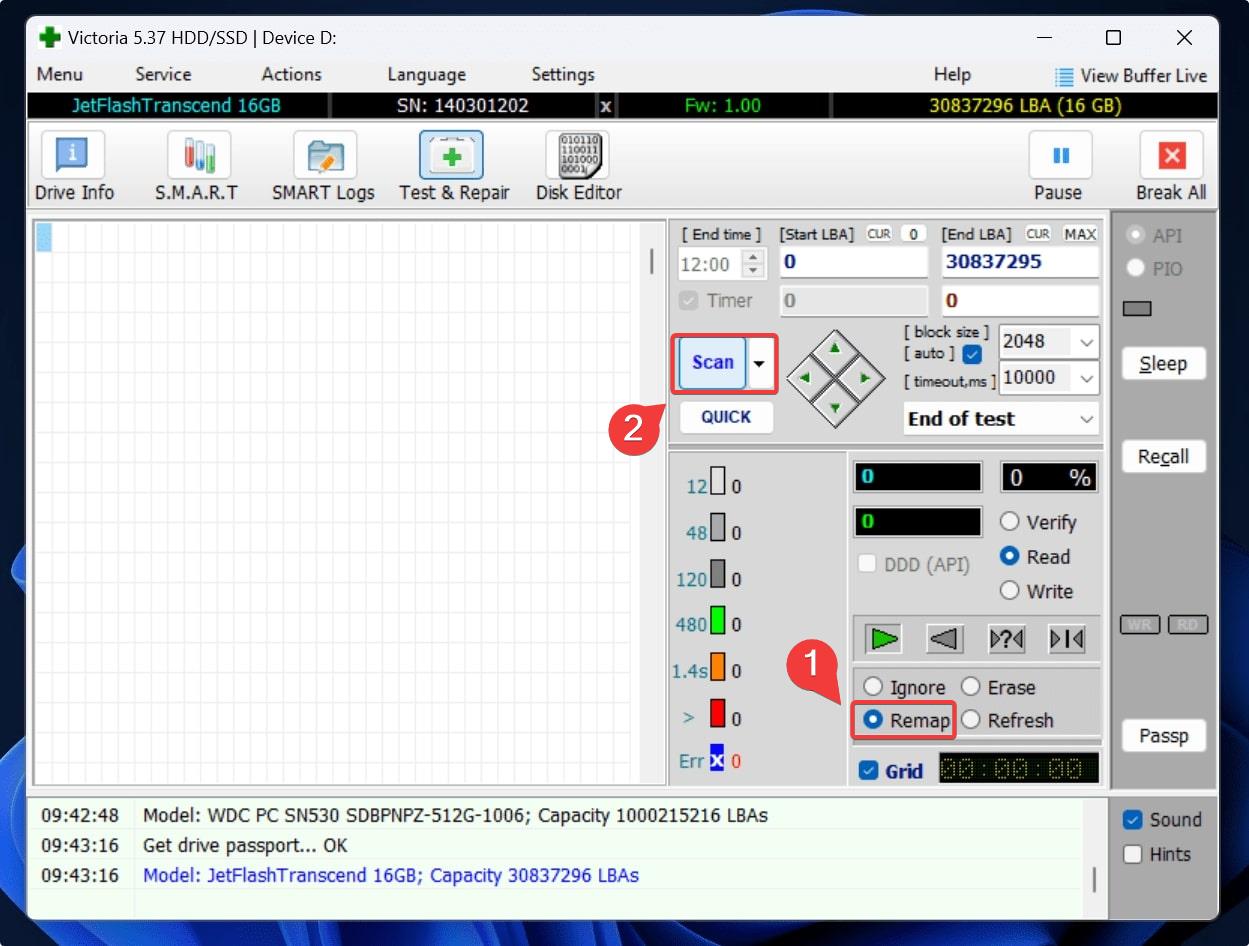
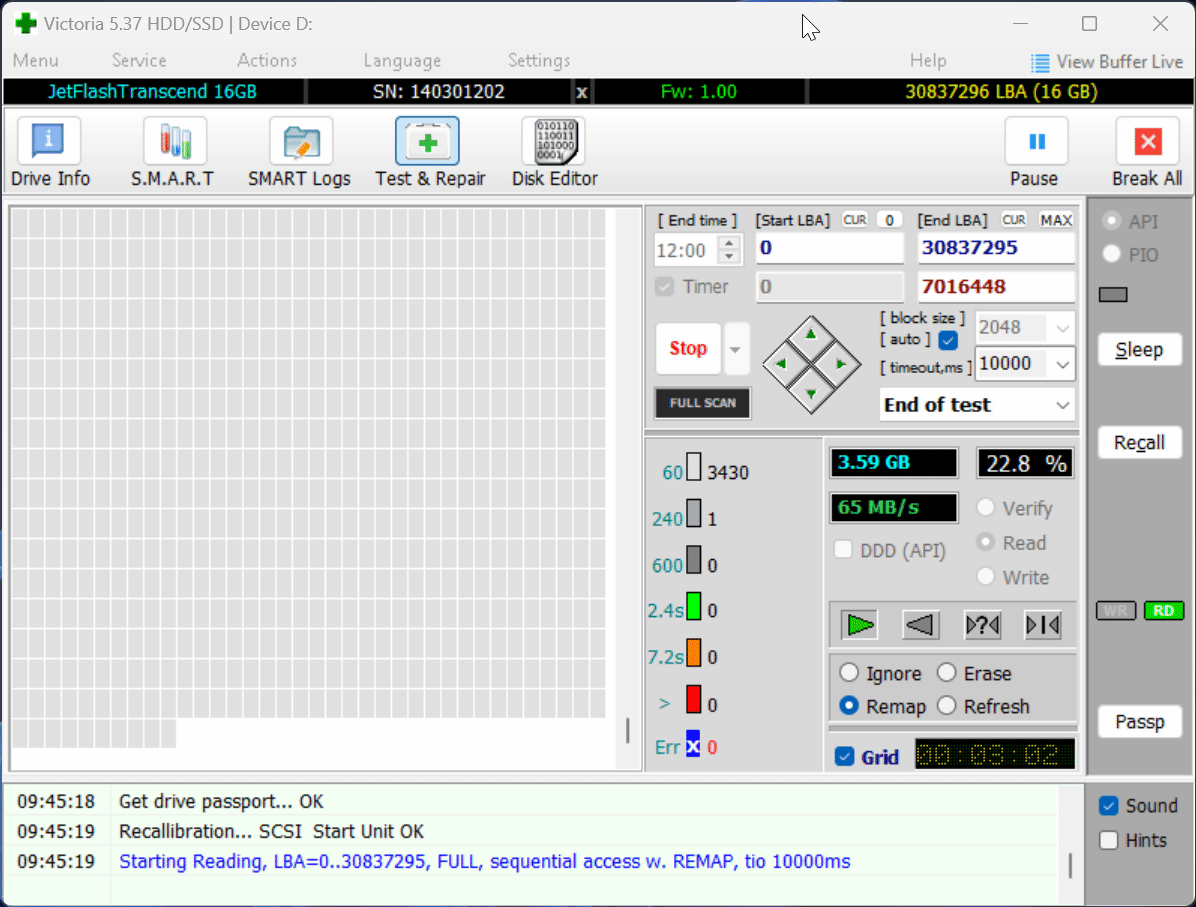
- Wait for the process to complete. The tool ensures that reallocated sectors get mapped correctly on your hard drive.
Method 5: Consider Replacing Your External Hard Drive
If the above methods don’t work, your final option is to replace the external hard drive. If you are currently using an HDD, it’s best to upgrade to a faster SSD – that promises several benefits over the traditional hard disk.
Lifespan-wise, the typical hard drive is designed to last between 3-5 years. If your hard disk is within that time frame, and you repeatedly encounter bad sectors, it’s best to back up your data and purchase a new hard disk.
Some critical factors to consider while replacing a hard disk include storage capacity, transfer speeds, security, compatibility, and durability.
How to Maintain the Health of Your External Hard Drive
Although logical or software errors arising in your external hard drive are not really in your control, here are a few proactive measures you can take to maintain your external hard drive’s health:
- 🛠️ Reduce risks of mechanical damage: Handle your external hard drive carefully. Invest in a shockproof hard drive case and ensure that you use the case while traveling. While flying, keep the external hard drive in your cabin baggage instead of the check-in luggage to prevent any rough baggage treatment.
- ♨️ Keep an eye on the temperature: High temperatures can quickly deteriorate the health of your hard drive. Ensure that you store your hard drive in a cool and dry location. Refrain from storing your hard drive in a garage or hot attic.
- 🔽 Limit external hard drive shutdowns: Frequent on-and-off cycles can result in unnecessary wear and tear on your external hard drive. Keep your PC on during the day to prevent excessive powering down of your external hard drive.
- ⚡ Invest in a surge protector: A good surge protector will protect your PC and external hard drive from abrupt power fluctuations.
Getting Smart with S.M.A.R.T.
An invaluable method of maintaining the steadfast health of your external hard drive is to harness S.M.A.R.T. (Self-Monitoring, Analysis & Reporting Technology) monitoring.
Most modern hard drives have an in-built S.M.A.R.T. system that collects and collates various reporting variables. S.M.A.R.T. tools like Crystaldiskinfo and Hard Disk Sentinel proactively calculate your external hard drive’s health by analyzing several S.M.A.R.T. variables, including different kinds of sector count (current, uncorrectable, current pending) amongst others to give you an early warning of a potential hard drive failure.
FAQ
How to remove bad sectors from a hard disk permanently?
If the bad sectors are soft or logical bad sectors, you can use CHKDSK or Windows’ error-checking tool to scan your external hard drive and fix bad sectors. However, if you are dealing with hard or physical bad sectors, you cannot fix the bad sectors yourself. In such a situation, it’s best to consult a data recovery service center to fix the hard drive.
Does full format fix bad sectors?
Yes, a full format scans your external hard drive for bad sectors and remaps them to a functional sector group. However, a full format will permanently delete your data. As a result, always ensure you perform a complete backup before engaging in any formatting activity.
How to fix bad sectors on an external hard drive on Mac?
Here’s how you can use the Disk Utility on Mac to fix bad sectors on an external hard drive:
- Connect your external hard drive to your Mac.
- Reboot your Mac while pressing CMD + R keys till the Apple logo appears.
- In the macOS utilities window, click Disk Utility > Continue.
- Select your hard drive and go to the First Aid tab.
- Click Run.
How to fix bad sectors on an external hard drive using CMD?
Here’s how you can repair bad sectors on an external hard drive using CMD:
- Open an elevated CMD window (with admin rights).
- Key in the command
chkdsk E: /f /r /x. - Wait for the scan to complete.
Conclusion
Bad sectors (both logical and physical) are concerning because they impact your hard drive’s performance and health. Fortunately, a few techniques exist to fix your external hard drive’s bad sectors. You can also implement proactive measures to uphold the health of your external hard drive. The bottom line is that as soon as you encounter the possibility of bad sectors on your hard drive, perform a backup immediately before attempting to fix the bad sectors.
This article was written by Joshua Solomon, a Contributing Writer at Handy Recovery Advisor. It was also verified for technical accuracy by Andrey Vasilyev, our editorial advisor.
Curious about our content creation process? Take a look at our Editor Guidelines.