If you’re a professional photographer, you know how big of a problem losing photos can be.
If you use a Nikon camera, you might lose NEF files from the SD card because of accidental deletion or formatting. You might also accidentally delete NEF files from your PC. In some cases, your storage device might encounter logical corruption and physical wear and tear, leading to the loss of NEF files.
However, If you’ve lost NEF files, you can still get them back. In this guide, we explain the NEF file recovery process step-by-step.
What are .NEF Files?
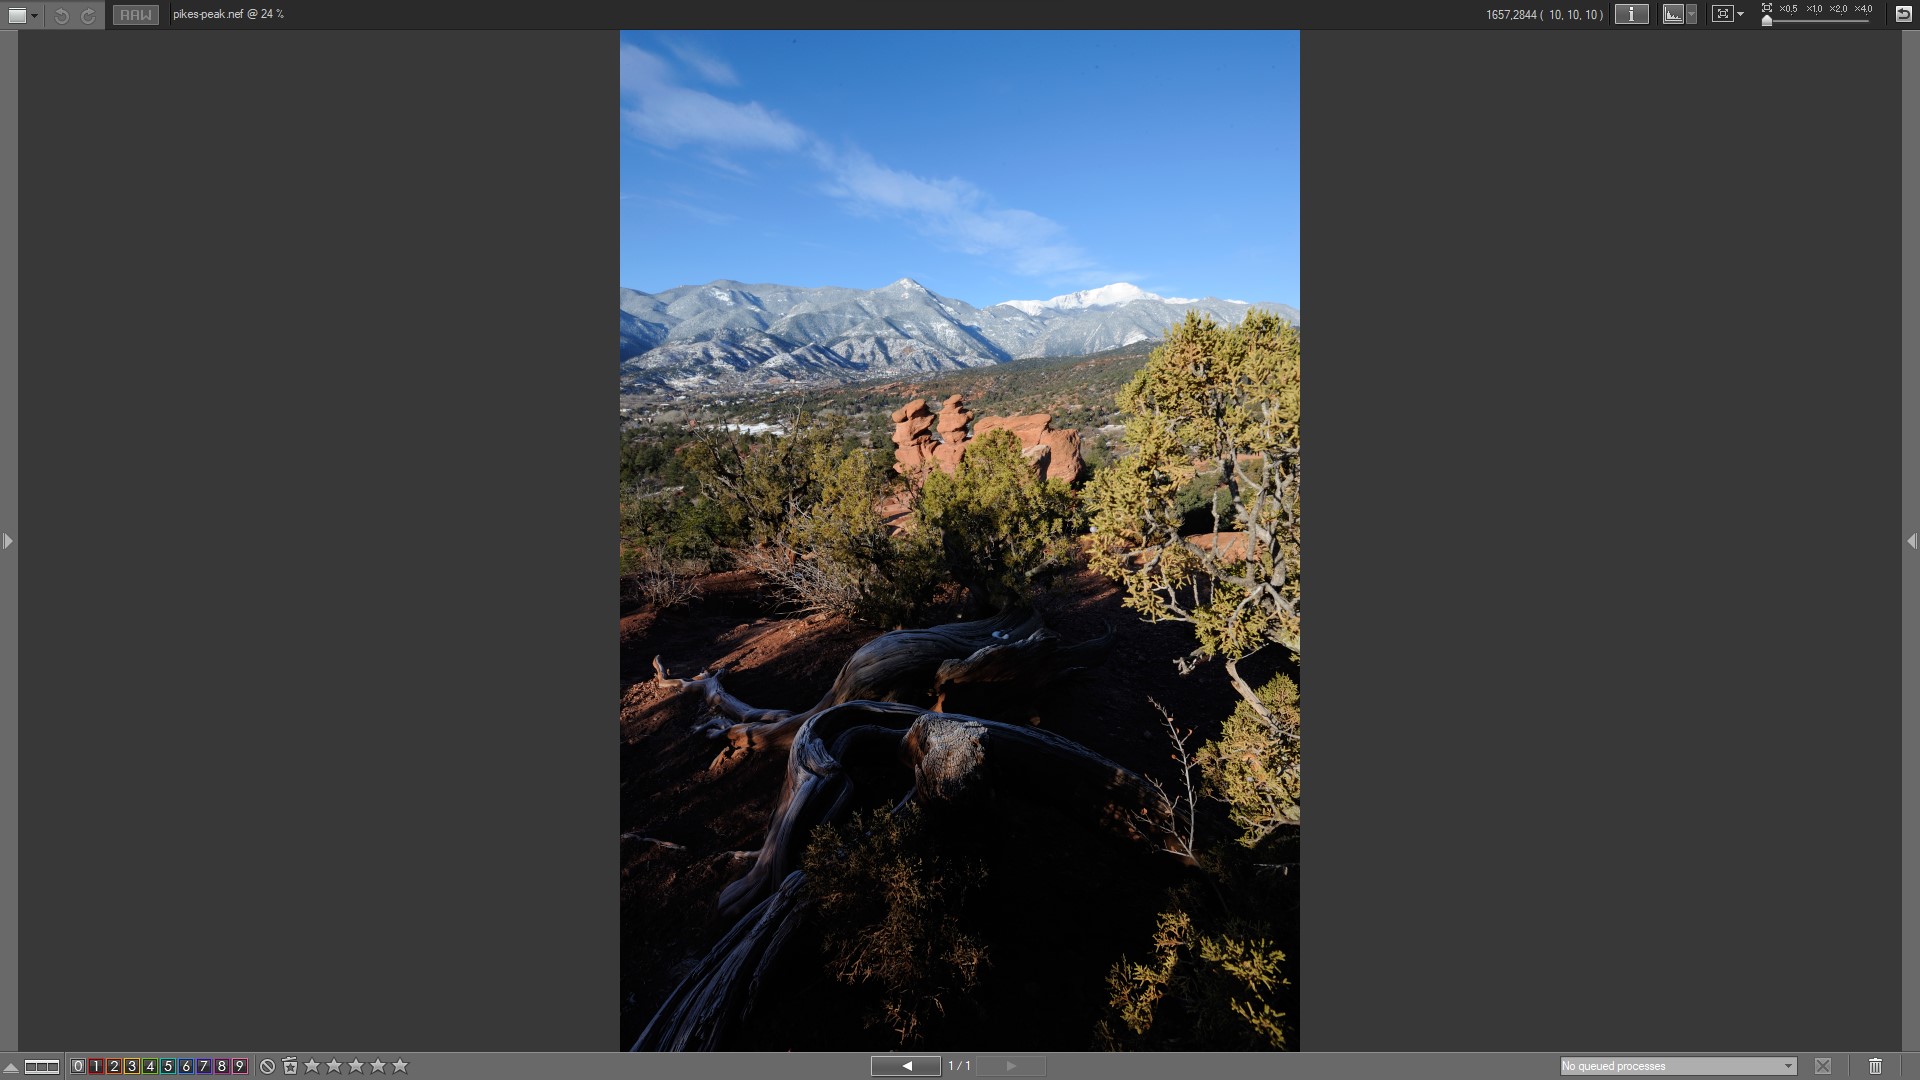
NEF (Nikon Electronic Format) files is a RAW image format exclusively used by Nikon cameras. RAW images store minimally processed data from your camera’s sensor and therefore are high quality. By the same token, NEF files are more high quality than other common image formats like TIFF.
NEF files also allow making non-destructive editing. You can change the contrast, hue, or apply filters without deteriorating the quality of your image. However, NEF files come with a few accessibility and editing restrictions, so not all tools can open NEF files. You can use Nikon software like Capture NX-D, Microsoft Photos, or third-party tools like Adobe Photoshop and IrfanView to open NEF files.
Is it Possible to Recover a Deleted NEF File?
Yes, it’s possible to recover deleted NEF files in most cases. The chances of recovery depend on various factors such as the reason you lost the files and how much you’ve used the storage device after losing NEF files.
Here are potential reasons that could lead to losing NEF files:
- ❌ Unintentional deletion: Mistakes happen. When you’re operating your camera in a rush or trying to clear out some old photos, you might end up deleting important photos too. Fortunately, the chances of NEF photo recovery are good in case of accidental deletion as long as you act quickly.
- 💾 Accidental formatting: Perhaps you forgot you had some important files on your SD card, USB, or hard drive and performed a format. Again, as long as you act quickly, there’s a good chance you’ll be able to recover the lost files from a formatted SD card or another storage device.
- 💽 Storage Media Corruption: Storage devices are prone to logical errors such as corruption. If your SD card or another storage media has become corrupt, you can still recover files from that SD card or device. However, you should perform the NEF file recovery before attempting to fix the corrupt storage device.
- 🐞 Virus and malware: Virus and malware can corrupt the files or remove them from the storage device without your consent. The chances of recovery are good if you perform the recovery as soon as you find out about the virus attack.
- 🤕 Physical damage: As long as your computer can read the data on a storage device, there’s a possibility that you’ll be able to recover the NEF files from that device. In case of severe damage, though, you might need help from a data recovery service.
Note: In case of severe damage, you should avoid putting the drive through a strenuous activity like scanning. Instead, you should create an image of the drive using a tool like Disk Drill, and scan the image to recover files.
Best 3 NEF File Recovery Solutions
Following are the best options you can use for NEF photo recovery from SD cards or other devices.
Option A: Disk Drill
![]() Disk Drill is an intelligent data recovery solution that makes NEF file recovery quick and easy. The free version lets you recover up to 500MB of data (on Windows).
Disk Drill is an intelligent data recovery solution that makes NEF file recovery quick and easy. The free version lets you recover up to 500MB of data (on Windows).
The great thing about Disk Drill is that it supports over 400 file formats, including RAW image file formats like NEF. It also works on any storage device, whether it’s formatted, corrupted, or became RAW. If your device has been severely damaged, you can also create an image of the disk from within the Disk Drill.
Here is how easy it is to recover NEF files from an SD card or another storage device using Disk Drill:
- Download Disk Drill: Download Disk Drill and install it to your PC.
- Create and Attach a Disk Image: Switch to the Data Backup section from the left sidebar. Select the disk you want to scan from the right pane and click on the Byte-to-byte Backup button at the top-right. Then, save the image file on your PC.

Next, go back to the Data Recovery section from the left sidebar and click on Attach disk image. Select the disk image here. You’ll now see the image listed in Disk Drill.
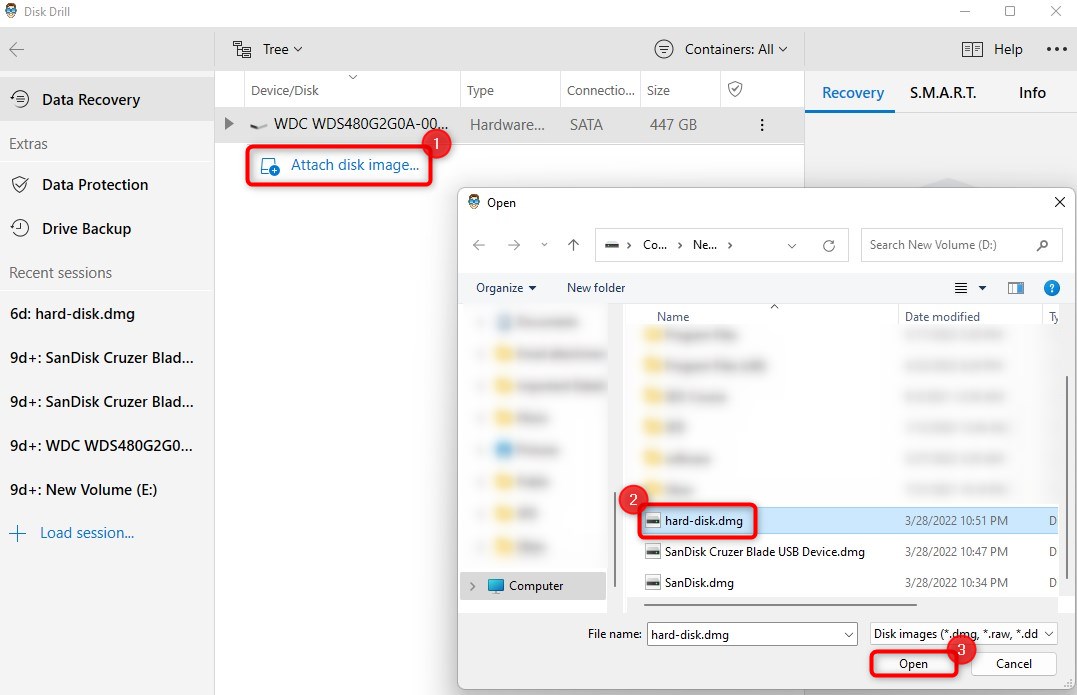 👀
👀Note: If your disk is working fine and you don’t suspect physical damage as the cause for data loss, you can skip this step.
- Scan the Disk: Select the disk from Disk Drill’s main screen and click the Search for lost data button.
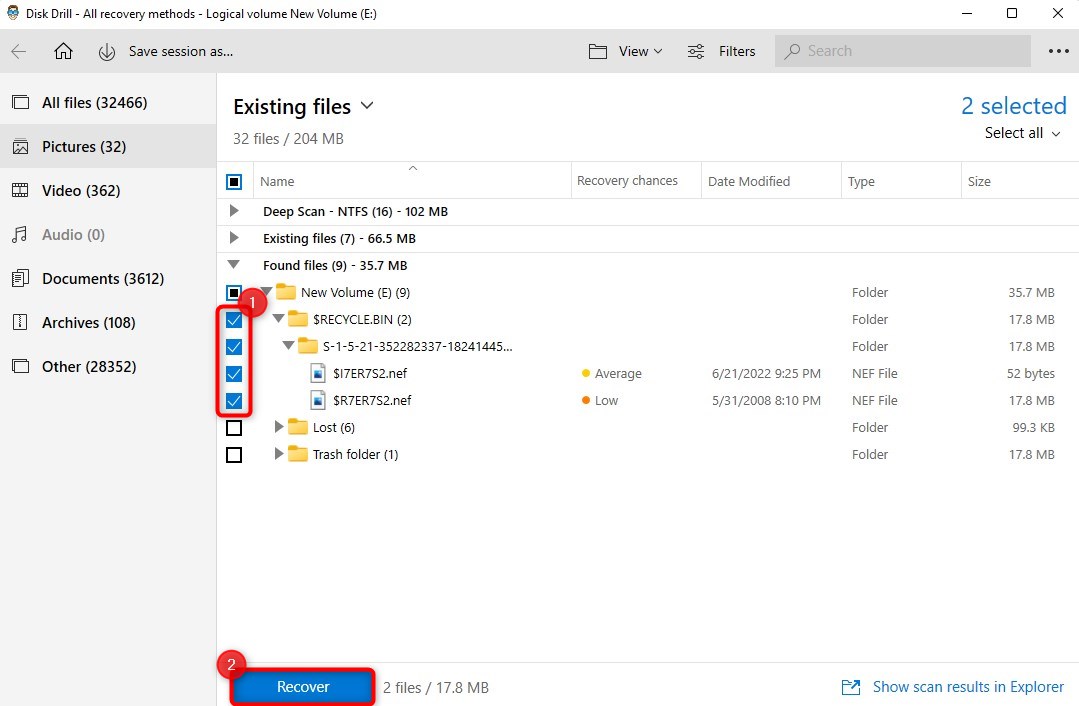
- Recover Files: Once the scan completes, you’ll see a list of recoverable files. Disk Drill allows filtering search results by file types. Since you’re trying to recover NEF files, you should select the Photos category from the left sidebar. Alternatively, you can also type “.nef” in the search bar at the top-right if you want to see only NEF files in the search results.You’ll now only see image files in the results. You can also preview these files on Disk Drill by clicking on the tiny eye icon next to the image’s name. Once you’ve found the files you want to recover, select those NEF files and click the Recover button.
Select a location where you want to recover the files and click OK.
Note: You should select a recovery location that’s different from the source location to avoid overwriting data.
Option B: Recuva
![]() Recuva also offers a free plan. With Recuva, you can recover files from SD cards, hard drives, or USB drives, but it’s still not as robust as Disk Drill.
Recuva also offers a free plan. With Recuva, you can recover files from SD cards, hard drives, or USB drives, but it’s still not as robust as Disk Drill.
There are several drawbacks to using Recuva. For instance, you can’t create an image of the disk using Recuva. You might also see shadow copies after a scan.
We tried recovering a NEF file using Recuva shortly after deleting it from the PC and were able to recover it successfully.
Even you should be able to recover NEF files in most cases, but as we mention in our Recuva review, the overall performance is average at best.
If you’d like to use Recuva, you need to follow this recovery process:
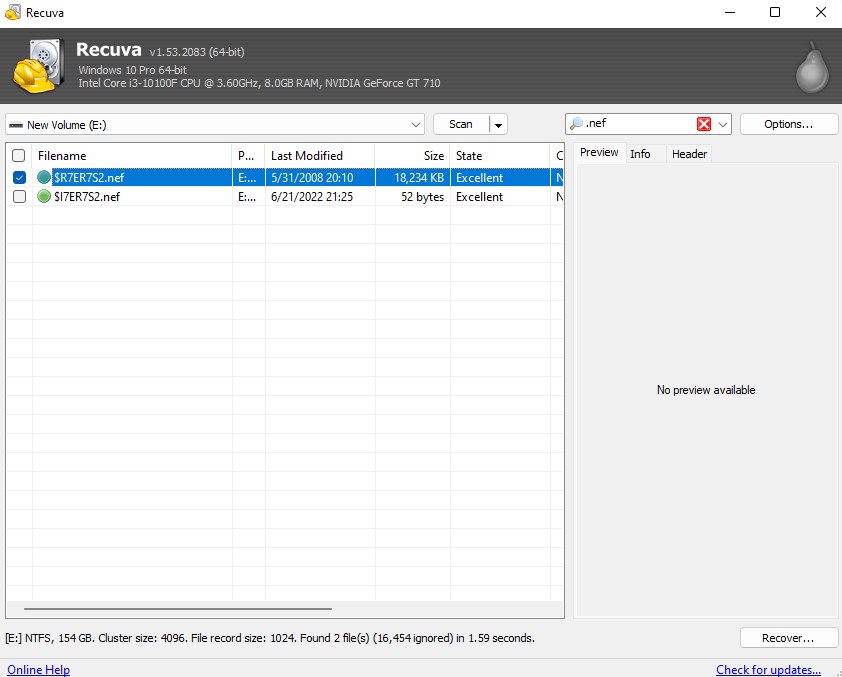
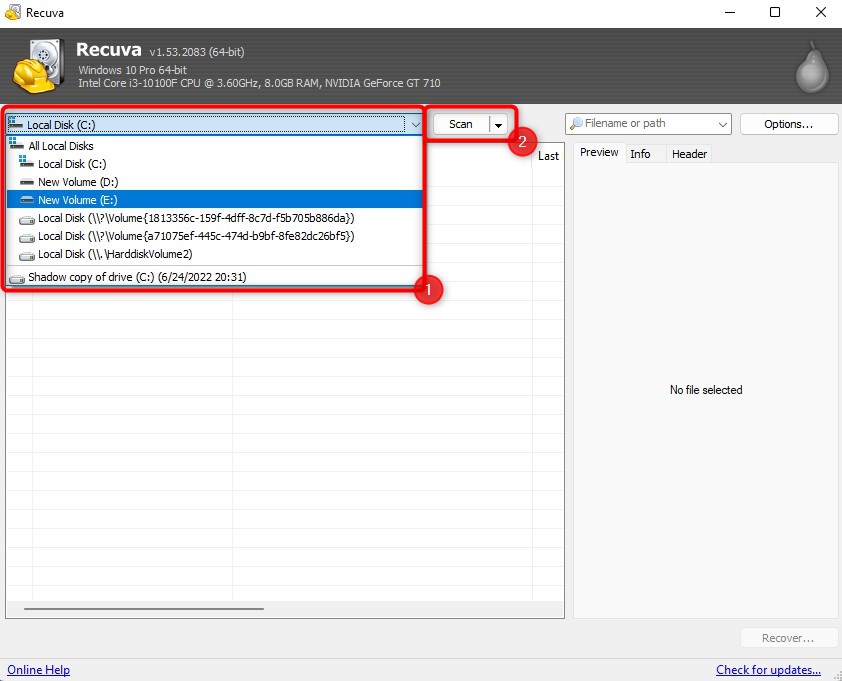
- Launch Recuva. If you see the Recuva Wizard, just press Cancel.
- Select the disk you want to scan from the drop-down menu at the top and press Scan.
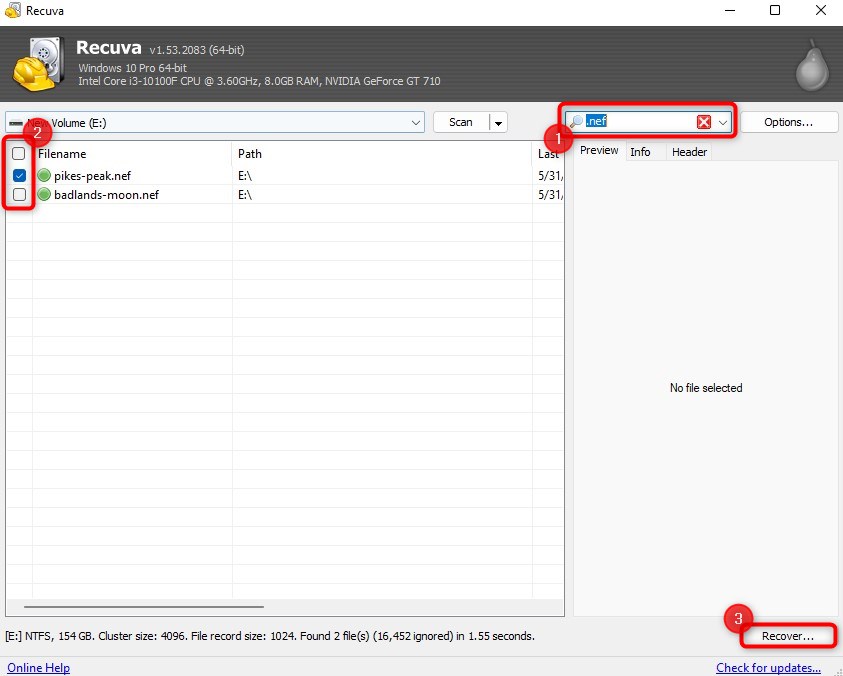
- When the scan completes, you’ll see a list of files. Since Recuva doesn’t offer a built-in option for filtering file by file type, you can use the search button at the top-right to filter for NEF files by typing in “.nef”. Then, select the files you want to recover.
- Click on the Recover button at the bottom right.
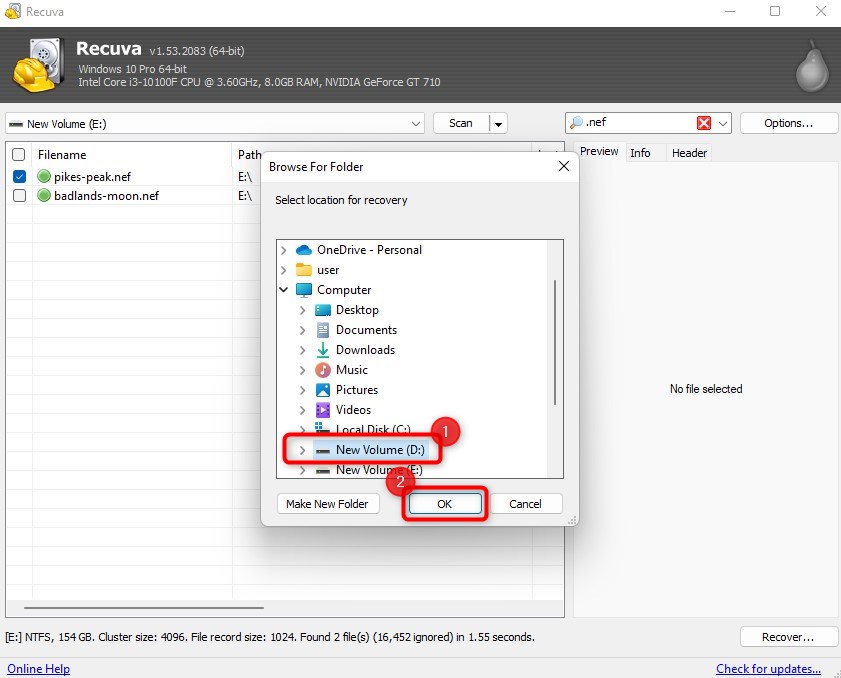
- Select the location where you want to recover the files and click OK.
Option C: Data Recovery Service
 In cases where your storage device has been severely damaged, you might need to rely on a data recovery service. For example, if the storage device has been physically damaged and the computer is unable to read the device, you won’t be able to scan it using a data recovery tool. In those cases, you’ll need to rely on a data recovery service.
How to Repair Corrupted NEF Files?
You can’t view NEF photos if they’re corrupted. When you recover NEF files that were corrupted before they were deleted, you’ll end up with the same corrupted file after recovering it too. Fortunately, there are several easy ways to fix corrupted NEF files as explained below.
Method #1: CHKDSK Windows Utility
In many cases, it could be the sectors on your storage device that have become corrupt, not the file. That’s when CHKDSK, a built-in command-line utility in Windows, comes in handy.
To use CHKDSK:
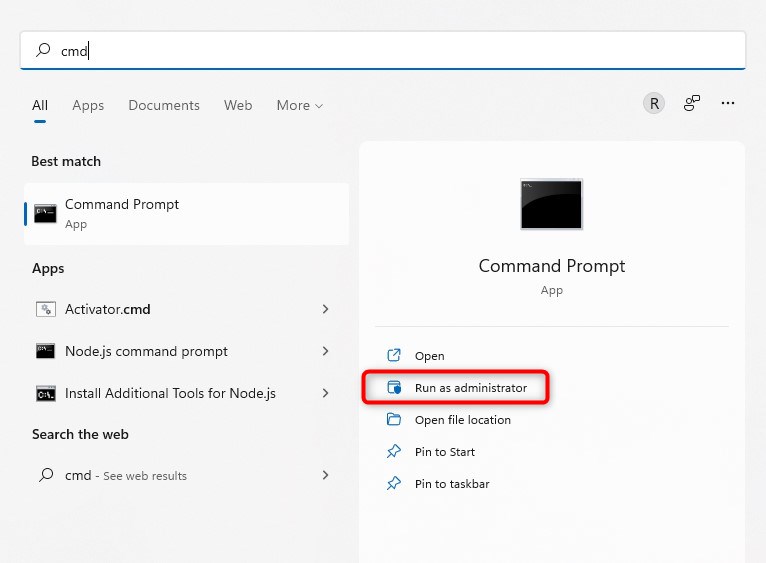
- Launch an elevated Command Prompt by searching for cmd in the Start Menu, hovering the cursor over Command Prompt, and selecting Run as administrator.
- Execute the following command:
chkdsk F: /f
(where F: is the drive containing the NEF files)
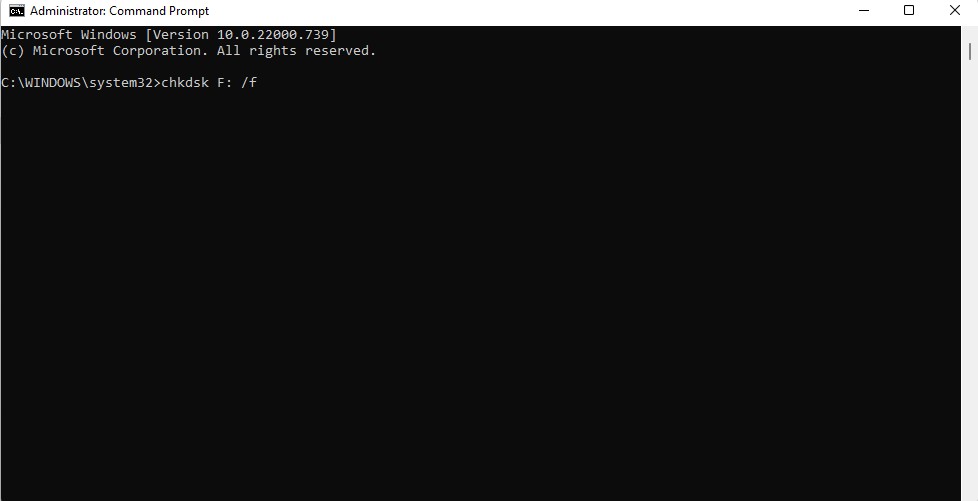
The CHKDSK utility will start scanning the drive and automatically repair issues it finds during the scan. See if you can access the NEF files.
Method #2: Convert the NEF File to Another File Format
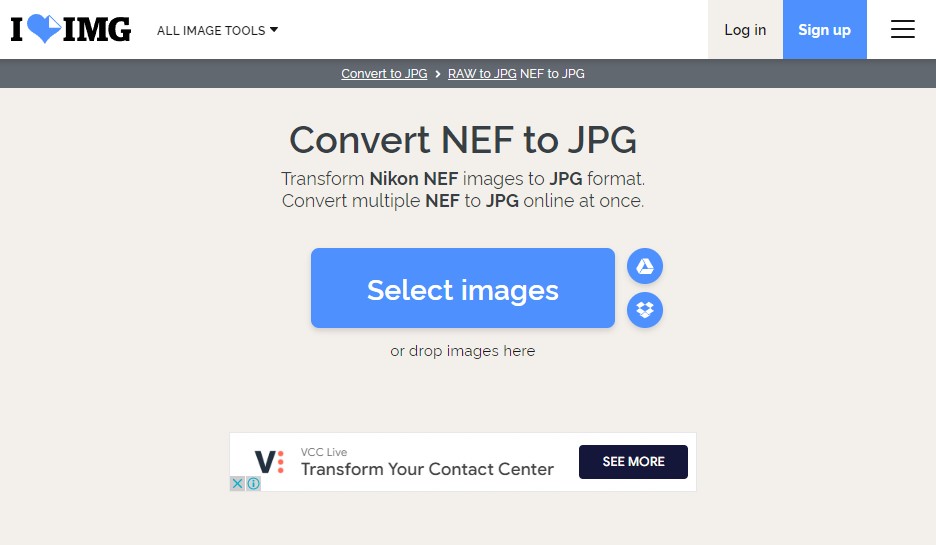
Converting NEF photos into another file format such as JPG can help fix corrupted NEF files. There are several file format converts online such as iloveimg and Convertio. Just upload your files to one of these tools, select a file format you want to convert the NEF file to, and download the converted file. Hopefully, you should be able to view the converted file.
Method #3: Open the NEF File in Photo Viewer
As simple as it may sound, you can often repair corrupted NEF files just by opening them in Nikon ViewNX 2 or any software that can open NEF files.
Download Nikon ViewNX 2 and install it on your PC. Once it’s installed, try opening the NEF file using Nikon ViewNX 2. You might just be able to view the file without performing any explicit NEF file repair.
Alternatively, you can also download the RAW image extension for the Windows Photos app and try opening the NEF file there.
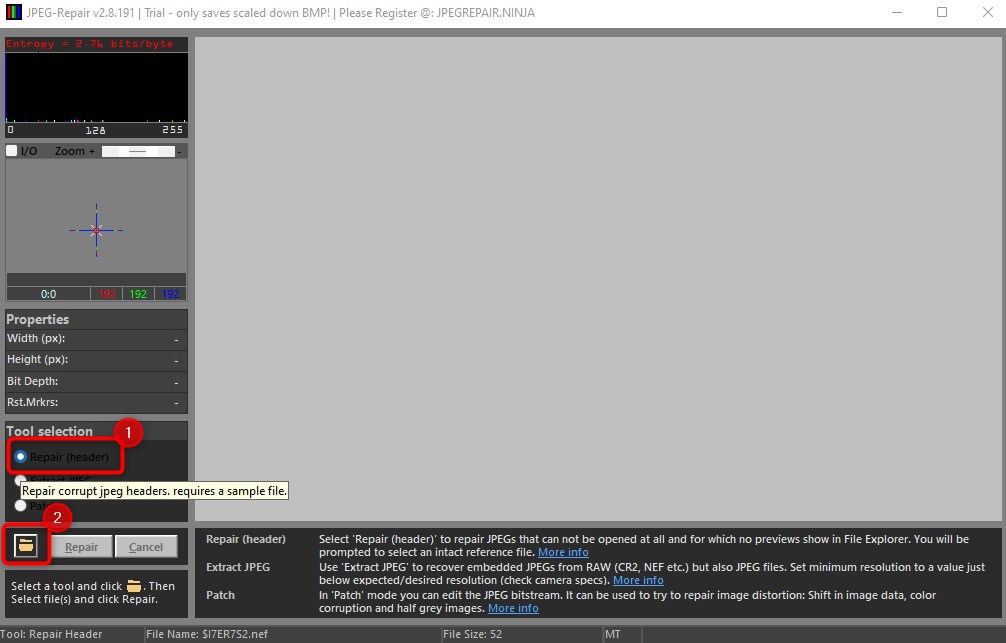
Method #4: Use a Photo Repair Tool
If none of these methods work, you can use a tool like JPEG Repairninja to perform NEF file repair.
Once you’ve installed JPEG Repairninja on your PC:
- Launch JPEG Repairninja.
- Click Continue without inserting a key to use the demo version.
- Select Repair (header) from the Tool selection section in the left sidebar and then click on the folder icon below to select a NEF file.
- Once you’ve selected a file, click OK.
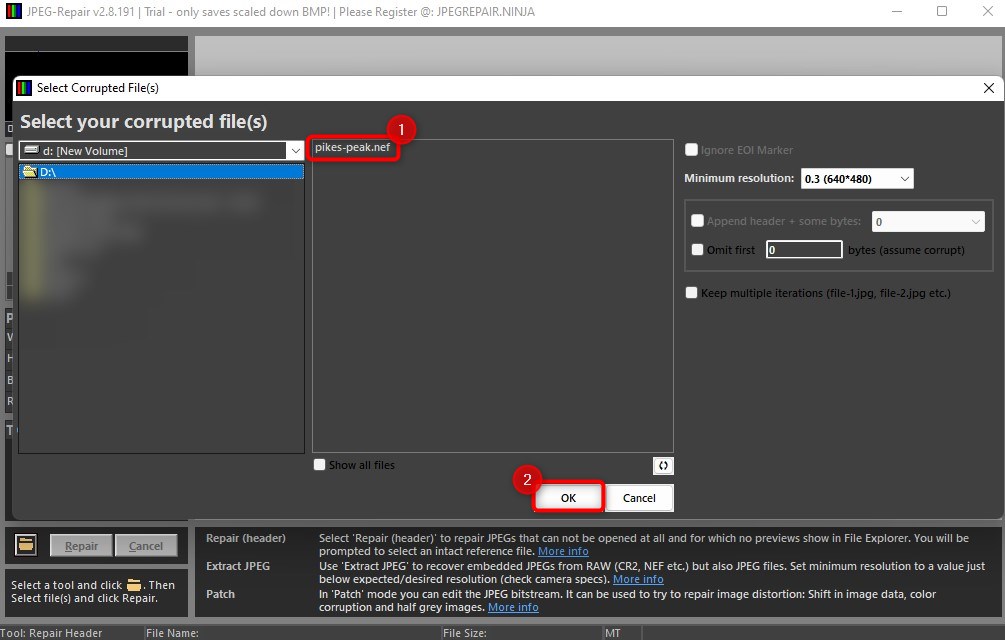
- You’ll also need to select another undamaged JPEG file that JPEG Repairninja can use as a reference while repairing. The file must be shot using the same camera. Select a file and click OK again.
- Click the Repair button.
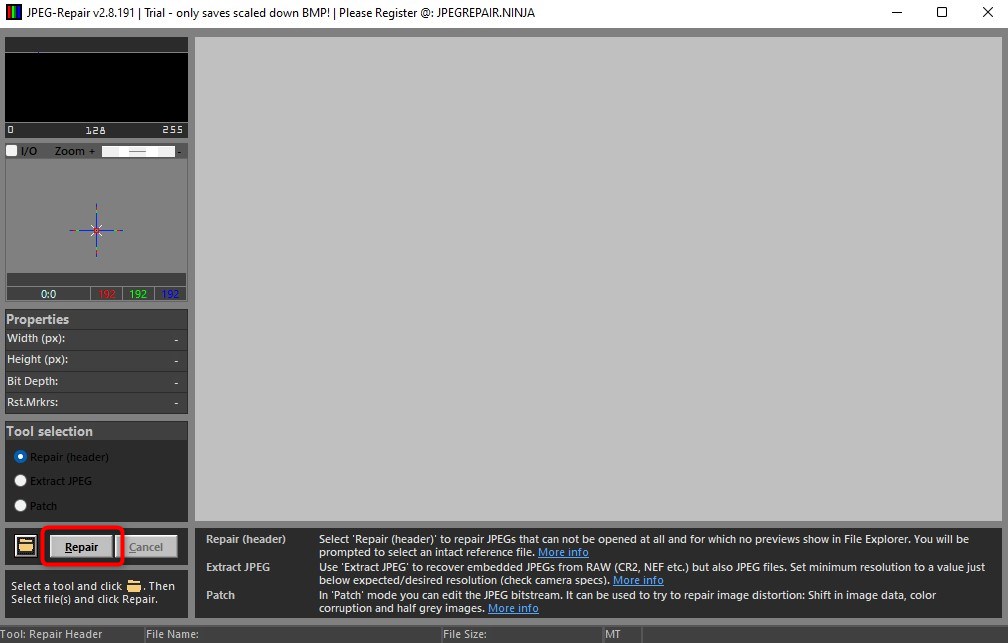
The tool will save the file as JPEG, not an NEF file. Go to the recovery location you had chosen and you’ll find the recovered files there.
FAQ
How to recover deleted NEF photos?
NEF photo recovery is an easy, four-step process with Disk Drill:
- Download and install Disk Drill on your computer.
- Launch Disk Drill.
- Select the storage disk containing the NEF files from Disk Drill’s home screen.
- Scan the disk.
- Select the NEF files detected during the scan and start recovering the files.
How do I fix a NEF file?
There are three ways to fix NEF files:
Use the CHKDSK utility on Windows. Convert the NEF file into another file format using an online file conversion tool. Try opening the NEF file in a tool like Nikon ViewNX 2.
Why can't my computer open NEF files?
Your computer might not open NEF files when you don’t have the right program installed. Not all photo views can open NEF files. You should use a photo viewer from Nikon or third-party tools like Adobe Photoshop or IrfanView to open NEF files. If the file doesn’t open even with the right program, it may be corrupted.
How do I view a NEF file?
To view a NEF file, you need to open it in a program that supports it. You can use programs like Nikon ViewNX 2, Adobe Photoshop, IrfanView, and Able RAWer to open NEF files.
Is a NEF file the same as a RAW file?
No, NEF files and RAW files aren’t exactly the same thing. All NEF files are RAW files, but not all RAW files are NEF files. NEF is Nikon’s RAW file format, but there are file formats such as CR2 and RW2.
Is there a Nikon NEF file recovery tool?
Nikon doesn’t offer a proprietary recovery solution for NEF files. However, you can always use better, more powerful third-party tools for NEF file recovery.
Conclusion
As a professional photographer, you know the consequences of losing a client’s photos. If you lose a few NEF photos, you might feel anxious, but a data recovery tool can help you. The tool can help you recover files and save them wherever you want on your computer without any external help.
This article was written by Arjun Ruparelia, a Contributing Writer at Handy Recovery Advisor. It was also verified for technical accuracy by Andrey Vasilyev, our editorial advisor.
Curious about our content creation process? Take a look at our Editor Guidelines.