Did you know that your external hard drive has an in-built recycle bin? This concept is just mind-blowing!
Keep reading further to find out how you can access this “secret” recycle bin because, under normal circumstances, the hard drive doesn’t reveal the recycle bin. We have also compiled a guide to fixing a corrupted recycle bin on an external drive and recovering data.
Click here to skip to data recovery from an external hard drive.
Where is the Recycle Bin on an External Hard Drive
Believe it or not, every external hard drive has a recycle bin folder. However, this recycle bin folder is hidden by default – similar to other system files.
The principle behind a recycle bin on an external hard drive is to have an additional layer of safety to prevent accidental data loss.
What is the $recycle.bin Folder on an External Hard Drive
The $recycle.bin folder is a critical system folder stored at the root directory of a hard drive.
You can find the $recycle.bin folder in all drives (both internal and external). This folder essentially performs the recycle bin function and collects data when you execute a delete command against any file stored on the disk.
Here’s a Quick Recycle Bin 101
🗑️When you delete a file, the recycle bin transports the corresponding index entries to a new location. Interestingly, even when you clear a recycle bin, the data is still there; only the indices get deleted.
🆓However, the recycle bin depicts this storage as free. As a result, as you continue to operate the drive, there’s a high probability of overwriting – thus reducing your chances of data recovery.
While dealing with recycle bin data recovery, it’s always crucial to stop using the drive immediately. We’ve covered some data recovery tips in the upcoming sections.
On the other hand, if you shift – deleted files, Windows skips the index collection step and directly marks this storage as “free to occupy.” Consequently, there’s a significant risk of data overwriting. In such cases, it’s critical to act quickly and attempt recovery of shift-deleted files.
How to See the Recycle Bin on an External Hard Drive
Here’s how you can find the hidden recycle bin on your drives:
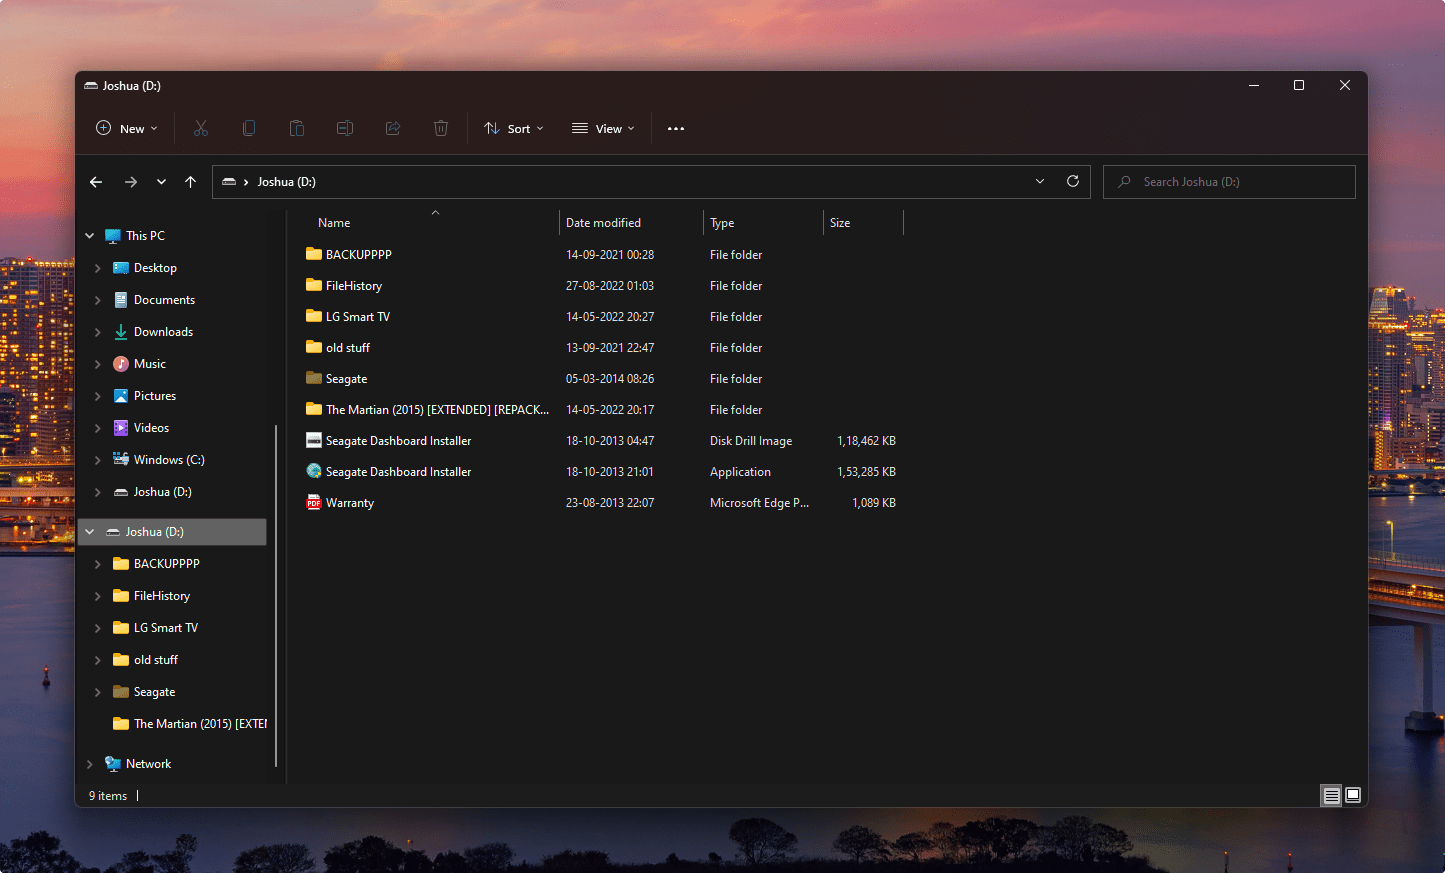
- Open File Explorer.
- Select the external hard drive.
- Click on the three dots > Options
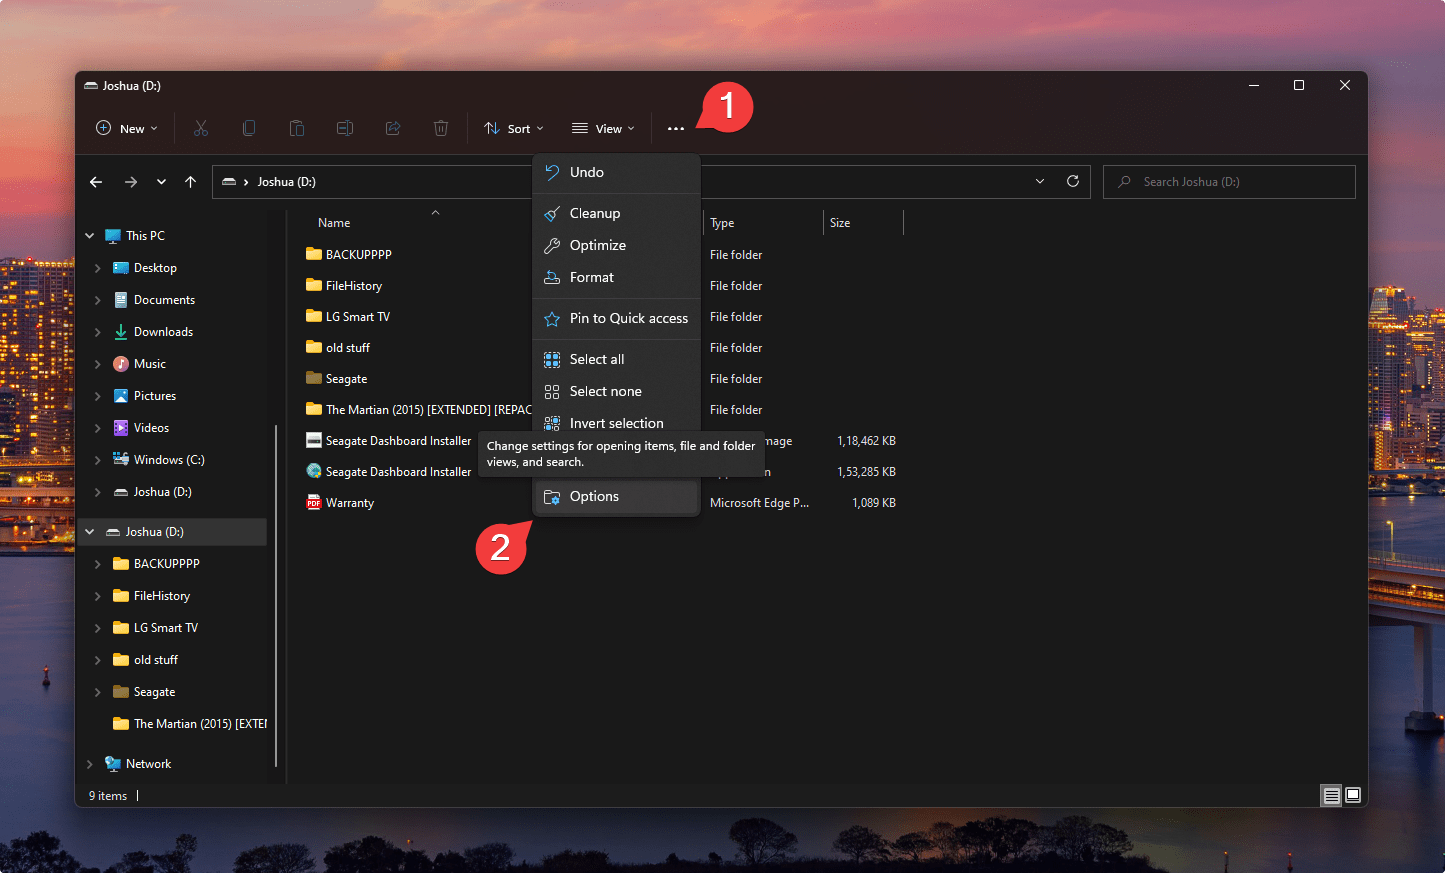
- Scroll to the VIEW tab
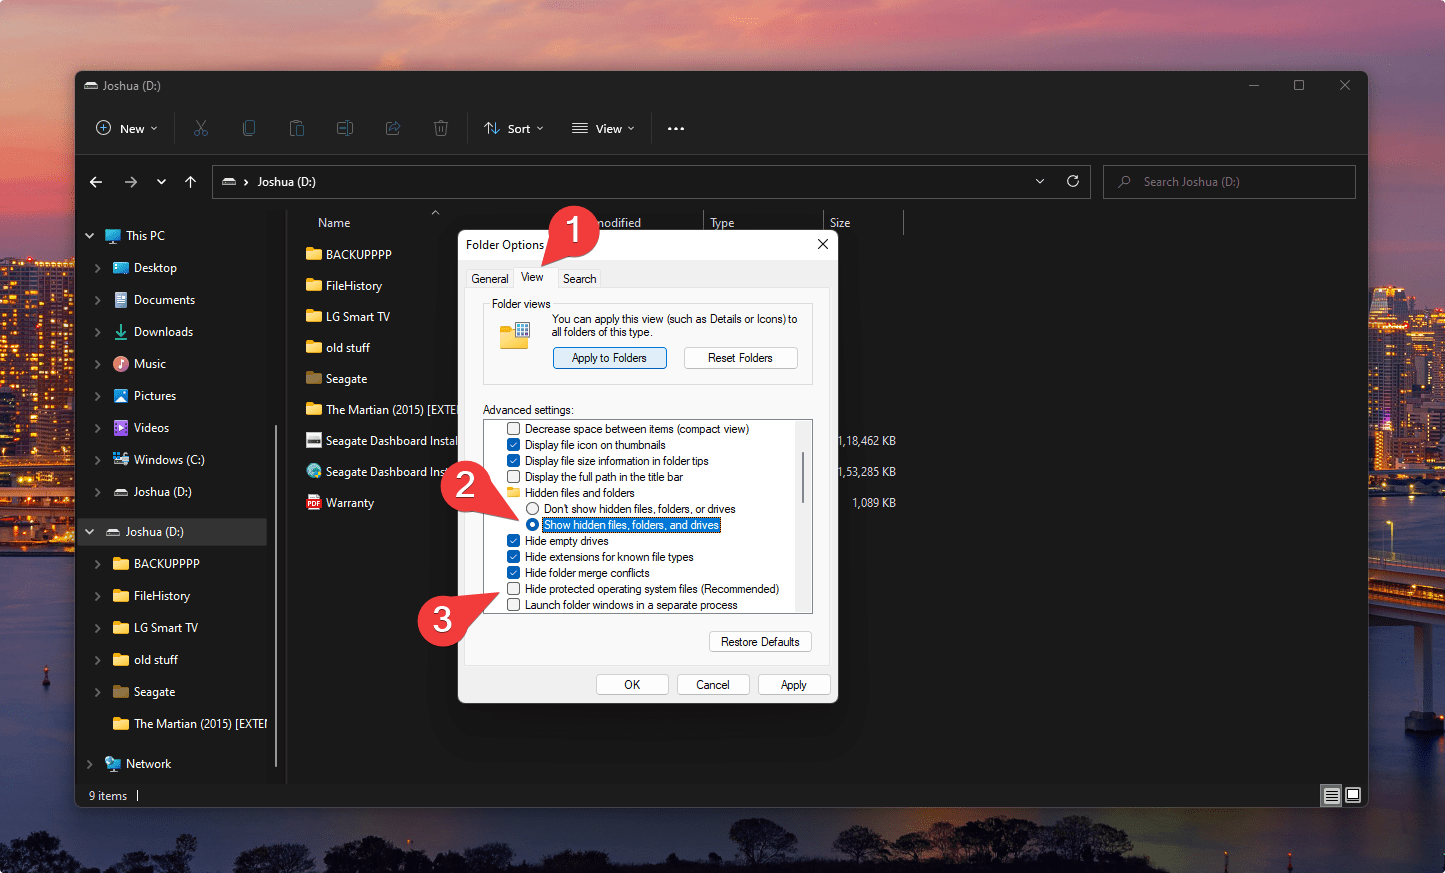
- Enable Show hidden files, folders and drives
- Disable Hide protected operating system files
- Click Apply to Folders
Result: You can see that the $RECYCLE.BIN folder is now visible.
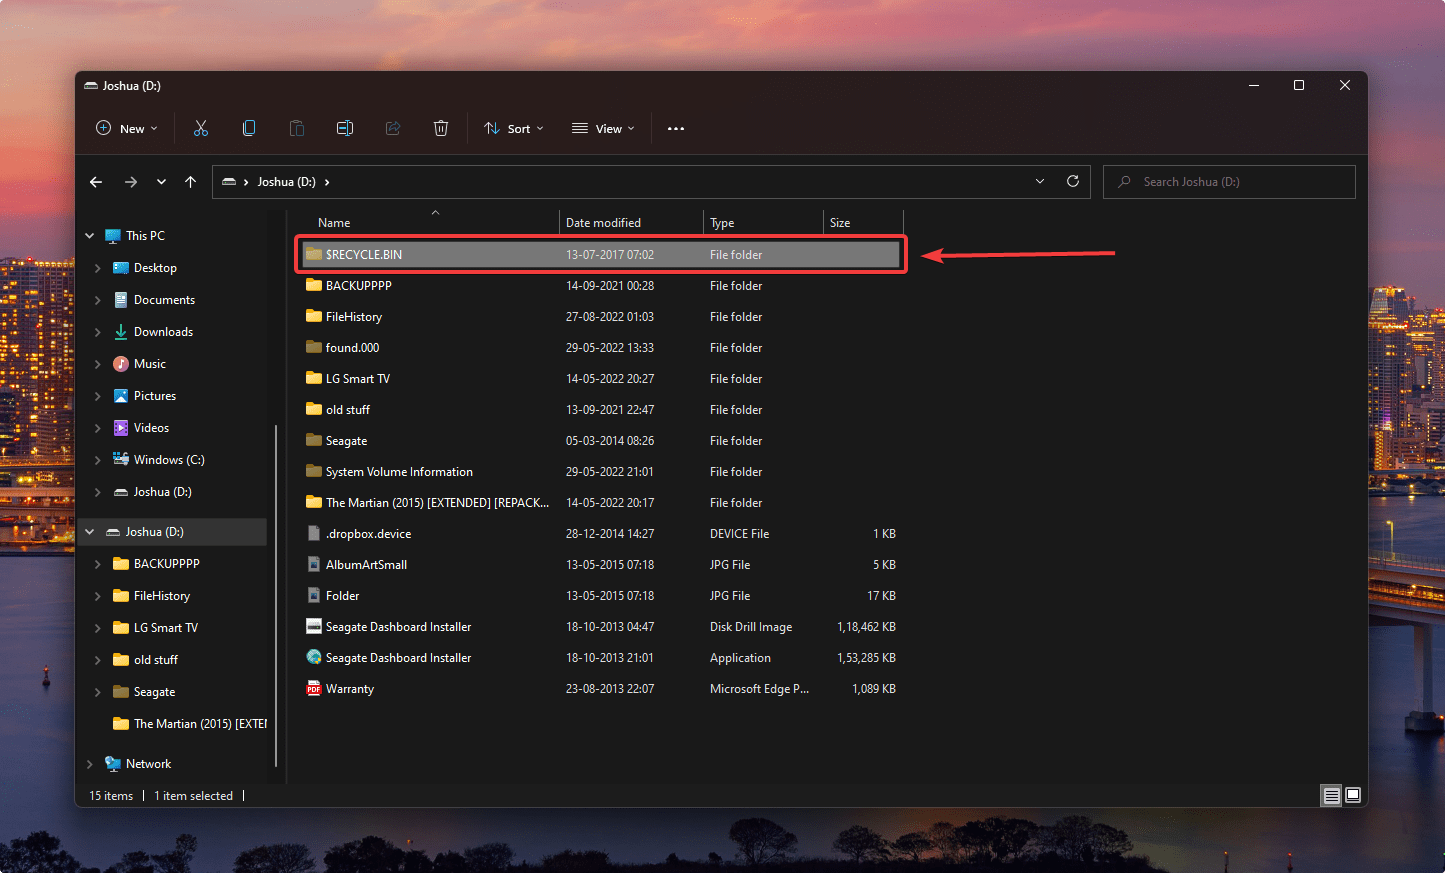
Note: In some cases, the recycle bin folder on an external hard drive only shows files deleted locally (from your internal hard drive). You can search for another folder named .Trashes which will have deleted data from your external hard drive.
If you can’t find your deleted files, don’t panic. Check out our comprehensive tutorial on external hard drive data recovery.
How to Fix “The Recycle Bin on X:\ is corrupted” on External Hard Drive
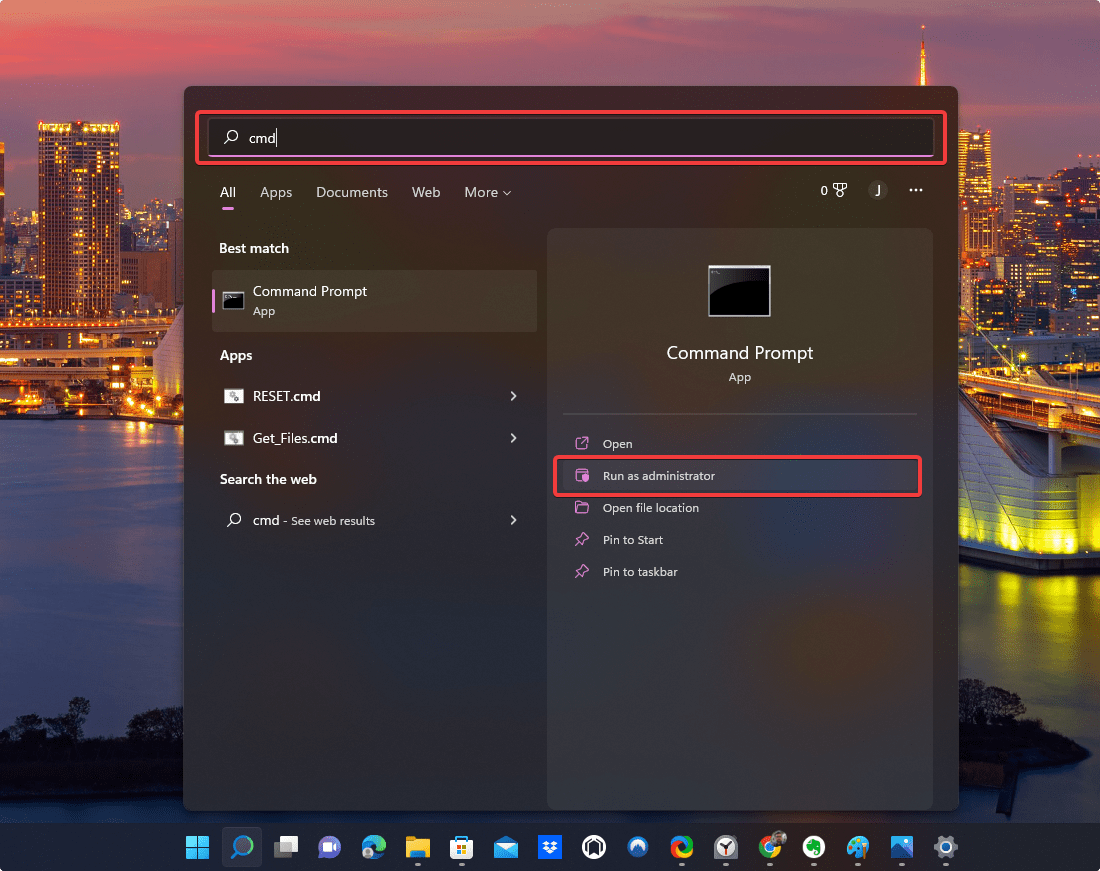
If you encounter the recycle bin corrupted alert, here’s what you must try:
- Search for CMD and select Run as Administrator
- Key in this command and then hit Enter
rd /s /q C:$Recycle.binNote: replace “C” with your drive letter.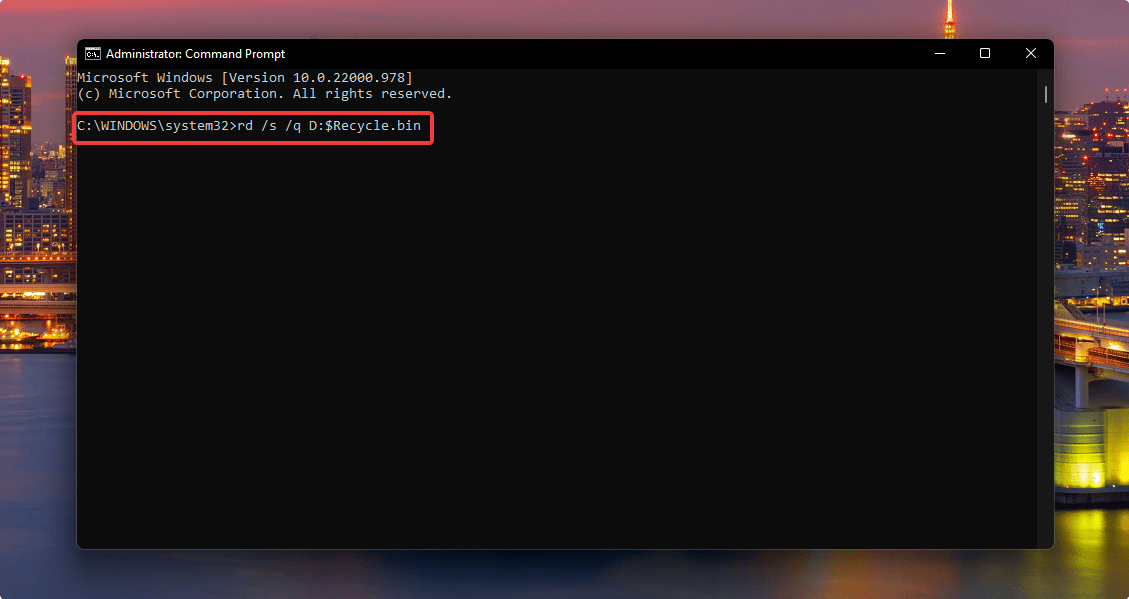
Result: The above command essentially deletes the $Recycle.bin folder. As a result, your computer will automatically create a new Recycle bin folder on your external hard drive.
What if your recycle bin doesn’t have the deleted files? This is where data recovery tools are handy when your deleted files are not in the recycle bin.
Reasons behind Recycle Bin Corruption
Here are some infamous culprits behind your recycle bin corruption:
- DLL (Dynamic link library) issues
- Abrupt system shutdown
- System failure
- Corrupted file paths
A damaged recycle bin prevents you from restoring deleted files. Moreover, whenever you try to access the recycle bin, you will witness the notorious “The Recycle Bin on X:\ is corrupted” or “access denied” alert.
How to Recover Data That’s Not in the Recycle Bin of An External Hard Drive
Third-party data recovery tools are your safest bet to recover permanently deleted data from an external hard drive.
The data recovery market is booming with several different kinds of players. Our elite pick is Disk Drill, a free, easy-to-use, and comprehensive data recovery tool.
Disk Drill offers data recovery from reputable Hard drive brands like Western Digital and Seagate. Furthermore, Disk Drill is renowned for assisting users with data recovery from any scenario.
Our team conducted an elaborate test of Disk Drill, and here’s our final verdict for your reference.
Disk Drill enables data recovery of up to 500 MB for free. Compatibility is a breeze as Disk Drill supports various Windows versions: 7/10/11
Without much further ado, here’s how you can recover data using Disk Drill:
- Download, install and Launch Disk Drill.
- Select the affected hard drive and pick your scanning option.
Note: For this demonstration, I’ve connected my old Seagate external HDD. This tutorial also suits other popular HDD models, including the WD Passport.
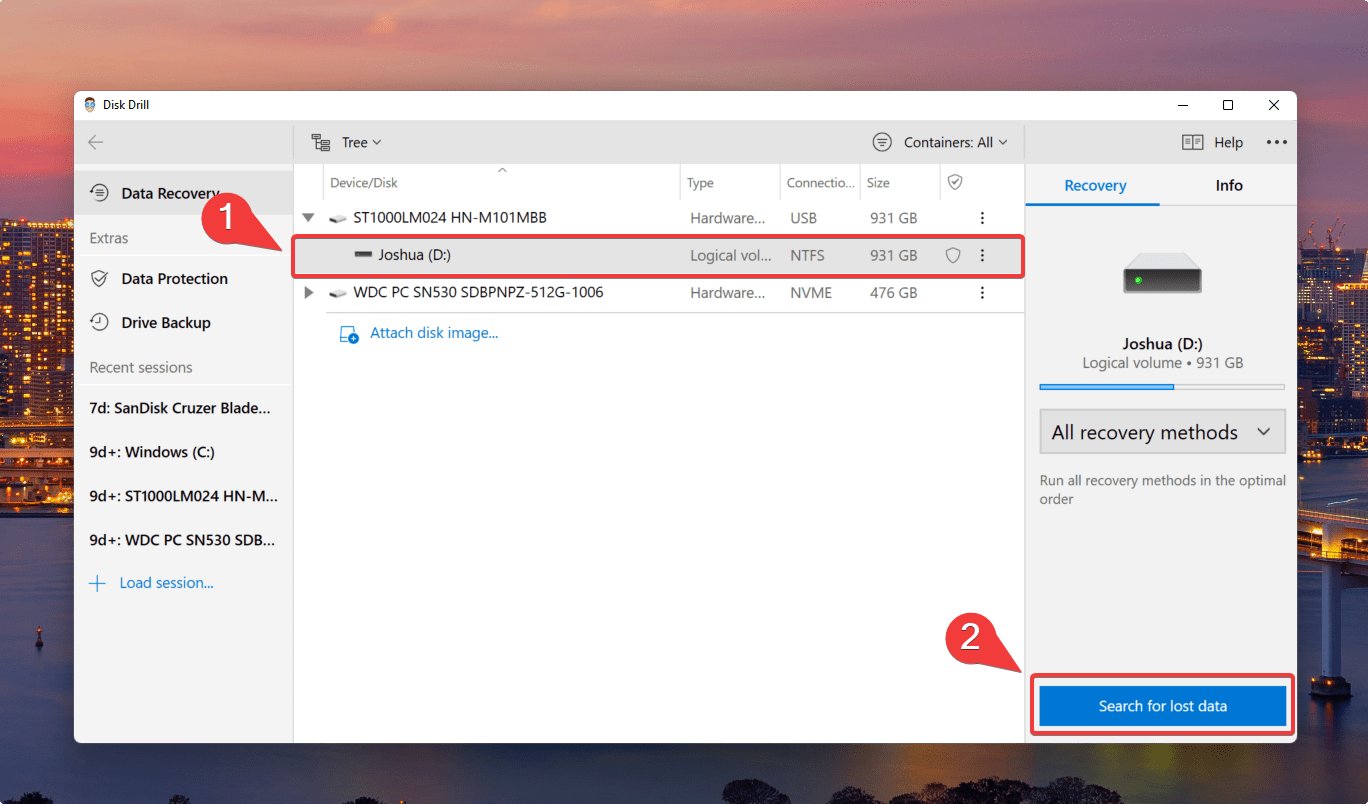
- By default, Disk Drill recommends the All Recovery Methods option to maximize data recovery chances. You could also try the Quick Scan or partition scan if you’re short on time.
- Click on Search for Lost Data. Disk Drill employs efficient data searching algorithms to detect and identify recoverable data.
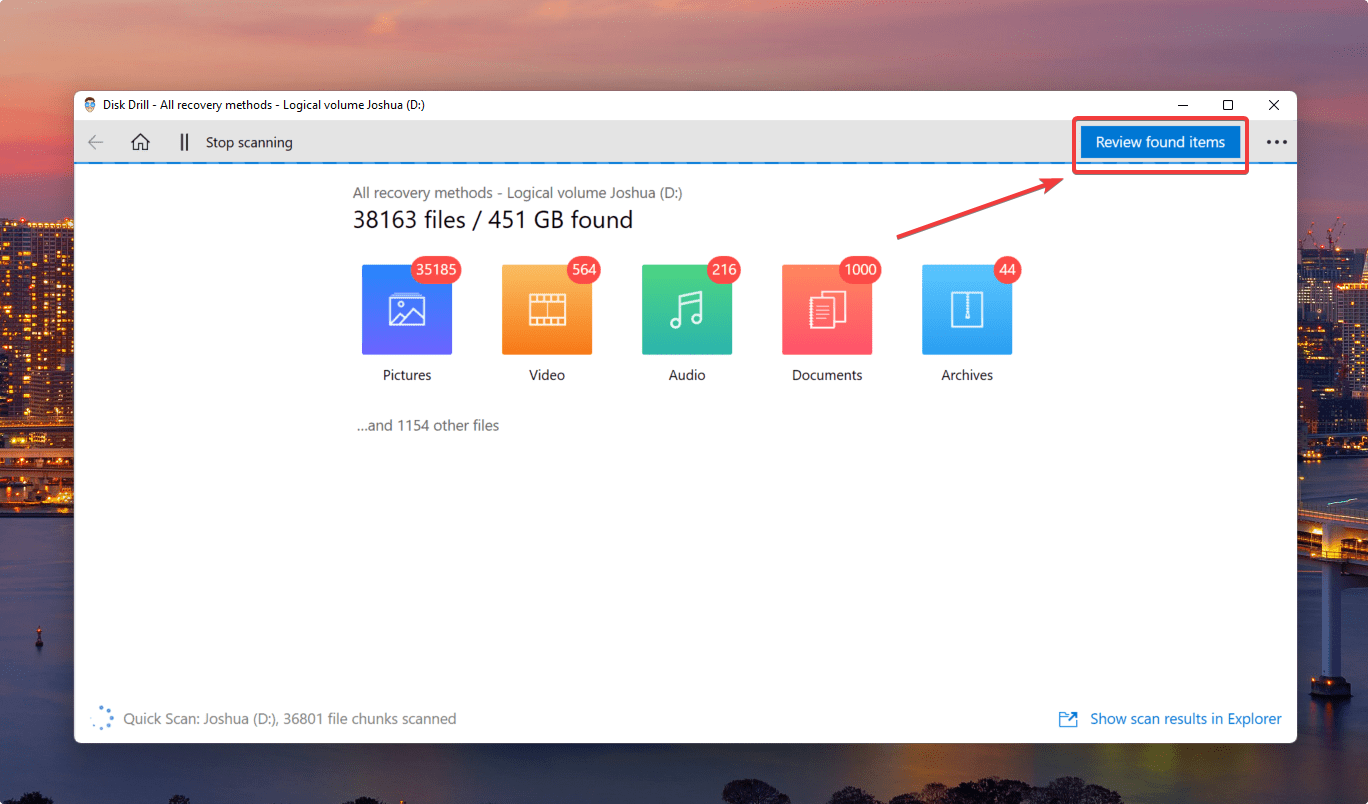
- Once the scan terminates, click on Review Found Items.
 Disk Drill has an awesome Preview Feature: Hover over files and click on the eye icon to reveal the file contents, last modified date, and size. This is particularly useful if you want to recover only a handful of files instead of a full partition/disk recovery.
 - Select the files you want to retrieve and click on Recover.
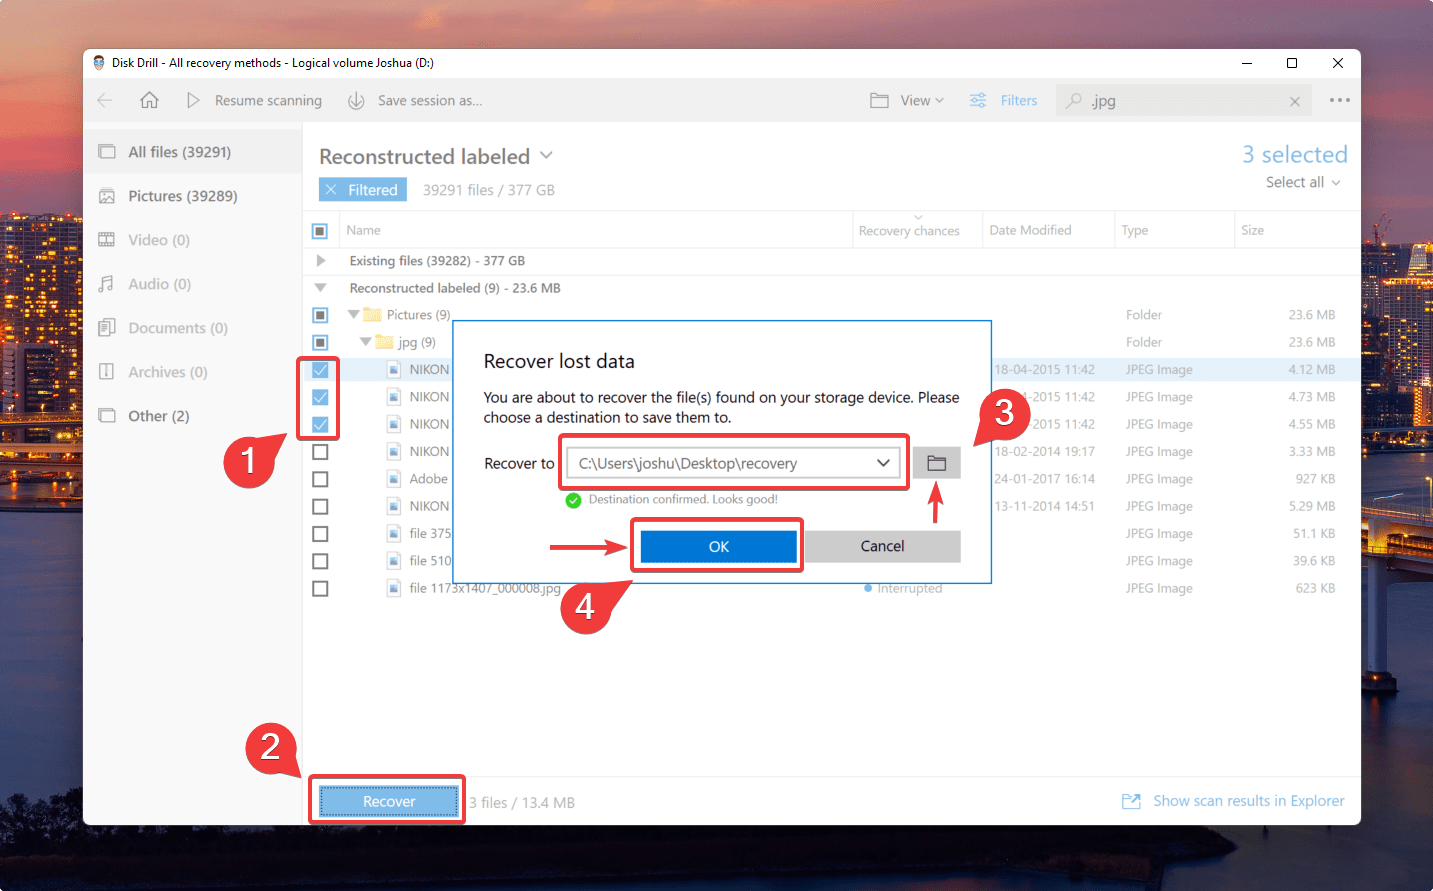
- Specify the destination for saving the recovered files and press OK.
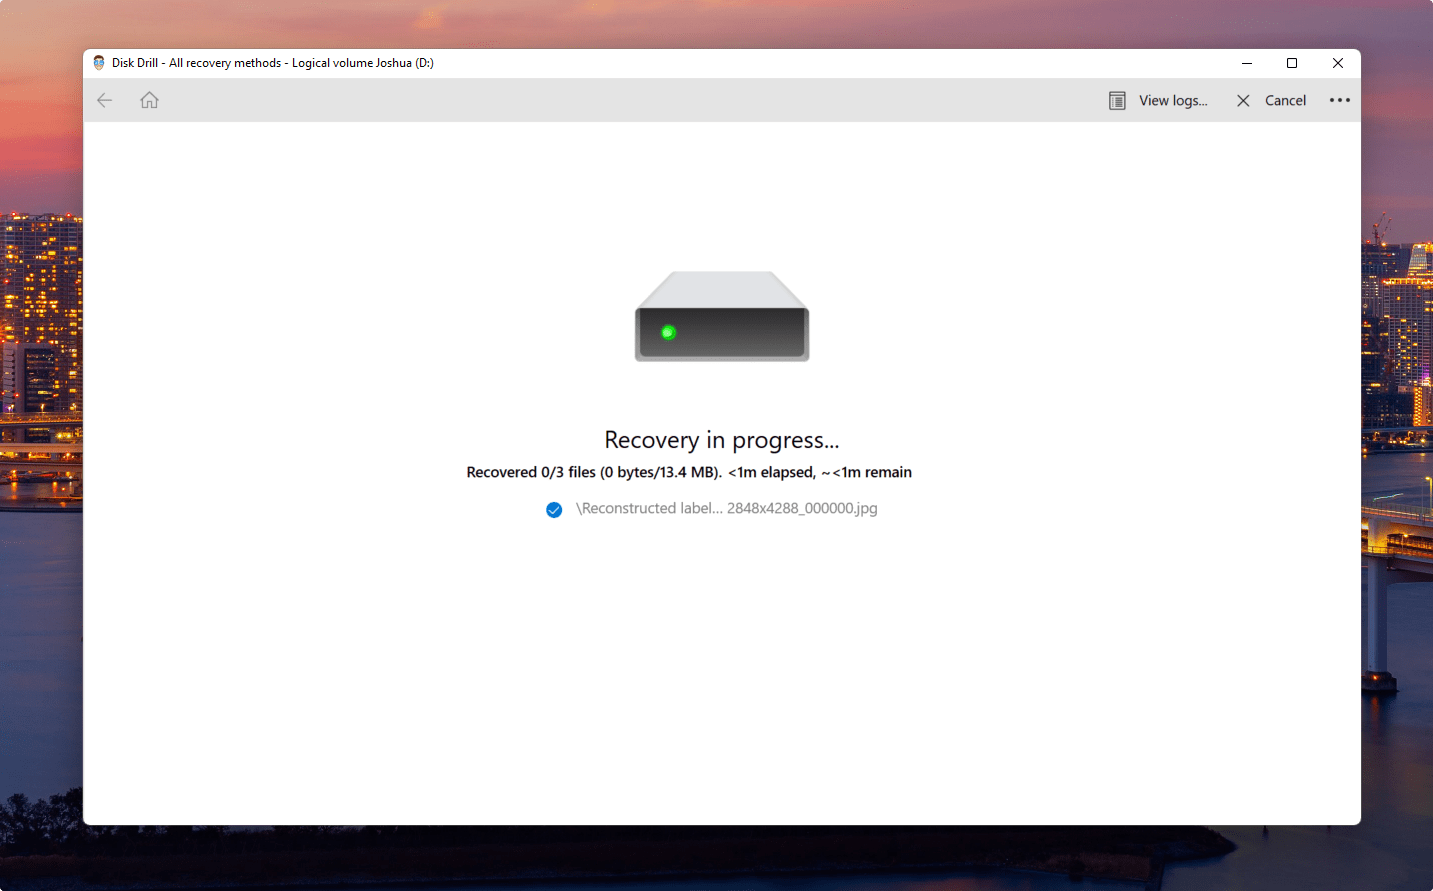
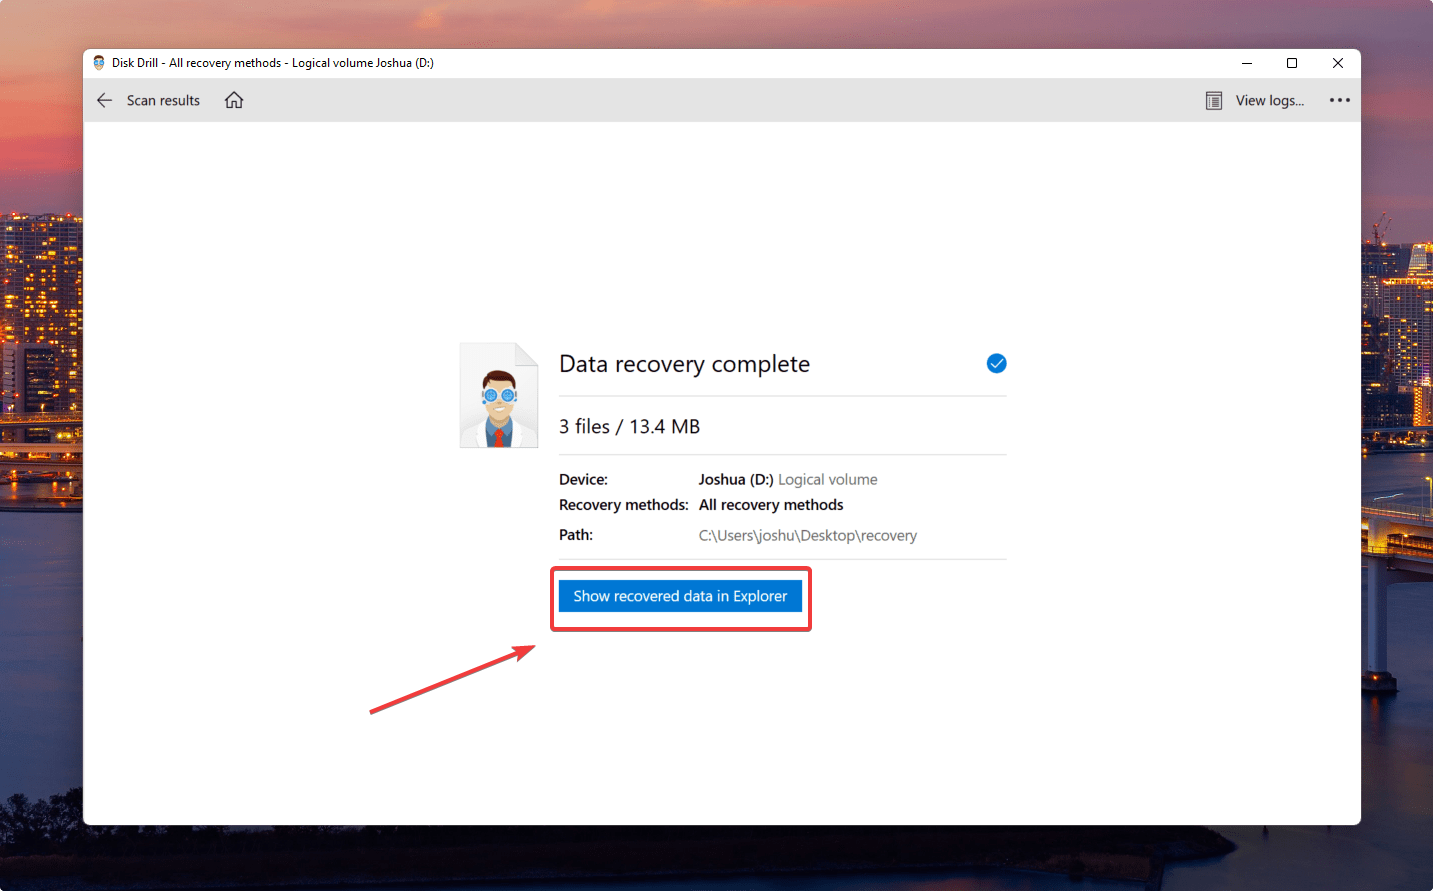
- Click Show Recovered Data in Explorer to open your recovered data folder.
Okay, that’s how you can recover data from an external hard drive. But what if you can’t access the external hard drive at all? In such situations, you must fix the issue causing your external hard drive to not show up – before trying data recovery.
FAQ
Why is there a Recycle Bin on my external hard drive?
Recycle bins are great when you accidentally delete important files. Although the recycle bin is a default inclusion in operating systems, external media like HDDs and SDDs also have an in-built recycle bin. The purpose is the same: to give users a second chance at undoing deletion mistakes.
How do I recover files from the Recycle Bin on an external hard drive?
By default, external hard drives hide the $recycle.bin folder. Here’s how to unhide it & recover data:
- Open File Explorer.
- Select the hard drive.
- Go to Options > View.
- Enable Show hidden files, folders & drives.
- Disable Hide protected OS files.
- Click Apply to Folders.
Can I delete the Recycle Bin on an external drive?
Yes, you can delete the recycle bin folder contents to free up valuable space on your external drive. Deleting the recycle bin will not prevent your hard drive from saving deleted files. The $recycle.bin folder will get created again by default.
How to empty the Recycle Bin on my external hard drive?
Yes, here’s how you can delete the recycle bin and free up space:
- Open File Explorer.
- Select the hard drive.
- Go to Options > View.
- Enable Show hidden files, folders & drives.
- Open the $recycle.bin folder and empty it.
How to access the recycle bin on an external hard drive on Mac?
Mac names its recycle bin folders as .Trashes. Here’s how you can access the recycle bin of an external hard drive on Mac devices:
- Open Finder and access your external hard drive.
- Press CMD + Shift + ..
- Navigate to the .Trashes folder.
Conclusion
The recycle bin is indeed a great inclusion to any drive be it internal or external. Accessing the recycle bin on an external HDD helps recover accidentally deleted data.
However, by default, external HDDs hide the recycle bin ($recycle.bin) folder. We have covered some steps to unhide this recycle bin folder.
Moreover, if you are trying to access the recycle on an old hard drive to recover data, chances are the data might not be easily retrievable. In such cases, third party data recovery tools like Disk Drill can aid your cause by offering free and secure data recovery features.
This article was written by Joshua Solomon, a Contributing Writer at Handy Recovery Advisor. It was also verified for technical accuracy by Andrey Vasilyev, our editorial advisor.
Curious about our content creation process? Take a look at our Editor Guidelines.