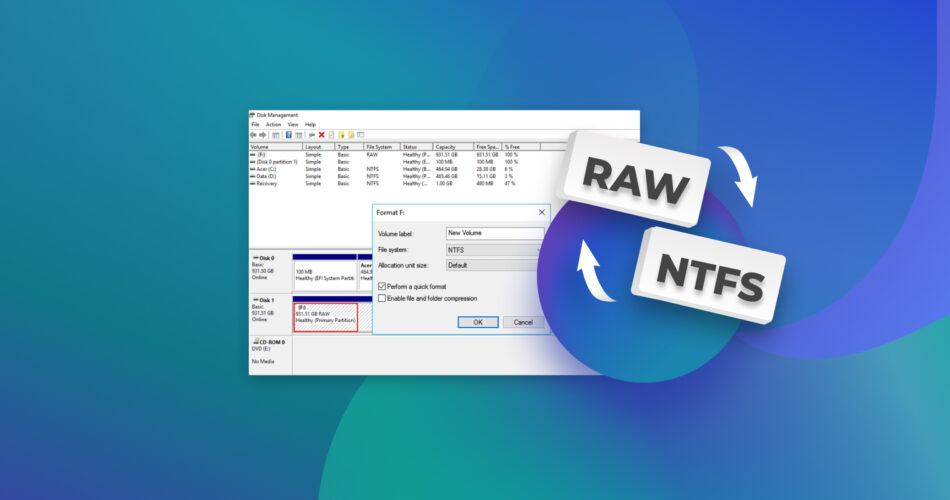
Panic ensues when a Windows user sees a disk suddenly appear as RAW. First order of business? To calm down. You can easily recover everything on that disk in most cases and even fix your hard drive so you can use it like before. In this guide, we help you convert RAW to NTFS without losing data.
What Happens to Your Data When Your Drive Goes RAW?
Your drive becomes RAW when your operating system fails to recognize the drive’s file system. This failure can occur for various reasons like physical damage to the disk, file system corruption, improper removal of the disk, or power failure when using the disk.
Depending on what caused the drive to go RAW, here’s what might happen to the data on the drive:
- Data remains intact: Your operating system can’t access the data on a RAW drive because your operating system can’t interpret the file structure and navigate the data. However, the data is still intact on your RAW drive as long as you don’t tinker with it.
- Tinkering with the drive can result in data loss: If you want to preserve and recover the data on your RAW drive, stop using it right away. Don’t try to reformat the drive. Formatting can lead to permanent data loss.
- Recover your data first: Before you do anything else to the disk or try to fix or repair it, recover your data. Use specialized data recovery software or services to recover data from your RAW drive. Recovery software can scan the drive at a low level, bypassing the need for a functioning file system. Instead of relying on the file system metadata, recovery software uses specific signatures and patterns that files leave on your drive’s storage space. Moreover, data recovery software finds remnants of the file system to recover files with pointers, preserving their names and folder structure.
Once you’ve recovered your data, you can try fixing the drive, which typically involves reformatting it.
Can You Convert RAW to NTFS Without Formatting?
There is no guaranteed way to convert RAW to NTFS without formatting the drive completely. A drive appears as RAW when the filesystem is missing, damaged, or not recognized by Windows. If the filesystem is missing or not recognized, you’ll certainly need to format the drive. However, if the filesystem is damaged, you might try using a tool like TestDisk to fix it.
Pro tip: CHKDSK is not available for RAW drives. However, CHKDSK can still identify drives that appear to be RAW because of a logical error, but in reality, are NTFS drives. However, it’s still worth using CHKDSK once because if the first boot sector is damaged, CHKDSK can fix the problem by using the second, backup boot sector. This means in some cases, using CHKDSK can potentially resolve the issue for you without having to format the drive.
How to Convert RAW to NTFS Without Losing Data in a Few Steps
The most reliable way to convert a RAW partition to NTFS without data loss is using a combination of a data recovery tool and formatting the drive. Make sure you use a reliable data recovery tool, though. We recommend Disk Drill (read our Disk Drill review) because it offers the byte-to-byte backup functionality and a broad range of features to make the recovery process simple.
Below, we’ve illustrated the process of conversion and formatting a RAW drive.
Step 1: Create a Byte-to-Byte Backup of Your RAW Drive
Your first step should be safeguarding your data so in case something doesn’t go well during the process, you can still recover the data.
Technically, you can straight away scan the drive using recovery software since Disk Drill is capable of scanning a RAW drive, but we don’t recommend it. A potential reason for the drive to appear RAW is drive corruption. Scanning a corrupt drive can potentially make matters worse, so creating a backup and scanning the backup image is a smarter choice.
Follow these instructions to create a byte-to-byte backup:
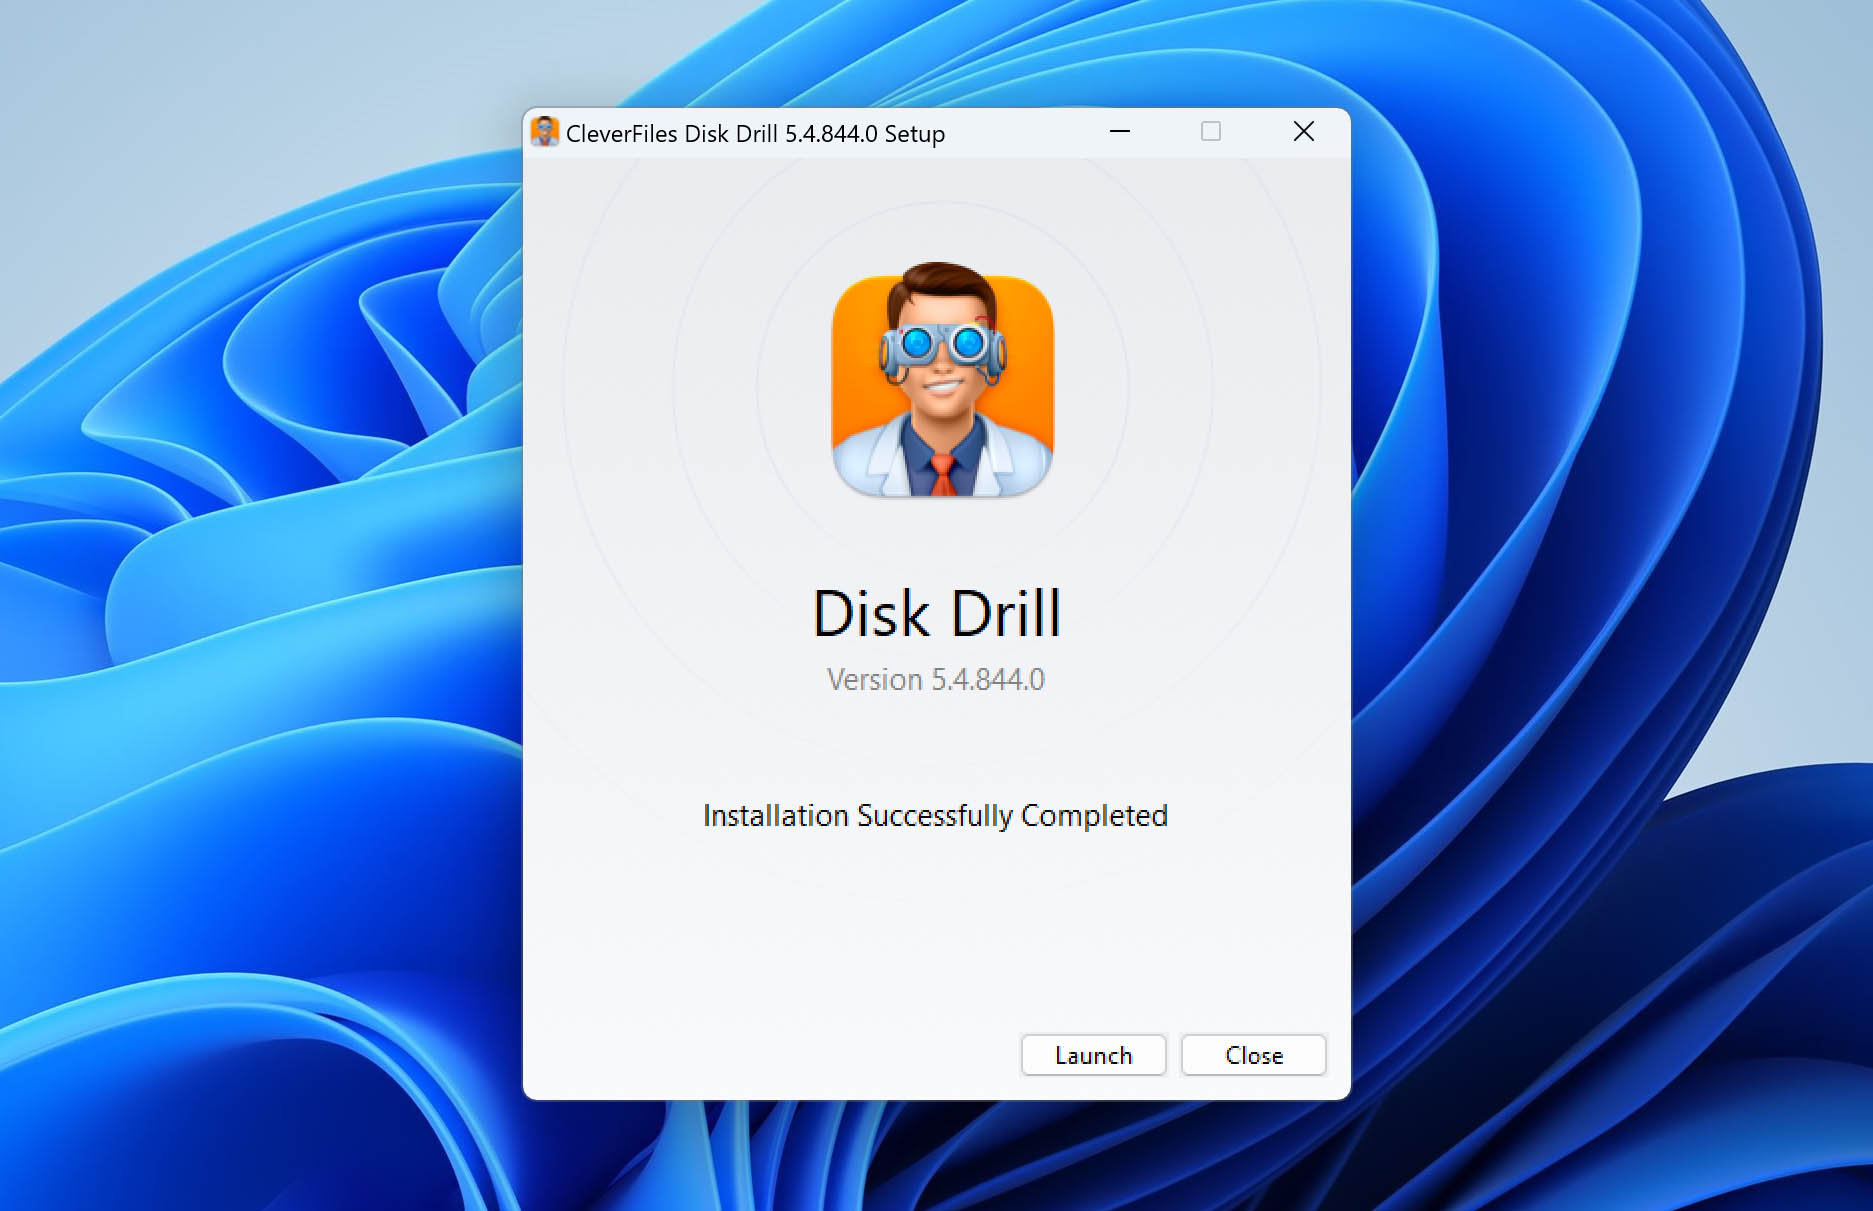
- Get started by downloading Disk Drill and installing it on your PC.
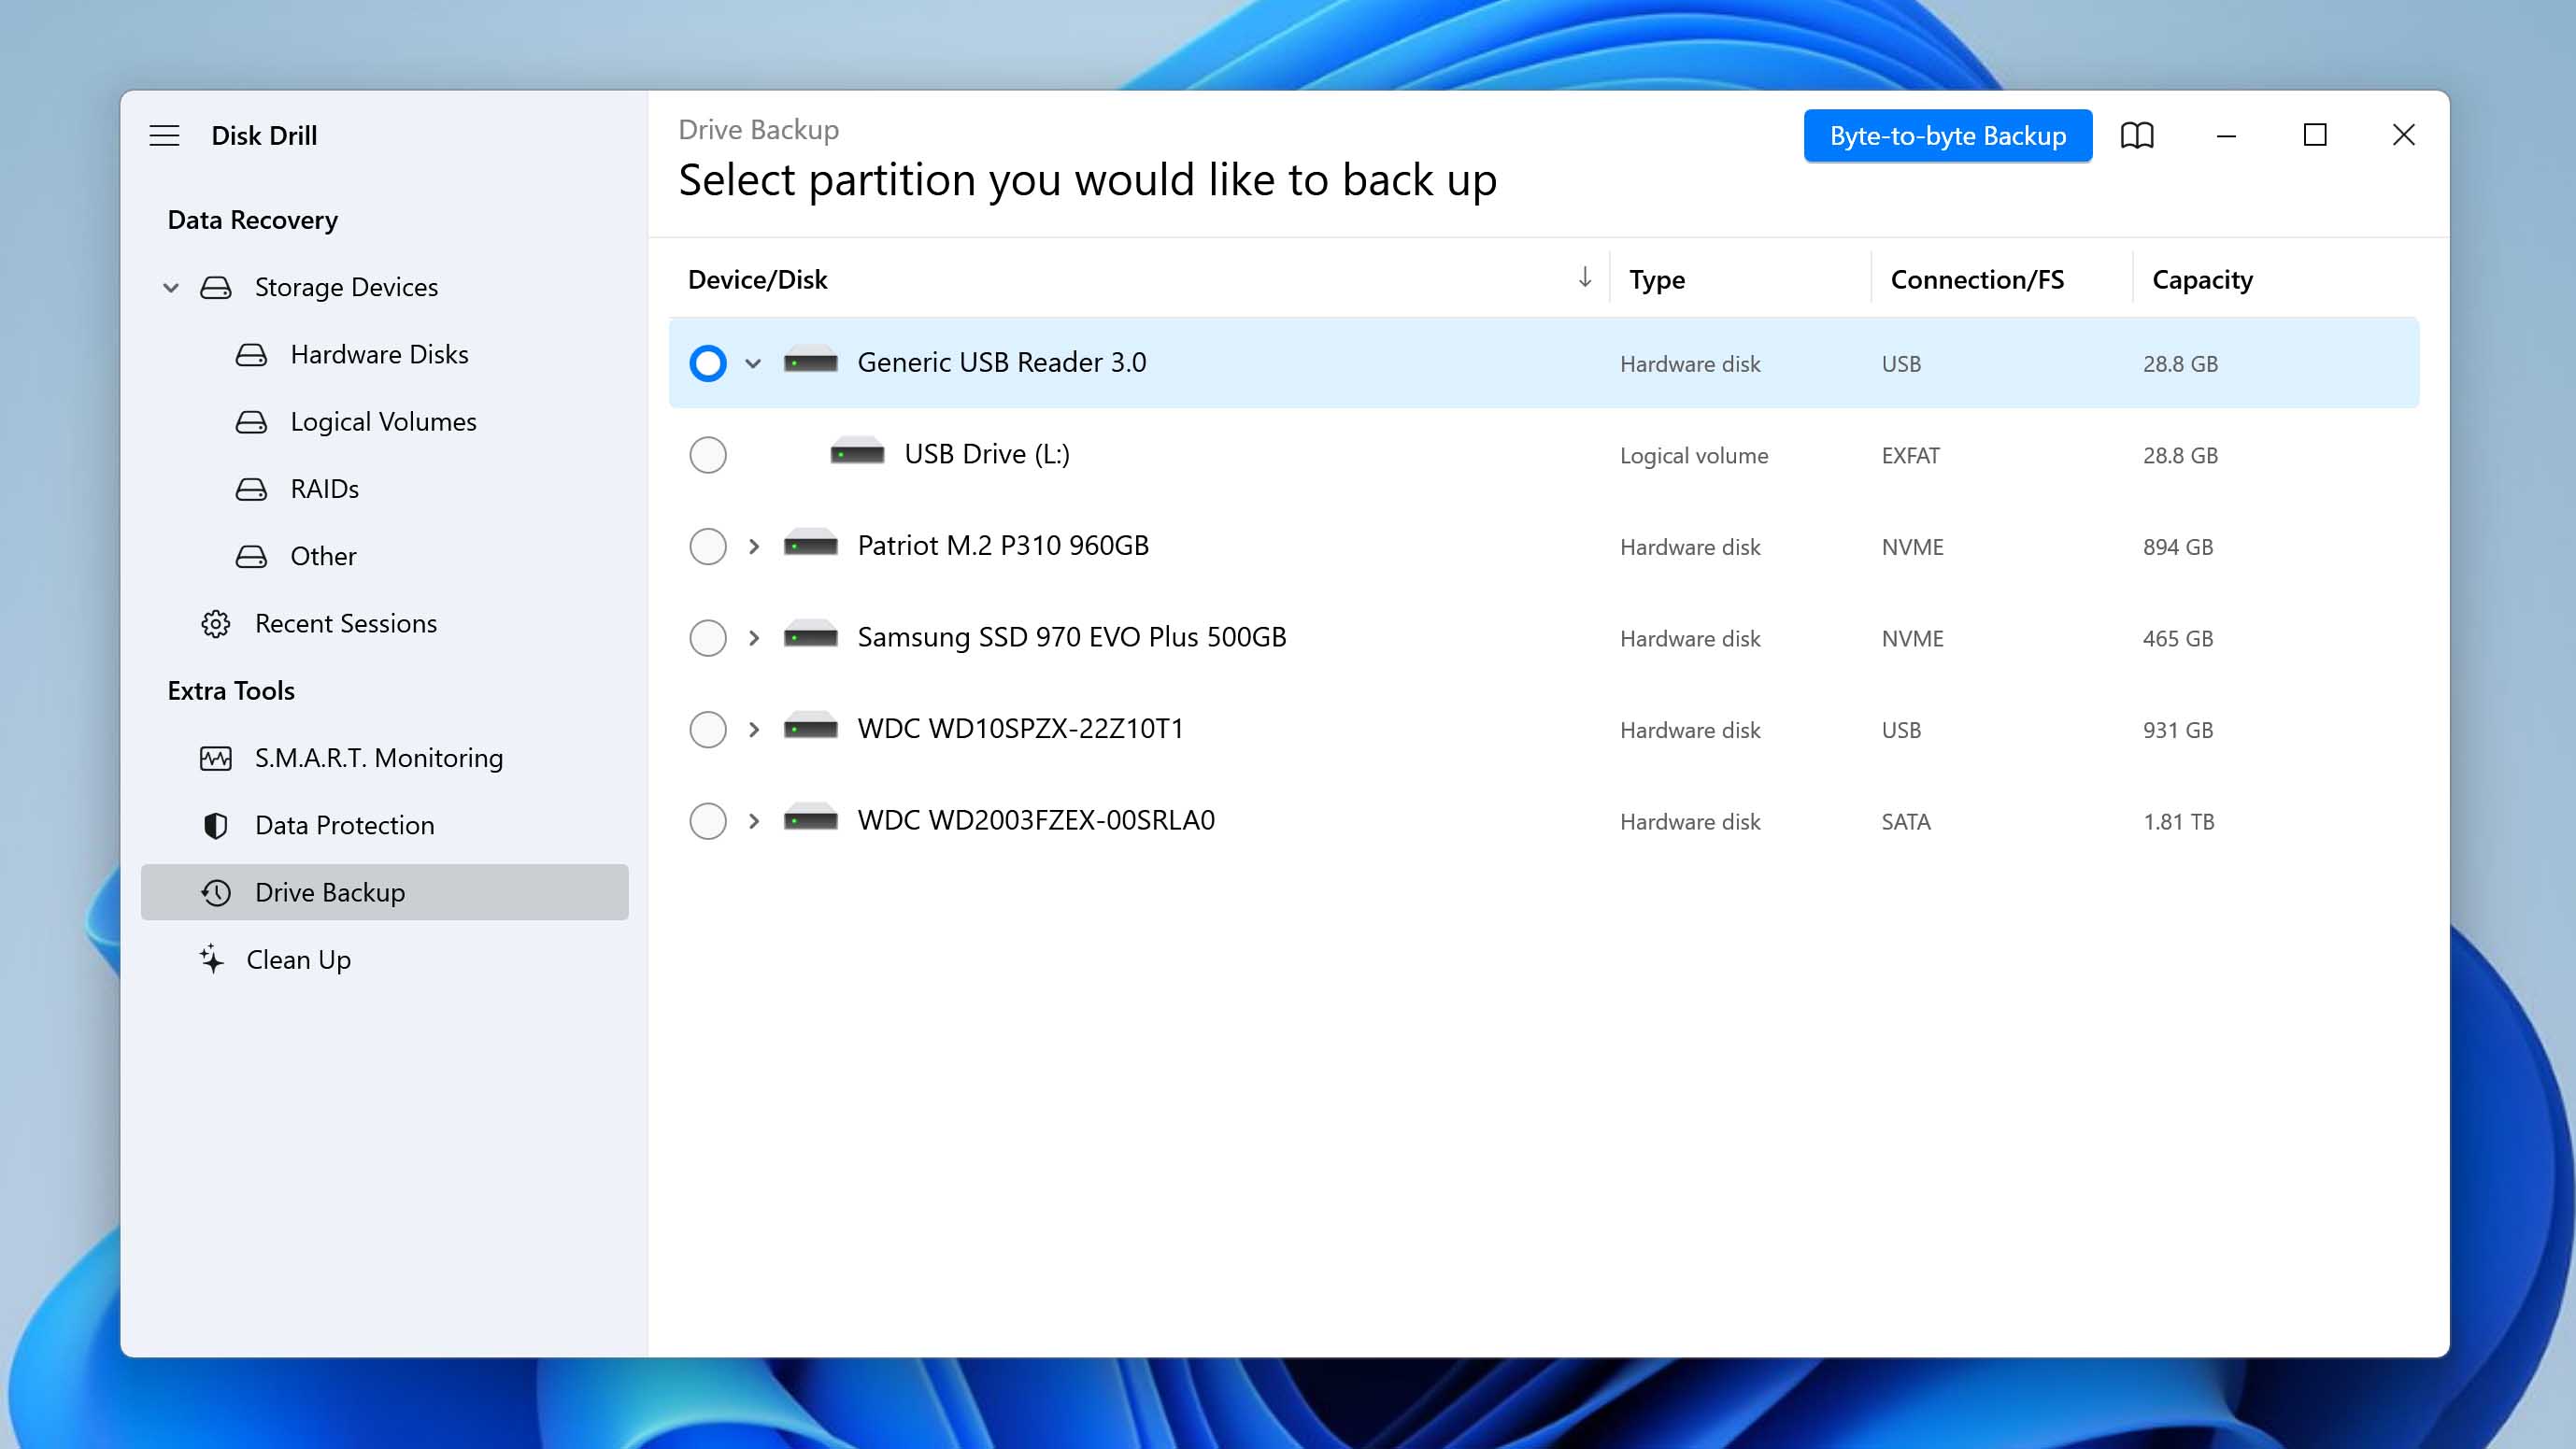
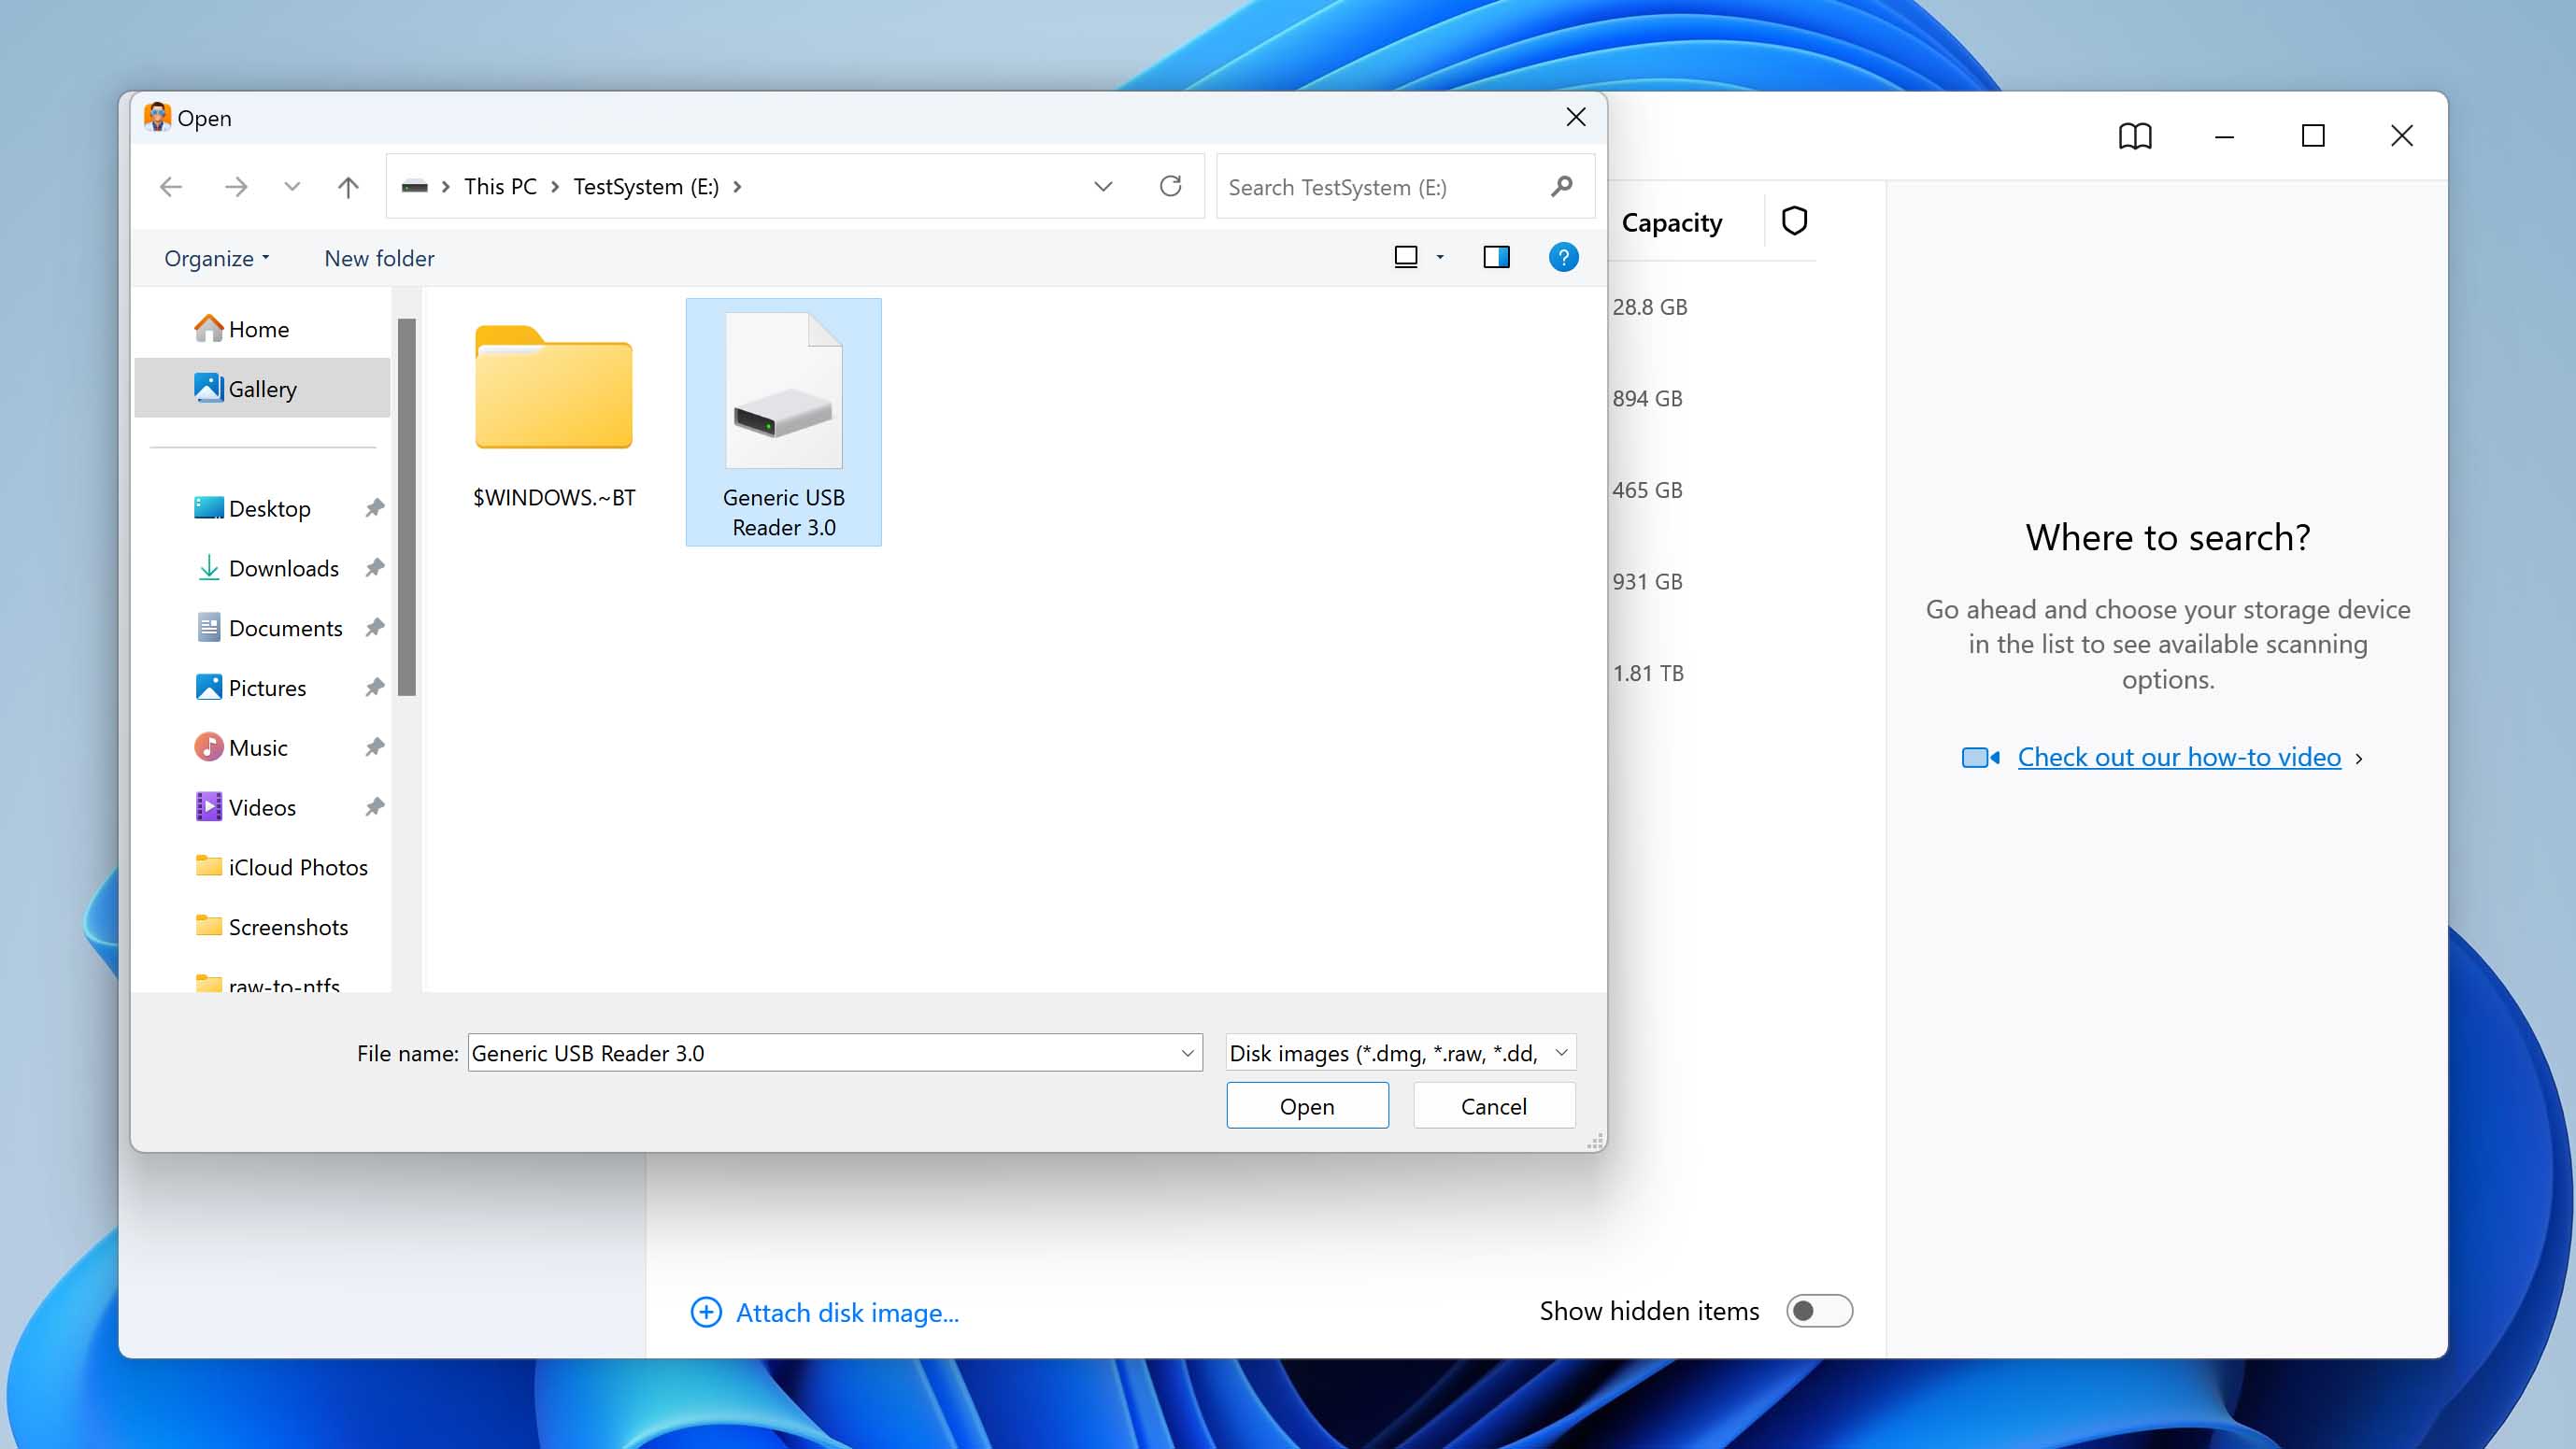
- Launch Disk Drill, switch to Drive Backup from the left sidebar, select the RAW disk, and click on the Byte-to-Byte Backup option at the top-right.
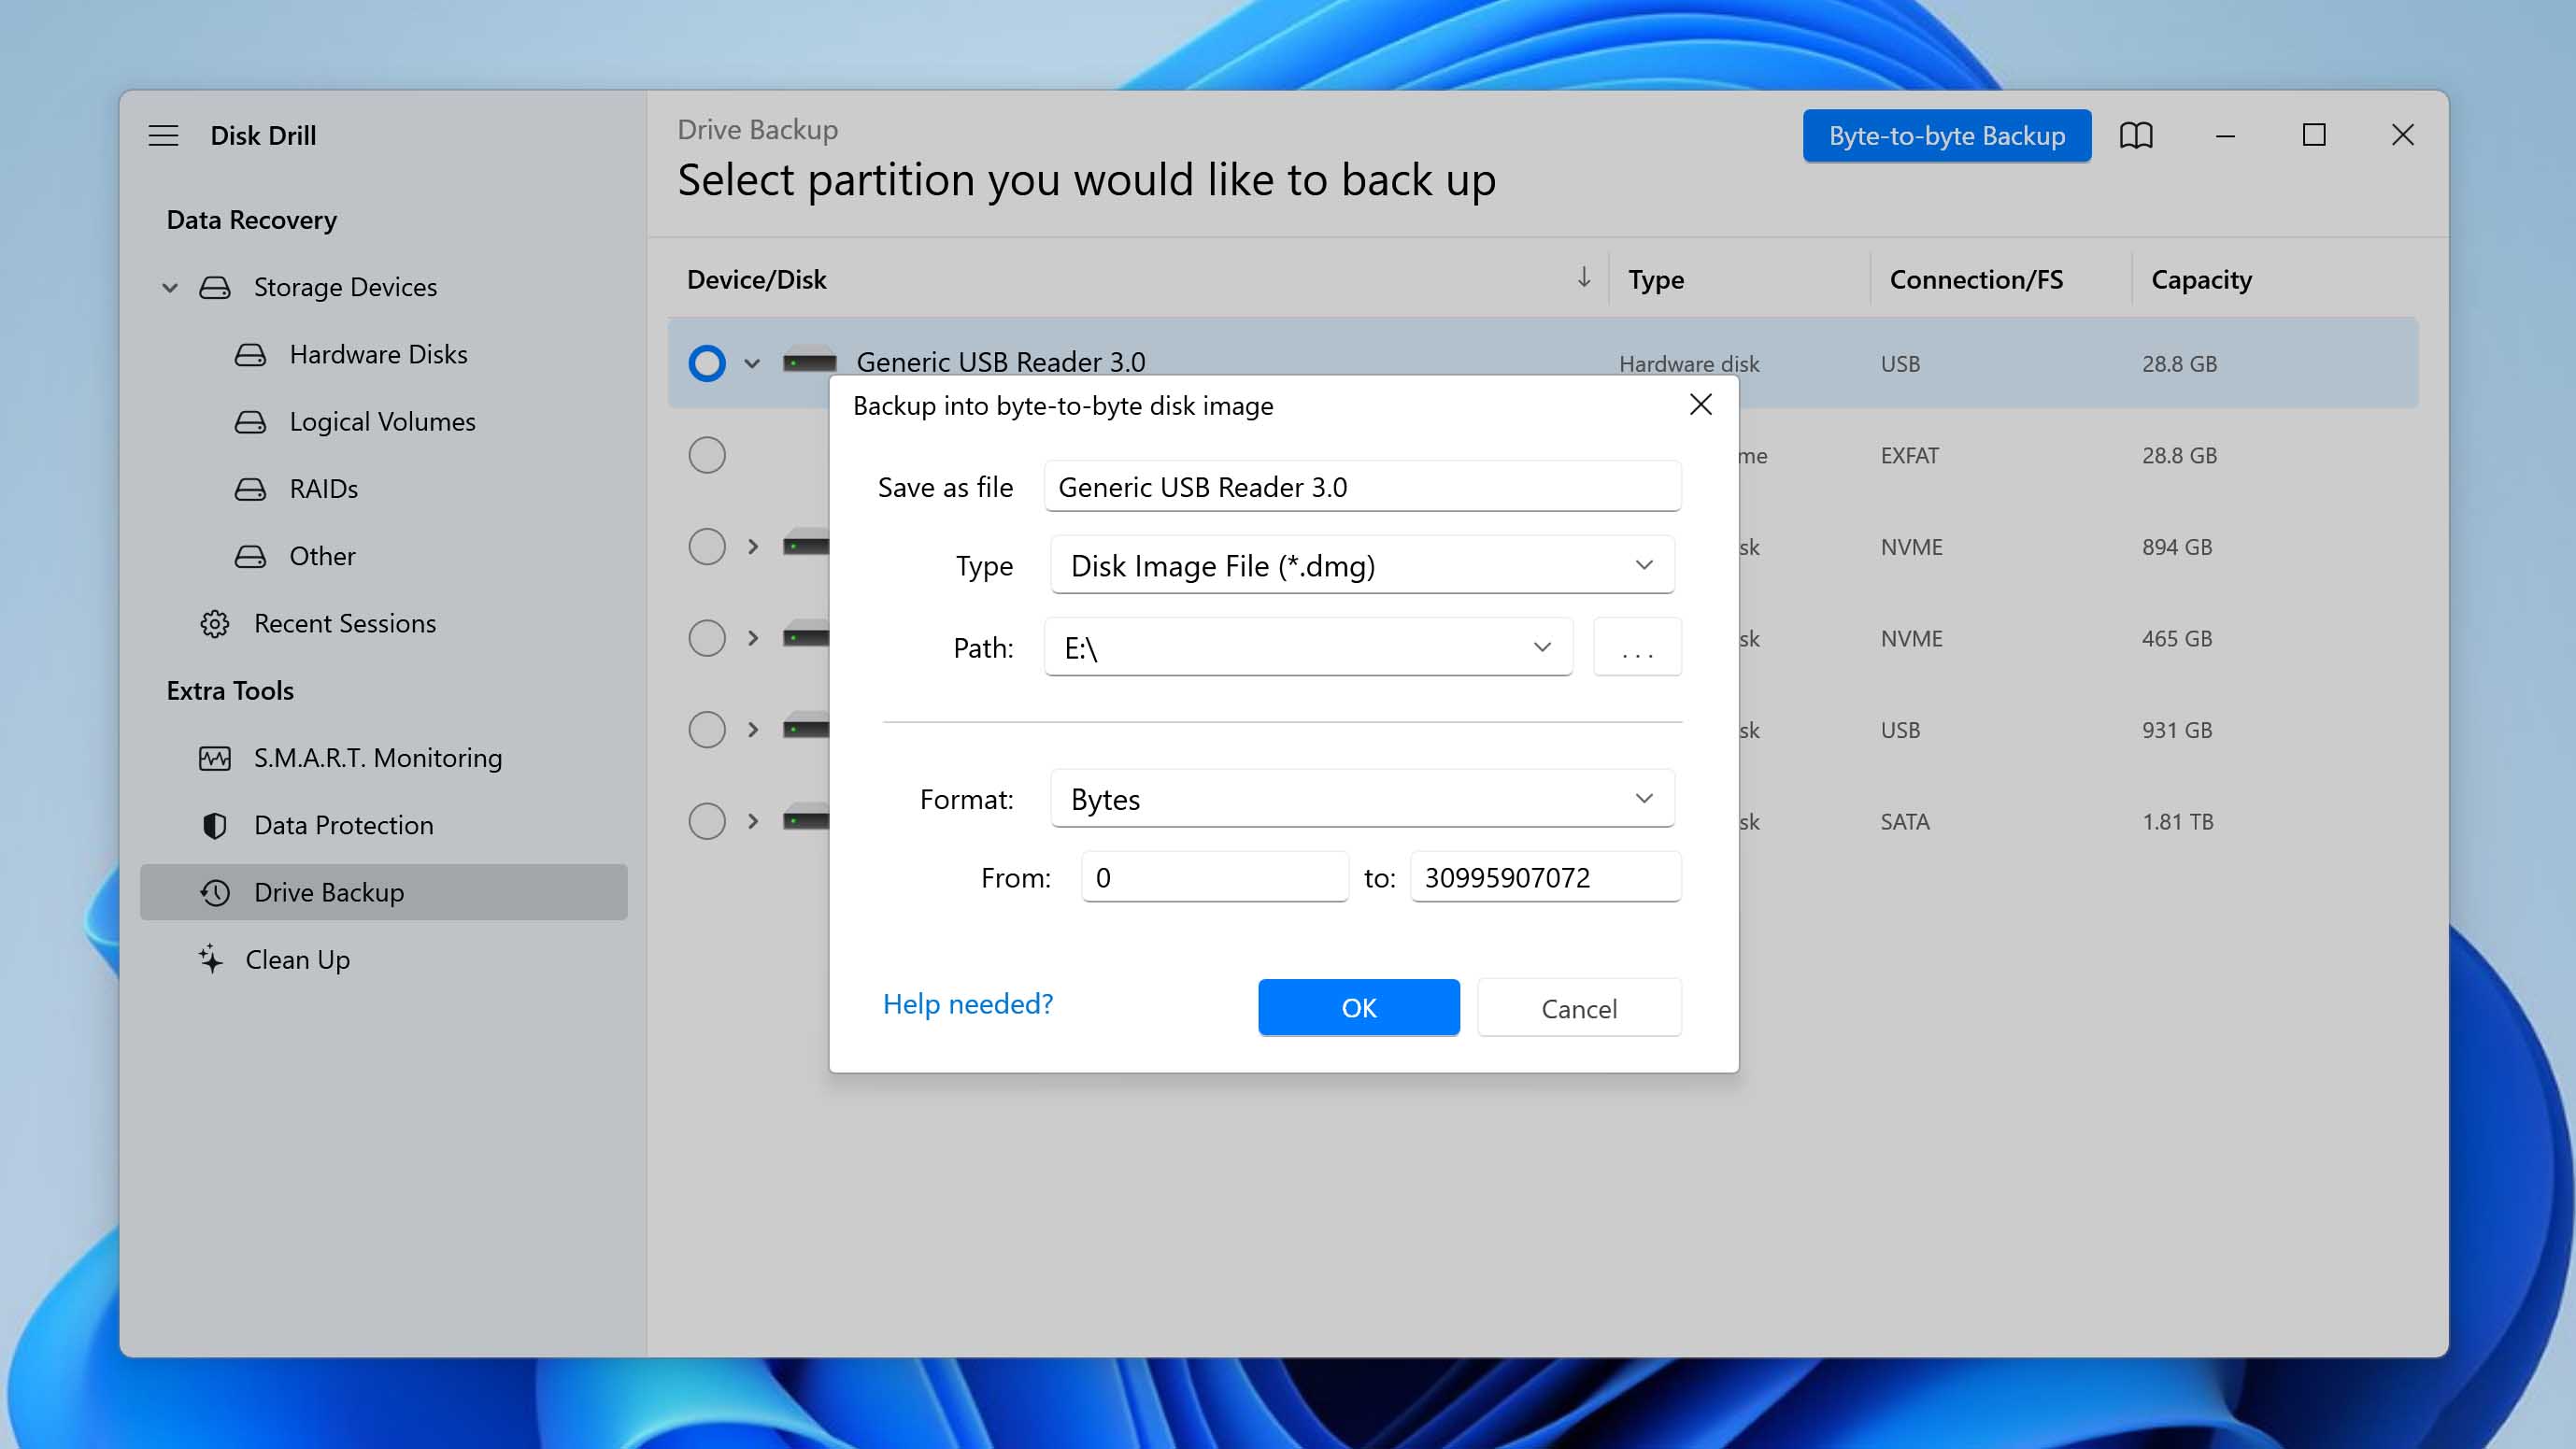
- Select a Path for storing the backup file and click OK.
Step 2: Format Your RAW Drive to Convert it to NTFS
Once you’ve backed up your data, format the hard drive. Formatting will rewrite the filesystem on your disk, which should fix your problem and make the drive accessible again. You’ll also lose your data after a format, but since you have a backup, you can rewrite the data to your drive after formatting.
You can use one of the several methods to format a drive on windows. We discuss the three easiest methods below.
Using File Explorer
The easiest way to format a drive is using the File Explorer:
- Press Ctrl + E to launch File Explorer.
- Right-click on the RAW drive and select Format.
- Select NTFS as the filesystem, make sure the box next to Quick format is checked, and click the Start button.
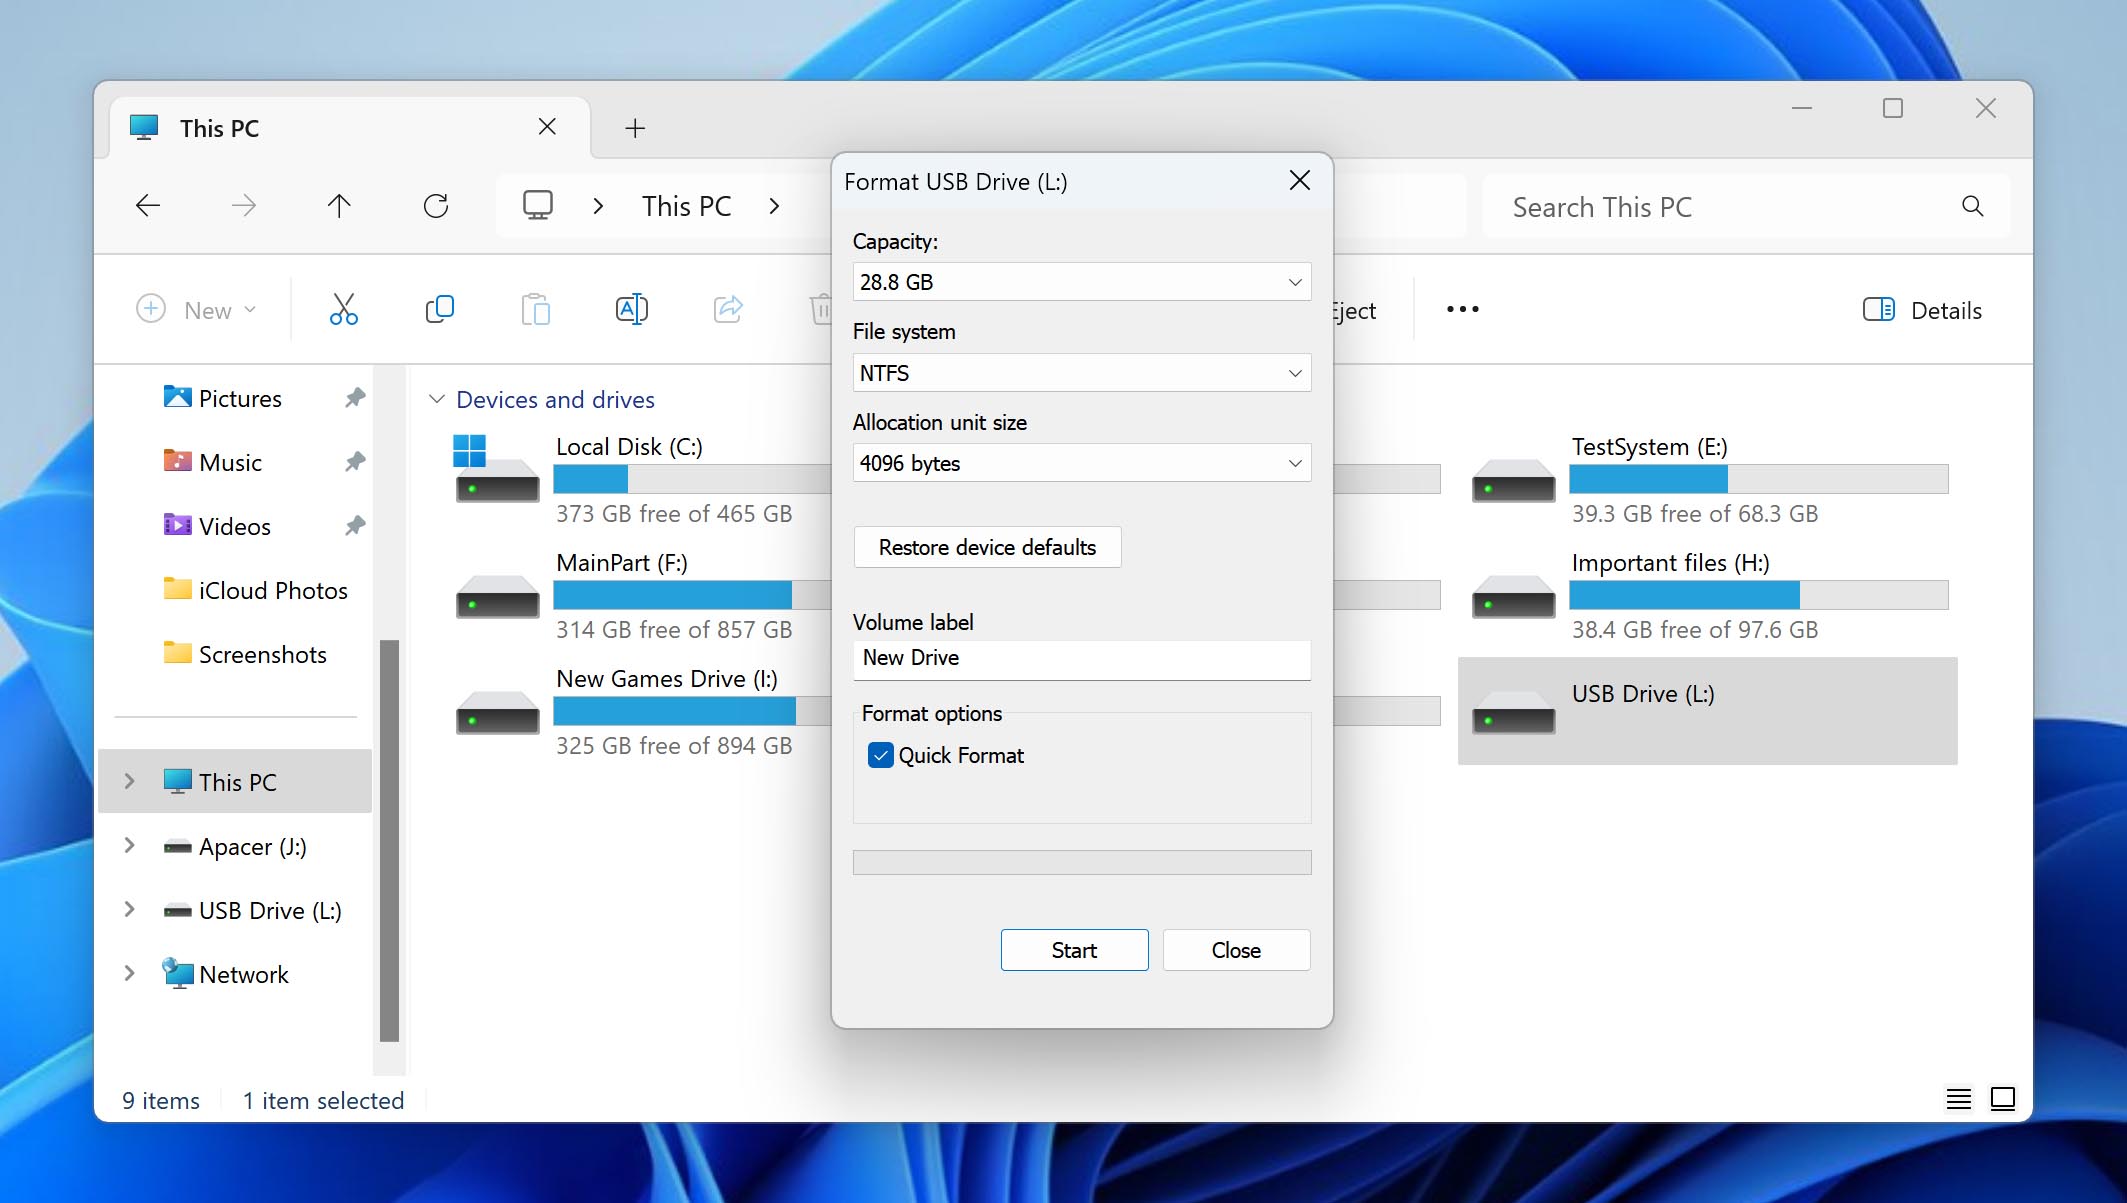
Once the process completes, you’ll see a new NTFS drive in the File Explorer.
Using DiskPart in the Command Prompt
DiskPart is a built-in, command-line utility in Windows that allows managing disk partitions. DiskPart can help you convert a RAW partition to NTFS (or any other file system like FAT 32 or exFAT as well):
- Search for Terminal in the Start Menu, hover your cursor over Terminal, and select Run as administrator.

- Type the following commands and press Enter (one at a time): diskpart list disk
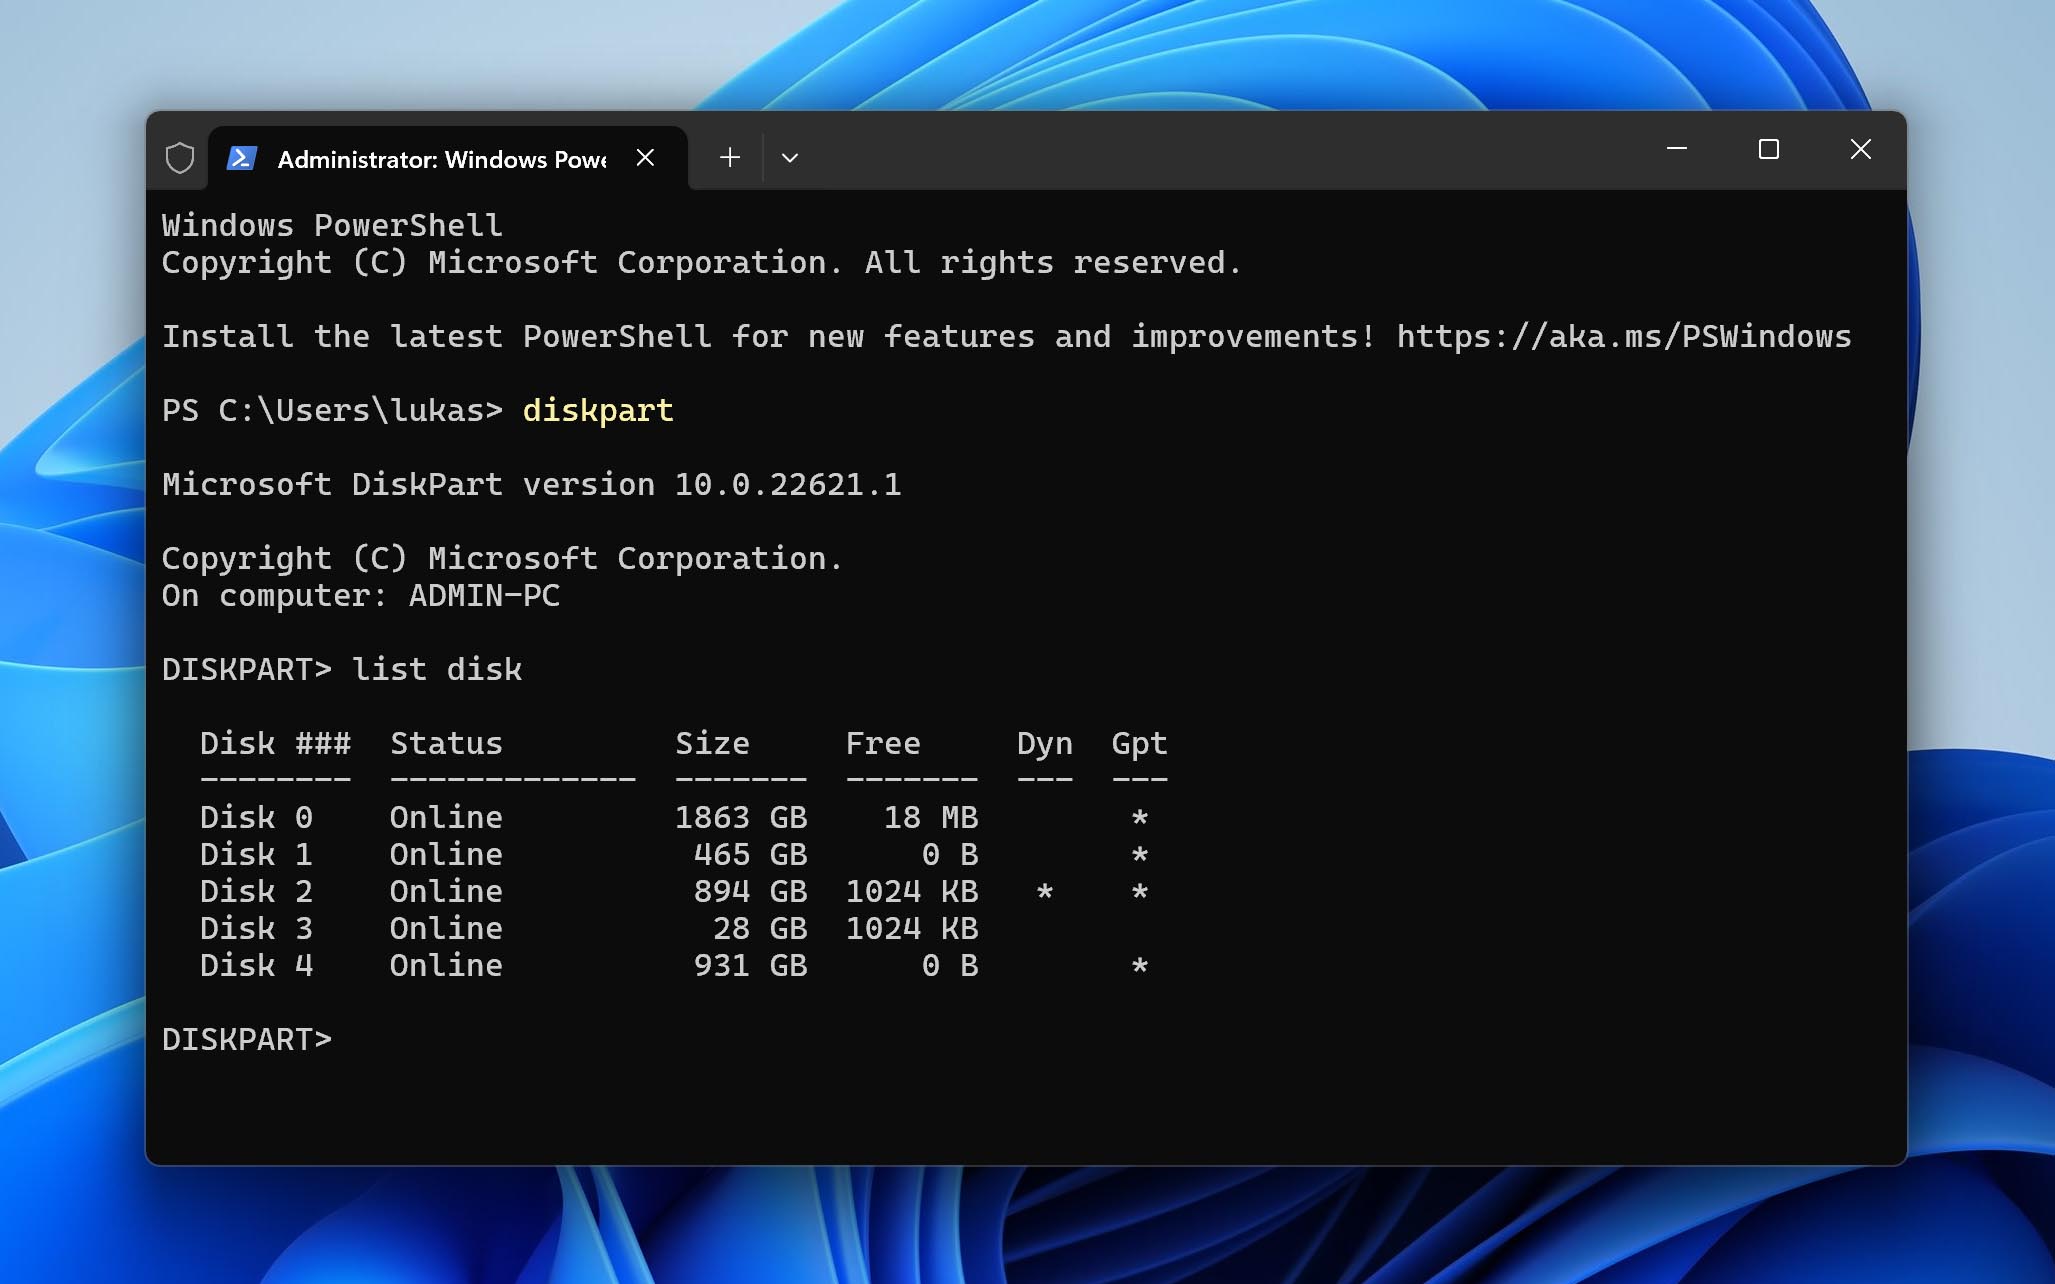
- Note the Disk ### for the RAW disk.
- Type the following command and press Enter: select disk 2(replace 2 with the disk number noted in step 3)
- Continue to execute the following commands: clean create partition primary format quick fs=ntfs
- Once the formatting is complete, execute the following command: assign letter=X (where X is the drive letter)
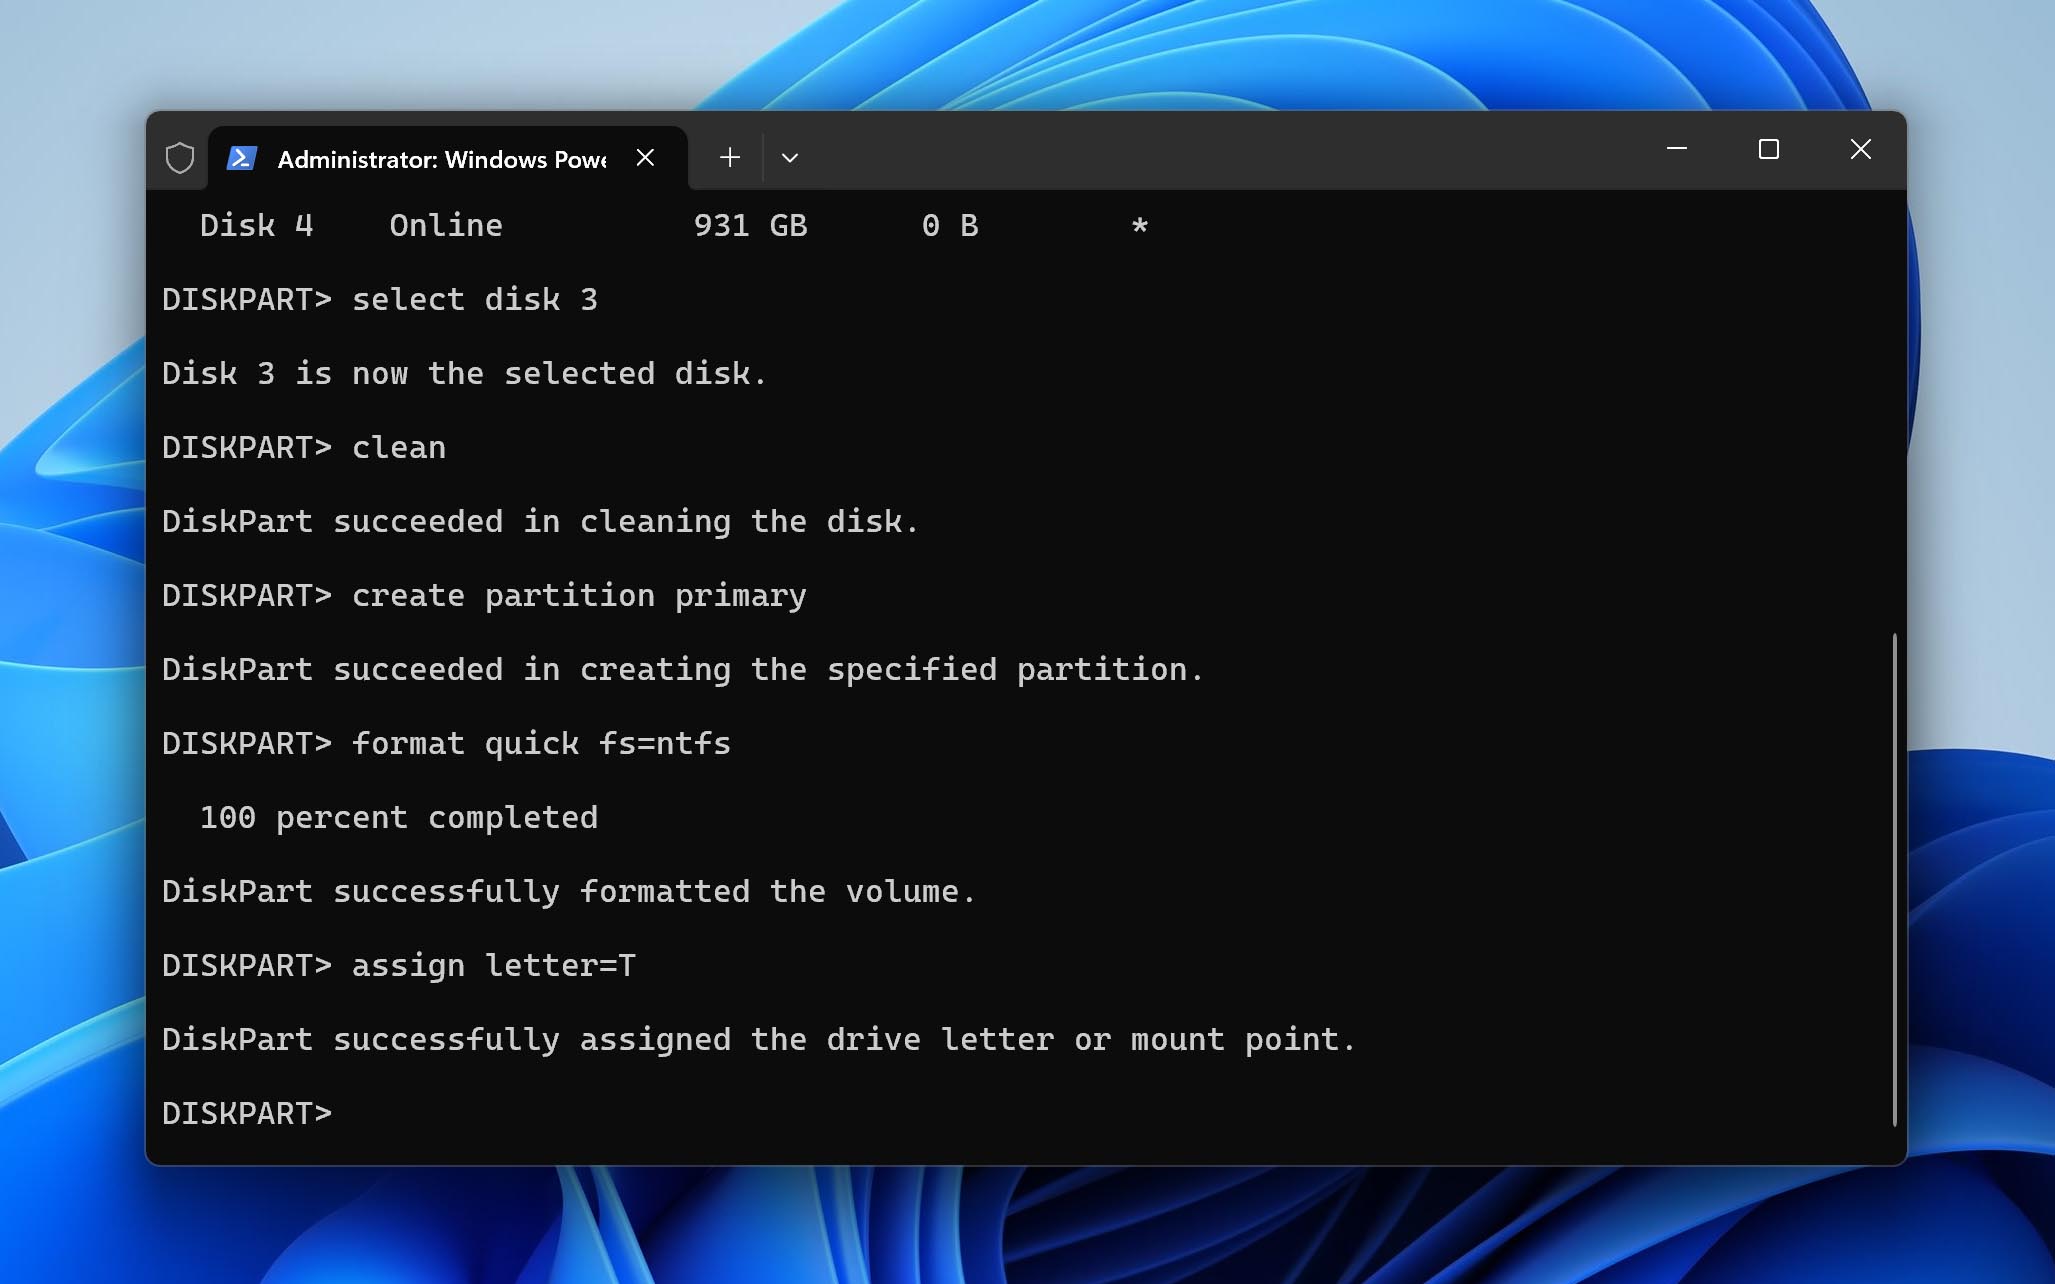
When you’re done, you’ll see the RAW disk appear as an empty NTFS drive.
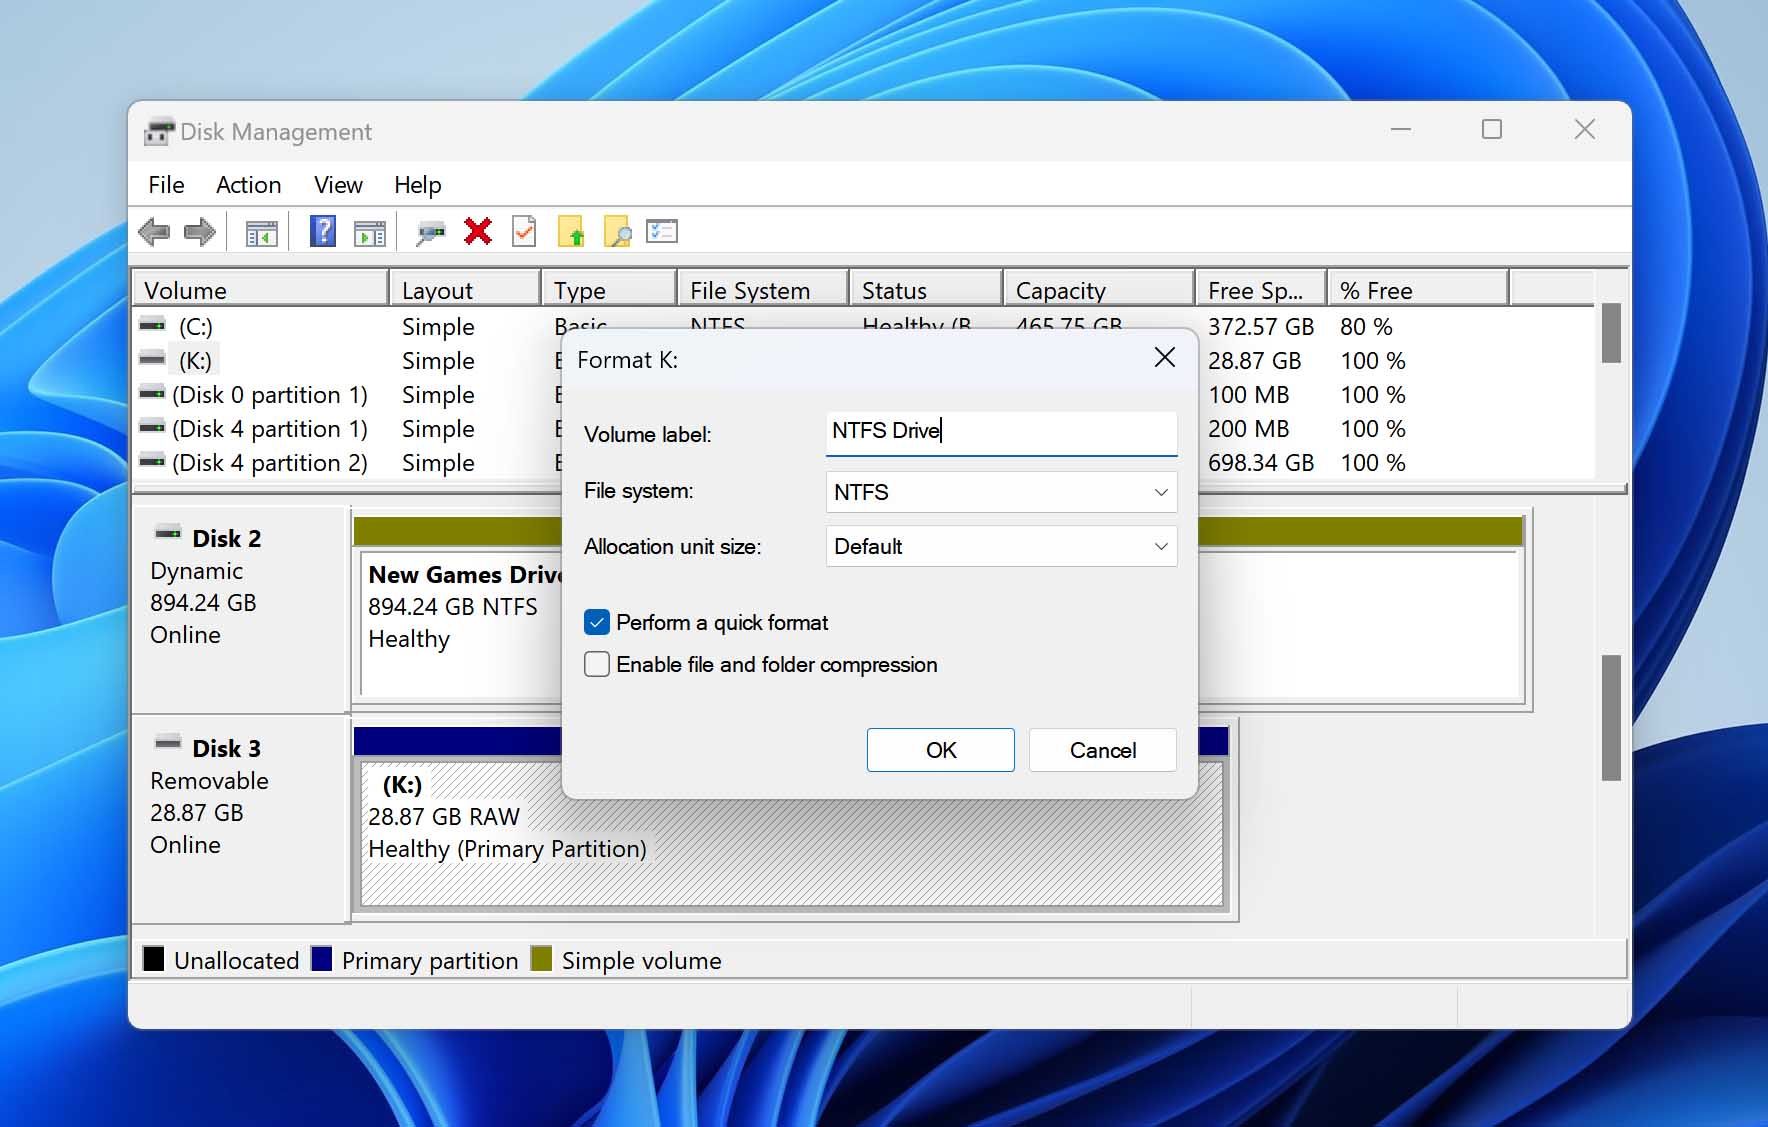
Using Disk Management
You can also use the Disk Management console on Windows to format the RAW drive and convert it to NTFS:
- Press Win + R, type diskmgmt.msc, and press Enter.
- Find the RAW disk in the disk management console, right-click on it, and select Format.
- Select NTFS as the filesystem, check the box next to the Perform a quick format option, and click OK.
- Confirm the format by selecting OK when prompted.
Step 3: Recover Data From the Backup
Once you’ve formatted the hard drive:
- Launch Disk Drill and select Attach disk image. Attach the backup image here.
- Scan the attached image.
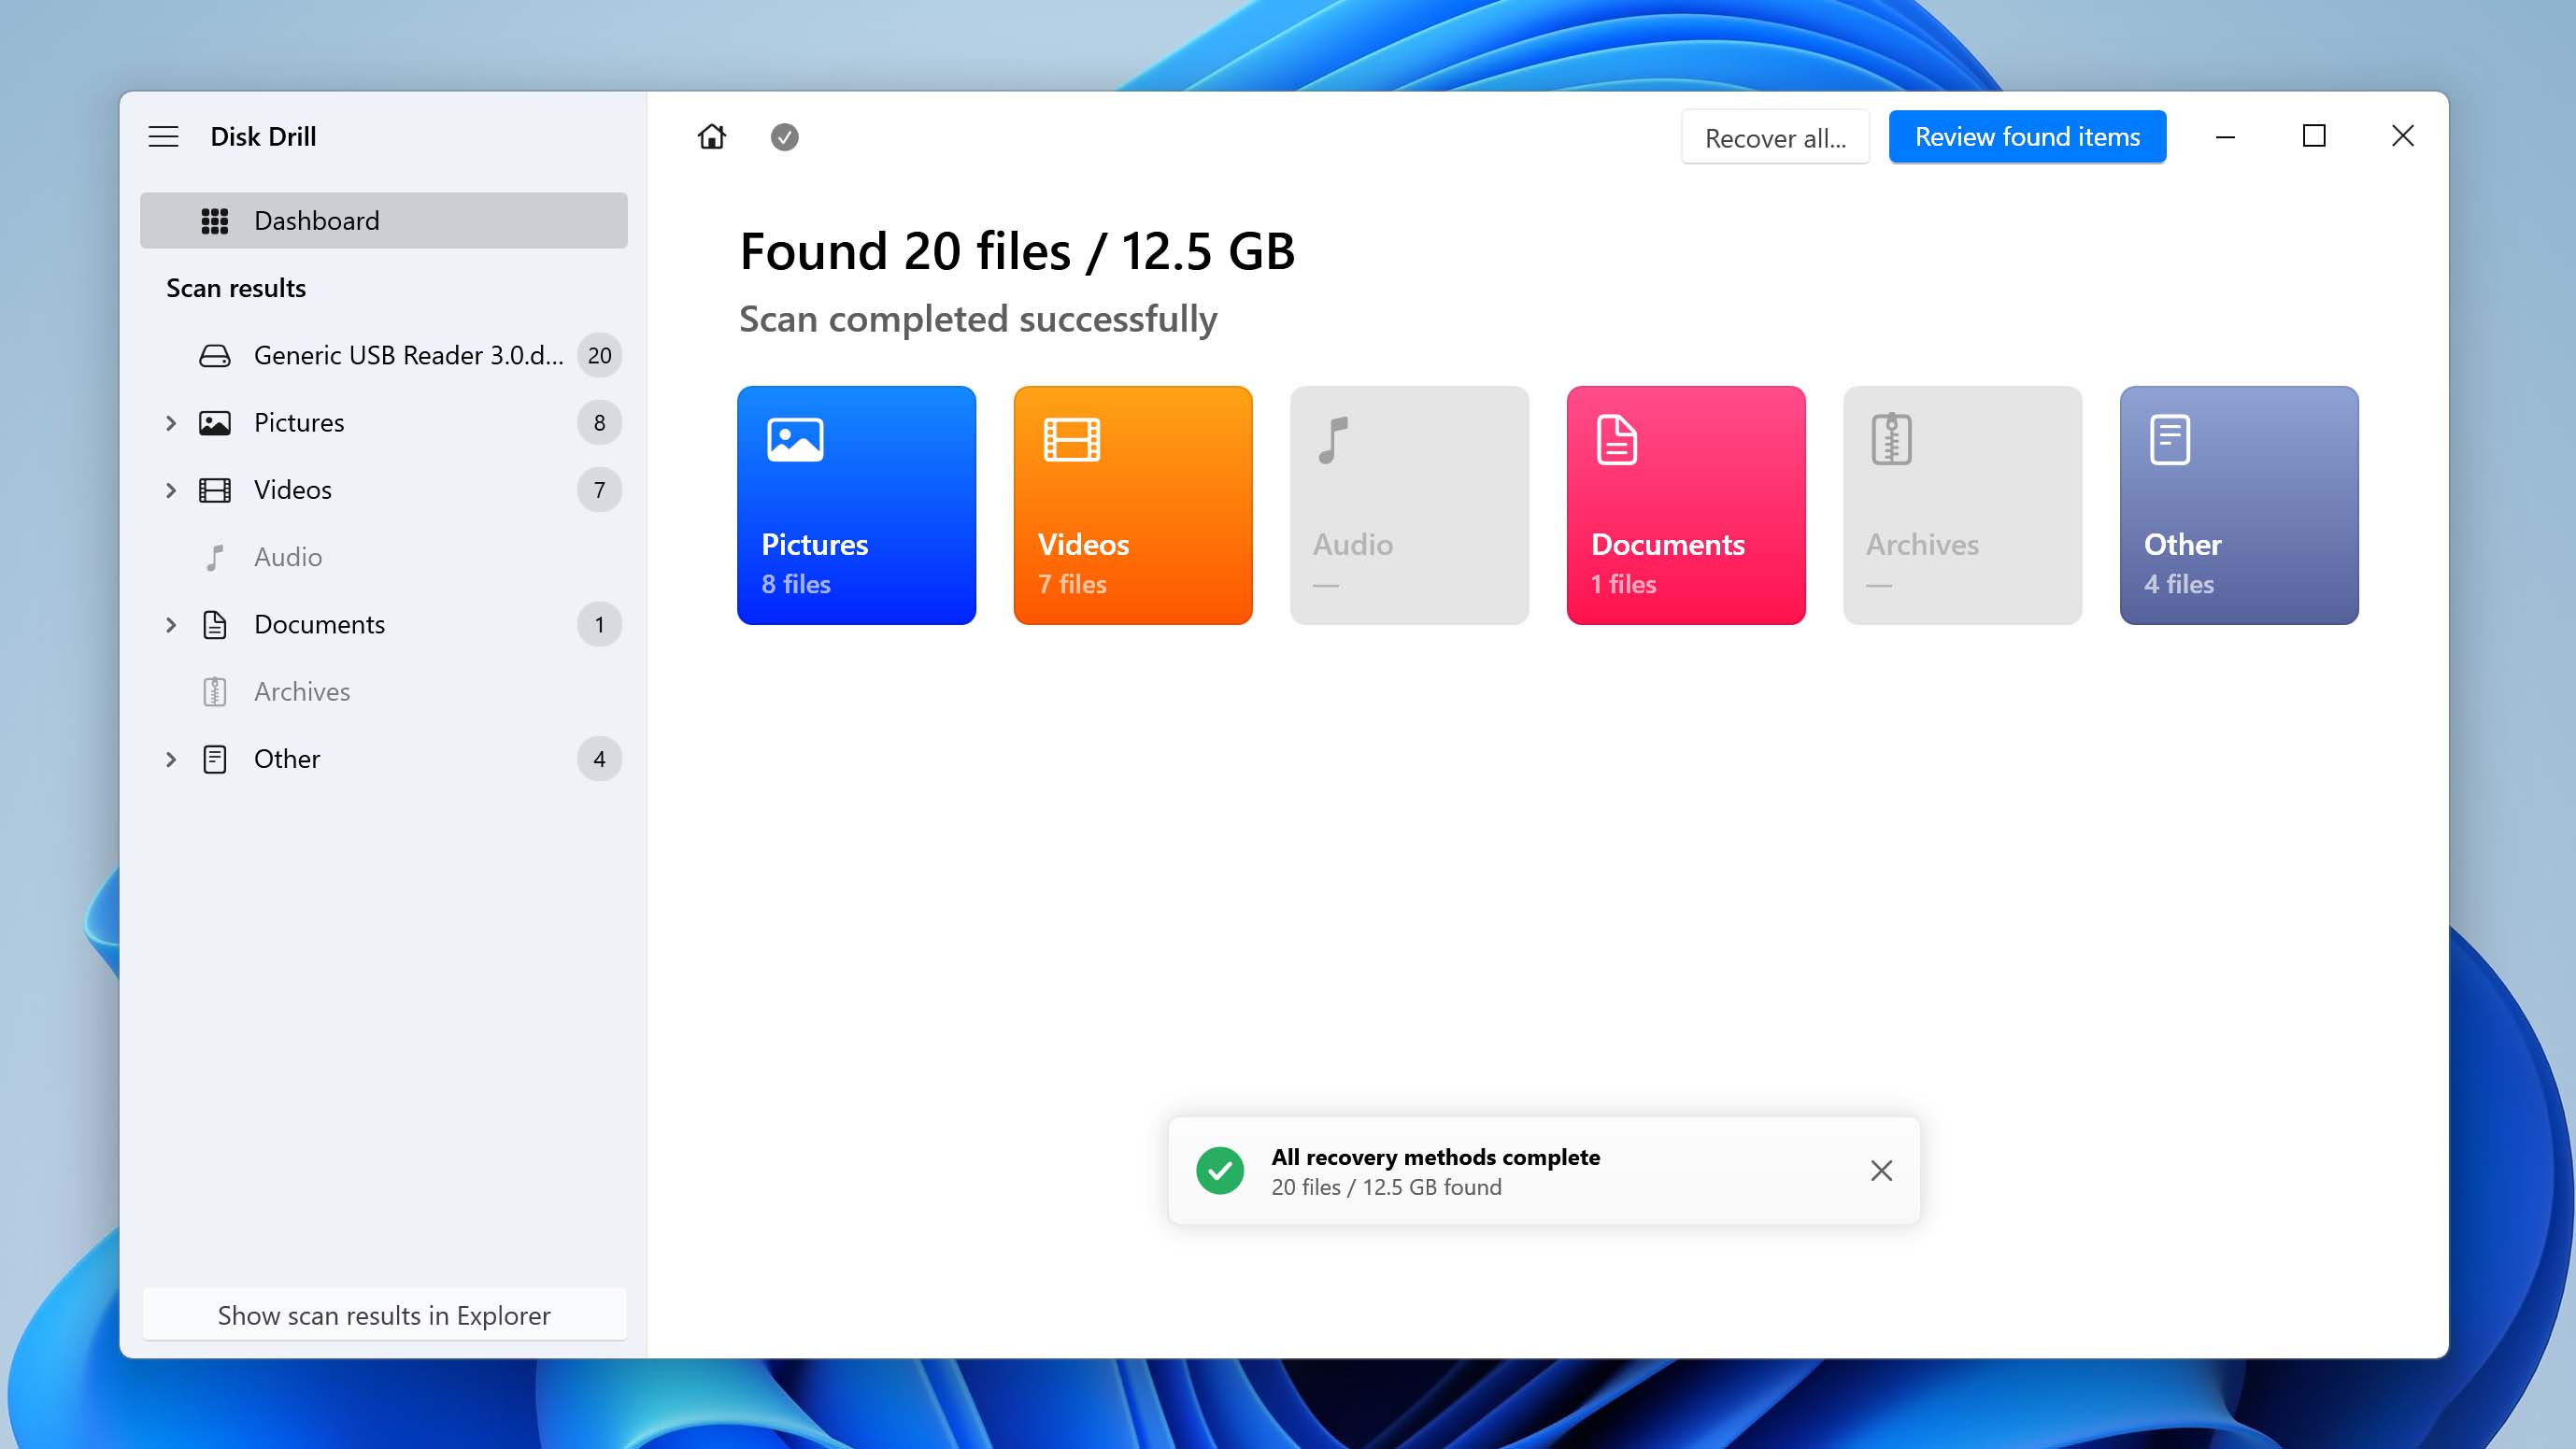
- Recover the files that Disk Drill finds.
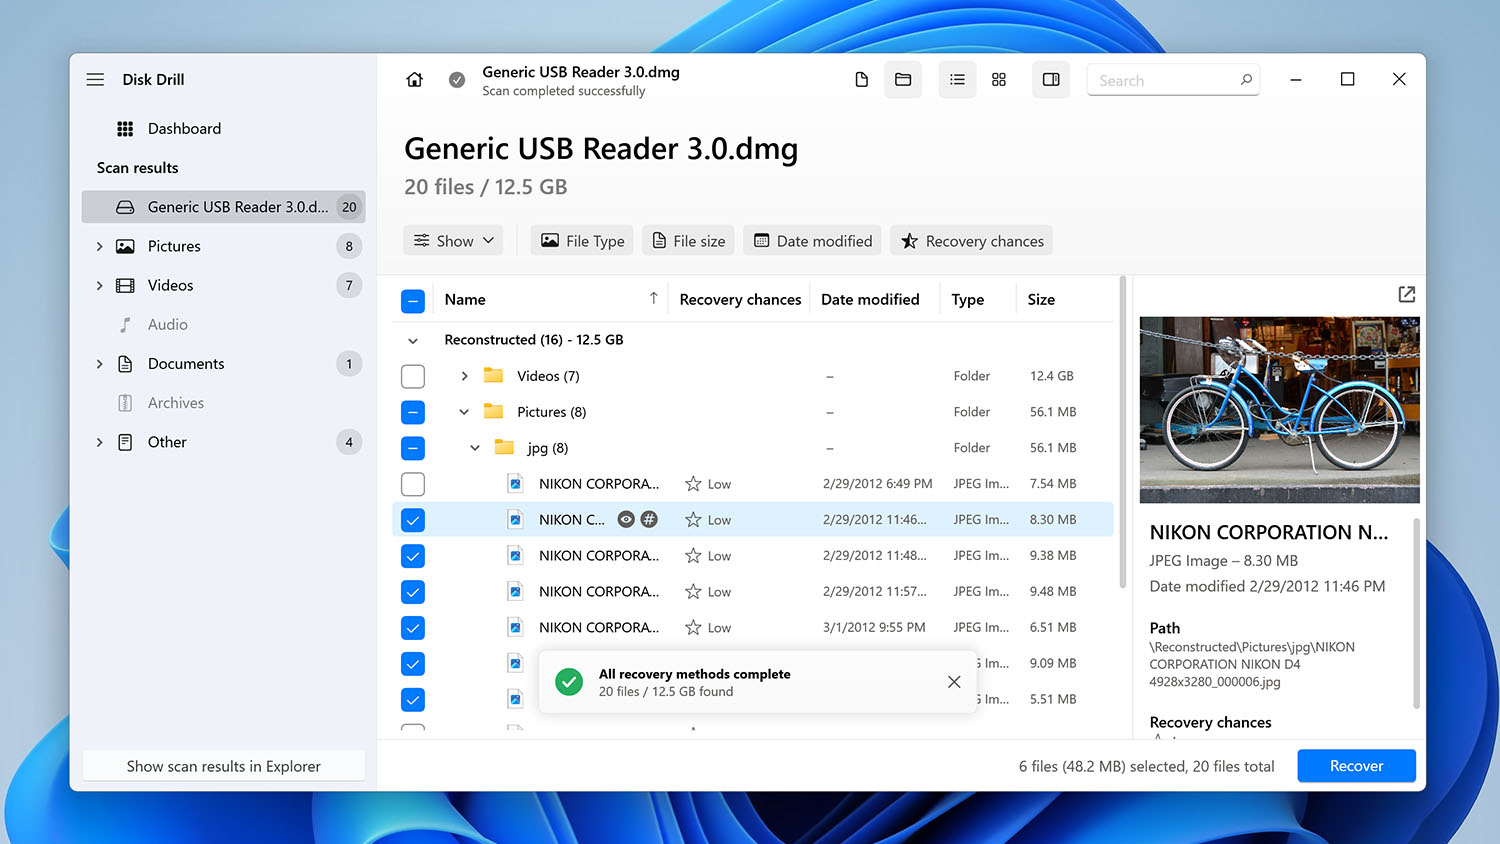
Alternatively, you can also just scan the new NTFS drive you see in Disk Drill.Recovering data from formatted hard drives is possible as long as you haven’t overwritten the data.
Note: We have a complete guide on recovering data from a RAW partition where we explain Byte-to-Byte backups in greater detail.
Bonus: Repair a RAW Partition with TestDisk
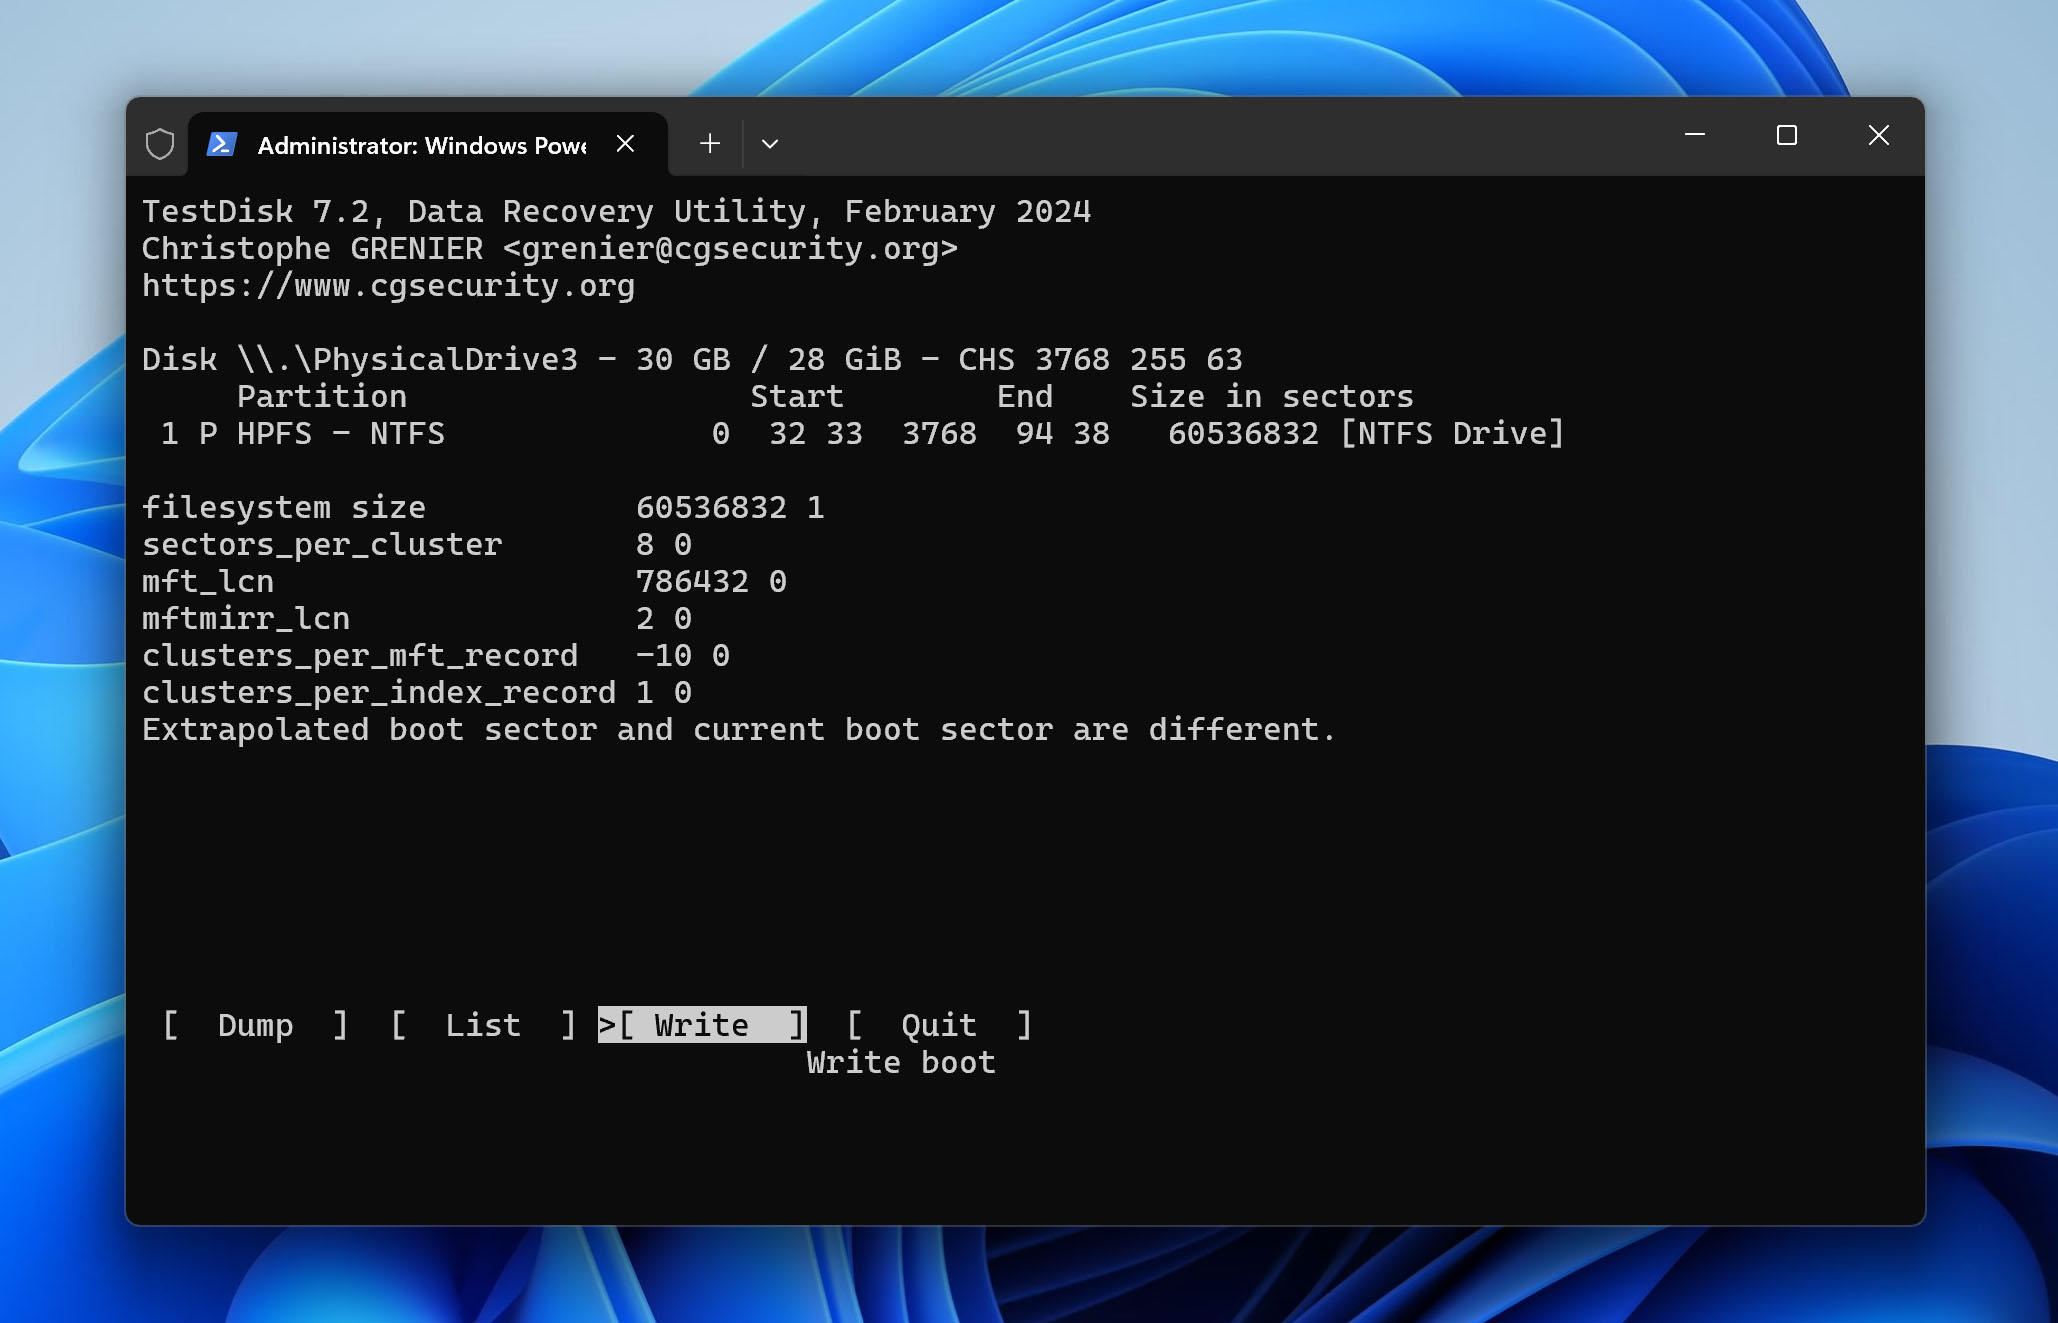
You can convert RAW to NTFS using TestDisk by using its feature that allows writing the partition structure to the disk. Here’s the process:
- Launch TestDisk.
- Select Create to create a log file.

- On the next screen, select the hard drive that appears formatted as RAW. If you can’t identify it, the disk size might help spot the right drive. Once selected, press Enter.
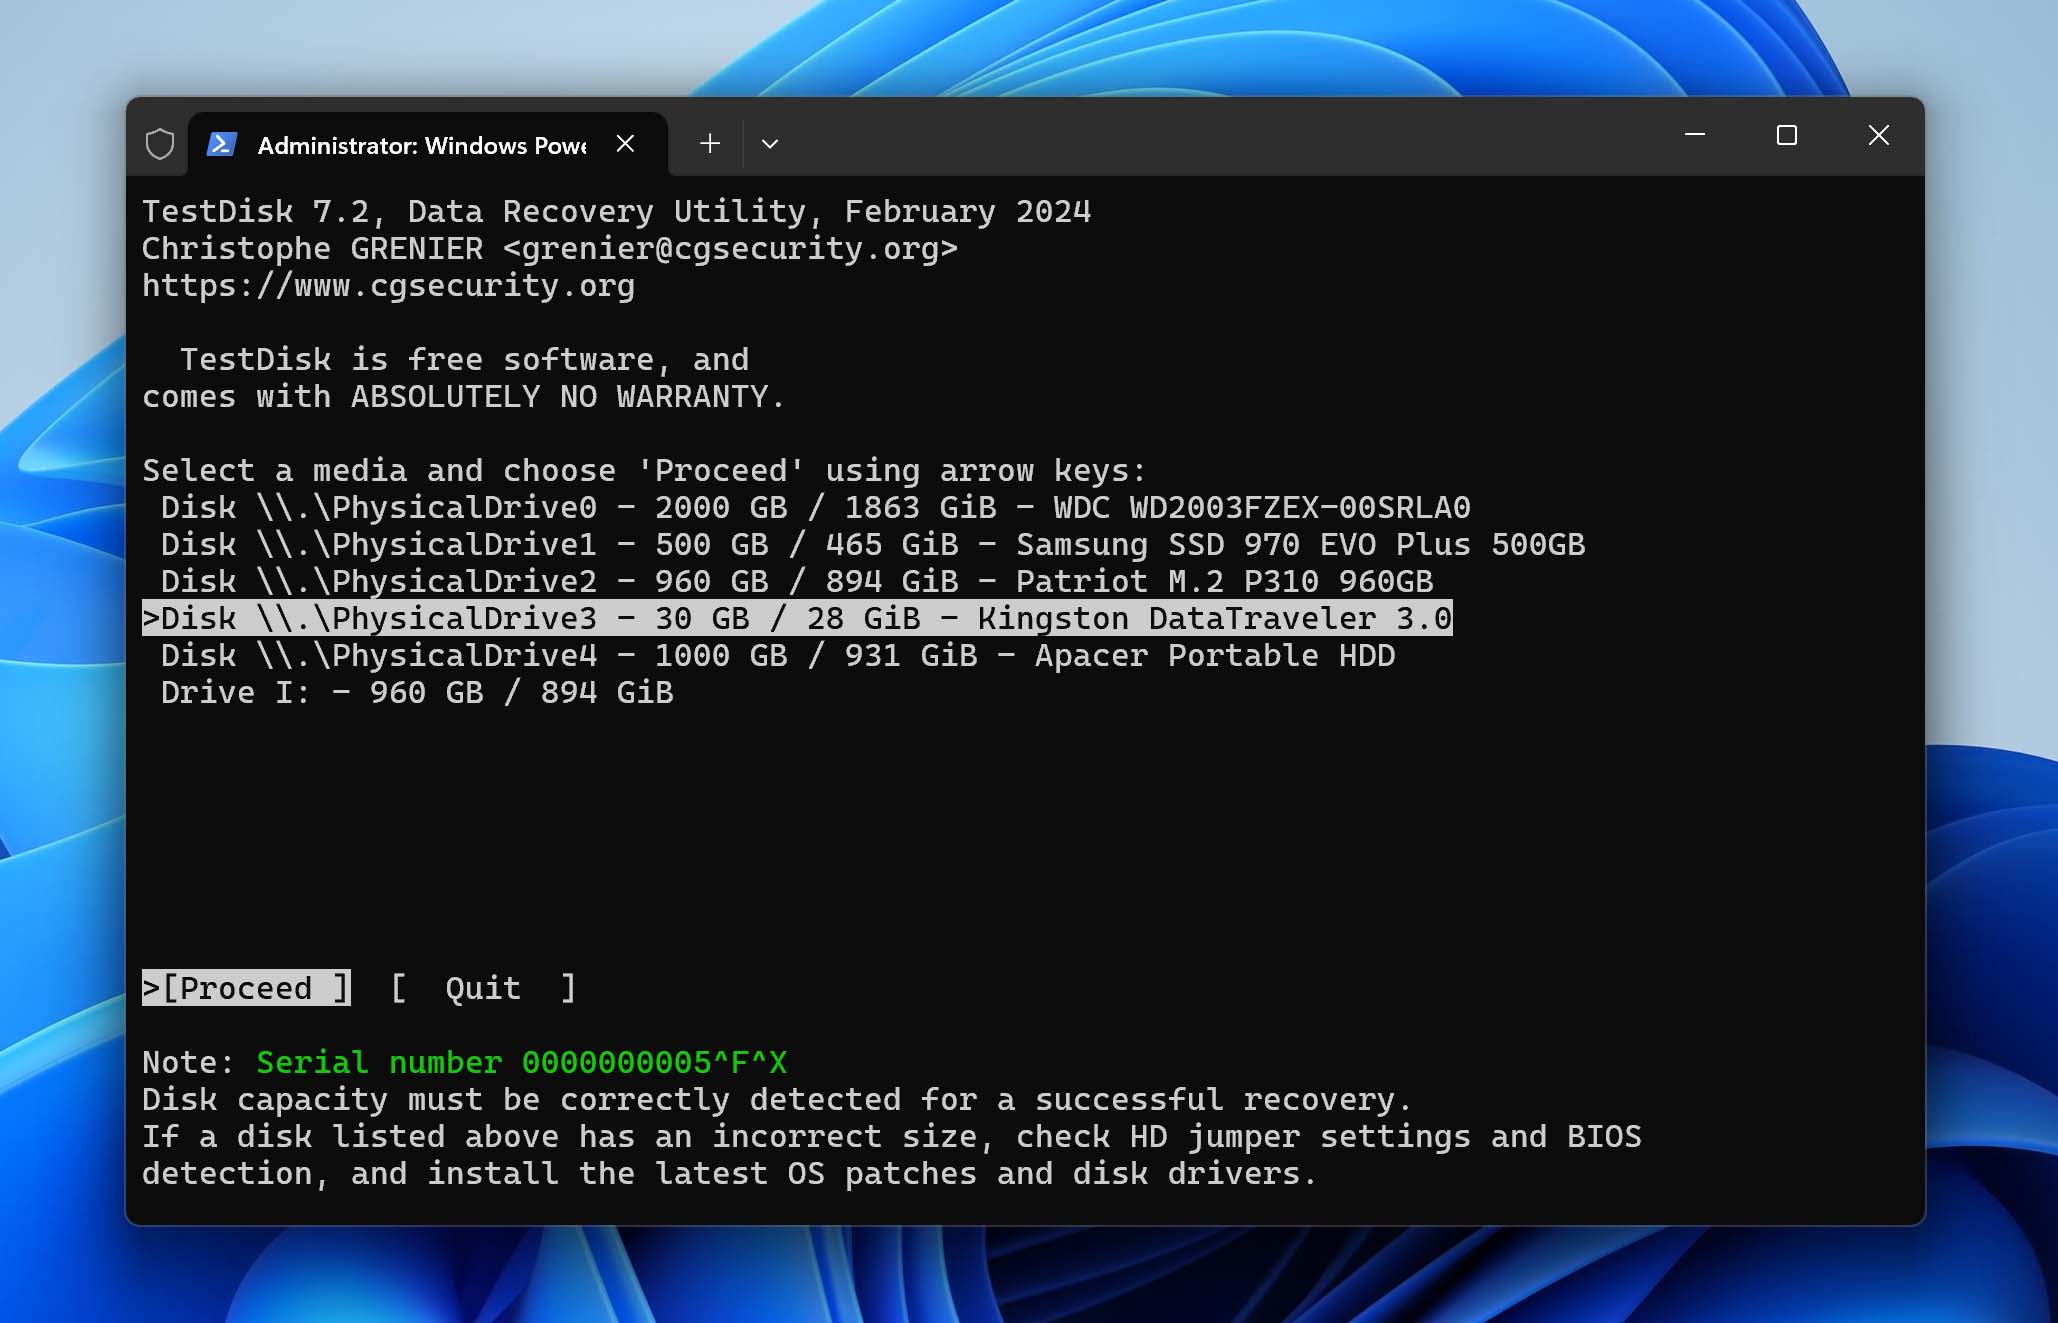
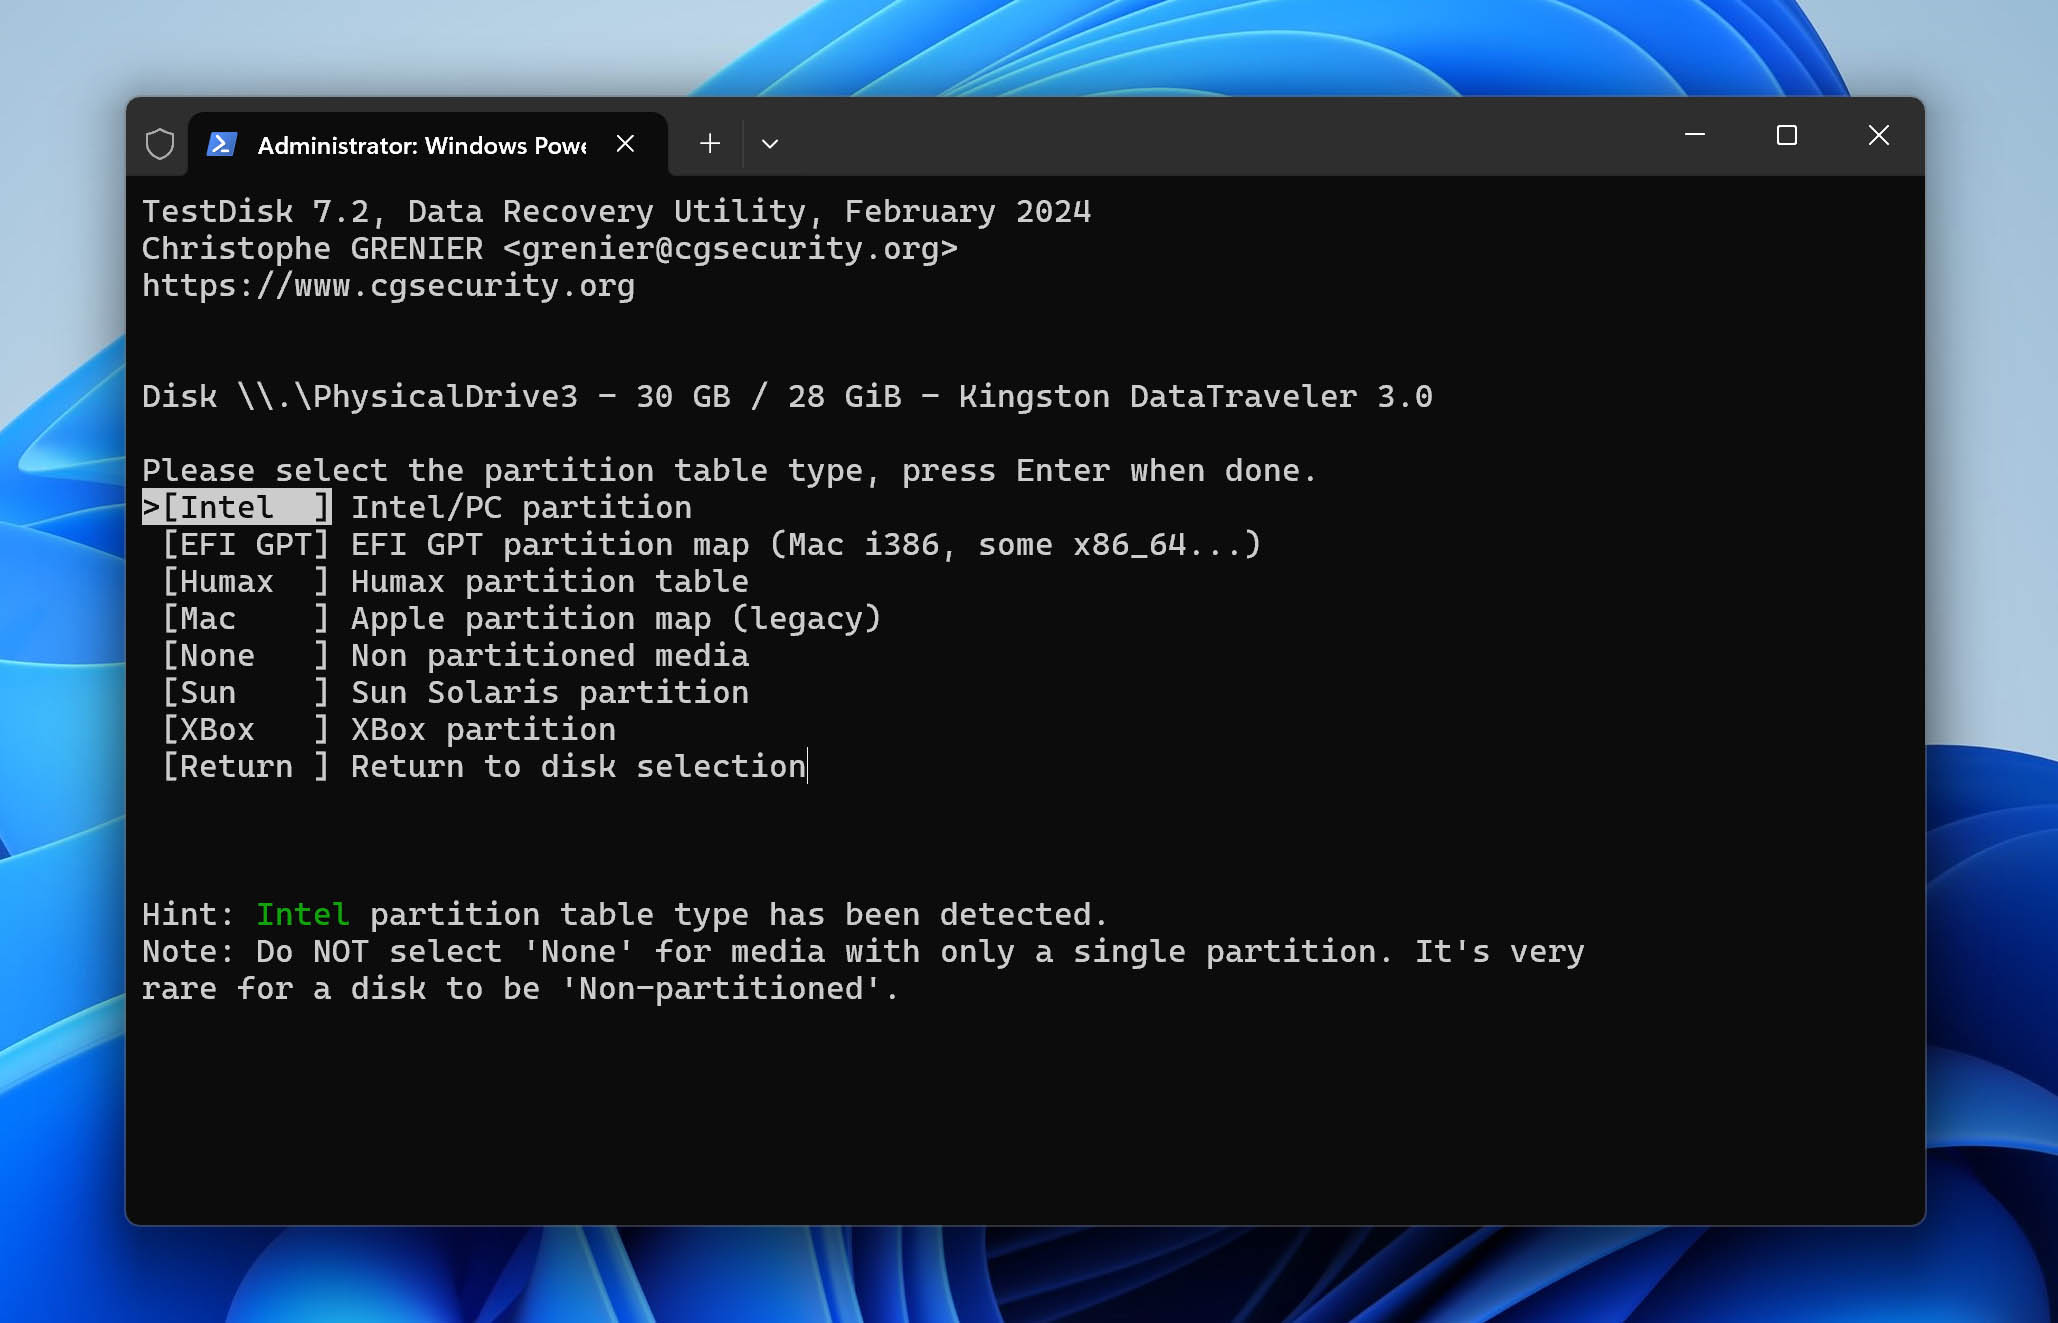
- Select the partition table type. In most cases, you’ll need to select the Intel/PC partition. Press Enter once selected.
- Select Analyze > Quick Search. Once the search ends, select the Deeper Search option because a Quick Search won’t detect a RAW partition. Note that a Deeper Search can take a while.
- When the search results appear, identify partitions that didn’t appear in the list after a quick search. Those partitions should be the RAW partitions you’re looking for.
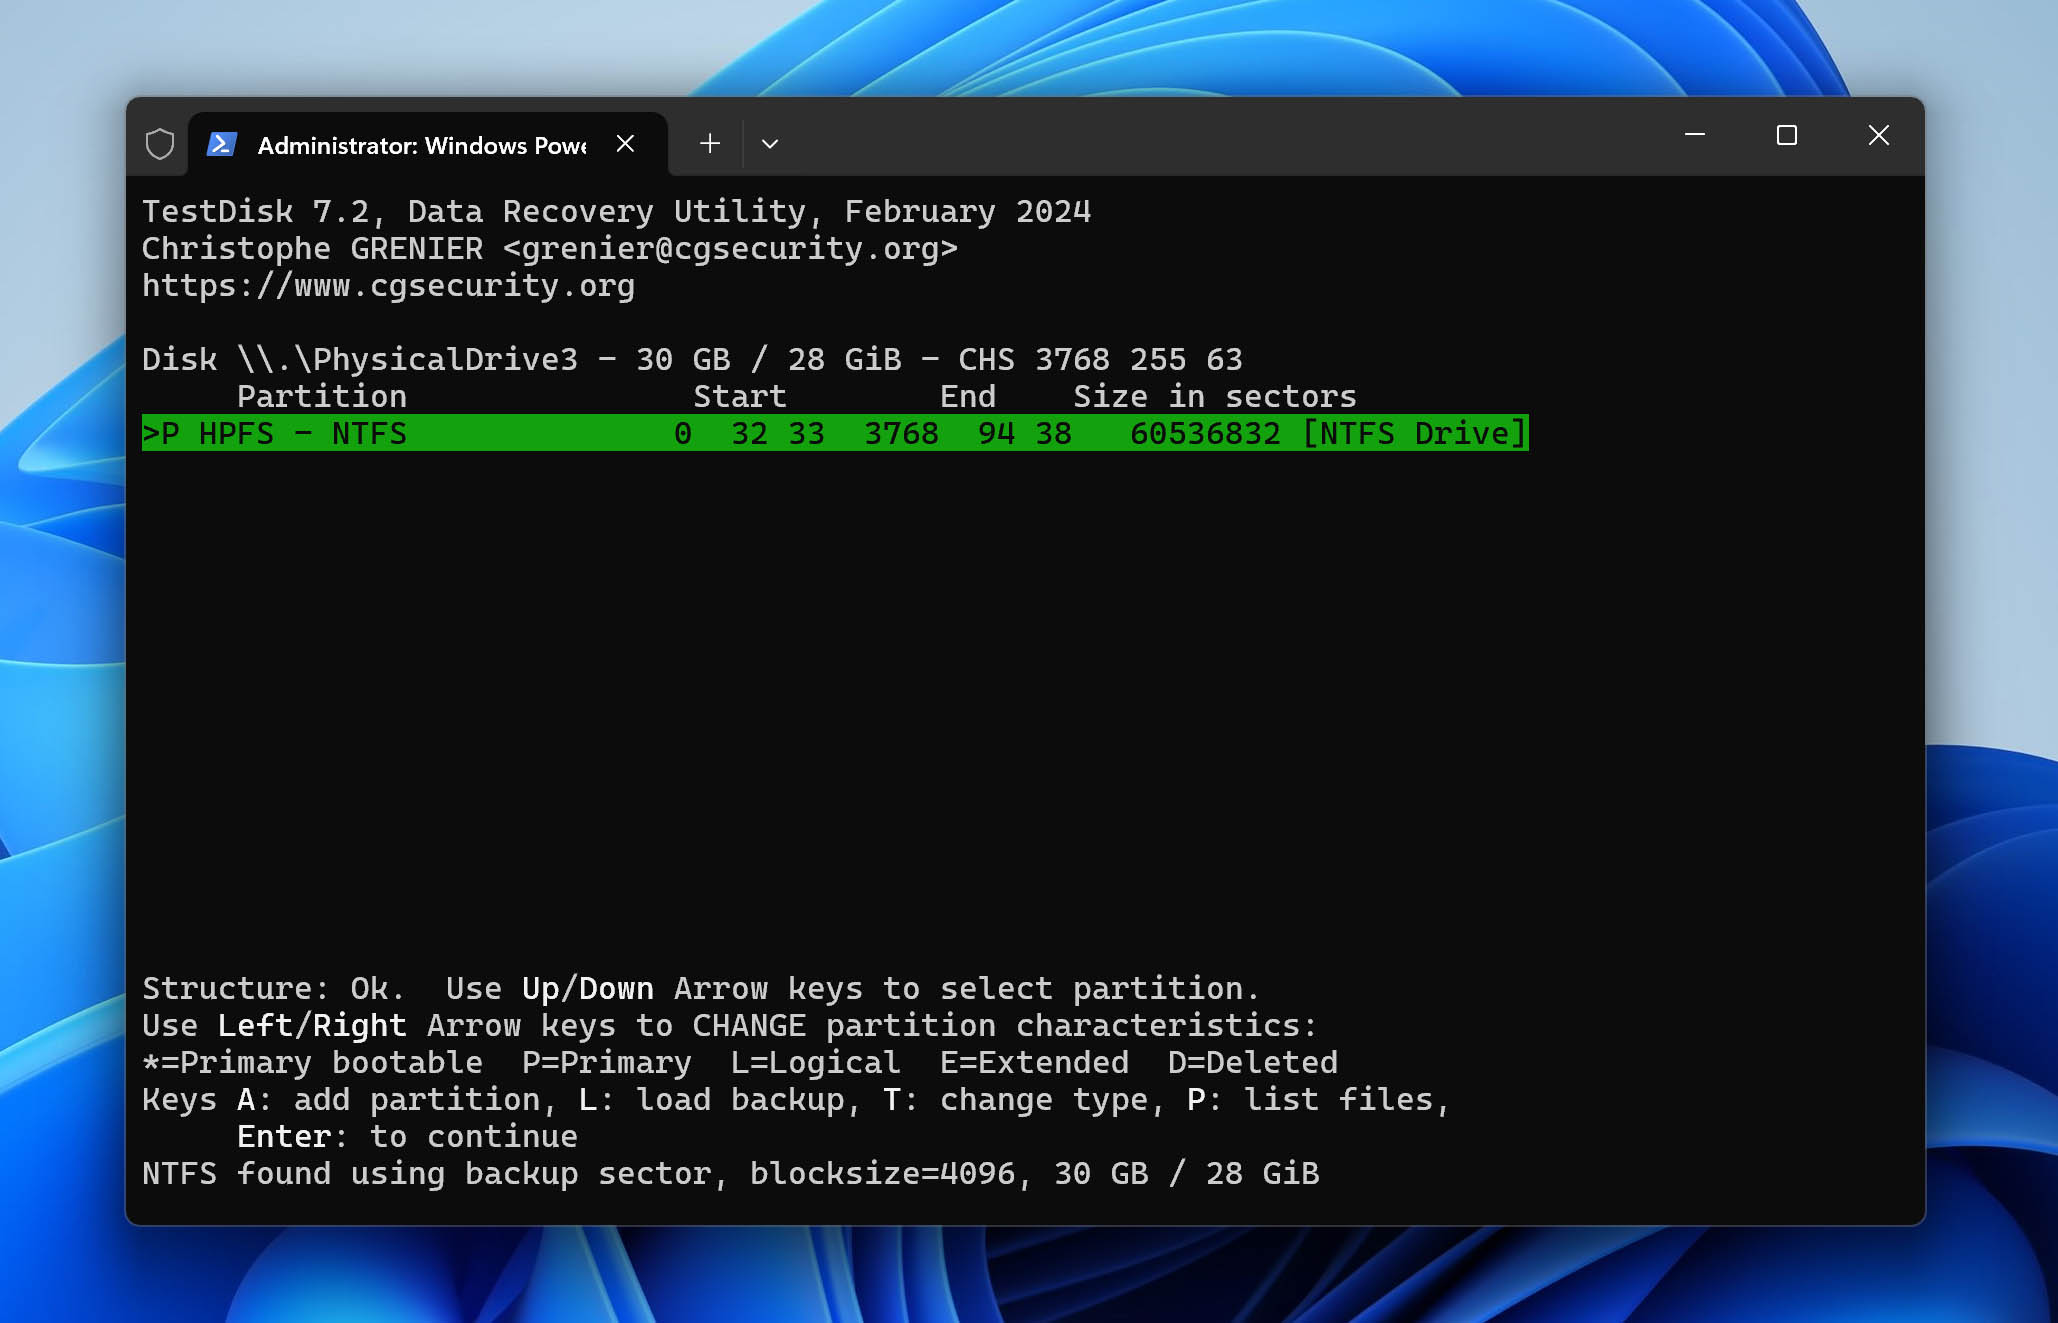
- Highlight the RAW partition using the up and down arrow keys and press P. If you see the partition files, the detected partition is correct. Press Q to return to the previous menu, repeat this process for all partitions, and if you see the files for each partition, you should be able to rewrite the partition tables.
- If the RAW partition has an asterisk against its name (towards the left), use the left/right arrow key to mark it as a Primary partition without the boot flag. You’ll see a P instead of an asterisk once marked successfully.
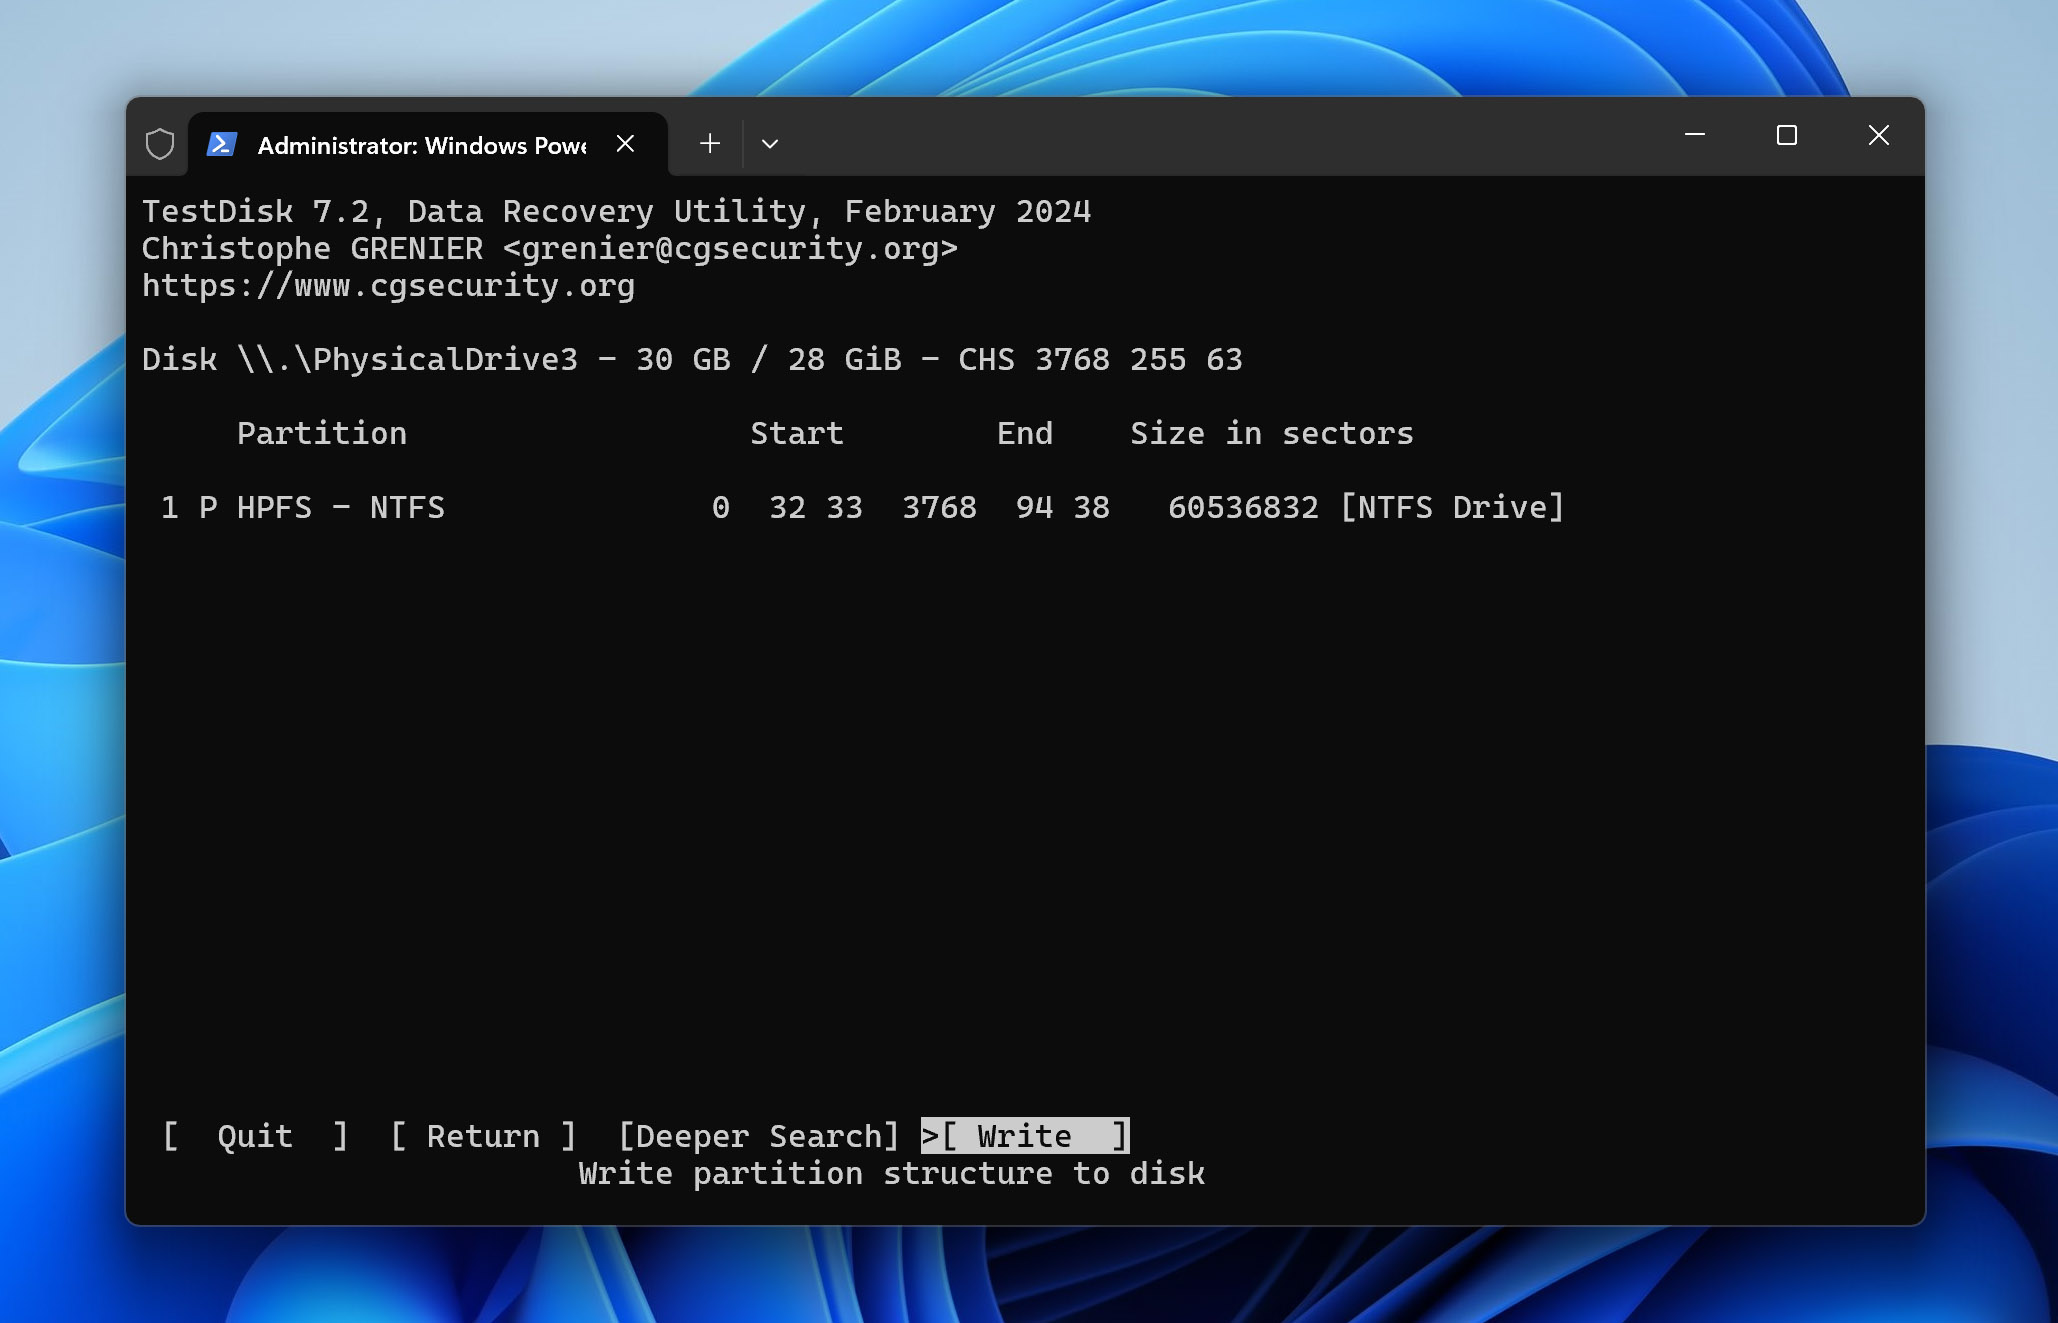
- When you’re done marking all partitions correctly, select the Write option to write the partition structure and press Y to confirm the operation.
- Once the writing process is complete, check the Boot sector details in TestDisk. If the Status says it’s good, you can exit TestDisk and reboot. If the Status is bad, you should also repair the boot sector before you exit the program. To do this, select the Rebuild BS option.
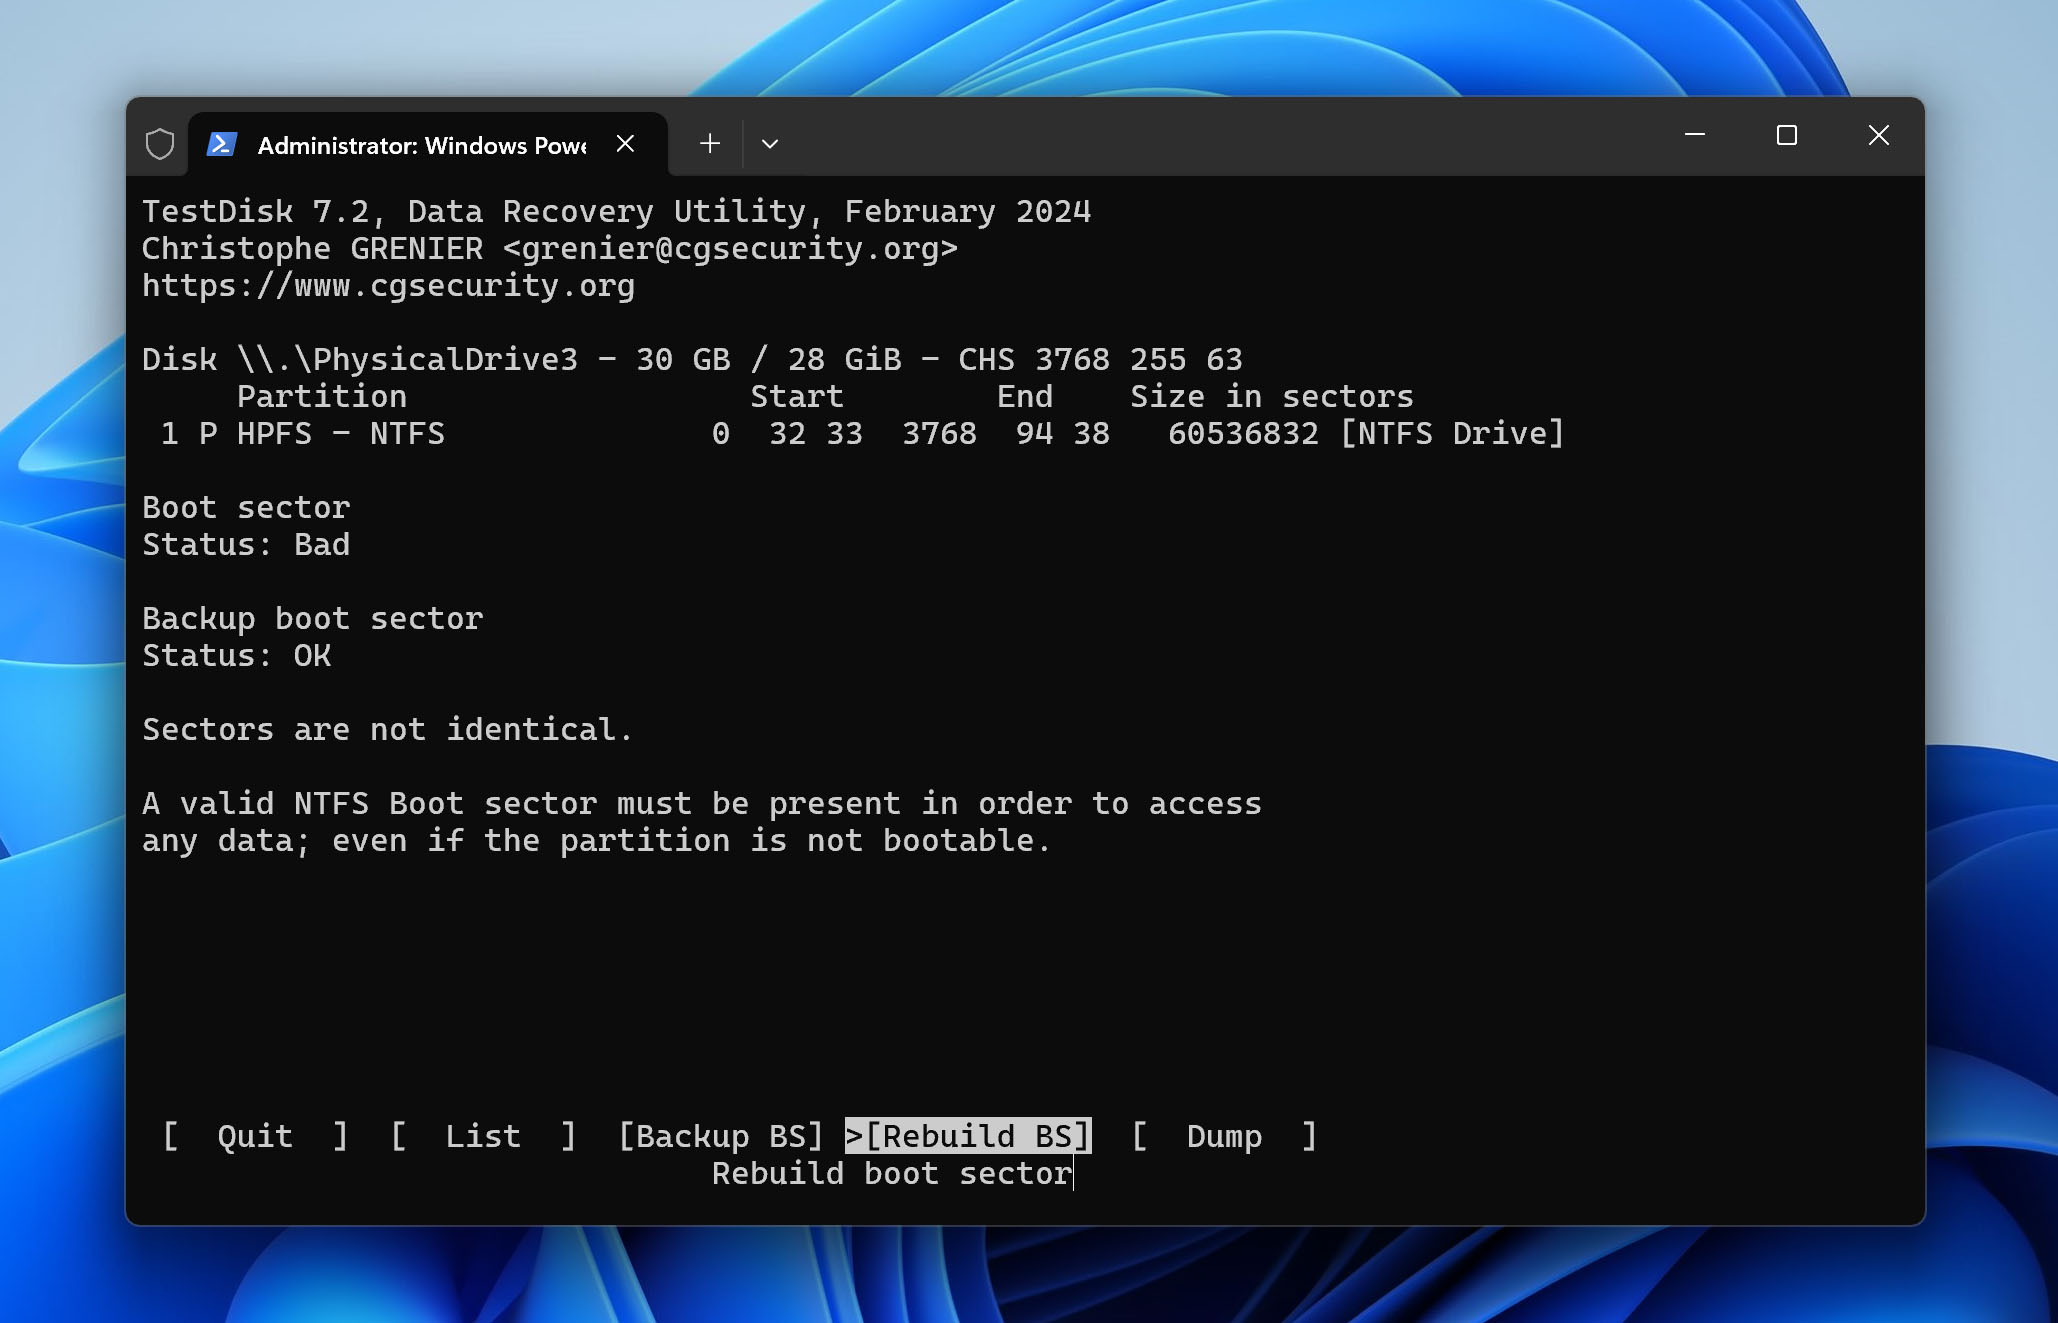
- Select the Write option on the next screen and press Y to confirm the operation.
- When the process ends, you’ll see a prompt for rebooting the PC. Select OK > Quit.
- Reboot your computer.
When your computer reboots, go to the Disk Management console to verify if TestDisk fixed the RAW drive. The drive should now appear as an NTFS drive in the console.
If you need more details on how to perform these steps, we explain the process in more detail in our TestDisk review.
FAQ
How do I convert RAW to NTFS in Windows 10 without losing data?
You can convert RAW to NTFS without losing data like so:
- Download and install Disk Drill.
- Create a Byte-to-Byte backup using Disk Drill.
- Format the RAW drive to NTFS.
- Attach the backup image and scan it.
- Recover the files to the new NTFS drive.
How do I fix a RAW hard drive to NTFS for free?
Formatting helps fix a RAW hard drive by converting it to NTFS. However, if you’re worried about losing your data, you can use a free recovery tool to recover the data and then format the drive. Once you’ve formatted the drive, you can rewrite the data on the drive.
How do I fix a RAW drive without formatting?
The CHKDSK utility in Windows might help you recover a RAW drive in some cases. If CHKDSK doesn’t help, you might try a free tool like TestDisk to fix a RAW drive without formatting. However, in case TestDisk doesn’t help, you can always use a data recovery tool to extract data from the RAW drive, format it to NTFS, and then rewrite the data.
In addition to RAW drives, this method works for internal and external drives with various other file systems as well. For example, you can use the same method to recover data from an external hard drive without formatting.
Can RAW files be recovered?
Yes, you can recover files from a RAW drive using a data recovery tool as long as the tool supports RAW hard drive recovery. The process of recovering data from a RAW drive is the same as with any other type of drive.
Conclusion
It’s easy to go into panic mode when your drive suddenly appears as RAW. However, you can easily fix the problem using a data recovery tool and formatting the drive. This method lets you keep your data intact and also helps convert your RAW drive to NTFS without too many technical difficulties.
This article was written by Arjun Ruparelia, a Contributing Writer at Handy Recovery Advisor. It was also verified for technical accuracy by Andrey Vasilyev, our editorial advisor.
Curious about our content creation process? Take a look at our Editor Guidelines.