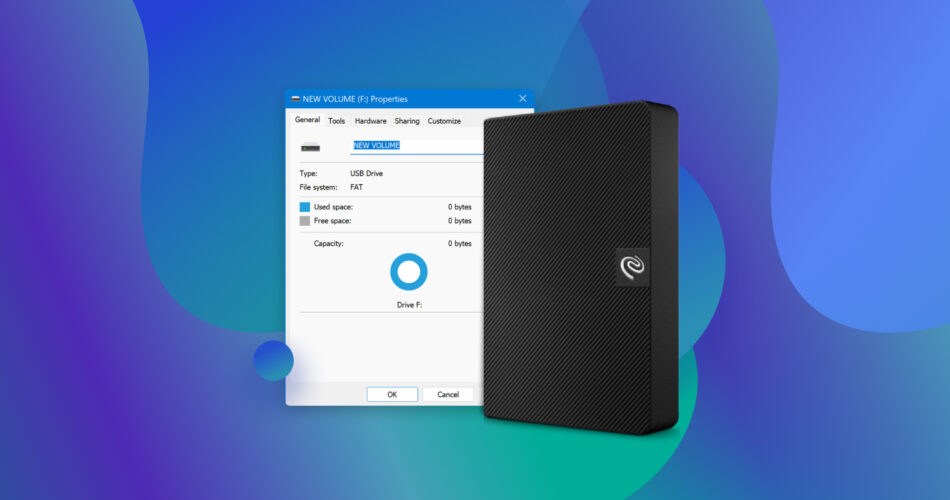
Hard drive corruption can manifest itself in different forms. A common issue that many users face, is the HDD showing 0 bytes or your files becoming 0 bytes. But, like other forms of disk corruption, it can be fixed, and your data recovered, using various DIY methods. We’ll take a look at the most effective fixes in the sections that follow.
What Are the Causes of the 0 Bytes Problem?
The zero-byte problem on an HDD is basically a form of hard drive corruption. There can be a multitude of reasons behind it, but the most common ones are explained below:
- 🦠 Viruses and Malware: Computer viruses are a leading cause of data loss and hard drive corruption. They can corrupt, modify, or completely wipe out the data on your storage device. Malware can also damage the drive’s file system, subsequently resulting in the HDD showing 0 bytes. If this is indeed the case, we also have a full-fledged guide dedicated to recovering files deleted by a virus.
- 🛠️ Hardware Malfunction: All storage drives are susceptible to physical damage from shock, water, etc. This can cause multiple issues, including the affected drive showing 0 bytes available. HDDs are more susceptible to hardware damage since they have a lot of moving parts. In case of hardware damage, if the drive is still readable, you can create a disk image of it and scan it for lost data. If it’s unreadable, you should contact a good data recovery service to fix it.
- 📂 File System Corruption: Improper use, malware, and other factors can damage the file system (NTFS, exFAT, FAT32, etc.) of your storage device, resulting in the computer displaying 0 bytes on the HDD or SSD. This can render the files inaccessible. In most cases, you will have to reformat the drive to resolve this. But, data recovery software like Disk Drill can still recover lost data after formatting.
Besides these, an unsupported file system, no logical volume on the disk, and a RAW partition can all cause the storage device to show 0 bytes available.
How to Recover Data From a Hard Drive That Shows 0 Bytes
If your files become 0 bytes in size or if your storage device is showing 0 bytes available, it is important to first recover your precious data from it. The best way to do this is to use third-party data recovery programs because they’re highly effective while being easy on your pocket.
In our tutorial, we’ll use Disk Drill, a leading data recovery program, to perform 0 byte file recovery. As long as your drive shows up in Windows Disk Management, Disk Drill can scan and recover data from it. Explored further in our Disk Drill review, a major reason why we recommend the software, is its intuitive and easy-to-use interface that makes data recovery extremely simple, even for new users.
Instructions on how to recover data from a hard drive that shows 0 bytes, using Disk Drill:
- Download Disk Drill and run the setup file.
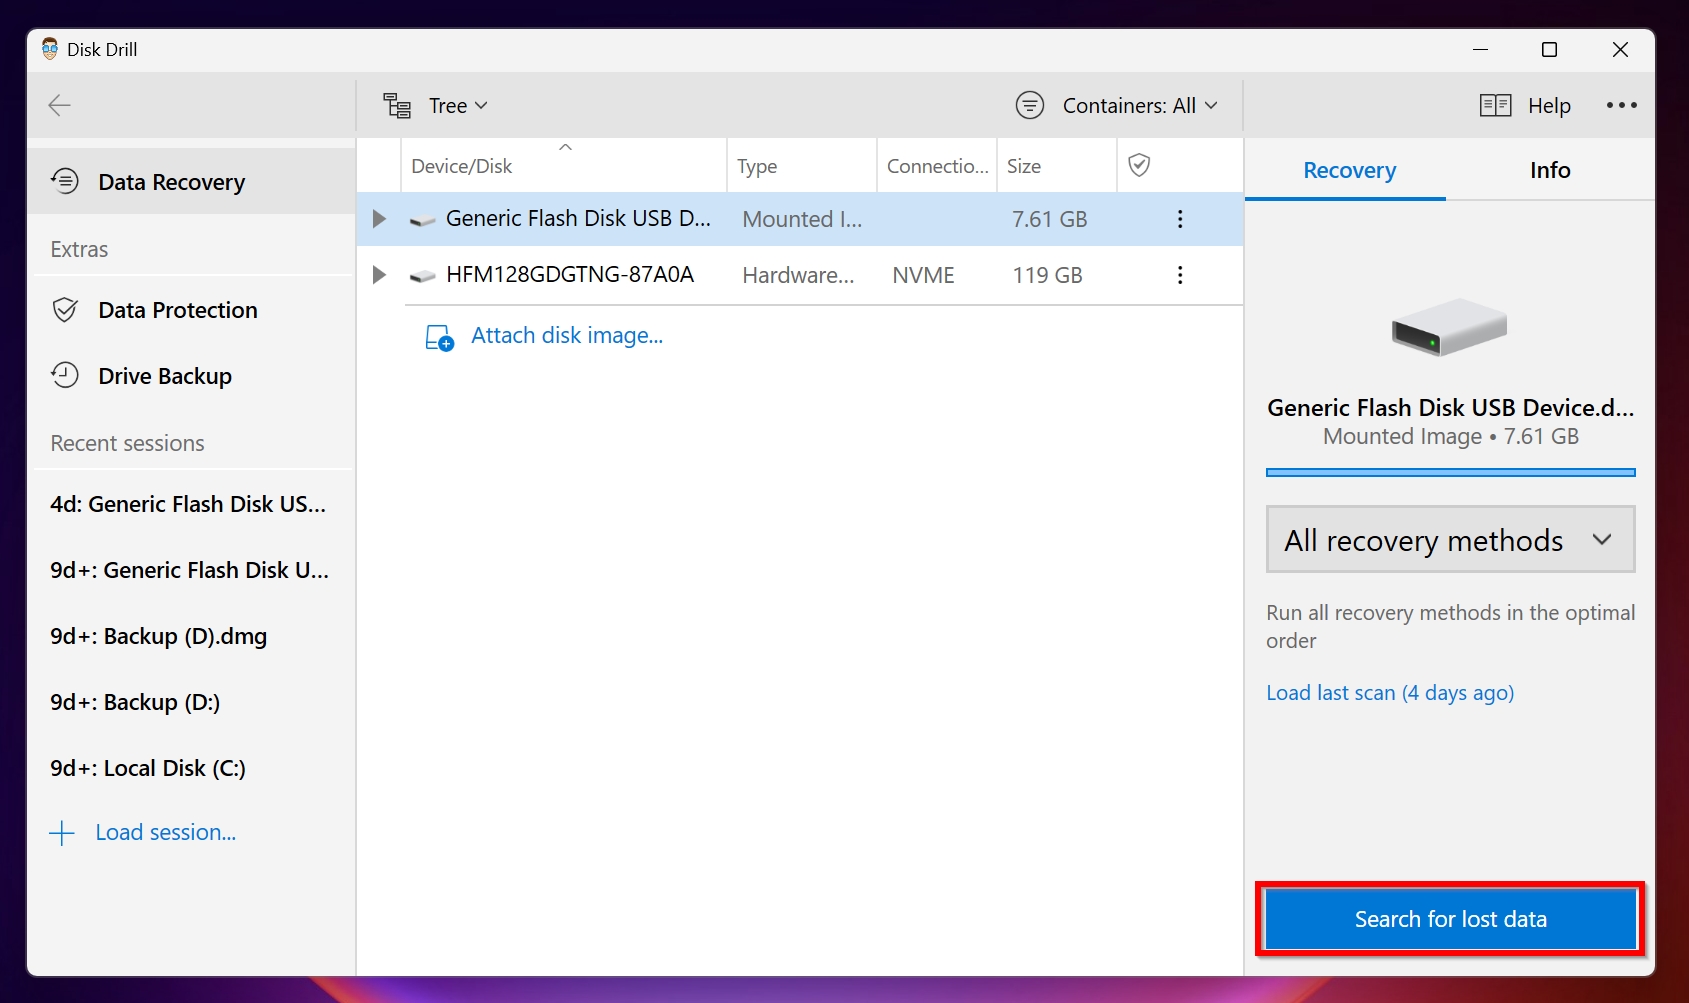
- After installation, open Disk Drill and select the HDD that is showing 0 bytes. Click on Search for lost data to begin the data recovery scan.
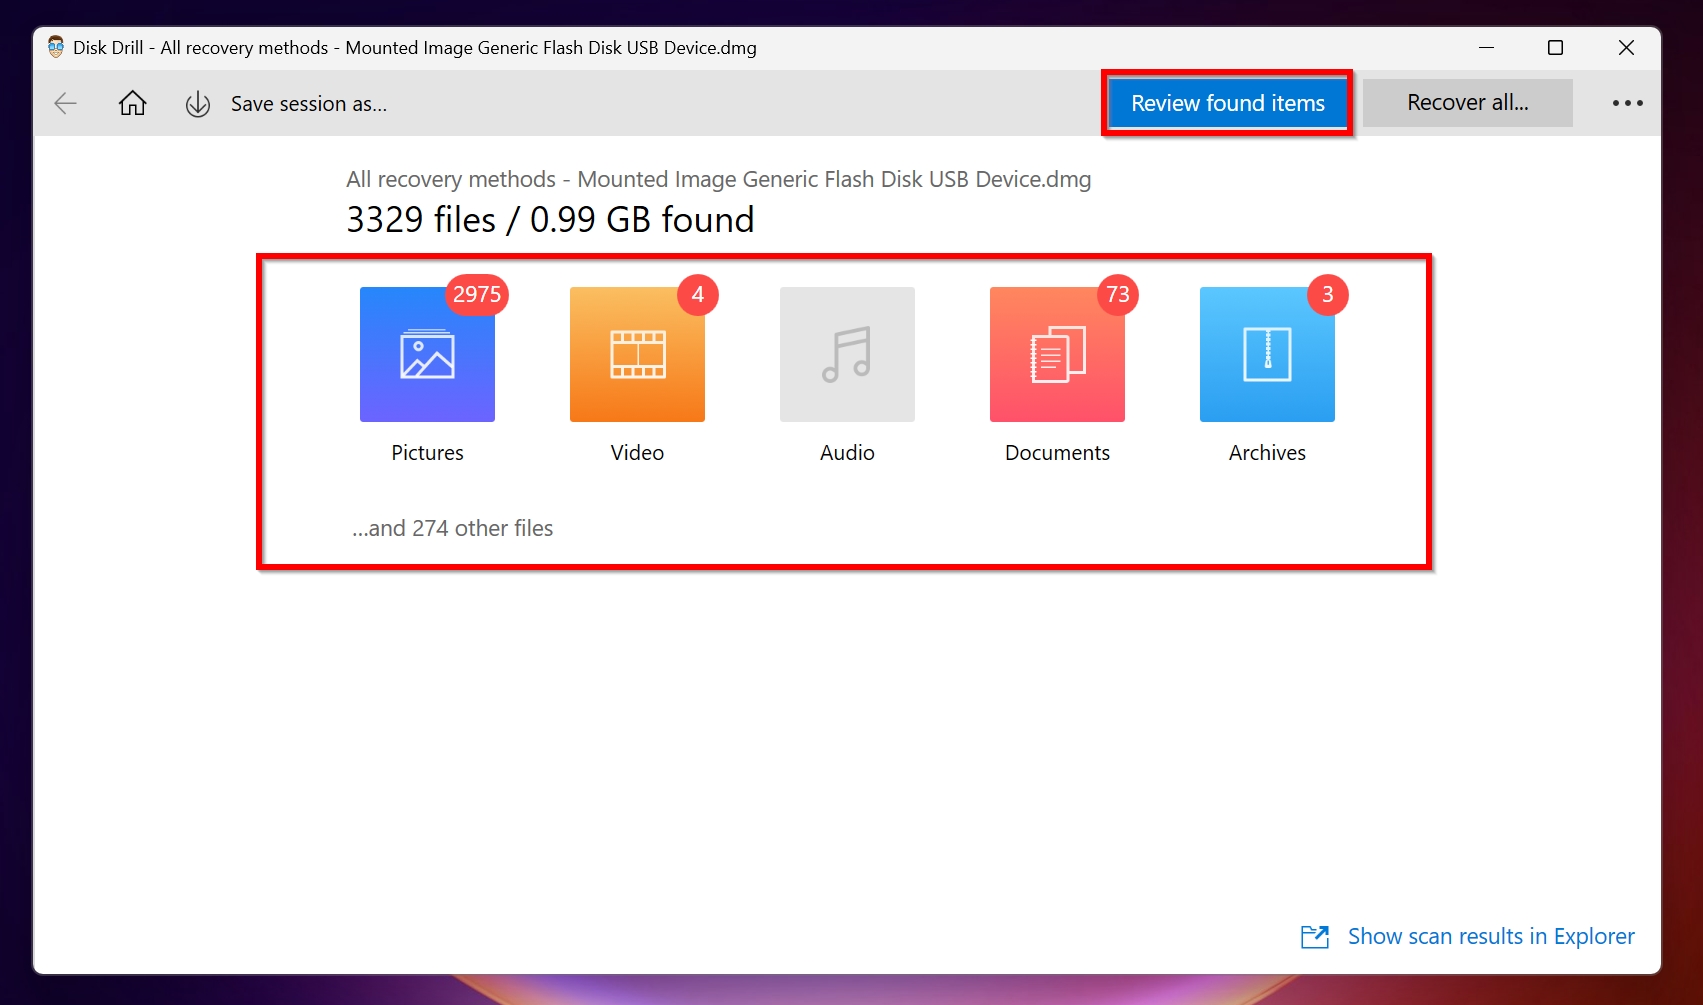
- Click on Review found items to view recoverable files. You can also directly click on the file type you want to recover on this page (Pictures, Videos, Documents, Archives, and Audio).
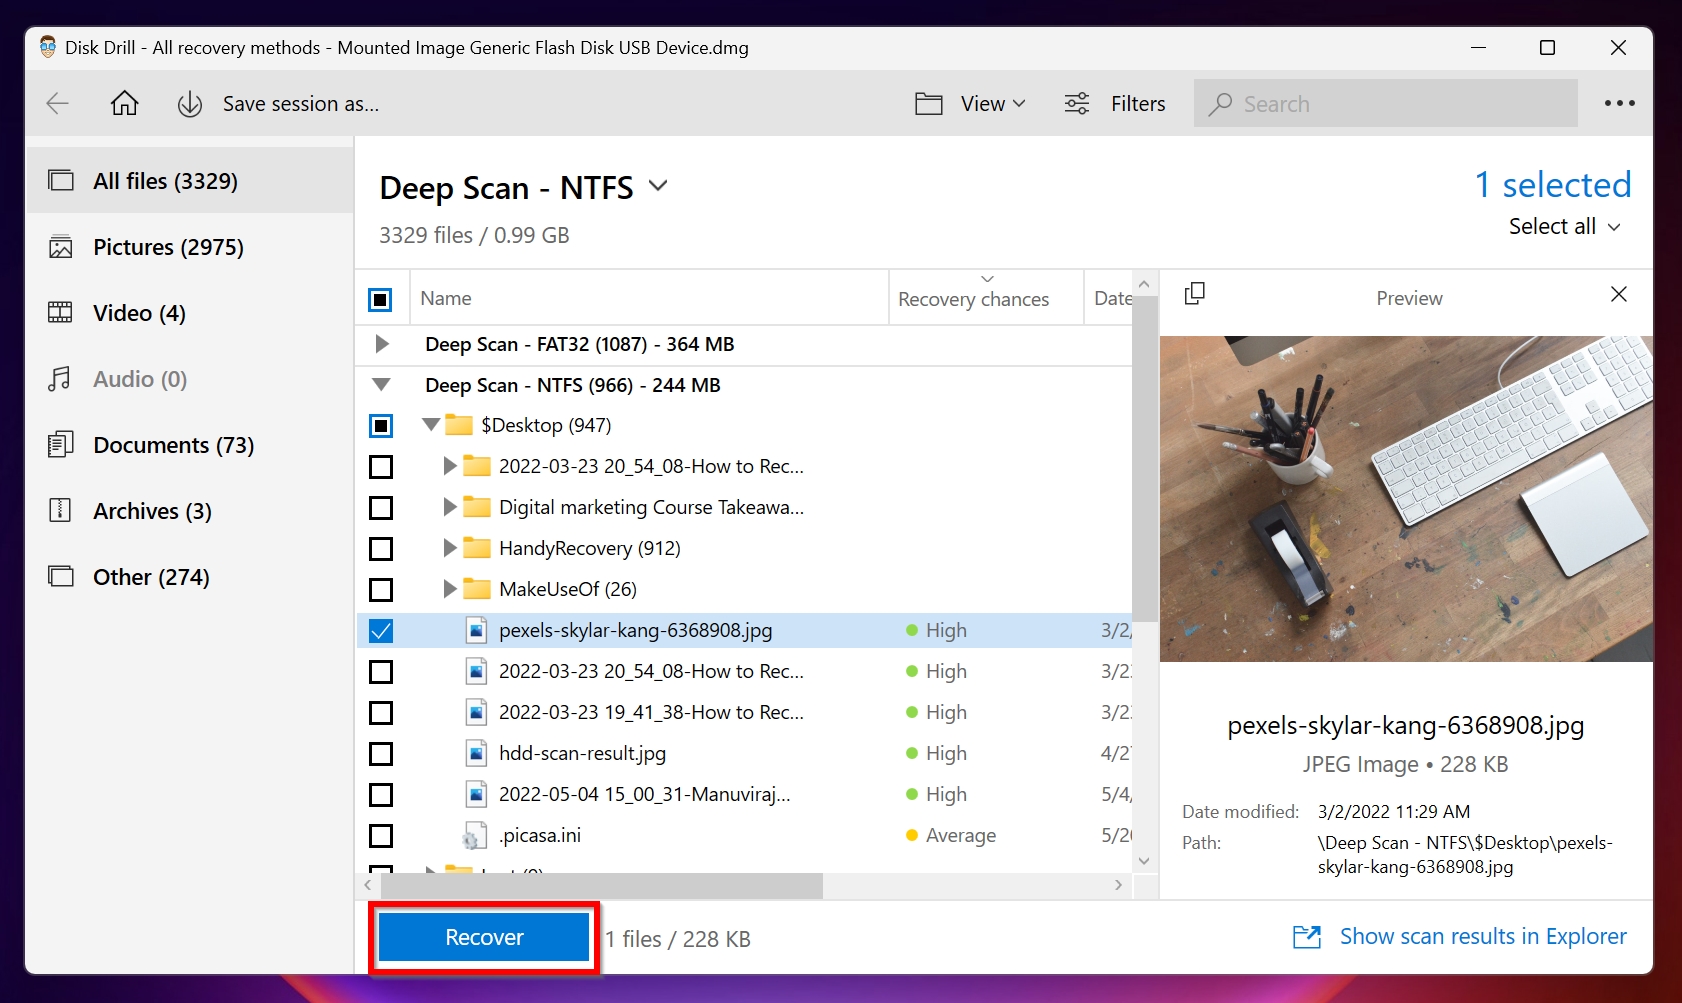
- Use the checkboxes to select the files you want to recover. Disk Drill lets you recover 0 KB files as well. Once selected, click on the Recover button.
- Choose a recovery destination in the next prompt. Click OK. Pick a recovery destination that’s located on another storage drive.
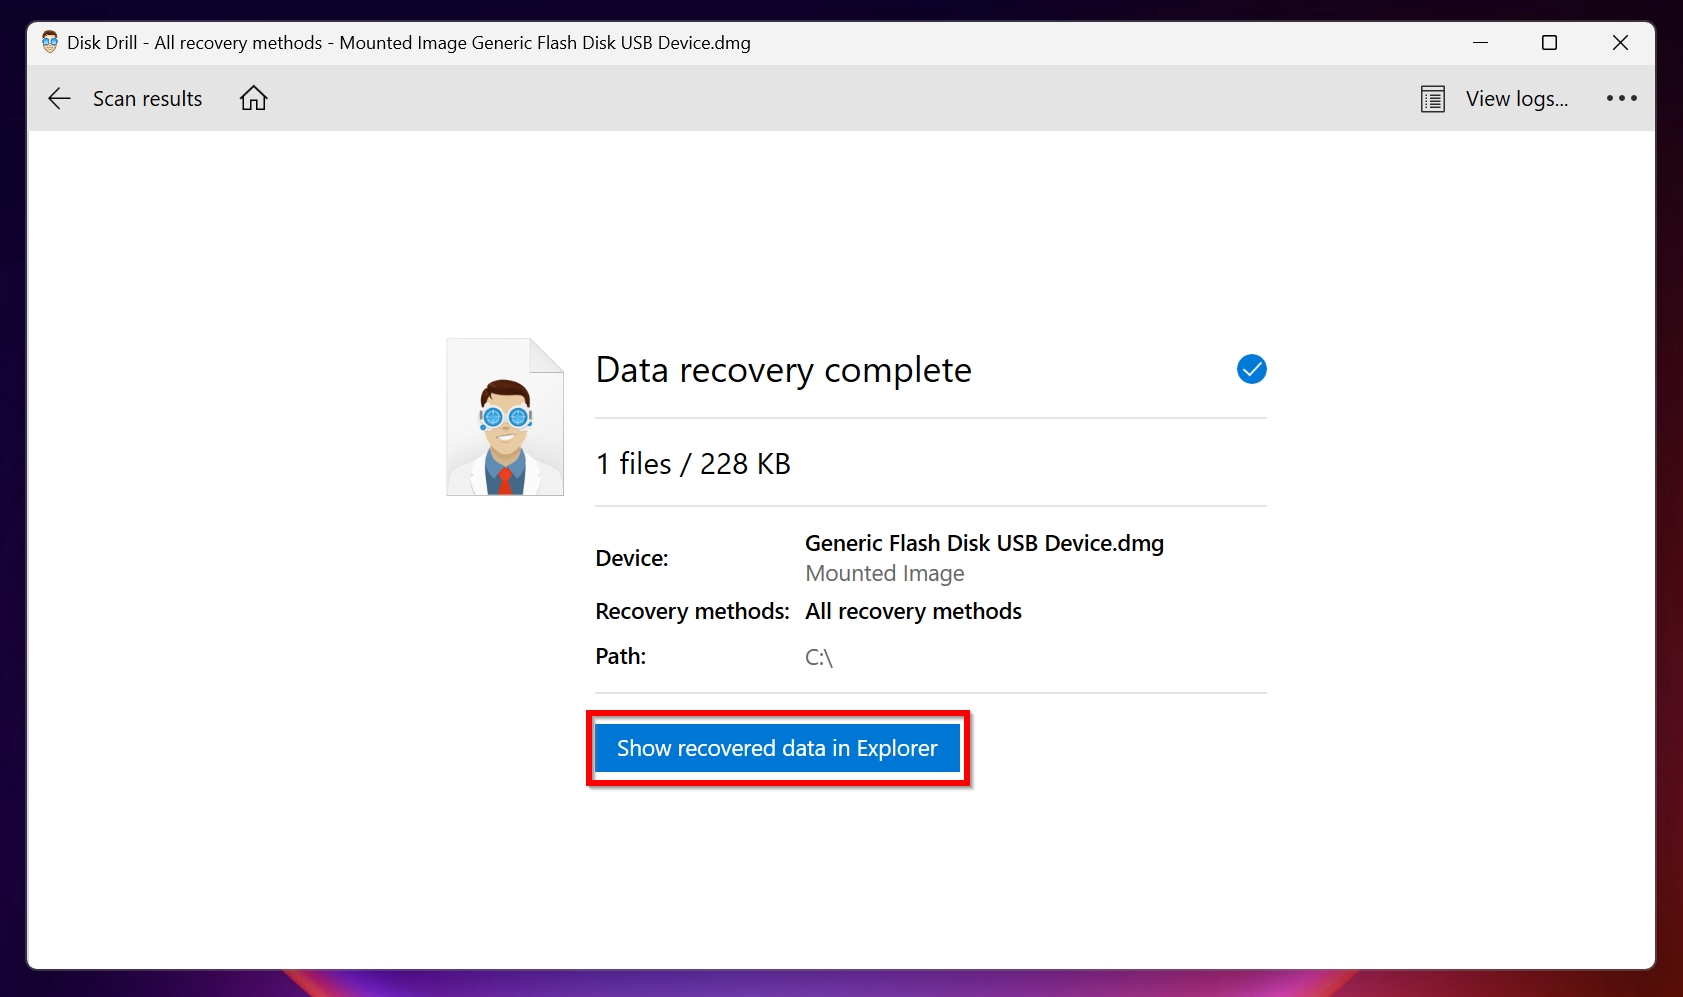
- Disk Drill will recover the selected files.
Note: If it’s the C drive that’s showing 0 bytes, you may need to connect the drive to another computer as an external drive, since Windows won’t boot. You can do so using a hard drive enclosure.
How to Repair a Hard Drive That Shows 0 Bytes?
In the sections that follow, we’ll take a look at the two most effective ways to repair a hard drive that’s showing 0 bytes. Both methods use a command line interface, so it’s recommended you follow the instructions closely.
Method 1: Run a CHKDSK Scan Using CMD
CHKDSK is an in-built command line utility in Windows that detects and resolves errors on your hard drive. The utility can scan your entire drive or a single partition of your choosing. So, if it’s the D drive that’s showing 0 bytes of free space, you can simply scan the D: partition, instead of the entire hard disk drive.
Here is how to use CHKDSK on Windows to fix the zero-byte problem:
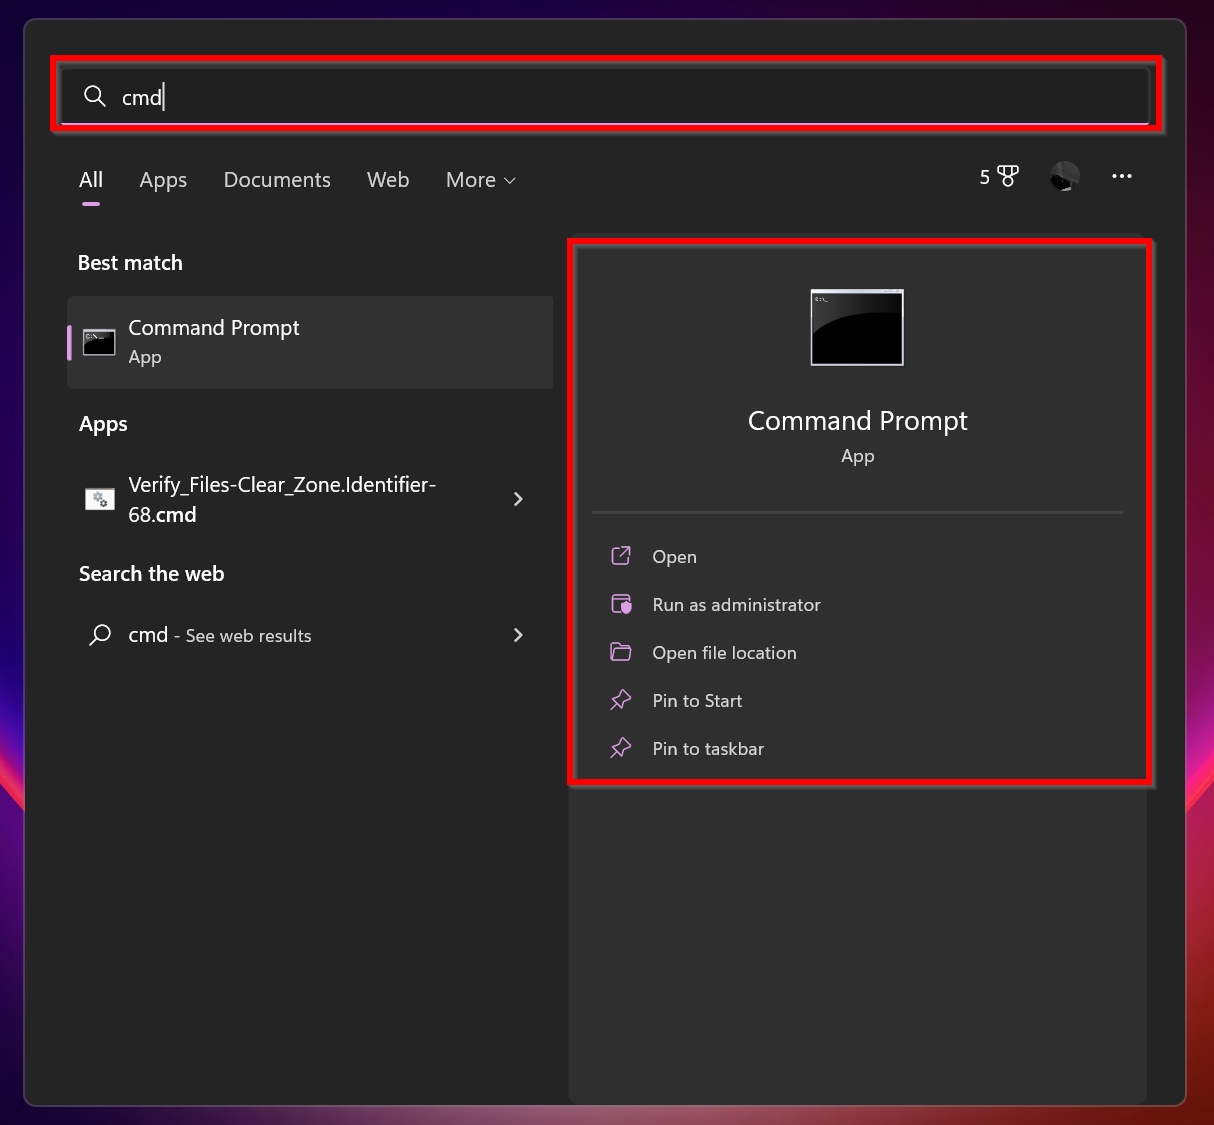
- On Windows Search (Windows Key + S), type cmd and right-click on Command Prompt > Run as administrator from the search results.
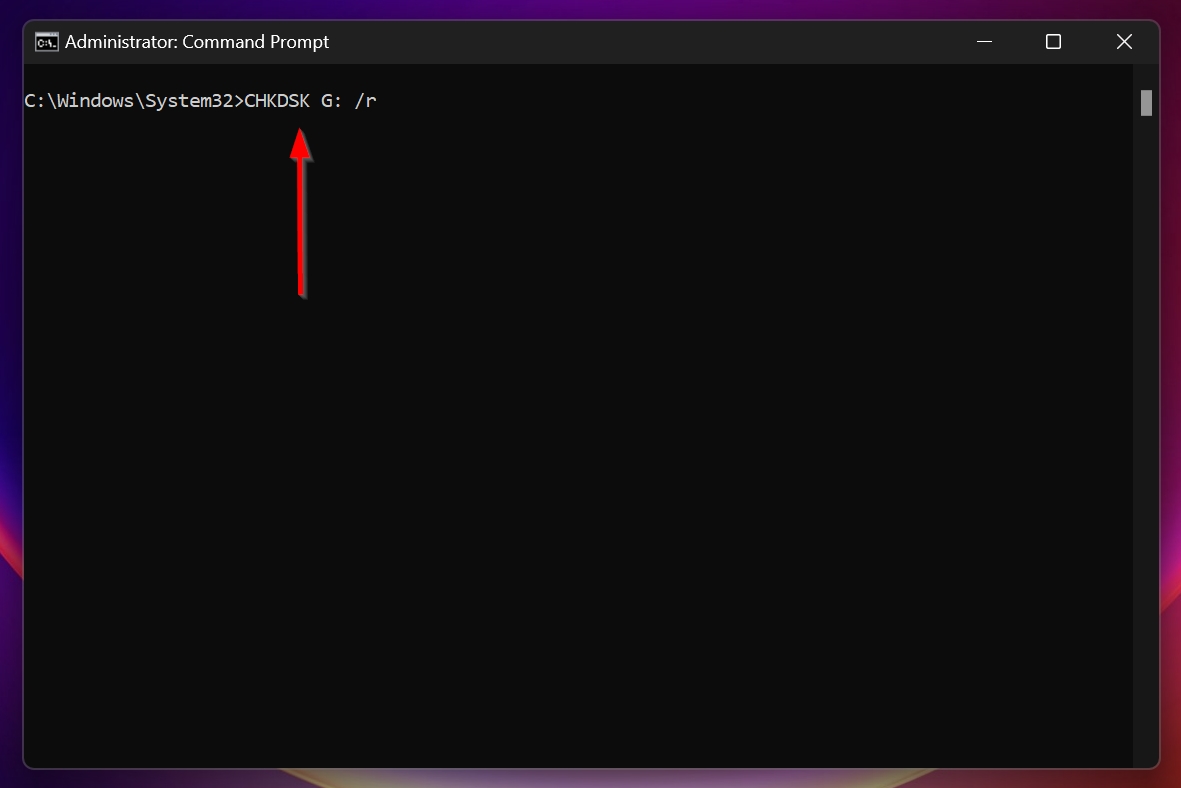
- In the Command Prompt console, type chkdsk X: /r and press Enter. Replace X with the drive letter of the partition that is showing 0 bytes. If you want to scan the entire disk, simply type chkdsk /r and press Enter.
- Wait for CHKDSK to scan and fix the 0 bytes problem on your disk. Reboot your computer after the scan is over.
Note: Sometimes, CHKDSK may ask to perform a scan when you reboot your PC. This typically happens when the disk is in use. You can safely press Y to confirm this and Windows will run a CHKDSK scan the next time you boot your PC.
Method 2: Try Using Partition Recovery Software
There are third-party data recovery programs that can recover 0 byte partitions for you. Two popular ones are TestDisk and DiskGenius. While these programs don’t have the best UI, they’re quite effective at recovering partitions showing 0 bytes free space.
TestDisk doesn’t have GUI, so users need to cycle through the options using arrow keys and press Enter to select an option. Our TestDisk review thoroughly explores the data recovery capabilities of the program, as well as how to actually perform data recovery using the software.
Unlike TestDisk, DiskGenius does have a GUI. In addition to data recovery, DiskGenius doubles up as a partition manager and a disk error checker. To learn more about the software, be sure to read our review of DiskGenius.
FAQ
Why does my file say 0 bytes?
There can be multiple reasons for your file saying 0 bytes. These include – the file being corrupted, the storage drive being corrupted, malware attacks, and a compromised file system. Sometimes physical damage to the drive can also result in the issue.
Can you recover 0-byte files?
Here’s a super-quick guide on recovering 0 byte files:
- Download and install Disk Drill.
- Open Disk Drill and select the 0 bytes disk you want to scan.
- Click Search for lost data.
- Click on Review found items.
- Select the files you want to recover and click the Recover button.
Why SD card shows 0 bytes on an Android phone?
An SD card could show 0 bytes on an Android phone due to corruption, file system damage, or physical damage. Rarely, if it’s a full-sized SD card, there can be an issue with the SD card reader
How do I get rid of the 0KB virus?
To effectively rid your computer of the 0KB virus, first, scan the computer using Windows Defender and, ideally, a third-party antivirus solution as well. You can then recover any lost data using a good data recovery program such as Disk Drill.
How to fix 0 bytes error on a USB drive that I cannot format?
If you’re unable to fix a USB that you cannot format using Diskpart or any other utility, the best thing to do is to use a third-party partition recovery software like TestDisk or DiskGenius.
Conclusion
The 0 bytes problem can be resolved easily by first recovering any lost data using Disk Drill and then attempting to recover the partition. In most cases, this should be enough. The issue can be avoided in the future by regularly backing up your data, running frequent virus scans, and handling the storage drive carefully.
This article was written by Manuviraj Godara, a Staff Writer at Handy Recovery Advisor. It was also verified for technical accuracy by Andrey Vasilyev, our editorial advisor.
Curious about our content creation process? Take a look at our Editor Guidelines.