Whether you’re the victim of an accidental reformatting or a corrupted drive, it can be heart-wrenching to think of losing all your precious data forever. The special moments captured in family photos. The vital tax documents. The work-related spreadsheets. And yes, even the saved game files on which you spent far too much time.
But luckily, a formatting error doesn’t mean your data is gone for good. There are a few simple steps you can take to get your files back—permanently.
This guide presents the three top options for recovering data from a formatted Mac hard drive. If you’d prefer to skip the theoretical explanations and proceed directly to the recovery guide, click here.
Recovering a Formatted Hard Drive on Mac: Is It Possible?
The short answer here is yes, you can recover a formatted hard drive on a Mac.
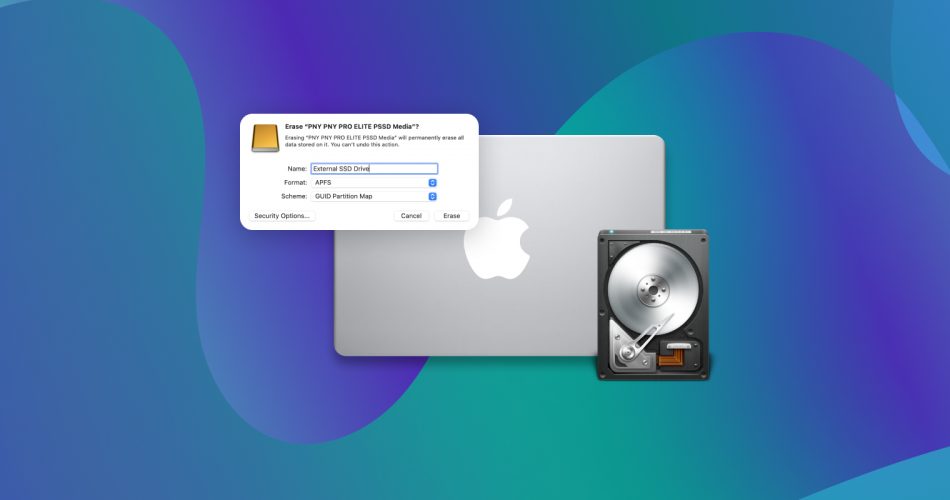
When you format a hard drive, you’re preparing it to use a specific file format system. On the surface, this process erases all of the information on the drive—a terrifying prospect if you aren’t expecting it.
However, your data isn’t actually gone here as long as:
- you used quick formatting (default on macOS in case no secure parameters applied) rather than full formatting;
- if you’re using an HDD (things get a bit trickier on SSDs thanks to TRIM, which deletes data permanently to boost performance).
Instead, it’s more like the process makes your information invisible. It’s only after you write new data over the existing data is your information lost completely.
Recovering a formatted external hard drive on a Mac is often the most common scenario and tends to be the easiest to handle. For a deeper understanding of recovery complexities associated with different drive types, refer to our Understanding Drive Types and Their Recovery Complexities section.
As a result, you can recover those “lost” files. However, to do so successfully, you need to follow these steps to increase your chances of recovering files from an erased hard drive on a Mac.
- Immediately stop using the drive. Every moment you continue to write new information to that drive, your chances of recovering your lost data are less and less.
- Find a data recovery solution. This guide outlines four of the best solutions out there (three that are software and one that’s a service). More on those in a bit.
- Cross your fingers. As long as you don’t use your hard drive immediately after formatting, chances are good you can recover your data. But some factors, like your hard drive type, can end up making recovery impossible.
Basics of Hard Drive Formatting: A Quick Guide
To better understand how you can recover files from a formatted hard drive on a Mac, it’s best to get a basic grasp of what formatting means.
In most cases, formatting a hard drive refers to creating or changing a drive’s format system. All drives need a format system. Simply put, the format is the specific way information on the drive is organized. Without that system of organization, the operating system cannot interact with the disk, as it would be unable to read the data stored on it.
Different operating systems can read data based on specific file systems. Modern Macs are compatible with three file systems: Apple File System (APFS), Mac OS Extended (HFS+), and MS-DOS (FAT) & exFAT (also compatible with Microsoft). macOS can also natively read files and folders on NTFS-formatted drives, however, it cannot write to NTFS drives by default.
As a result, you may find yourself needing to reformat a drive to make it compatible with your Mac. Fixing a corrupted hard drive may also mean you need to reformat. And you may have even reformatted your drive entirely by accident.
Regardless of the reason for formatting, you can potentially retrieve your files, as they aren’t truly gone until new data is written on the drive.
How to Recover Files From a Formatted Hard Drive on a Mac
There are a few ways to recover deleted files on a Mac. But when it comes to getting your data back from a formatted hard drive, your best bet is to use third-party software to get your data back (a.k.a, “unformat your Mac hard drive”). Don’t worry—it’s not as scary as it sounds.
Below are the three best options we’ve found for formatted Mac hard drive recovery.
Option A: Disk Drill for Mac
Disk Drill is without a doubt our go-to option if we want to recover files from an erased hard drive on a Mac. Among the best data recovery software options out there, Disk Drill is remarkably simple to use. And it boasts an impressive 90% recovery rate—not bad at all.
![]()
This data recovery software is free to use and capable of recovering hundreds of file formats from storage devices. Whether your drive is formatted, corrupted, or even perfectly healthy, Disk Drill is an excellent tool for data recovery.
Dive deeper into the specifics of Disk Drill by exploring our in-depth review. We also have a separate article focusing on the safety analysis of Disk Drill; however, our reviews are based on the Windows version. If you’re keen on learning more about the macOS version, we recommend these articles: review #1 and review #2.
To recover your deleted files from a formatted Mac hard drive using Disk Drill:
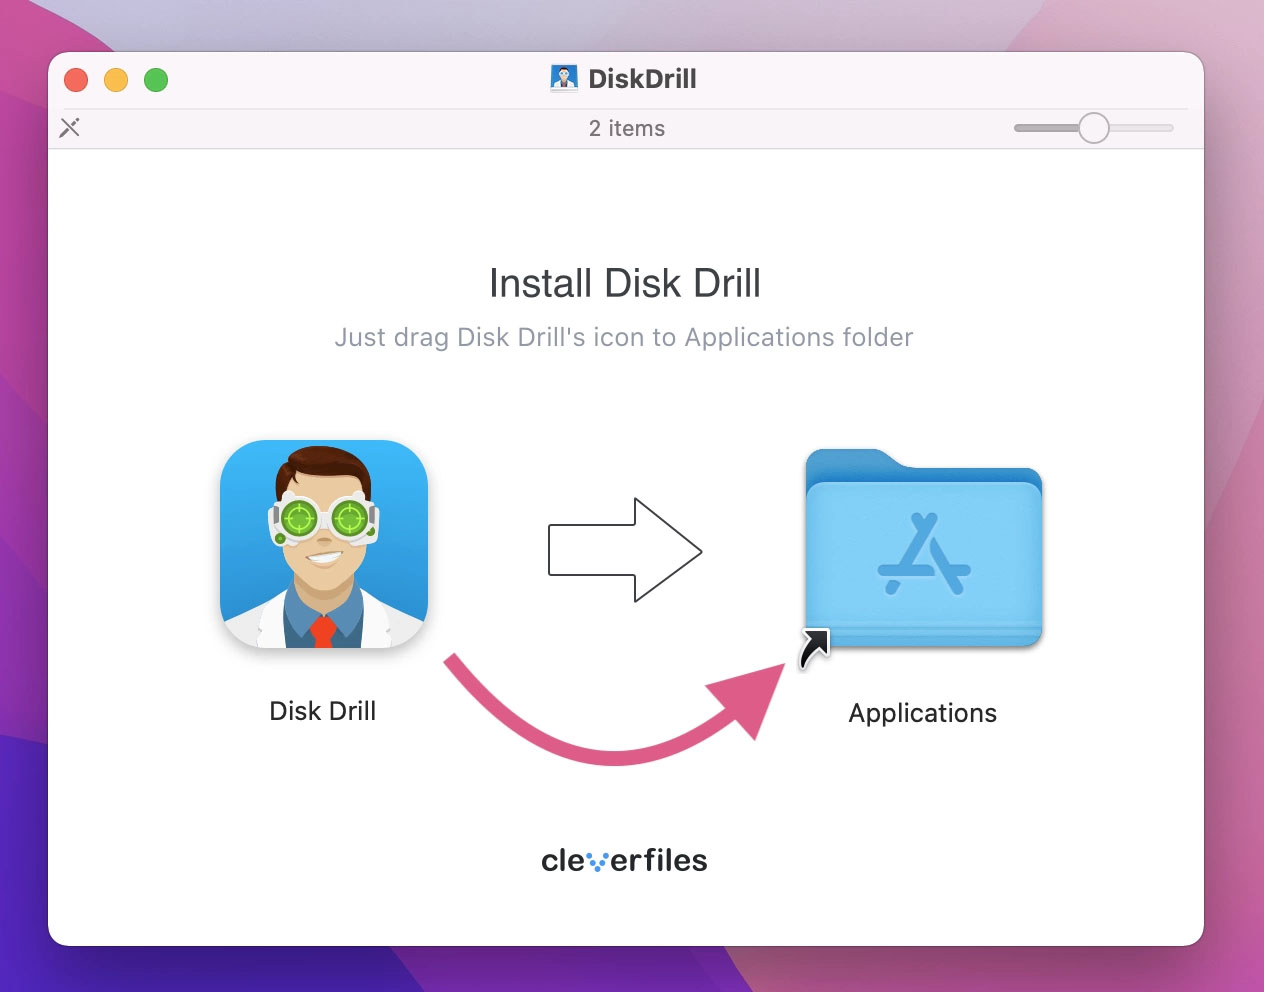
- Download Disk Drill and install it on your Mac by dragging the icon to the Applications folder.
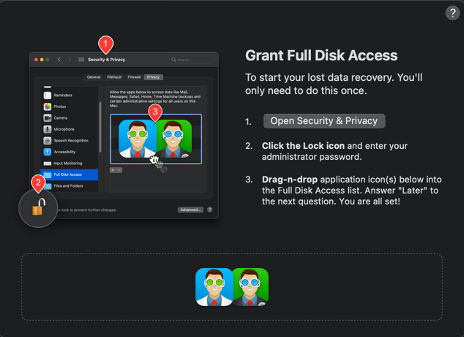
- Launch Disk Drill and grant it full disk access (required if you want Disk Drill to find your lost files).
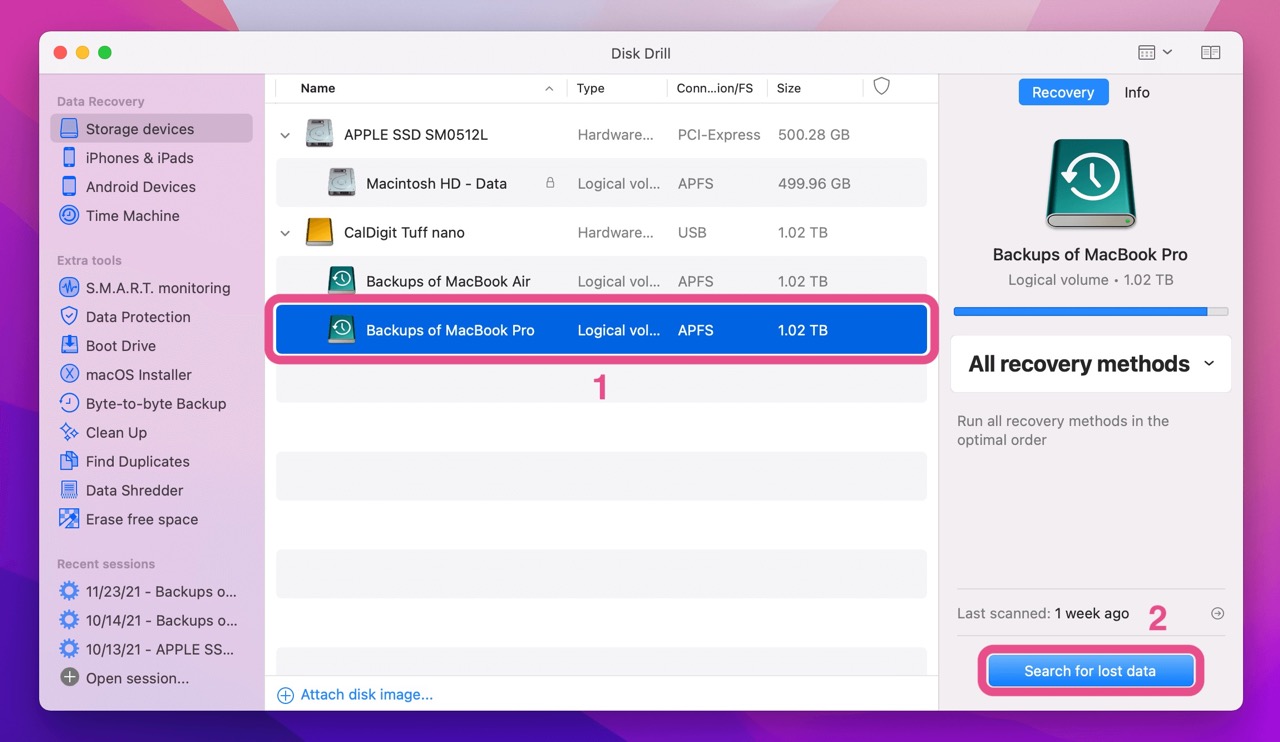
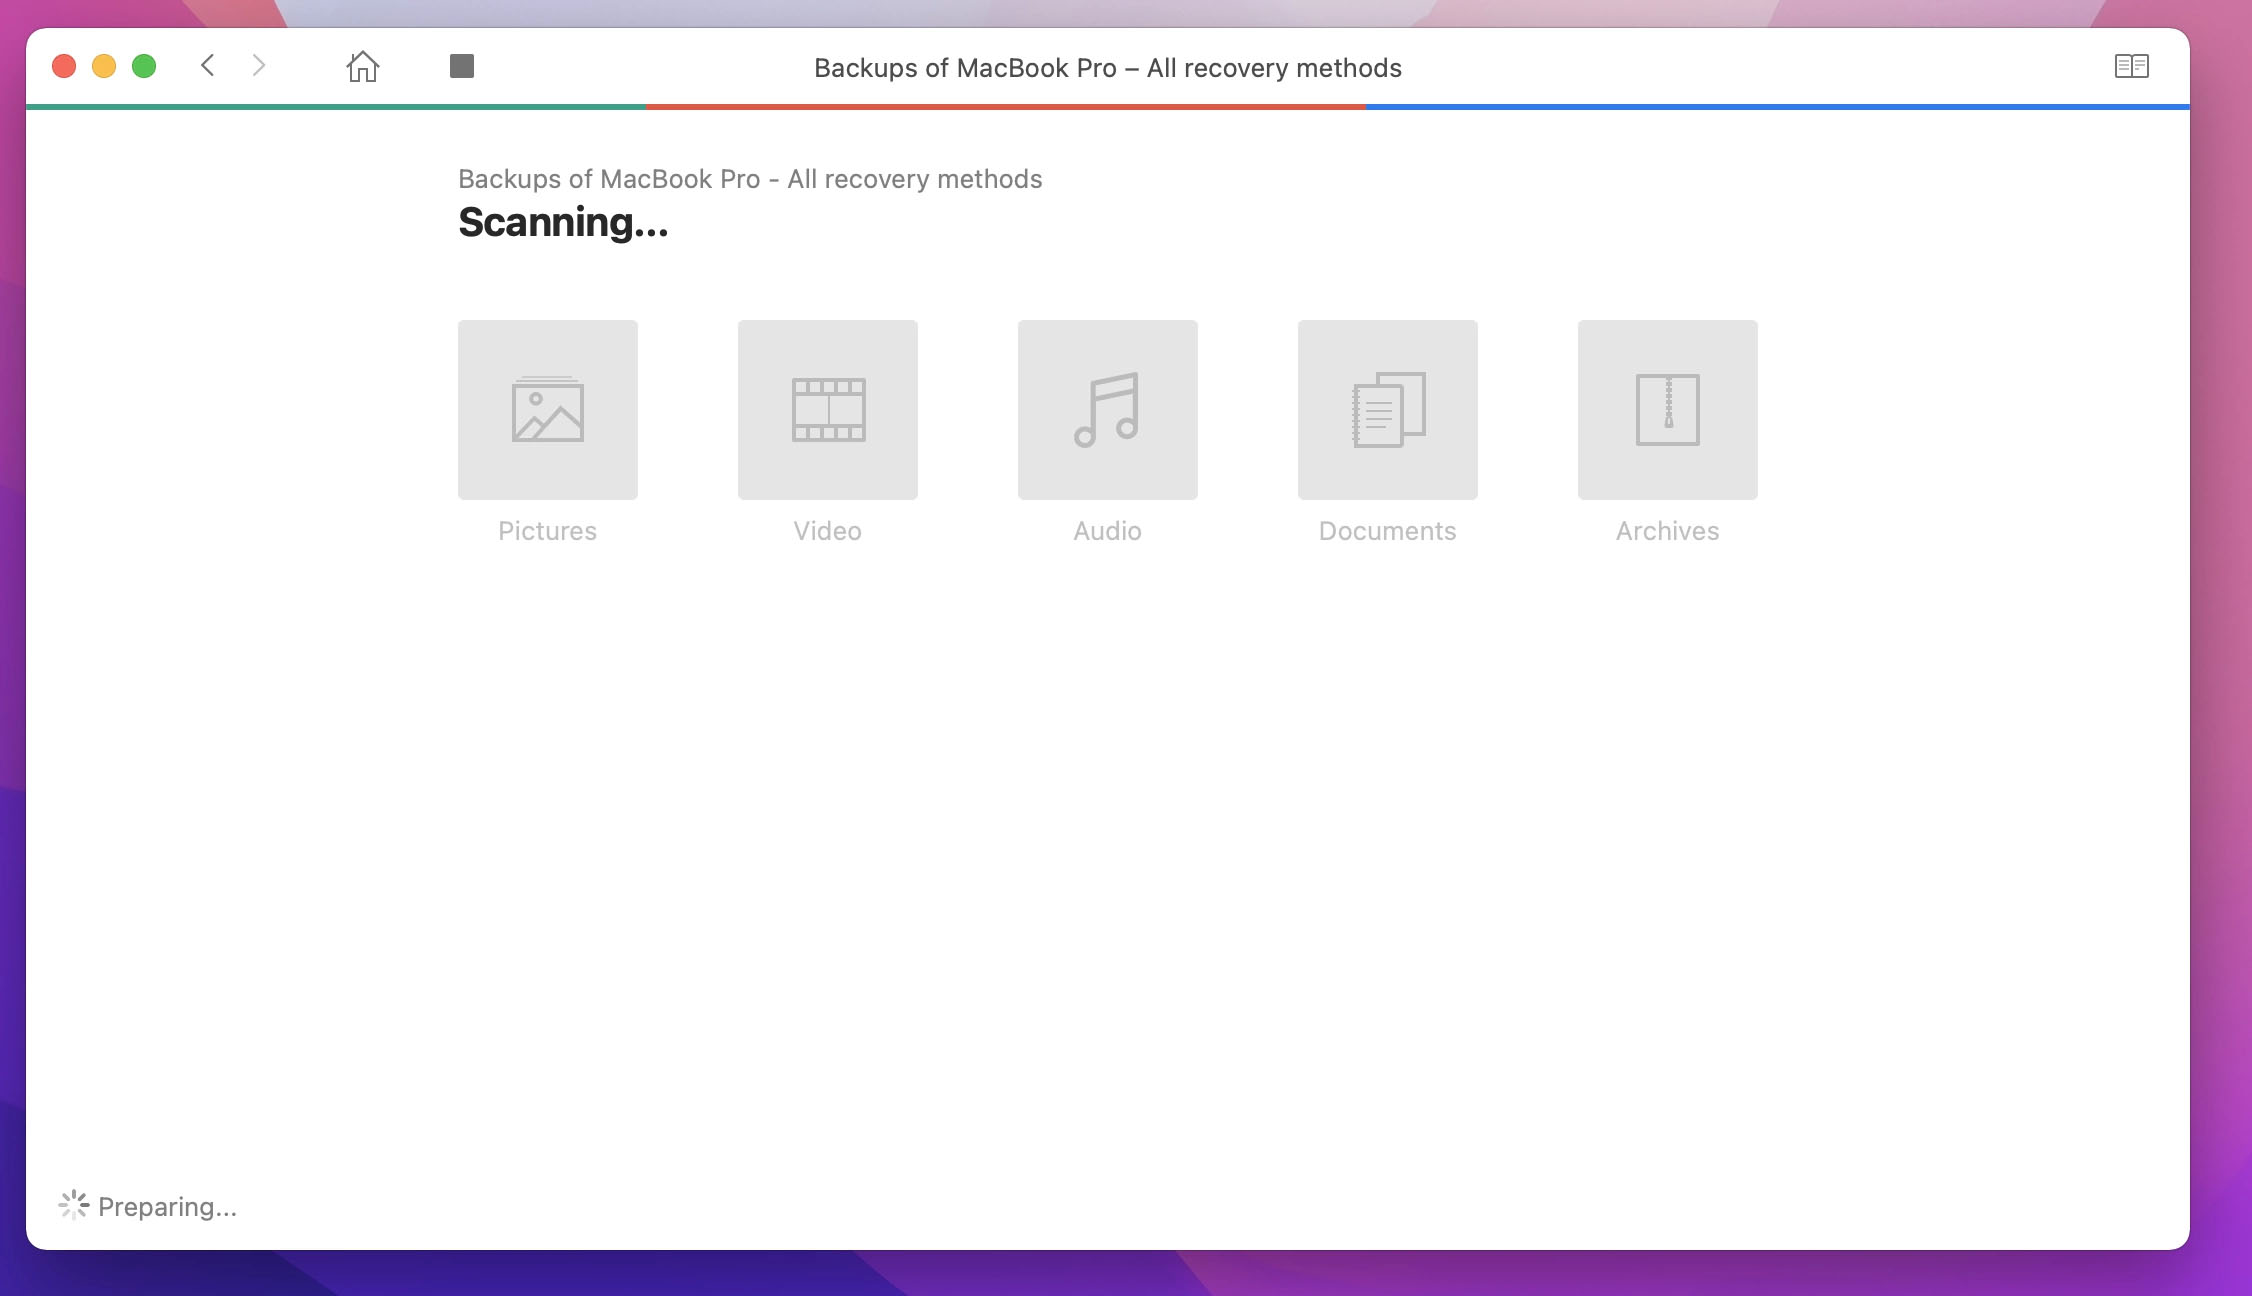
- Choose the formatted hard drive you want to scan and click the “Search for lost data” button to start the scan.
- Wait for the scan to finish. The duration may vary depending on several factors:
- Connection method
- Size of the drive
- Condition of the drive (if there are many bad blocks, the scan will slow down when reading them)
- Number of file systems on the disk
- Degree of disk fragmentation
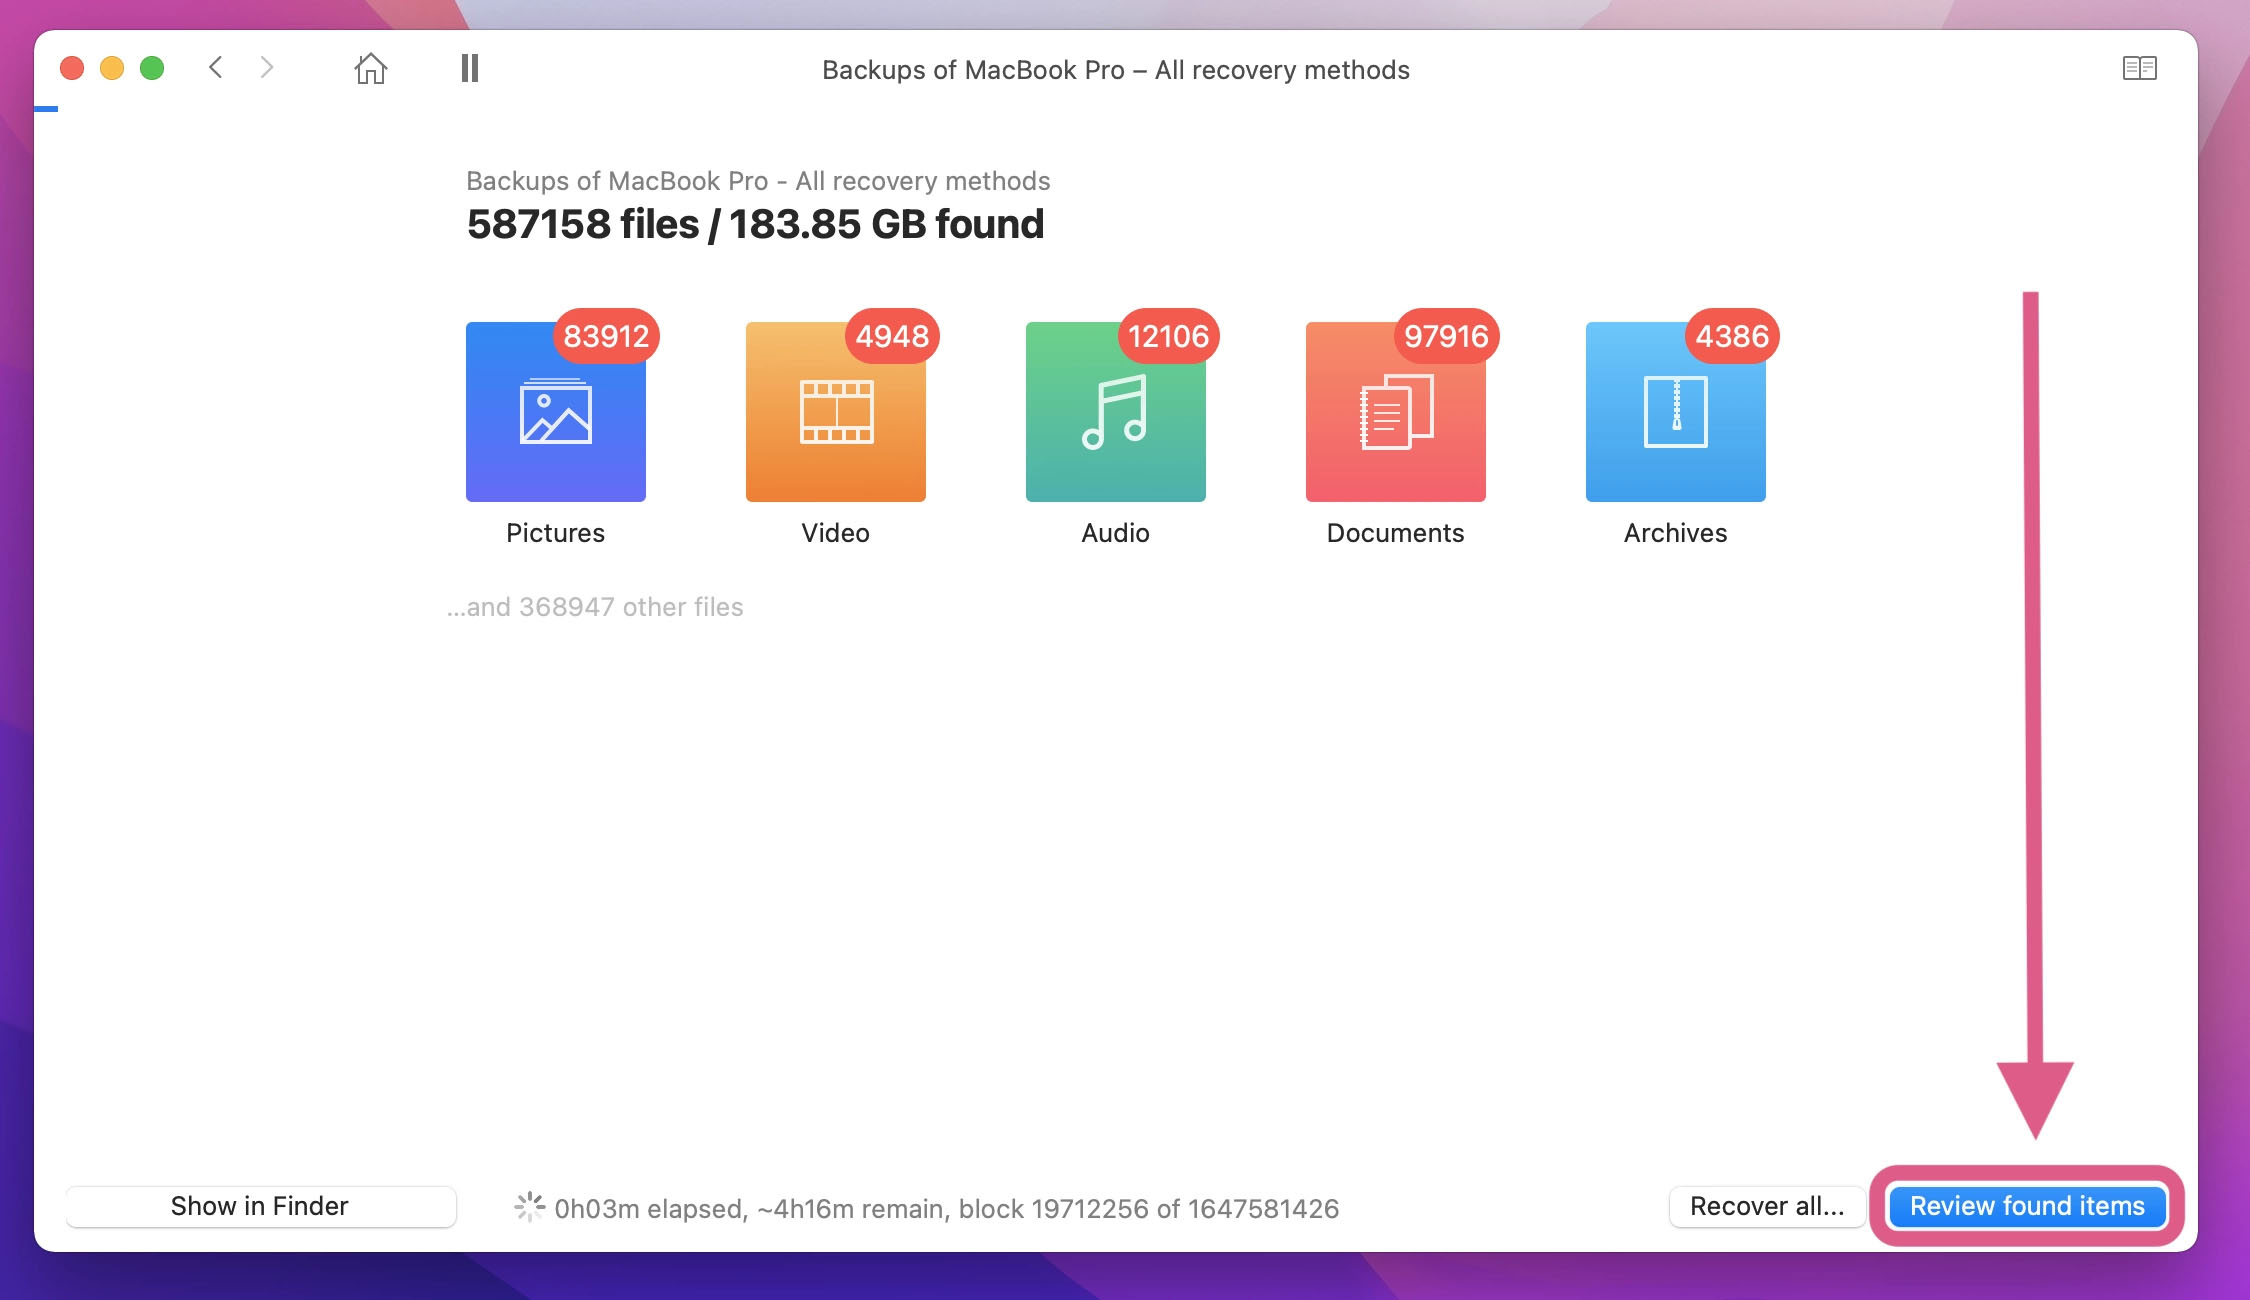
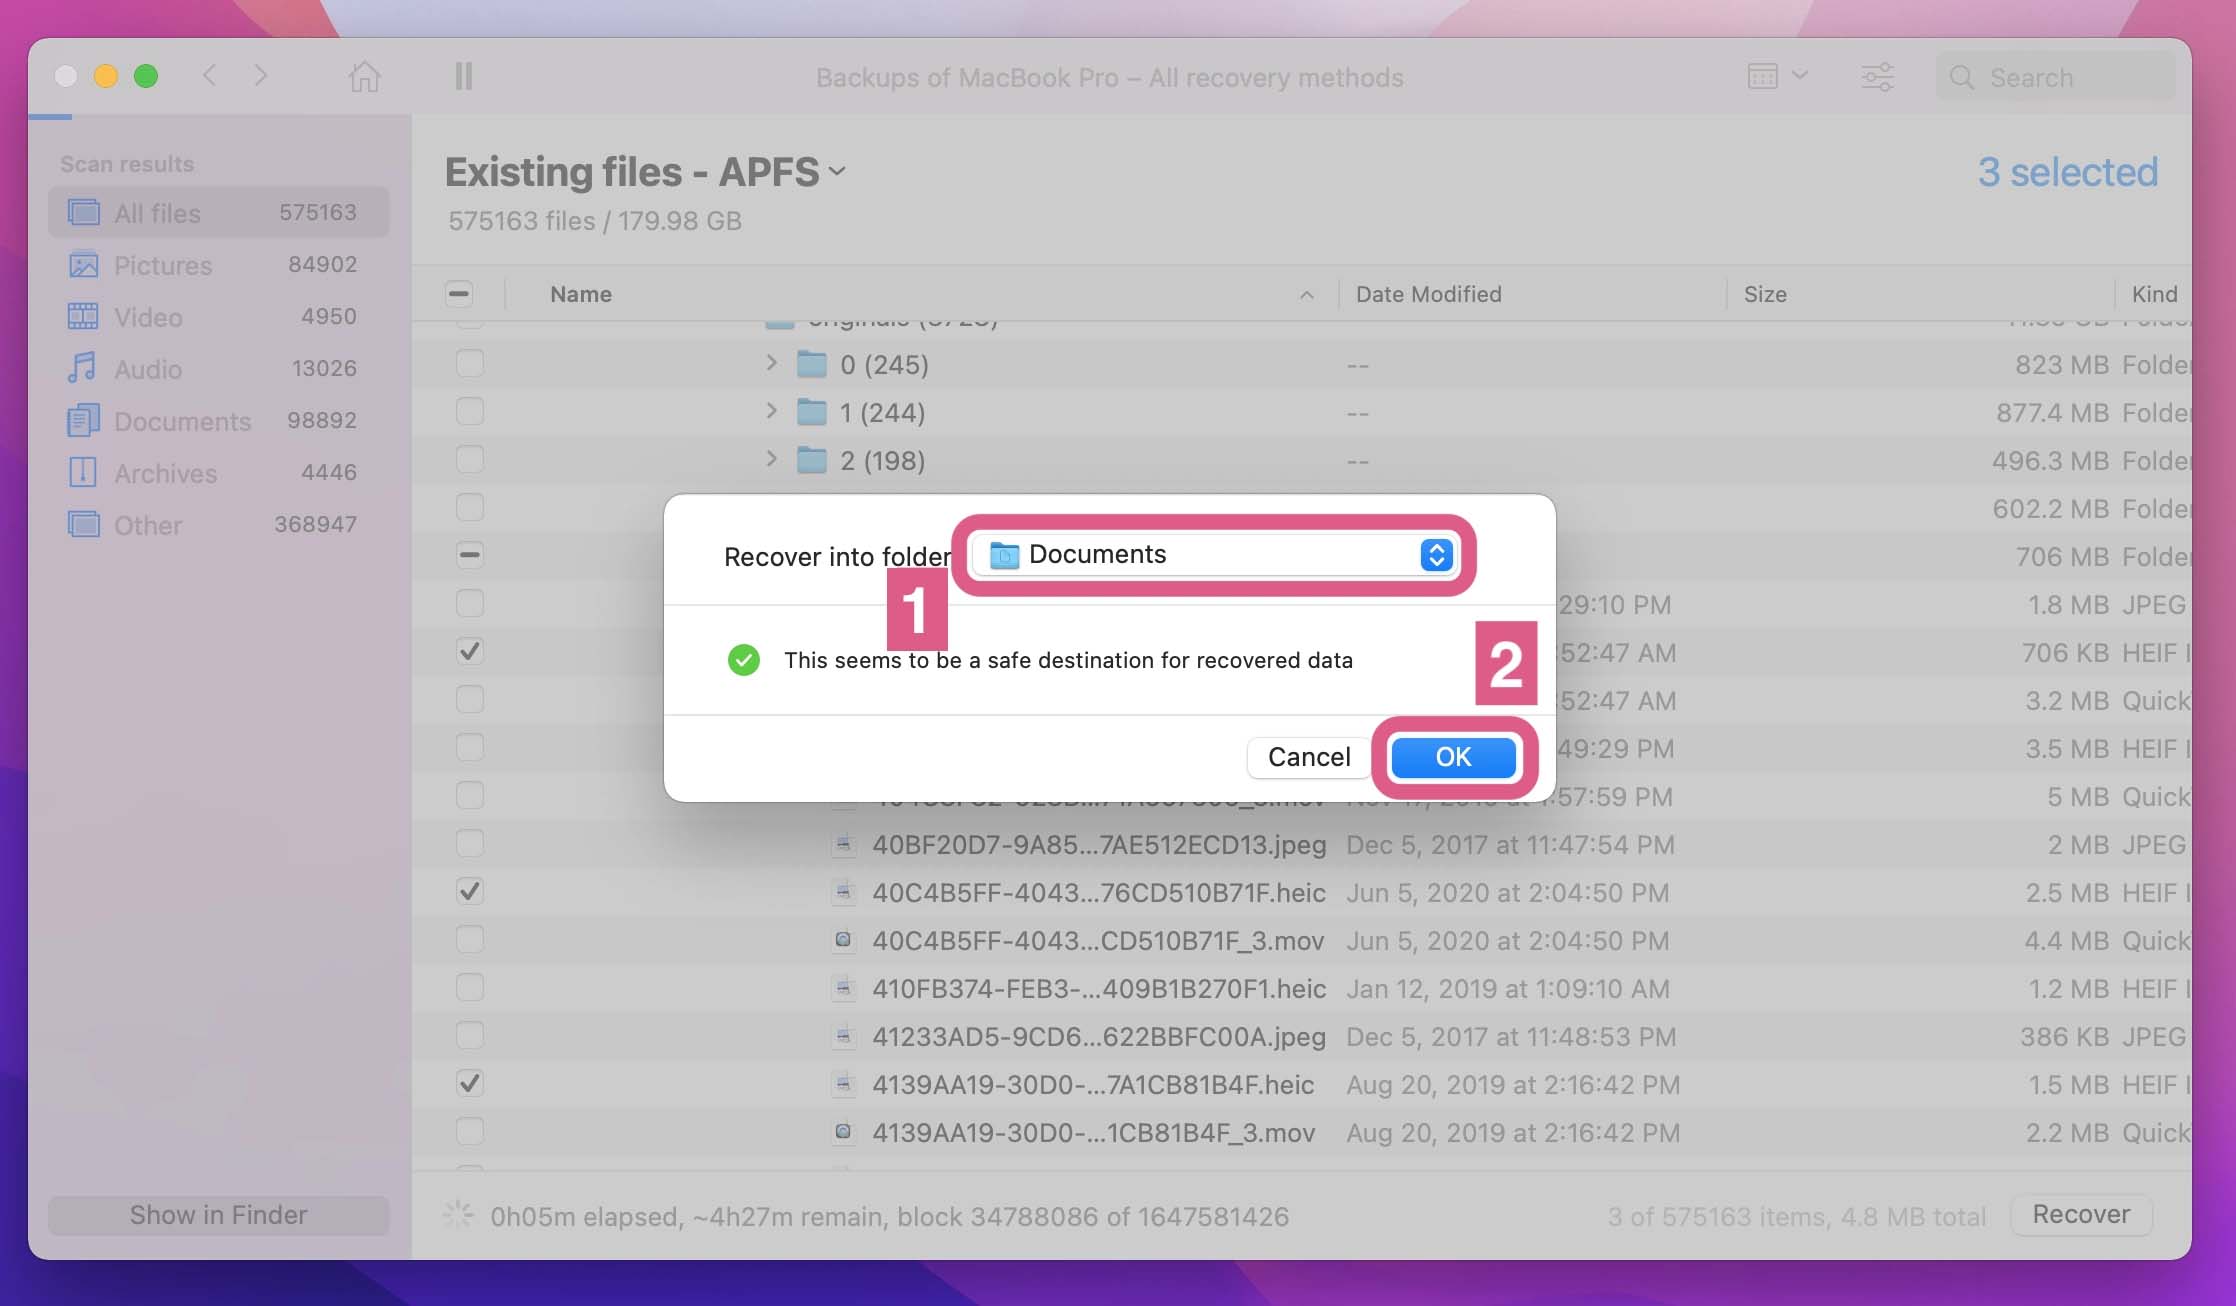
- Click “Review found items” to view the found files (or click “Recover all” to relocate everything found on the drive).
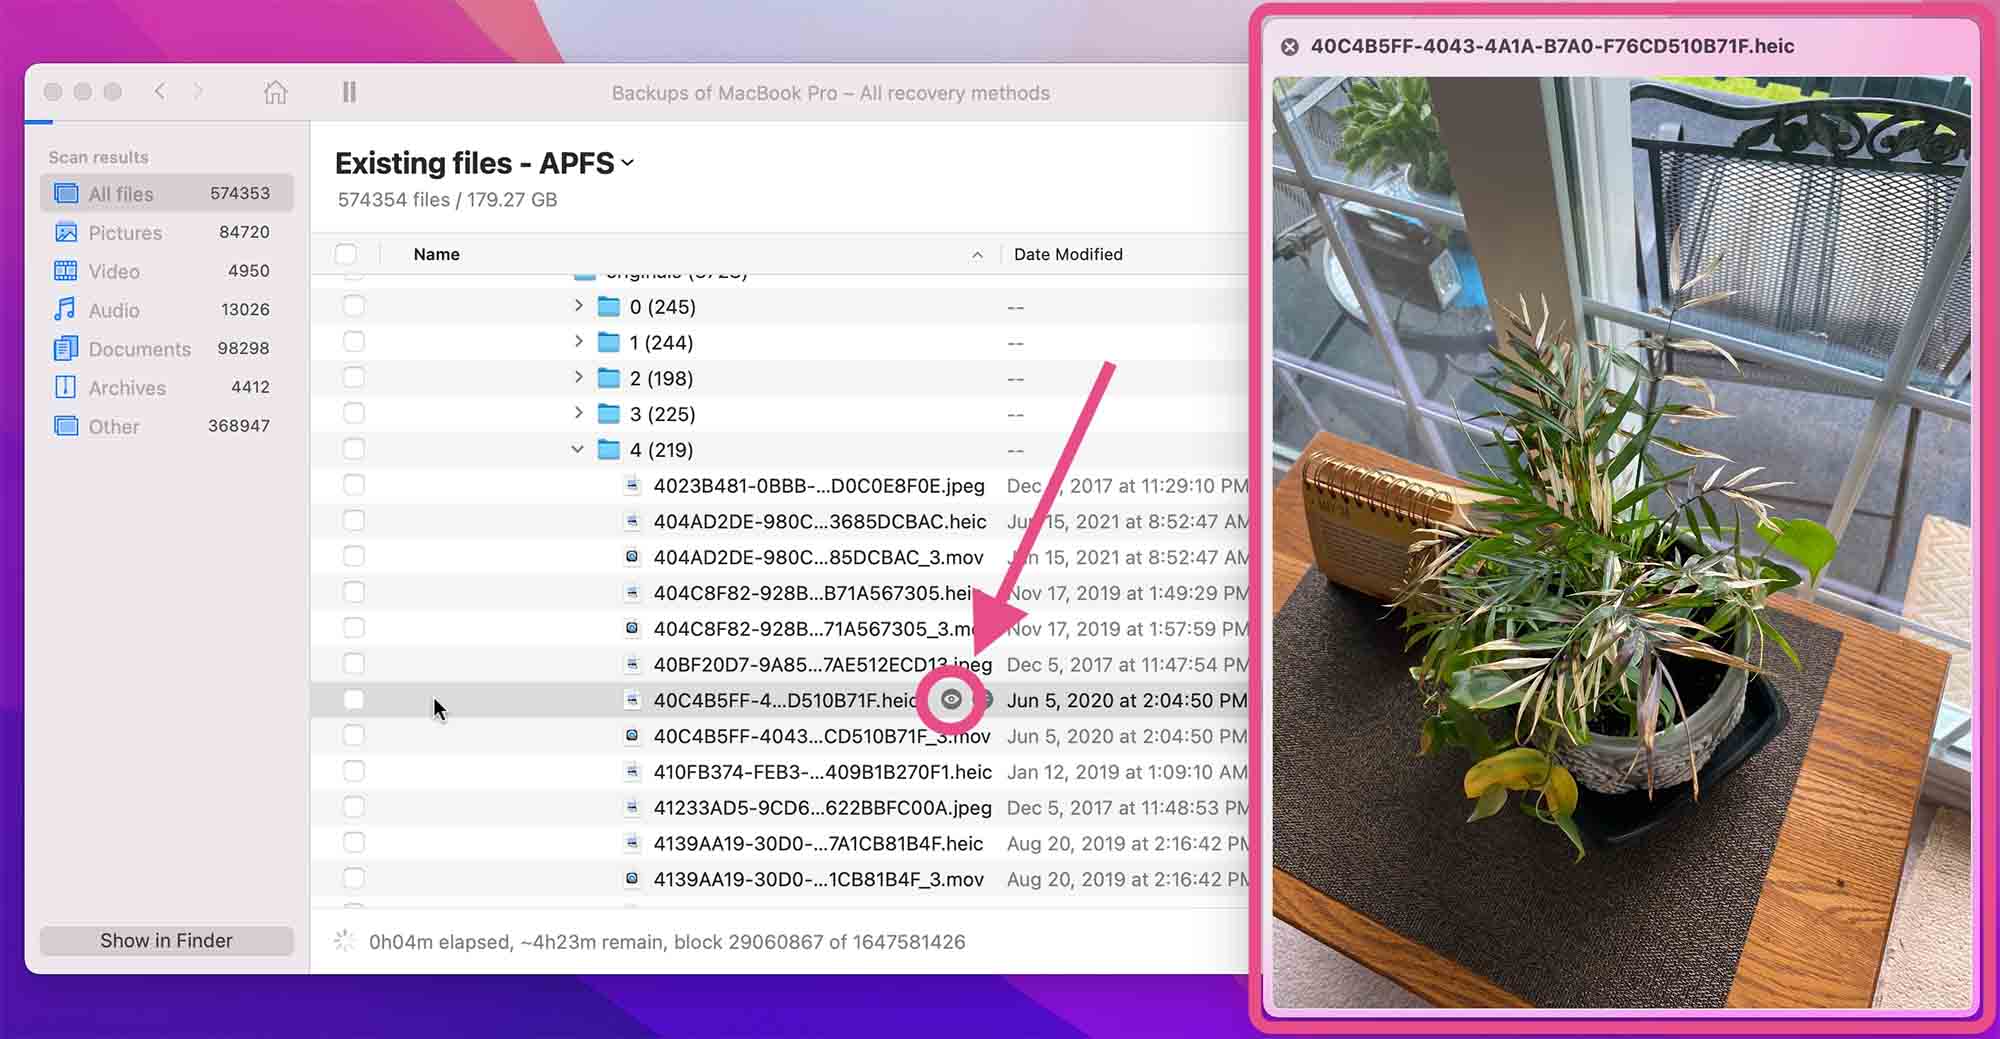
- Find the files you’re looking for. Click the eye icon next to the files to preview them.
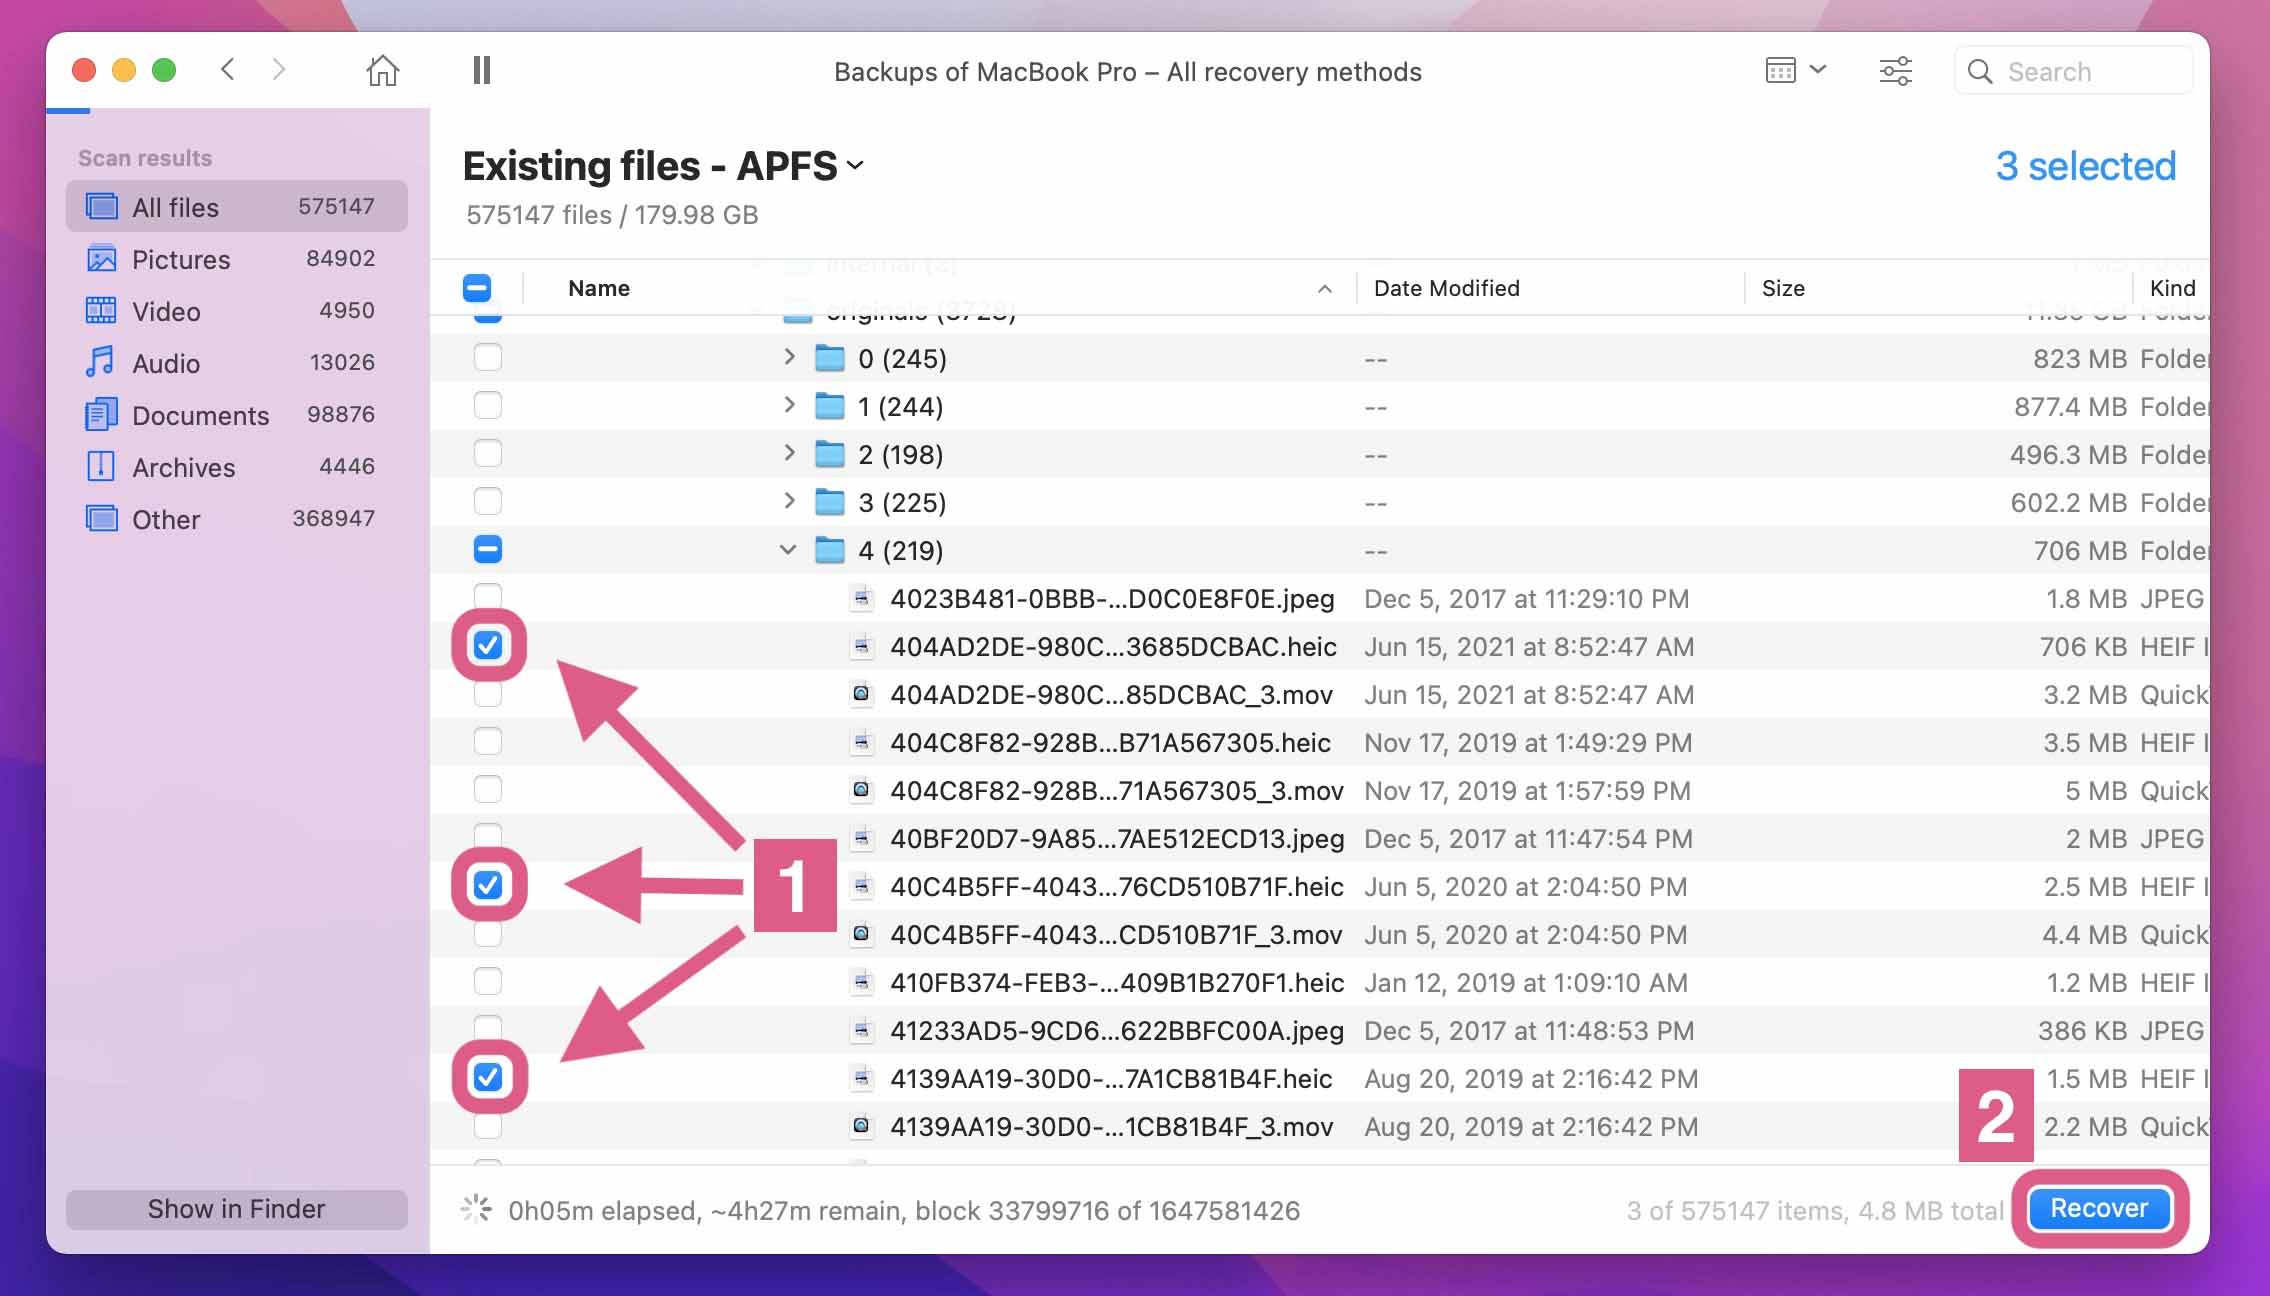
- Select the files you want to restore and click the “Recover” button.
- Choose the destination you’d like to restore them to and click the “OK” button. Make sure you don’t restore to the same drive to avoid overwriting the data.
Option B: PhotoRec
PhotoRec is another data recovery software option. It’s completely open-source, which means you won’t have to pay to use it. You’ll have to download and install two additional pieces of software to access it though, Homebrew and TestDisk.

It also doesn’t have a graphical interface (maybe a turn-off for some). But rest assured, it’s a snap to navigate.
Take a look at our detailed review on PhotoRec to learn more about using this recovery software.
To recover your files from a formatted Mac hard drive using PhotoRec:
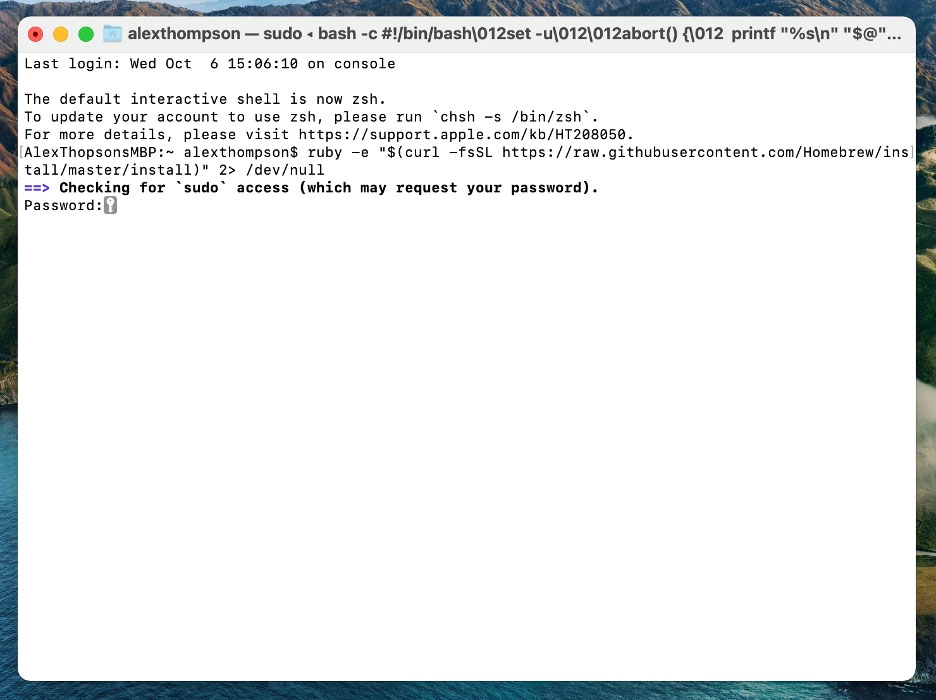
- Install Homebrew by navigating to Terminal (Command + Space, then type “Terminal”). Then copy and enter this command:
ruby -e "$(curl -fsSL https://raw.githubusercontent.com/Homebrew/install/master/install)" 2> /dev/null
You may need to enter your Mac user password. Do so and hit Enter (your screen will not show your password as you type as a security measure).
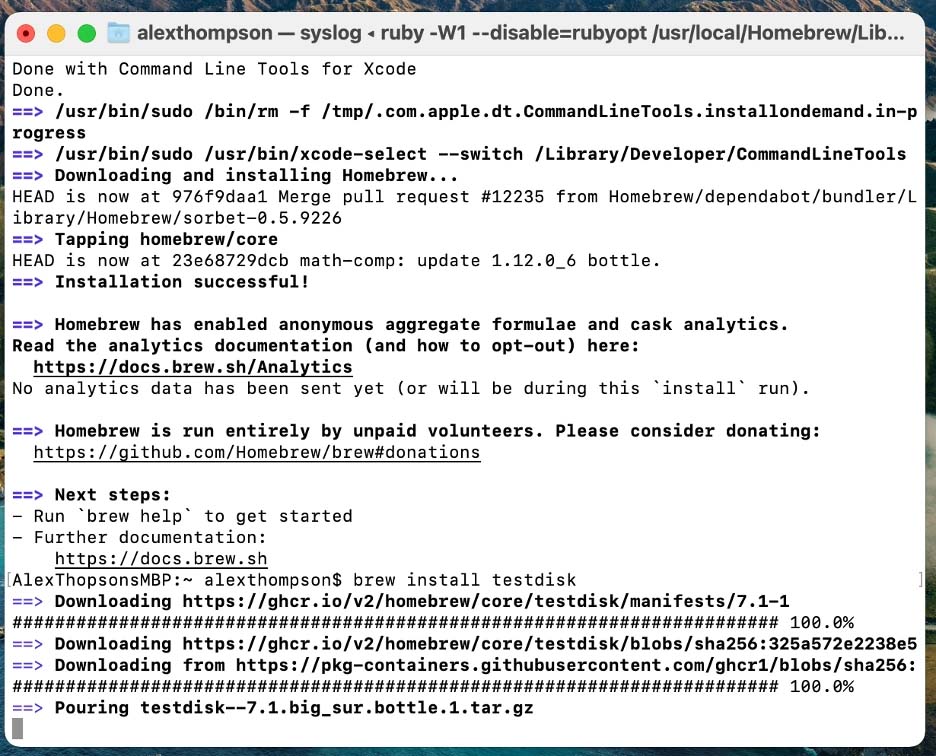
- Enter the following command to install TestDisk:
brew install testdisk
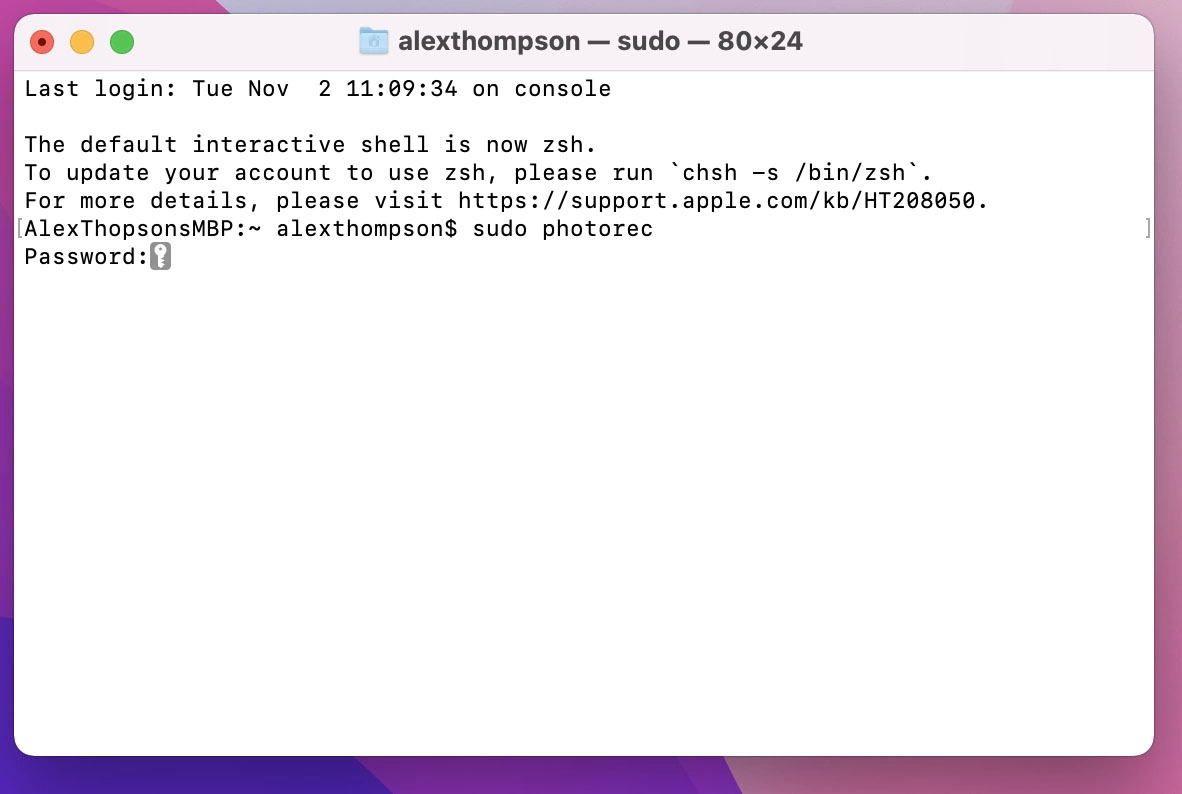
- Run PhotoRec by entering the following command:
sudo photorec
- Choose your drive from the populated list. If your formatted disk is not showing, check that it’s correctly connected to your Mac and relaunch PhotoRec.
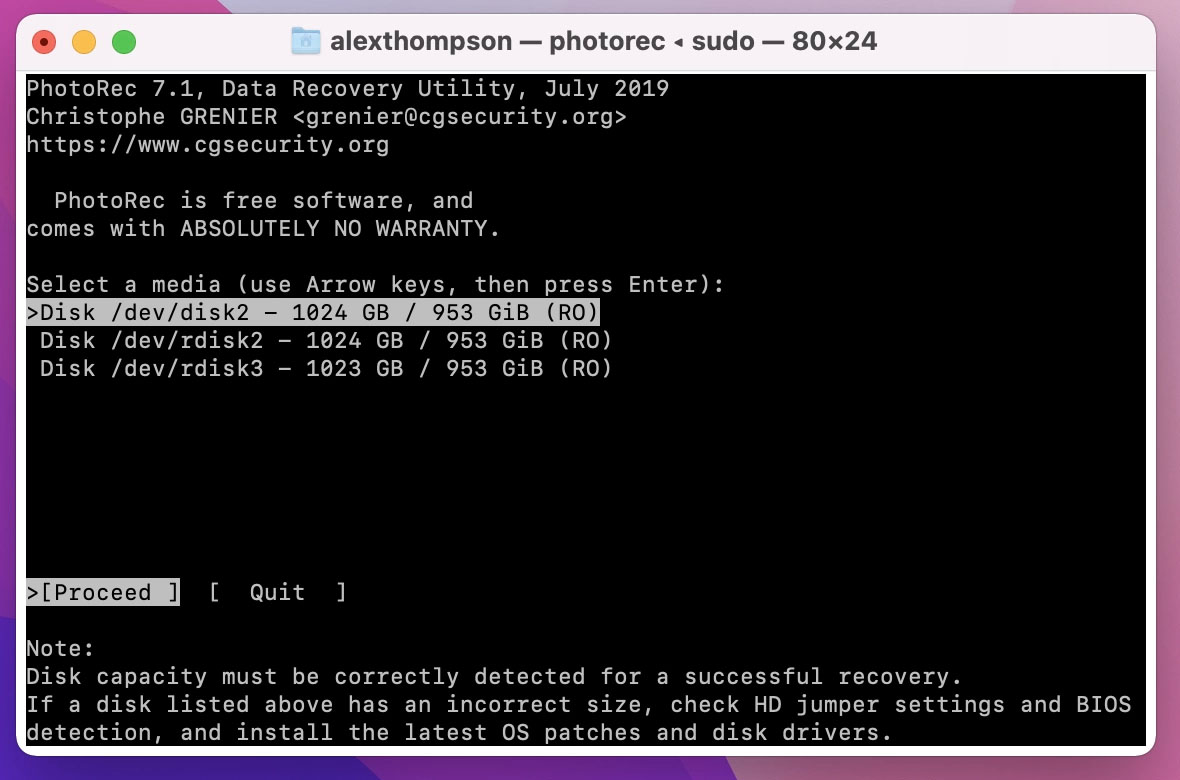
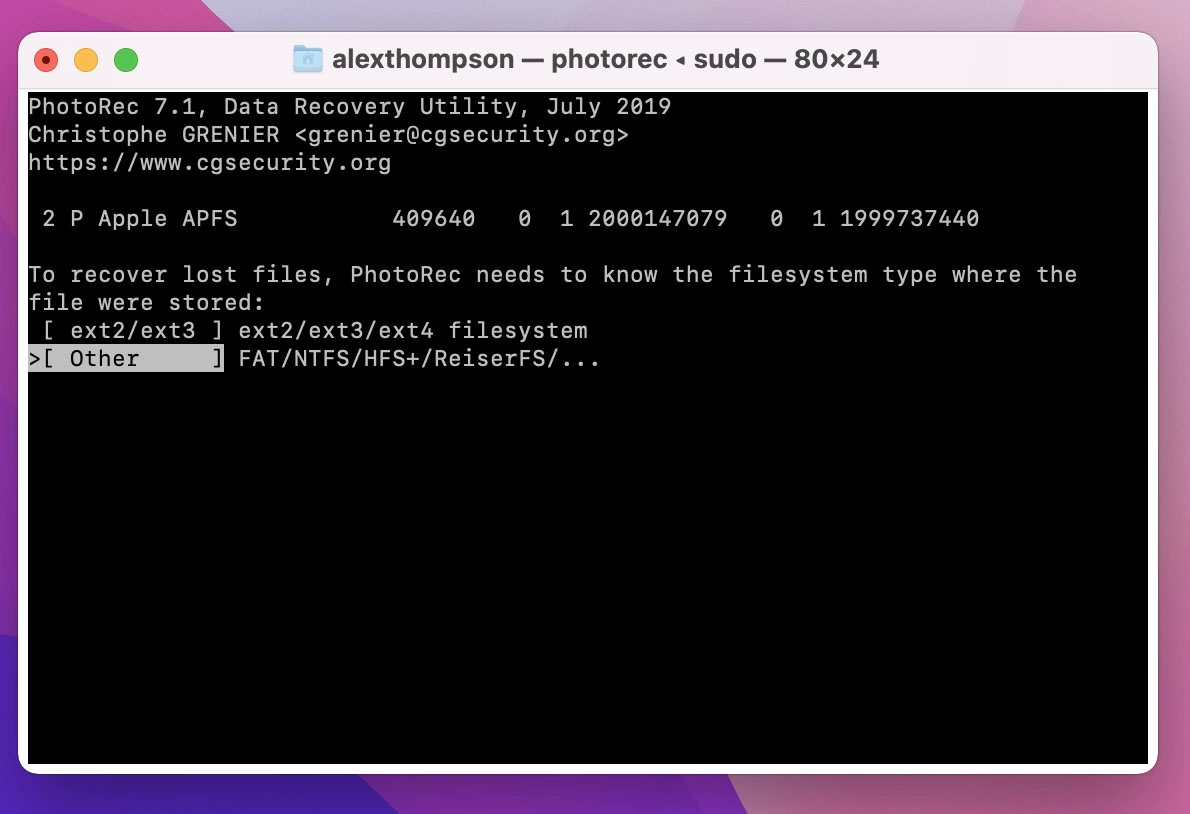
- Select the type of file format that the storage device uses.
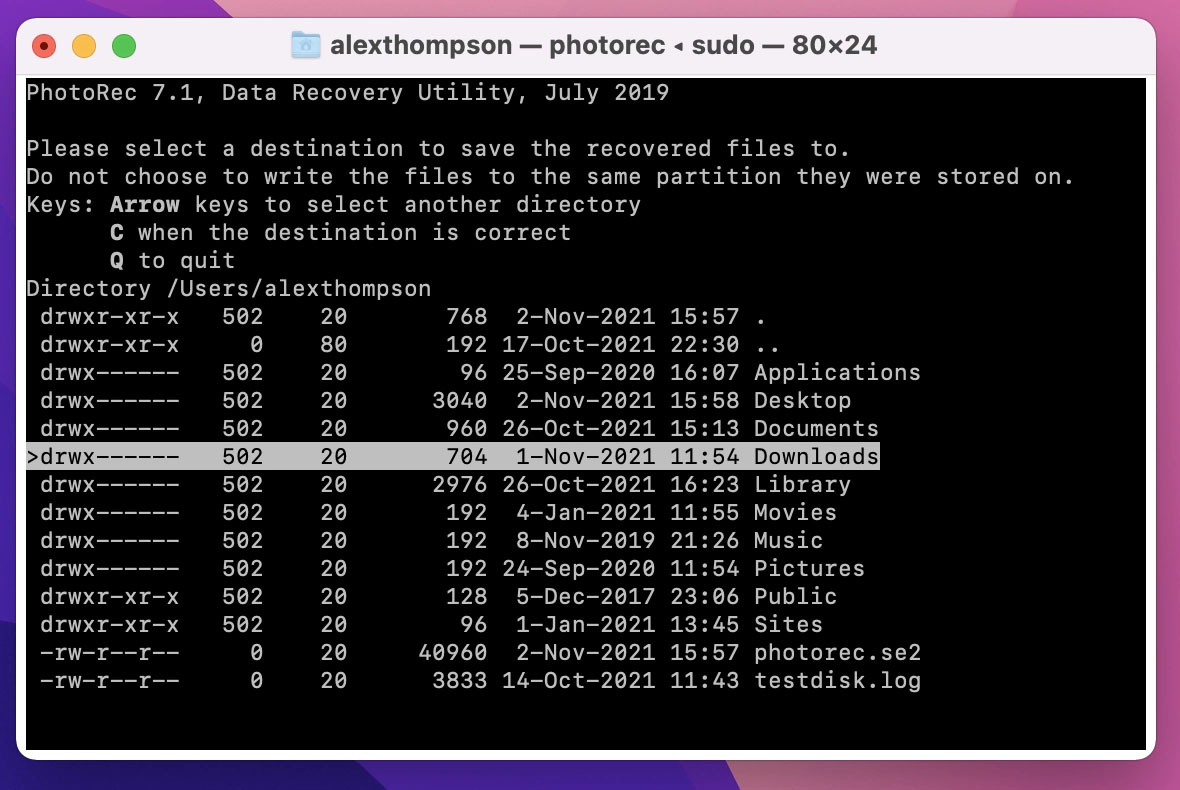
- Select the location you’d like to save the deleted files. You can’t select the individual files on the drive, so be sure you put them in a location that’s easy to navigate, as PhotoRec will recover all the files it finds.
- PhotoRec will then start recovering your missing files. You’ll receive a notification when the process is over. You’ll also be able to see how much of your data PhotoRec was able to recover. After that, head to the location you selected, and your recovered files will be there, good as new.
Option C: EaseUS Mac Data Recovery Software
Another option to recover an erased hard drive on a Mac is EaseUS. Featuring a smooth graphical interface, plenty of compatible file types, and yes, a free option, EaseUS is a favorite for data recovery.
![]()
That being said, you’re limited to 2GB of recovered files with the free version, which may be less than some users hoped. The paid plans may also be out of some people’s price range.
We’ve talked about EaseUS before. And if you want to get a better idea of how this recovery software stacks up, take a look at our comprehensive EaseUS review here.
To use EaseUS to restore a formatted hard drive on Mac:
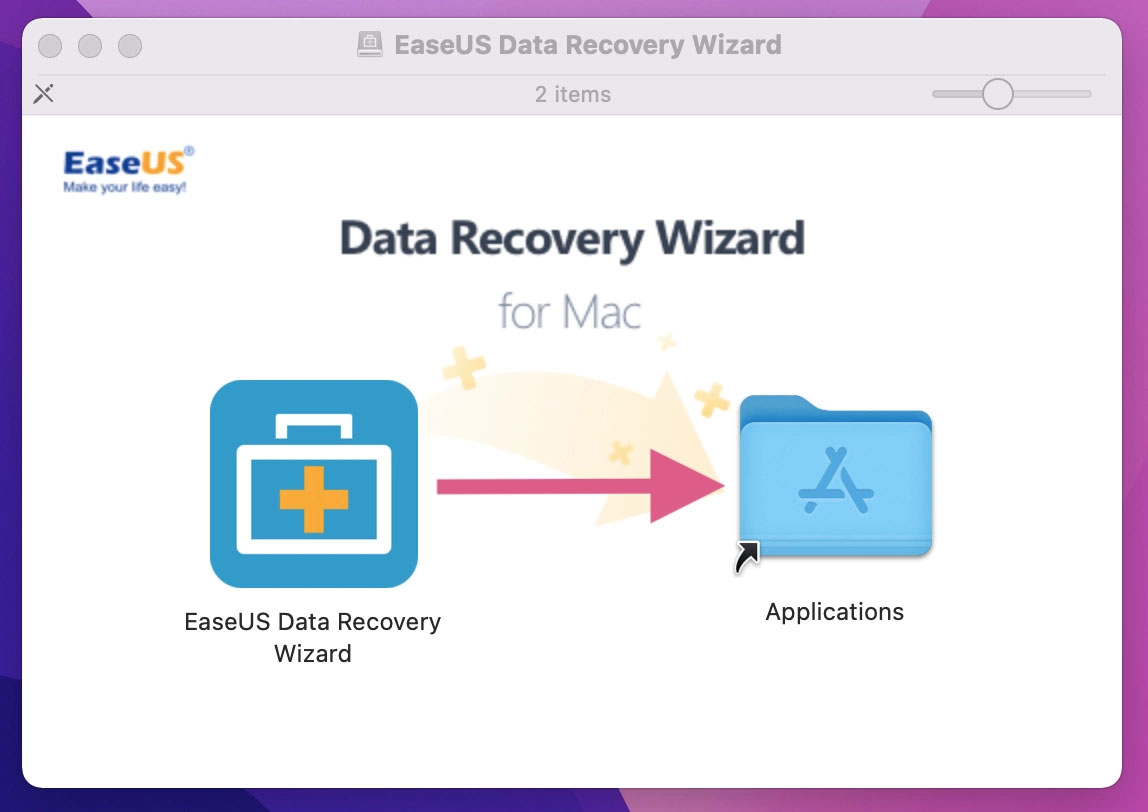
- Download and install EaseUS Data Recovery Wizard. You’ll want to make sure you’re downloading the “Free” version rather than the “Trial” version. The free version lets you recover up to 2GB of files. With the trial version, you’ll need to upgrade to a paid plan to recover any files.
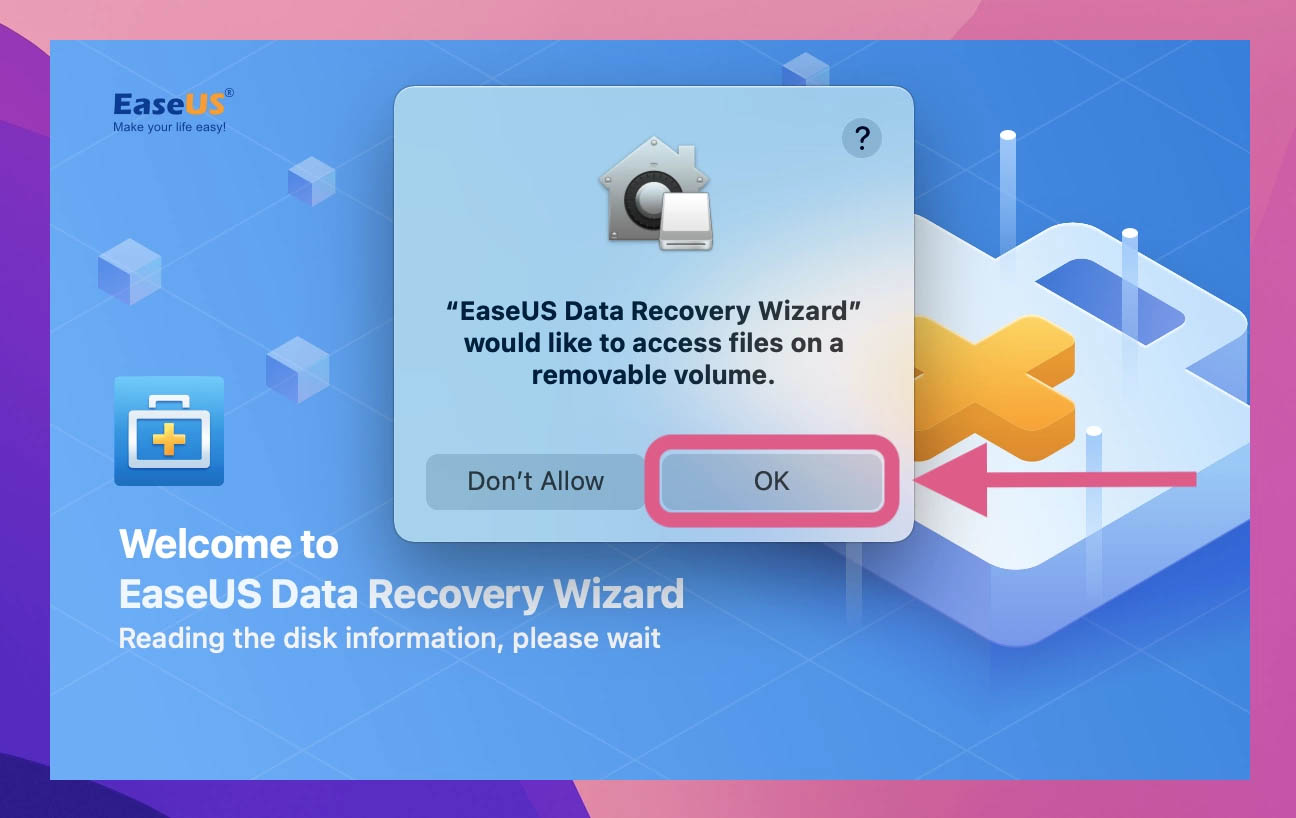
- Grant EaseUS permissions to access your drives (required for data recovery).
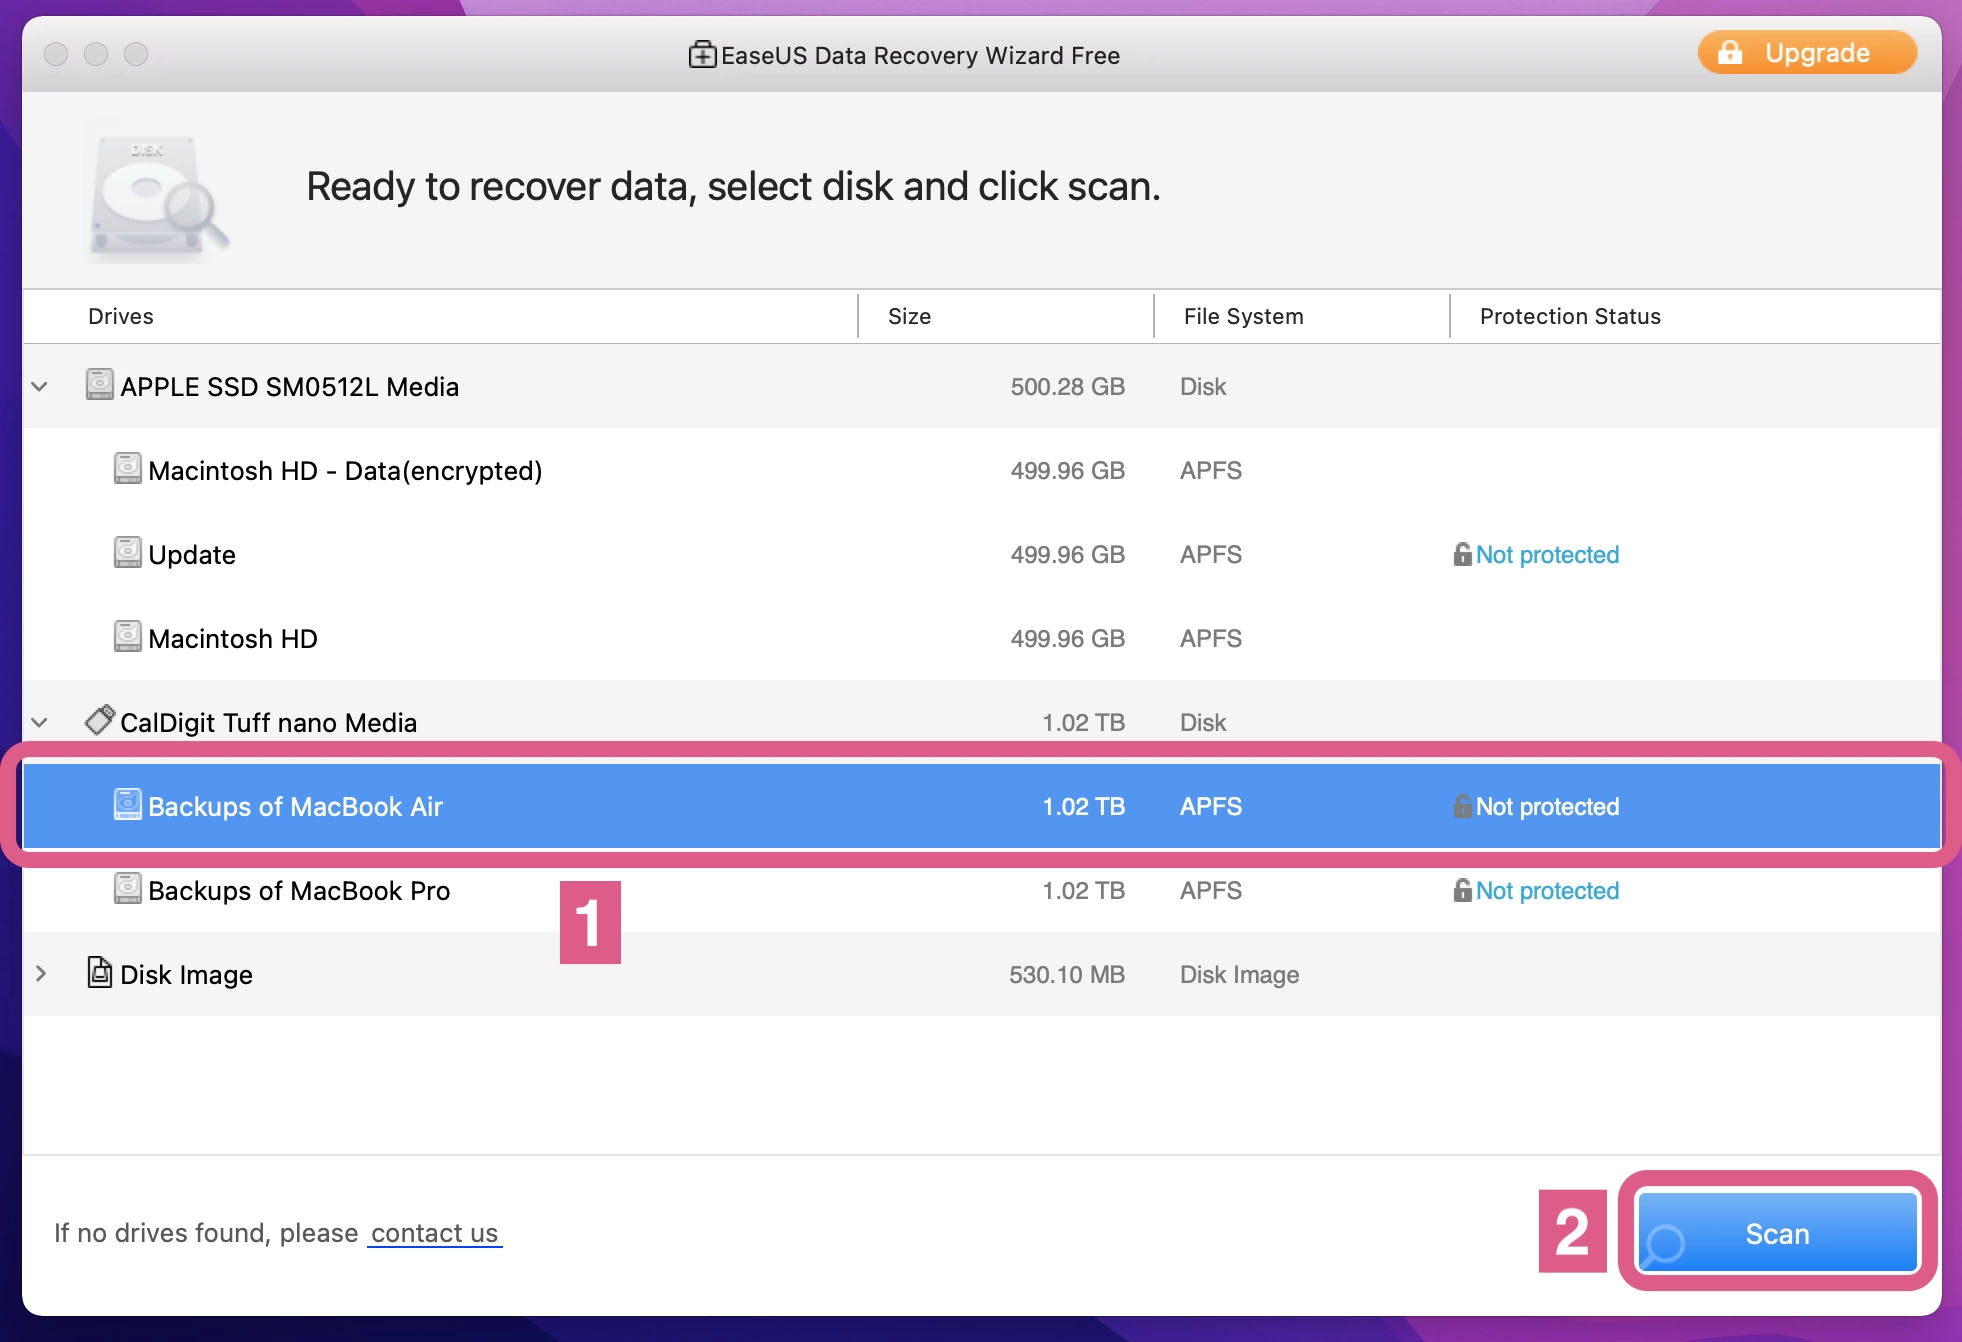
- Locate the formatted drive from which you’d like to recover files, and click the “Scan” button next to it.
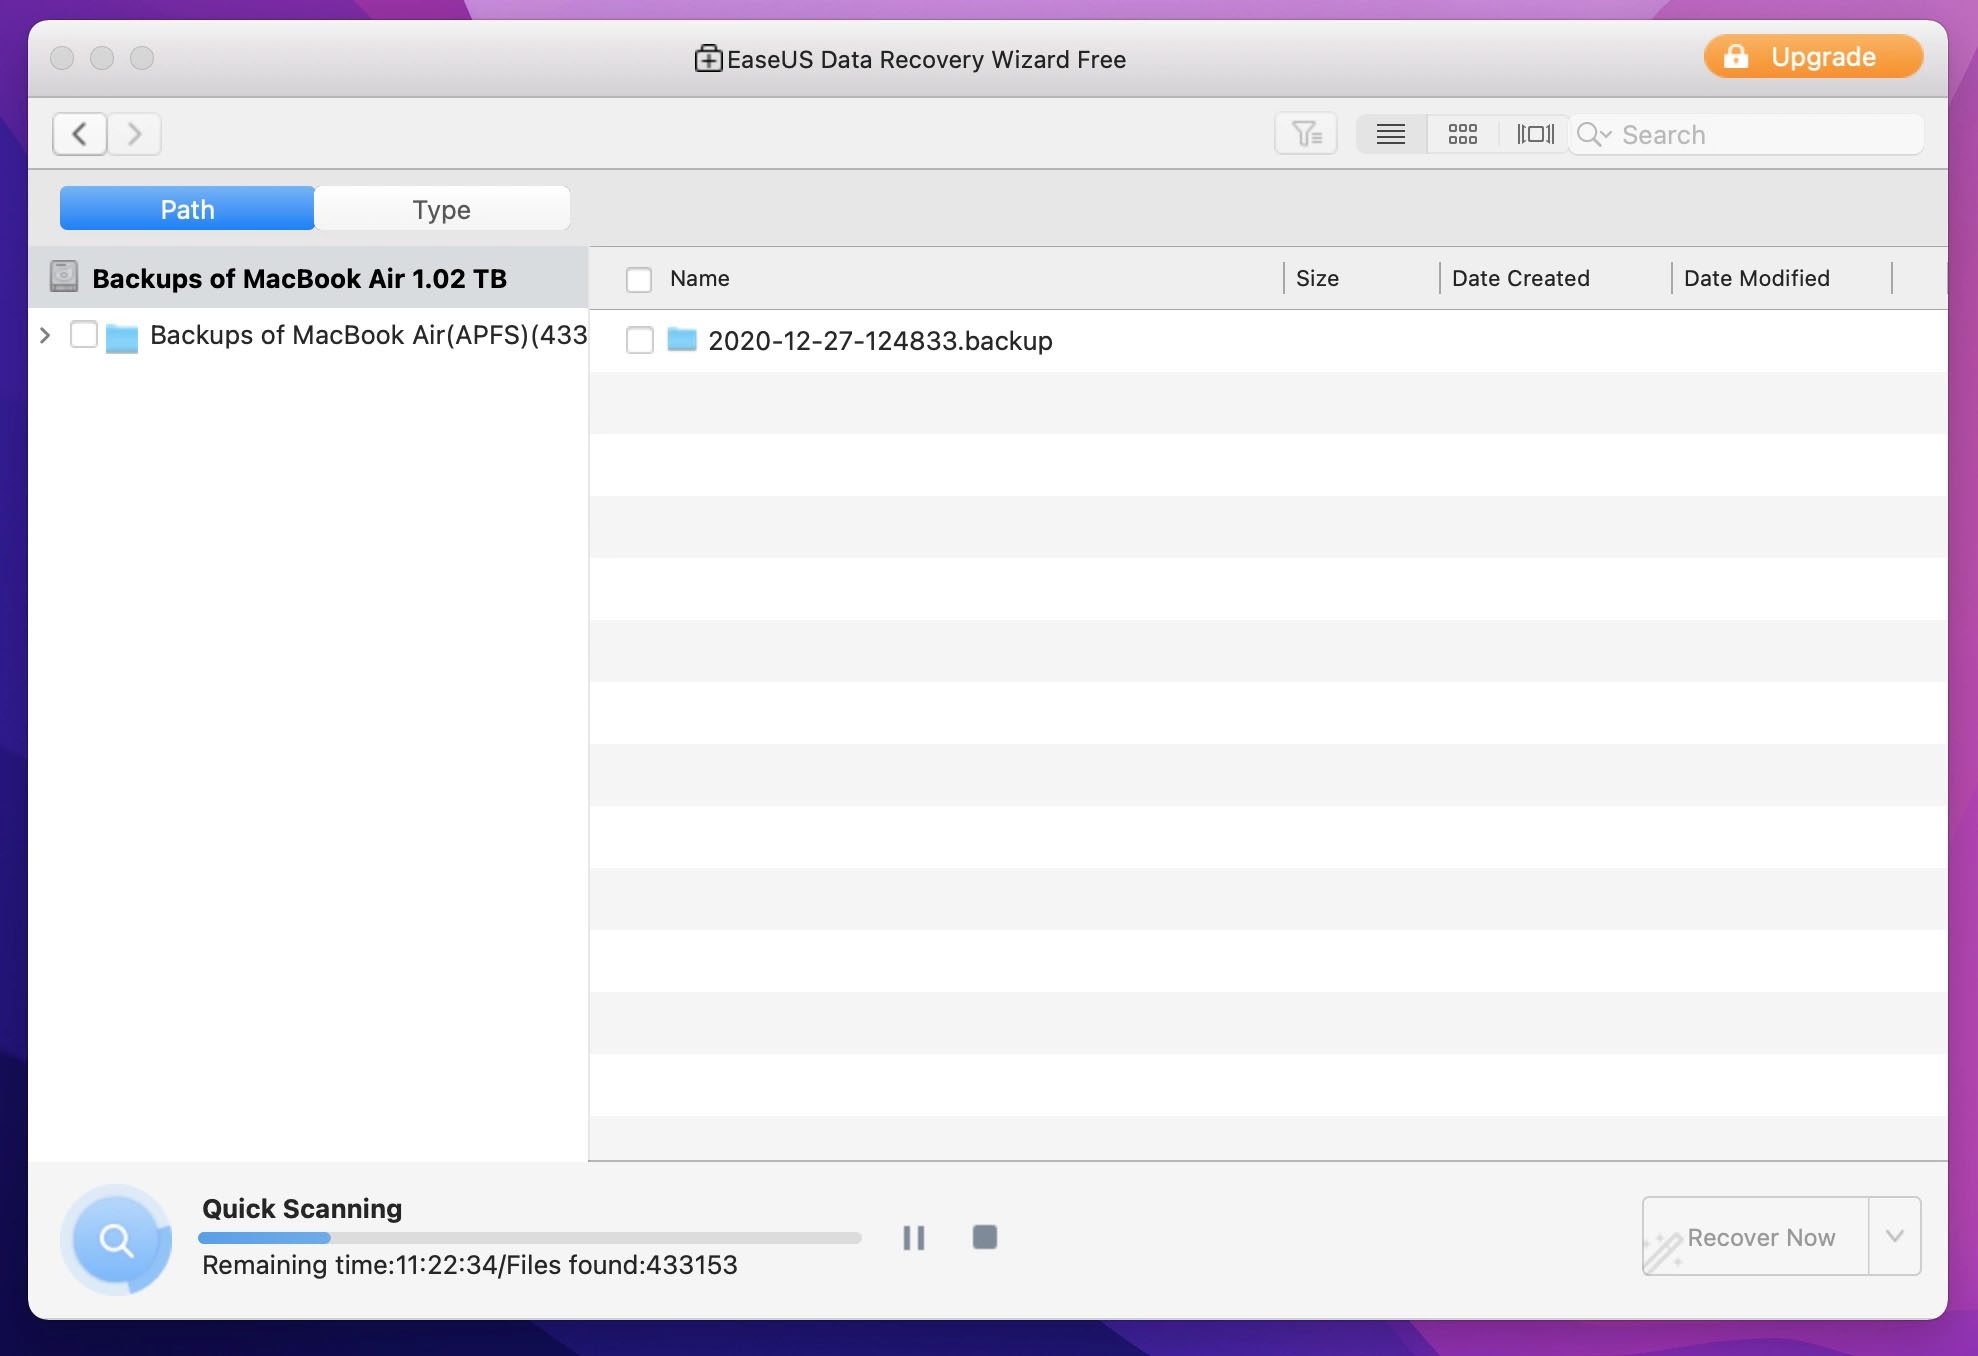
- Wait for the scan to complete. It may take a while, depending on the parameters we described above.
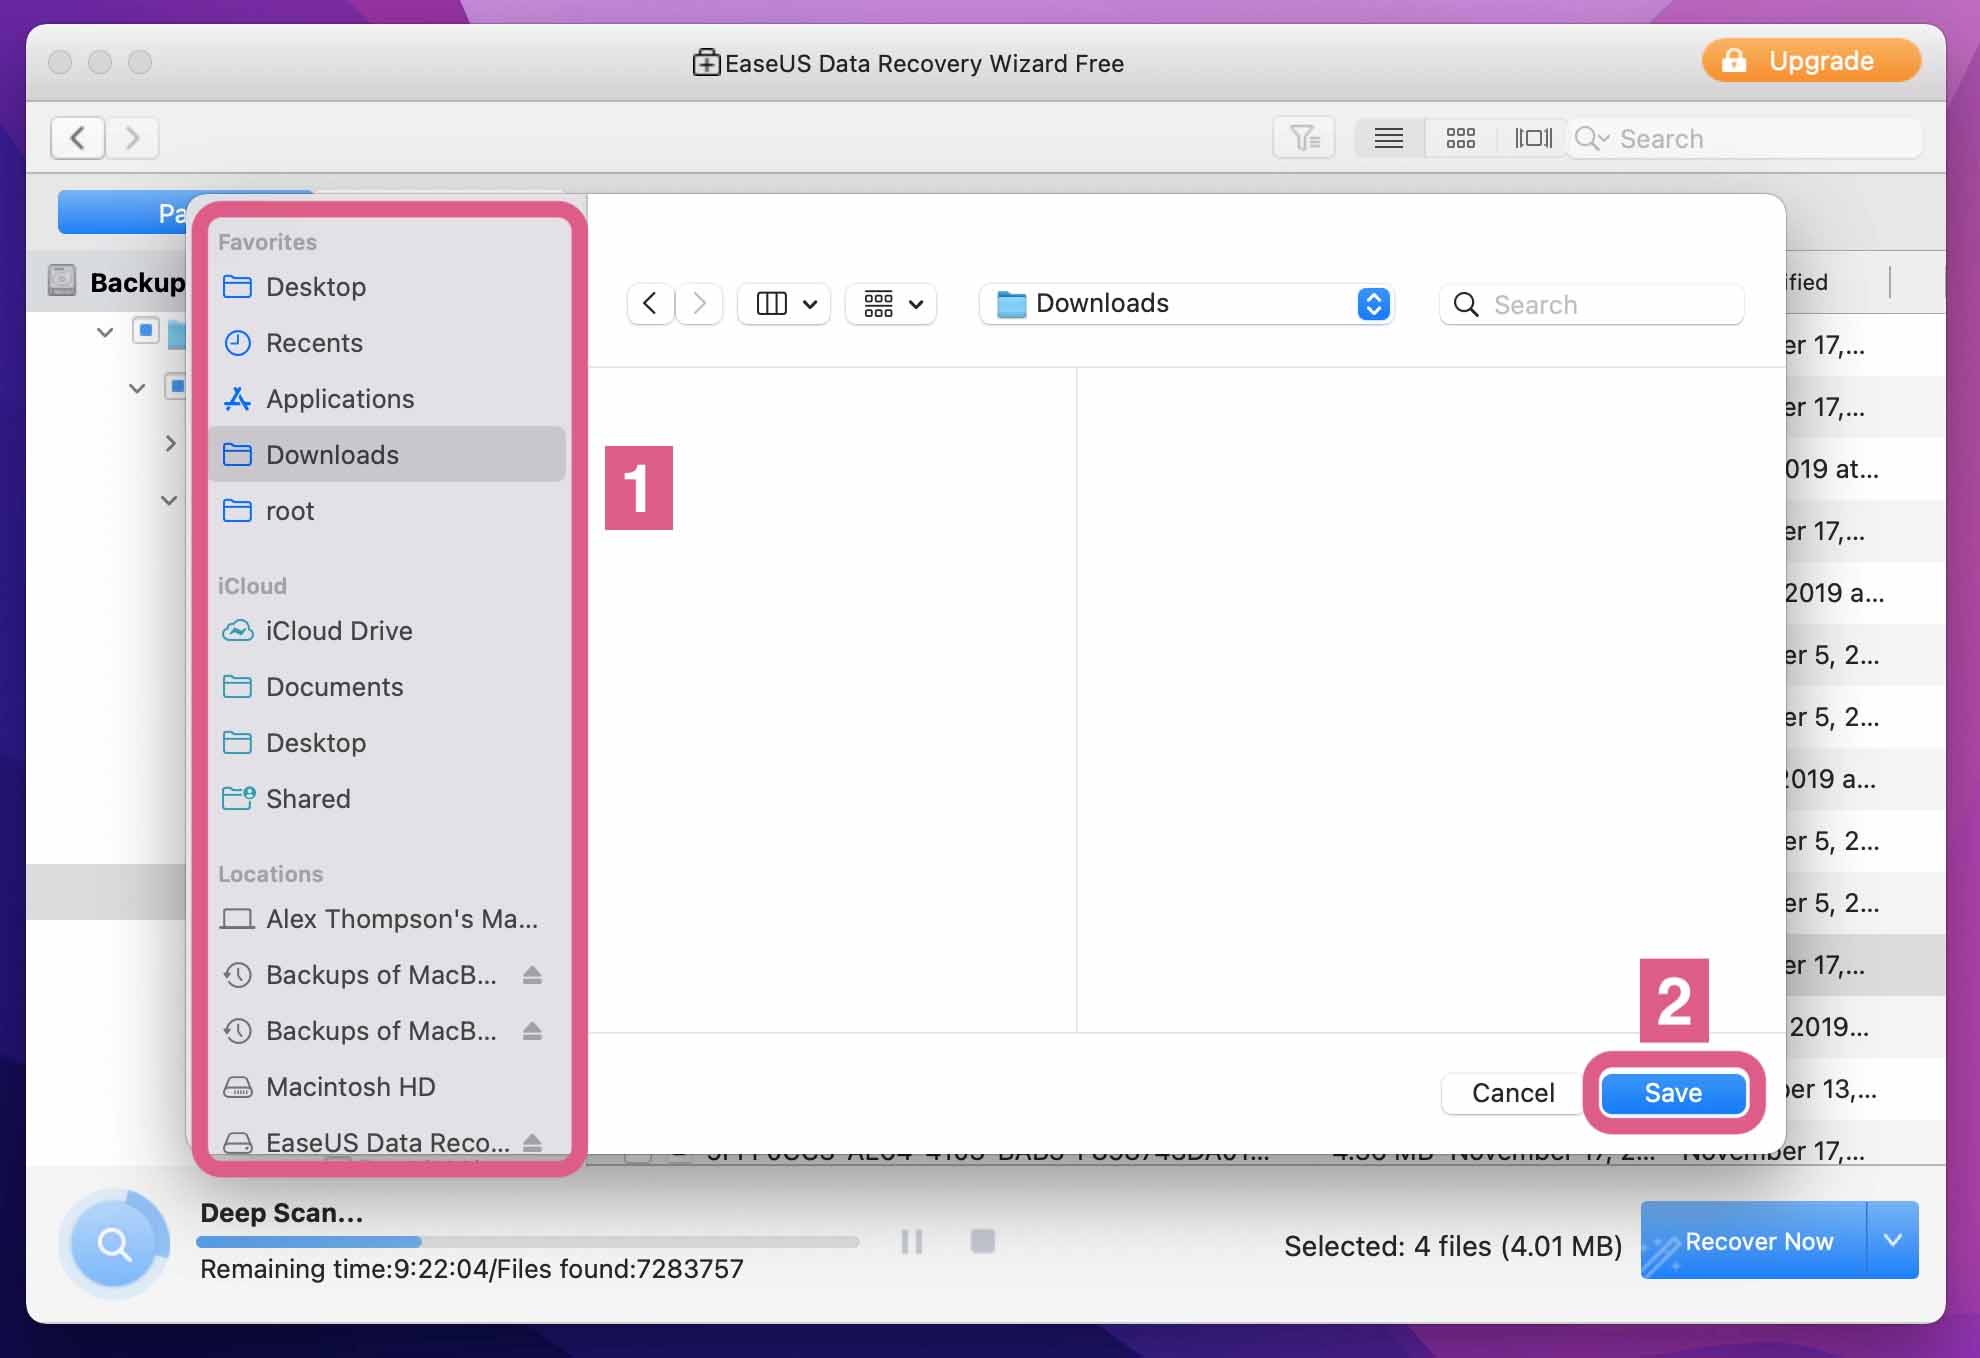
- Drill down through the file locations to find the files you’d like to recover. You can double-click the files to generate a preview. After you’ve chosen your files, click the “Recover” button.
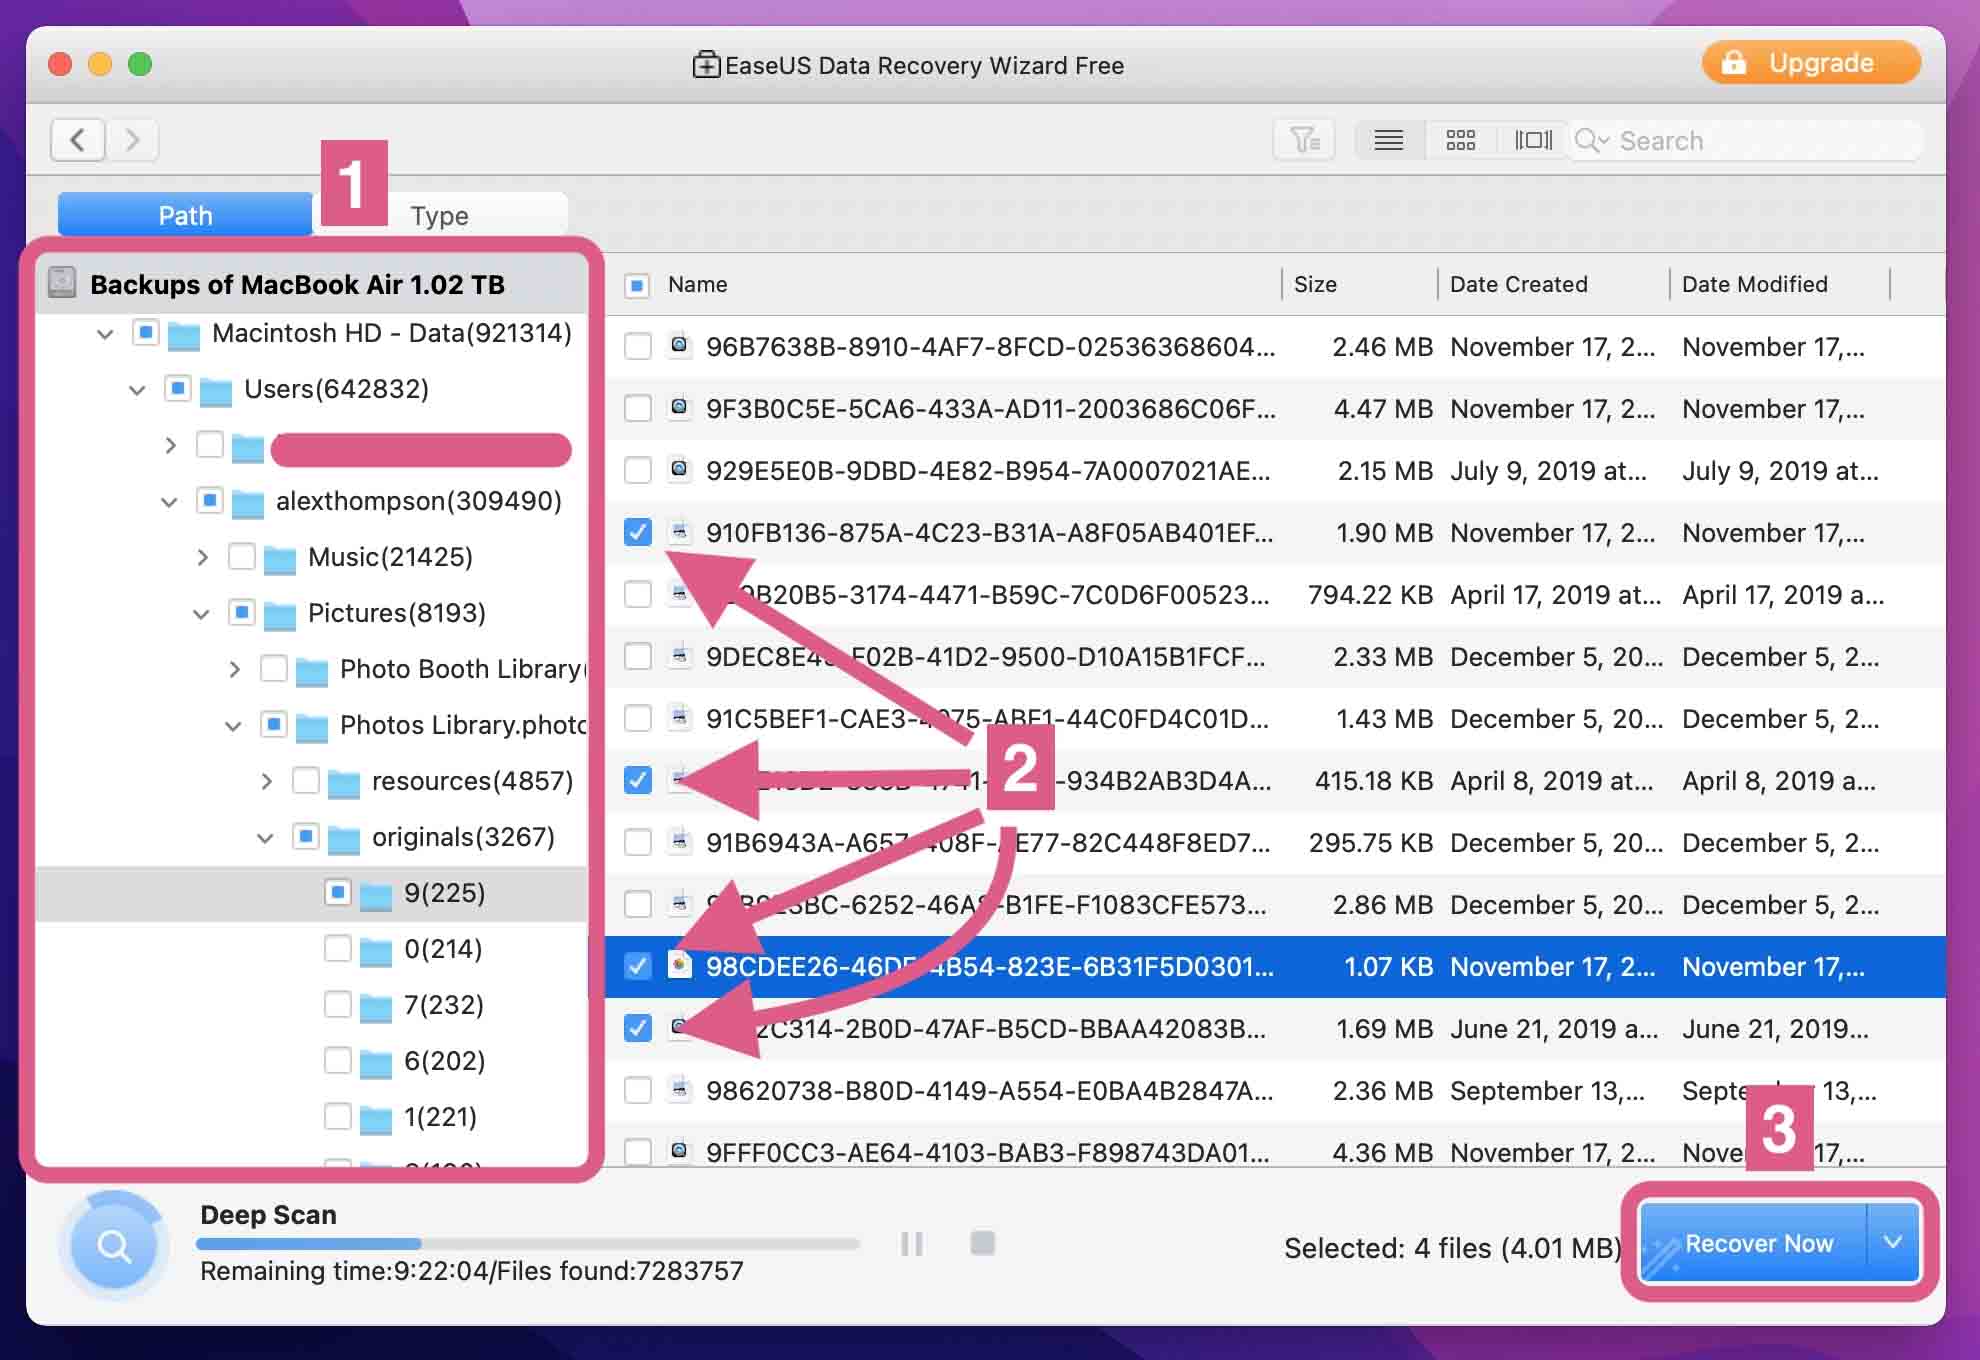
- Choose where to save your recovered files and then click the “Save” button. Your files will then transfer to that location where you can interact with them like usual. Remember, you’re limited to restoring just 2GB of files using EaseUS Data Recovery Wizard.
Curious about the mechanics behind file recovery software? Discover the intricacies of how data recovery tools retrieve lost files and the science that powers them. 👉 Read our in-depth article on how data recovery software works!
Special Mention: Seeking a Professional Data Recovery Service
If the free options above don’t work for you (or you simply want to leave your data recovery to the professionals), you can also reach out to a data recovery service.
These services specialize in getting your data back, no matter the cause of loss. They use specialized tools, advanced recovery methods, and a wealth of experience to achieve the best results possible.
It’s worth noting that a professional data recovery specialist will be able to restore data from mechanically damaged drives (which is outside the limits of most free software). They may also offer a warranty on their work—if they can’t recover your data, you don’t pay.
Wondering where to find the best professional data recovery service? Wonder no more. We have already put together a list of the five best data recovery services in the industry.
Understanding Drive Types and Their Recovery Complexities
The process and success of data recovery can vary significantly depending on the type of drive and the specific circumstances surrounding its formatting:
- External Hard Drives: Recovery from external hard drives is generally straightforward. If you’ve formatted an external hard drive, follow the recovery instructions provided in this article.
- Internal Hard Drives (Non-system partition): The process for recovering data from a non-system partition of your Mac’s internal hard drive is similar to that of external drives.
- Entire Internal Hard Drives: Although it’s uncommon, accidentally formatting your Mac’s entire internal hard drive is possible, which leads to a more intricate recovery challenge. Especially if you have a Mac with a security chip or M processor, you should be aware that during reinstallation, recovering any data is not possible due to the encryption of the system disk. If you’ve already reinstalled macOS after formatting, you can still follow the recovery guidelines in this article. However, be mindful that some old data may have been overwritten during the OS reinstallation. If you haven’t reinstalled macOS following the accidental format, you can:
- Boot from Another Device: Use an external drive with macOS installed to boot your Mac, allowing access to your internal drive without adding new data.
- Use Your Internal Drive Externally: By connecting your Mac’s internal drive to another computer as an external drive, you can access and attempt data recovery without risking further overwrites.
Regardless of the situation, if you’ve formatted the entire internal drive, it’s strongly advisable to seek consultation or services from data recovery professionals. Their expertise and tools can significantly enhance the likelihood of successful data retrieval.
Comparing Top Data Recovery Solutions for Formatted Mac Drives
Choosing the right tool is crucial when recovering data from a formatted Mac drive. We’ve distilled the features, recovery scores, and pricing of three leading solutions to help you decide. Here’s how Disk Drill, EaseUS, and PhotoRec compare:
| Software | Key Features | Recovery Score | Starting Pricing |
|---|---|---|---|
Disk Drill for Mac |
|
90% |
$89.00 (lifetime) |
EaseUS Data Recovery Wizard for Mac |
|
65% |
$89.95 (monthly subscription) |
PhotoRec |
|
50% |
Freeware |
Below are just a few of the most frequently asked questions about how to recover a formatted Mac hard drive.
FAQ
Is it possible to recover data from Mac hard drive to PC?
Yes, you can recover data from a Mac hard drive to a PC. However, the simplicity of the process will depend on what file format system you’re using.
If your Mac hard drive uses the unencrypted HFS+ format, you can use data recovery software like Disk Drill to recover the files and save them to your PC, with no reformatting required.
If you are not using an HFS+ format (like APFS, for instance), you’ll need to follow the steps outlined in this guide.
What is the best data recovery software for Mac?
There are quite a few options out there. But we’ve found the best data recovery software for Mac is Disk Drill.
Disk Drill is easy to navigate, simple to use, highly effective, and can recover over 400 different file types.
Plus, there’s a free version so you can test out the interface risk-free.
Does Apple have data recovery software?
Unfortunately, Apple doesn’t have any data recovery software. Time Machine can be helpful if you’ve been running regular backups. And if you’re near an Apple store, you can visit the Apple Genius Bar to see if they can help.
Your best bet, then, is to use data recovery software to find deleted files or recover a formatted hard drive on a Mac.
How to format an external hard drive for macOS?
Three file formats are compatible with macOS: Apple File System (APFS), Mac OS Extended (HFS+), and MS-DOS (FAT) & exFAT.
When you format your external hard drive, you’ll need to ensure you select one of those three file formats for it to be compatible with macOS.
How to format a hard drive for Mac and PC?
If you’re using the hard drive for both Windows and your Mac, select the exFAT file format when formatting the hard drive. It’s the only file format that’s compatible with both systems.
Conclusion
An accidentally formatted hard drive on a Mac may seem like it spells disaster for your files. And if you don’t know what you’re doing, it can.
But with the solutions outlined above, you can bring your data back from the abyss. Best of all, the strategies are uncomplicated, widely available, and inexpensive (even free). And with them, you can get rid of that lump in your throat and recover your files from a formatted hard drive on Mac before you know it.
This article was written by Alex Thompson, a Author at Handy Recovery Advisor. It was also verified for technical accuracy by Andrey Vasilyev, our editorial advisor.
Curious about our content creation process? Take a look at our Editor Guidelines.