Formatting a storage device is just what you need to “refresh” it, eliminate all its contents, and free all its available space. However, it’s also what we’ve all absent-mindedly done at least once in the past, then realizing we did have the data we needed on the newly-formatted device.
Smartphones increase the chances of such a mistake since it’s only a tap away. Thankfully, as we’ll see, although it’s not possible to “un-format” a storage device, it is possible to repair the damage.
You can recover most (if not all) of the the lost files from a formatted SD memory card on an Android phone. It’s even possible to recover data from a formatted SD card using Android, directly on your mobile device, for when you don’t have access to a computer. Let’s see how.
Is It Possible to Unformat SD Card on an Android Phone?
From a technical standpoint, it’s impossible to “repair” a formatted storage device. A format is a one-way process; once it happens, there’s no undo. And yet, that doesn’t mean the data on a formatted device is gone and lost forever.
A typical “quick format” doesn’t really erase any data on a storage device. Instead, it recreates the basic “scaffolding” for storing and indexing data, the file system, while marking all space as available for use. The data that existed on the storage device before is still there, recoverable until new data is written over the same spot.
And that’s why if you act quickly, right after such a format process, it’s possible to get back most of the data on the device. Advanced data recovery tools can analyze the formatted space, locate the files that existed there, and bring them back to their former glory.
Another way to sidestep the problem is by using cloud services and backups. They can’t “uncover” the data that might already exist on your device, but they can bring it back to it from cloned versions that remain available elsewhere.
So, to recap, it’s not possible to un-format an SD card, but that’s not the correct question for such situations. Instead, that would be “is it possible to recover my files from a formatted SD card on Android” where the answer’s an emphatical “yup”!
To maximize recovery potential, you should stop using a formatted SD card as soon as you realize there’s still data on it that you need. Further use can overwrite the remnants of your data.
How to Recover Data From a formatted Android SD card Using a Data Recovery Tool
There are many ways to get back the files you lost after a format. For example, you can “pull them out” of a backup or re-download them from a cloud storage service.
Still, it’s better, if and when possible, to recover the same files that still “linger under the (formatted) surface” since they might include changes not yet backed-up or synced with their copies.
Thankfully apps like Disk Drill make that both possible and effortless. One of Disk Drill’s superpowers is its wide compatibility with a vast number of storage devices, including most types and brands of memory cards. The general rule of thumb is that “if your PC can recognize a storage device, so can Disk Drill”.
The micro SD card with which you extended your Android smartphone’s internal storage isn’t accessible anymore from any file manager? Don’t fret – as long as your PC can “see” it, it’s almost a given Disk Drill will be able to scan it. What’s better is that despite being a desktop-first app, Disk Drill can recognize and recover most file types supported by Android phones and tablets, from APK installers to photos, video, and audio files.
One caveat, though, is that the app itself is not available for mobile devices. Thus, to use it, you’ll have to take your SD card out of your Android device and connect it to your PC.
With your SD card detected, download Disk Drill from its official site and install it on your computer. Then…
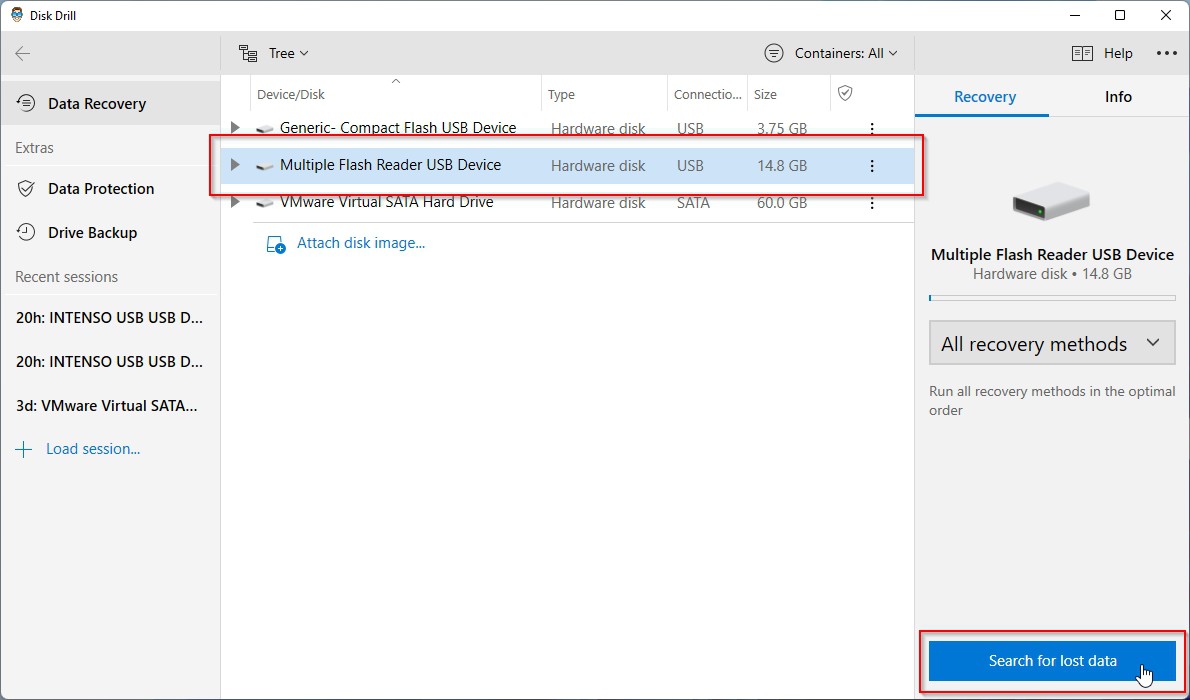
- Run Disk Drill and choose your mobile SD card from its main Device/Disk list, right at the center of its window. Ensure that All recovery methods is selected from the pull-down menu on the right. Then, click on Search for lost data on the bottom right.
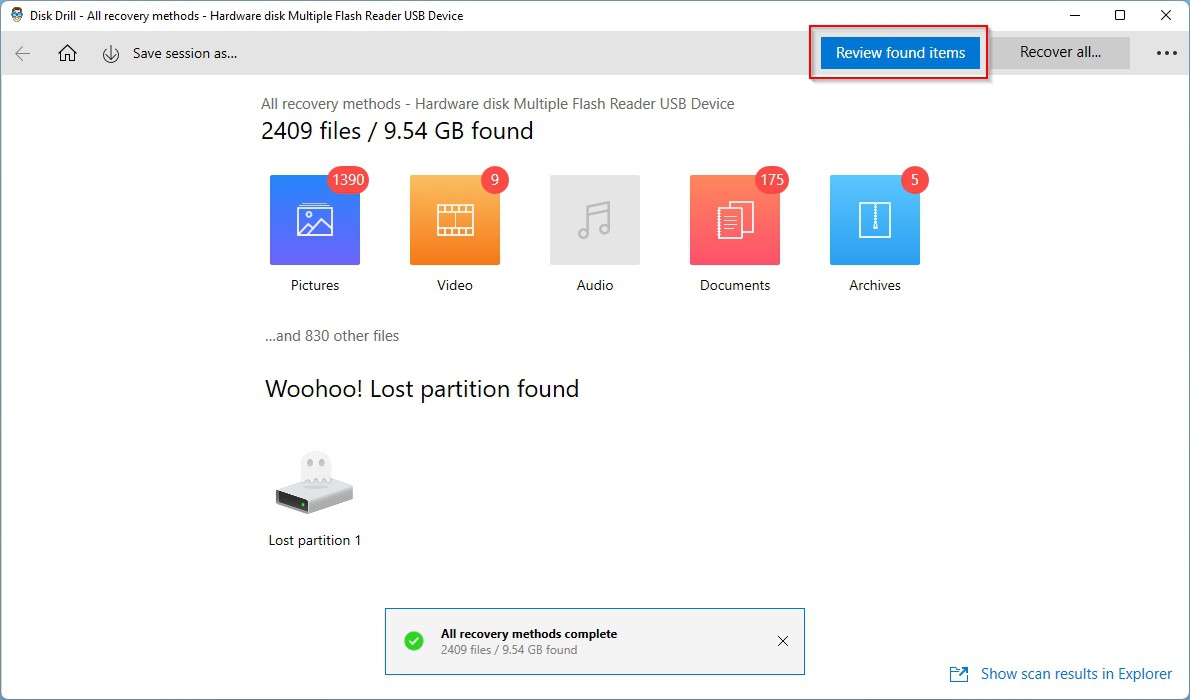
- For optimal results, let Disk Drill’s scan run its course. You can click on Stop scanning at any time to “break” the process or on Review found items, on the top right, to check what the app’s found up to that moment. However, it’s worth waiting for the scan to complete to let Disk Drill locate as many files as possible.
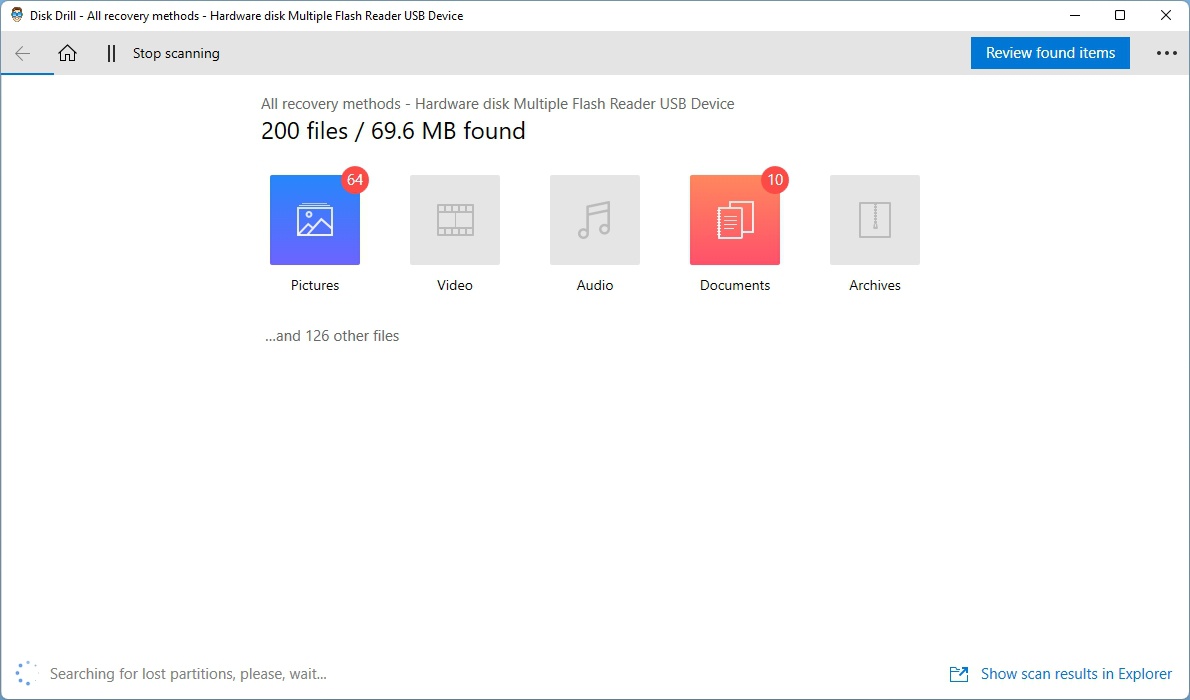
- When Disk Drill’s scan completes, click on Review found items on the top right to see all the data it located on your formatted memory card.
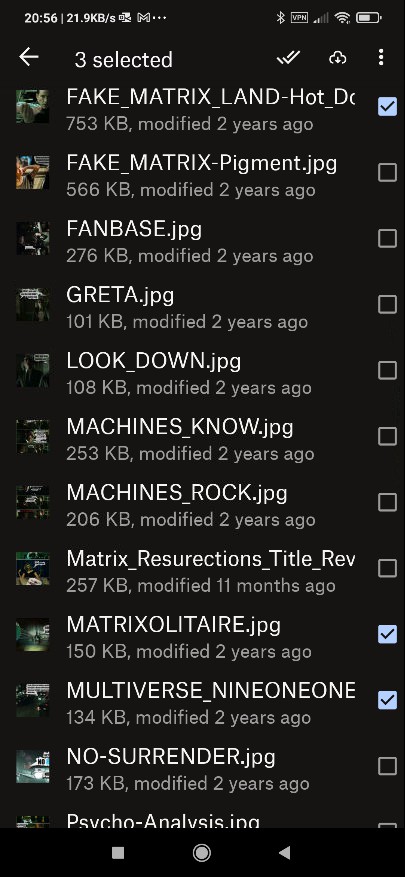
- Go through Disk Drill’s results, and place a checkmark on the left of any documents, videos, audio files, or other types of files you’d like to get back from your mobile’s SD card. If their filename doesn’t help, remember that Disk Drill also allows you to preview many types of files. For that, either right-click on them and choose “preview” or click on the little hovering eye icon on the left of their name.
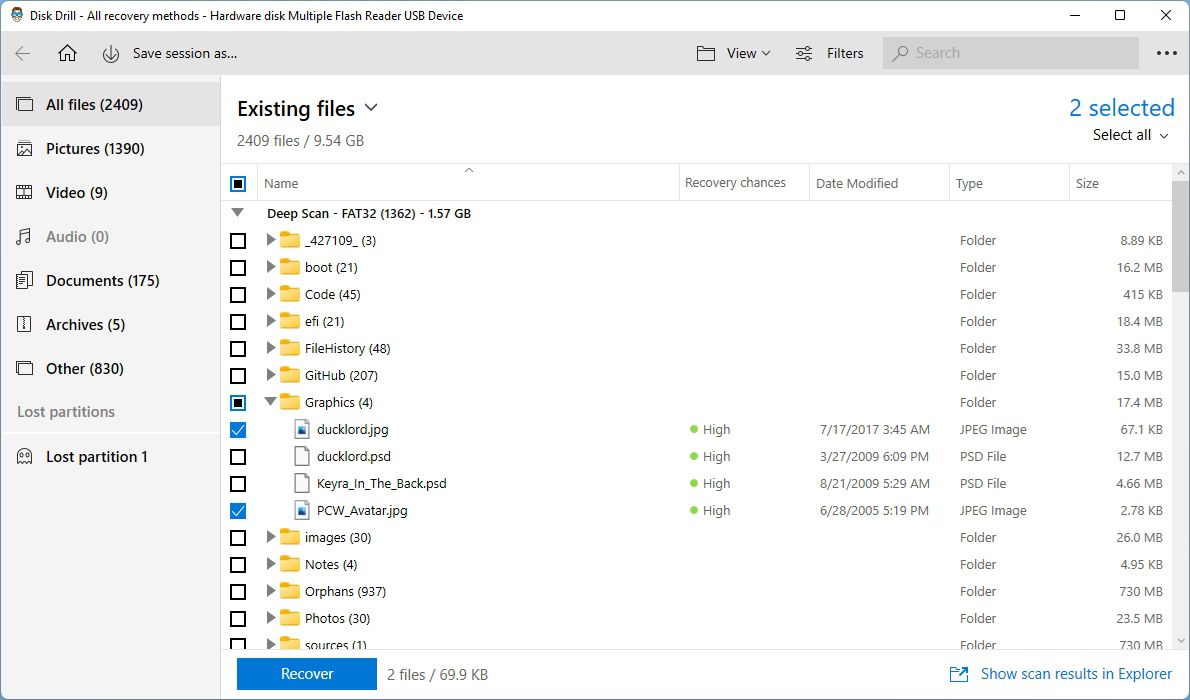
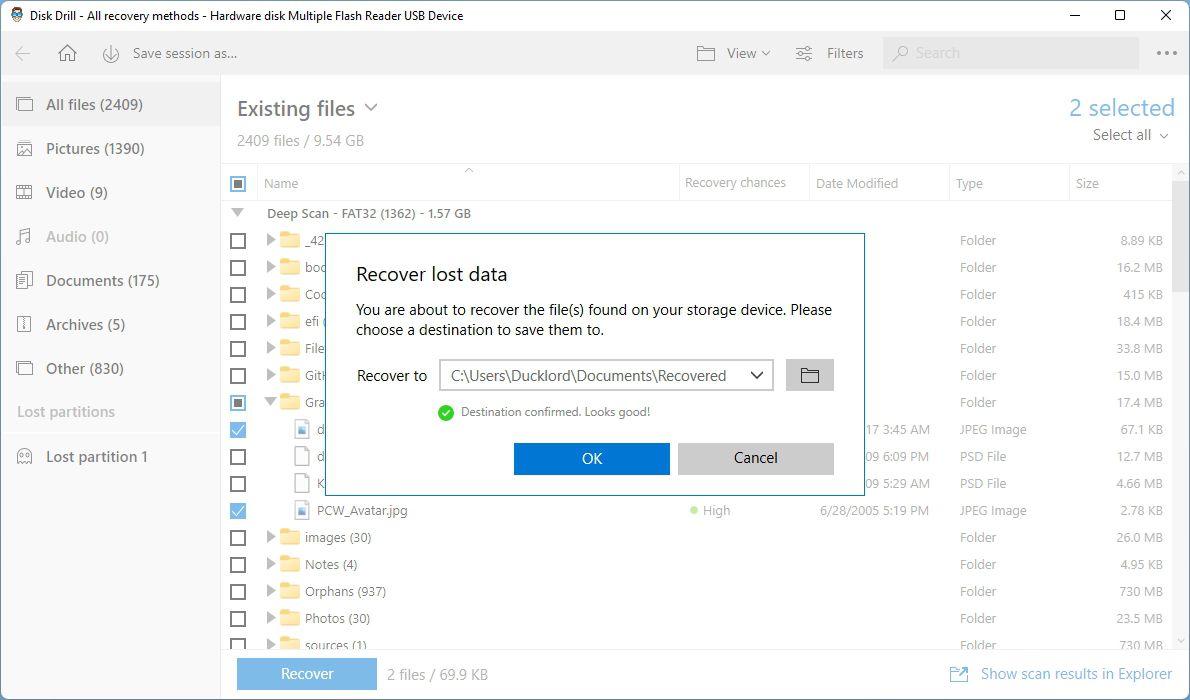
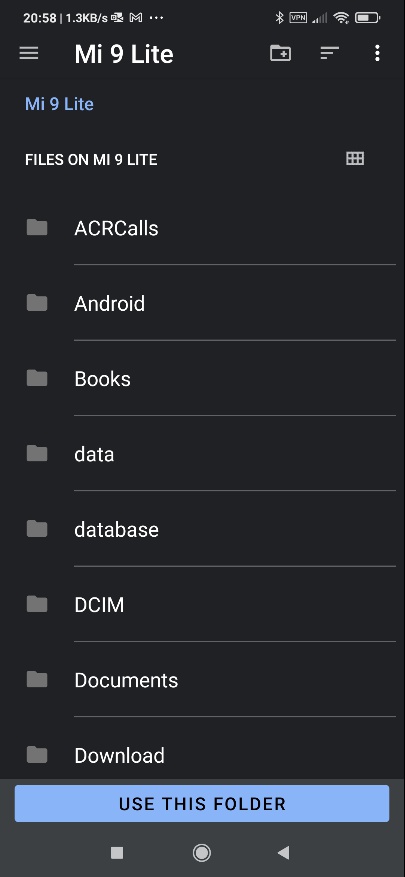
- With your to-be-recovered files selected, click on the blue Recover button under Disk Drill’s file list. When asked, on the new window that appears, click on the button with the folder icon to choose a path on your computer where you want to store the recovered files. Then, click on OK.
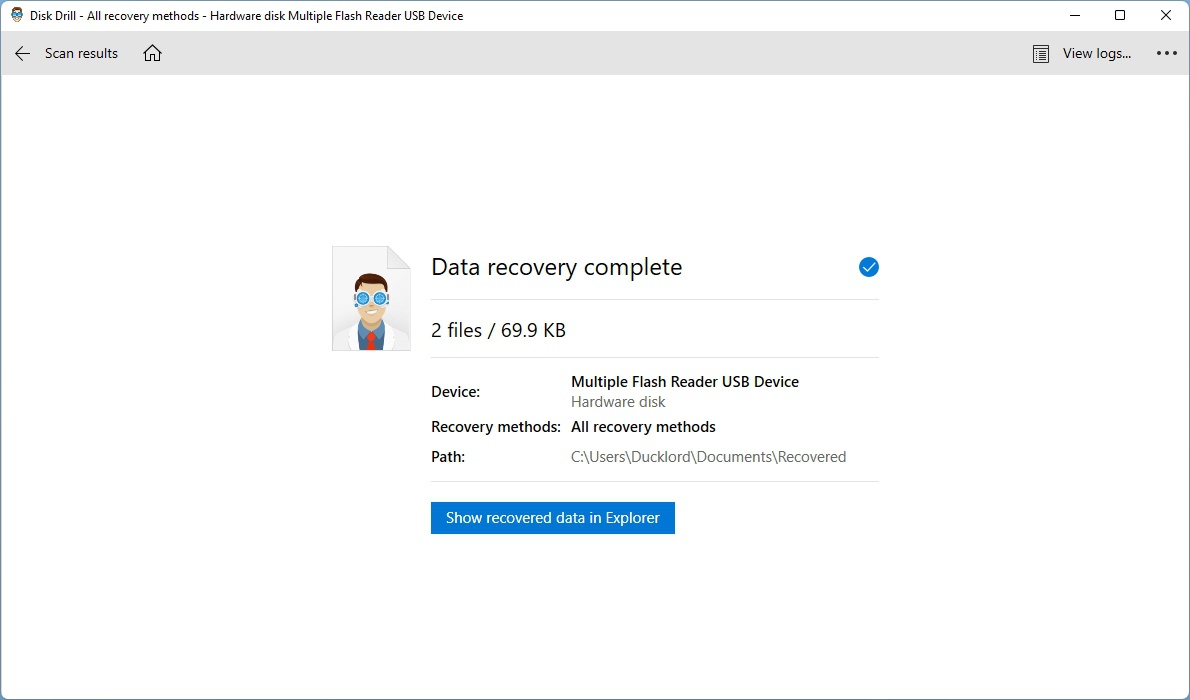
- It won’t take long for Disk Drill’s recovery process to complete. When it does, Disk Drill will show you a summary of the results of the process. To check them out, click on Show recovered data in Explorer to open the target path you selected in the operating system’s default file manager.
How to Recover Files From Formatted SD Card on Android Without PC
Disk Drill might be great at what it does, but its advanced functionality also means you need a PC to run it. Even if you don’t currently have access to one, it might still be possible to bring your files back with one of the following solutions.
Method #1: Fish Your Files Out of The Trash
If you’d moved your files to an app’s Trash/Recycle Bin folder, good news: maybe they’re still there! And yes, that means even after formatting your SD card!
Many apps come with cloud-syncing capabilities, and the contents of the Trash folder are included in this cloud-synced data. So, it’s highly probable you could reinstall them, run them, and find your files “hiding” in the Trash folder.
Since that’s possible with many apps, we’ll only use Google Photos as our example. Feel free to check out the other apps you were using to find out if that also applies to them.
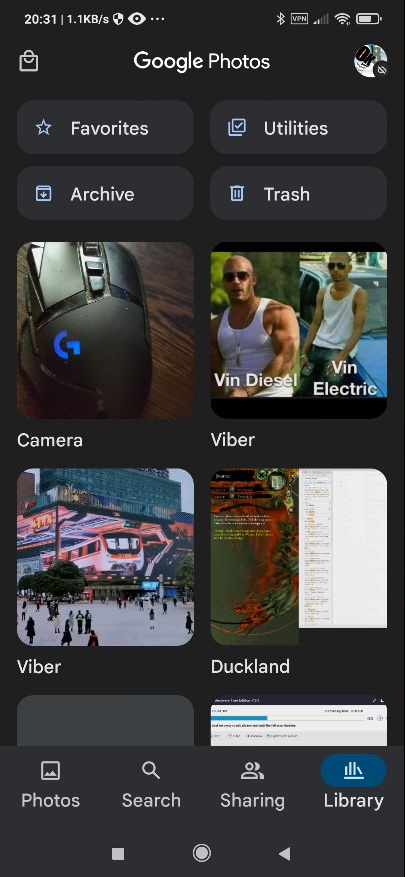
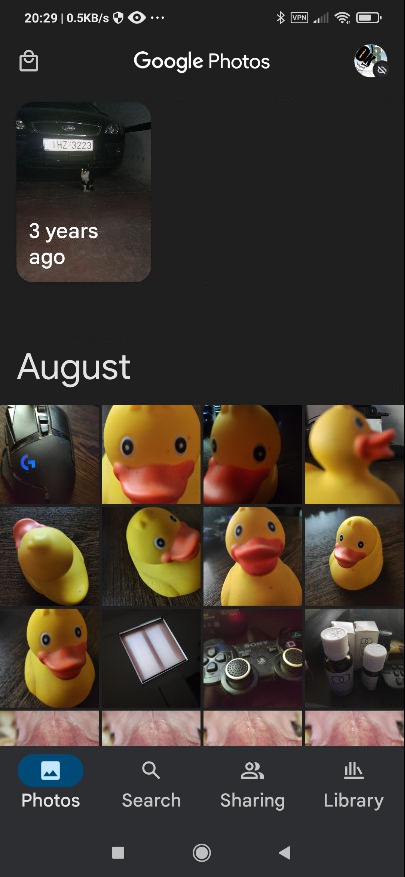
- Open Google Photos, and tap on the fourth icon on the bottom of the app, labeled “Library“.
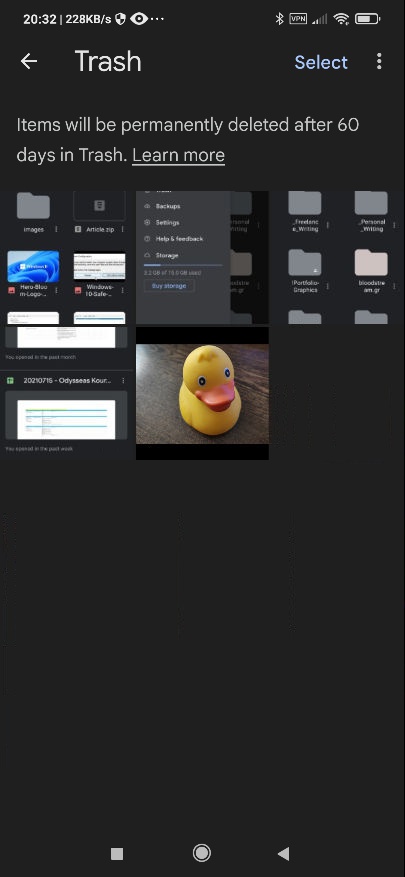
- On the Library page, ignore the photo collections that dominate its interface and instead tap on Trash.
- Google Photos keeps deleted files in its Trash folder for up to 60 days. Thus, you may find them there if it wasn’t long since you lost yours.
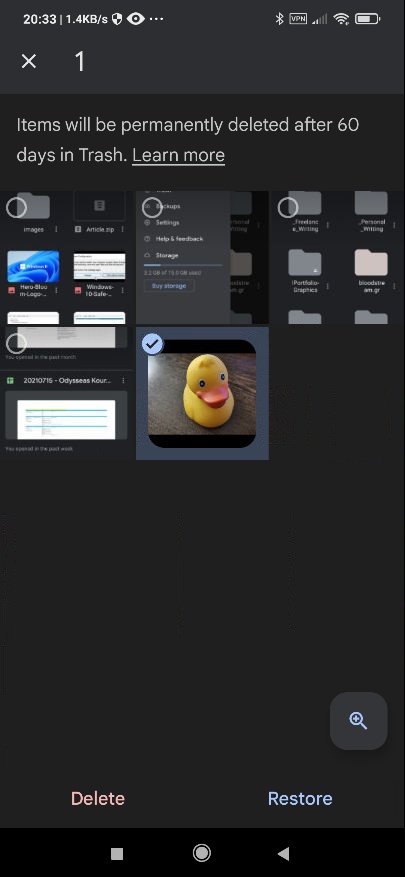
- Tap and hold on one photo to enter batch selection mode, and then tap on the other files you wish to recover. Finally, tap on Restore on the bottom right of the app. You’ll find your photos back in Photos’ main gallery.
For even more ways to bring back lost files from various apps and solutions, check our guide on how to recover deleted files on Android.
Method #2: Recover Your Files From an On-Device Backup
Did you keep local backups of your most important files, either manually or using a third-party app? Then, you can bring them back from those backups.
Since there are many backup solutions available, all working similarly, let’s use Google’s Files app as an example of how you can backup and restore your files on an Android device without using a PC.
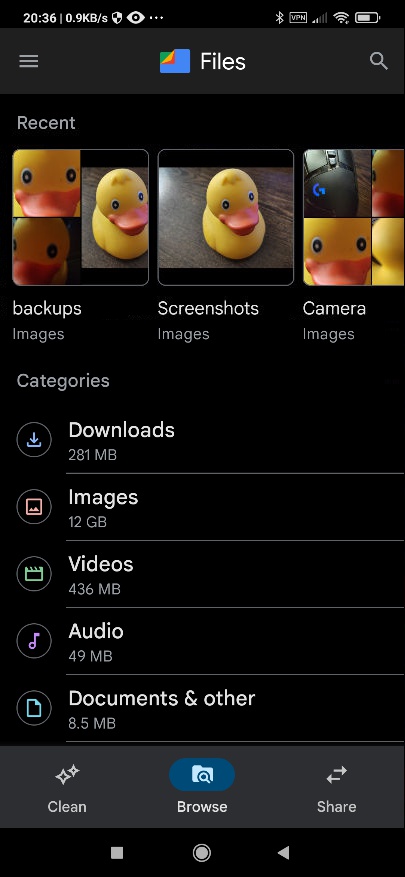
- Locate and run Files. While on its Browse tab, check its categories and folders for the files you’d like to back up.
- Tap and hold on one of the files you want to back up to enter “selection mode”. Then, tap on the rest you’d also like to include in your backup.
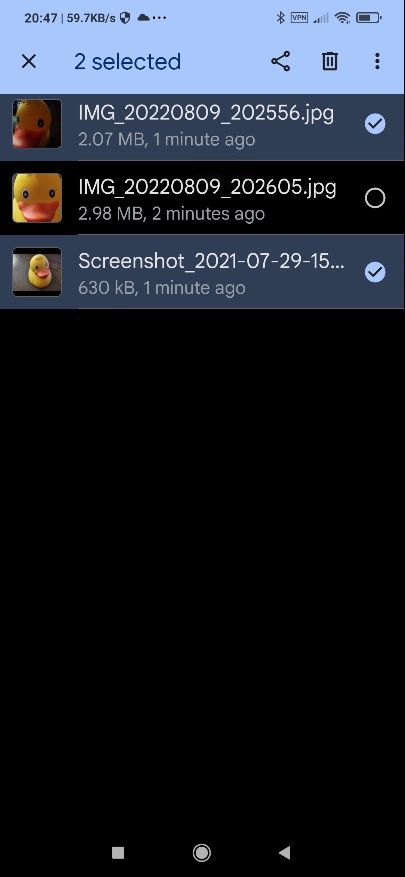
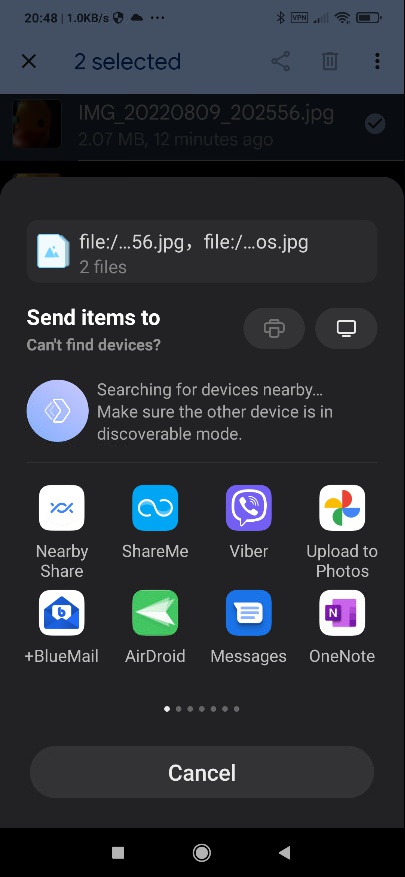
- With your files selected, you can tap on the Share button and then “forward” your files to any app or service on your device. You could, for example, email them to yourself or “send them” to Dropbox.
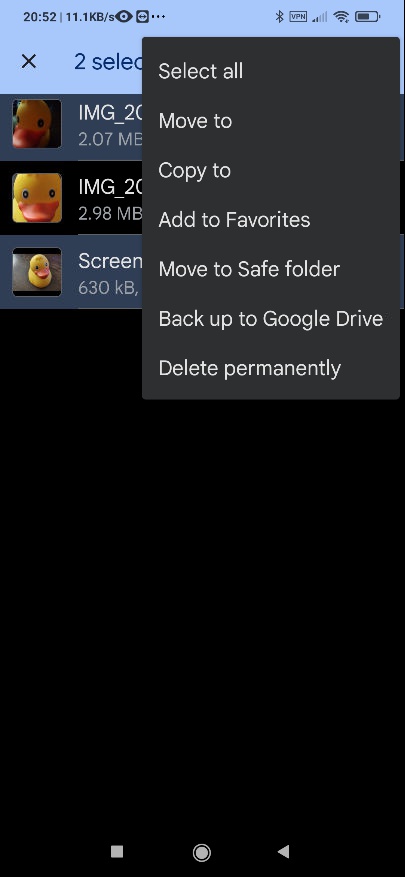
- Alternatively, tap on the three-dot menu, and then choose if you’d like to move or copy them to a local folder, add them to Files’ Favorites, secure “Safe folder”, back them up to Google Drive, or Delete them permanently.
If this was supposed to be a part about recovery, how come we’ve discussed backing up your files?
First, because without having backed them up, you won’t have a backup to restore them from.
Secondly, because the restoration process is the same, but from the opposite “direction”: after running Files, point it to your backup folder instead. Select the files you want to restore from this folder, and repeat the steps above to bring them back where they should be.
Method #3: Re-Download Your Data From Cloud Services/Backups
If you didn’t keep local backups but had saved the same files before on cloud hosting services like Dropbox or Google Drive, you can grab them again from there.
To bring your precious files from those “clouds” back to your device, you can:
- Run the Dropbox app.
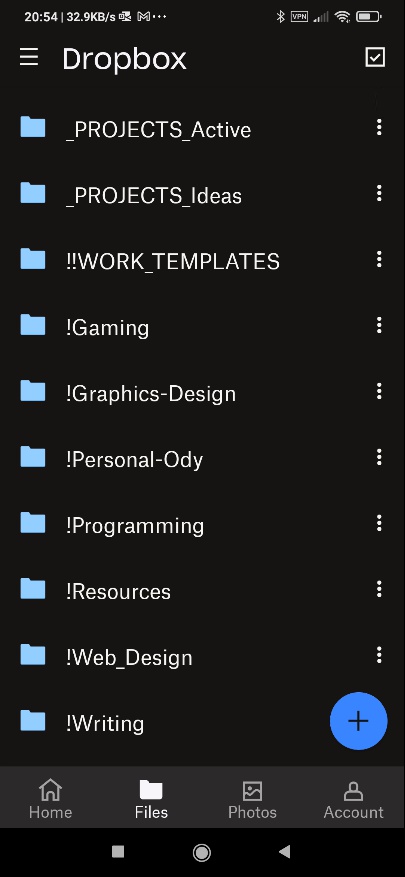
- Go through its folders and locate the files you want to bring back. Tap and hold on one of them to enter “selection mode”, then on the rest that you want to recover, to also select them. You’ll see a checkmark on the right of all selected files.
- Tap on the three-dot menu button on the top-right of the screen. Then, choose Save to Device.

- Navigate your device’s storage hierarchy and select the folder where you want to save your recovered files locally.
If you were using Google Drive, the same process goes like this:
- Run Google Drive’s app, and ensure you’re on its Files tab.
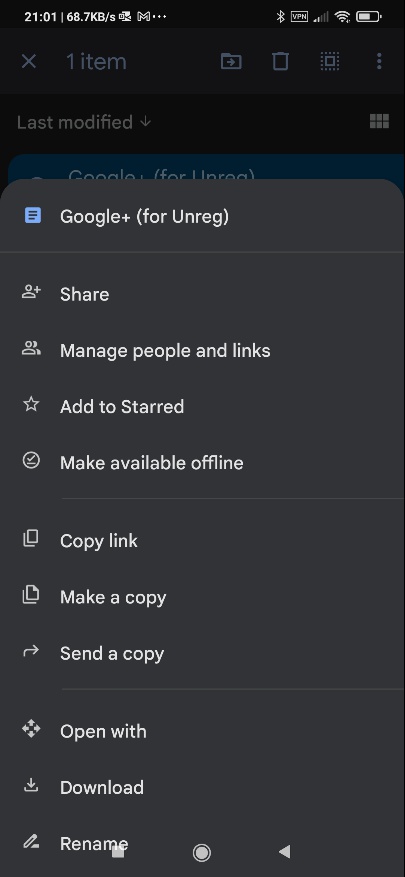
- Navigate the folders there and locate the files you want to bring back to your device. Tap and hold on the first one to enter “selection mode”, and then also tap on all the other files you want to recover. Note that in our screenshot, you can only see a single file with no multi-selection mode enabled.

- Tap on the three-dot menu on the top right, and then choose “what you want to do with your files”. You can restore them locally, send copies to others, rename them, re-download them, etc.
We used Dropbox and Google Drive as examples, which are only two of the many cloud hosting services. Still, if you prefer something like Mega or Box, the process should be similar on them or any other cloud-hosting service.
Method #4: Use an Android Data Recovery App
With Disk Drill not running on Android devices, if you haven’t kept any backups nor were using cloud hosting services, your files are gone. Extinct. Or, as Monty Python may say, pining for the fjords.
Unlike the parrot in the famous Monty Python sketch, though, you might still be able to bring your files back. Disk Drill might not be compatible with Android, but apps like Diskdigger are made especially for the platform. They might not be as intelligent, feature-rich, or thorough, but more often than not, they can get the job done. You can learn more about some of them in our article on the best SD card recovery apps for Android. However, for this guide, we’ll only use one of them: Diskdigger.
We particularly like Diskdigger because it combines more than adequate results with a straightforward interface. You don’t have to deal with APK files, custom installations, or rooting rituals, since its basic functionality also works on “unrooted” devices, scanning their internal storage.
However, it’s worth noting that we’re talking about (and we’ll be using) Diskdigger’s Android app version. You can also find a desktop version of Diskdigger, for which we have a thorough review.
To bring back your files with it directly on your Android device:
- Search for “diskdigger” in Google’s Play Store, and install the app on your device. Then, open/run it.
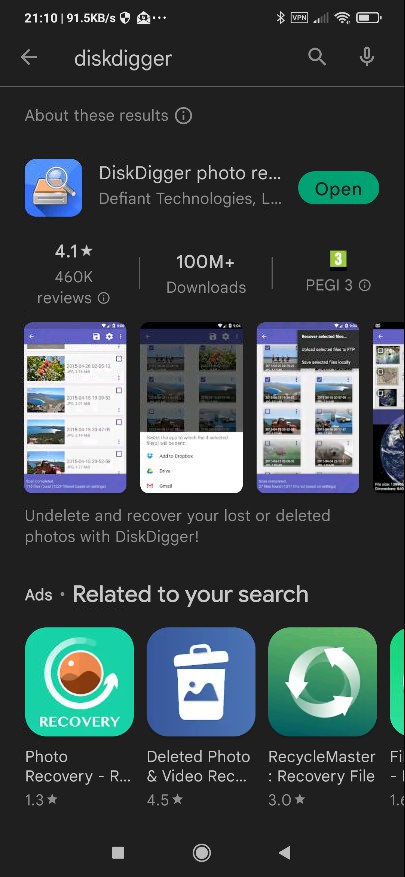
- Ignore Diskdigger’s advanced scans that only work on “rooted” devices. Instead, tap on Star Basic Photo Search, that’s front and center on the app’s main page. When asked, “tell” Android to Allow Diskdigger to access photos, media, and files on your device.

- When Diskdigger’s scan completes, it will present a results list. Tap on the empty box on the top left of the files you want to get back to mark them for recovery.
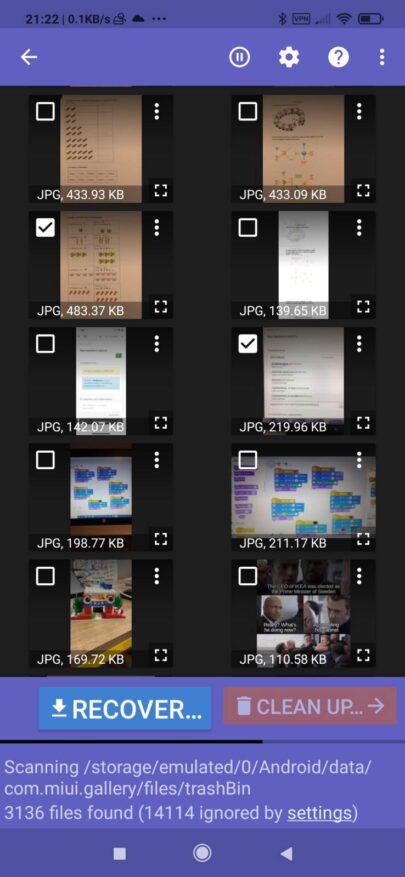
- After selecting all the files you want back, tap on Recover at the bottom left of the screen. Finally, choose where you want to store your recovered files. You can save them locally, upload them to an FTP server, or “Save the files to an app”, to send them to Dropbox, Google Drive, an email client, etc.

Method #5: SD Card Recovery Service
The methods we saw can bring your files back but aren’t magical solutions that work no matter what. Suppose you are dealing with a failing Micro SD card that isn’t recognized by any devices anymore or data stuck inside a “dead”, non-responsive smartphone. In that case, there’s nothing you can do. But somebody else might.
We’re referring, of course, to specialists like those we saw in our article on the best SD card data recovery services. Equipped with the advanced know-how and equipment needed for such tasks, data recovery specialists can even revive non-working storage devices to salvage data.
Their services come at a cost and include a delay for sending your storage device to them to have it checked. If you consider your files important enough, though, it’s worth contacting them, for they might pull off what we “mere mortals” can’t.
FAQ
How can I unformat an SD card on my Android phone?
Unfortunately, it’s not possible to “un-format” an SD card. What is possible is recovering its data. It can be as simple as:
- Download and install Disk Drill.
- Disconnect your formatted SD card from your Android device.
- Connect it to your PC and scan it with Disk Drill.
- Choose the files you’d like restored.
- Have Disk Drill save them on your PC.
Is it possible to recover videos that were stored on a now-formatted SD card?
You can recover, restore from a backup, or re-download any type of file, including videos.
The only technicality worth mentioning is that video files are harder to recover or slower to download because of their larger size compared to other file types.
Can I recover files from a formatted SD card on Android without a PC?
Although the best data recovery solutions work on PCs, even without one, you still have options. For example, you can:
- Recover your files from a manual backup.
- Redownload lost files from cloud hosting services.
- Use an Android data recovery solution.
Conclusion
As we saw, a formatted SD card is not the end of the world – or the data you had stored of it. There are many ways you can get that data back. “Ways” that range from a simple copy process directly on your Android device to a full-blown (but automated and effortless) data recovery from your powerful desktop PC.
And even when everything else fails, instead of proclaiming your data “gone”, you can have the experts try their hand at bringing it back.
This article was written by Odysseas Kourafalos, a Editor-in-Chief at Handy Recovery Advisor. It was also verified for technical accuracy by Andrey Vasilyev, our editorial advisor.
Curious about our content creation process? Take a look at our Editor Guidelines.