While MicroSD cards have gotten more robust with the years, they are still prone to developing a myriad of issues. These problems can make your data inaccessible or corrupt your files, losing you important information.
Fortunately, there are many ways of recovering data from MicroSD cards once connected to a Windows 10 (or 11) computer. Here is a guide on how to do so.
Pick the Appropriate MicroSD Card Recovery Solution
Cause |
Possible Solution |
😯 I accidentally deleted files or formatted my microSD card. |
Accidentally deleting or formatting your microSD card is the most common reason for losing data on a memory card. Thankfully, you can restore any deleted photos or videos by scanning the SD card. |
📛 I get different read/write error messages. Some of the files on the microSD card are corrupted. |
Data corruption can affect SD card file systems as well as individual files. If you fail to recover data from your corrupted SD card using data recovery software, try fixing it with a utility like Checkdisk. |
🧹 MicroSD card is not appearing in File Explorer. |
Formatting issues can make a microSD card inaccessible to Windows. But most data recovery tools can restore data even from a RAW microSD card. If that doesn’t work, you might be dealing with a physically damaged card. |
⚒️ I need to recover a physically broken micro SD card. |
Physically damaged microSD cards are impossible to fix through software means alone. You should contact a professional SD card recovery service to get the best chances of recovery. |
Pro-Tip: Keep in mind that continuing to use the microSD card and saving more files to it decreases the odds of data recovery being successful. You should stop using the SD card and take it out from the device (phone, camera, etc.) it is plugged into.
How to Recover Deleted or Lost Data From MicroSD Card
Scanning the microSD card with a data recovery tool is the best way of recovering lost data from it. Whether that data was lost due to accidental deletion, accidental format, or even memory card corruption, a good microSD card recovery software can get your data back easily.
There are many good data recovery tools out there, but for this guide, we will be using Disk Drill. This is because Disk Drill consistently ranks at the top in our software tests, making it the best data recovery tool for beginners and experts alike. It also has a free version, giving you 500MB of free data recovery without any feature limitations. You can find out more about the software in our detailed review.
For now, let’s move on to the step-by-step method for recovering data from a microSD card using Disk Drill.
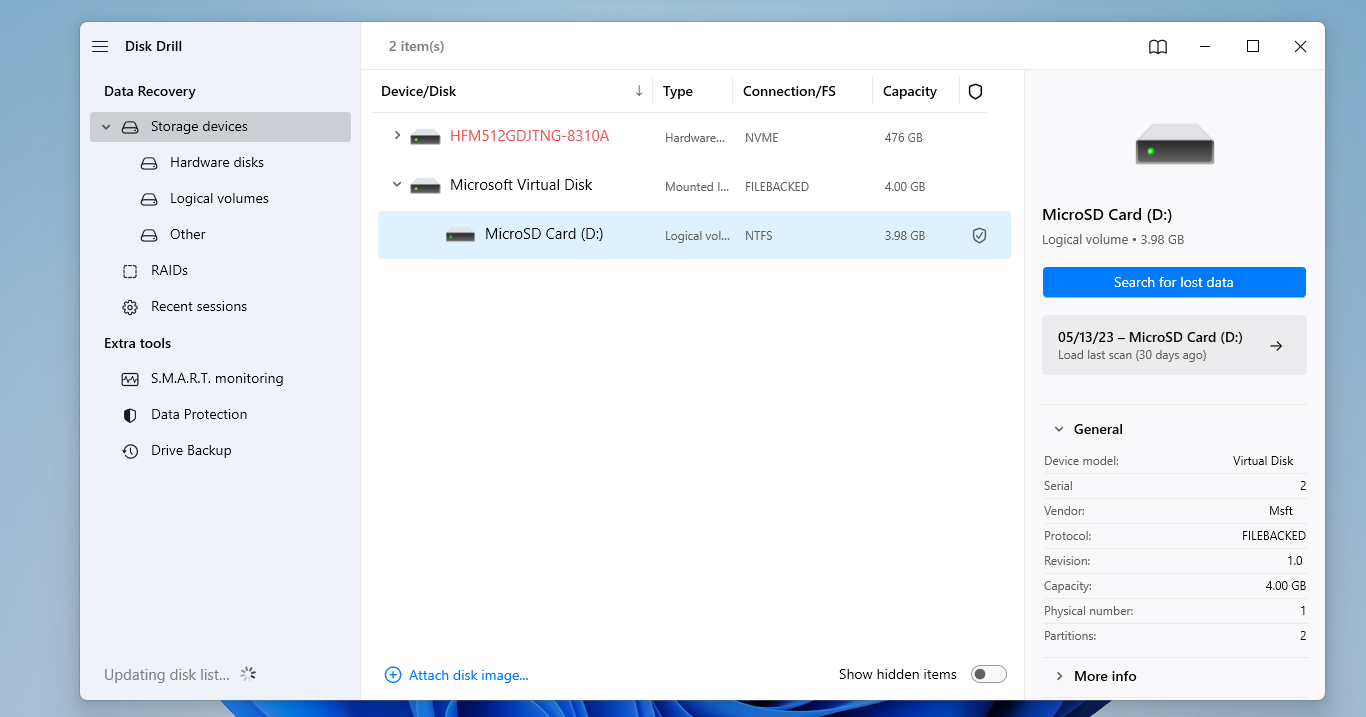
- Begin by connecting the microSD card to your computer using a card reader.
- Download Disk Drill and run the setup to install it.
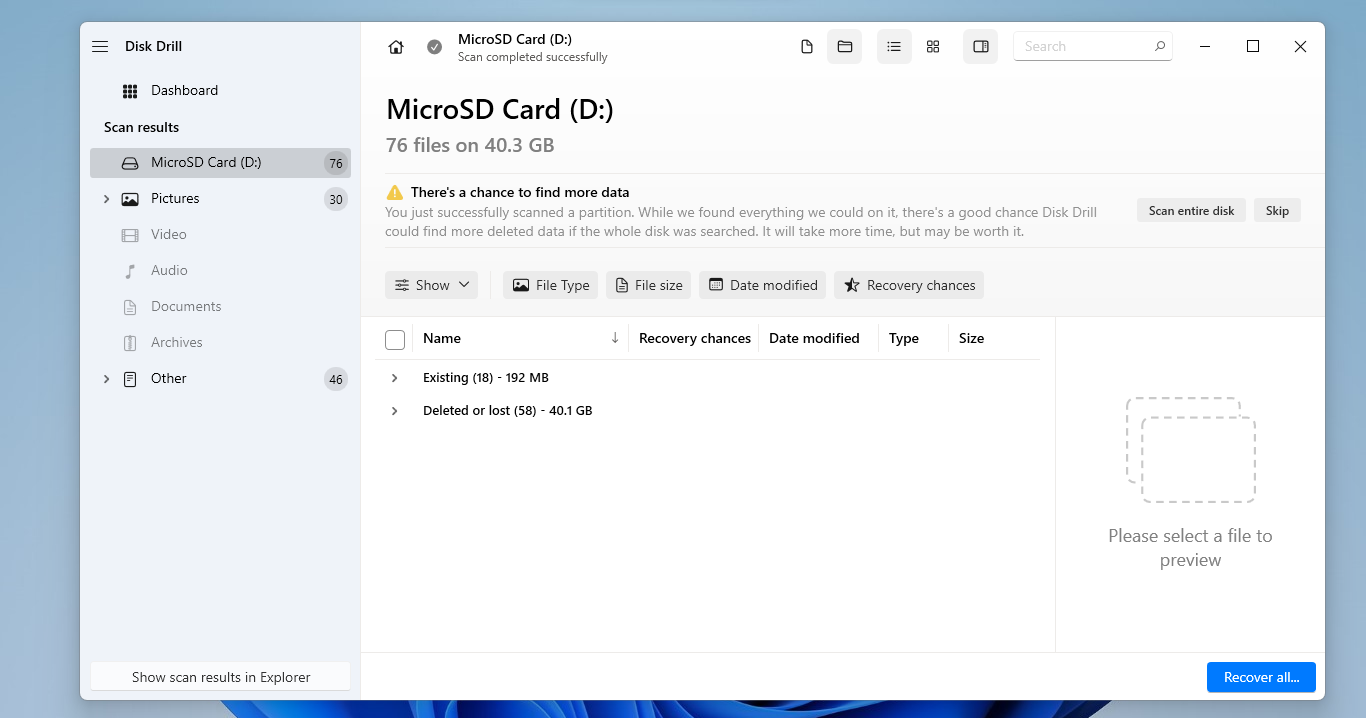
- Now open Disk Drill. You can see a list of all drives accessible on your computer. Select the drive representing your microSD card and click on the Search for lost data button.
- Disk Drill will now perform several types of scans, sorting the results based on the file types. Once the scan is complete, click on the Review found items button to view the results.
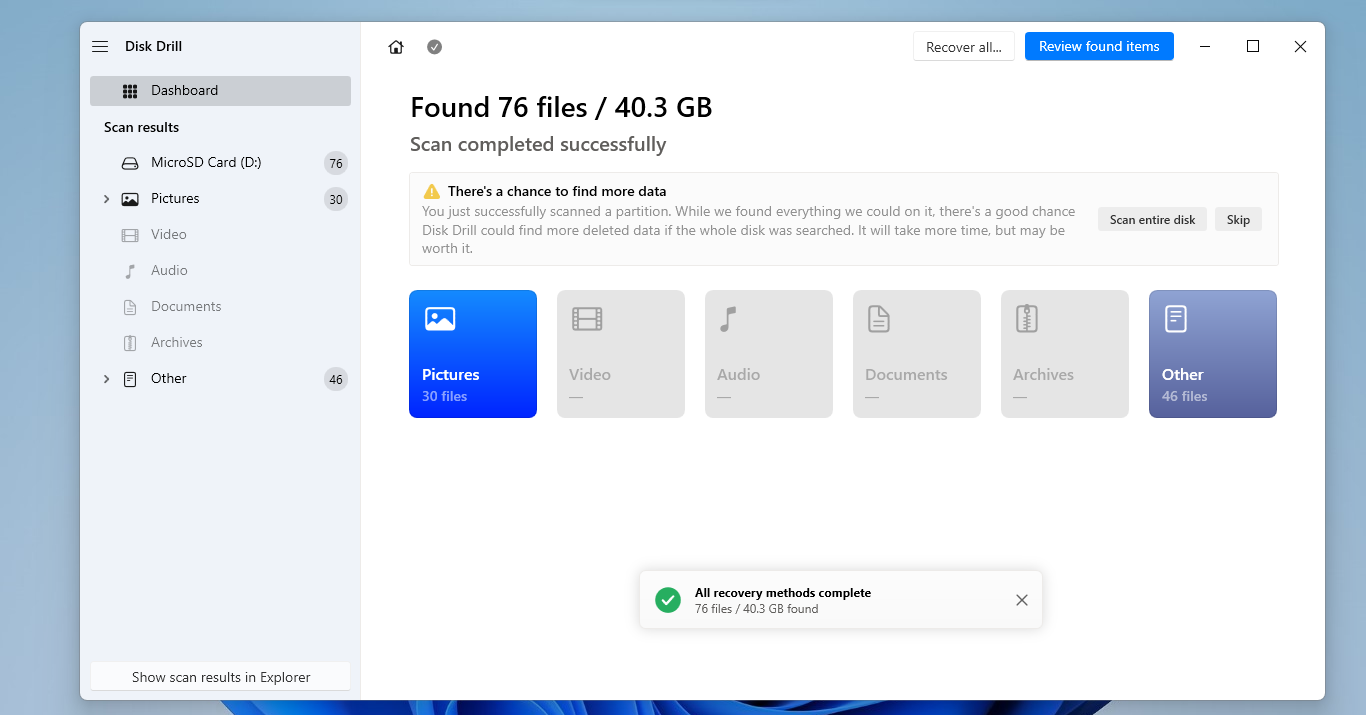
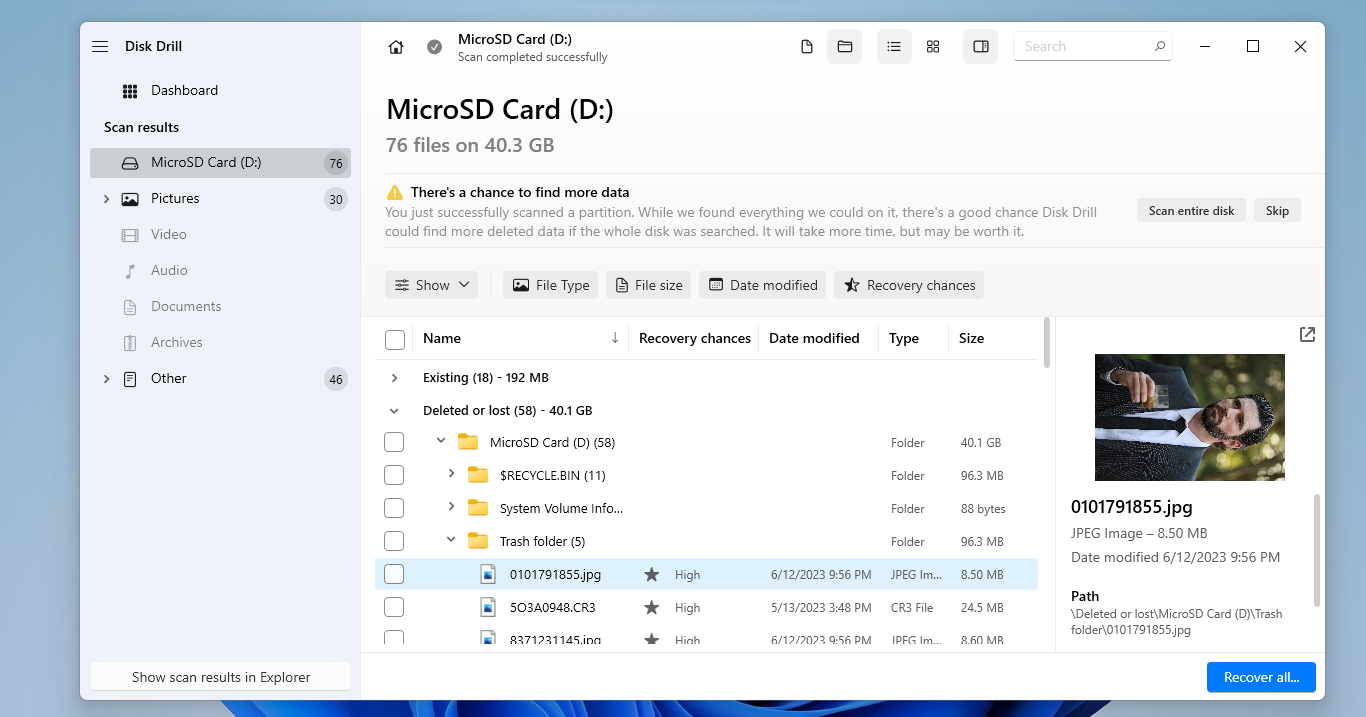
- The results are sorted into three different folders: Existing, Deleted or lost, and Reconstructed. The Existing directory, obviously enough, contains files that still exist in your hard drive with their complete metadata. Deleted or lost will contain the files that were lost due to accidentally deleting or formatting the drive. Finally, the Reconstructed folder will display files that were recovered by Disk Drill using their file signatures and often lack metadata.
- Browse through the directories until you find the files you are looking to recover. Photos can even be previewed by clicking on the eye symbol, though don’t panic if the previewed photo looks to be low quality – it is just a thumbnail. You click on the arrow button right next to the photograph to view it in full dimensions.
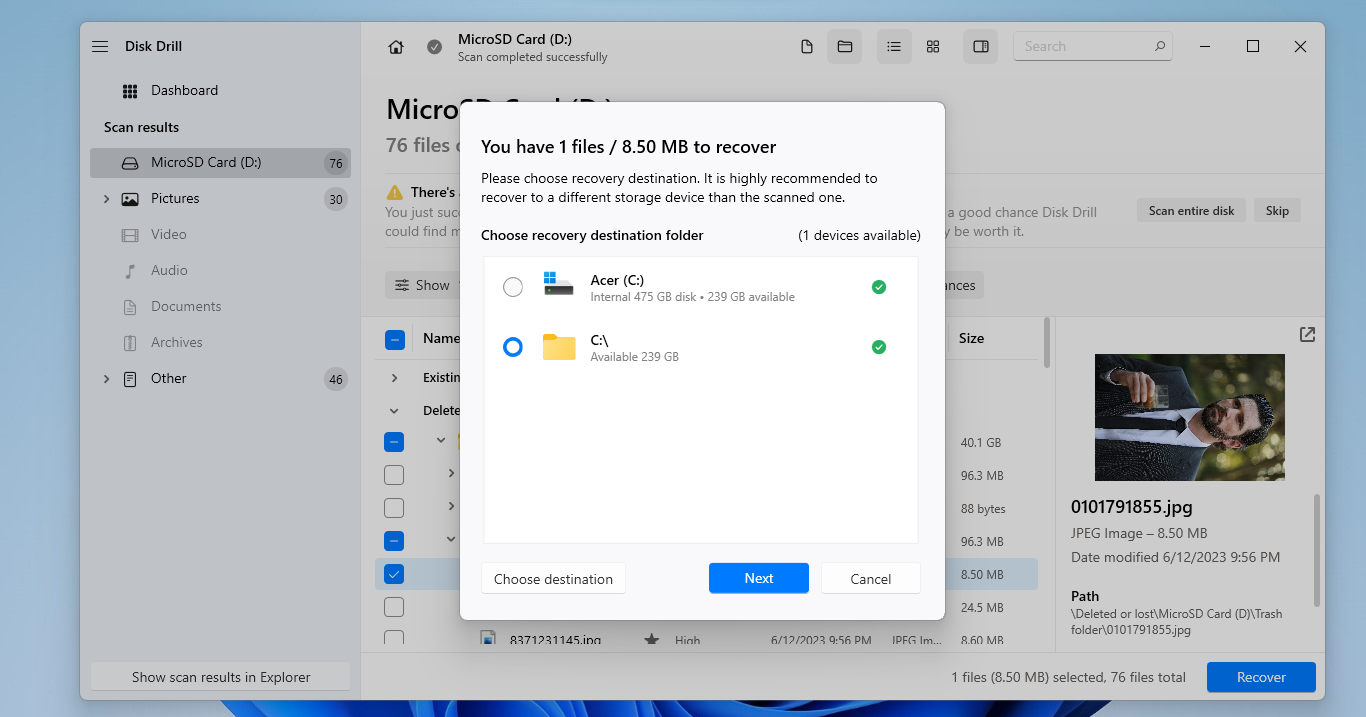
- Select the files you want to save, click on Recover, and choose a recovery destination. Make sure not to save it to the microSD card, as that can overwrite existing files.
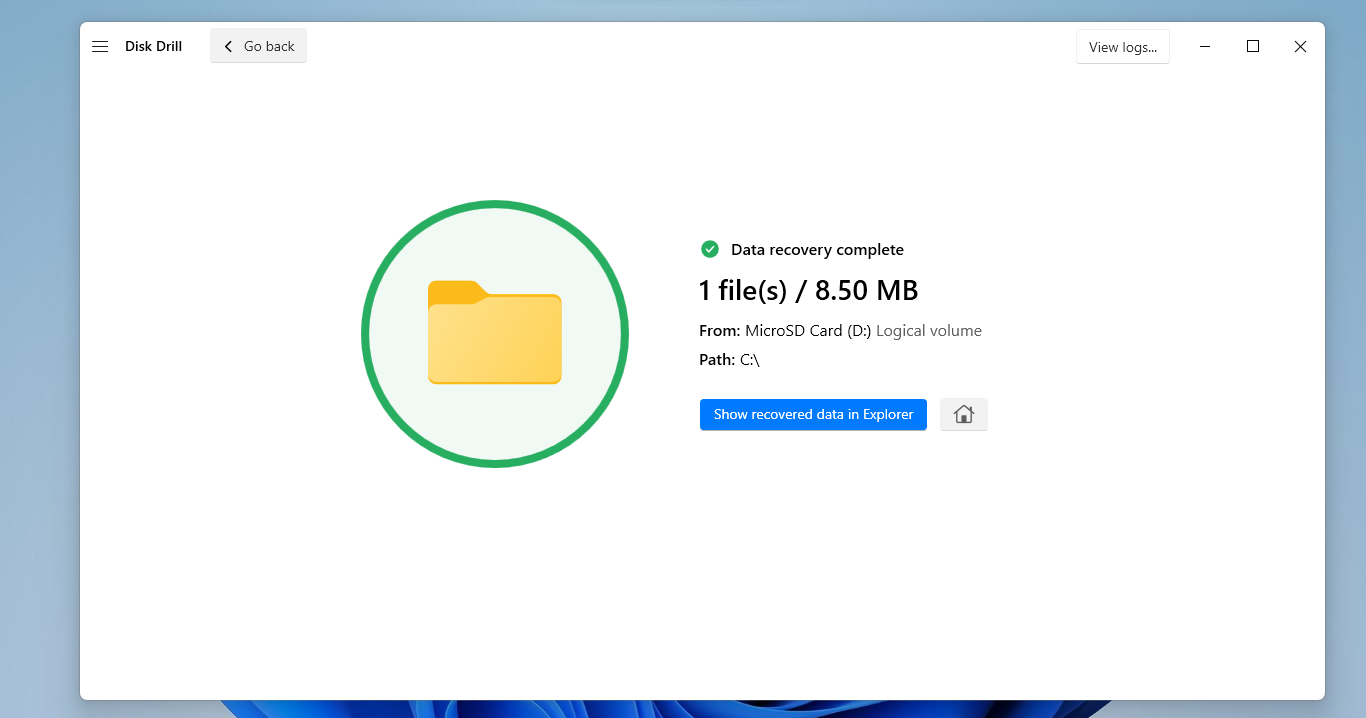
- You will get a success message when the files are recovered.
How to Fix the Logical Issues With Your MicroSD Card
Data recovery tools can only function if the card is detected by your computer. Sometimes logical issues or a poor connection can prevent the card from being accessed. Here are some methods of resolving this issue:
Method 1: Troubleshoot Your MicroSD Card Connection
The first step toward recovering data from your MicroSD card is to connect it to a computer. If you run into issues at this stage itself, you cannot continue.
Often the problem lies with the card reader. MicroSD card readers built into a laptop are usually reliable, but flimsy external readers can give you trouble. Try using another card reader or using a different USB slot to get it working.
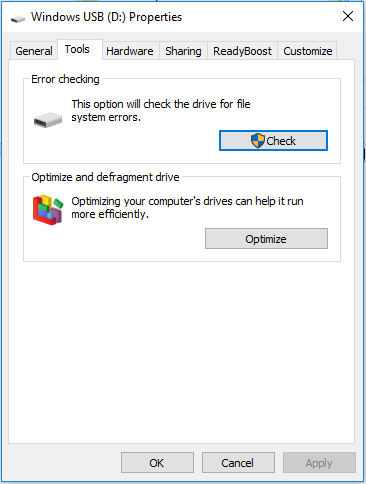
Method 2: Use the Error-checking tool
The simplest method is to use the error-checking tool. It can detect and fix basic logical errors, which is often all that is wrong with your MicroSD card.
- Right-click on the drive of your SD card and select Properties.
- Now head to the Tools tab and click on Check. Your SD card will now be scanned for errors. Simple issues will also be automatically repaired.
Method 3: Assign a new drive letter
A popular fix is to assign the SD card a new drive letter. This forces the PC to mount the drive again, often allowing you to access the files again.
- To assign a new drive letter to your MicroSD card, open Disk Management.
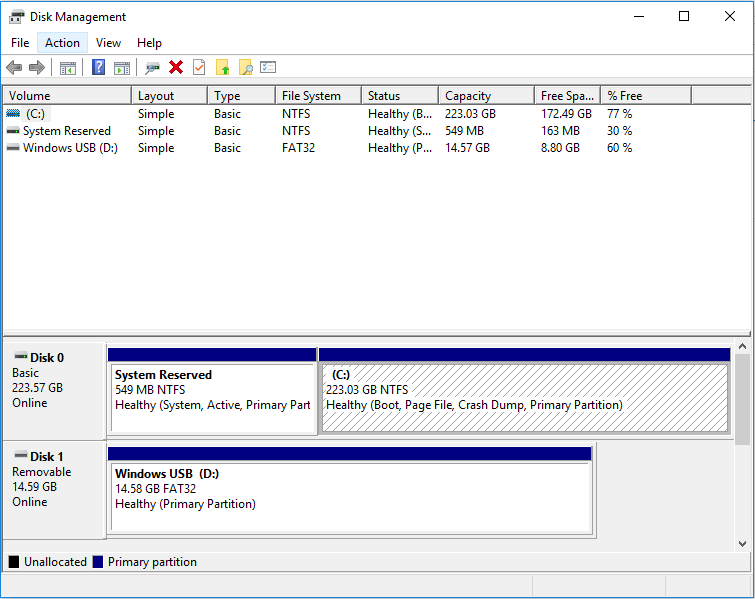
- Right-click on the MicroSD card and select Change Drive Letter and Paths A new window will open, displaying the current drive letter.
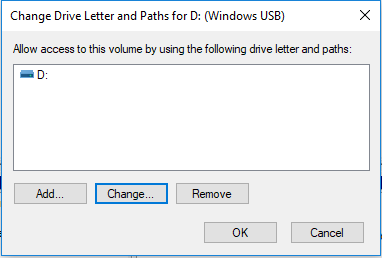
- Select Change.
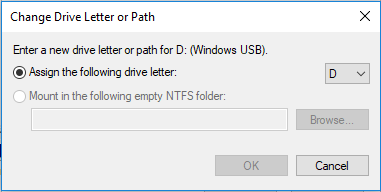
- In the window that appears, you can select a new drive letter from a drop-down menu. Click on OK when you are done to actually mount the SD card with the new drive letter.
Method 4: Show Hidden Files
It is uncommon, but also possible that your files are merely hidden. This can be due to malware, or even by accident. Such files don’t show up even when your file system is working properly and need to be found by other means.
You can show hidden files by using the attrib command. The File Explorer is an option too, but the cmd method is faster and works even on those files being forcefully hidden by a virus.
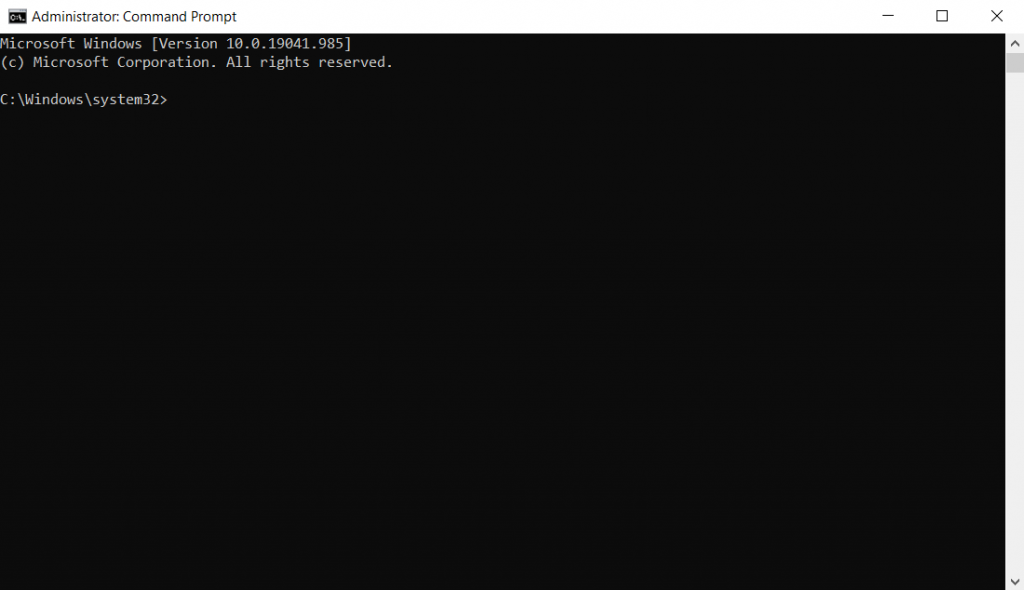
- To use the attrib command, open Command Prompt with administrator privileges. Just search cmd in the Start Menu and select the Run as administrator option.
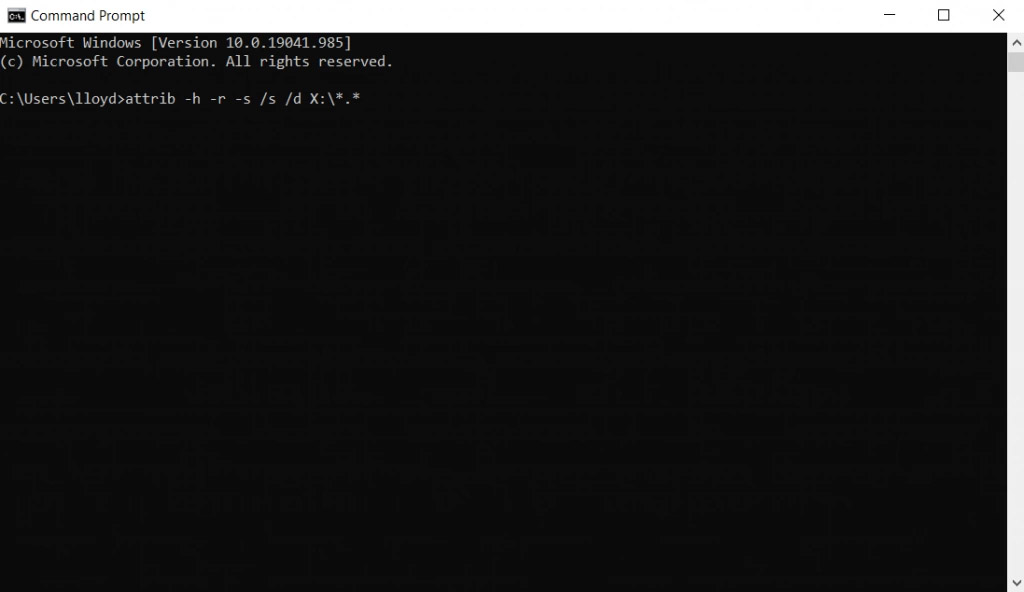
- A command prompt terminal will open up, ready to accept commands. Enter: attrib -h -r -s /s /d X:\*.*
Where X is the drive letter of your MicroSD card. All hidden files on the drive will be forcefully unhidden, allowing you to find your missing files with ease.
What is the Difference Between MicroSD Card and Standard SD Card
There is a lot of confusion regarding the various names of SD cards. Some cards sport a ‘Micro’ prefix, while others are just captioned SD cards. Then there is the ‘HC’ or ‘XC’ printed underneath the main title, further complicating matters.
Basically, SD card naming conventions have evolved as the technology itself has changed during the last two decades. Cards currently in the market are usually SDHC cards, with a rare few SDXC cards also being sold.
When these cards got further miniaturized from their original form factor, they were then labeled as MicroSDHC cards or MicroSD in short. Thus MicroSD and standard SD cards differ not just in physical size, but also in technical parameters like capacity and transfer speeds.
FAQ
Can MicroSD card data be recovered?
Yes. Lost or corrupted files can usually still be repaired and recovered with the right tools. Connect the SD card to your computer and use a good data recovery application to scan it. This will display all the files that can be recovered, allowing you to save the ones you want.
How to recover data from a MicroSD card not being detected?
There are two reasons why a MicroSD card might not be detected by your phone: there may be logical issues, or the memory cells themselves may be damaged.
In case it is the former, it is still possible to recover data by connecting the SD card with a computer and scanning with a data recovery tool. But if the card is physically damaged, you have no other option but to contact a professional recovery service and see if they can scrounge something up.
Can you recover photos from a corrupted MicroSD card?
In most cases, yes. If the file system is corrupted, for example, the data is usually intact and you can restore it without much trouble. But if the files themselves are corrupted, they need to be repaired first, which isn’t always possible.
One way of doing this is by using the CHKDSK utility. Accessed through the Command Prompt, this nifty little utility restores basic data corruption. Simply enter chkdsk G: /F /R /X in the command prompt terminal, where G is the drive letter of your MicroSD card.
A better method is to use a data recovery application. Software like this specializes in detecting and restoring photos lost from a memory card for any reason, whether it’s accidental deletion or data corruption.
In which cases should I contact the MicroSD card recovery service?
Your first step should be to scan your MicroSD card with a data recovery app. In most cases, this is all you need to successfully recover your important files and save them. But if these tools fail to access the disk or find anything useful, the issue probably goes deeper.
Failing memory cells and other hardware issues are much harder to fix and require professional diagnosis. That is when you should reach out to a dedicated memory card data recovery service and see if they can restore any of your data.
What is the Best SD card recovery software to recover data from microSD cards?
There are many factors that influence how “good” a data recovery tool is. Pricing, performance, difficulty – all of these and more must be considered in tandem. Keeping this in mind, here are some of the best data recovery tools available on leading platforms:
You can try any of these five applications to recover data from a MicroSD card. All of them have free versions to try too, so you don’t have to worry about buying one right away.
What is the best free microSD card recovery software?
There are a lot of great SD card recovery apps that offer a free version with various limitations. Disk Drill leads this pack with its extensive file format support and intuitive UI, followed by R-Studio and PhotoRec with their own pros and cons.
You can also use Microsoft’s own Windows File Recovery tool, available for absolutely no cost. But the command line interface makes it hard to use, and its performance in recovering files is not on par with the other apps we mentioned before.
Conclusion
There is a lot that can go wrong with a MicroSD card. For hardware faults, there is no recourse but to contact a professional recovery service. Even then, the chances of recovery are slim.
But usually, the problem will be something milder. Be it an incorrectly formatted drive or hidden files, these issues can be easily fixed. You can take a step-by-step approach to fix these issues, or better yet, leave it to a data recovery tool to sort it all out.
Data recovery applications are built to be able to recover data lost due to any means and are the most hassle-free method of getting your files back from a malfunctioning MicroSD card.
This article was written by Levin Roy, a Contributing Writer at Handy Recovery Advisor. It was also verified for technical accuracy by Andrey Vasilyev, our editorial advisor.
Curious about our content creation process? Take a look at our Editor Guidelines.