
Have you been searching endlessly for a set of files or even a particular one? The file may likely be hidden from view, or even deleted from the drive. So, how do you view all the files on a Mac? Keep reading our guide to know the reasons why you can’t see some files on macOS, and what you can do about it.
Why Can’t You See All Files on Mac?
There can be several reasons why you can’t see all the files on your Mac. They may be hidden because they’re system files, or the files could have disappeared entirely from your drive for some reason.
Usually, one of the following reasons is why you’re unable to view all the files on your Mac:
- 🫣 Accidentally or Intentionally Hidden Files: It’s effortless to hide files in macOS (as well as to show them again). You could accidentally use the Command + Shift + . (dot) shortcut to make hidden files invisible again (if they were visible earlier). Also, if you were renaming a file and added a . (dot or period) before the filename, macOS treats it as a hidden file. In addition to this, certain application-specific files are intentionally hidden to prevent accidental deletion or modification.
- 🔐 System Protected Files: Critical system files are hidden by macOS, to avoid any unintended changes. Modifying or deleting these files can hamper the functioning of the OS, so it’s best to let them be as they are.
- ⛔️ Restricted User Permissions: Your user account may have different folder permissions. Certain folders may be inaccessible to you, or you may have limited access to them. You can modify these permissions by logging in using an Administrator account.
- 🔎 Search and Filter Settings: If you’re unable to find a file using the Finder, double-check the filter settings. For example, if you’re looking for a document, but the file type filter is set to Music, the file won’t show up in the search results.
- 🧩 Corrupt File System: If the file system of your storage drive is damaged, you won’t be able to access your files, even if they’re present on the drive. A corrupt file system can indicate more serious problems like a build-up of bad sectors on your disk or a malware infection.
How to See All the Files on Your Mac
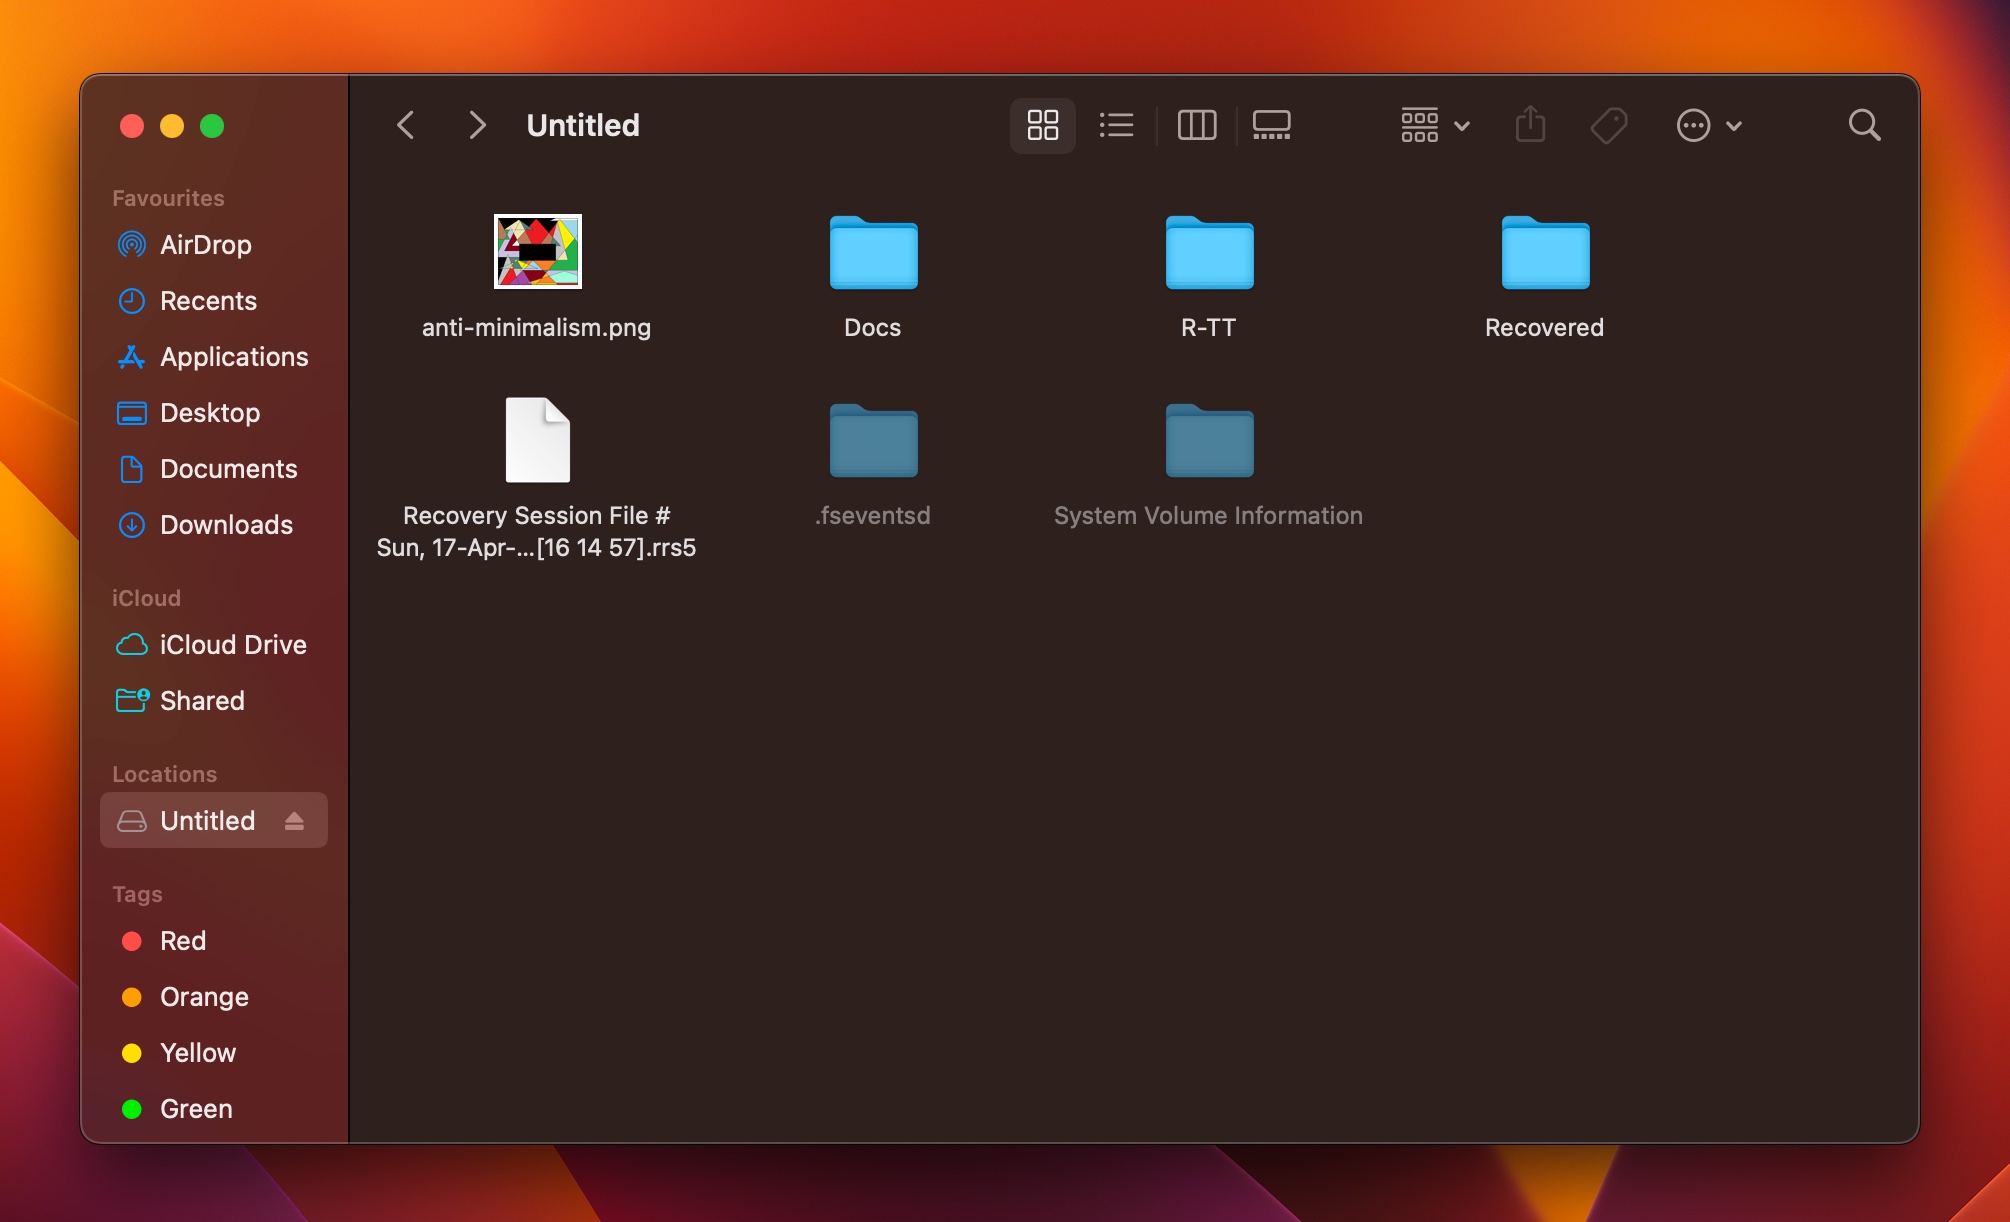
There are several ways to view all the files on your Mac. In case you’re still unable to find the required files, they may have been deleted from your Mac. To aid you in that case, we’ve included a method that’ll help you get those deleted files back.
Method 1: Make All Files Visible on your Mac
It’s quite likely that the files you’re looking for are hidden. Viewing these hidden files is an easy affair.
- Open Finder and navigate to the relevant drive.
- Press Command + Shift + . (dot) to show all hidden folders and files on your Mac.
- You can toggle between hiding and viewing the files using the shortcut.
Feeling adventurous? You can also use the Terminal app to view hidden files and hide them again. Here’s how:
- Press Command + Space to open Spotlight.
- Search for the Terminal app and launch it.
- Type defaults write com.apple.Finder AppleShowAllFiles true in the console and press Enter.
- Type killall Finder and press Enter.
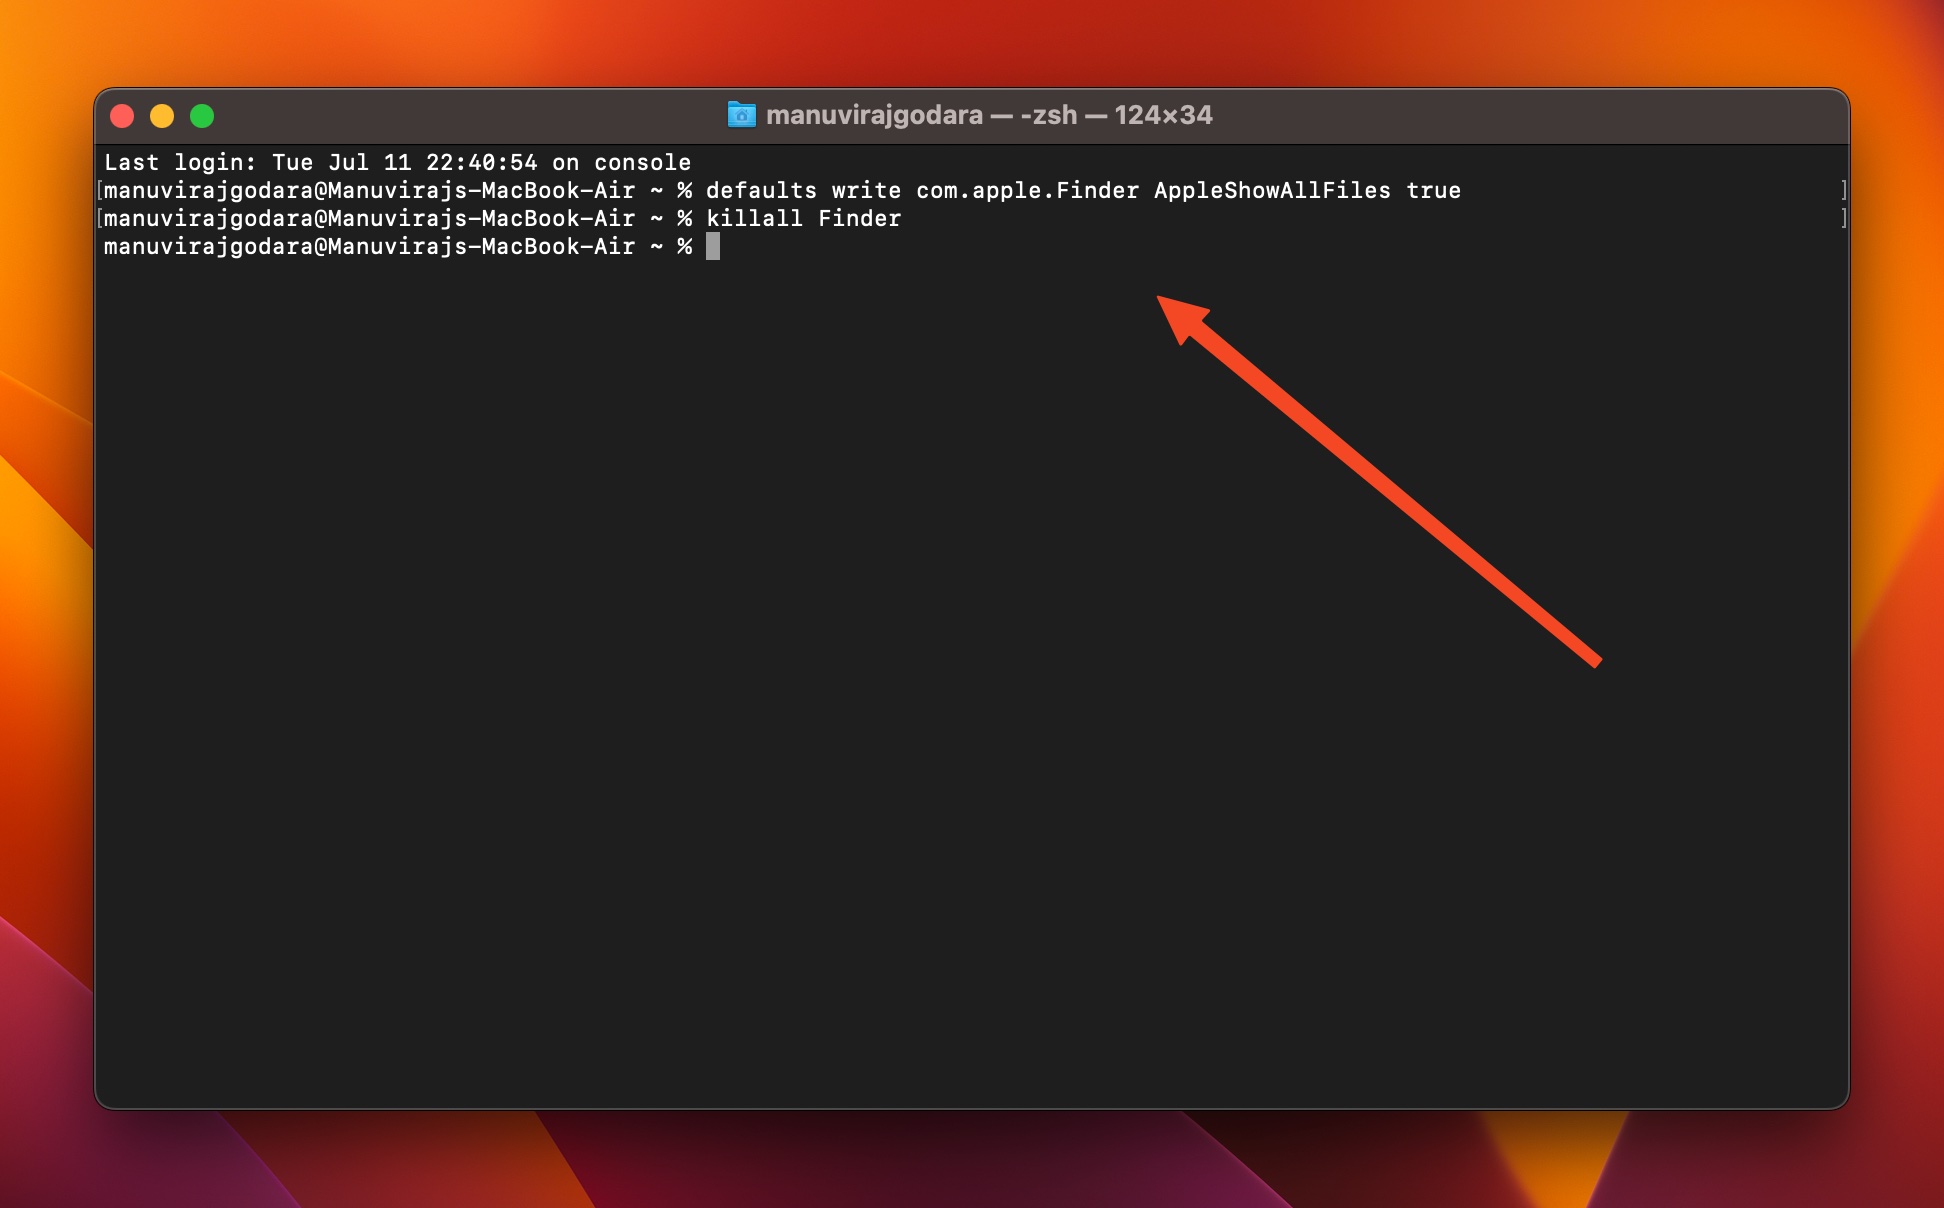
- Open Finder and you should notice that all hidden files are now visible. To hide them again, follow step 3, but replace true with false.
Method 2: Look for the Files Manually
Finder’s Advanced Search can help you find your files if you can’t remember where you placed them. It has a variety of parameters that can help you zero down on the file you’re looking for.
Here is how you can use Finder’s Advanced Search to effectively look for the desired files:
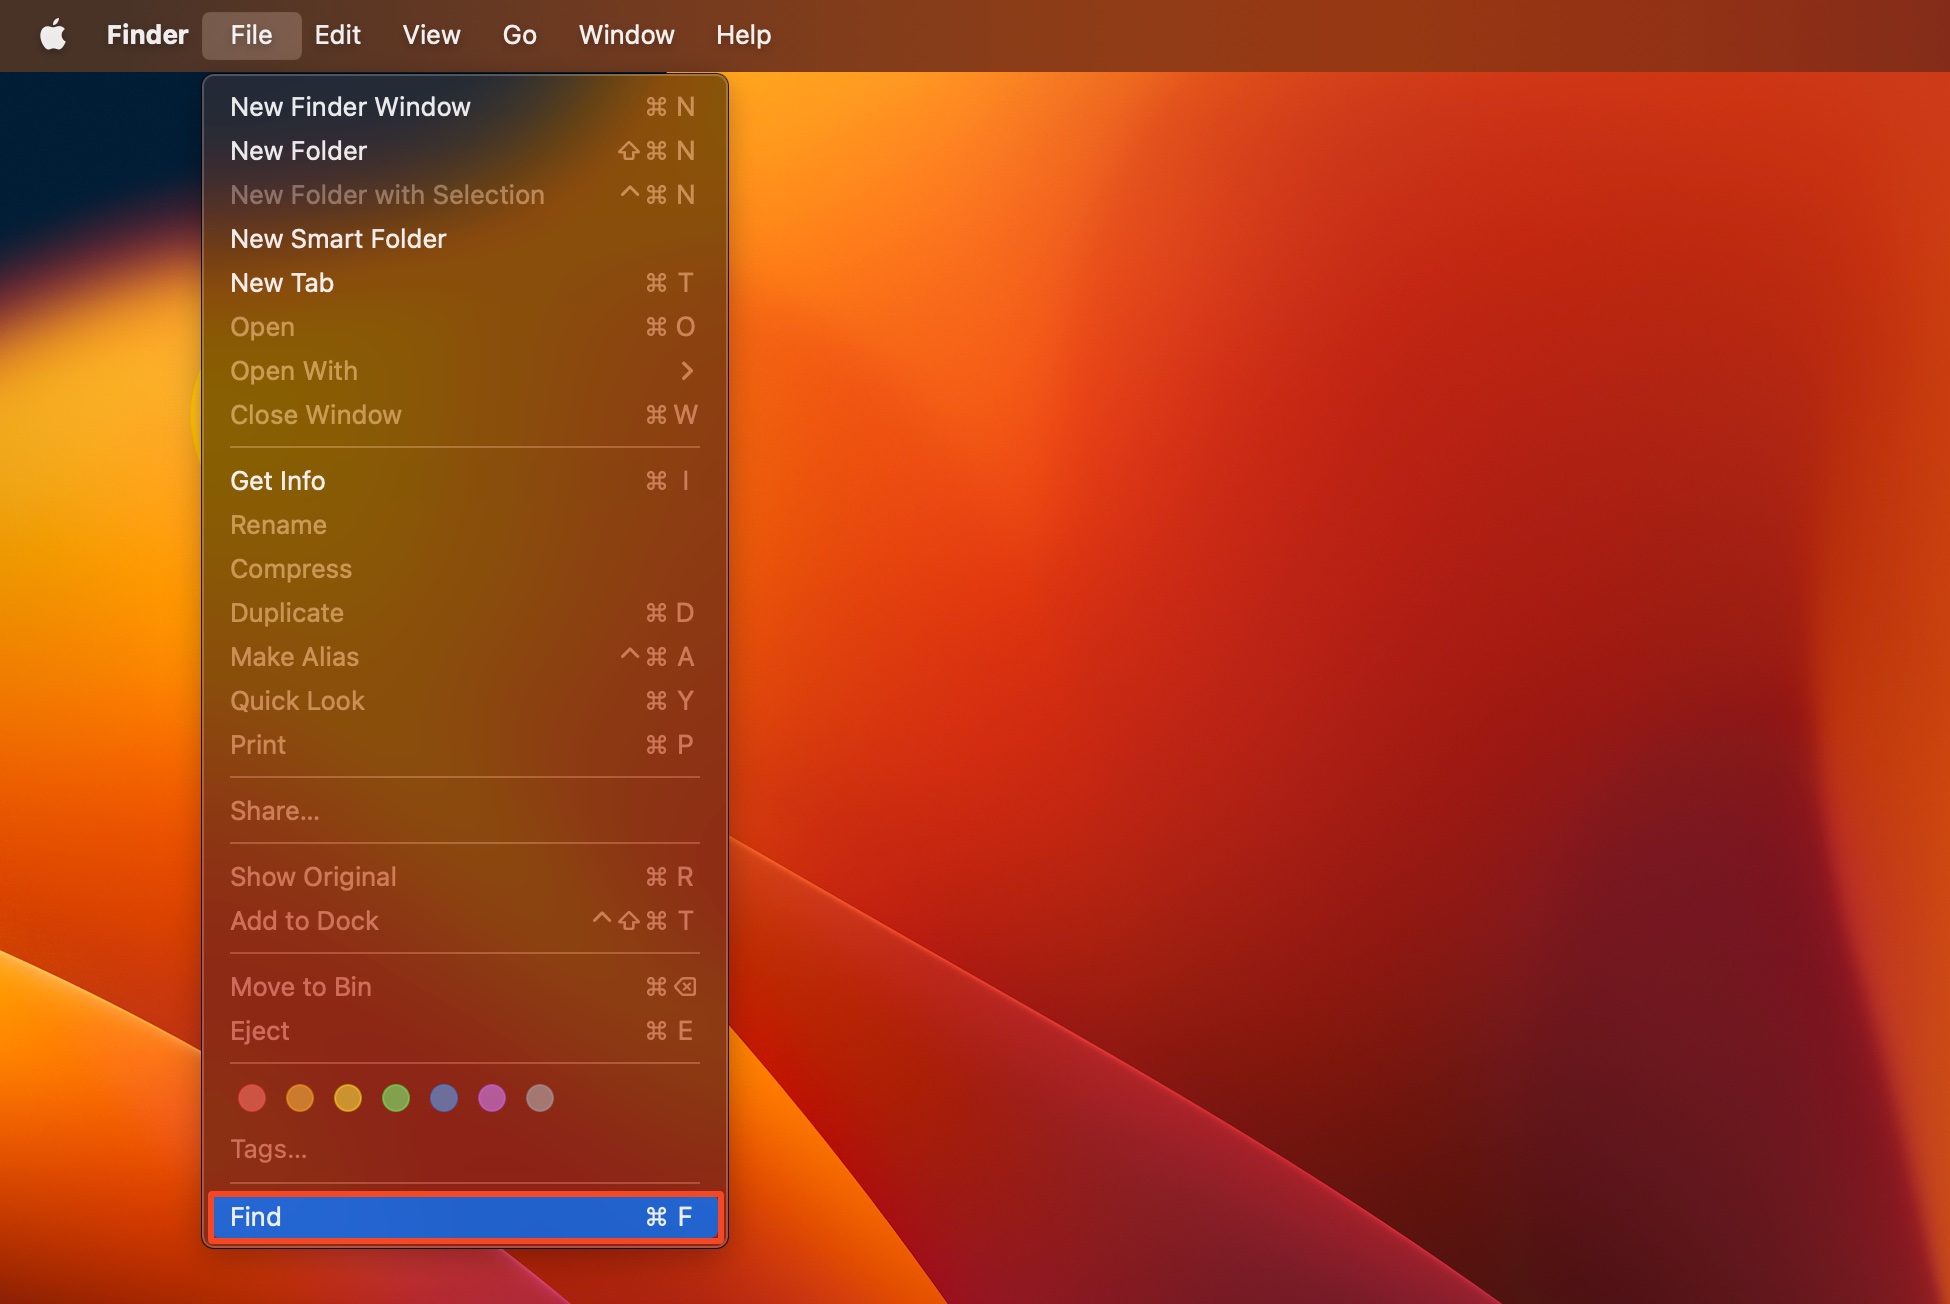
- Open Finder and in the Apple menu bar, click on File > Find.
- Right below the Search: This Mac bar, you’ll see a parameters bar that you can use to narrow down your search.
- Use the left drop-down menu to choose how you wish to modify the search. You can use options such as Kind, or Name. For example, if you wish to search for PNG photos, select Kind and choose Image, then PNG from the successive drop-down menus.
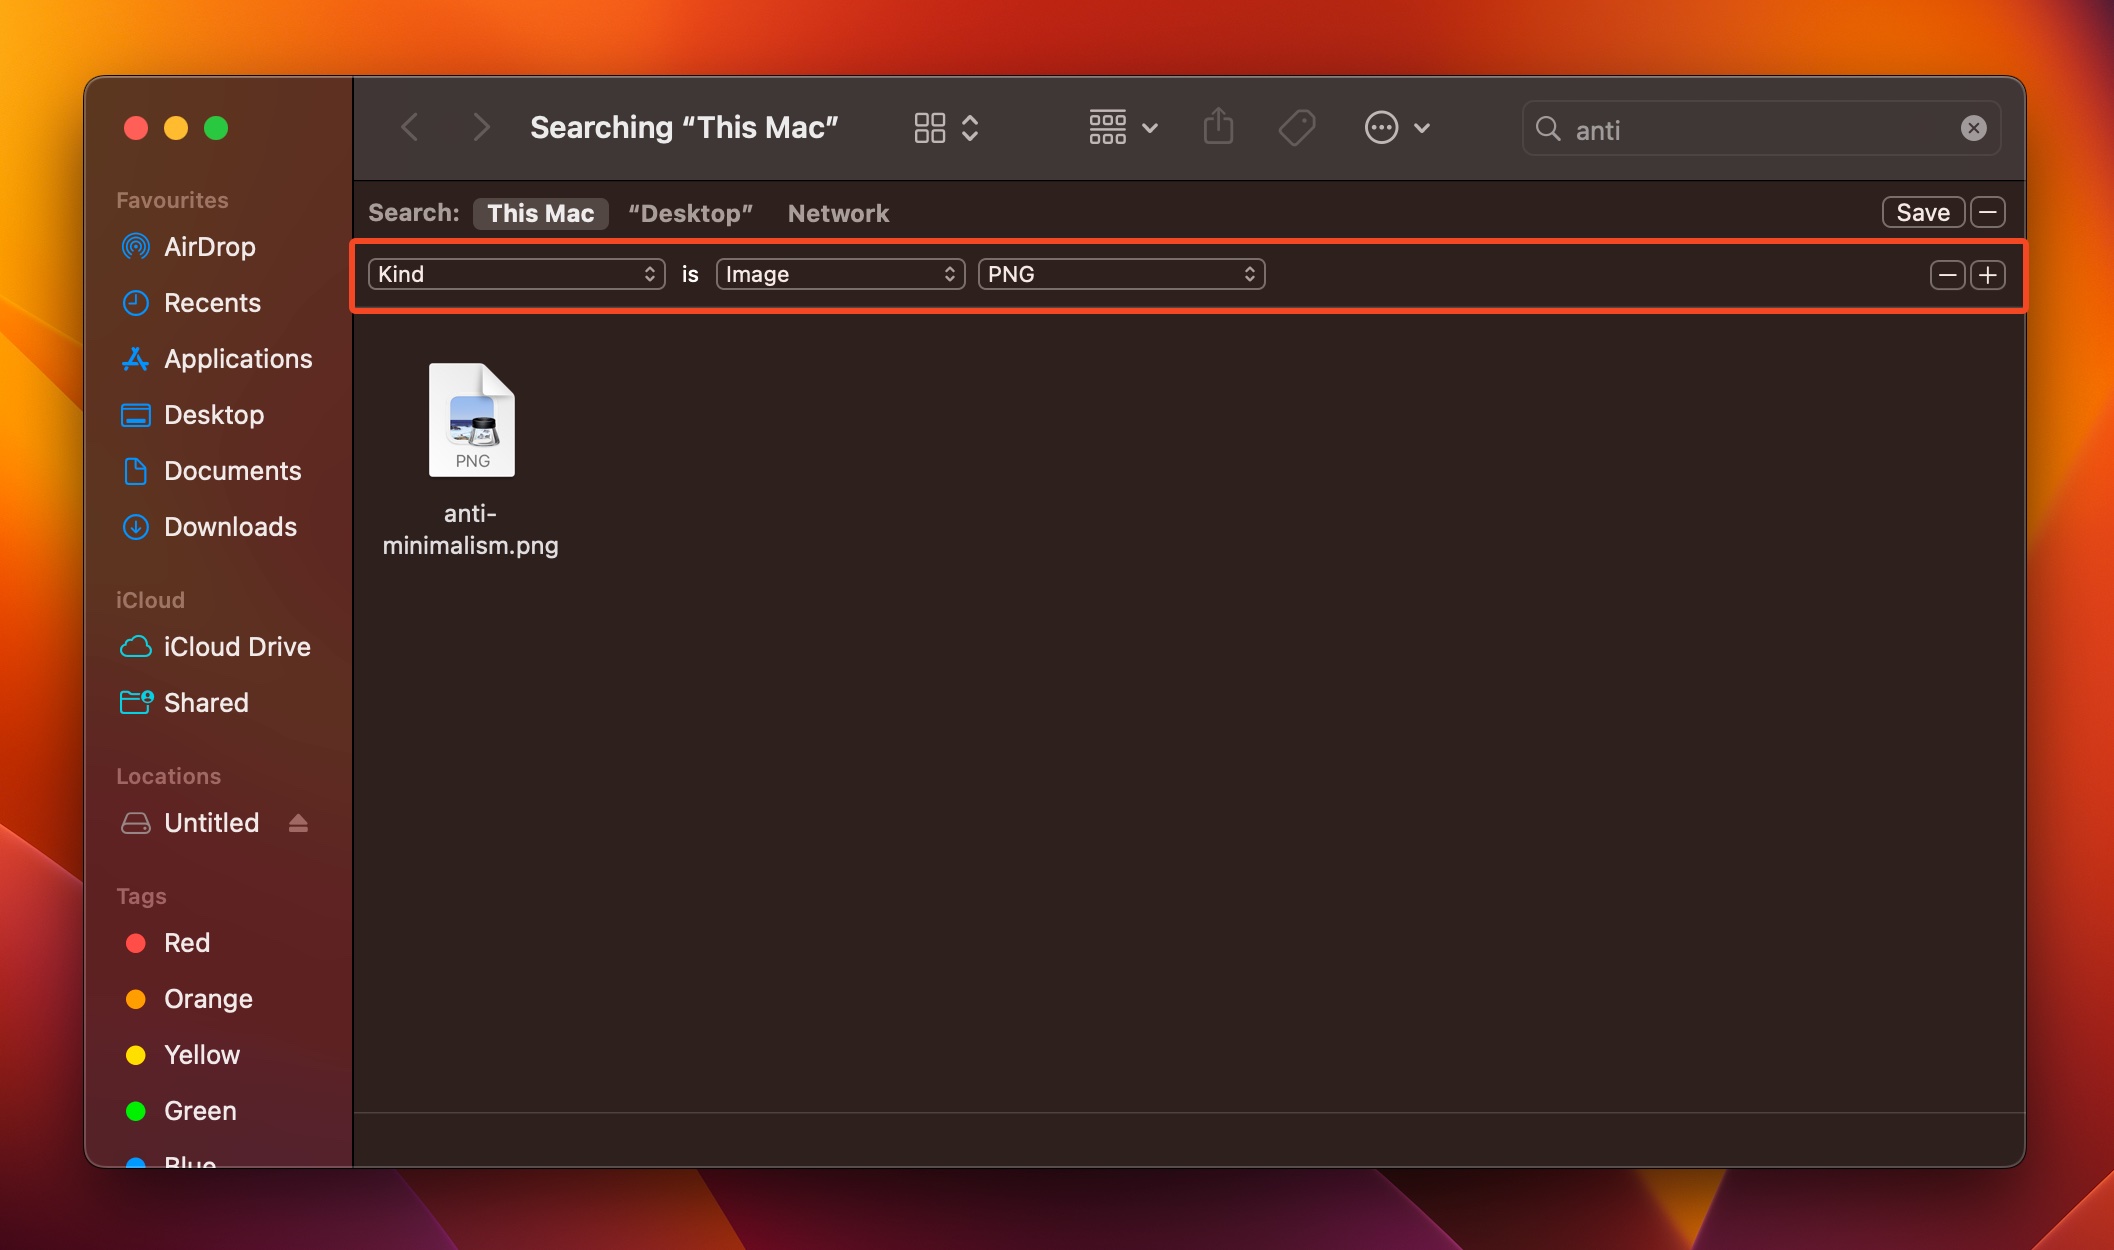
- You can add or remove search criteria by using the + and – buttons.
For more information about Finder Search, check out Apple’s official guide for it.
Method 3: Ensure Your Drive Has a Recognized File System
If you can’t see the files on an external hard drive connected to your Mac, it’s likely formatted with an incompatible file system. Mac recognized file systems include Apple File System (APFS), Mac OS Extended, FAT, exFAT, and NTFS (read-only).
Usually, macOS throws up a prompt as soon as you connect a drive with an incompatible file system, asking you to format it. If there are any file system issues, macOS will display an error message that asks you to initialize the disk. It’s best to ignore this and manually fix the drive using Mac’s Disk Utility.
Method 4: Repair the Drive
A corrupt or missing file system could be the reason why you’re unable to see all the files on your Mac. If there are any file system issues, macOS will display an error message that asks you to initialize the disk. It’s best to ignore this and manually fix the drive using Mac’s Disk Utility.
Your Mac has an in-built disk repair feature, called First Aid, that you can use to fix a range of file system issues. However, the repair process can potentially result in some data loss. So, use it only if you’re sure the drive is corrupt, and it’s not a simple case of an unrecognized file system or accidental deletion.
First Aid attempts to reassign any information stored in the bad (unreadable) sectors of your drive to reserved sectors, allowing you to view your files again. These bad sectors are then marked as such, and they will no longer be used to store any data.
Here’s how to use First Aid to repair a storage disk on your Mac:
- Go to Finder > Applications > Utilities > Disk Utility or search for the Disk Utility in Spotlight (Command + Space).
- Click on View > Show All Devices.
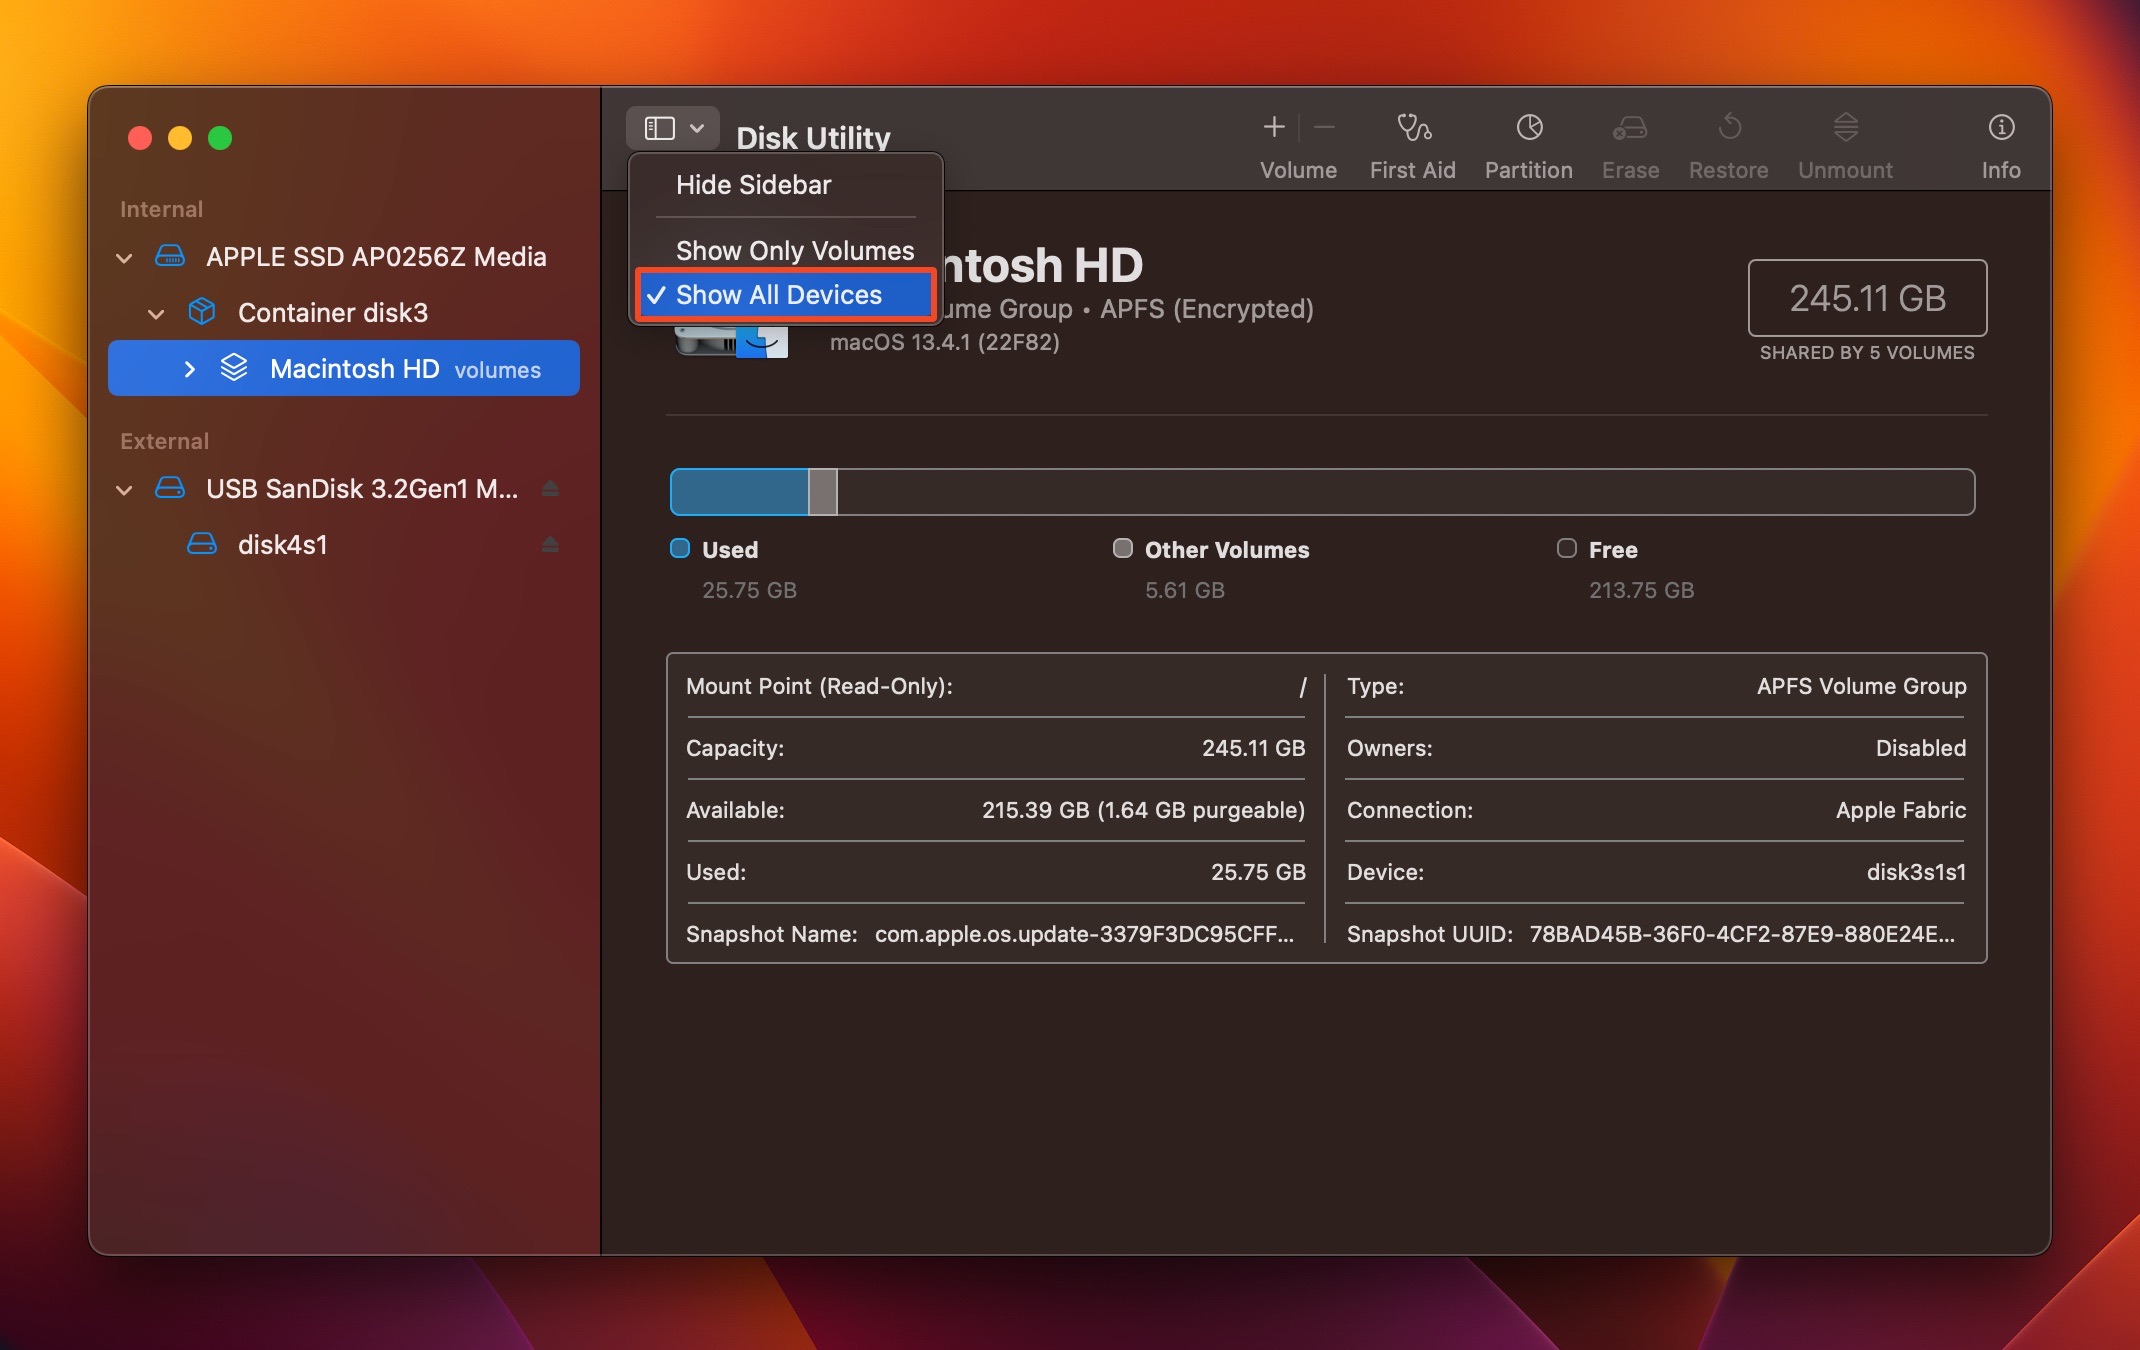
- On the left sidebar, select a volume of the relevant disk, and click on the First Aid button.
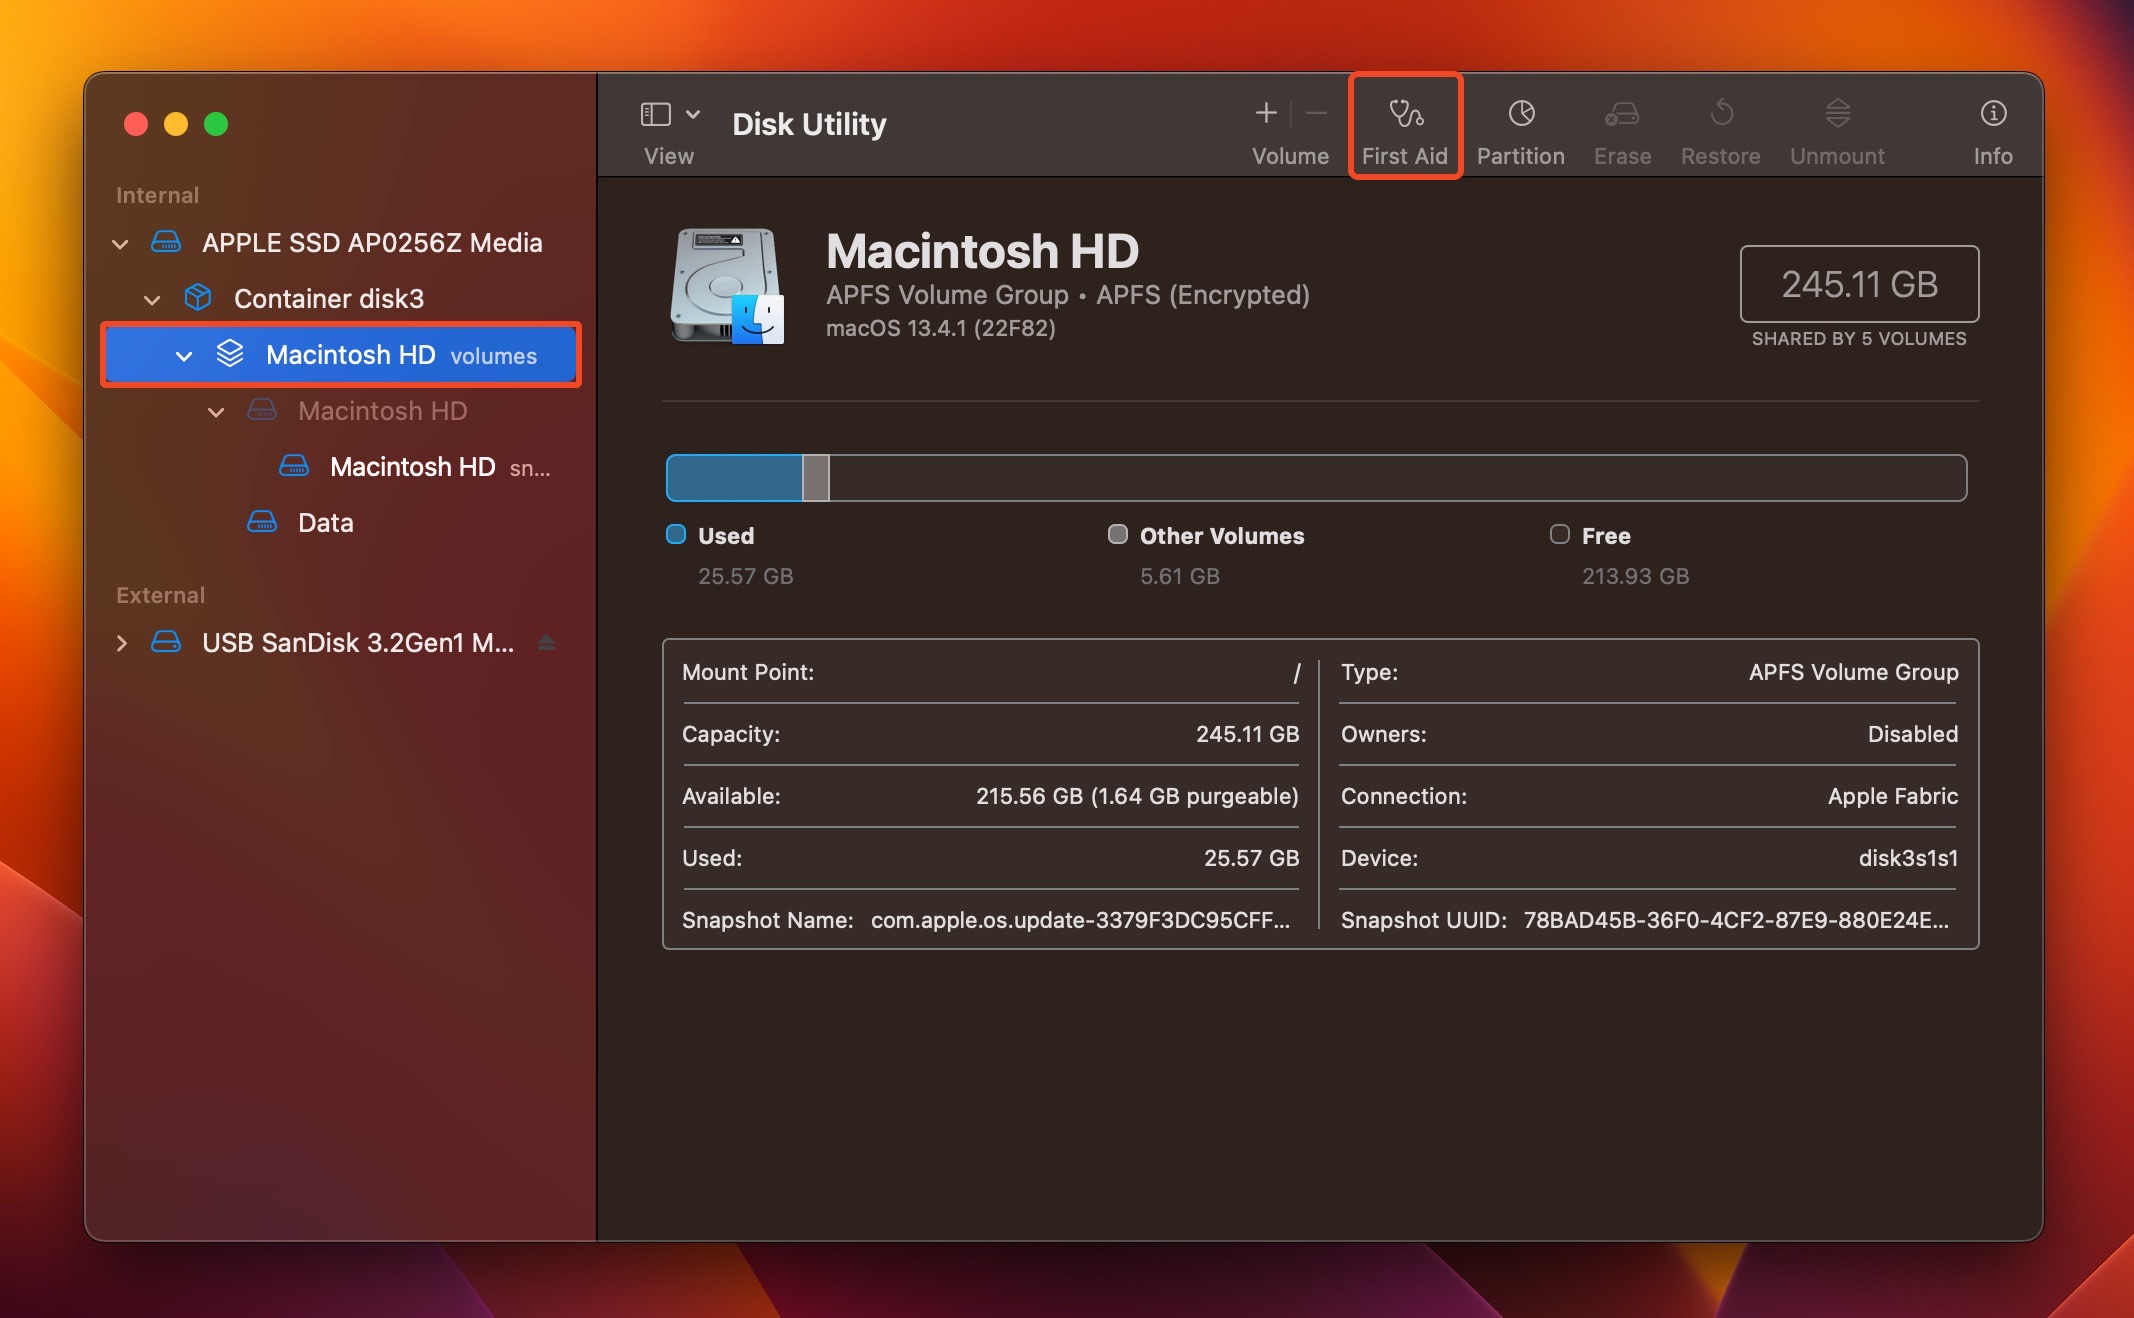
- Click on Run in the confirmation prompt.

- Repeat steps 3 & 4 on each volume of the disk.
- Now, select a container from the disk and click on the First Aid button. Click on Run in the next prompt. Again, do this for all containers in the disk.
- Finally, select the disk itself and click on First Aid. Confirm the command on the next screen.
- Disk Utility will let you know if it was successful in repairing the disk.
Many popular external hard drive vendors, like Seagate, Samsung, and Western Digital (WD), have their own, native drive management programs. You can use these apps to fix your drive as well. However, not all programs have a Mac version.
Method 5: Use a Data Recovery Tool to View All Your Files
If none of the aforementioned methods worked for you, then data recovery software might be able to help you out. This software can both display, and catalog all the files on your device, including ones that were deleted (it’s possible your files are neither lost nor hidden, but simply erased from the drive). A good data recovery program can recover data from corrupted disks, and retrieve data lost during the process of repairing such disks. There are plenty of such tools, but it’s crucial to choose only the best options.
For this tutorial, we opted to use Disk Drill. Its easy-to-navigate UI, compatibility with all common file systems across Windows and macOS, combined with an exceptional data recovery algorithm make it the perfect choice for most users. Using the tool, you can view all the files on your storage drive, including ones that are hidden, deleted, or have simply disappeared. It’s also excellent at recovering files that went missing due to hard drive corruption.
As far as possible, Disk Drill recovers files with the folder structure intact. For example, if you’re looking to recover files that disappeared from your Desktop folder, you can easily find them in the Disk Drill recovery screen because they will be visible under the Desktop folder tree. Even If it’s unable to recover the folder structure, you can use Disk Drill’s preview feature to easily identify the correct files, which is especially useful when you’re looking to recover disappeared photos or videos.
Note: If you suspect that your storage drive has file system issues and bad sectors, it’s best to create a Byte-to-byte Backup of it and scan that for missing data, instead of directly scanning the drive. A direct data recovery scan is stressful to the drive and can worsen the damage.
Here’s how you can use Disk Drill to see all the files on your Mac, and recover deleted data:
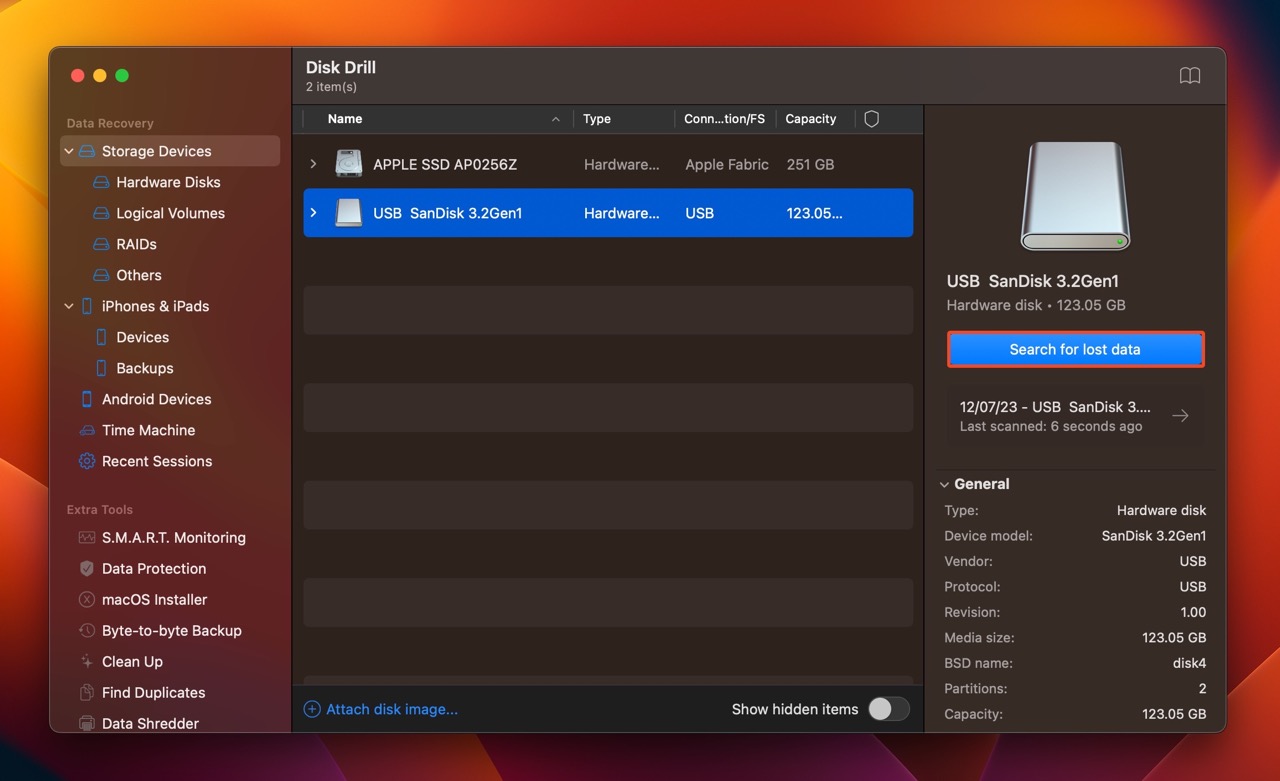
- Download Disk Drill and install it.
- Open Disk Drill, select the storage drive you wish to see all the files on, and click Search for lost data. If you’re opting to scan a Byte-to-byte Backup, click on Attach disk image > Browse for the disk image. Click on the disk image in Disk Drill and choose Search for lost data.
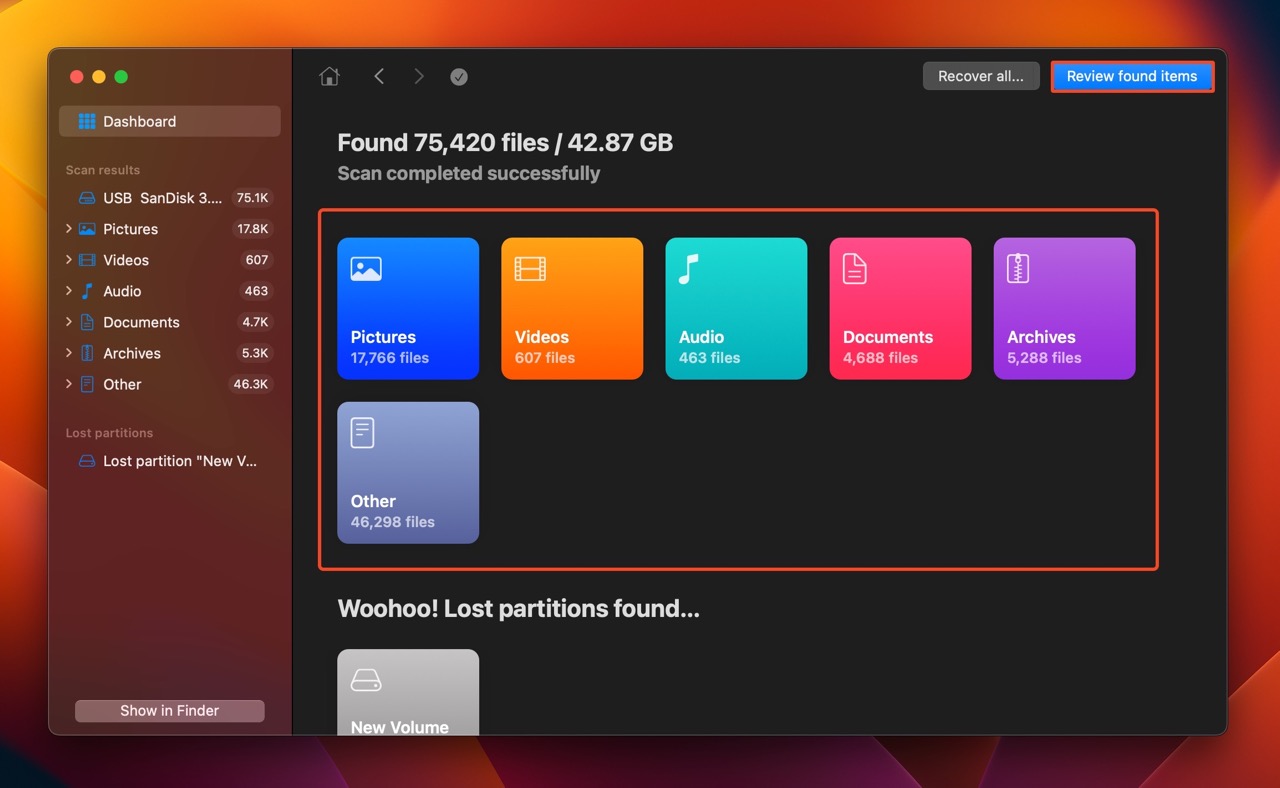
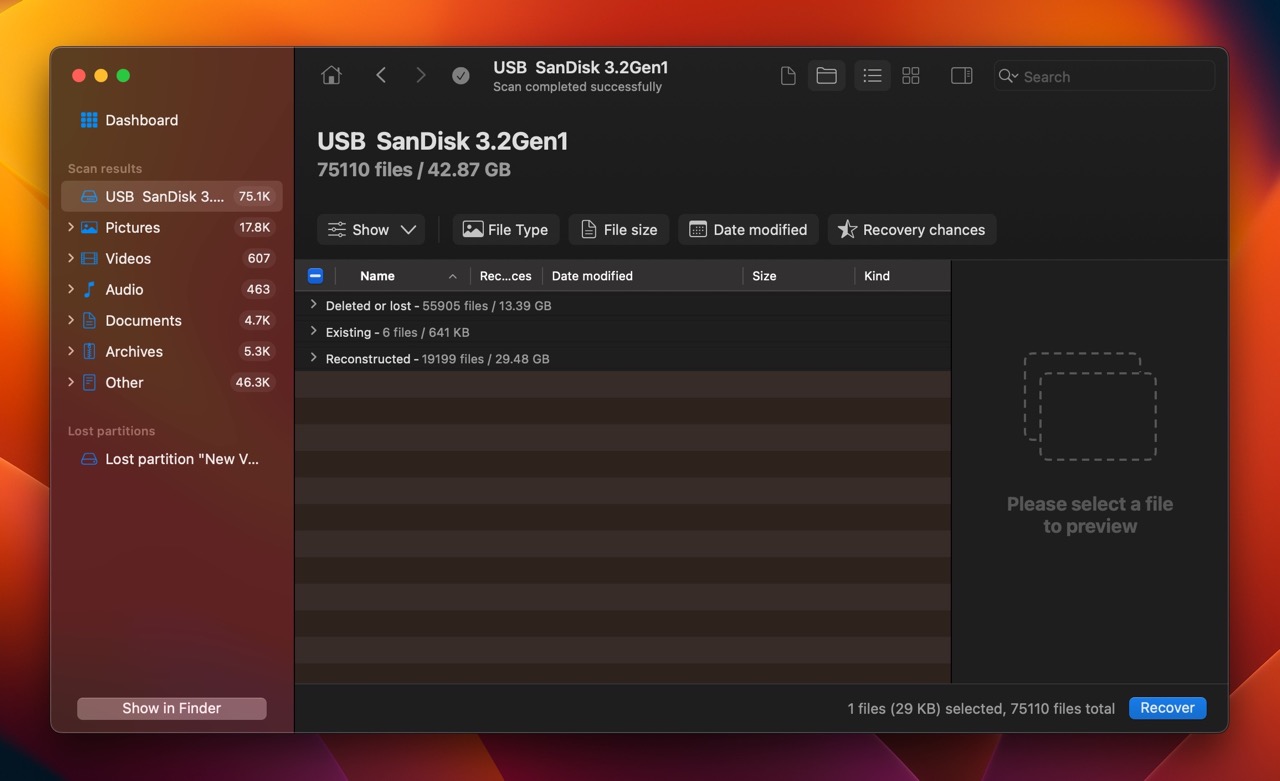
- Click on Review found items. If you wish to recover a specific file type, filter out the results by clicking the relevant file type (Pictures, Video, Audio, Documents, Archives, and Other).
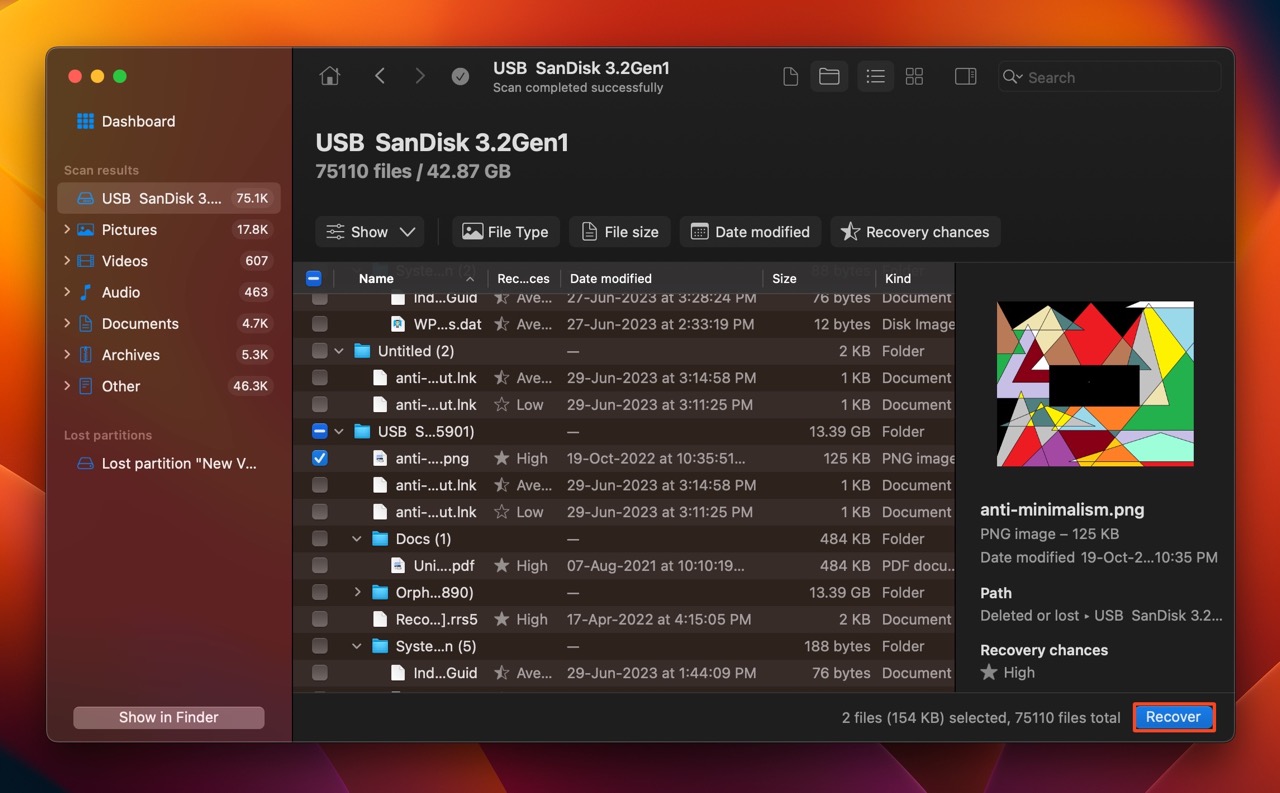
- Expand the Existing section to view the currently stored files on the disk. To view deleted files that are recoverable, expand the Deleted or lost and Reconstructed sections.
- Select the files you wish to recover and click on Recover. To help you select the correct files, Disk Drill displays a preview of the currently selected file.
- Pick a recovery destination and click Next. It’s best to recover the files to a different drive, and not the one you recovered data from.

- Disk Drill will recover the selected files. You can see all recoverable files using the free version of the program, but to recover them, you’ll need to upgrade to Disk Drill Pro.
To know more about Disk Drill, its features, safety, and what the Pro version offers, read through our detailed review of the tool.
FAQ
How to view all files on a Mac?
To view all files on your Mac (even the deleted ones), follow these steps:
- Download Disk Drill and install it on your Mac.
- Open Disk Drill, select the disk, and click Search for lost data.
- Click on Review found items.
- You’ll be able to see all existing and recoverable files on the disk.
- Select them and click on Recover to get them back.
How to show hidden files on an external hard drive on Mac?
To show hidden files on an external hard drive on Mac, follow these steps:
- Open Finder and navigate to the external hard drive.
- Press Command + Shift + . (dot) to toggle between viewing hidden files and hiding them again.
Why is an external hard drive not showing files though they still exist on Mac?
If the files exist on the external hard drive, they may just be hidden from view. Navigate to the drive and use the Command + Shift + . (dot) shortcut to view them.
Why can't I see all the files on my external hard drive on a Mac?
The files disappeared from your Mac’s external hard drive, because of one of the following reasons:
- The files are hidden.
- The Mac is having trouble reading the drive because the disk is damaged, or it’s formatted with an incompatible file system.
Conclusion
Viewing all your files on macOS is a piece of cake if the files were simply hidden from view. But. Even if they were deleted, third-party data recovery programs make it easier than ever to get them back. But, creating regular backups is, by far, the best way to keep all your files secure. We recommend you store your backups on a local storage drive as well as a cloud solution.
This article was written by Manuviraj Godara, a Staff Writer at Handy Recovery Advisor. It was also verified for technical accuracy by Andrey Vasilyev, our editorial advisor.
Curious about our content creation process? Take a look at our Editor Guidelines.