Did you accidentally delete some photos from your Android SD card? Did you try to access the photos you took yesterday but can’t find them anywhere no matter where you’ve looked? Does your Android phone’s external storage appear corrupted, its contents inaccessible?
In such cases you should act as quickly as possible for the longer you postpone dealing with the issue, the lower the chances you’ll be able to recover deleted photos from an sd card on an Android phone.
So, let’s see how you can get restore your lost files from an SD card on an Android device.
Important Preparation Steps
When you accidentally remove or realize they’re gone, you should immediately take some steps to ensure you’ll be able to recover photos from an SD card on an Android phone.
Pick up your device right now, and..:
- Ensure nothing is actively using your SD card. Terminate any running applications, and don’t launch anything else.
- Check the solutions in this article and choose if you’d like to try to recover your photos directly on your device. If yes, or those methods fail, move to the next step.
- Shut down your phone.
- Disconnect your SD card.
- Connect it to your PC or Mac (you might need an SD card reader for that).
- Scan it with an app like Disk Drill and have it save your precious photos on another storage device.
All of the above and everything we’ll see in this article also applies to Samsung phones. However, if you’re using a Samsung device, which may offer more options for getting your files back, make sure also to check our guide on how to recover photos from a Samsung phone.
Depending on the method you choose to retrieve deleted photos from the SD card on an Android phone, the best solutions are:
Chosen Method |
Solution |
🪟I need to recover deleted photos from an Android SD card using Windows PC. |
Scan your SD card with Disk Drill’s Windows version. |
🍎I need to recover deleted photos from an Android SD card using Mac. |
Scan your SD card with Disk Drill for macOS. |
💻I need to recover deleted photos from an Android SD card without a computer. |
Install DiskDigger from the Play Store to your phone’s internal storage and use it to scan your SD card. |
In this article, we prioritize photos (and pictures/images) over other files. If you want to get back different types of files from your Android’s internal or external storage, check our guides on how to recover deleted files on Android and how to recover files from a formatted SD card on Android.
How to Recover Photos From an SD Card on an Android Phone
With various ways to recover deleted pictures from SD card on Android, which one should you choose? Not so fast: why try recovering something which might not need recovery?
Your lost files may still be accessible but hidden from view. Still, before using an SD card photo recovery app, even if it’s among the best Android data recovery software available, it’s better first to check the most common image hideouts on Android devices.
Step 1: Ensure You Deleted Photos From an SD Card
Apart from individual third-party apps, like your favorite social media clients, the following are the spots where photos tend to hide on Android devices.
Your phone might be using Google’s “generic” Photos/Gallery apps or ones made by the device’s manufacturer. The solutions we’ll see are a mix of both, and the steps are similar in all cases. For this article, we’ve used a Xiaomi smartphone.
Check Recently Deleted Album
If you accidentally deleted a whole photo album on Android, it might still be available from your smartphone’s Gallery app. If your phone isn’t overflowing with files, your deleted album should be available up to 30 days after its deletion.
To “undelete it” from the Gallery app:
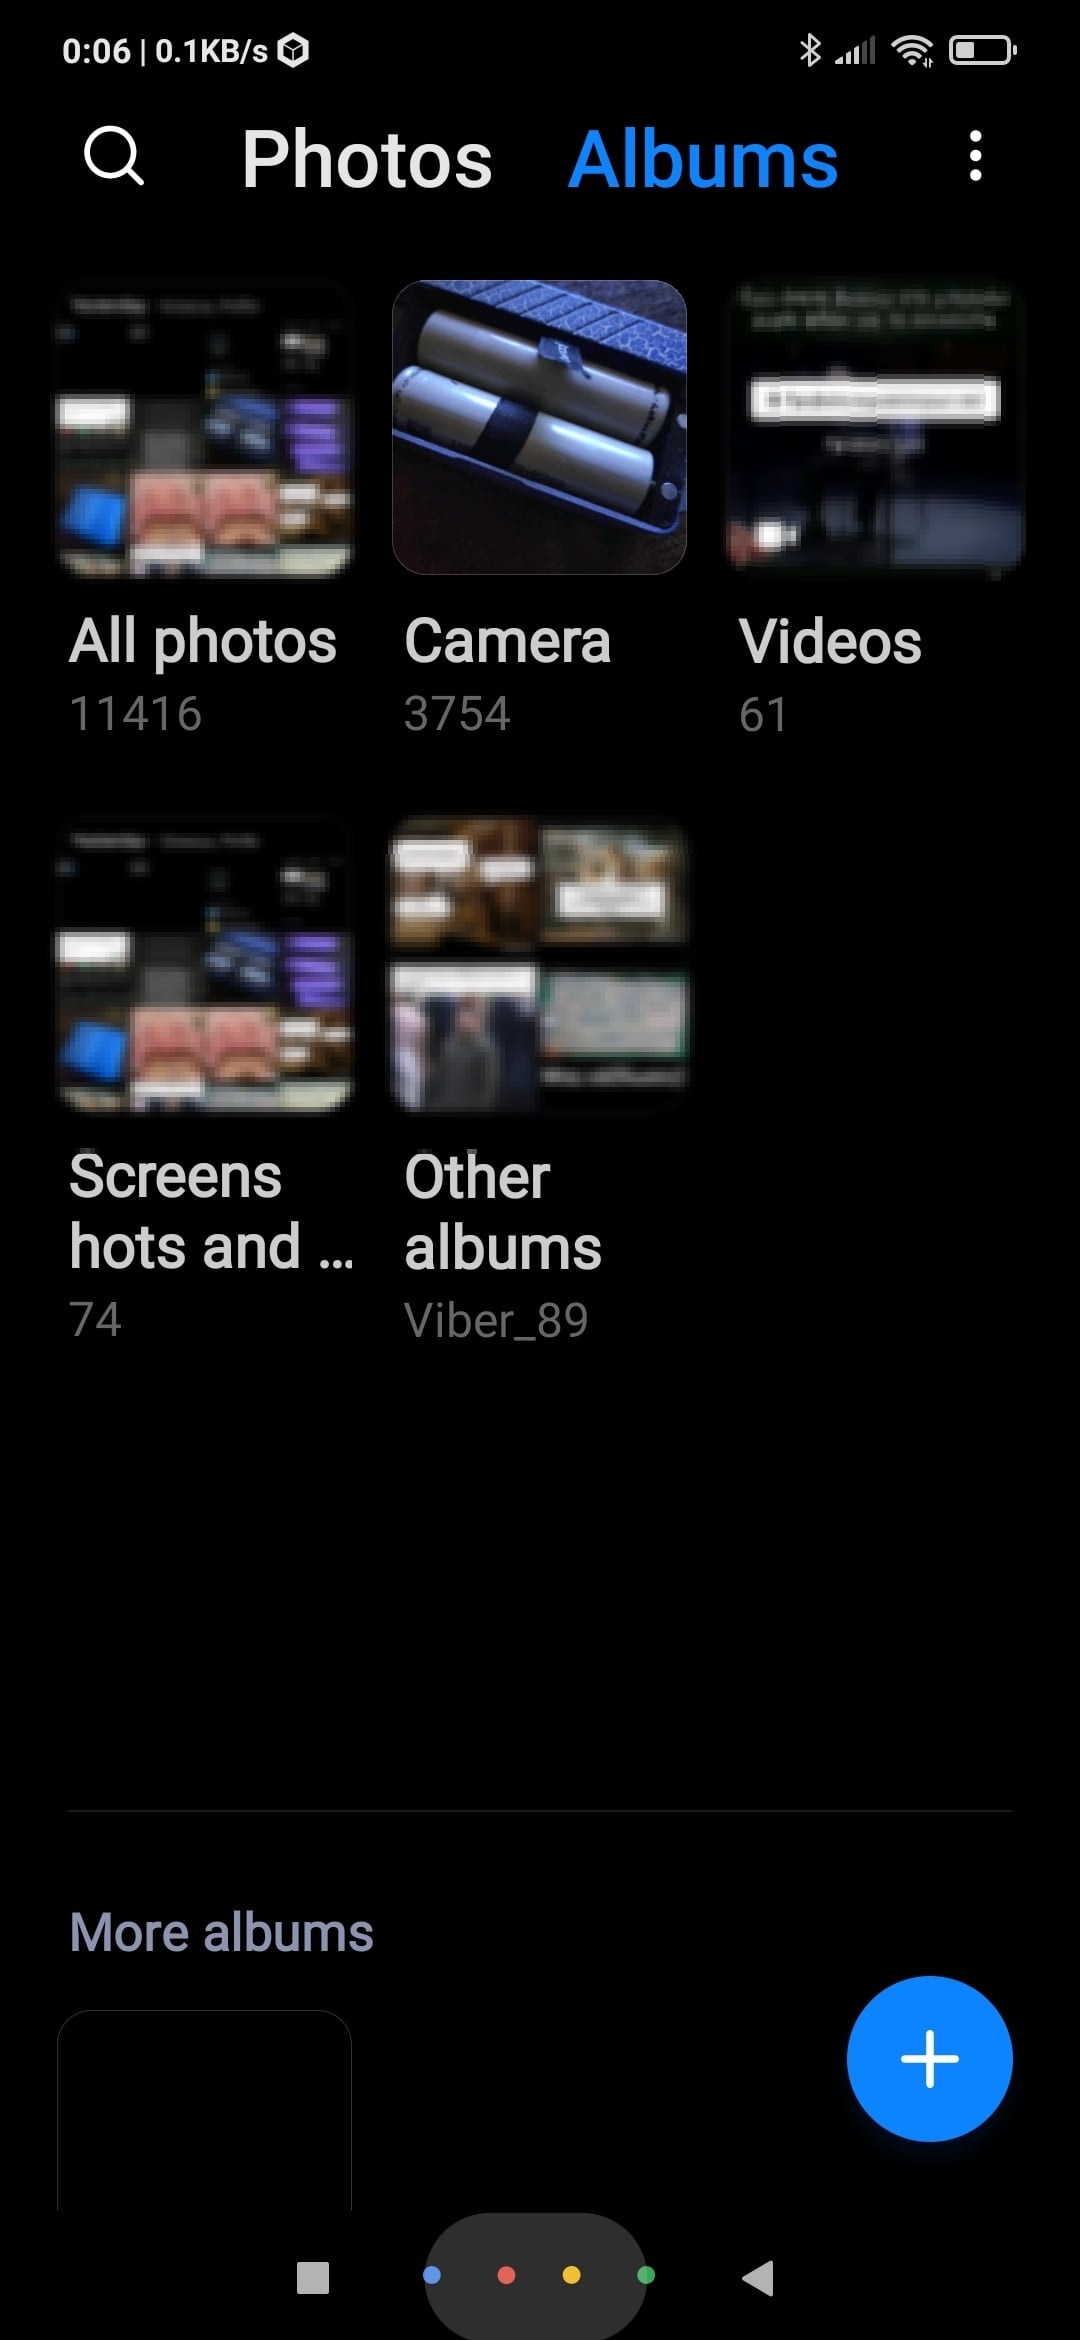
- Run the Gallery app. Then, move to its Albums section.

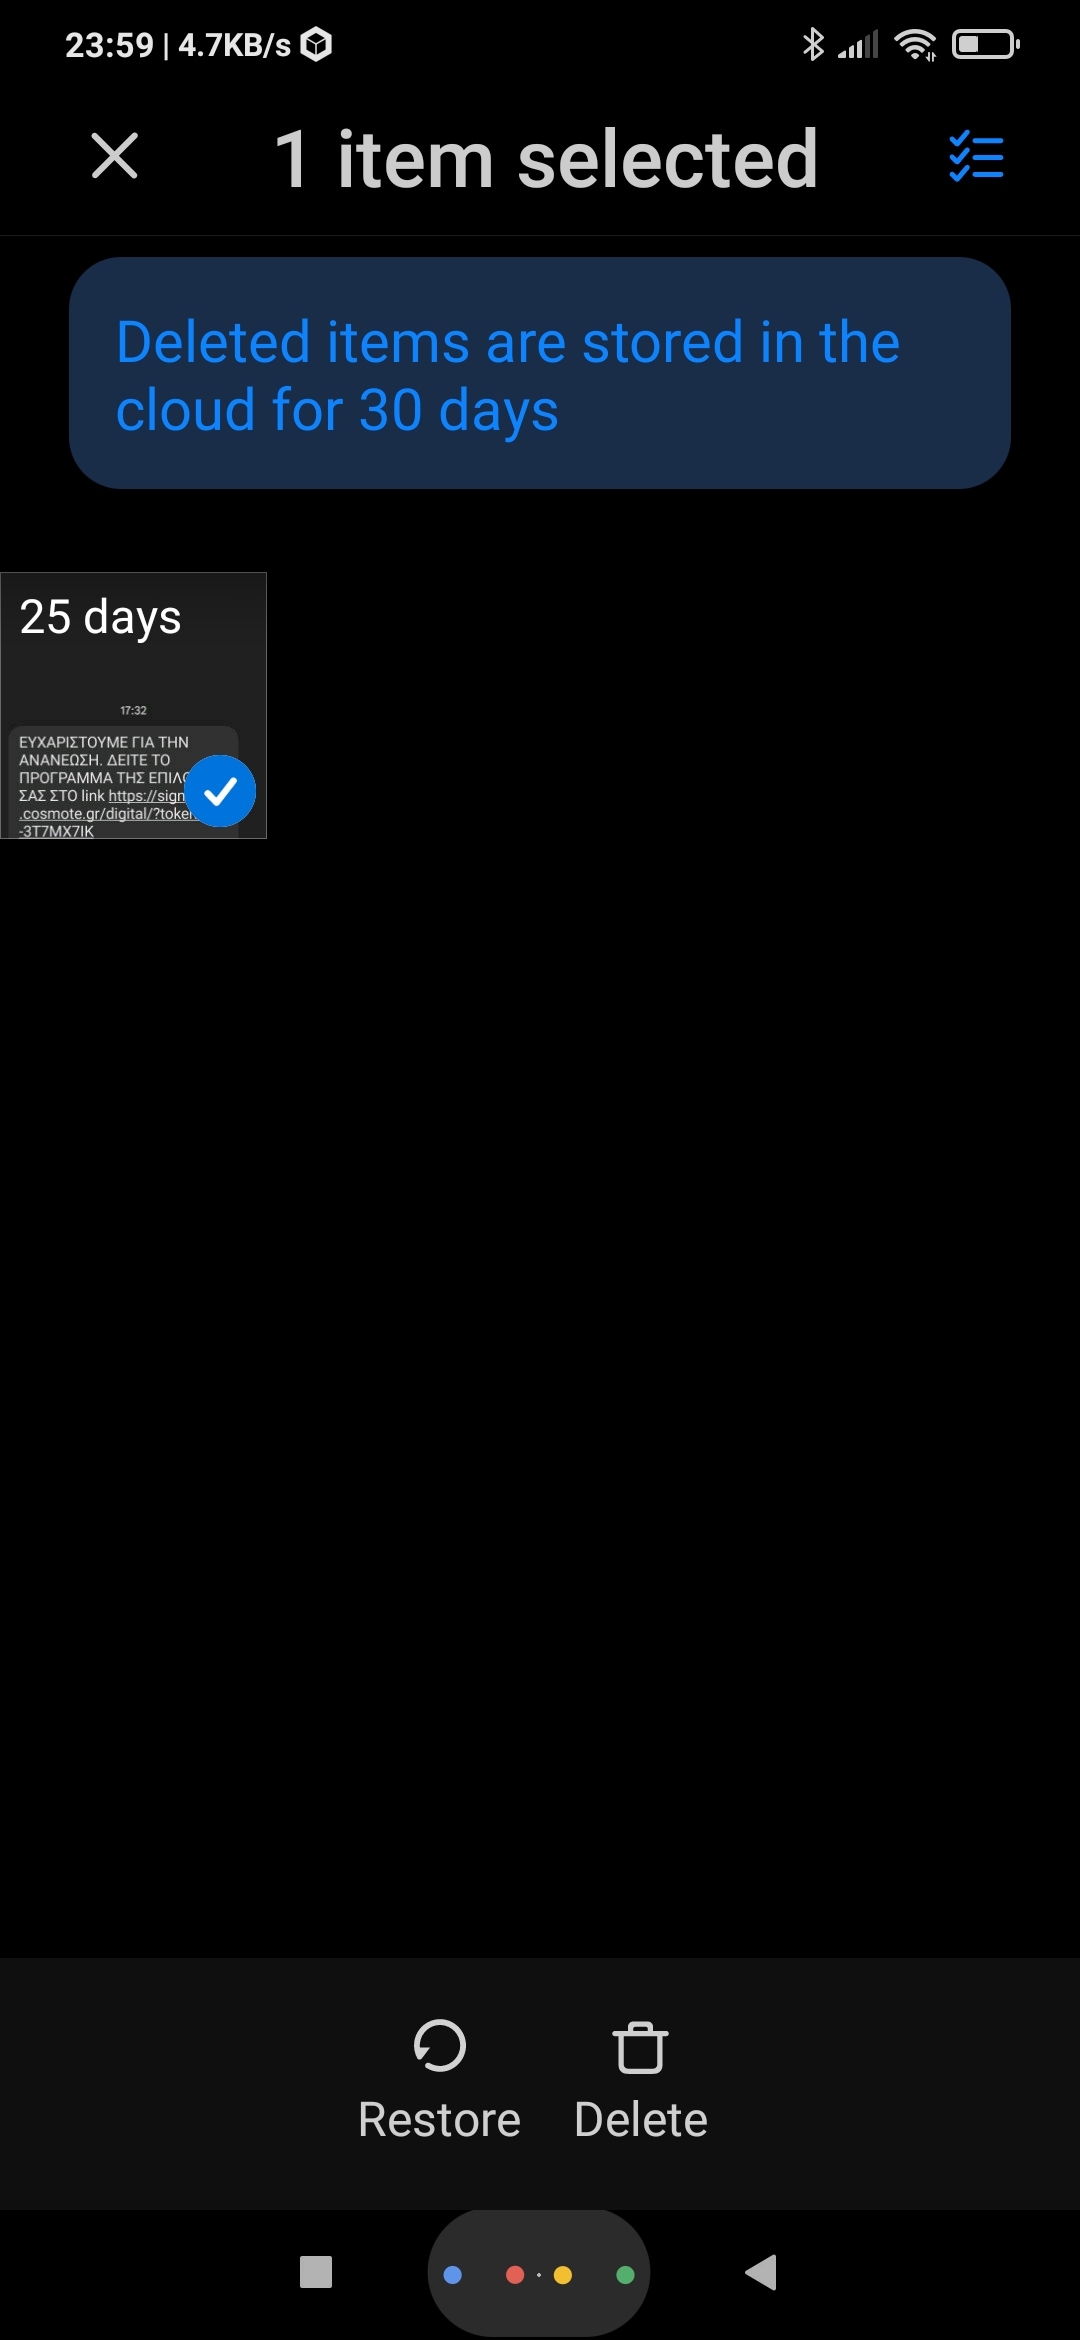
- Scroll down to find the Deleted items entry, and select it.
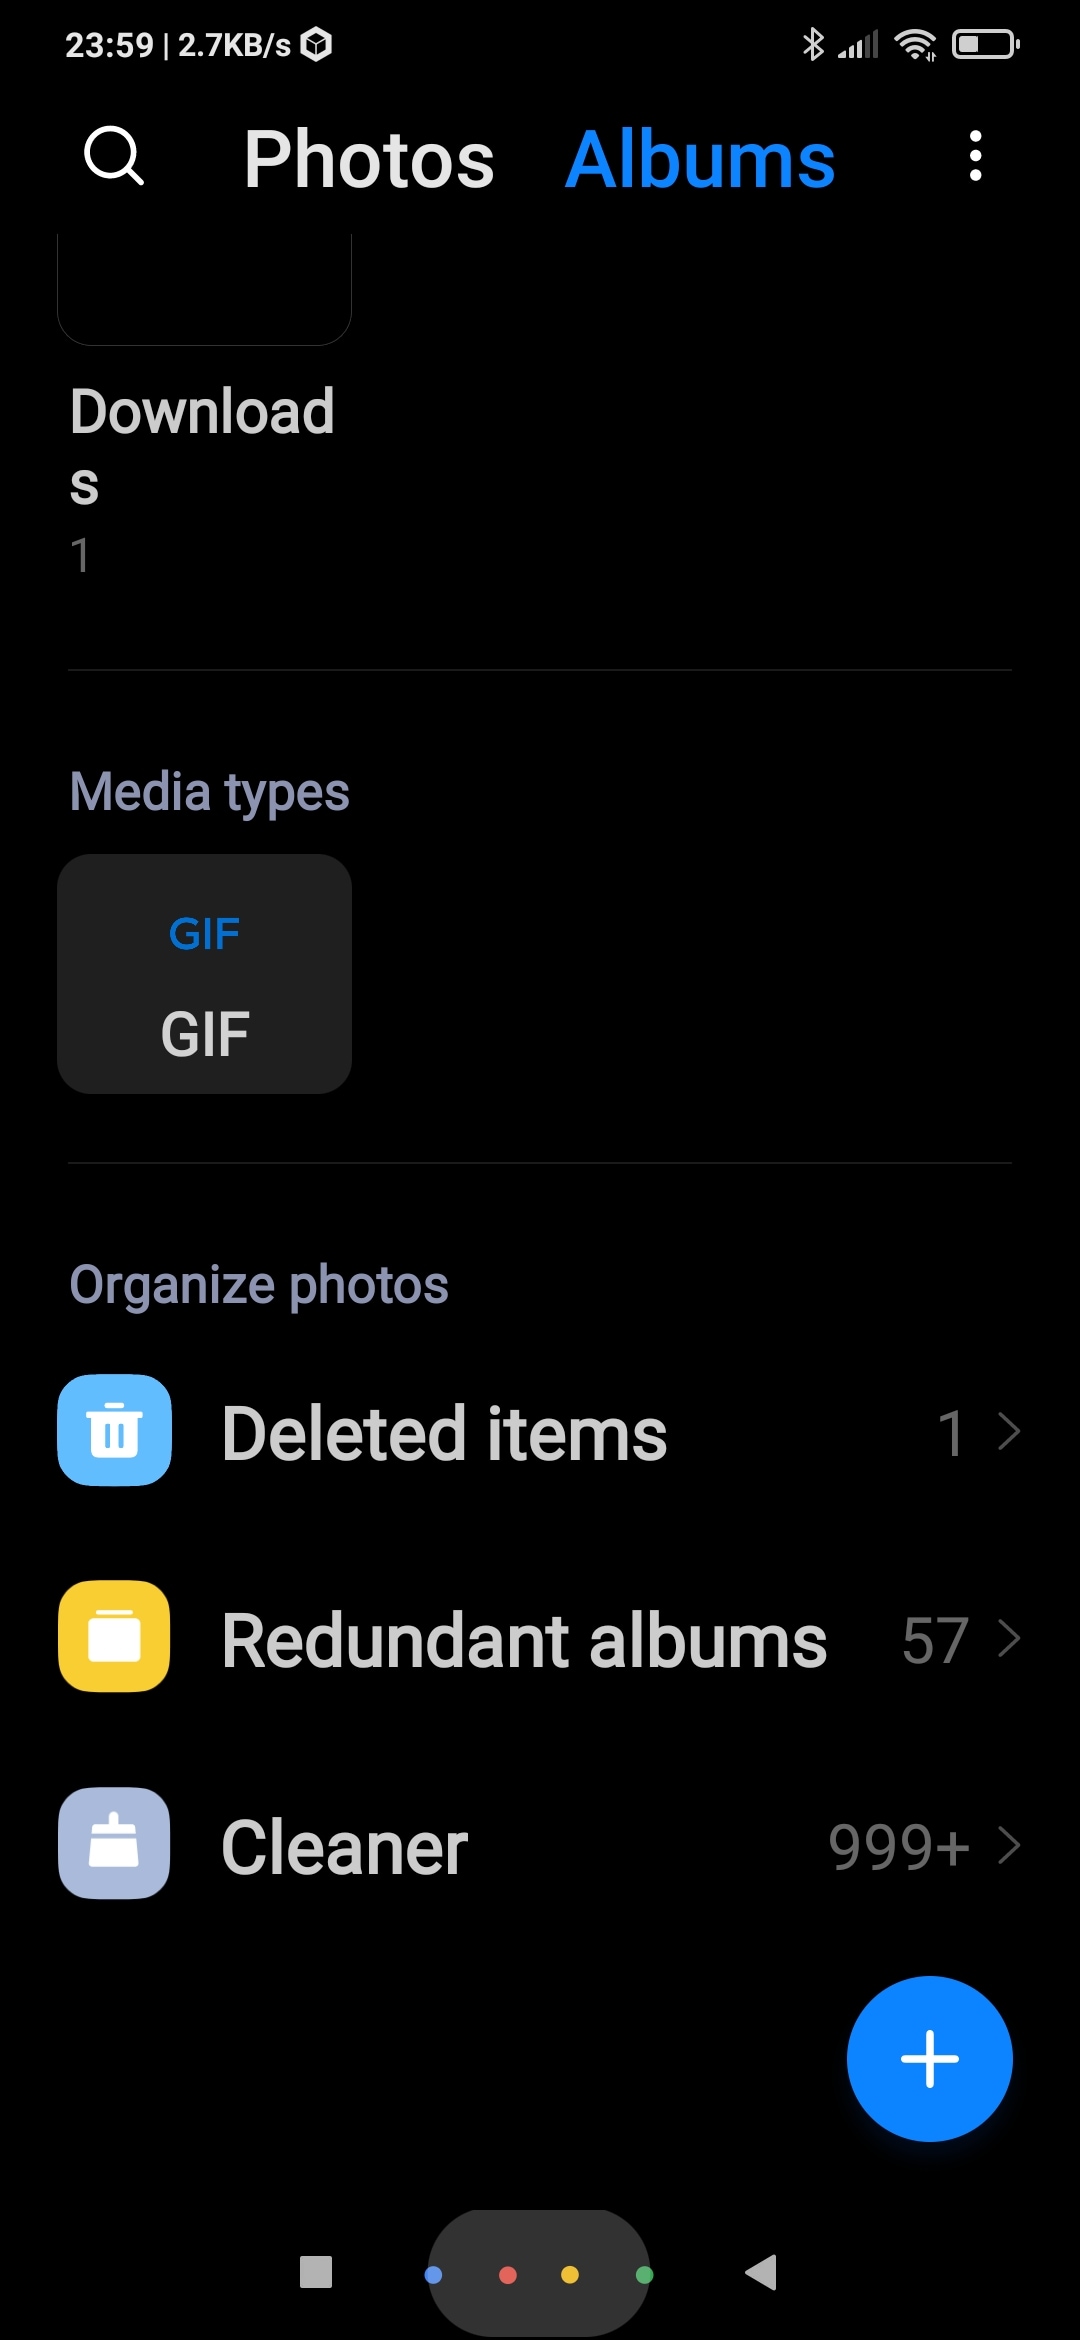
- If your album is among the deleted items, select it and then tap on Restore to undelete it and bring your photos back.
Check Hidden Albums
Are you sure you didn’t delete your photos, or you can’t find their album among your Android phone’s deleted ones? Maybe you hid the whole album – it’s easy to do absent-mindedly and even more common to do intentionally, but then forget about it.
Thankfully, unhiding albums is as easy as the following:
- Run the Gallery app and visit its Albums page.
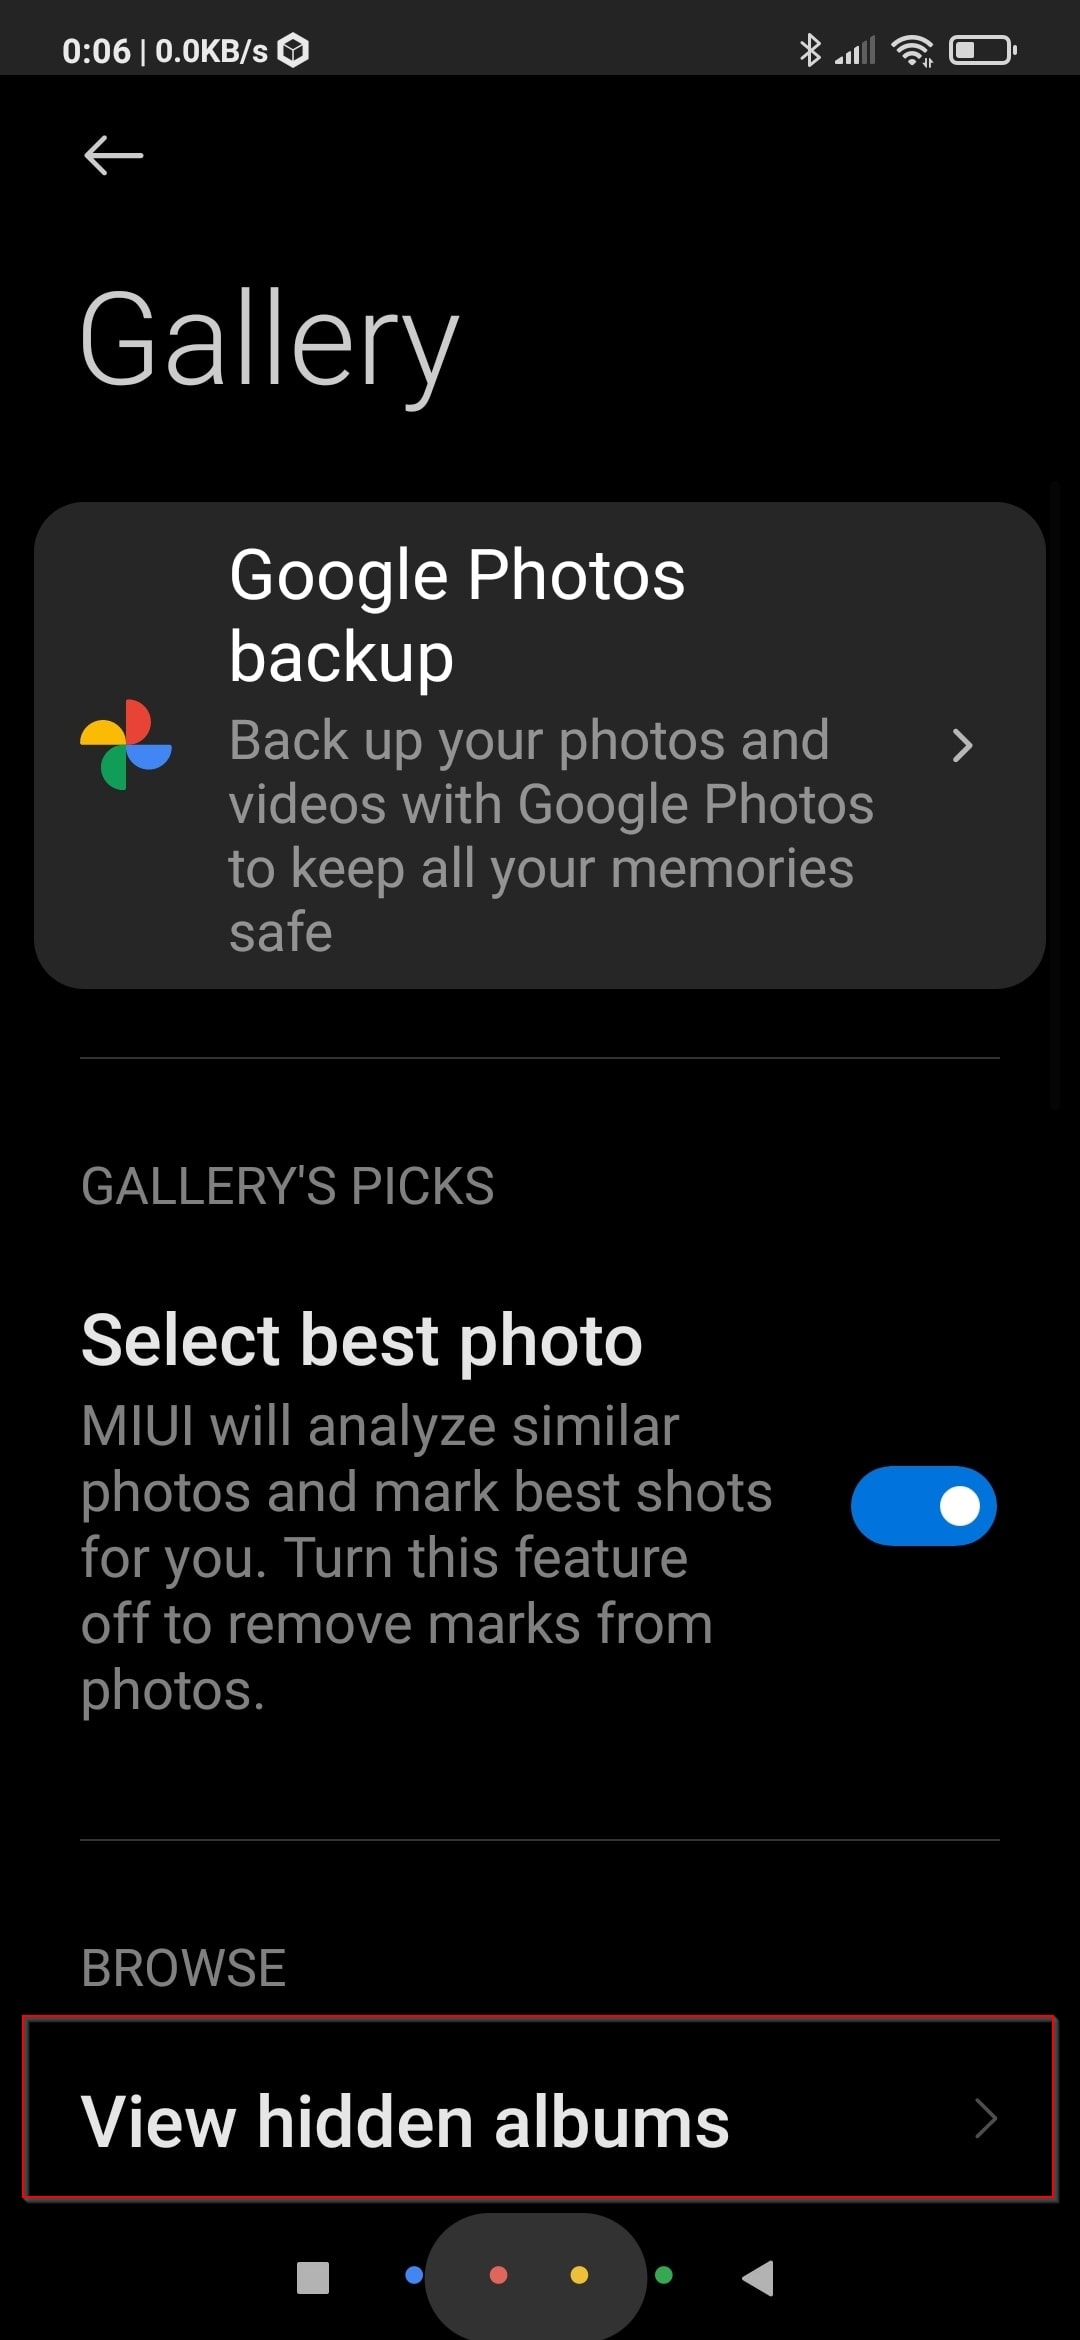
- Tap the three-dot menu button on the top right of the screen, and select Settings.
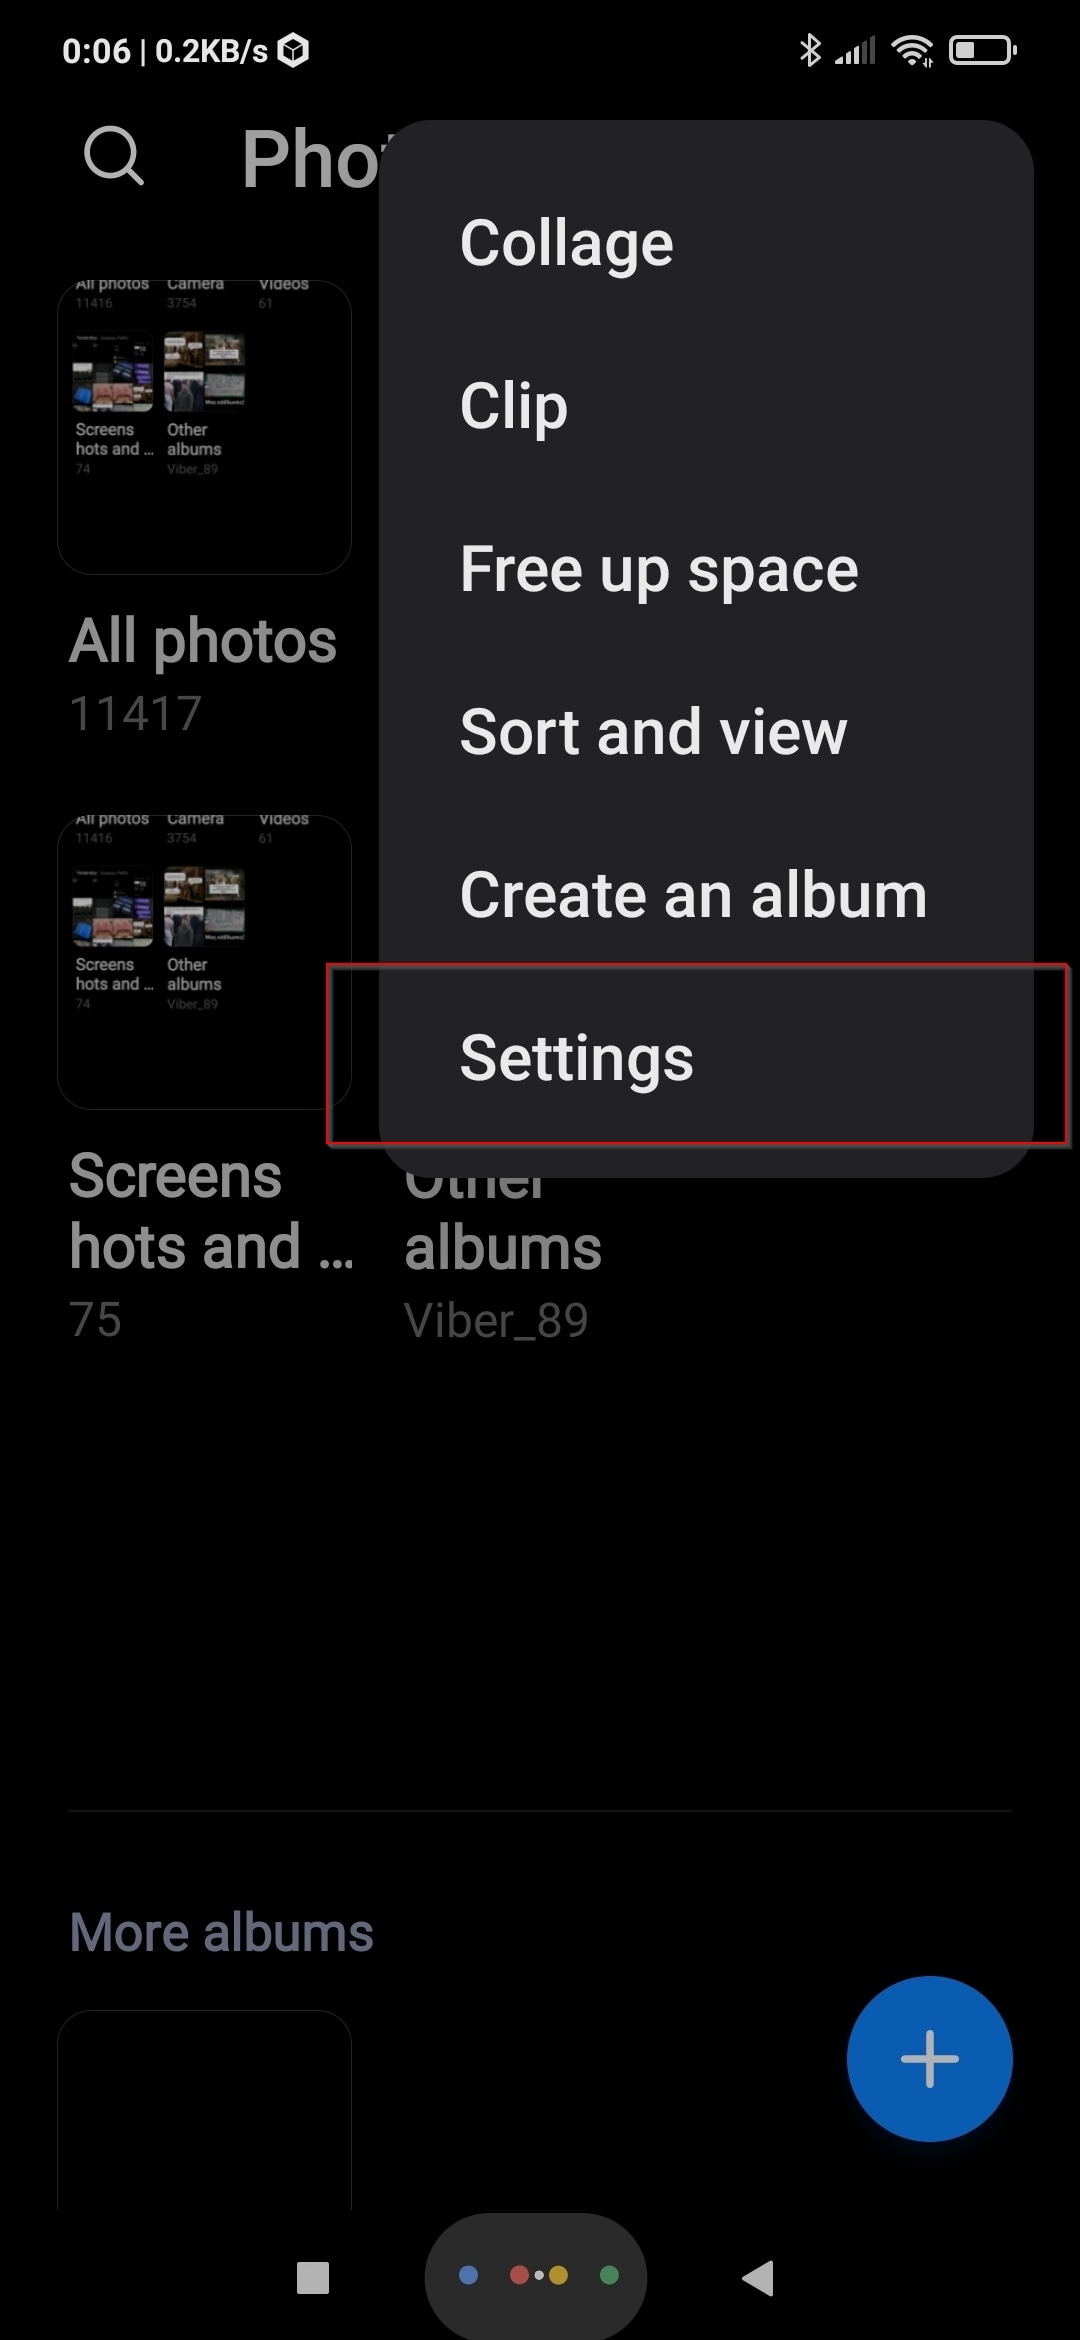
- Select that you want to View hidden albums.
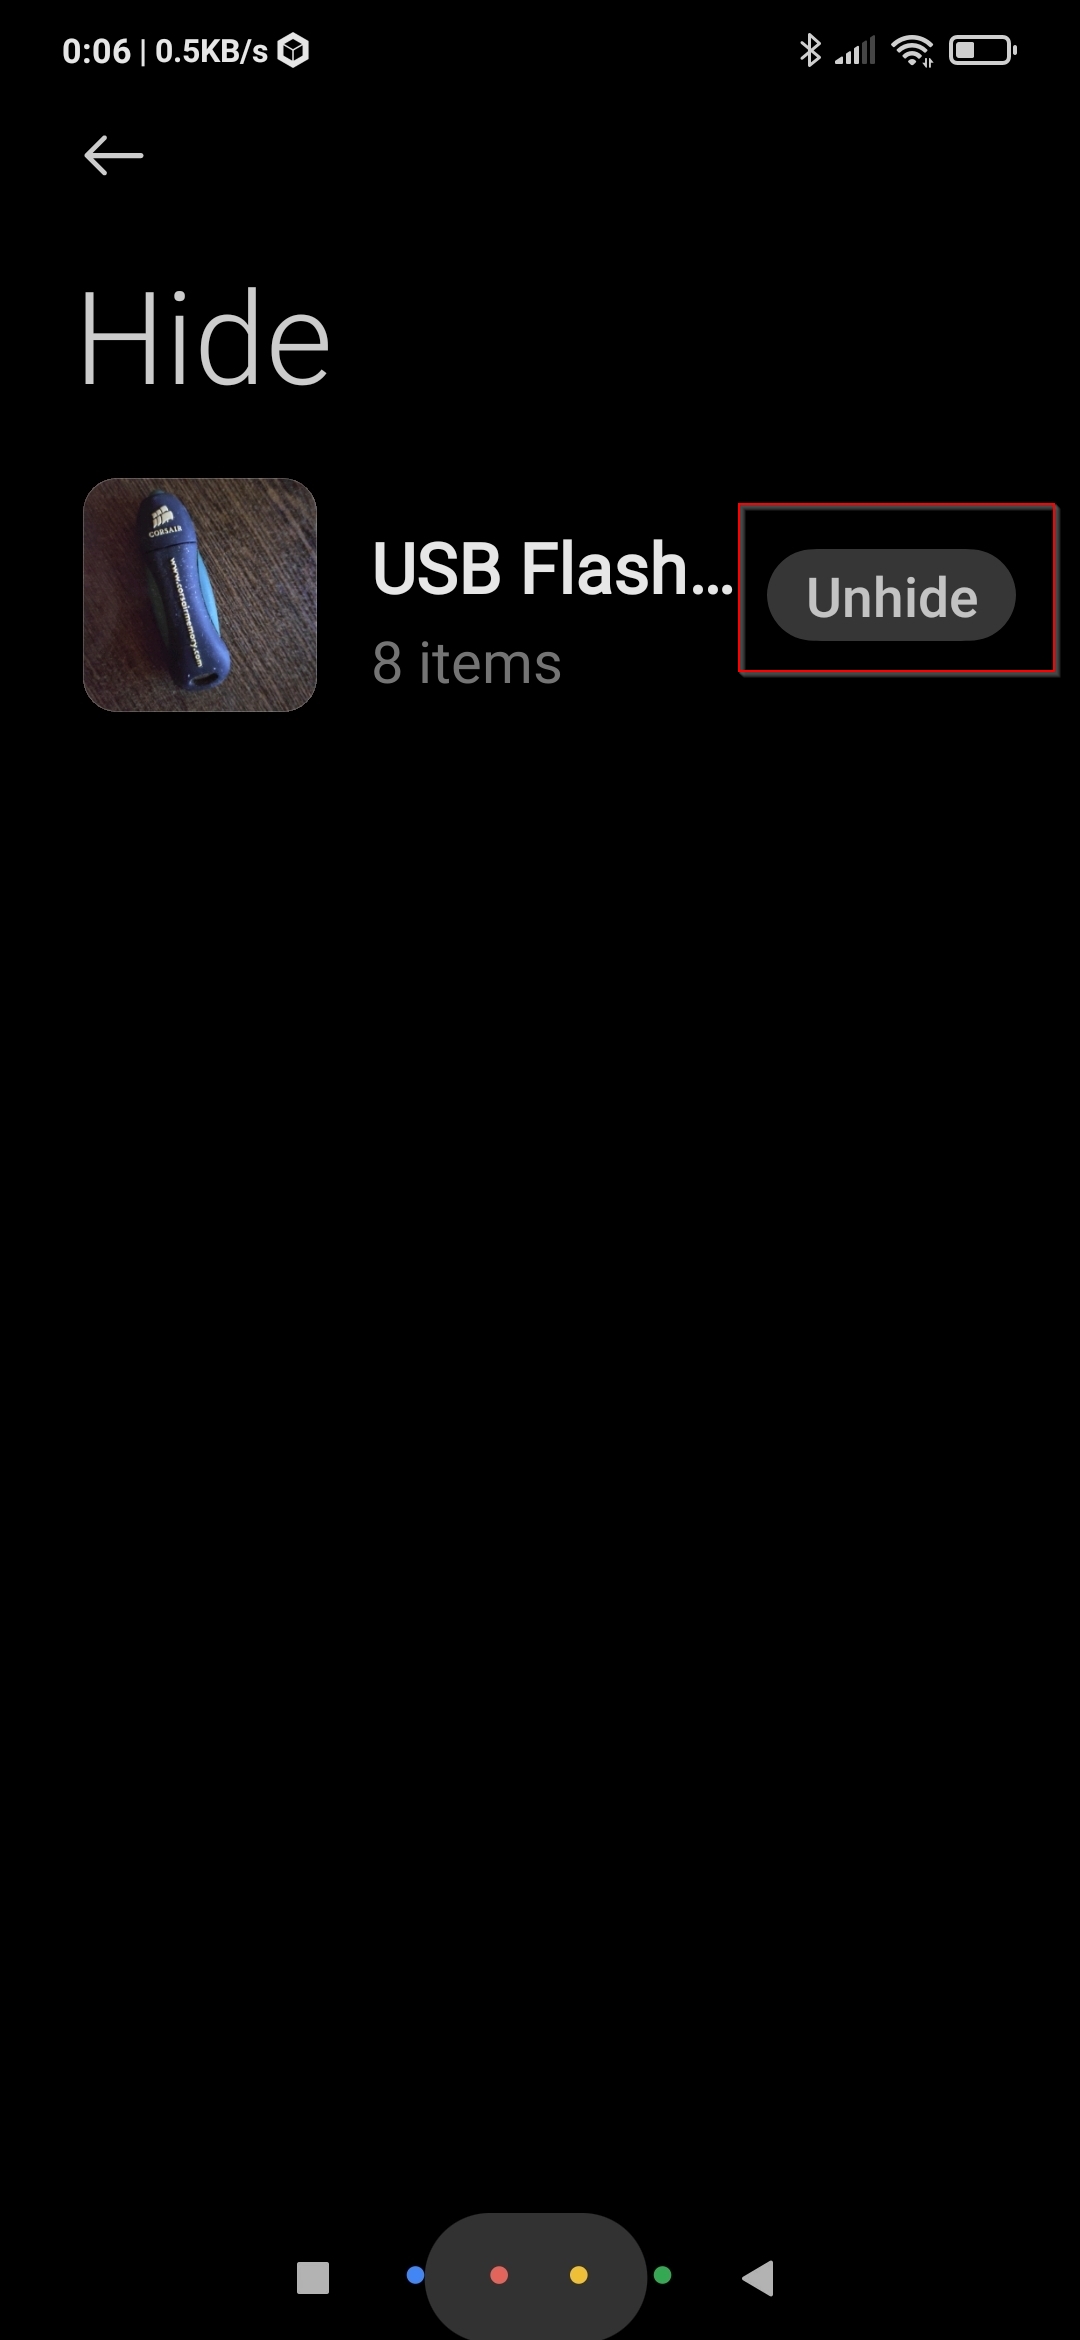
- Tap on Unhide next to the album you want to make visible again.
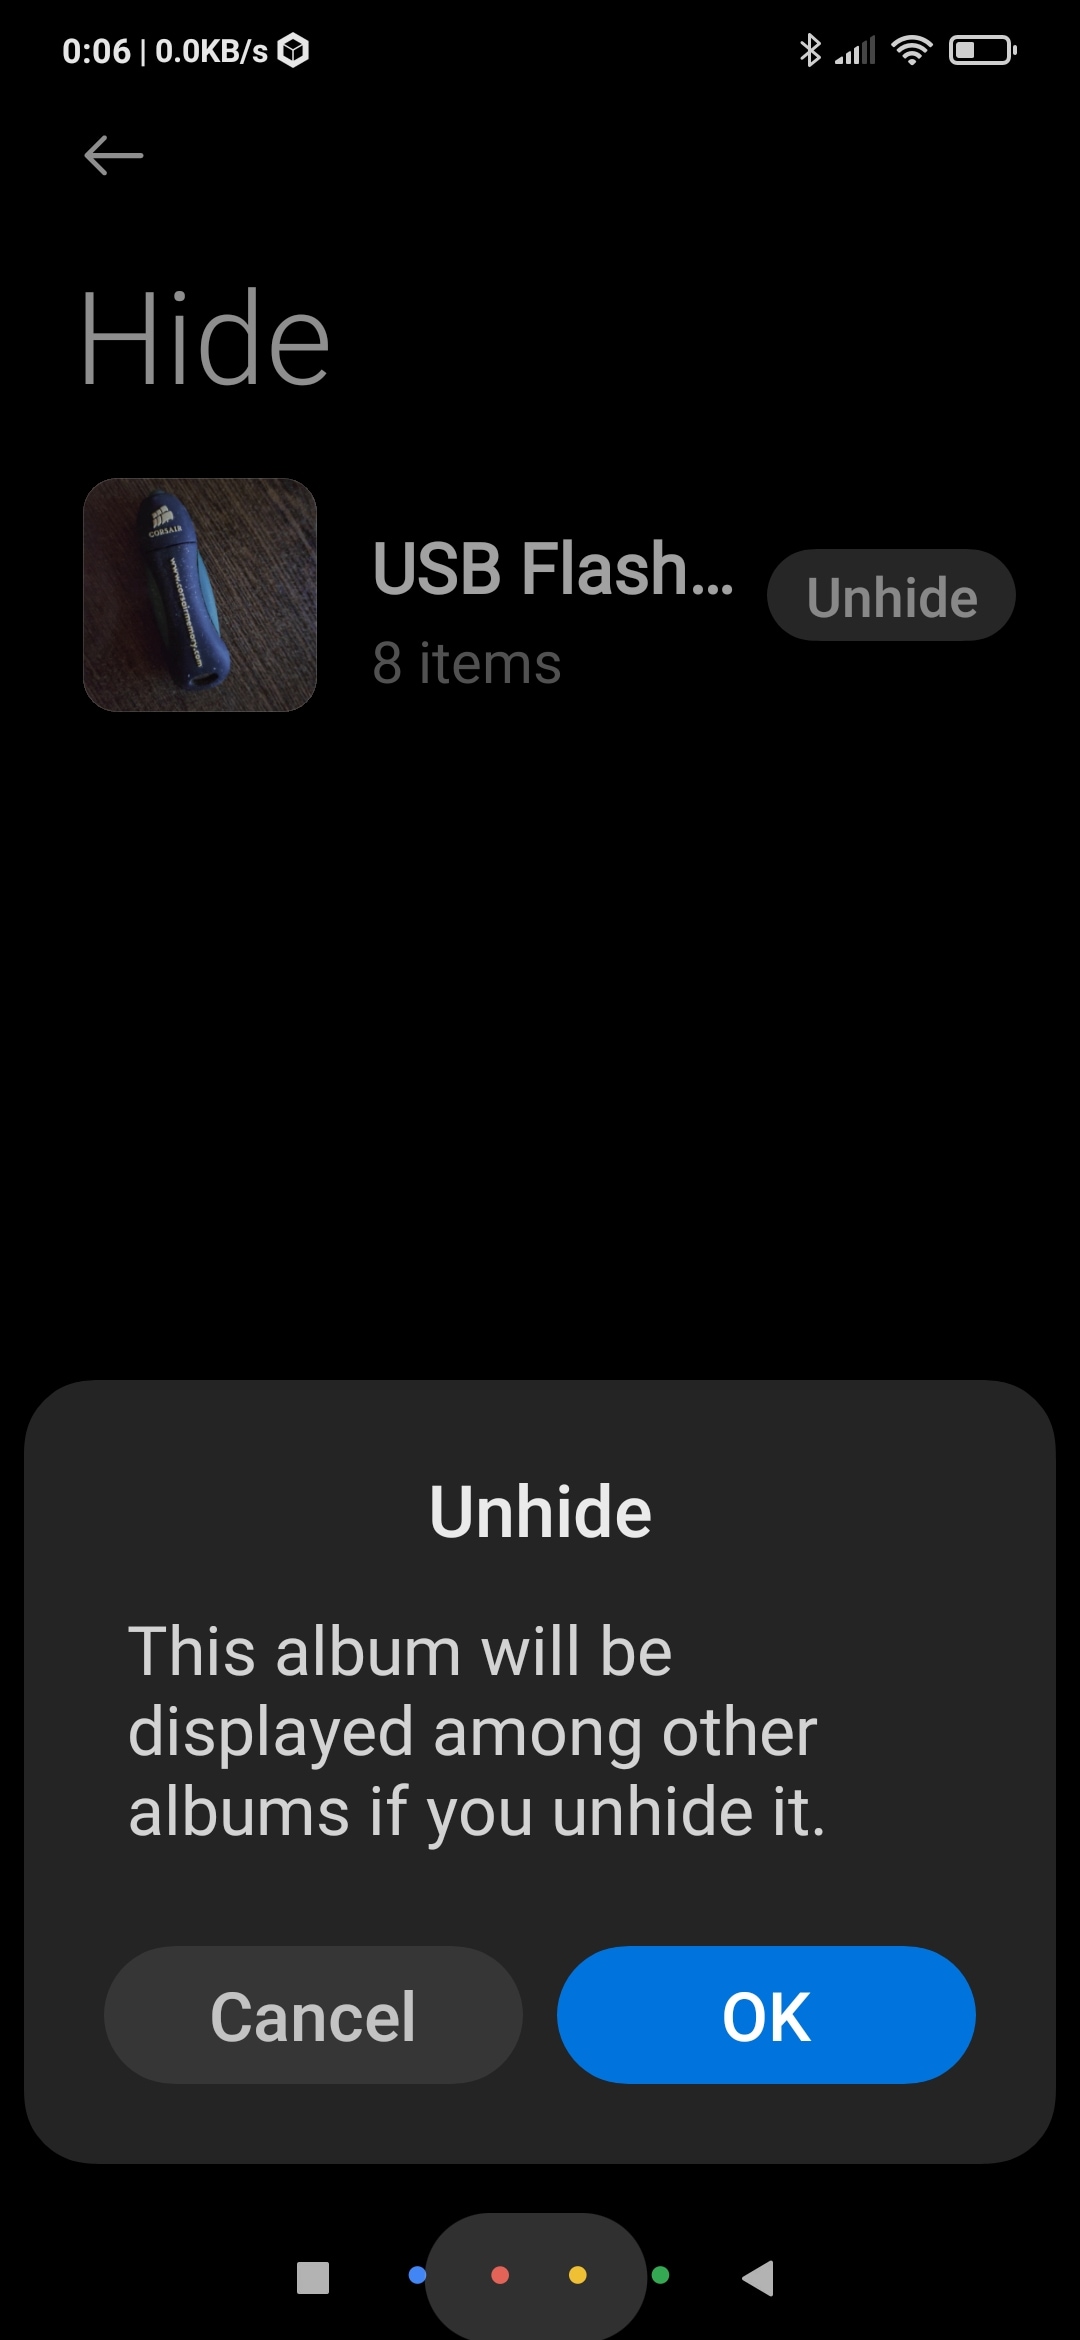
- Tap on OK to confirm you want o unhide the album.
Check if the Photos Are Hidden
If your photos are hidden on the file level, you can render them visible again using a file management app. You can do that directly on your phone, or your Windows or Mac computer.
To unhide your files on Android:
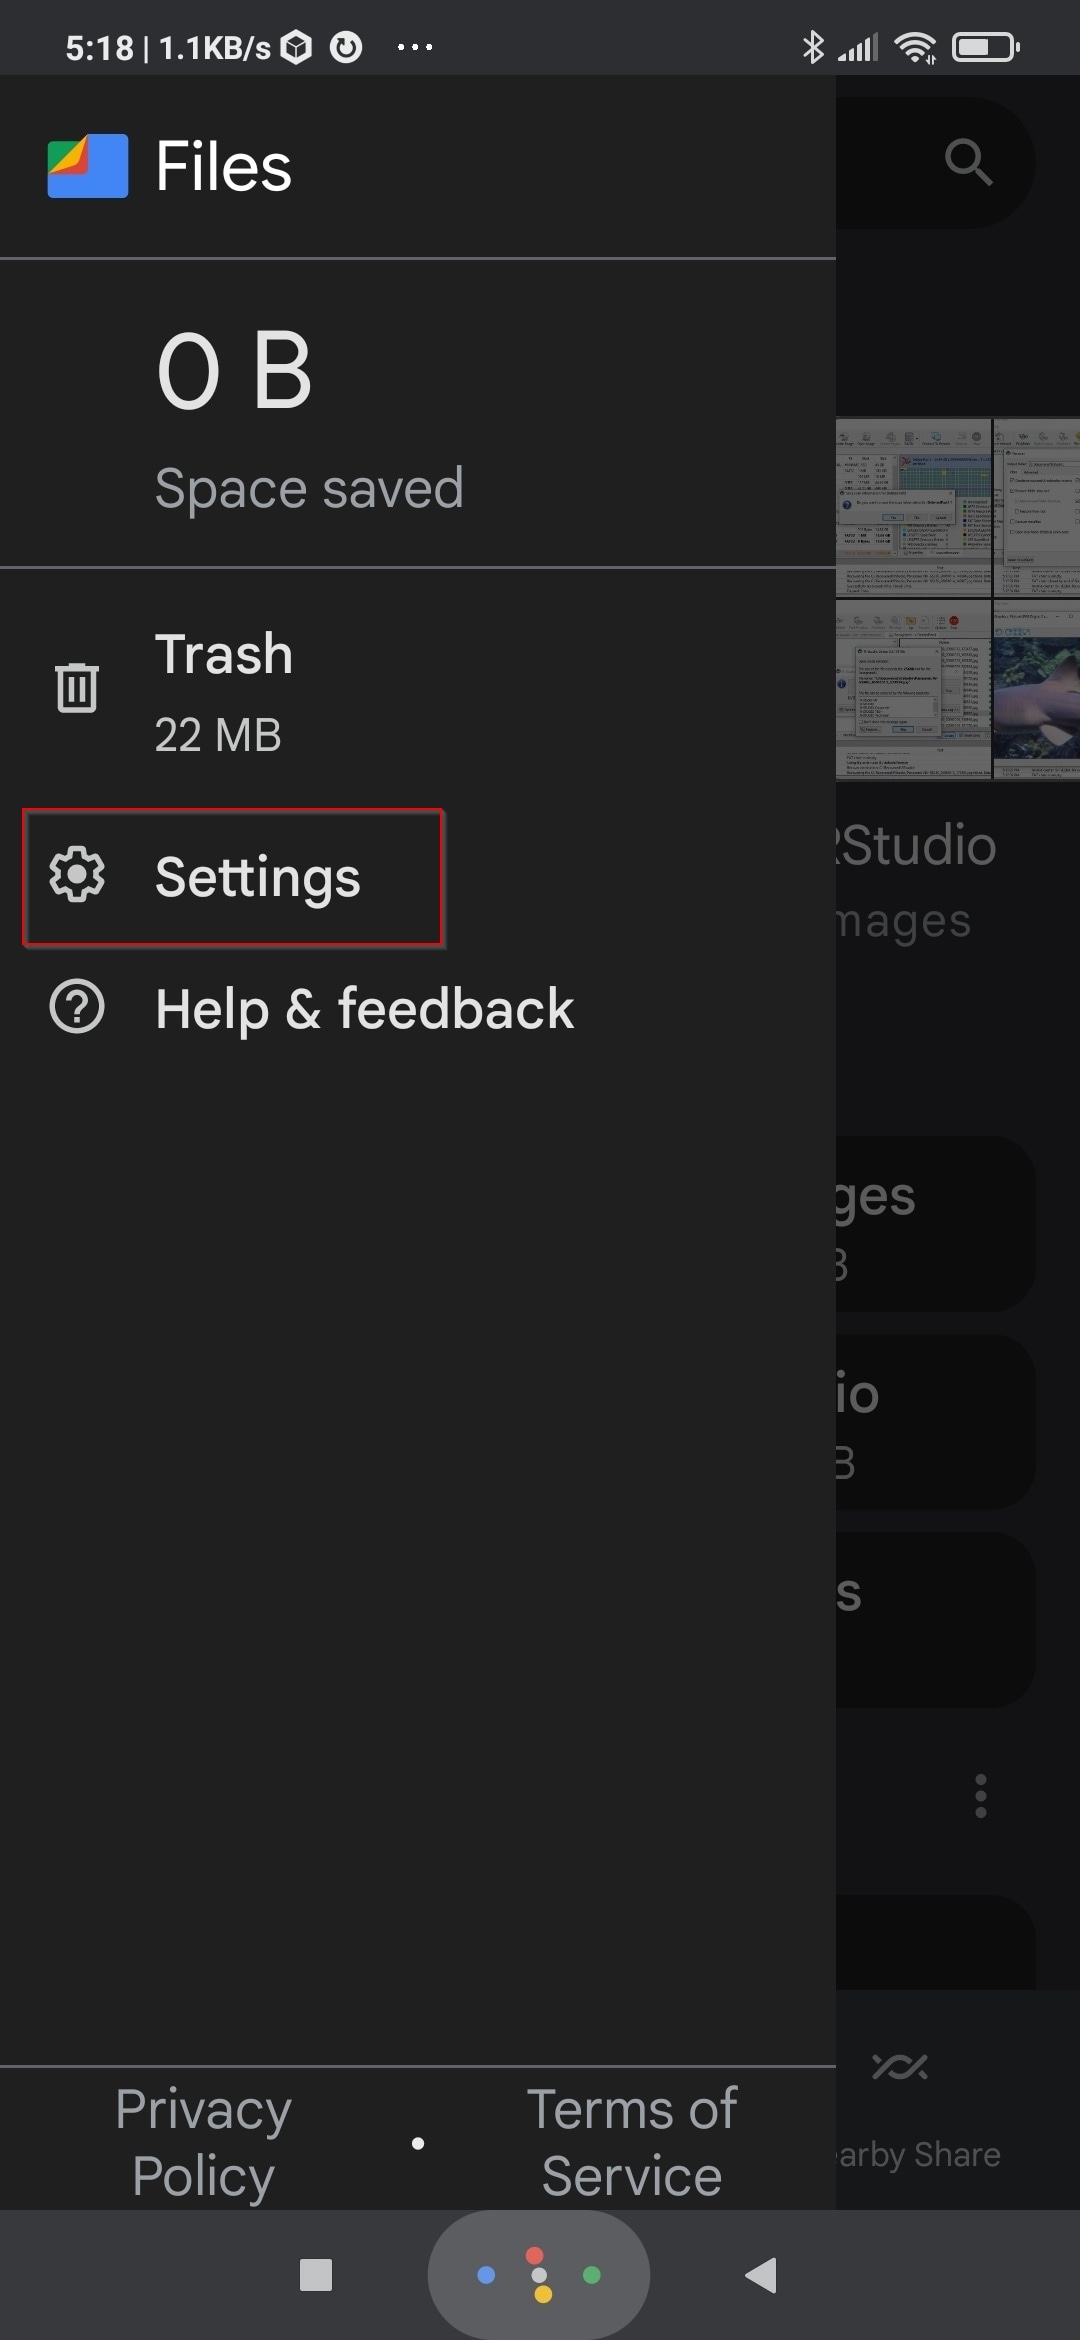
- Install a file management app that offers an option to unhide files on your phone, and run it. Many popular apps offer the feature, like ES File Explorer, but we’re using Google’s own Files app for this article.
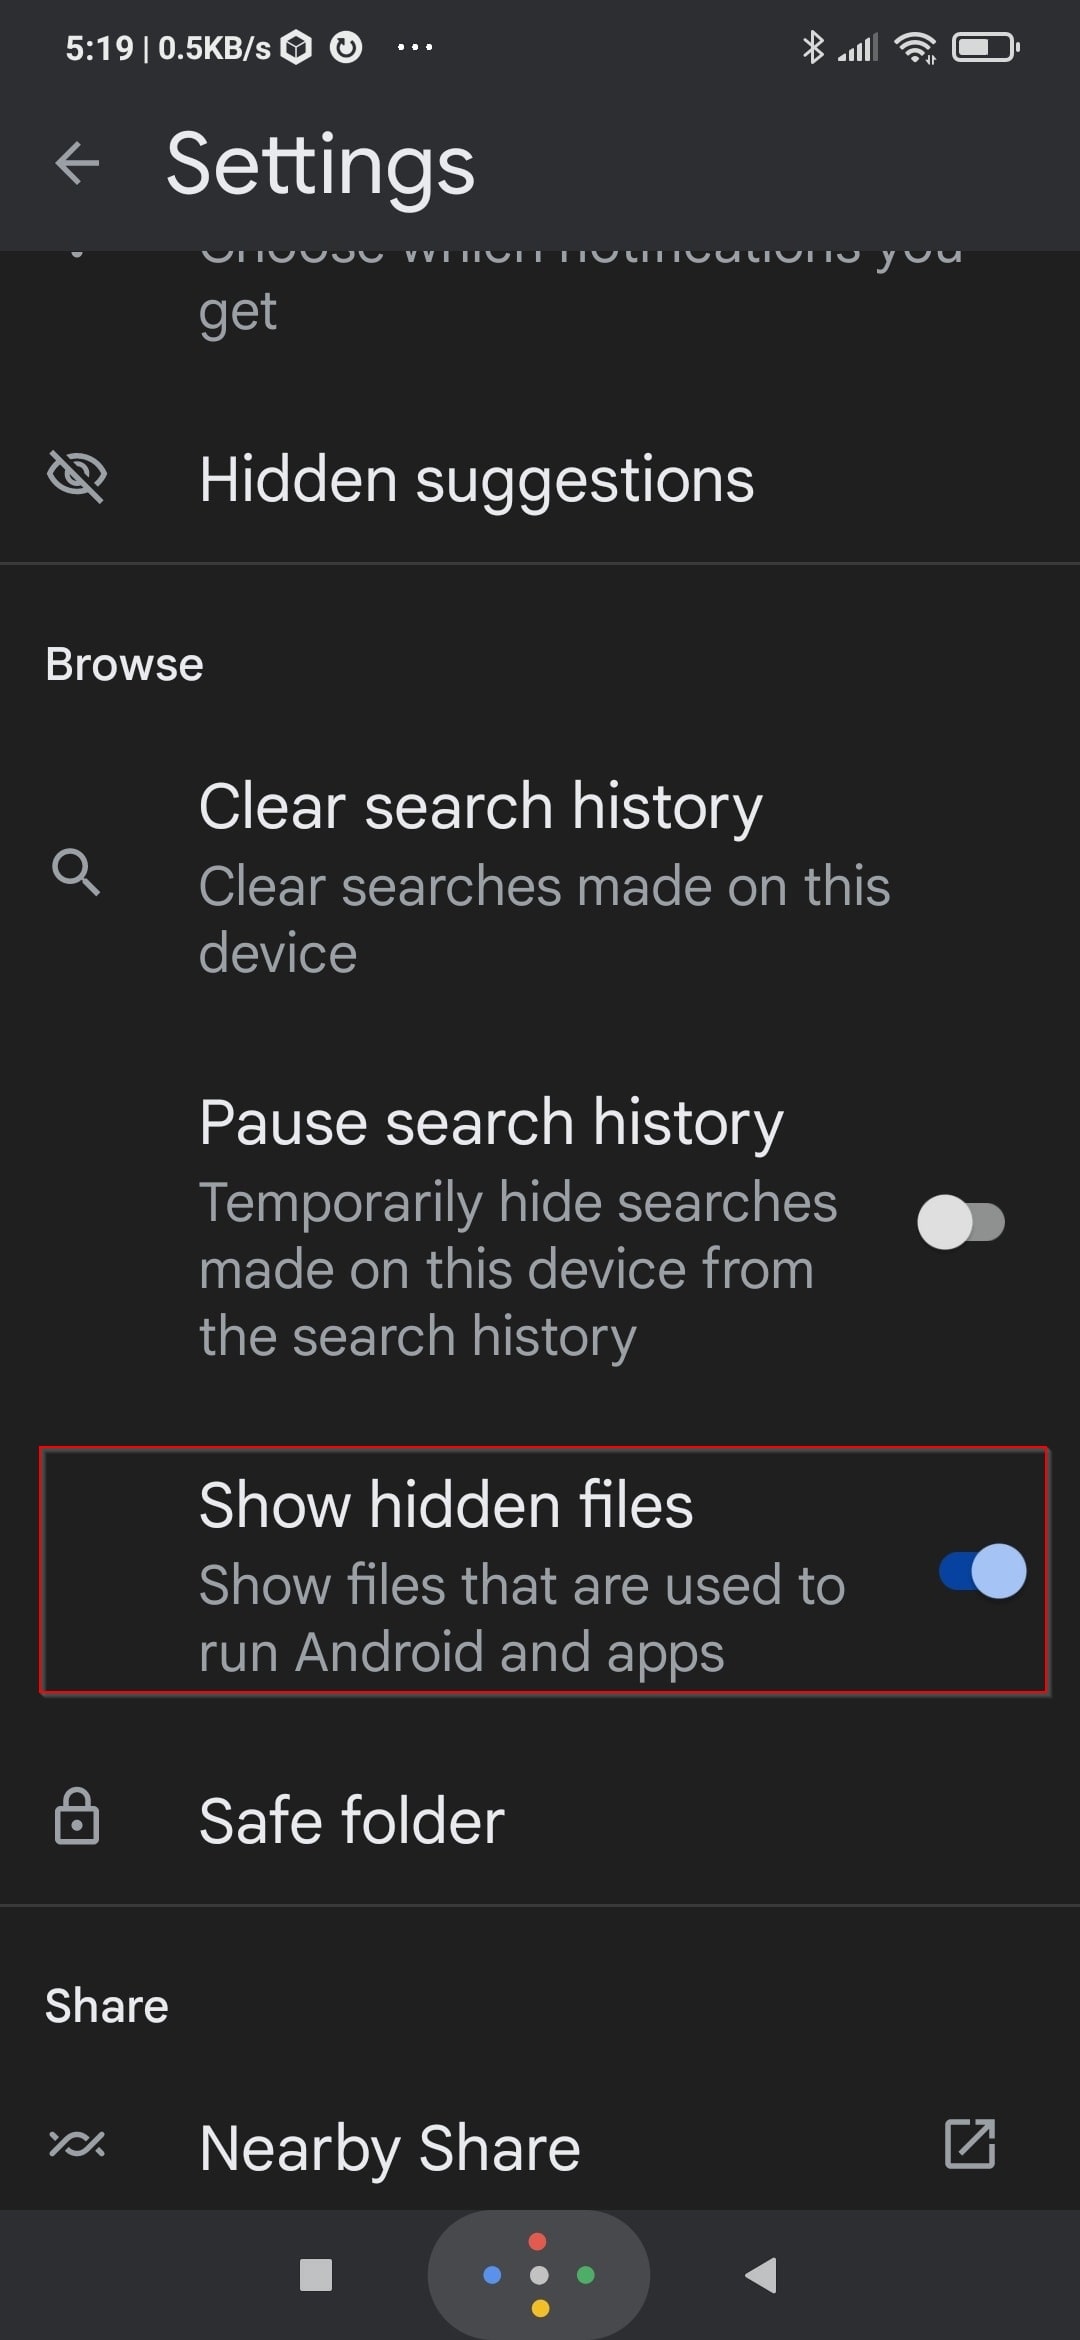
- Tap the app’s hamburger menu icon on the top left, and choose Settings.
- Enable the option to Show hidden files. Exit the menu and return to the app’s main screen. Now you should also see hidden files when browsing your SD card.
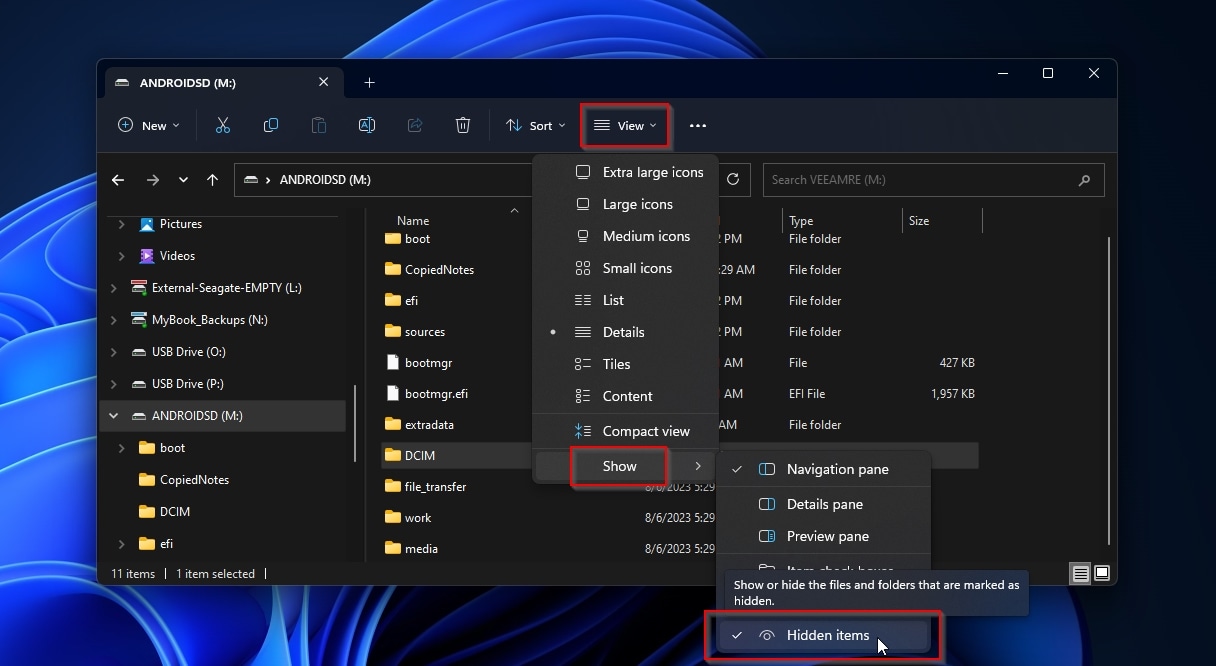
You can view hidden files on Windows this way:
- Run Windows File Expllorer (or press Windows Key + E on your keyboard to quickly launch it). Select your SD card from its folder tree view on the left side of the window.
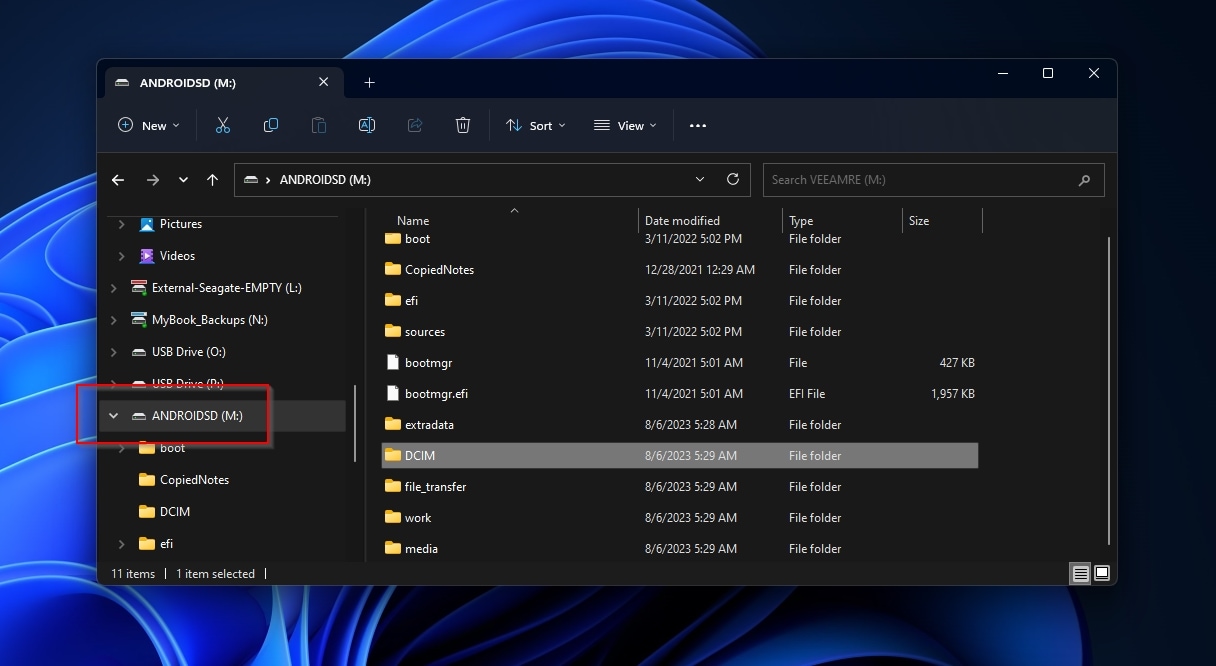
- Turn your attention to the app’s toolbar, and click on View > Show > Hidden items. You should now be able to see all of your files, including the hidden ones while browsing your SD card with Windows File Explorer.
To unhide files on macOS:
- Run macOS’ built-in file manager, Finder, from its Dock. Navigate to your SD card.
- Press the Shift + Command + . (Period) buttons on your keyboard simultaneously to have all hidden files unveiled. You can use the same shortcut at any time to hide them again.
Step 2: Recover Deleted Photos From an SD card on Android
Are your photos deleted and inaccessible on your SD card? You can try to recover deleted photos from an SD card without a computer, but unplugging your SD card, connecting it to your PC or Mac, and scanning it with an app like Disk Drill usually leads to better results.
Method 1: Using Recovery Tool for Windows and Mac
For this article, we’ve decided to use Disk Drill, not only because it’s widely considered one of the best data recovery solutions but also for convenience: Disk Drill is available on Windows and macOS and works the same way on both.
It’s worth noting that despite not being presented as explicitly SD card photo recovery software, Disk Drill can recover any type of file, including photos and images, from most storage devices, just like the SD card you’re using on your phone.
It also helps how Disk Drill supports all major file systems used when formatting SD cards on Android, Windows, and Mac, like:
- FAT16/32/exFAT
- NTFS/NTFS5
- HFS/HFS+
- APFS
- EXT2/3/4
It can even scan “RAW” devices, which usually show up as having no file system at all after some kind of corruption or other damage.
Also, it doesn’t matter if your SD card is a typical microSD, SDHC, or SDXC, if it’s a ten-year-old “slow” one marked with Class 2 (C2), made by Lexar, or a newer and much faster UHS 3 (U3) one, made by Transcend: Disk Drill can work with all of them.
The only “requirements” are:
- You must connect your SD card to your computer. You might have to purchase or borrow a standalone SD card reader if it doesn’t have an SD card slot.
- Your SD card should be in working condition for your computer to “see” it.
You can learn more about the app and all it can do by checking our extended review of Disk Drill.
To save your deleted photos from your SD card using Disk Drill on Windows or macOS:
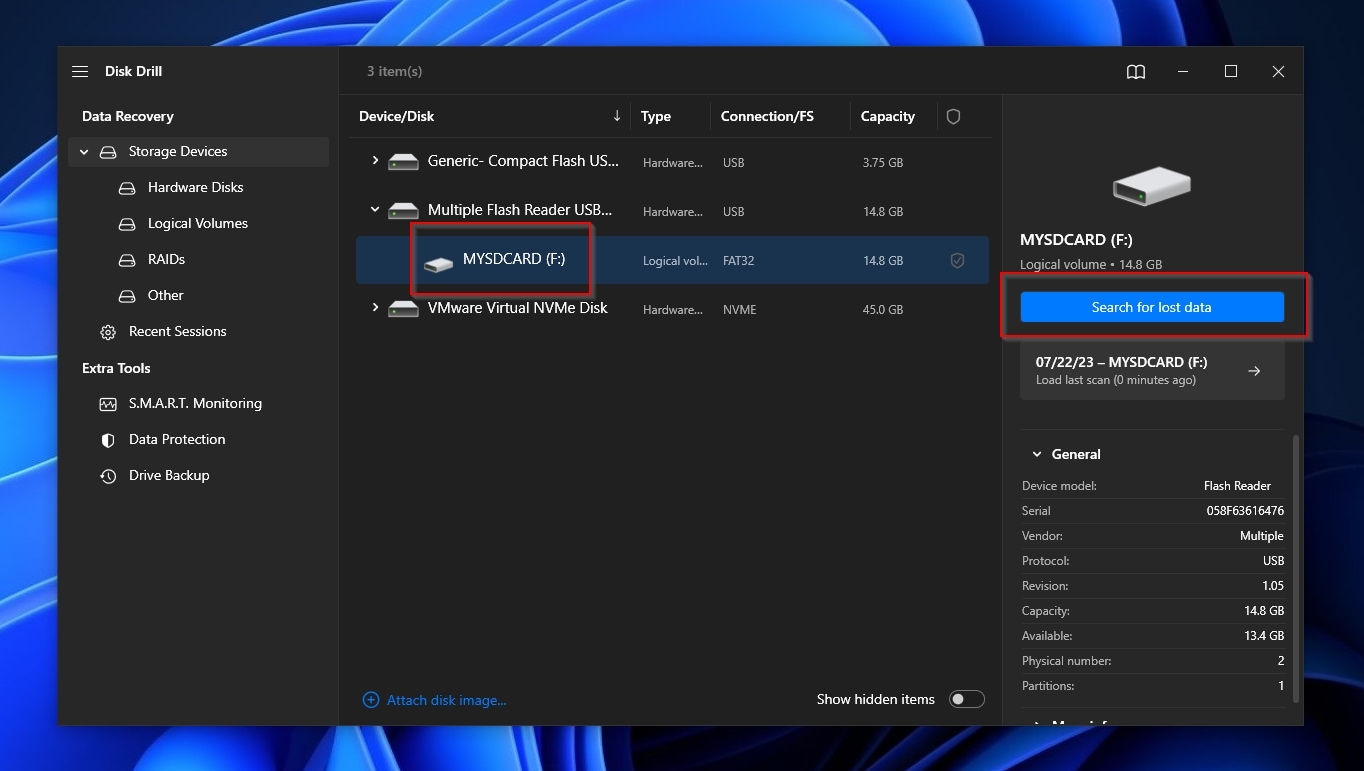
- Download the app for your platform of choice from Disk Drill’s official site. Then, install and run it. With your SD card connected to your computer and correctly recognized, select it from Disk Drill’s Device/Disk list, and click Search for lost data.
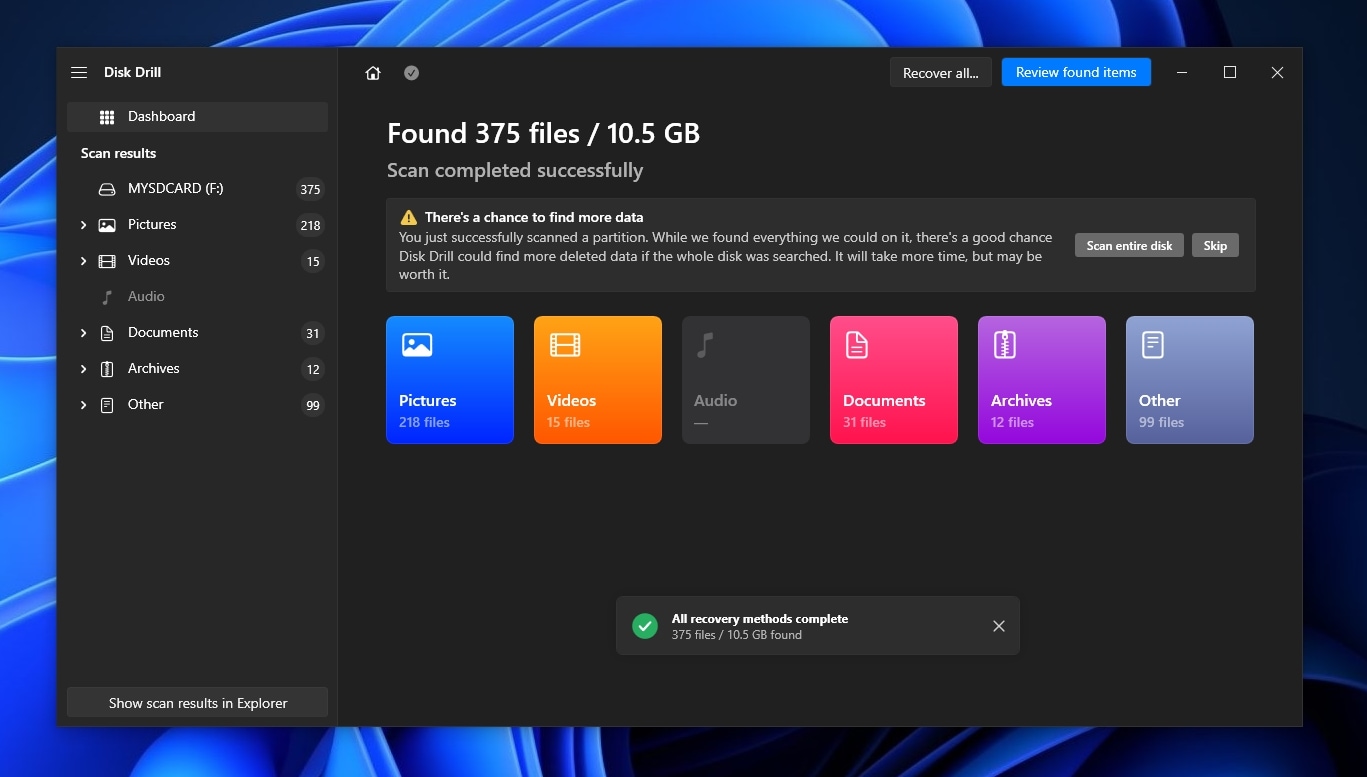
- Give Disk Drill enough time to finish scanning your device for optimal results. If you cut its scan short, it will find fewer pictures. When the scan completes, click on Review found items.
- If you can’t locate your images among the myriads of results Disk Drill might show you, use the app’s categories (on the left of its window) and filters (above the results list) to select which files you want to view.
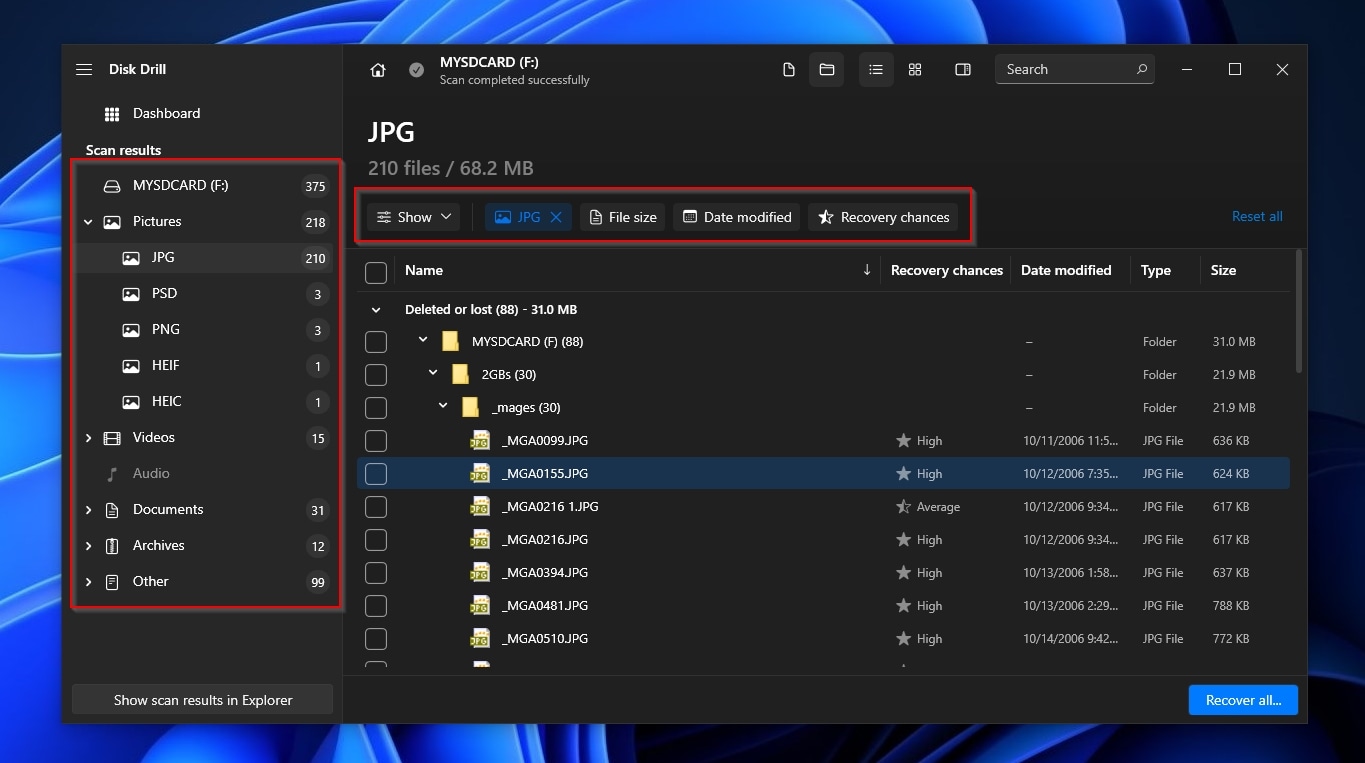
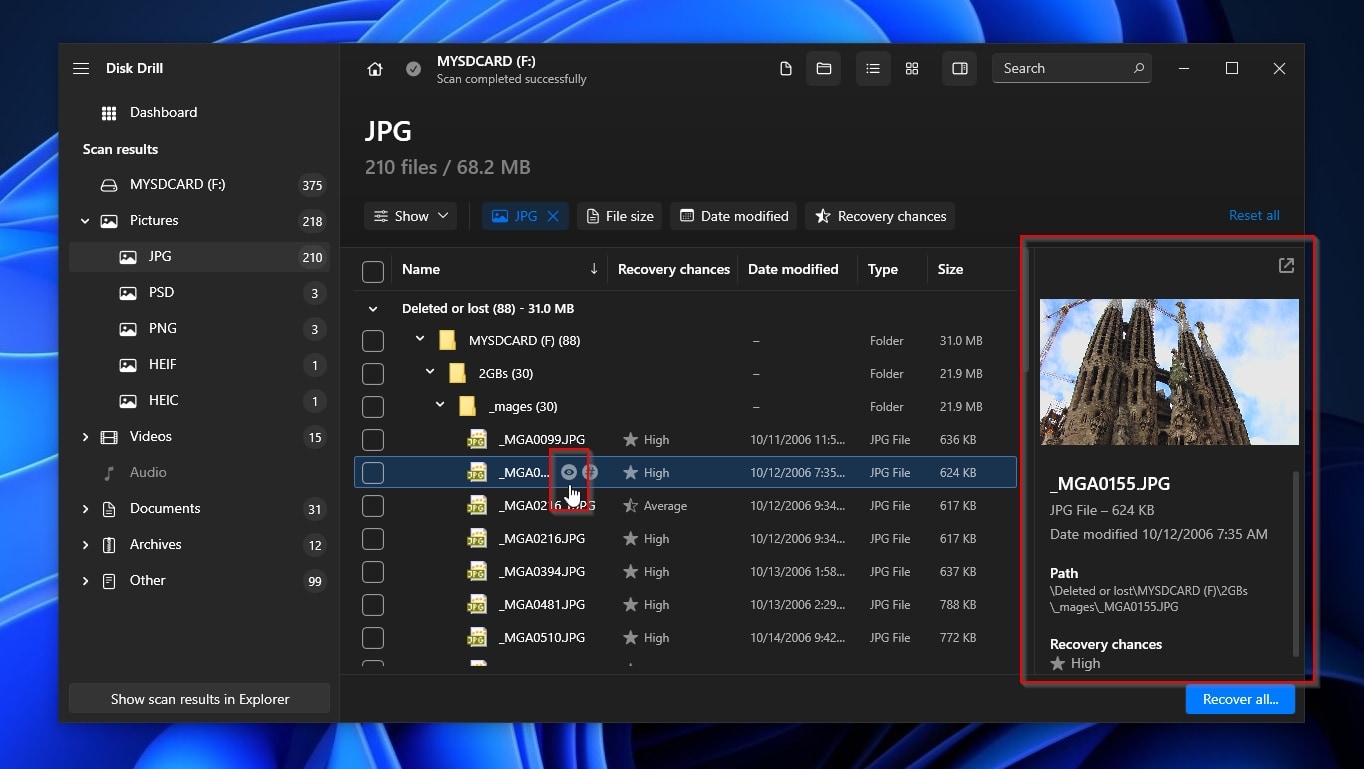
- Disk Drill may find hundreds of photos and other types of pictures in popular image formats, like JPG, PNG, etc. Can’t you tell from their filename if the files Disk Drill found are the ones you want to recover? Click on the little eye icon, which shows up when you point your cursor at a file, to see a preview of their contents.
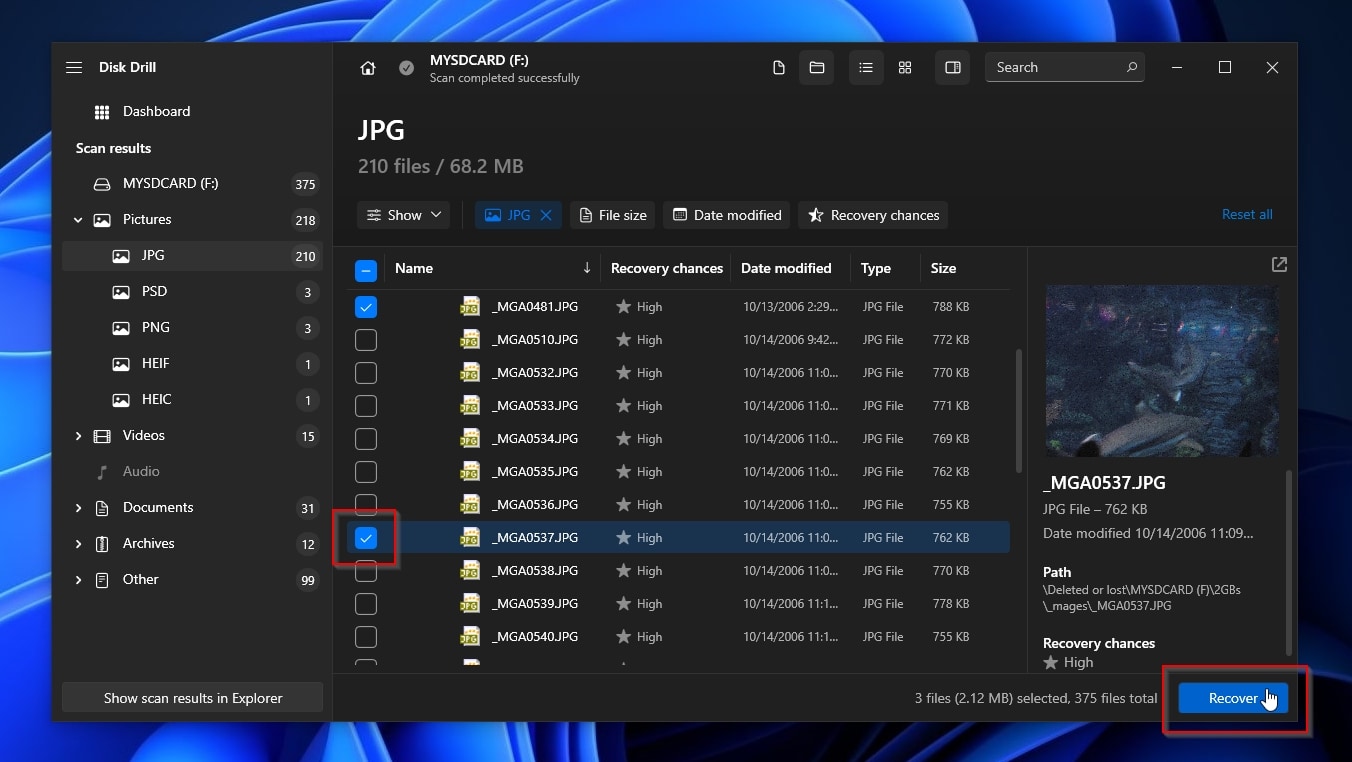
- Place a checkmark on the left of the files you want to get back and click on Recover.
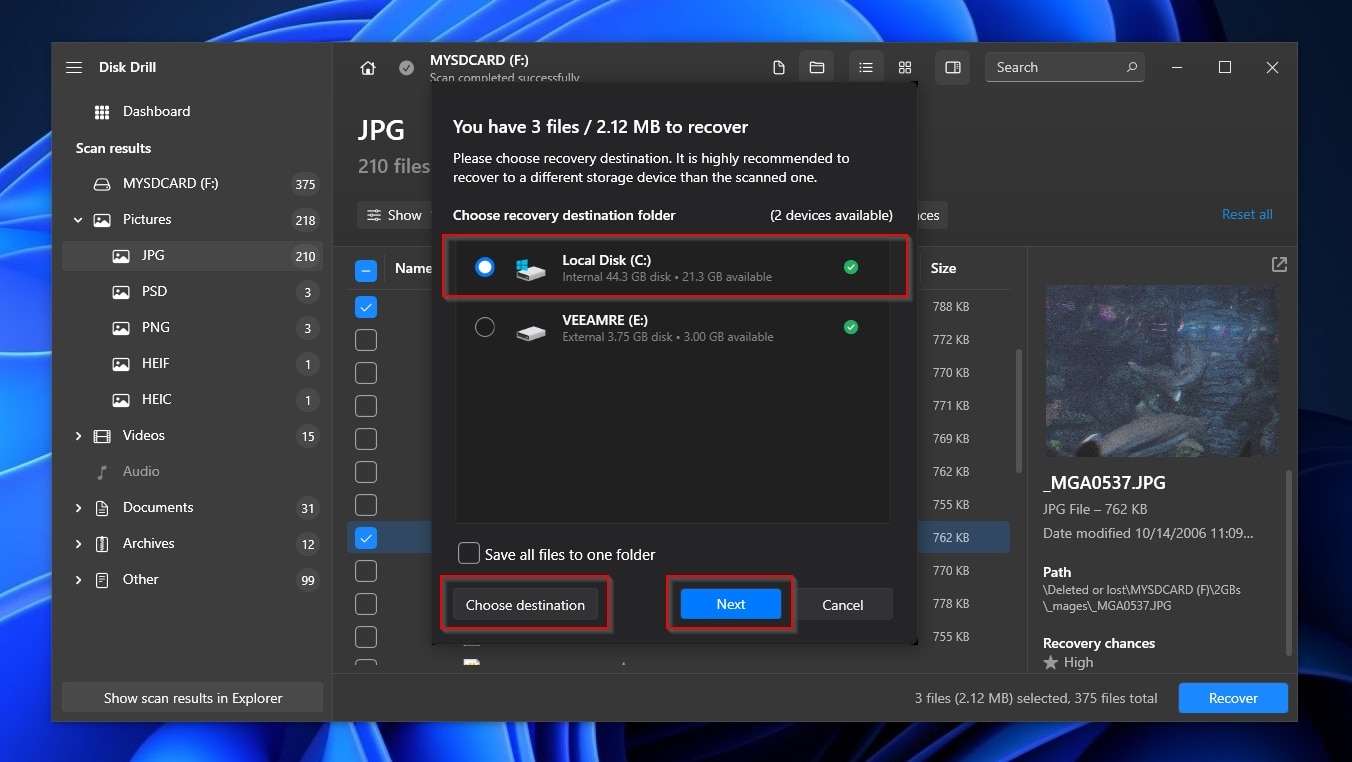
- Choose where you want to save the recovered files. Remember to select a different storage device than the SD card you’re recovering from to avoid overwriting any data.
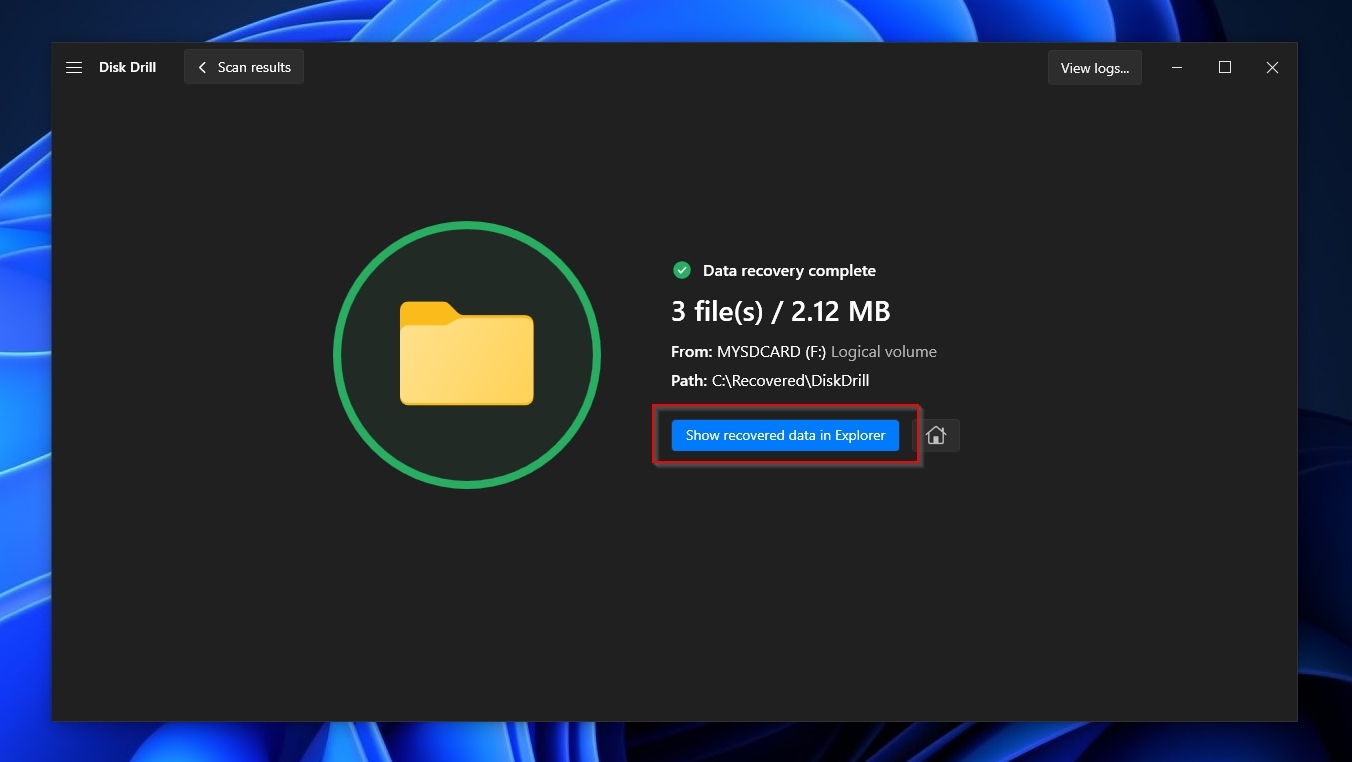
- Disk Drill’s zippy recovery will be complete soon after. You can check out the restored photos it brought back with a click on Show recovered data in Explorer.
If, for whatever reason, you’d prefer to try an alternative to Disk Drill, you’ll find more options in our article on the best SD card recovery software.
Method 2: Using Recovery Tool for Android
Android has many protection layers to protect your data from prying eyes. Because of that, apps that run on Android, even those specializing in handling files and recovering data, never have full, complete, and unrestricted access to its storage. Your Android device must be rooted to enable them to thoroughly scan the whole storage and locate as many files as possible.
That, though, only applies to software running on your Android device. By unplugging your SD card from your non-rooted, restricted Android phone and connecting it directly to your PC or Mac, an app like Disk Drill can scan its entire contents, locate, and bring back seemingly gone files. It’s worth noting that the app’s Mac version can also “directly” scan Android devices, and not only their detached SD cards.
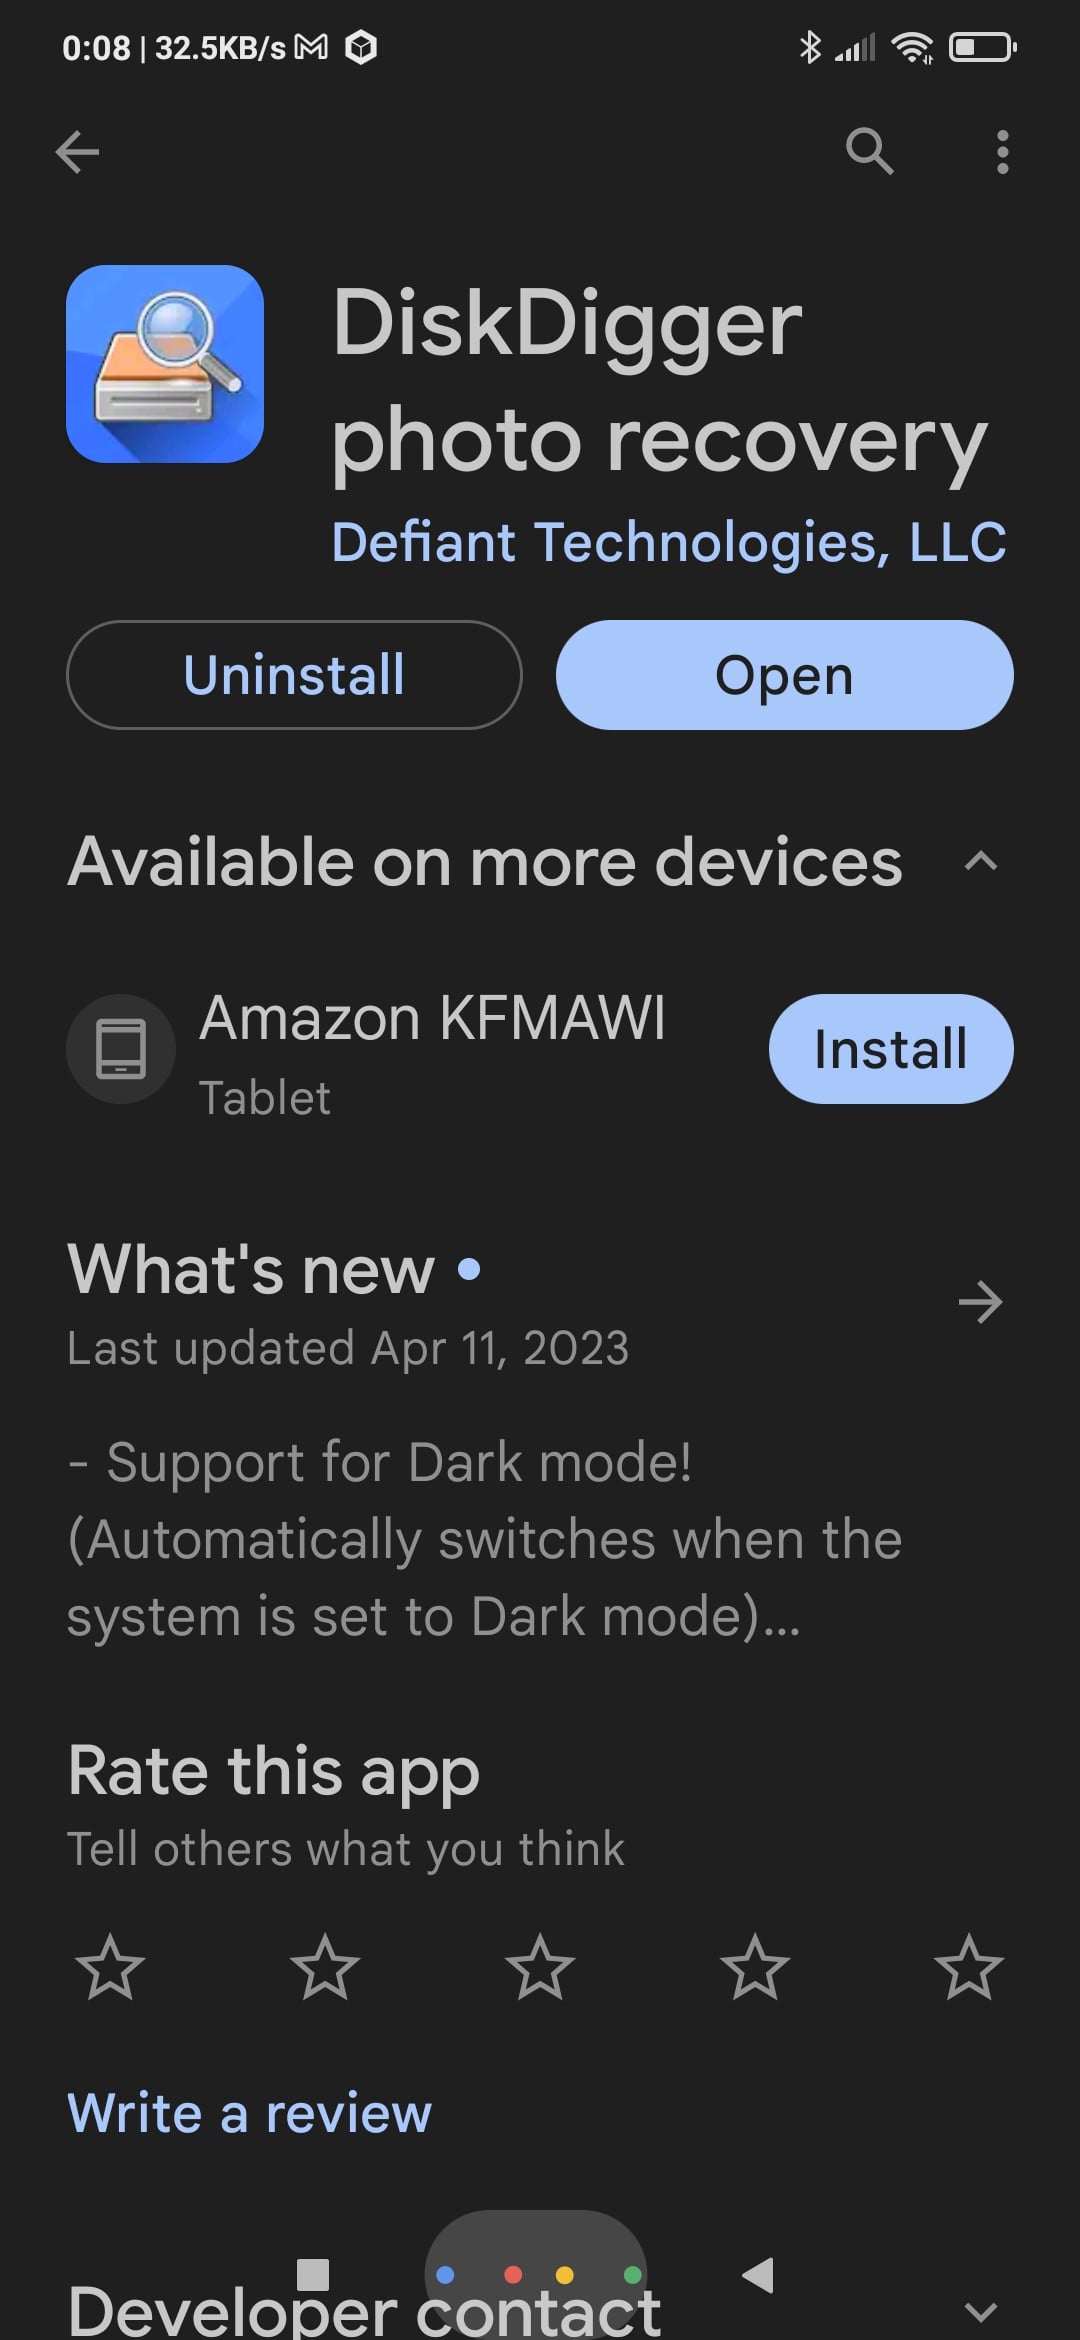
You don’t have access to a computer, or would you prefer to recover photos from an SD card on Android directly? You can use an app like DiskDigger, which you can consistently find among the best SD card recovery apps for Android. Still, if your device is not rooted, DiskDigger will only be able to save the thumbnails of your photos. To learn more about the app, check our review of DiskDigger’s Windows PC version.
To recover your deleted photos with DiskDigger directly on your Android device:
- Find the app in Google’s Play Store, install, and run it.
- From DiskDigger’s main screen, tap on Search for lost photos.
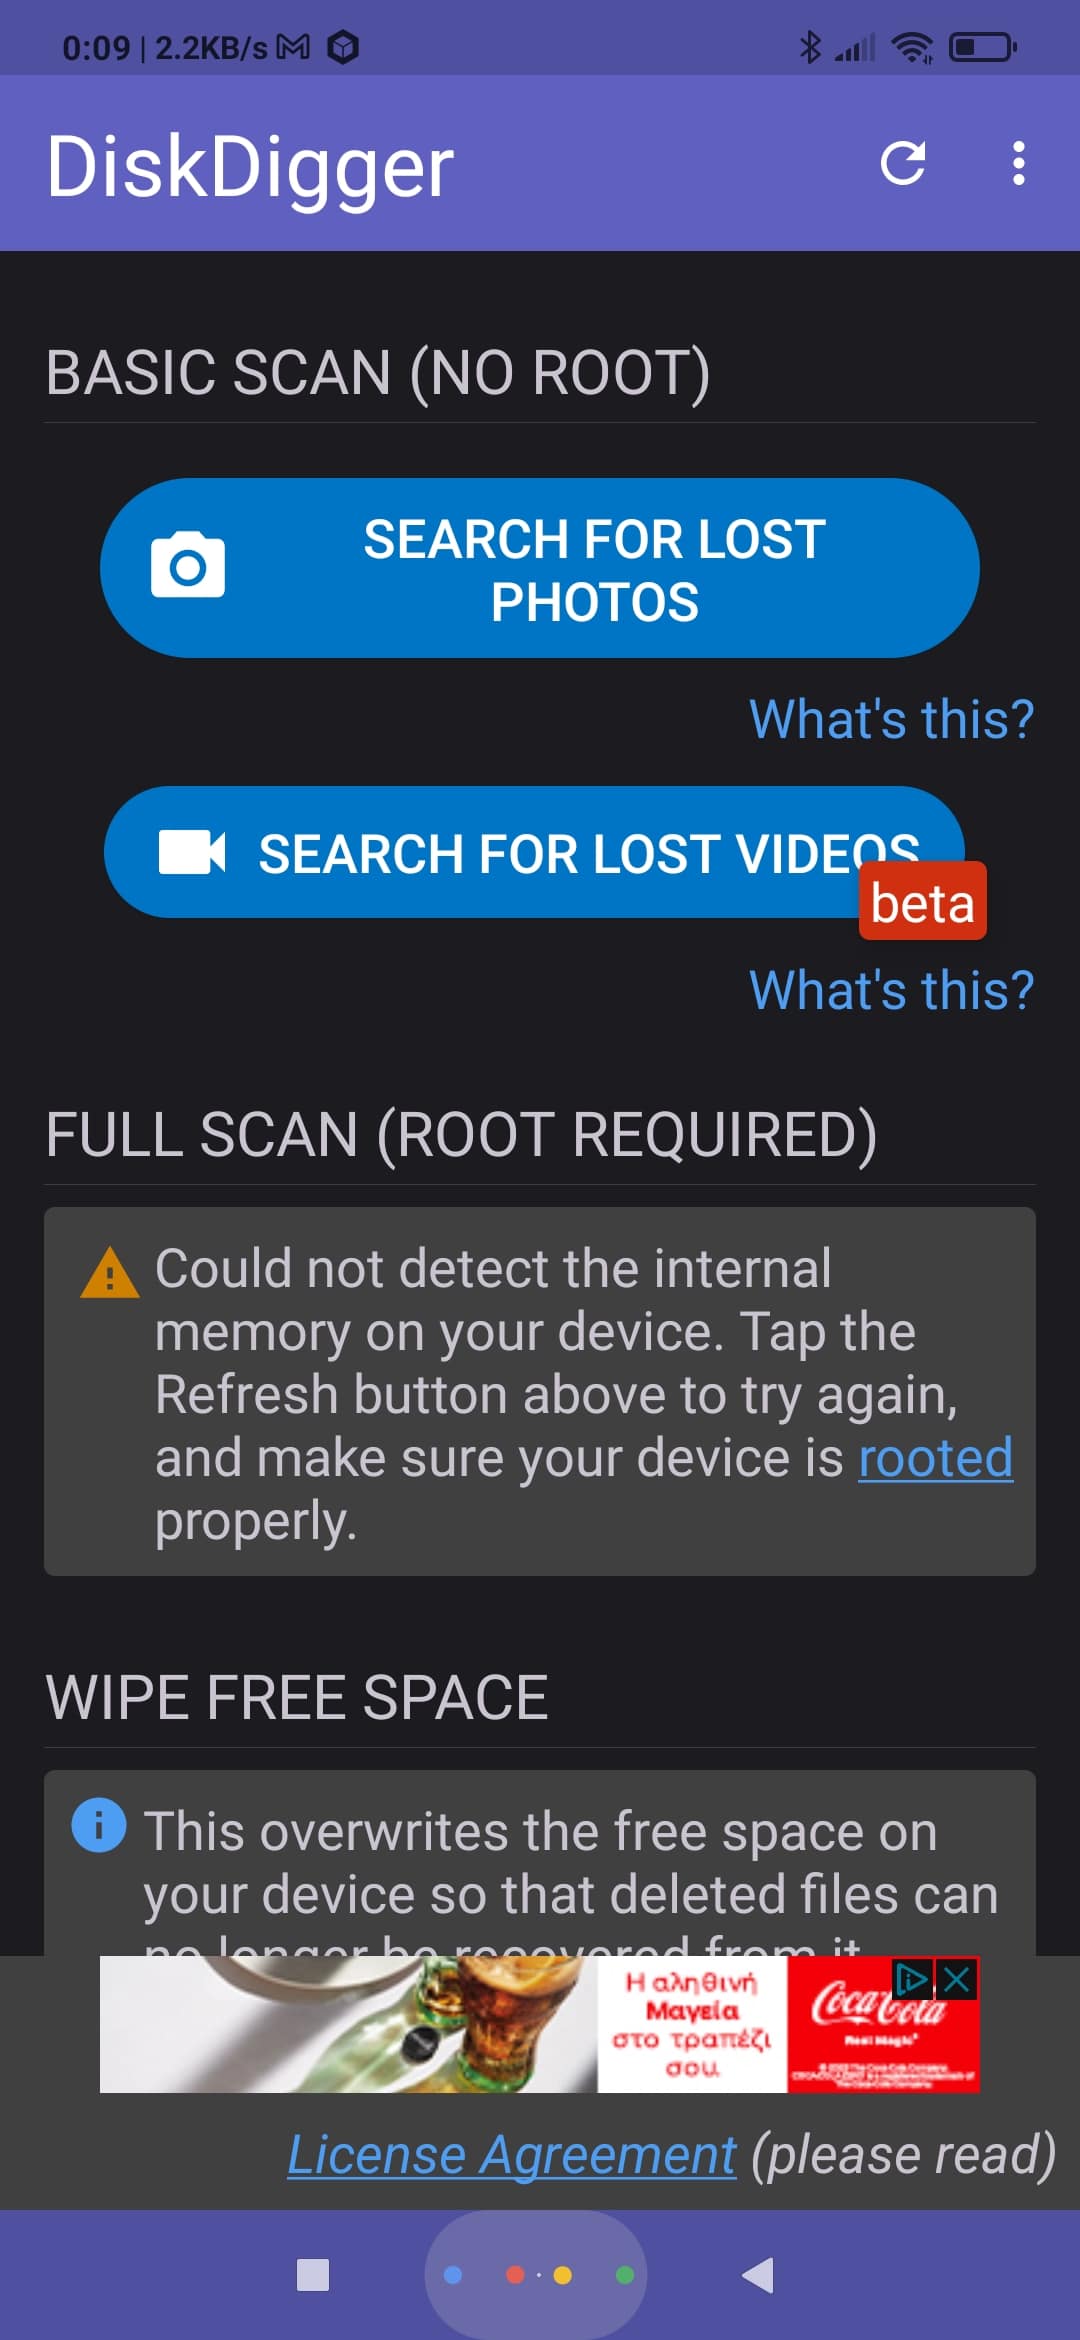
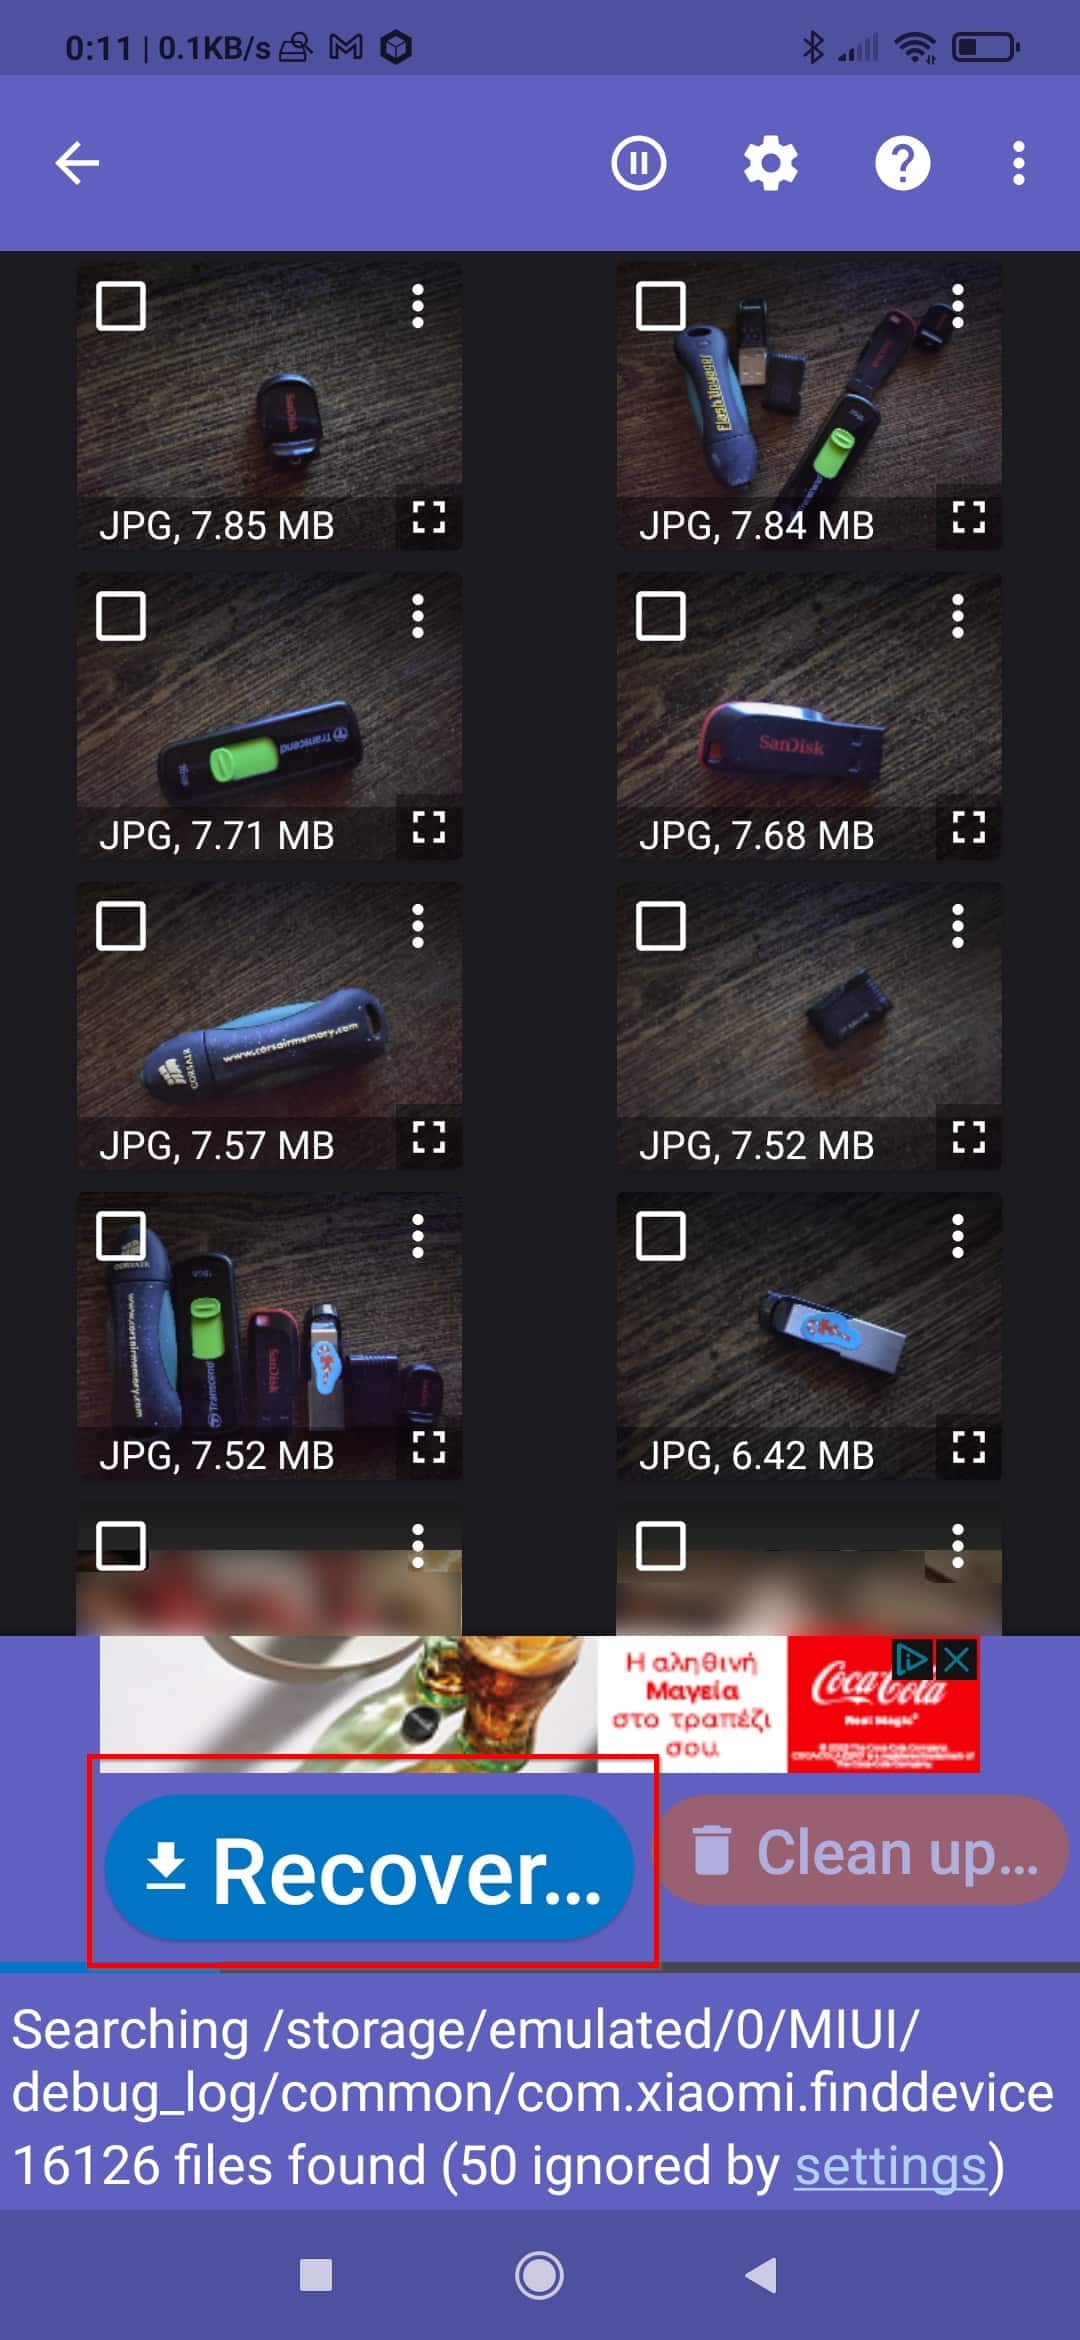
- DiskDigger will start scanning your device – including the SD card – for lost photos. If the ones you’re seeking show up before the scan finishes, you don’t have to wait for its completion: tap on your photos to select them and then tap on the big, blue, friendly Recover button.
- Choose the method you prefer for recovering your files. For this article, we went for the first option, (Recommended) Save the files to an app on your device (…).
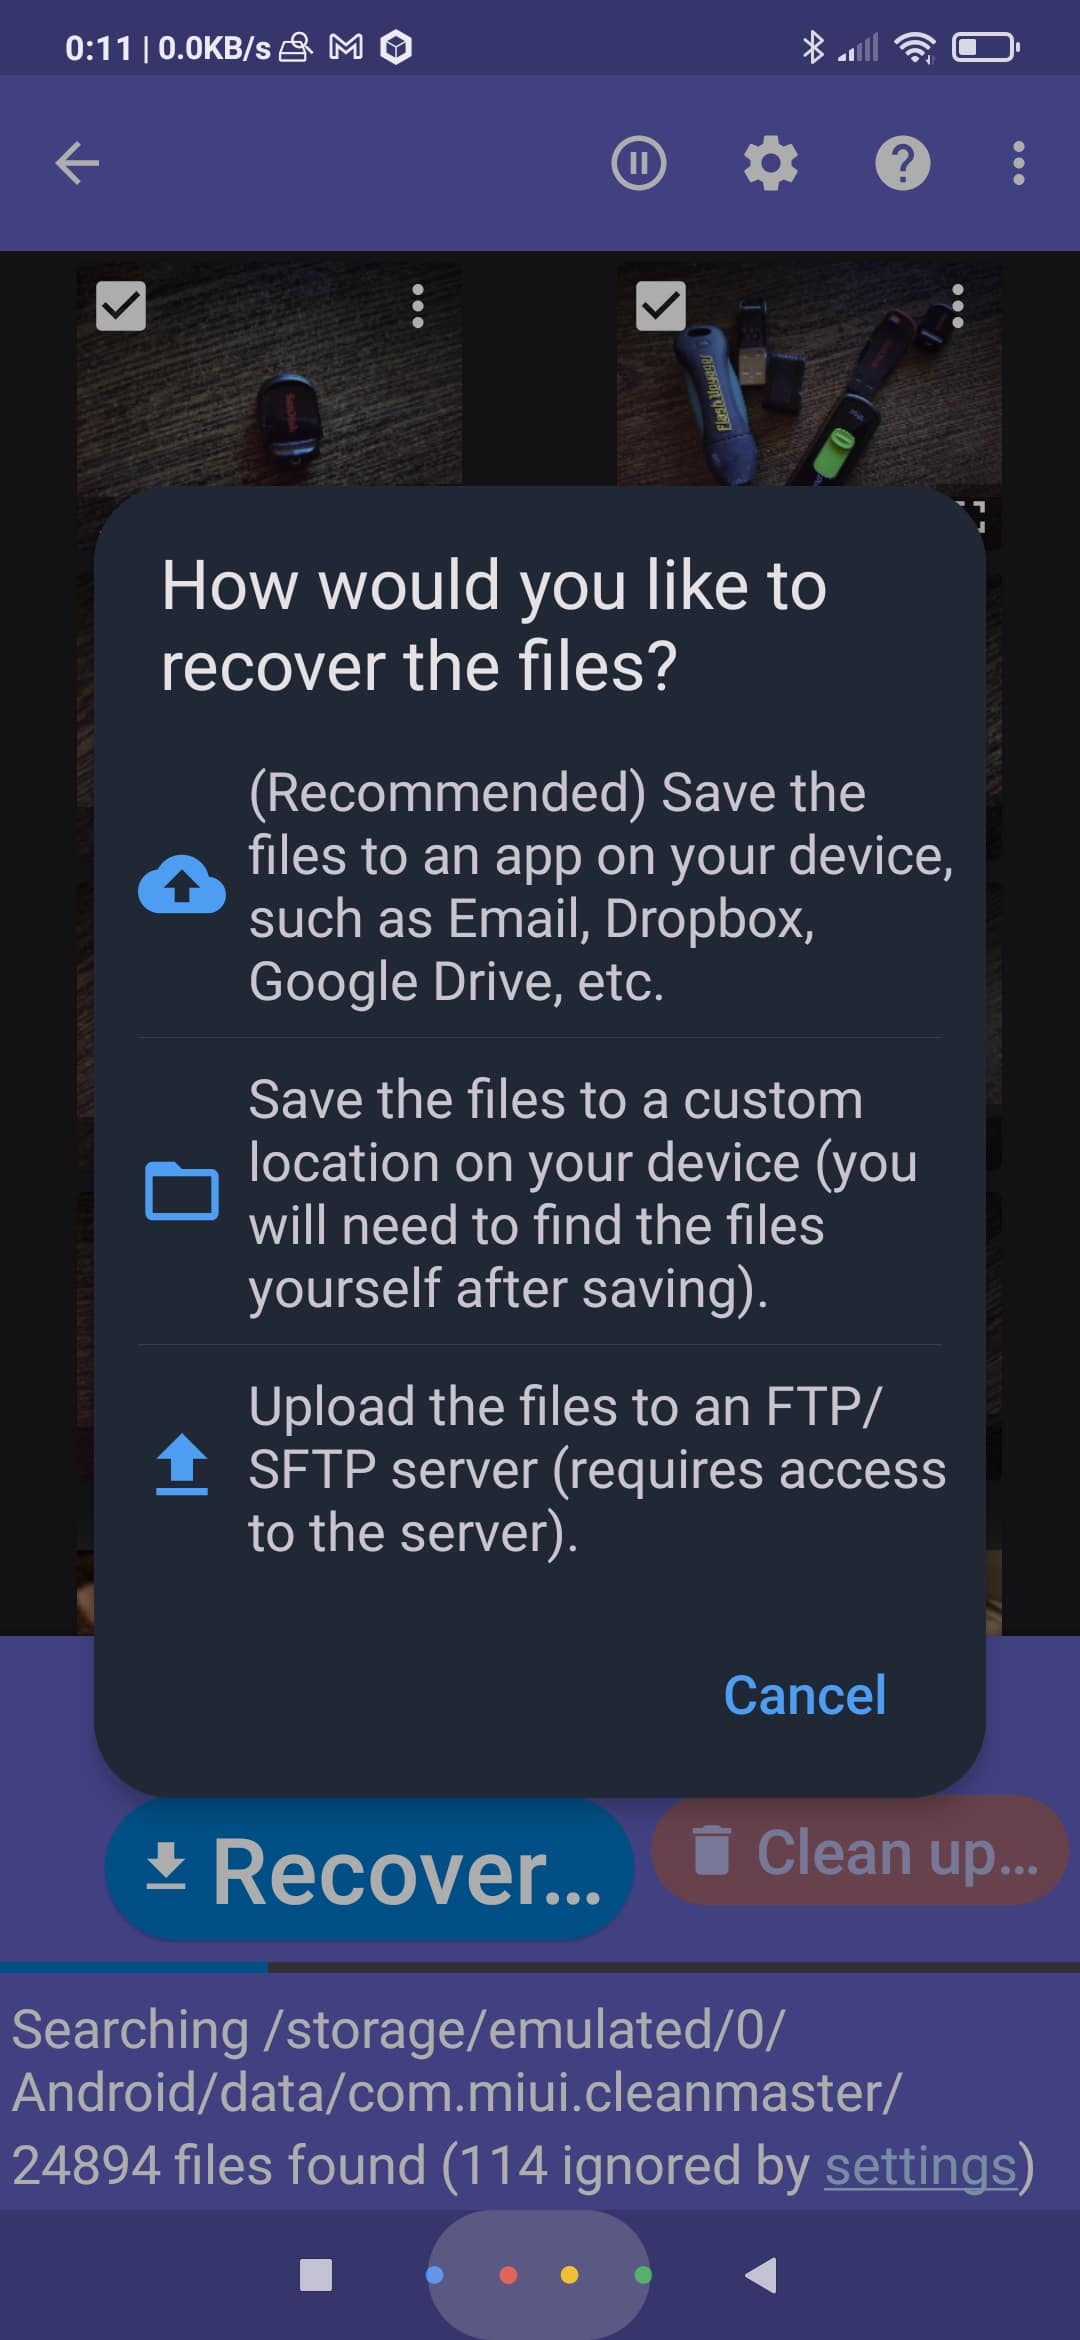
- If you chose the same approach, select the app where you want to “forward” your recovered photos. We decided on an email client and “sent” our photos to ourselves as attachments to an email.
If you didn’t manage to locate and save your deleted photos with the methods we saw, you’ll find more alternative solutions in our articles on how to recover deleted files from an SD card, and how to recover deleted photos from an SD card.
FAQ
How do I recover permanently deleted photos from my SD card?
Get back your deleted photos by scanning it with Disk Drill on Windows or macOS:
- Download Disk Drill from its official site, install, and run it.
- Scan your SD card with Disk Drill.
- Locate the permanently deleted photos you want back among the app’s results, and mark them for recovery.
- Choose a destination for the recovered files.
- Click Recover.
How to recover deleted photos from an SD card on an Android phone?
You can use an app like DiskDigger to recover deleted photos from an SD card directly on your Android phone.
- Seek DiskDigger at Google’s Play Store, install, and run it.
- Tap on Search for lost photos.
- Select the photos you want to recover.
- Choose how you want to recover them and where they’ll be saved/forwarded.
How to recover photos from an Android SD card for free?
Depending on if you want to use only your phone or have access to a PC or Mac, apps like Disk Drill and DiskDigger allow you to recover many of your deleted photos without paying for a license. Still, your photos may not even need recovering: you might be able to get them back by “unhiding” them or locating them among the “deleted albums” on your Android phone.
Conclusion
As we saw in this article, even if your photos are nowhere to be found, you still have many options for locating them. If they’re hidden, you can unhide them or the album they belong to. And if they’re deleted, specialized data recovery software solutions can locate their remnants on your Android’s SD card and undelete them.
At least, if you act quickly enough, for if you postpone trying to get them back, the app you’re using or Android itself might remove them to make space for newer files, or they could be overwritten. Spring into action as soon as you realize your files are gone, though, and you’ll probably be able to save all of them effortlessly.
This article was written by Odysseas Kourafalos, a Editor-in-Chief at Handy Recovery Advisor. It was also verified for technical accuracy by Andrey Vasilyev, our editorial advisor.
Curious about our content creation process? Take a look at our Editor Guidelines.