Losing files on your Mac, whether by accident or as a consequence of hardware failure, is an inconvenience. At some point, unfortunately, almost everyone experiences it.
However, losing an entire partition on your Mac can be critical. This could turn out even worse for those who are unfamiliar with Mac partition recovery, or even Mac partitions in general. Luckily, there are ways to recover your data, even if that data sits in a recently formatted APFS or HFS partition.
In this article, we’re going to look at some helpful ways you can recover deleted partitions on your Mac to recover the files you need.
Do you want to skip the theory part and go straight to the recovery guide? Click here.
What Are Mac Partitions?
Partitions are used by both Windows and macOS. Partitions allow you to segment your hard drive into smaller portions, giving you more control over where your data is, and how you want it organized. Effectively, partitions make up the logical portions of your hard drive where data is stored.
Partition types, also known as file systems, dictate how your hard drive handles your data. Apple directly supports three partition types: Apple File System (APFS), Mac OS Extended (HFS+), and MS-DOS (FAT)\ExFAT. macOS also has read-only support for NTFS (New Technology File System).
- Apple File System (APFS) – By default, all Macs with macOS 10.13 or later use the Apple File System (APFS) partition type. APFS is optimized for SSD storage that’s used in recent Mac computers, but it also supports older, traditional hard disk drives (HDD) and externally attached storage. APFS has strong encryption and features space sharing, snapshots, and improved file system fundamentals.
- Mac OS Extended (HFS+) – Prior to APFS, HFS+ was the default file system, appearing on all Macs with macOS 10.12 and earlier. While it can still be used as a partition type, Apple discourages it, as it lacks important features that are otherwise very common in modern partition types, such as encryption.
- MS-DOS (FAT) and exFAT – Both FAT and exFAT are file systems developed by Microsoft and are traditionally found on Windows systems. Apple supports these partition types for those who work with dual operating systems or external storage devices formatted in Windows.
No matter what partition type your system uses, information regarding your partitions is stored in the partition table. This partition table allows your operating system to understand where your files are located by reading the partitions on your disk drive.
In addition to the partition type, the partition can be Primary, Extended, or Logical:
- Primary Partition – Your OS is stored on a Primary partition. Primary partitions are the only type of partitions that can be booted from by the BIOS on startup. You can have multiple Primary partitions and choose which one you’d like to boot to. You can only have four Primary partitions on a single drive.
- Extended Partition – Extended partitions hold Logical partitions. Data cannot be stored on them directly, but instead, data is stored on the Logical partitions within the Extended partition. If an Extended partition exists on a drive, it will occupy one of the four Primary partition slots.
- Logical Partition – While there can only be four Primary partitions (or three Primary partitions and one Extended partition), there is no limit to the number of Logical partitions that can be created within an Extended partition. Logical partitions can be formatted with any filesystem and can be used to store data.
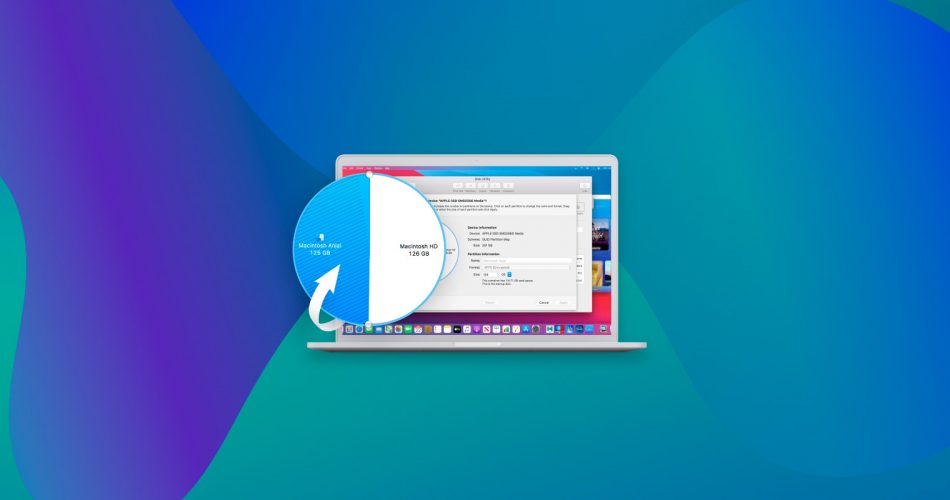
You can check the status of your partitions using the Disk Utility tool that’s included with macOS. With this tool, you can also view information like what type of partition you have and how much storage space is left.
Both partitions and partition tables have a chance of being recovered, though the likelihood depends on the damage sustained. In any case, recovery should always be attempted. If an entire partition cannot be recovered, some of the data may be recoverable at least.
What Can Cause Partition Loss on Your Mac?
There are many reasons why a partition could have been deleted or lost. Some are avoidable, some are not. Let’s take a look at a few of the reasons:
- ⚙️ Hardware-related issues – Notable hardware issues include fatal hard drive errors and file system corruption. This can be caused by logical or physical corruption to the disk drive, power failure, or extreme operating temperatures. Most forms of hardware failure and system corruption are unavoidable and can strike at random.
- 🦠 Malware or virus attacks – Malware and viruses can be designed to corrupt your data and specifically target your disk drives, causing catastrophic loss of your files.
- 💁♂️ User error – Partition loss can occur if there is an error made during hard drive partitioning. Partitioning a hard drive is a delicate process, and an accidental format can easily wipe an entire partition in mere seconds. Because of this, it’s always recommended that you take your time and check over everything before taking any actions.
- 🔋 Power loss or unexpected system shutdown – Your computer is constantly running processes in the background, even when idle. If your computer shuts down during an important event like an operating system upgrade, BIOS upgrade, or partition resize, it can cause partition loss, among other issues.
- ⛔ Incorrect command usage – If you’re making modifications to your partitions using the Terminal, it’s easy to make a mistake if you don’t know what you’re doing. The diskutil command is used to do everything partition-related – create, mount, unmount, and of course, delete. Before using it, be sure to understand exactly what your syntax is doing.
- 💻 Corrupted partition table – The partition table, also referred to as the Master Boot Record (MBR), GUID Partition Table (GPT), or Apple Partition Map, holds information pertaining to the structure of your partitions. Your operating system uses this table to understand where your data needs to go. If any of these partition table types are corrupted, it can cause your partitions to disappear.
How to Recover a Mac Partition
No matter how the partition was lost, there’s no doubt that it’s a huge inconvenience. We’re going to look at a few ways you can recover your data.
Method 1: Recover Specific Files from a Mac Partition
Instead of recovering the whole partition, you may only need to recover a few important files. In this case, you can use specialized partition recovery software to recover the files that you need. For file recovery, you can try Disk Drill, recovery software for Macs that focuses on recovering deleted files.
Our editorial team makes use of it all the time because it’s simple, robust, and has a proven record of successful file recoveries. Not to mention, it’s a lot more cost-effective compared to other Mac file recovery software on the market.
There are three types of partition recovery supported by Disk Drill:
- Universal Partition Search – Disk Drill will scan the disk for any partition headers. Any partitions that are discovered are mounted as a virtual disk. This virtual disk allows the partition to be scanned so that lost files can be recovered.
- Scan for Lost HFS+ Partition – If your HFS+ partition has been reformatted, Disk Drill will scan for reformatted partitions and rebuild them using the backup copy of their header. The header is used to recover the data structures that were in place before the reformat and mounts them as a virtual disk for recovery.
- Rebuild HFS+ Catalog File – Each Mac has a catalog file that stores records of all the files and directories stored in the volume. If recovering the HFS+ partition isn’t possible, Disk Drill will attempt to rebuild the catalog file instead. The catalog file is then mounted as a virtual disk to be scanned for lost data.
No matter what partition recovery type is used, all types will display any lost or recoverable data.
To recover files from a lost Mac partition using Disk Drill:
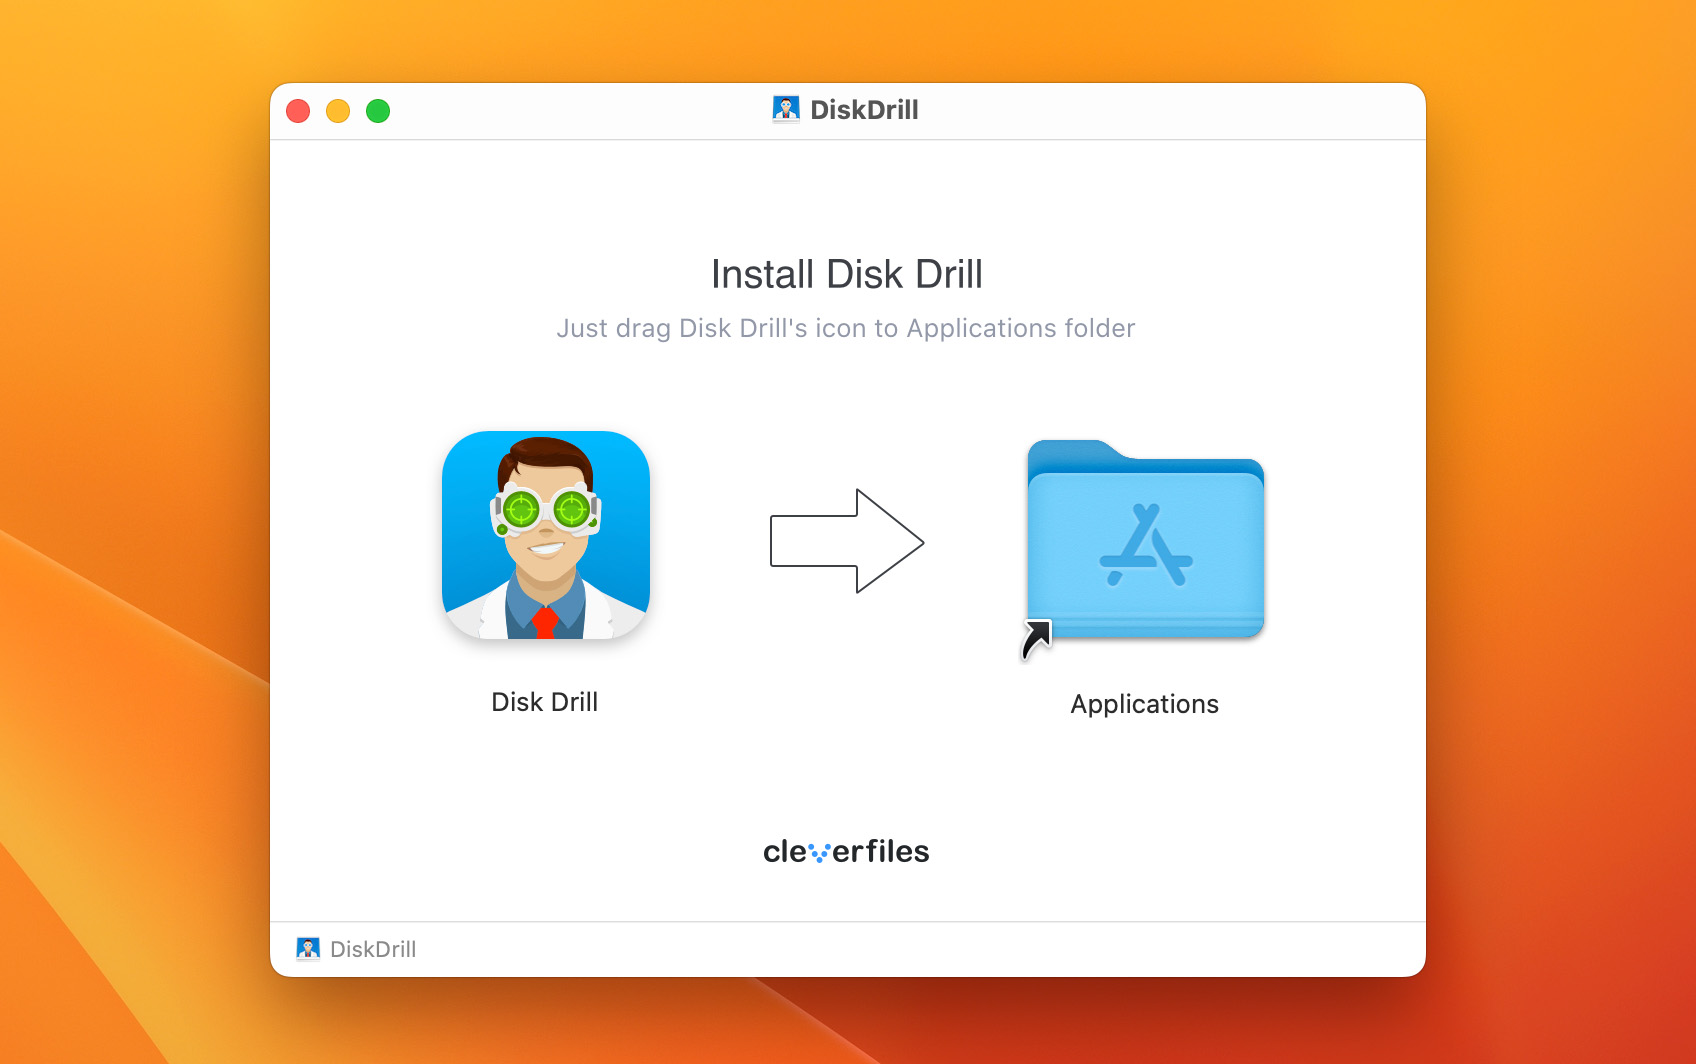
- Download and Install Disk Drill. Disk Drill is available for both Windows and Mac. To begin, download Disk Drill to your Mac, and install it.
- Scan Your Mac. Once installed, open Disk Drill. Inside, you’ll be able to see your hard drives and partitions, as well as a “Search for lost data” button. Click the “Search for lost data” button on the drive where data loss has recently occurred. This will begin scanning the disk for recoverable data.
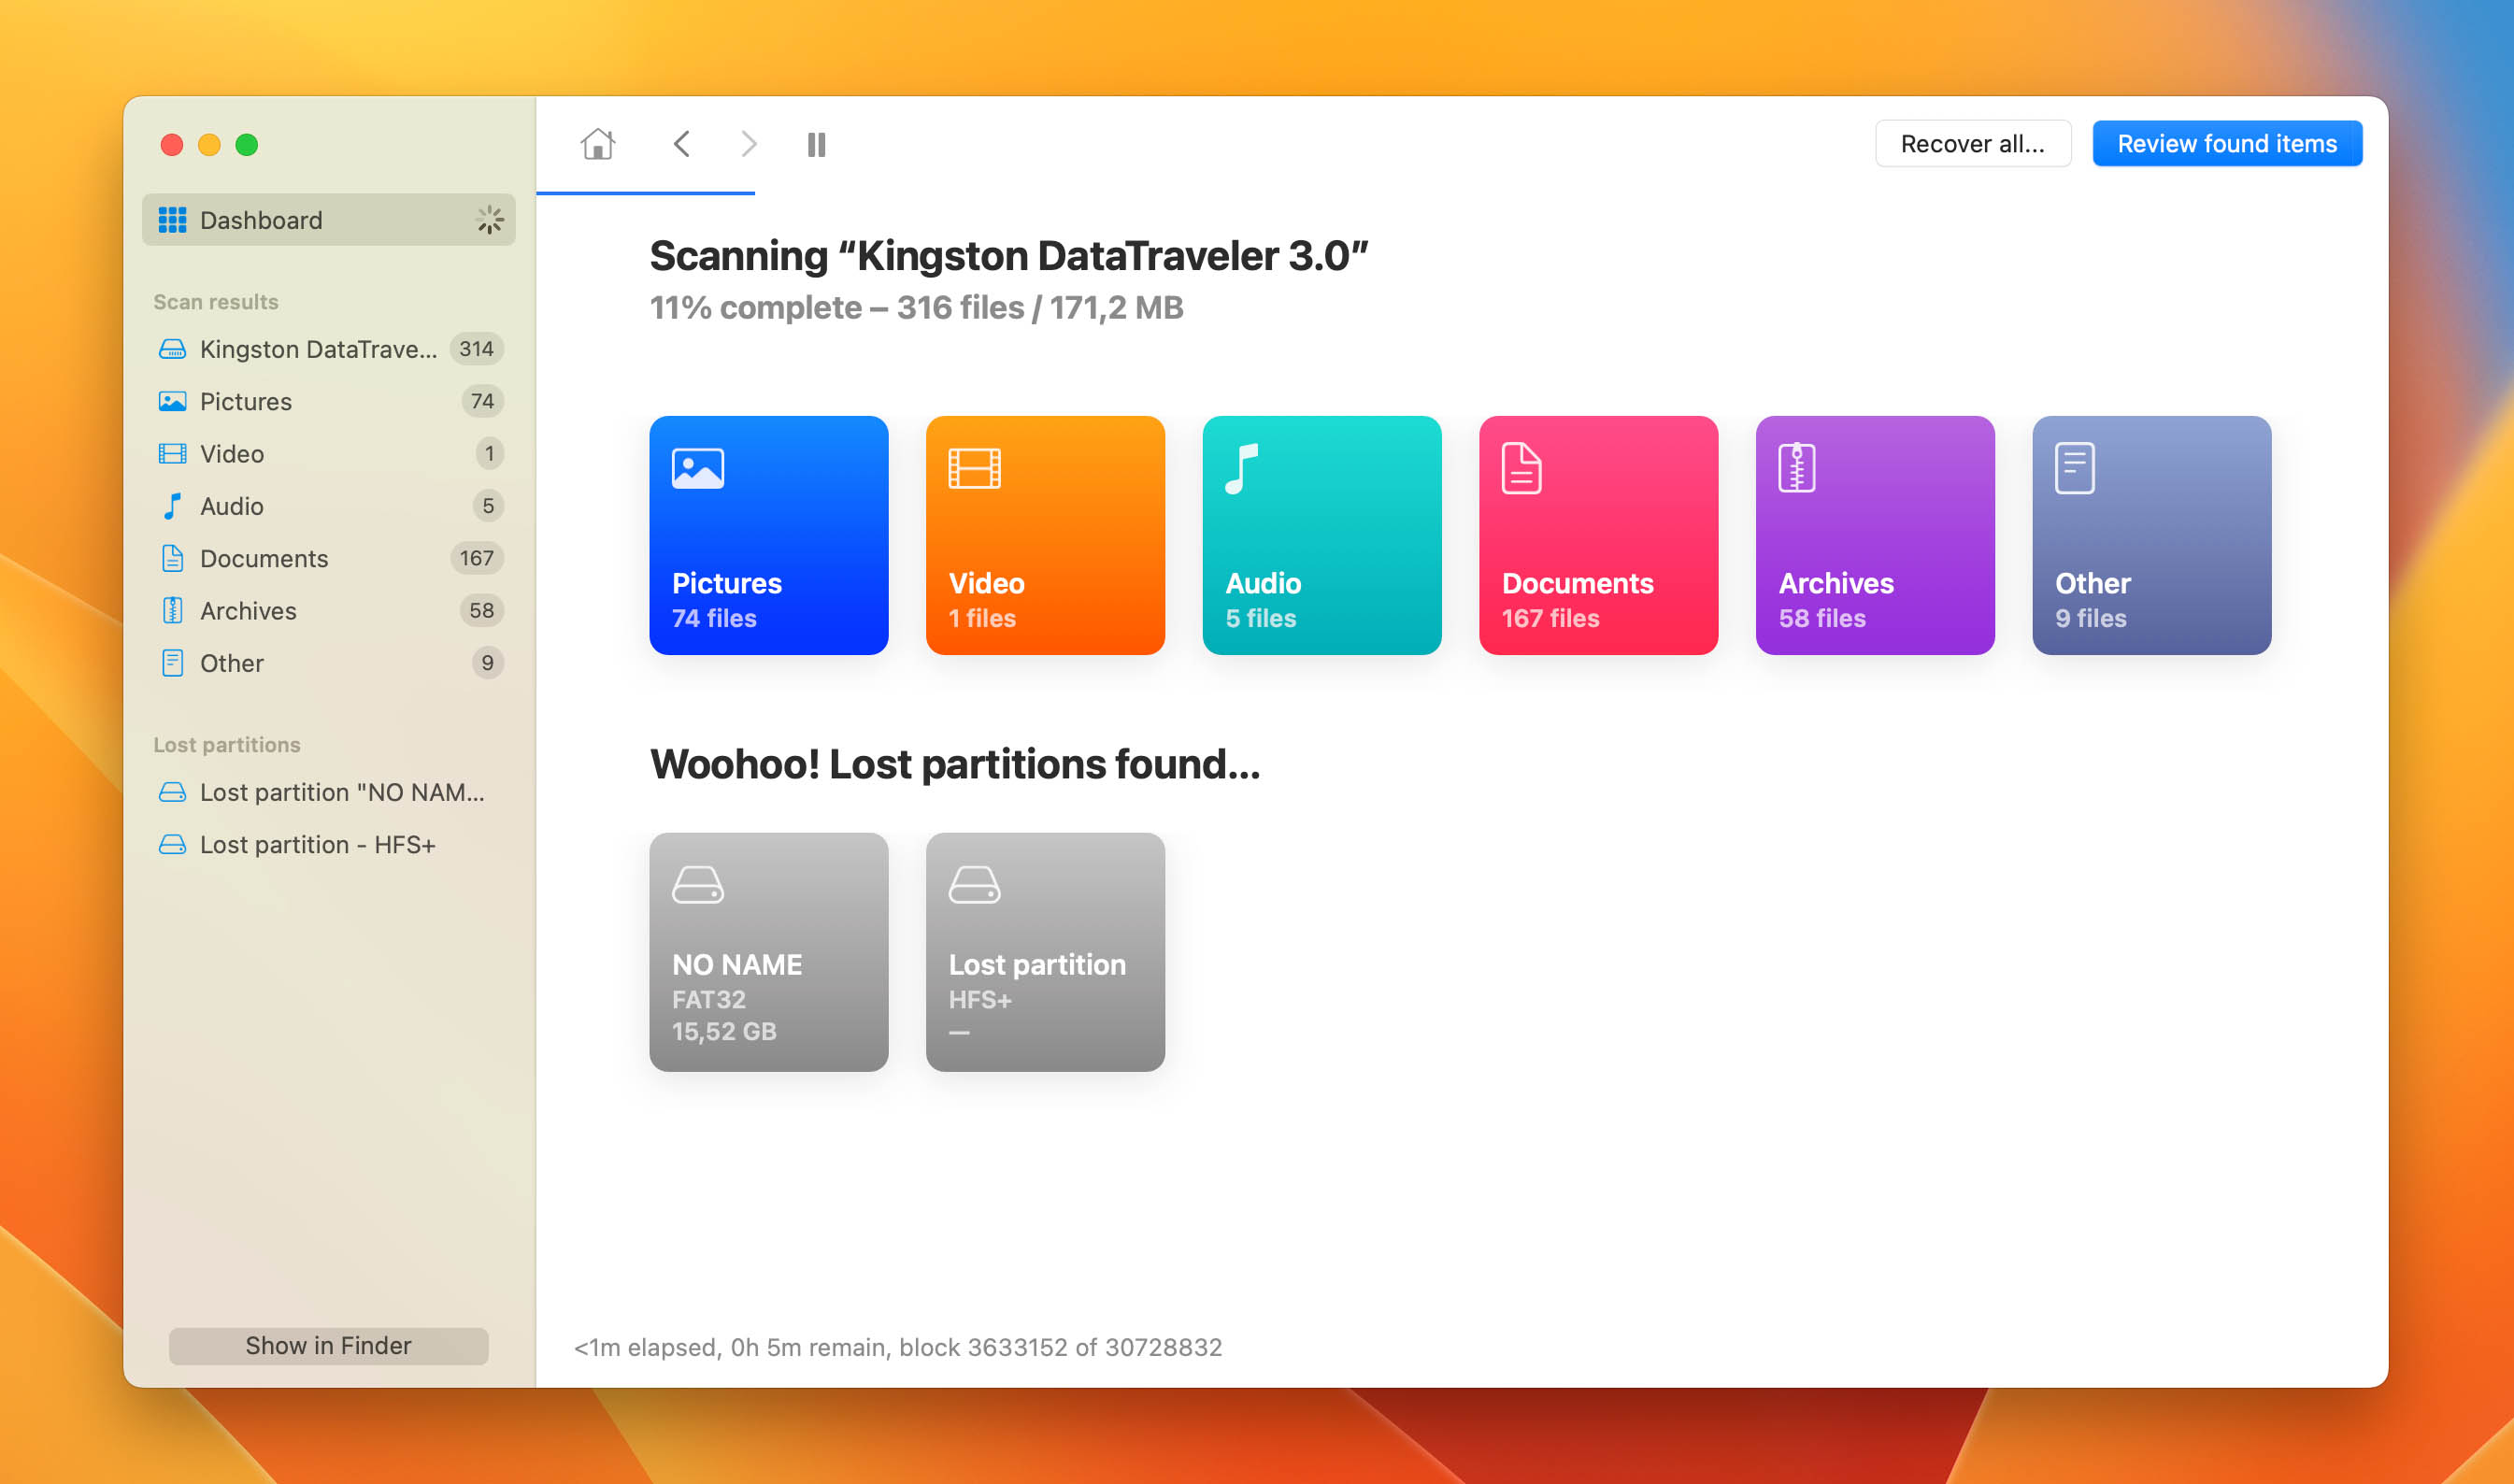
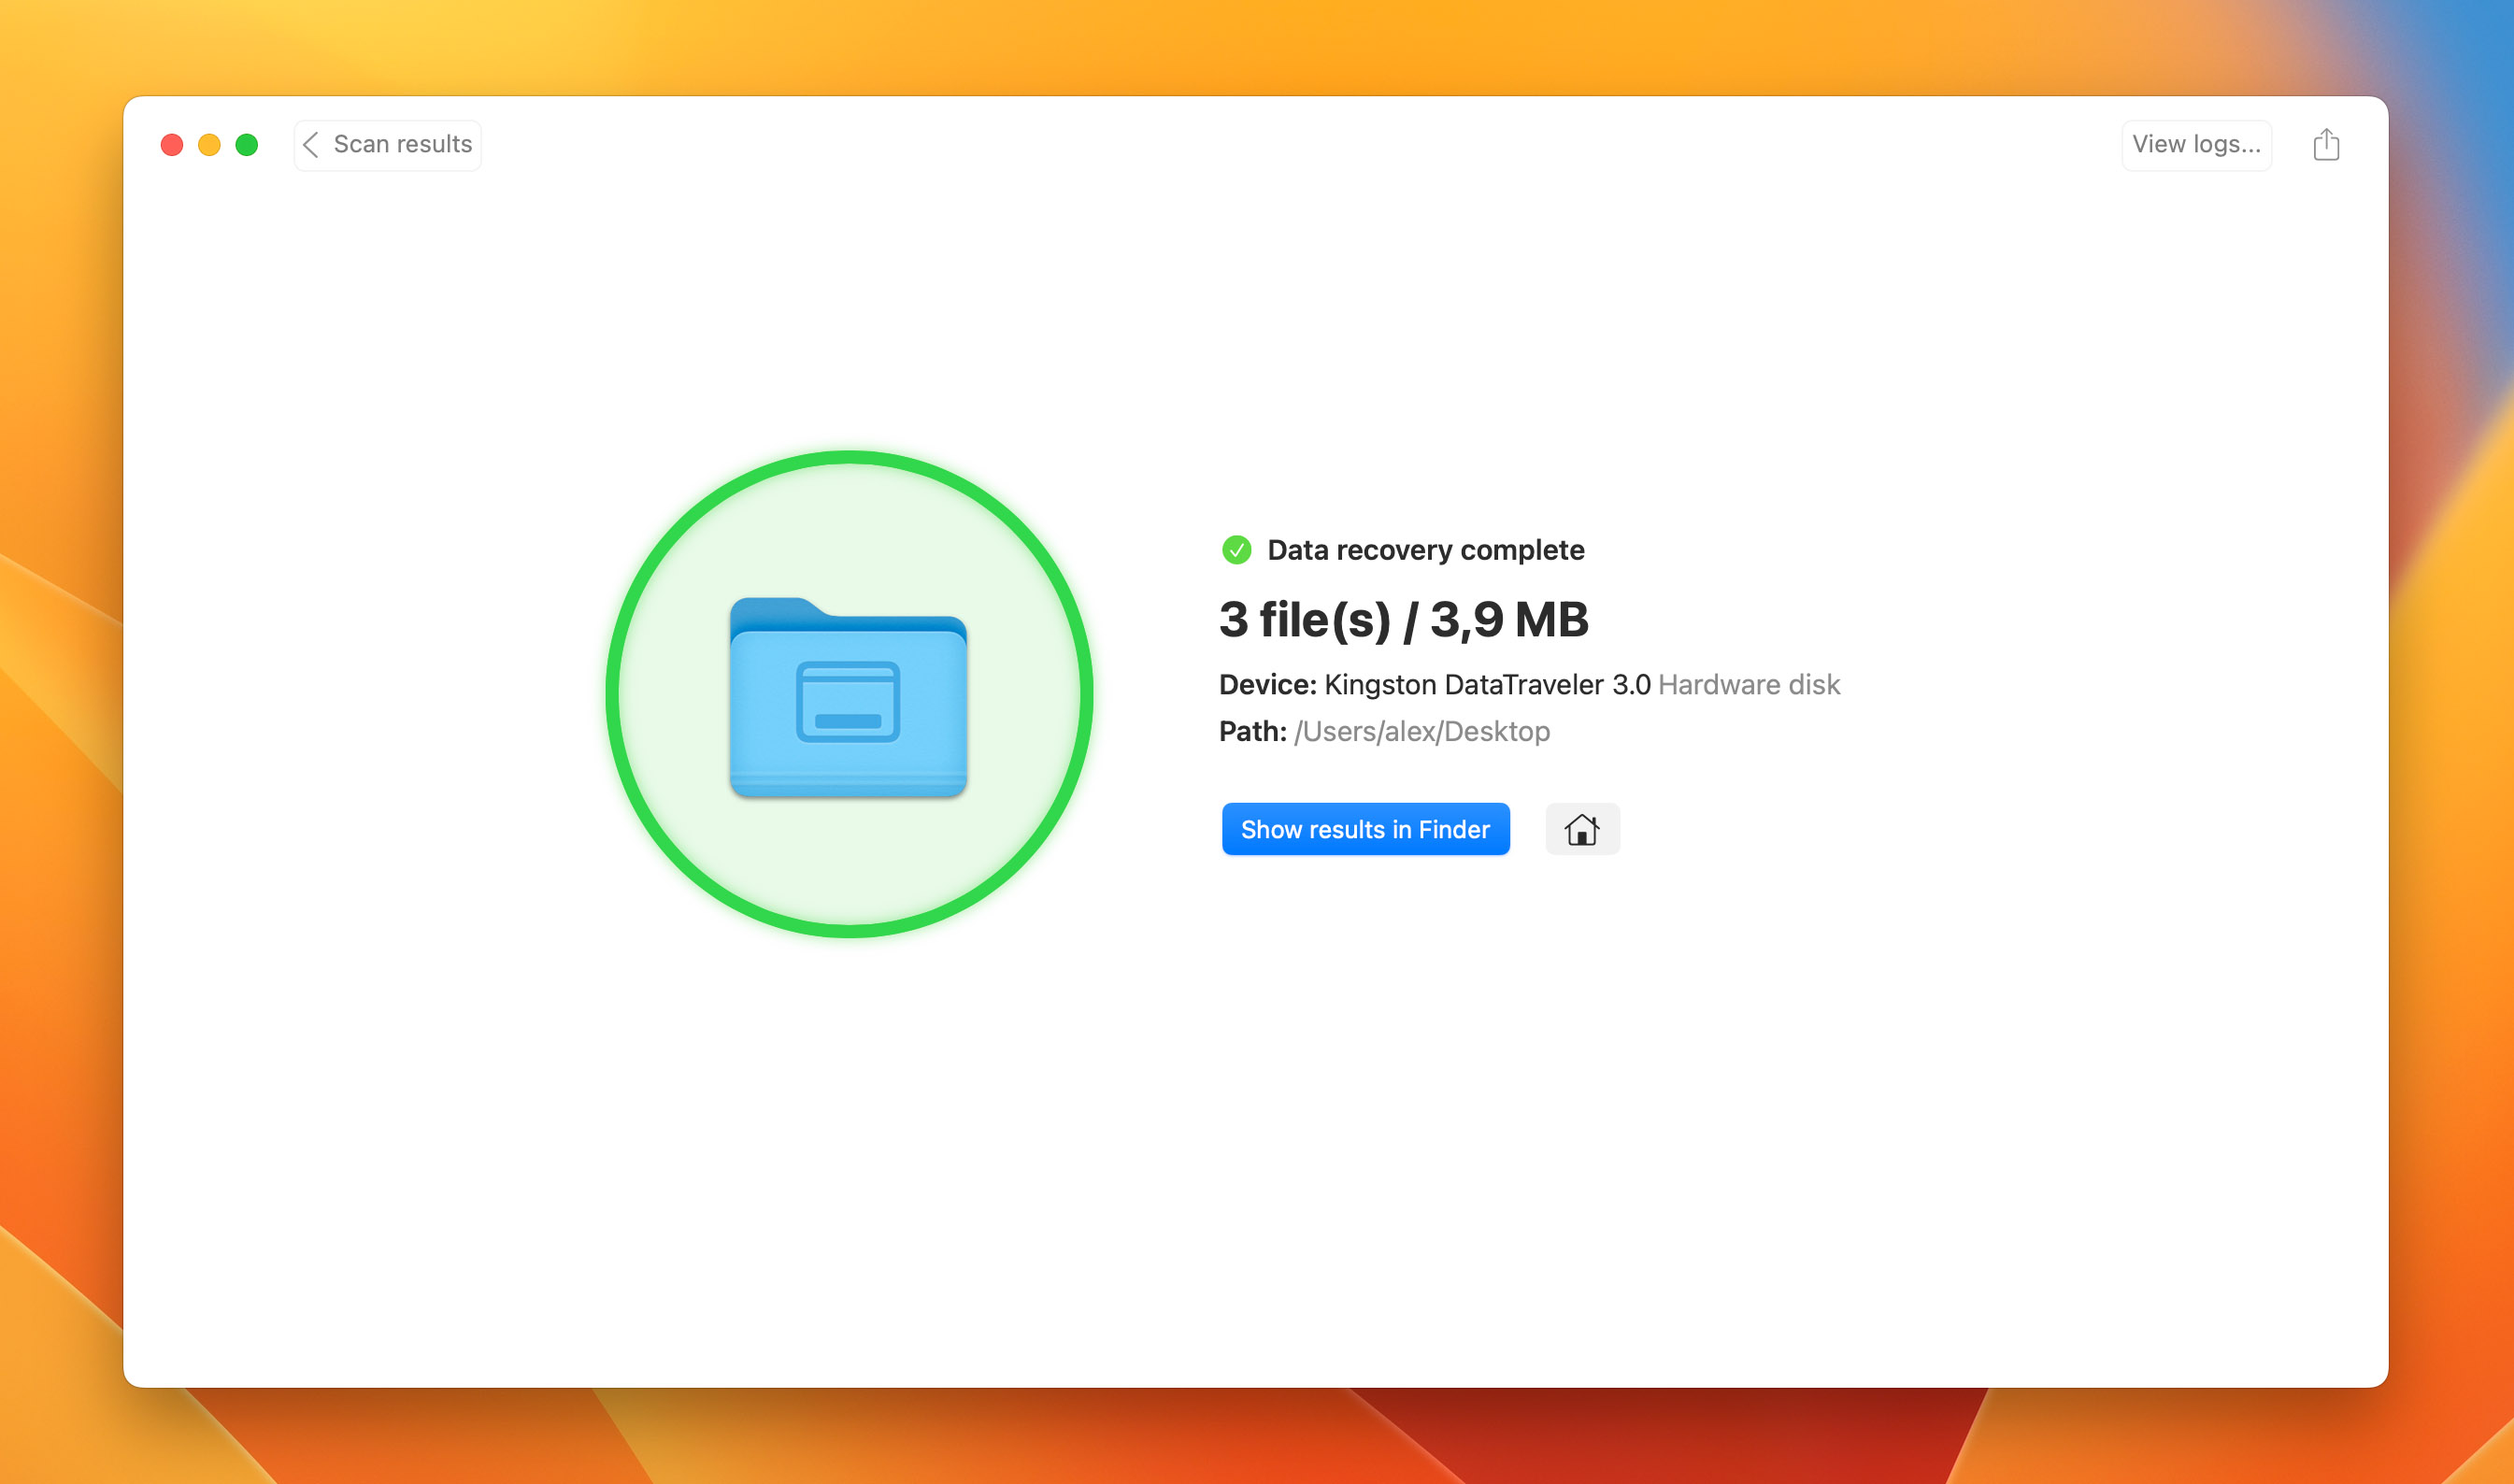
- Recover Your Files. One Disk Drill has finished scanning the drive or partition, you will be presented with a list of files that you can choose from to recover. At this point, it’s as easy as selecting the files you’d like to recover, and clicking the Recover button.
Interested in learning more about Disk Drill? We have conducted two comprehensive reviews of this product. Our first review evaluated its data recovery capabilities, while the second focused on testing Disk Drill’s performance in data and PC security. As for a review of the macOS version of Disk Drill, a comprehensive one can be found here.
Method 2: Recover an Entire Deleted or Lost Partition on a Mac
To recover entire partitions that have either been lost or deleted, we’ll need a larger solution. TestDisk is a great tool for recovering whole partitions. Open source and available on multiple platforms, it’s the go-to tool for big jobs like this.
Because it doesn’t offer a graphical interface, it’s not as beginner-friendly as applications like Disk Drill. However, we’ve written some instructions below for you to follow.
To recover a lost or deleted Mac partition using TestDisk:
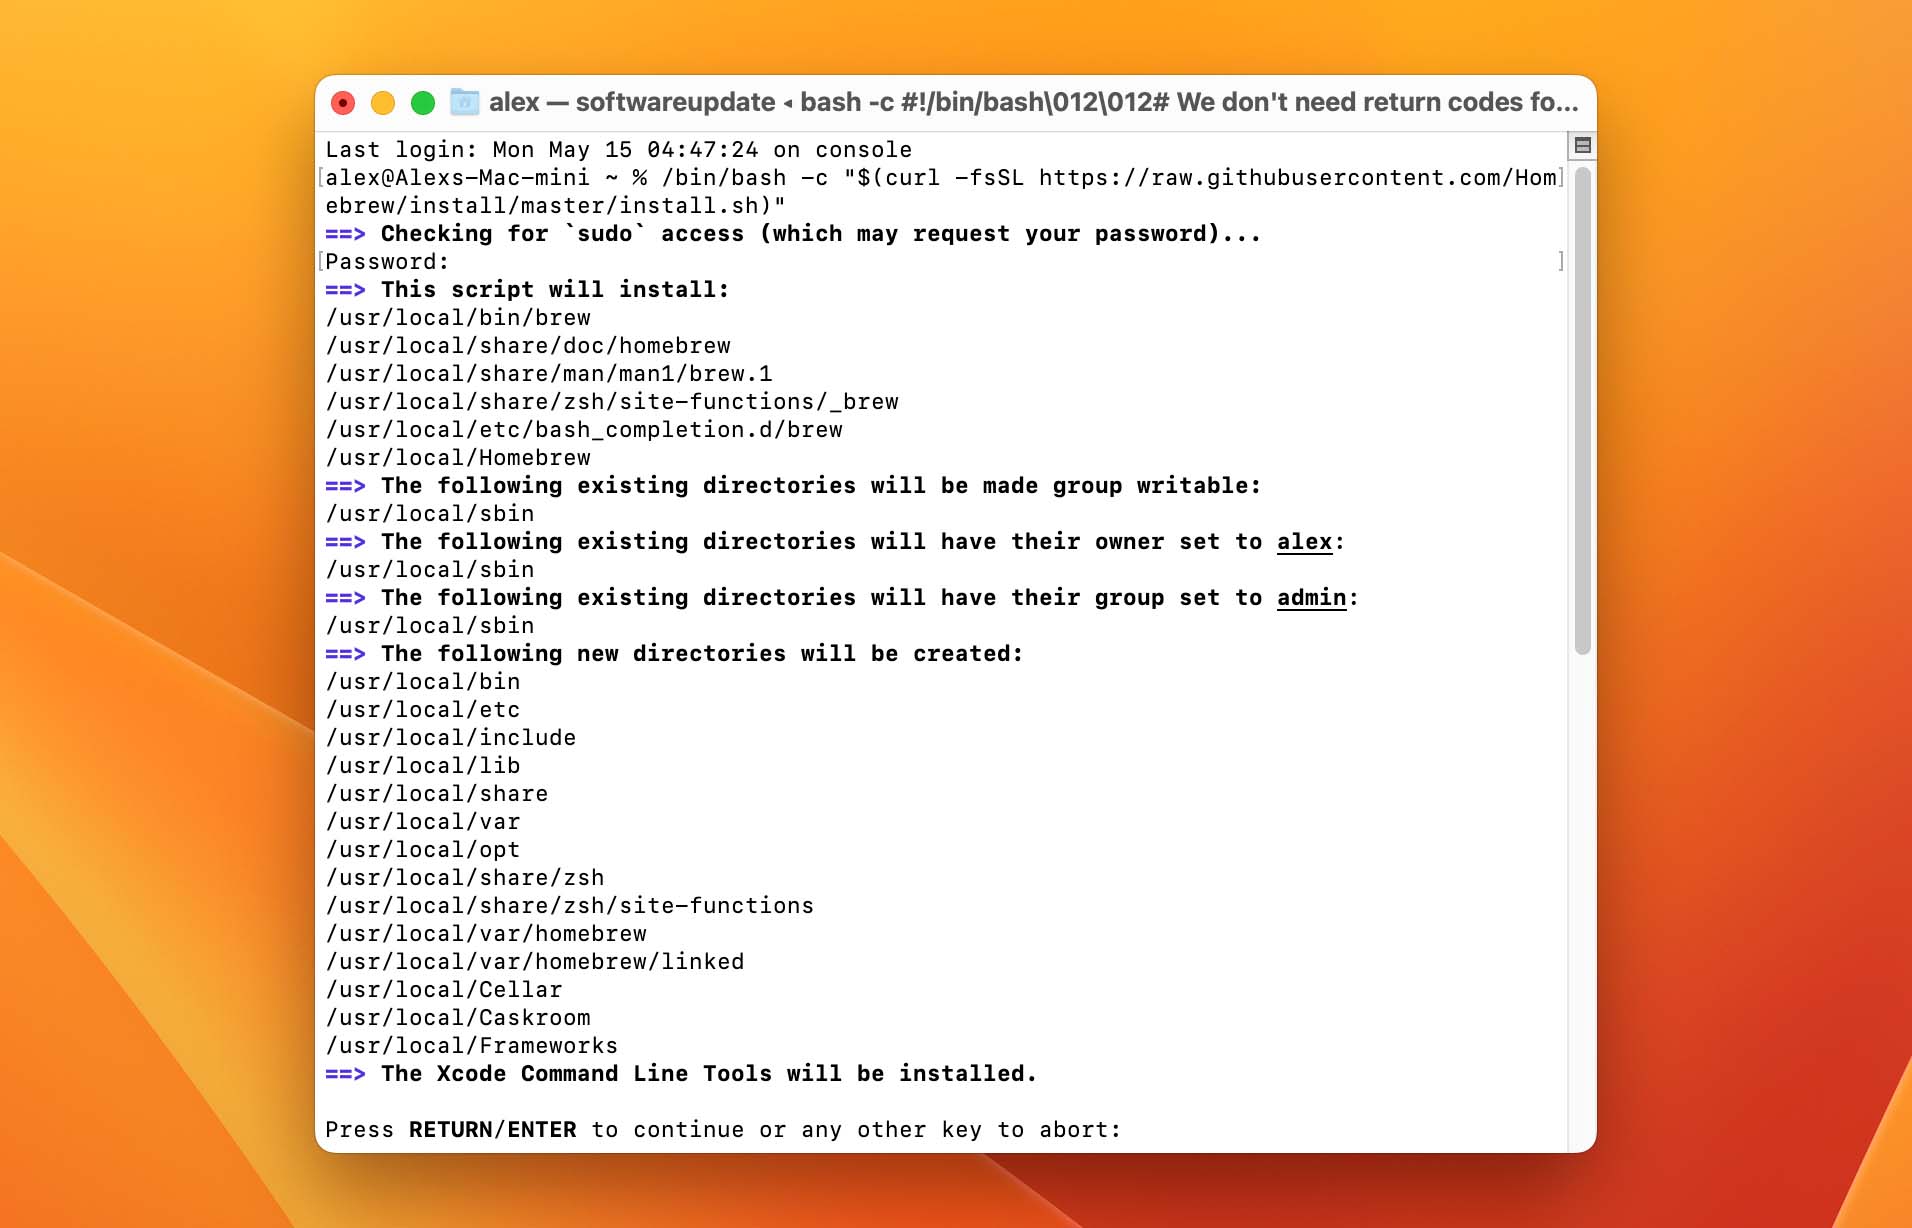
- Install TestDisk Using Homebrew. Homebrew is a free, open-source software package management system that allows you to install software on macOS. You can install it by pasting the below command in Terminal:
/bin/bash -c "$(curl -fsSL https://raw.githubusercontent.com/Homebrew/install/master/install.sh)"
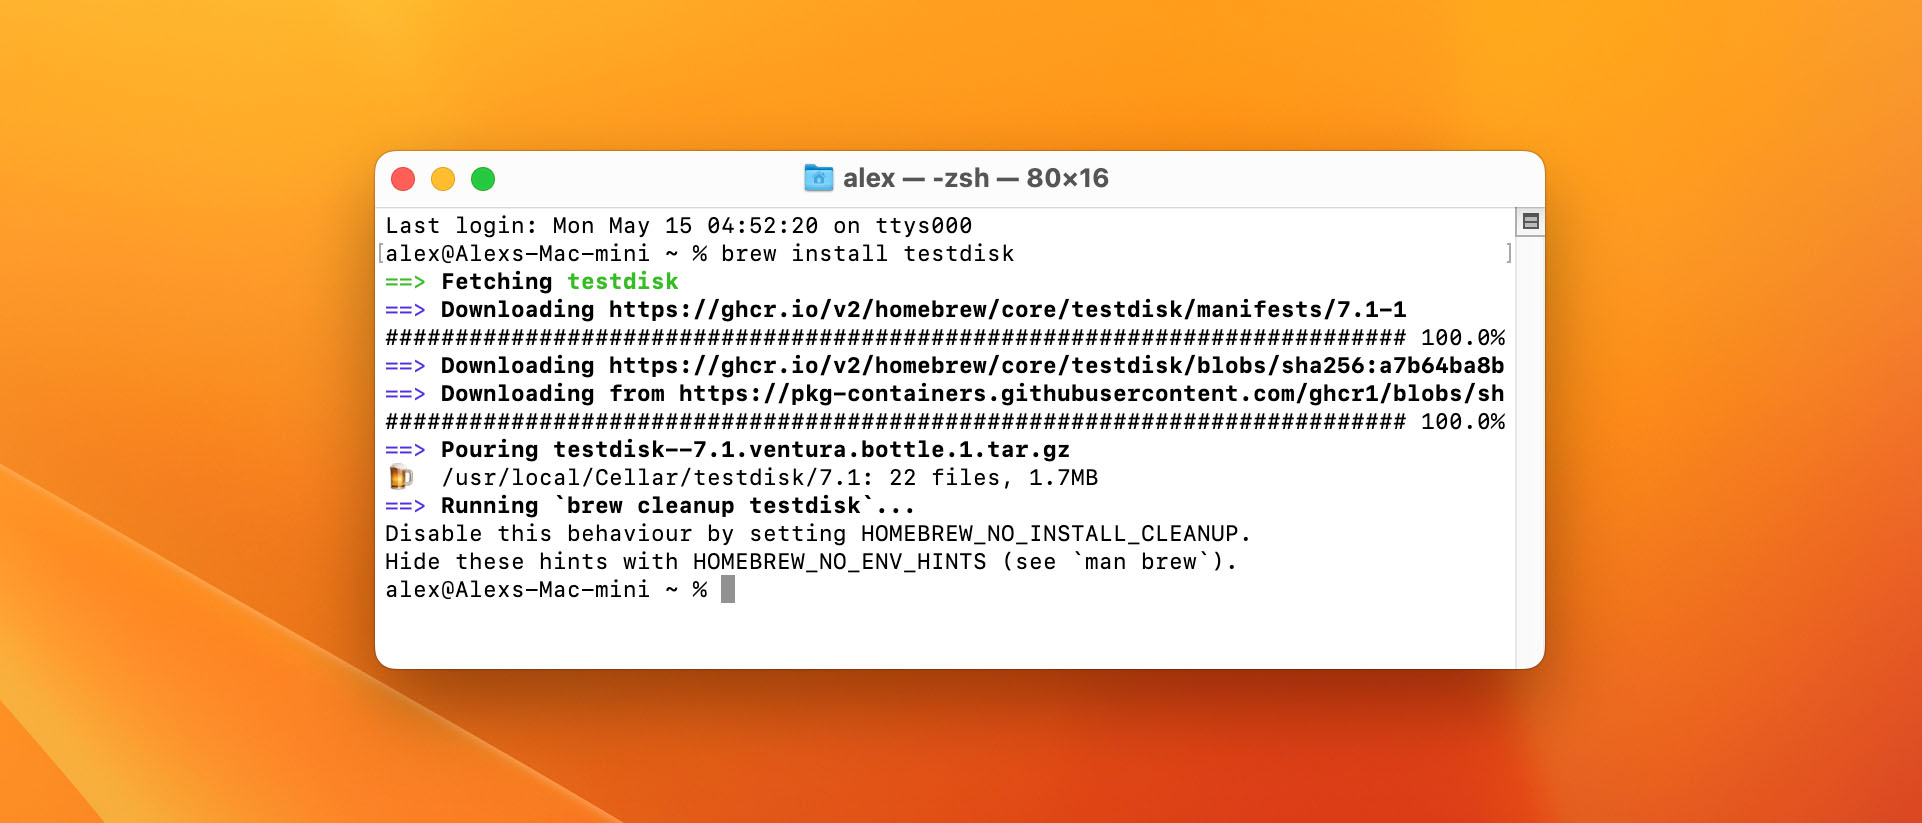
 After this, to install TestDisk open Terminal and type:
brew install testdisk
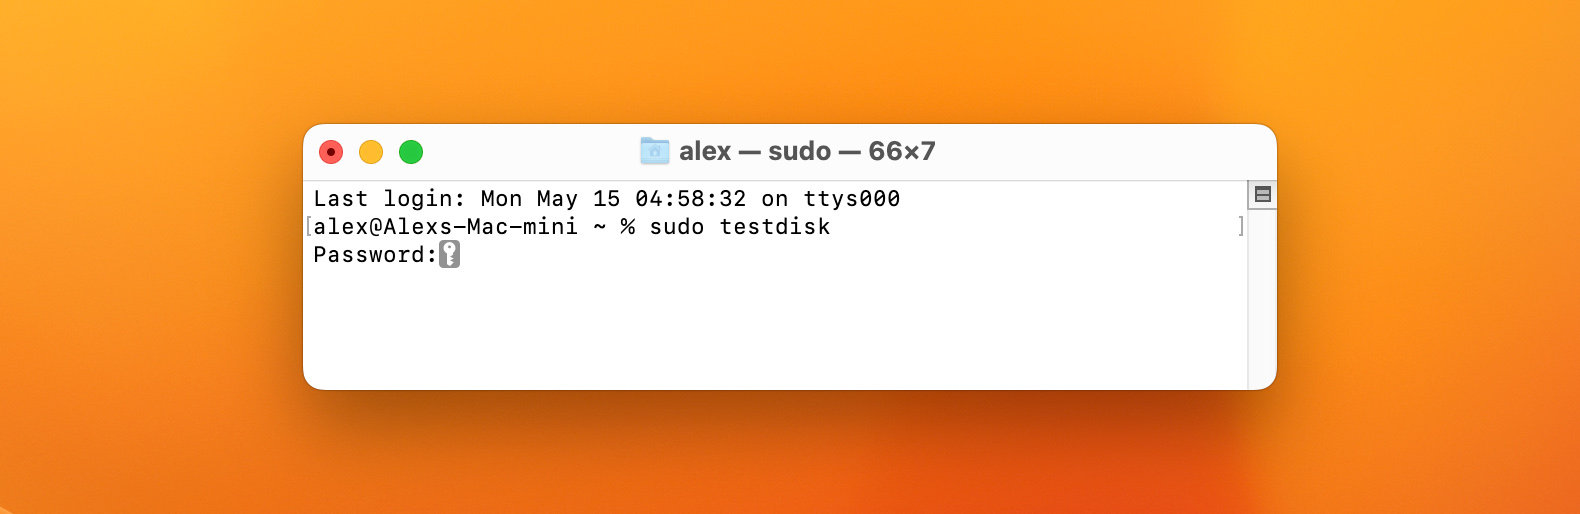
- Use TestDisk to Search for Lost Partitions. In order to launch TestDisk, use the below command in your Terminal, and hit Return to launch TestDisk.
sudo testdisk
Upon launch, TestDisk will ask if you’d like to create a new log file. This is recommended, as it will give you a full overview of the tasks being executed. Once you’ve decided, you will need to choose the drive you want to scan, as well as the partition table type. TestDisk automatically suggests the correct option. On the next screen, choose to analyze the current partition structure and search for any lost partitions. Lastly, you will have the option to begin a Quick Search.
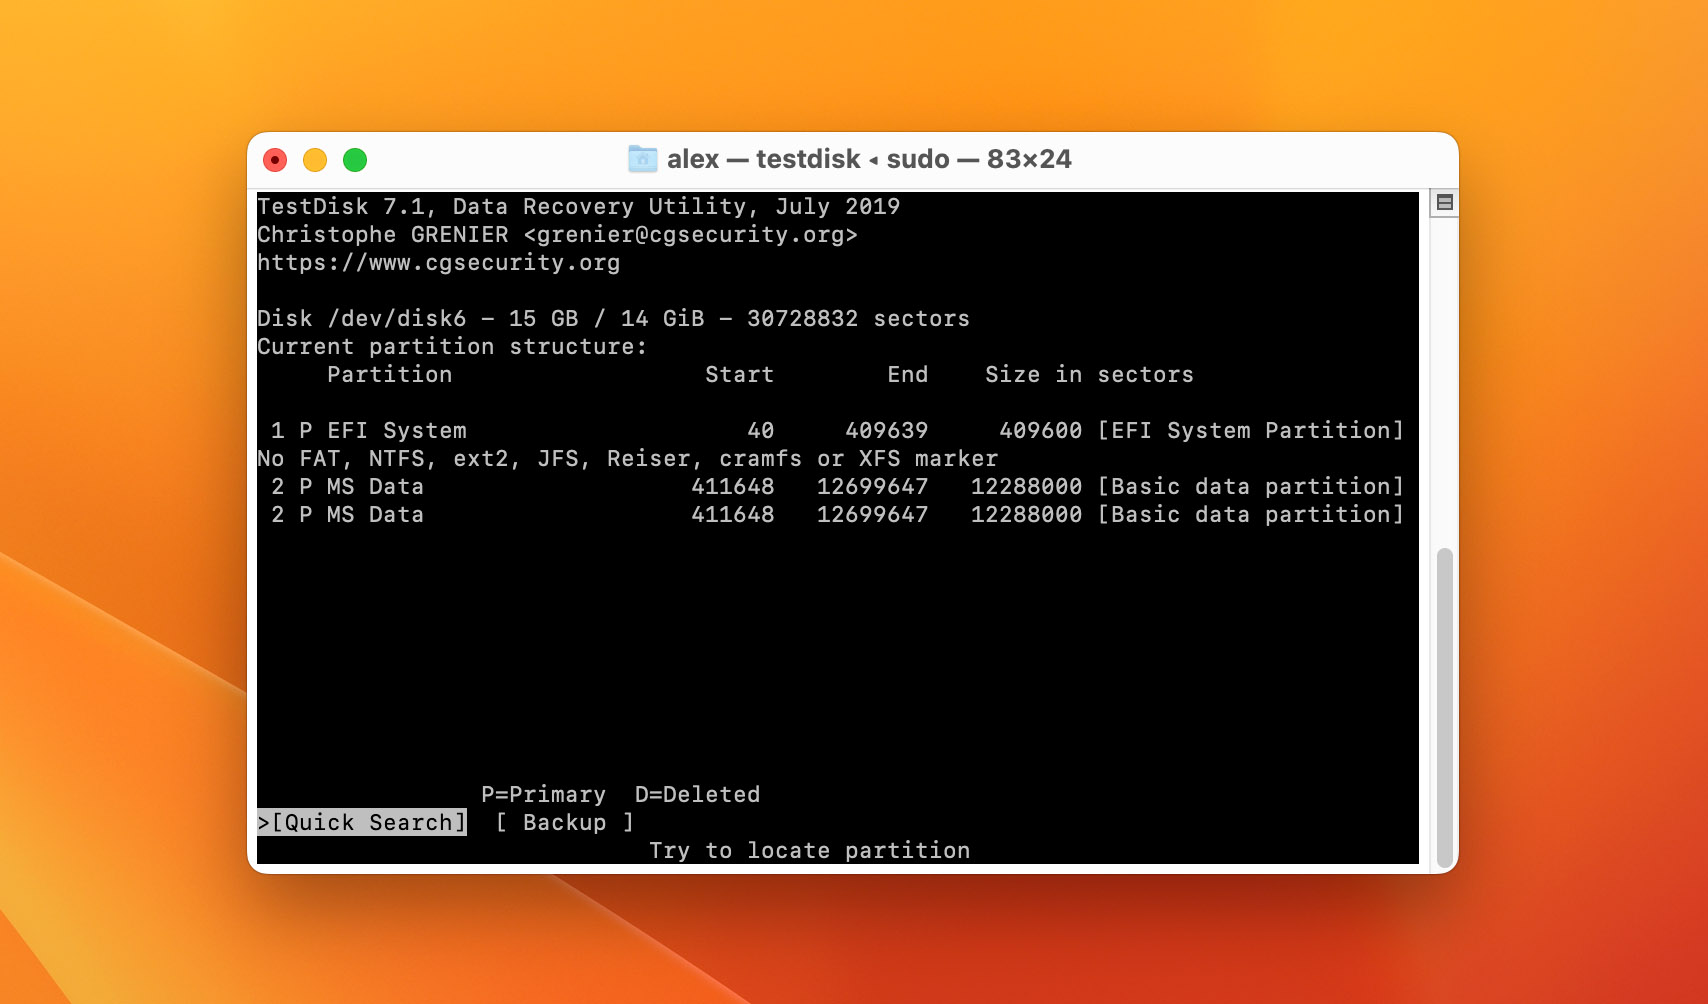
- Recover The Partition. Upon completion of the Quick Scan, TestDisk will show you all recoverable partitions. Choose your partition and hit Return to continue. You will have the option to Write, which will save the partition structure.
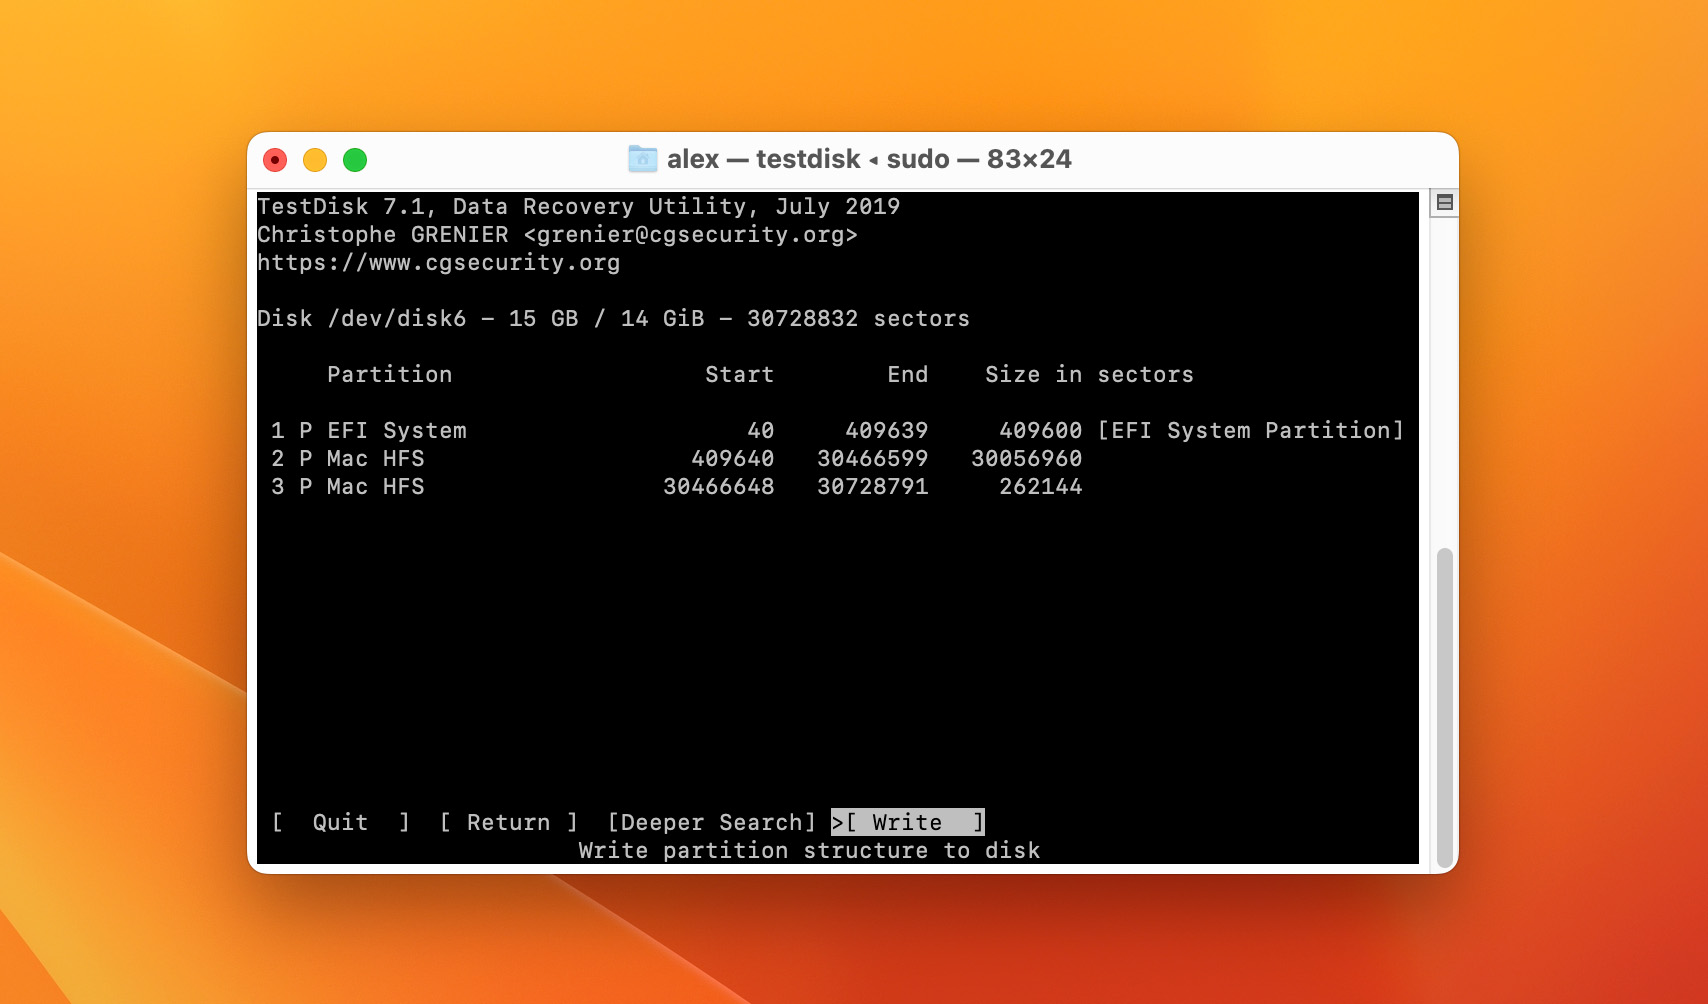
If your partition is not visible, you can continue with a Deeper Search for an in-depth scan. Once finished, you will be presented with another list, containing the recoverable partitions.
Are you interested in TestDisk? We have conducted a review of this product, which can be found here.
Method 3: Repair a Damaged Partition on Your Mac
Not all fixes require third-party software. In fact, sometimes you can get away with using Apple’s Disk Utility app that comes with your Mac.
To repair a damaged partition using Disk Utility:
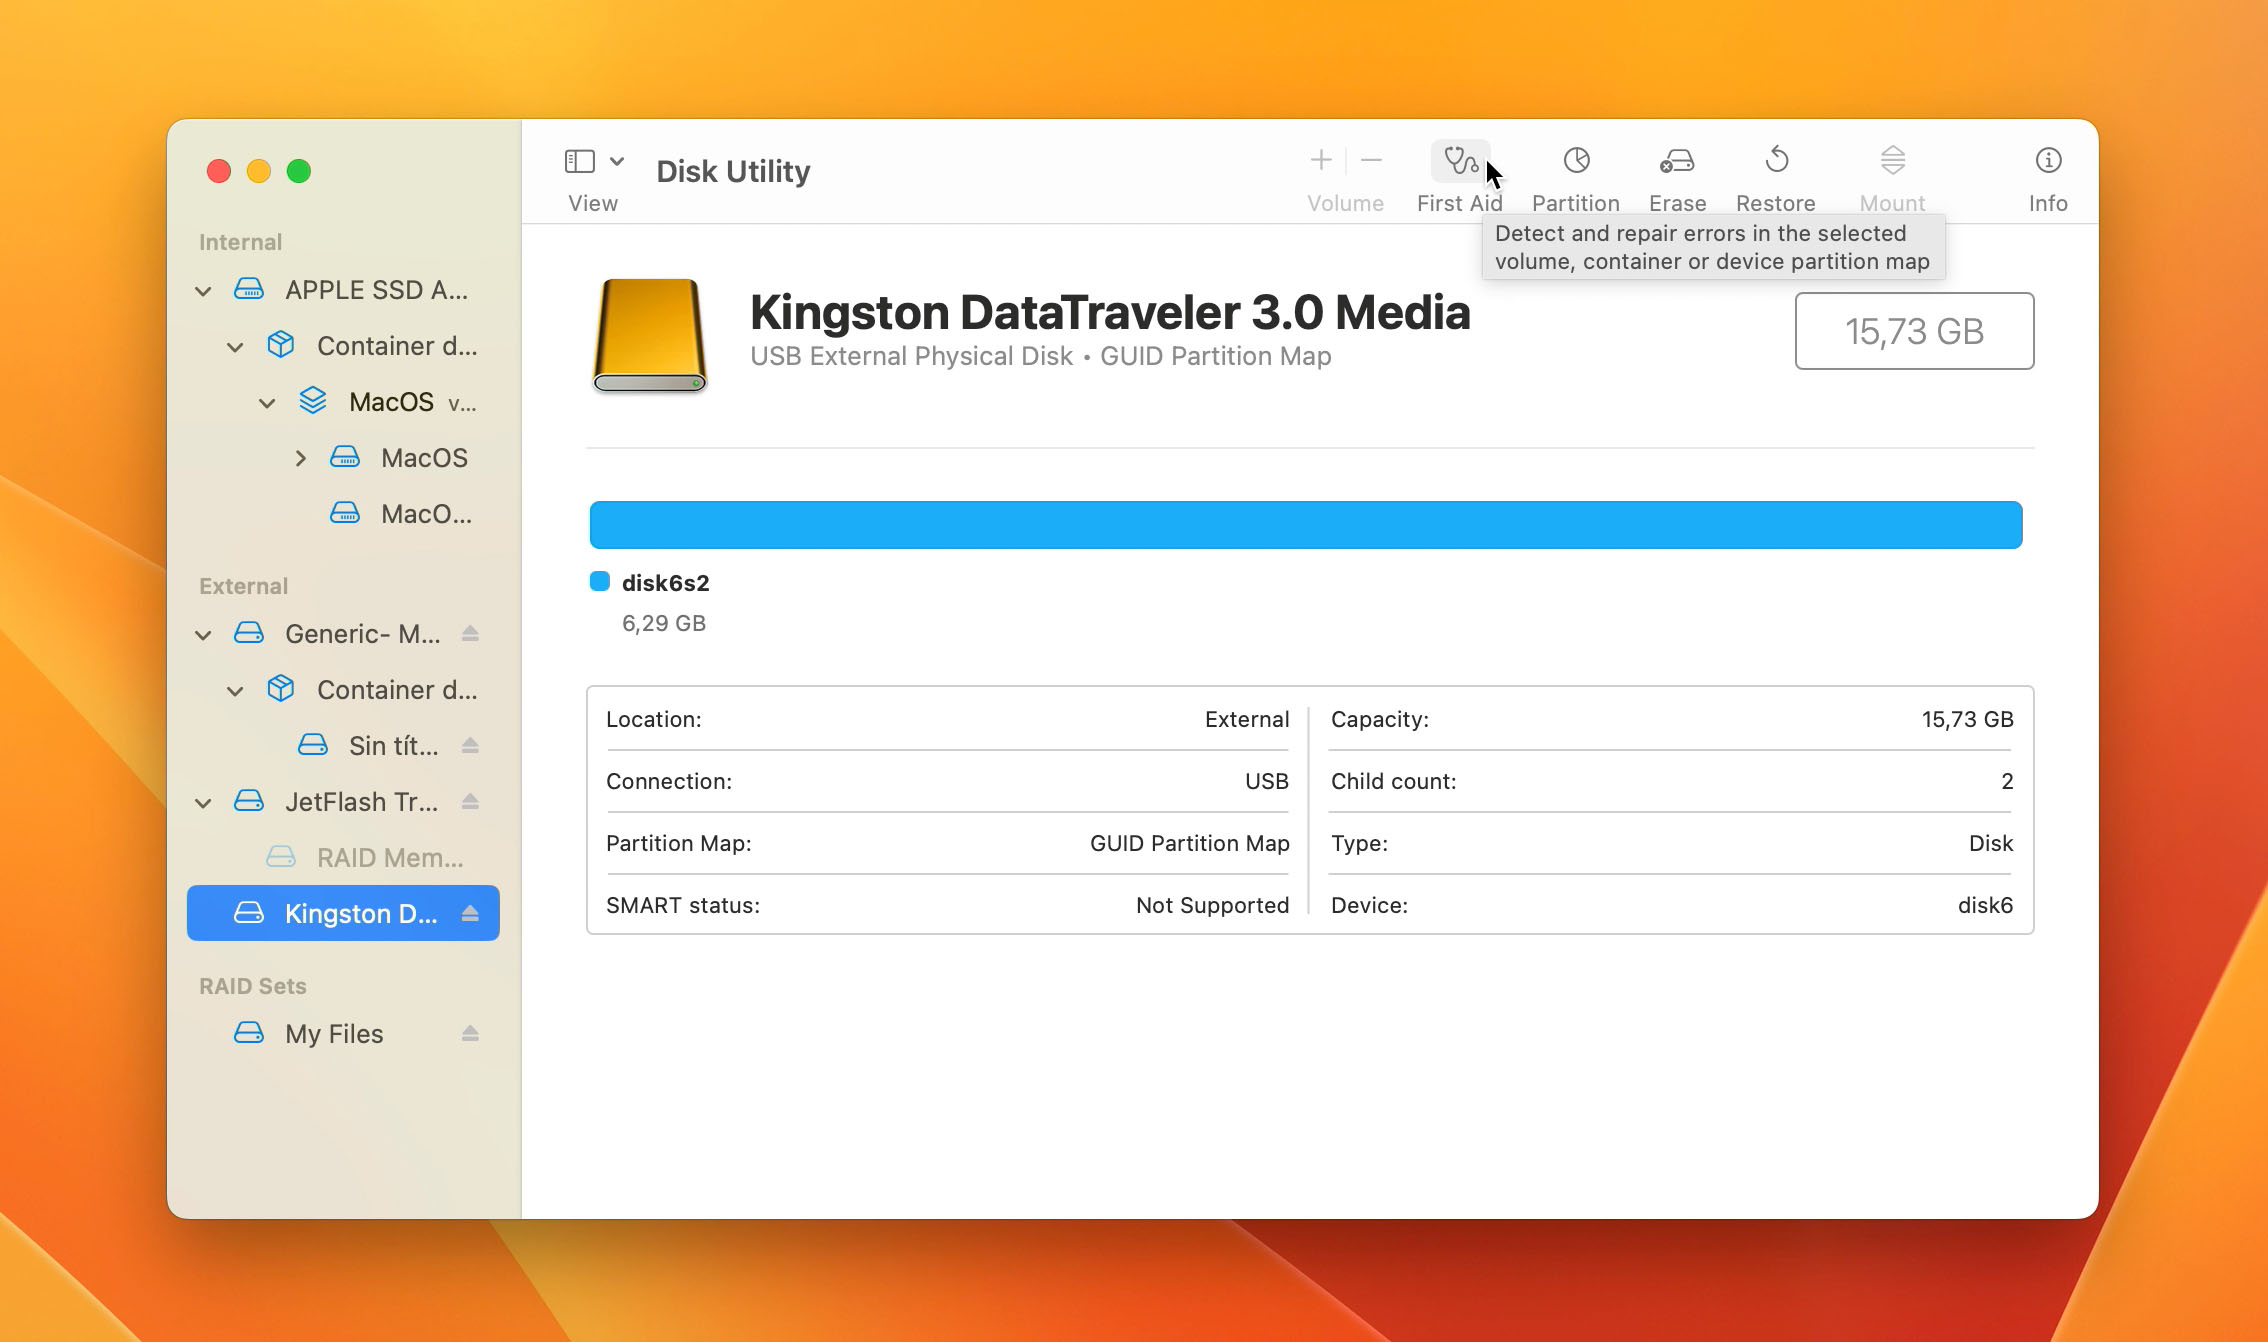
- Open Disk Utility. Through Finder, go to Application > Utilities and open Disk Utility. For recovery of partitions on the same drive your operating system is installed, it’s recommended you boot into macOS Recovery mode before launching Disk Utility.
- Choose The Partition. Choose the partition you’d like to assess, then click on the First Aid button.
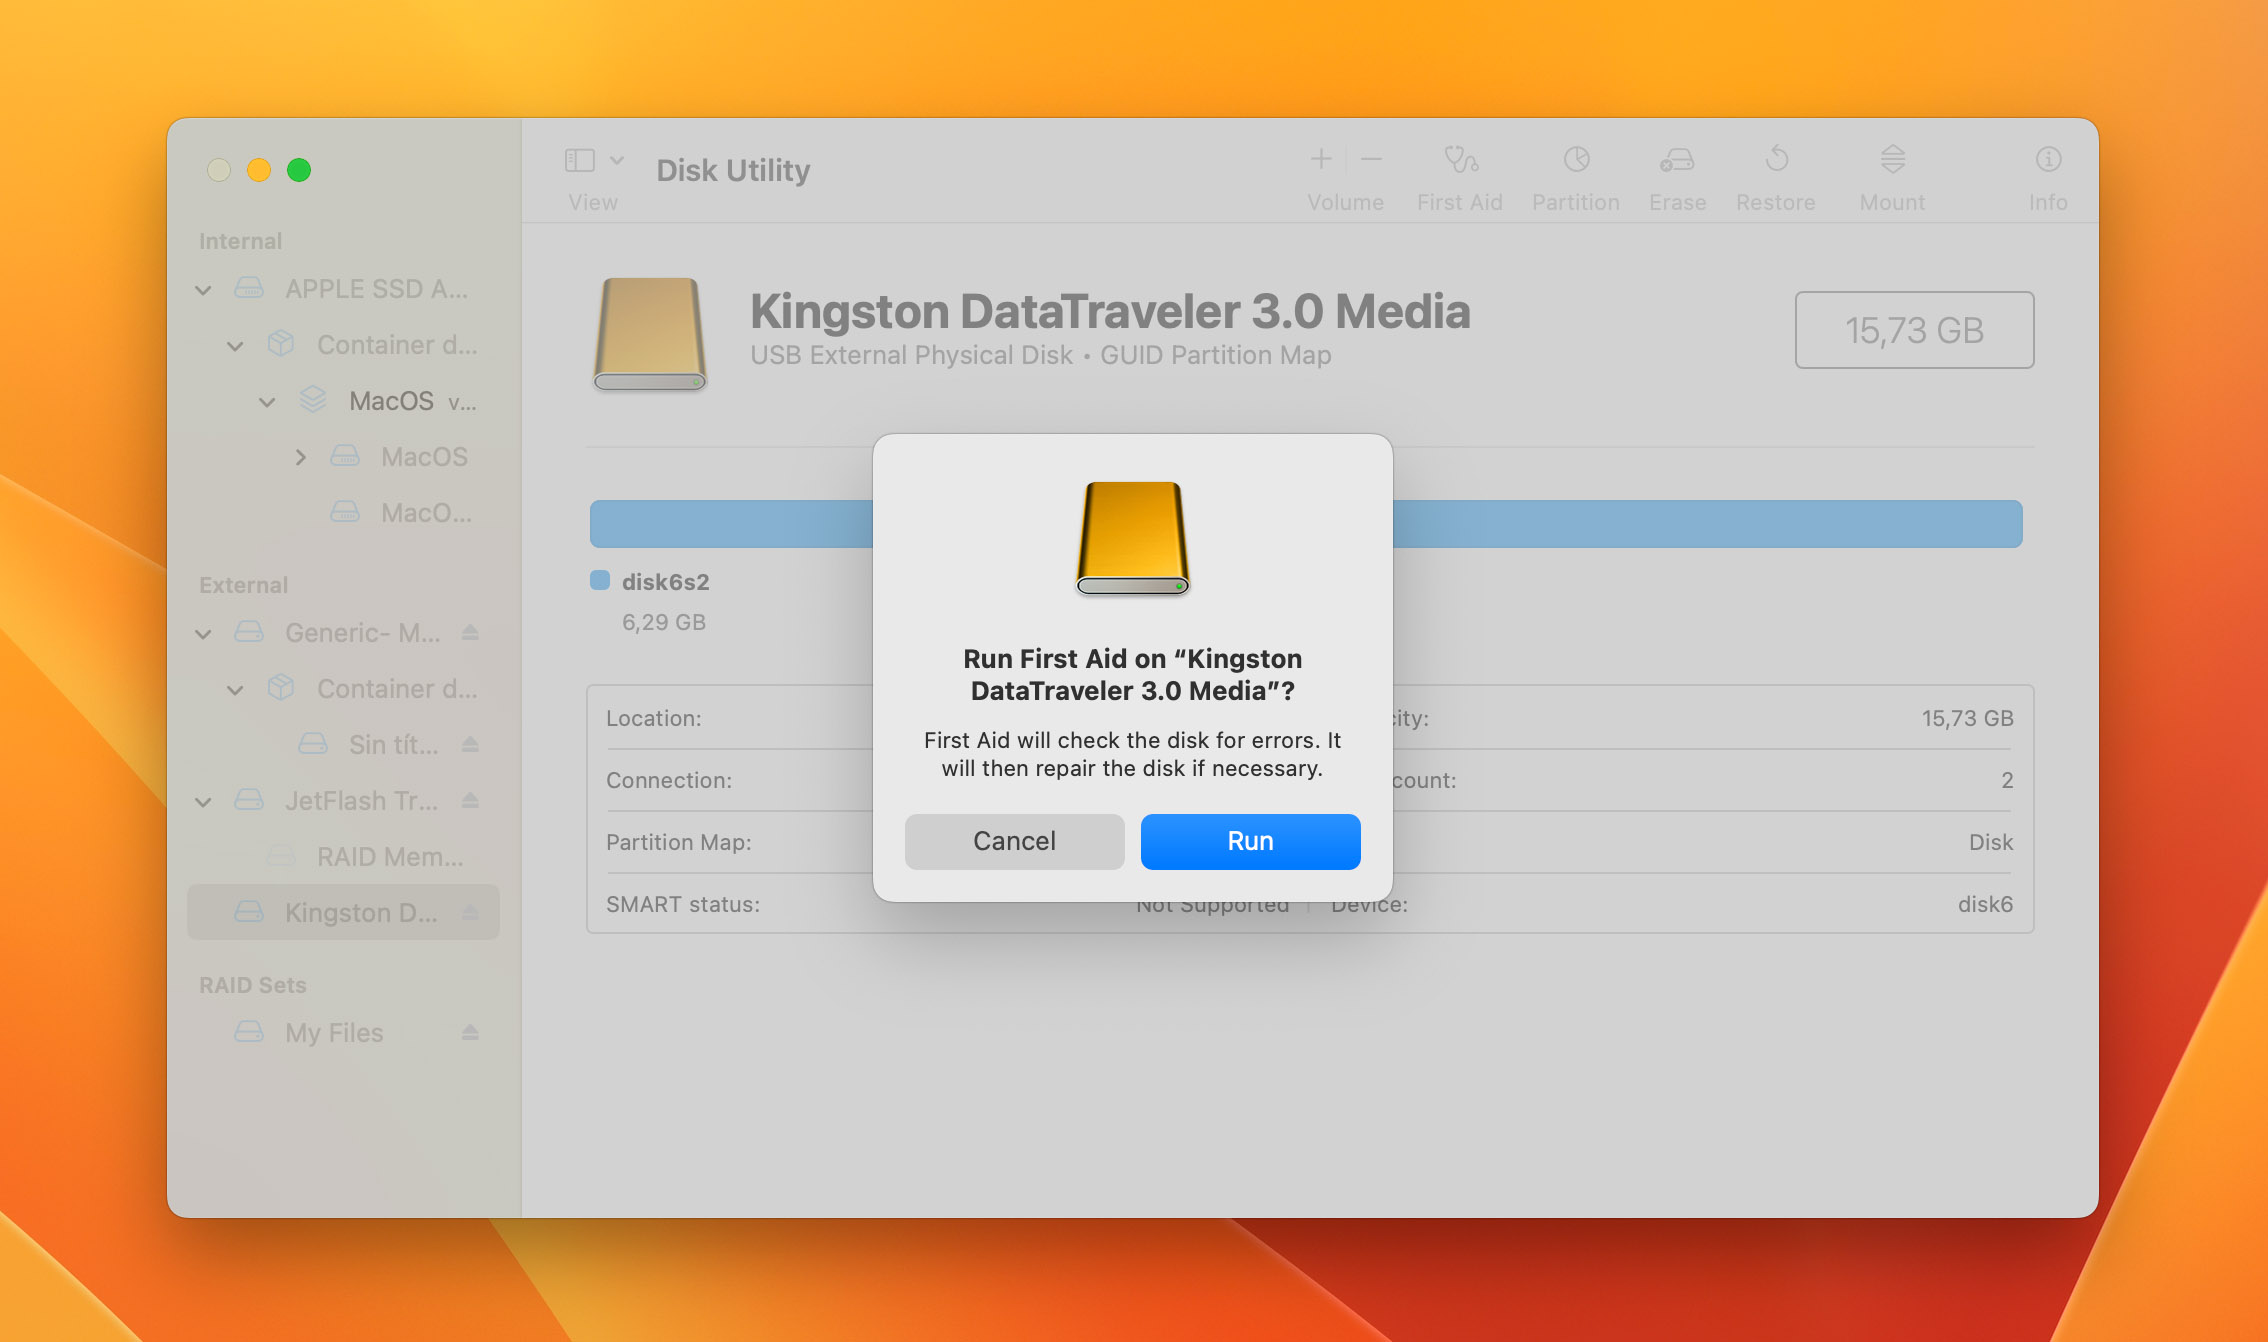
- Confirmation. A simple screen will pop up asking you for confirmation. Click Run, and it will begin to search for problems, and automatically repair them where possible.
How To Protect Against Mac Partition Loss
While there isn’t a bulletproof way of guaranteeing your disk drives won’t fail at any point in time, there are some proactive steps you can take to protect your data, making data recovery a lot easier for yourself, and/or your team.
📁 Make Backups
Making backups of your data is truly the best way of retaining your files. Backing up your data is important, as it not only ensures that your files are safe, but it also makes it easier to recover them in the event of disk failure.
One of the best ways of backing up your data is by using a cloud service like Google Drive or Dropbox. These services hold your data for you and make it accessible from anywhere with a data connection.
An added benefit of using a cloud-based service like Google Drive is that it makes it a lot easier to collaborate with your team, as they all have access to the files from a central location.
⚙️ Regularly Check Your Disk Health
Although SSD technology is becoming increasingly popular (and cheaper), hard drives still reside in a great portion of the computers we use. Because hard drives contain moving parts, they’re susceptible to failure over time. It’s not a matter of if it will happen, it’s a matter of when it will happen.
To reduce the risk of hard drive failure, you can routinely check the health status of your hard disk drives through Disk Utility. This gives you the best chance of identifying when it’s time to switch out your storage. To learn more, check out this post from OSXDaily or our guide on monitoring hard drive’s health on a Mac.
🩺 Use an Antivirus
As mentioned previously, malware and viruses can contribute to data loss. As a Mac user, you’re less susceptible to viruses compared to a Windows user. However, this doesn’t mean that the threat isn’t real.
Malware and viruses are still a threat for Mac users, so to ensure you’re protecting yourself (and your data) against these digital threats, it’s recommended you actively use an antivirus. Malwarebytes offers a free version of their software that allows you to clean your infected Mac, alongside a premium version that comes with added benefits, like active malware protection.
💻 Avoid Multi-Booting
Multi-booting involves installing two or more operating systems on the same machine and being able to choose which one to boot into. The problem with this is that Apple doesn’t natively support it. Any errors that occur during the installation of an additional operating system can cause disastrous partition loss.
Instead of installing one or more additional operating systems alongside macOS, consider using a virtual machine with VMware or VirtualBox. Virtual machines allow you to install any operating system inside its own isolated environment by simulating a computer. You can dedicate physical resources to it, and even allow network access inside the virtual environment.
❤️ Monitor Your Drive’s Status
At some point, your drive will start to fail. A dying disk drive will start to show symptoms like erratic performance and disappearing files. If you start to notice your drive acting a bit weird, it’s important that you stop using the disk and immediately backup or move your data to a new drive. Any writing, formatting, or creation of new partitions to the disk could be detrimental to your data once your hard drive starts to fail.
⚠️ Remove Drives Safely
External drives can be partitioned too. When removing any sort of external storage media, it’s imperative that you safely eject the drive before removing it from the machine. If the drive is in the middle of a writing process, it can corrupt not only the data but the partition on the drive itself.
Symptoms of a Failing HDD
If you want to keep an eye out in anticipation of hard drive failure, here are some symptoms you can remain vigilant of.
- Slow Data Access – Your Mac is taking extra long to access files that were otherwise quick to access before.
- Loud and Excessive Spinning – Your Mac sounds like it’s working twice as hard when opening applications, or even sitting idle.
- Random Dismounts – For external drives, they can start dismounting from your Mac at random.
- Clicking Noises – You can hear clicking noises coming from your Mac, particularly where your HDD is located.
- Intermittent System Performance Issues – This could be a range of things, such as your Mac freezing, applications closing, or files randomly corrupting.
If you are experiencing any of the above issues, it’s recommended that you do a health check on your hard drive using Apple’s Disk Utility. If it returns with concerns, it could potentially mean that it’s time to switch out your hard drive.
Conclusion
Having a plan in place for disk failure is proactive. This means doing what you can to prevent your data from being lost or deleted in the first place.
In most cases, partition loss is unpredictable and unexpected. However, as mentioned above, there are some steps you can do to better prepare yourself for when data loss happens.
This article was written by Jordan Jamieson-Mane, a Staff Writer at Handy Recovery Advisor. It was also verified for technical accuracy by Andrey Vasilyev, our editorial advisor.
Curious about our content creation process? Take a look at our Editor Guidelines.