Your FAT32 storage drive may become RAW due to file system corruption and other forms of logical damage. So, how do you convert the drive from RAW back to FAT32, without losing data? Simple, read the sections below as they explain how you can do this, in the form of step-by-step instructions.
Reasons Why You Need to Convert Your Data Storage From RAW to FAT32
There are several reasons why your drive may become RAW, prompting you to convert the RAW drive back to FAT32.
These include:
- 💽 Your storage device (HDD, SD card, and USB drive) is brand new and has no file system.
- ❌ You formatted your storage drive incorrectly, or the formatting process was interrupted due to a power cut or force shutdown. This typically corrupts the file system, prompting Windows to display the HDD, SD card, or USB drive as RAW.
- 🦠 The existing file system got corrupted. Culprits behind a corrupted file system include malware, power outages, improper ejection, and a failing device. It’s recommended you recover all your data as soon as possible in this scenario, lest you face the risk of complete data loss.
Common RAW to FAT32 Conversion Problems Solved
To choose the appropriate course of action when trying to convert a RAW storage device to FAT32, you need to understand three things–why you want to convert the drive to FAT32, what stage of formatting you’re in, and whether you need to save your data. Use the table below to find the corresponding solution to common problems you may face.
Problem |
Solution |
I need to convert a new hard drive/SD card/USB drive from RAW to FAT32. |
To format a new storage device to FAT32 using Windows Disk Management or Command Prompt, the partition size should be less than 2 TB. To bypass this limit, as well as convert a memory card or a USB drive (more than 32 GB) from RAW to FAT32, use a third-party RAW to FAT32 formatter. |
I need to retrieve data before converting from RAW to FAT32. |
First, use data recovery software to restore your data. Then proceed to convert the RAW storage device to FAT32 using any of these formatting tools. |
I formatted my storage drive from RAW to FAT32 and want my files back. |
If you formatted the device using Windows Quick Format, you can still use data recovery software to get back this data. In case of a full format, it’s best to contact a professional data recovery service. |
I need to fix a RAW drive and convert it back to FAT32 without data loss. |
To fix a drive that was previously formatted to FAT32 and became RAW, using TestDisk is your best bet. If you fail to fix the file system, you can still use data recovery software to pull out your data. |
How to Convert From RAW to FAT32 Without Losing Data
To successfully convert a RAW drive to FAT32 without losing data, you’ll first need to recover data from it, and then proceed to format. The sections below will explore both steps of the process.
Step 1. Retrieve Data From Your RAW Device
You can choose from several data recovery apps on the web. But, it’s important to select one that suits your specific scenario.
In our case, we chose Disk Drill, as it supports data recovery from a variety of file systems, including RAW, FAT32, NTFS, exFAT, and more. Additionally, it can recover data from various storage device types such as SD cards, HDDs, USB drives, and SSDs. Disk Drill’s simplified approach to data recovery, combined with a modern, easy-to-use UI, makes it perfect for novice users as well.
For a deep dive into Disk Drill’s features and its data recovery capabilities, browse through our Disk Drill review.
Here’s how you can use Disk Drill to recover data from a RAW device:
- Download Disk Drill and install it.
- Connect the RAW storage drive to your PC.
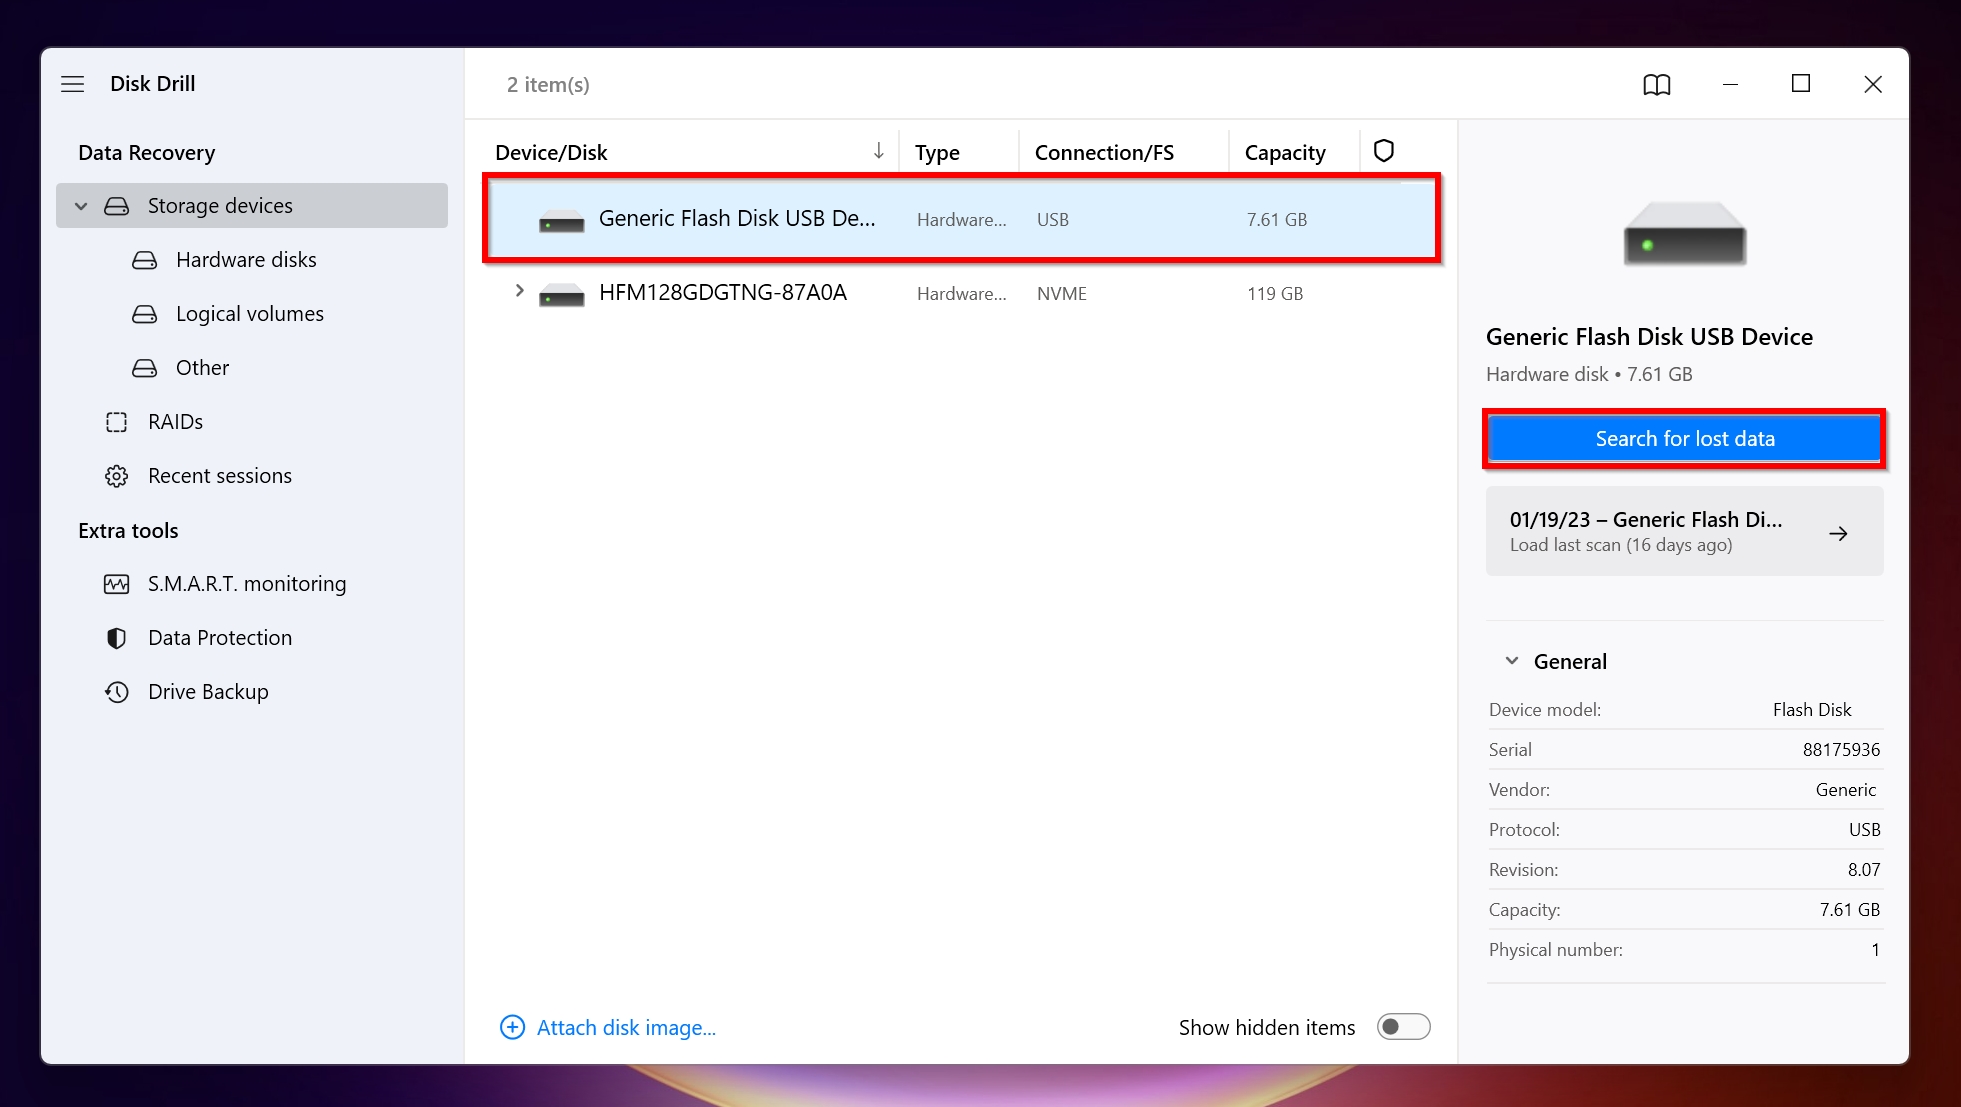
- Open Disk Drill, select the RAW drive, and click Search for lost data.
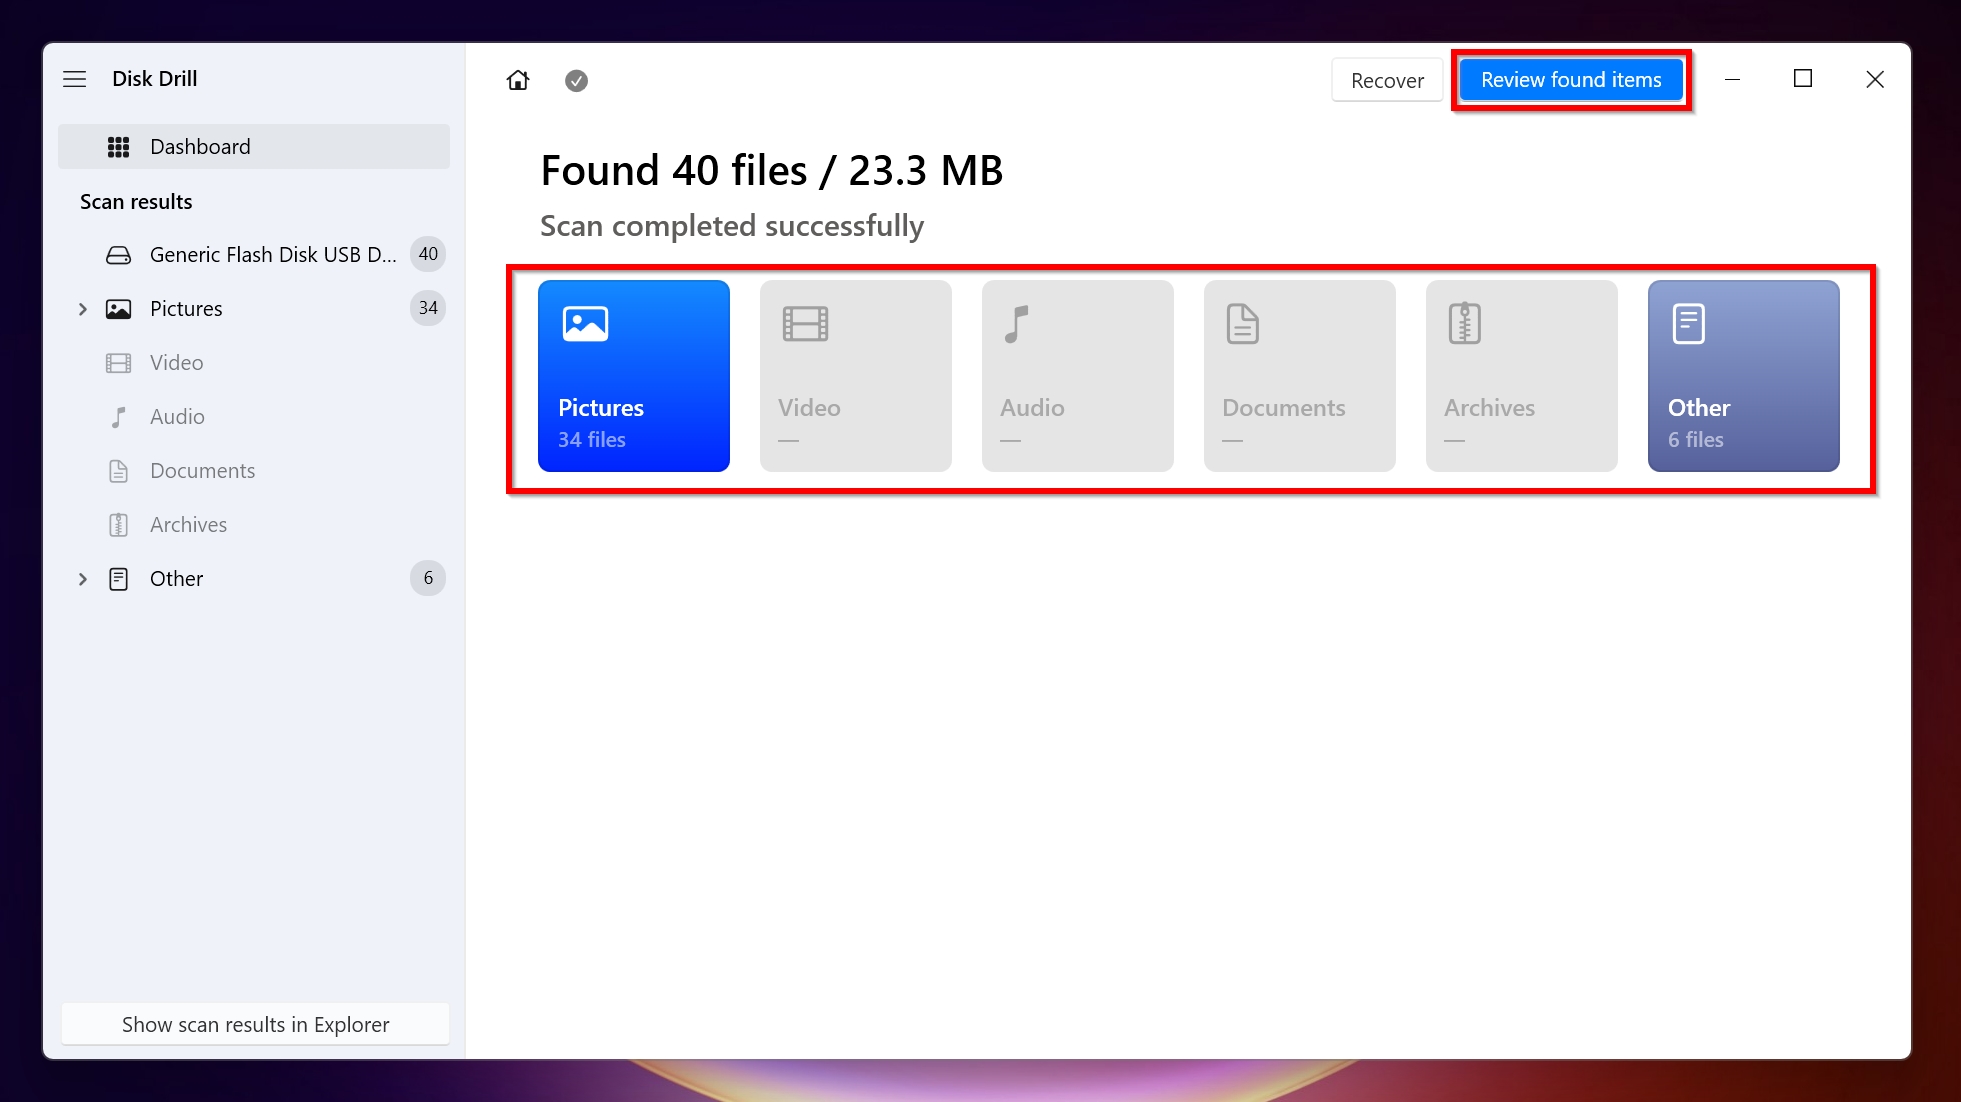
- Click Review found items, or directly select the types of files (Pictures, Video, Audio, Documents, Archives, and Others) you want to recover from your RAW storage device.
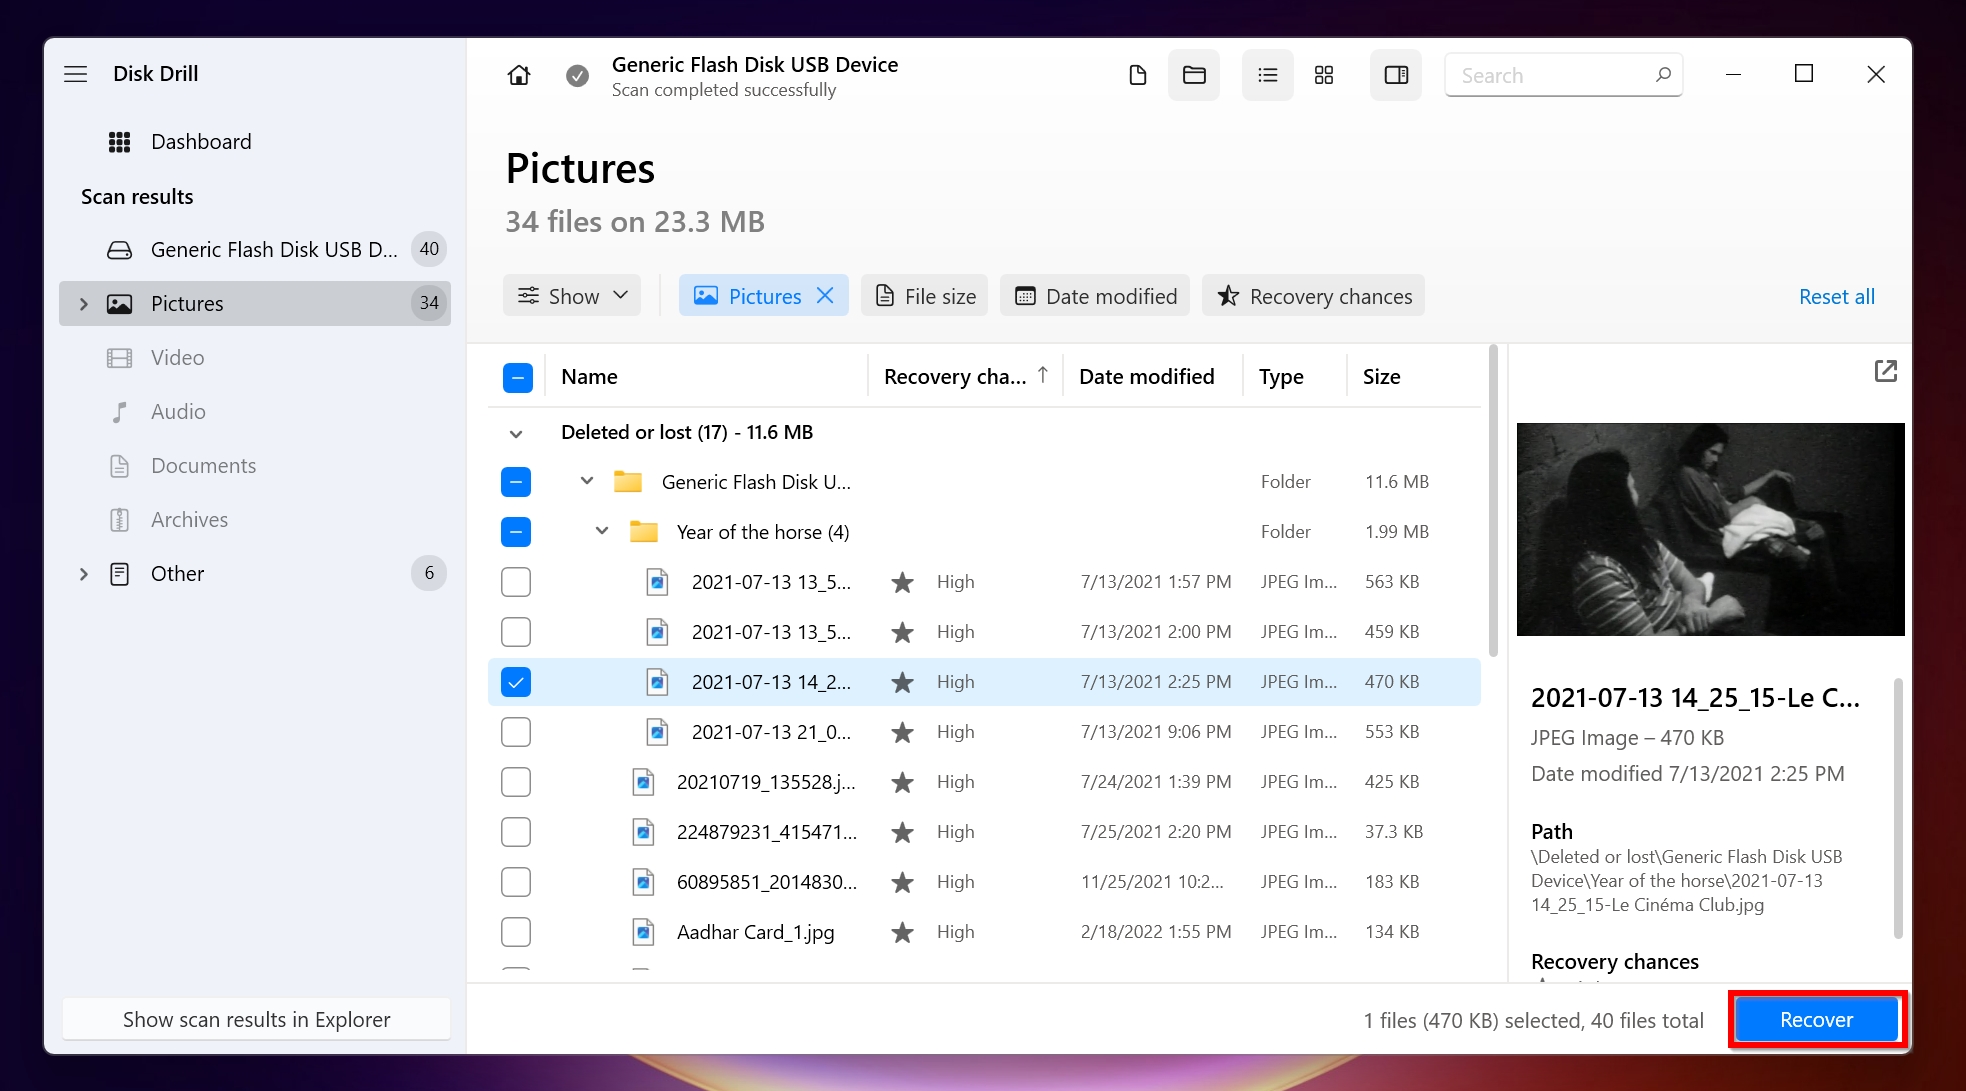
- Expand the Existing section to view the files already stored on the drive, the Deleted or Lost section to display files that were previously deleted, or the Reconstructed section to display files that Disk Drill found using file signatures.
- Select the files you wish to recover, and click Recover. Disk Drill will display a preview of the selected file. As a free user, you can recover up to 500 MB of data as part of Disk Drill’s free trial. Further recovery requires a license.
- Choose a recovery destination, and click Next.
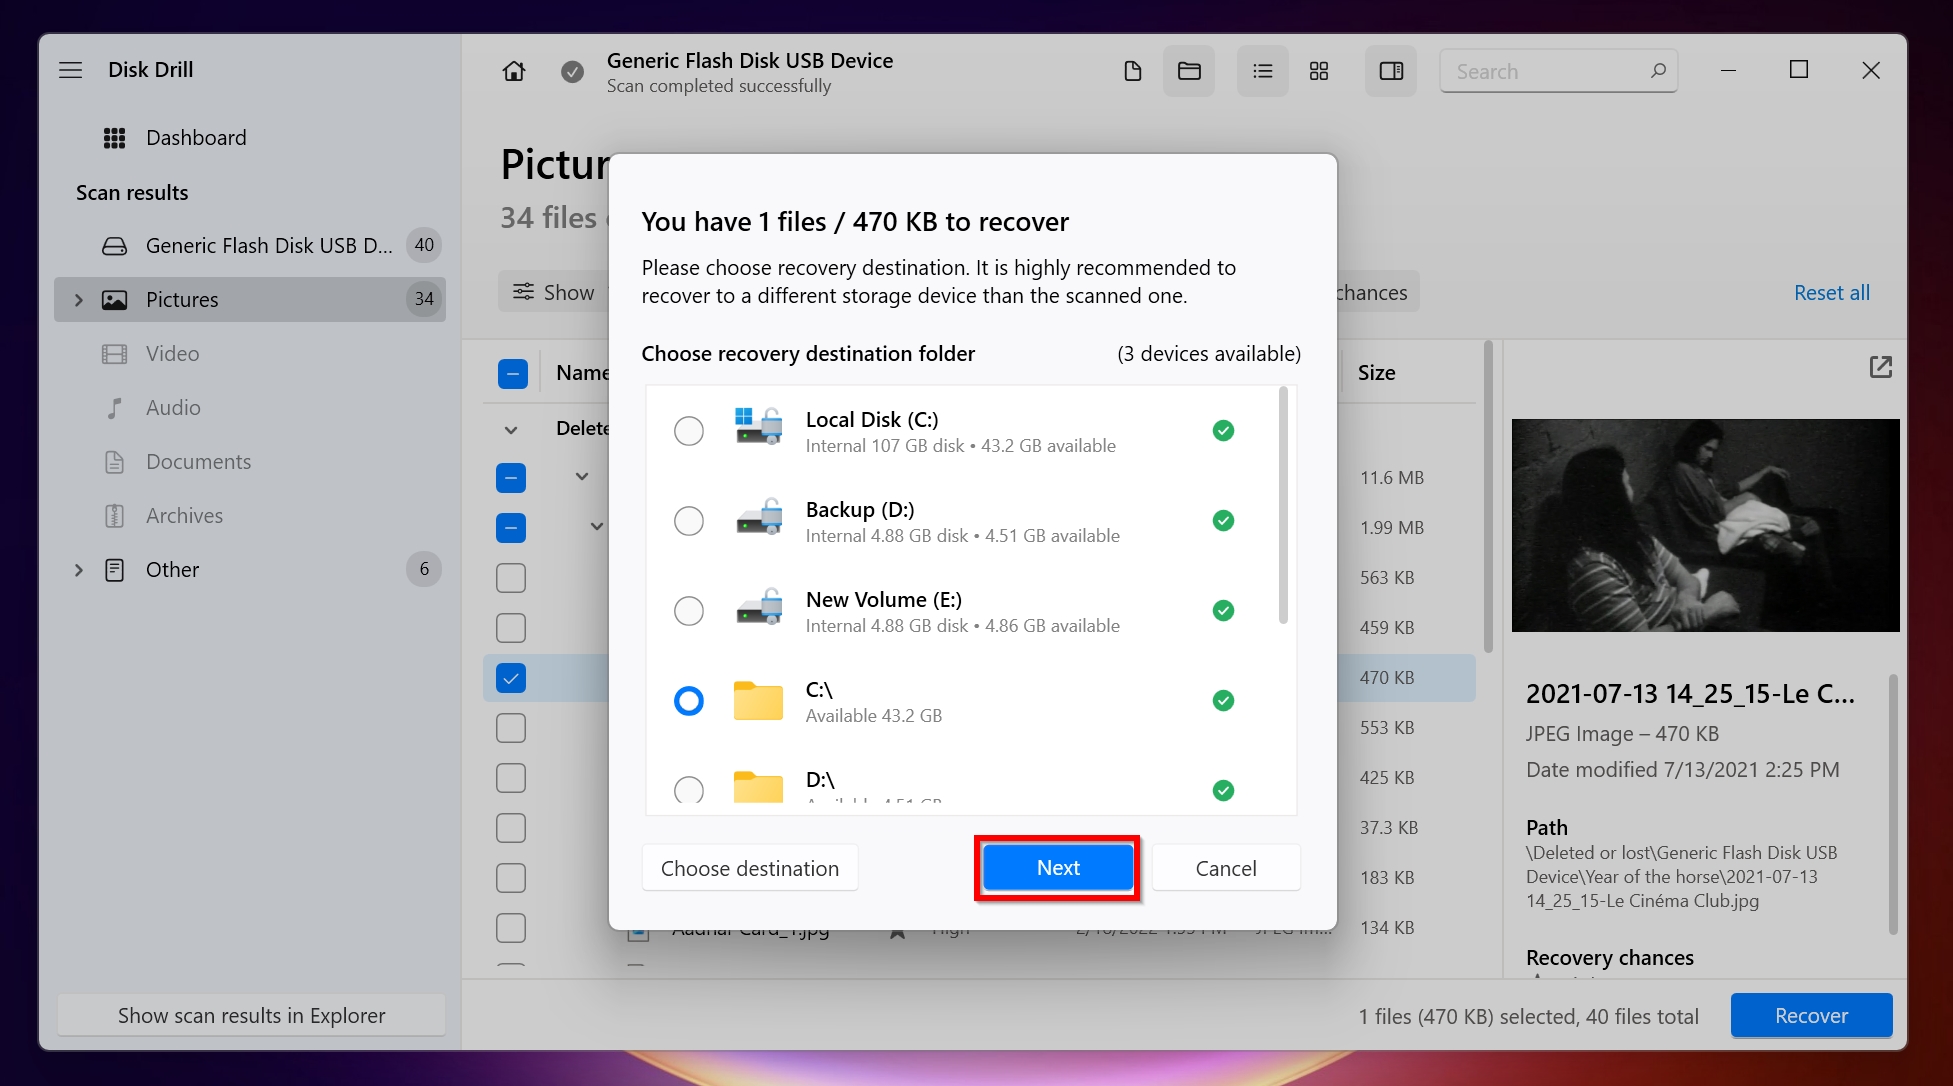
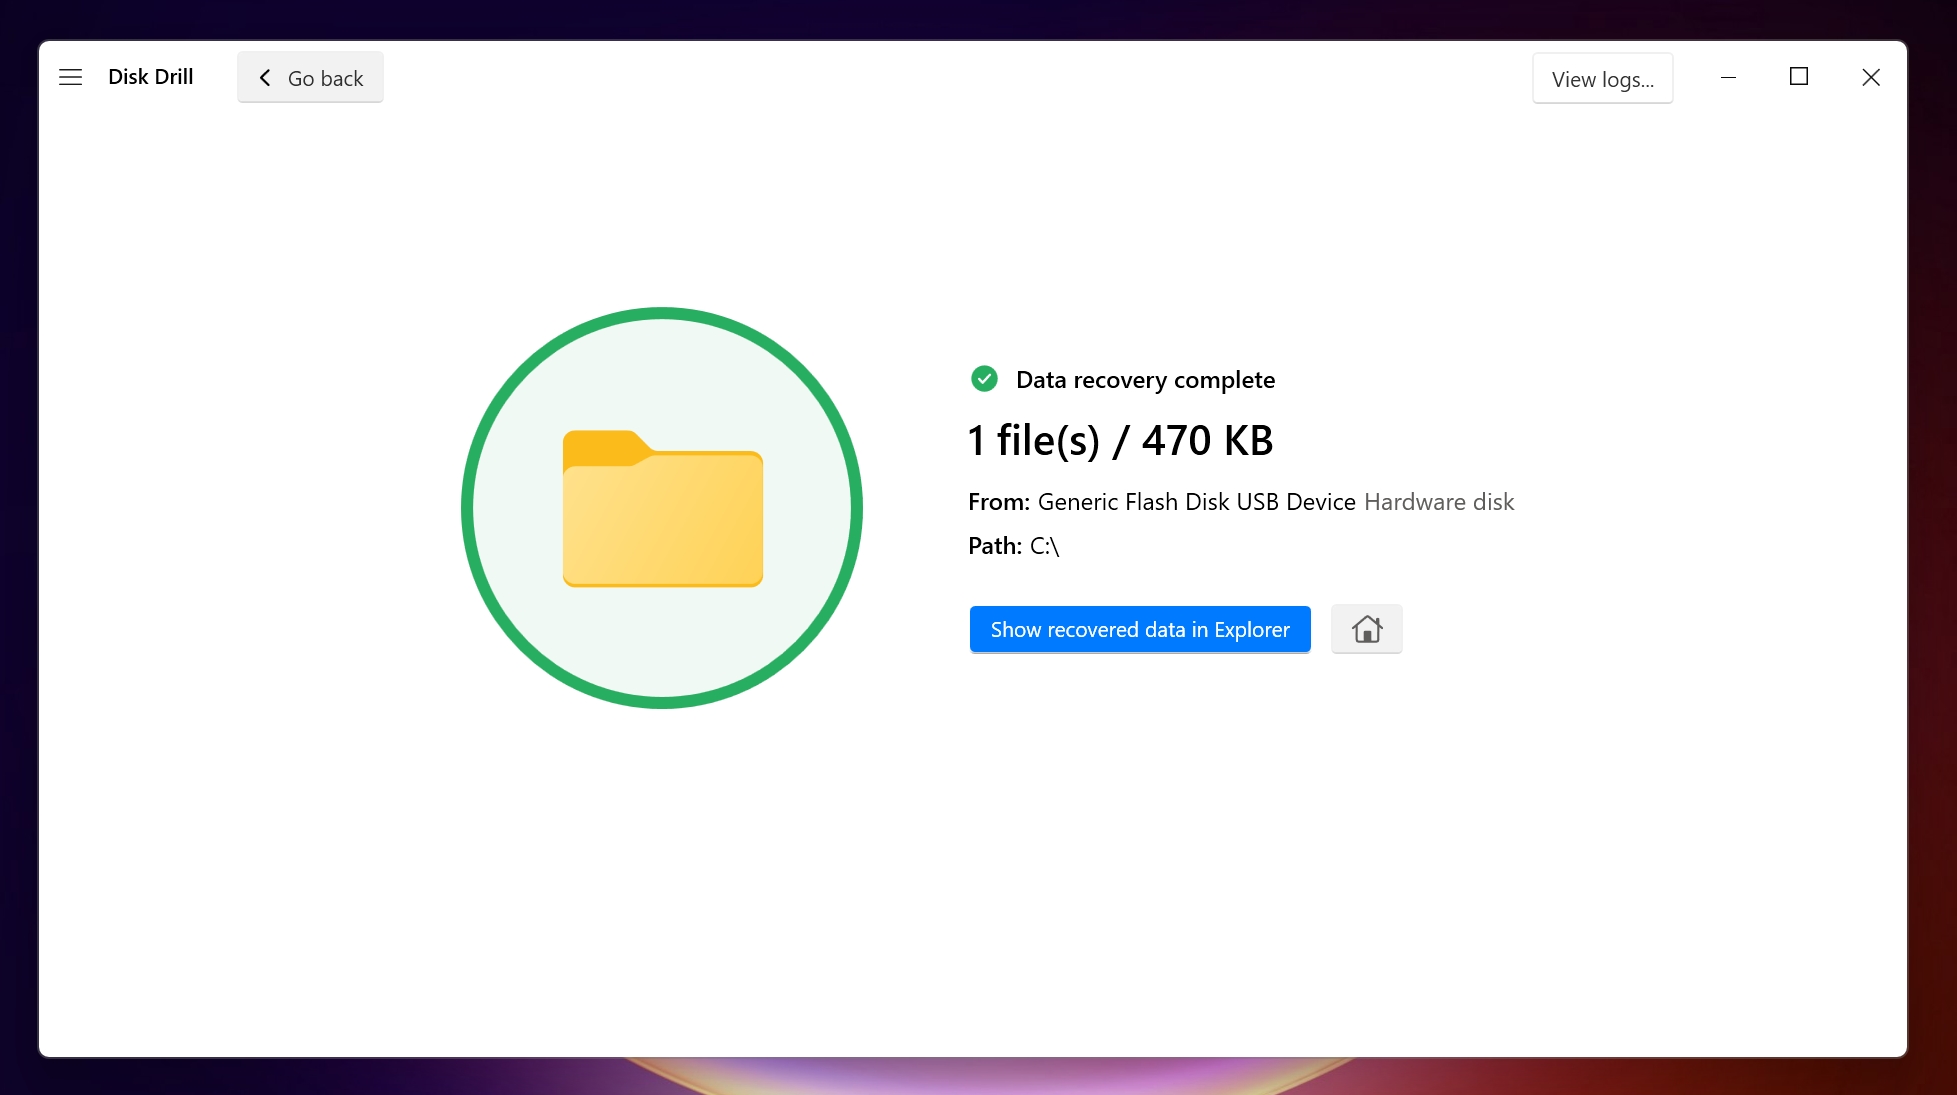
- Disk Drill will recover your files.
Step 2. Convert From RAW to FAT32 Using Formatting Tools
Windows users can convert a RAW drive to FAT32, using the Command Prompt or Disk Management. However, Windows places certain limits when using its in-built tools. For instance, you cannot convert an SD card from RAW to FAT32 if it’s larger than 32 GB. The same applies to USB drives as well.
To bypass these restrictions, you’ll need to download third-party formatting software. We’ll explore three ways of formatting a RAW drive to FAT32.
Step 2.1. Convert a RAW Drive to FAT32 in Disk Management
Disk Management offers a simple way to format storage drives to the FAT32 file system. After recovering your data, you can safely use Disk Management to convert your drive back to FAT32.
In our tutorial, we’ll convert a RAW USB drive (8 GB) to FAT32 using Disk Management.
The instructions remain the same, regardless of the storage device you’re using:
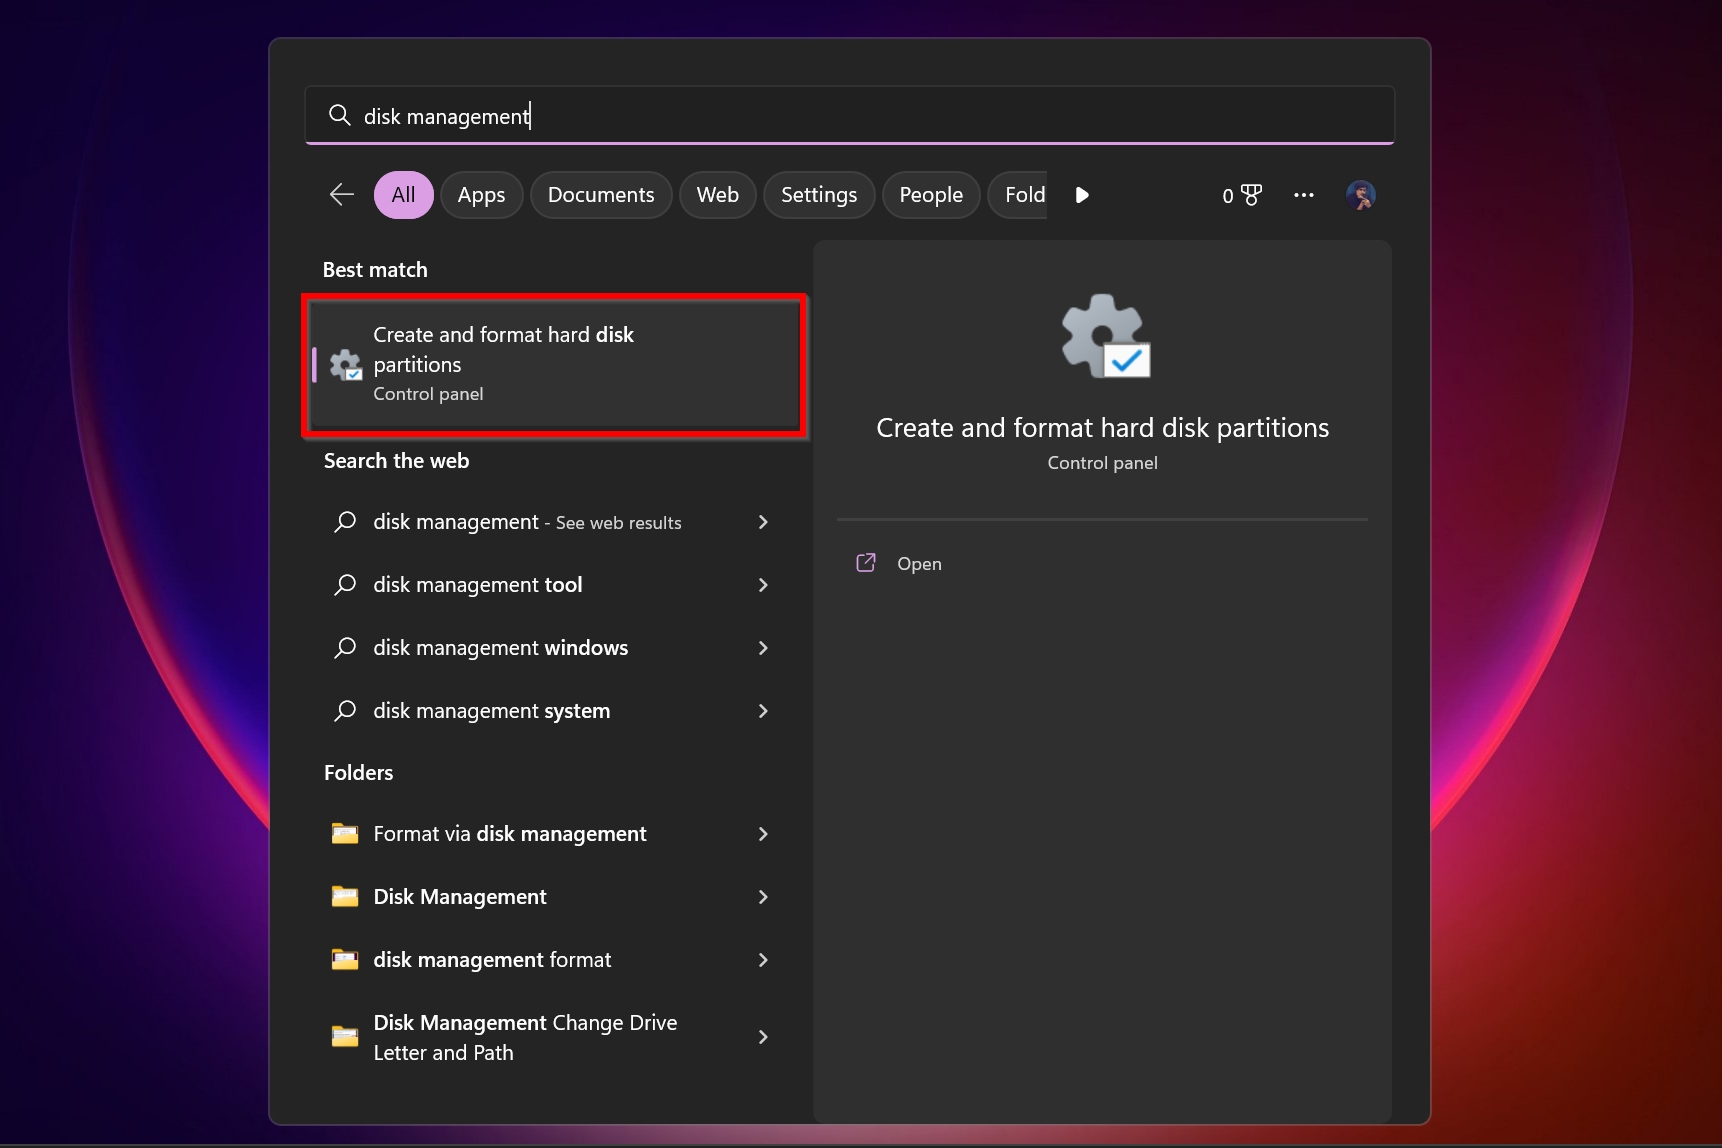
- Type disk management in Windows Search (Windows Key + S). Click the Create and format hard disk partitions option.
- Right-click on the RAW storage drive and choose Format.
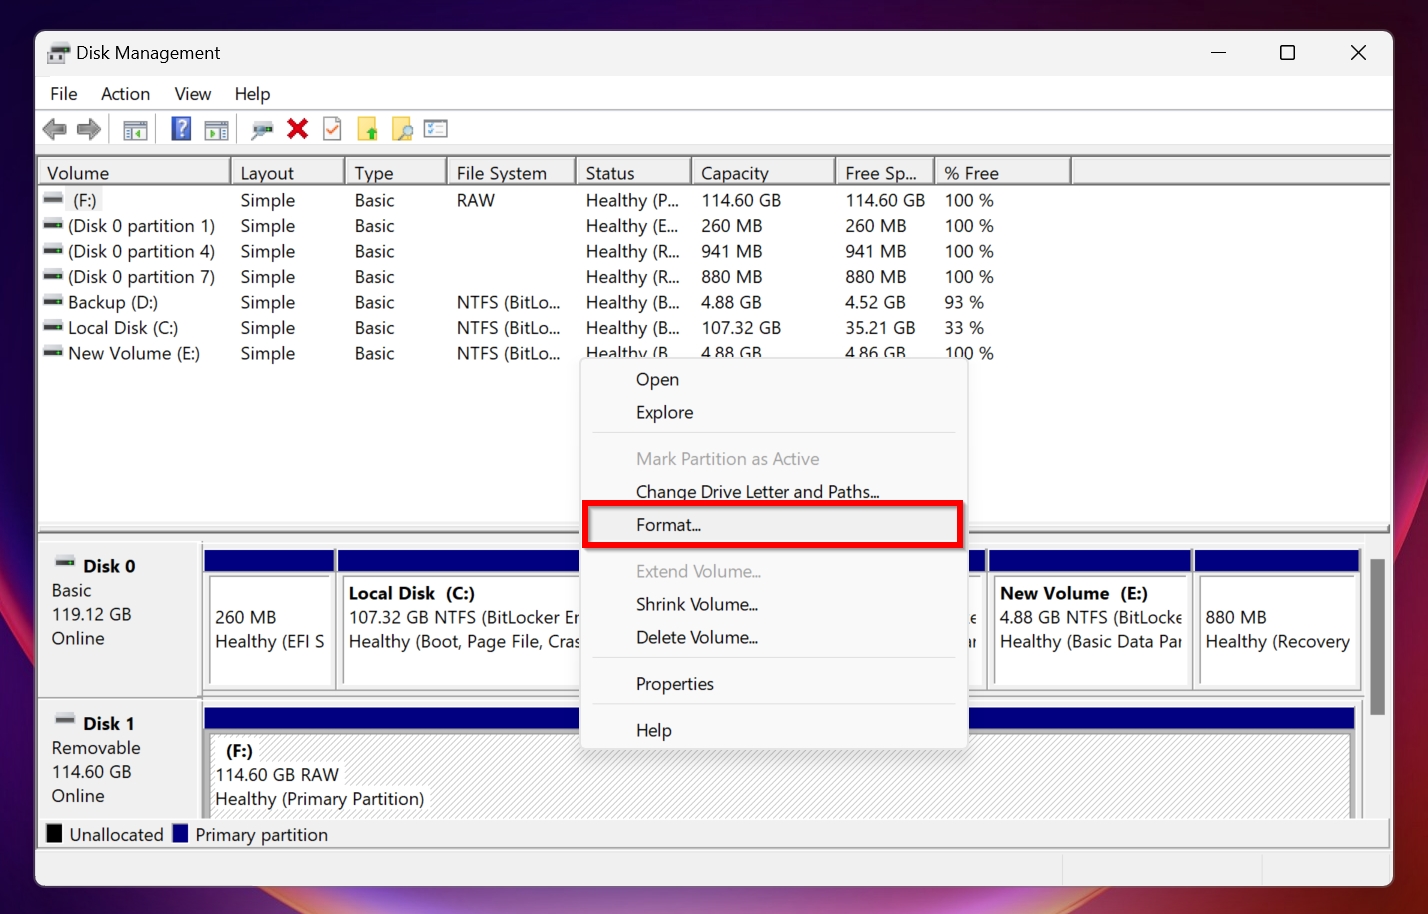
- In the format parameters window, select FAT32 from the File system drop-down menu. Click OK. You’ll only get the FAT32 option if the drive’s storage space is less than 32 GB.
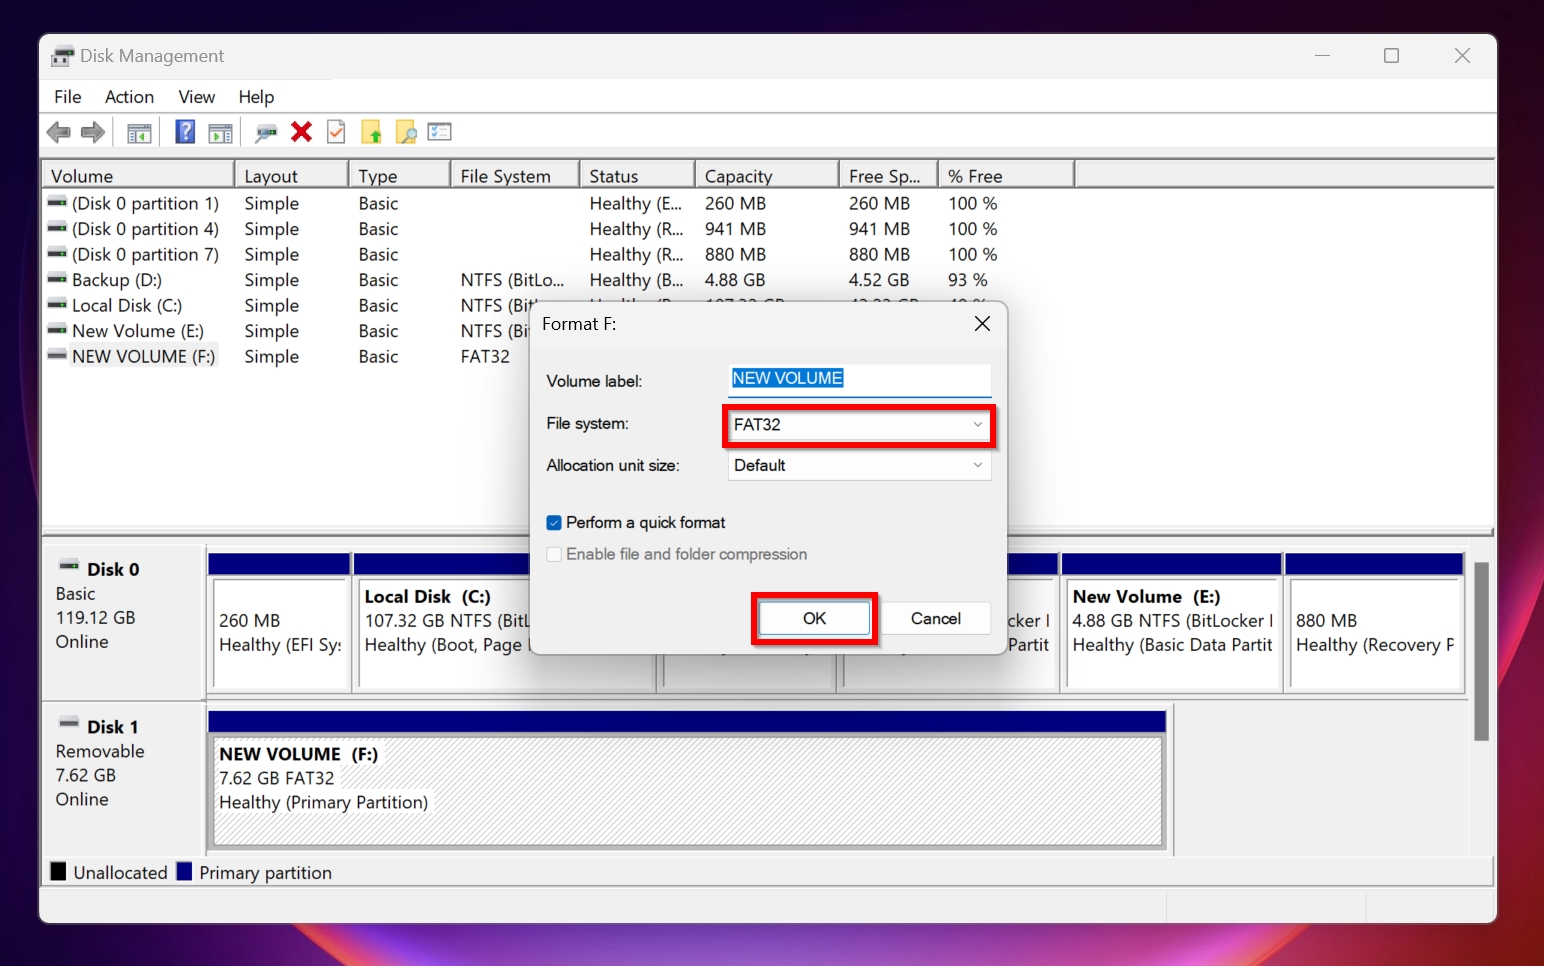
- Click OK on the next prompt to format the RAW drive to FAT32.
Step 2.2. Convert a Drive From RAW to FAT32 using CMD
If you’re comfortable using a command line interface, the diskpart utility within Command Prompt is another way to format a drive to the FAT32 file system.
Before proceeding, it’s important to reiterate–you cannot convert a RAW SD card/USB drive larger than 32 GB to FAT 32 using CMD.
In all other cases, here is how you can format a drive to FAT32 using the Command Prompt:
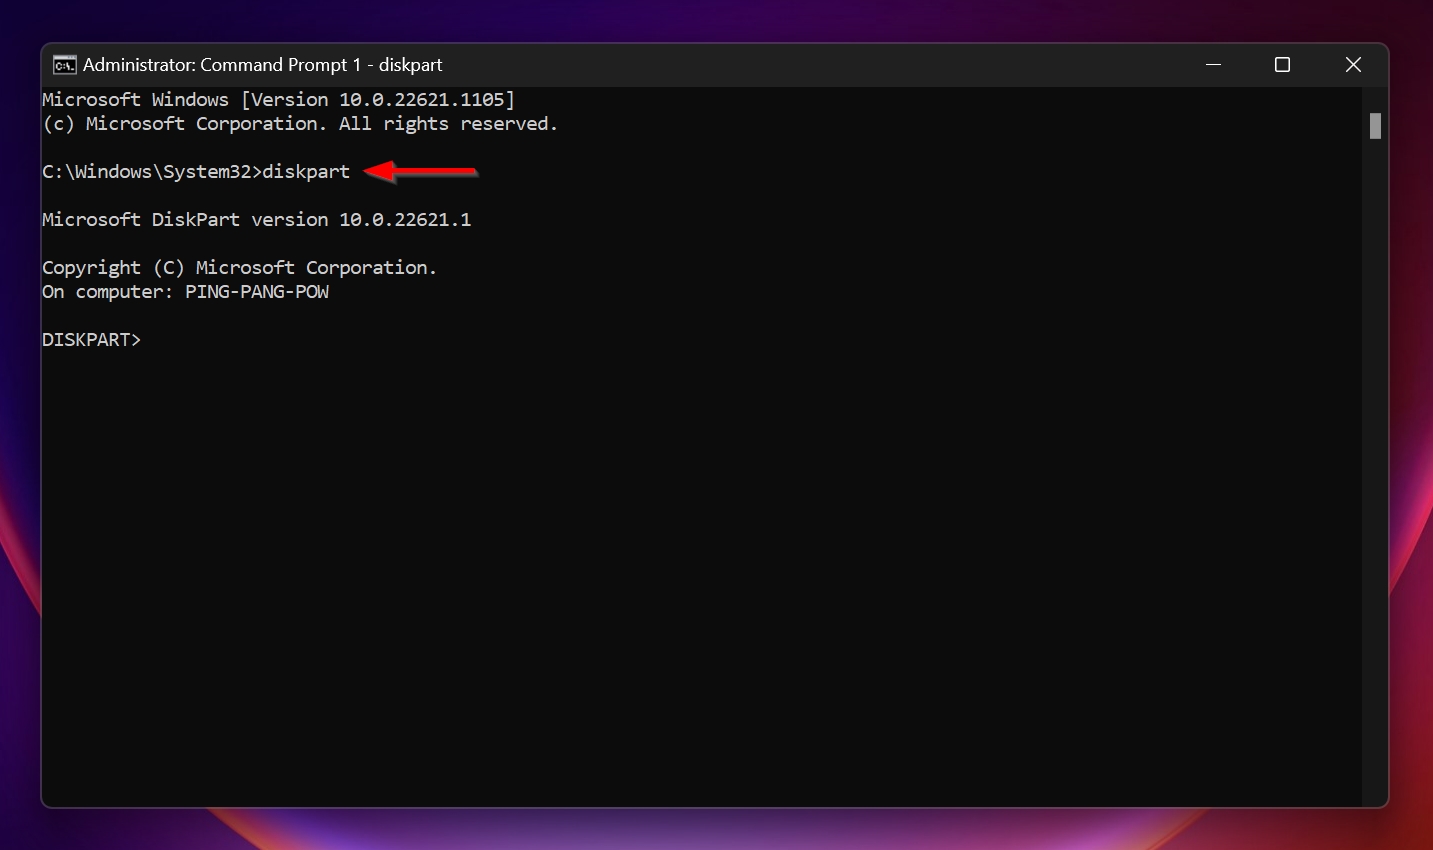
- Search for cmd in Windows Search (Windows Key + S), and right-click on Command Prompt > Run as administrator.
- Type diskpart in the console and press Enter.
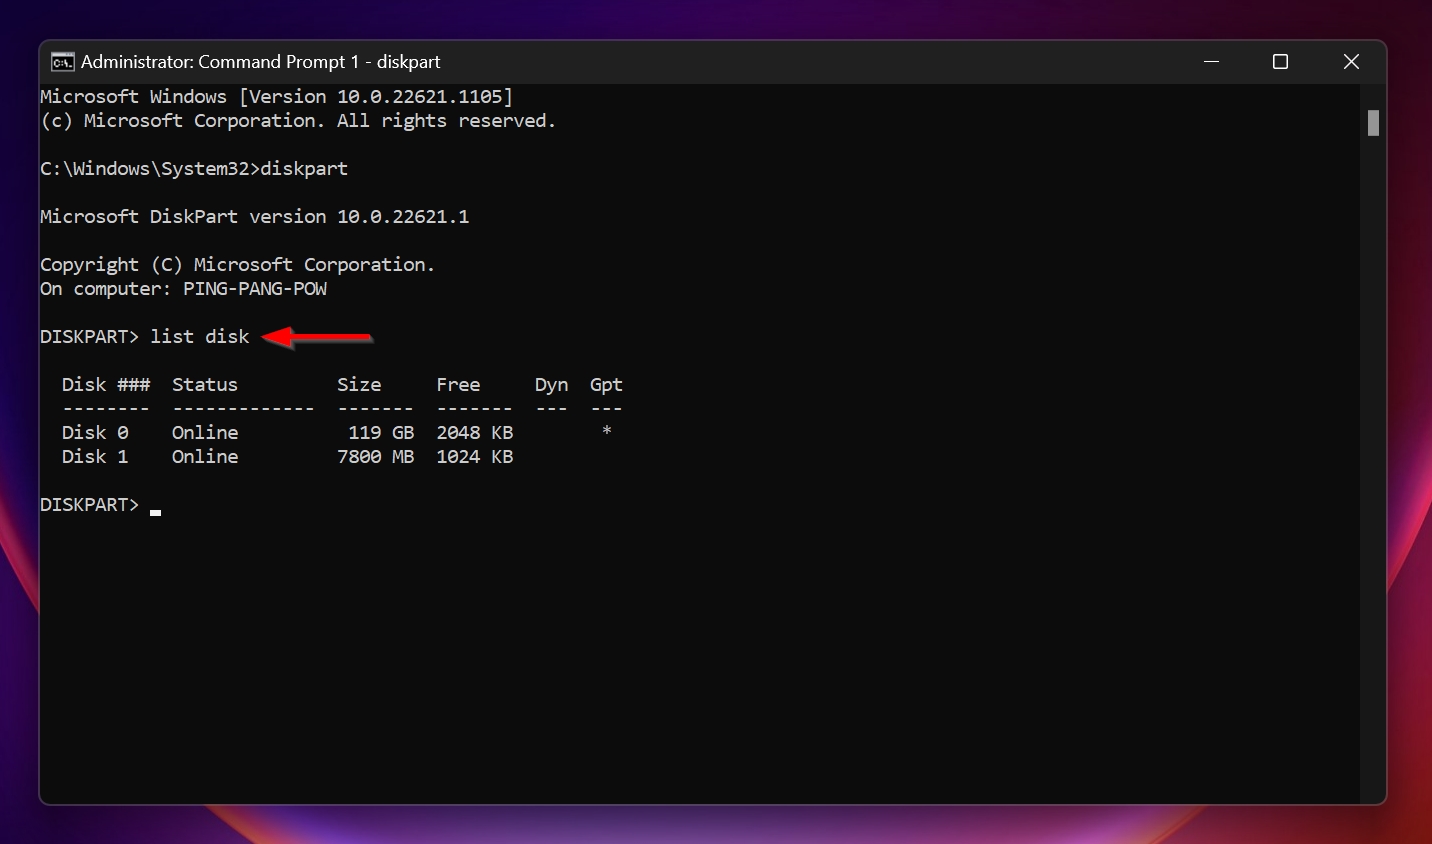
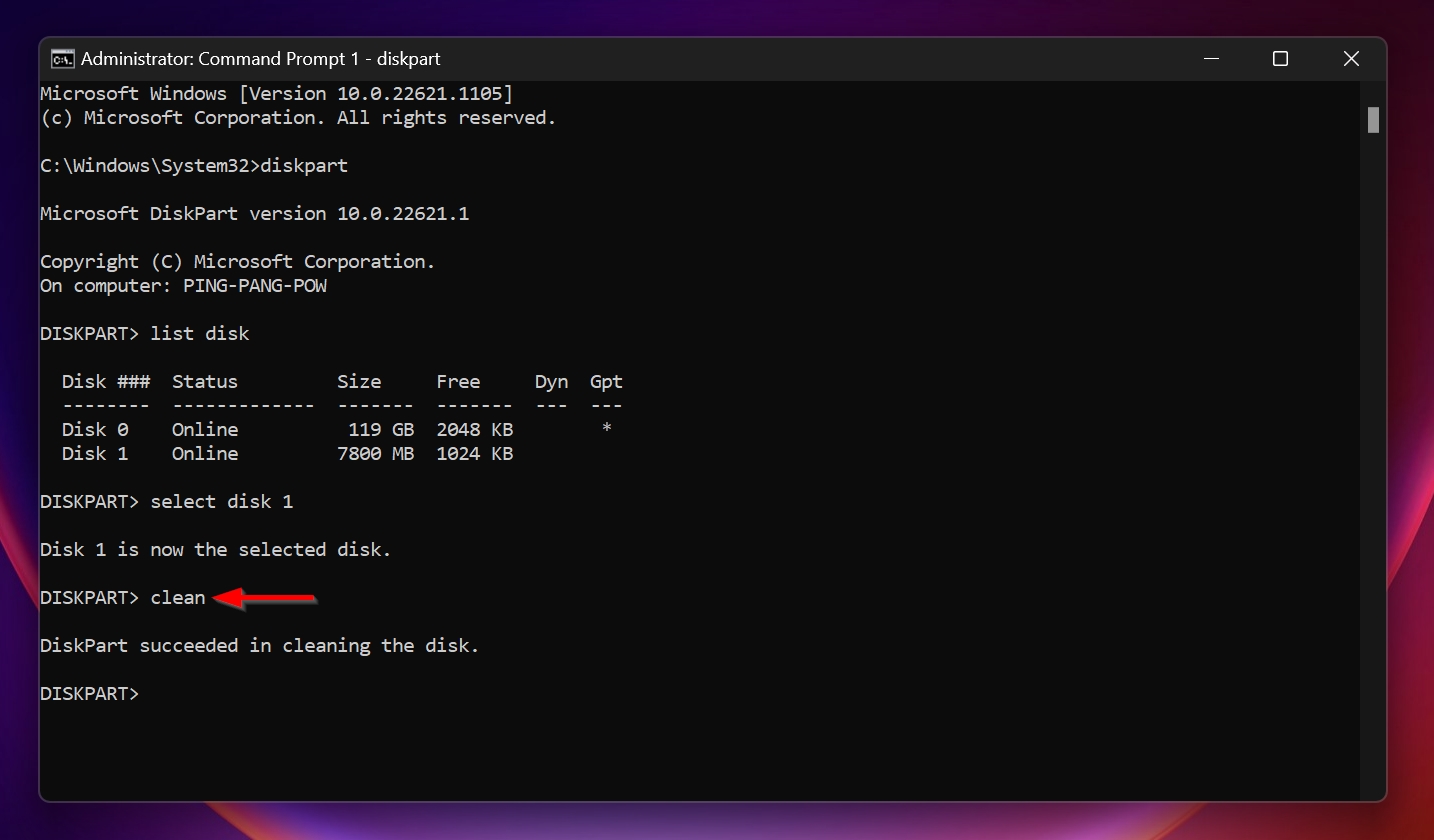
- Type in list disk and press Enter to display all the drives attached to your computer. It’s recommended you disconnect all unnecessary external storage device from your PC to avoid confusion.
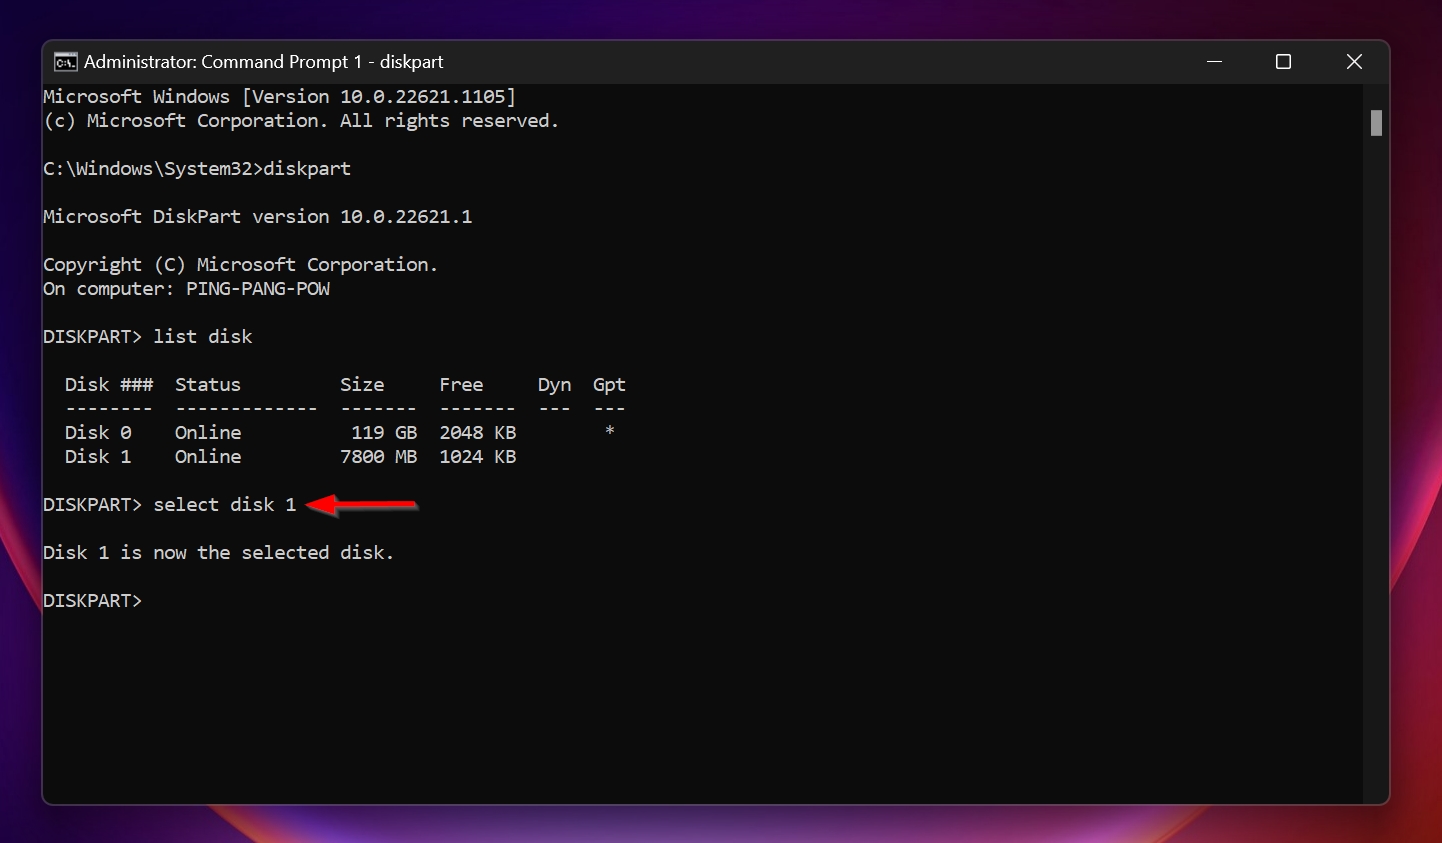
- Type select disk x and press Enter. Replace “x” with the disk number of the storage device.
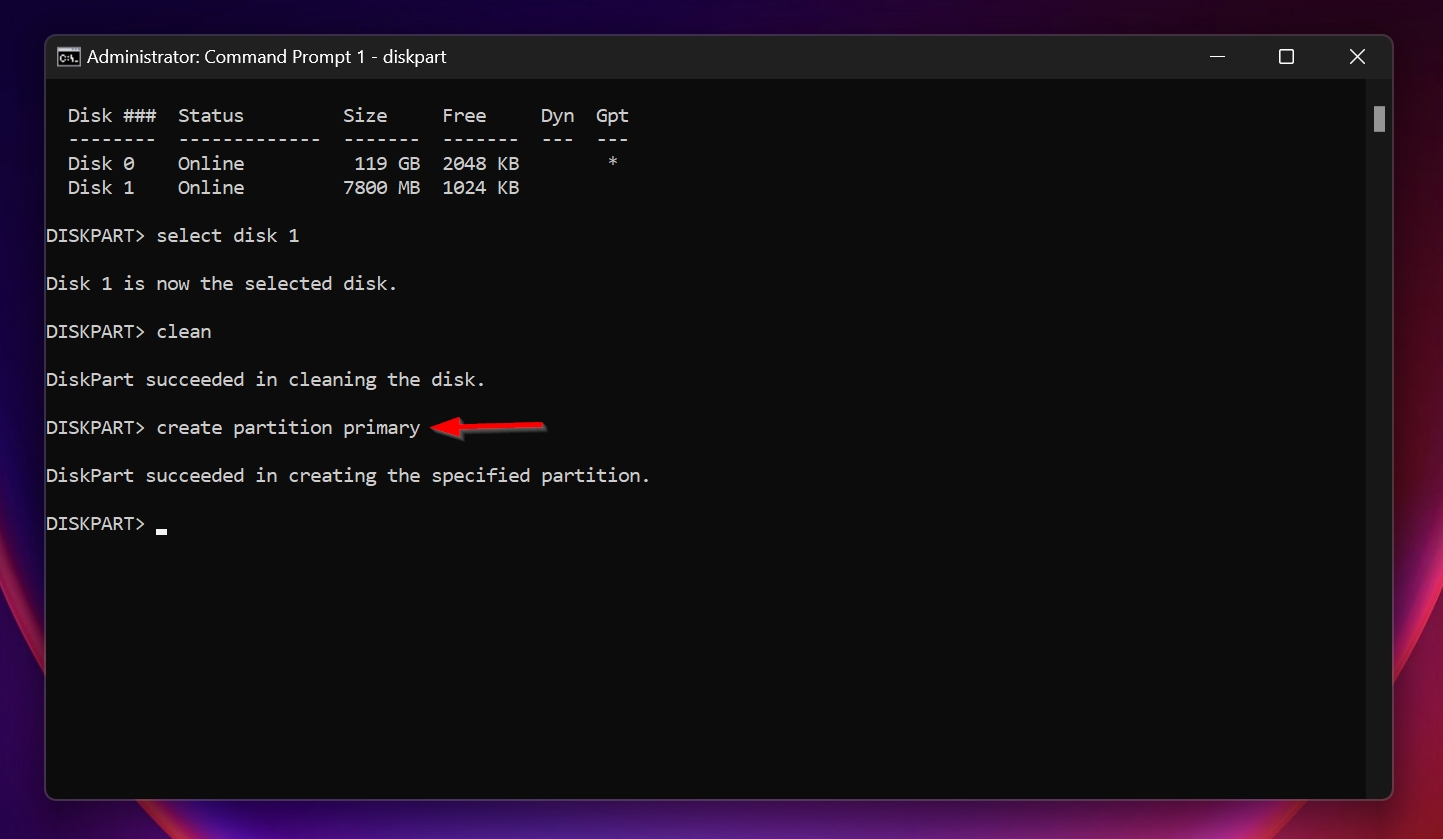
- Type clean and press Enter.
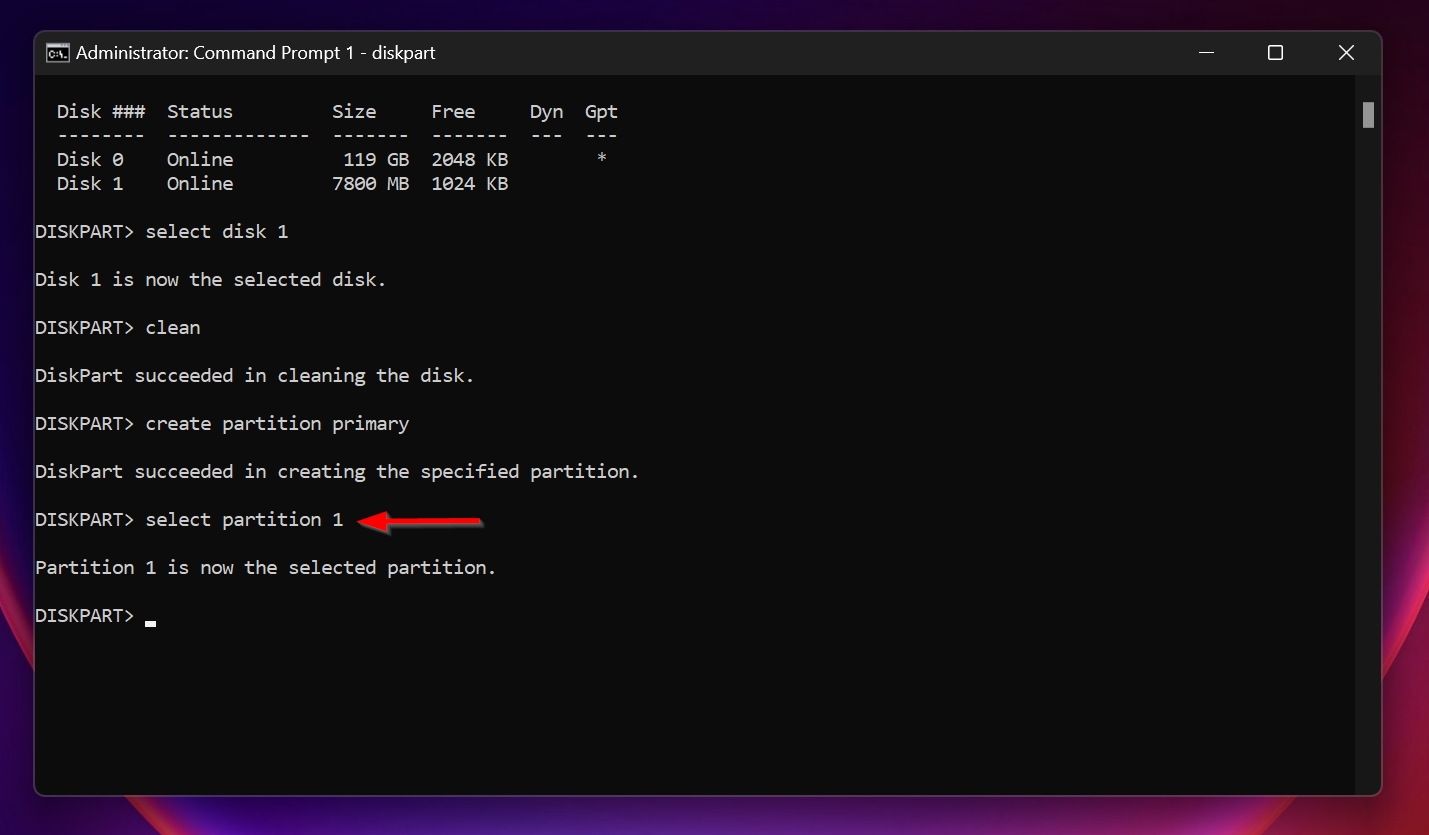
- Type create partition primary and press Enter.
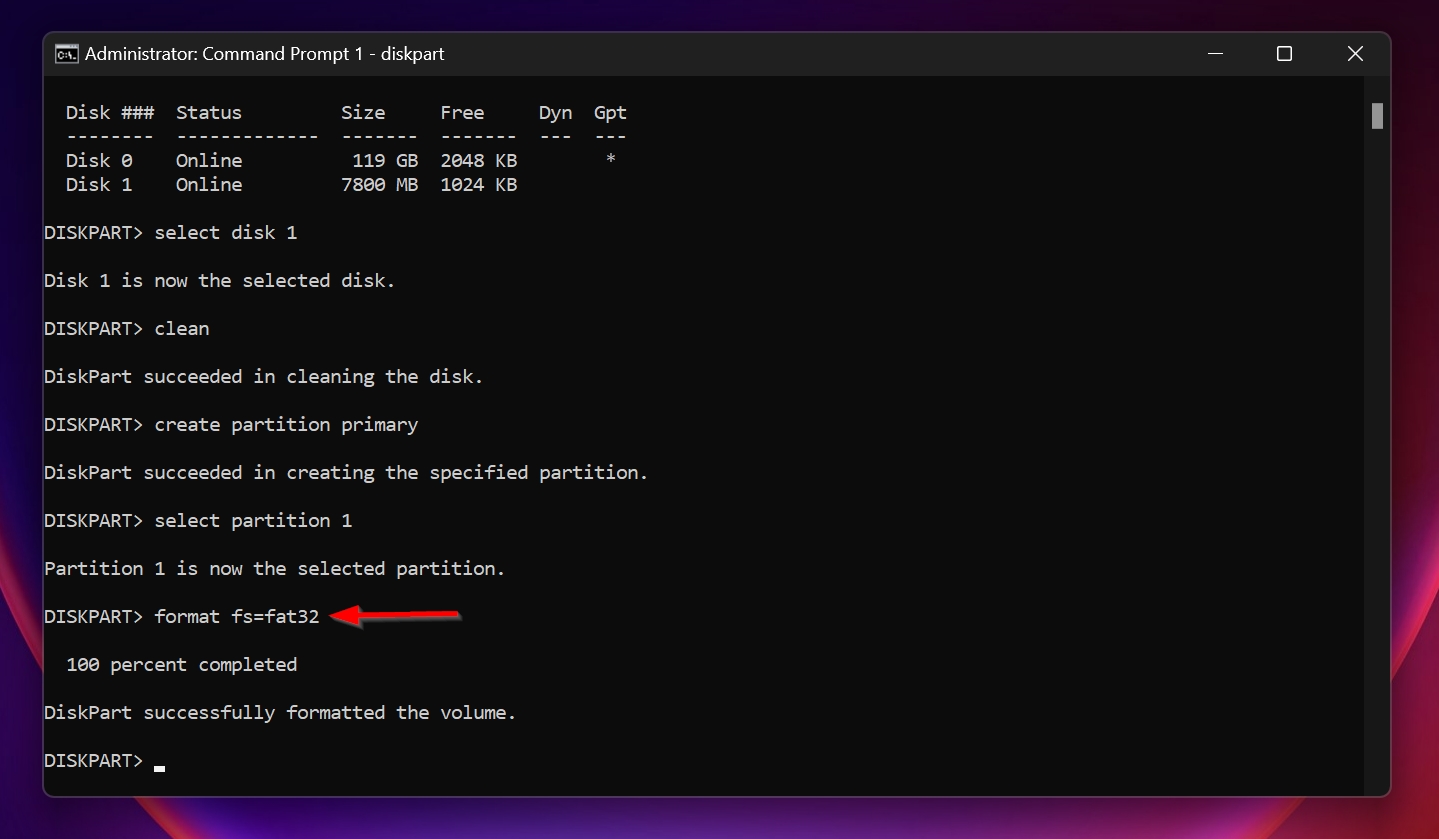
- Type select partition 1 and hit Enter.
- Finally, type format fs=fat32 and press Enter to begin the formatting process.
Step 2.3. Convert From RAW to FAT32 With Third-Party Tool
FAT32Format is a free app that can format most types of storage devices to the FAT32 file system, even if the storage size exceeds 32 GB. You can even use it to format a microSD card from RAW to FAT32.
Here is how you can use the program:
- Download FAT32Format. This is a direct link, so the download will begin as soon as you click.
- Extract the .exe file in the archive to a partition on your PC. Don’t create a subfolder.
- Now, look for cmd in Windows Search. Right-click on Command Prompt > Run as administrator.
- Type CD /D X:\ in the console and press Enter. Replace “X” with the partition letter that contains the FAT32Format.exe file. In our case, it was the C: drive.
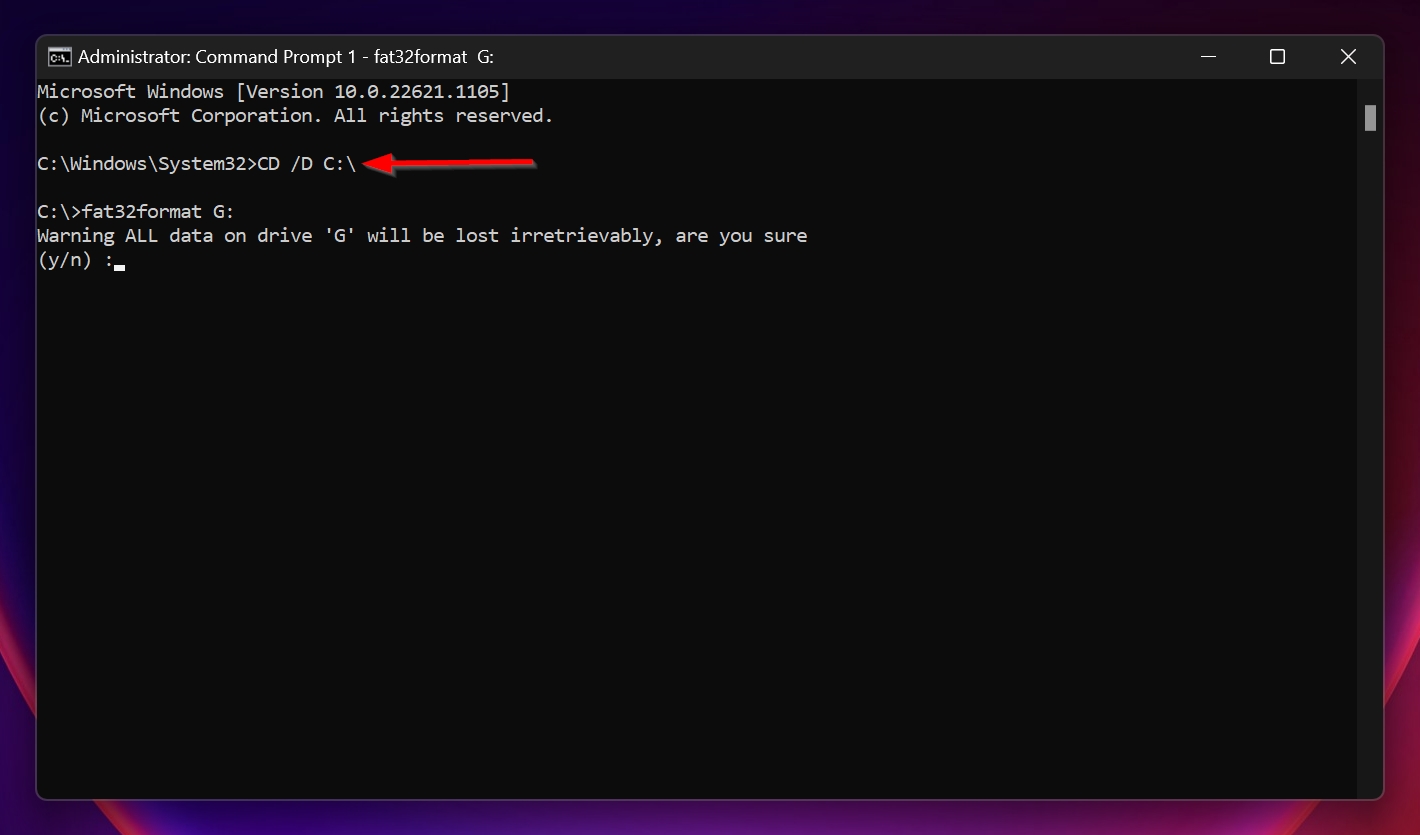
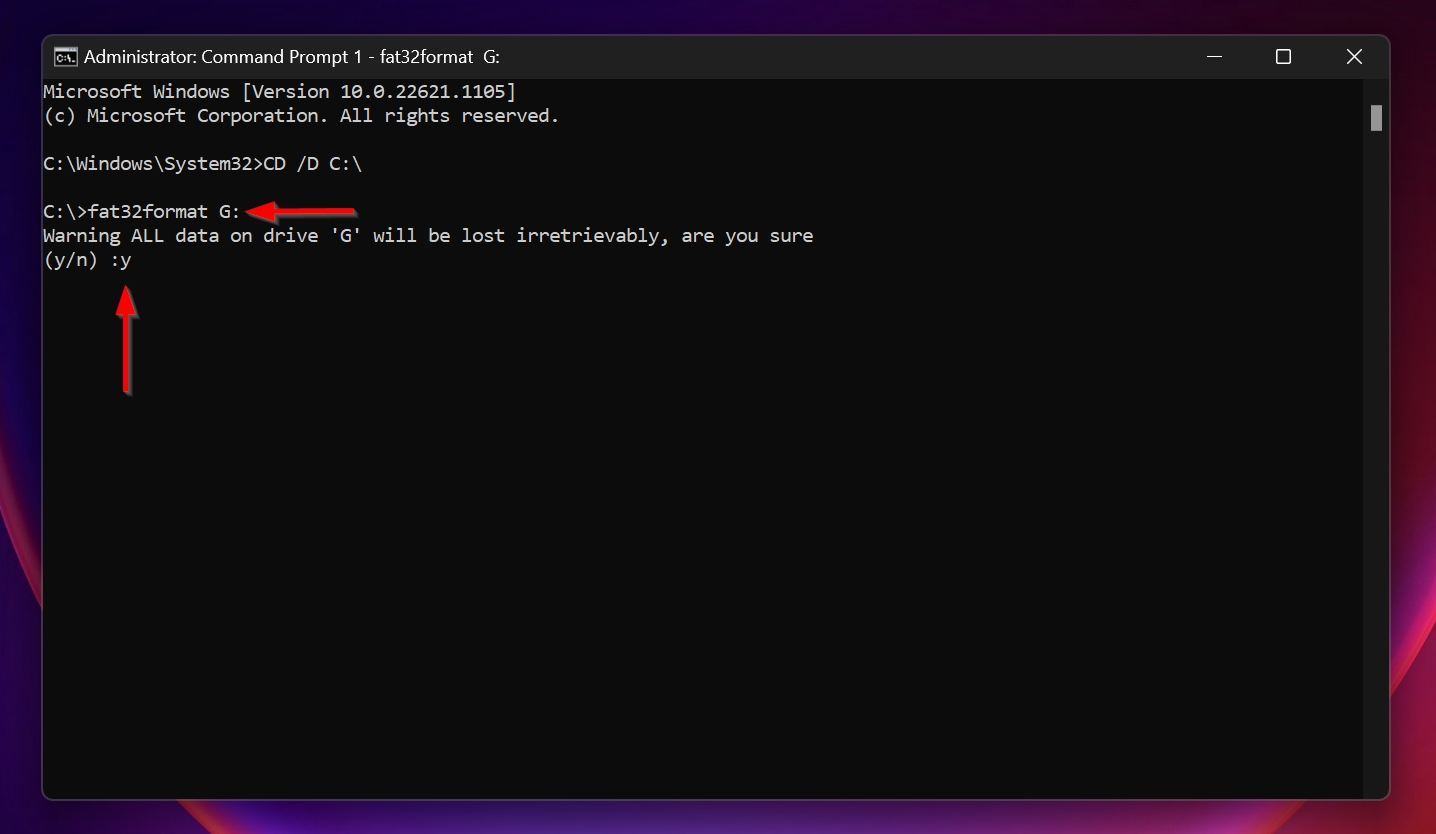
- Type fat32format X: and press Enter. Here, X denotes the drive letter of the storage drive you want to convert to FAT32. Type Y and press Enter when prompted to confirm.
How to Fix a RAW Drive and Restore It to FAT32 Without Losing Data
When the drive suffers only minor corruption, it’s possible to convert the RAW storage drive to FAT32 without formatting it. Windows utilities such as CHKDSK can sometimes help you do this, but they’re not as effective as third-party software, like TestDisk.
TestDisk is an excellent data recovery and partition repair program that can recover RAW partitions to their original stage. Since the program uses a command line interface, be sure to follow the recovery instructions carefully:
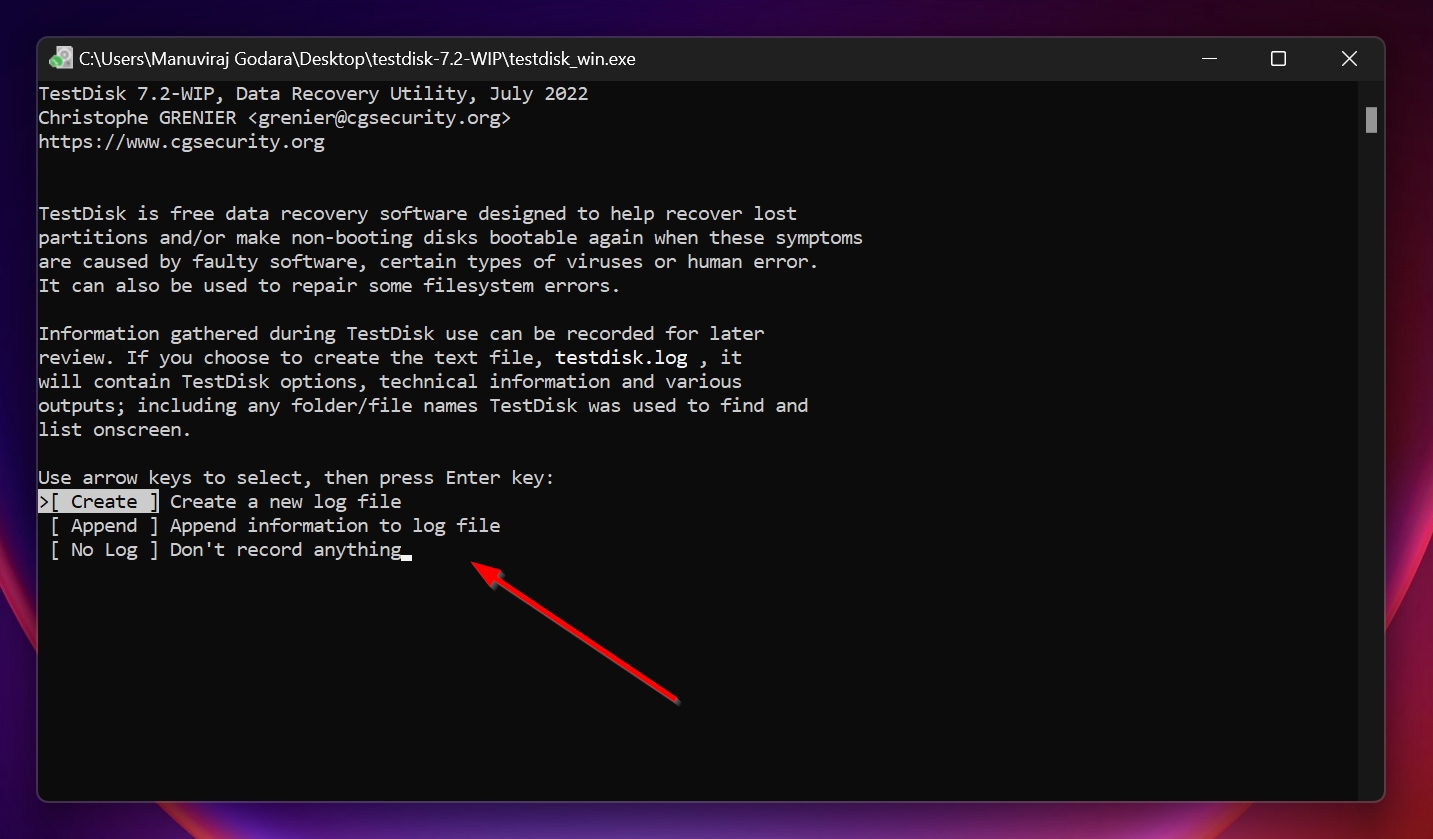
- Download TestDisk and install it.
- Run TestDisk and choose whether you want to create a log file. Use the arrow keys to navigate and the Enter key to select an option.
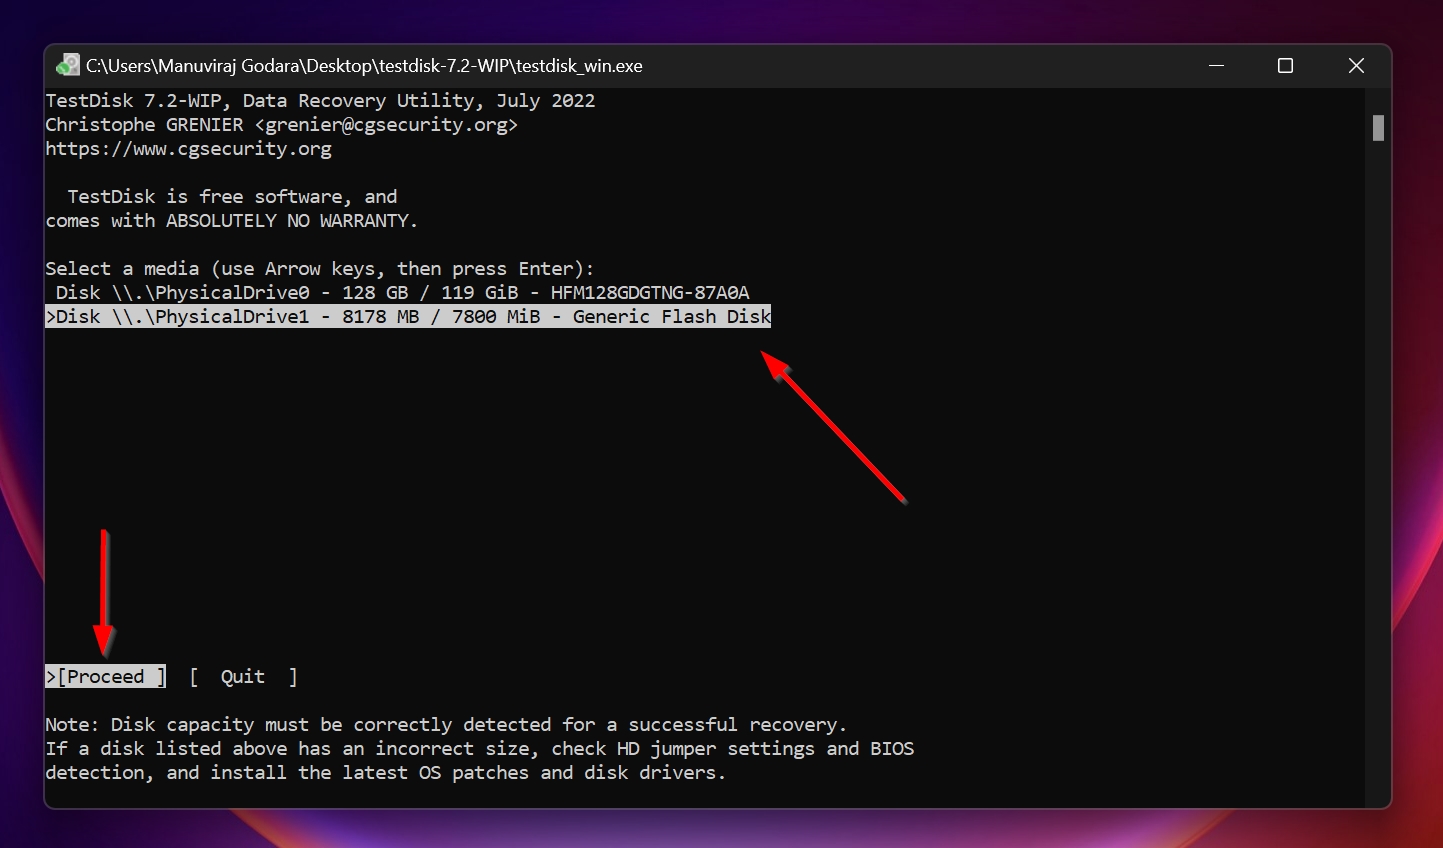
- On the next screen, use the up/down arrow keys to select the RAW drive, and the left/right arrow keys to select the Proceed option. Press Enter.
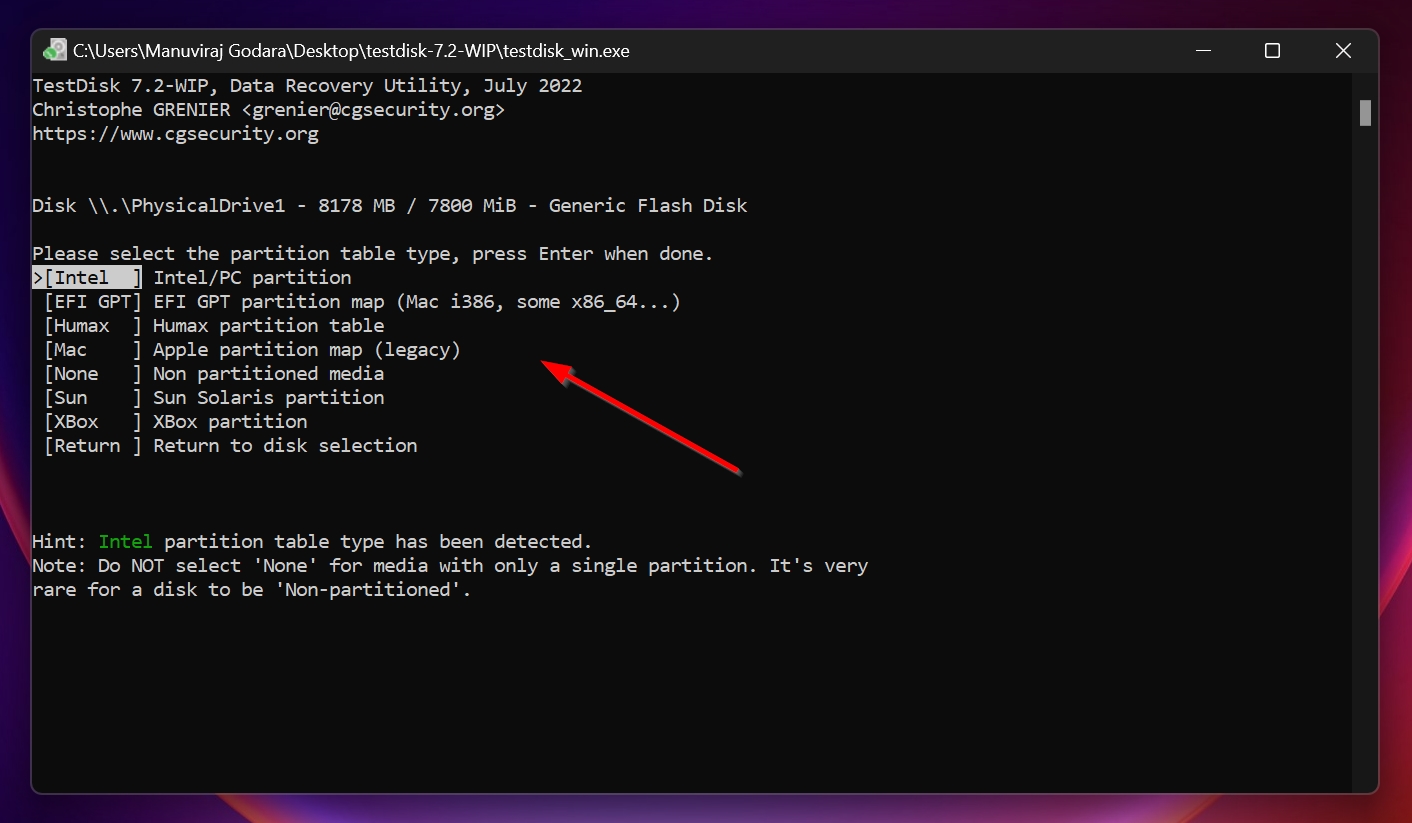
- Now you’ll be prompted to pick a partition table type. Since TestDisk automatically detects this, it’s best to simply press Enter on this screen. Don’t modify anything.
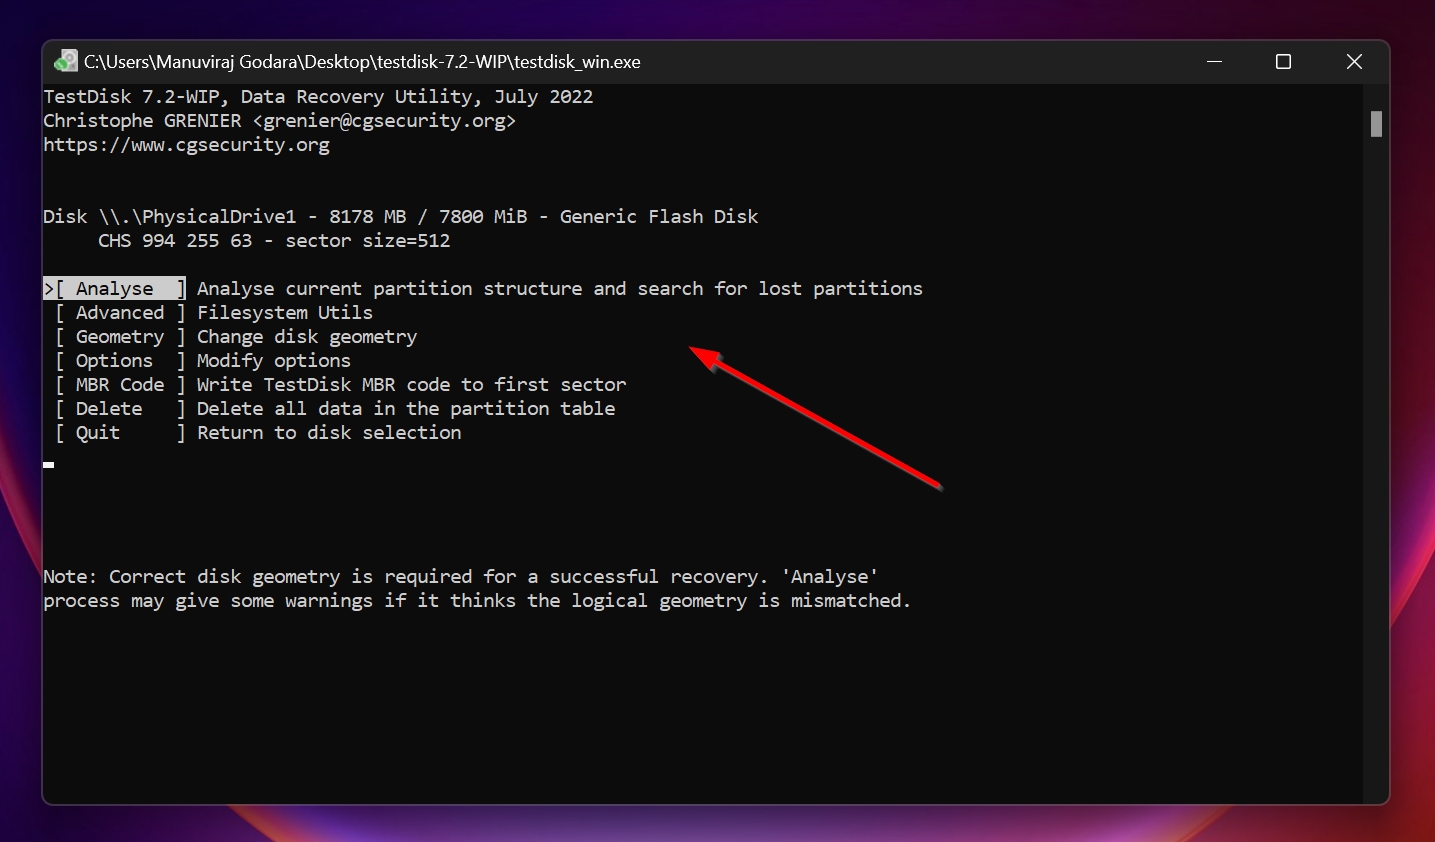
- Select Analyze and press Enter.
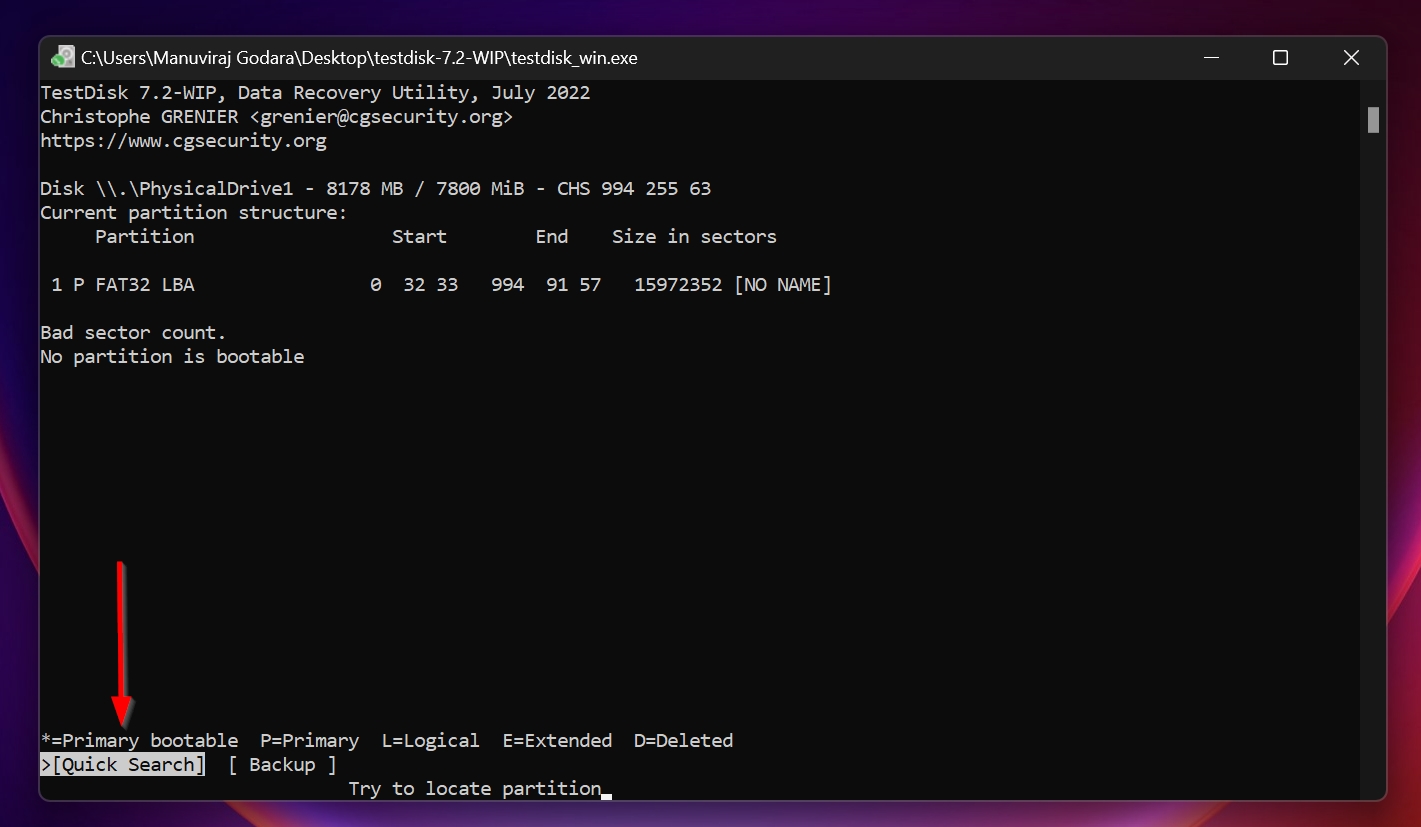
- Highlight Quick Search and press Enter.
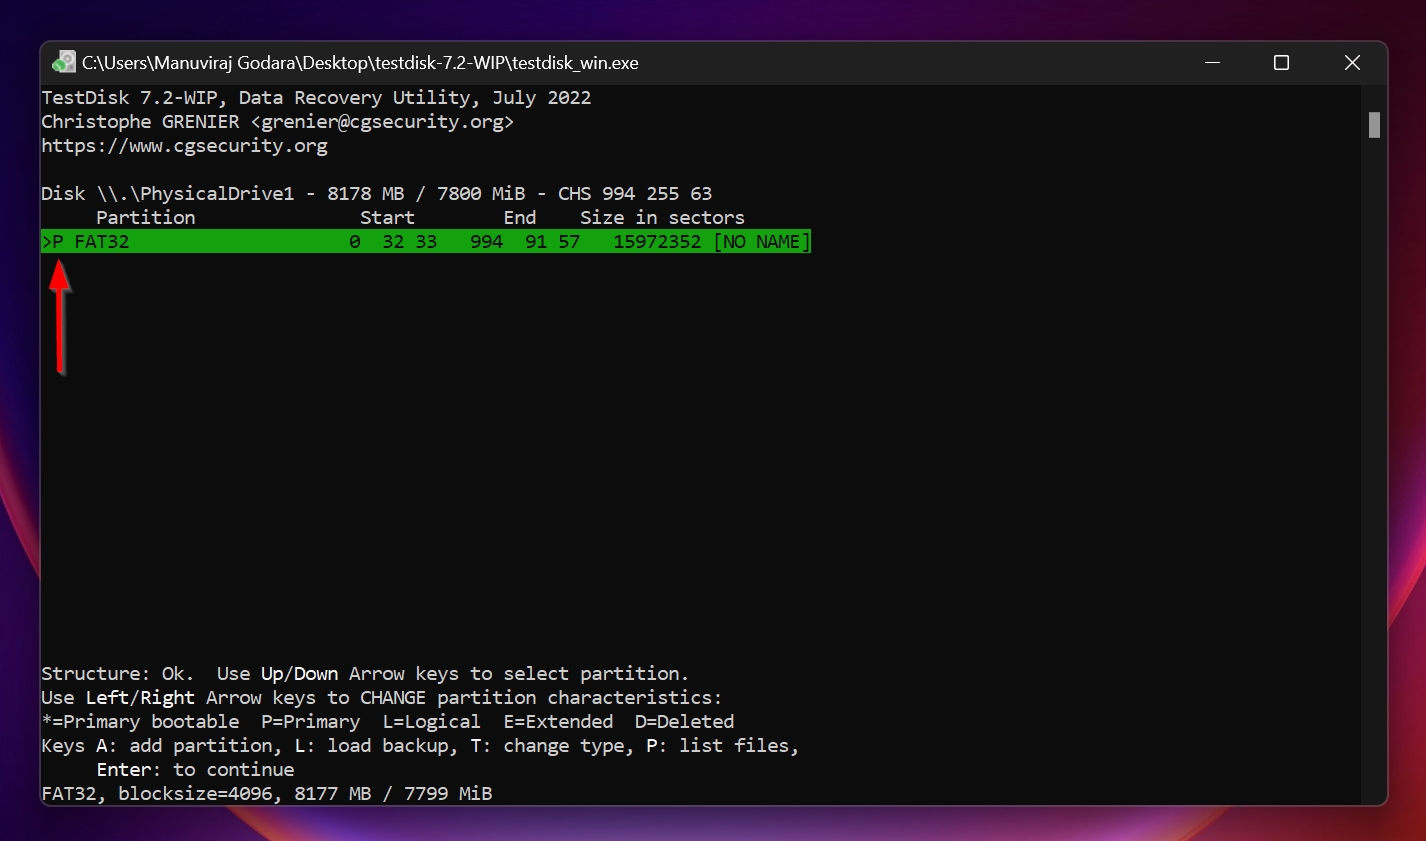
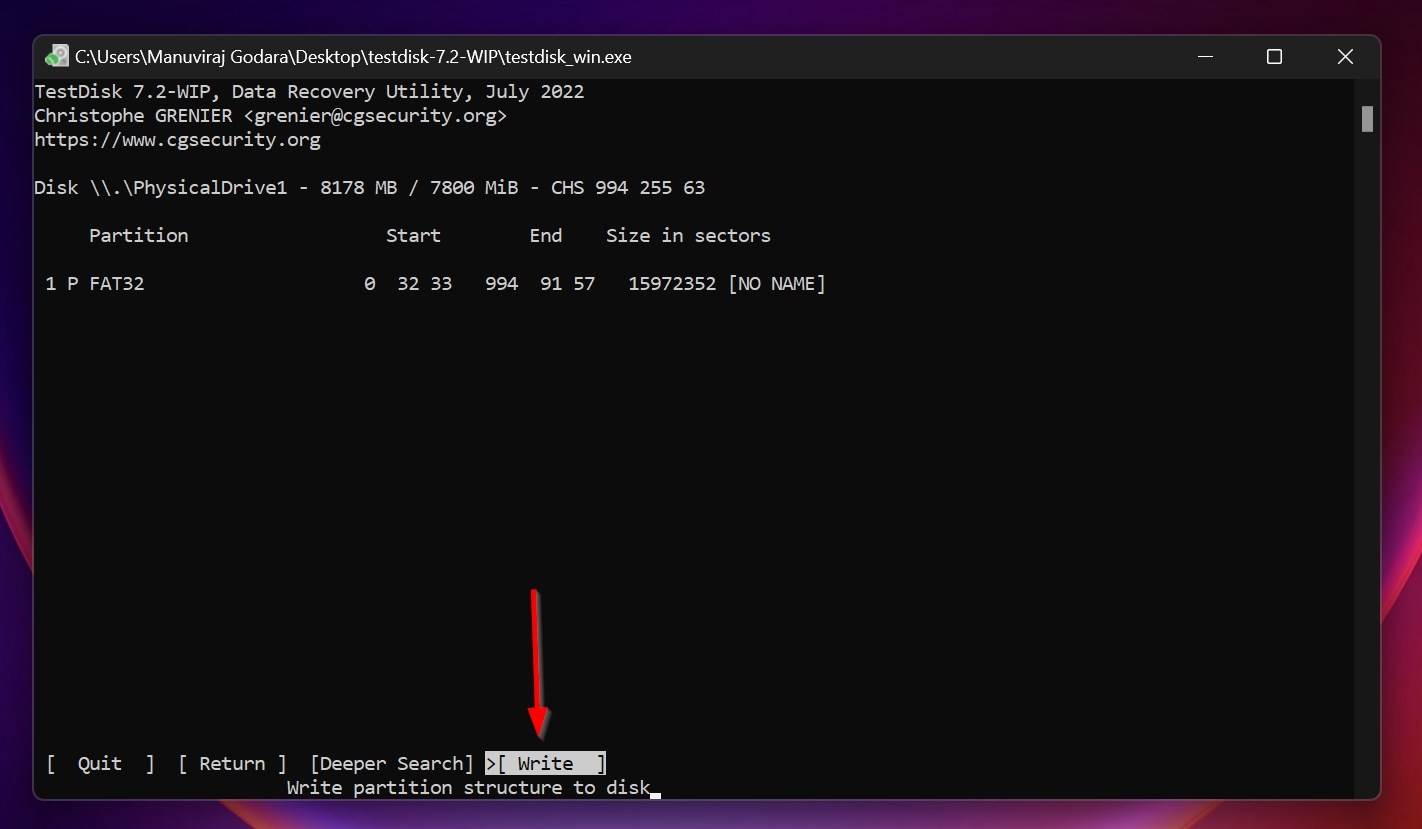
- Now, use the left and right arrow keys to ensure there is a “P” before the file system type. Use the image below for reference. Press Enter.
- Here, select the Write option and press Enter. Press Y on the confirmation screen.
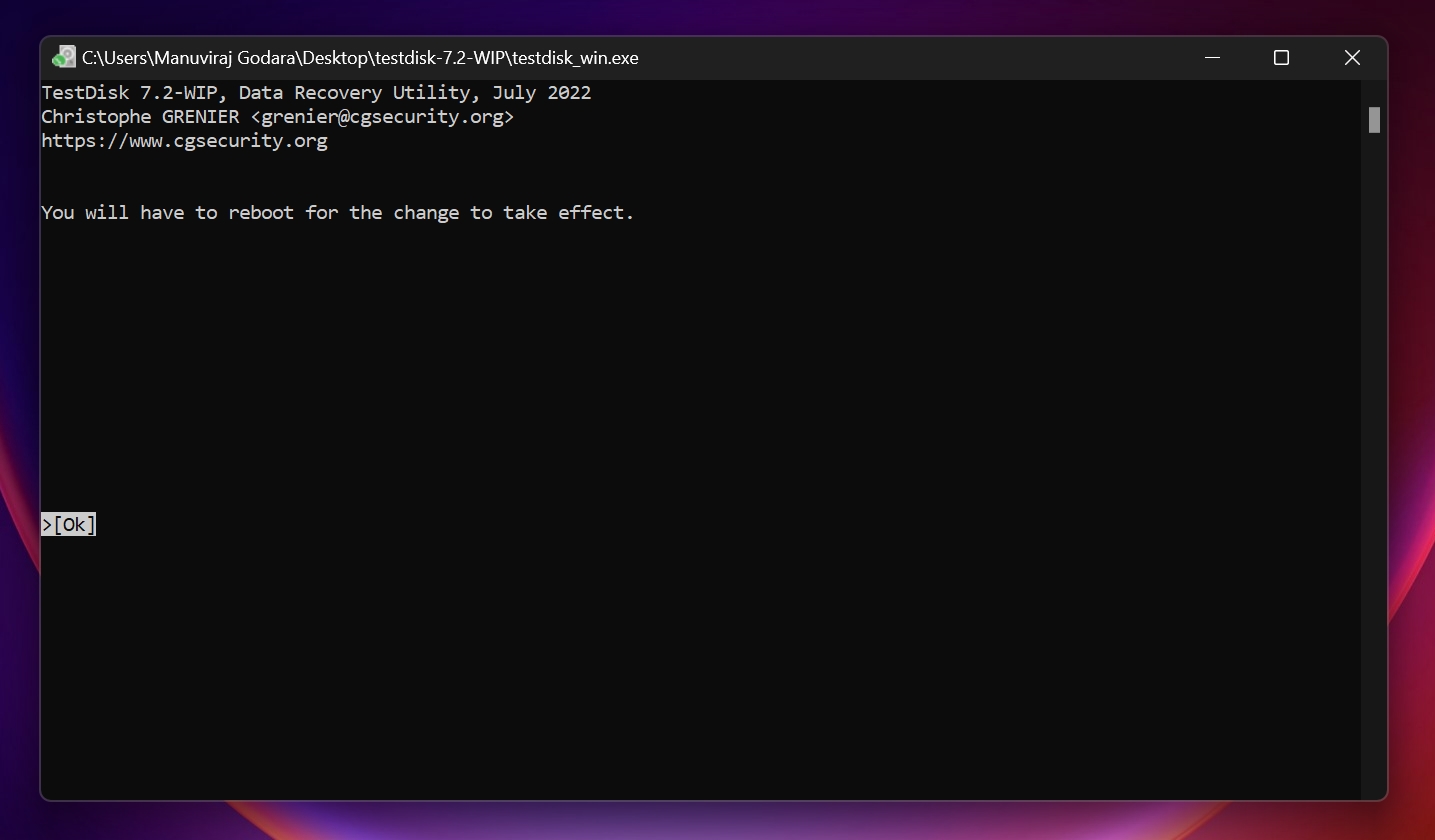
- Reboot your PC.
To know more about how TestDisk operates and how it fares with other programs, take a look at our detailed TestDisk review.
FAQ
Why can't I format my SD card or USB drive to FAT32?
Windows will not format an SD card or USB drive that is larger than 32 GB to the FAT32 file system. Use third-party formatting software to get over this limitation.
How do I format a RAW USB to FAT32?
If the USB drive has a storage space of 32 GB or less, you can Windows Disk Management or the Command Prompt to format it to FAT32. For drives larger than 32 GB, use third-party software like FAT32Format to do the same.
How to convert RAW to FAT32 or NTFS without losing data?
There are two methods to change a RAW drive to FAT32 or NTFS:
- First recover the data using Disk Drill, and then format the drive like you usually would.
- Use TestDisk to recover and restore the corrupt partition to its previous state.
Why is the CMD convert command not available for RAW drives?
The “convert” command in CMD is used to convert a drive from a FAT file system to NTFS. It doesn’t support any other conversion, including the conversion of NTFS drives to FAT.
Conclusion
If none of the options helped you to convert a RAW drive to FAT32, it’s best to contact a data recovery professional. It’s also recommended that you keep multiple backups of your data to further minimize the chances of data loss.
This article was written by Manuviraj Godara, a Staff Writer at Handy Recovery Advisor. It was also verified for technical accuracy by Andrey Vasilyev, our editorial advisor.
Curious about our content creation process? Take a look at our Editor Guidelines.