Have you recently connected your SanDisk Extreme Portable SSD to your Mac, only to find that it’s not detected or not showing up? Many other Mac users have experienced the same issue, including us! Having dealt with it before, we understand your pain, especially if you have important data stored on the drive. In this article, we’ll walk you through the top solutions to the problem, from quick & easy fixes to more intricate troubleshooting methods.
Note: Based on our research on this topic, when you unsuccessfully connect an external SSD to your Mac, the disk may not appear in the following places: Disk Utility, Desktop, and the Finder sidebar. We’ll try to address these cases, and provide you with effective solutions to fix the issue of a SanDisk Extreme Portable SSD not detected by Mac.
SanDisk SSD Not Showing Up on Mac? Here’s Why
When you connect your SanDisk Extreme Portable SSD to your Mac and it doesn’t show up, there can be several reasons, why depending on where exactly you can’t see it:
Disk Utility:
- Connection problems (ports, wires, etc.): The SSD may not be properly connected to your Mac, or there may be an issue with the USB port or cable.
- Problems with the SSD itself: Physical damage or some kind of hardware failure may be preventing the SSD from being recognized by your Mac.
Desktop and sidebar in Finder:
- Unmounted disk volume: The drive might not be mounted, making it unavailable for access.
- Unsupported file system/missing file system/uninitialized disk: The SSD may have an unsupported file system (such as EXT4), or the file system may be missing or not initialized at all.
- Corrupted file system: The file system on the SSD may be damaged or corrupted, which may make it seem as if it doesn’t exist at all.
- External drives are not displayed: Your Mac may simply be set to not display external drives on the desktop or in Finder’s sidebar.
Good to know: We recommend you start by checking if your SanDisk SSD is not detected by the macOS Disk Utility tool because any drive that’s not displayed in Disk Utility certainly won’t be shown in Finder or on the desktop either.
How to Fix a SanDisk Portable SSD Not Detected by Your Mac
If your SanDisk Portable SSD is not detected by your Mac, there are several solutions you can try to restore access, and this section provides step-by-step instructions that you can easily follow.
Warning: Some of the methods below may result in data loss. If you have important data on your SSD, we recommend recovering it first using a reliable tool like Disk Drill (you can find more information about it near the end of this article)
Method 1: Restart Your Mac and Verify the SSD Connection
A simple restart can sometimes resolve temporary bugs that might be preventing your Mac from recognizing the SSD, such as misbehaving applications or system processes interfering with peripheral devices. A restart clears out the system’s memory and allows it to load everything afresh.
To restart your Mac:
- Click the Apple icon in the top-left corner.
- Select the Restart option.
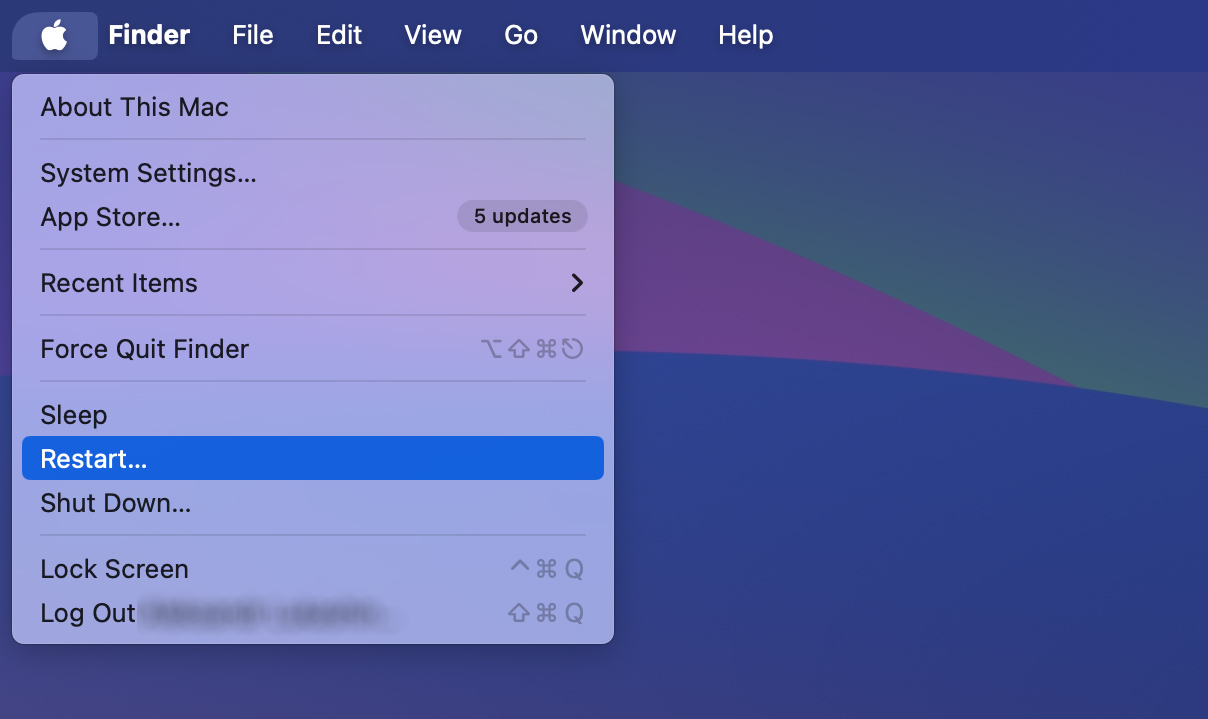
- Wait until your Mac finishes booting up.
If a restart doesn’t do it, then you should check for connection issues:
- The cable: Examine the USB cable you’re using to connect the SanDisk SSD to your Mac. Look for any physical damage to the cable itself. If you have a different cable, then use it instead even if the original one looks healthy to rule out hidden damage.
- The connection to the SSD: Verify that the USB cable is securely plugged into the SanDisk SSD. A loose connection can prevent the SSD from being recognized.
- The connection to the computer: Make sure the other end of the cable is firmly connected to your Mac’s USB port. Also, test different ports to rule out any issues with the port itself.
If after verifying the connection, your SanDisk SSD is still not detected on Mac, you may need to consider other techniques to find your SanDisk SSD on Mac.
Method 2: Configure External Drives to Show Up When Connected
If your SanDisk Extreme Portable SSD is not showing up on your Mac’s Desktop folder or in Finder’s sidebar, then it’s possible that your operating system is configured to not show external drives in those locations when they are connected (maybe you’ve changed the setting in the past and forgot about it).
Fortunately, the solution couldn’t be any simpler:
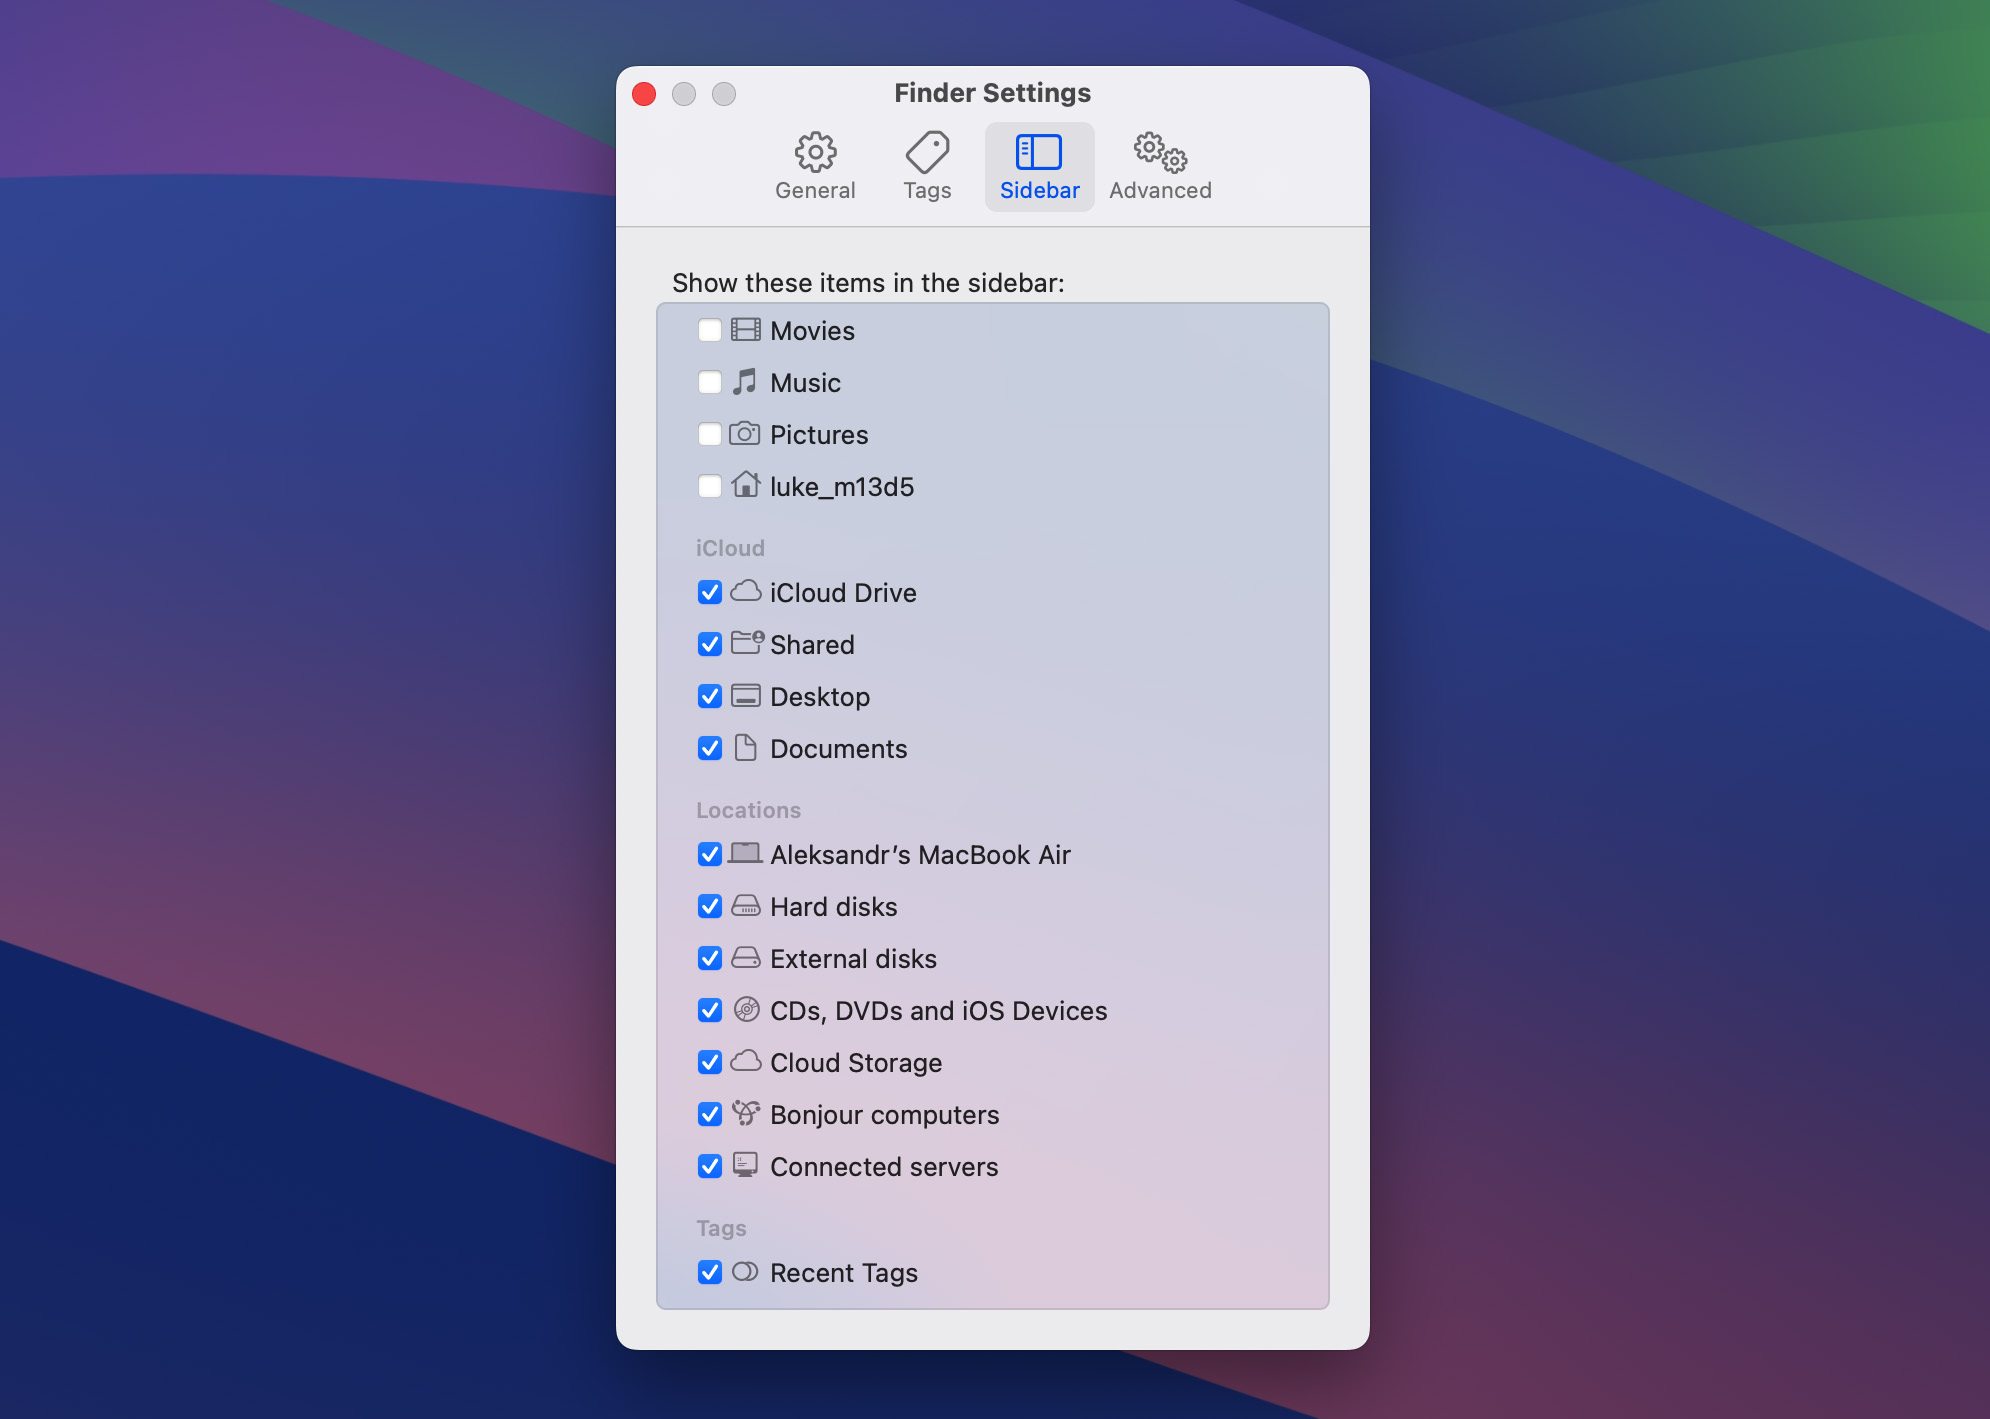
- Open Finder and select Settings from the Finder menu.
- Make sure the External disks option is checked in the General tab.

- Navigate to the Sidebar tab and make sure the External disks option is checked there as well.
The External disks option not only causes SSDs to show up in those locations but also regular spinning hard drives. This is why we also recommend this method in our article on 5 Methods to Fix External Hard Drive Not Showing Up on Mac.
Method 3: Mount the Disk Volume
When a drive is connected to your Mac, it needs to be “mounted” for you to access its files. In computer terms, “mounting” a disk volume means making it accessible to the operating system. When a disk volume is not mounted, it will not appear in the Finder or on the desktop.
To check if your SanDisk SSD is not mounted and to mount it, follow these steps:
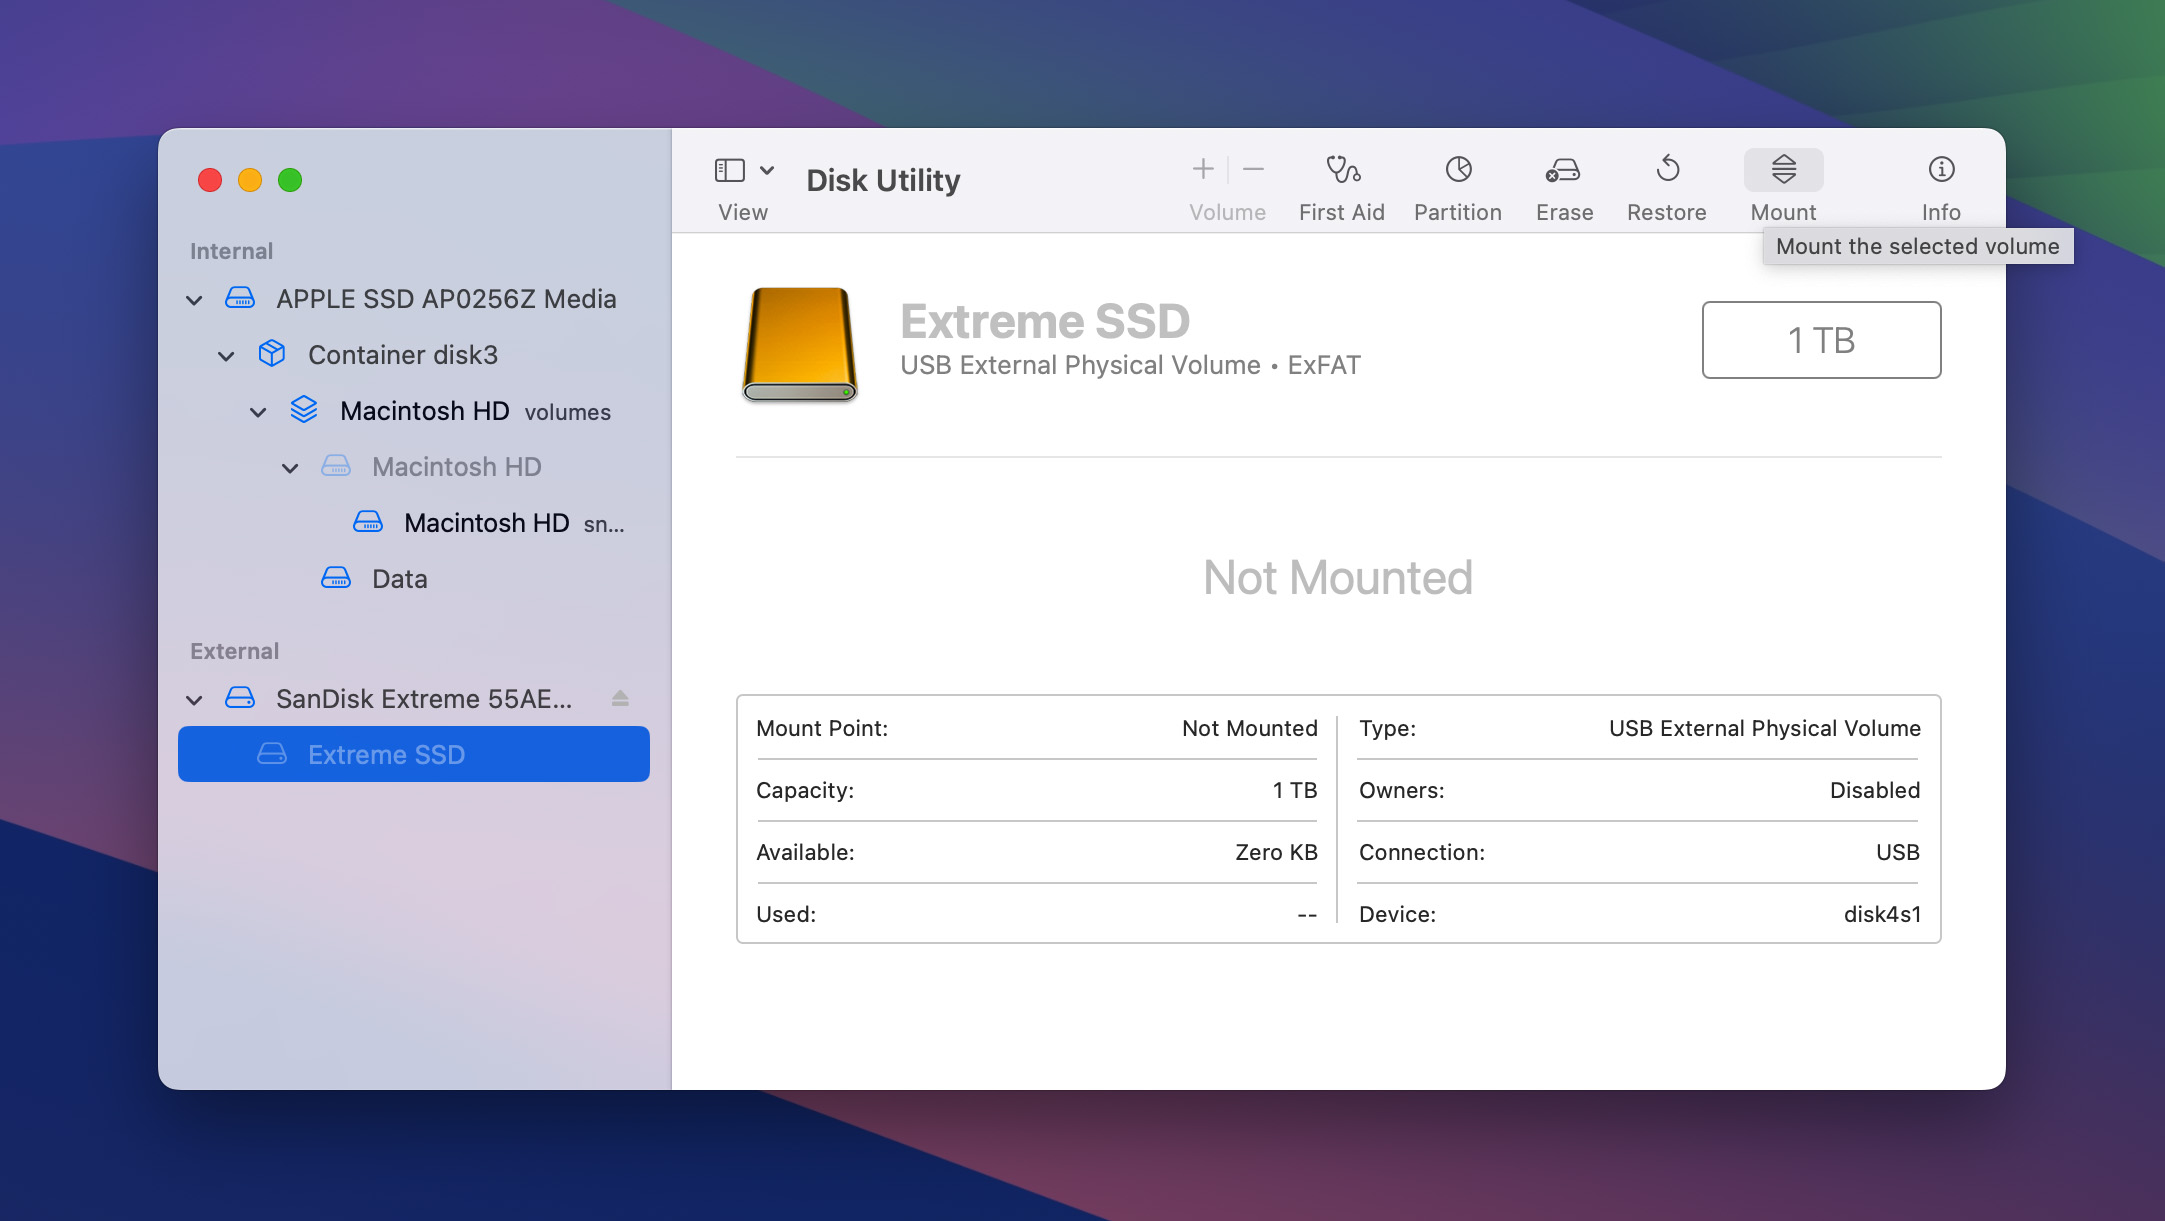
- Open Disk Utility (located in the Applications -> Utilities folder or by searching for it in Spotlight).
- Look for your SanDisk SSD in the left sidebar. If it’s listed but grayed out, it’s not mounted.
- Select the disk volume and click the “Mount” button in the toolbar (or right-click the disk volume and select “Mount” from the context menu).
If the “Mount” button is grayed out or if you see an error message, there might be a problem with the file system on your SanDisk SSD. In this case, you can try repairing the disk using Disk Utility’s First Aid feature. For a more detailed guide on how to fix an external hard drive that is not mounting on a Mac, check out our article on How to Fix External Hard Drive Is Not Mounting on a Mac.
Method 4: Repair the Damaged File System with TestDisk
One possible reason behind the SanDisk SSD not showing up on Mac issue is a damaged or corrupted file system. When the file system is damaged, your Mac may not be able to recognize the SSD, or it will recognize it but won’t be able to access it.
To repair the damaged file system, you can use TestDisk, an open-source software application developed by Christophe Grenier. With it, you can fix partition tables, rebuild boot sectors, or even recover entire lost partitions.
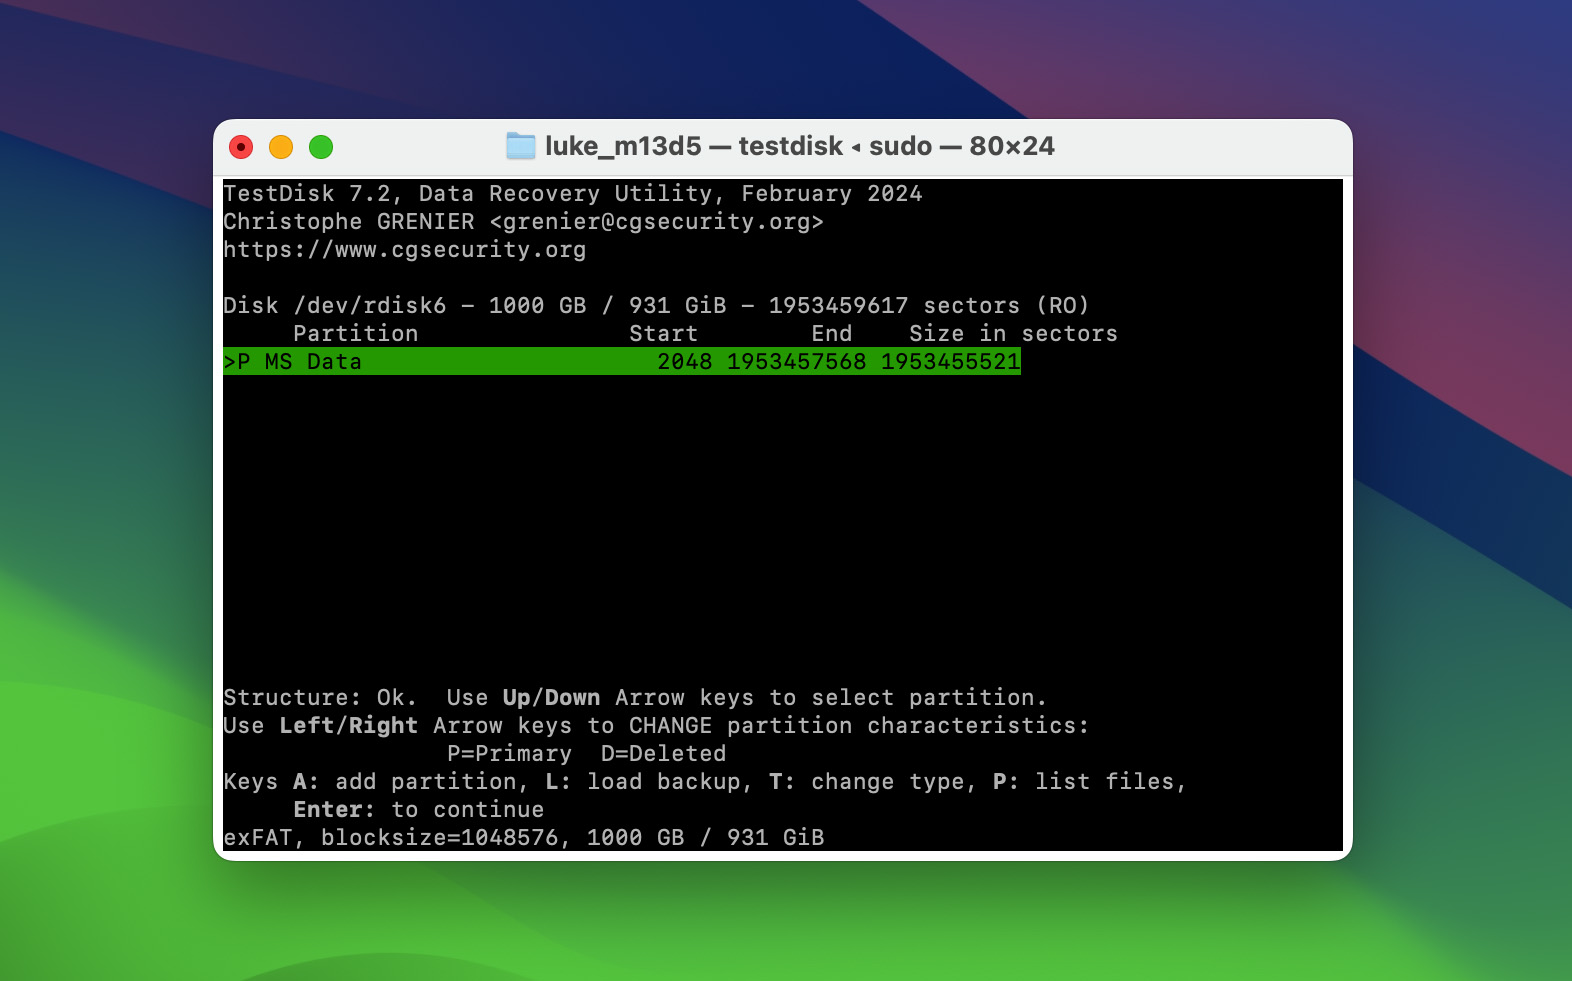
TestDisk is a command-line tool, meaning it doesn’t have a graphical user interface, but it’s still relatively easy to use. You can find a detailed guide on how to use TestDisk in our TestDisk Review.
Good to know: While TestDisk can also be used to perform Mac SSD recovery, its performance is significantly limited compared with Disk Drill. Therefore, we don’t recommend using TestDisk for data recovery purposes.
Method 5: Format (Initialize) the SSD
If your SanDisk SSD is brand-new, it may not have a file system, which is necessary for your Mac to store files on it. The solution is to create a compatible file system on the drive, a process referred to as initialization.
There are several file systems compatible with macOS, but we recommend only the following three for use with portable SSDs:
- APFS: This is Apple’s native file system, designed for macOS. It offers advanced features like snapshots, encryption, and improved performance. If you plan to use the SSD exclusively with Apple computers, APFS is a great choice.
- exFAT: This file system is compatible with macOS, Windows, and Linux. It’s ideal if you plan to use the SSD across different operating systems.
- FAT32: Because of its age, the FAT32 file system doesn’t offer many modern features, and it has a 4 GB limit on individual file sizes. However, it’s widely supported across various platforms, including smart TVs, gaming consoles, and other devices, making it an option for drives intended for broader use.
Once you’ve decided which file system you want to use, you’re ready to format/initialize your SanDisk SSD in Disk Utility:
- Open the Disk Utility tool.
- Select your SanDisk SSD from the left sidebar. Formatting will erase all data on the drive, so make sure you really have the correct drive selected.
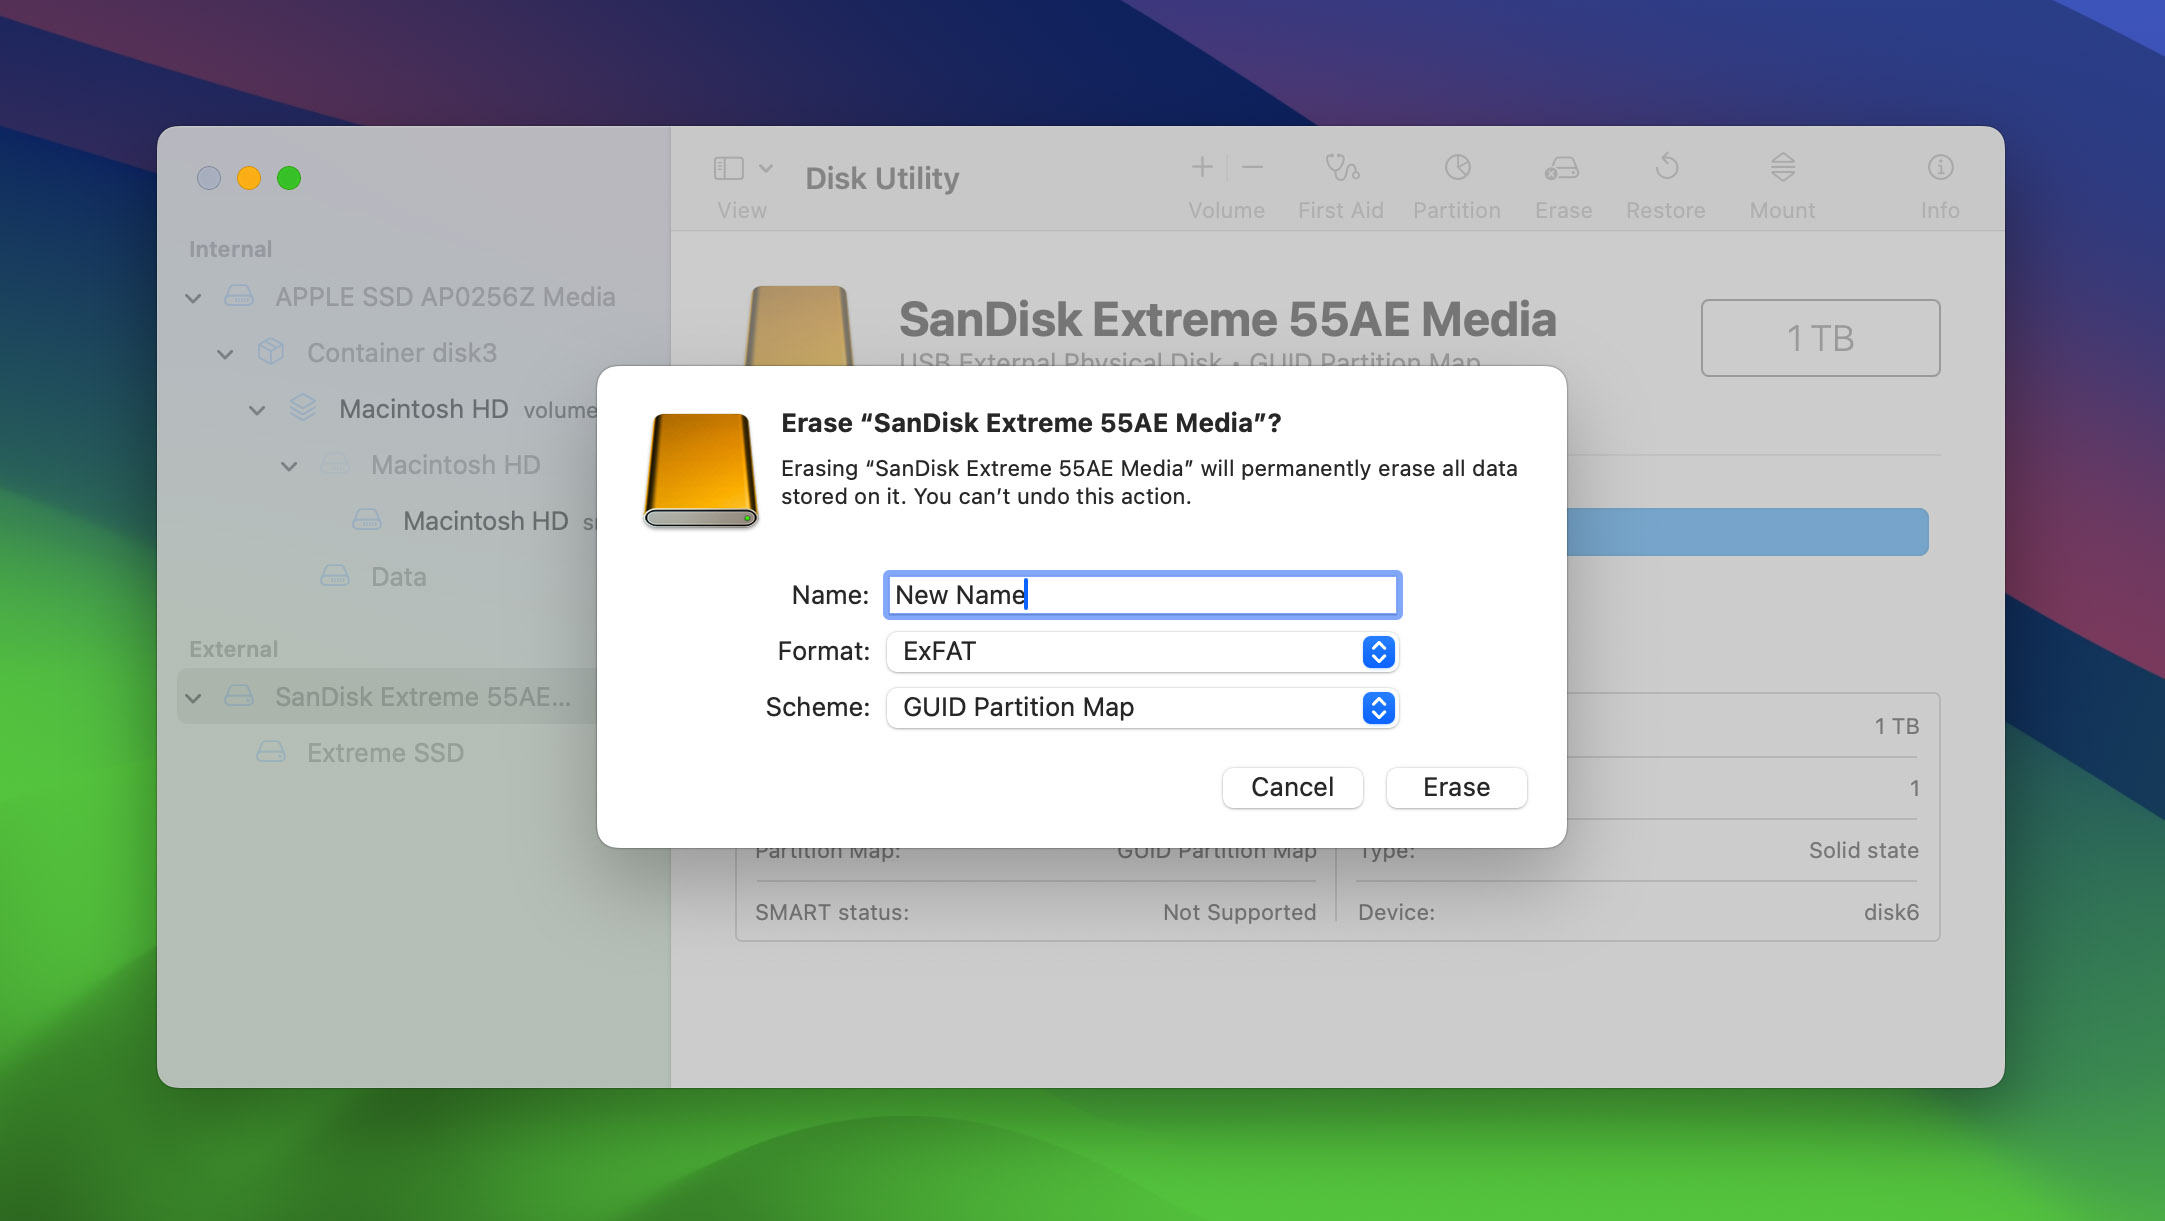
- Click the Erase button in the toolbar and choose the desired file system.
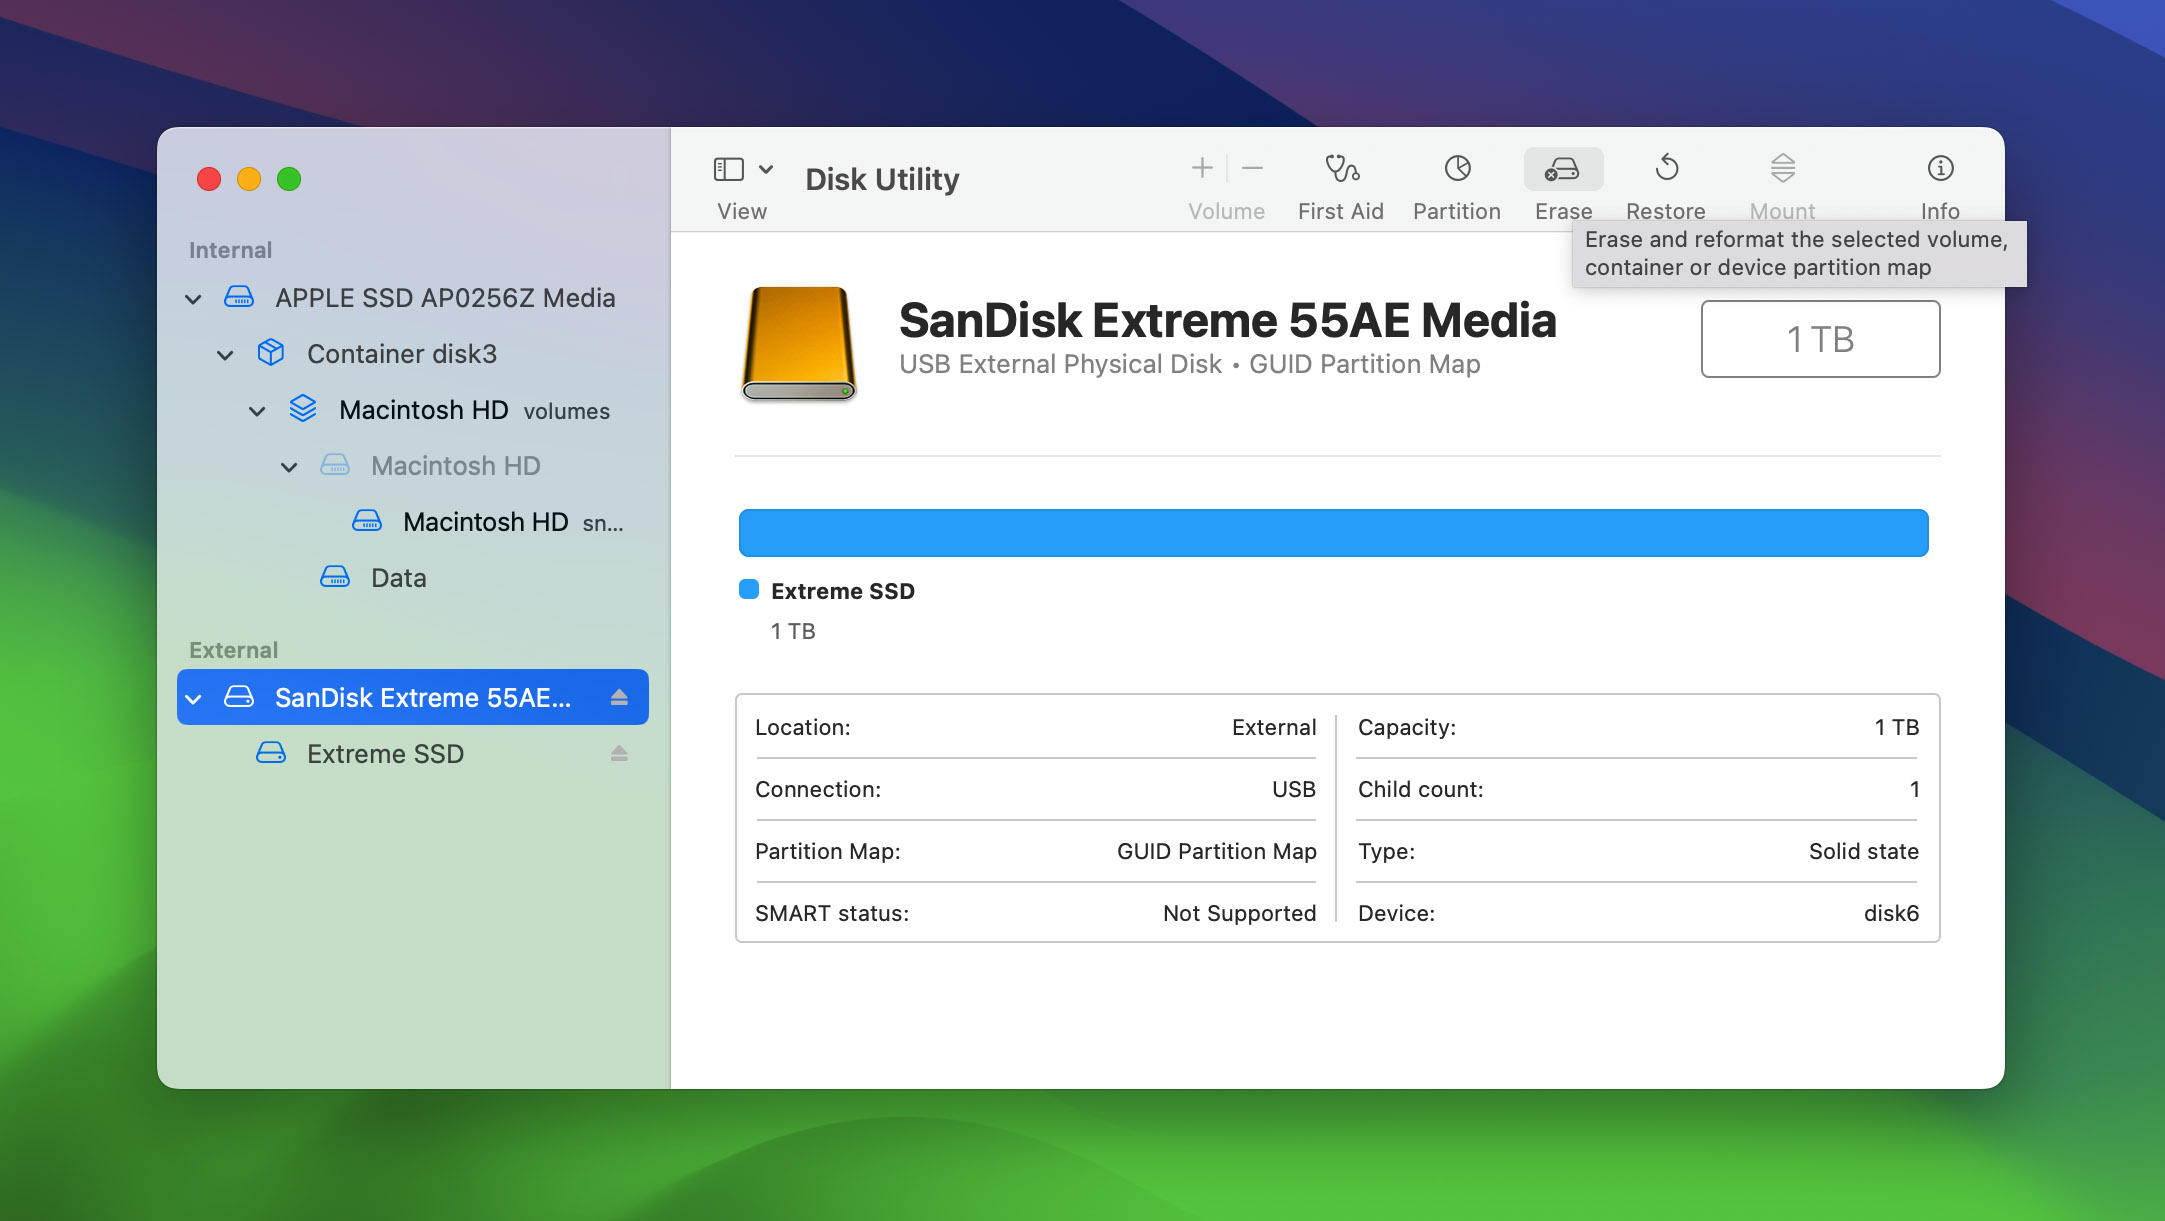
- Click Erase again to confirm.
- Launch Finder and check if the SSD can be accessed.
Other Techniques to Find Your SanDisk SSD on Mac
If you’ve tried the methods above and your SanDisk SSD still isn’t detected on your Mac, don’t give up! Here are some additional techniques you can try:
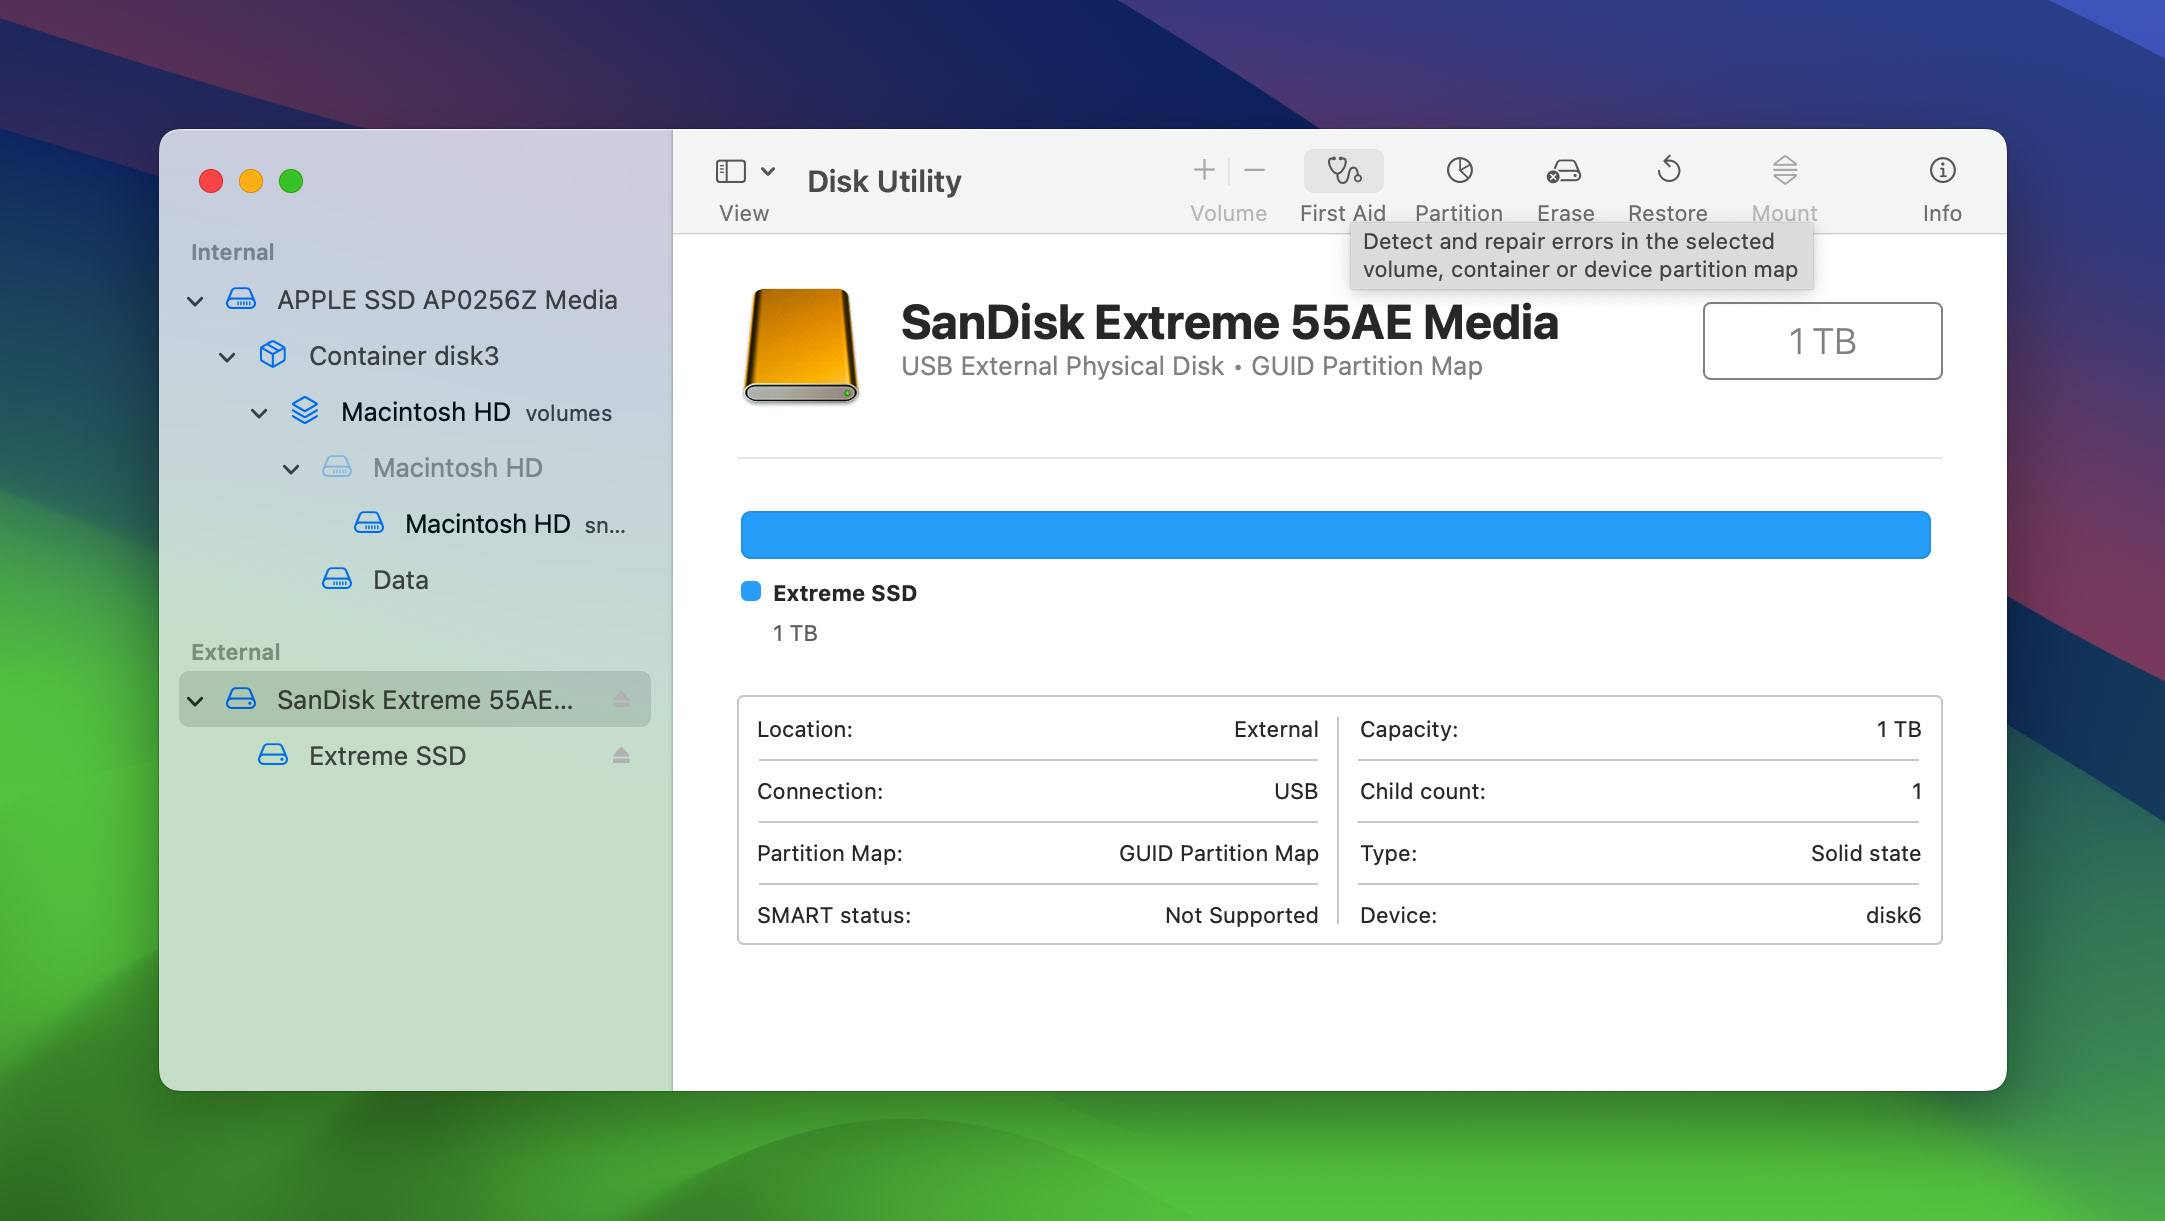
Option A: Use First Aid in Disk Utility
If your SanDisk SSD is detected in Disk Utility but not showing up on the desktop or in Finder, you can try using Disk Utility’s First Aid feature to repair any potential issues with the drive. Here’s how:
- Launch Disk Utility.
- Select your SanDisk SSD from the left sidebar.
- Click the “First Aid” button in the toolbar (or right-click the SSD and select “First Aid” from the context menu).
- Before proceeding with this method, be aware that using Disk Utility’s First Aid feature can potentially lead to data loss, especially if there are serious issues with the drive. If you’re willing to accept the risk, you can click the Run button.
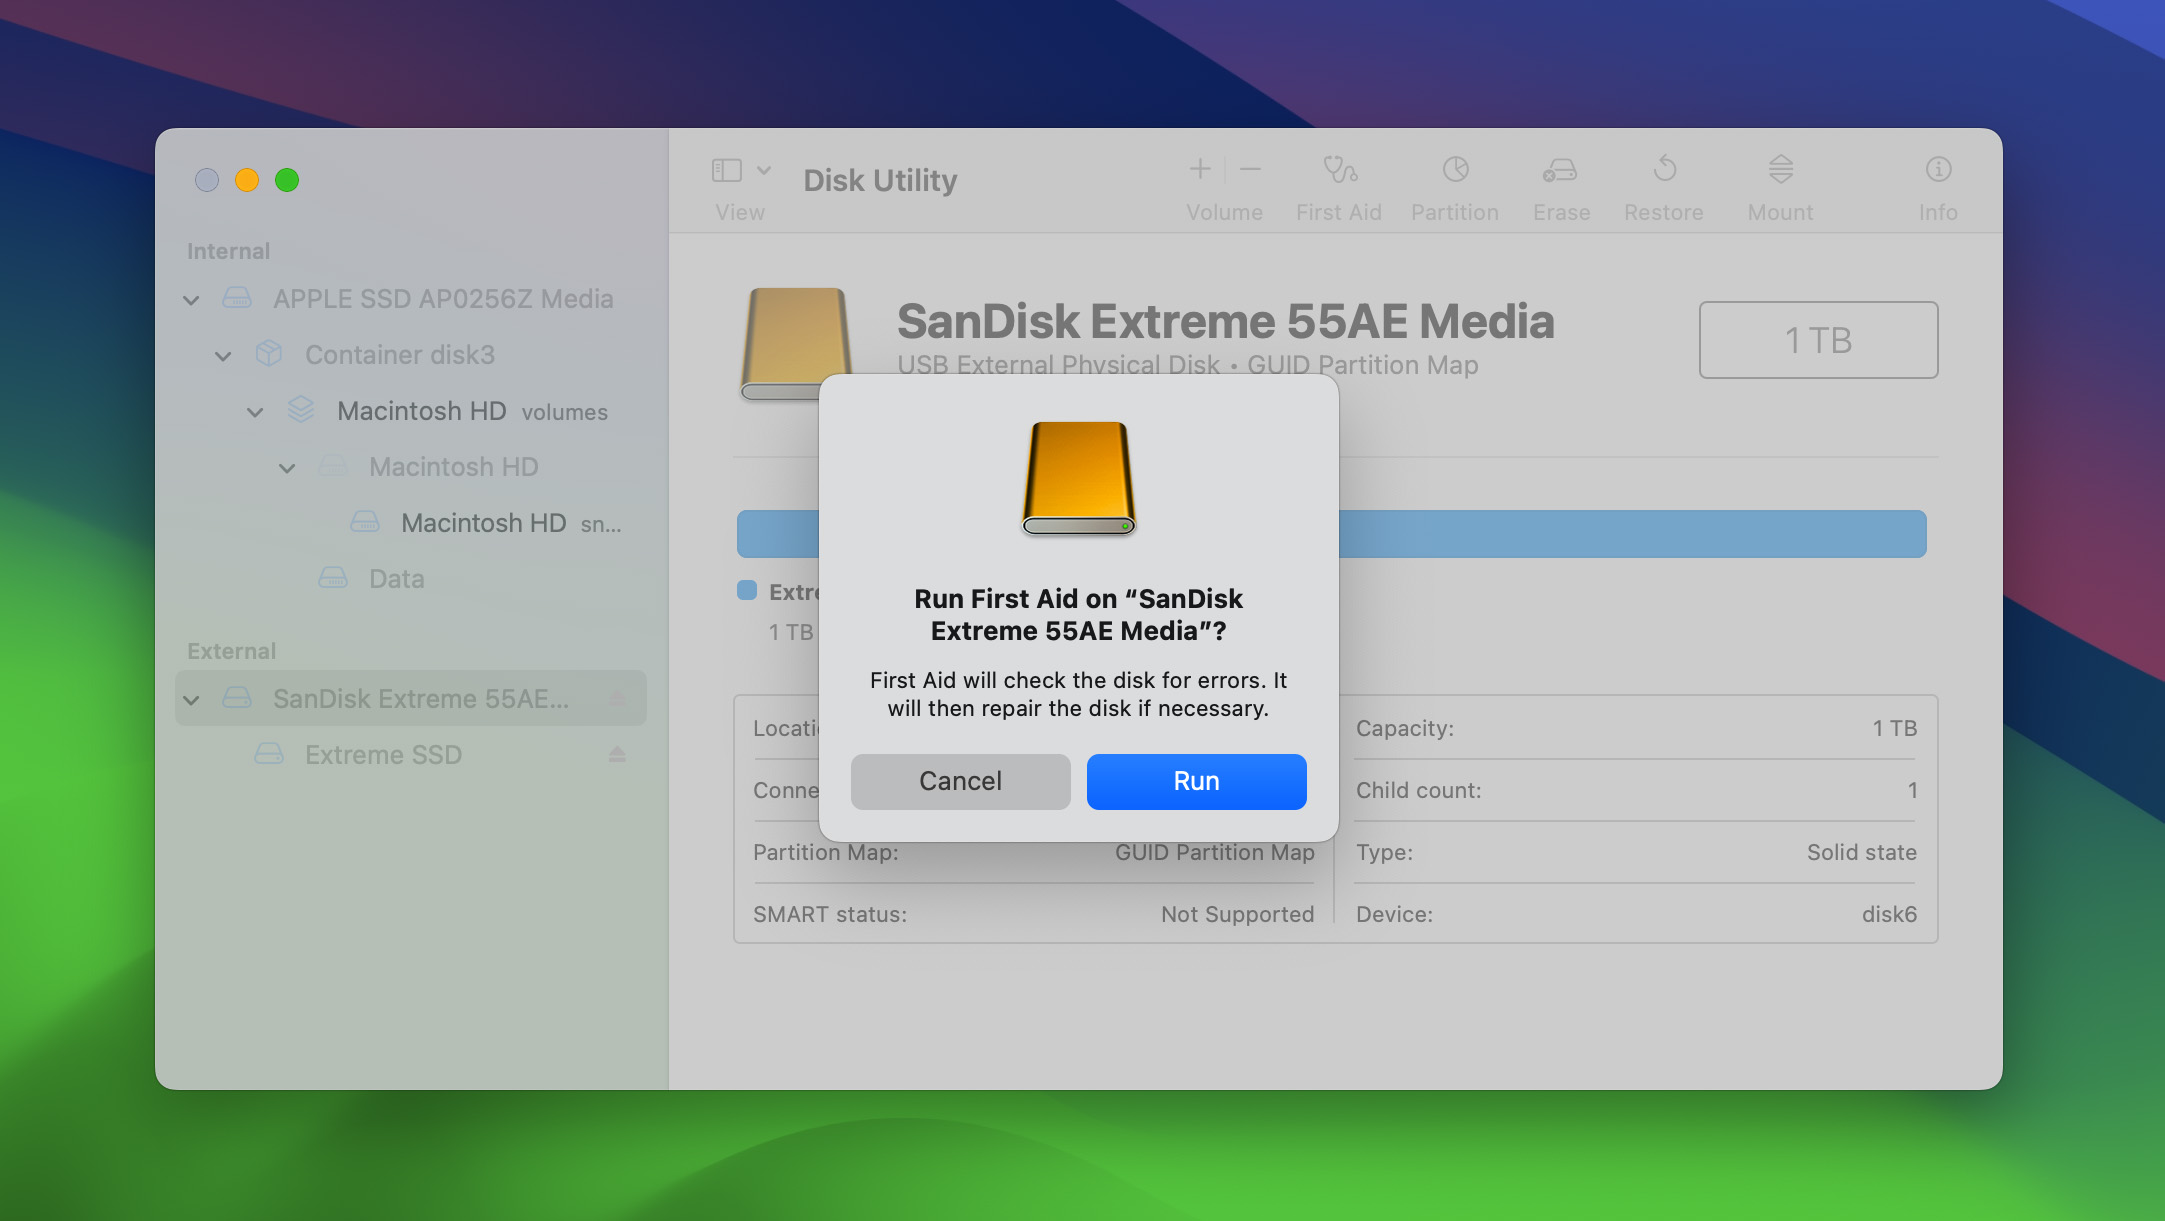
- Wait for Disk Utility to scan and attempt to repair any disk errors.
Truth be told, the likelihood of the First Aid feature successfully fixing issues with your SanDisk Extreme SSD not being detected by Mac isn’t high, especially if you’ve already tried TestDisk, but it takes just a few clicks, so it’s worth the effort.
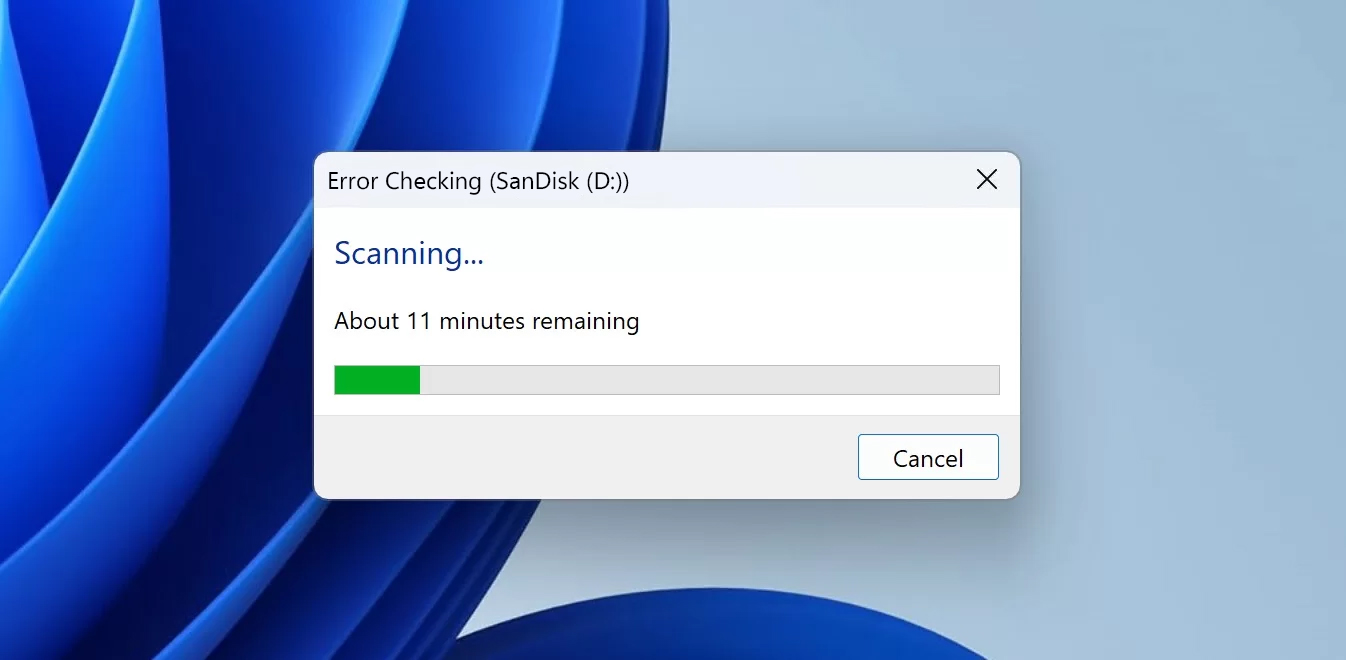
Option B: Connect the SSD to Windows to See if It Can Find and Fix the Error
Some users have successfully detected and fixed SSD errors on Windows, like this user did on the Apple Discussions forum and another on Reddit. That’s because Windows has its own version of the First Aid feature, and it can repair issues that macOS might not be able to.
Of course, this method only works if your SanDisk SSD is formatted with a Windows-compatible file system, such as exFAT or FAT32. If your SSD is formatted with APFS, it won’t be recognized by Windows. In fact, you might be prompted to format it, which could cause you to lose all the data stored on the SSD.
But if your SanDisk SSD is using a Windows-compatible file system, then you can do the following:
- Connect your SanDisk SSD to a Windows computer using a USB cable.
- If Windows detects an error on the drive, click Repair to begin the repair process.
- Wait for the repair process to complete. This may take several minutes.
- Once the repair process is complete, disconnect the SSD from the Windows computer and connect it to your Mac.
- Check if the SSD is now detected on your Mac.
Option C: Try Resetting the SMC and NVRAM
For Intel-based Macs, resetting the SMC (System Management Controller) and NVRAM (Non-Volatile Random Access Memory) can resolve system-level issues that might affect SSD detection:
- SMC Reset (T2-equipped Macs): Shut down your Mac. Press and hold the following keys on your built-in keyboard for 7 seconds: Control, Option (Alt), and Shift (on the left side). While holding these keys, press and hold the power button as well. Continue holding all four keys until your Mac turns off, then release.
- SMC Reset (Non-T2 Macs): Shut down your Mac. Press and hold the following keys on your built-in keyboard: Shift, Control, and Option (Alt). While holding these three keys, press and hold the power button as well until your Mac turns off.
- NVRAM Reset: Restart your Mac and immediately press Option + Command + P + R for 20 seconds, then release and let it boot up.
Good to know: Apple Silicon Macs (which use Apple’s custom ARM-based chips, including the M1, M2, and M3 series) don’t have an SMC (System Management Controller) or NVRAM (Non-Volatile Random Access Memory) in the traditional sense used in Intel-based Macs.
How to Recover Data from a SanDisk Portable SSD Not Showing Up/Not Mounting on a Mac
Even if your SanDisk Portable SSD is not showing up properly and is thus impossible to access using Finder, you may still be able to recover your data from it using the best data recovery software for Mac. Such software can access and recover the data on the SSD directly, even when the file system is damaged, at least as long as the disk is listed in Disk Utility with the correct size.
Our Mac SSD recovery software of choice is Disk Drill (read our Disk Drill review for detailed analysis). That’s because it supports not just Apple’s native file systems but also cross-platform file systems like FAT32 or exFAT, has excellent signature scanning capabilities (supports around 400 file signatures), is exceptionally easy to use, and is completely safe.
Here’s how to use Disk Drill to recover data from an SSD that’s not showing up properly:
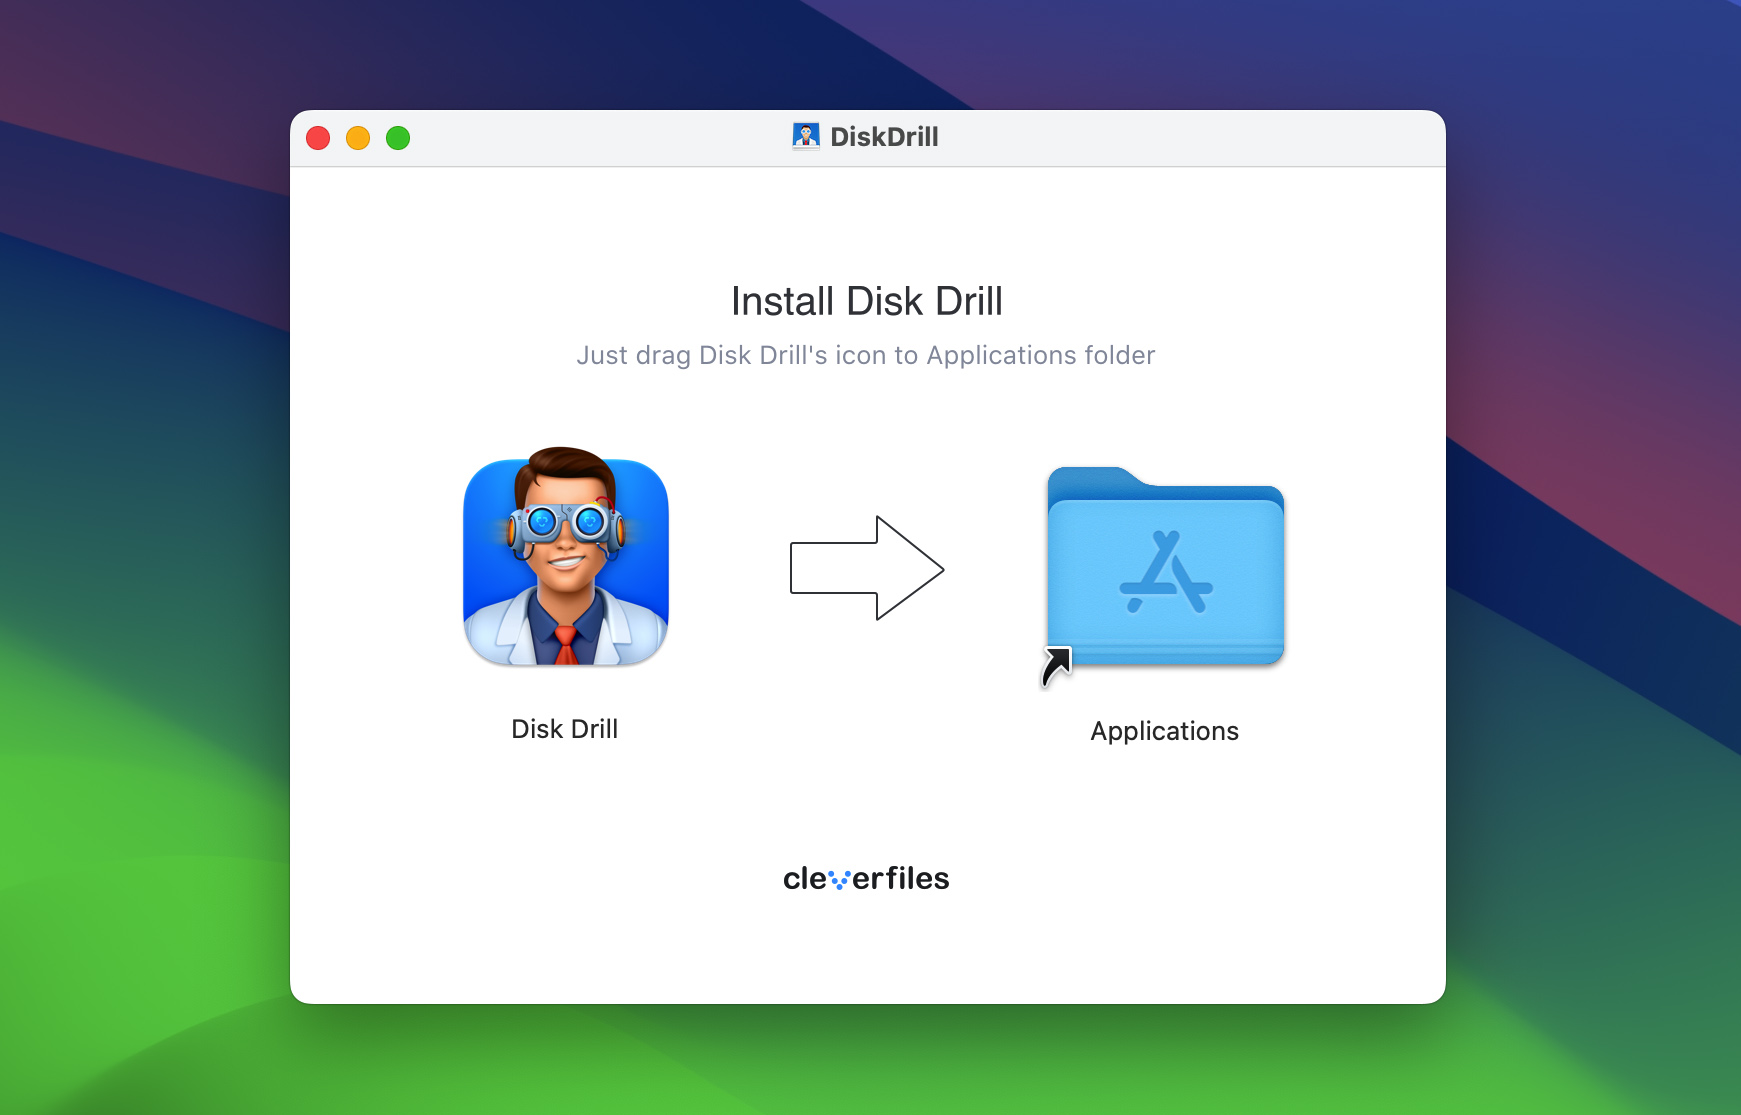
- Download and install Disk Drill for Mac from the official website.
- Launch Disk Drill and select your SanDisk Portable SSD from the list of available drives.
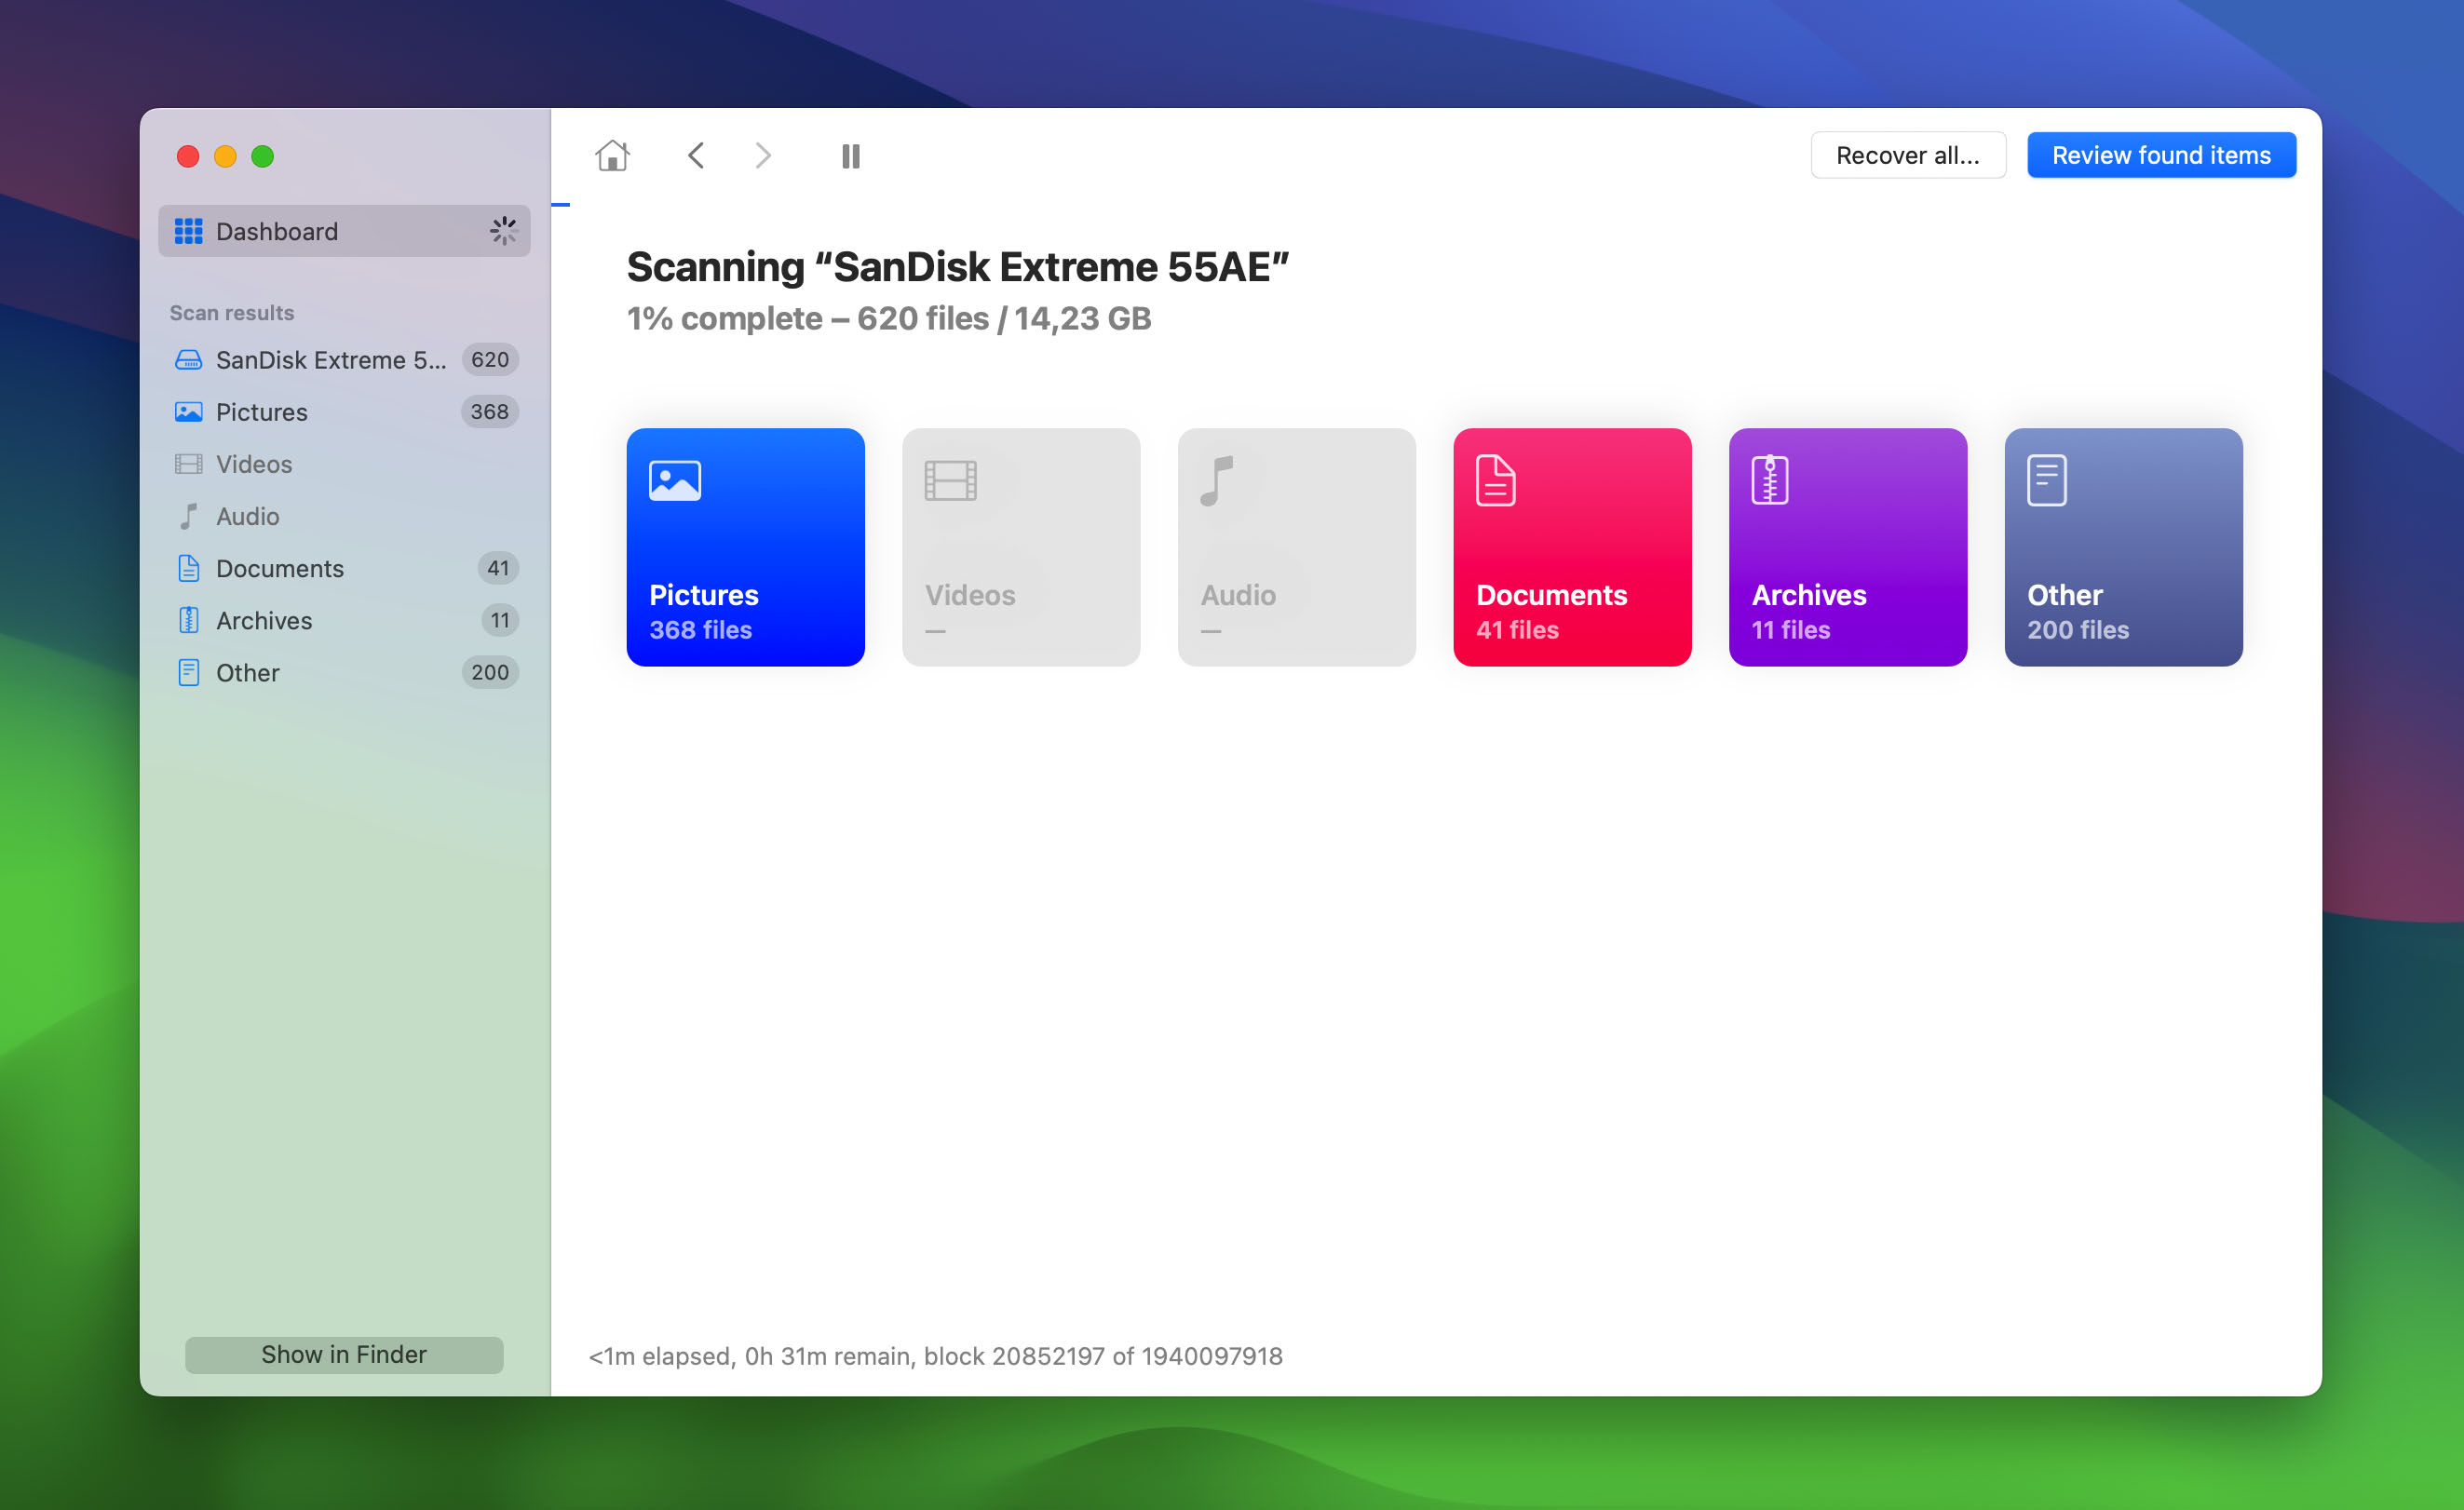
- Click the Search for lost data button to start scanning your SSD for recoverable files.
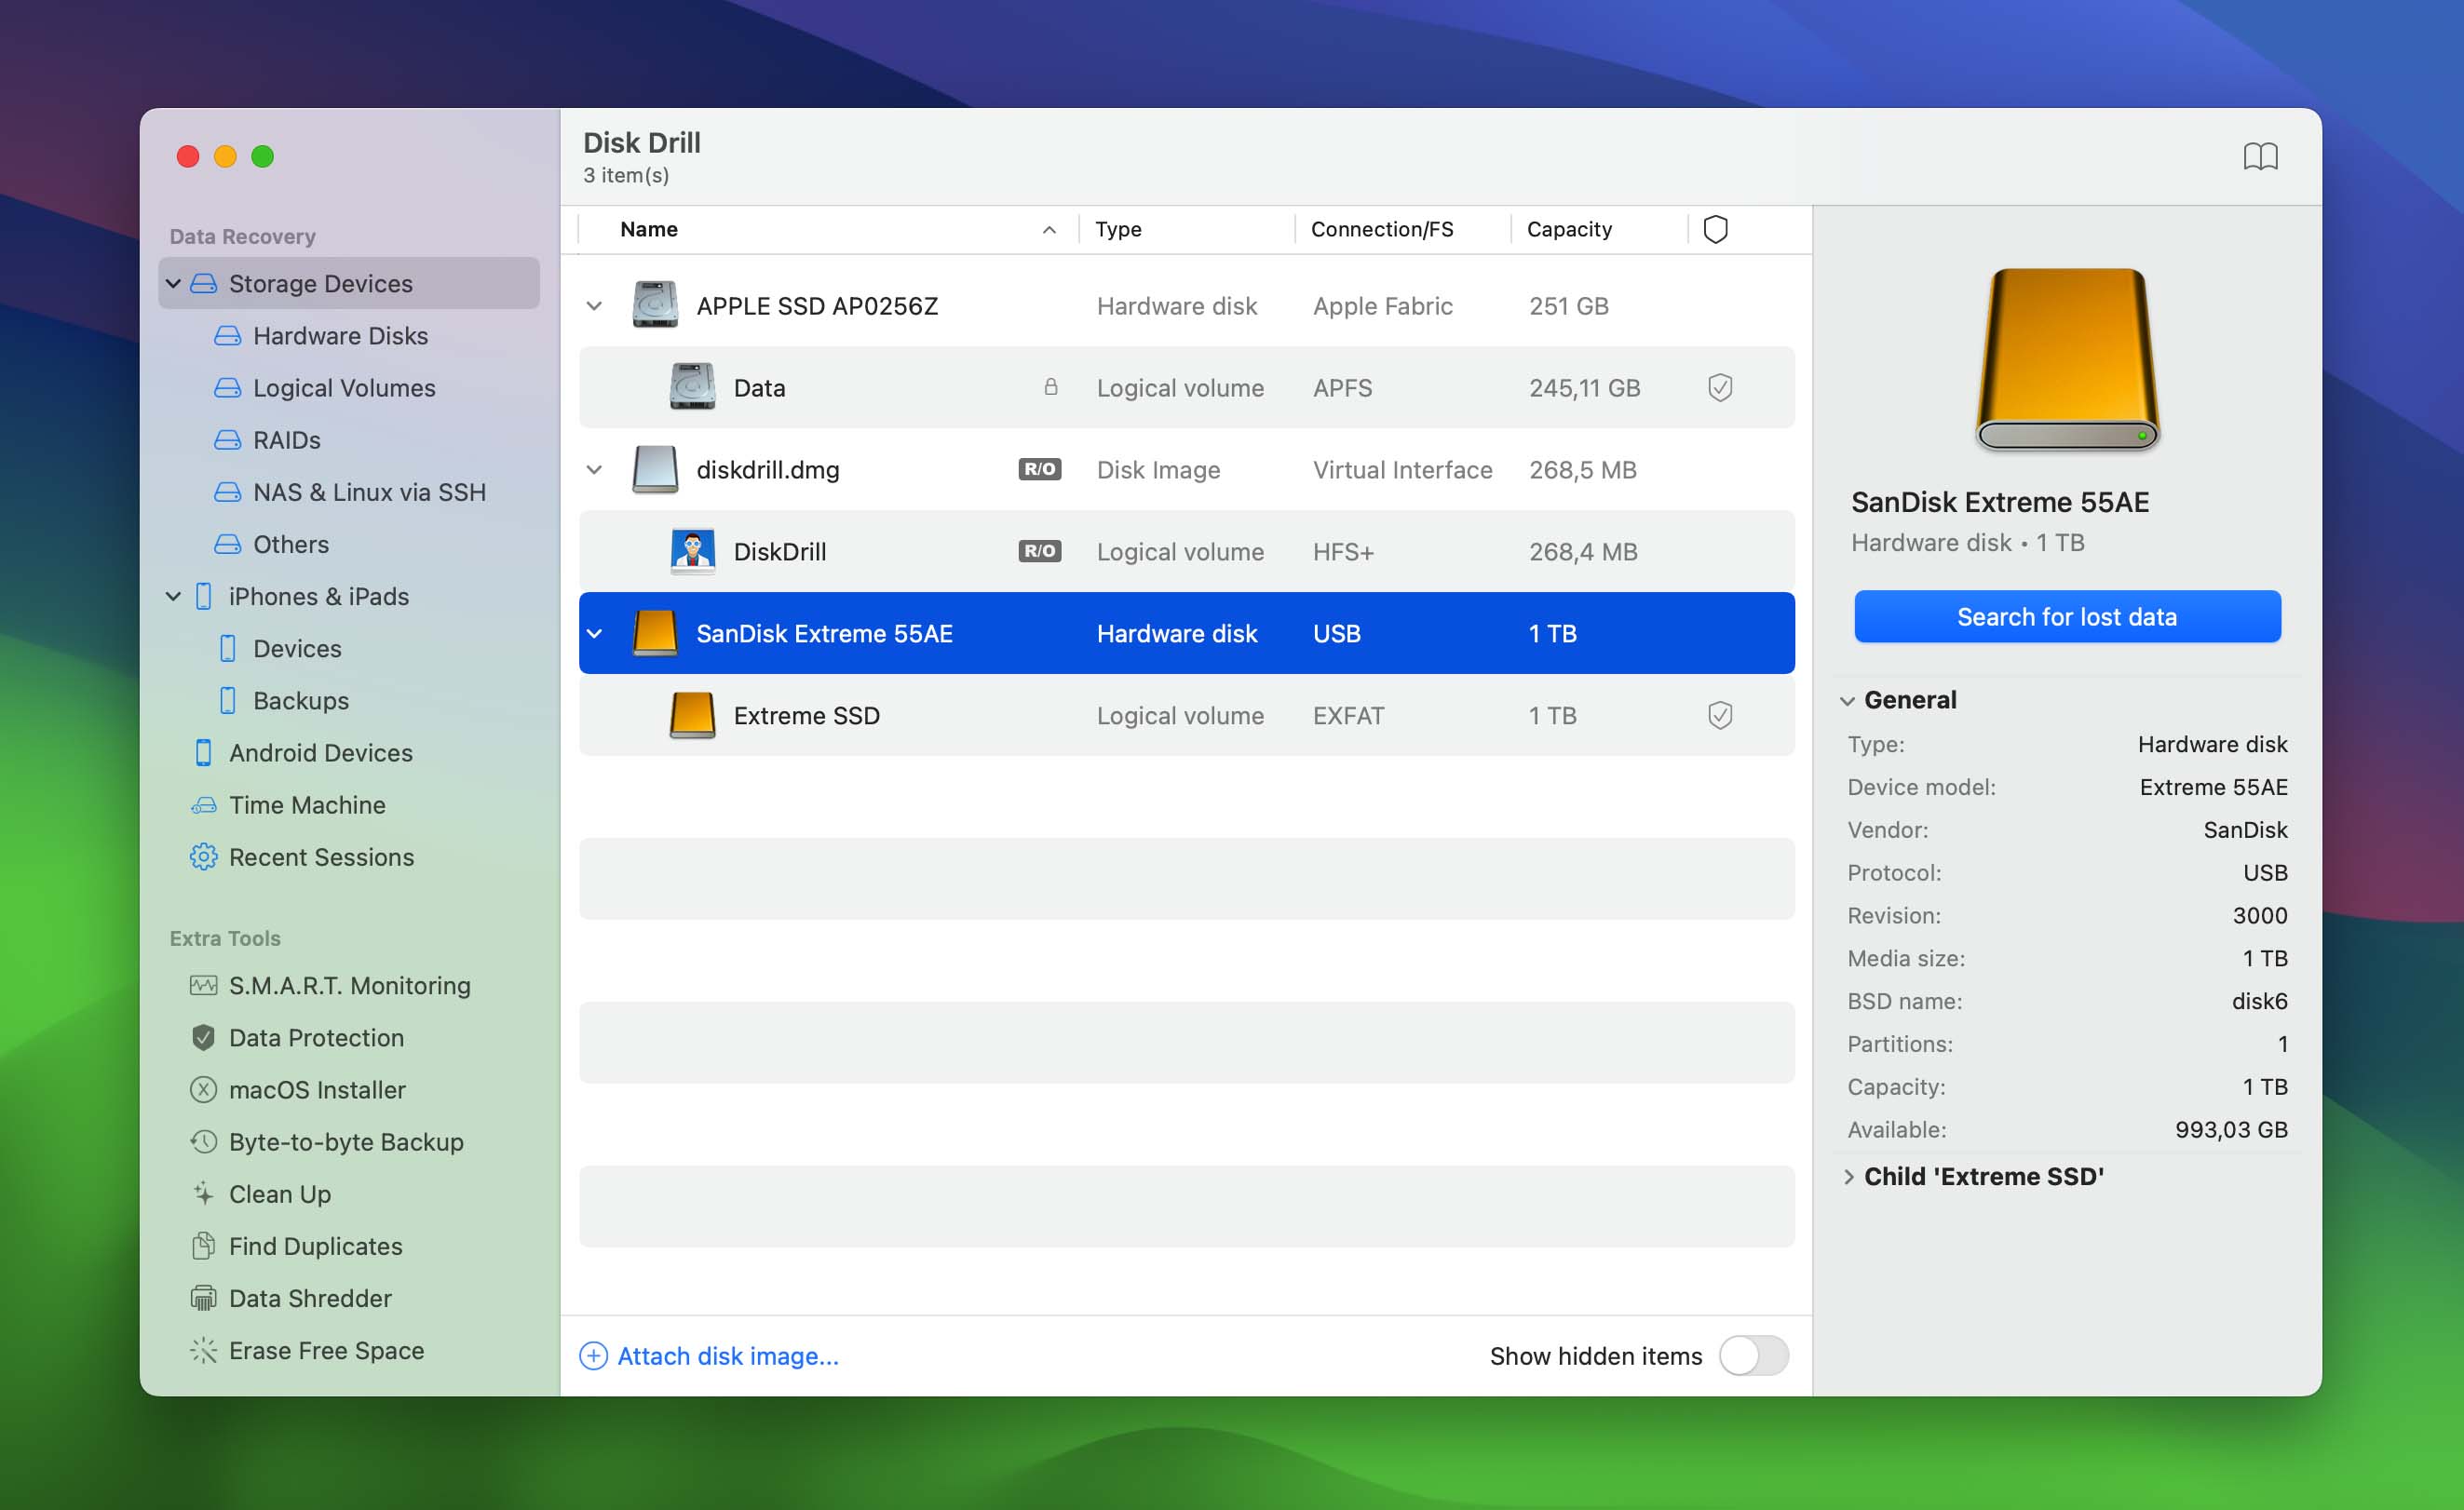
- Wait for the scan to complete. This may take some time, depending on the size and speed of your SSD. If you hate waiting, you can click Review found files and see the results appear in real time.
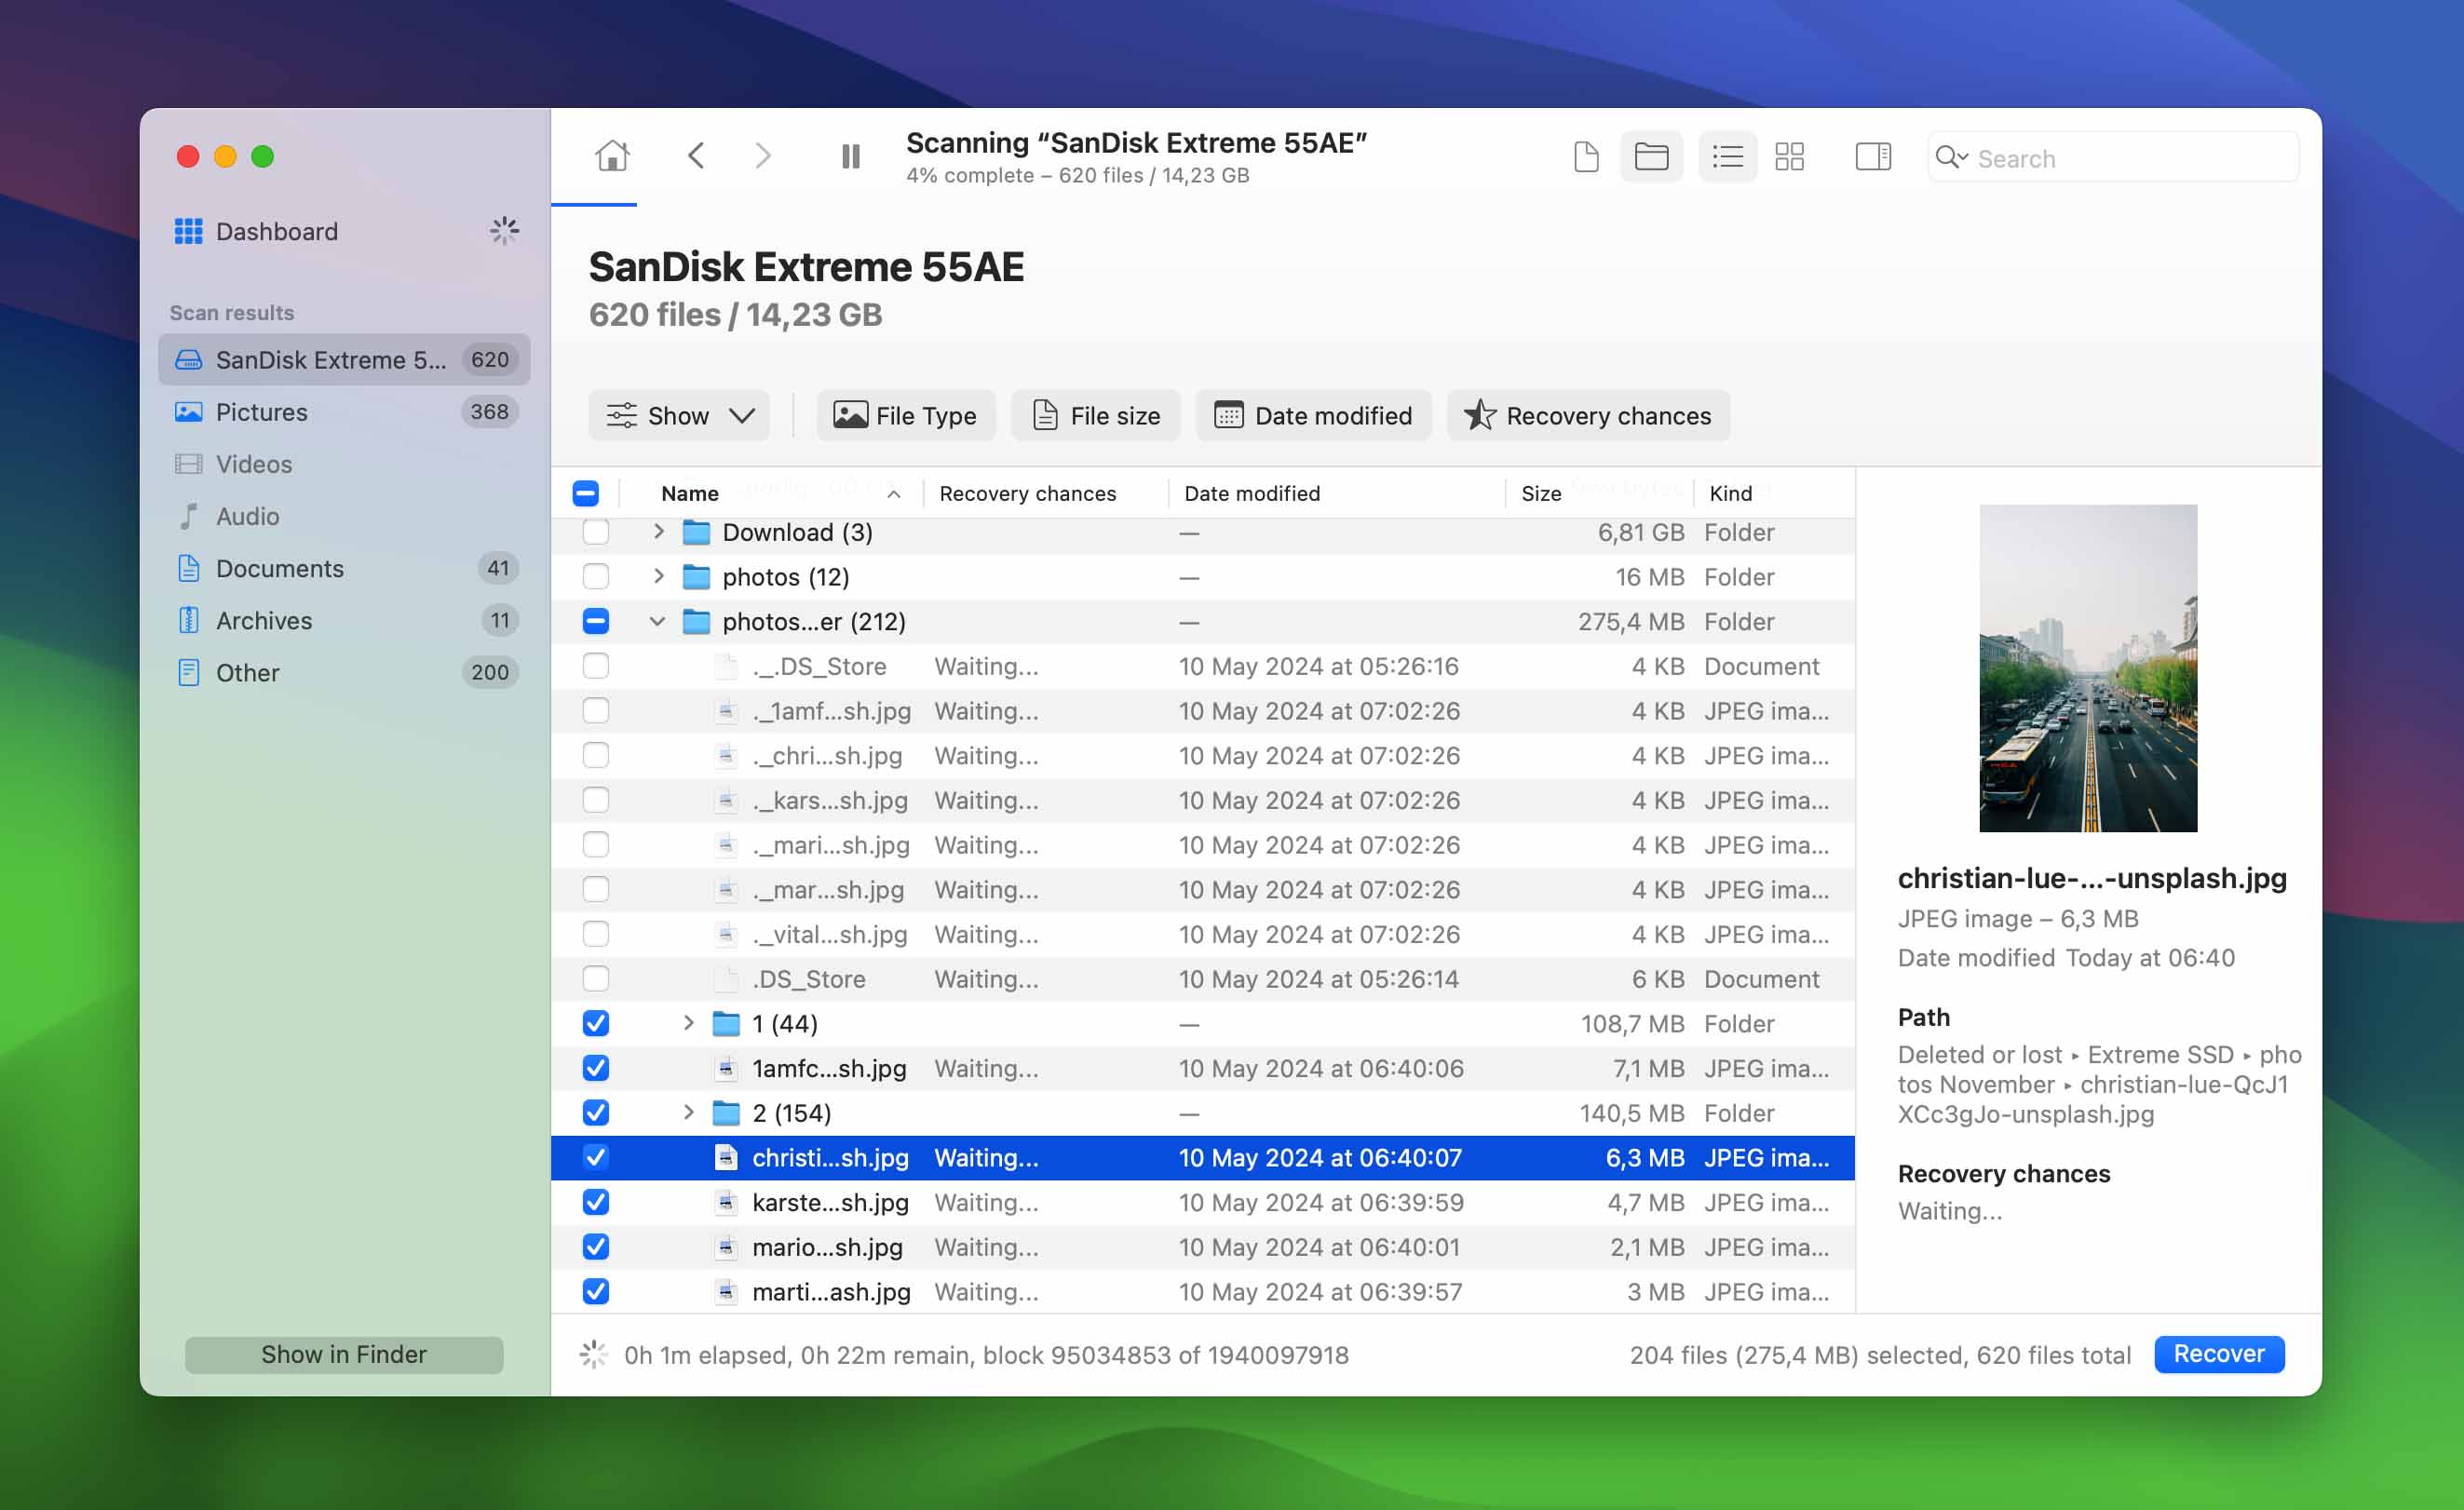
- Take advantage of Disk Drill’s search feature, file type filters, and preview capacities to locate and select all important files that you want to recover from the problematic SSD.
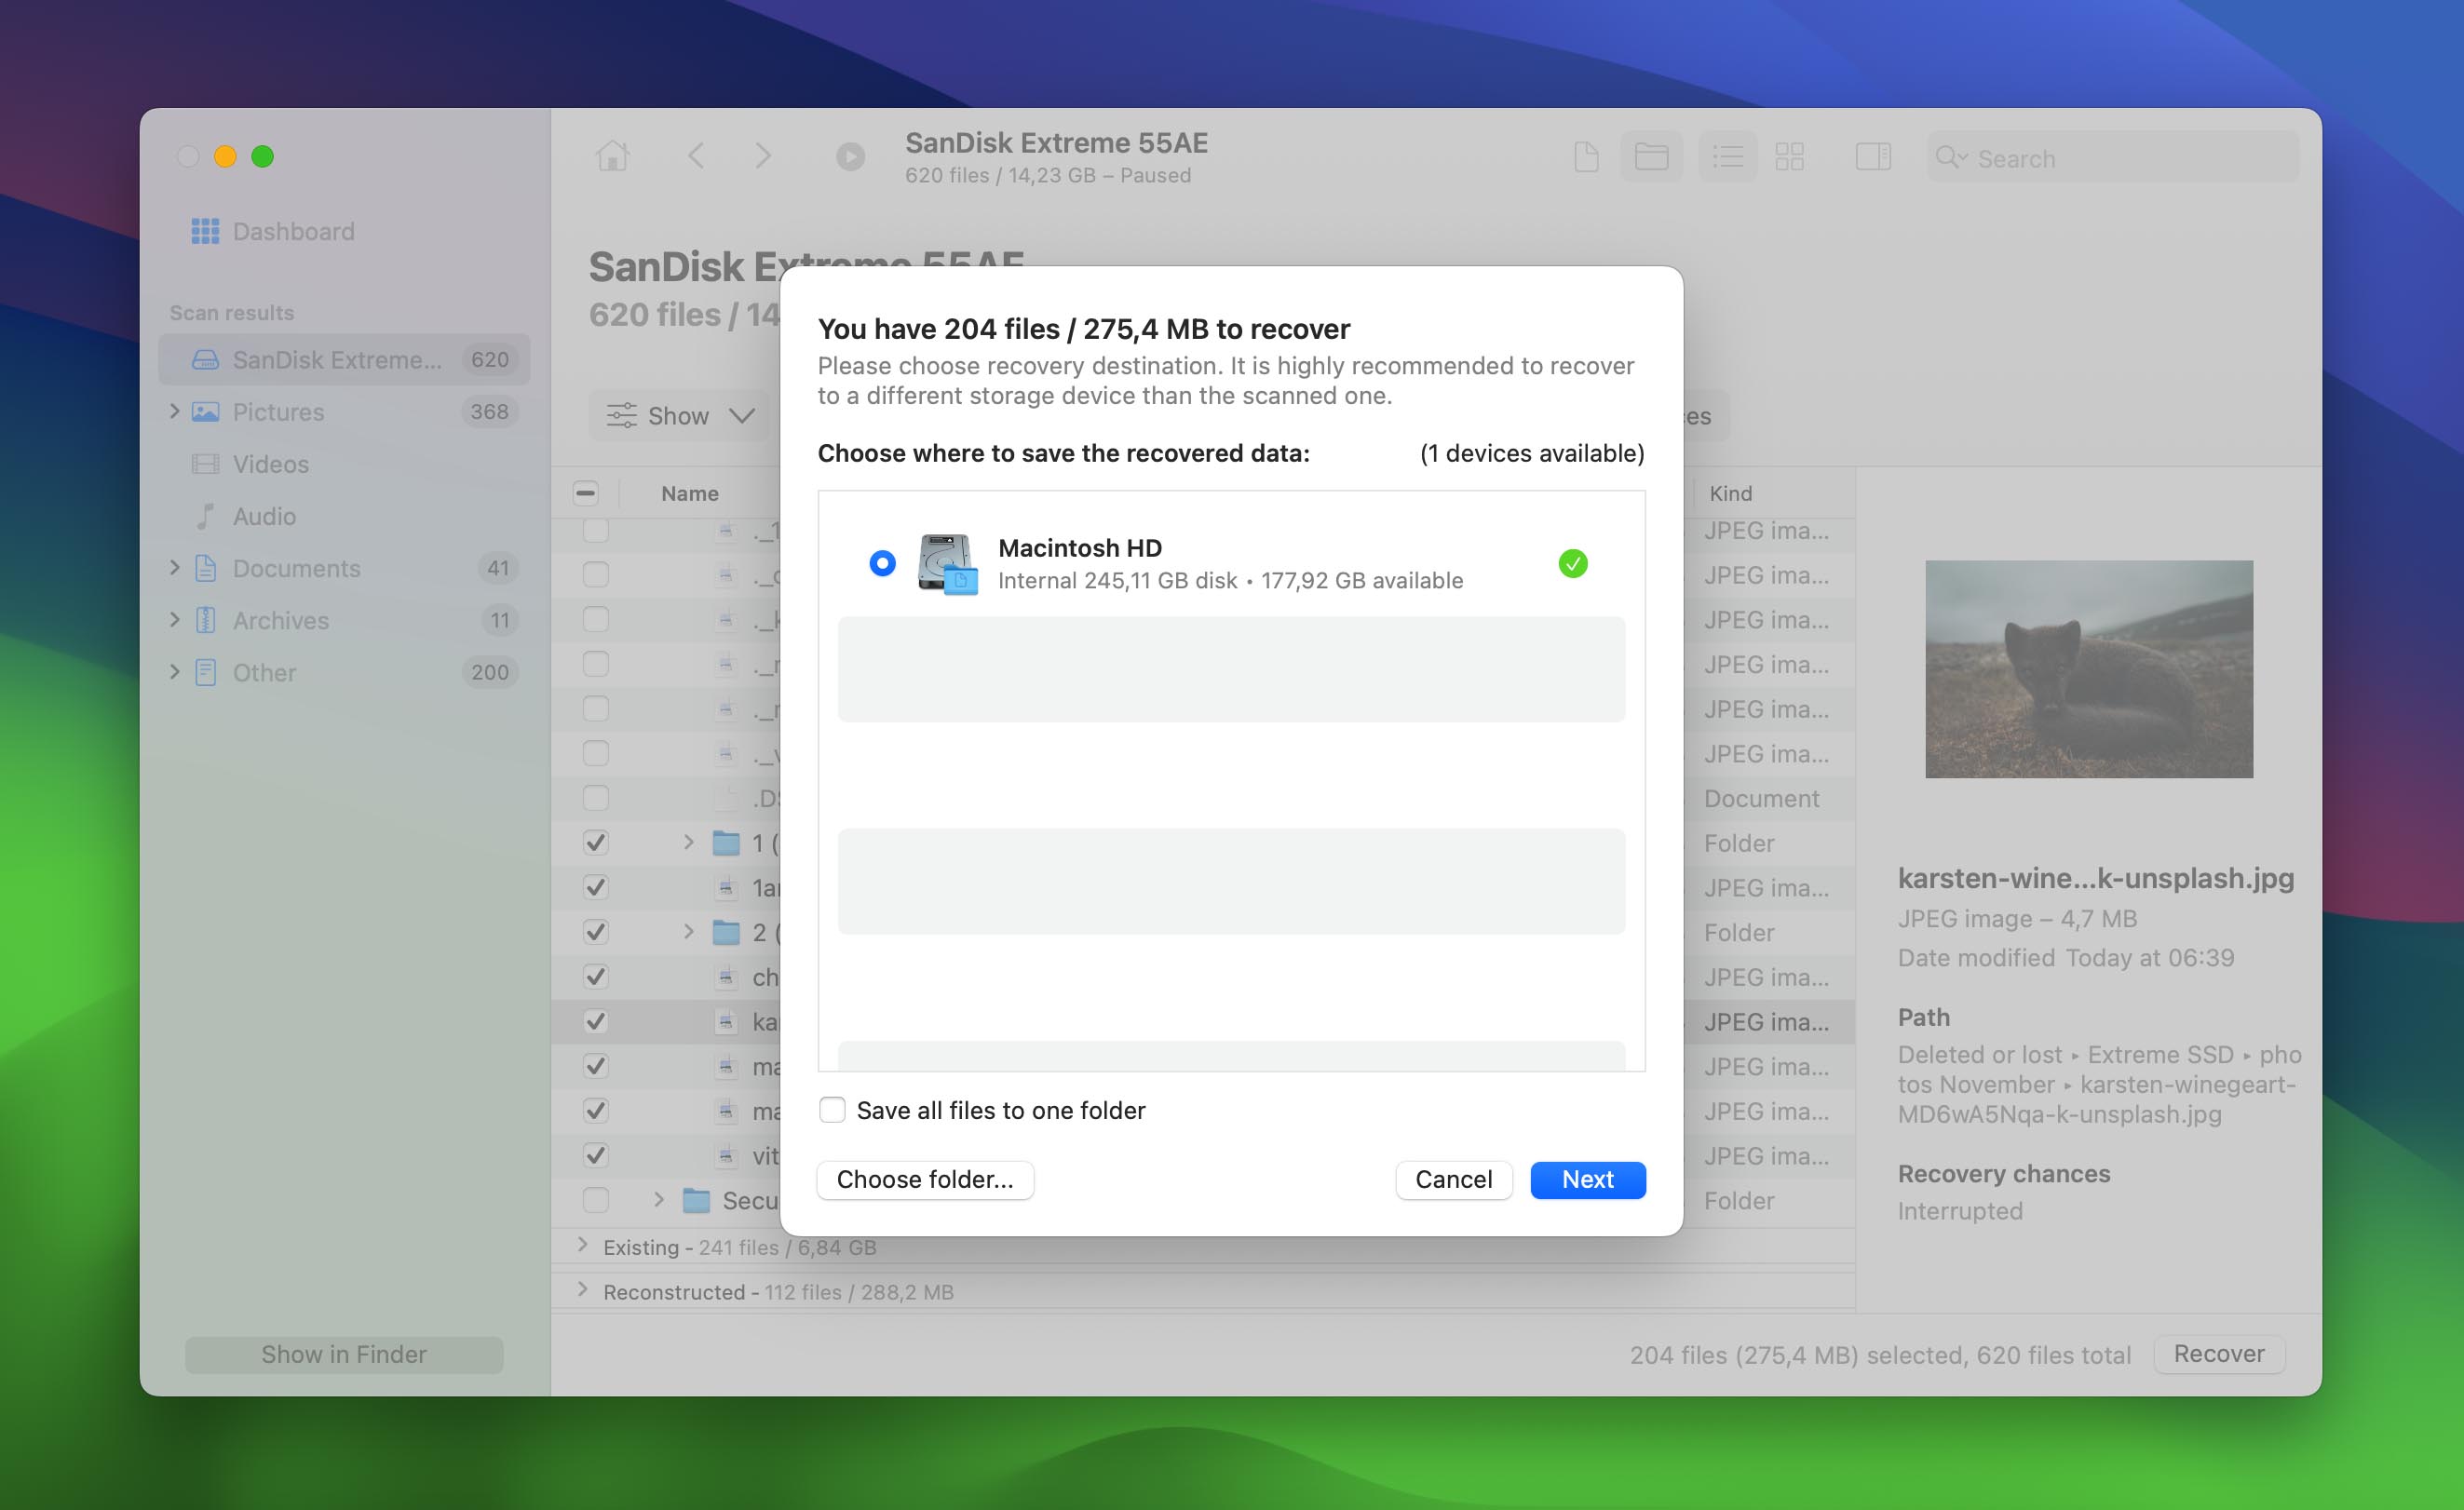
- Click the Recover button to recover the selected files. You’ll be prompted to choose a location to save the recovered files. Make sure to choose a location other than your SanDisk Portable SSD to avoid overwriting the lost data.
- Wait for the recovery process to complete. Once it’s done, you should be able to access the recovered files in the location you chose.
Now that you’ve recovered all important data from the SSD, you can safely proceed with more destructive fixes like formatting.
Conclusion
Your SanDisk Extreme Portable SSD may not be detected by your Mac for a number of reasons, including connection problems, issues with the SSD itself, or problems with the file system, but there are just as many effective solutions to fix this issue. If the SSD contains important data, then we recommend recovering it first using a reliable tool like Disk Drill, a top-rated data recovery software known for its impressive capabilities and Apple-esque ease of use. From there, you can proceed with troubleshooting the issue using the methods outlined in this article.
This article was written by David Morelo, a Staff Writer at Handy Recovery Advisor. It was also verified for technical accuracy by Andrey Vasilyev, our editorial advisor.
Curious about our content creation process? Take a look at our Editor Guidelines.