Problems accessing your Mac hard drive on a Windows machine? It was likely formatted by your Mac to either APFS or HFS+, which are Apple file systems not natively supported by Windows. To access your data, you’ll need to reformat its file system to one that Windows supports.
Here’s the problem: you need to format your drive to convert it, but formatting wipes your drive. However, there is a way to get around the data loss. Below are step-by-step instructions on how to convert your Mac hard drive to Windows without losing data.
How to Convert Mac Hard Drive to Windows Without Losing Data
To convert a Mac formatted hard drive to Windows, you have to reformat it – unfortunately, that means that your data will be wiped. However, using a special tool, we can retrieve your data from your APFS drive or HFS+ drive even using a Windows machine. Once your data is secure, we can safely format the Mac hard drive to Windows.
We’ll go through this process step-by-step in the guide below.
Step #1: Scan Your Device/Backup For Existing Data
Disk Drill is a data recovery software that can scan your drive for existing data and save it to a location you choose. And because Disk Drill provides great support for macOS file systems, it can read your Mac drive on Windows and save its data.
It even works when your drive fails to mount on Windows Explorer or is not recognized by the operating system. Below, we’ll show you how to retrieve data from your HFS+ drive or APFS drive using a Windows 10 computer and Disk Drill.
If you want to know more about Disk Drill before downloading and installing it on your own computer, you can read our full Disk Drill review.
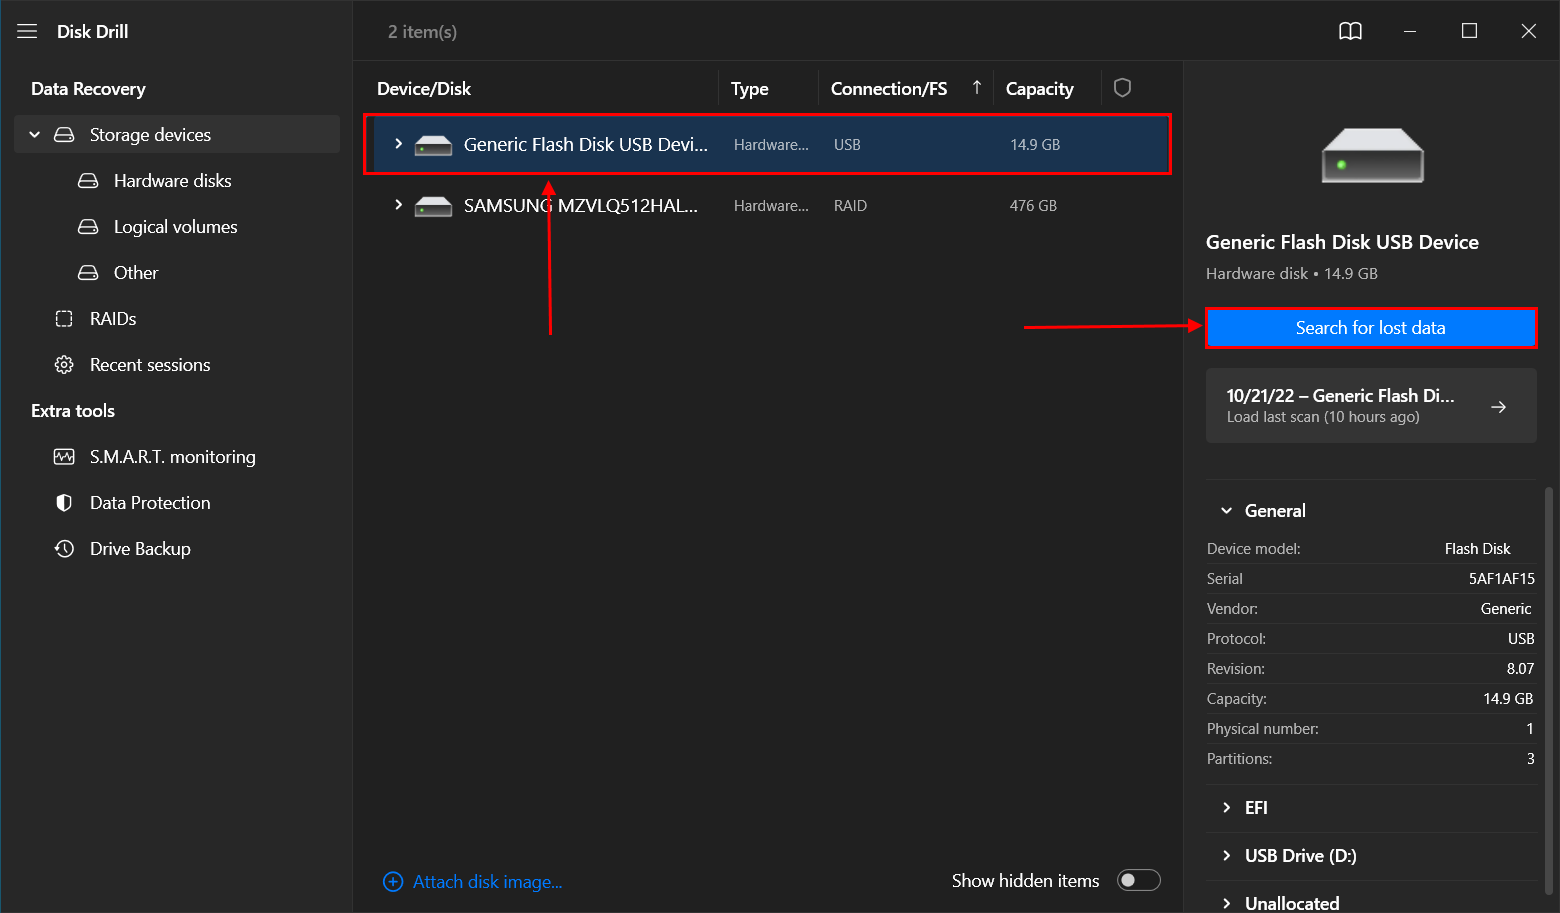
- Connect your mac-formatted drive to your computer. Then download, install, and launch Disk Drill.
- In the middle pane, expand your drive and select the HFS+ or APFS volume. Then, click Search for lost data.
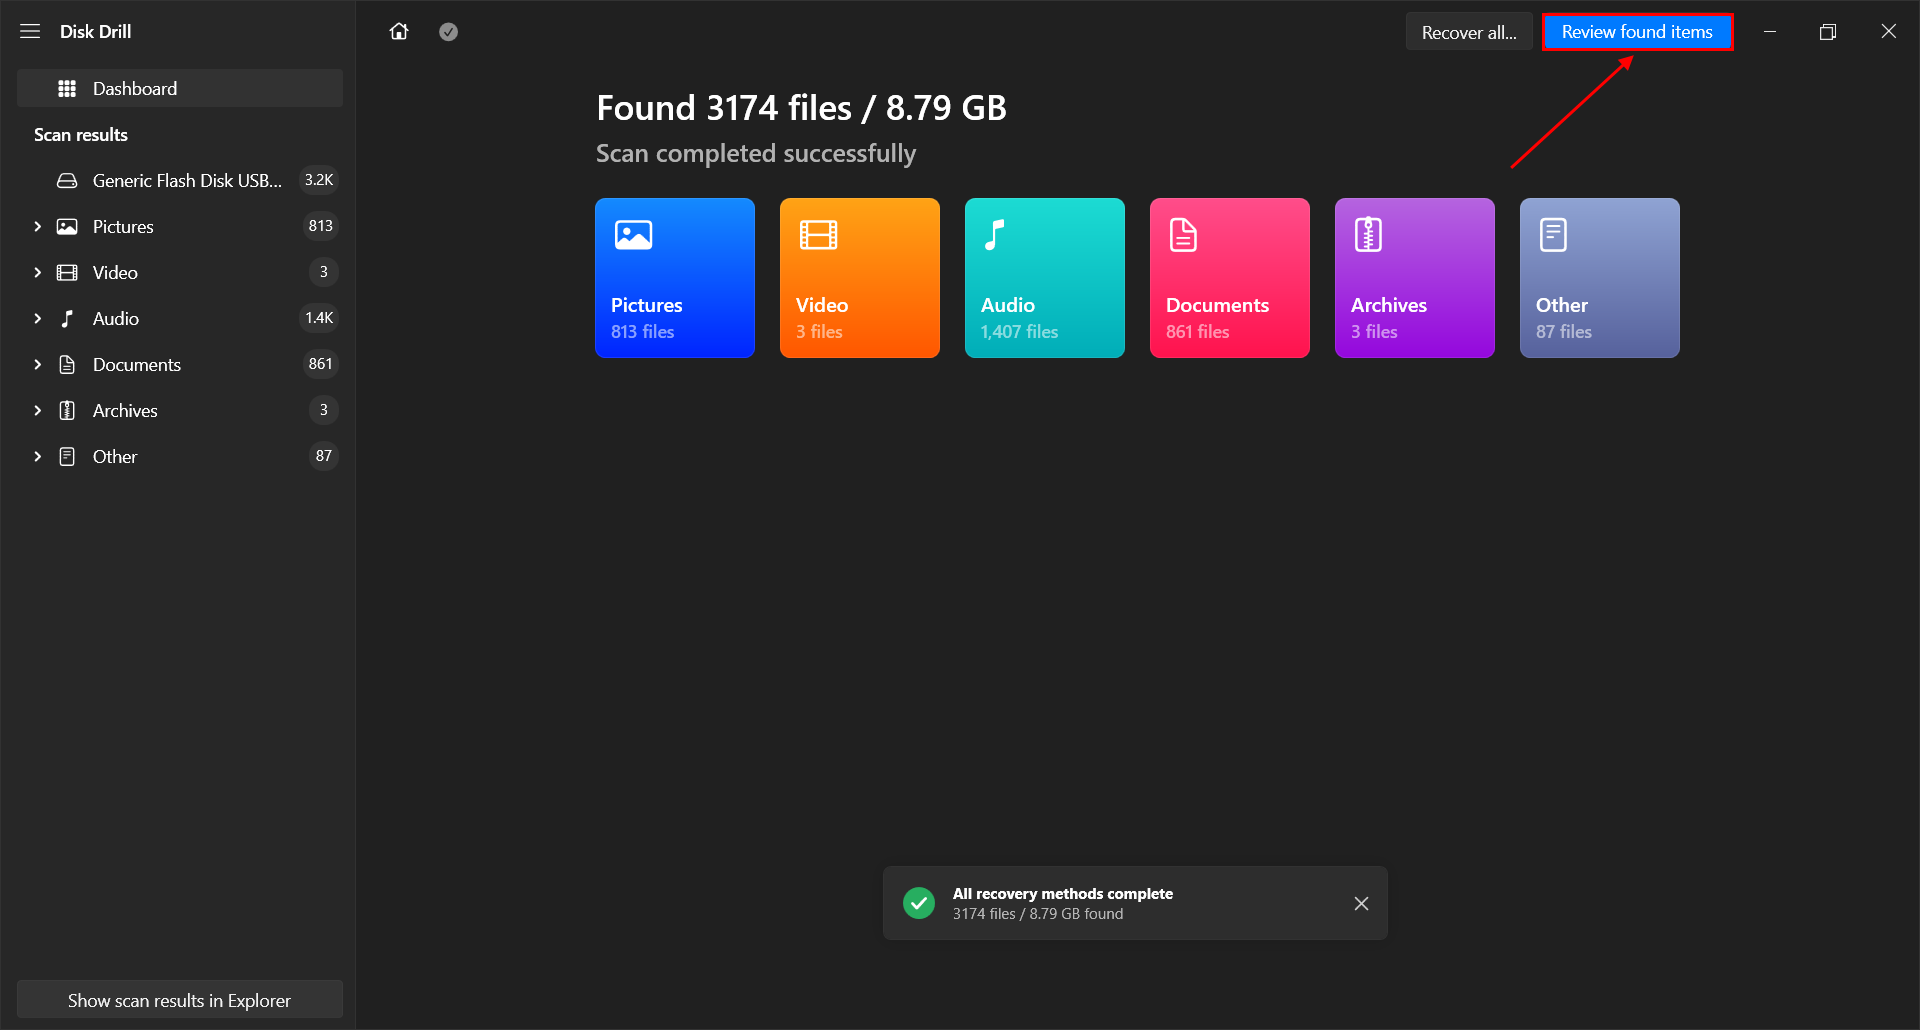
- Wait for the scan to complete, then click Review found items.
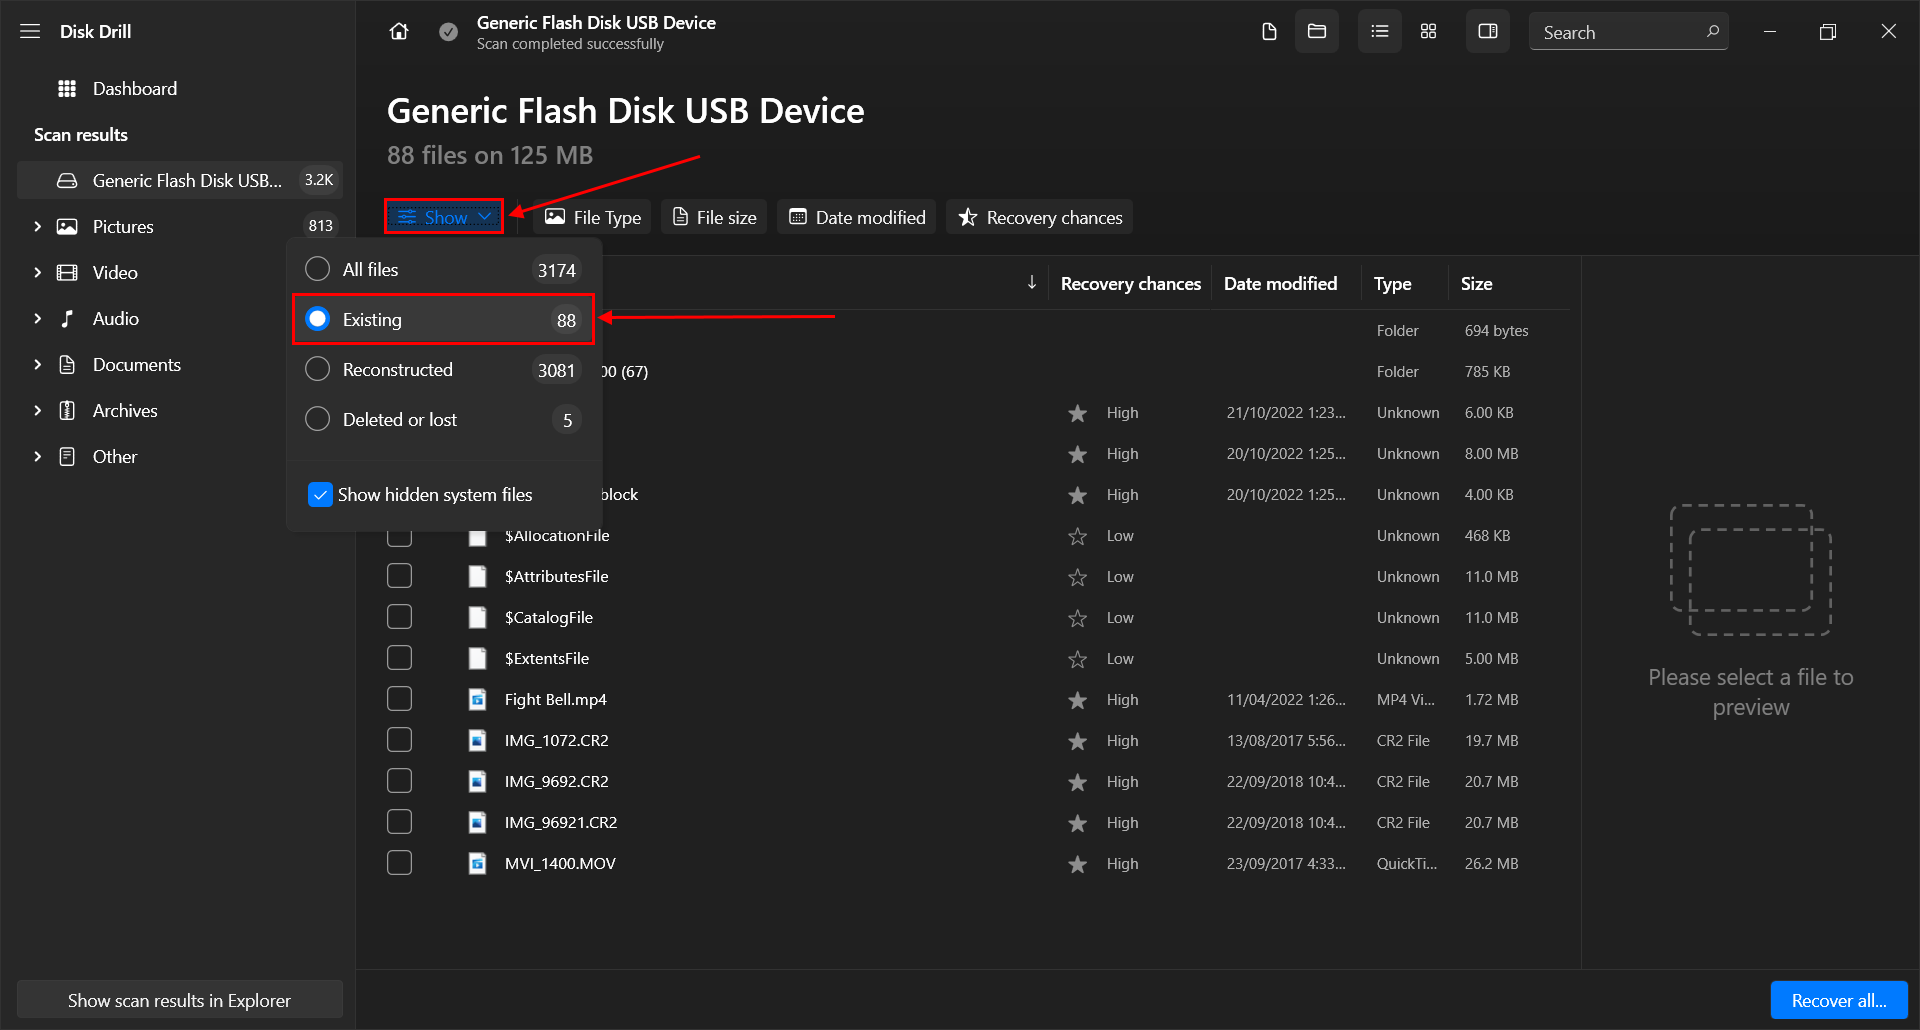
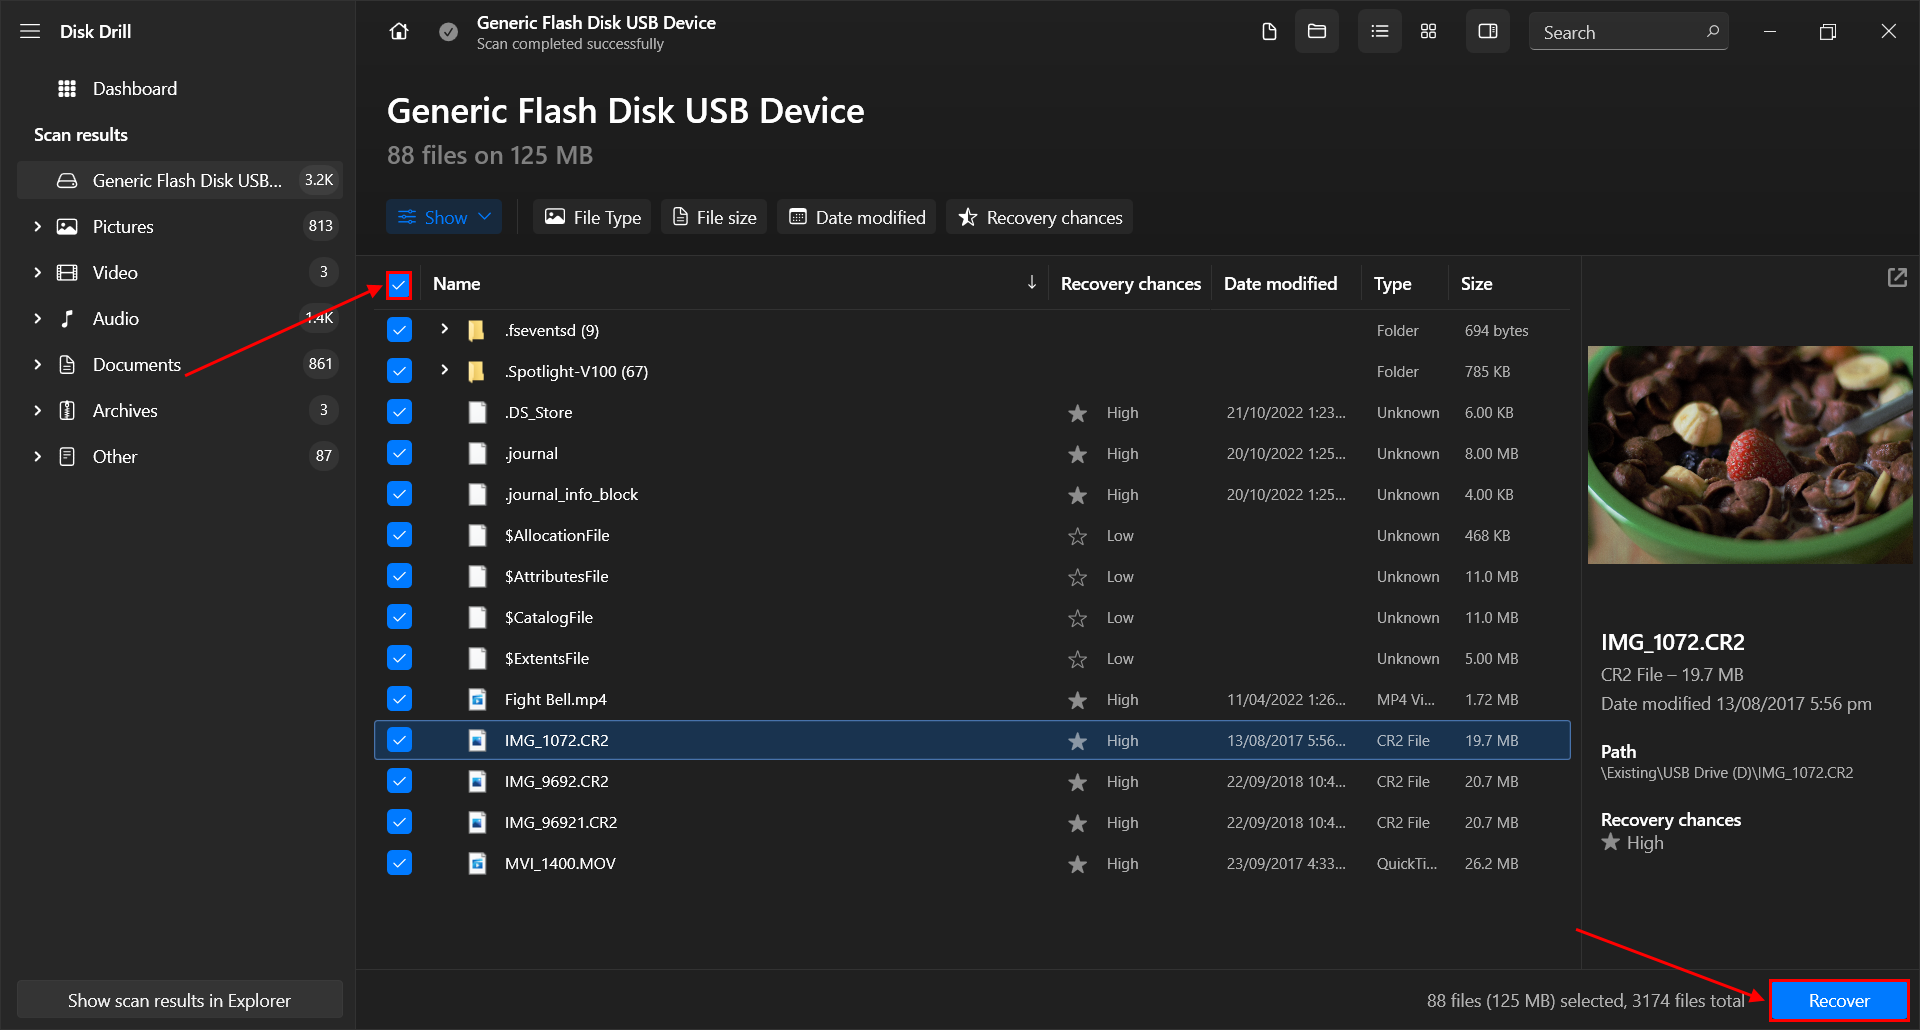
- Click Show and select Existing. This will filter the results and show only the data that is currently present on the drive.
- Tick the box beside the Name category header to select all your files. Then, click Recover.
- Select a folder where you want to save your files. You can click Choose destination for a wider search. Then, click Next to recover data from your Mac drive to your PC.

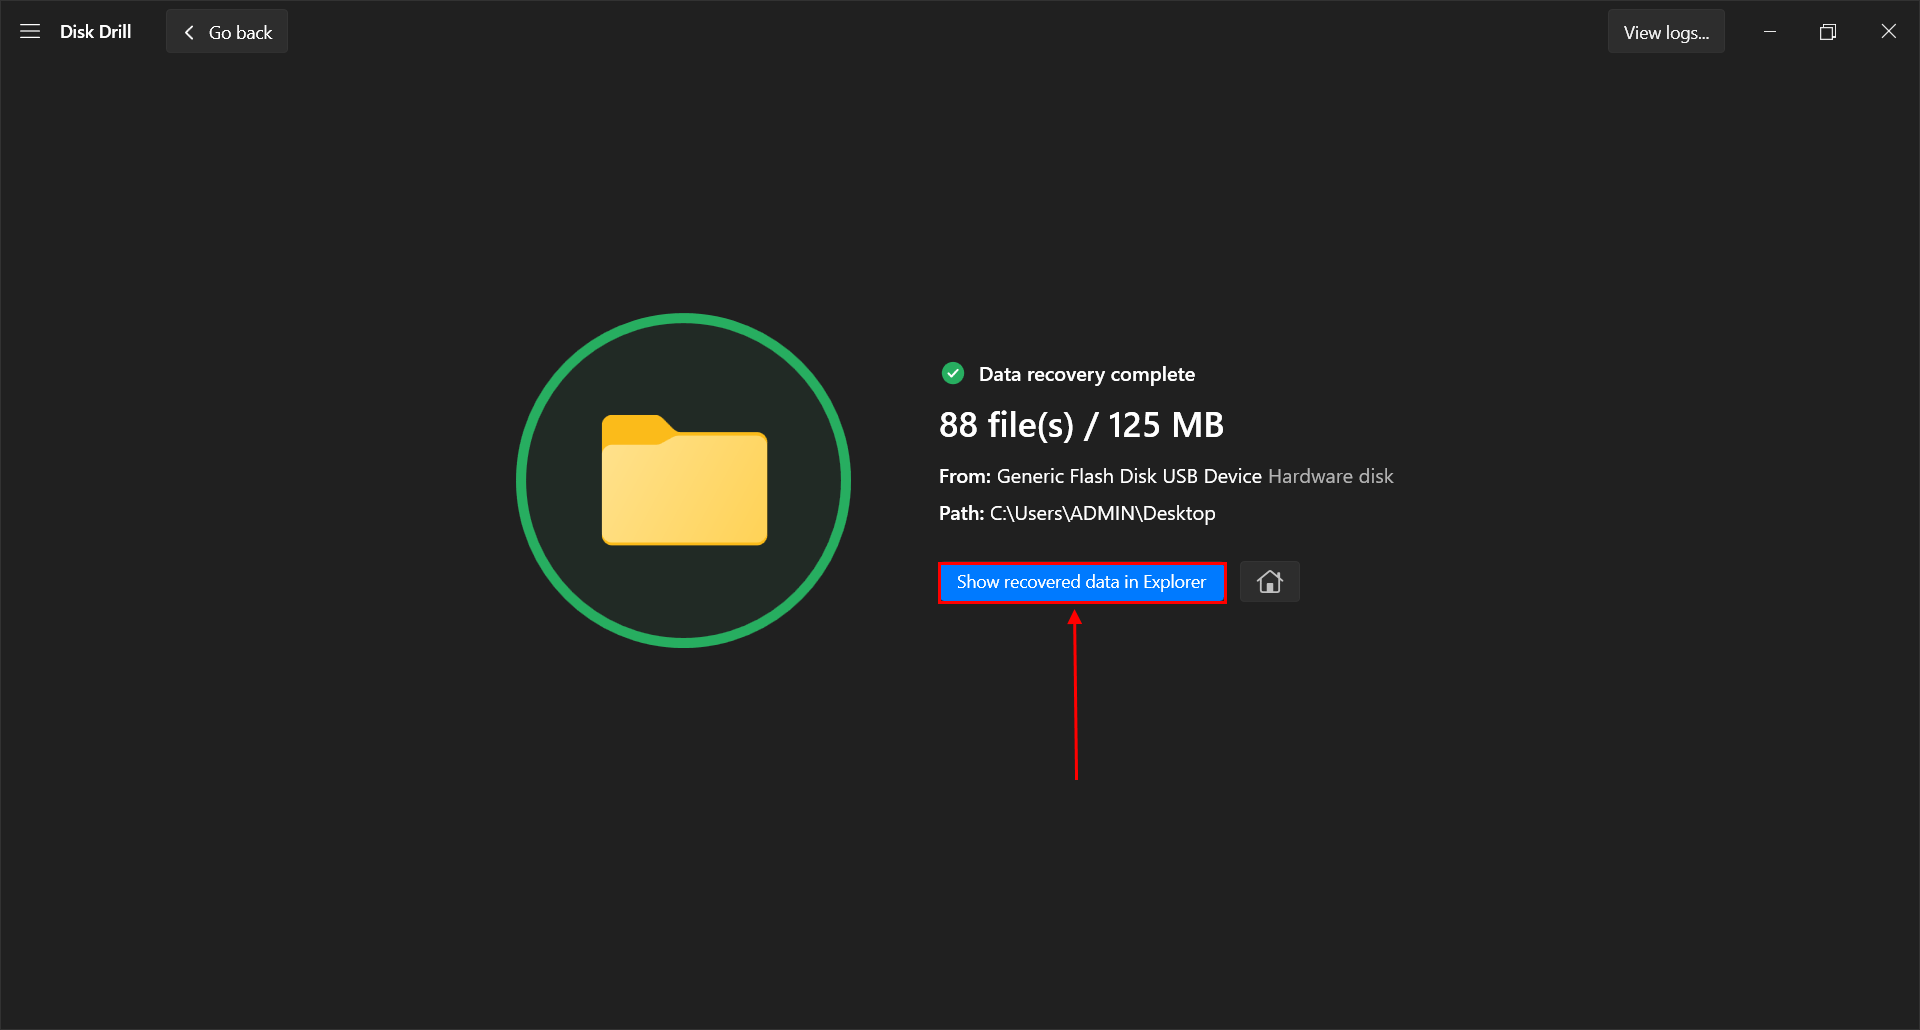
- Once recovery is complete, click Show recovered data in Explorer to open the folder containing your files. You have now successfully copied your data from your Mac drive to your Windows PC and can safely convert your drive.
Disk Drill Basic for Windows offers 500 MB of free data recovery. Beyond that, you’ll have to purchase a license. Free data recovery software exists, but not all of them have an allocate feature and they all have their own limitations. Manage your expectations.
Step #2: Format Your Drive to Windows-Supported File System
After you’ve secured a backup, you can safely convert your Mac external hard drive to Windows via formatting. Fortunately, the tools we need for this task already come with Windows: Disk Management and Command Prompt.
Pro tip: You can actually skip this section under a certain condition. Upon connecting your drive, Windows may have prompted you to format your drive using its formatting tool. After securing your data, you may attempt to access your drive from Windows Explorer – this should activate the prompt again. This time, agree to format your drive.
Step #2.1: Clean the Drive’s File System Using CMD (diskpart)
First, let’s clean the drive. The diskpart command has a clean function that can delete all files and partitions. After cleaning the disk, it becomes unallocated or uninitialized and we can then give it a format.
To clean your Mac hard drive using the diskpart command:
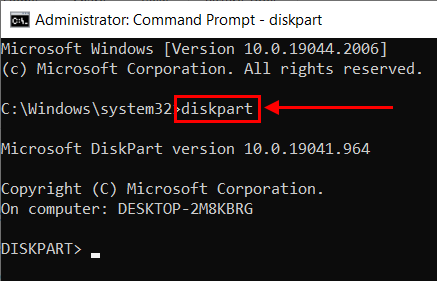
- Hit Windows Key + X to open the Quick Access Menu, then select Command Prompt (Admin).
- Type the following command and hit Enter:
Diskpart
- Then, type the following command and hit Enter:
List disk
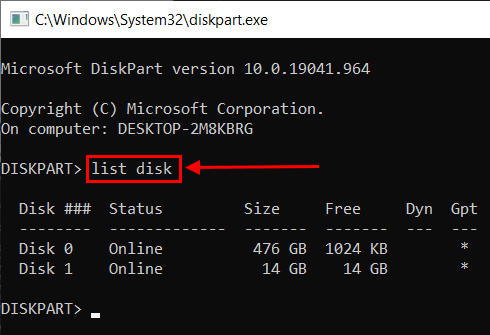
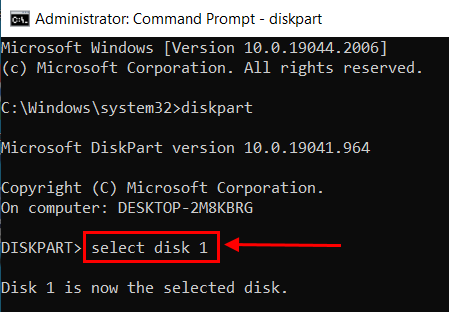
- Then, type the following command and hit Enter:
select disk "#"
Replace “#’ with the your Mac drive’s corresponding disk #. You can double-check its size in the Disk Management app to ensure you selected the correct disk.
 ❗️
❗️Be extra careful with typing the correct disk number. The next step will delete all of its contents.
- Type the following command and hit Enter:
clean
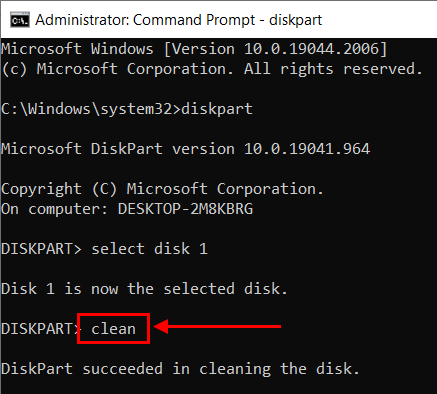
As soon as you see the message “Diskpart succeeded in cleaning the disk”, you can close the window.
Step #2.2: Initialize the Drive in Disk Management
After cleaning it, your hard drive becomes unallocated. To prepare it for use by Windows, we need to initialize it in Disk Management. Although it is not a format, initializing a disk will also erase any data left on it.
If you left Disk Management running in the background during Step #2.1, you have to click Action > Rescan Disks to update the list of disks that appear on the list.
Pro Tip: If you weren’t able to back up your data beforehand, you can recover data from your unallocated drive using Disk Drill. Launch the app and select your drive from the list (it will show up in Disk Drill even if it doesn’t in File Explorer) and click Search for lost data.
- Hit Windows Key + X and select Disk Management.
- In the Disk Management window, right-click on the Mac hard drive and select Initialize Disk.
- In the dialog, you will be required to choose a partition style. Select GUID Partition Table. Then, click Okay.
Step #2.3: Format Unallocated Space
Formatting an unallocated disk space to NTFS, FAT32, or exFAT will make it usable in Windows. However, we suggest exFAT so you can use it on both your Mac and Windows computers. We can do this using Disk Management (Windows Key + X > Disk Management).
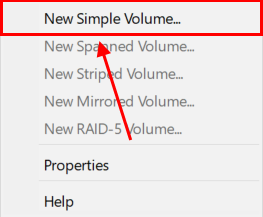
- In Disk Management, right-click on the unallocated disk and select New Simple Volume.
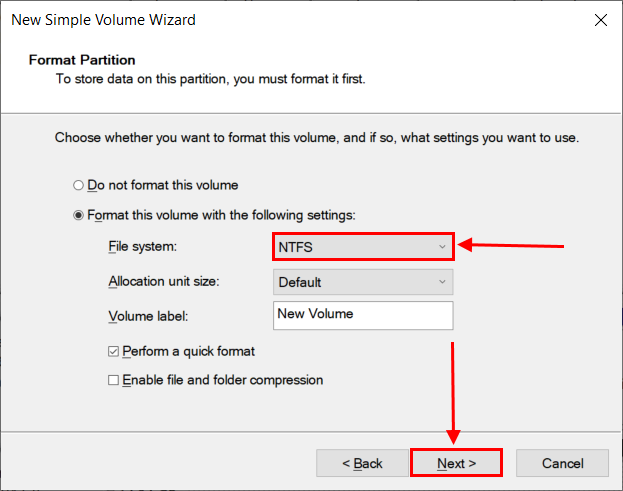
- Follow the wizard. It will ask you to choose the amount of disk space, assign a drive letter and name, and select a file system. You can leave them as is, except for the file system. For this, choose NTFS, FAT32, or exFAT. Then, click Next and proceed with the wizard.
After the process is complete, you can transfer your data back to your newly reformatted drive.
How to Convert Mac Formatted Hard Drive to Windows on macOS
If you prefer, you can also convert the external hard drive from Mac to PC using your Mac. The process is similar to that of using a Windows PC: back up your data first, then format your drive. This method is also a great way to format your hard drive without losing data. Detailed instructions are below.
Step #1: Create Data Backup
You can create a backup in two ways. One is to manually copy and paste your files to another storage device formatted to exFAT (which is compatible with both Windows and Mac). You can also opt for cloud storage like iCloud or Google Drive. Either storage option will make the files accessible on a Windows device when we restore them later.
Another way to back up your data is to use Disk Drill’s Byte-to-byte backup tool. This method is not only more comprehensive, as it copies your entire drive, but it’s also more efficient since you don’t have to manually copy and paste your files (note that you’ll need to pay for a license to recover them later). Here’s how to do it:
- Connect your drive to your Mac, then download and install Disk Drill.
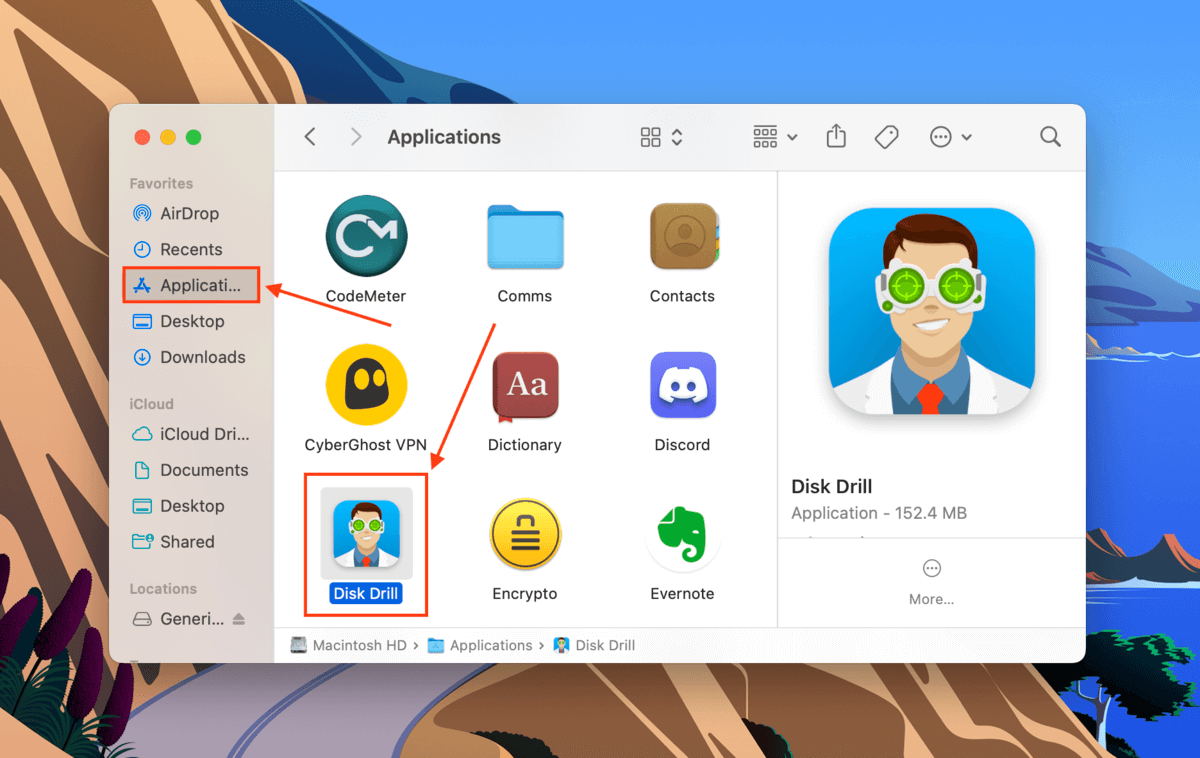
- Launch Disk Drill (Finder > Applications).
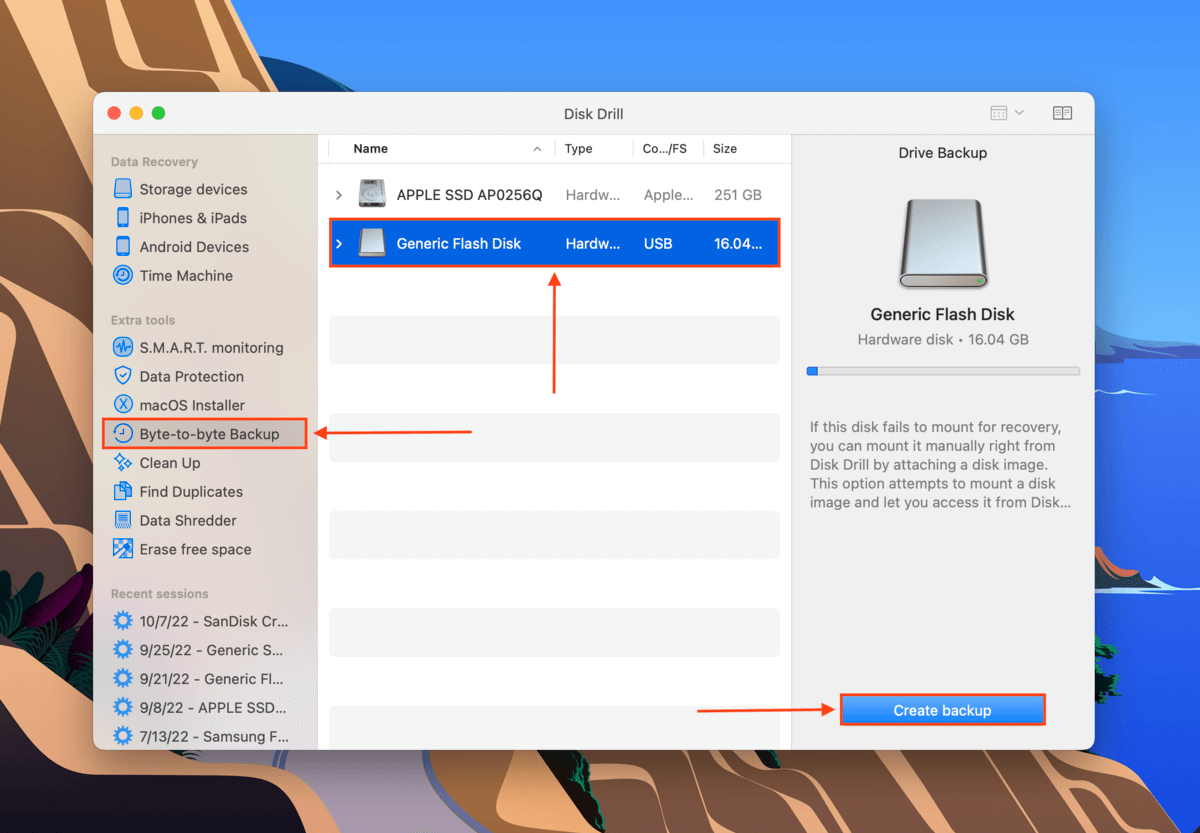
- In the left sidebar, click Byte-to-byte backup. Select your drive from the middle pane, then click the Create backup button.
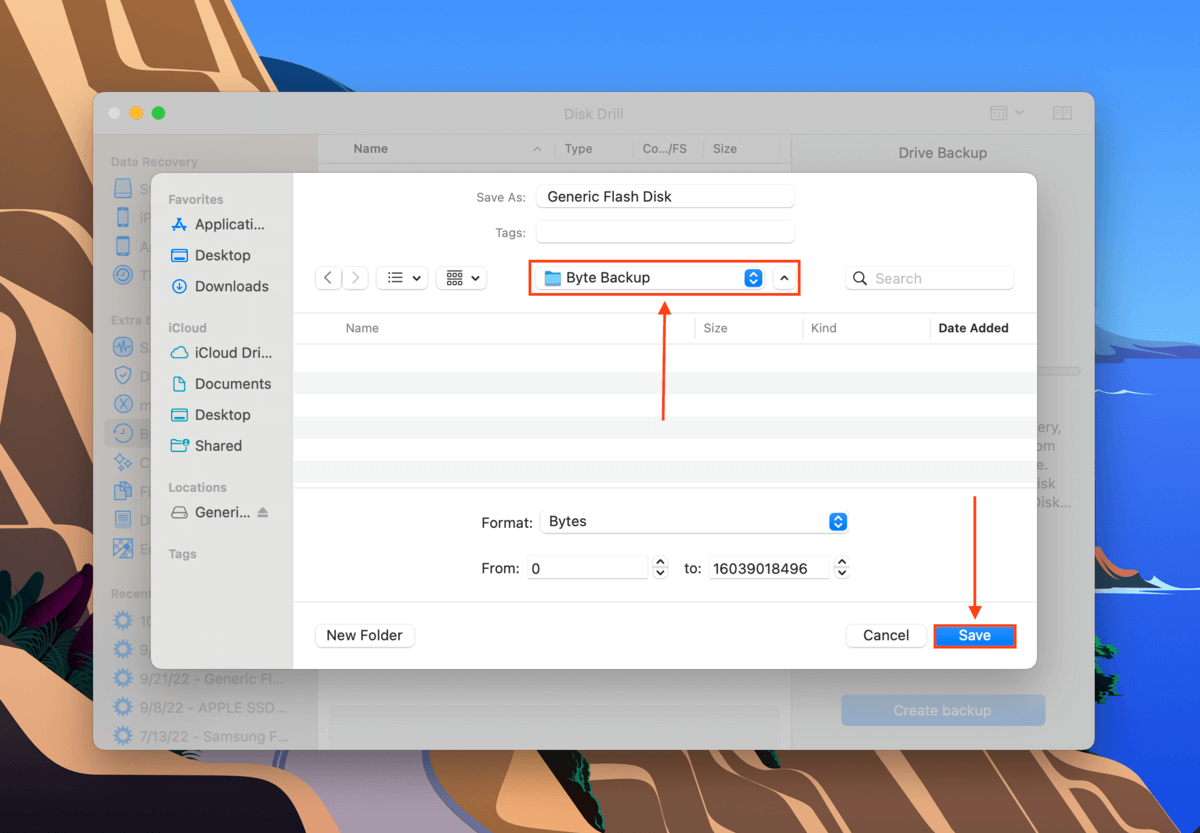
- In the dialogue box that appears, choose a safe location for the backup file. Wait for the backup process to complete, then close the app.
Step #2: Format the Drive Using Disk Utility
Formatting a drive on Mac is made simple with the Disk Utility app, which comes baked into macOS. It can recognize drives even if they’re formatted with Windows file systems. Here’s how to use it:
If you were unable to save a backup of your drive, Disk Drill may still be able to restore data from a formatted Mac hard drive even if you changed the file system in the process (for ex. From APFS to exFAT). To do it, launch the app and select your drive from the list, then click Search for lost data to proceed with recovery. Note that Disk Drill Basic for Mac does not offer free recovery.
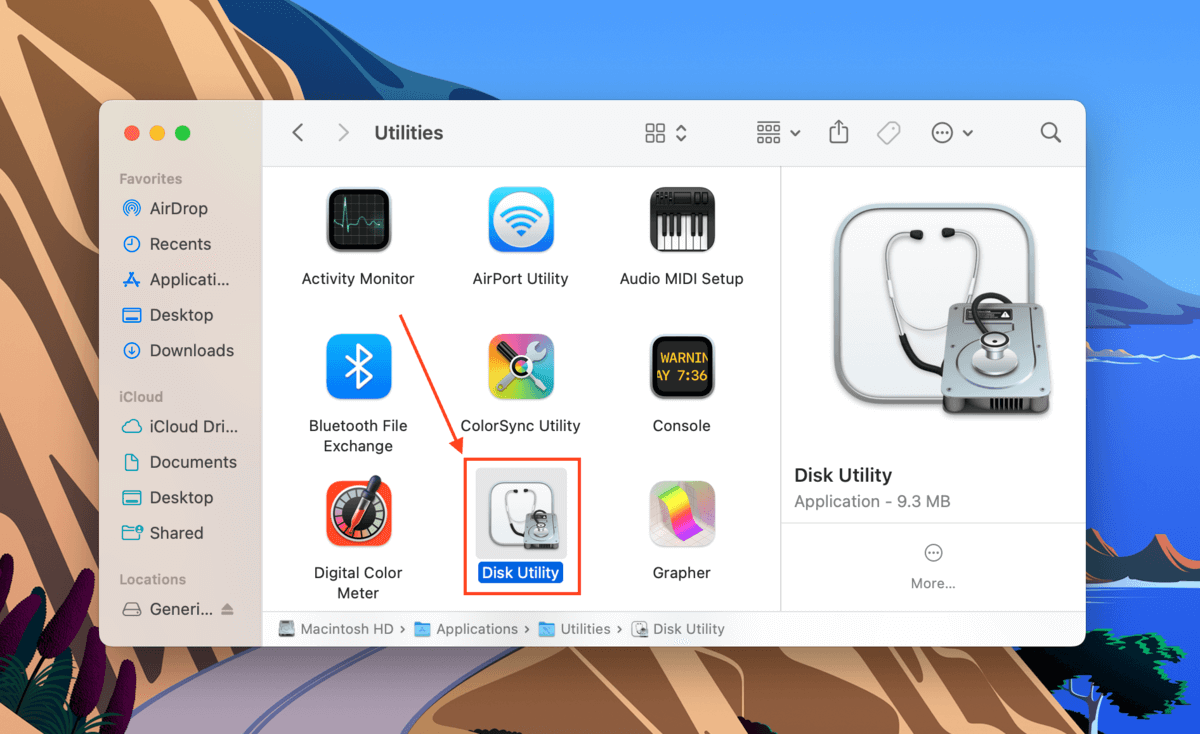
- Open Disk Utility (Finder > Applications > Utilities).
- Select your drive from the left sidebar, then click the Erase button at the top of the window.
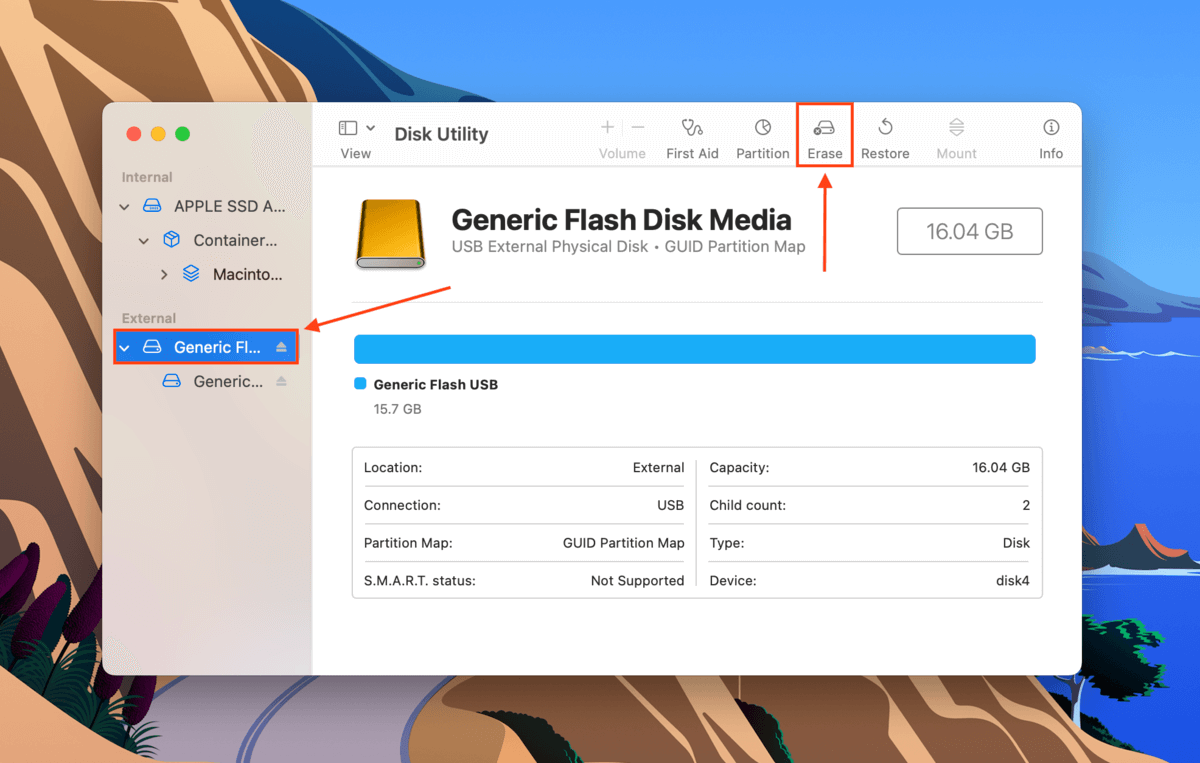
- The Erase dialog box will appear. For the format, choose exFAT/NTFS/FAT32. For the Scheme, choose GUID Partition Map. Then, click Erase.

Once you’re done with the formatting process, you can transfer your data back to the drive. And if you chose to format your drive with the exFAT file system, you can use it with both your Mac and Windows computers.
If you used Disk Drill to create a Byte-to-byte backup instead, you can use the app to recover data from your hard drive by scanning its image. Simply double-click the image backup file in Finder and Disk Drill will automatically launch itself and select the image from the list of drives. Then, click Search for lost data to proceed with the recovery process.
FAQ
Can I use Mac external hard drive on Windows?
You can’t use your Mac external hard drive on Windows if it’s formatted to HFS+ or APFS. In this case, you’ll have to convert it to an NTFS, FAT32, or exFAT file system. We highly recommend exFAT, because it’s compatible with both operating systems.
Can I format a Mac hard drive for Windows?
Yes, you can. To format your hard drive for Windows using a Mac, follow the steps below:
- Back up your data.
- Launch Disk Utility (Finder > Applications > Disk Utility).
- Select the hard drive you want to format and click Erase.
- Choose a Name, select exFAT as its format, and GUID Partition Map as its Scheme. Then, click Erase.
How do I open a Mac-formatted hard drive on Windows?
To open a Mac-formatted hard drive on Windows, you first need to back up your data then format your drive to a Windows-compatible file system like exFAT, FAT32, or NTFS. Note that this process wipes your data, so make sure to secure your files first!
Is exFAT format reliable for both Mac and Windows?
Yes, both Mac and Windows can read and write to exFAT-formatted hard drives.
Why Mac hard drive is not showing up on my PC?
Mac hard drives use file systems that can only be recognized and used by Macs. To get your hard drive to show up on your PC, you need to format it to a Windows-supported file system like exFAT, FAT32, or NTFS.
Conclusion
When you format your drive, always consider what operating systems you’ll be using it with most often. We highly suggest choosing exFAT by default, as it’s compatible with all operating systems. There may also be times when things will not go 100% according to plan – so always keep a backup on a separate drive or in a cloud.
This article was written by Alejandro Santos, a Staff Writer at Handy Recovery Advisor. It was also verified for technical accuracy by Andrey Vasilyev, our editorial advisor.
Curious about our content creation process? Take a look at our Editor Guidelines.