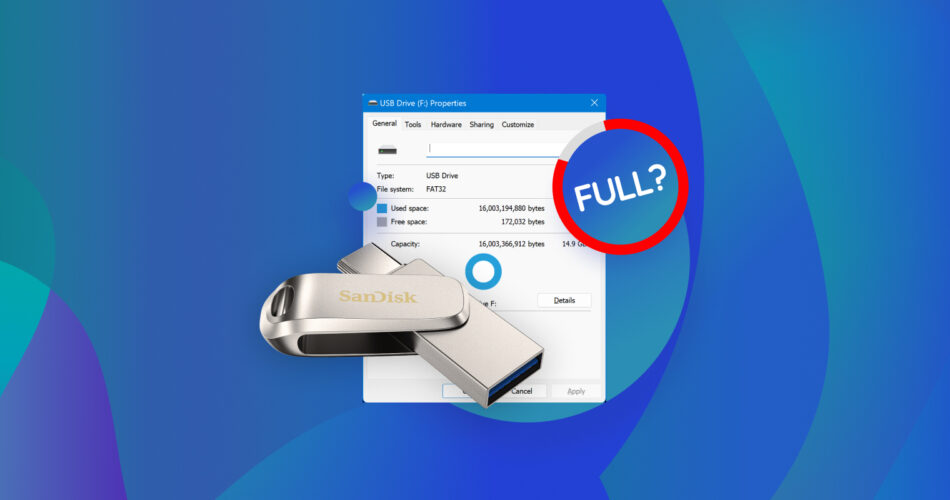
Most of us have half-empty USB flash drives lying around for a quick fix in case of emergencies or urgent storage situations. Say you’re in one of those situations. But when you plug in the pen drive to your computer, an error message appears “There is not enough free space on the hard drive. Delete one or more files to free disk space, and then try again.”
If you’ve found yourself in such a situation, don’t worry. Several Windows users have complained about facing this issue – their USB drive says it’s full, but there’s nothing on it. Fortunately, this issue can be solved easily.
This article will help you understand the reasons for this issue and provide a detailed guide on how to fix your USB flash drive and recover your files from it.
Why Does My USB Flash Drive Say It’s Full?
There are a few reasons why you might encounter the ‘USB is empty but says it’s full’ error. Let’s try to understand why you cannot copy files on the USB drive even though there’s space on it.
📁 File Size is Too Large for the File System
One reason that your USB drive says there is no space even though there’s nothing on it is that you’ve probably tried to copy a large file on a FAT32 formatted flash drive. A FAT32 formatted drive means you cannot copy files larger than 4 GB. Thus, in such a scenario, you’ll get an error message that reads, “the file is too large for the destination file system.”
🦠 Corrupted File System
Another reason your flash storage shows it’s full, but no files are on it is that your file system might be corrupted. This can be both due to logical and physical reasons. If the USB stick/thumb drive is old, it may have developed bad sectors and thus has read-write issues.
Sometimes, the USB drive may show unallocated space due to incorrect formatting or virus attacks. Other reasons for a corrupted file system are external factors like moisture, dirt, etc., or physical damage. In such scenarios, it’s best to recover files from the corrupted USB drive before attempting to fix it.
How to Fix an Error When USB is Empty But the Space is Used
As we’ve mentioned, if your USB shows it’s full, but there are no files on the drive, it’s most likely due to logical reasons or file system corruption. The drive may have developed bad sectors, so you’re unable to access the few media files on the USB drive, or the files on your flash drive are hidden.
Fortunately, there are ways to solve these issues without much hassle. Following are the methods you can use to fix the ‘USB flash drive is full’ error based on the reason for the problem.
Method 1. Fix USB Drive Using CMD (chkdsk)
The CheckDisk utility is a built-in method on Windows that can help fix file system errors or restore bad sectors. If the USB stick shows its full capacity, but there are no files on it, the issue can be potentially repaired using the CMD prompt.
Here are the steps you can follow to fix the USB flash drive with the CheckDisk utility:
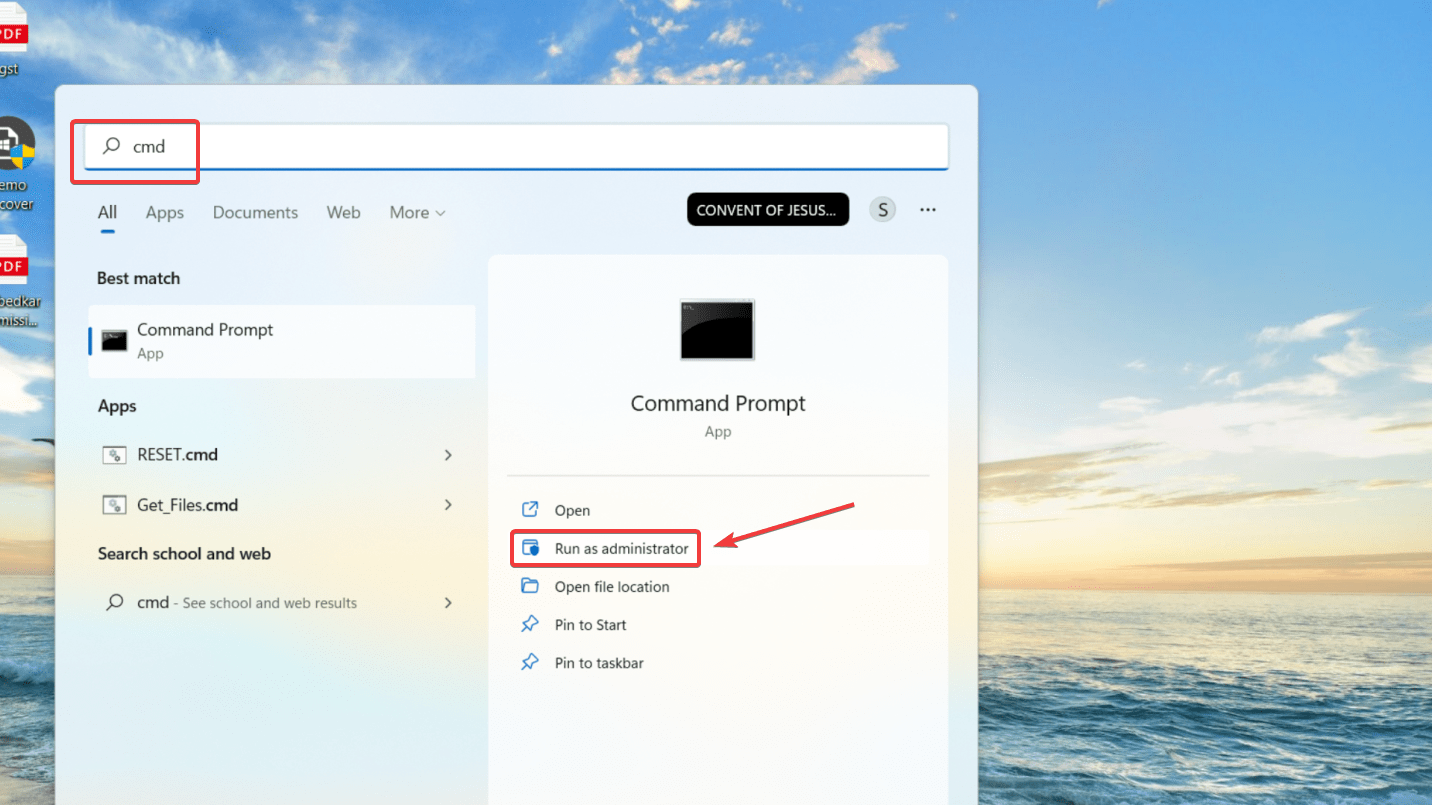
- Go to the Start menu and type in cmd. Now, select the Run as administrator option.
- Once the Command Prompt window opens, run the following command:
chkdsk F: /r(Remember to replace F with the drive letter assigned to your flash drive)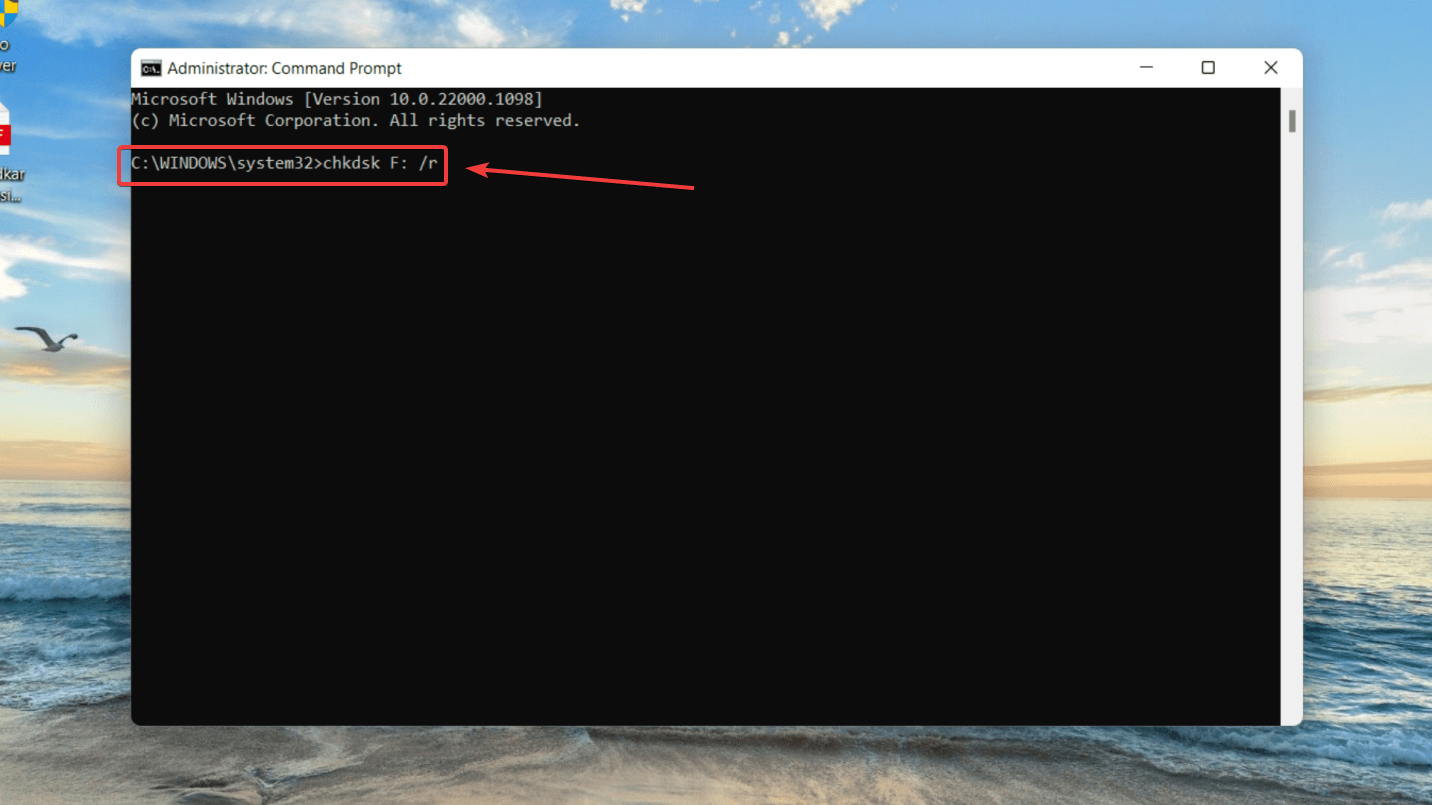
- The chkdsk utility will automatically fix the logical issues it finds during the process. Once the process is complete, exit the Command Prompt window.
Method 2. Format the USB Drive
If the CheckDisk utility doesn’t work for you, there’s another method you can use to fix the USB flash drive error. Formatting the USB drive can help fix drive corruption and even remove the 4GB file transfer cap that’s associated with FAT32 formatted devices.
Be warned that formatting would mean losing all the data on your flash drive.
Here’s how you can format your USB drive with Windows File Explorer on Windows:
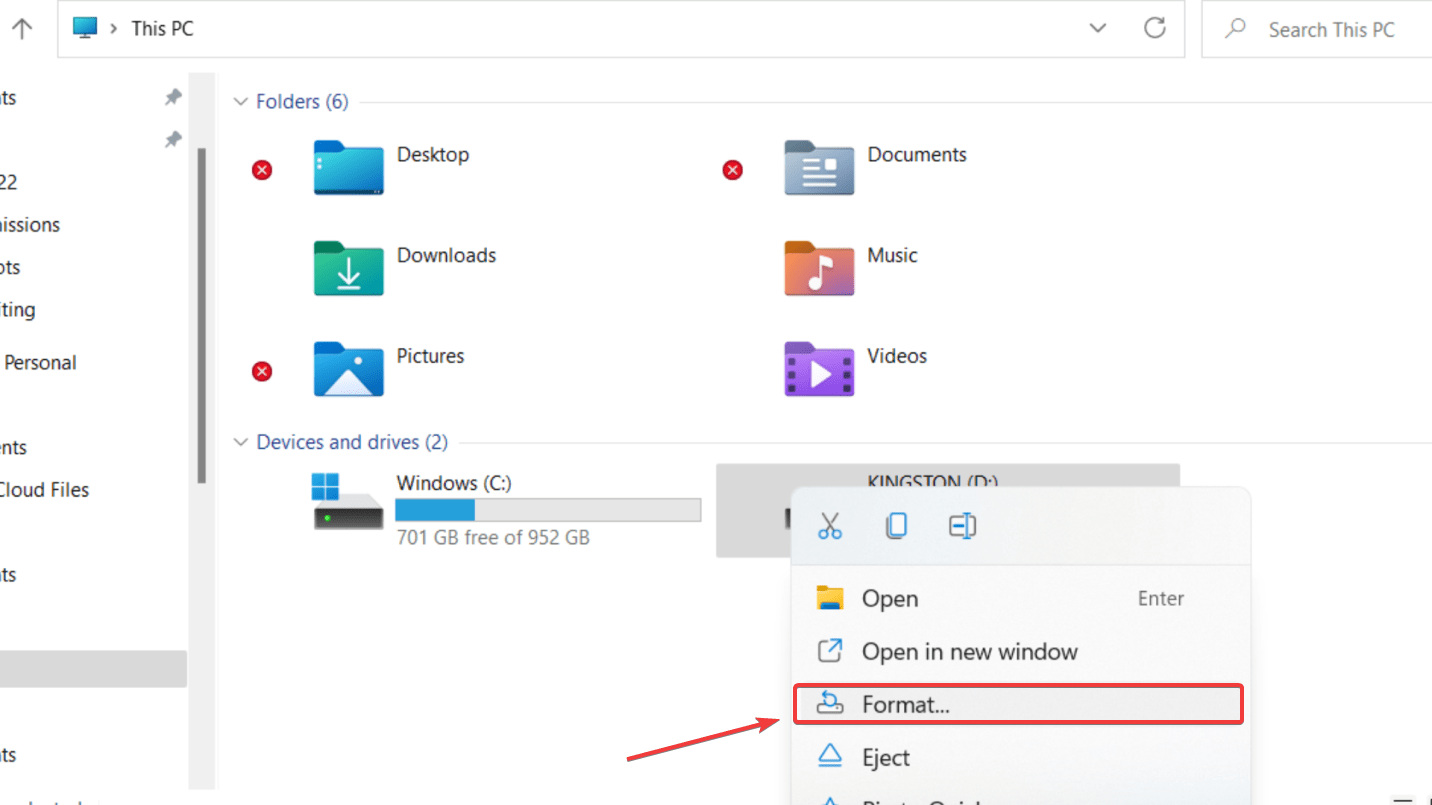
- Launch File Explorer and go to This PC.
- Right-click on the flash drive and select Format. You can choose to format it either as NTFS or exFAT.
- Now, check the box next to Quick Format and click Start.
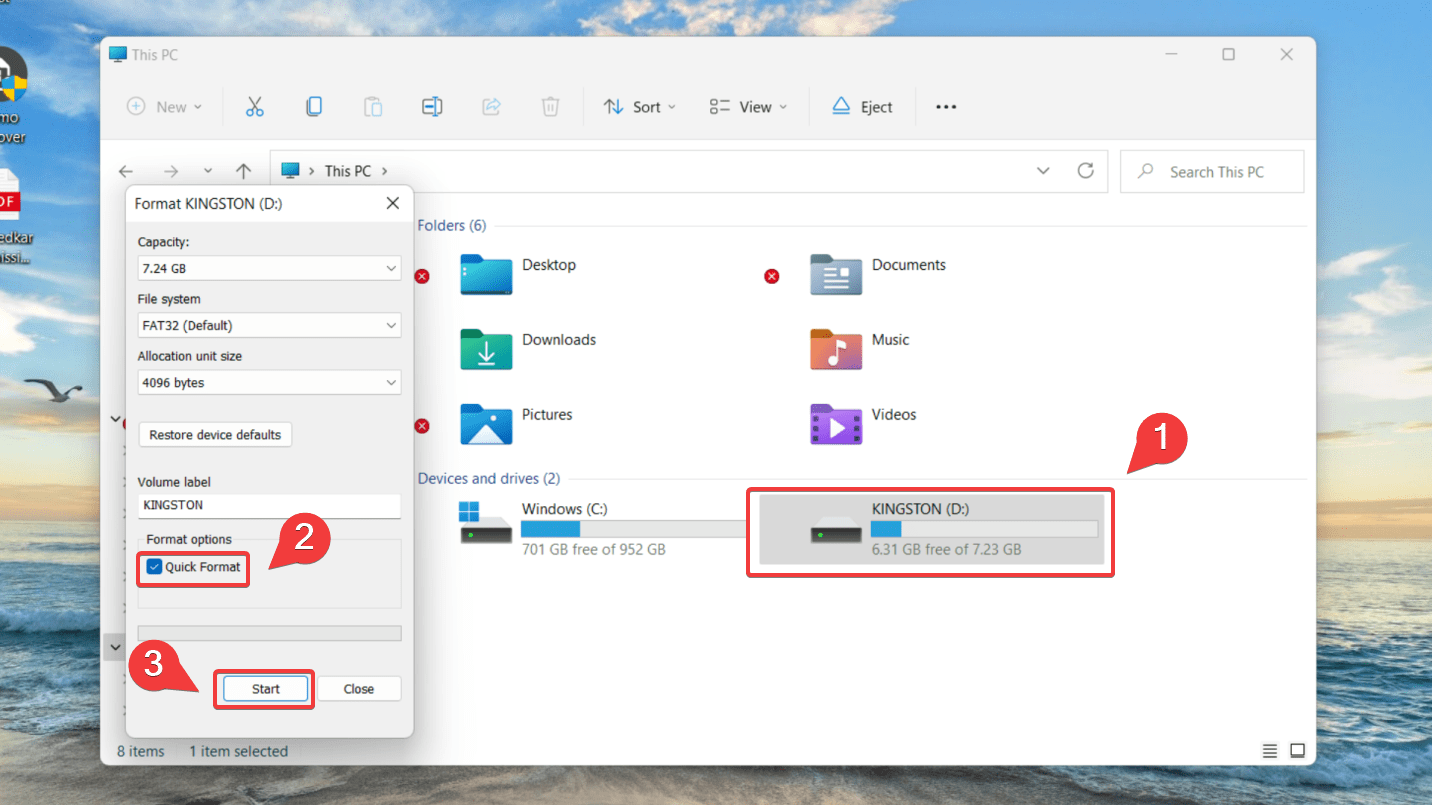
- Once the format is complete, your flash drive should work just fine.
Method 3. Repair Corrupted Partition With TestDisk
TestDisk is open-source partition recovery software designed to help recover lost partitions or make non-booting disks bootable. It’s available for free and can run on all major operating systems.
If your USB stick continues to show an error where the drive files are not showing, but the space is used, you can try using TestDisk to repair the corrupted partition.
Here’s how you can repair the corrupted USB partition with TestDisk:
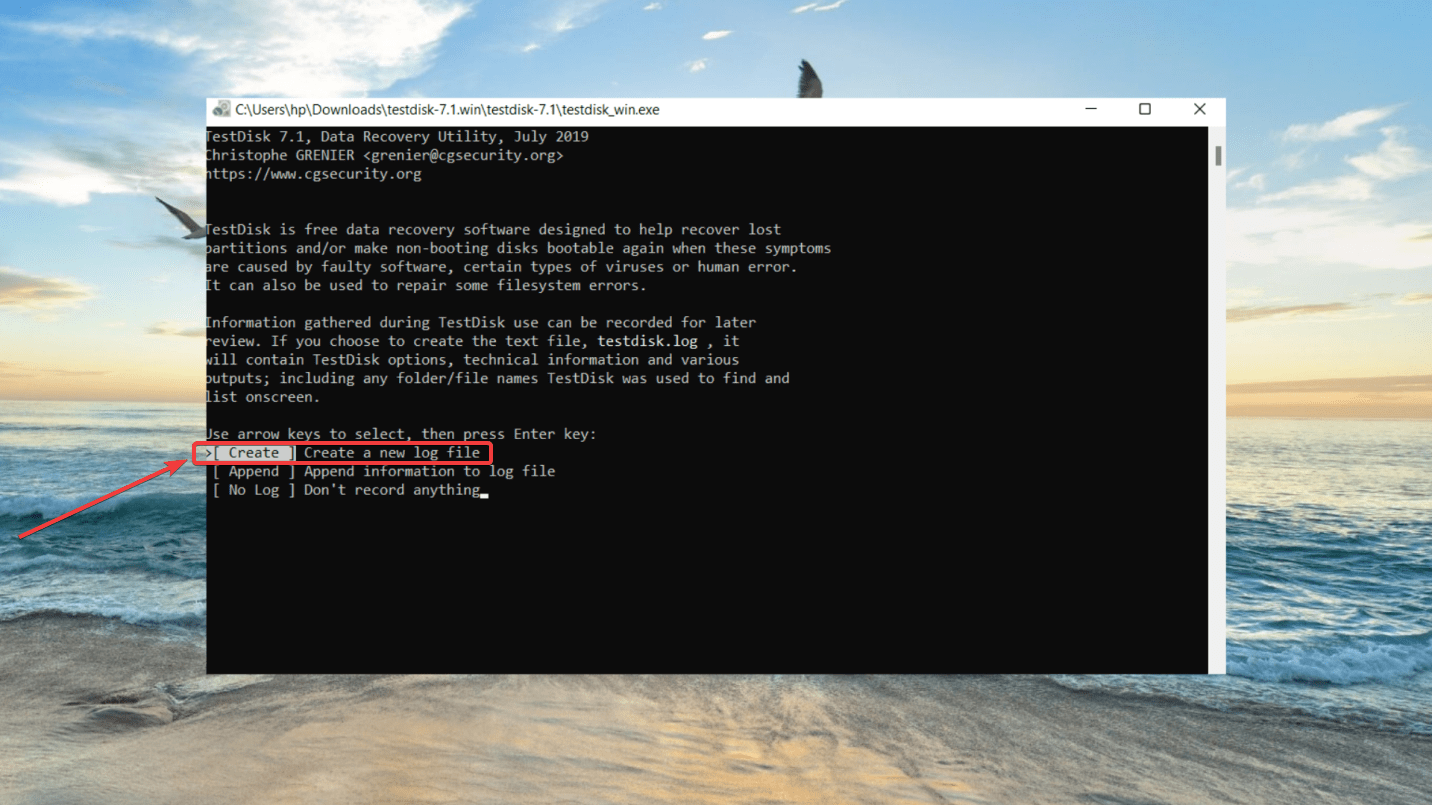
- Download and unzip the TestDisk folder. In our case, the folder was named “testdisk-7.1.win”.
- Right-click testdisk_win and click Run as administrator.
- Use the arrow keys to select the No Log option, then hit Enter. You can also click Create to create a log if you choose.
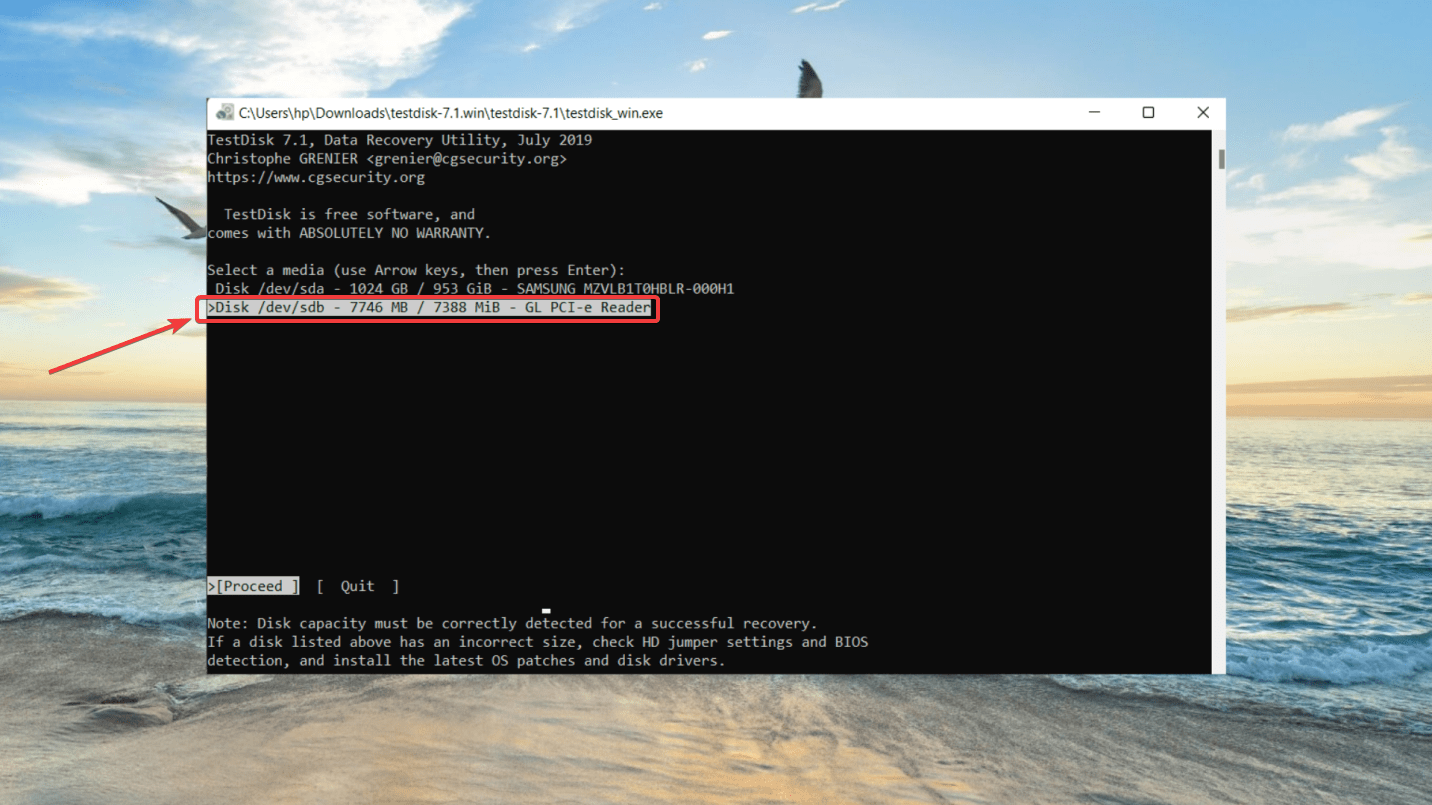
- Now, select the USB thumb drive containing the corrupted partition and press Enter.
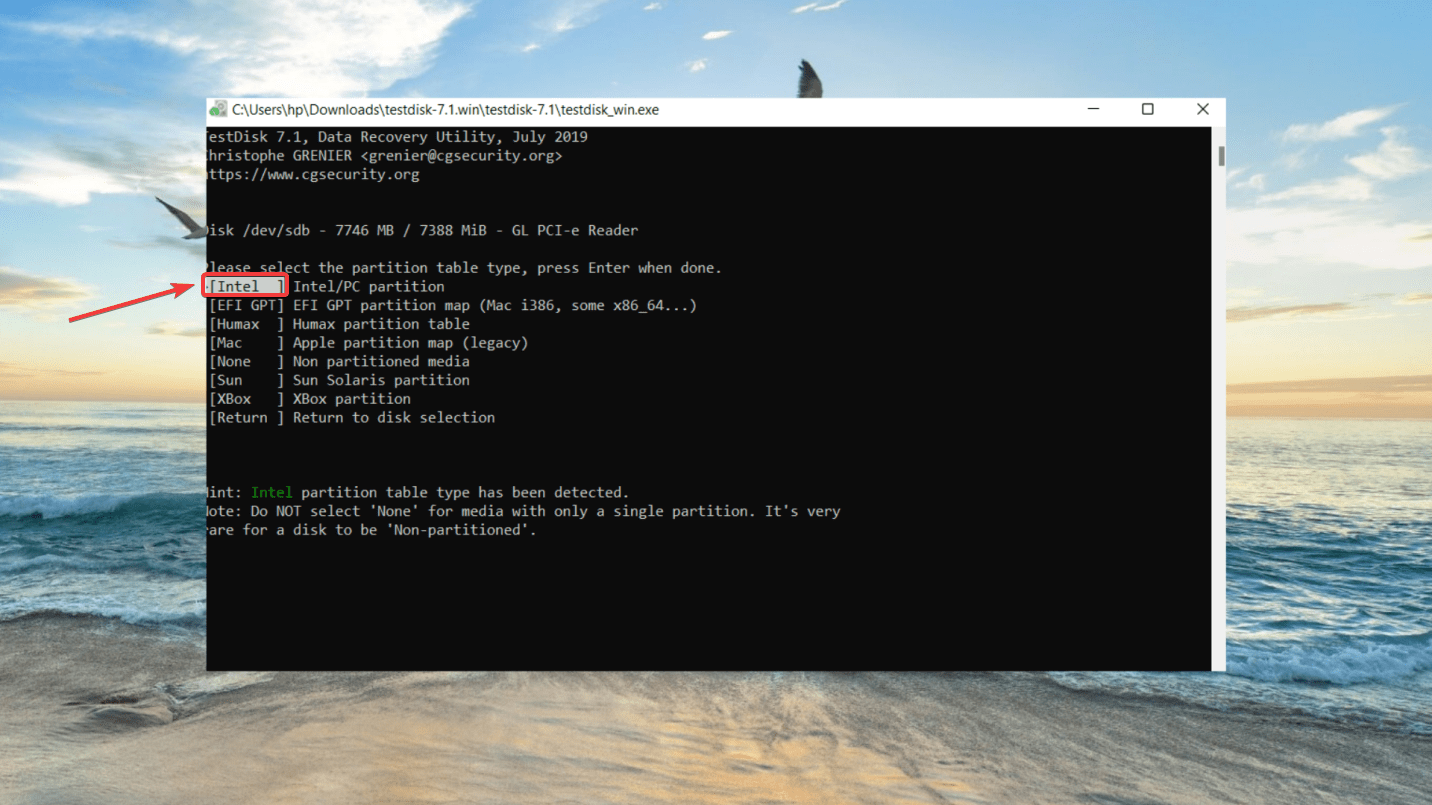
- Select the partition table type. Since you’re on a Windows PC, select Intel. Now, press Enter.
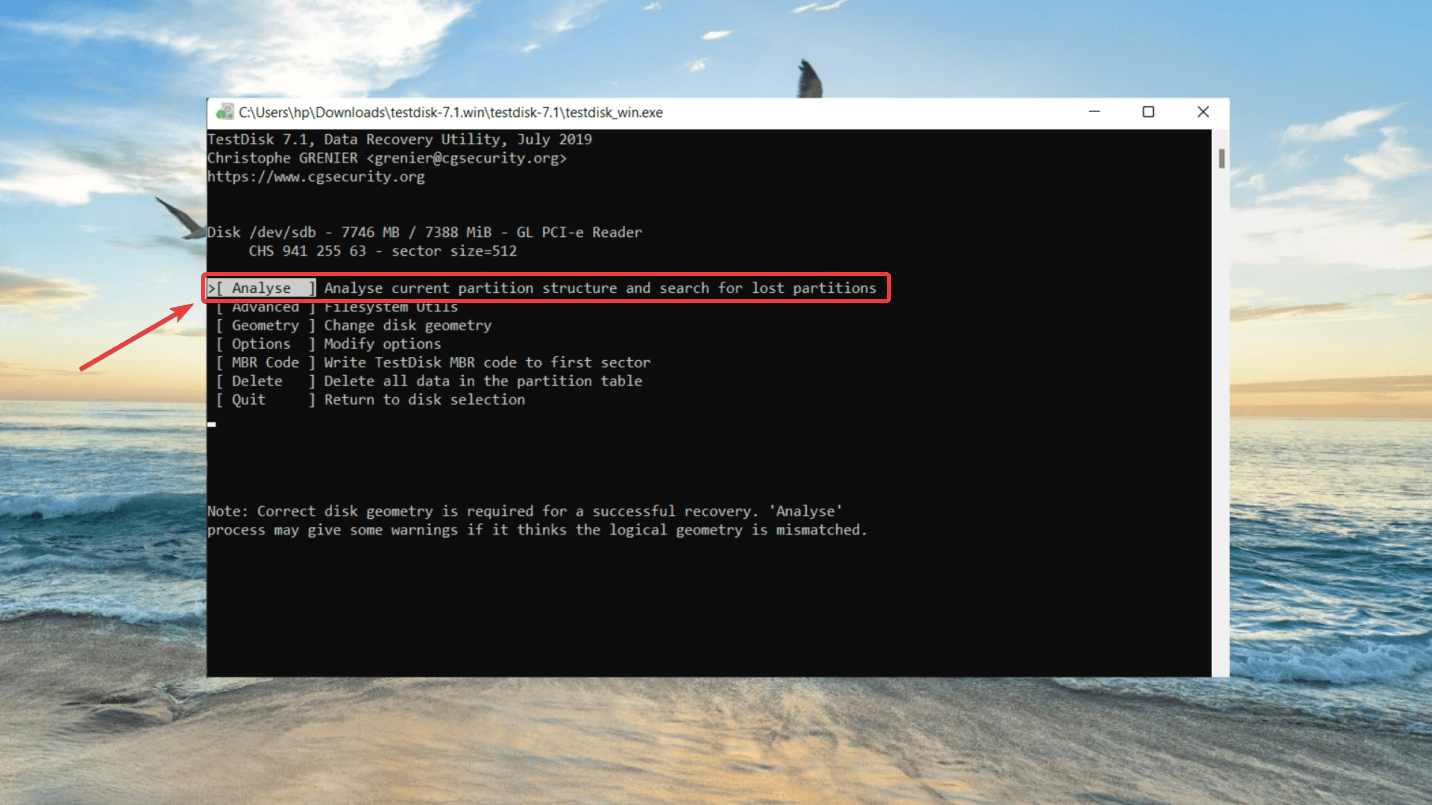
- You can select the Analyse option and initiate a Quick Search to begin the partition recovery process.
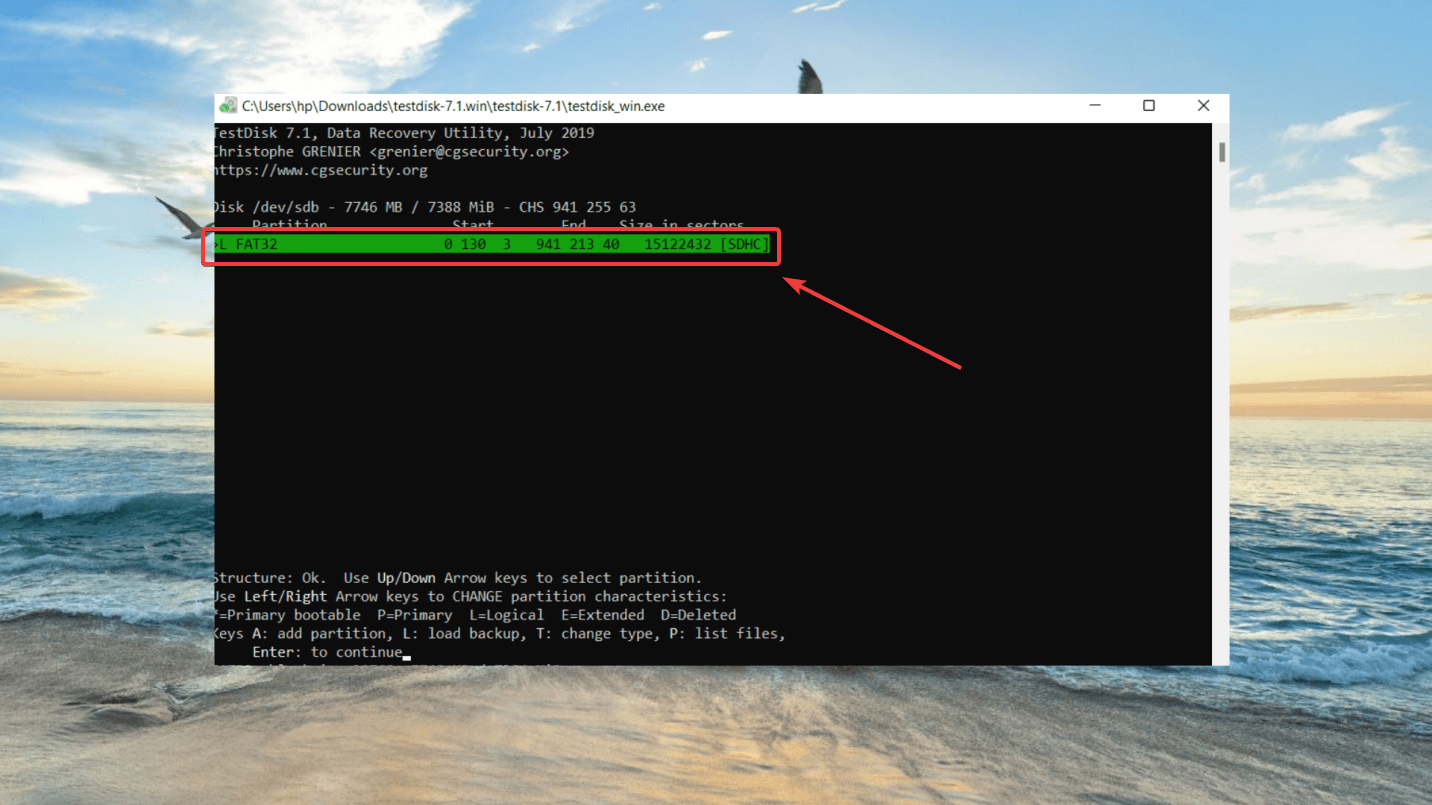
- After the scan is complete, you can select the partition you wish to recover and follow the prompts on the screen. Move to the Write option and press Enter.
- Press Y to write the partition table and press Enter again. Now, your computer will need to reboot to repair the corrupted partition.
How to Recover Files From USB Drive that is Full But Showing Empty
Disk Drill is one of the best USB recovery software available on the market. It boasts a sophisticated user interface, supports all major operating systems, and offers additional, easy-to-use features like data protection with the Recovery Vault and S.M.A.R.T. Disk Health Monitoring to safeguard your data.
You can use Disk Drill to recover data from a corrupted or broken USB flash drive in a few, simple steps. While professional data recovery tools can often seem intimidating to amateur users, Disk Drill is a superior option from our list of leading data recovery apps. It offers a sophisticated algorithm to make the data retrieval process efficient.
Here’s a detailed guide on how to recover files from a USB drive that shows full but there are no files on it, using Disk Drill:
- Download and Install Disk Drill from their official website.
- Connect the USB stick to your computer to begin the recovery process.
- Launch Disk Drill on your computer. Now, select the USB flash drive from the list of devices your computer can access. While Disk Drill selects the All Recovery Methods option by default, you also choose from other recovery methods – Quick Scan or Deep Scan.
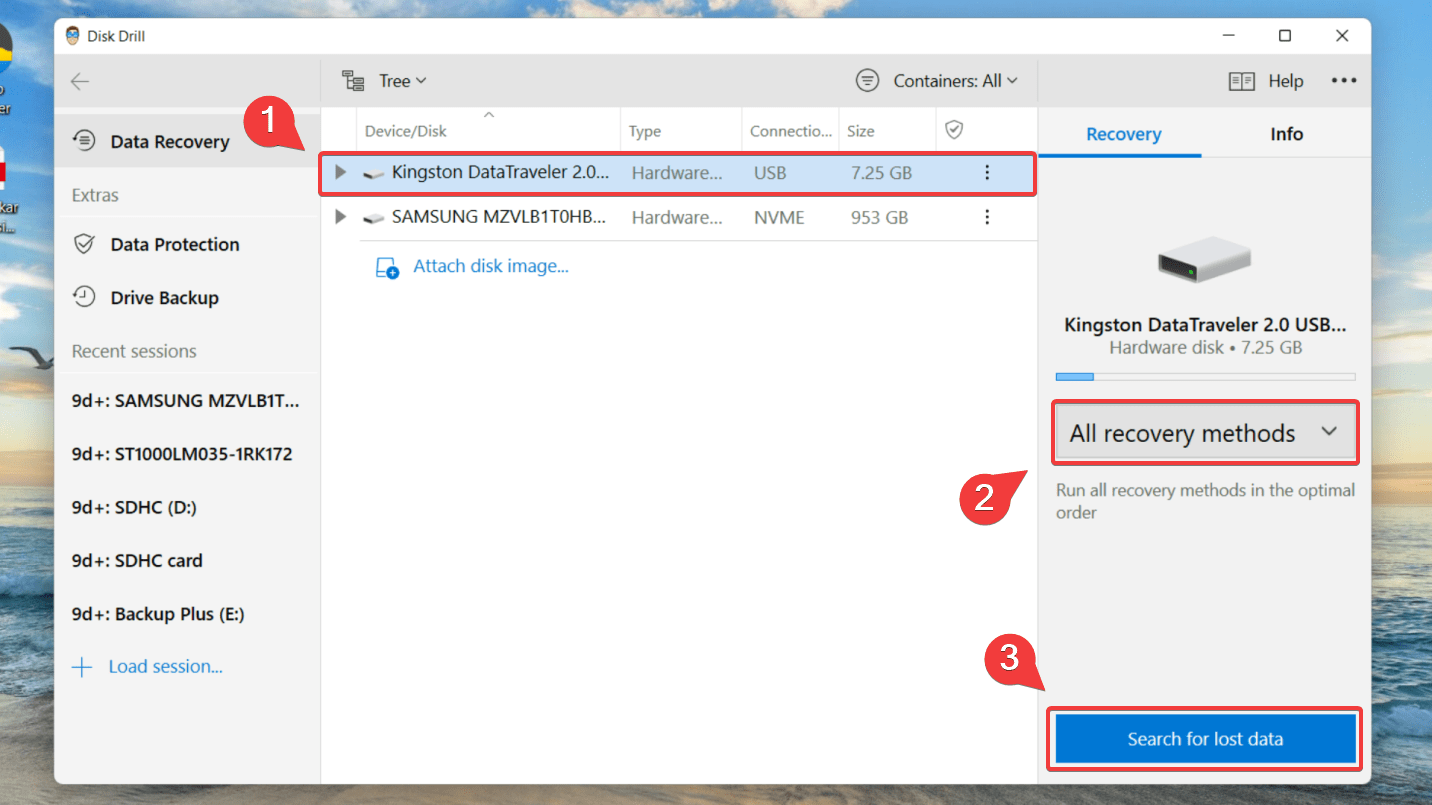
- Click Search for Lost Data. Disk Drill’s advanced algorithm will scan through the data. Moreover, you can pause, save or resume the scan whenever you want.
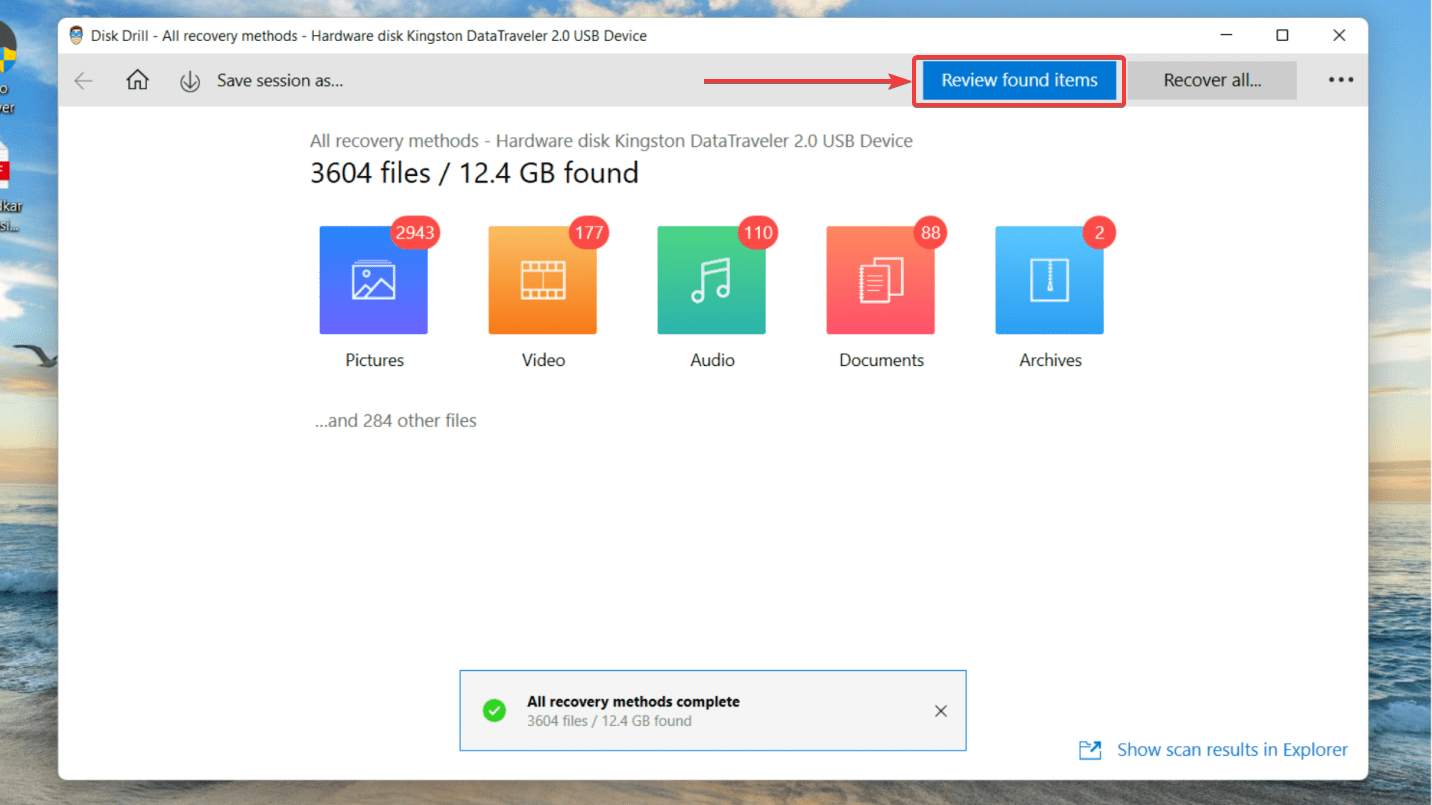
- Once the scan is complete, you can filter through the results. Now, click Review Found Files.
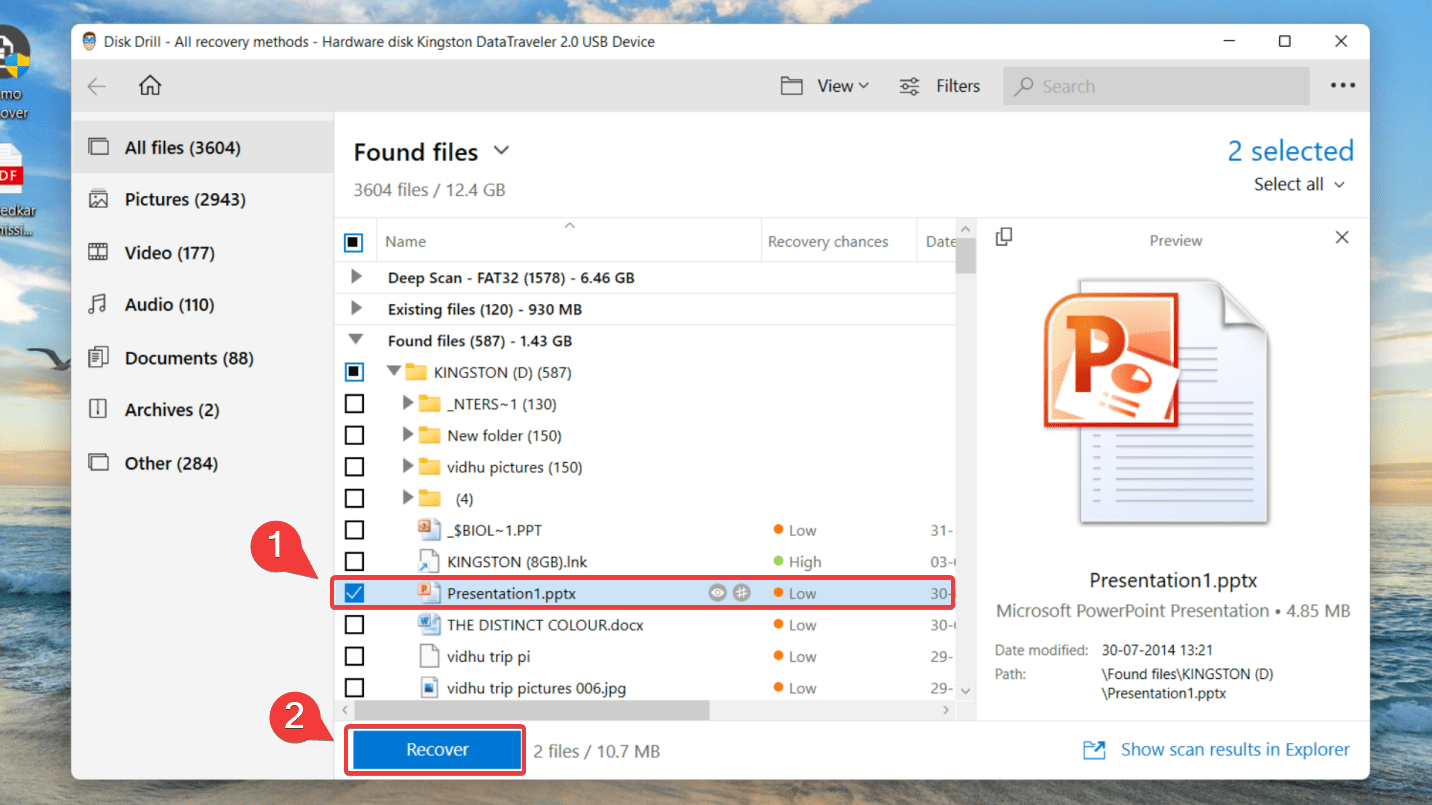
- Preview the files you want to recover. You can do so by hovering your mouse over the eye button to the right of the file name. A panel on the right will also indicate the success rate for recovery – low, average, high.
- Select the files you wish to retrieve from your USB thumb drive and click the Recover button.
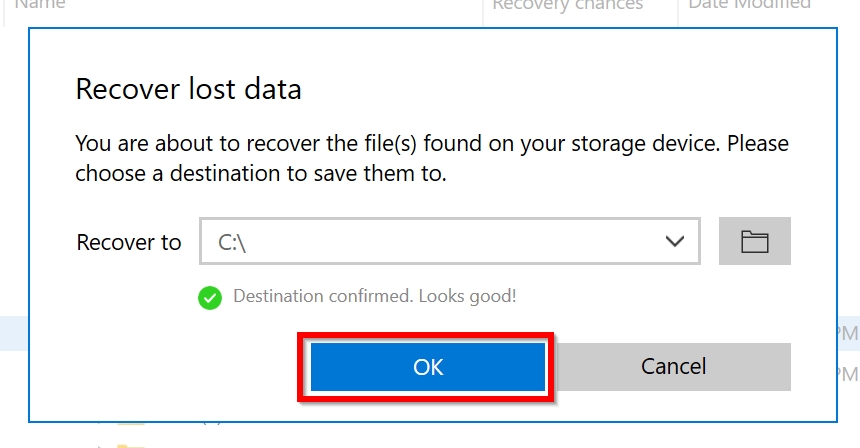
- Select the recovery location and make sure you’re restoring your files to a different device from which you’ve just recovered data. Finally, click Ok.
If your USB drive says it’s full but there are no files, Disk Drill is your ally in recovering your precious data.
For an in-depth analysis and all the pros and cons of the Disk Drill data recovery software, you can go through our Disk Drill review.
FAQ
How to check if the flash drive is empty?
Here’s how you can check if your USB stick is empty:
- Go to File Explorer > This PC > Devices and drives to locate your USB thumb drive.
- Right-click on the flash drive & select Properties.
- When the window opens, check Used Space and Free Space on your USB device. Capacity is the total space of the flash drive.
How to get more space on the USB drive?
You can get more space on your USB stick by creating new partitions from unallocated space on the drive. Follow these steps to allocate free space:
- Press Win + R and type diskmgmt.msc. Now, press Enter to launch Disk Management.
- Find the unallocated volume, right-click on it, and select New Simple Volume.
- You’ll see an installation wizard for creating a new volume. Click Next. Now, enter a size for the new partition, and click Next again.
- Select a drive letter you want to assign to the new partition, and click Next.
- Select a file system, enter a Volume label, and click Next.
- Finally, click Finish and to create a new partition.
How to restore the USB to full capacity on Mac?
Follow these steps to restore the USB drive to its full capacity on Mac:
- Connect the USB stick to your Mac.
- Go to Applications > Utilities > Double click and open Disk Utility.
- Select your USB thumb drive on the sidebar, and choose Erase.
- Rename the pen drive, choose the format as MS-DOS (FAT) for Format, Master Boot Record for Scheme. Then click Erase.
Why does it say my USB is full when it's not?
The USB flash drive says its full when it’s not due to the following reasons:
- Logical issues like file system corruption, developing bad sectors, wrong format, etc.
- Physical damage like moisture, dirt or broken USB stick.
- If you’ve tried to copy a large file on a FAT32 formatted flash drive.
Conclusion
While USB flash drives are a convenient solution to store your media files, documents, and other data, they often show errors and can become inaccessible due to damage or corruption.
However, it is quite easy to fix the USB drive and recover data from it. You can try using the methods mentioned in this article to repair and recover data from your pen drive without complications.
This article was written by Joshua Solomon, a Contributing Writer at Handy Recovery Advisor. It was also verified for technical accuracy by Andrey Vasilyev, our editorial advisor.
Curious about our content creation process? Take a look at our Editor Guidelines.