There are several ways to repair USB drives, but none of them offer the same level of fine-tuning as the Windows Command Prompt (CMD). Whether it’s revealing hidden files on your USB drive (attrib command), performing an error-checking scan (chkdsk command), or formatting the drive (diskpart command)—Command Prompt lets you do all this, and more. That’s why it’s best to first use the Windows Command prompt to repair a flash drive before moving on to paid third-party repair tools.
So, how do you fix a pen drive using Command Prompt? What commands to execute? How to save existing data from the USB drive? The guide below answers these questions.
Why Is It Important to First Back Up Your Data?
Before proceeding to repair your USB drive using CMD, back up any existing data from the drive to another location. A corrupted, or damaged USB drive may experience further data loss, or fail entirely—a backup protects you in case this happens. Additionally, some methods to repair the drive—like running CHKDSK—may cause minor data loss.
If you can access the pen drive’s files, manually copy them to a safe location on your PC using Windows Explorer (Windows Key + E).
However, if the pen drive’s file system is corrupt, or it’s facing other logical issues, it may not show up in Windows Explorer. In this case, use a good third-party data recovery tool to create a disk image and recover data from it. Most third-party data recovery programs can access your USB drive, even if it doesn’t show up in Windows Explorer.
Backup and Recover Important Data Using a Specialized Tool
There are plenty of tools that can help you back up and recover data from your USB drive. We decided to go with Disk Drill, mainly because of its ease-of-use, and versatility. Using Disk Drill, you can do both—create disk images, and recover data from these disk images. Most other programs let you do the latter, but not the former.
Disk Drill for Windows offers a free trial, letting you recover up to 500 MB of files without paying a penny.
Here’s how to use the program:
Part 1: Create a Backup Using Disk Drill
- Download Disk Drill and install it.
- Connect your pen drive to the PC.
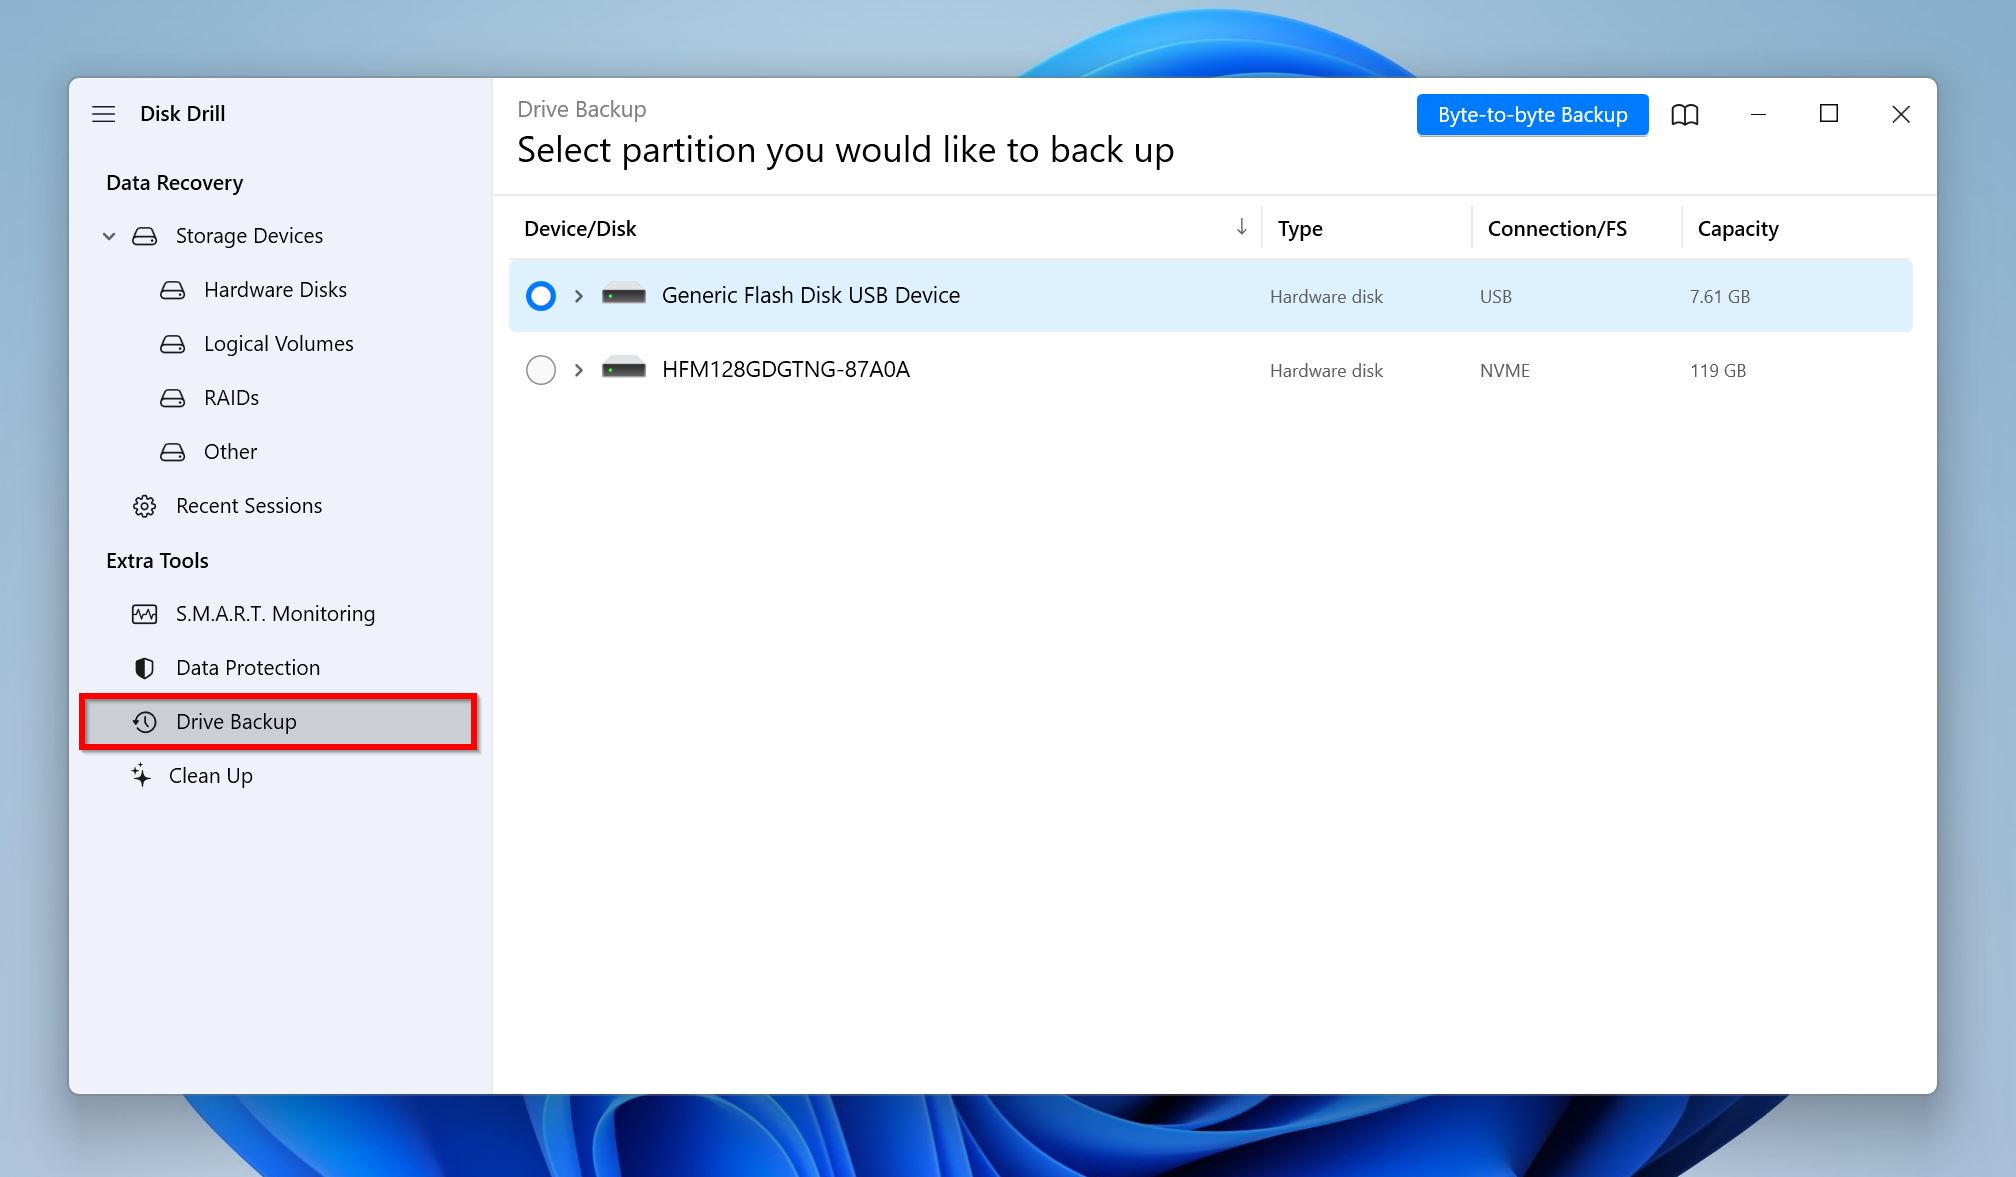
- Open Disk Drill, and click on Drive Backup under Extra Tools.
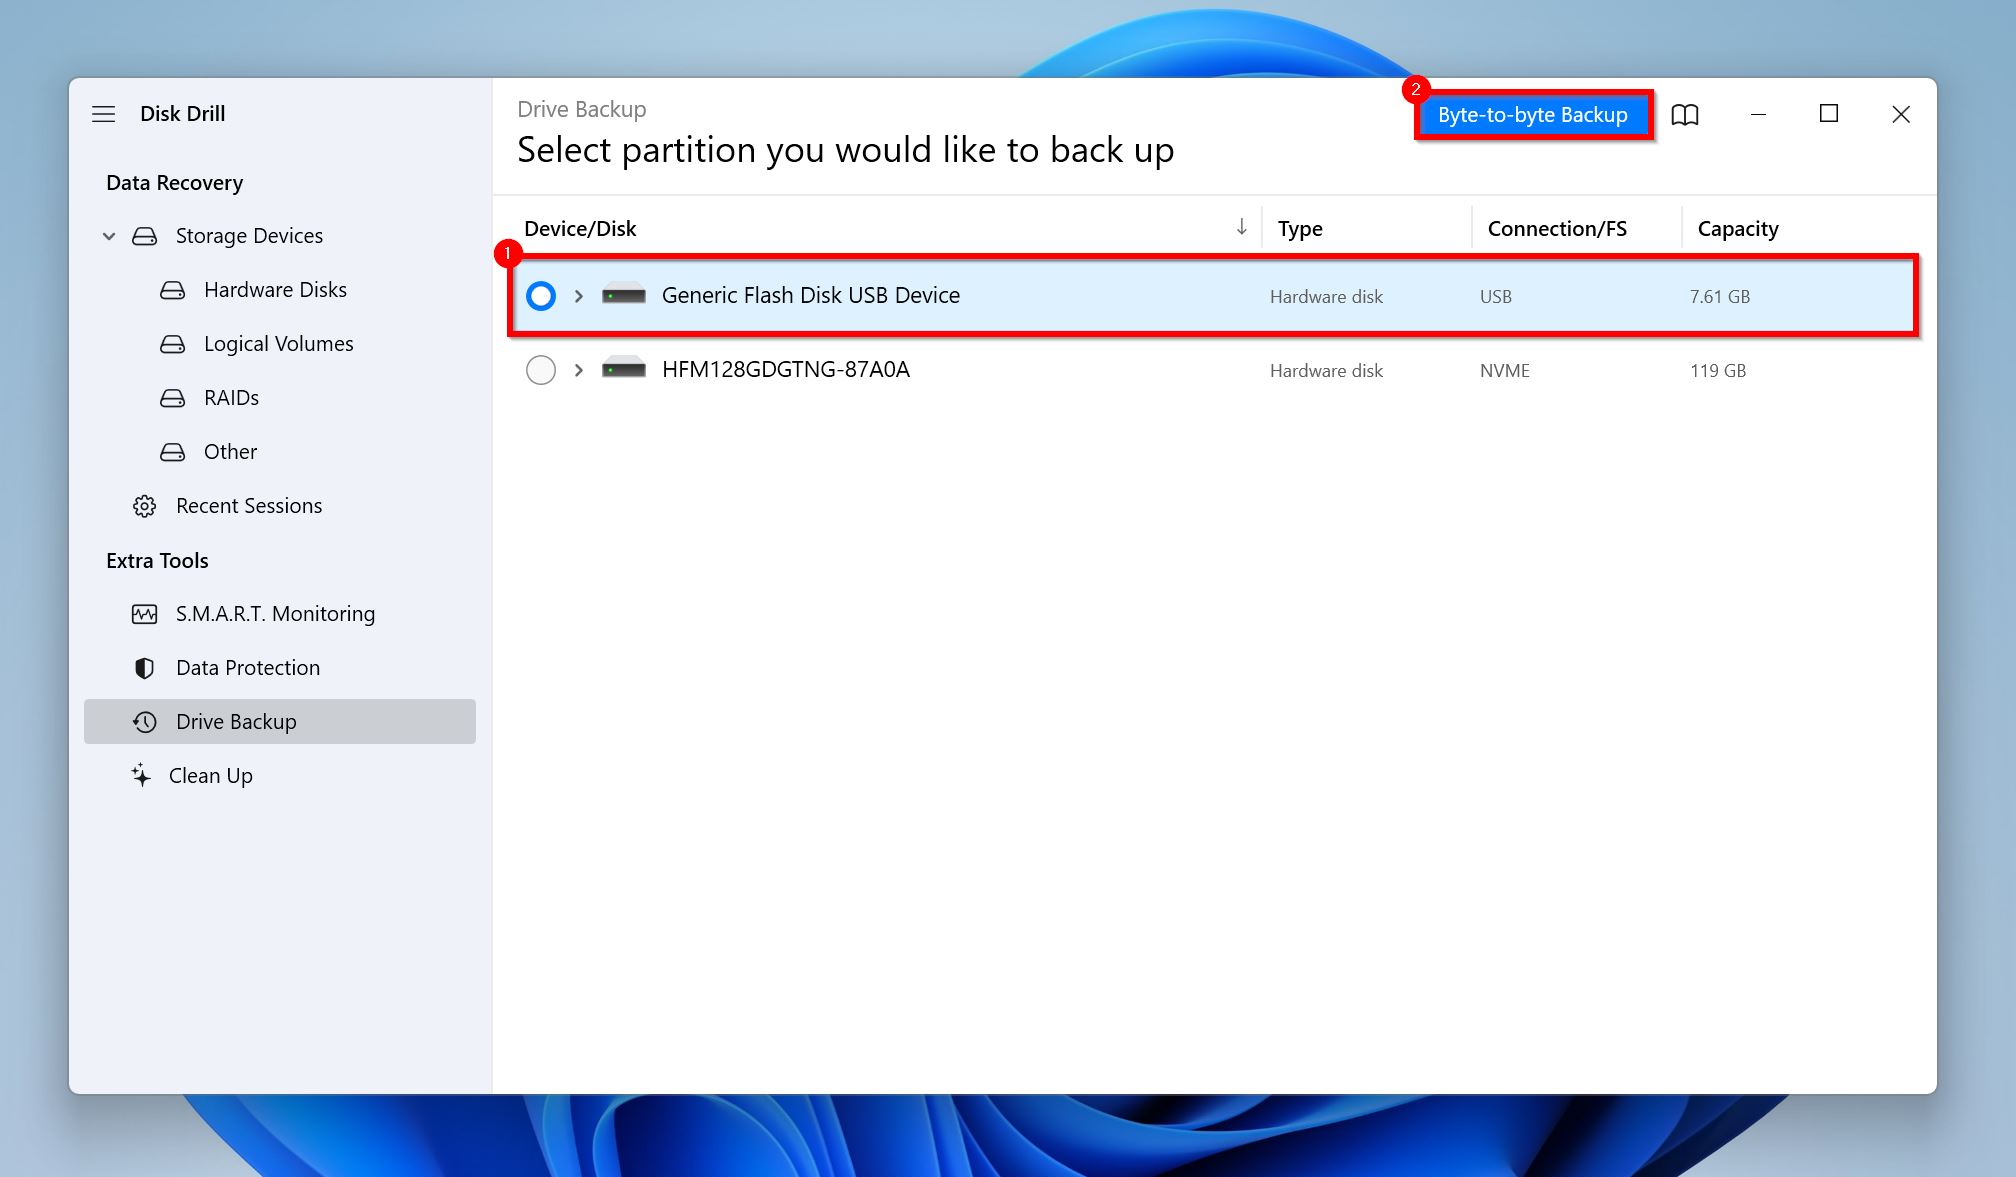
- Select the flash drive from the list of storage devices, and click on Byte-to-Byte Backup.
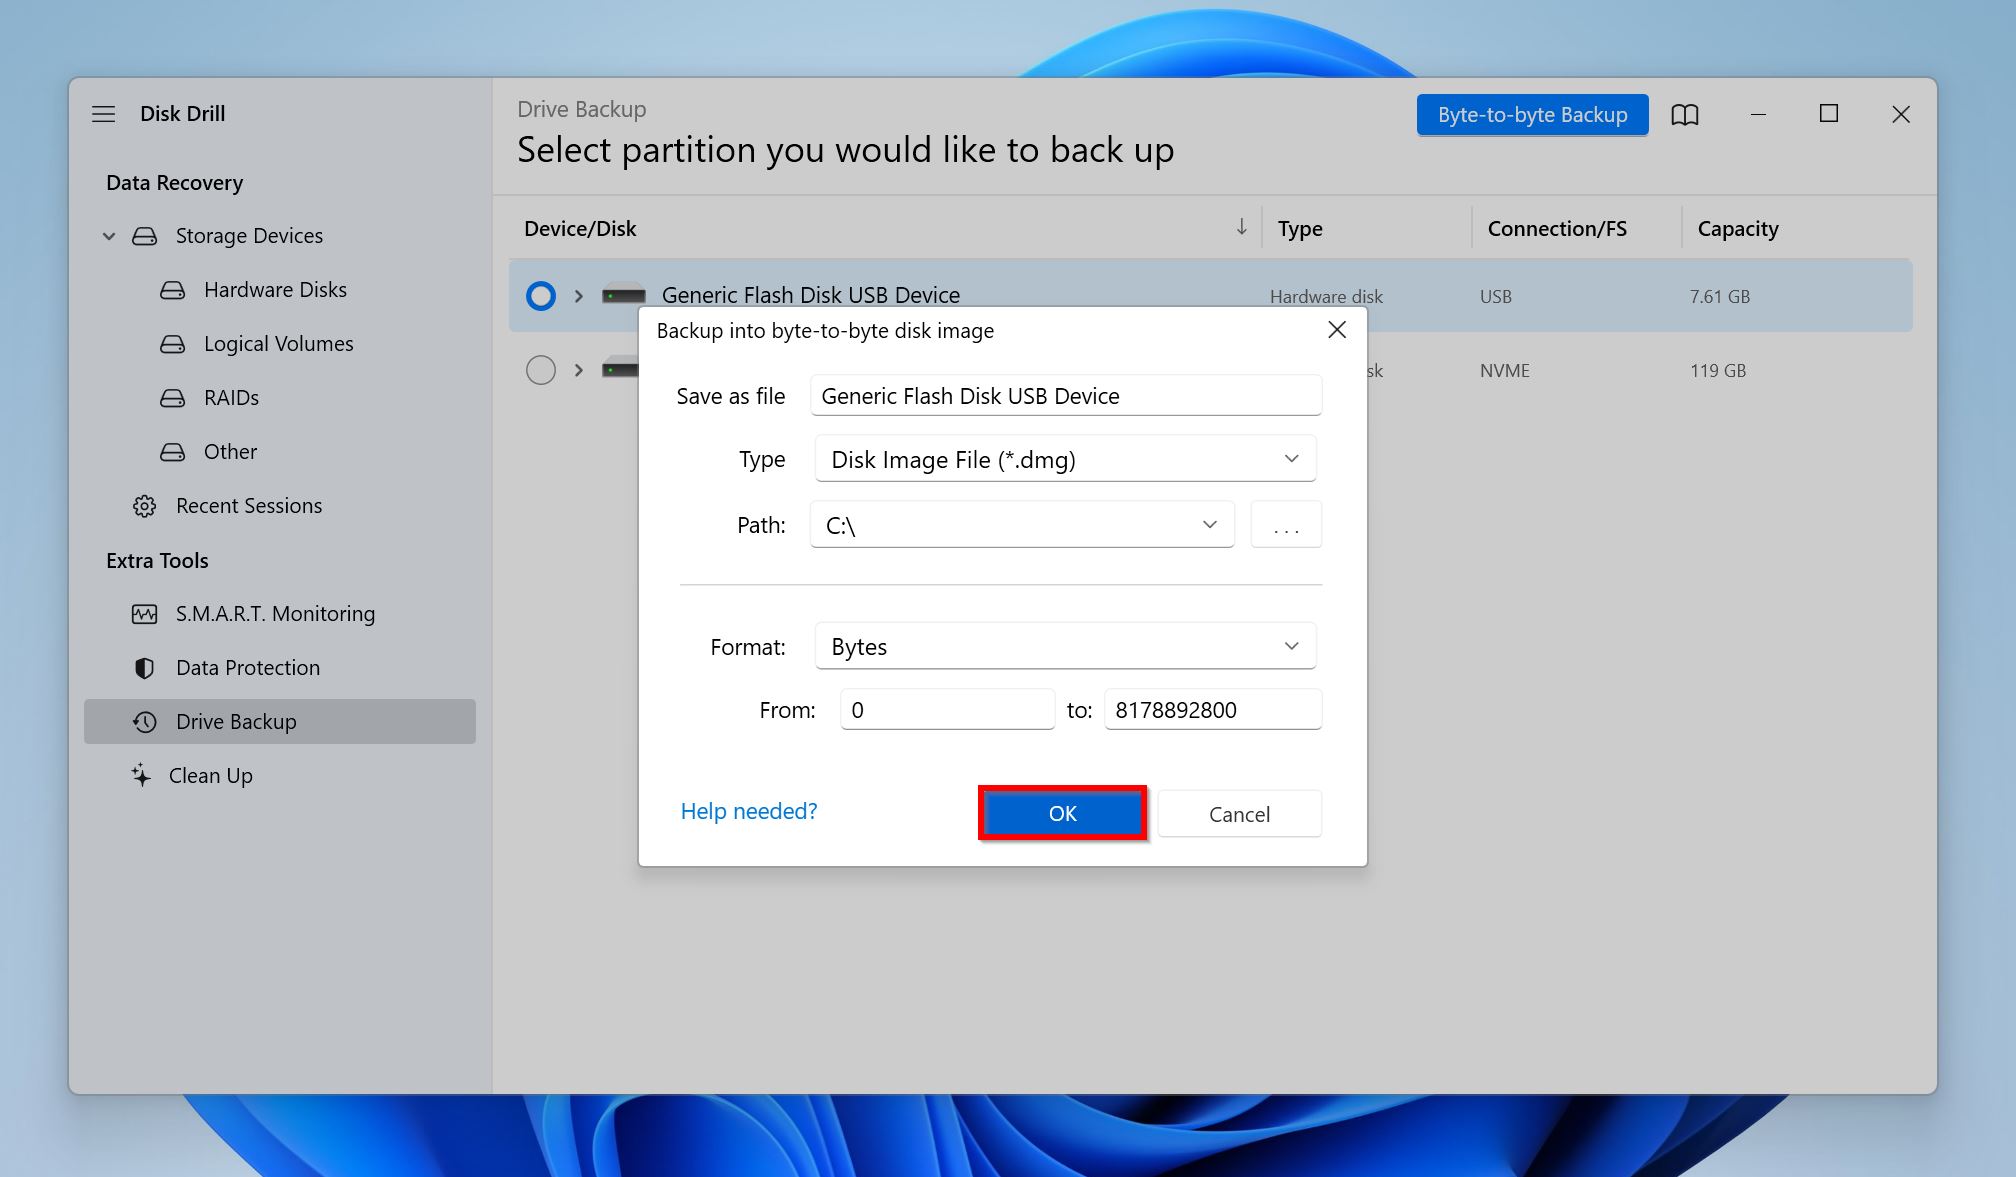
- Choose where you’d like to save the disk image to, and click OK. The destination should have free storage space that equal to, or more than the pen drive’s total storage capacity.
- Disk Drill will create the disk image. This may take a while, depending on your PC and the pen drive’s storage capacity.
Part 2: Recover Your Data Using Disk Drill
- Open Disk Drill and ensure you’re on the Storage Devices screen, under Data Recovery.
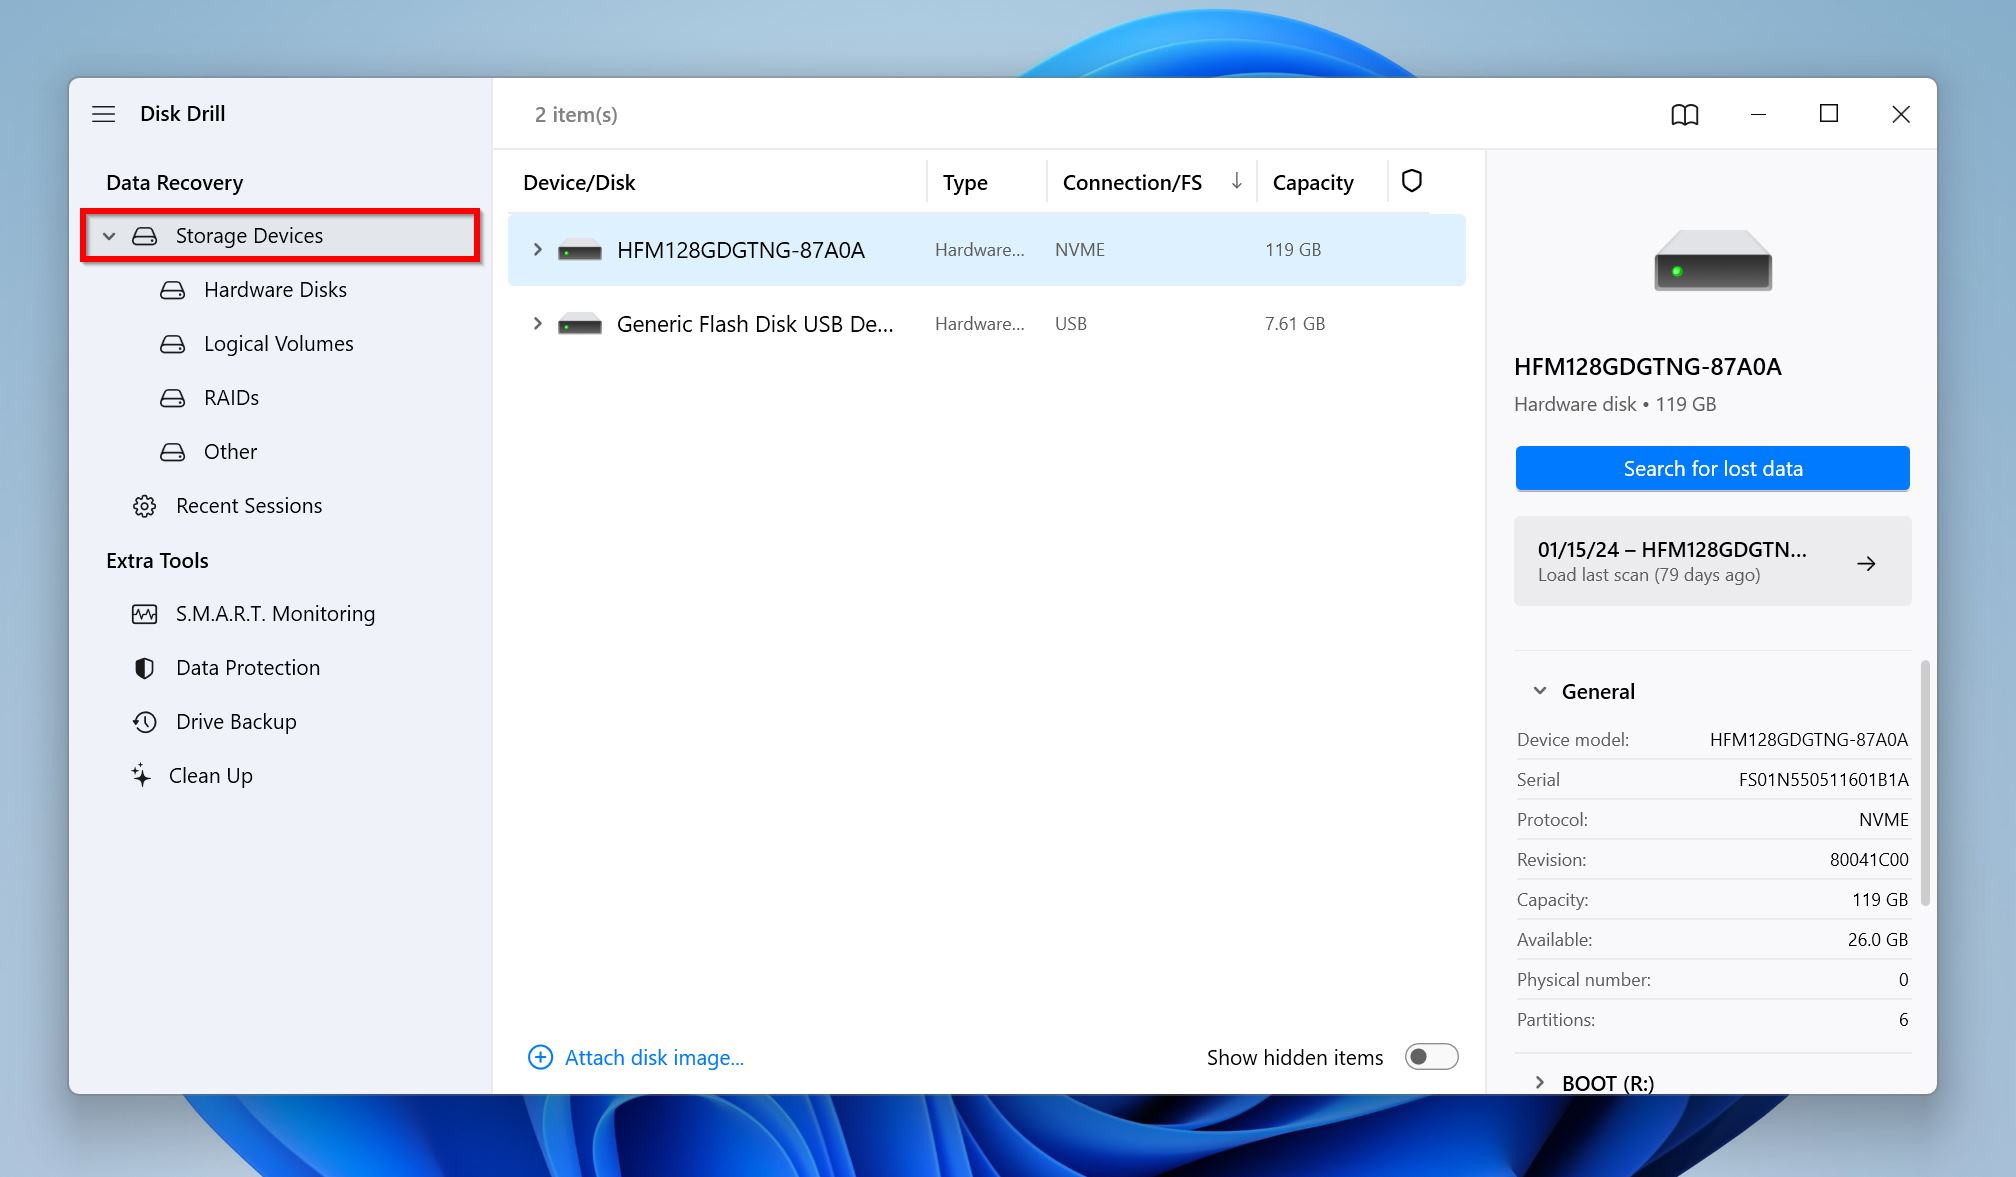
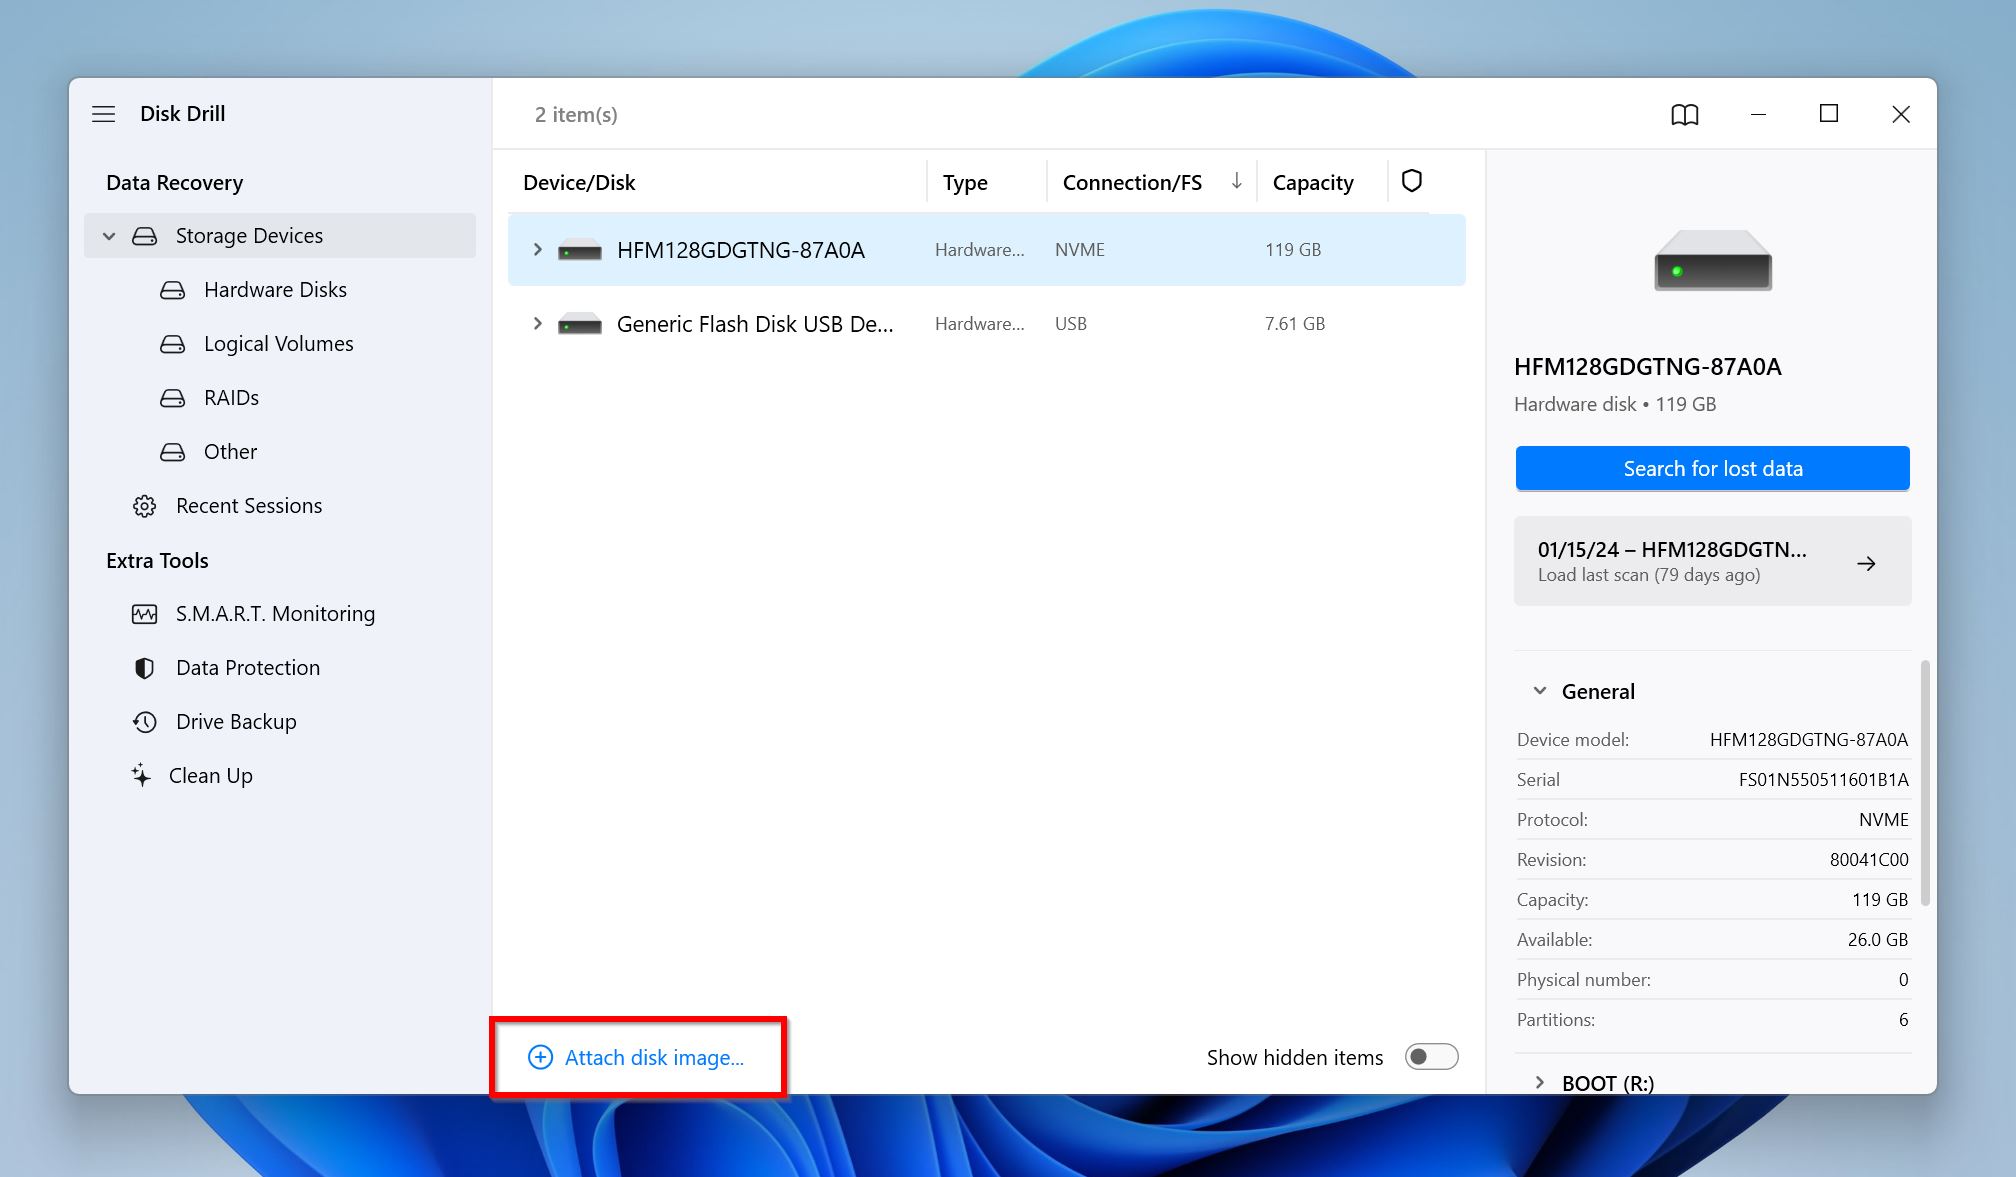
- Click on Attach disk image towards the bottom of the screen.
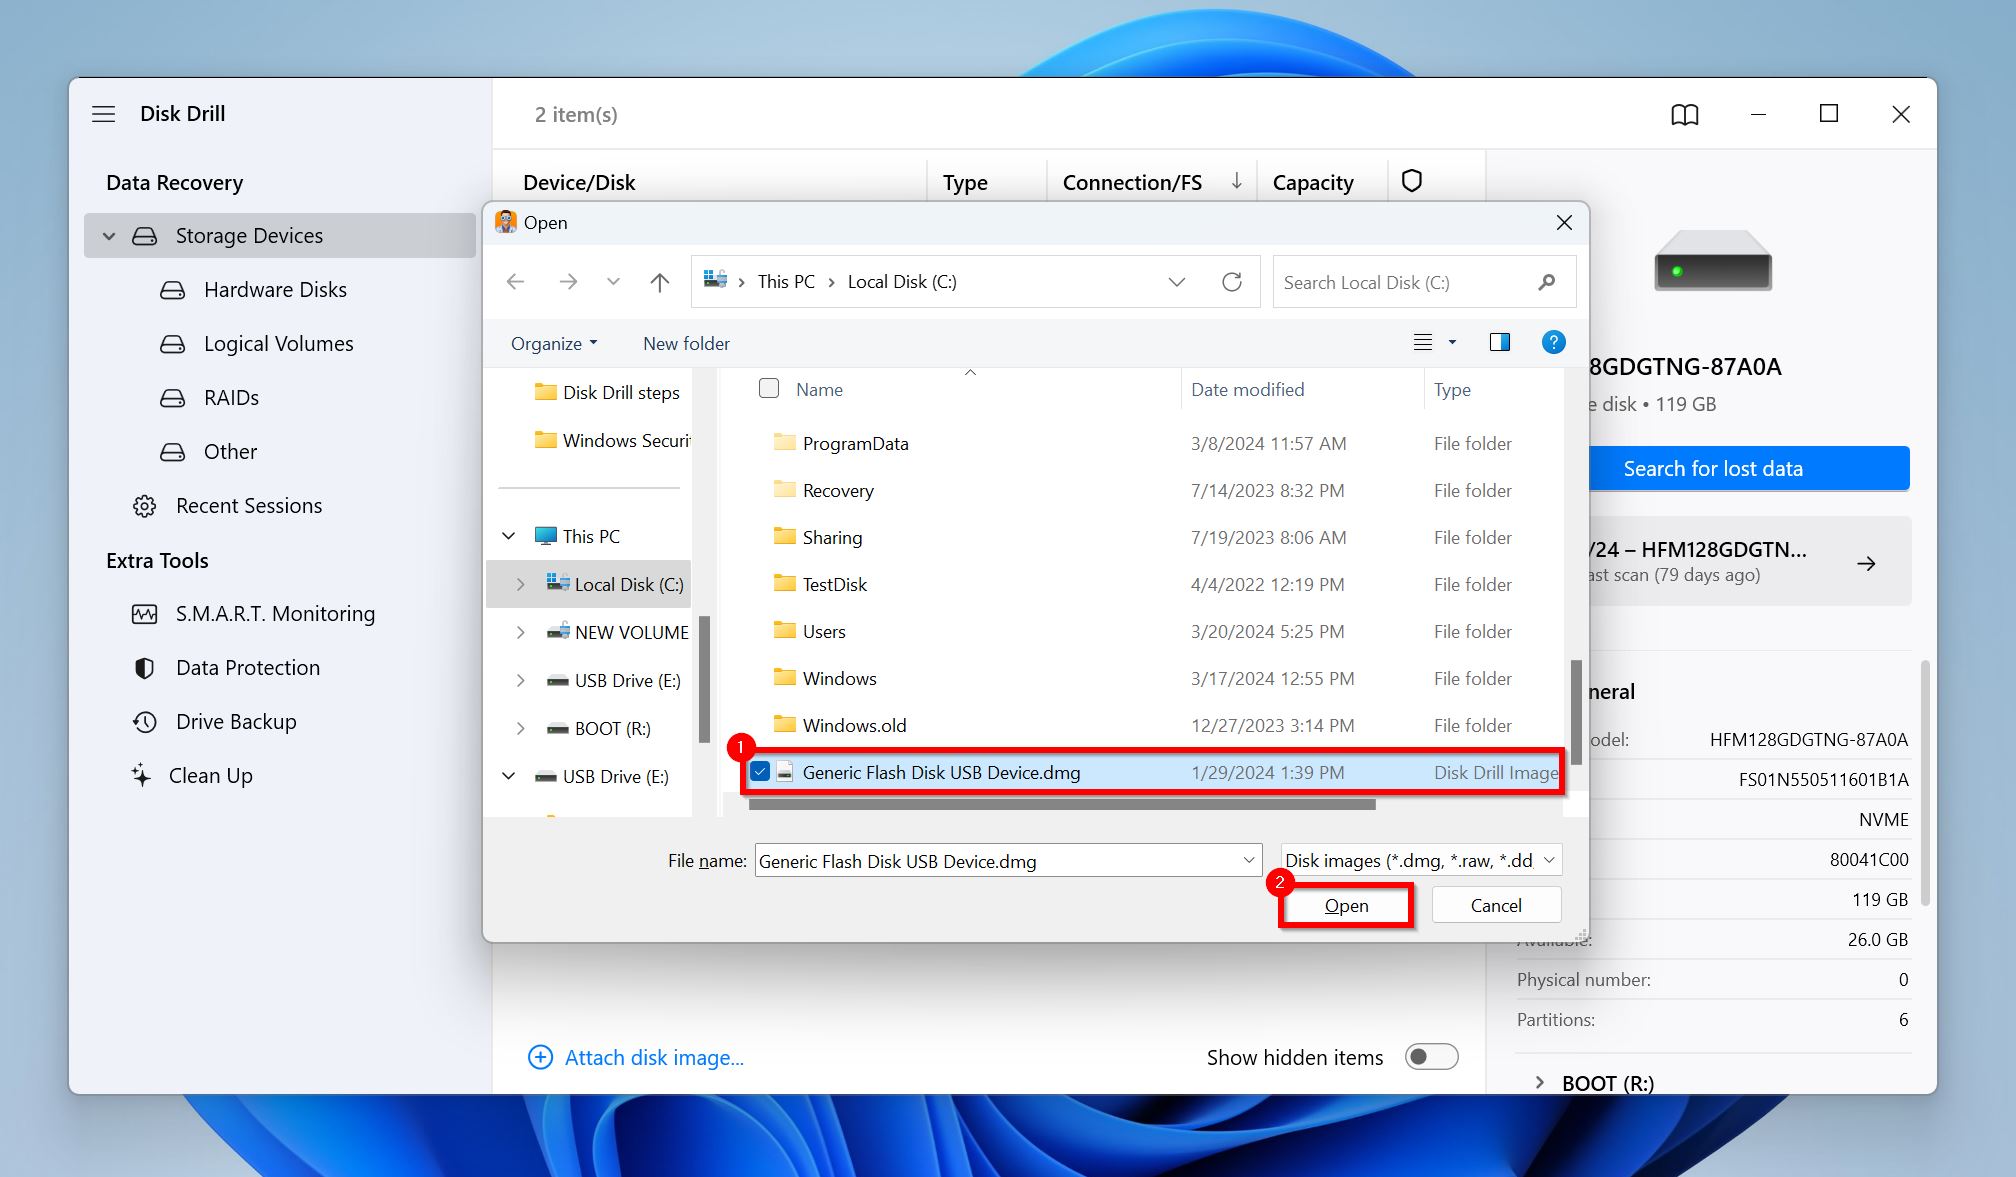
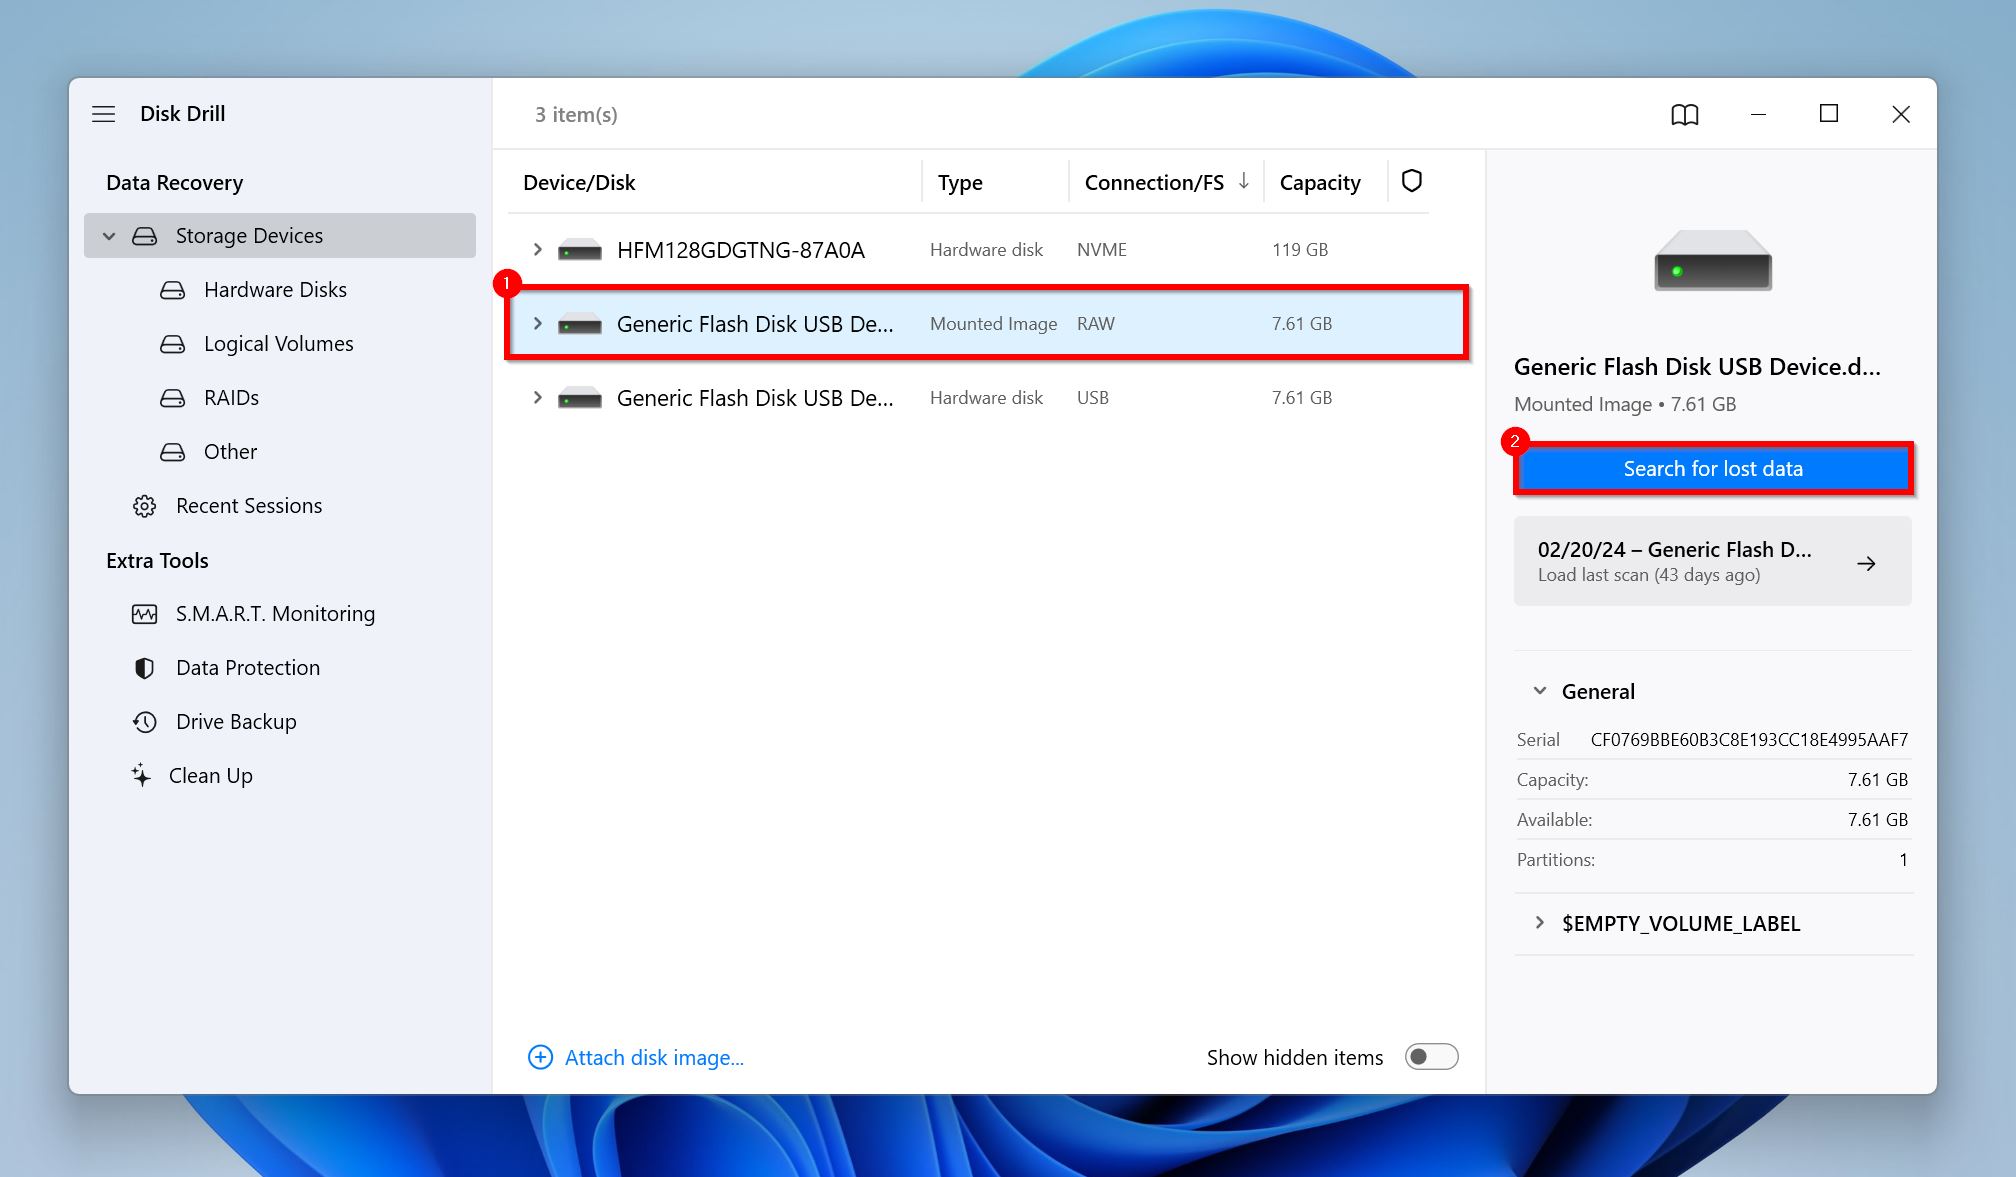
- Find the flash drive’s disk image in the browsing window, select it, and click Open. The disk image will show up as a separate drive in Disk Drill, with Mounted Image listed in the Type column.
- Select the disk image you added, and click on Search for lost data.
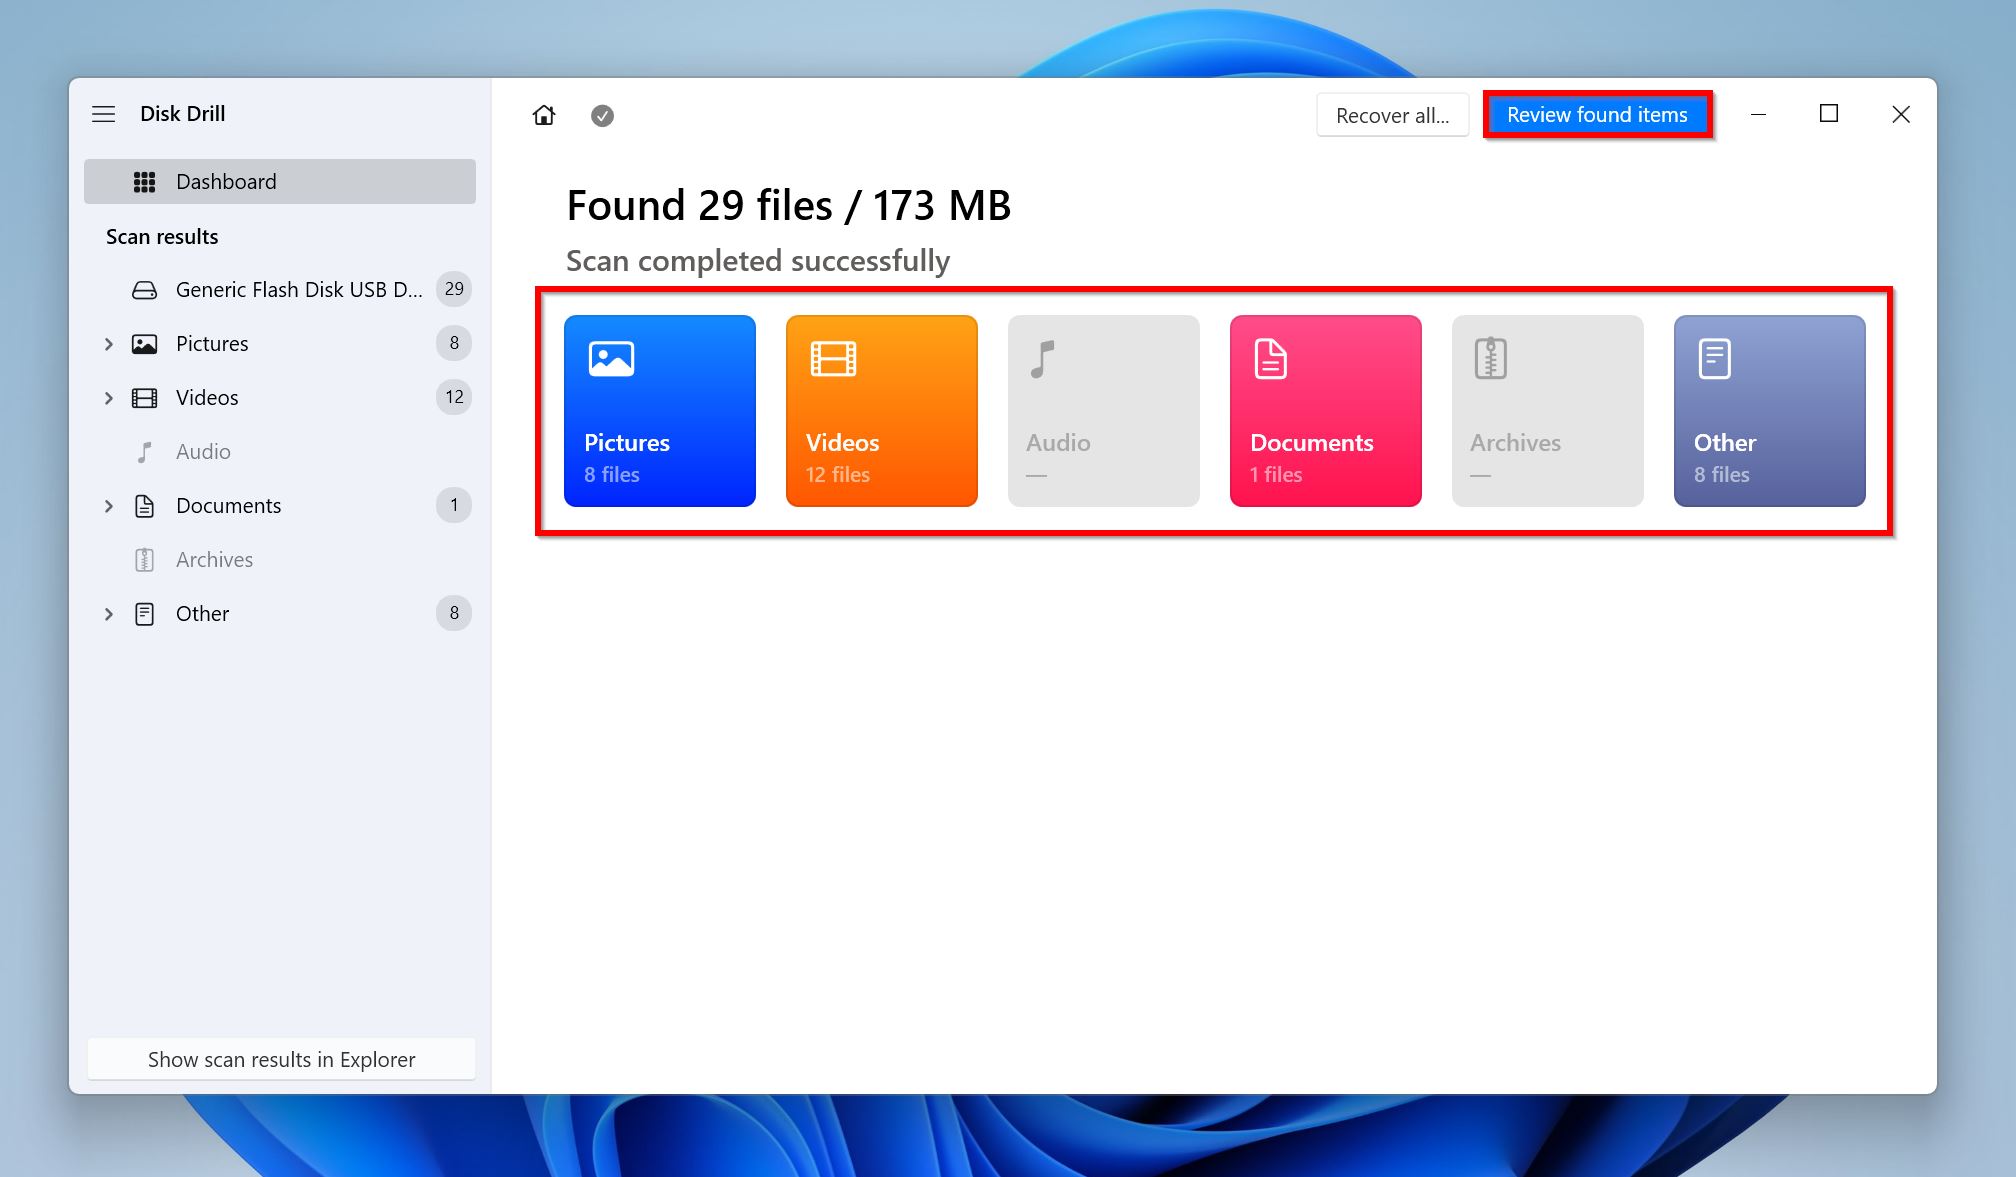
- Click Review found items to view all the files Disk Drill discovered. To view specific file types, click on the relevant tiles instead (Pictures, Videos, Audio, Documents, Archives, and Other).
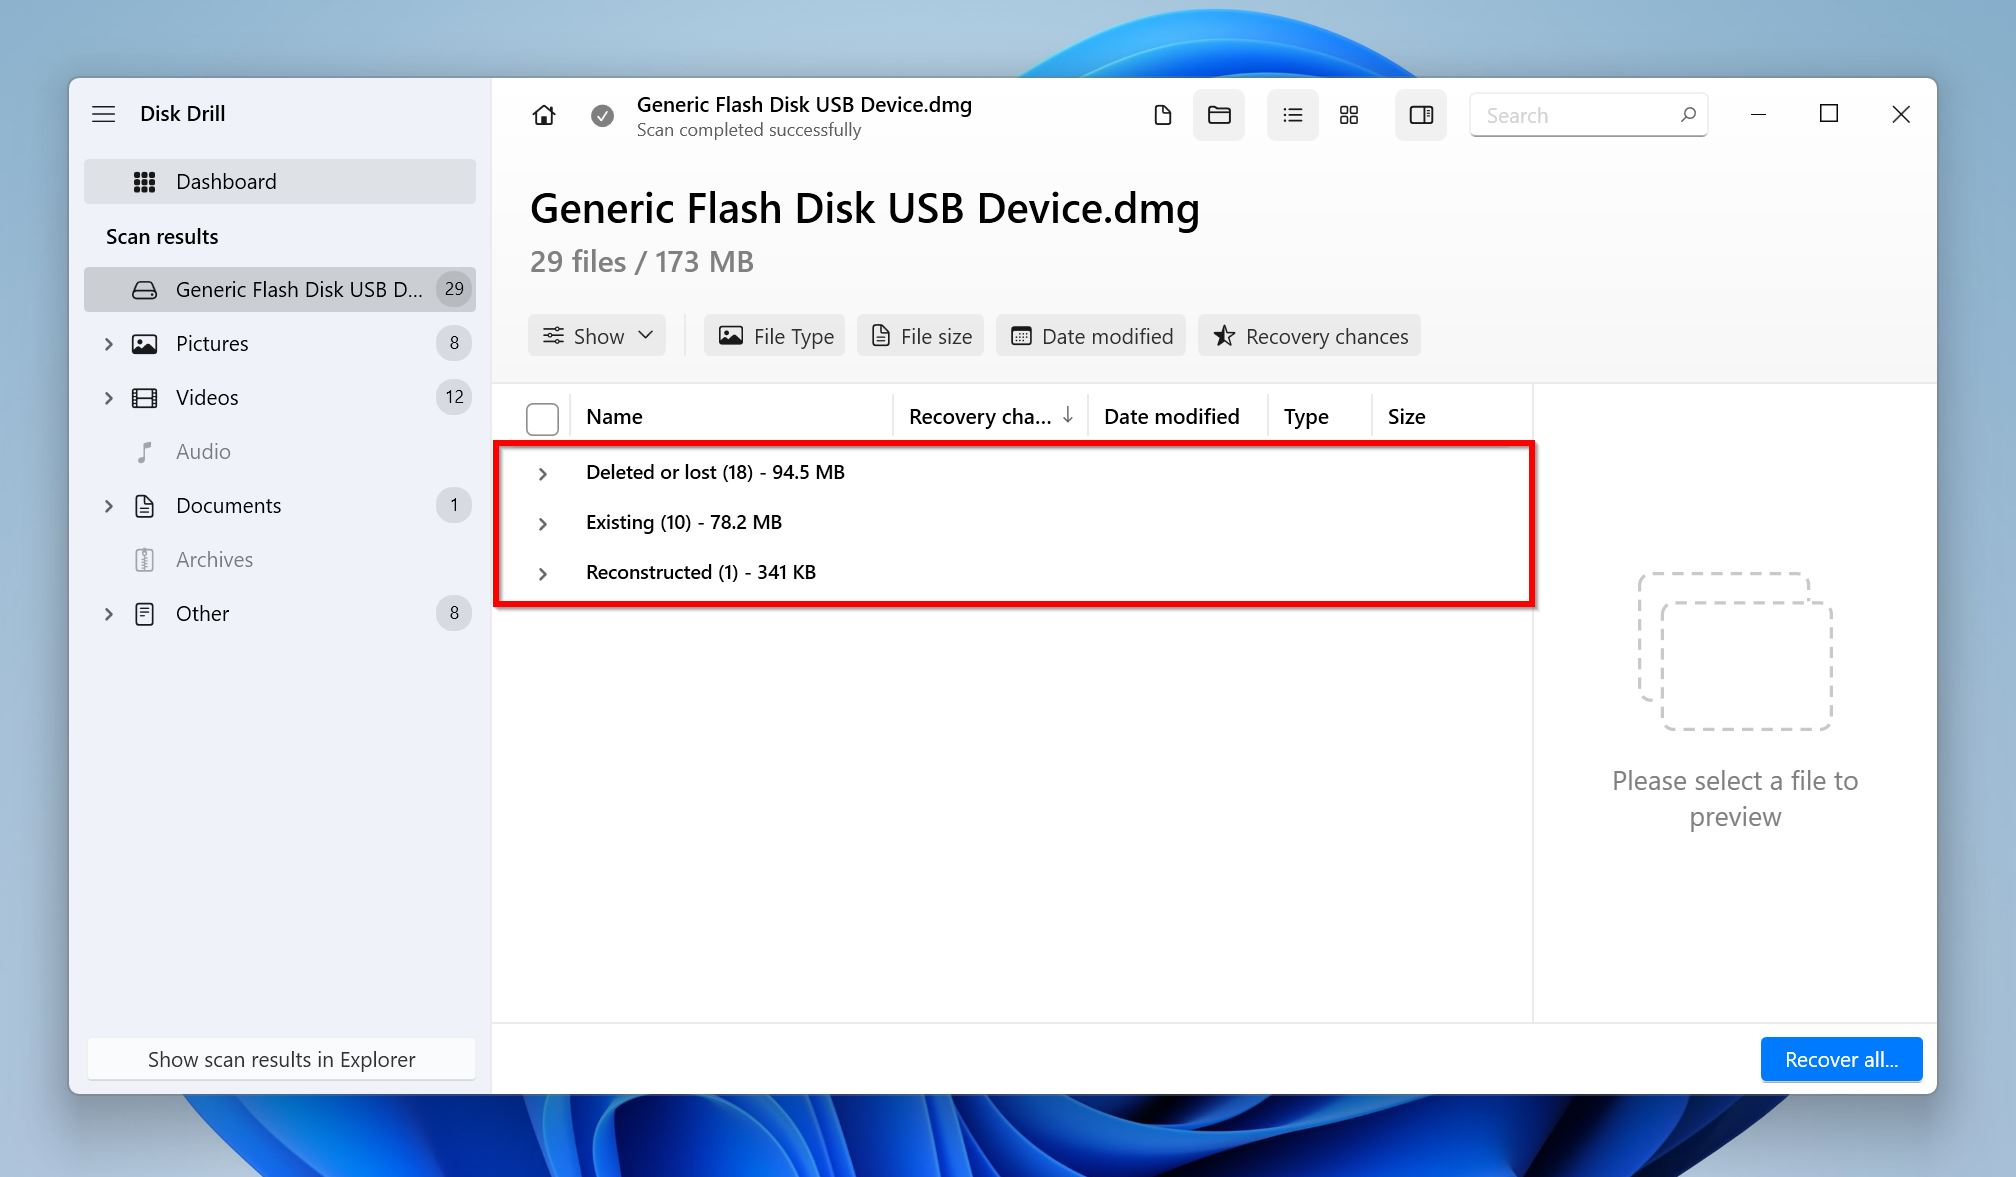
- Expand the Existing section to view currently stored files on the pen drive. To view deleted files that are recoverable, expand the Deleted or lost and Reconstructed sections instead.
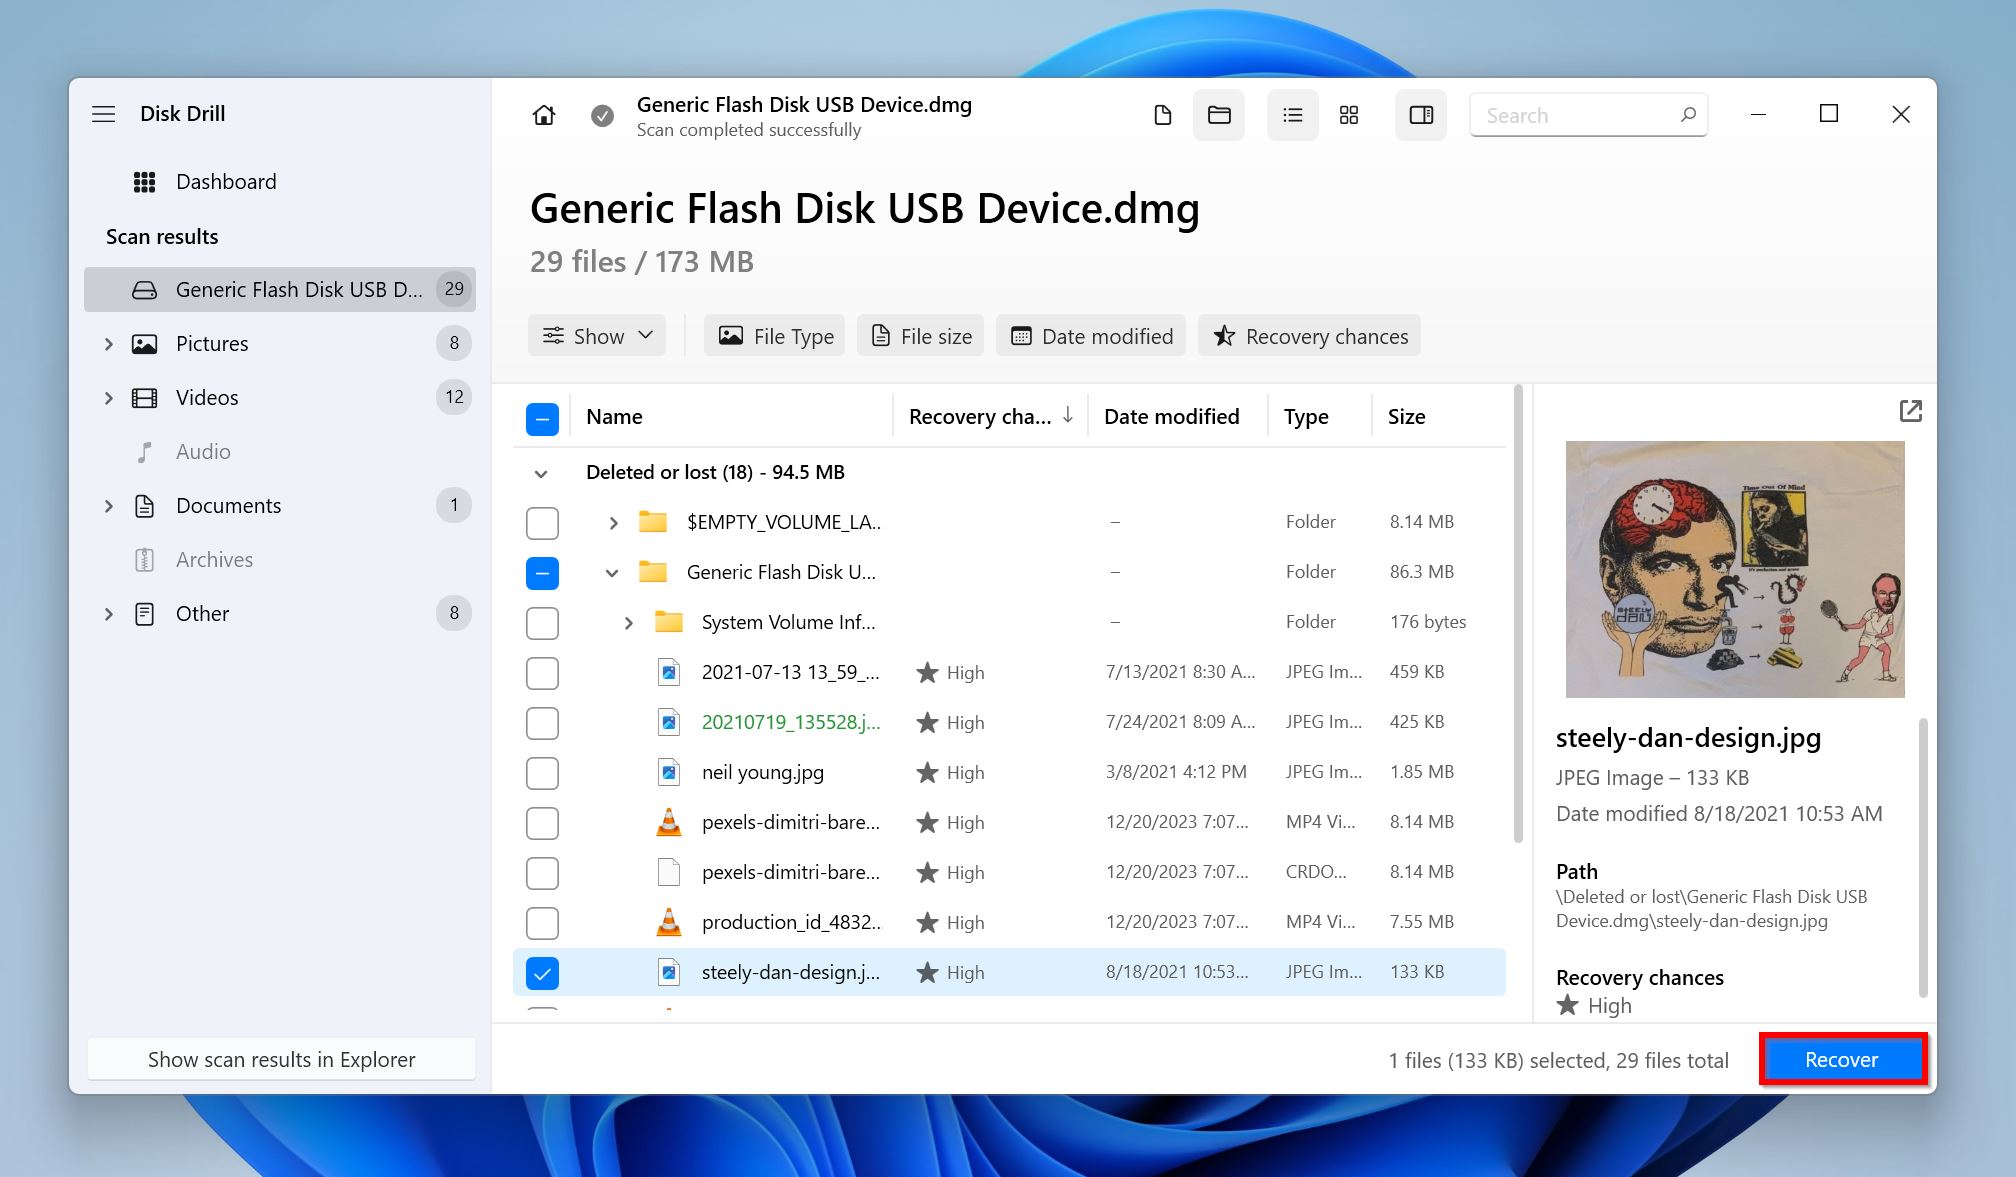
- Select the files you wish to recover and click on Recover. Disk Drill automatically displays a preview of the currently selected file, but you can manually preview any file by clicking the eye icon next to the filename.
- Choose a recovery destination and click Next.

- Disk Drill will recover the selected files.
Bonus: For a detailed look at the tool, read through our Disk Drill review.
How to Repair a Flash Drive Using CMD
Let’s take a look at a few methods that will help you fix a USB drive using CMD. Three of the methods work without downloading additional software, they are all run using Windows Command Prompt. The last method will require you to download an open-source data recovery program.
Method 1: Fix Hidden Files on Pen Drive Using CMD (Attrib)
One of the ways to recover files from USB using CMD, is to use the attrib command. Sometimes, malware can modify the attributes of files and directories, rendering them inaccessible or hidden from view.
The attrib command in CMD restores these attributes so you can regain access to your files and folders.
Instructions on how to use the attrib command:
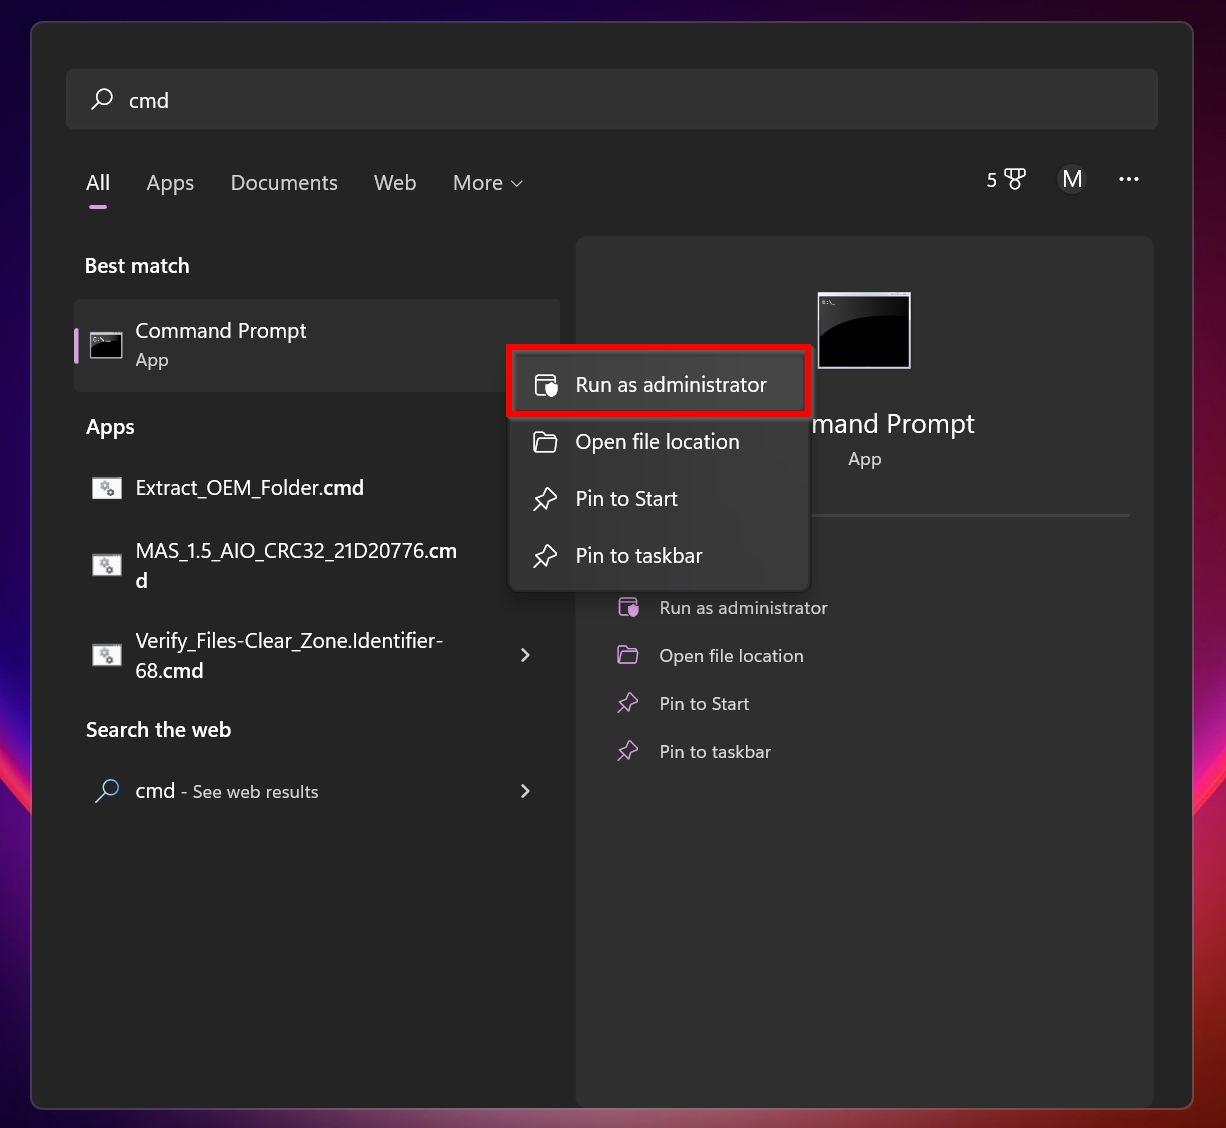
- Type cmd in Windows Search (Windows Key + S) and right-click on Command Prompt > Run as administrator from the search results.
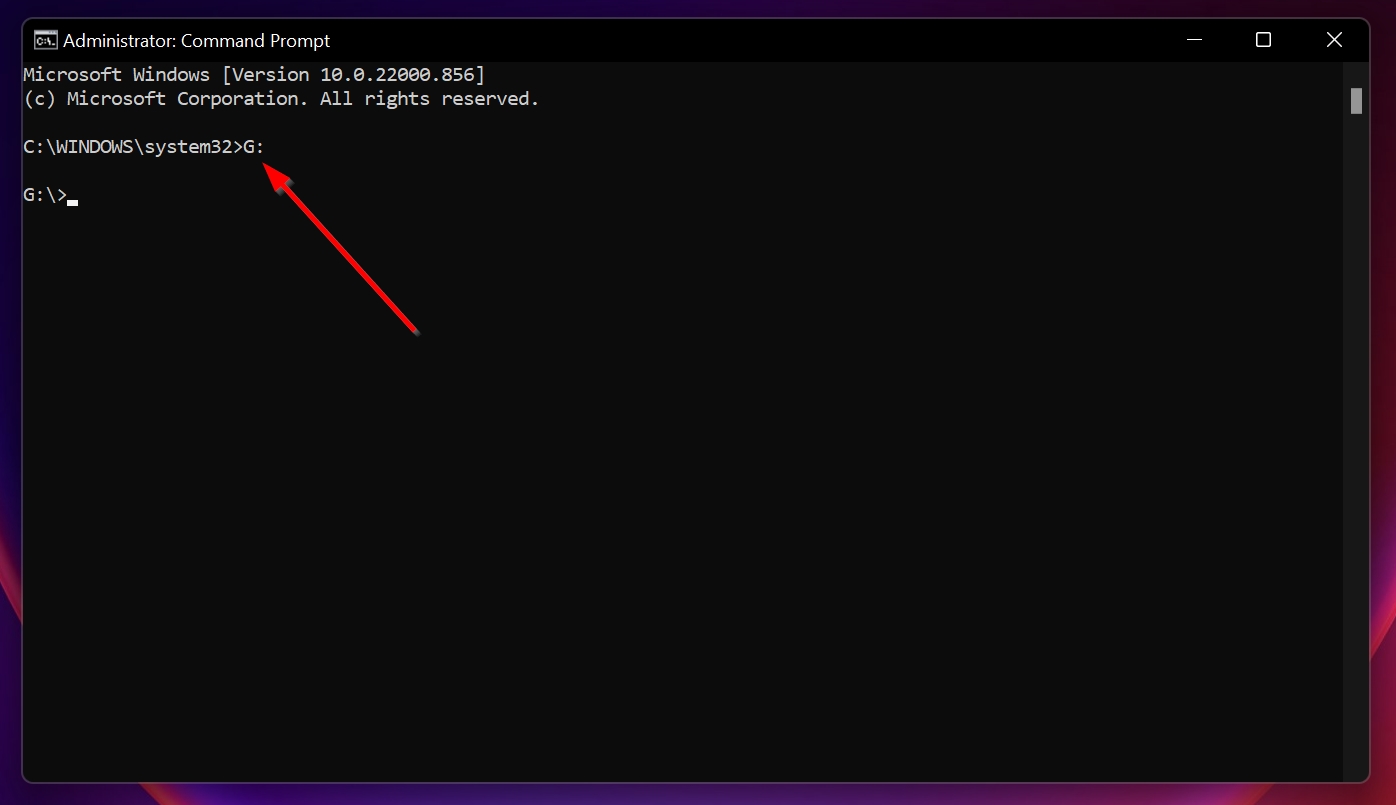
- In the console, type X:, where X is the drive letter of your USB drive and press Enter.
- Now, enter the following command and press Enter: attrib -h -r -s /s /d *.*.
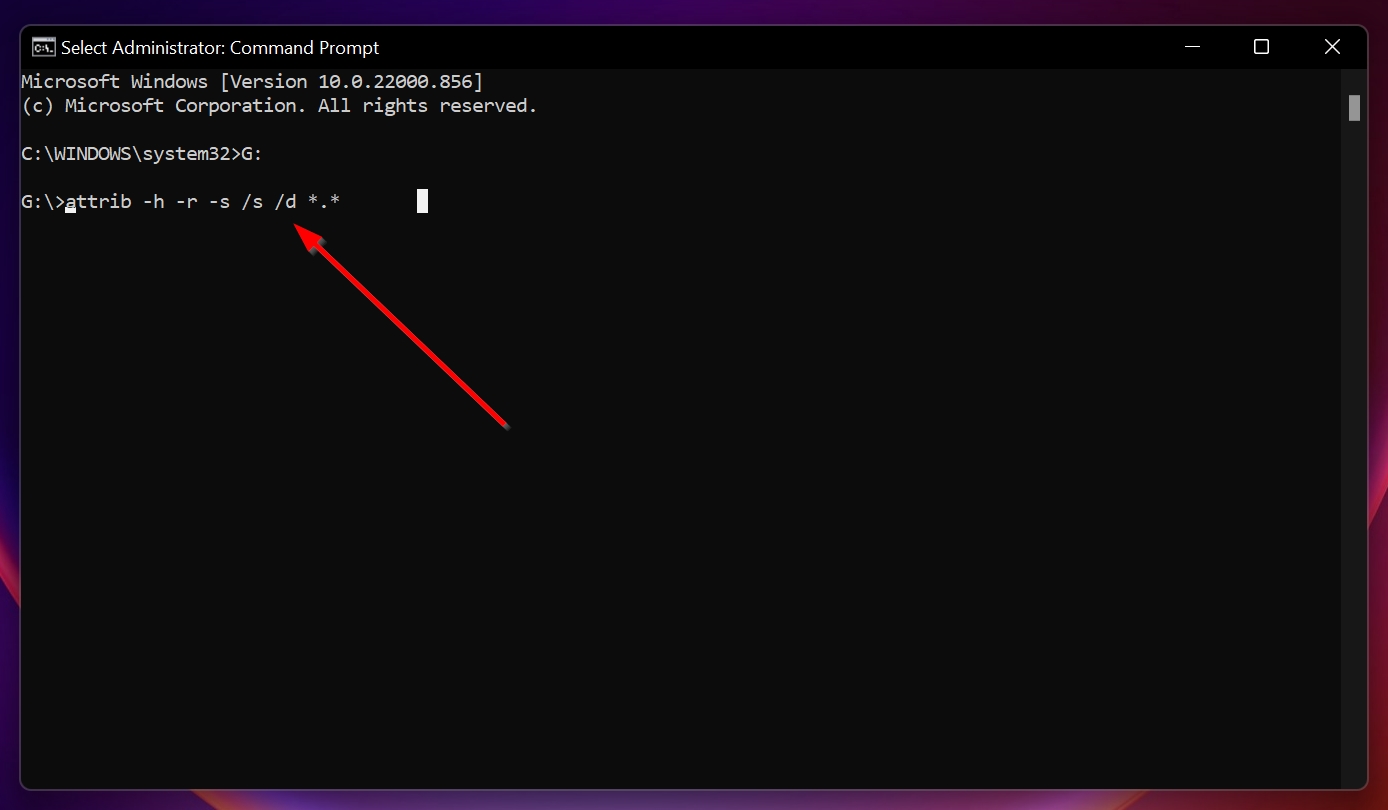
- You should now be able to view any files that went missing because of a virus.
It’s good to know what the parameters at the end of the attrib command mean:
- -h unhides the files.
- -r removes the Read-only attribute from the files.
- -s clears the System file attribute from the files.
- /s and /d apply attrib and any other command line options to directories as well as all matching files and subdirectories.
- *.* informs Windows that you want to apply attrib to all files in the current directory.
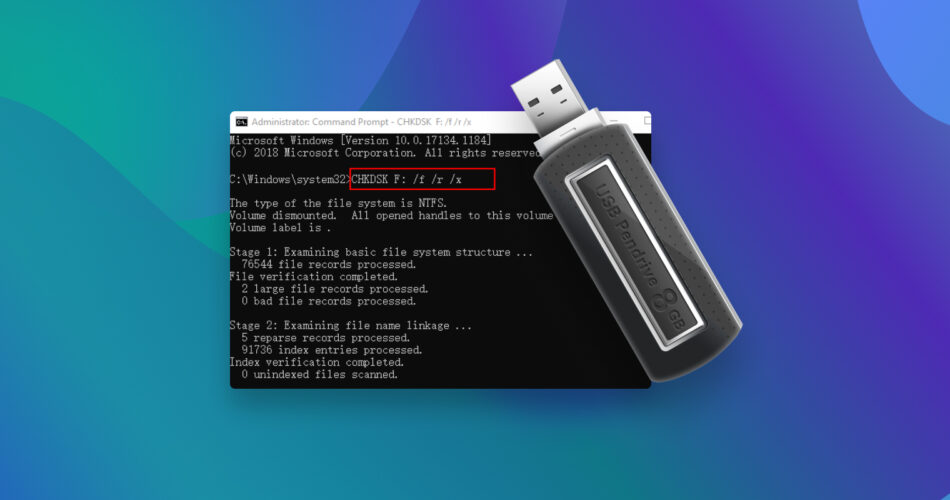
Method 2: Repair Corrupted USB Drive With CHKDSK
CHKDSK is Windows’ in-built command line utility that can help repair a USB drive using CMD. It automatically scans and checks for errors on a disk. This includes detecting and repairing bad sectors, thus fixing the corrupted USB drive. While CHKDSK can restore some of the data on your USB drive, it can also rewrite it, so it’s best to first create a backup of your USB drive.
Note: If your flash drive has turned RAW, the CHKDSK command will not work. The only exception to this is if your USB drive was first formatted in the NTFS file system before it turned RAW.
After running the CHKDSK command, you can also scan the drive using USB data recovery programs to get back any information that may have gone missing.
Here is how to fix a USB drive in CMD using the CHKDSK command:
- Again, run Command Prompt as administrator. You can use Windows Search (Windows Key + S).
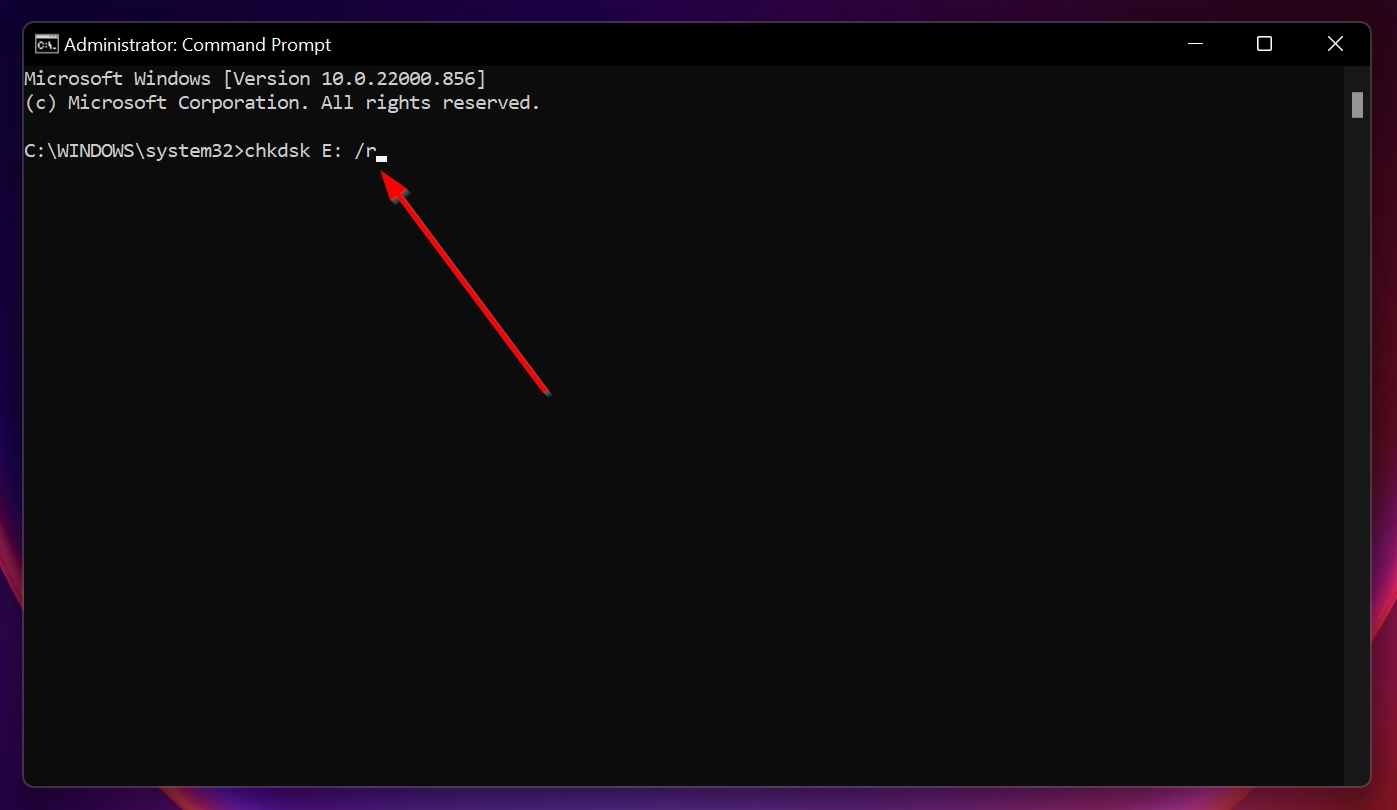
- In the CMD console, type chkdsk X: /r (replace X with the drive letter of your USB drive), and press Enter.
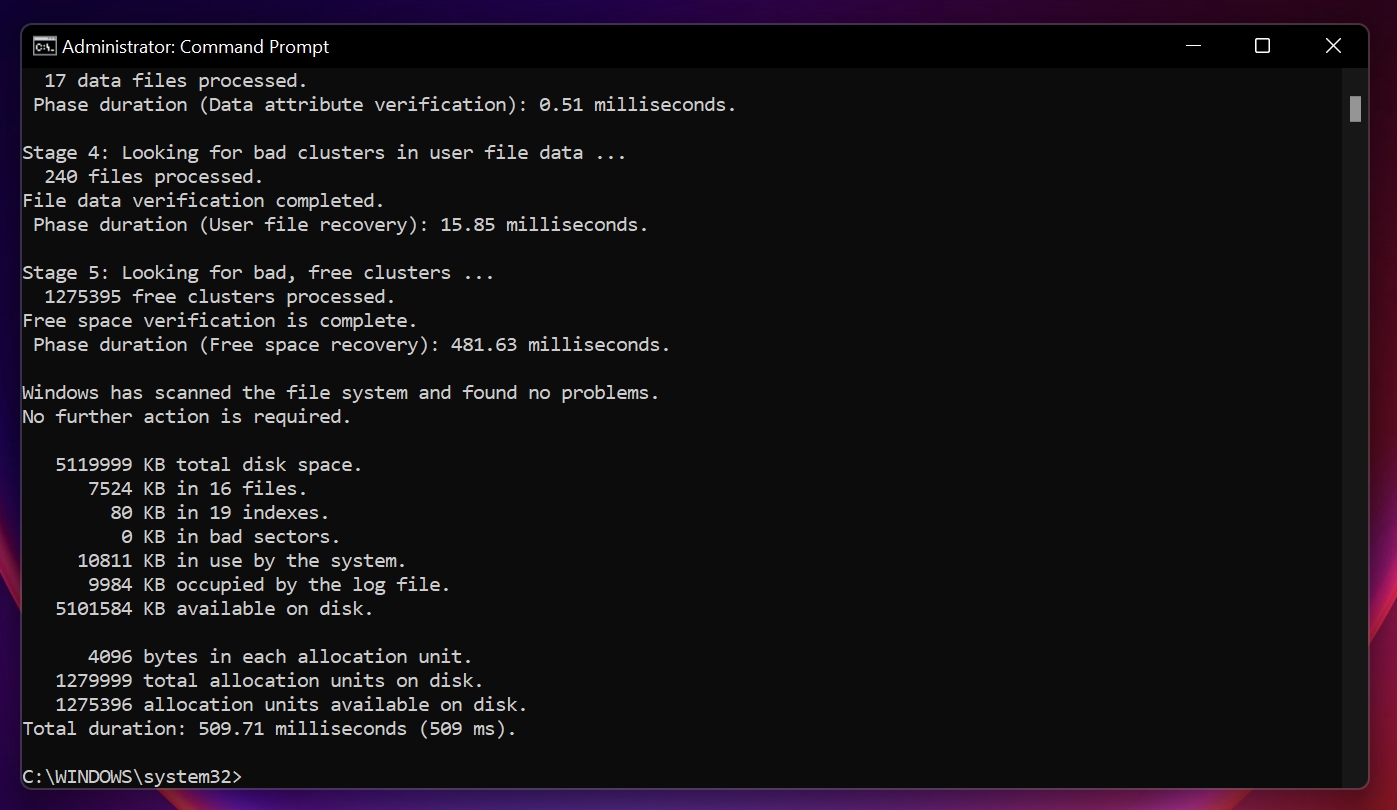
- Wait for CHKDSK to finish scanning and repairing the USB drive. The time taken may vary depending on the size of your USB drive.
Method 3: Format Flash Drive Using DISKPART Command
Diskpart is a command line utility in Windows that is used to manage and make modifications to physical as well as virtual drives on your computer. Formatting a RAW or corrupt USB drive to a recognized format using diskpart is one of the ways you can repair a flash drive using CMD.
While formatting will delete all the data on your USB drive, you can still recover it using data recovery software like Disk Drill. This only works if you Quick Format the drive. Thus, closely read the commands in our diskpart tutorial and remember to add all the parameters specified in each command.
Tutorial on how to run a Quick Format on the USB drive using diskpart:
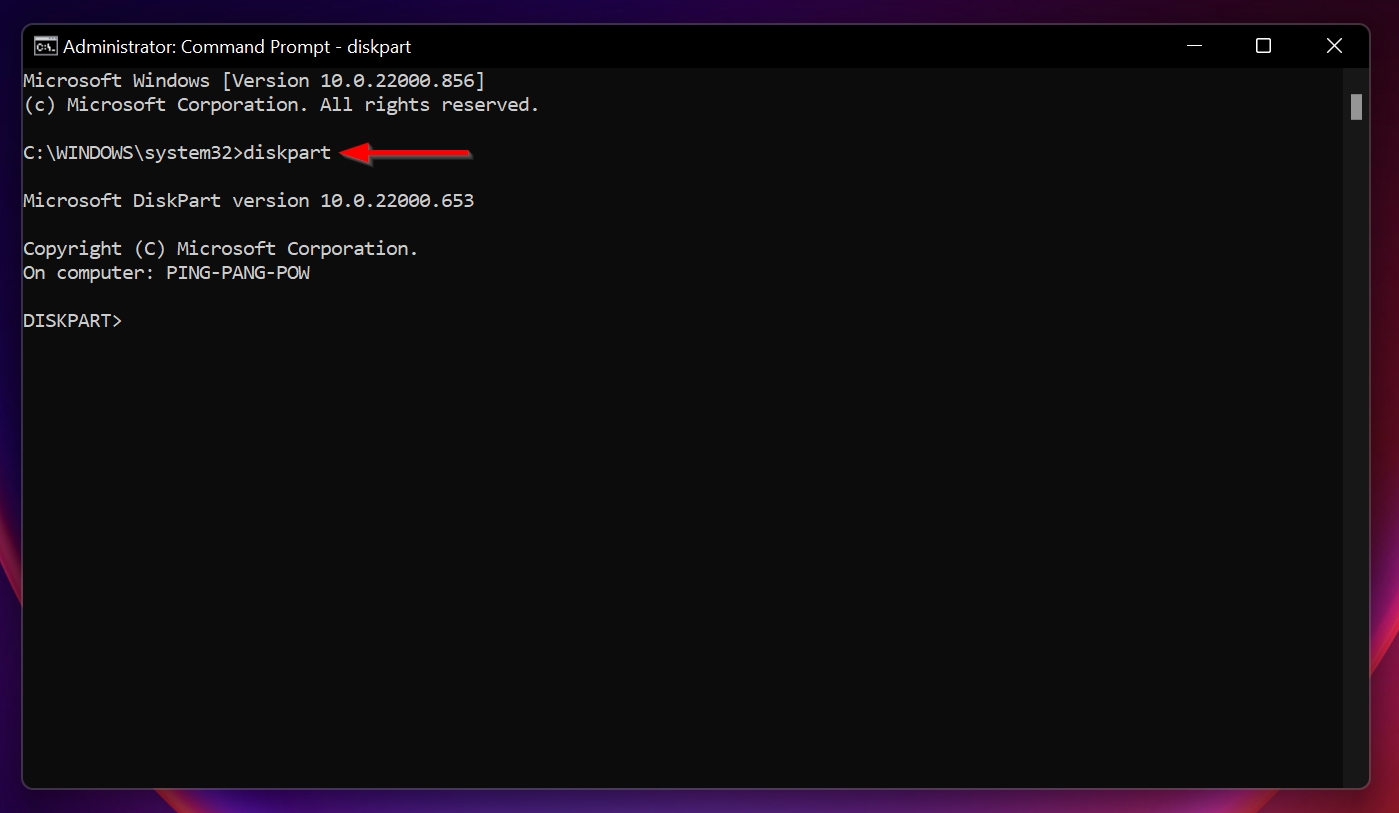
- Search for CMD in Windows Search (Windows Key + S). Run Command Prompt as administrator.
- Type diskpart in the console and press Enter.
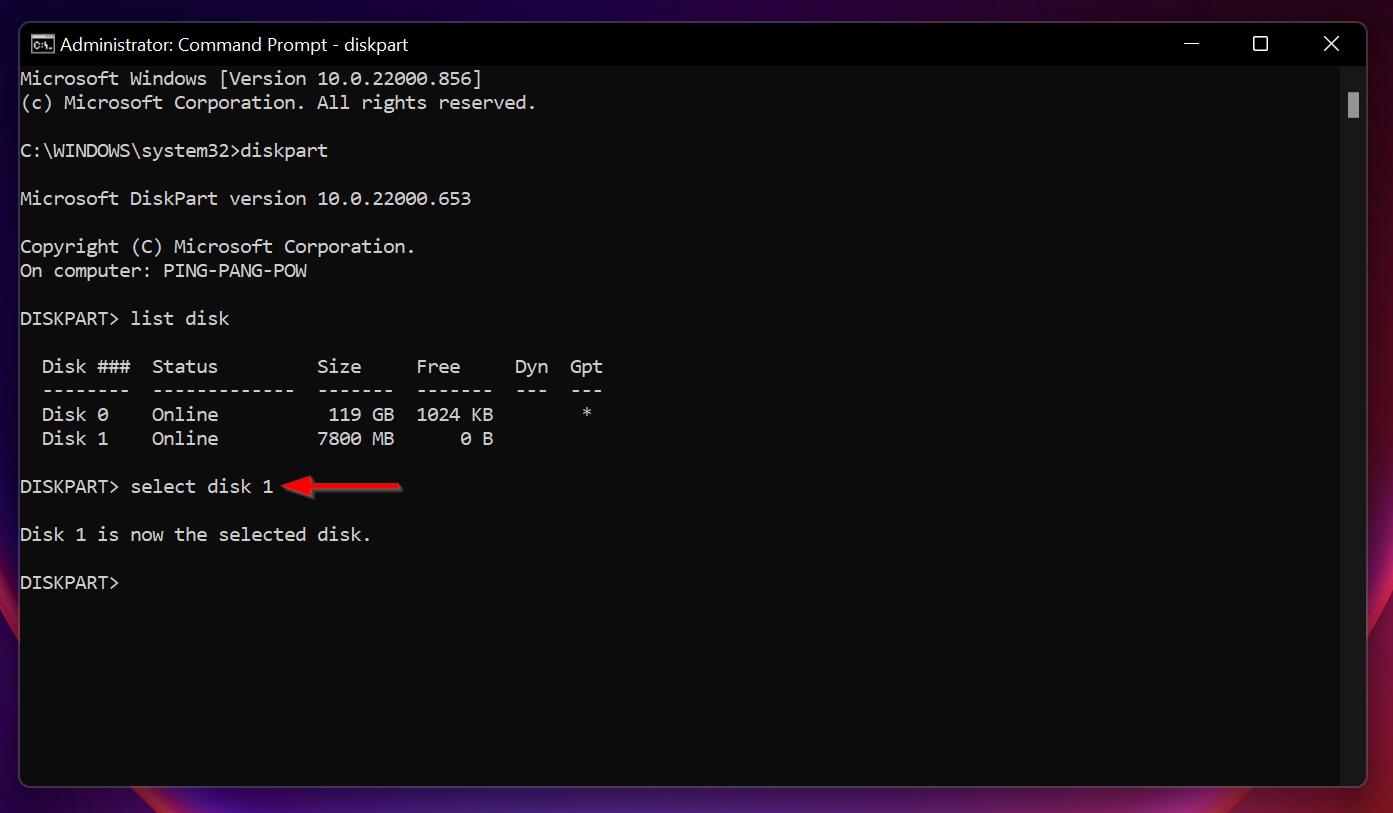
- Type list disk and hit Enter to list the storage devices connected to the PC.

- Now, type select disk x (replace x with the disk number of the USB drive) and press Enter. In our case, the disk number was 1.
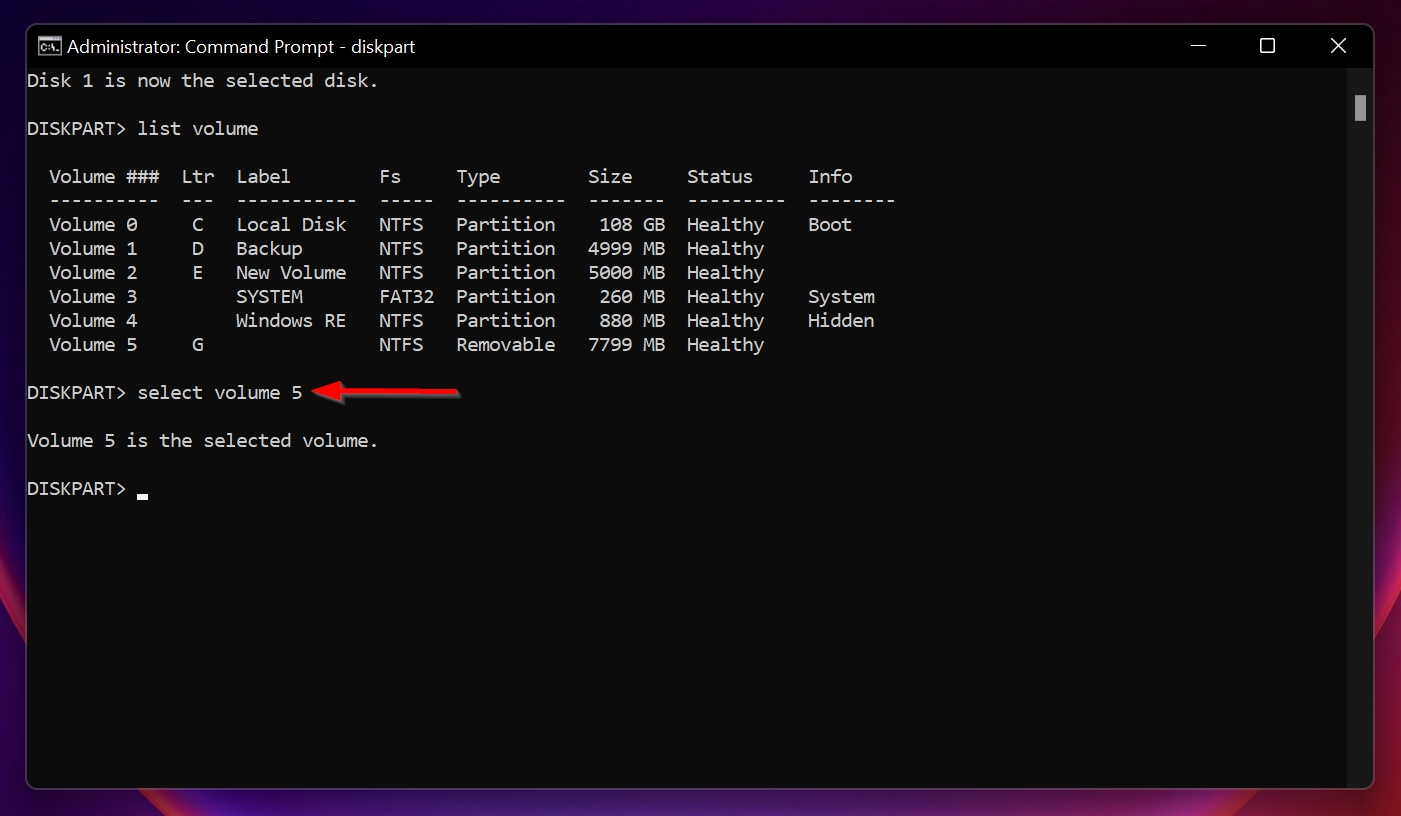
- Type list volume and press Enter.
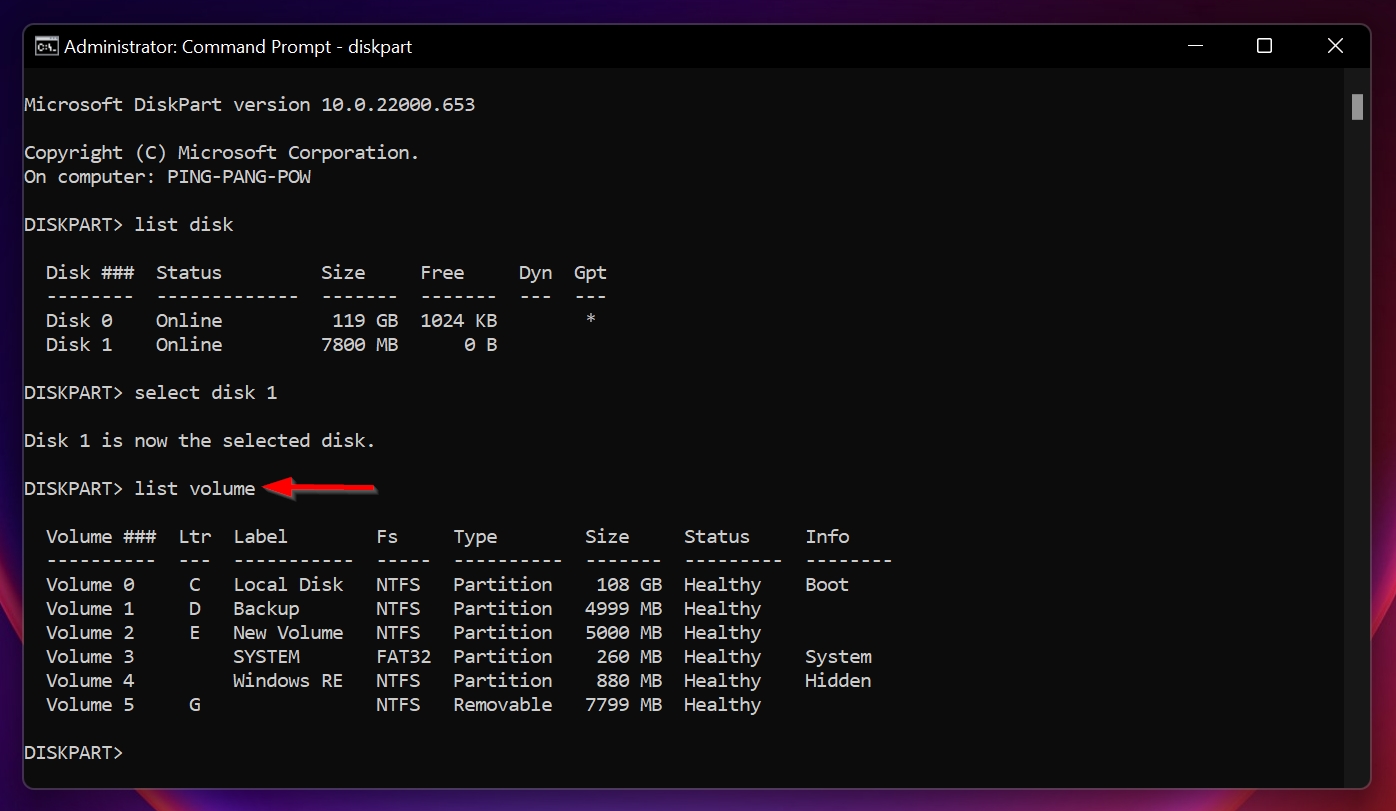
- Type select volume x (again, replace x with the number of the volume), and press Enter. In our case, the volume number was 5. You can determine this by looking at the size of the volume or the drive letter.
- Finally, type format fs=ntfs quick and press Enter. Diskpart will Quick Format the USB drive. You can also replace ntfs with any other file system of your choice, such as FAT32 or exFAT.

Method 4: Recover Lost or Corrupted Partitions With TestDisk
TestDisk is a third-party, open-source recovery program that can help you recover lost or corrupted partitions on your USB drive, and restore its functionality. The software is quite adept at data recovery and is one of the best USB repair tools currently. Unlike Disk Drill, TestDisk doesn’t have a GUI, so using it is similar to how you would recover a flash disk using CMD.
How to fix a corrupted USB drive and get back lost data using TestDisk:
- Download TestDisk and extract the archive.
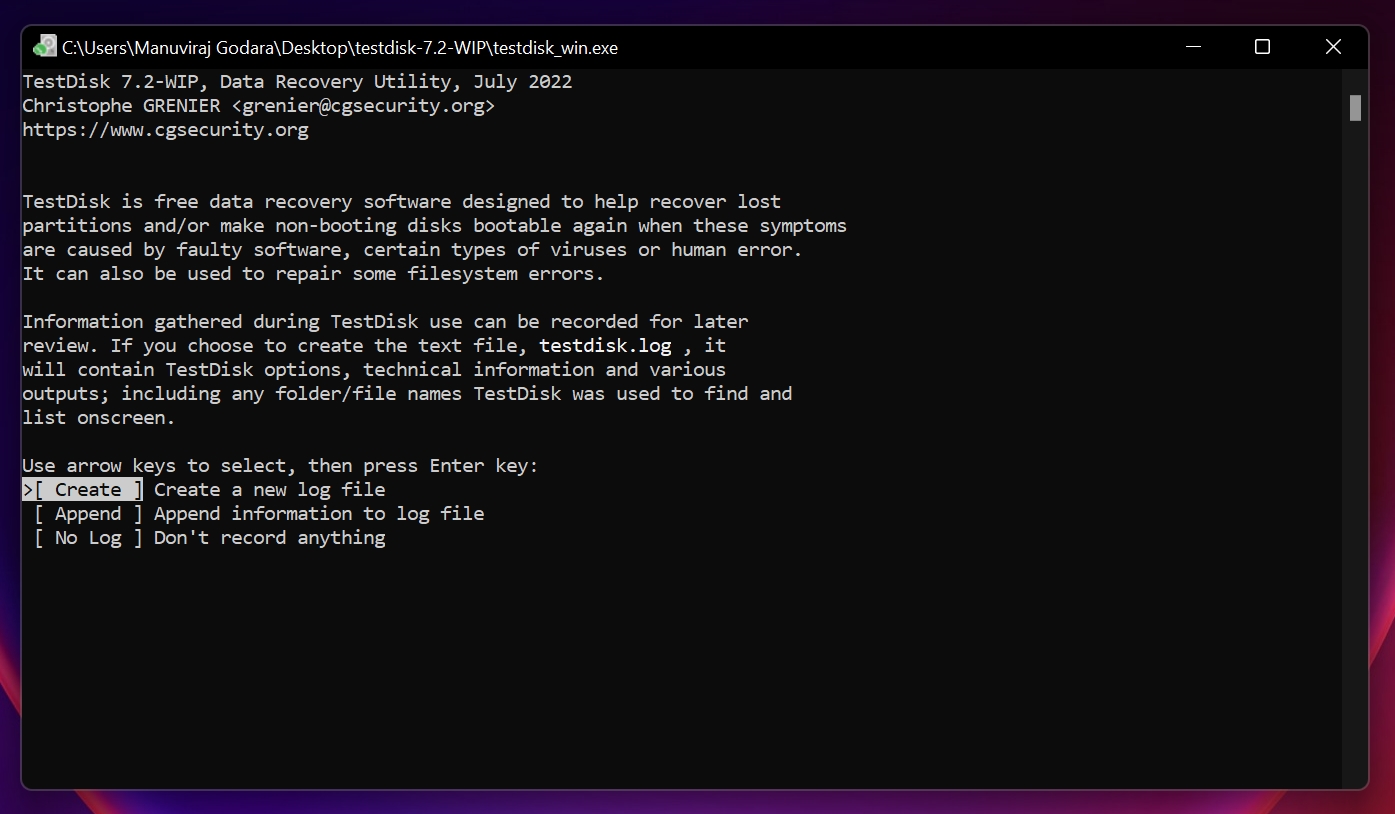
- Run the testdisk_win.exe application.
- Select whether you want to create a log file or not. Use the arrow keys to navigate and press Enter to confirm the option.
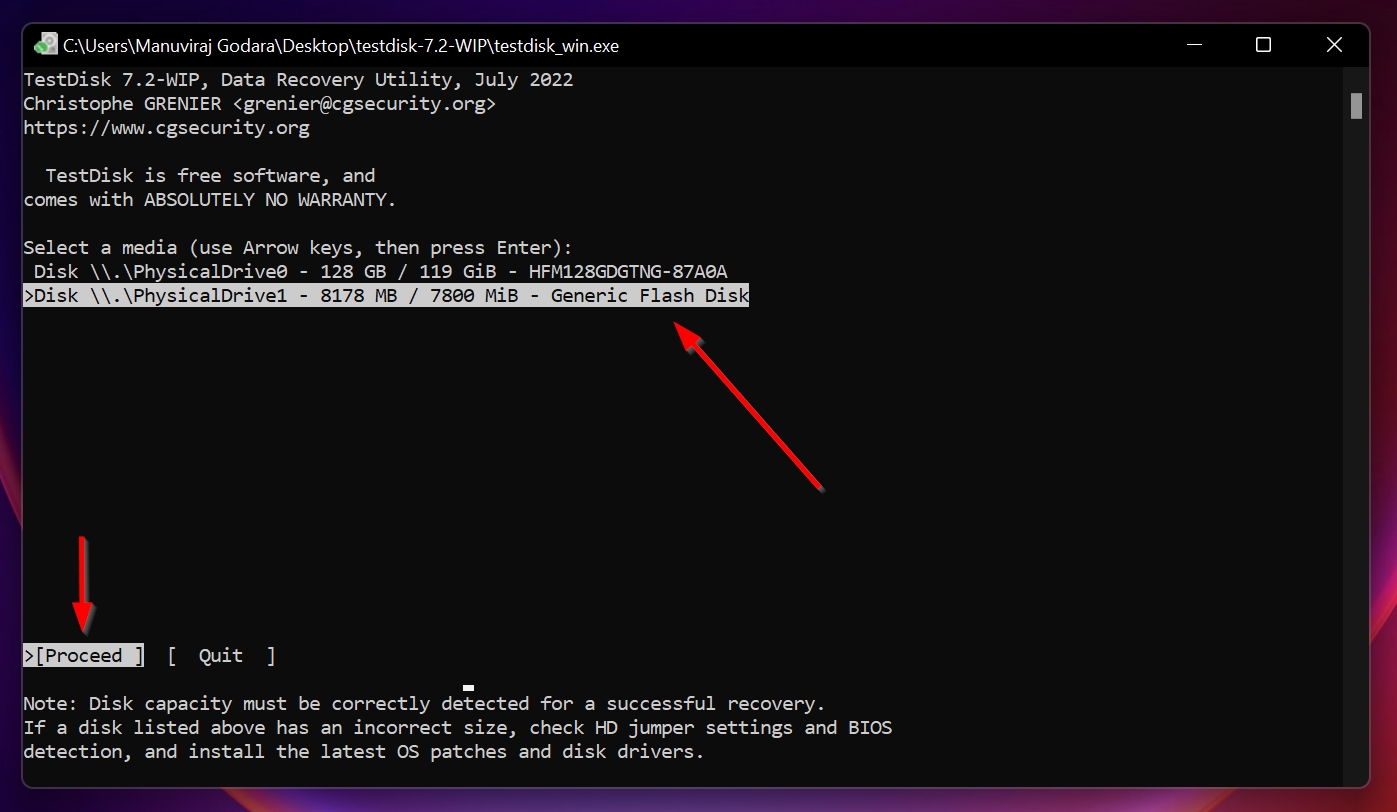
- Now, select the USB drive from the list of media and press Proceed.
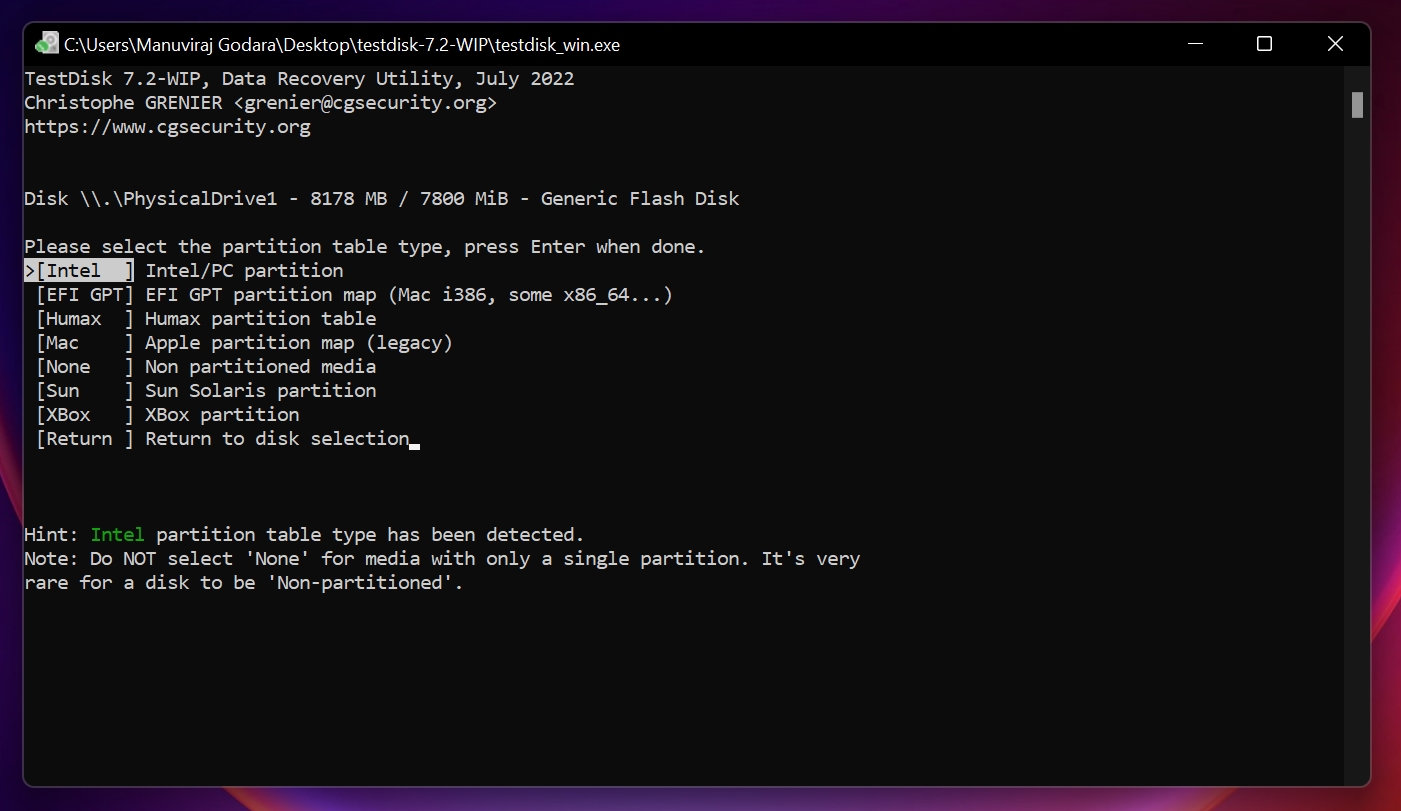
- Choose a partition table. TestDisk detects this by default, so it’s recommended you simply leave the highlighted option as it is and press Enter.
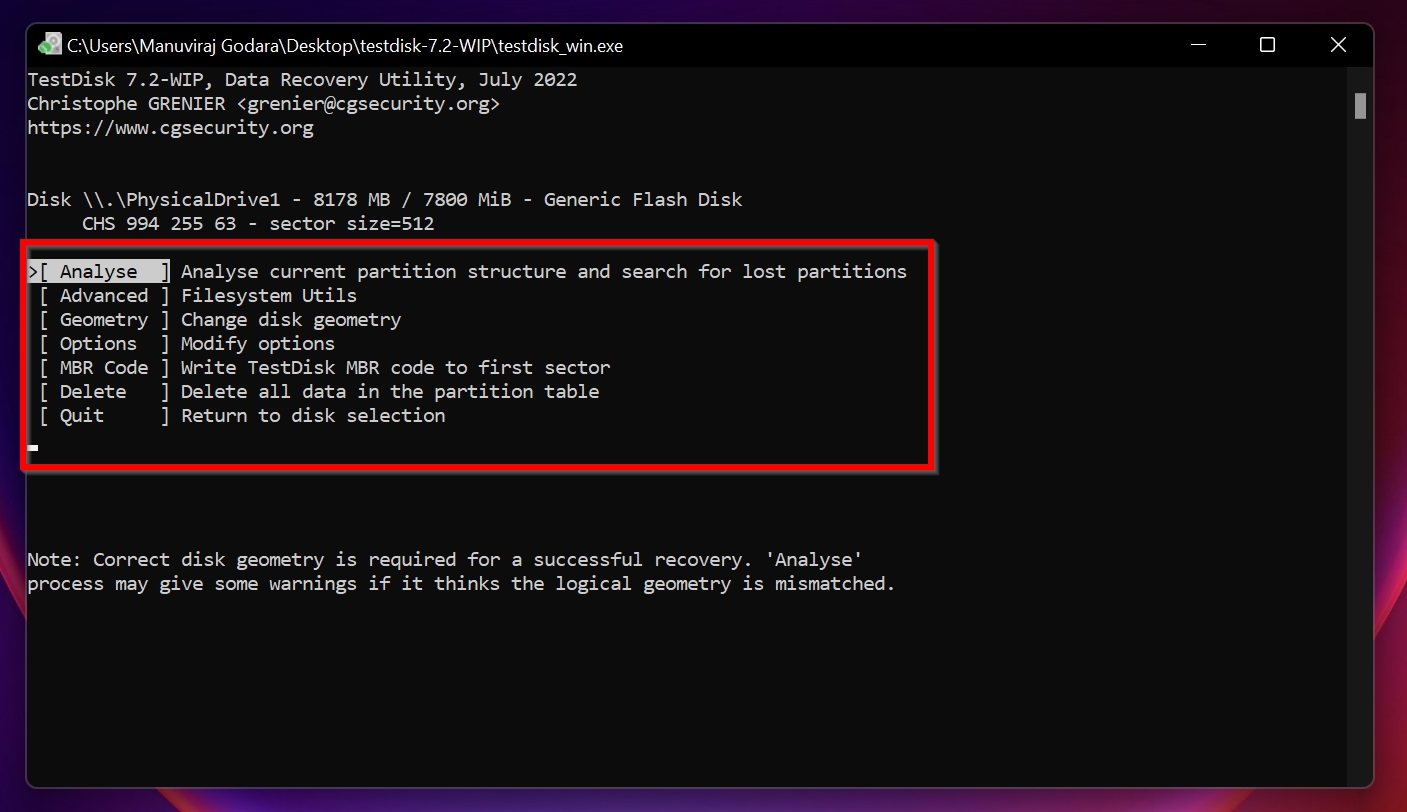
- Choose Analyse and press Enter.
- Ensure that Quick Search is highlighted and press Enter.
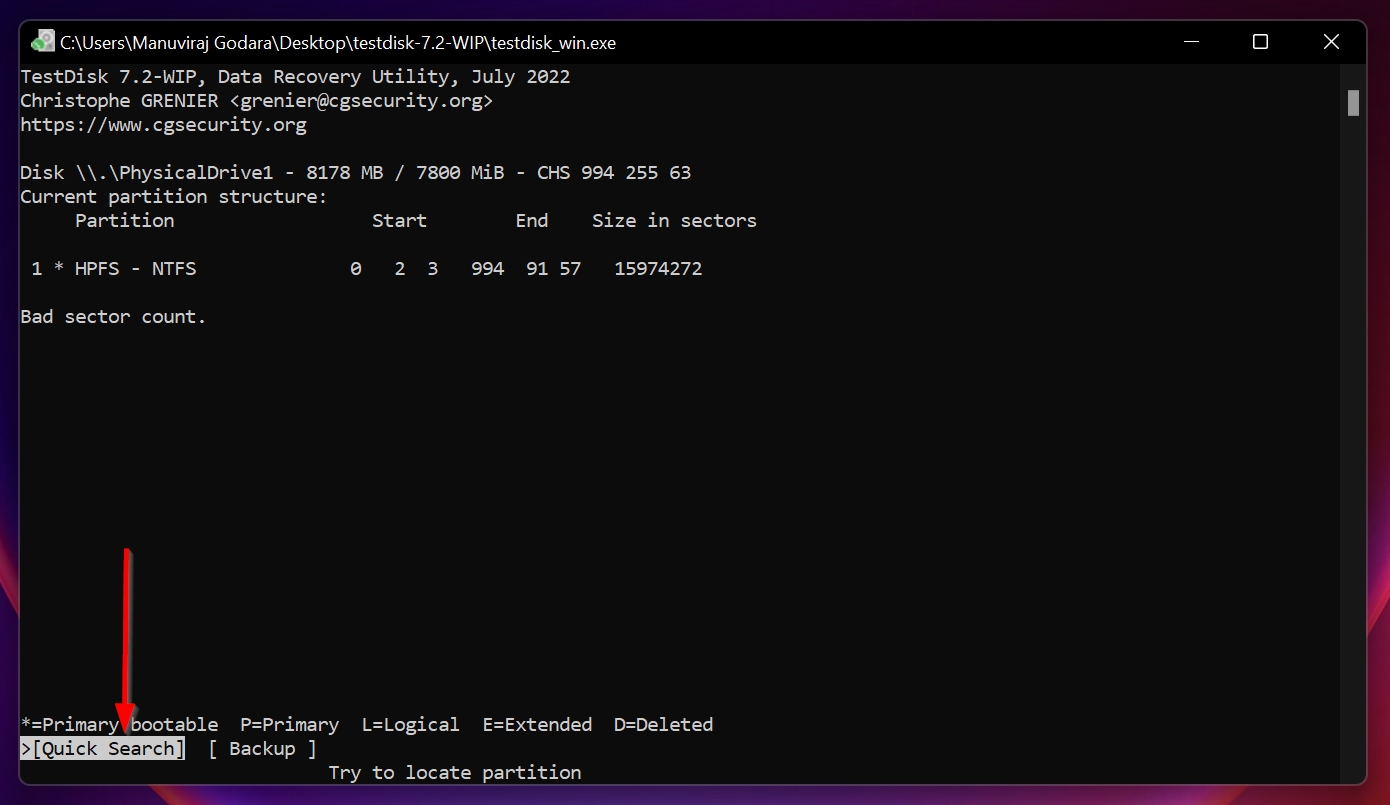
- Here, press P to view recoverable files in TestDisk. After confirming, press Q to go back.
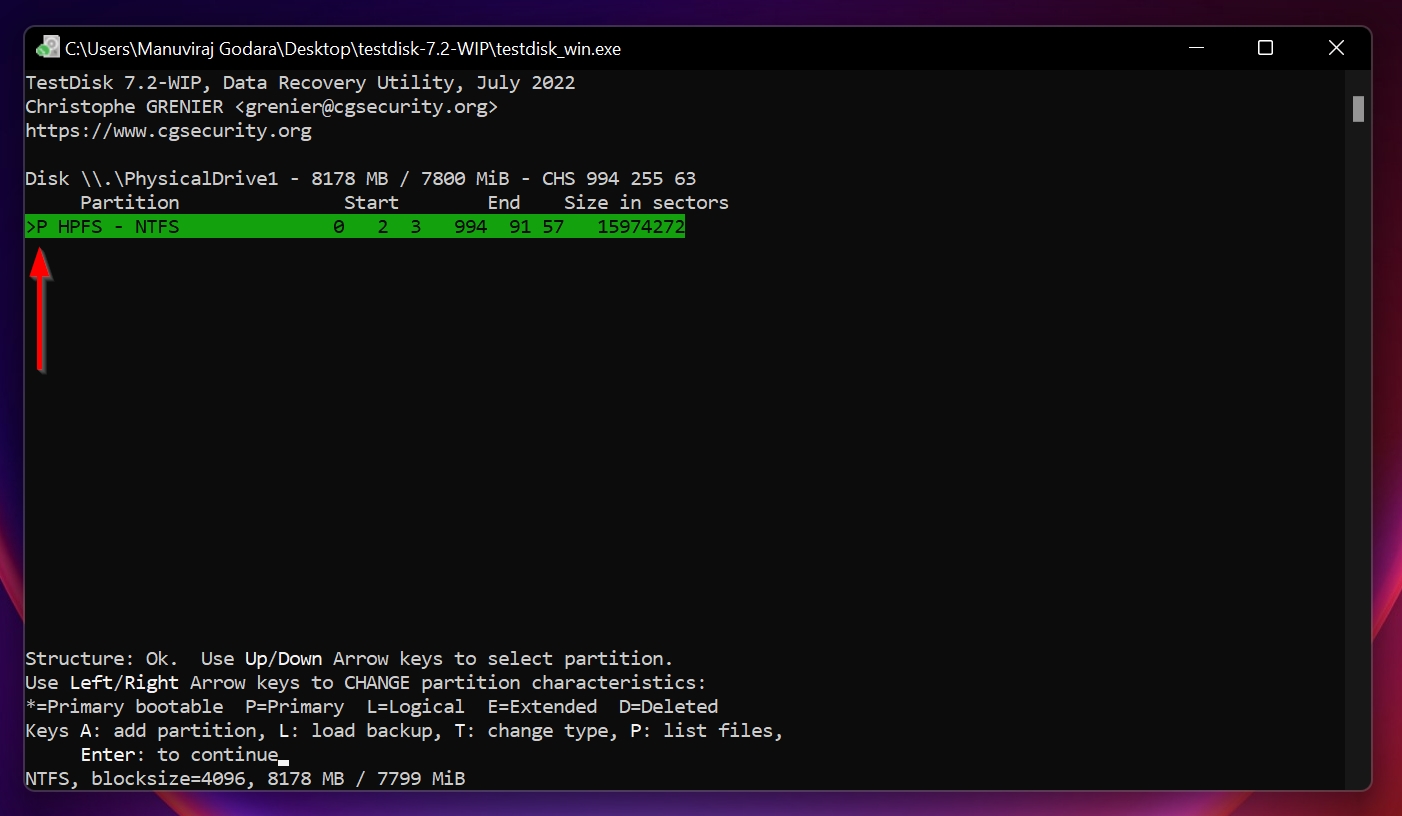
- Use the left and right arrow keys to make sure that there is P at the beginning of the partition, as shown in the image below. Press Enter.
 Select the Write option using the arrow keys and press Enter.
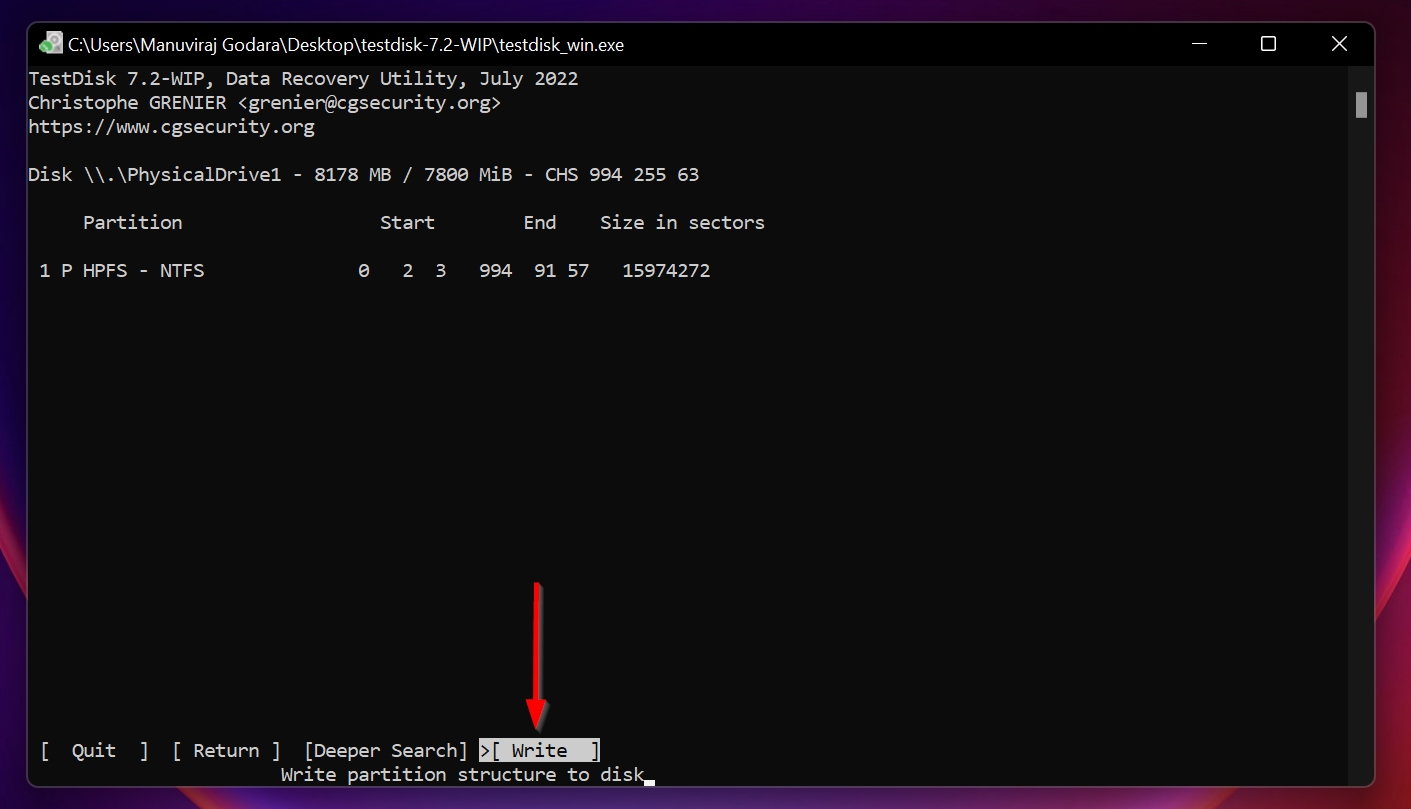
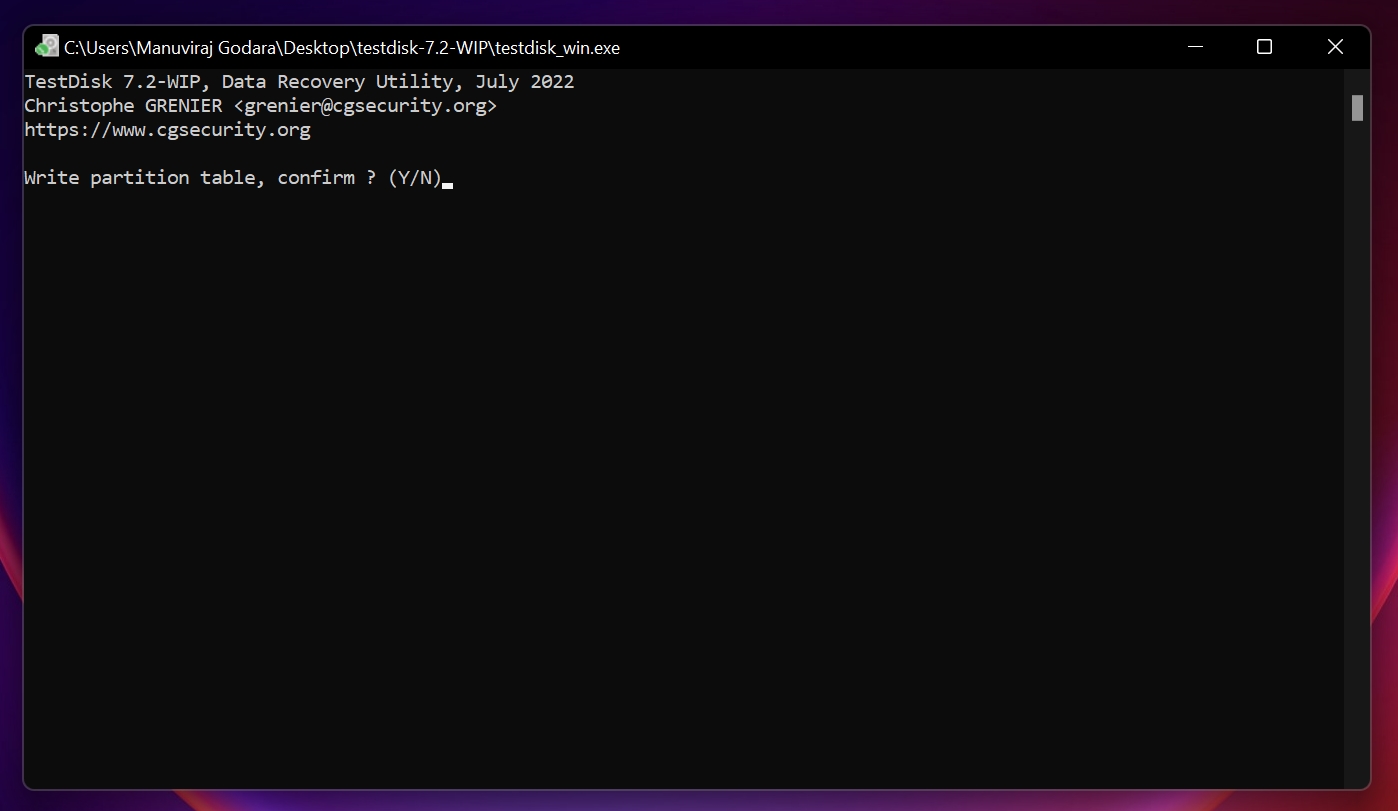
- Press Y to confirm on the next screen.
- Wait for TestDisk to perform the operation and then reboot your PC.
The methods above highlight how you can repair a flash drive using CMD or using TestDisk. In case none of the methods work, it’s best to contact experts and send in your USB to repair service. You can also contact a data recovery service to recover files from the broken USB drive.
FAQ
How can I recover data from my corrupted flash drive in a few steps?
The easiest way to recover data from your corrupted flash drive is to use Disk Drill:
- Download and install Disk Drill.
- Open Disk Drill, select the USB drive and click on Search for lost data.
- Click Review found items.
- Select the files you want to recover and click Recover.
- Choose a recovery destination and press OK.
How do I run chkdsk on a flash drive?
If your USB drive is not readable by the PC, CHKDSK will likely not work on the USB drive. But, there’s no harm in running CHKDSK to see if it can find and detect errors on the drive. Just remember to first create a backup of your data.
- Run Command Prompt as administrator.
- Type chkdsk X: /r (where X: is the drive letter of the USB) and press Enter.
- Wait for CHKDSK to detect and fix the errors.
How do I fix a corrupted flash drive without formatting?
There are various ways to fix a corrupted flash drive without formatting. Some of them are:
- Use the attrib command to reveal files hidden by malware.
- Run the CHKDSK command.
- Use TestDisk to recover lost partitions on the USB drive.
Can I fix my USB device not recognized using CMD?
While CMD will not help you in this case, there are other fixes you can try that will fix the USB device not recognized error in Windows:
- Connect the flash drive using another USB slot.
- Reboot your computer.
- Reinstall the USB drivers using Device Manager.
- Update the USB drivers.
Can I fix a RAW USB using CMD?
A RAW USB drive is essentially one whose file system is damaged beyond recognition, or it’s missing a file system entirely. To fix this, you need to format the USB drive to a recognized file system. Here’s how you do this using CMD:
- Connect the pen drive to your PC.
- Run Command Prompt as administrator.
- Type diskpart and press Enter.
- Type list disk and press Enter. See which disk (Disk 1, Disk 2, etc.) is your USB drive.
- Type select disk x and press Enter. Replace x with the disk number of your pen drive. For example, if your pen drive was Disk 2, type select disk 2 and press Enter.
- Type clean and press Enter.
- Type create partition primary and press Enter.
- Type format fs=ntfs quick and press Enter. You can replace ntfs with any Windows-recognized file system of your choice.
- Windows will format the pen drive and it will no longer show up as RAW.
Conclusion
It may be convenient to fix a USB drive using CMD because it eliminates the need to download third-party programs, but it’s likely that you will need a utility like Disk Drill to create a backup of the drive first. Additionally, if the drive is severely corrupted, your only option may be to recover the data first because the USB drive will be unfixable without formatting it first.
This article was written by Manuviraj Godara, a Staff Writer at Handy Recovery Advisor. It was also verified for technical accuracy by Andrey Vasilyev, our editorial advisor.
Curious about our content creation process? Take a look at our Editor Guidelines.