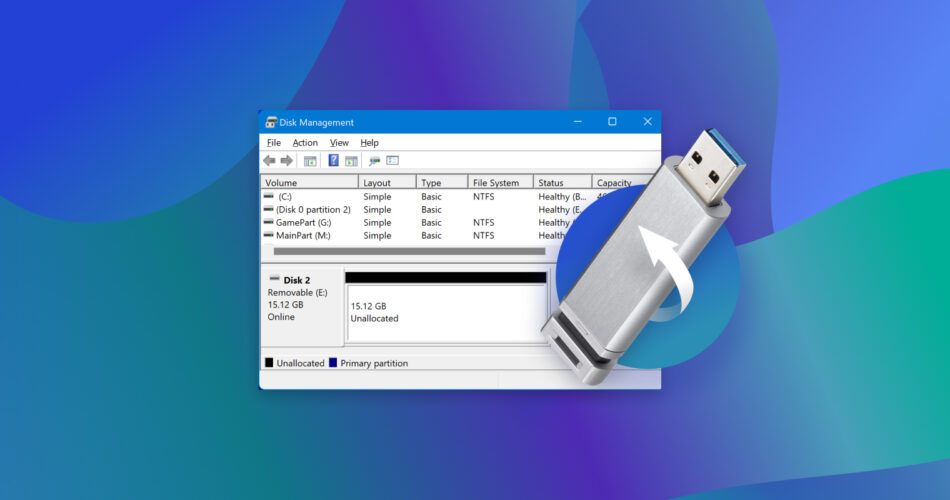
If your USB drive shows up as unallocated in Disk Management—or if just one partition does—it means you can’t use that space to store anything. And if you had files on it, they’re out of reach (for now). This problem pops up all the time, but the good news is that fixing it is nothing new. We’ve helped plenty of folks sort out their unallocated USB drives, and today, we’re here to help you do the same. Stick with us, and we’ll walk you through it.
What Does Unallocated Space on USB Mean?
First things first—what exactly is “unallocated space”? When a flash drive has unallocated space, it means part of the drive isn’t assigned to any partition. Think of it like a vacant lot—there’s potential, but until it’s “built on,” you can’t use it to store files. If your USB drive shows as unallocated, your Windows doesn’t recognize the space as usable, even though it’s physically there.
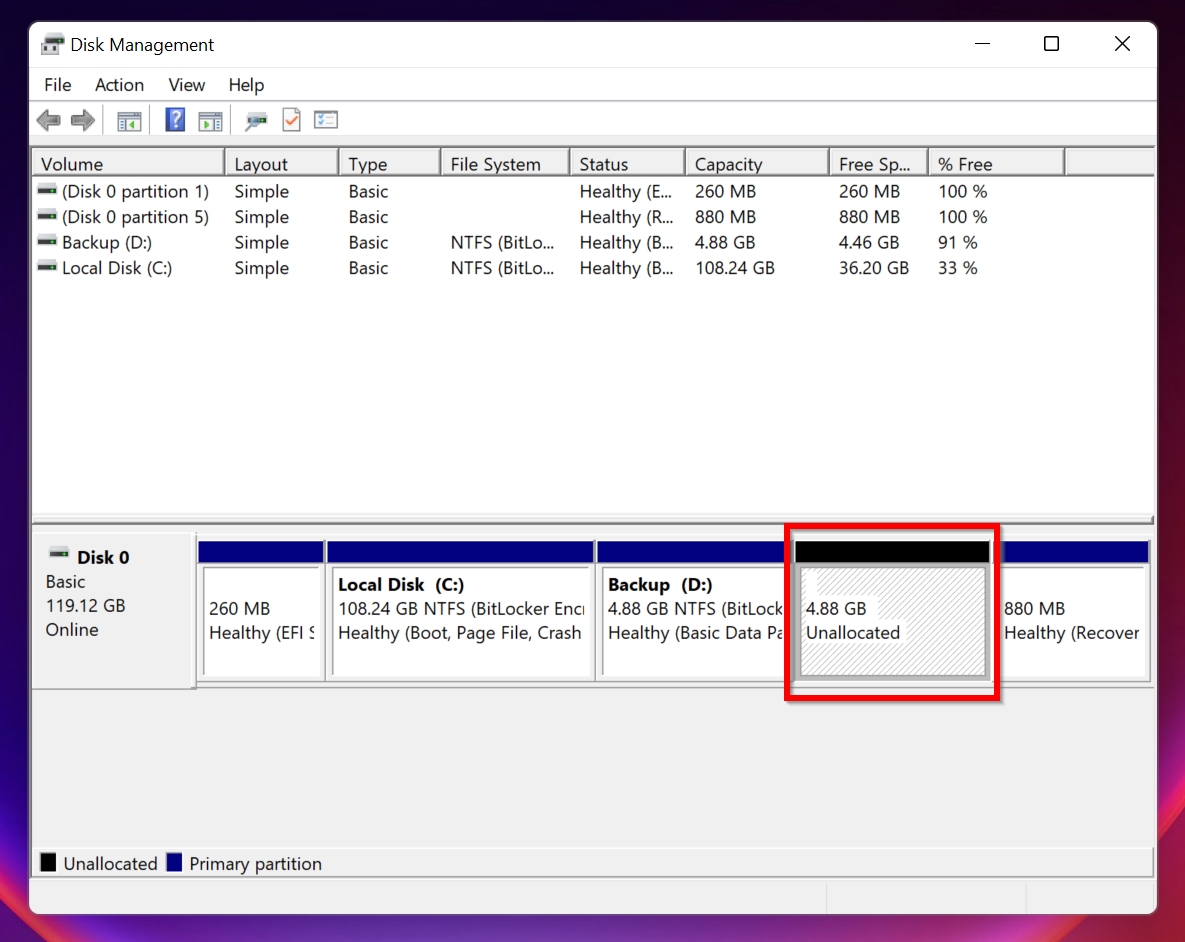
You might see this issue in Disk Management as a gray bar labeled “Unallocated.” The size of the space can vary—it could be the entire drive or just a portion of it.
3 Options to Fix Unallocated USB Drive
There are three reliable options to fix a USB stick with unallocated space.
However, we need to warn you upfront—if you had important files on your USB drive before it became unallocated, your first step should be getting them off the drive. Repair methods can fix the USB, but they might erase everything that was on it (option #1 might fix it without data loss, but options #2 and #3 will definitely erase the drive/partition). It’s better to play it safe and recover your data first. Yes, we know you can’t access them through File Explorer anymore, but specialized USB data recovery tools can often retrieve them. If your data matters to you, check out our section on how to recover data from unallocated USB drives before you proceed with any repairs.
Option #1: Fix Unallocated Space on USB Using TestDisk
In cases where unallocated space on a USB flash drive results from damaged/lost/deleted partitions, it’s often possible to fix the problem with TestDisk. This is a great tool we’ve used many times. It’s open-source and free, which is a big plus. However, being open-source and free also means it’s not the most user-friendly option out there. It runs entirely in the command line, so there’s no fancy interface. That’s okay, though—we’ll walk you through it.
Here’s a quick guide on fixing your unallocated USB drive using TestDisk:
- Head to the official TestDisk website and download the tool. You’ll see the latest version listed as 7.3, but it’s still in beta. We recommend version 7.2 instead, which is the most recent stable release.
- Once downloaded, unzip the file to a location that’s easy to access.
- Open the TestDisk folder and launch the executable file (testdisk_win.exe). If prompted, run it with administrator privileges to avoid permission issues.
- In the terminal window, select [CREATE] and hit Enter (you can also select [No Log] if you don’t need a log).
![Choose [Create] to make a log file](/wp-content/uploads/2024/12/test-disk-Unallocated.jpg)
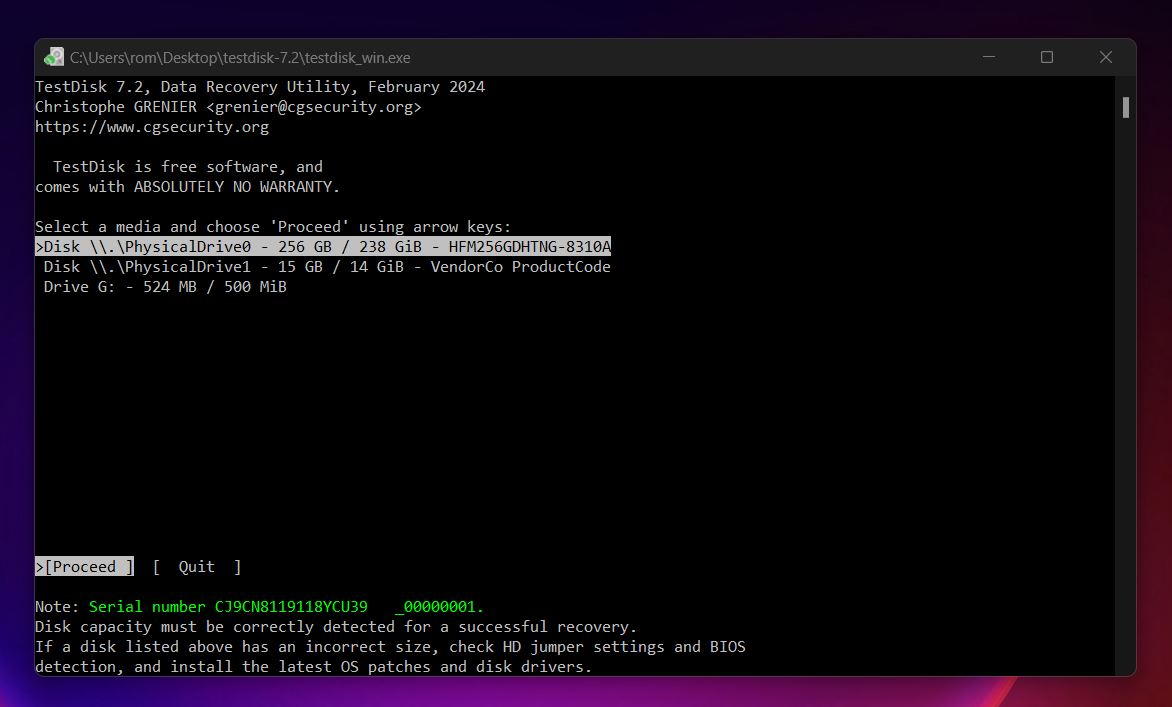
- Select your USB stick with unallocated space on it and hit Enter.
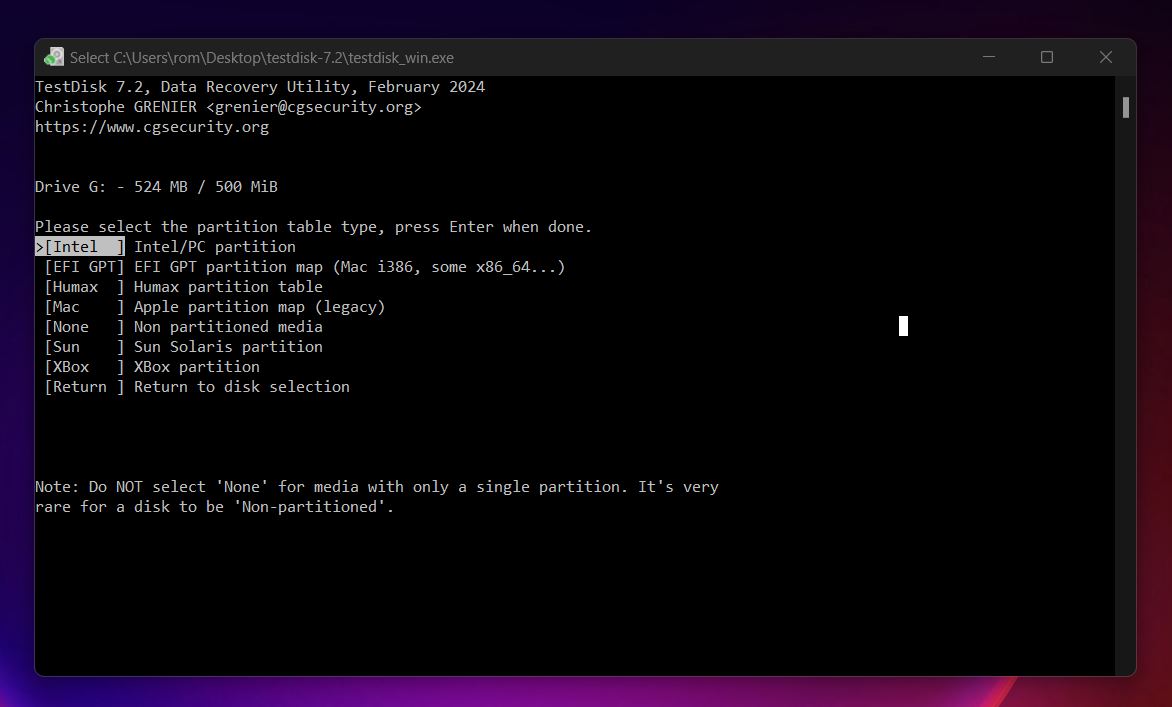
- Now, you need to select a partition table type. TestDisk usually detects the correct partition table type automatically. For most USB drives, it will recommend Intel/PC.
- Select the Analyze option and press Enter.
- Pick the Quick Search function and hit Enter. TestDisk will try to recover your deleted partition.
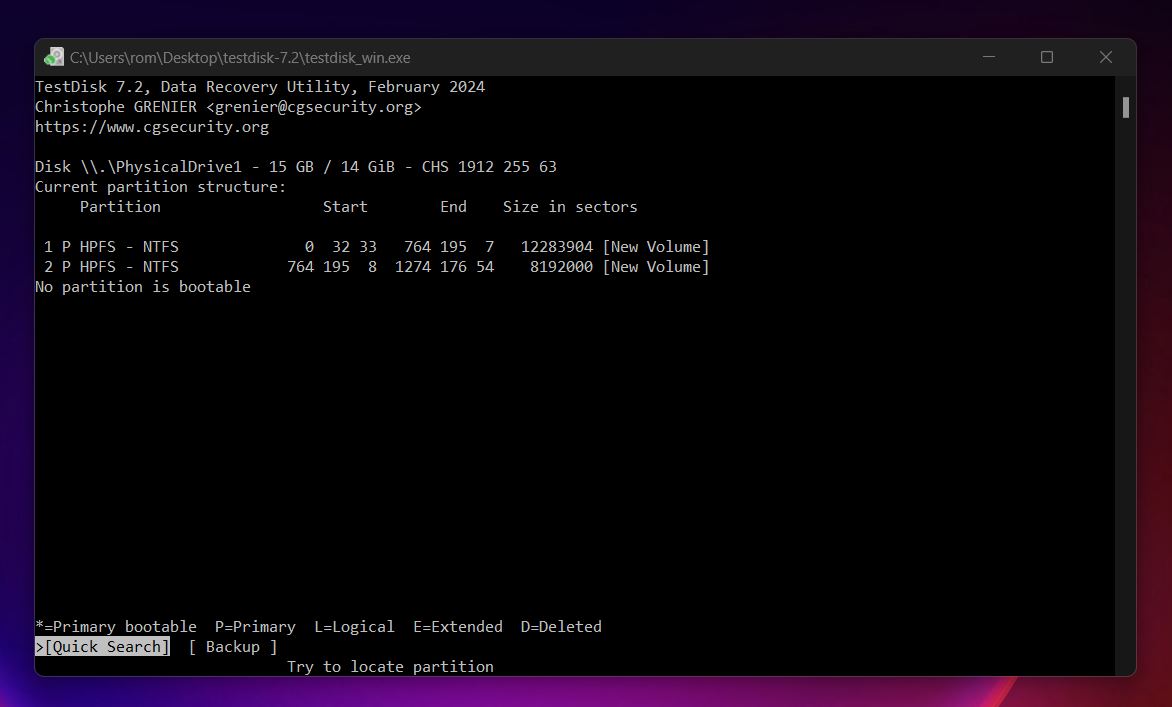
- Select your partition and press P to reveal the partition files. Press Q to return to the partition list. After having selected your partition, press Enter.
- Select the [Write] option and hit Enter; Enter Y to Confirm.
![Choose [Write]](/wp-content/uploads/2024/12/test-disk-Unallocated-write.jpg)
- If you didn’t get any hits, try a Deeper Search.
- Reboot your computer. Once it’s back up, your USB drive should appear in File Explorer, fully restored.
TestDisk has so much more to offer in addition to merely fixing unallocated disk space; Check out our complete dissection of TestDisk: Pros, Cons, and scan results.
Option #2: Recreate Unallocated Space Using Disk Management
Another option is to create a new volume out of the unallocated space using Disk Management. This method assigns the unallocated space to a new partition, so it’s usable again.This approach works best if you don’t need to recover any files from the USB drive or have already retrieved them.
Follow these steps to reclaim your unallocated USB disk space:
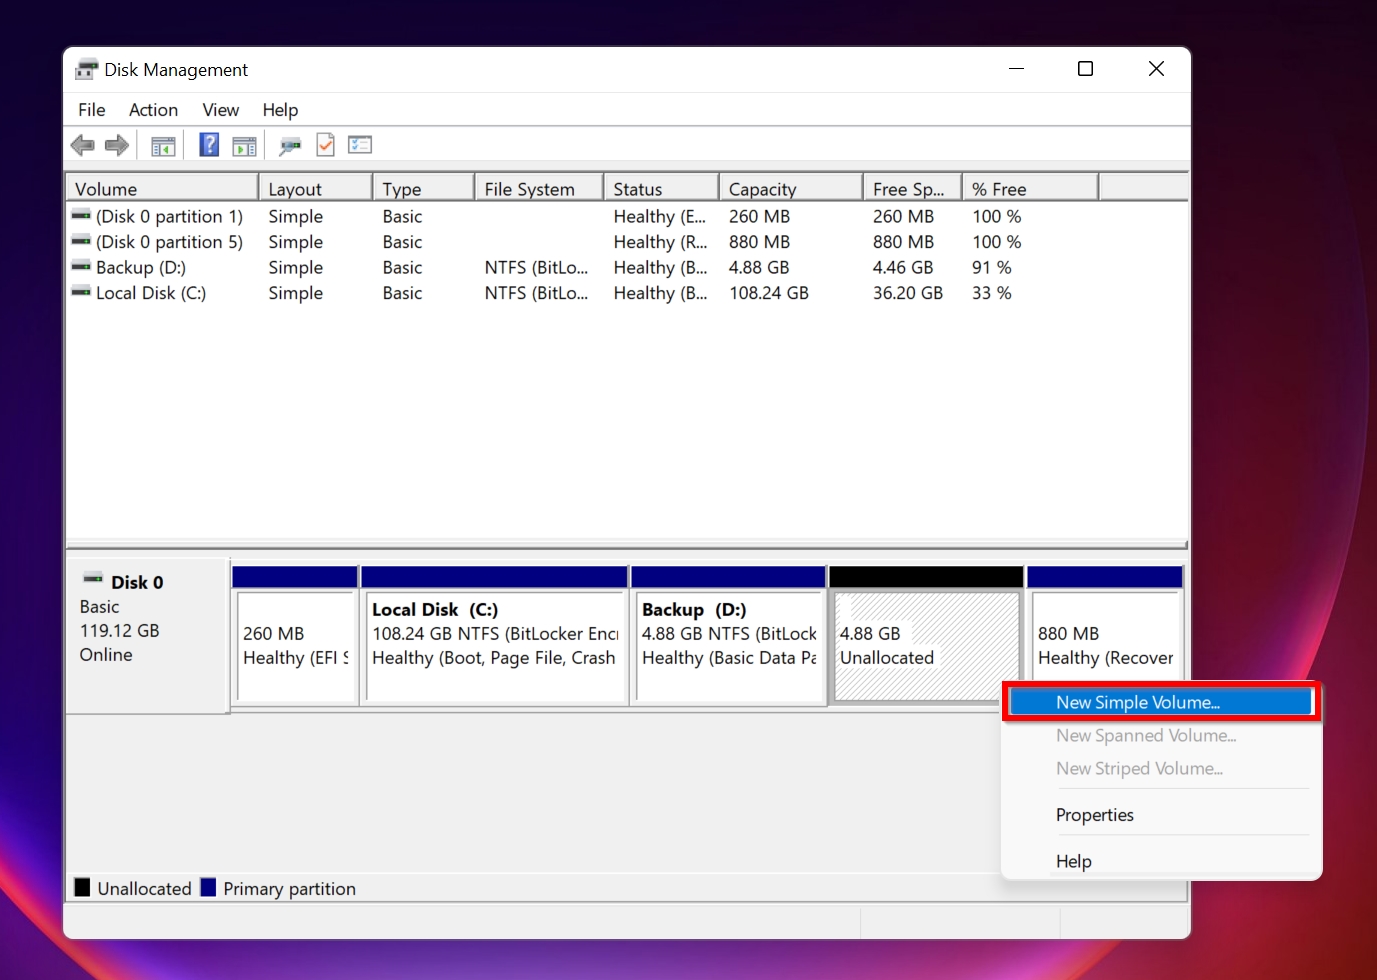
- Right-click on the Windows logo and select Disk Management.
- Navigate to the unallocated volume; Right click > New Simple Volume.
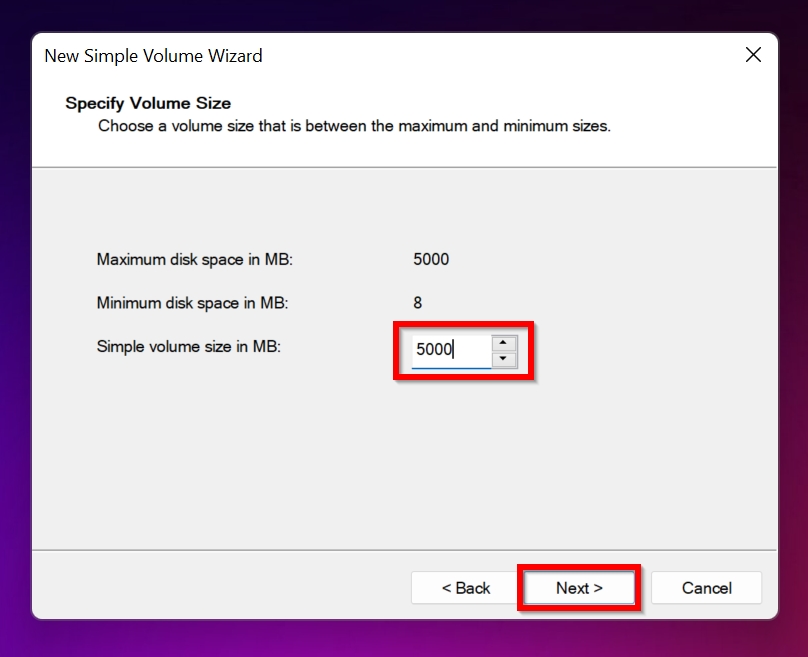
- On the installation wizard, click Next; Enter the new partition size, and hit Enter.
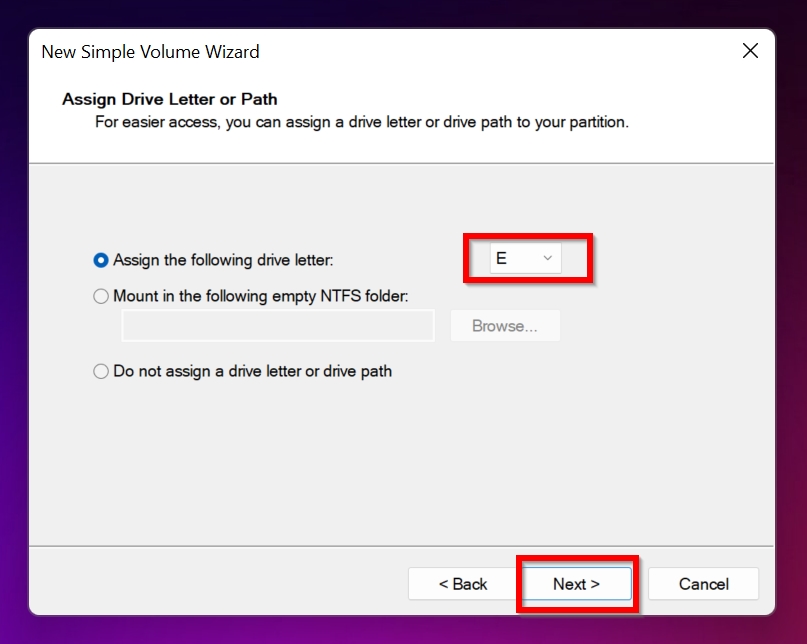
- Select a drive letter to assign the new partition and click Next.
- Configure the file system settings and click Next.
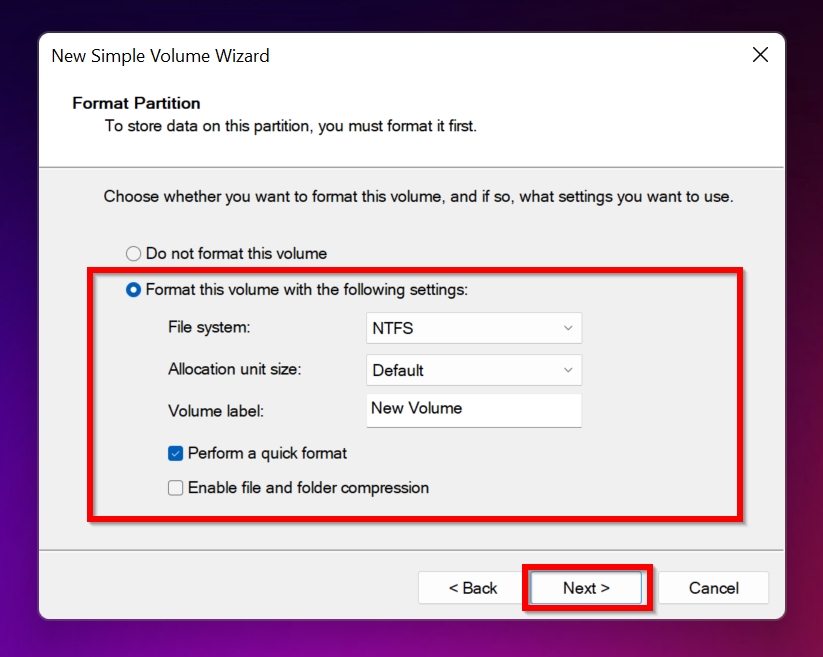
If you’re unsure which file system to select:
- NTFS: Best for Windows-only use. Supports large files and advanced features but isn’t compatible with some older devices.
- FAT32: Compatible with most devices and operating systems, but it has a 4GB file size limit.
- exFAT: A modern alternative to FAT32. It works on Windows, macOS, and other platforms without file size limits.
- Click Finish.
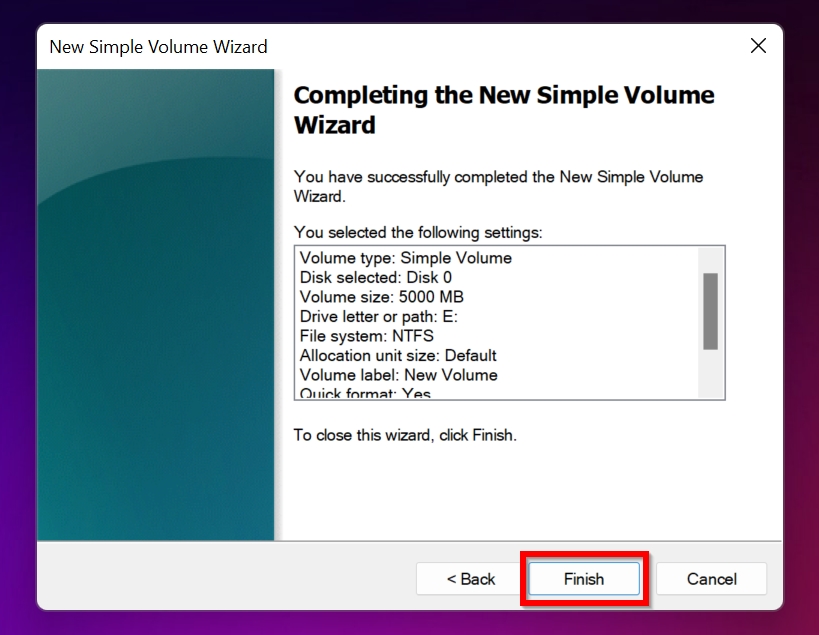
Now, the previously unallocated space should be accessible and ready to store data.
Option #3: Allocate Space Using CMD (diskpart)
Another native Windows tool that can “allocate” your USB flash drive is DiskPart. Like TestDisk, it runs entirely in the command line, so that’s where you’ll need to start.
DiskPart can accomplish the same task as Disk Management but offers you way more control if you know what you’re doing. That said, it’s not foolproof—one wrong command can select the wrong drive and wipe out data you didn’t mean to touch. Be careful here. Double-check your selections because trust us, you don’t want to end up with bigger problems than you started with.
Follow these steps to reclaim your unallocated USB disk space using the DiskPart utility:
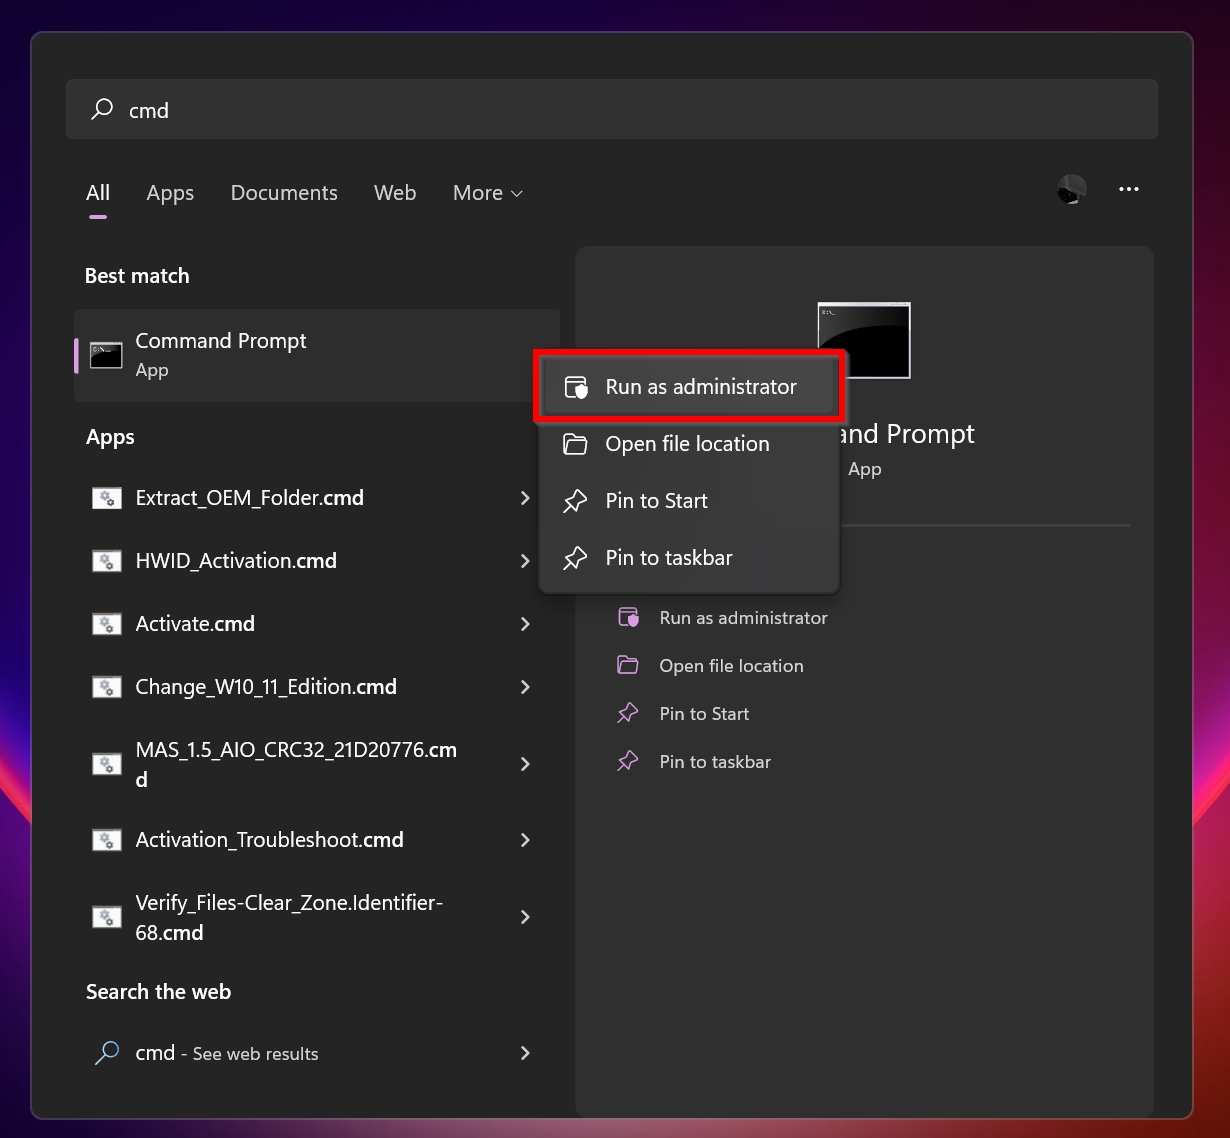
- Press Win and type in CMD; Select the Run as Administrator option.
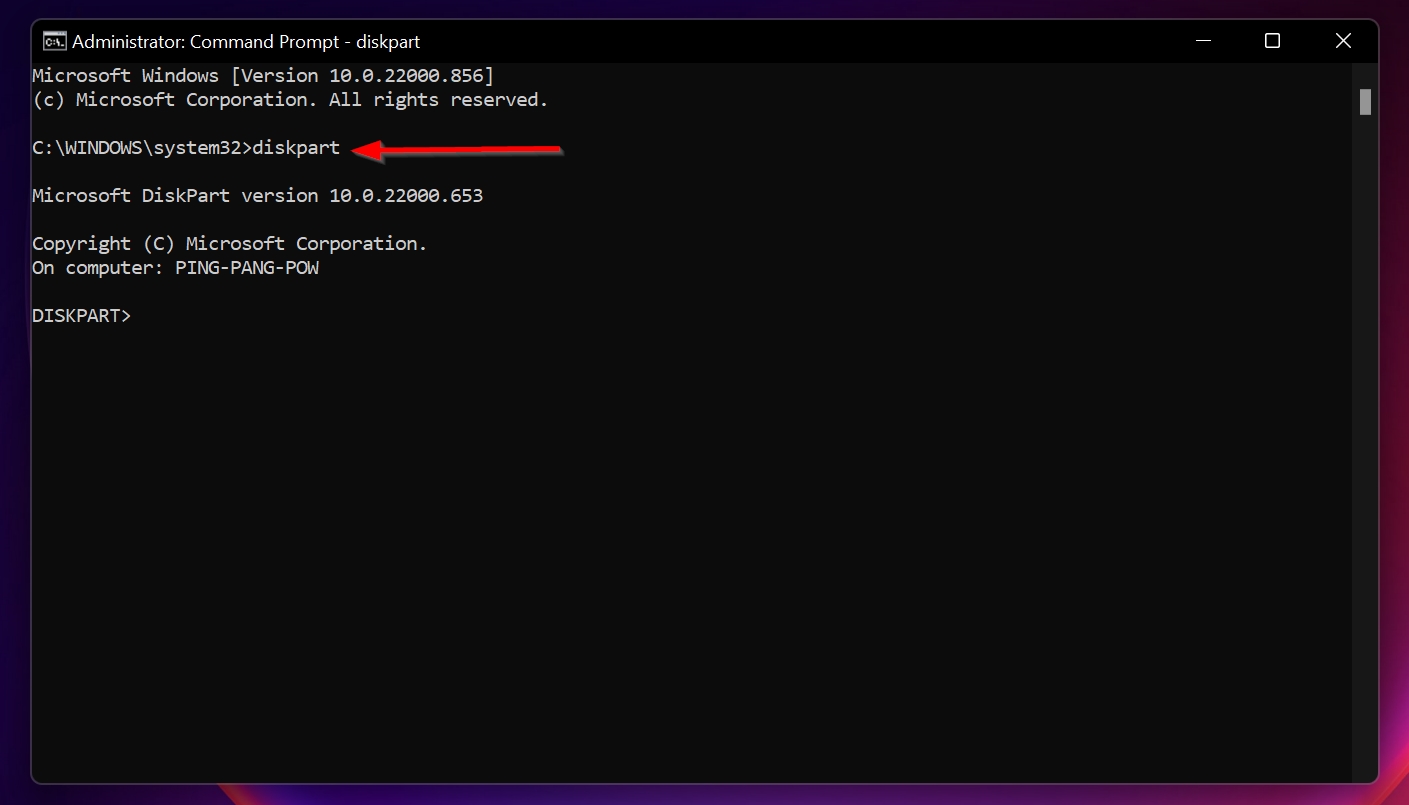
- Key in the following commands while pressing Enter after each line. Start with: Diskpart
- Then “List volume”.
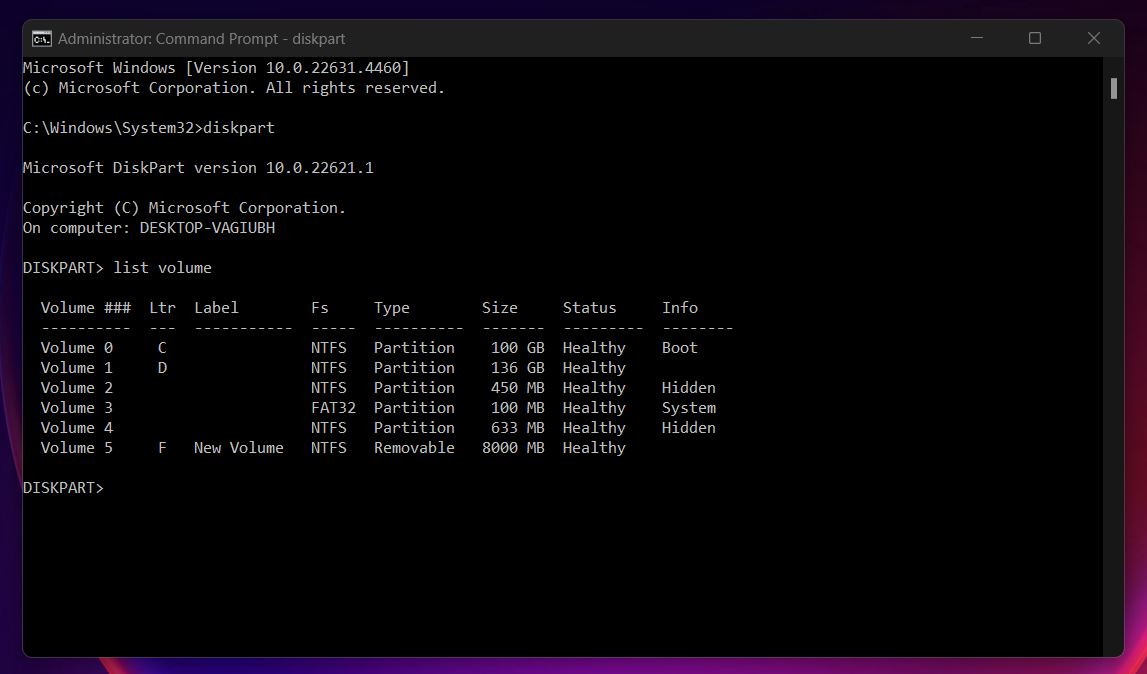
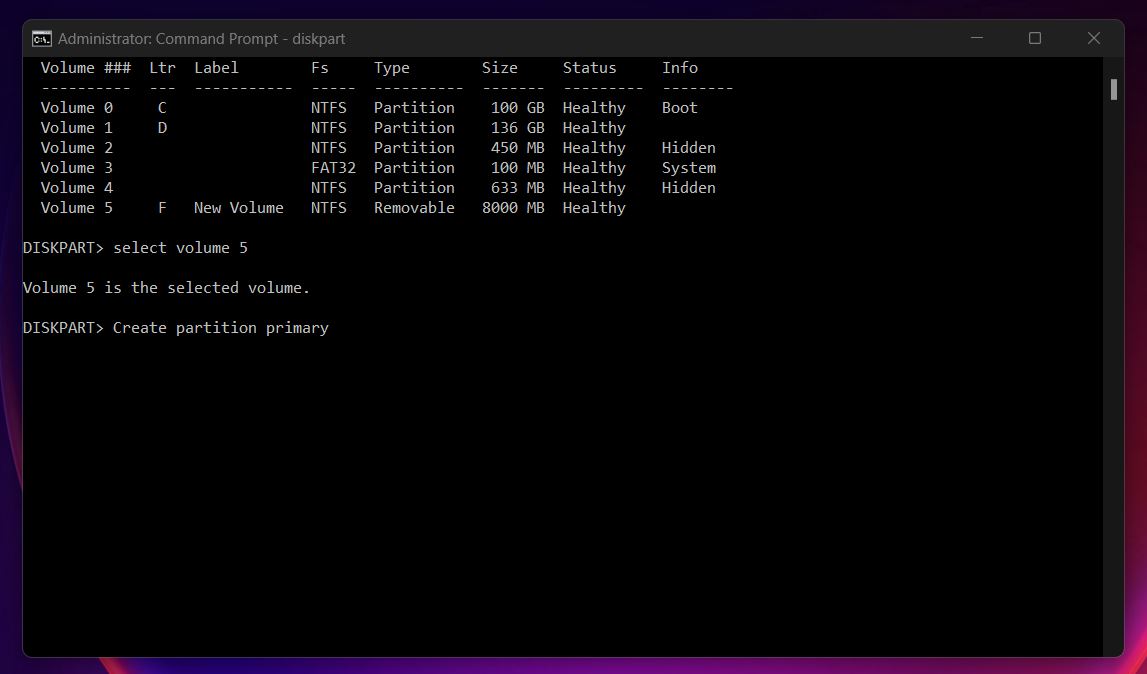
- Find the volume containing unallocated space and enter this command: Select volume 3 🗨️
Use the relevant disk number when you type in this command). In this case, Volume 5 represents our pen drive.
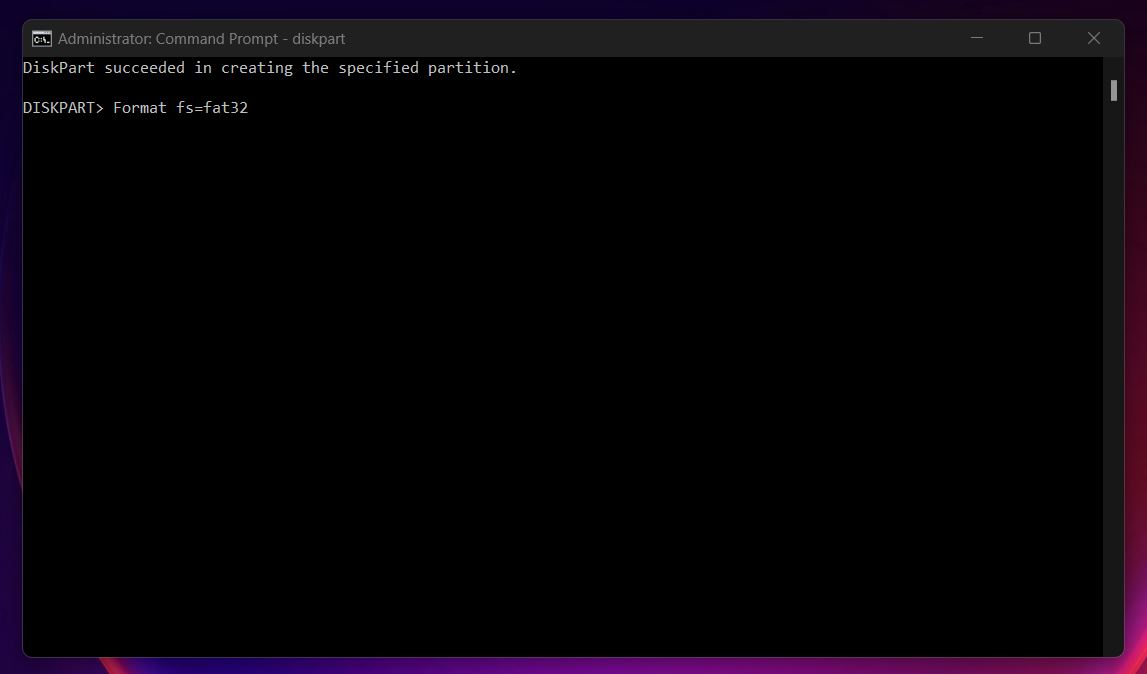
- Now, execute this command: Create partition primary.
- Finally, format the disk into an appropriate filesystem. For instance, if you want to stick with the FAT32 file system, use this command: Format fs=fat32.
At this point, you should be able to access your USB drive normally again.
How to Recover Data from Unallocated USB Drive
If you have important files on a USB drive that shows as unallocated in Disk Management, you can still recover them using third-party USB data recovery tools. These tools can access your drive even if File Explorer can’t. As long as your OS recognizes the drive—which it does if it’s visible in Disk Management—you’re in luck.
There’s a myriad of data recovery tools out there, and finding the right tool often feels like looking for a needle in a haystack. Our expert team reviewed the best data recovery tools, and one of the apps we can confidently recommend to everyone is Disk Drill.
Drill Data is a top-tier option in the market, and for good reason. It offers powerful data scanning and retrieval capabilities. Additionally, the user interface is a breeze for new users who need to quickly recover deleted files from a flash drive (it can also retrieve data that isn’t deleted but simply inaccessible). Compared to other tools we tested for this article, Disk Drill feels like something designed to make recovery as simple as possible.
The free version from Disk Drill permits data recovery of up to 500 MB. As a result, you can get started with data recovery for free and check which files you can retrieve before making a purchase. It’s a no-risk way to see if the tool works for you.
Here’s how to recover data from an unallocated USB stick:
- Download, and install Disk Drill.
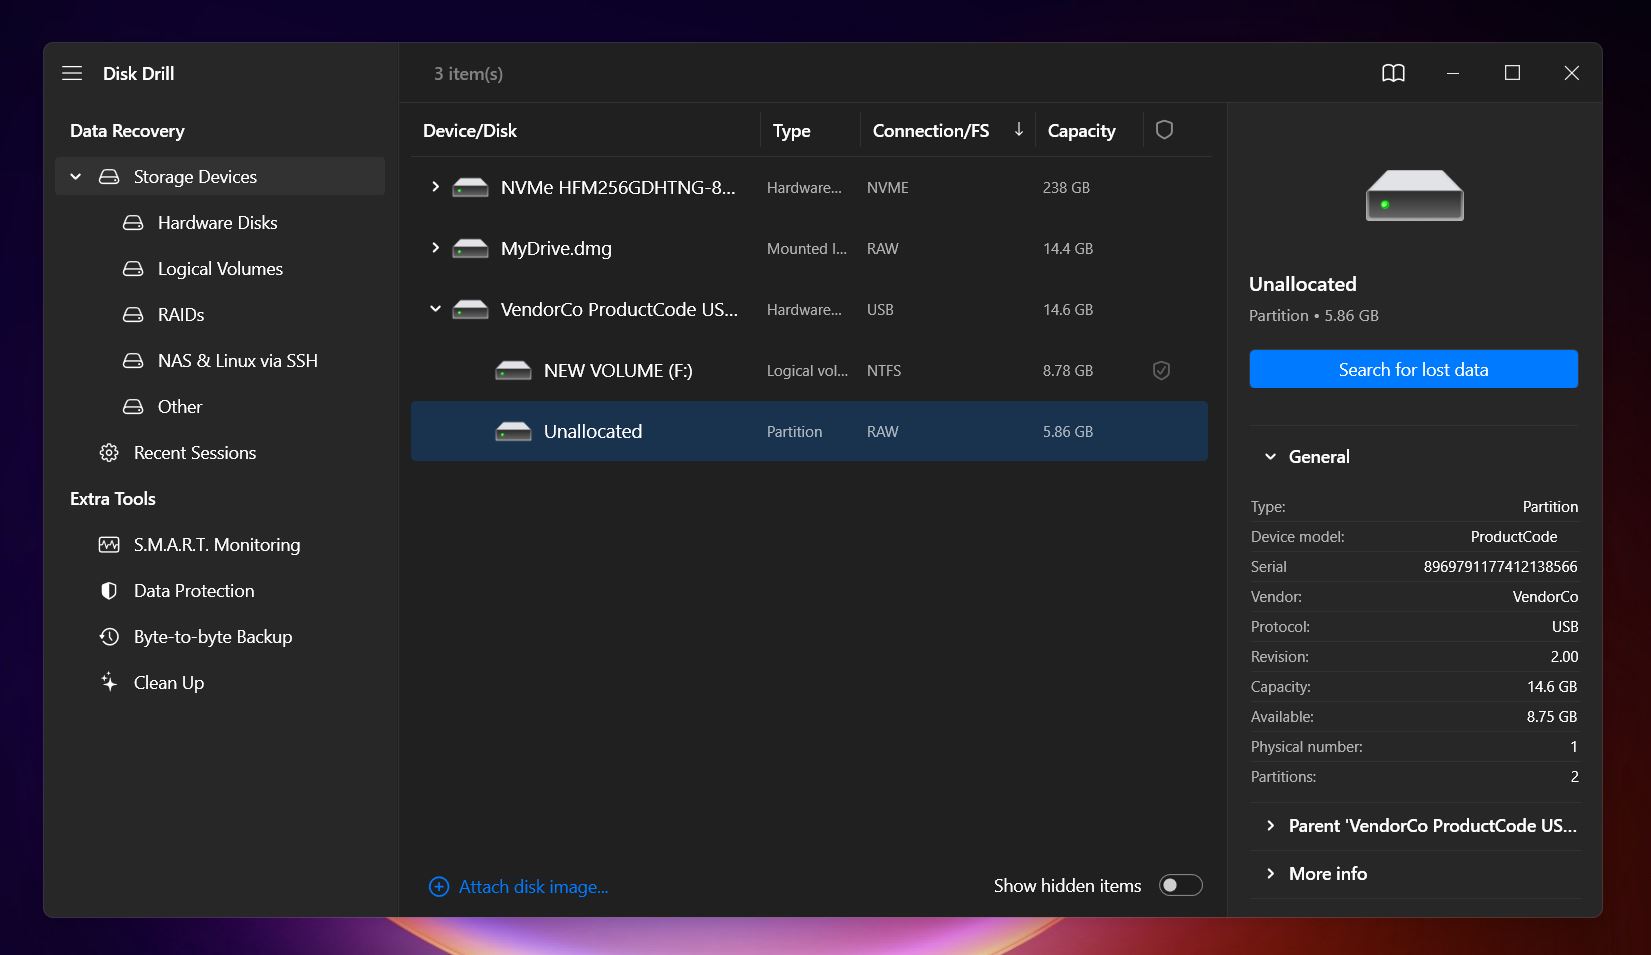
- Launch Disk Drill, and you’ll see all connected drives on the main screen. Select your USB drive (or its unallocated partition) and click Search for lost data to begin the process.
- As Disk Drill scans, you can view recoverable files in real-time (or you can wait for the scan to finish and then click Recover All… if you want to restore all the data found on your USB drive).

- You have the option to display files as pictograms or in a list view. The files are organized into categories such as “Existing files”, “Reconstructed” and “Deleted or lost”. This allows you to see both files currently on your USB drive and those you previously deleted.
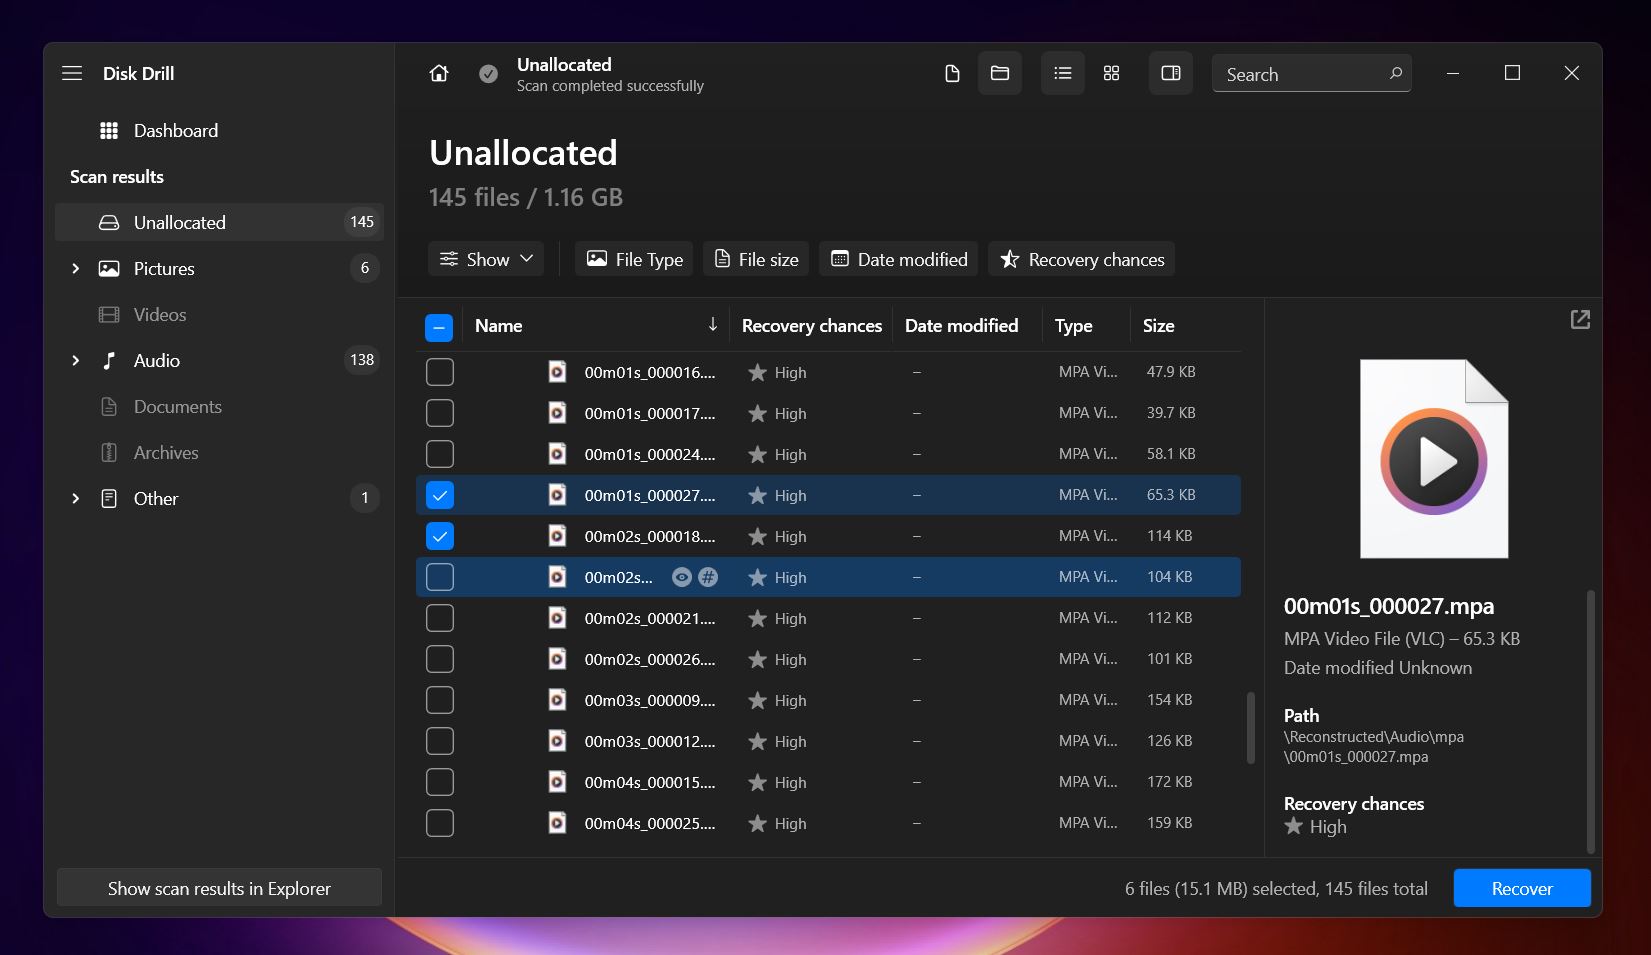
- Disk Drill can preview a wide range of file formats supported by Windows. As long as you have the proper viewer installed on your OS, you can preview almost any file format before recovery.
- Select the files you want to retrieve and hit Recover.
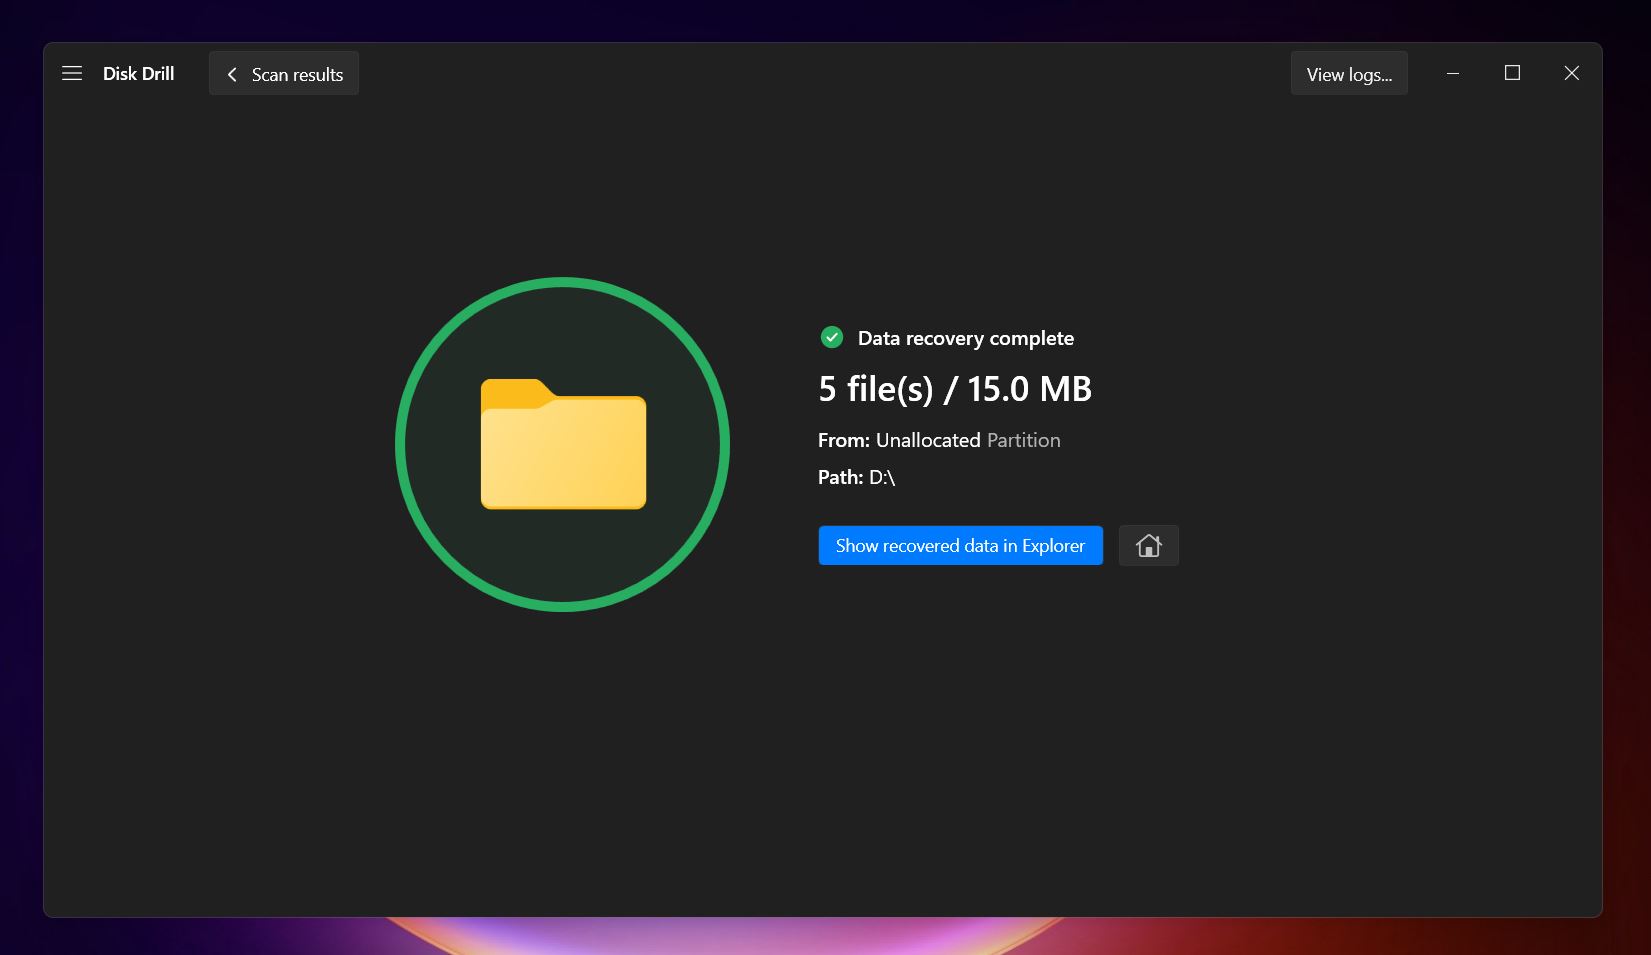
- Choose a safe location on your computer or an external drive to save them.
- Click on Show recovered data in Explorer to navigate to your recovered files.
The bottom line is that Disk Drill is an end-to-end data recovery tool that is your one-stop solution for many data recovery scenarios. The tool facilitates data recovery from broken USB drives, formatted USB disks, RAW partitions, and corrupted flash drives. However, if Disk Drill doesn’t feel like the right fit for you, there are several Disk Drill alternatives that might suit you better.
FAQ
How do I fix an unallocated USB Drive without losing data?
You can use TestDisk to fix an unallocated USB drive. It’s great for repairing issues caused by damaged, lost, or deleted partitions, and if it works, your data should stay intact. That said, it’s a smart move to use a data recovery app first to pull any files from the unallocated space and save them somewhere safe—just in case something goes wrong during the repair. Here’s how you can fix an unallocated USB drive using TestDisk:
- Download, install & launch TestDisk.
- Select [CREATE] > Enter.
- Select the USB drive > Enter.
- Choose partition type table (INTEL for Windows).
- Pick [ANALYZE] > Enter.
- Choose Quick search> Enter.
- Select [Write] > Enter > Y.
How do I restore unallocated space on a flash drive?
You can make “unallocated” space “allocated” again using Disk Management, but keep in mind this process involves formatting, which will erase any data on that space. If the files on the unallocated space are important to you, it’s a good idea to recover them first using data recovery software like Disk Drill or PhotoRec. Once your files are safely retrieved, you can use Disk Management to allocate the space. Here’s how you can restore unallocated space on your USB stick:
- Open Disk Management.
- Right-click the unallocated volume > New Simple Volume.
- Click Next > Enter.
- Select a drive letter > Next.
- Complete the configuration > Next.
- Click Finish.
Why did my USB drive suddenly become unallocated?
Usually, a USB drive is unallocated because its partition was deleted or it’s brand new and hasn’t been formatted yet. These are the most common scenarios. Other causes, like file system corruption or physical damage, can also result in an unallocated USB drive, but these are very rare.
How to recover data from an unallocated USB drive?
An unallocated USB drive doesn’t show up in File Explorer, so you can’t access it like you normally would. However, you can still recover data from it using data recovery software. These tools can scan your USB drive for files as long as it’s visible in Disk Management. Here’s how you can recover data from an unallocated flash drive:
- Install & launch data recovery software.
- Select your unallocated USB.
- Click the option to search for data.
- Review and select the files that you need.
- Recover them to a safe location.
How to format an unallocated USB drive?
You can format an unallocated USB drive using two built-in Windows utilities: Disk Management or DiskPart. Both options are straightforward and get the job done. Here’s how to format it using Disk Management:
- Right-click the Start button and select Disk Management.
- Locate your USB drive in the list. It will appear as “Unallocated.”
- Right-click the unallocated space and select New Simple Volume.
- Follow the wizard to assign a drive letter, choose a file system (e.g., NTFS or exFAT), and format the drive.
Alternatively, you can use DiskPart (Command Line) to format your USB drive:
- Search CMD > Run as Administrator.
- Key in: Diskpart List volume
- Type: Select Volume 3 Replace ‘3’ with the relevant disk number.
- Key in: Create partition primary
- Enter: Format fs=fat32
- Wait for the process to format and restore your USB to original state.
How do I fix a USB drive with unallocated space that cannot format?
If your USB drive has unallocated space that won’t format, try these steps:
- Open Disk Management, delete all existing partitions on the drive, and create a new one. Assign a file system like NTFS or exFAT during the process.
- Use the command-line tool DiskPart to clean the drive, create a new partition, and format it. This method often works when Disk Management fails.
- Use tools like TestDisk or dedicated disk repair utilities to repair the partition table or recover the drive’s functionality.
- If none of the software solutions work, the drive might have hardware issues. In this case, you’ll need professional repair services or a replacement.
This article was written by Joshua Solomon, a Contributing Writer at Handy Recovery Advisor. It was recently updated by Roman Demian. It was also verified for technical accuracy by Andrey Vasilyev, our editorial advisor.
Curious about our content creation process? Take a look at our Editor Guidelines.