An ESD USB is a great way to install a fresh copy of Windows on your machine, though creating one effectively erases all the data on your flash drive (or any other USB device you use). But what happens if you forget to back up some important files? And what if you want to return your USB storage device back to its original state after you install the OS?
We’ve helped plenty of people undo their ESD USB setup, and we’re here to show you how it’s done. We’ll walk you through each step, including how to recover any data that was on the drive before the setup.
What is the ESD USB meaning?
ESD is short for “Electronic Software Delivery,” and an ESD USB is a type of storage format used to create a bootable Windows installation on a USB drive. You can use it to set up Windows on your computer or as a recovery tool for OS repairs. The ESD can be created on any USB storage device using an ISO file of the OS installer or through the downloadable media creation tool for Windows 10 or Windows 11.
When you create an ESD USB for modern Windows systems, it formats the drive and sets up a 32 GB partition to store OS files. The process deletes everything on it. That’s why it’s important to back up any important files first if you want to format the USB without losing data.
The most common methods to create an ESD USB involve tools like the Windows Media Creation Tool, Rufus, or similar software. These programs typically use a quick format for the process, which is good news—it means there’s a chance to recover data. A full format, on the other hand, would overwrite the entire drive, and make recovery virtually impossible.
However, keep in mind that part of the original data might still be overwritten if the system stores the new image in areas already marked as “ready for overwriting.” This means that not just the free space on the USB, but even previously occupied sectors, could be affected.
It’s pretty easy to return the ESD USB to its normal state, but recovering the data that was on the drive before the image was written is less certain. To find out, you’ll need to scan the drive with a good recovery tool and check what files, if any, can still be recovered.
2 Simple Steps to Change ESD-USB to Normal USB
Actually, restoring an ESD USB to its normal state usually requires just two steps. First, we’ll try to recover any data that was on the drive before it became an ESD USB. Then, we’ll reformat the drive to remove the ESD partition and restore it to a standard, everyday USB. Let’s start.
If you’re not concerned about the files that were on your drive before it became an ESD USB, you can skip the first step and go straight to Step 2 to reformat the drive. Also, don’t forget to check out the alternative method.
Step 1: Recover Files from ESD-USB
In case you were unable to back up your important files before the ESD USB was made or were simply unaware that they were essential at the time, you’ll be glad to know that there’s still a chance that you can unformat your USB. And by “unformat”, we mean restore your lost data. The best way to go about it is through the help of powerful data recovery software, like Disk Drill.
Disk Drill is one of the best USB recovery software around, given how effective it is at retrieving files from a wide variety of data loss scenarios, including ESD USB formatting and accidentally deleted files. It also sports a catchy user interface that’s easy to use even if you’re a newbie to the process. You won’t have to immediately commit to payment either, as Disk Drill includes a free version with all of its features that you can use to recover up to 500 MB of data. This way, you can check if your data is recoverable at all and see how many files you’re able to salvage before deciding whether to upgrade.
The amount of data you can recover depends primarily on what was overwritten in the process.
To recover files from ESD USB, simply follow the steps below:
- First, download Disk Drill from the Cleverfiles website.
- Run the downloaded installer and follow the instructions that appear until successfully installed.
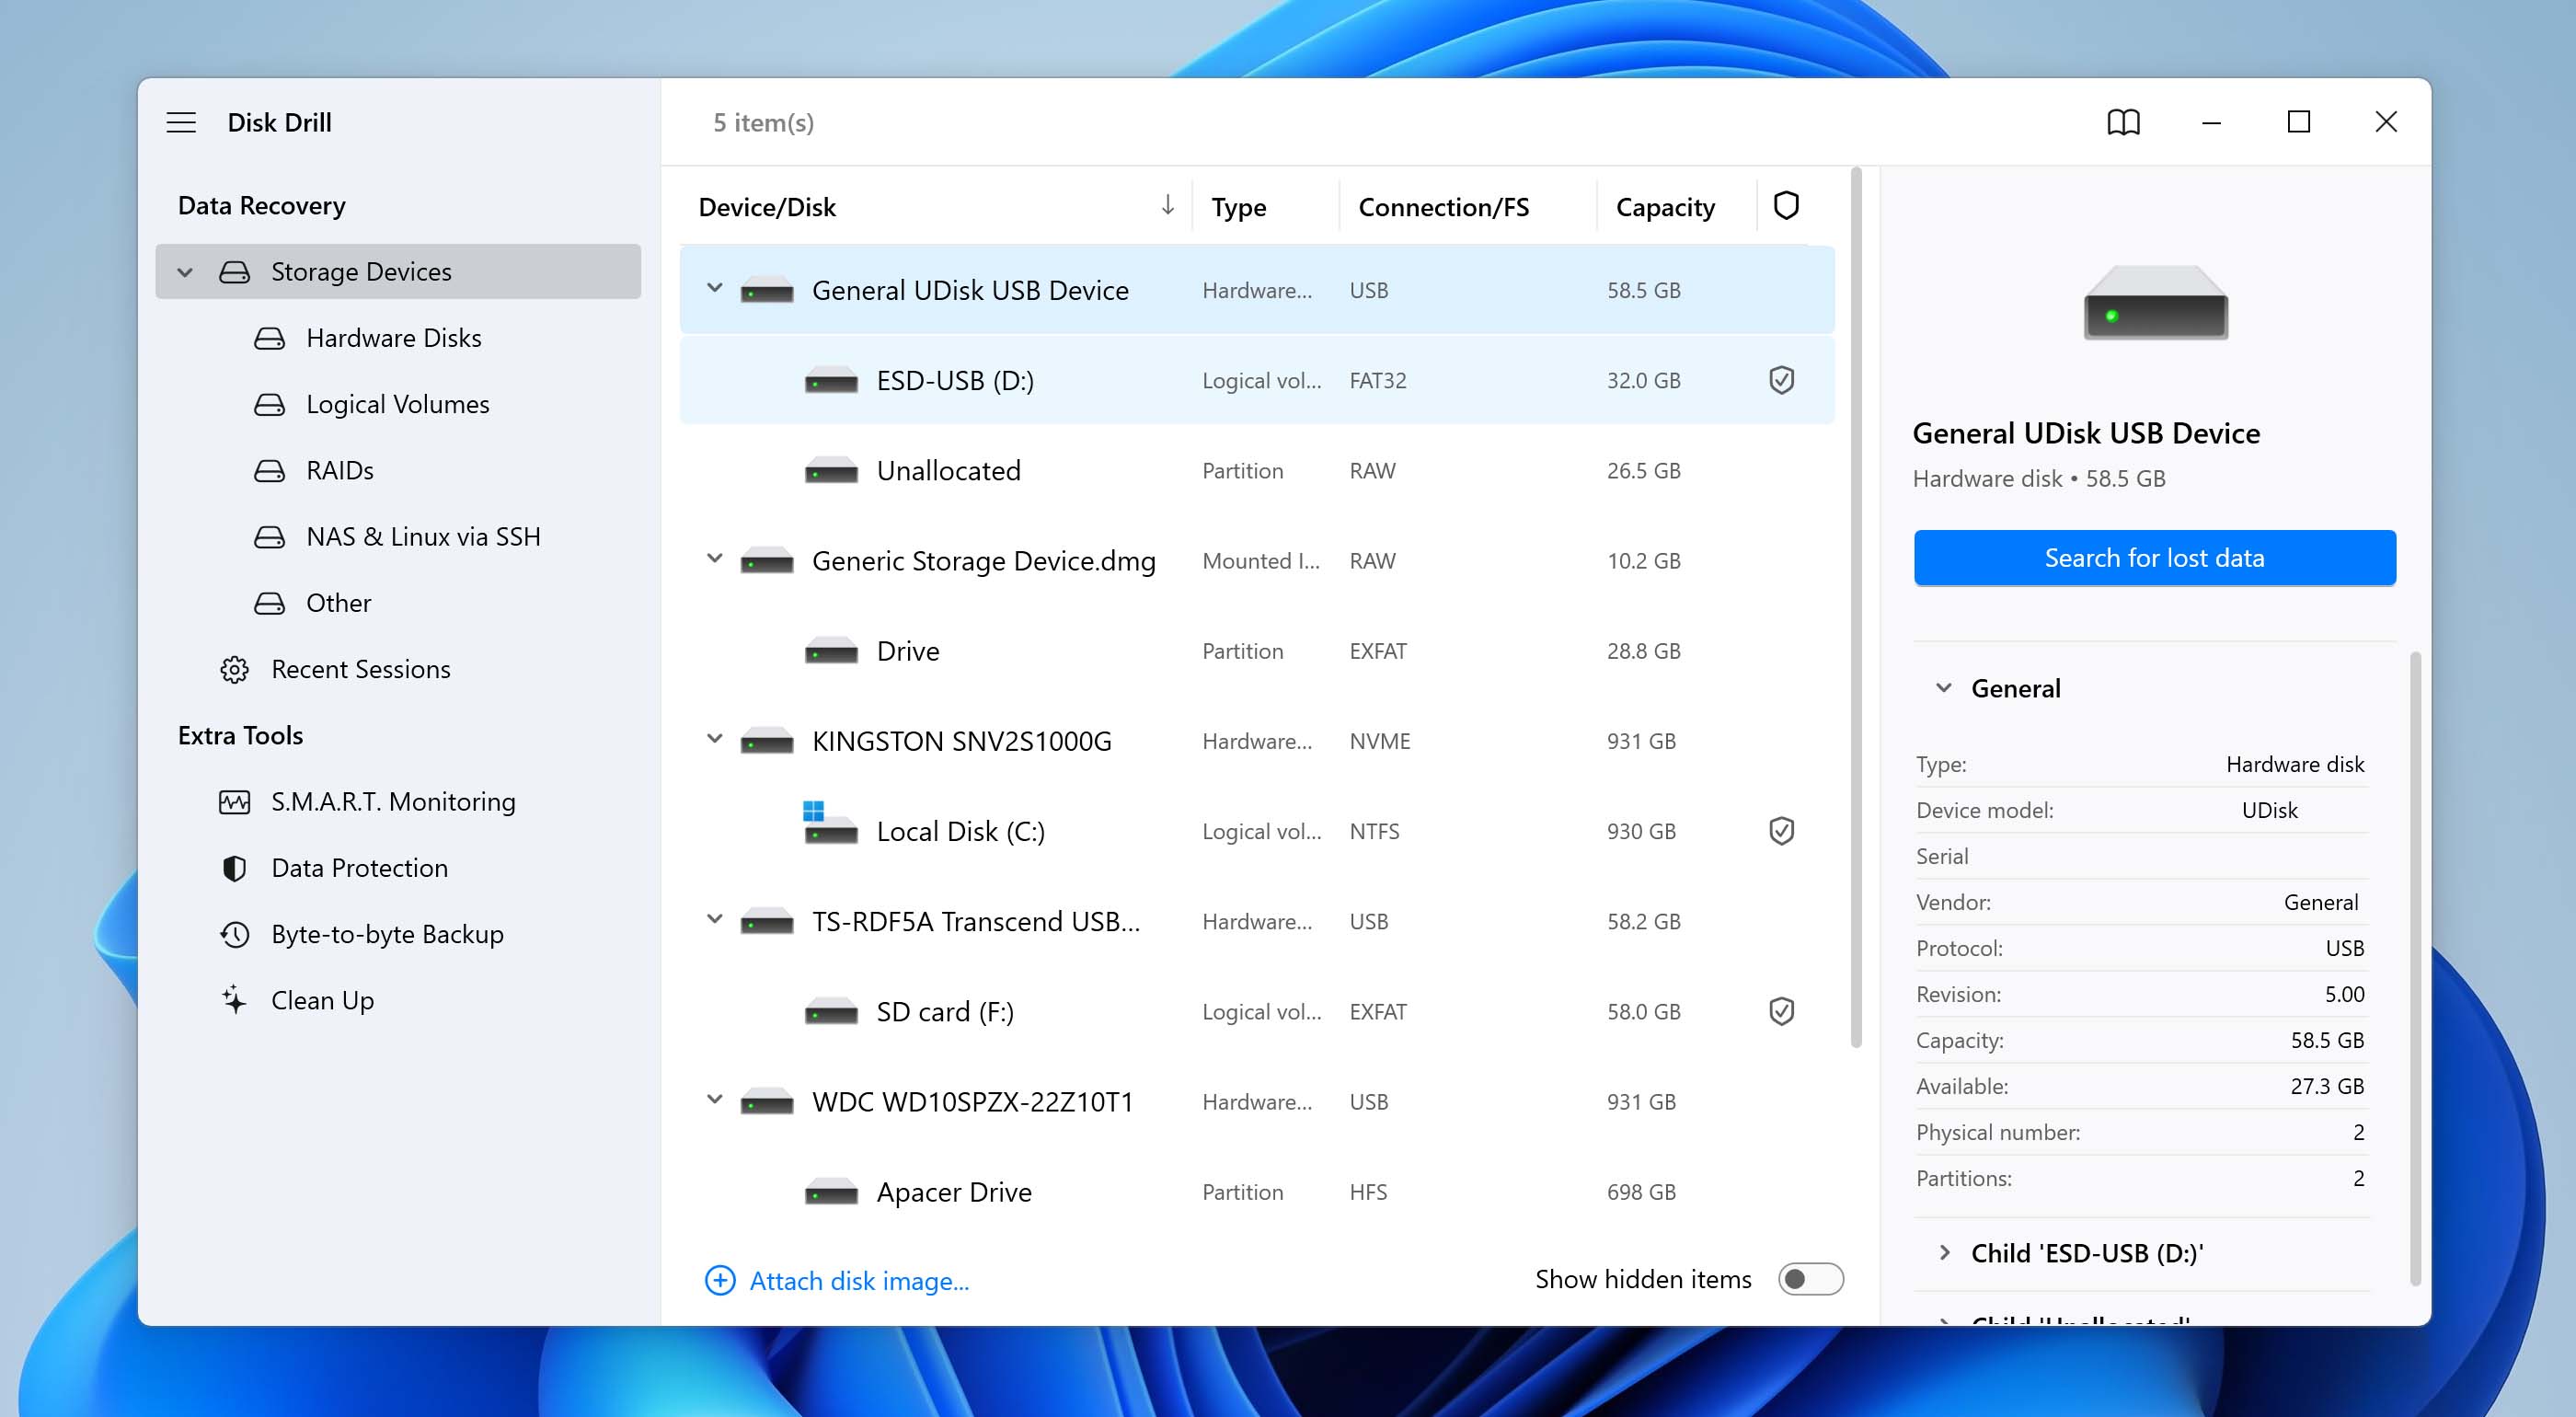
- Make sure the ESD USB is connected to your computer and launch Disk Drill. From there, select the ESD USB from the list of available storage devices and click Search for lost data.
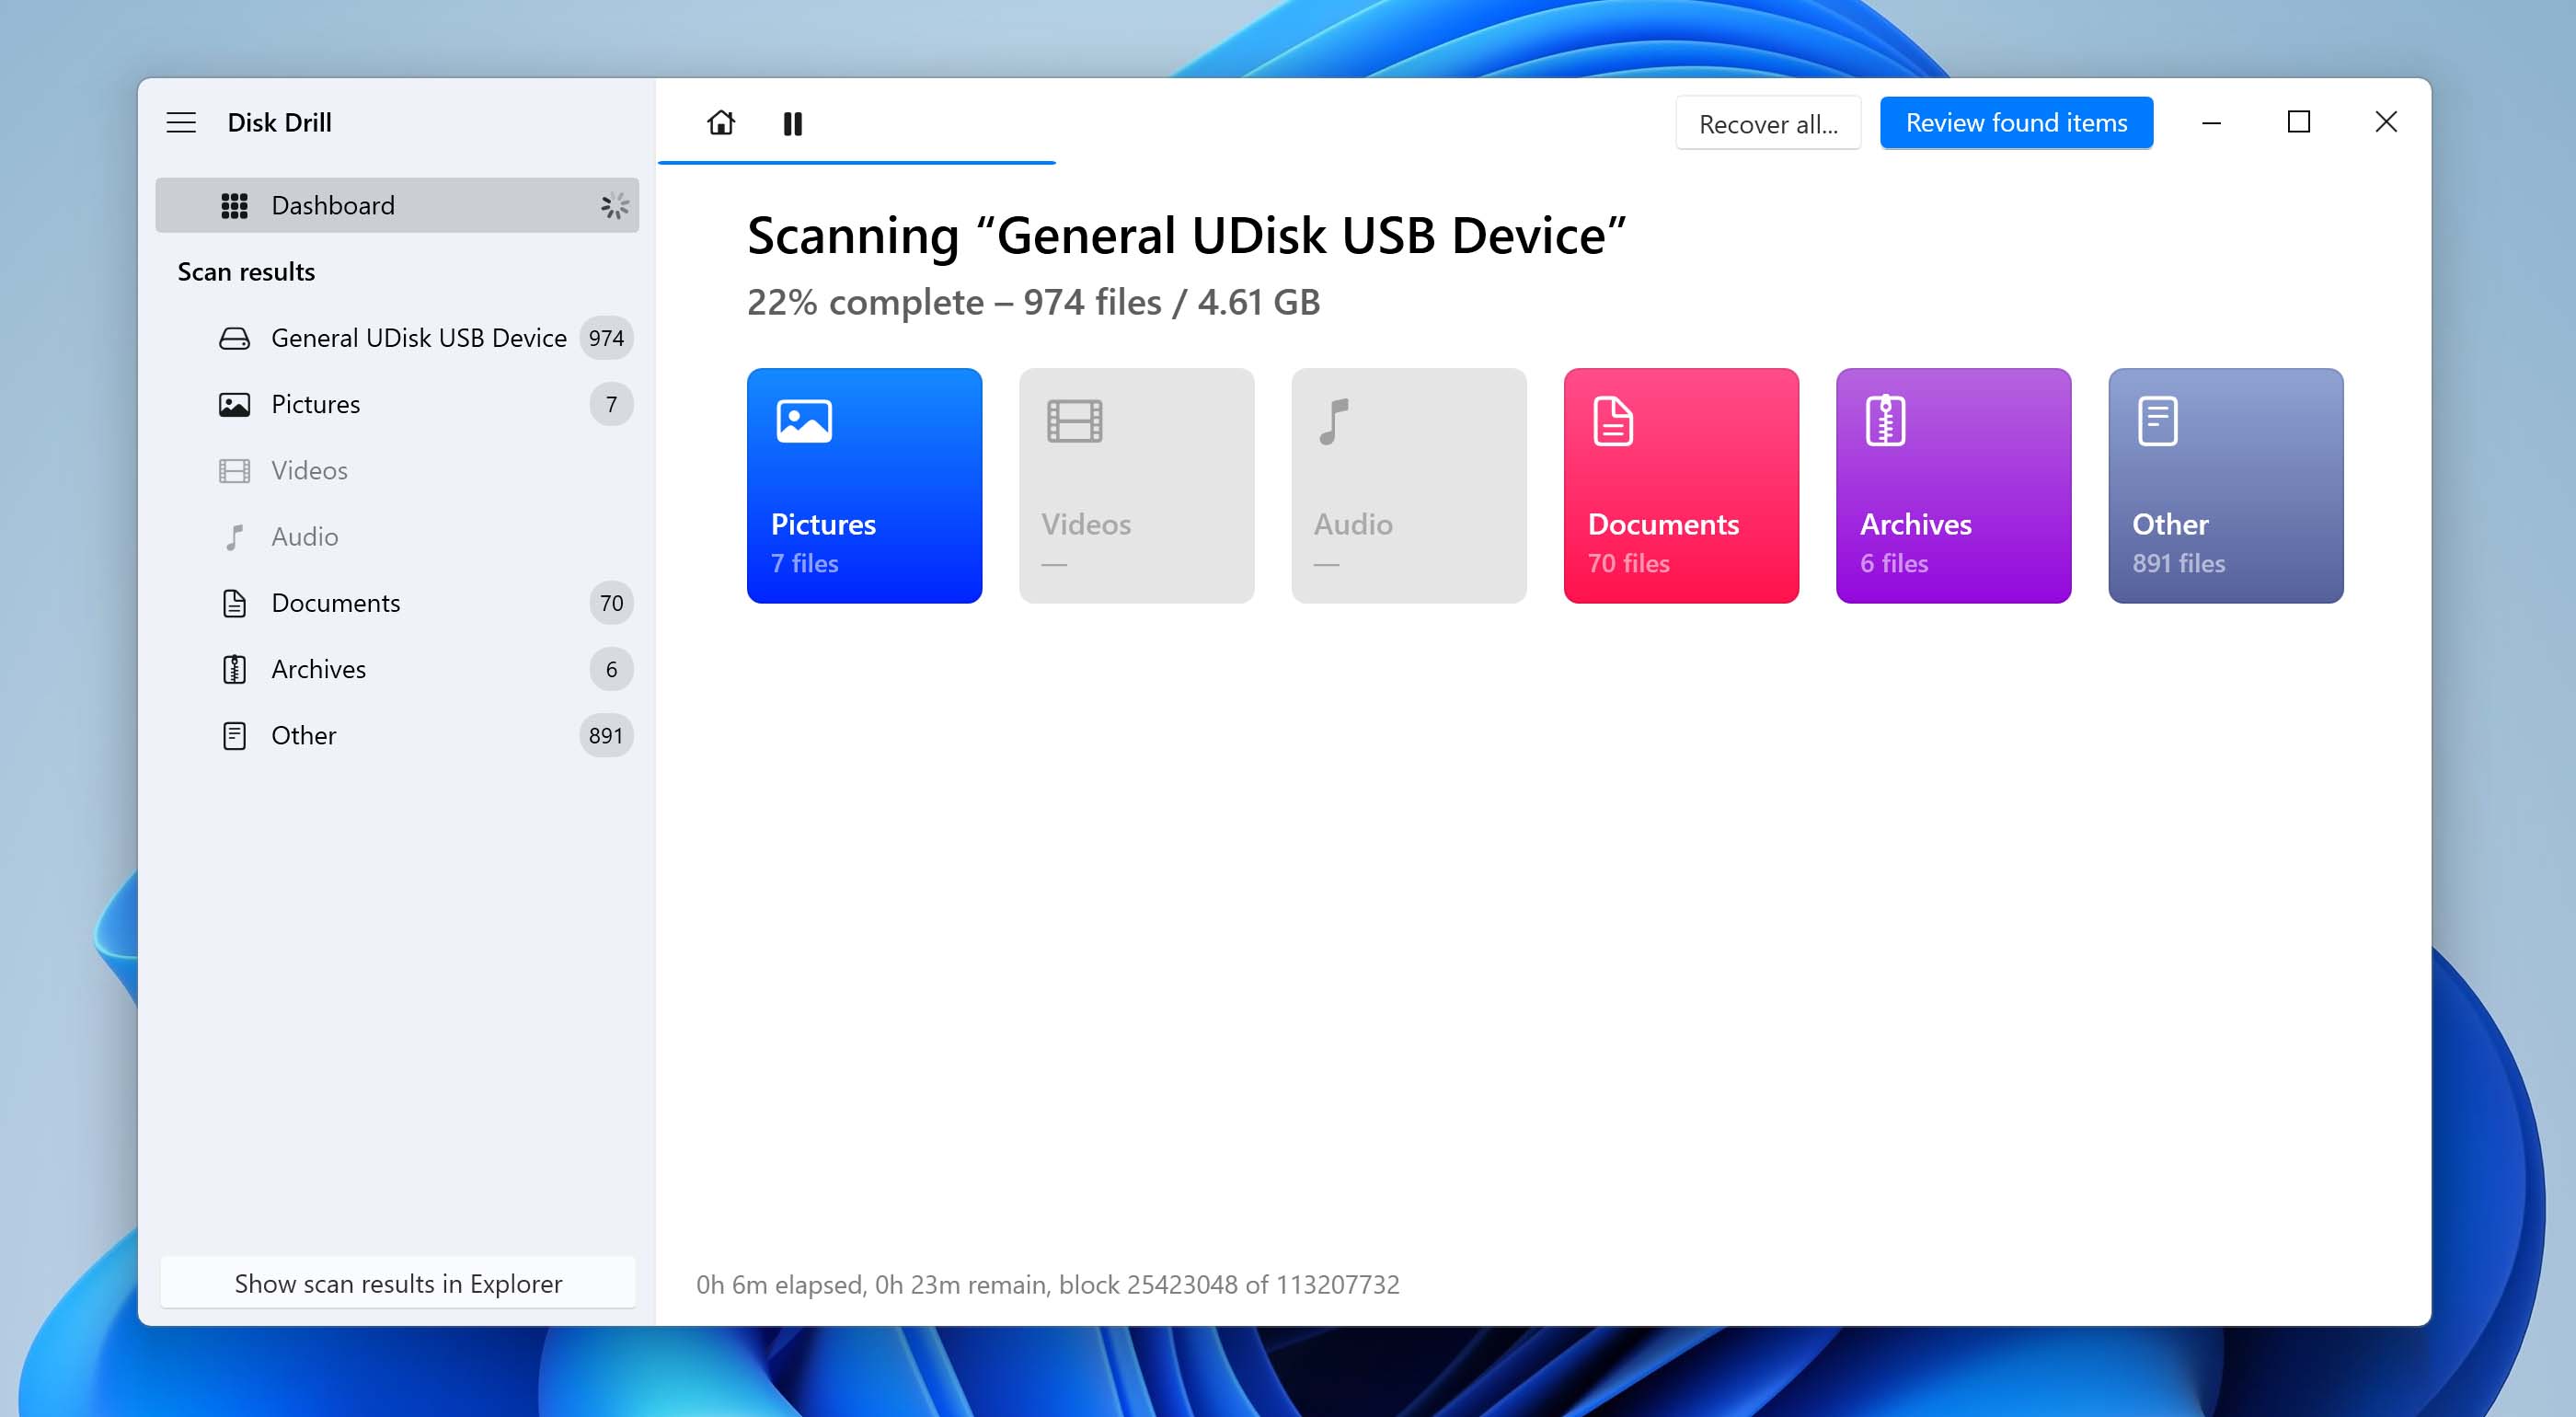
- After that, the program will now start scanning the drive for any lost data that can potentially be retrieved. The bigger the storage capacity of your USB, the longer this is likely to take. As you wait, you can click the Review found files button on the upper-right corner of the screen to browse any files that the scan has picked up so far. Otherwise, you can just wait until the scan is finished and then click the same button to proceed.
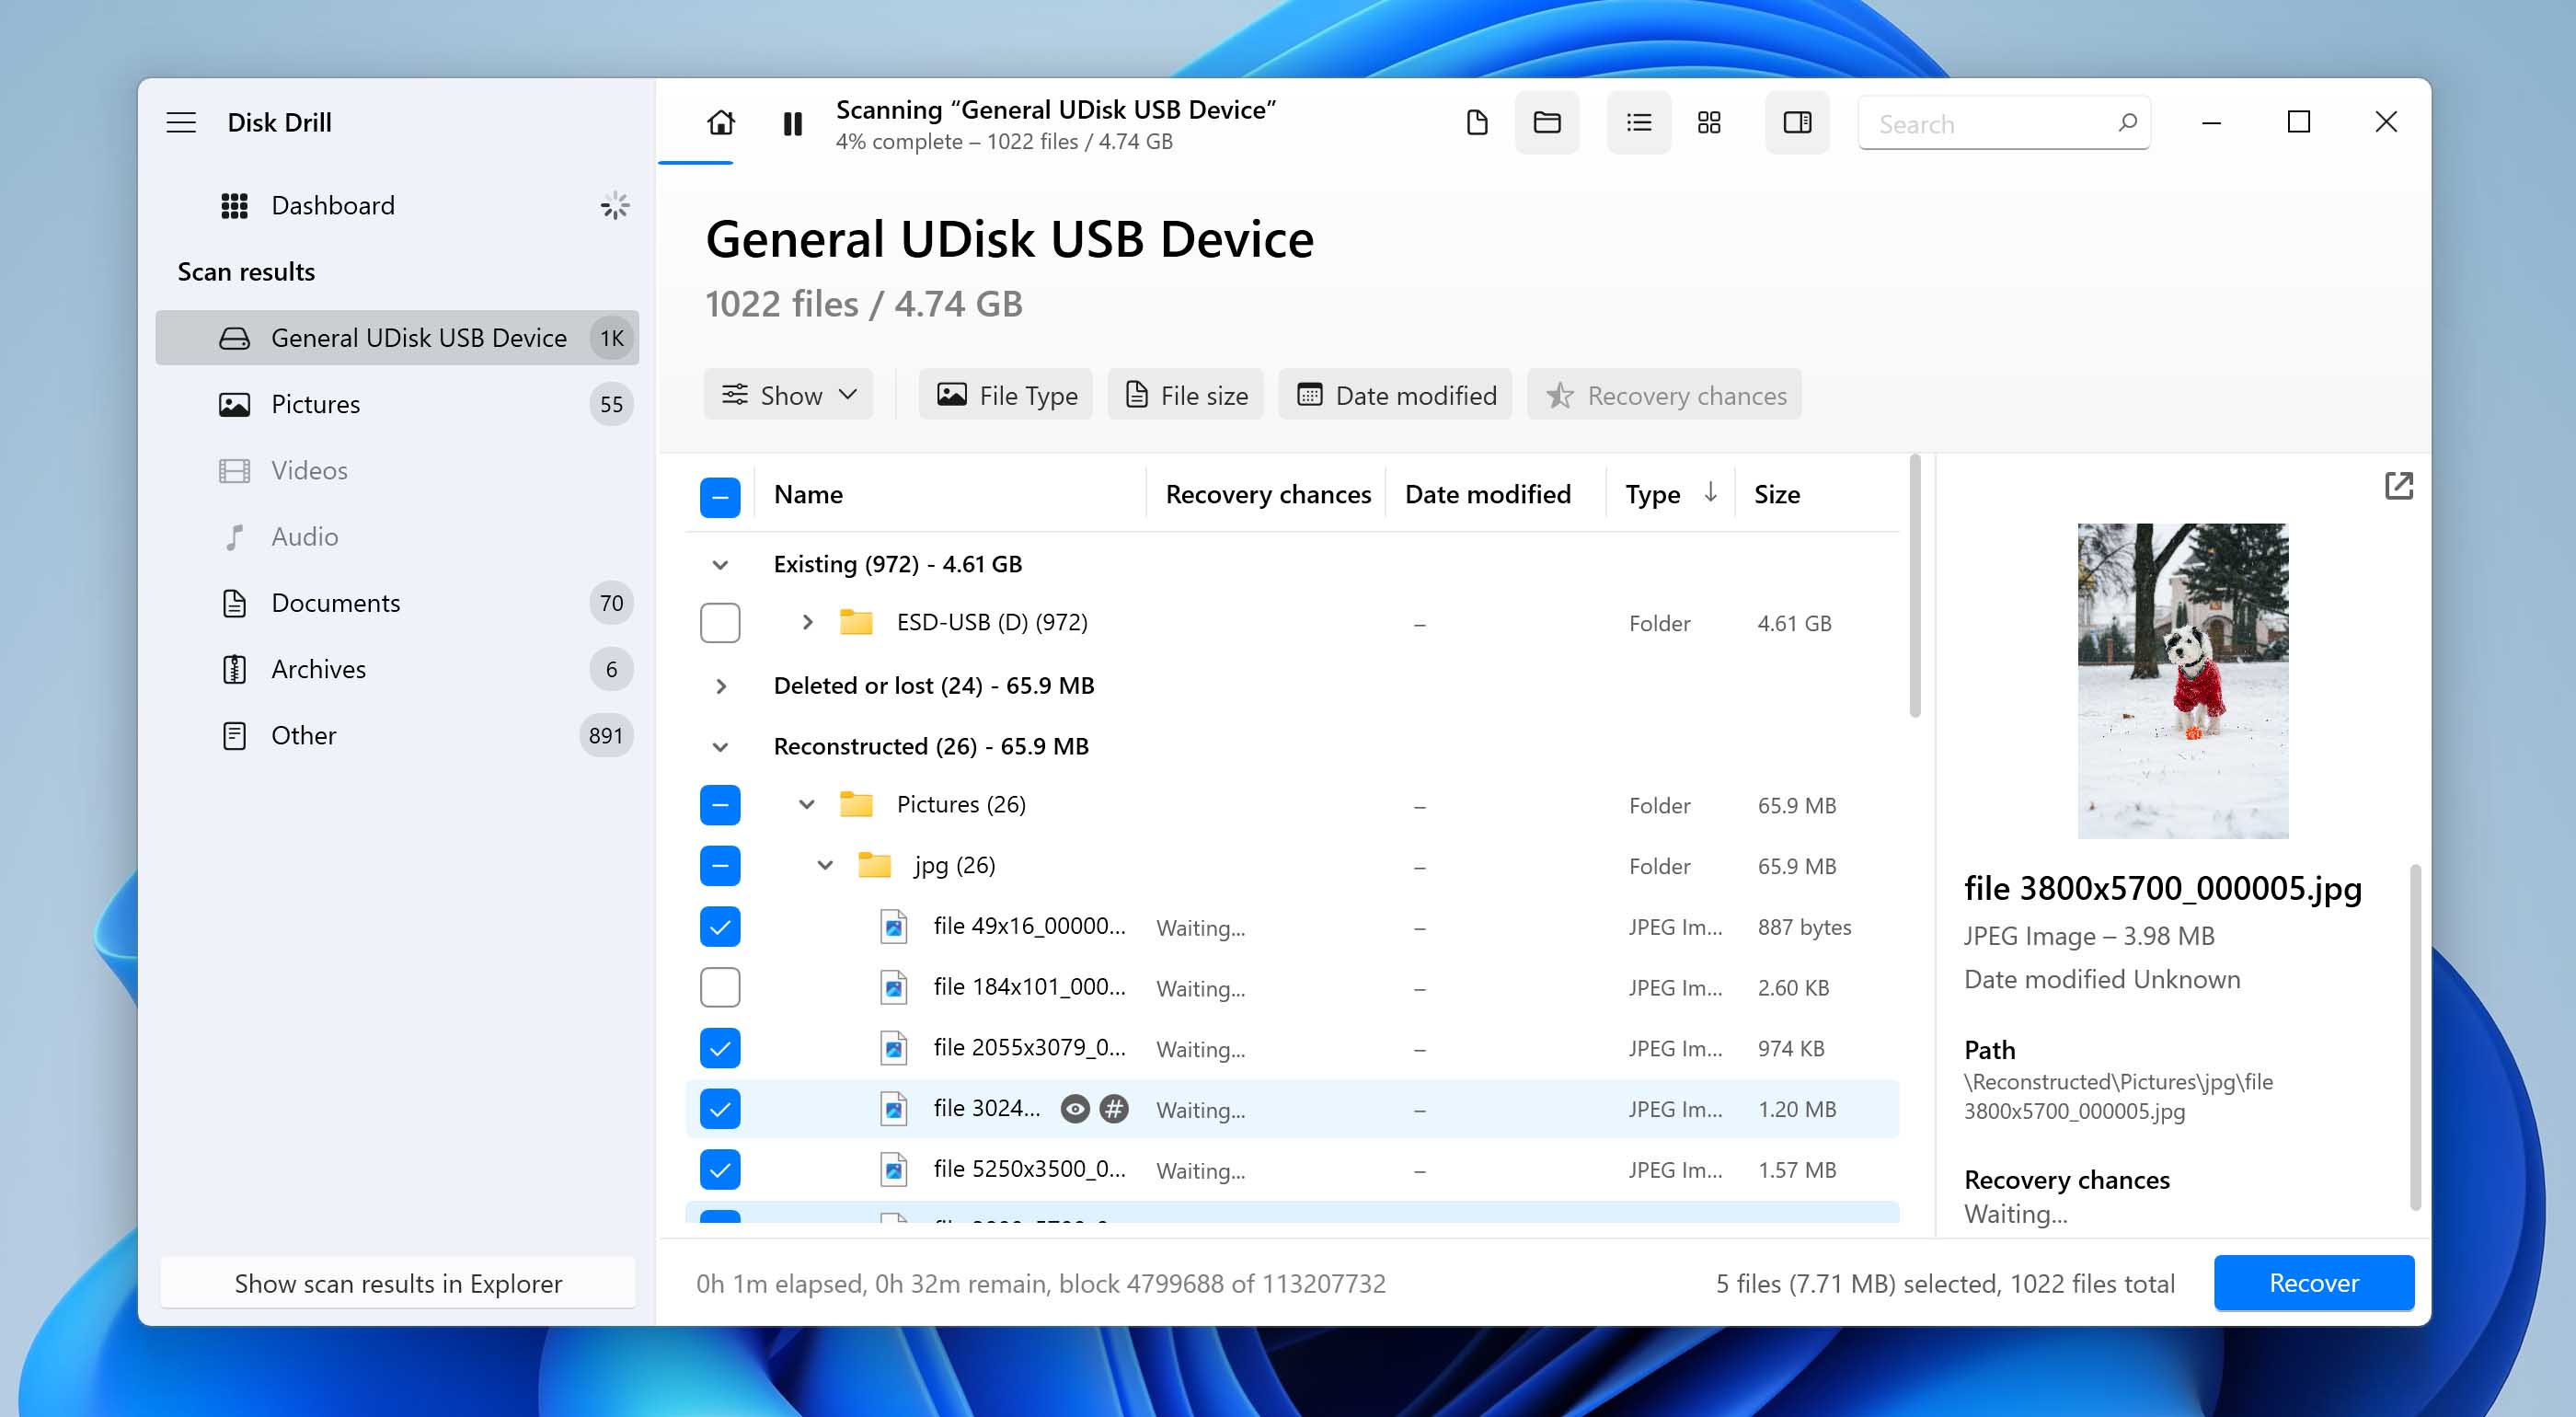
- In the results section, navigate through the found files until you find the ones you want to recover. You can make the search easier on yourself by using the category options on the left side of the screen, and there’s also a search bar in the top-right corner in case you’re aware of the file name or type.
- When you click on a file in the results, a preview window shows up on the right, for a quick look at the file. For a full preview, just click the eye icon next to the file name. Disk Drill supports previews for almost all file types, as long as you have the right software installed on your Windows system to open them.
- Finally, check the boxes next to the files you want to recover, and click Recover when you’re ready to continue.
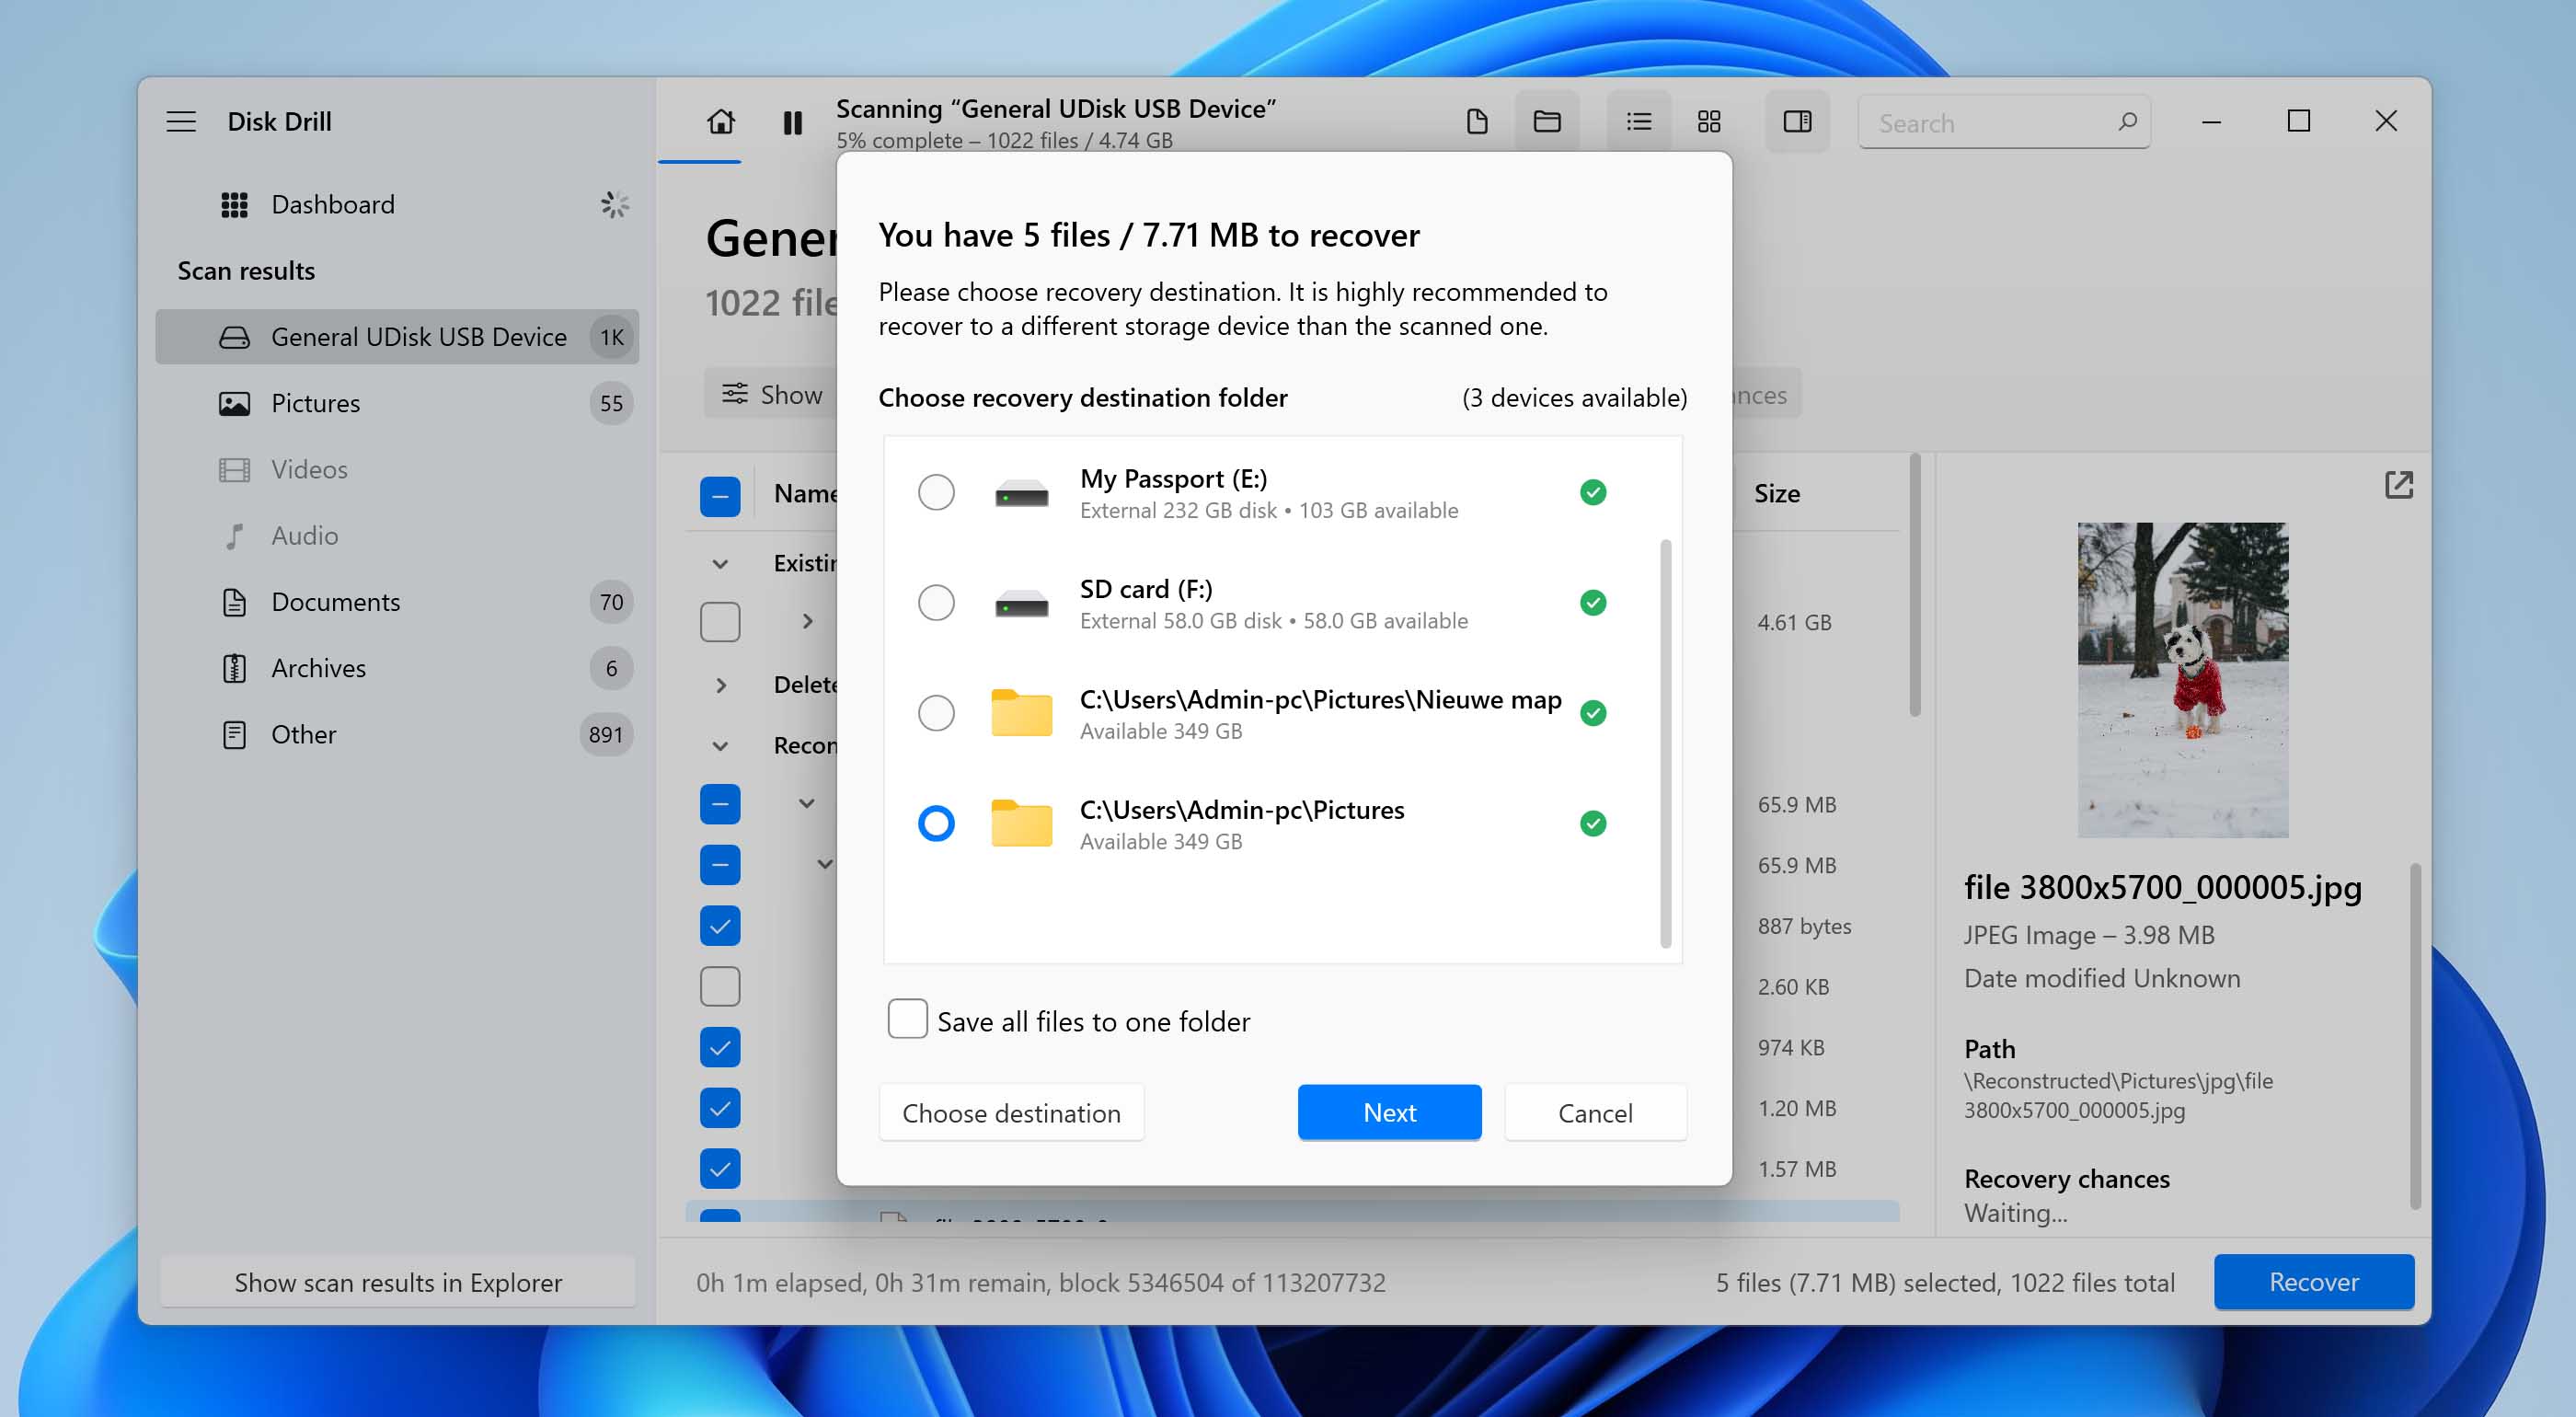
- A small window will appear where you’ll need to decide on the storage location for the recovered files. Make sure that this is on a different device than the ESD USB that you’re trying to recover from. Click Next once done.
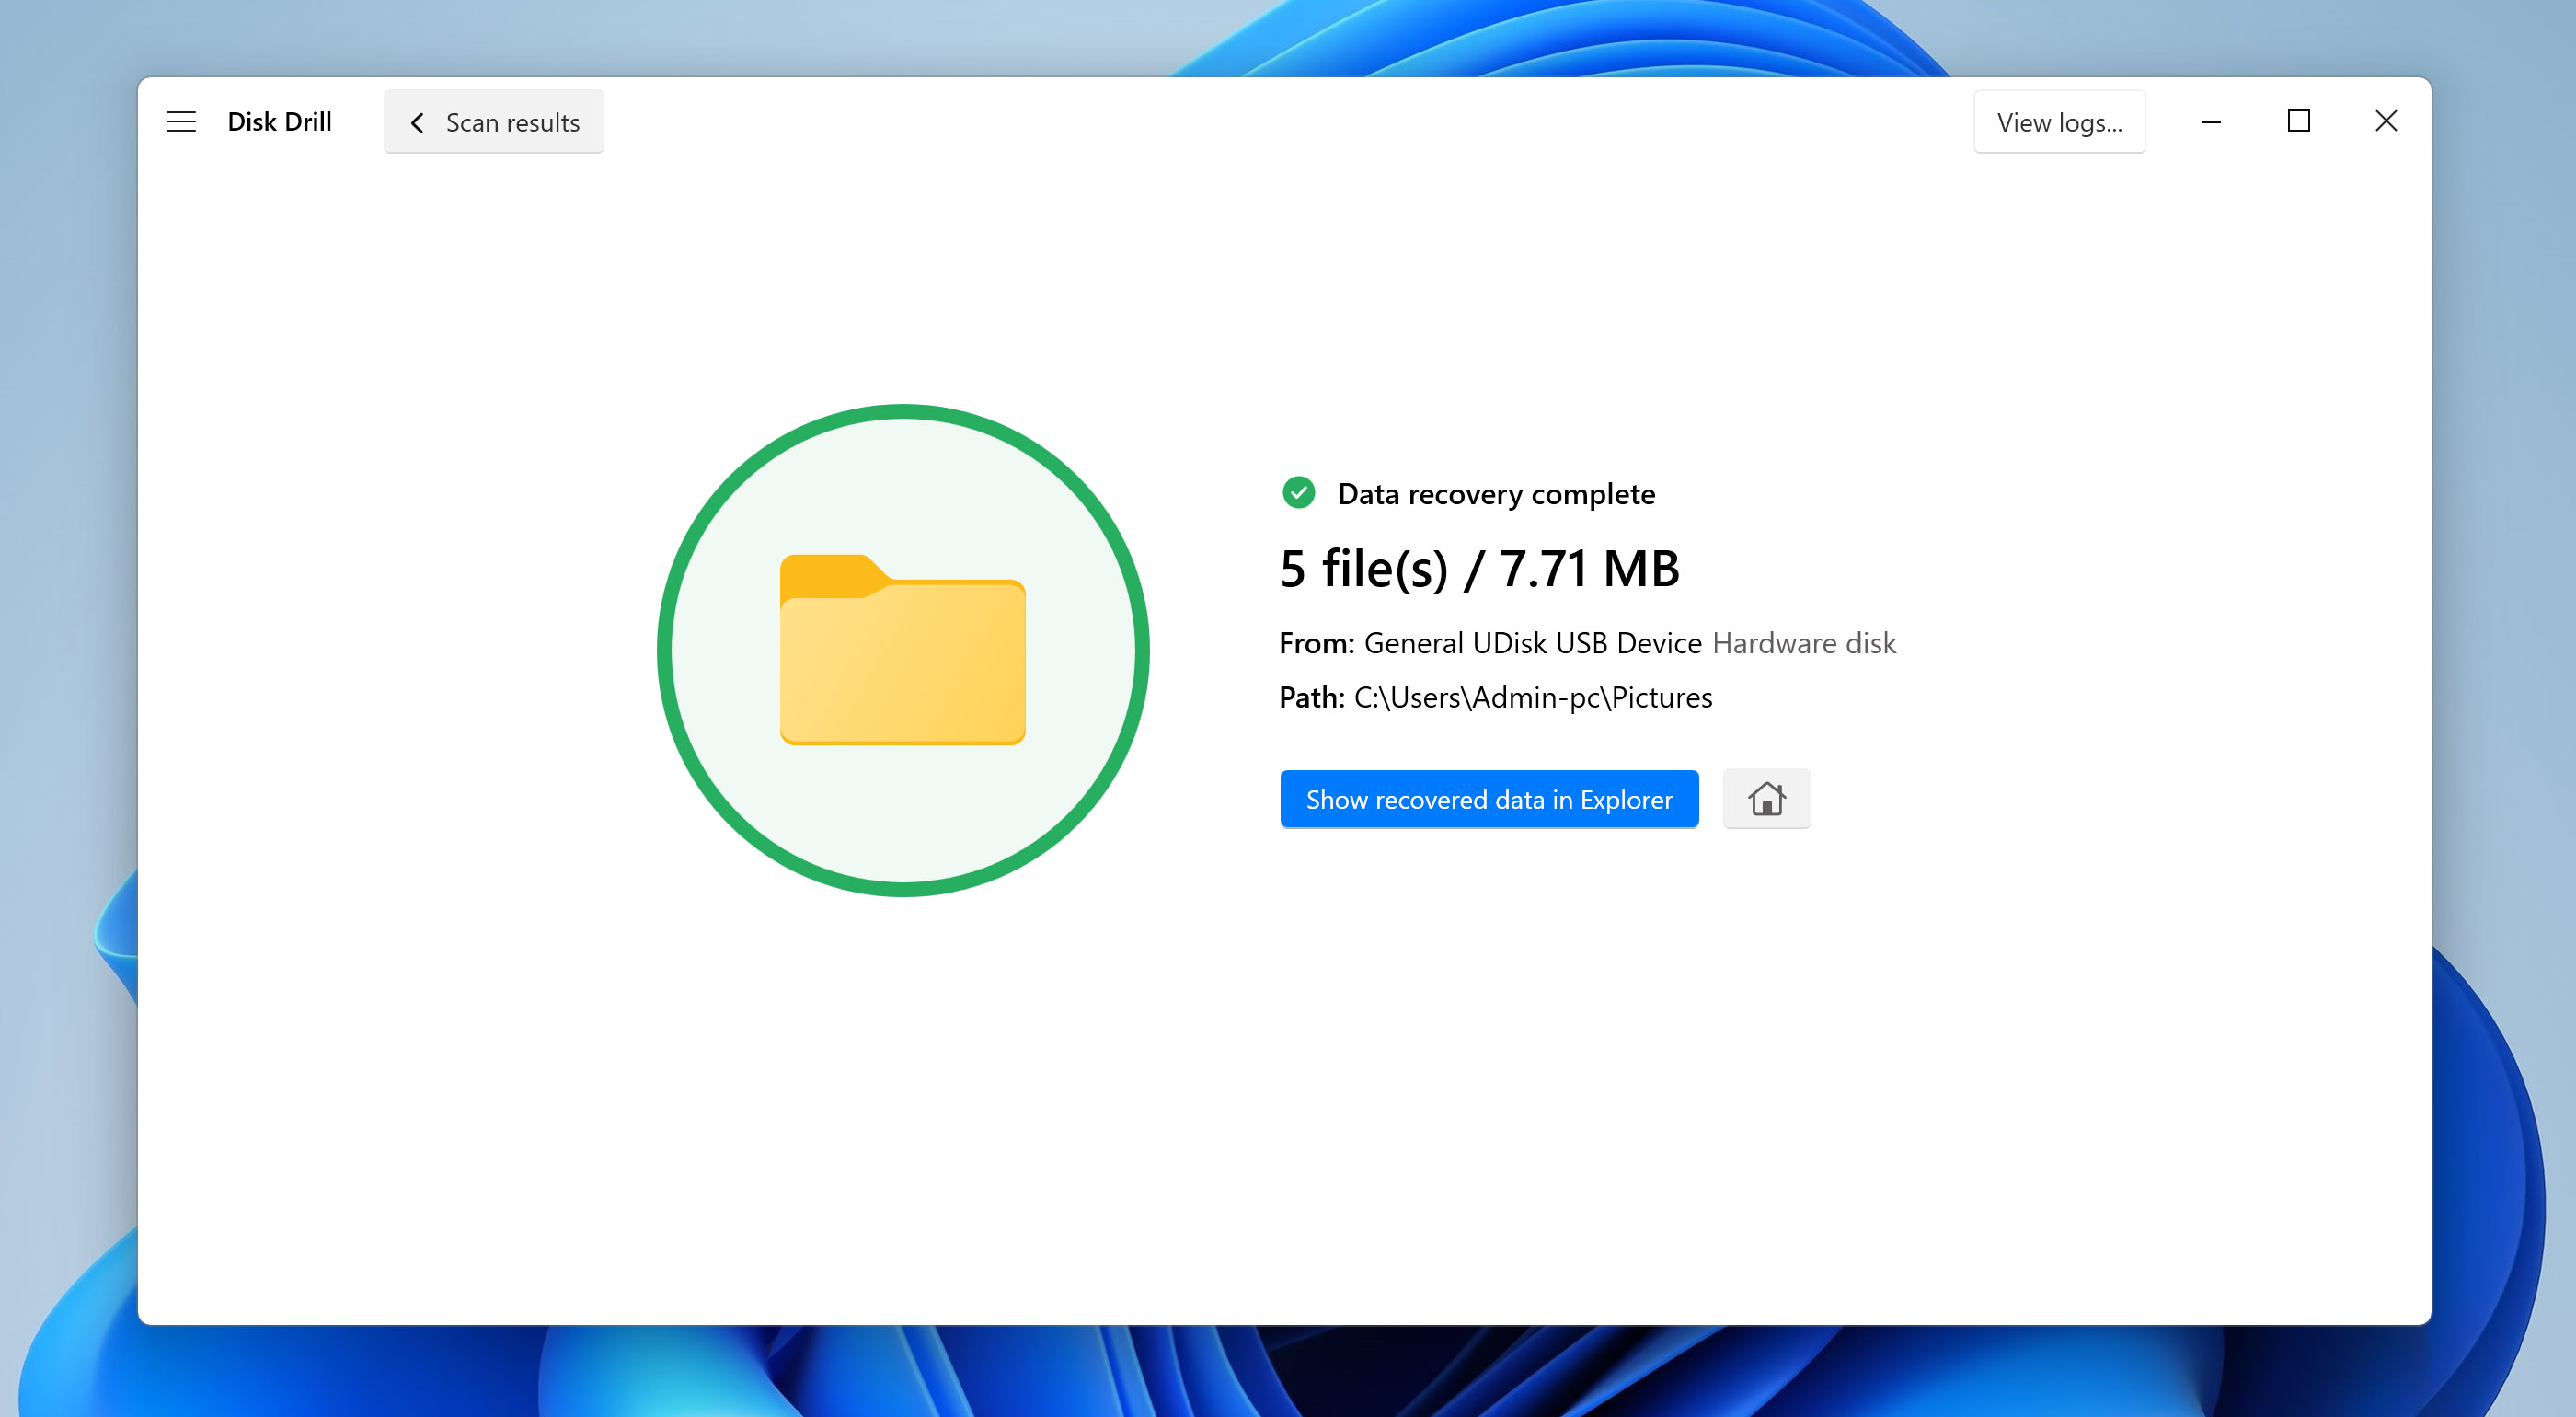
- At this point, Disk Drill will try to recover the selected files from your ESD USB. You’ll receive a completion message once this process is done. If you’d like to be taken straight to the rescued files, you can click the Show recovered data in Explorer button.
Disk Drill is one of the best tools of its kind, and we’ve successfully used it before to undo ESD USB setups and recover lost files. Its effectiveness in this scenario comes down to several key capabilities:
- Uses a non-destructive recovery process, so it doesn’t change or overwrite any data on your drive.
- Disk Drill can find and recover lost or deleted partitions.
- Works with a variety of file systems, including NTFS, FAT32, exFAT, and more.
- With options like Quick Scan, Deep Scan, Disk Drill can tailor the recovery process to either find recently deleted files or or dig deep for data on formatted or damaged drives.
- Disk Drill’s Signature Scan searches by file signature and covers about 400 file types. This is especially helpful in severe cases of file system loss where standard recovery methods may fall short.
Step 2: Format ESD-USB Drive
Finally, once your files are safely recovered, you can format the ESD USB back to a standard drive.
Formatting will wipe the ESD setup, clear out system files, and restore it to a blank USB format for regular use. Just follow the steps in Disk Management, and your USB will be back to its original state.
Here are the steps on how to do this:
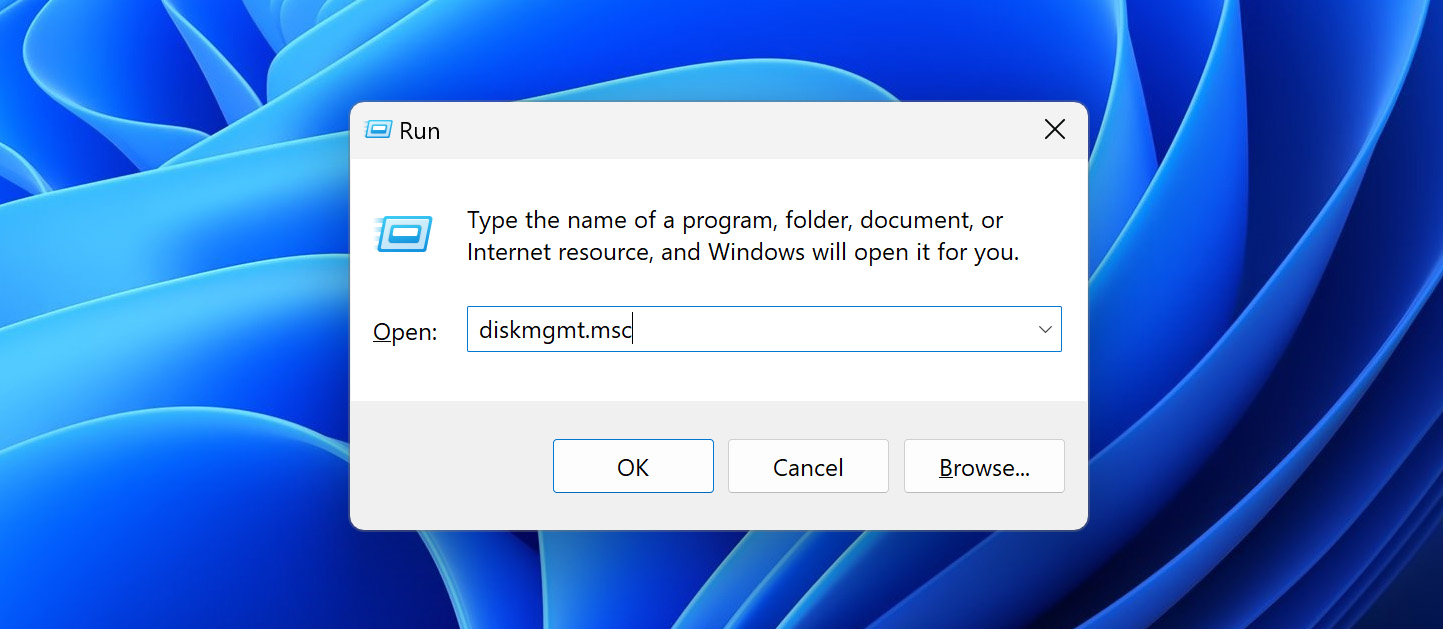
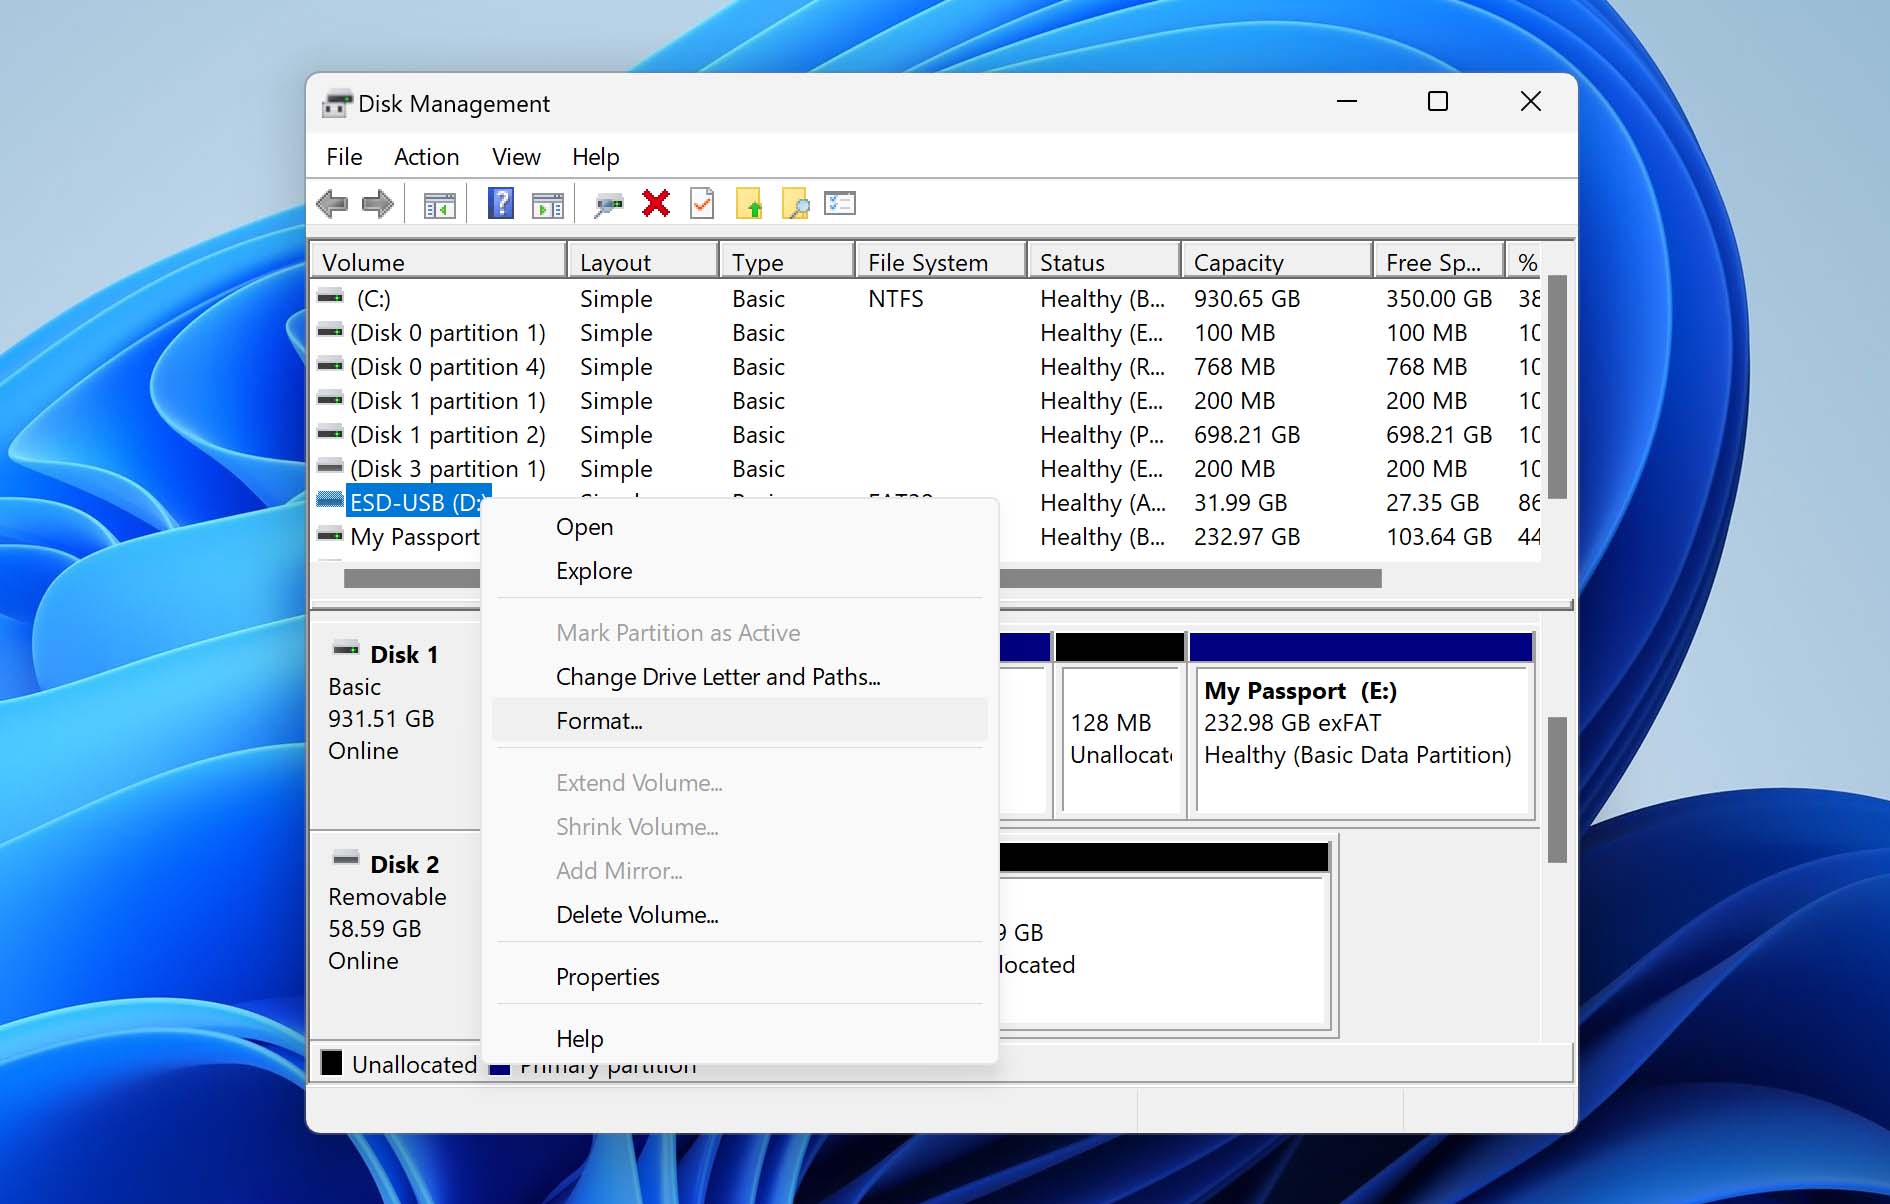
- To get started, press the Windows + R keys on your keyboard to bring up the Run command window. From there, type in “diskmgmt.msc,” and press Enter.
- Next, right-click your ESD USB and select the Format option. A pop-up will appear, warning you that all data will be erased in the process. Then, click Yes.
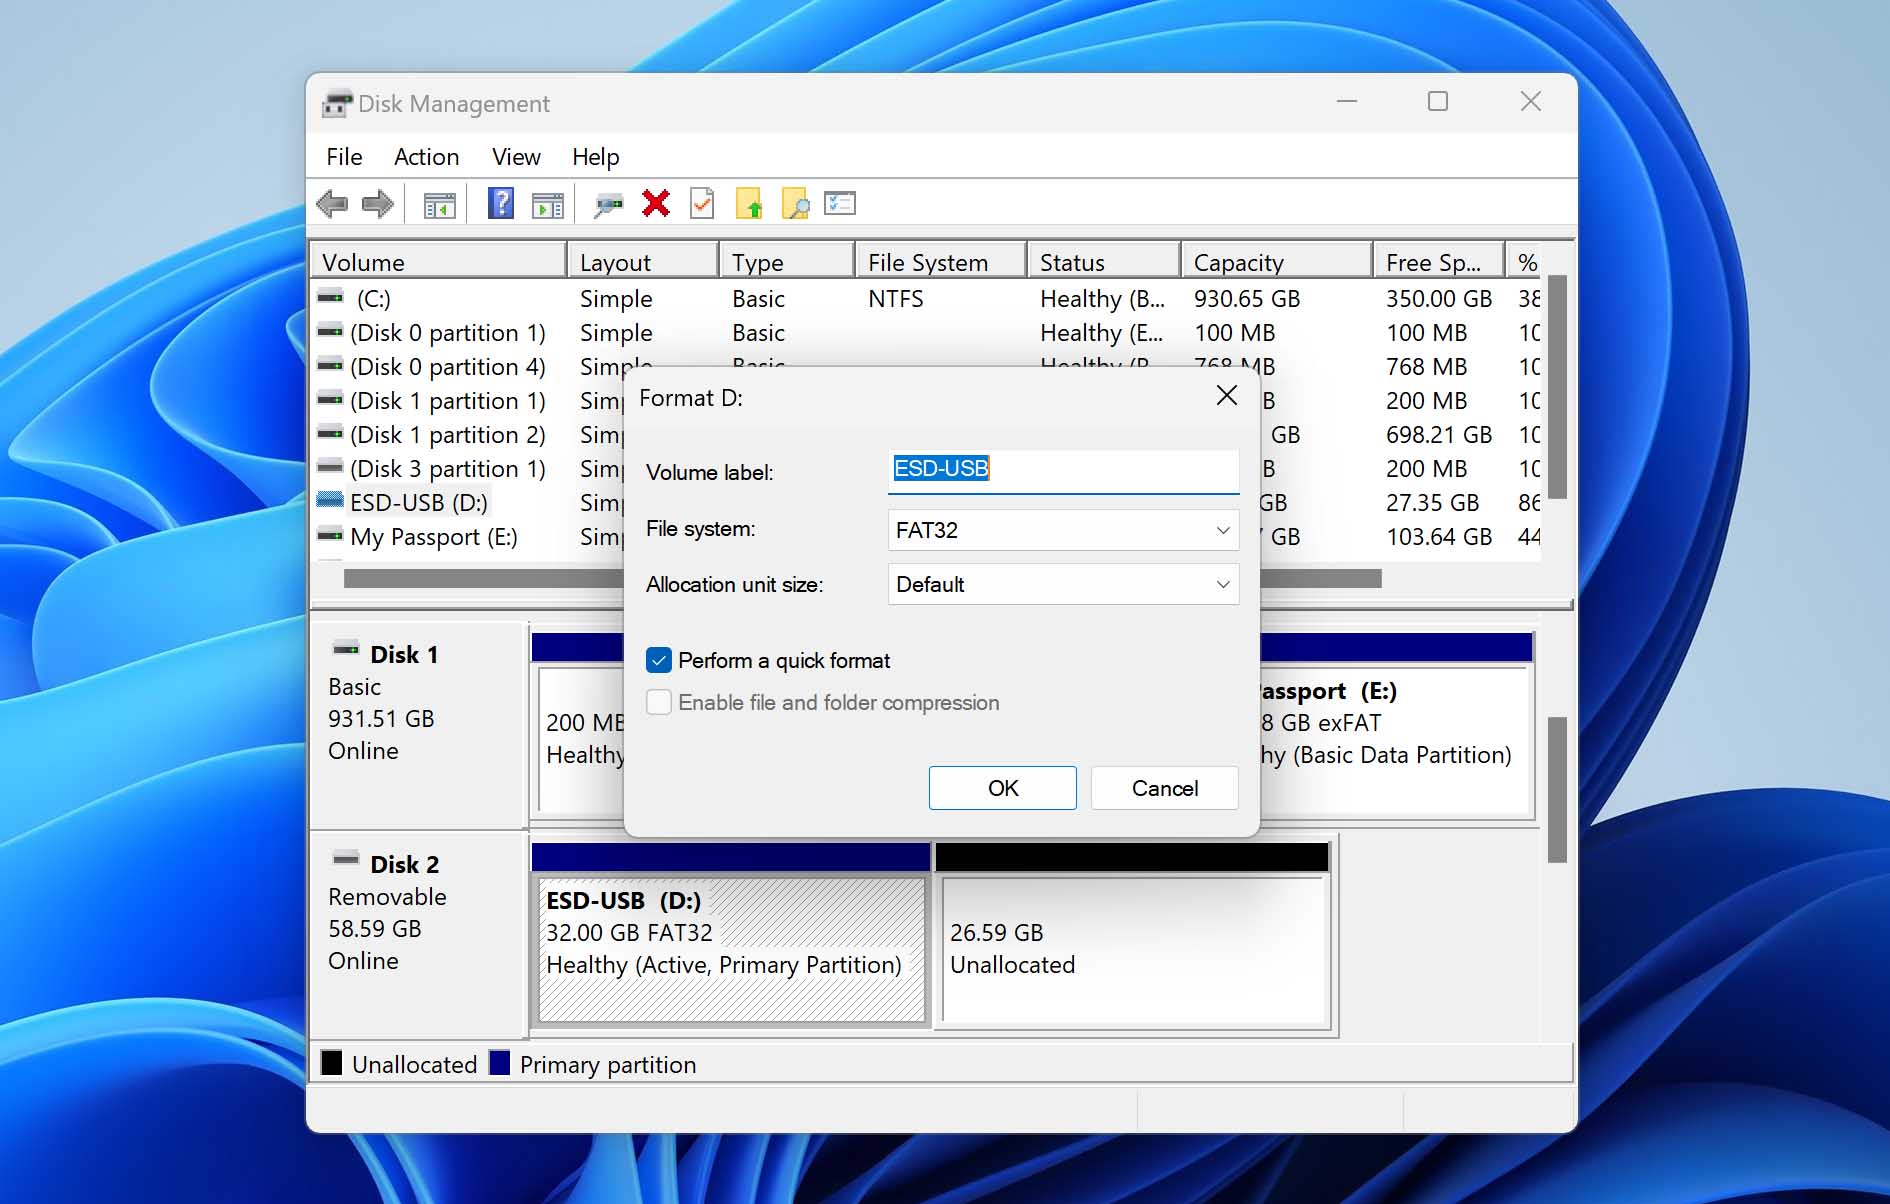
- Click the dropdown next to File System and select the option you’d like for your USB drives. The selection includes NTFS, FAT32, FAT, and exFAT. You can also decide on the label for your device, allocation unit size, and whether or not you want to perform a “Quick” format or a full one. It’s worth noting that files erased by a “Full” format can no longer be recovered. Click OK to finalize the formatting process, and your USB should then be back to normal.
If you don’t remember which file system was on the drive before, or aren’t sure which one to choose, here’s a quick guide:
- NTFS. Best for Windows-only use, especially if you’ll store large files over 4GB.
- FAT32. Works on almost all devices and operating systems, but has a 4GB file size limit, so it’s best for smaller files and cross-platform use.
- exFAT. Great for both Windows and Mac, with no file size limits, ideal if you’ll be using the drive across different Windows and Apple devices.
(Alternative) Create a New Volume/Partition on the ESD-USB drive
If you want to keep the ESD USB for future use but still need it as a regular drive, you can create a new volume on the drive. It can be a great alternative to formatting, since the ESD setup only uses about 32 GB, you can use the remaining space for everyday storage.
To create a new partition on a storage device, simply follow the steps below:
- Open Disk Management the same way we discussed before: press the Windows + R keys on your keyboard, type in “diskmgmt.msc” and press Enter.
- Next, find your ESD drive among the devices listed and click on it. On the bottom portion of the window, right-click the part of the USB that’s labeled “Unallocated” and select New Simple Volume.
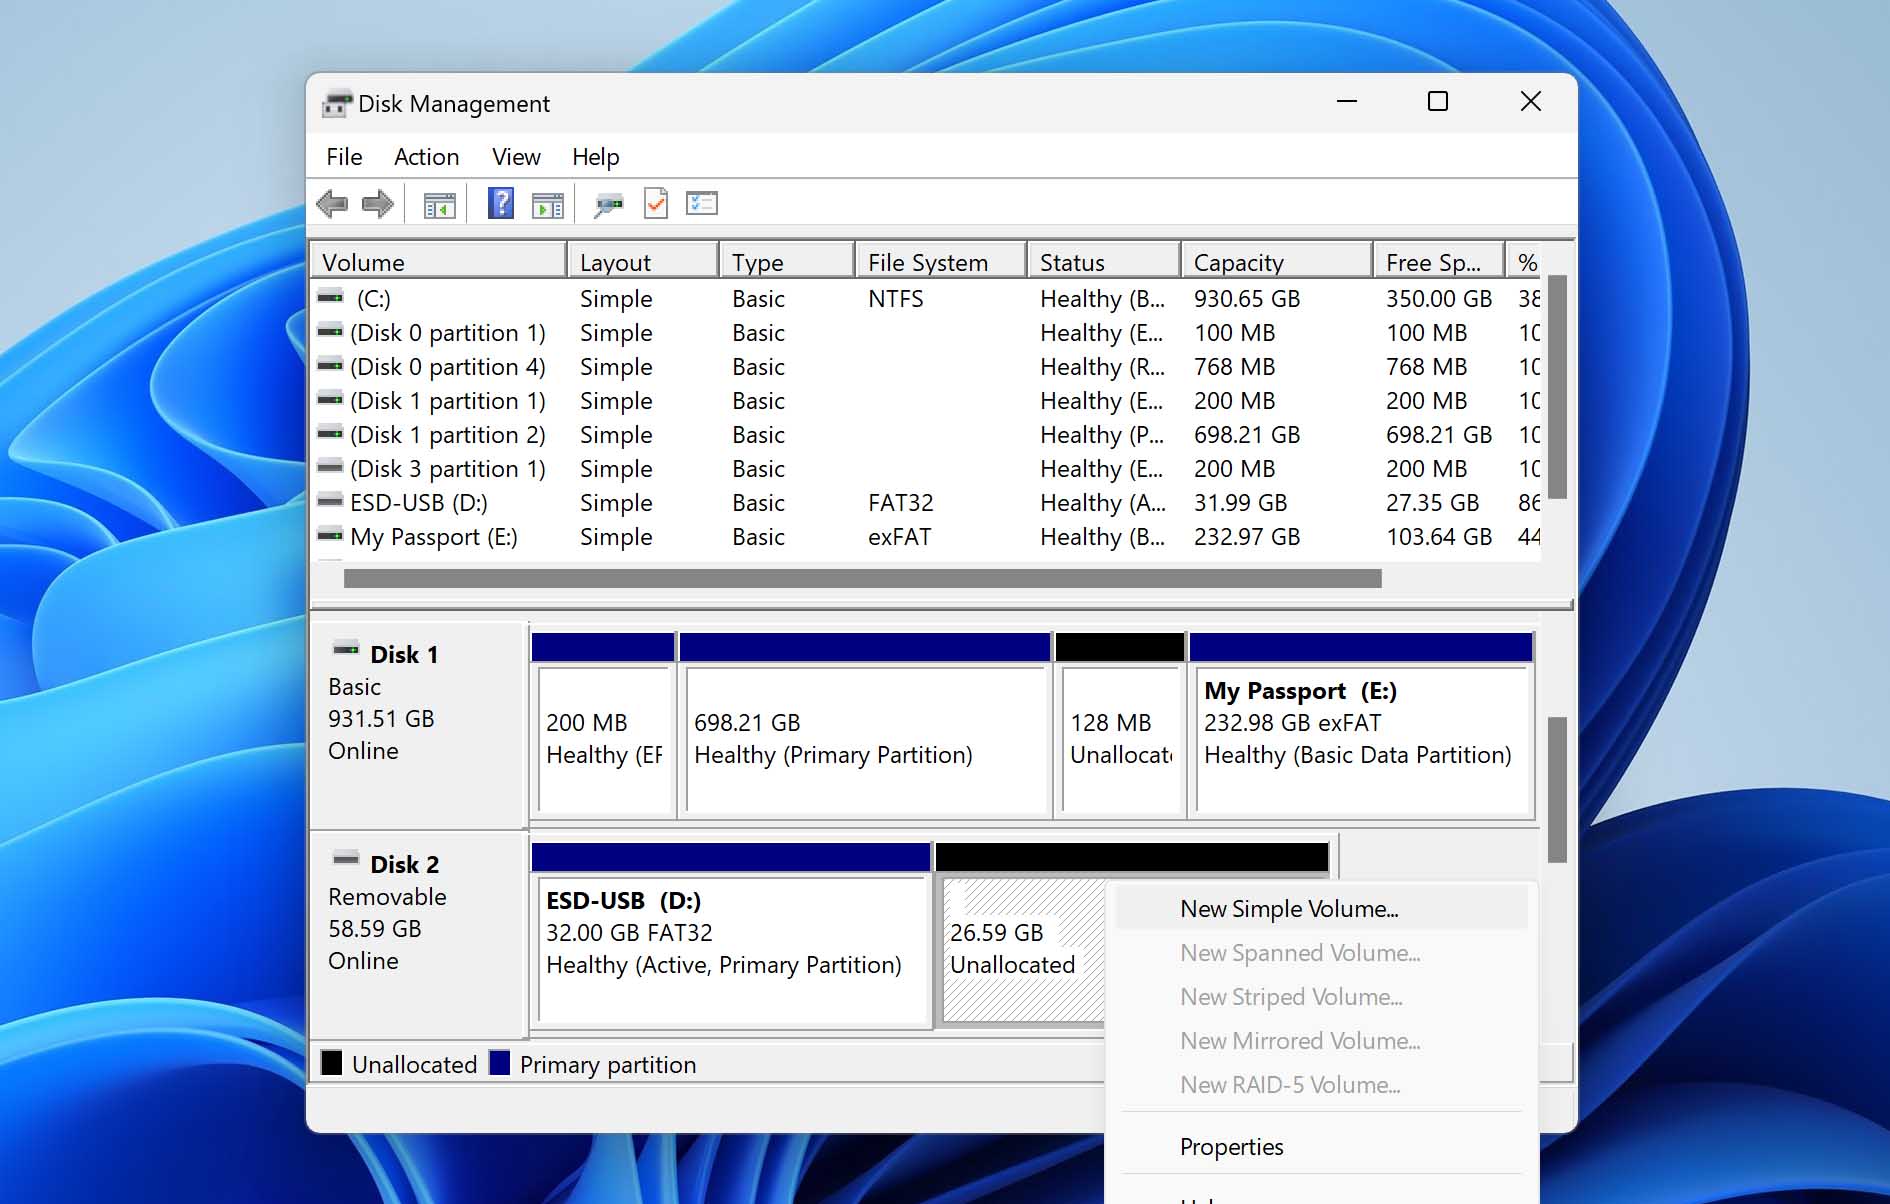
- A wizard will appear that will guide you through the process. On the 4th screen, you’ll have the opportunity to select the file system that you’d like for the new volume. Also, make sure to have the “Perform a quick format” option ticked. Continue until the volume creation is complete.

Now, your drive will have two partitions: one with the original ESD-USB setup, and a new partition for extra storage.
Don’t Want to Do It Yourself? Here’s What We Recommend
If you’re not comfortable with the process—especially the recovery part—you could reach out to a data recovery service. However, we believe this is a fairly straightforward case that most people can handle on their own with a little patience and the right tools.
Professional services typically focus on more complex jobs, like RAID recovery, and may not prioritize tasks involving USB drives. If you don’t want to risk it or feel unsure, another option is to seek guidance from someone experienced. Platforms like r/datarecovery or other online forums are great places to find knowledgeable individuals who can walk you through the process via text or video call, often for a small tip or just out of goodwill.
This approach keeps things affordable and stress-free. Converting an ESD USB to a normal drive is usually DIY-friendly, so don’t be afraid to give it a try!
FAQ
Can I recover data from a bootable USB?
The short answer is yes, you can recover data from a bootable USB, as the tools that create bootable drives typically use Quick Format rather than Full Format. Quick Format deletes the file directory but leaves the actual data intact until it’s overwritten, whereas Full Format erases and overwrites the entire drive, which makes recovery impossible. However, you need to keep in mind that during the bootable USB creation process, new system files are written to the drive, which can overwrite parts of the original data. Recovery software, like Disk Drill, can help retrieve what’s left, but it’s important to manage your expectations—no tool can recover data that has already been overwritten.
How to convert ESD-USB back to normal with CMD?
To convert an ESD USB back to a normal drive using CMD (Diskpart), follow these steps carefully. However, we have to warn you—if you had important data on the drive and want to recover it, you should scan the USB with a recovery tool like Disk Drill before this process. Once you proceed, all data on the drive will be erased, and any files not recovered beforehand will be permanently lost.
- First, open the Windows Run command window (press the Windows + R keys). From there, type in “diskpart” and press Ctrl + Enter to run the tool with administrator privileges.
- Next, type “list disk” and press Enter.
- You will now see a list of all the storage disks currently connected to your machine. Locate your ESB USB among the list. You should be able to tell by the storage capacity. Now type “select disk,” followed by the number assigned to your ESB USB drive. For example, select disk 3. Hit Enter to proceed.
- Next, type “clean,” then press the Enter key.

- Then, type “create partition primary” and hit Enter.
- Type “Format fs=” followed by the type of file format you want your USB to have. For example, format fs=NTFS. Then, press Enter to continue.
- Finally, type “assign=” then the drive letter you want your USB to have. For example, assign=h. With this, your USB will appear as drive H: on your computer. Press Enter to execute this last command and finalize the process.
How do I delete ESD-USB partition?
To delete the ESD-USB partition and reclaim full storage on your USB drive, follow these steps:
- Plug in the USB drive and make sure it shows up on your computer.
- Open Disk Management.
- Find Your USB Drive in the list. You should see the ESD partition listed.
- Right-click the ESD partition and choose Delete Volume. This will erase the ESD partition and free up unallocated space on the drive.
- Then right-click the unallocated space, select New Simple Volume, and follow the prompts to format it as a single, usable drive.
- After this, your USB drive will be fully reset, with the ESD partition gone, and all storage available for regular use.
After this, your USB drive will be fully reset, with the ESD partition gone, and all storage available for regular use.
This article was written by Princess Lescan, a Staff Writer at Handy Recovery Advisor. It was recently updated by Roman Demian. It was also verified for technical accuracy by Andrey Vasilyev, our editorial advisor.
Curious about our content creation process? Take a look at our Editor Guidelines.