Adata has managed to build a solid reputation for itself since it was founded in the early 2000s, offering durable and reliable storage devices like USB drives, hard drives, and SSDs, at an affordable price. But as dependable as their products are, they’re not infallible and may require data recovery or repair.
For Adata USB owners who are in desperate need of a solution for lost data or a malfunctioning drive, read on.
In this guide, we’ve put together a list of the best Adata USB flash drive recovery and repair tools for the job.
Adata USB Flash Drive Recovery Tools in a Nutshell
While Adata does offer a host of different software for purchasers of their storage products, none of them are really geared toward recovering lost files from one of their devices or repairing it. Here’s a quick run-through of the services offered by the brand:
🧰 Tool |
💬 Description |
SSD Tool Box |
The SSD Tool Box app is designed primarily to help users retrieve info from their SSDs and quickly alter their settings. It also provides some optimization settings for their storage drives. |
Acronis True Image |
Acronis True Image functions as a cloning program, allowing users to efficiently copy files from an existing hard drive over to a new SSD. |
OStoGO |
OStoGO is a simple tool that lets you create a USB boot drive out of your Windows DVD installer. That way, you can install the operating system via the USB instead of having to use a DVD. |
Backup ToGo |
As its name suggests, Backup ToGo is a form of backup software that offers various functions, including incremental, real-time, and scheduled backups, cloud, and phone features, and more. |
While Backup ToGo can technically be used to restore missing files from an Adata USB, the program needs to be set up before the data loss in order to facilitate the recovery, which is usually not the case. Aside from that, none of the company’s software can really be considered Adata flash drive repair tools.
Best 5 Adata USB Flash Drive Recovery/Repair Tools
Despite the brand not offering any first-party apps to help in Adata flash drive recovery and repair, there are a fair share of programs out there that can help you recover corrupted USBs without formatting, retrieve missing data from a flash drive, or fix one if it’s in an inaccessible state.
Tool #1: Disk Drill
The most effective DIY method of recovering lost or deleted files from a flash drive is via data recovery software. They can also help recover files from a corrupted USB as well.
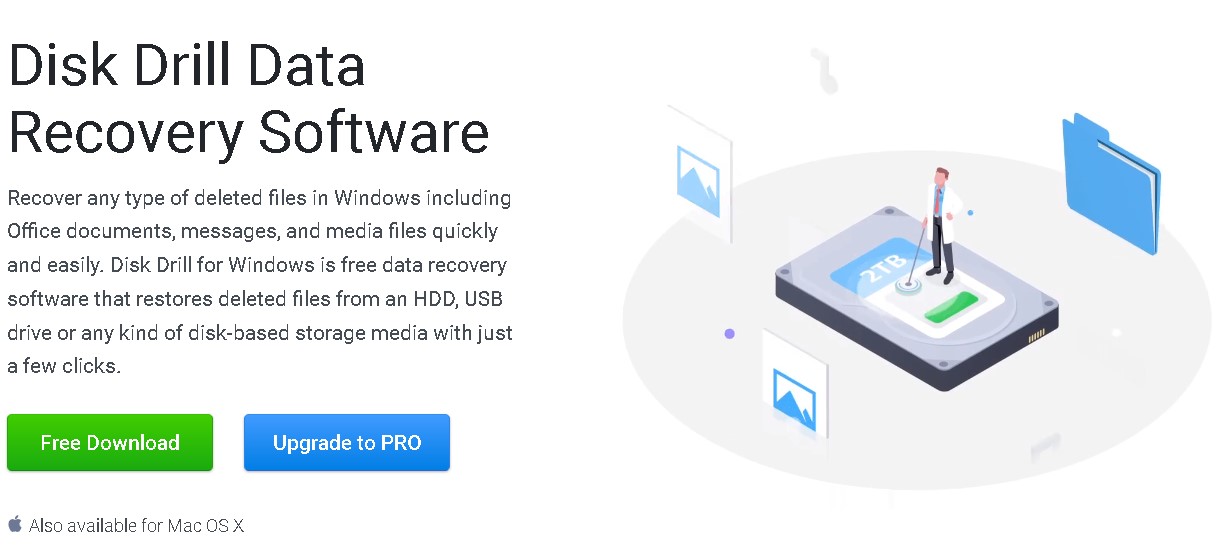
Disk Drill manages to stand out from the crowd through a combination of excellent recovery ability, an accessible user interface, unbeatable file format support, and excellent compatibility with a host of different storage devices – Adata USBs included. Plus, it offers a full-feature trial that you can use to recover up to 500 MB of data.
Here’s how to use Disk Drill to rescue your files:
- To get started, navigate to the Cleverfiles website and download the Disk Drill setup file.
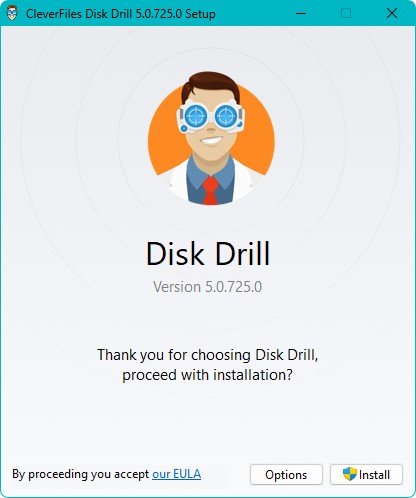
- Then, launch the downloaded file and follow the instructions provided by the wizard until the program is successfully installed.
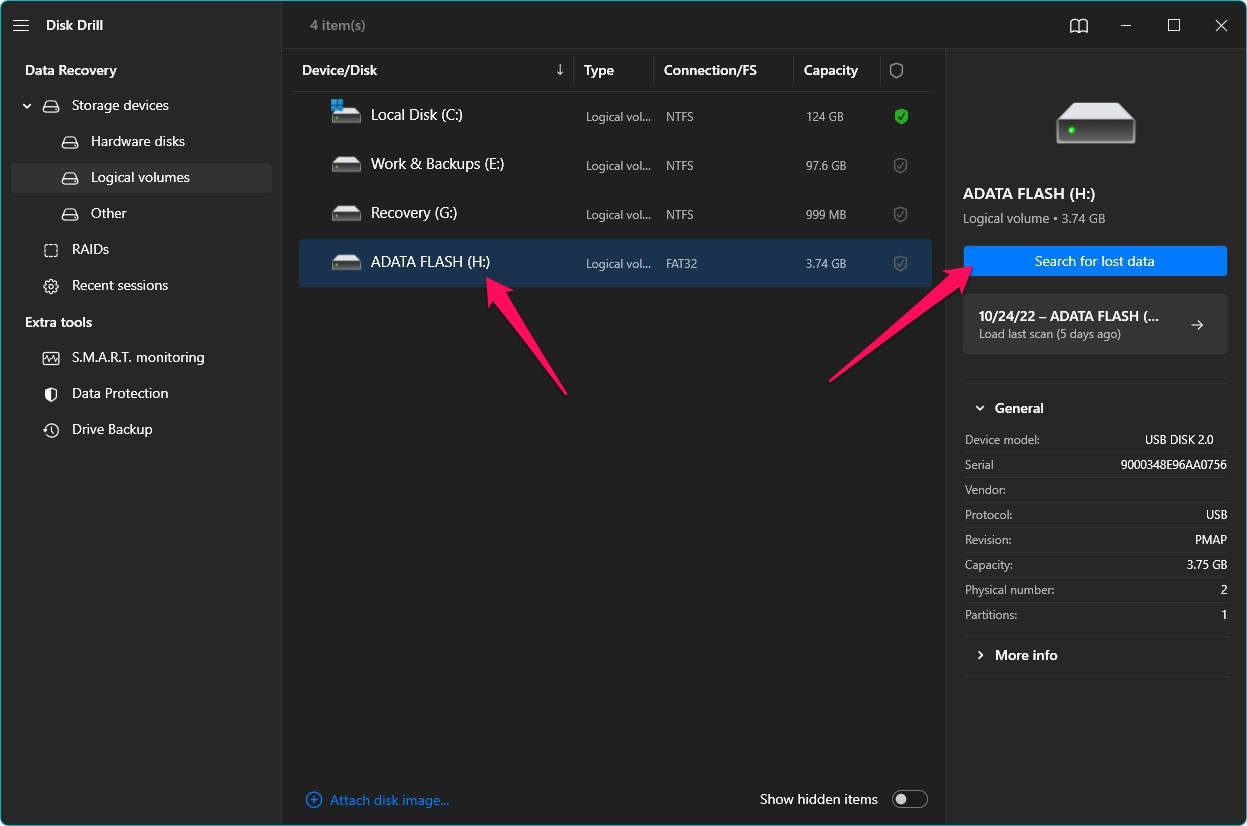
- Make sure that your Adata USB is properly inserted, then launch Disk Drill and select it from the list of available storage devices. Once done, click Search for lost data to proceed.
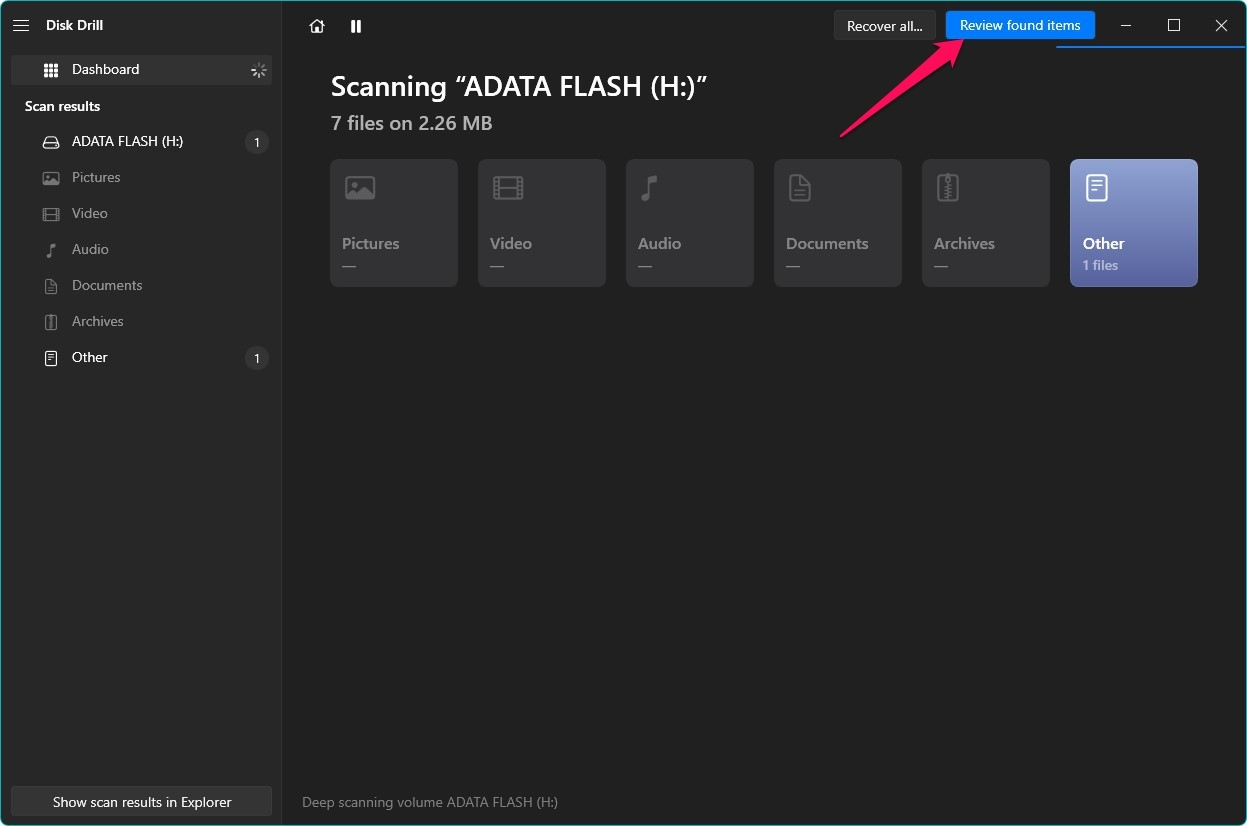
- After that, the app will start scanning your Adata USB for any recoverable files. While the scan is ongoing, you can click the Review found items button located on the top-right corner of the window to browse through the files that have been found so far. You can also simply wait for the scan to finish and click the same button to proceed to the results section.
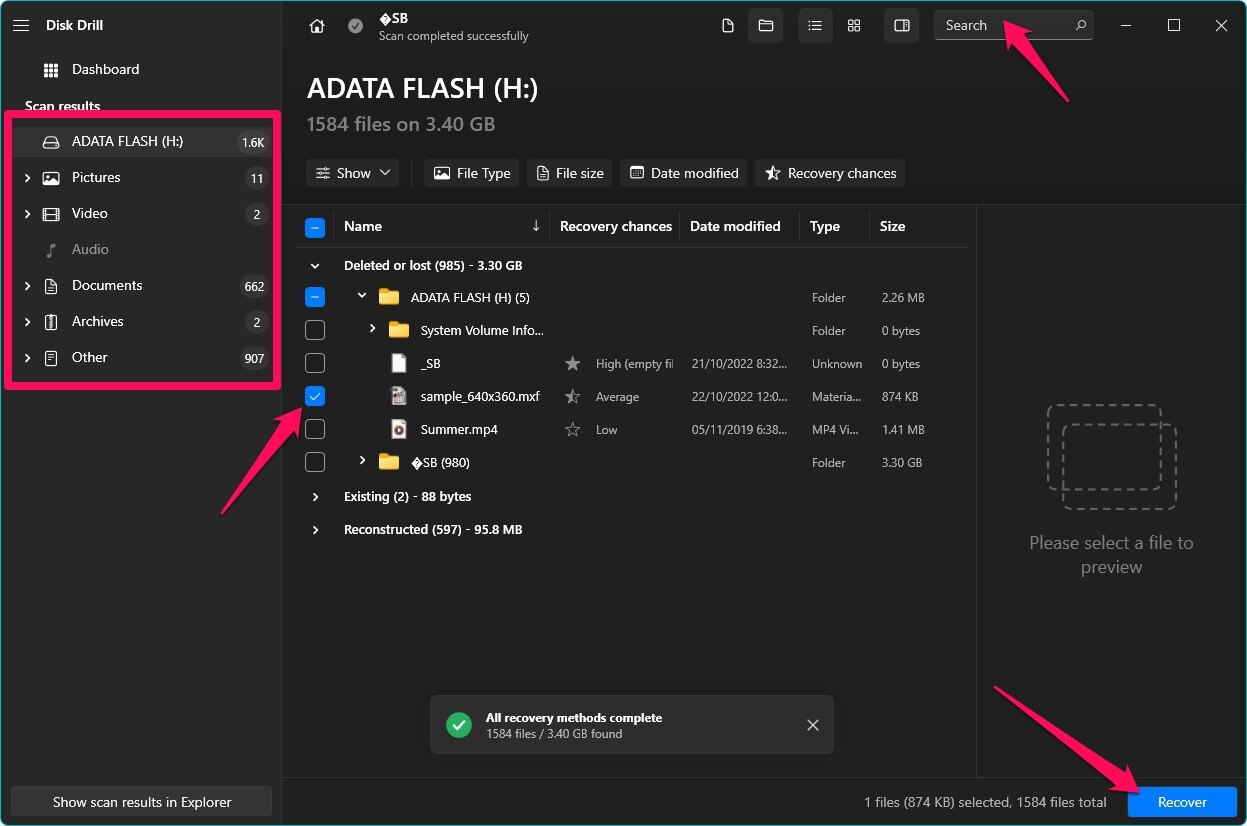
- Once you get to the results section, browse through the found files until you find the ones that you want to recover. You can narrow down the search by using the categories on the left-side panel, as well as the search bar on the top-right corner. Next, select the files you want to retrieve by ticking the checkbox beside the file name, then click the Recover button to continue.
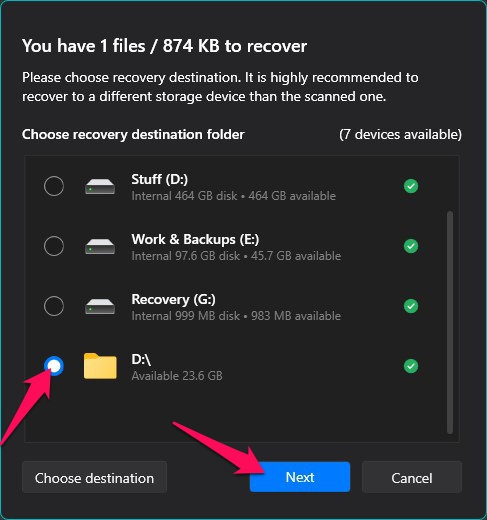
- A small pop-up will then appear, asking you to choose which location you want the rescued files stored. Hit OK when you’ve decided.
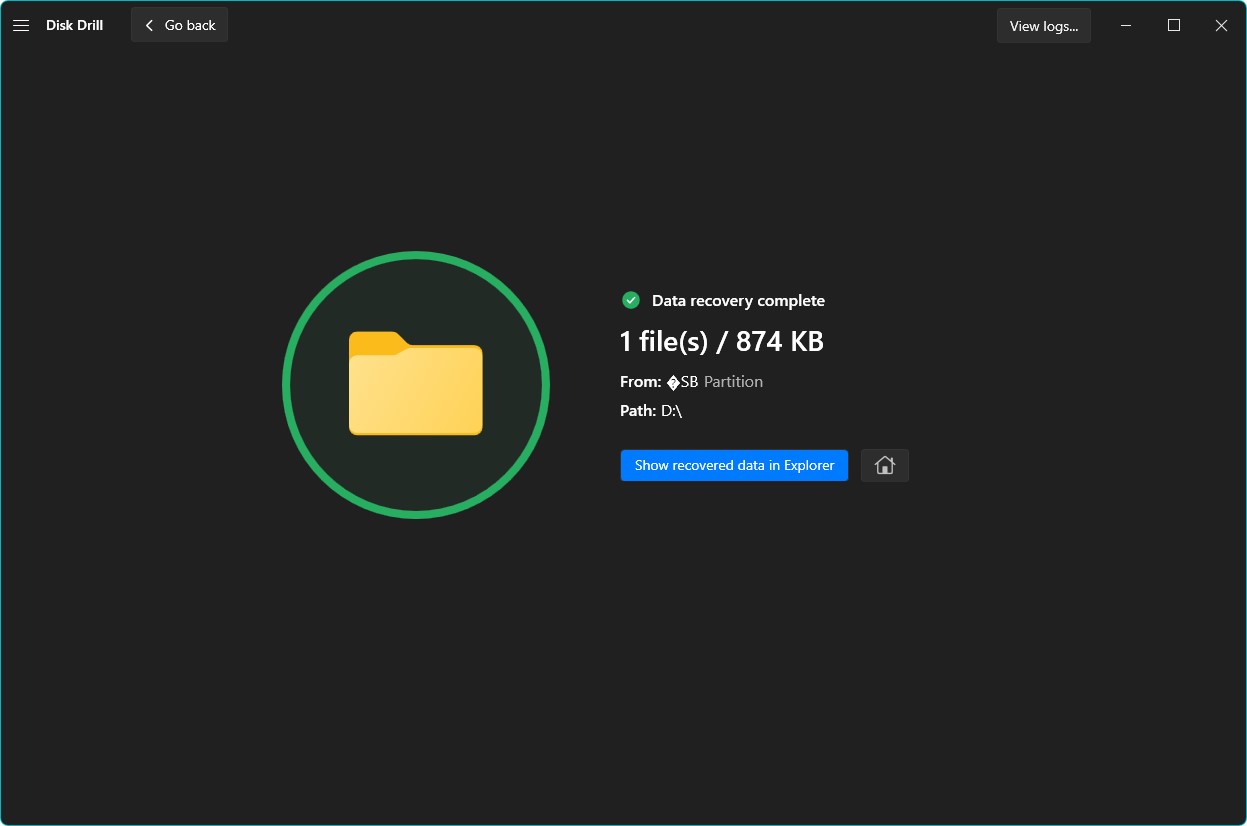
- Disk Drill will now try to recover the lost files from your Adata USB. Once complete, you’ll receive a message saying that the operation was successful. You can also choose to click the Show recovered data in Explorer button to go to where the files are stored.
Tool #2: CHKDSK
Chkdsk is a built-in Microsoft Windows utility that allows you to repair your flash drive using cmd. It scans a connected storage medium to isolate bad sectors and also attempts to repair errors in the file system of the drive if possible.
Follow the steps below to use Chkdsk to scan and repair your Adata flash drive:
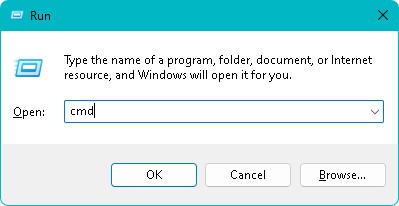
- First, press Windows + R to bring up the Run box in Windows, then key in “cmd” and hit Ctrl + Shift + Enter. This will launch the program as an administrator.
- Next, type “chkdsk” followed by whatever drive letter is assigned to your Adata USB. For example, if the drive letter of the flash drive is “E:”, then the command would be “chkdsk e:”. Press the Enter key to run the command.
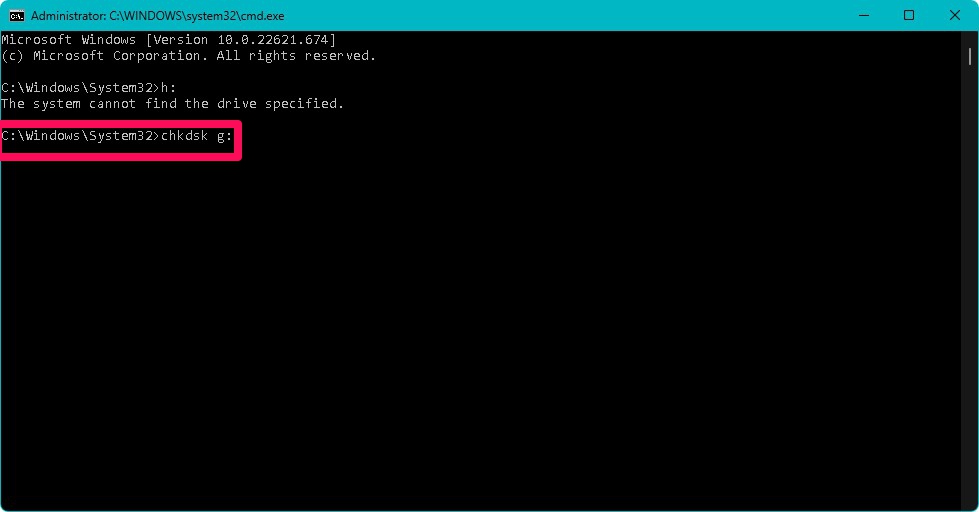
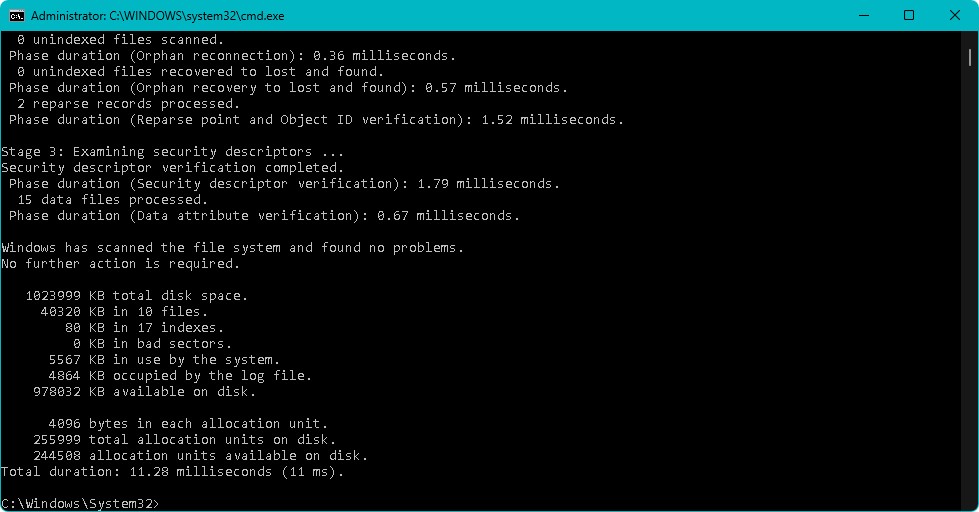
- Upon clicking, the Chkdsk tool will then scan the device for errors and potentially repair errors in the file system of the drive.
Tool #3: TestDisk
TestDisk is a totally free, open-source program whose sole purpose is to retrieve lost partitions and repair storage devices that no longer boot up as they should. Though it’s worth noting that it only works for problems caused by human error, viruses/malware, and software-related issues.
Using TestDisk is quite simple. Here’s what you can do to repair your Adata USB flash drive:
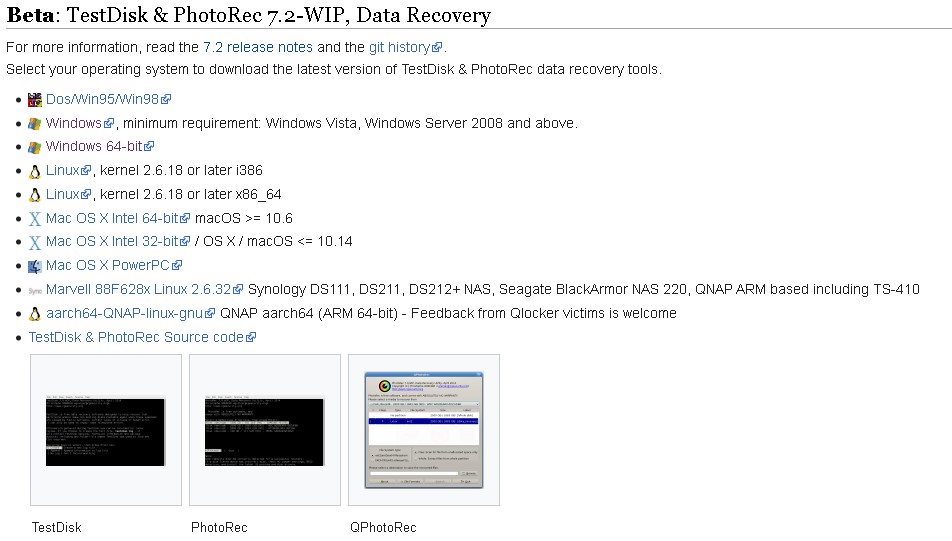
- First, download TestDisk from the official website, making sure to select the correct version for your machine. We’re using the Windows version for the purposes of this guide.
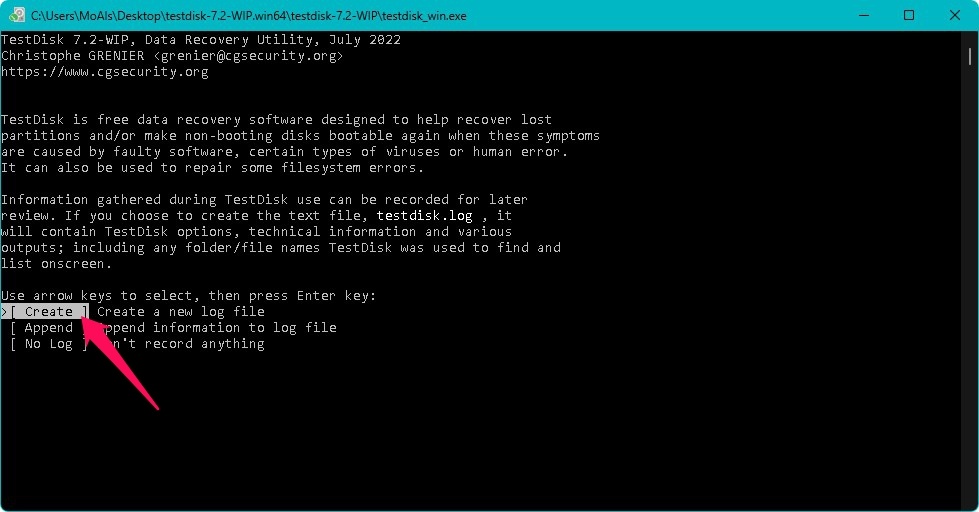
- Then, extract the contents of the downloaded file and run testdisk_win.exe. Use the arrow keys to decide whether you’d like to create a new log file, append info to an existing one, or not create one at all. Hit Enter to proceed.
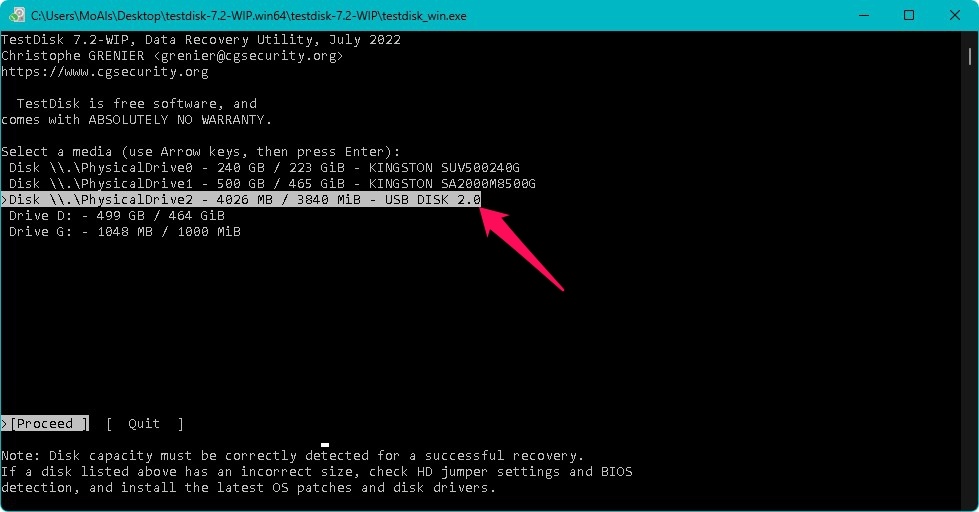
- Next, select your Adata USB using the arrow keys and hit Enter.
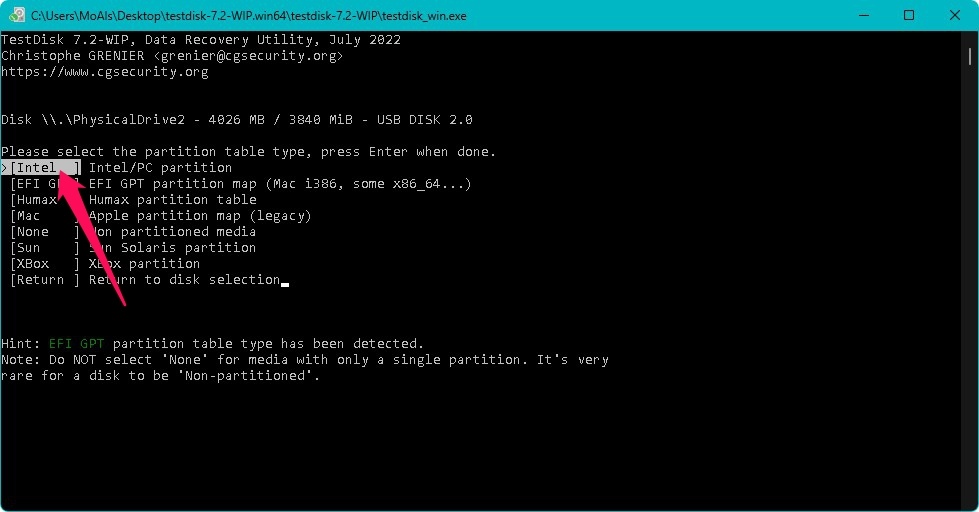
- You’ll now need to select a partition table type. For Windows users, select Intel and press Enter.
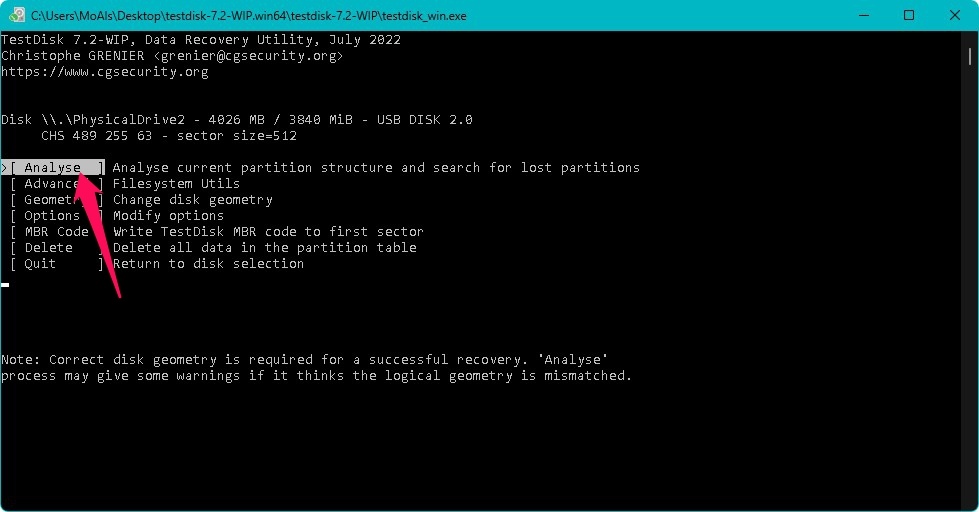
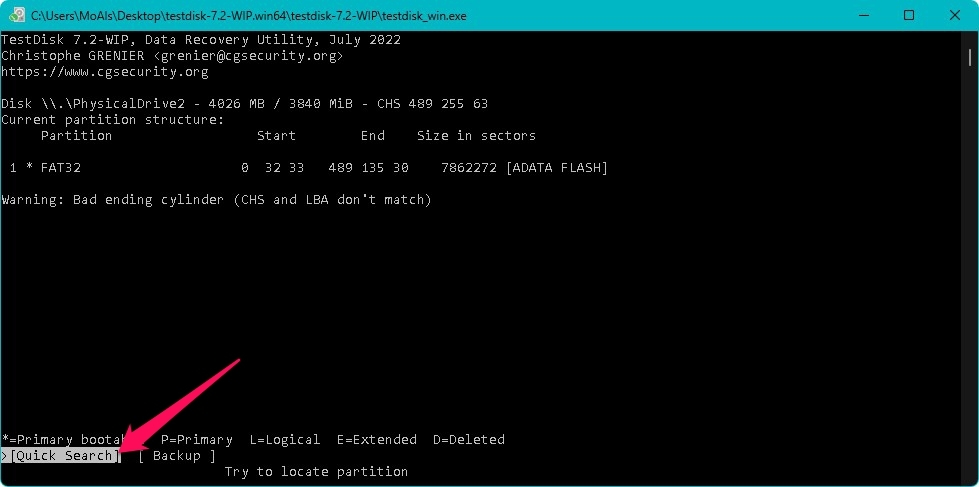
- Next, highlight Analyse and hit Enter.
- After that, TestDisk should now display your partition structure. A message will appear if there are issues with your USB. Select Quick Search and press Enter.
- The program should now display the search results. Missing partitions will appear here. Hit Enter to continue.
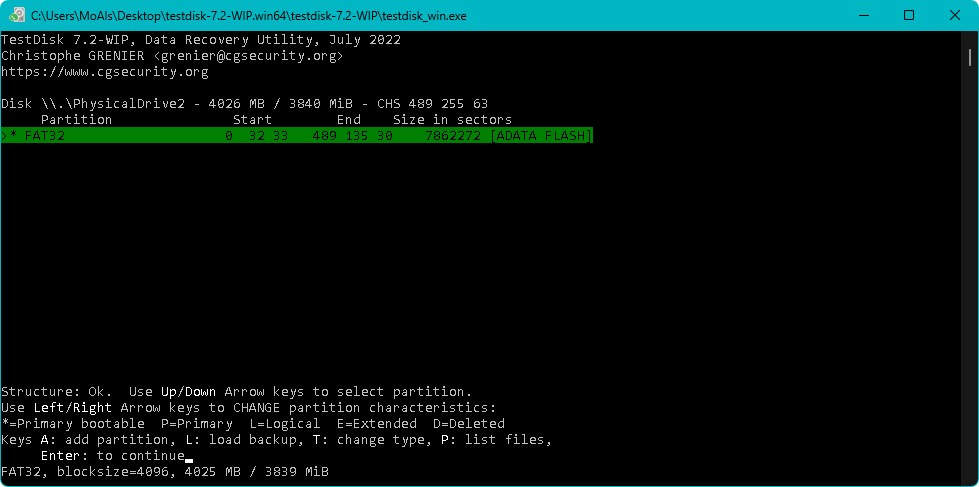
- If the partitions and data are appearing as they should, select the Write option, hit Enter, and press “y” to confirm. If not, select Deeper Search, wait for the scan to complete, then choose the Write option and press “y” to confirm.
Tool #4: Victoria911
Victoria911 is a hard drive utility designed to scan for bad sectors on your storage device and allows you to remap them to ensure that your operating system doesn’t write new information to those faulty sectors.
Here’s how to use Victoria911 as an Adata repair tool to find and remap bad sectors on your USB:
- To get started, simply download Victoria911 here.
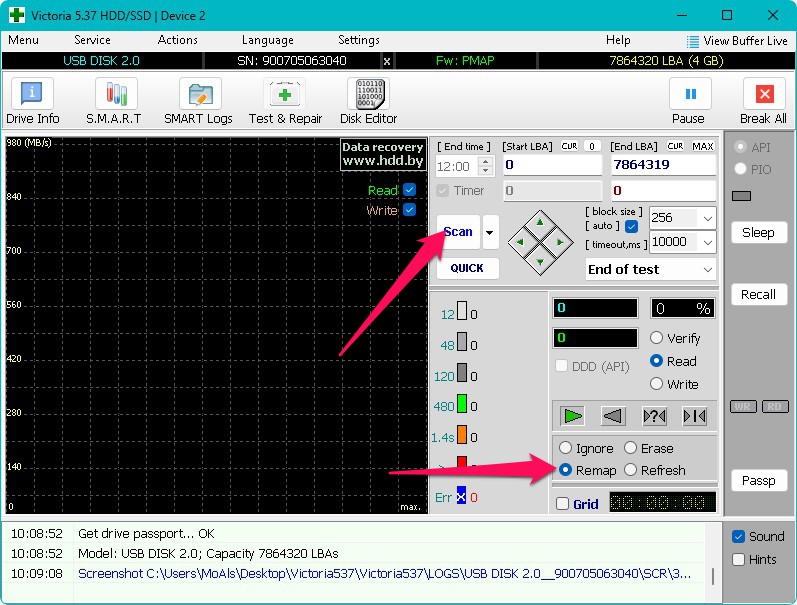
- Then, extract the contents of the downloaded Zip file, then launch Victoria.exe. From there, select your Adata USB from the list of available storage devices on the top-right side and click the Test & Repair option near the top of the window.

- To scan for bad sectors, select the Ignore option on the right side of the window and click the Scan button. The results will be displayed once the scan is complete.
- To remap the bad sectors, select the Remap option on the right, then click Scan. Similar to the previous step, the results will appear after the scan is finished.
Tool #5: HP USB Disk Storage Format Tool
The HP USB Disk Storage Format Tool is a free program released by Hewlett Packard that can help you format USB drives on Windows operating systems ranging from Windows XP to Windows 10. It can format to NTFS and FAT32 file systems and has the added bonus of being able to create a DOS startup disk out of your system files.
Follow the steps below to use it to format your Adata flash drive:
- To get started, download the HP USB Disk Storage Format Tool from here.
- Launch the downloaded file, then select your Adata USB from the list, along with the file system and formatting options you want.
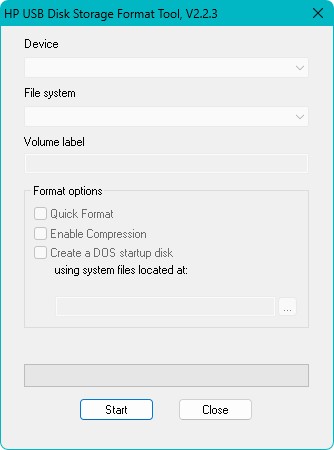
- After that, click Start to finalize the format.
FAQ
How can I recover my Adata USB flash drive?
The go-to method for retrieving lost files from an Adata USB is through a top-notch data recovery program, like Disk Drill:
- Download and install Disk Drill.
- Launch it and connect your Adta USB.
- Scan your Adata USB drive.
- Select the files you want to recover.
- Choose the recovery location and click OK.
Can an Adata USB flash drive be repaired?
That really depends on the extent of the damage incurred by the Adata flash drive. If it’s exhibiting file system, booting, or bad sector issues, then Chkdsk, TestDisk, and Victoria911 might just be able to help with that.
How do you fix a malfunctioning Adata flash drive?
The best way to fix a malfunctioning Adata USB drive is by simply formatting the device. If the Windows formatting function is giving you trouble, then it’s worth trying the HP USB Disk Storage Format Tool. If the state of the flash drive is too bad, however, then it may be best to leave the broken flash drive recovery to a data recovery specialist.
What is Adata ToolBox?
The Adata SSD Tool Box is a program that pulls up in-depth disk information about an Adata solid-state drive. It includes diagnostic and optimization tools, as well as various utilities.
What is the best Adata USB flash drive repair tool?
There really isn’t a single BEST Adata USB repair tool, since it really depends on the issue you’re trying to fix. Looking to fix file system errors and mark bad sectors? Chkdsk has you covered. Having problems with lost partitions and unbootable drives? TestDisk is the way to go. Unfortunately, the programs mentioned here won’t be able to help you fix the “USB not recognized” error.
Conclusion
Adata offers some pretty useful software to its users, but none of them are really designed for recovering or repairing their USB flash drives. If you’re looking to recover missing or accidentally deleted data from an Adata USB or want to fix its bad sectors and other issues, then there’s a good chance that the programs we listed above can help you out.
This article was written by Princess Lescan, a Staff Writer at Handy Recovery Advisor. It was also verified for technical accuracy by Andrey Vasilyev, our editorial advisor.
Curious about our content creation process? Take a look at our Editor Guidelines.